DBH 740 R - Hammer BOSCH - Free user manual and instructions
Find the device manual for free DBH 740 R BOSCH in PDF.
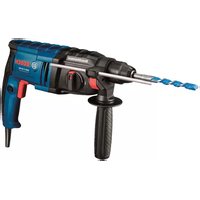
| Product type | Pneumatic hammer (combination hammer) |
| Brand | Bosch |
| Model | DBH 740 R |
| Power source | Compressed air (pneumatic) |
| Recommended operating pressure | 6.3 bar (typical value) |
| Air consumption | Approximately 10 l/s (estimated) |
| Weight | Approximately 6 kg |
| Tool holder | SDS-plus |
| Main functions | Drilling with percussion, drilling without percussion, chiseling |
| Operating mode adjustment | Rotation/hammer stop (3 positions) |
| Auxiliary handle | Adjustable position (wing screw) |
| Depth stop | Yes, adjustable |
| Dust cap | Yes |
| Safety | Wear hearing protection, eye protection, dust mask, gloves, fitted clothing |
| Regular maintenance | Clean the air inlet filter, lubricate with SAE 10/20 motor oil |
| Periodic maintenance | Grease the gear every 300 h with Bosch special grease (ref. 3605430009) |
| After-sales service | Bosch France: 0811 360 122, Belgium: +32 2 588 05 89, Switzerland: +41 44 847 15 12 |
| Spare parts | Use exclusively genuine Bosch parts |
| Repairability | Repair by qualified personnel only (Bosch approved workshop) |
| Disposal | Recycling via recycling center or Bosch approved workshop |
Frequently Asked Questions - DBH 740 R BOSCH
User questions about DBH 740 R BOSCH
0 question about this device. Answer the ones you know or ask your own.
Ask a new question about this device
Download the instructions for your Hammer in PDF format for free! Find your manual DBH 740 R - BOSCH and take your electronic device back in hand. On this page are published all the documents necessary for the use of your device. DBH 740 R by BOSCH.
USER MANUAL DBH 740 R BOSCH
OBI_DOKU-37778-002 In Page 1 Thursday, February 23, 2017 6:02 PM
Robert Bosch Power Tools GmbH
70538 Stutgert
GERMANY
www.bosch-pt.com
160992A33X[2014.02]AS/256UNI

160992A33X
0607557501

BOSCH
de Originalbetriebsanleitung
en Original instcccrers
H
M
it siuuii i
n Duspschellie sbrvksaunlizng
da Original trupssanrirg
Sv Brusserwiring original
no Original driftsinstack
fAkepaesatohoei
el corunu oonn
t r Original gertme talm
m
e
hu Lredel hnszalutasnas
TUOpHHaHbHOe pyKOBoDCTBo
1
UK OPGRAHANES
0
TAYNS
rostrucuon ornac
bgOpHnHnHnHnHnHnHnHnHnHnHnHnHnHnHnHnHnHnHnHnHnHnHnHnHnHnHnHnHnHnHnHnHnHnHnHnHnHnHnHnHnHnHnHnHnHnHnHnHnHnH
mk Open variable yen mdo pa bane
sr Original outputs
sl Izimna nevodila
hr Original upute zare
Weslckosorgn
正本使用说明书
tw原始使用說明書
知
中
in Ernunck Pumunkuntus Fennugssan
Original
viBan goc heng dan su dung
a1 = 12,a2 = - 14,b_2 = 14
1


Deutsch|5
Deutsch
OBI_BUCH-2092-002.book Page 8 Thursday, February 23, 2017 11:46 AM
8 | Deutsch
General Safety Rules for Pneumatic Tools
WARNING Before installing, operating, repairing, maintaining and replacing accessories as well as prior to working near by the pneumatic tool, please read and observe all instructions. Failure to follow the following safety warnings may result in serious injury.
Save all safety warnings and instructions for future reference, and make them available to the operator.
Work area safety
Pay attention to surfaces that may have become slip-pery from using the machine, and to tripping hazards from the pneumatic or hydraulic hose. Slipping, tripping and falling are main reasons for workplace injuries.
Do not operate the pneumatic tool in explosive atmospheres, such as in the presence of flammable liquids, gases or dusts. While working the workpiece, sparks can be created which may ignite the dust or fumes.
- Keep children and bystanders away from your workplace while operating the pneumatic tool. Distractions from other persons can cause you to lose control over the pneumatic tool.
Pneumatic tool safety
- Never direct the airflow against yourself or other persons close by, and conduct cold air away from your hands. Compressed air can lead to serious injuries.
- Check the connections and the air supply lines. All maintenance units, couplers, and hoses should conform to the product specifications in terms of pressure and air volume. Too low pressure impairs the function of the pneumatic tool; too high pressure can result in material damage and personal injury.
Protect the hoses from kinks, restrictions, solvents, and sharp edges. Keep the hoses away from heat, oil, and rotating parts. Immediately replace a damaged hose. A defective air supply line may result in a wild compressed-air hose and can cause personal injury. Raised dust or chips may cause serious eye injury.
Make sure that hose clamps are always tightened firmly. Loose or damaged hose clamps may result in uncontrolled air escape.
Personal safety
Stay alert, watch what you are doing, and use common sense when operating a pneumatic tool. Do not use a pneumatic tool while tired or under the influence of drugs, alcohol, or medication. A moment of inattention while operating a pneumatic tool may result in personal injury.
Use personal protective equipment. Always wear eye protection. Wearing personal protective equipment such as a respirator, non-skiid safety shoes, hard hat or
hearing protection - according to the instructions of your employer or as required by the provisions for work and health protection, reduces the risk of personal injury.
Prevent unintentional starting. Make sure that the pneumatic tool is switched off before connecting it to the air supply, picking it up or carrying it. When your finger is on the On/Off switch while carrying the pneumatic tool or when connecting the pneumatic tool to the air supply while it is switched on, accidents can occur.
Remove any adjustment tools before switching on the pneumatic tool. A wrench or key left attached to a rotating part of a pneumatic tool may result in personal injury.
Do not overreach. Keep proper footing and balance at all times. This enables better control of the pneumatic tool in unexpected situations.
Dress properly. Do not wear loose clothing or jewellery. Keep your hair, clothing and gloves away from moving parts. Loose clothes, jewellery or long hair can be caught in moving parts.
If devices are provided for the connection of dust extraction and collection facilities, ensure these are connected and properly used. Use of dust collection can reduce dust-related hazards.
Do not directly inhale the exhaust air. Avoid exposing the eyes to exhaust air. The pneumatic tool's exhaust air can contain water, oil, metal particles and debris from the compressor. This can cause damage to one's health.
Pneumatic tool use and care
Use the clamping devices or a vice to secure and support the workpiece. Holding the workpiece by hand or against your body will not allow for safe operation of the pneumatic tool.
Do not overload the pneumatic tool. Use the pneumatic tool intended for your work. The correct pneumatic tool will do the job better and safer at the rate for which it is designed.
Do not use a pneumatic tool that has a defective On/Off switch. A pneumatic tool that cannot be controlled with the switch is dangerous and must be repaired.
- Disconnect the air supply before making any adjustments, changing accessories, or when not using for extended periods. This safety measure prevents accidental starting of the pneumatic tool.
- Store idle pneumatic tools out of the reach of children. Do not allow persons unfamiliar with the pneumatic tool or these instructions to operate the device. Pneumatic tools are dangerous in the hands of untrained users.
- Maintain the pneumatic tool with care. Check for misalignment or binding of moving parts, breakage of parts and any other condition that may affect the pneumatic tool's operation. Have damaged parts repaired before using the pneumatic tool. Many accidents are caused by poorly maintained pneumatic tools.
- Keep cutting tools sharp and clean. Properly maintained cutting tools with sharp cutting edges are less likely to bind and are easier to control.


OBI_BUCH-2092-002.book Page 13 Thursday, February 23, 2017 11:46 AM
English|13
Use the pneumatic tool, accessories, application tools, etc. according to these instructions. Take into consideration the working conditions and the activities to be carried out. This reduces the development of dust, vibrations and noise to the greatest extent.
The pneumatic tool should be set up, adjusted or used exclusively by qualified and trained operators.
The pneumatic tool may not be modified in any way. Modifications can reduce the effectivity of the safety measures and increase the risks for the operator.
Service
Have your pneumatic tool repaired only through a qualified repair person and only using original replacement parts. This will ensure that the safety of the pneumatic tool is maintained.
SafetyWarnings for Pneumatic Rotary Hammers
Check if the type plate can be read. If required, provide for replacement from the manufacturer.
In case of breakage of the workpiece or an accessory, or even of the pneumatic tool itself, parts can be thrown about at high speed.
During operation, repairs or maintenance, and when replacing accessories on the pneumatic tool, always wear shock-resistant eye protection. The degree of the required protection should be separately evaluated for each individual application.
Wear a hard hat when carrying out work overhead. This prevents injuries.
- Use the pneumatic tool only when the chisel is secured against falling out. Otherwise, the application tool can be thrown about.
Worn, bent or broken parts of the tool holder must be replaced. This prevents injuries.
Apply the pneumatic tool firmly to the surface to be worked before switching the pneumatic tool on.
The operators and the maintenance personnel must be physically capable to handle the size, weight and power of the pneumatic tool.
Be prepared for unexpected movements of the pneumatic tool that can develop owing to reaction forces or breakage of the application tool. Maintain a firm grip on the pneumatic tool and position your body and arms to allow you to resist such movements. These precautions can prevent injuries.
Caution! Application tools can become hot during prolonged operation of the pneumatic tool. Wear protective gloves.
In case of an interruption of the air supply or reduced operating pressure, switch the pneumatic tool off. Check the operating pressure and start again when the operating pressure is optimal.
- When using the pneumatic tool for the performance of work-related activities, the operator may experience unpleasant sensations in the hands, arms, shoulders, neck area or other body parts.
When working with this pneumatic tool, assume a comfortable stance, hold the tool securely and avoid unfavourable positions or such positions, where it is difficult to keep your balance. For prolonged work, the operator should change the stance or posture, which can help avoid discomfort and fatigue.
Should the operator perceive symptoms such as persistent nausea, discomfort, throbbing, pain, tingling, numbness, burning or stiffness, these warning signs should not be ignored. The operator should notify his employer about the symptoms and consult a qualified physician.
Never use the chisel as a hand tool. The chisels are heat-treated and can break.
Use only sharp chisels. Dull application tools can lead to heavy vibrations and fatigue breakage.
Never cool off hot accessories in water. This can lead to brittleness and premature failure.
Do not use the chisel as a lever. Otherwise, it can break.
- Use appropriate detectors to determine if utility lines are hidden in the work area or call the local utility company for assistance. Contact with electric lines can lead to fire and electric shock. Damaging a gas line can lead to explosion. Penetrating a water line causes property damage.
Avoid contact with "live" conductors. The pneumatic tool is not insulated; contact with a "live" conductor can lead to an electric shock.
WARNING The dust developing during sanding,
operations can act carcinogenic, teratogenic or mutagenic. Some of the substances contained in these dusts are: - Lead in lead based paints and varnishes;
- Crystalline silica in bricks, cement and other masonry work:
Arsenic and chromate in chemically treated wood.
The risk of disease depends on how often you are exposed to these substances. To reduce the risk, you should work only in well ventilated rooms with appropriate protective equipment (e.g. with specially designed respirators that filter out even the smallest dust particles).
When working on the workpiece, additional noise can develop, which can be avoided through appropriate measures (e.g. by using damping materials on occurrence of ringing noise from the workpiece).
Operate the pneumatic tool in such a manner that as little dust as possible develops, e. g. through moistening the material being worked.
When the pneumatic tool is equipped with a silencer, always ensure that it is available and in proper working condition when operating the pneumatic tool.
Vibration effects may cause damage to the nerves and blood circulation disorders in the hands and arms.
Wear close-fitting gloves. The flow of compressed air makes the handles of pneumatic tools cold. Warm hands are less sensitive to vibrations. Loose fitting gloves can be caught by rotating parts.


14|English
If you notice that the skin of your fingers or hands becomes numb, tingles, hurts or turns white, stop working with the pneumatic tool, notify your employer and consult a physician.
Do not hold the application tool while working.
Hold the pneumatic tool with a not too firm yet secure grip, compliant with the required hand-reaction forces. The vibrations can be intensified the firmer you hold the tool.
When universal rotary couplings (bayonet couplings) are being used, retaining pins are required. Use Whip-check hose restraints to protect against failed hose connections or the connection between hose and pneumatic tool.
Never carry the pneumatic tool by the hose.
Switch the pneumatic tool off immediately when the application tool locks up. Be prepared for high reaction torque that lead to kickback. The application tool locks up when:
the pneumatic tool is subject to overload,
- it jams or cans in the workpiece or
- its tip goes through the material being worked.
Use auxiliary aids to absorb reaction torque, such as a supporting fixture. If this is not possible, use an auxiliary handle.
Never place your hand near rotating application tools. You could injure yourself.
- Do not allow the drill bit to rattle on the workpiece. This can lead to significant intensification of the vibrations.
Symbols
The following symbols could have a meaning for the use of your pneumatic tool. Please take note of the symbols and their meaning. The correct interpretation of the symbols will help you to use the pneumatic tool in a better and safer manner.
Symbol Meaning

Before installing, operating, repairing, maintaining and replacing accessories as well as prior to working near by the pneumatic tool, please read and observe all instructions. Failure to follow the following safety warnings and instructions may result in serious injury.

Wear ear protectors. Exposure to noise can cause hearing loss.
Wear safety goggles.
| Symbol Meaning | ||
| W | W | a t t P o |
| Nm Newton metre | Unit of energy (torque) | |
| kg | Kilogram | Mass, weight |
| Ibs | Pounds | |
| mm Millimetre Length | ||
| min | Minutes | Time period, duration |
| s | Seconds | |
| \( \mathbf{m i n}^{-1} \) | Revolutions or motions per minute | No-load speed |
| bar | bar | Air pressure |
| psi | pounds per square inch | |
| l/s | Litres per second | Air consumption |
| cfm | cubic feet/minute | |
| dB Decibel | Unit of relative loudness | |
| QC Quick-change chuck | ||
| ○ | Symbol for hexagon socket | Tool holder |
| ■ | Symbol for external drive | |
| UNF | US fine thread (Unified National Fine Thread Series) | |
| G | Whitworth thread | Connecting thread |
| NPT | National pipe thread | |
Product Description and Specifications

Read all safety warnings and all instructions. Failure to follow the warnings and instructions may result in electric shock, fire and/or serious injury.
While reading the operating instructions, unfold the fold-out page with the illustration of the pneumatic tool and leave it open.
Intended Use
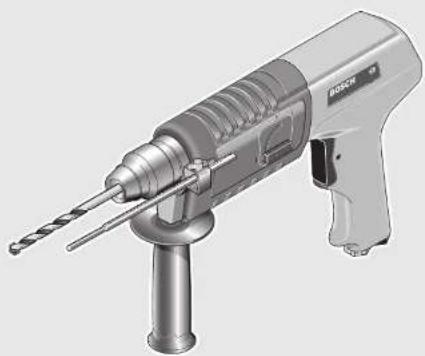
The pneumatic tool is intended for hammer drilling in concrete, bricks and masonry, as well as for light chiselling work. It is also suitable for drilling without impact in wood, metal, ceramic and plastic.
The rotary hammer is suitable for use in wet and damp rooms and for outdoor jobsites.
Product Features
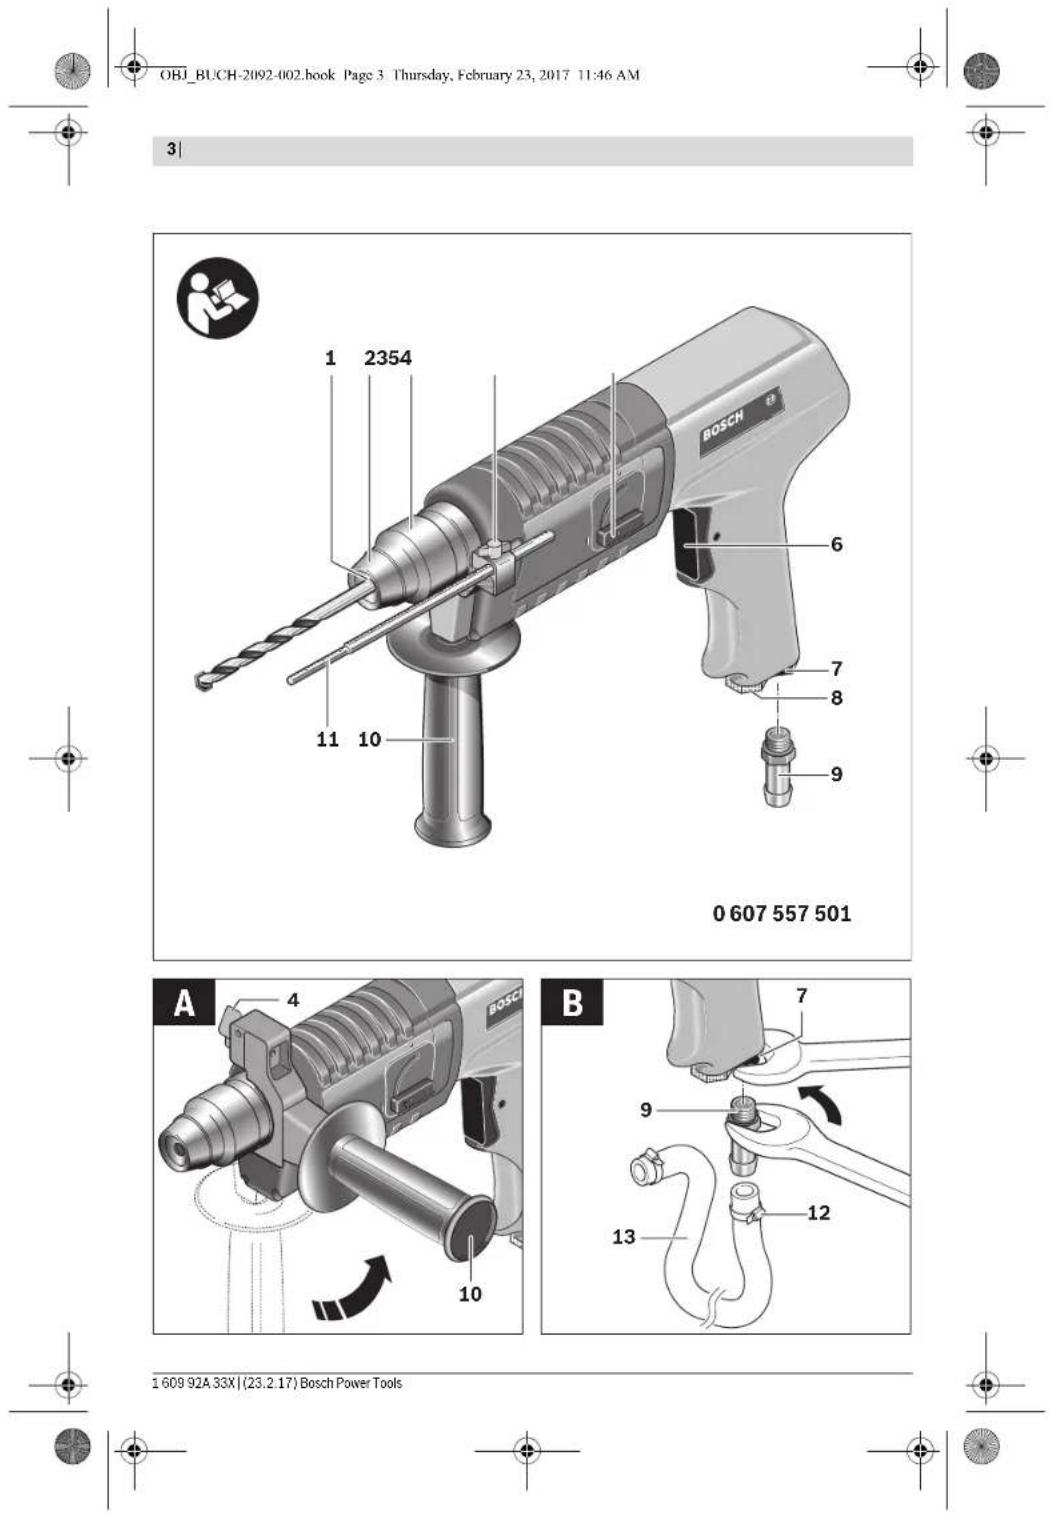
The numbering of the product features refers to the illustration of the pneumatic tool on the graphics page.
1 Tool holder
2 Dust protection cap
3 Locking sleeve
4 Wing bolt for adjustment of auxiliary handle


English|15
OBI_BUCH-2092-002.book Page 15 Thursday, February 23, 2017 11:46 AM
5 Mode selector switch
6 On/Off switch
7 Connection socket at air intake
8 Air outlet with silencer
9 Hose fitting
10 Auxiliary handle
11 Depth stop
12 Hose clamp
13 Supply-air hose
14 Securing screw for key type drill chuck
15 Key chuck
16 SDS-plus adapter shank for drill chuck
*Accessories shown or described are not part of the standard delivery scope of the product. A complete overview of accessories can be found in our accessories program.
Technical Data
| Pneumatic rotary hammer | ||
| Article number 0 607 557 501 | ||
| Rotational speed under load, max. | min-1 | 850 |
| Impact rate | min-1 | 3900 |
| Output power | W 740 | |
| Drilling diameter, max.: | ||
| - Concrete | mm | 20 |
| - Steel | mm | 13 |
| - Wood | mm | 30 |
| Tool holder | SDS-plus | |
| Max. working pressure for tool | bar | 5 |
| psi | 72.5 | |
| Thread size of hose connection | G 1/4" | |
| Inner diameter of hose | mm 13 | |
| Air consumption at no-load | l/s | 15 |
| cfm | 31.8 | |
| Weight according to EPTA-Procedure 01:2014 | kg | 3.0 |
| lbs | 6.6 | |
Noise/Vibration Information
Measured sound values determined according to
EN ISO 15744.
Typically the A-weighted noise levels of the pneumatic tool are: Sound pressure level 89 dB(A); sound power level 100 dB(A). Uncertainty K = 3 dB.
Wear hearing protection!
Vibration total values a_i (triax vector sum) and uncertainty K determined according to EN 28927:
Hammer drilling in concrete: a_v = 5m / s^2 K = 1.0m / s^2 Chiselling: a_v = 6m / s^2 K = 1.1m / s^2
Drilling in metal: a_ < 2.5 m/s^2 . K = 1.5 m/s^2
Declaration of Conformity
CE
We declare under our sole responsibility that the product described under "Technical Data" is in conformity with the following standards or standardization documents:
EN ISO 11148 according to the provisions of the directive 2006/42/EC.
Technical file (2006/42/EC) at:
Robert Bosch Power Tools GmbH, PT/ECS,
70538 Stuttgart,GERMANY
Henk Becker
Executive Vice President
Engineering
Helmut Heinzelmann
Head of Product Certification
PT/ECS

Robert Bosch Power Tools GmbH
70538 Stuttgart,GERMANY
Stuttgart, 01.01.2017
Assembly
Auxiliary Handle (see figure A)
For safety reasons, the pneumatic tool must only be used with mounted auxiliary handle 10.
The auxiliary handle 10 can be set to any position for a secure and low-fatigue working posture.
Turn the wing bolt for adjustment of the auxiliary handle 4 in anticlockwise direction and set the auxiliary handle 10 to the required position. Then tighten the wing bolt 4 again in clockwise direction.
Exhaust-air Guidance
With exhaust-air guidance, the exhaust air can be diverted through an exhaust-air hose away from your workplace, while at the same time achieving optimal sound-proofing. Additionally, your working conditions are improved, as your workplace can no longer be contaminated though oil-containing air and dispersed dust or chips.
- Unscrew the silencer at air outlet 8 and replace it with a hose fitting 9.
- Loosen hose clamp 12 of the exhaust-air hose, mount the exhaust-air hose to hose fitting 9 and retighten the hose clamp.
Connecting the Air Supply (seefigure B)
- Ensure that the air pressure is not lower than 5 bar (72.5 psi) because the pneumatic tool is designed for this operating pressure.
For maximum performance, the values for the inner hose diameter as well as the connection threads must be adhered to as listed in the "Technical Data" Table. To maintain the full performance, only use hoses with a maximum length of 4m . The compressed air supplied should be free of foreign material and moisture to protect the tool from damage, contamination, and the formation of rust.
Note: The use of a compressed-air maintenance unit is necessary. This ensures proper function of the pneumatic tools.
Observe the operating instructions of the maintenance unit. All fittings, connecting lines and hoses must be dimensioned for the pressure and the required air volume.


OBI_BUCH-2092-002.book Page 16 Thursday, February 23, 2017 11:46 AM
16|English
Avoid restrictions in the air supply, e.g., from pinching, kinking, or stretching!
When in doubt, check the pressure at the air inlet with a pressure gauge with the pneumatic tool switched on.
Connecting the Air Supply to the Pneumatic Tool
- Screw hose fitting 9 into the connection socket at air inlet 7.
To avoid damage to interior valve components of the pneumatic tool when screwing hose fitting 9 in or out, it is recommended to counter hold the projecting connection socket of air intake with an open-end wrench (size 22mm ).
- Loosen hose clamp 12 of supply-air hose 13, mount the supply-air hose to hose fitting 9 and retighten the hose clamp.
Note: Always mount the supply-air hose to the pneumatic tool first, then to the maintenance unit.
Selecting Drill Chucks and Tools
For hammer drilling and chiselling (chiselling only with MV 200 accessory), SDS-plus tools are required that are inserted in the SDS-plus drill chuck.
For drilling without impact in wood, metal, ceramic and plastic as well as for screwdriving, tools without SDS-plus are used (e.g., drills with cylindrical shank). For these tools, a keyless chuck or a key type drill chuck are required.
Changing the Key Type Drill Chuck
To work with tools without SDS-plus (e.g., drills with cylindrical shank), a suitable drill chuck must be mounted (key type drill chuck or keyless chuck, accessories).
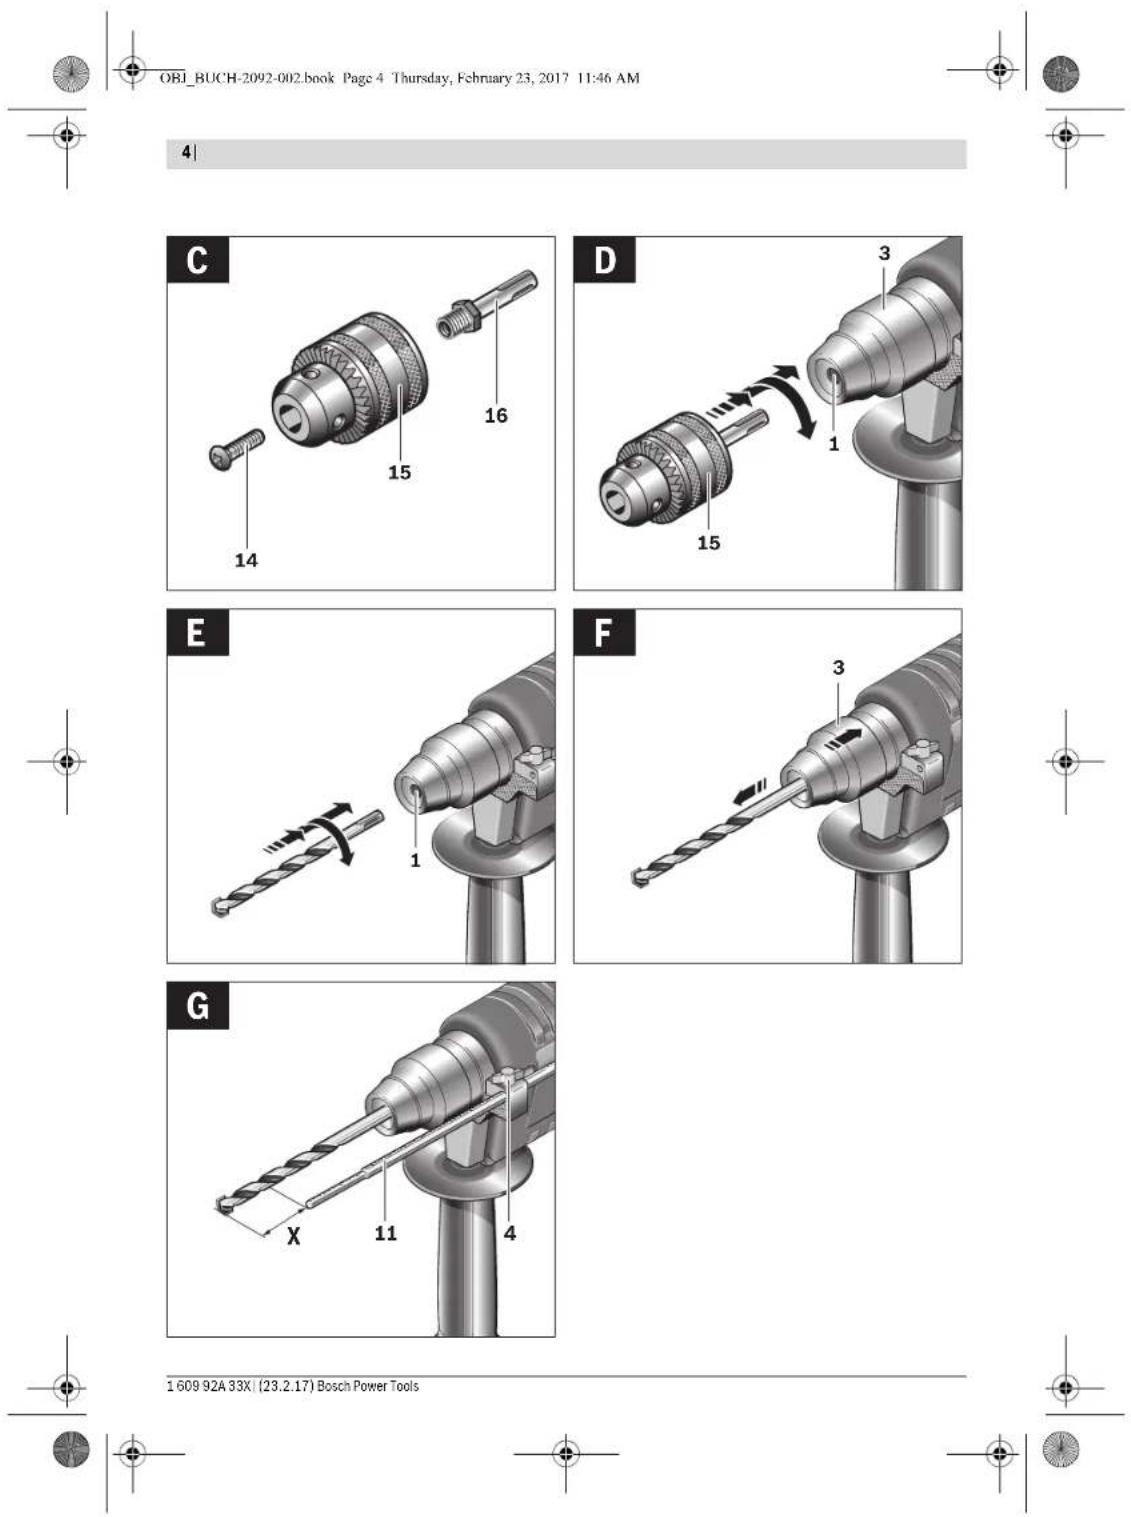
Mounting the Key Type Drill Chuck (see figure C)
- Screw the SDS-plus adapter shank 16 into a key type drill chuck 15. Secure the key type drill chuck 15 with the securing screw 14. Please observe that the securing screw has a left-hand thread.
Inserting the Key Type Drill Chuck (see figure D)
- Clean the shank end of the adapter shank and apply a light coat of grease.
- Insert the key type drill chuck with the adapter shank into the tool holder with a turning motion until it automatically locks.
- Check the locking effect by pulling the key type drill chuck.
Removing the Key Type Drill Chuck
Push the locking sleeve 3 toward the rear and pull out the key type drill chuck 15.
Changing the Tool
The dust protection cap 2 largely prevents the entry of drilling dust into the tool holder during operation. When inserting the tool, take care that the dust protection cap 2 is not damaged.
A damaged dust protection cap should be changed immediately. We recommend having this carried out by an after-sales service.
Inserting SDS-plus Drilling Tools (see figure E)
The SDS-plus drill chuck allows for simple and convenient changing of drilling tools without the use of additional tools.
Clean and lightly grease the shank end of the tool.
- Insert the tool in a twisting manner into the tool holder until it latches itself.
- Check the latching by pulling the tool.
As a requirement of the system, the SDS-plus drilling tool can move freely. This causes a certain radial run-out at no-load, which has no effect on the accuracy of the drill hole, as the drill bit centres itself upon drilling.
Removing SDS-plus Drilling Tools (see figure F)
Push back the locking sleeve 3 and remove the tool.
Inserting Drilling Tools without SDS-plus
Note: Do not use tools without SDS-plus for hammer drilling or chiselling! Tools without SDS-plus and their drill chucks are damaged by hammer drilling or chiselling.
- Insert a key type drill chuck 15 (see "Changing the Key Type Drill Chuck", page 16).
- Open the key type drill chuck 15 by turning until the tool can be inserted. Insert the tool.
- Insert the chuck key into the corresponding holes of the key type drill chuck 15 and clamp the tool uniformly.
Removing Drilling Tools without SDS-plus
- Turn the sleeve of the key type drill chuck 15 with the drill chuck key in anticlockwise direction until the drilling tool can be removed.
Operation
Starting Operation
The pneumatic tool works optimally at a working pressure of 5 bar (72.5 psi), measured at the air inlet when the pneumatic tool is switched on.
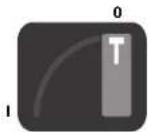
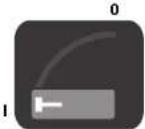
Setting the operating mode
The operating mode of the pneumatic tool is selected using the mode selector switch 5.
Note: Change the operating mode only when the pneumatic tool is switched off! Otherwise, the pneumatic tool may become damaged.
Turn the mode selector switch 5 to the requested position.

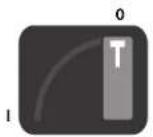
Position for drilling without impact in wood, metal, ceramic and plastic as well as for screwdriving
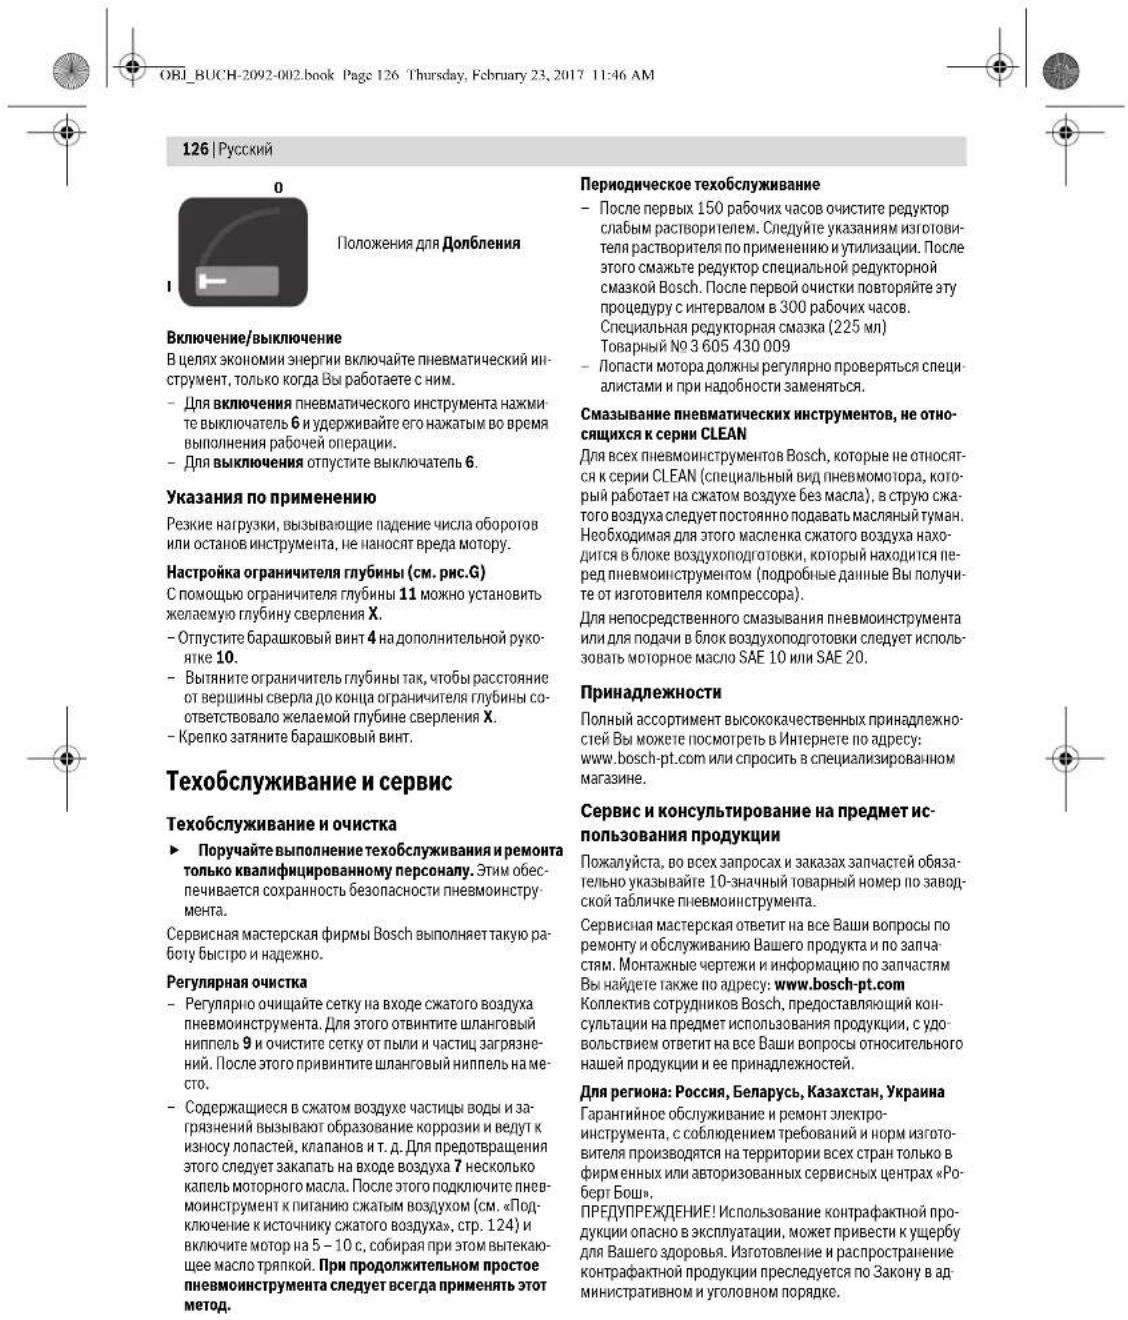
Position for chiselling


English|17
OBI_BUCH-2092-002.book Page 17 Thursday, February 23, 2017 11:46 AM
Starting and Stopping
To save energy, only switch the pneumatic tool on when you are using it.
- To switch on the pneumatic tool, press the On/Off switch 6 and keep it pressed during the working procedure.
- T o switch off the pneumatic tool, release the On/Off switch 6.
Working Advice
Sudden loads cause a sharp drop in speed or a complete stop, yet do not cause damage to the motor.
Adjusting the Depth Stop (see figure G)
The required drilling depth X can be set with the depth stop 11.
Loosen the wing bolt 4 on the auxiliary handle 10.
- Pull out the depth stop until the distance between the tip of the drill bit and the tip of the depth stop correspond with the desired drilling depth X .
Tighten the wing bolt again.
Maintenance and Service
Maintenance and Cleaning
Have maintenance and repair work carried out only through qualified persons. This will ensure that the safety of the pneumatic tool is maintained.
An authorized Bosch after-sales service agent will carry out this work quickly and reliably.
Regular Cleaning
- Clean the sieve at the air intake of the pneumatic tool regularly. For this, unscrew the hose fitting 9 and remove any dust and debris from the sieve. Afterwards, retighten the hose fitting again.
Water and debris particles in the compressed air cause rust and lead to wear of plates, valves etc. To prevent this, fill several drops of engine oil into the air intake 7. Reconnect the pneumatic tool to the air supply (see "Connecting the Air Supply", page 15) and run it for 5-10 seconds, while catching/picking up the escaping oil with a cloth. Always carry out this procedure when not using the pneumatic tool for a longer period of time.
Scheduled Maintenance
Clean the gearbox after the first 150 running hours using a mild solvent. Follow the solvent manufacturers directions for use and disposal. Lubricate the gearbox using Bosch gearbox lube. Repeat the lubrication procedure every 300 hours after the initial gearbox service. Special gearbox grease (225 ml) Article number 360543009
- The motor plates should be checked regularly by specialised personnel and replaced, if required.
Lubrication of Pneumatic Tools that do not belong to the CLEAN Product Line
For all Bosch pneumatic tools that do not belong to the CLEAN product line (these have a special type of compressed-air motor that functions with oil-free compressed air), oil mist should be added continuously to the flowing through compressed air. The compressed-air oiler required for this is included in the compressed-air service unit on the line side of the pneumatic tool (for more details, please refer to the compressor manufacturer).
For direct lubrication of the pneumatic tool or admixtures to the service unit, use SAE 10 or SAE 20 engine oil.
Accessories
For more information on the complete quality accessories program, please refer to the internet under www.bosch-pt.com or contact your specialist shop.
After-sales Service and Application Service
In all correspondence and spare parts orders, please always include the 10-digit article number given on the type plate of the pneumatic tool.
Our after-sales service responds to your questions concerning maintenance and repair of your product as well as spare parts. Exploded views and information on spare parts can also be found under:
www.bosch-pt.com
Bosch's application service team will gladly answer questions concerning our products and their accessories.
Great Britain
Robert Bosch Ltd. (B.S.C.)
P.O.Box 98
Broadwater Park
North Orbital Road
Denham
Uxbridge
UB95HJ
At www.bosch-pt.co.uk you can order spare parts or arrange the collection of a product in need of servicing or repair.
Tel. Service: (0844) 7360109
E-Mail: boschservicecentre@bosch.com
Ireland
OrigLtd.
Unit 23 Magna Drive
Magna Business Park
City West
Dublin 24
Tel. Service: (01) 4666700
Fax: (01) 4666888


20|Français
OBI_BUCH-2092-002.book Page 21 Thursday, February 23, 2017 11:46 AM
Francais 21
OBI_BUCH-2092-002.book Page 26 Thursday, February 23, 2017 11:46 AM
26|Espanol
Robert Bosch (France) S.A.S.
instalar, operar, repary mante
OBI_BUCH-2092-002.book Page 30 Thursday, February 23, 2017 11:46 AM
30 | Espanol
a_1 = 5m / s^, K = 1,0m / s^
Cincelado:an=6m/s²,K=1.1m/s²
Taladrado en metal: a_h < 2.5 m/s^2 , K = 1.5 m/s^2 .
1609 92A 33X(23.2.17) Bosch Power Tools
Executive Vice President Head of Product Certification Engineering PT/ECS

Robert Bosch Power Tools GmbH ZB 368,Electron, GERMANY
Stuttgart, 01.01.2017
Montaje
Empunadura adicional (ver figura A)
OBI_BUCH-2092-002.book Page 35 Thursday, February 23, 2017 11:46 AM
Portugues 35
OBI_BUCH-2092-002.book Page 37 Thursday, February 23, 2017 11:46 AM
Portugues 37
11 Esbarro de profundidade
12 Bracadeira para mangueiras
13 Mangueira de alimentacao de ar
14 Parafoso de seguranga para mandril brocas de coroa dentada*
15 Mandril de brocas de coroa dentada
16 Fixação para brocas SDS-plus*
Henk Becker Helmut Heinzelmann Executive Vice President Head of Product Cert Engineering PT/ECS

iV. k = m _____
Robert Bosch Power Tools GmbH
70538 Stuttgart,GERMANY
Stuttgart, 01.01.2017
OBI_BUCH-2092-002.book Page 38 Thursday, February 23, 2017 11:46 AM
38 | Português
OBI_BUCH-2092-002.book Page 44 Thursday, February 23, 2017 11:46 AM
44 Italiano
Executive Vice President Engineering
Helmut Heinzelmann
Head of Product Certification PT/ECS

Robert Bosch Power Tools GmbH
70538 Stuttgart,GERMANY
Stuttgart,01.01.2017
Montaggio
Impugnatura supplementare (vedi figura A)
OBI_BUCH-2092-002.book Page 52 Thursday, February 23, 2017 11:46 AM
52|Nederlands
OBI_BUCH-2092-002.book Page 57 Thursday, February 23, 2017 11:46 AM
Dansk|57
| Symbol | Betydning | |
| QC | Hurtigudskiftningspatron | |
| ○ | Symbol for indvendig seskant | |
| ■ | Symbol for udvendig firkant | Værktæjsholderen |
| UNF | US finf gehind (Unified National Fine Thread Series) | |
| G | Whitworth-gevind | |
| NPT | National pipe thread | Tilslutningsgevind |
Executive Vice President Engineering
Helmut Heinzelmann
Head of Product Certification PT/ECS

iV. k = m
Robert Bosch Power Tools GmbH
70538 Stuttgart, G
Stuttgart, 01.01.2017
Tekniske data
Special-gearfed (225 ml)
Typenummer 3605430009
Motorlamellierne skal kontrolleres at specialiseret personale og usdskiftes after behov.
Bosch Service Center
Telegrafvej 3
2750 Ballerup
På www.bosch-pt.dk kan der online bestilles resvende aller oprettens en reparations ordre.
TIf. Service Center: 44898855
Fax:44898755
E-Mail: vaerktoej@dk.bosch.com
Bortskaffelse
OBI_BUCH-2092-002.book Page 62 Thursday, February 23, 2017 11:46 AM
62 | Svenska
OBI_BUCH-2092-002.book Page 63 Thursday, February 23, 2017 11:46 AM
Symbol Betydelse
| bar | bar | Lufttryck |
| psi | pounds per square inch | |
| l/s | liter per sekund | Luftfürbrukning |
| cfm | cubic feet per minute | |
| dB Decibel | Storhet für relativ ljudniva | |
| QC Snabbchuck | ||
| ○ | Symbol für invändig sexkant | Verktygsfeste |
| ■ | Symbol für utvändig fyrkant | |
| UNF | US-fingänga( Unified National Fine Thread Series) | |
| G | Whitworth-gänga | Anslutningsganga |
| NPT | National pipe thread | |
Henk Becker
Executive Vice President
Engineering
Helmut Heinzelmann
Head of Product Certification
PT/ECS

iV. k = m
Robert Bosch Power Tools GmbH 70538 Stuttgart, GERMANY
Stuttgart, 01.01.2017
Bosch Power Tools 1609 92A 33X|{23.2.17}


Buller/vibrationsdata
Mātvdānena forljdunivān har tagilts fram baserande pān EN ISO 15744.
Bosch Service Center
Telegrafvej 3
2750 Ballerup
Danmark
Tel.: (08) 7501820 (inom Sverige)
Fax: (011) 187691
Avfallschantering
OBI_BUCH-2092-002.book Page 69 Thursday, February 23, 2017 11:46 AM
Symbol Betydning
QC Hurtigchuck

Symbol for innvendig
sekskant
Symbol for ultvendig firkant Verktoyfeste
US-fingjenger
UNF (Unified National Fine
Thread Series)
G Whitworth-gjenger
NPT National pipe thread
Tilkopingsgienger
Produkt- ogytelsesbeskrivelse

Boringimetal:ah<2.5m/s,K=1.5m/s²
Tekniske data
Trykkuft-borhammer
| Produktnumber 0607 557 501 | ||
| max. turtall, belastet | min1 | 850 |
| Slagtall | min1 | 3900 |
| Avgitt effekt | W 740 | |
| Bordiameter max.: | ||
| - B e t o n g | mm | 20 |
| - S tål | mm | 13 |
| - Tre | mm | 30 |
| Verktøyfeste | SDS-plus | |
| max. driftstrykk på verktøyet | bar | 5 |
| psi | 72,5 | |
| Tilkopingsjenger for slangefilmkoppling | G 1/4" | |
| Innvendig slangevidde | mm | 13 |
| Luftforbruk ved tomgang | l/s | 15 |
| cfm | 31,8 | |
| Vekt tilsvarende EPTA-Procedure 01:2014 | kg | 3,0 |
| Ibs | 6,6 | |
Samsvarserklaring
C
Vierklaer som eaneansvarlg at Produktet som beskrives under «Teknische datast stemmer overens med folgende standard der aller standardisierte dokumenter, EN ISO 11148 iht, be-stemmelsene i direktivet 2006/42/EF.
Tekniske data (2006/42/EC) hos:
Robert Bosch Power Tools GmbH, PT/ECS,
70538 Stuttgart,GERMANY
Henk Becker
Helmut Heinzelmann
Executive Vice President
Head of Product Certification
ngineering

Robert Bosch Power Tools GmbH
70538 Stuttgart,GERMANY
OBI_BUCH-2092-002.book Page 70 Thursday, February 23, 2017 11:46 AM
70|Norsk
- Skru vingeskrun til innstilling ekstrahandtaket 4 mot urviserne og sving ektrahandtaket 10 lit onsket positjon. Deretter skru du vingeskrun 4 fast igjen med urviserne.
Utblasningsluftf.org
Med en utblasningsluftf.organ kan du lede utblasningsluften gjennom en utblasningsluftlangsborte ar fearobsomrade dtg og samtdig oppn e an optimal lyddemping. t tilgegf forbre drer du arbeidsvilkarene dine, fordri arbeidsplassen icke lenger kan tilsmusses av oljeholdig luft erler stev hvh. spon kan virlves opp.
OBI_BUCH-2092-002.book Page 75 Thursday, February 23, 2017 11:46 AM

Suomi 75
Tuotekuvaus

Executive Vice President
Head of Product Certification
Engineering

Robert Bosch Power Tools GmbH
70538 Stuttgart,GERMANY
Stuttgart, 01.01.2017
Asennus
OBI_BUCH-2092-002.book Page 82 Thursday, February 23, 2017 11:46 AM
82|EAnvka
10PiooBcTnAβn
11ObnyocBabouc
12 201kpaac oAynv
13∑uivactpoogosnncpeepa
14 Biag aagaaelac yia yapaawto tooX
15paovawtoaok
16 TReAeOc unoOxHcyi Taok SDS-plus
Eepnnta nou aneikovocvtia h neypapovotai dev nepokovotai ot stovatp ooskeuaia. Ta tov naipn katalayo ckapnntuvkoi ta to npoypaayc ekapvotau.
Texvka xapaktnpItuKa
Henk Becker Helmut Heinzelmann Executive Vice President Head of Product Certification Engineering PT/ECS

Robert Bosch Power Tools GmbH
70538 Stuttgart,GERMANY
Stuttgart, 01.01.2017
SuvapoAoynon
Pioo0eTn laBn (Bheneukova A)
To evayaeio nnciaoyou aepa yia loyouac oopaleci ciatigenei ta vxpnaoionoiel mvo je uovapnooyenyn npno0eTn loh10.
Hnpocbernlambda10 npoei va puotaiore oe oanafoote eon emoue ie va va umoepoe et rova epaote aeva aiva mukua.
- Tugioe in bia 10 pOIOAIOI IN pOIOBIOI IN pOIOBIOI IN AIOBIOI 4 pOIOAIOVIIOTN IN POIOAIOKc KpOIOBIOITN pOIOBIOIN AIOBIOIN 10 aTNI EMIIOUOIN EON AkoAOBAC apIEE T bia 10 pOIOAIO 4 yupovtnc IVp e opoaiokoi Apoia
Obnynon tou eepxoevou aepoc
Me nI biBepaiai dtaTnnc faepiouo iinaepie va anyohoe te vovpumapaoe aio ao xupoi ou npyaedae kai rauo xpova v enmteke kai apdnn npoyuwaan. Kkrc on autro belaunovotra o uovtkec ncc npyaedac, cncn o xipoc rou npyaedce dev pnuvatni kivov an o npcau npneixkA hia n to opnoBauovoknv k/kwpcviv.
Ecbioote to ayotipno any tny efo8epa 8 kaiavikata-OTHOte Tov je To pako 9
-XaIapawTe To aIyKnpa OaIyva 12 Tou oAlyva eApiao KaItepeWTeTo OaIyva eApiaopoueOu pakOp OaIyva 9, aIyovTaeTo aOyKnpa OaIyva.
SvOeOg Omy TPOPOOa aepoc (Blae eKova B)
IpoaTe,vaunivlneanieoTouepaaumotepn and 5 bar (72,5 psi),enohtoepyaleo meceoue ou aepaivoaegauvo yaurntvncionaeuoyic.
Ia TnV emtnxla Tc meyotnc duvntac ixoc npenei va Tnpouvaia o tue, ia To cowepcko avonya Tou ao Awa Yau Kaoboc koi yia Ta anepala ouuveanou aovapoeovtai stov nivaka Texwika xapakntipnktid. Ia Tn diatthonr Tc nHnpooc ixoc vXpnqunnoeite aoAiwec meyioTo uKoc 4m.
O eioxoyepovoc apec npenei va uny npeiyex Eva ovtkejeva Kau uypaia, yaa vnpoatcurtciro cypaaleo aepoc ano qmuic, Bpojuic Kau oceoiouac.
Ynobecn:Anateirn xpon niac movdaac ouwnpnoan. EToi eaoailear n aporin Aucropyia Tou cyaekoi aepoc.
Oaata npoooohn o6noyicxepiaqou nncovabacovvtnponc.
1609 92A 33X (23.2.17) Bosch Power Tools


84|EAAnvka
-Fupate ro diakomn avataoic kpoovnc/epiopnpic 5 atny enduun thc
Oeon yia toumna xwpic kpoowon
oe Euua, petaa kai oe kepuka
kai naaotka uka kaboc kai yia
Bubuata
Oeon yia kaLemuopa
Oeon e aeitoupyia kEKTc aeitoupyiac
I tay n eokovon neevepiae, evenvoipnote o epyaelo meneuepou aev npovot, ovat ao xnpnuoioeit.
biakonON/OFF6Kkpaotocovnatnevo kata ndiapkeiaTc biadikaclaeepyaac.
eaeepo to biakomn ON/OFF 6.
Ynodeseepyaia
Ophiia nu eayovot anotopia npokaoov iogni mnnou apoiou stpov h akon kai yknvnda tou epayelou aepoc, xuipic uac vbaamouv tov knvthpa.
Pouon onyou Baoouc (Bleeneikova G)
Me ToV oBNO 11 npoepre va pOlaeTo emBuHnTo 0Boc Tumipatox C.
AaTne TjBda je Tnu kepaah tounau metaoaaac 4 o np oetm aBo 10
TpaBnTe Tov oyno Baooc npoc ta eKa, pexn anoTaan aoaocaonaiqntou purnavio kai nny auiuTuoyao Baooc vayanokpivra tao emiBunto Baooc pumnaTOC X.
-2pIeTe mBiae ne Tnu Kepaan tumou nataoaoac Gava oTa- 6epa.
Suvthponk Kat Service
UvtnpnonkkaBapuoc
Na aadetere tncpoyoe ouvtipnongkai enokceu n ovo e apotaekmaeepo npooaikko. Eoi eaoepa
Aketo n diatripnan Tn aopdaeiaoc Tou epyaelou aeoc. 'Eva euaoobompevo katoaeta Service Tc Bosch ektele Tq epyaoleuc autc yipoyopa kai apoaiku.
Takikoc kaogap
Na kabiapie taiku ta neyua otny eioo aepoc, tou epaiaeiu aepoc, f' auto npenei va eipiboeote to pakop oulambda 9 kai va apapoeete ra oawatiaokovnckai bmuac ano ta neyua.Akoakowne npenei va biwaoet nka kalakapok owriya.
Ta ouajaria vepou kai pwnacnou nepiokovrntov aopa npokaoiv ouoieoo kai onyoyoe obpawu ta euaojauw, baibowk an. Tia va emoblae kai terio npenevi va balete otni eoao aepoc 7 mepcic otnyoe laodi kivnpa. Svudote na to cyapaleo apoc otny napoyn aopc (Bleene uvveon otnypopofoia aepoc, okeiba 82) kaqotre to va icatoupyna5-10 s. Fpouyitic tauropova to efepxuevo lai eva navi. E peinwnou no to epayelo aopc dev npoketai xpnnoomoi nei yia apketod kaipo, tore npenie va cappoctne navto nmpana w dbukcia.
Teipoiodik ouvthpon
KaBapato To mXavaiouo metadoon kivnong metao nio npoTec 150 wpc Ktoupyiae E avnno diaut. Tnpotrc cx oetieke me Tx npan kai anoupon Tou diaut unobeiEeou Tou KAeuaon Tou AkoAoiBac aoWOTTo ngaviou oetadooc kivnong e to etiia yia naxvaiopoukoviknO liocTNC Bosch.Na enovaalabete Tny npanaw diabKaia kaBapauo metao 300 wpc, keTuoyiaic metao tvTo npio KaBapoo.
Ei6koAIOcVuaIyauooucKlvnnc(225ml)
Aopuc eupetnpou 3605430009
a e aouapata Tou Kwnthopnpen va eeyovra ot kntkva xovikia baoiura ancbokcckiaucjcvvo npooimko kai aypeoicta,aaVcAoi.
Alnavon Tou evayelow nmeiepeyou aepou nou dev an kouv ony katokuaotk oepa CLEAN
Tnpoue to biokaiwa aalayov.
Türkce
Güvenlik Talimatu
OBI_BUCH-2092-002.book Page 88 Thursday, February 23, 2017 11:46 AM
88|Türkce
Sembol Anlami
QC Hizl degistiril mandren
laltgen sembolu
Disdortgen sembolui Uckoyan
US ince dis
UNF (Unified National Fine
Thread Series)
G Whitworth dis
NPT National pipe thread
Urun ve islev tanimi

Executive Vice President
Head of Product Certification
Engineering
PT/ECS

iV. k = m
Robert Bosch Power Tools GmbH
70538 Stuttgart,GERMANY
Stuttgart,01.01.2017


Turkce 89
Montaj
Ek tutamak (Bakim: Sekil A)
SDS-plus'suz ucin cikarilmasi
OBI_BUCH-2092-002.book Page 95 Thursday, February 23, 2017 11:46 AM
Polski|95
Symbole
Gwint National pipe thread
ruowy
Briggs
(NPT)
Gwint
przyfczeniowy
OBI_BUCH-2092-002.book Page 96 Thursday, February 23, 2017 11:46 AM
96 Polski
Dane technicznne
Executive Vice President
Engineering
Helmut Heinzelmann
Head of Product Certification
PT/ECS

iV. k = w_c
Robert Bosch Power Tools GmbH
70538 Stuttgart,GERMANY
Stuttgart,01.01.2017
Montaz
OBI_BUCH-2092-002.book Page 102 Thursday, February 23, 2017 11:46 AM
102 | Cesky
Henk Becker
Executive Vice President
Engineering
Helmut Heinzelmann
Head of Product Certification
PT/ECS

n = 1
Robert Bosch Power Tools GmbH 70538 Stuttgart,GERMANY Stuttgart,01.01.2017
1609 92A 33X| (23.2.17) Bosch Power Tools


Cesky 103
Montáz
Pridavná rukoje (viz obr. A)
Pneumaticke naadi se z bezpechnostnich duvodu smi pouziv jen s namontovanou pridavnou rukojet 10.
Abyste dosa hi bepezne a bezunavov preacovni drzeni, mu zete pridavn dezdio 10 libovoln natoit.
- Otocte kridlov y sroub pro pfrestanvi pridavne rukojeti 4 prot smeru hodinovych ruciec a otocte pridavne dradlo 10 do pozadované polohy. Potom opet utahnete kridlov y sroub 4 ve smeru hodinovych ruciec.
Bosch Service Center PT
KVapence 1621/16
692 01 Mikulov
Na www.bosch-pt.cz si muzete objednat oprava Vašeho stroje online.
Tel:519305700
Fax:519305705
E-Mail: servis.naradi@c2.bosch.com
www.bosch.cz
Zpracovani odpadu
Pneumaticke na radi, prisluensstvi a obaly by mely byt dodany k opetovnemu zhdnoceni neposkozujicimu zivotni prostre. df.
Henk Becker Helmut Heinzelmann Executive Vice President Head of Product Certification Engineering PT/ECS

Robert Bosch Power Tools GmbH
70538 Stuttgart, GERMANY
Stuttgart, 01.01.2017
Montáž
NPT National Pipe Thread
menet
Csatlakozo menet
TeMHKHa 6E3oJAnCHOnTH npn pabote c nHbEMaTHueCKHM HcHTpymentAM
HKOra He HanpaBnIte NotoK Bo3yXHa Ce6H HpyrNx NiDeH He HanpaBnIte XoNoBbI Bo3yX Ha pyKn.CKaTbI B03yX MoKeT npBcEeTH K cepEbe3HbIM TpABMam.
PnpoeepTe coeHnHn Hnnn HnTann. Bce y3nbl TeXOBcNHyBANHMybIuHaHnDOnxHbBlb paCHTAHHa DabnHe HeO b6m BoDyAaYBaHBe TEx HHECKHX DAHNbIX.CNHIKOM HNkOE JaBnEHne OtpNJTeBHcKa3BaBaeTc Ha FyHKUHOHbHO CnoOCBOCTn NHEMOHCTpyMeHTA, CNHUKOM BONbUoE daBnHE MoKet HAeETM MATEpNAhBHy uepb N pRnEeT K TpaB MaM.
3aunuie 1nHnOHTKm6a,cykeHHpaTbOpTe nKeBxKpae.3auuueiAunHnHOnTtenaMa CnBnBaUxNCHdaneR.HemdeHNO MeHrnopeHNHbIe. NIOBPEXHEHINHHITAHNA MOKET PnHBCTK HENHO INBBMTHUECKORo IaHg TpaBMAM. IIOHRTABNbIKN CTpykKa Moryr npaHHTb
CnepHte3aTm,TOb63axHMdnnlaunHaBcerda6bn xopo0o3aHTy. BcneCTBHe NIOXHO 3aTJAXKIN HIN NOBpeKDeHHA3xKMOB dNnlaHARBO3MOKeHN HEOKHTponP oBaAHN BbIXO B03DyXa.
BezonaachoctbIIOdei
Bybte BHHMATEnbHb, cnehtaem, 40B bdaenee, H npOyMaHNO NOxOHTK P kaote C nheBMATHECKMH HCTPymENTo. He paotabe T CnEBMaTHcckMH NCTPYMTOM BYCTANOM COCTOHN HN ECNBI HaxoHTecb noBnnHHeh NapkOTKHOB, CNPTHBX HANTKOB NHNEKAPCTB.MHNYTHA HEBHHMATENBHOCTb npHpaote C nHEBMATHcckMH HCTPymENTo MOKET pNPBCETC Kepb3HbIM TpABMM.
OeBaIePaboyOeDxyNo63atEnbHOHaBeBaIe 3aunthbe Ouy. HINBnYnlaBbIe CpedCTBAaHHTI, TAKAEK Ka3aHTI OPAHOBdXANHHa3auTHaHECKONB 3raaJbOyBb, 3aunTHaN KACKa NnHAYuHNH, -B3aBN CMOCTNOT HNCPTPyKINpABoTATEAINN INN TpeBOAHIN texHNKBe3oNtacOHmNnCahHtApBHXHOPM -CHNKaOT pCKTpABM.
N36eAte HnpeHnmepeHnro BknoueHn. NpeT TEm, KAKoDknOHTb NHEBMTHNECKHN HhCTPmEHTK HcTOHHKY BO3dyA, NOHHTb HnNnepeHcTe hero, y6eBNTbcBT, 0TO NHEBMTHNECKHN HhCTPmEHTBKnOHeN. NpeHocKa NHEBMTHeCKTo HnHCTpyMeNTa C nIaIeM HA BkKnOHTaTE HnN ONDKnOHTe HkNOUeHNO RnHEBMTHeCKTo HNtEPEyMeNTa KTOCHNYBO3dyXa MOrYPiNEBCTN HcHeCAthBM CNYqAR.
IpeBkIOOHeHMe NHEBMATHeCKOrHO HCTpyMHTA y6bpeHte HAcTPOeHHBe MHCTpyMTh. HAcTPOeHHb HnCtPYMeT, HAXOJIaONH BO BPAaIOUeHcE DetAI IN NHEBMATHeCKOrHO HCTpyMTha, MOKET CTbTb PnPHOH O TaBMyb.
He nepeoueHbAte c6e. Bcerda 3aHHMaIte yctoi HBOE NOJIOKENHE COXPAHAIAB PAHOBECYE.TOYHO BOE NIOJOKENHE COOTBCTByOUIEE NOIOJEKENTE IaNO 80BANT BAMyIuHCOxPAHAI KONPHTB HAD NHEBMATHECKMHNCTpyEMHOTMBEOKINDAHbIXCNIAYHX
Hocte noXdoaIyO oEky. He hocte npocctophy OeKny u Kyaepaehnn. Depkhtne BOnocb, odKny npKABuBtu ha pacCToHN OT BpaauoUxncxBcTaeNan. IpocptopnA oEckdy, kyaepaehnn i nnHHbte BonoCb moTyt nonact Bo pbaauoUmech CETAn.
Ecnnpdycmptepa BO3MOXHOCTb MOHTaKa yctpoCTB nOtOCa c6pObaHn, npOBepTe npaBnBHOCTb NIOKNIeOHHHN CNOIb3OBAHn TAKHX YCTPOCTB COKpaJAEOT PCK BO3HNK HOBEHNA ONChBH XCHTAYH N-3A pblHn.
HeBbxaHnepaOtpoabTahnnBO3dyN.6e8aIraTeNoanadHnOPaobTaHnOBO3dyN.Ba3a.OTpOtaTahnnBO3dyX, BHXoJINHHIN HTHMEATNHcKTOHNPyMeHTA,MOKETCpeKbTABoY,MACNO,MeTaNIEcKHeCACTMKN 3aqrP3HmH IN KOMnPecoppa.3To4peBaTOyEePoDMIgD30OpOBa.
PnBbHbIoo6ObaeeHc NHeBMaTHuecKHM HNCTpyMeHON TEO HcNo1b20BaHne
HcnoB3yIe 3axHHMhIye yctpoCTb HA HTH TCKn DnA 3xpePENHnIe NIOnpOKn O6paBtBuMaero MATEpHa. IpnpeKHNBaO6paBtBuMaeyo Detan pyKOn NNII pKNNMaEE K TEny, HnB3a ObecneYHe BeonaCHOCTb IIp paBoTe C INHEBMAtuNecKHM HHTpyMeHOM.


Pycckn121
He nepperpykaeTne HEBMATHueckn HNCTpyment.Hc
No3byte HEBMATHueckn HNCTpyment, KOTOpB
CneuaHbno pIepHa3aueH JBaWero Bna 6paob.
IIOxOpauiu HEBMATHueckn HNCTpyment paObaTeT
IyueHn HADKeHee BYKazAHOM DnA Hero dHaNA3OHE
MOUHOCH.
Hcnonb3yIe NHEBMATHECCHNHCHTPymET CnoBpeKHNHBM BIKHOATENEM. TheMTHeCNCKHINCTpyMeHT, KOTOpH He BKNIOAeTc Mn HnE BkNOAeTcA onaceH nTrebye pemOHa.
OtknouaHte noauy Bo3dyxa nepei Hactpoikoh HHCTPymHa, 3ameo npnnaeXhctei hnc en Cbl BDOrE Bpme H6yete er cnoN30bAr.3a Mepa npedoctoopoxHcHn poeTbaPaaeHertneHapeHpeHHoe BKNHOHE THEBMATueCCKTOHCCPTPMHa.
XpaHHTe HcNcONb3yEmbe HNEBMATcKcKHe HcTpyMeBtB HeOcOTyNHOMdAeTeMeCHe. He paepaHTe NOB3OBATCb HNEBMATcKcKHe HcTpyMeTOM NHAMQ, KOTOpBe H HezAKoMbCS HmH NnH HeHTAMHACToxH HcTpyKu. HNEBMATcKcKHe HcTpyMeTHI ONaCHb BYPKXeHObTHbXfNII.
Tuaattenbno yxakhaabe 3a NHEBMATHcckHM HcHtpy MHTOM.CnDte 3a TEM, Tc6bI NOBHXHbIE Detanr HNCTpyMeTA pabotAn HCpABHO He a3eAAN KTO6bI Detanr,KOTOpBE MORY BHNITb Ha pa6oTY NHEBMTHcKO HNCTPYMHTA,He bINN CNOMAHNNIOBpeXdEh. Ipeed hCNONbOAHmEH NHEBMATHcckO Rn HNCTpyMeTA NOPB6XdHBe Detanr NoEO6XdMOIO tOpemOnTHPOBaTB.MHOXECTBO HECACTHbIX CNYaeB INPOCXODIT NO pNHUHNE IIOXORO YX0Da 3a NHEBMATHcKCMH NHTCPYMTOM.
CoepKHepeKyHnHcTpyMeHTBCHOTe HOBpE M3aatauBaIte eo.TuaTeHNbO yXoKeHHnBe peKyuHne HcHTpyMeTbIC OCTpbmIpeKyHnnK PkOMKaM MeHbIe 3AKNHBAOTCNHXNFE BcETh.
NcnoIb3yIe NHEBMATWcckn HNCTpyMeHNT, pNHNaIeXKHOCTNH KCMY, CNEHMbIe PaoCHyHn HHTCPyMEnbTIu T. D. B COOTBETCBHM C HAOZIMHH YKAA3AHJHM.HYTHBaJItePnTbOM YCIOBNI CneIQDHKNY BblONPiHeMoP BOHt. 3TO NNOKET MAKCMANbIb CHN3HTb ObaTOBOAHBe NpHJ, BVpaQHNo H yJM.
HactpaBb,perynpoabThCNOn3oBbTneMaTHueckcKHeMHCTyEmBeHpa3peaTeaTcNtboKBoKaINHnIOPOBaHbHM No6yehHbHM onePatoAM.
BHOCHbN K3MHeHn B INHEBMaTHueCKn HnCTpyMeHT 3anpeaaet. IIOo0hBe H3MEHHeH MOrT CYH3NtB 3D- fekTHBHocTh MeP NO TEXHHKe DE3OaHcOHT N IOBbCHT Pnck ONeIporap.
CepBHC
PemOHBaWeroINHEBMOHNCTPymeHTa NOpyaHTe TOnkKBanHnHpOBAHMyNepcoHanyNToLKcC HcNoIb3OBAHHeM OPGHHaJIbHbIX 3aYcaTeH.3THM o6ecneuBaetcB e2oNaCHOCTb INHEBMOHNCTPymeHTa BdAnHeHMe.
Yka3aHHH NO TEXHHKe 6e30nacOCTn Dn NHEBMATHccknx nepoopatopob
CnOeHTe 3a TEM, YOb6DaHnBHe, YKazaaHnBHe Ha zAboDcKoT TaNnHKe, BbHn pa36OpHbIb. PInr Heo6xmoMoCTn aanPocHte y np034OBtTene Hoby TaNnHKe.
B Cnyaee nonomkn obpaabaHbMaem 3arotobKn, npHnAdJeKxocHT Hn CAMOTO INHEBMATNcECKOTNOHCTpyMeHTA O6nOMKn Moryt pa3netaTbC c BbICOK NcopoCTbIO.
Prrk 3cknnyataun, a taekse BO vpeem pemaHTa, texo6 cnyxHBAHn 3aMeHNpHnaNdxNcoHcTe NHEbMaTHueCKeKOr HhCTpyMehTA BcERda 063atBteHo HOncTe npTOBHOyDAPHe 3aUnTNbE OOK. Heo6OdIma TceNeHb 3aUnTNbI onpeJeTcHra KAKdoTo OTdenBHorO CNYAAR hCNpONb3OBAHn HhCTpyMehTA KOHKPTHO.
PnBbIbnONHeHHpaBToHADrONOBHnAeBAeBaTe3a 申THbIbWNEM.TaKHMobpAsOM,BAMyDactCRK6EkaTb TpABM.
IcnoB3yIeNtHebMOHCTpyMeNToTbnkoTOrTa, KOrTa 3y6nO npEdoxpaHEo To bInaDennHa. HnAne pboaOnu HnCTpyMeHT MoKet COCKOHTb NOTETbE.
H3nooHbIe,deOpMhpoBaHbIe HnH cNoMaHHbe
TaeHAn pNcncO6BHeHraJr KpEnerHeHHcTPyMeHTA
He6XoHmO 3aMeHrtb. TaKmObpaOM, Bam ydaCTcr
H3eKaHb1 rpaBM.
NepeTEm, KAK BKNIOHTb NIEMOHOTPYMENT, NIOHOYCTAHOBINTe eoHaO6baTaBMaEMoNobPXEHOyCT.
Onepatop H6cbnyhbaounnepcohandoohn6b6b8 BCOBTBCTBYUOEN PHHNECKOHΦoPme,Heo6xOHN MoI paoTb C HEBMaTHeCKHM HcHTpymToM DAHNHO P3MaPe, BEca NMOUHOCTN.
Bybte roTOBBI KHEOKHDAHHBM DABKHeHM NHEBMHOHCTPYMHTA,Bl3BAHBM PEAKTHBHBM CINAMN HINNONOMKO CMENHOPOIpaOBOER HNCTPYMHTa.KpenkoDePKNTE NHEMBATNECKHN HNCPTPYMHTn NPNBEdnKOpynCn pykN B Tako NONoKeHne, pNn KOtOpom BcCMOKETe NPOTHBNOEChOBaTb 3TN MEBblnpoDCIOpOKKHOCTNHMOYr IpNDOTBPaNTbTPaBMb.
Octopokno!PnI dnnntelhO 3KcNpyataunHnneMathuCheckoro Hnctpymeta CmehnhpaobOnnHnchtpymert MoKeT HARpeBaCb. OeBae3aunThnbe npetatKn.
Pnpepe6xncpaedoeB03yNnHpymhebueHH paobero daaeneBBkOHTNEeMaTHNecknn HcTpyMeH. Pnpoebe paooee daaneneH nOntB BkIOte HcTpyMeH, KOJIpa oae daanene CHOB ayet ONTHMaBbHM.
B Obepepaobotc nHbMaTHueckHMnHCTpyMeHTom y onepotaMOyT BHOHKeHaBHeHNpHThIeOuJeHHa KKNTx, PYkXt, NpHuAc, Yee HNApDyTHx qACTX Tena.
JnpaobotbcaTHM INHEBMATHcKHM HNCTpymHTOM npHMMte yD0bHyno3y,CnDEtA 3toKHNNOJXeHHEMTe Nn H36BaTHeYeD0bHybNs 03 nHnN B KTOBtpx cNoXHOyepXHBaTb paBHOBecHe. Pn npOdonKHTenbHohpaobeonepatopOndoKeHMeNTb NOJXeHHeta Tena BO3EgXHHe MYeD0bCTb y UcTocNTH.


Pycckn123
CmBON3nueHne
Pepe moTakom,3Kcnnyata
mH, pemOHToM,TexMHcckHM 06
CNYKbHnHMeN H3AmHeo NpHHAD
NeXHOCTe INBbMaTHueCKCN HN
CPyMEHTOB,A TAKKepepe Pa6O
TOB6INHn HNX,BHMAteIbHO nPo
uHTAte H BnIOHNHBe BCE yKa3a
Hn. BeBInONHeHn HIXKeJeNyO
HXH NcHrpykDn YK3AHHnNo TE
HnkeE3OAnOCHTn MOKeT NOeYb
3a COBn cepE3Hbe IpaMbI.

PImHMeHHe PcreCTBa 3auHTbOp ranoh Cnyxa.BozdeCTBne Uyma MOKET pIpeBcTH K notepe Cnyxa.
Mcnonb3yIte 3aunTHbIe O4KN.
Bt Batt MoutnOctb
| Hm | HbkyoTH-Metp | EduHnuaAHeprn (КрутшIMМомeNT) |
| Kf | KHIOIgPamM | Macc, BeC |
| Ibs | ФуHTbI | |
| MM | MHUHMeTp | Динha |
| MHN | MHNYtI | ПюдОпЖгтел- Ность |
| c | CEKYHdI | |
| MHN1 | чсJOOobopOTOB ИИN ДвИЗБЕНВ B MHNITY | ЧИСЮ obOPOTOB хлОстOrO XODa |
| bar | 6ap | atmocферhoe Давлиеиke |
| psi | ФуHTbI Ha KBaIpaTHbI ДJOH | |
| n/c | nIHTbI B CekYHdI | ПOTpeBблENHe BOZdYka |
| cfm | КуБИчecKHe ΦуТь B MHNITY | |
| ДБ DeuHcBělI | EduHnua OTHOCH- Тelьнoi CHNl b 3Byka | |
| QCБИСТРССМЕннI 到рОн | ||
| ○ | ОвоЗнayчENE BnyTpeHne- roШЕТРЯППИКHA | |
| ■ | СИМВОн НарУжHOrO чetytpeRexPraППИКHA | Паурон |
| UNF | STANДАrtTOHоpe3b6bI CUJIA | |
| (ЕднIHиН haциОнAHьHь STANOH TOHоnbOБТКH CUJIA) | ||
| G | pe3b6a YHrTbPora | ПиХСоEdINHITel- нэя рe3b6a |
| NPT | нauHOnHаньHь STAnДAPRT trpybHоpe3b6bI CUJIA | |
OnncanHe npoDyKta n ycnyr

PnTtBTE BcYK3AHHN HHTpykHnNo TEXHKHe 6e3oAnChOhty. NytUeOHN BOTHOeHH YHK3AHHN HHTpykHnNO TEXHKHe 6e3- OANCHOCHTMOTY CTbI PnHnHOH NpOKeHn 3NEKTPHueCKHM TOKOM, NOxApa NTRKeBbX TpABM.
Noxyanjcta.OTKpOte packnadHyTO cTPhHcy CnnIOCTpa- LMM HTEBMOHNCTPMyEMTA H octabrrne ee OTKpbToI NOKA Bby Kyaetae pykoBcDcBo n 0Kcnlytaaam.
PpHMeHeHne No Ha3HaueHHO
NHEBMATUHcckHN HCTPYMEHT PnEaH3aHueH NIN JyApdHORO CbepenHHB aBoTeH, KMPnHuKAMHe, a TAKeJHO nnerKx DnIb6ekhhXpabot. OH TAKePnIPrOEN dN HBezdyAPdHORO CbepenHHB aDpeBecHHe, Metanne, KepaMHe NnactMaCCe. NepFopatop npriFOED nn HcnoNlsb0aHHn B MOKpIX H BlaNkblx NOMEeHHnx, a TAKeH a ChpOInNoaKaK h yNtLc.
H306paXeHHbIe coCTaBbIe qACTn
Hmepaun npedctanenbHex KMOHENTOB BnONHeNo nO60paXeHHIO HEBMOHCTpyMeHTA HcTpAHue C HNO-CTPAUNIN
1n
2 Konnaokdraaunrbl0Tbinn
3ΦHKCHpyHouaTnHb3a
4 Eapaulokobbl BnHITIpeylnipOBK dnONHNtBnHnykOKT
5BbKIOaTeNbYdapa/cctHaOBBaPaaHnH
6 Bbiknooyateinb
7 PnhcoeHNHHTenbHbI mTuyepe Ha BXOe BO3Dyxa
8OTBepCTHeIy BbIXOa Bo3yXc TnyHTeM
9ⅢaHROBbHnnn
10 DononHHTenbHaar pyKoRTKa
11OrpaHnHTenbIy6nHb
12 3axm dna shaHa
13 Ⅲnahr noqauH B03dyxa
10IePaxaHnBHeBn BHHCTBcpeHNbHOrO nIpaHOa C 3y64btaHmBeHIOOM
15 CBePnHbHn NaTPOH C3y6 YaTHM BeHcOOM
16 PocadochnyxXBcOToBVK SDS-plus cBeprnhHoro na TpoHa
3'06abqKaHbHe HnObnCAnhBe pNpHaIaNEXHoCTH nE BxAQATB CTaNAPrTbN oEBe MoNtAcBn. PInbNb IAccoPTHM E pNpHaIaNEXHOCTb Bb HAIETe B haAae IpnpramMe pNpHaIaNEXHOCTe.
Texnueckne daHHble
OBI_BUCH-2092-002.book Page 124 Thursday, February 23, 2017 11:46 AM
124|Pycckn
Texnuecka dokymehta (2006/42/EC):
Robert Bosch Power Tools GmbH, PT/ECS,
70538 Stuttgart,GERMANY
Henk Becker Helmut Heinzelmann
Executive Vice President Head of Product Certification Engineering PT/ECS

iV. k = m _____
Robert Bosch Power Tools GmbH
70538 Stuttgart,GERMANY
Stuttgart, 01.01.2017
C6opka
DOnonHnTeNbHaR pyKoRTka (cm.phc.A)
H3co06pBekhenE TEXKHNBeONAChOCTN INHEBMATNECKN HHTCPyMHT pa5eIaTaETC HCNIOb3o8aT bTolKo C MOHTPOBAHBOH DOnONNHREHbY pKOAKTKO 10.
DOnONHHTeBHyO pyKoTky 10MOKHO NOBEPHYb BIO6oe OIOJOKHEn, YTObO b6eOEJIb 803MOKHOCTb 63EaIACHO H YeTOOMHouen paobToC HINCTPYMeHTOM.
- NobePHTe 6apaXkoBb BnHIT yCTAHOBKn DOnIOHNTe bHbHOy PkyoTKn 4 npTOHB HACOB O TcpeKN HObepHn Te pyoKtky 10 B HyKHOe NOJKeHHe.3aTeM KpEkn 3aTnHrte 6apaXkoBb BnHIT 4 B HappanBHeHHacOBO CTpeKN.
OTbOd OTPa6oTaHHOro Bo3dyxa
Upe3 KOMIOHENTbIy OTOBQA OTPaobatoHHoRBO3dyXbbl MoKHeTbe OTOBHTbOpaobatoHHHBo3dyxNo IuHaHyrBaToe PaobOero MeTe pno OJHObpemEHOM OTHMHbOM TpyEHNH BExNona.KPome TOrO,STMH yNyuaoiTaCBAu paOBpoye cYcNOBn,TAK KaC Baue paOooMe Mec To6 bue He 3a- rpa3HReTc BO3dyom CcoepKaAHmE MaCn H Bo3dyX He POnIMHMAETc IbIbN CTpyKk.
- BbkyptyIe TyyHInIeNb 3N OBcPcTyrA NByBxOaD B03JyXu 8 NocTaBbTe Na Ero meo ItoHaiobr N HmnnnE 9.
Ocnabte XoMUT 12uHaHnIaIpTa6oTaHnHO B0aDyXa HApKENHtIe HAnHJIaIpTa6oTaHnHO B0aDyXa HNaHROBOMHNHIIeN 9, YTO 3AHTYbU ShnHOBbXoMUT.
IpoKIOUOeHNE K MCTOUYHKy CKaTOrO BO3dyXa (cm.pnc.B)
Cnnde3aTEM,ntobbIabnHe60xya6bIHOmeHne56ap(72,5pi),tK.nHEBMATueckmHNCTpymEnTpaccuHTAH3TOpaoBeDaeHnEe
JIOOCTIKHCHMAKCMMABHOHOMOHOTNHe06XoDMBOBJIepKHBnBbIHHyBHTPENHIEFOHMaERPAUHaAINPPOCENHIHTeHOBpe3bbl3AHEnH,PNBEHBeHNbE TaSNuCE《TexHueKcNEHdHb》.JrAoCXpAHBNHOONHOMOHOCHTNObEyTEc buaHramc CnnHOH He 6ooee 4 M
PnpB3OHKOBcHmCnHEHcNcHcyETN3HcMpyTbAbeHHeNH MaHOHTpOM HAxOJE BKnHcHNOEHORNtBBHmOHCTpyMeHTa
PnEOOHNHEINI PINTAHN KCHBbM BO3yXOM K IHeBMOHCTPYMENTY
BHHNHITE XnHbROBb HnHnBe.9 B pNCHoEDHNHTe bHy tUeepy hXoDe BOAdyxa 7
IINPepoTbpauHIN NOBpeKHeH BHHTpOHNHXAactEH BEBHNI INHEMOHNCTPYMENTA CIEyET PIPN BEEPTbBAHHN HBBEPtBAHHN IaHrTOBO rHmNE9yEepKHBATb PPnHOeHNHITREhN hTuyepe BXOda BOADyxa 7raeHbMb KIOYOM(3822MM).
1609 92A 33X (23.2.17) Bosch Power Tools


Pycckn125
OcnaBHTXOMYTHK12 7nAHaTNOaHbBO3yKa13N3aKpeHtB 7nAHI Ha HINInene9,3aRrhyDnIgTOI0XOMYTHK.
YkaaAHHe: BCEjda 3akpeiHneIte WnAHI NpOAHu BoDyxa CHa- yana Ha nHeBMOHcHTpyMeHTE H aTeM Ha BNoke BoDyxoNOD- tORObK.
BbI6Op cBepnHbHOro npatPOna HnHCTpymEnTa
Cmeha natapoha c3y6aTbIM BeHcOm
Ipaqobc nHCTpyMeHTOM 6ea SDS-plus (HanpHmep, pna CBepnCnIHNDHueCKHM XBOCTOBHKOM) CnEDyETYCTAHABNbBbNoXoDnCHCBepnHbHybN aTPOH (HAp. nATPOH c3yOaBHmBEHOM NblbStP03aKHMHOaTPOH, npHaJIeNKBHOCTN).
YCTAHOBKa CBePnHbHoro NaTPOHa c 3y6aTbIM BEHcOM (CM.PHC.C)
BBHHTNE NOCAOHN XBOCTOBNK SDS-plus 16 BcepINbHbN NATPOH C3yBbAHM BEHUM 15. PedeoxpAHNTe CBePNHbN HnPOn C3yBcAaTM BEHOM 15 PedeoxpaHHTeNBHM BINTOM 14. YtH, TnpeoDPaHNTenBHy BNHT HmeeT NeByo pe3bby.
YCTAHOBKAnatpOHaC3y6aTbIMBENHcOM(cm.pnc.D)
- OuHuaIe HnEICKa CMAsbIaBte BCTaBNHEM N KOHeN IocADHOHO XBOCTOBHKA.
BcAeHbIe CbePnIbHnI npO H cYbHtM BHeIOMC BpaIeHm B nCaOpHoe THeDo aoTOMaTHeCKoB 6bnKpOBKn.
PnpoepbeBIOKOPBAHNE NIOBTKIOB BYTBAHNTB CEBPNINbHBN PANTOH C 3yCbAITBM BEHDM.
CHATNE natoha c3y6uatbIM BEHcOM
CDBHHTeΦNCHKPYUOYIb3y3 H3a3d, YbBbTE CEBPINbblbTAPONC 3cYbATbIM BEHUM 15
3aMeHa pa6oery HnCTpymEnTa
3aunthbI konnayok 2 npedopBpaaaet B 3auhntenHOH CTNE HNn pnoHHKOBHeHne bInn OCTCBepnHn B natoH. Pnp 3aMe ne paoboeo HHCTpyMeHa cneDnE 3a TEM, T06b konnnakok 2 He 6bn nobpeckhen.
HeMeDnHNo 3aMeHHTe NpOePKeHNb HnBtHnB KOnnaHOK.3To peKoMeHdyTeCBAInNHTb CnAMn cepBCHChMactepcKOH.
YctahOBka pa6oery HnCtpyMeHTa SDS-plus (cm. pnc. E)
C HOMOHIOI PATOHOA SDS-PLUS BIX MOKETE IPOCTO H yDIOHO CMEHHTb paobOHNHTCHPTyMe3 pnpMENHIN DONNNH TELHOH NHCPTyMeTA.
OCHNTHE N CHERKA CMAKbTe BCTAeMmKOHeu paBOeO RO HCTPYMHTA.
-ⅡOBopaHbBa,BCTabBePabOHHNHTpyMeHTBnTPOHdoABtOMaTHueckcKOfHKnCpOBaHn.
\PoepbEpeTbeΦKcCaIIO NOBtIKO BbITaHTyBpAobOH HCTPYMHTE.
PaobouHnHcTpOyMeT SDS-plus HMeET cBbOdy DBeHXeHHN, KOtOpAOBycBoNHaCnCTeMoH. BpeSyIbTaTe 3TOrHOx HOCTOM XoY BO3HnKaet PaHnAbHoE 6HeHne. 3To He HMeET BHNHnAO THOHOCTCb CBEpENHH, TAK KAC CBpIO CEHTPNpyETCAABOTMAUHECKN.
CHATHE pa6ooyero HnctpyMeHa SDS-plus (cm. pnc.F)
C-BHnBHeDΦeCHmPcHMyOuYIbMb3y3Ha3aHdHbBbTe pabo- HNHCPTPYMHTNtHaipnoA.
YctahOBka pa6o4nx HNCTpyMeHTOB 6e3 SDS-plus
YkaaAHe: He npHMeHHre HcHcTpyMeHTb 6e3 SDS-plus pHa yadaphoro CbepeHnHnDolBeHnI HcHcyMeHTb 6e3 SDS plus n CbepeHnHnNatpoH 6ydt NOBpeKdEh np Y daapHom CbepeHnHnDolBeHnI.
- YctaHOBIne natoPc 3y6bTaBM BEHcOm 15 (Cm. CMeHa natoPc a 3y6bTaBM BEHcOma, cIp, 125).
POBEPHNTAIONC3yBHTBMEHJOM15HACTOJIbKO,TO6bMOKHO BCTABHTHBHCTPYMHT. BCTABTeHHCTPYMHT.
BCTbteKIOHOTnATPOHaBCOOHTBEYIOUmeOTIEBpCTMRnATPOHaC3yBuTbIMBeHNOM15NpaBHOMePHo3aKMITE HHCITpyMEnH.
CHATHE pa6o4uHx HnCTpyMeHTOB 6e3 SDS-plus
NoBepHnre HnB3y CbepnnhBoro natoPcA c3y6aTbM BEHOM 15 nOMOIOI KIOHOJn naHPOHa npoTHBaCaoBOI CTpENK HAcTOBko,TOBb MOKO bIO HO BHHbYpaB OBOOHNCTpyEMHT.
Pa6ota c HNCTpyMeHToM
Bknouenne
THIEBMATUHECKHN HCTPDMHT pab0aTeT OTMMAHNO pHn paB6OeHM daBHeHHN 5 6ap (72,5 psi), N3MepeHHOM Ha BXode B03xyaB IN BYKIOHENHO THIEBMATUHECKOM HCTYPMEHTe.
YctahOBkapeXHMa pa6oTbi
C nomoube npereeknouatey yadp/octaohbka bpauehen 5 Bblpaetc pckmnpaobtbi HcBMaTHeCKrOHOHCTpyMeH Ta.
Yka3aHHe: IpeKeIIOuAHTe peKHM paBtBJToNbKO pHi BblKIOCHENHO THEBMATHECKOM HCTPcMeYI Haue BO3MOKHNBOPEKDEHNIIEBMATHCCKTOHCTPcMEnA.
- 彩藜甲HITNEpeKINHO tAtenb ydaP/aOCTaHOBA BpaIeHHN5B XJENAEMO NOXENHEJIe.
IonoKeHHe CbepeHHe 6e3
yapa3peBcHHe, METaNE, KePAmKe HnCHHTeMHeCKx MATEpU anax, I nakoTeIraKpyuHa HnR/BlkpyuHaHH BHTOB


OBI_BUCH-2092-002.book Page 127 Thursday, February 23, 2017 11:46 AM
YkpaHcbka127
Pocn
YyONHOMOCHHHa H3rTOBHTeMeOpraHHa3aHa:
OOO Pobep Boos
BauyTHICKoe Wocce, Bn.24
141400,r.XmMkn,MockOBckarObn.
POCCN
Ten:88001008007(BOHOKnoPOCCNH6ecnnaTHb)
E-Mail: info.powertools@ru.bosch.com
IOnHyIO nAkyanbHyIO HOpmauHIO pacnnonoxeHH cep
BCHbIXIeHTPOBINpHEmbIXIpyHKTobBblMoKeTeNonyuTHb:
- Ha oΦnuaHbHom caIte www.bosch-pt.ru
- nH6o no TenefoHy cnpaBOuHO - cepBnCHOn CnyKb6
Bosch 8800 100 8007 (3BOHOK no Poccnn bcnnatHy)
Benapycb
IN P06epTo 000
CepBnchbI ueTp no o6c7yKnaHnO 3NeKtponHCTpyMeHa
yn.THMnpa3eBa,65A-020
220035,r.MHHCK
Benapycb
Ten.: +375 (17) 254 78 71
Ten.: +375 (17) 254 79 15/16
ΦaKc:+375(17)2547875
E-Mail: pt-service.by@bosch.com
OΦmuaHbHcainT:www.bosch-pt.by
Ka3axCTah
TOO Po6epT 5ow
CepBnchbIeHTpNoobcyKbAHNIOeKToHcTpyMeHa
r.AmMaTbi
KasaxcTaH
050050
np.Paibm6eka169/1
yr.yn.KOMMYHANbHa
Ten.: +7 (727) 232 37 07
ΦaKc: +7 (727) 2330787
E-Mail: info.powertools.ka@bosch.com
OfHnAaBbHm caHt: www.bosch.kz; www.bosch-pt.kz
YTHH3aun
OtNyckHbMn cBpO CK HsMoHcHcPymENT, npHAdnEeK HocTH yNauOBky CnepyET caTb Ha KONOrHeCk NCHcyo peuPKyunHIOXoDko.
Cma30hble matepnaibn cpectBa nOCHTK
DONKbIyTNHn3HpOaBtcb3KoNOrnueckn NcTbIM
06pa30M. BbInonHnHte 3aKoHHhe npedncaHHa.
Cornacno npednHcAHm NoepraTye TYNN3aun H nonact MToTPOI Naonact MToPoA cOpExkT rEIOHO HArpeBaTe Ix CbIIe 400°C, TAK kAp N3TOMB0MOKHO BvDeneHHe BpEnHx dNf sOpoBba NapoB.
Ecnn BaunnBmOnHcTpyMeH BonBue HepaBocncOc6en, to caJain ero, noKanArycta, BJeHTp YtnHn3auu HnN BTOPO1IO, HanPmep, BABTOPK30BaHHy cpeBCHyMo MaTePCKyIO BoI.
Bo3MOXHbI XaMeHeHHa.
ykpaiahcbka
Bka3iBk 3Texhikn6e3neKn
3araabhi bkaaibk 3 texhik 6e3neek dna HHEBMTHHn npnaqib
A NOITEPEDEXEHHA
IpeoMOnTAKeM, BHKOPHCTAHHM, DEMOHOM
TexHHMM 6cbnyOByBAHNH i 3aHIIOo npnndra NHEBMATHNHX IHCTpyMeTb, a TAKOx nepeI TM, k npaOboTH no6h3y HX, yBaXho pOpuTaeYcI HCtpyKII IOTpMMyTEcE X. HEBKOHAHH HAcyTNHX BKA3IBOK 3 TexHHK 6e3IeKN MOKe pH3BeCTH Do cepHO3Hx TpaBM.
36epiraite BkazibK3 texiHK 6e3neK i nabaBte IX onepatopar.
Be3neKaHaPobOouMyMicui
Cnkye 3a NOBxHHM, KIe HEe3 BHKOPCTAHN IHCpymEtMy MOyTb CTAt NcH3bKMM, a TAKOX 3anoGirte He6Be3nei NepeuennHeepe 3nHEmatHi a6oRpaBNIu HNAHN.10CKOB3AHN, nepeeuennH i naHnE rONOBHHm npnuHAMI TineCHNX yUkOKeHb H naOp6OBy MiuC.
He npaouothe 3 nheBmatuHm iHcpymertom y cepeobnui, de ichye 6be3neka BwOyXb HacnIOK npcyTnoCTi ropoox piinr, ra31b ao npiny. IpH oboooi oopboNbaHO detani MOkyt bTOpOBaTHC icpn, BiD knx MoKe zaiMaTHC nH ao nap.
Pidacpobn3nheBMTHHmIHCTpyMeHtme H 1DnyckaKe do po6oVOro Micra nndauie, diter i BIDByauiv. Raoo Baasa ybaara bye BinBepHyta IHMHOCo5amh, BH MoKTe BTPaTIIN KOHTPObHaI INHEBMTHHMMHCTpyMeHtme.
He6e3neKa nHEBMaTHHx IHCTpyMeHTB
HikonHe cnpaMOByTe NOBITpHHNNotIK Ha ce6e 60 ha HnHINXNoNDHe IcnpaMOByTe XONHOne NOBITPA HA pyKn. CTnCHyte NOBITpMOKe NpH3BcTn DcpeH3NHx TINECHNX yUkOxKJeHb.
IpebeipBnre 3eHaHnIHinHxHHeHH. Bci Byan
TexHINHOOcbHyOBaHHy,MyTHiUAnHHMaOTb6yH
poepaoXbaHNHa TnCK iKInkCTb NOpIRr,3a3aHuHBI
TexHINHX DAHNX. SaAMHH TnCK HerATBHO BnINBa Hc
fhyHKIOHyaBBH INBEBMHTHO IHCPTPMENTY,
3aEBNKNTHnTnCKMOKe pNbBOJNTNo OIKoKDJIeHH
MATEPIANBHIXNHOCTIOITPABM
3axnaiTe 1nAHHB BID nepeHHHn, 3nyKeHH, nonaHHn po3HHNKBI I rOcPHK kAp8. 3xauHae nAHHB BID Tnna, oni iJepan, uO oBeptAOBc. HeraHOMHaHteNooKdoKeHH mAnr. NooKdoKeHH HBNHOI hHI MOnE pNbOHTn DO xpyTIN HAHPO HnAAHn i npaHb Hm. PnHtHnn tHpcA/ctpykKa MOKytb PAHHT OH.
Cnkyte3aTm,063aTHcKaCKo6aIIHnra 3aBxM6ynaDopbe3aHTHyta.KeepnorHOaTARHYr


128|YkpaHcbKa
abo nookdkehi mnaHrobi ckoMoKe HekonpoIbOBOaHO BxOOnTHIOBIIpR.
Be3neKaIIODei
5ydyte ybaXHHM, cnkyte 3a TM, uo Bn pOHTe,
TAPOcZdNBO NOBtECE nI qac POb0Tn 3
NHEBMTHHMM HCTpyMeTeHOM. HeKOPCTyTEcE
NHEBMTHHMM HCTPYMeTM. kUQ Bu CTOMNEH I a60
3hAXOpDTEcN iID pieIO hapKOTnKB, CnPHTHx HHOJI8. MInb HeYBaXHOCTI pNO KOPCHyBAHNl
NHEBMTHHMM HCTpyMeTM OMOE pINBBOHTN DO
cepH3NHX TpABM.
Braatepooyoanrtao6083koboBnarrte 3axchkioknynp.OCO6NE TaXHcE CnpOJxHHN,IK HnAP,3XACTOPORAHIXHANH,3AXHCHE B3YTR,UHO KOBAAETCB,3AXCHA KACKA aBO HabyuHNK,-B 3aENKHOCTBID IHCPTPyuINPObOTADABu a6O BMOr TEXHIKBe3NKeCHuCahITrapHnxHOPM-MmEHwycPH3NK TpA8M.
YHnKaIe HnAbMHCHO BmHKAHn. Nepu HIX nIeDyBaNTH NHEBMATHNHN IHCTPYMHT DO NOBITp, nIHIMATH ao 10peHOCHNT HNO, yNEBHtBC T TOMy, IO NHEBMATHNHN IHCTPYMHT BHMKHeHH. IpeHecEHn HneBMATHNHO IHCTpyMHTy 3 naJIbEJM HA BmHKaI aBO iNkIOHcHn YBIKMHYTOI IHEBMATHHO IHCTpyMHT Do NOBITp MOKe npINsBDnTH Do HeuaChnx BnADKB.
IpeDTHM,AKBMKATNHBEMaTHHINHCTPMEHT, Hn6epitb HanaorodkByanbHIhCTPMEHTN. 3HAoJMeHHHnHaiarOyBanyhoIO hCTPMEHTa Bdantii NHEMaTHHOrHOIHCTPMEHTY,IOeBaTeTBCR,MOKe IpH3BDHnDIO TpABM.
He nepeouihoe ce6e.36epiraTe ctiKe nooxehnTa piisnohBa.Ctke nooxoehnH i biinobiHne nooxoehnTina do3oBnRb Bam kpaue 36epiratn KOHTPbHaN HHEBMATHHM HCTpyMeTM y HEICIOIBAHX CNTyuaHx.
Bdarrte npndatn oar. He bgaarite npoctoptn oar ta npkpcn. He nctabnaite Bonoec, oar ta pykabni 6bn3ko do detanei, zo pyxaoTbcr. Poctoptopn oar, npkpcn afo doare Bonoec MoKytb nonadatn beaui, uo oobetaoCt.
KIOICHYMOKNIBCTBnMOnTAXy NIOIDCMOKOTBAIbHX TaNHO6IPHINPcTPOIB, NEpePiTe, uO6 npABnHBO HOBn iDcHnTA npAHHNo BHKOPHCOTBOYtCBr. BHKOpHCTAHNA TAKHX NPcTOPIB 3MEHUY PnIKH BHHKHeHH HeEe3neHH CTVAUYEPEEP3N
He BnKtte 63nocepeHb BIDnpaoboe HOBITpR. Cnkyte 3A TmH, UO BIDnpaobae NOBITpR He nortpanno BOi. BIDnpaobae NOBITpR, OIO BXKOHTB 3IHEMATNHO IcTpyMENTY, MOKe MICNTNBOy, ONIO, Metanebi aactHHK Ta36pDyHNH3 KOMPecopa. LIE MOKe IeKoNDTH ADOPO10.
PnBnBHe NBOGxENHnTA KOPCtByBAHHN NHEBMTHNHmHNhIcHYPMTeAHm
27 KapirikinHnHa 6a0 nIiHAnBaHn 6oPboHOBaO MATEpiany KOPHTyTEcA 3TtHKHHM NPHCTOPAMN
a6oNeataMn. PnHtPNMyOu 6p0bNIOBany Detanb OduHcPyko 6oI pHTNCKyOu H JIo TINa,HEMOKTHBO DOCHT Be3neHPO IpaKOBaTH 3IHeBMaTHHHM IHCTpymEOMT.
HepehebaHataKxyteIhneBMaTHuHHHInCTpyPmHT. BkOpHcTObTuYteIhneBMaTHuHHHInCTpyPmT, 10 cneIaIbNo pRk3haueHNJrBaunHX BnIDBpO6t. PIIATMthnIhneBMATHuHHHInCTpyPmTpIaQUCpAe TAnHJIiHIIeB 833aAHyEOHY MianaozHI rORo nOTyNHOCT.
HekopctyTeaNHEBMATHHHHCTPymENTM,Ako0 NOKOJDKHENBMMK4H.1HEBMATHHHHCTPymENT, 10E HBMKaTaBCaBO He BMMKaTeBC, E HeBa3neHHM I nortpeBye pemOHY
PepedTMKHNAAATOBYBATHINCTPYMHTMIHATnnpndaa6aKaUBOBHOdRyacHe6yDetae KOPHCYBATNCHINCTPYMOTB,BMKHITbNOBtPA.LI nonepedkabhi3axoOn3anOIOHTcHBAOMCHOMBYMAKAHHOINHEBMATTNHOINCTPYMHTy.
36epiraintheHBMATMHINHCTPymENTH,KHMNHcme HKeOPHYTCEb,DAEKOBDITIEe. Heo30BnHTe KOPHTyBATNcHEBMATHMHNHCTPymETOM 0oc6am,uo He3aHOMi3Horo pO6TOIOA6oHeHTANu 10io hctpykui. ypa3I3actocybaHHHedocbiueHHMM 0oc6AMnTHBMATHMHNHCTPymENTHeccytBco6i Hebe3eKy.
CTpaHNO DORIADKTE 3a BAUM HHEBMATMHNIMHCPTPMHTM. NpeBipRte,06pXomyet detaniHCPTPMYE 63dOranHO PAIOBAMTA He 3aDAnTaIO6 Detani, AkoMOyTB BnINBHnHaH Na cyHKNUOHyBAHHN HBEOMATHHORIO HCPTPMHT, HByNH NOANAHMMBOA NOIKoDKENHM. Nepu, HIX KOPICBYaTHNHEBMATMHNIMHCPTPMHTOM, NOIKoDKENHETeTpeBa BIDPcEMHTbAH. BeHNk KITbKtCB HeuaChHXBnADKIB CNPIHNNCTCBnORAHMN DORIaDM 3a HHEBMATMHNIMHCPTPMHTAMN.
TPhMaTe p3aBnH IcHTpyMeHH HArOCTpeHHM I cHTHM. CtapHaHOIgRbHITp3aBnH IcHTpyMeHH 3 roCTPMH p3aBnHMM KpaAM MeHJ 3aKnHIOHOBC JIX IeJIe BECH.
BHKOPKCTOBYTE HNEBMATNNHINHCPTPYMEHT, npnnaa do hBo, BCTABHI pOeUI HCPTMENTOI BIDNOIBHO Do nXkBA3IOK. SePbI To yBOARN pR bOMy YM0B oPOB Ta N CnEUPKXY BHKOHYBAHO PObTH. UeONOMOKE MAKCMMaBHO 3MeHNTH YTOBPOEHHHNYY,BiBPACU IuWMH
HanautoBobyath, peryNobTHA BHKOPHCTOByBATH NHEBMATHNI HcTpymEnTH Do3bONREtCBnHe KbnlMfKOBAHIM HABVHMnE ONepATOpAM.
BHOCHTH 3MHH DO NHEBMATHHORIO HCTPYMENTY 3a6oPohReTbC. Taki 3MHH MOXYTB 3MEHUNHT DIEBCTB 3axOJB 3TexIKH 6e3neKn i 3ibJbHTN PH3NK dIra onepatropa.
Cepbic
PemontyathnheBmonpnaIaddo3BOJrCTbCRNHee KANlkiFOBaHHmФaxIBuM 3B NKOpCTAHNRnOprihAubHx3AnyactH. NIIe TaK pObaTa nHEBMOnpNaIOM He6yBeINKInkAT He6zEnKe.


YkpaiHcbKa129
Bka3iBk 3 texiik 6e3neKn dnn nheMaTHnHex nepbopatopip
Pepebipte, qitko nhtcba 3abocka Ta6nHka. 3a Heo6xidHCTO aEBPHCTc DO BnPo6Hka 3a HOBIO.
BnnaKy noonmK60p6noHbOaHO 3arotOBKn a6o npnndnn HABTc camoro nneBMATnHOrIO nchtpymety tactHHM MoKytb po3nITaTHC 3 BnCOHO WbHKtio.
PnEcknnyatau, a TAKOKnIauepeMHTy, TexoCnyOByBAHHi 3AmHH npnAadn NHEBMATHORHO INCTpyMEHTY 3ABXnO6OB8KAGOBO HocITnPOTHyADHn 3AXNCHIOKYnPHo. HeOx61DHm CTynHb 3AXHcyBnHAeCTbCKpEmoDnKOHrO KOKPeTHORO BnAnky BIKOPKTANHInCTPYMEHTy.
PⅡI qac BHKOHaHnPo61 Hnd TOnBOIO OqraTae 3axKCHy KACKy.TaKHMMHOMB,BN3MOKETe yHHKHTN TPABM.
KopchyTeCAHBMATHMMHCTPYMHTOMTINbKn TOnI, JAKO 3y6n0 3a6e3neuehe BID BNAdHn. IHAKWE MOKE CTATHCIA, IO POBOOH HCTPYMHT 3ICKOHTB Ta BIDNETHB.
Cnpaobani,deopomobani nnonamani detari npnctpdo knpimneHHIHTymeHno3AMIOBAT. TAKHMYHOH,BM3MOXETE YHHKHTTDPAB
PpIHK DBMKATN HHEBMATMN IHCTPYMOHT, MIHO BCTAHOBITRO HA O60BnABHANOBEXHI.
Onepatopio6cnyrobyouhnepecohan noBHnHmATH
nexHyphi3nHyfOpmy,u0667ynB3mo3
npaobath3nheBMTHHHHINCTPymOTAMTKX
pO3MIPiB,3TAKOOBARHOI TAKOONTOYHKHCTO.
Sybte rotoi do hecnoibahnx pyxih nhebmaTHHORIO INCTPYMENTY, AIK MOXYB BHNHHHTN BHACINIDOK peauHHMXX MOMETI ABO NOOMKH BCTABHOPOBOHOr INCTPYMNTA. MIHO TPMaJIe NHEBMTHHMH INCTPYMENT, TPHMAITE CBOE TINO Ta pkyH y nonoxEHNI, BY KOMY Bn 3MOKETE npOTCToTH qyam.Li 3actepekhi 3axdoH noMOxyTB 3anobirtn TpAMAM.
06epeXn!Pn trbanin ekcnnyatau nHEBMATHOHO INCTPYMENY BCTABHm po6ouH INCTPYM MoKe HarpBAtnc.Bdraire 3axNCHI pykabHI.
Pnpepe6ox 3 noctaaHHM NOBtpr1 npr 3meHneHHI pOo0rTO TCKY BmKHTb NHEBMATyHH INCTPYMT. PpeBPeIOPOoOH TTKCH I3HOY yIMKHTb IHCTPYMT, KOJI POoOH TTKCH 3HOY ByDE ONTHMAHMM.
PiJ vac poBOTH 3IneBMATHvHMn HcTpymemtOB 0nepatopo MOpTyb BHHKHTN HEPNCMHIBiDyTTB KKTsTx, pykax, npeayx, mhi abo B iHINXxactHnxTia.
Ira po60th 3 uHnHEBMATMHH hICTpyHemtOM cTahhny y3pHnyNo3y, he3a2bHaire TAdHIOTHPMATH IHcTpyMe IYHKaHTe He3pyVHX NONOKeHB a60 nONoKHe, BAKX BAKKO 36epRiH pIBHOB. IIaC TPNBAIOpo60th onepatop NOBHHe 3MHNOBH
NONOJEHHI TINA DIA 3a06iRaHHA He3pyHocI Ta CTOMHEHNI.
Onpatopy He MoKna IriHpyBn Tai KCHNTOMN, Rk Hapnp. TPhBane HesJyKaHHa, NoBa cApK, 4cTre cepE6BHTH, 60ni, CbePbIX, nyRTOVA, neHHH Abo 3aHHHH. Onepatop NobHNHe NOBIDMTH npe Ip pOboTodabu i 3eepHyThCb 3 KaBaniDfIKoBAHO MekHNO KOHCytBaTciO.
Hikonn He BHKOPHCTOByte 3y6nNo B RKOci pyHoro IIncTpyMeHa.3y6nNo ByNo TepMnHO oboPoJIeHe IMoKe 3IOMMTTCN.
BHKOPKCTOBYTeTINbKnroctpi 3y6nna.1pN BKNOPCCTAHNIyTOPObOFOIHTPmEHTMOKMyTb BHNHNYHHTADIOCNbHBIPOaJIaTBOMTEpyHBNAHn.
Homonie Hoxonoydxtayrapre npnndra ybuIe. Ide MOKIE pnp3BCTTH.DO KPNIKOCTa I nepeuaCHORo MaAMHHA.
Hikonne He BOKPCTOBYBE 3y6BnO B KIOCTI BAIXEN. HAIKUDE BOHO MOKE JNAMATHC.
IIN3HAXOJXHEHTRy6I npBOADKNBHKOPHCOTBYNE pnpdntnnpnndnAO 3eBEPHTCBn BMCUEBE nipnncmTBe eNkTePO,F3a-TO BODONOCCTAHHH. 3aENNEHHN ENEKTPONPOBDXMOKE pN3BODHTNO NOKEXTA ypaKeHHN eNkETPCHHHM CTpyMOM.3aENNEHHA R3AOBJ tyBNMOKE pN3BODHTNO DnBbxy.3aENNEHH BDOIPOBHQHOITpBNMOKE 3aBdATNIKQdy MATEPIANHHIMIHHOCCTM
YHKKaIe KOtAKy 3 npoBdoKOIO, 0o 3haoDITcBcNlNDHpyroIO.IHEMOHCTPYMNET He MAE IONJI.1 KOTAKT3 npoBdoKOIO, 0o 3haoDITcBcNlNDHpyroIO.MOKEpH3BcTHDO yOaKeHHNEKPTMnHM CTYPMO.
TONEPEDXEHHA
NII, qo Tsyoboctb cnn 6oBouH JnakdoKan
p03nnHbHH, mniFyBHH, cBepnEHH i noi6HH pOboTax, MoKe 6Ty KAnuepeRHeHH, WkIaHHeHH dna Nnoa a6o 3mHOBaTH cnaKobHH matepiA. 3OkpeMa, nMn MOKe MCTHTHO
CBNHecb ydpabax i nakx;
- KIHCTJIHNK HKNKHEM3E ZMI, JEMEHTI AHINH MATEPianX, IIO 3ACTOCBOYTBCAI PIM DYMHBAHTCHI CTH
- apcen i x pomat B epeBHH, 1005 blya o6p6bnaHa XIMIKATAMH.
P3KHK 3AEXBOPBAHHI 3AENKHT BIDTOR,IKCACTO BN 33HABAHINIOXPEPOOBHIN.1NIM3MEHNHEHNEB6E3EKNr TpeBaIpaOaOHsI BIOpDE PNOBITPOBAHHN pIMIMENHIX IbPAHTBIIIOJIbHE AAXHCNE CnOPJDKEHN (HAPN, CneiJIaNbHNpeCnicipatop,IOBdIPINbTOPOBE HAIBT OoHAHMeHHI pNNHIN).
Pnpo60ti3arotOBKOoMOKybBHHKNHYDdoatKoBIyMHNKHXMOKHa3ano6iRTTHaONOMOIO BIDNObIHx3AxoDiHAp, BHOKOPCTHAI0NJUHNN MATEpIani pNd3eneHauHNI pN KOtAKTI 3arotOBKOIO.
EcknyatyIe IHEBMATWHH INCTpyMENT TAK,06 BHNKHANO NKOMORA MEHNI HAMPHKNAJ,WNAXOM 3BONOXHENbO6PONBOAHO RATEPIAN.


130|YkpaHcbKa
JHKIO INHEBMATHNNI INCTpymEnT OCHaueHH NMyMOTyHNKOM, ZABKDNnepeBpIeIe IHO HABHcHb Tn CBOAmy MCIuI iO6pnBpo6oCt
Bibpaia moe 3aBdTH uKoH Hepbam kpoBoo6iry KcTei pyk.
Bdarahe By3ki pykabHKn. Yepes noit noBirpa pykoTHn HEBMATHHN IHCTPYMHTN Moxyb oxoOxyBaTHCb. Tenni pyKmH NeuBpAaNBBI do B16paJI. Wipoki pykabHKn MOxyb 3aeeHNTHc b y pctanx, zo oBeptaoTbCn.
Akuo uKipaa Hnabux a60 KCTx Hmie, cBepbhtb, 60ntb abo 61ine, npHHHbTb pOby 3 HneBMATuHMn IHcypemrO, nobIDMe npo ue poToaIoo i 3eepbHcdo Nkapae.
He Tnmae 3mHHn po6Ou IHcTpyment nIac po6Ot.
TPhMaTe nHEBMaTHHm IHCTPmHT He 3aHaTo MIHO, aIe BnBEHNO BiNobIO do cHn peAKTu pyK. CHM MiHUIe BH PhMaTe IHCTPmHT, THM BiJIbue MoKE NOCHINTNC BiPOAJI.
KIO BuKOpHcTOBHybCry HIEbpCaIbHI o6ePbIbHI 3eHHnHHe (KyNAKOBi MyfTH), Heo6xIDHO BCTAHOBIOBATH CTONOPH ITNTH. BHKOpTOBHYte 3a06kHNM TPOCKH DuaHrA, Oo6 yHKNKYTH NOpENHn3 CDAHnAN HA3 n3HEBMATyHM HcTpyMeHTOM ABO aHNRbMI KIX cObo.
HikonHepehocBe THeBMaTHuHl HcTpyMeHTn 3a 1nAhr.
HeraHbBMMKHTIINHEBMATMNHHN INCTPYMENT,AKIO BCTABHHPOOHHINCTPYMENT 3AKNNHNO.ByDte roTobIO DO BHCOKHX peAKTHBHXX MometHIB,IO npHsBOaTbdo cinaHH. BCTABHHPOoHHINCTPYMENT 3AKHNHOE,AKIO:
-HeBMaTHHIN HCtpymEt NpeHaBaHTaKeHHN,
- nepekoeneHn B o6pobnOBaHn 3arotOBu a60
- RAKIO HOCHKHEMBATMCHNYH ICHPTYMETH BXOANDHTB 3 o6b012bHARoM Omepiayi.
IINrNoraeHnpeaKuiHHX MOMENTIB BHKOPCTOBYTE DONOMIXHHN PNPCTRI, HANPHKNAD, ONpy. JkUO ue HeMOKHNBO, BHKOPCTOBYte DOATKOBY PYOKTKY.
HikonHe TpHmaite pyky no6n3y BiDpo6o0rIO IHcTpyMeHa, zo o6epTaBcR. BIMOKTe nopaHmTCA.
HeBaIe CbePny 6mHcR 6o6pObohany 3aorotbky.Le MoKx npN3BECTn DO 3aHHO NOCHNEHH B6paui.
CHMBOIN
HnKyuOdaHI CMBONH MOKYb 3HaOobHbCBAmpn KOBCHYBaHH Baaum HHEBMOPnIaOM. ByuNacKa, 3aAMrAte Ii CMBONH TAix HAeHH. PpaBnHe POzMHIN CMBONBIJIOHMOKE BaaPnBBHO Ta HebeaeHNO KOpHCTyBATNC HBEOMnPHaON.
CNMBON3HAHEHHH

Ipeep MoHTaxem,
BHKOPCTAHNM, pEMOHOM
TexHMHo6cNryOBaHHM i3AMINO npnndnPHEbMaTHNHx INCTpyMeHtB, aTAKOx nepeD TM,
NKpauObaTH no6h3Ny HIX,
yBaHXo npoHTAte yci ICHTPKuI IOTPHMyTeBcI X. HebKOHaHH
HAcTyHNX BKA1BOK 3 TECHIKH
6e3NeKn IHCTpyKu moXe
Pi3BeCTH Do cep03hNX TpaM.

BdraHae HabyuHHK. Uym MoKe NOUKOHTN CNYX.
BraaTe 3axnChi okynap!
Bt Bar NotyKHcIb
| Hm | HbIOTOH-METP | Одненье eheprii (обertealthи Moment) |
| кг | КINORРAM | Маса, bara |
| Ibs | ФуNTM | |
| MM | MinIMETP | Довжниа |
| XBHn. | XBHnIH | Трьаліпь |
| c | секунд | Битретен ПИОHM |
| XBHn.1 | oberte Naо рухи 3a XBHnIHy | KINькіст. надегін ha хол检Tomу xOу |
| bar | бap | |
| psi | ФуNTN Ha KBaцрathni ДIOHM | Повітpen ПИСК |
| π/c | Пл'tР Na 3a SEkyн'dy | |
| cfm | КуБИЧIФуNT ha XBHnIHy | Витрета nobітpres |
| ДБ DeuHбeHn | Oco6HnBa OdnHnuz BIDHocho rOncHOCTI | |
| QC UHdKOZaTHCKHni NaTPOH | Патрон | |
| ○ | СHMBON BVHTPIUHbOro шЕТнграNHнka | |
| ■ | СHMBON 0OBHIIshbOro KBaДрatura | |
| UNF | stAndapt TOnHoi piәi СЗДA (CdHHH NaHJOHaJIbHnri stAnon TOnHoi obp6bHn СЗДA) | |
| G | piэb YITBopta | Спolyчи рэь |
| NPT | НaJOHaJIbHn CTanДар ТуБиOi piәi СЗДA | |

OBI_BUCH-2092-002.book Page 131 Thursday, February 23, 2017 11:46 AM

YkpaHcbKa131
3 ⅢaHaHnI nOaui nobirpo
4ΦikcyuanyrBnHT3y6actoro CBepeHnHbHoro natpoha
5 3v6yactn CBePnHbHH natpoh
6XBoCTOBm3SDS-plusnBcBepnnHoro natpona
*60abaehe 500nKcane npnnadnne H bXoDNTB C tAndptnHm ocbar nocTabKn. NobHn acotMtHnent npnnadn Bn 3naIe B hauin npornpam npnnadn.
Texhi dahi
| П�ЕВМУЧМЕРФОТ | ||
| Товарни homер | 0 607 557 501 | |
| Мakc. кльбICTь обергпiod навалхженим | xви.1 | 850 |
| КльбICTь удAPIБ | xви.1 | 3900 |
| Корисна пост冈ichtь | Вт 740 | |
| Дiamетр розсевeredиюванього otbyору, макс.: | ||
| - стон | MM | 20 |
| - стоь | MM | 13 |
| - деревенá | MM | 30 |
| Пагон | SDS-plus | |
| Мakc. робочий тинк ha рobochую Inctrpymentl | 6ap | 5 |
| psi | 72,5 | |
| Прочdnувална рizьба шалною оштуега G 1/4* | ||
| Читné дiamетршианca | MM 13 | |
| С两款нвадьни постри на хлобосту му xody | n/c | 15 |
| cfm | 31,8 | |
| Bara bialnovi do EPTA- Procedure 01:2014 | Кт | 3,0 |
| Ibs | 6,6 | |
3aBa npo BiNbOdiHictb
Mn 3aBnBcMo nii Hauy BHKNIOHy BiINOBiAbIbHCTb, 100
OTi
OHTeXHHJN DAnHXs npOyIKT BINOIBaIe TAKHM
HOPMa mAb oOp HmPbTHBnH ODOyEMET EN ISO 11148
BiNOBIOHO do nonOJooEHN DIOPEKTHB N 2006/42/CC.
Techivna doKymeHTaui (2006/42/EC): Robert Bosch Power Tools GmbH, PT/ECS, 70538 Stuttgart, GERMANY
Henk Becker
Executive Vice President Engineering
Helmut Heinzelmann
Head of Product Certification PT/ECS

iV. k = m _____
Robert Bosch Power Tools GmbH
70538 Stuttgart,GERMANY
Stuttgart, 01.01.2017
MOHTAX
IodatkoBa pyKoRTka (INB.MaN.A)
3MIPyBaHbTexHHKBe3NKeHN KOPCHCyBaTHC INHEBMATNHIM IHCTPYEMHTOM DO3BOJHcBcRcN HNE 3 MOHTOBaHOO DODATKOBOYPOKTONKO10.
IodatkoBy pyKoRTxy 10 MoXnHa NoBepTAty B dyb-Ke nonoxeHHH, uO 3a6eNeuey 3pyHy po6Oy Be3 BTOMneHH ryk.
BjdkpyTITbTBHIT-bapaHnHKIpeyERPOBAHNNdoaTkoBOI pyOKTKN4 npOTH cptINK roHNHHKA i nobepHTB doaKTOKBY POKTKY 10 B KaHAI NOONKHEIN. Tcna
Bosch Power Tools 1609 92A 33X|{23.2.17}

132|YkpaHcbKa
Zb0rO3aTARHITbBHT-6apAHN4K4NOePraHHAM3a CTrpIKoTOQINHHKA.
PiKNoeHH NoBirpo NHeBMaTHuHOr npHnady
-3akpytihnlaahroBHNH9BcnOyHHNHTyepHa BxoDIOIporR7.
L063a0b0fTHN N00KoDKeHNO BHYrPliuHxqTnH KAnAna, pnpkAkyRiB1BkDyBuHHIiHaHRBOHO HInen9 9Tre6pa nprrpHMyBaTH BmCTYnaOCHnCnoTyHN YTuep 非BAxoDiPiOBTP7raKOBHMKnHOEM (po3mip nID KIOH22 MM).
- Pocnabre xomytn 12 uanra nna onda ni nobitpr 13 i 3akpiinb uanai nna ondaqui nobitpr na uanahroBomy hineni 9, Tyro 3aetnhybni xomyT.
Bkaia:UaHnI dna nodaui nobirp rte6a3abxdi CIOATKAY MOHTyBaH Do IIeBHMATHHOPOIIaIY IINue niciu zo do ybna TeXobcnyroBuHaHH.
Bn6ip cbepnnbHoro natopona ipo60nx inctpymertib
Dnepoapui i oobhaHH (OobhaHH Hne 3 npnndam MV 200) Bamntp6i bi oboi icHPTeMH n3 SDS-plus, RIKo Mocha BCTPOMN B cBpeiHNbNHn patOH a SDS-plus.
Dn CpeiHNbHH bE ynpy B DepeBHm, Metani, Kepami i nactMaci, a TAKOK AekpyuBAHn RBHTB INKOPHCTOBYtBC poBIH icHPTeMH be3 SDS-plus (HanP., cBpeiHa 3 uHHINpHNNH XBOCTOBHKOM). Dn TaKHX pOboHH icHPTeMH notpHIN MBWko3ATNCKHI CpeiHNbHH npatOH a60 3y6aTCHn CpeiHNbHH npatOH.
3amHa 3y6yactoro CBepnHbHOro natpona
LIO6 npaKobatn 3 pO6OHMM HcTpyMeHTAMM 6ea SDS- plus (Hapn., i3 cEBPDNM 3 uINHDPNHM XbCTOBKM), TpeBaMOHTyBatn PpIaTHMN CEBPdNlbHN NpatPOH (3y6bactHn a0bIbNNkO3AATHCNH CEBPdNlBHN NpatPOH, pnpia/4).
MOHTAK 36yOCTORO CEBPDAHINBHORO NATPOHA (AHN.MAN.C)
3aKpyTb XBOCTOBHK aSDS-plus 16 b ay6bactn CBepINbHn natPOH 15.3adKcYIe ty6bactn CBepINbHn natPOH 15 3a donoMoro fikcyOuro GBHHa 14.3BaKaHae Ha Te, zo fikcyOuyr RBHTMa nly pIs.
BCTPOMHnHH3y6actoro CBepHnHbHOro nAtrhoHa (mB.mn.D)
- PpOCHCTB KINHKN XBOCTOBHKI I TPOXH 3MACTB HRO。 -PObepTaOCh, BCTPOMITb 3y6aCTHN CEBPDNHHN nATPOH XBOCTOBHKOM B3aTnCKaH, uO6B HYBIMUOB y 3aENNEHH.
- Nepeiprpo fikcaio, noTARhybui 3a 3y6hactri CbePfIbnHbnI natPO.
BnMaHHa 3y6aacto rCbePnHbHoro nata
NITHTHbIcKyoHyBnyK3HaadIaHIMbIy3bUcAchTm CEBPNDNTHaNHPO15
3amHa po6o4oro IHcTpyMeNTa
HIN03axHCNH KOBNAOK 2 3anobirae NotpanHHIOB nATPOHN NNIY BID CEBPNEHNIJ, VAC pOBOTN. IINIac BCTpOMNHAPOBOVOr IHCTPYMeTHaCnIKyTe 3a TMM, IO6 He NOIkoDNI HIN03axHCNH KOBNAOK 2
Ypasi nouokdoekhenHH Nnno3axhCHoro KOBnauka HOro Tpe6a Heraiho 3amiHHT. PekomeHyctcb paohnt ce B cepichin mainctephi.
BCTPOMHRAHPOBOHXIHCPTyPMHTa3SDS-plus (dHbMaN.E)
3aBnBcBpHbNMy npOHy 3 SDS-plus p060nIHCTPYMENMOXHaPtoI 3pyHO MIRTH 63BKOPKCTAHNR DQATKOBHX IHCTPYMHTB
PnIOHCTB KINIK NPOBOHO ICHPTMENA,KKIM BIB BCTPOMNIAETBCNA TPOH,TOXHAACTMBIHO.


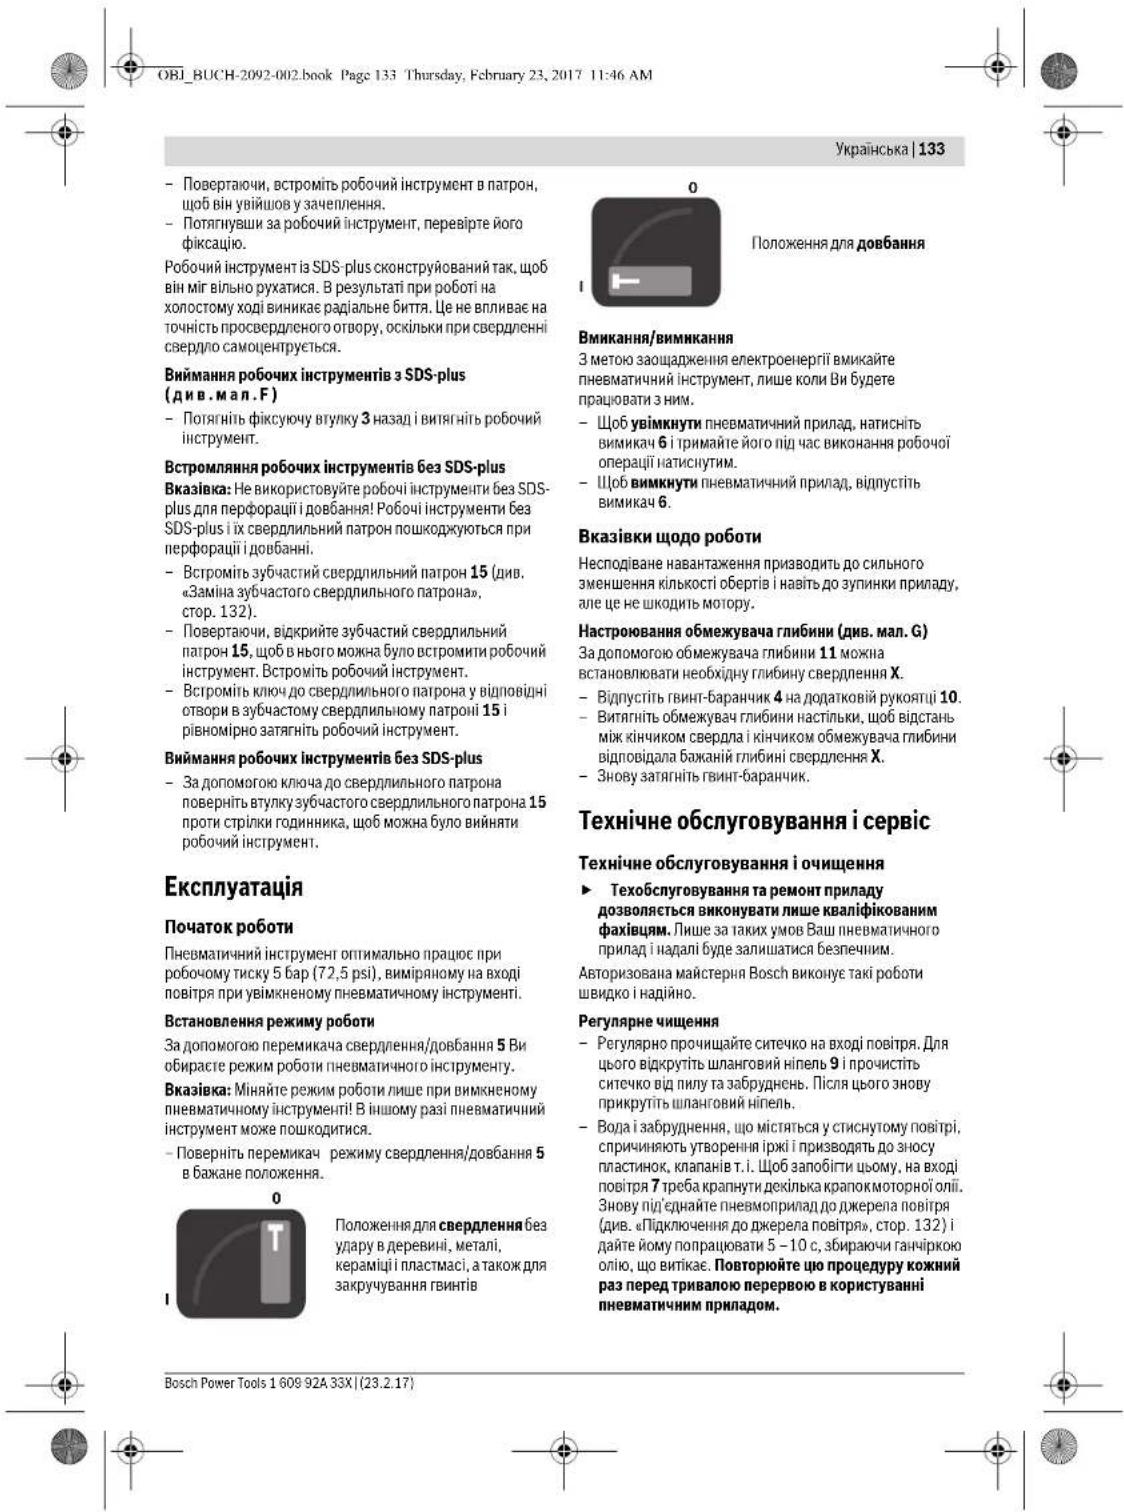

Kazakura 137
PeakunbkytepeMece ananb-camnbl acnabH 63ybyybe661hen naDa 6onatBn HneBMaTHKanbkypanbkyinmenerepeketepheAab60bnb.1nHeBMaTHKanbkypanb6ekem yctan deehi6en konaapbH3dbny epeketepjYcTaNtBNkanbKentipH3.Ocb CaTBkWapnapApkbpKaPakattHynpdbAnbHanyMVKH
A6aB6onbHb3!AnmblcnnbIacnantap nHEBMATHKabIK Kpyanbly 3aKyKaHIT naDaanraHrann HcKb3bnKetYi MykH. Kopray KonoBAH KHJ3.
Aya Kenyi ToKtaca Hemece XyMbICKa KepeKTI KbCbIMbTomeHEnCe NHeBmATKnkB Kypan eWedi. XyMbICKaKepeKTI KbCmbl TcEepin OITMaIbnb KbCImBXaJdaiNnHa KaItra XyMbICt IcTeynB DactaHIs.
PHEBMATHANKBbABOTMAbTI naIaNanAHydA Kymblc apeketepinOpbnayKe3iHe naiNanAHybl anakah, kon, hik, moHbH HeMece 6oKa debeoniktepihe XaKbMcb3TyrCtkeDPe c3ey MyMKH.
BynIHEBMATKANbIK KypaIeMHXyMbICICTeyuH XaJIb KyIe TpybI bekem TypbIb3, an Tene- TehiKnIcYtant YpO KHyBb6onBbIbN de KyIepInHe TpyMaHb3. PndanaHybU yzak YaKbITbY XMyCbIapAda De HcybAbyCtbPbJx KaBMcBc3IbKx HeaIpaayAbH bAnDbI ay Anly BpeK
Erepnainananybukyakbbtbyxkbimcb3dbky,yyp, kacyk,buuy, ybnk kany, deye KREHEme Hecice pcin kany bchntcBHTMNTDapblc 6ce36yn6gnirnenblkbiNac3bKIOyMmHEmEC.
Piadananybubxmybc6epyuihe xabap6epin mamandpirepre xabapncbykket.
OohbIbIeKaauH kon caMaHbI petHe nnaDaanBn3. OihbIaT terMHNbIK hKeJREH 60bn, uItbHbY MMKIN.
TeK ekip oikfHtapb naiaIaIahnIbIb3. AnIaJIbIcannAblacn anan erneHbncon, KaTb TepBeyMeH KJxDyHAn JaXpIbNcAan IaN nn Kenyi MyMkh.
Kabdbknapeepinewkaanhyda cybtaib3. BymopttkkxKaHepeteyBanyra anbn KenyiymkmH.
OBytmbu Ekwakn Tytkbw peHne naJaanahBaBb3. 8nnieoe, oncbHab.
Kaxetti3dey Kypanapabhi naidana hbnx kacbipbhrn Kopek Cbimapab Tabbiu3 Hemeck xepriinkti Kopek Yibimhaba WukpibH3.3eKTPcBmabHHA THO ept Hemece ToK coryha anb nnky MyMkh. Ta3 Kybipbni 3akbmday kapeblica bnny kenly MyMkh.Cy kbpibn 3akbmday Matepehndlbk BNHfA bbln Kenly MyMkh.
TOKOTETIH CBMbTMBH3.1HEBMATHKANIKACnAP OKyuaHAnbDbpBIMAHFONBIHOHbIKTOKCBMbHA THIOI TOK COYbHaAINBENKYMVKII
ECKEPTY Yukipney,apanay,terictey,6pybnay XeHcKac apeketepdi opblhy Ke3iHe naia gonatoBnWan konpeorehdi,repatorehdi Hemece MytarehdI ccep eyi Mymkh. Ocb warap TOMEHOrI 3aTKeTepdi KaMTnDbI:
- NaK HeMece bOrynapdaFbI KpFacbIH;
KpiPi, 6emHt KHe 6acKa tac 3aTeKtePiDei KpNCTaVbbl KpeMHe3eM;
XHHHbIKbOeIeH efauH KUuH MeH xOpMaT. ABybpIn kany Kayn obi sTaTeKreDyapw 6onya 6baHnHCTb. Kaynti Tomehdery yuih Aybc Kjengetinerin 6bnMepe TtictcakBkJkbApKnaptan KHin Xymbc Icteh3 (MbcaBn apAhb KypactbpaHn en Kkiu wan BnWckTeepir cyairine HuaHTKbHurp)
DaihHdamaiaCTey Ke3iHe KocbMua Wbyn naDa bonyb MyMKIn, OHb ThiTc Wapanap Apkbln anBHy any MyMKIn, MbcIaN daBHHdamaCbHbPnAraH aBb6bc WbKKKaHa OkuaynTaBpTaBH MaTePhaandpaBn naDaany.
IHEBMATKbnk Kpyanbl MyMknHiiHnue WnAa 33 naia gonbndai erin naindaanbHb3, Mscbnai bEHNenT MEATPnabHdblMbKnDnatyfa bOaNba.
ErepnHEMaTHKAnbIKypaIa6aceHTeKiIb6ap 60anca on NHEMaTKnabIK KypaIbI naIadanany Ke3iHe6ap 60bnI yphbc KMybIc tceY kyHHe 60nybH kamTaMaBc3 etIH3.
Dipinye cepa anakan meh kondaapanb hepek xke HAK aunhae bca kanei danyba hce6e9 6oyu Mykim.
TAP konfantb Khi3. HEBMaTHKAnbIK KypanDbH TYKANApB CbFbnH 3aApKBbIb My3dab BoYbIb MMKH. Xkbln konfap dipineye acepeHHoBmNbaIb.KeH konfantb Aahbn TpyA BnE1Kep opan KeTIy MMKH.
ErepapmaKtapaBtpeiYbInkanca,kbuBaCA, KaCACA HEMeCe OK peHdi 6oBnI KAnca nHeMaTHKaBbIK KpyaBbl kMyBlc icTeyDi ToKtBatin XyMiC6epyWir xabap6epin dApirepre xabapncabi3.
AnmblcannmblaacnntbJxMbcKc3HKeKaTbYyctamaaH3.
PHEBMATKANbIK KYPaNDbI eTe KaTbIeMec, Gipak BepiXcYTANAN eTINRn AnakAdbkpeAkHg KyuTePi cKaTbAnE.RepKAtbbpK YCTacAbH3 Tep6Bnyep KUYueoMyMKH.
Erep yHnBepCanbai anhmanb tipkecimdi (xaydbipKwabts tipkecm) naidanany Kepek Gonca, 6ektiKtIeepdai naidanany Kepek. UlnaHn Mehen HneBMATKANIK ABOTAMATEHEe uINAHTAP KocjIFAHKepi kAkpanyi KaFdaHnida KopraHbc Gonybi yuHWhipecheck KopraHbc KypaNbHn NaidanahnBuH3.
I\PheBmatNkBaIK KypaIbIbIeKuKaHAn IImaHrIbHAn yctan ketepMeH3.
Amnblc-anmblb acnan ToKanca, nheBmatkakk KypaIbMbippen cendpip3.Kepi coKbHa akenetin XoFapbpeaekn CatepeTaeBn Bokbnb. Jxmybc kypaIbN kecene KaJainnpada Tytbrfa:
-HEBMaTKaIbIK KypalapbIKKkykTeHc
- eHdienin XaTkAn DaBbHJaMa KcAca HeMece
-yybIMeHnIeNTHaBnDamaiWHeHteJI.
Peakum catyayuyin tiperiuchnKbI Kocmbma
mexAHMdbi naHdanaahbIa. Erep MykIn 60mnaca
Kocmbima TYtKaHbN naHdanaahbIa3.


OBI_BUCH-2092-002.book Page 138 Thursday, February 23, 2017 11:46 AM
138|Kasaika
KoIbIbIaHnBIn KxatKaH KypanDbH XaHbHa 6onmaybKepe.3iHj3di JkapaAtaTahyBbH3MymKiH
BpybI dainmamdaipindecmeich. Byn terpeyky KATBI Kyueiin ketyine an lyan kenly Mymkih.
Benrinep
Temeheri Benrinerp HneBmatkanb Kypanb naiaIahnya Maibnabdy Bonny MyMkh. Benrinerp Mehen Opanbi MbaHanaipbH kaiTan aibHb3. Benerepdi Dpybc IycHy iCtRE HneBmatkanb Kypanb dI pybc api cHmDi naindahyra KeMeKteciD.
Benri Marbina
KabdbkTapbOpatny, naDnAnany,KxHEnyKxHe anmactpydAnBnBnKxHe nHEBMATHKnBk Kypan KaBbHbNAbKMyMbICIcTeyDen anBnB apBkn HcyKaYbnKTapbO kInOpbHaDb. KaynciCzdk HcyKaYbnKTapbHemceceepntnepiOpbHmayKaTbI xaPakATaHTyra anBn Kenyi MMKHy

Kynak caktaebn mknj3. 1ybn acepiHc ecy kabineti3 3akmbdahbyMmkiH

KopraHbIe Ke3indipikri KmiHj3.
Ohim XaHe KbI3MeT CnNaTTaMaCbI

Bapnkyainicikhyckayntkaptbnx hane ecepttnenepiokb. TexKahaibk kaynicidhkyacnyhtkbrnhx Hae eceptnepdi cakamay TOKtih CORYha,ep TcHHe/Hemecce aybpkapaATAHynpara anbl KeliY MyMkhN.
THeBMaTHaKbIK KypaIbH CypeTI bap BerI aUbIN naIaNanAHy HcaybHbH Oky KeiIne OOh aUbIK YCTaHbIa.
Taraihndany6oynbHnaKoIaHy
IHEBMATHKAIbIKypan nepFopatopmH6eTOHbIb, KIPHI, TaTbIOHOFAJXHeJXKAFYKMBCTapbHaApIHraH. ONXHe aARaM, MetaI, KepAMKa, NactMaCCAHb KaYcBIs OORA apHAnrA.
NepFopatop cybIXaHeDbIMKnB6nMepeDe XHe aXbIX KepdEi KypblbCTapda naDaIaNMyFa APHAnH.
BenneneHren Kypamdb6nweKTeP
Kepcetinre Kypamdactap Hemipi cyperTep 6apBettier INHEMaTHKaIbIK KypaPbnIH CNnTaTAMcbHa KaTbCTbl.
1Acnan nHaTpoHb
2WahHnCaKaTaNtBn6yKtbpMa
3BeKityTeKec
4 KanakbbybpyfkbocbmuTtKaHbXkbDkbyy
5 KaYdybl/aHAnydybTOKTaTy KCKbIbbl
6KockbW/ewipriu
7Aya kipicinhe bipikripetin Kente Kybbl
8BaeCnTeKiwTeriayaawrbbcbl
9UHaHKeTe Ky6bipb
10KocbIMuaTtKa
11 Tepehikwekteriui
12UHaH KAmblrbl
13Aya kybnbyi
14 Taqik bpybnaay natoHb yuHn ToKtAaBb
15 Ticti Toxdk Bypranay npohb
16 Byprbnay npohb yuih SDS-plus-acn an npohb
*EeHneneHren HeMee ChnattanFAn Xa6DkTap CTahdptBtY kTeK3yXaENmIMn KAmblamDa. TOnbIK Xa6DkTAPbI 61dIn Xa6DkTAP b4gdpnAmabMaTbTabac3B
1609 92A 33X (23.2.17) Bosch Power Tools


OBI_BUCH-2092-002.book Page 139 Thursday, February 23, 2017 11:46 AM
Kazakura139
TexHkAnbik ManimetTep
a_1 = 5M / c^2,K = 1,0M / c^2
O10: a=6M/c², K=1,1M/c²
Metanbbypfnany:a<2,5M/c²,K=1,5M/c².
Caikecik manimdeci

Keke kayankepuninienb63,TexnHkabk Manimetep"de cnattanfah bHIHH TBEHeneri epexe Hemece HOPMATBt KykaTAPra cKaec eekih BIDipem3:EN ISO 11148 2006/42/EG epekenepiidera hikTKamanaapbi Xehe 3epicrpei bohhuia.
Tenchiknabik Kyaatap [2006/42/EC) Tomenderipei: Robert Bosch Power Tools GmbH, PT/ECS, 70538 Stuttgart, GERMANY
Henk Becker
Heimut Heinzelmann
Executive Vice President Engineering
Head of Product Certification PT/ECS

Robert Bosch Power Tools GmbH
70538 Stuttgart, GERMANY
Stuttgart, 01.01.2017
XnHay
Kocbimwa TtKa (A cyperin Kapaiba)
HbMaKabKpyaandKayicdiKce6ebiHcK 0pAihfN aKocmbuaTytkamn 10 naananyKepe. KocmbuaTytkaHb 10KcaTbnBeekmXaneWapuTnBt HxMcb Kyin OpahtbHa3.
KocmbuTaKaHbHxkbHbTy yHIN KanakBbSybpfcBu4
carat tInHe KacpBcBaTtBa7paan Kocmbua TyKaHb10
KaKETTI KyHHe KcAbaH3.CocbH KaNkTaTyKaHb4
carat tInIme 6ypan Xahe 6ekhiHa.
Ubifatbihaya kynieci
IbtaBih ayaa KjEcmH bfaTbA hyaH yhaHn HxMBC opbHna APb Daftbnip Bp yaHITTA OHTHMnDy DbbcE 8K36eBy eKtMyMkiC. COndAak MykMxuapTAPbH da JXkCapTaBcB, EitKeH MykMocOpb MaNb AyamEn NaactahBaid Hemce MAn MeH KOHka KotePIMMei
- Baechdtkiy iaya 8bhybHa 8nbaBpIn, nhaHTbIK KJIe JbBybHmeh 9 uImacbIbHpa.
-ⅢaH KAMBHTAPBH 12 aya bIbapy IuaHbHpa 6ocatbn aya IIbIpy IuaHbH KeTe Kybbl 9 YcIeH UauHr KaMUTBH TaPTbN SeKITIH3.
Aya xerictipyre kocbiny (B cypetih KapaHb3)
Aya KblcBmbl 5bapdah (72,5ncn) temen 60mMayhna Bk3XeKt3iH3i, EHTeKNI HEBMATKhakblk Kpyan ocbbl XyMbI KblcMbHba APahrHan.
MakcHmndy KyatKaKety yuH uHaNtBnX kapbItaBn EHI MeKocBny OHbFb KENeMI. TexHKnBbN MAnIeTep" KecTeCHe NkcpetinRtnen Bony KaKet. TOnbK, KyatBb Cakay YuH WHaHTapDbH MAcKcHmndy 3byHbHb4 m60Ny KaKet.
XerK3iinHbCbfBnFAh ayaBerJedne MeH bNfAanBbTKah BOC 60nyi KaKet, etKHeiTHIeBMaTHkAnBuKypanDu 3akMmAdhydAn, NaCTAHyDh HEmec 3eDhen Kopray KaKet.
Eeepnte: Cbfbnraa aya KbiMeT Kepcety Kpybnfcbsh nainanany HkepK. Byy KpbIbHApkBnH INHEBMNTAHkBnK kypanbH MInC3 JMYMC lCTeyin KaMTAMacB3 eTy MyKMHN. KbMert Kepcety KpybnfcbhNnainanany HcyaynbkaptbOpbHdHa3.
BapnB, apMaTypa, BipKippy KybBpnapbMeu uanHartap KcBcMn3He tanan etinTren aya KeiMeHc ca perte OpuHanybl KaKet.
XeKtkiy mHaHTapbHbH kHaHbHmaybHa, HmMeyHe HEmec XaPbMAYbHa Ke3 KekTki3iH3!
Kakot Kebon aya kipinye Maohemptmeh Nhematikabuk Kypadni Kcbci Kbcmbdi Uueuich3.
Aya kerticipinyihnheBMaTHkAnbIK KypanFa Kocbinybl
-ⅢNaHtBk KeTe Ky6bpHb 9aya kipiciHH 7 bipikiptiH KeTe Ky6bpHa 6paan Kipri3i3.
Bosch Power Tools 1609 924.33X| (23.2.17)


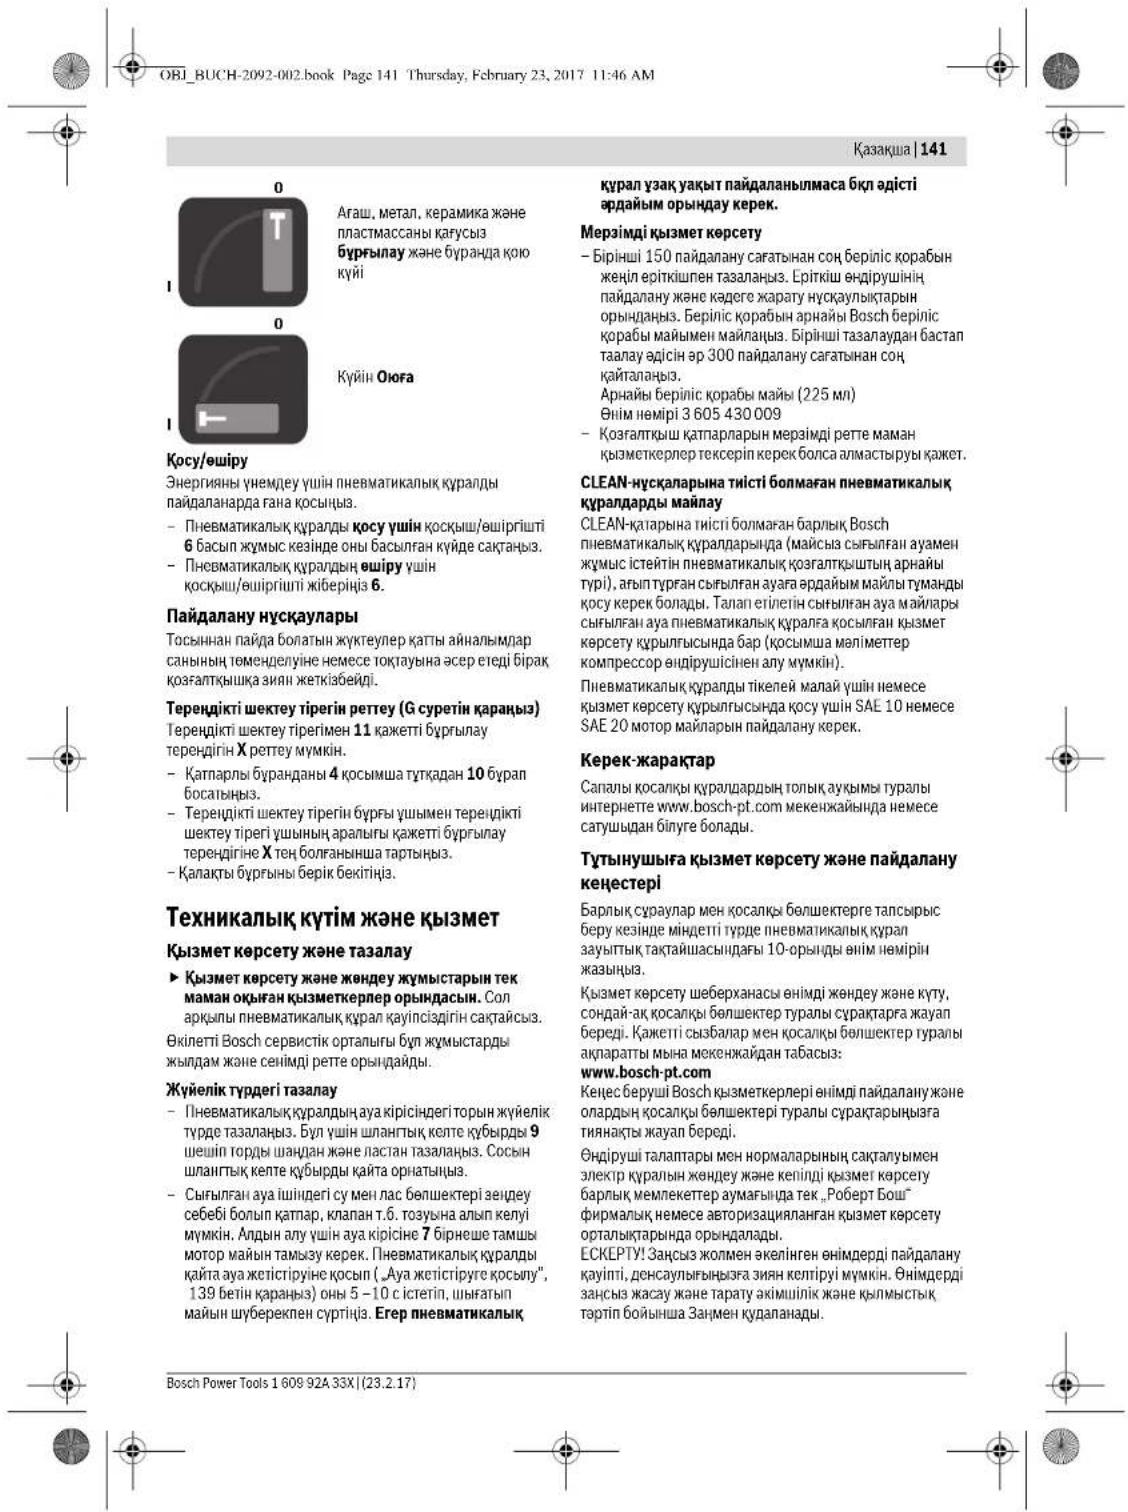

Romàna 143
OBI_BUCH-2092-002.book Page 145 Thursday, February 23, 2017 11:46 AM
Romàna | 145
cheazadaca:
Henk Becker Helmut Heinzelmann Executive Vice President Head of Product Certification Engineering PT/ECS
j_u I ②
Robert Bosch Power Tools GmbH
07538 Stuttgart, GE RMANY
Stuttgart, 01.01.2017
Montare
Māner supplementar (vezi figura A)
Centrude service Bosch
Str.Horia Macelariu Nr.30-34
013937Bucuresti
Tel. service scule electrice: (021) 4057540
Fax: (021) 4057566
E-Mail: infoBSC@ro.bosch.com
Tel. consultancy: (021) 4057500
Fax: (021) 2331313
E-Mail: infoBSC@ro.bosch.com
www.bosch-romania.ro
Eliminare
Scula pneumatica, accorsore i smbalajul tribue direcionata tatre o statie de reciclare ecologica.
Eliminate ecologic lubrifianti di detergenti. Respectati prevaliderile legale.
Eliminati in mod corespunzator lamele torolului La mele rotorului contin teflon. Nule incalzii la peste 400^, deoarece in caz contrar se pot degaja vapori daunatori sanaatati.
Be30nachOCTHa pa60THOTMOACTO
BHHMABAHTE3aNObpxHOCTH,KOHTOMOKeJaCaCTAHANXb3rABN BNCEDTBHE NOI3BAHETO HA MauHNHATA,KAKTOnHaJeCEcMBHeT0tBbDyHHnHnHnXPaBnHHnUHJI,IOxMb3BaHe,npemBaHe nnaDa Hc TaBHHe TpNHnH3aHapAHBBAHnHa paoTHOToMaCTo.
He pabotete cTHEBMATHIN HNCTPmEHT BcpeaC NOBnHEHa ONAOCTOT EKCNIO3M, KbTeO HMa neCHO3ANAHM NTHOCHTN, FAOBHO HN npax. Pnp 6pa60baT
He na deTAYA MoRat da ce obp3ayBvat HCKPi, KOHTo Da Bb-1nAmEHRTipaxa IIN hapire.
- DpIbXte HabnOaTeH, Deua NocTeHenn Ha 6e3oNaH pA3cTOnHHe OT pAbOTHO MRCTO, DokATO NOLBaTE nHEBMTHHnHnHCTpyMeT. Ako OKNHOBARe BHHMa HmEO Cn CDPYn NIIa MoKeTe Da 3aRyGHe KOHTPOn HAD nHEBMTHHnHnHCTpyMeT.
Chryphnoct npn pa6ota c nheMaTHHn HnCTpyMeHTN
HnKora He HacowBaIte HxOJaMaTa Bb3DyMaCTpy KbMc6eBe HnnN KbMdpYrHnla;OTKIOHOHaBtCe TcyDEHata Bb3DyHaCTpy oT pyetce H. B3DyXbT nod HaRrAHe MoXeJa PpHHINu TeKKnTPaBMn.
PnoepBaIe CbeHHeHH HtpbOpOBoHn. BcNtKHepeUyHPB-BeHTHn, OaCNtTHeN, CbeHHeHH MApKHyu TpBBA Da cbTBeTCTBAt Ha TeXHWeCKHte NapAMeTpni OTHoHHeHa HAnrTaHe HdEHT Ha BByDa. TaBpe HAcKO HAnrTaHe BNOUABa Pabotata HA NHEBMATNUHINCTpyMeHT, TbBpe BACOHa HAnrTaHe MOKe Da npEHNBKA MATEPhAHI EHTN HAPAHBBAA.
Pnpna3BaIe MapkyuTe OT npBbaHe, CBBaHe,OT KnOHTc p 3aTbOpTeH N OCTpN b6OBe. IpKxte MapkyuHe Na p3oTOnHHe OT k3OHTmHa H ToTINHa BbTpTuCe cEneMeHH Ha MaHH, nppeNa3BaIe Tn OT omACBaHBe. BedHara ZameHHe MapkyuTe, Ako ce nobPeHr. NoppeBa D 3axpaHuaBHraTrpAK Moke d nppeNBkA KcKcBAChE Y YCKOPBRAUc CE B p3aTINH NocOK BCNECTBHe Ha peAKTHBHe TcNH CBO6OeKn KaPa H MaKy, KOTo DA pnnHH HapAHBBAHn. BdHHTn H 3aBHXeHn OT B3dyWhATA CTPy IpXn HcTPyKKn MoTat Da nPiHNH TeKKn TpABM Ha ONHe.
BHHMABAHTBcHKnCKoBuHaMapkyuHa ca NaocToHn HO3pABO 3aterHtH. HeaTeHATn ININ NOBpeHn CKO BuHa MapKyUH MoTat Da npYHHT HEKOTponPiHApHO HTHue Ha BvDyX.
Chryphocth na nepcohana
BbTe BHHMATEHN, CbpeDOTOABAHTE Ce Bbpy DeHNOCTTA, KOHO H3b5pBaHTe N b6te pneJnAaHBM, KATOpaobOTHe cNHEBMATuH NcHTpEMTH. He kON3BAITE HEBMATuH NcHTpEMTH, KATO tce H3-MOPEH NIKORAO TCE NOBINHHETo HA ynoBaun cPcDEtba, ANKOKON MNEKAMEMTH. EJINMH NHEBMMAHIE npaOBATAc CnHEBMATuH NcHTpEMTH MOEJa da PnpENBMBCA cepEOHSI TaBPAA.
Pabotete cnnnnpnpeaanncpedtba BNHARNC npnepnaa Hno. HoceheHO naHHn npnepnaa CpeCTBA, napn. knxatenn MaCKA, 3papBn pabottn o6yBkn cbc ctaBnHN rpaefpcn,pneNanL hneM nH ymo3a rnyuHTEN (ANTFOH) cbfNaCHO YKazAHNTA ha paboT aDteTNn bI NaCHO pneNINCAHNTA h BAINHNTe PaaNope6b no oxpHa HA Tpyda HAMNAIBo ANCCHTA OT HA paRaBHAnB
B3MMAIe MEPKN 3a36BaRae HbKNOHAEto NO He BHHMaHHe. YEpBaBAte Ce, Ye NHEBMATNUHHT HCTpyMeTHe 3KNIUeH, INpDAI To Cb5Pb4BeT KSM 3xApHN BauTa MPExa 3Ba3DyX NoHJRAHReA. AkoBpInke PbCTa CN BbPxI NyCKOBIN IpKbCBAJ, KoATO ppeHacrTe NHEBMATNUHHT HCTpyMeT, INKO Ako TO Cb5Pb4Be T KMI


150|Быларск
MPEGKATA 3a Bb3yynof HADJRAHOE, KOATO E BKHIOCHEN, MOIAT Da Bb3HHKAT TpYJDBO J3HOIOYIKY.
Pepn da BKNIOHTe NHEBMATHNHNHCTpyMeHT ce YBEPABAHTE,NE BCHNU NHOMOUNHNCPTpyMeHT cAOTCTPAHNO Ht. HCTpyMeHT3a perynHPaHe, 3abpaEBB BbPTAUc 0ce 3BeHO HA NHEBMATNNHHNHCPTpyMeHT,MO XeJa PpENH3BHKTEKKNTPaBMn
He HauuHaeBaIe B3MOXHOCTHe C3AemaTe BHHaHn CTaBbHIO NOXeHHe HA TAOHO CHN NODpKJHAE NOCTHOHPOHBOHeCbeBUNTO NOXeHHe HAI JIIO, Cb6pa3EoH C3bBbPbBaHATA B MOMHe DcHOC, Iue Bn PO3B0JIa KOHTPOINPATE No-DOpe HHEBMATHUHHN HCTpyMeHt PnH B3MHNKBAHe H A HeOuaKaBH CNTHaYIM.
Pa6oTeTe CnoDxOAno 6ObNeKo. H Heocete UHpOKn IApEXnnIyKpaAeHHN.IbJbKeTc KcHTe CN,ApEXtneCN bKbAaHnHa Be3onAno PAcSTOnHe OBTbPTaue Ce 3BaHn.IIpOKKHe,IpEXnYkpaAeHHN INBbINIOCH MOrAt Da bDat yBneHEn OT BbPTaue Ce 3BaHn HA THeMaTHN HhCTPmYEn.
Ako Morat da bdat MOHTPnH npaxoynBentHa Hn acnpaonHn CHCTema, ce yebpnaite, he te ca BKNHOHN FyHKINHPaRbHIO. Hnon3BaHToE H TaKINBA CHTEMA HAMUHA BpeDNIte NocIeCTBn, PpeDN3IKBANHOT BNCOKA 3aPnHoCT.
He BmuaBaire HnOepeDCTBEHO pTa60BTHNtCBtEHTBb3dyx.H36BaBaire nonaHaHTo Bb3dyuHATAcpyaouBe H. CTPyraTpOABTOHCTCBtEH B3dyXMOKe Da cIbPkaOBdHn, MaCENHn HnmetAHHNACTUHKIN 3AmbpcBAHnOT KOMnPecopca.TeMoratJa npedHBNkAT ybpexKaJHn HAapBaTeo.
PmKnBO OTHoWeHHe KbM IHeBMaTHuHHTe HcTpymEtH
HnnonbaHne npncnocbneHHa3a 3axBaunae HmHMeHRE,3a06e3dBHXHTe 06pa0TBaanHgTAEHn. Korato dbpkTe derAa c pka Hn ro npntckate KbM TALOTo CN, He MOKeTe DA KOHTpONHPATE ChryPhO NHEBMAMTHNHYHNCPTYMCNT.
He npetobapbaite nhebmatnHnHcTpymEn.3a BCka onepa, KTOA H3bHBAte, non3baite PpeBdEHHa 3a ceta nhebmatneHnHcTpymEn. C noDIOAAI NHEMATNHe HnCTpyMeHT IN NOOCOeHNr O IPOIN3BOITENPAoTeHnHaJAnOHJe paOoTtRE NoCHrHyHONoKAECTBHO.
KHeH3non3BaeIe NHEBMATHcHnHCTpyMeHT,HNTOyN COBnpekcbayeNOBpeD. HBeBMATHcHnHCTpyMENT, KOToH He MOKeJa 6bE bKJIOH Neu H3KIOHNo PnpDEBnOHToPNOB3BOITENNAHUY, eOnaCeh.
PnHn da HbpaBate NaCTPOHN no NHEBMATNHN HcHTpyMNT,da 3aMeHne pNHCNO6eHnN KIN KORA TnpDblKHTENHO Bpe HMa Da To HNONBAte PnKsCBaTe NoaBaHTo Ha cTbeHb3dyx.Ta3n MPKna PnEDOTpBATA BKNIOVAHETo HnHEBMATNHN HcHTpyMNTNo HEBHMHnHe.
CbxpaHbBaTe NHEBMaTHN HnCTpyMeTH Ha MeCTa, HeoCTbHN 3a Deua. He DonyckaTe NHEBMaTHN HnHTpyMeTDA bDe NoI3BaH OTnHa, KOHT HMRAT ONt HnHe cI npOeH TeN ykaAHHa 3a BeOnaCHOCT.
Korato 6bDat nol3BaHn OHneHTHNNotpeBHTEN, HNEBMAHTNHUEHCNTPMEyHsCaI0AHH.
OTHACHTe CepnKINBO KbM NHEBMATMHNHNCTPymENT.PnpEBPABte NaaNDQBNXHTe MOyNHpyHKOHNHPaT HOPMAHNO HE c3AKINHBat,DAHn HAma NOBpeDEHNNHcynneH enMeHTN,BCNECTHe HA KOETO NHEBMATMHNHT HCTpymET Da He FyHKUONHpa,KAto e pIpeBDnEHO. PnpdA da non3ate HNEBMATMNHNHCHPTymENT OprAHN3HPaTE moENTHpAHeto HNA BpeDEHMOYN.MHOro OTTPyDObTe 3nONnykCeb DpIKaT Ha NIOO NODbpKaHHN NHEBMATMHNHNHCTPymEH
PnDpBpaHtepeXeHTHeHCTpyMeTHnObepe3aToeHH H NCTH. OBepe NoDJIbPbKaHtEpeXeHIIHCTpyMeTHnC oCtprpeXeHHpBcEo 3aKInHBn pO-paKnIO n03BoNanBn PO-nIeKo BOHeHna HA MaMHnHa.
H3nON3BaIte HneBMaTHNHaH NHTCPymET, OoNtNHTENHeHnPncOcNoEHnRA, P6oTHMe HnCTPymETn T. H. CbNACHO TcN EYkaaHNr. IprTOBA cna3BaJIe TaP BoTHMe YcNOBnH NocOeHNe TcBfIKN 3a H3NtNHHeHn He Na opaeHHe.Taka oTJeNHeTo H naipax, BbIpaQnnTe H yMua Ce OOrAnuHabAT, DOKKONKT OE B3mXkOH.
PiBbMaTHHHTNCTpyMeT Tpr6Ba Da 5e MoTHPah, o6CnyKbaHn N03BaHcMoO KBAHnHpaH n CbOTBeTHoOuyehnePOCHAn.
He cOnycka H3MeHHeHTo HnHEBMTHHHNnHCTpyMHT. N3MeHHaTn PO HBeBMTHHHNnHCTpyMHT MoTat aBnOwAT Be30NaHcOHTaMy n Da yBeyHnat PnCKOBete 3a nepcohana.
CepBn3
DonyckaTe BaunHnT NHEBMTHueH HNCTpyMeHn Da 6b- DepeMOHTnpa CaMo OTKBAHnDnHpauHHexHHuHn CaMo cOpHnHaHnpe3epBnH uactm. CToBa ce rapaHTnpa, Ye CHTpyHOCTa Ha NHEBMTHuaHH HNCTpyMeHn Ue bJe 3an3aHa.
Yka3aHHHa 3a 6e3oNaChpa 80ra CnHEBMATHNNnepopopn
AnHnHTe HaTabenkata Ha ypeDaTpa6Ba DaMoraTaJa ce TcI. Hnoe6bdoMocTe cHa6Dte Cpe3epBaHa Ta6en KaOTPiOn3BDoTnEJIa.
PnCuyNBaHe Ha 06pa6oTBaHH DetaiH,Ha enemeHT HaOIOJIHNTeHO pNCHOCO6bneH HnHa CAMH NHEBMaTHe HnHCTpyMeHr MOrTa OXTBpKhT qAcTH, YcOKeHN Do BNCOKA cKOpCT.
No Bpeme Ha pa6ota CnHEBMaTHHH HhCTpymEn, KAKTo Hnp H3bBpuBaHe pMeOHN HnTexHueCKo 06cnykBAhe Hn CMHa HA DoNbHNHTENH NpCnOco6NeHHn Tpa6Ba BHnAHn Da c HoCN yCtOHnBa HA npd3 3auHtA Na OHTE. CTeNEHtA HA Heo6XoDHMaTAt 3auHtA Tpa6Ba Da 6bIe Oe HENBa Hb BceKN OTdeHn Cny- qai.
Korato h3mbnbaate deHNOCTB TabaHaHa No3nua,pa6botete c npednaHa Kaca. TaKa h3bRaTe eBEHTyAnHH HaparBaHnA.
HnON3BaIe HneBMaTmHINr HcPTyMeH mCaKoTARO cekaeTa oCnryerp CpeuY KnaJaDe. B pOToTHBnCly


BbIrapckn 151
aBcBbCTByBaONaCHOTpaB0THHTNCHPTyMHTda6b- DEH3XbPJIeH CToJMAckoPocT.
H3noeHH,OBHnH NCH CUYNEHN eneMeHn Hn rHe2do To Tp6BaDa 6bDat zameHH. TaKa h3BnBeTaO nAcHOT Ot HaparBaHe.
Pnepa da BKNHouche THeBMATHHN HHCPTyMEnT Go nppe Ta 10 do 6pa5bTaHata bna. poxhxCHT.
PaboteuHTe CnHEBMATHHn HnCTpymEn H nepcoHaTbNoNpDnBkTaMy TpBaBA da ca FmHnecknToHHn Da CnPABATc Pa3mpeHt,e,Macata H MoUHocCTa HnHEBMATHHn HnCTpymEn.
5bDteNoTROBEN3aHeOuKaBOHOTcKAneHa NHEBMTHUHNHCTPmENT, B3HHKBAIO BCNECTBHe HpeAKTNBH CNN pN OP6abOTBAHTo HnTeTaN HnCuyNBaHc HpaOBoTHN HcHTpMEn. IpBXTe NHEB MATWHRH NHTCPMEn 3pABoA, aTNIOTo HbCuTe Cn-BnO3Hn, pN KOrTO dMOKeTE daIPOTHBDECTBaTe HA OTCKaUHETO HnEBMTHUHNH HcHTpMEn. Te3n PPeINa3Hn MepKn MOrAT da IpeOtBPaTHT HapAHRaBnHn.
BHHMaHHe!Pn npOdbNkTNenH N3non3BaHe Na HneB- MaTHMNHnHcPTyMeT pabOTHTe HcPTyMeHTn MoRat da ce HaRoepaet. Mn3non3BaPeIpeJ3aHn PbKAcYi
Pn npkebcBaHa nOdaabaHTo HA cTbCTeH B3dyx HnnpnoHHXabaHa hAnraHTo hKlnouBaIne NHEBMATMHNHCPTyMeHT. IpOBepeHanraHTo H 3aONHeTe OTHOBo paOta npDocTHraHe AH ONTMANH CTOHHOt.
PnH3nON3BaHe Na HHEBMaTHyHHN HNCTpyMeHt PabOToaHTC Hero MOxE Da NHa HENPHNTHo YceuaHe Ha PbUeTe, PAMEHETe B30aTa HA BPATA HNN BDPyrNtAChT HAnTNO.
pa60ta cTo3n HHEBMaTHue HNCTpyMeH 3aemaTe yObo6a NHOna, BHHMaBAte da Cte bCTbAHHNo NOXeKeHe HA TnOto H N8BaBte HeyDObHeNE TOn3HNHnTAKHB, pN KOtIO NoDbpKATE PAHOBECe CycnHpe. NHO3bPbHa HpOblKnHTenE DeHocTH pa6oTeuHATc HBEbMATNuH HNCTpyMeH Tpa6Ba nepOHNUdo npOMeHHo NNOXeHETO Ha TAnTO CT, KOeTO NOMara 3a HAMJIaBaHe H HenPHrTHHeYceuaHn Hymopata.
Ako paoboteuHHT C INHEBMaTHHH HNCTpyMENT Yceua CMNTOMM KATO HEPa3nONJOKeHEn, TEEcct, CbpueBHe6, G0Nka, cbp6eKh, 3aBbXBAhe Ha yWHTe, napene HNK cKBaHOCT, TEm pNHPaHne HTPBa6a Da b6aDat MRhoppauH. Pa0bTHKNbT PRA6Ba DA NHDopmHaPapOtoDaten CH Na CE KOHCyTTnpaC KBaINHcHnpuHoMeHNCHKcNoIue.
HIXKORA He H3non3aHTe cKaa KaTO pTuEN HnCTpy- MENT. Cekauite ca TepMoO6paboTeHN MoRat Da ce CyH-NT.
H3nON3BaIte camo 6dope 3atoeHcKeaH.1pR paBO Ta Cb 3aTbPNHEcKeaH moKe Da BL3HHKHTC HNIH BHOpaIHN cYUVBNAH BCN6DCTBE YMOPA HA MetaPA.
HKnKOra HoxnJaDaTe CytEnH NcHtPrymeHTN nPnHnDLeXHoCTbBbOda. Toba MoKe Da npEcn3BaKn OkpeKxOCTBaHTo EMM nIpeKJBepeMeHHn DeFeKTn.
HKeON3BaIe cKaa KaTO NoCT.B IpOTnBc HcyaT ToM MoKeJa Ce CuyTN.
HnON3BaIte NOxOAnu ypeH, 3a nPoBepTe 3a HauNHTo Ha cKPNTH NoB nobPbXocTt eNeKtpoH/Hn TpBbOpBNo, Hc Ce oBpHeTe 3h HnOpFAMa KbM CbOTBEHTMH MEChTn CHaDkTNn CNyX6H. BnHa3eHTo Ha paOthnH INCTPYMeHTB N cbPHKOCOBHeH C enEeKtPpOBDoNO MOKe DA npEKn3BnKa IIOXAP Hn TOK OJyad. YpeKDaHTo HA tAonpOBDo MOKe Da npEkn3BnBA EeknO3H. YpeKDaHTo H aBOOnpOBoND ppeH3BKNBA HAHTeNTNo MATpeMAHNH WETi.
N384BBAIe DonpaHae HneEeKPNpOBDHH NnHapENHE. THEBMATHHHHTHCTyPMHT He n30nHApHn CbPnPKoCHOBHmTo My C pOBDHHNn HapENKHeMOKeJa PnEDH3BnKa TOKOB YdAP.
A BHIMAHNE OTdHnHATcpe nHnHmPoreHenepa3ane,HNHOBae,npbObae HApN. DeHIOCTn npax MoKe Da bJe KAnuePoreHen, Da yBpeKDa IIOHa NOb APeMeHHEN HKNH Npda PnDnBnKBa HMeHENHa HnCnEChTeBHeHATA HKnOpMaHg.HKOnOT cB-DbXkUHTte Ce ToTH npx BEEIHTBa Ca:
-ONOBONOBOCdbp KaaHbONnnaKOBe;
KPCTANEH CNINHEB DNYOKHC B TYXN K EPEMDH,SHMENHTIpyTHDAPDCKH MATEPNHNI
apceHnXPOMATBXMHNHO6pabotetaaIbPBCeHNA. PCKCBOT3a0oONBAHE3ABNCHTOtaOBKoTeCtEO NIOXEXOHNA HBNINHNOH TAE NBEcCTA.3aDgTPOHPNHe TE OAnCHOCTA,TP6BaJnpaobTHRE CAMOB DOpBe npOBepTRPAHBO MNEUHNI BCSCBTOBTHTNEHHNpNDaANH CPECTBA (HaNP.CbCNUEHNAHO KOnCTpyHnPAHIXATEHIN ANAPAH,KTOMO FNTNIPRAT HA-NMANTKACTHNNI pAX).
Pn6o6oTaBae Ha DetaiHH MoKe B DoJIbHHeHa
MMA CINHO HatoBaBae HA CNYOBn Anapat OTo Hepe
PpHAnAH Wym, KOKe MoKe To 6Be MaHANEHO Upe3
B3eMaHETO HaIOXODaNIPpeNa3HH MEKn, Hanp.
3HON3BAHETO Ha WMOnONITbAaN MATEpHAn BB3
HKBaHe HA KAMbaHc EeKt Pn6o6oTaBHeTo Ha
DetaiHa.
IPOBpeMaPbOaCeCTapAHTe Da ceOTenBb3-MOKHOHAMKNOpKaX,Hanp.KATOOBNAKHBATEMRC-TOTO,HAKOETO KbPTHe.
Ako nHEBMaTHnHHHnCTpyMeHT e cboPbHex Cbc WyMo3aTnyHtten, No IbpeMa Ha pabota ToH TpaB8a Da e HauHHe, Da 6Be B M3pRHO bCToHHe N da FyHKHoHpa npABnHoo.
TenehpapnHBeBpaunMOrat da npuHnrYbpeKdAne HnepBHe NCMUeHNB aNpKyaunHa Na KpbBa Ha pueTe.
Pa6oTe c nblTHPbKABHn. PkOXBaTKeHa NHEMaTHHHNCTpyMeHTc oxJXAKdT BcNEdTBE H aIOTOKA CbCTeH bBxYt. TOnTIne PbSeNoHACrT No-NeKHOtaHOBaBHARHtO tBbpaun. HIpOKPiE PbKaBnMORatDa bSdAT3XbaHAn HYBVECHN O BpTRnC 3EBHe.
Ako yceHTHe,ue Koxata Ha pBuTe Bn CTane HeuyBCTBNTHe, YCeUaTe Cb6BeKN HN 60Ka Nn CE OuBtB N 6HIO, npyeCTahOBeTe paOToTa C nHEBMTHHnHCTpyMeHT, yBdoMeTe paOToTaTe nCn Ce KOHCyTNpaiTc nekap.


152|Бынгарский
No Bpeme Ha pa6ota He dpbXte pa6othma HhctpymHt.
PbXTe NHEBMATHNNH HCTpyMeHT CHYPOHO HE pKaeKAnEO 3pABO, KATO npOTHBoEeHCTBaTE Ha b3-HNKBaUHTpe peAKUHOHH CnH. BHPaunHTe MOrT Da ce 3ACHNAT, AKO DpKHTe NHEBMATHNNH HHTpyMeHT TBLDpe 3pABO.
Ako ce H3nON3BAT yHbEepCAHN bC6HHTINNN (NAIOB CNBcHINNTEN), TPNBa Da cNoCTABT 3actonopraBauu nnTOBte. H3nON3BaIe OCHrpyBAaun Bp3KHeWhipcech 3a3auyta BcuyyAa To k3Aa3 hC6DHEHHeHO Ha Mapkyua 3a CbCTen BB3dyx KbM NHeBMaTHUHHN HCtPmeyEHT MHa Bp3KbM KMeDyMapKYu.
HIXORA he nephaeirhe HHEBMATHNHINHCTPymENT, KATO ro dpxKte 3a Mapkya.
Ako paOthTHH NHTCPMENT ce3aKHHH, 3KNIQUBATE HNEBMTHHNNH NHTCPMENT He3ab6ABHO. BJeTe NOgTOTBENa 3aTOEEMpeAKUHNH MOMENTH, KOTO pIeMbHBAATOTKAT. PaOthTHH NHTCPMENT bNOKIPA, KORA TO:
TINHEBMATNUHHNHTNCHPTyMeNTbgepePepoBapen,
-ce3aknnnBobpaobotBaHnnaTain
-octpneTo My npemHe npes obpabotbHaHn DeTaeH.
H3n03BaTe NMOOHH nPNCnoc6BHeHH 3a NoeMaHe HApKaHNOHHTE MOnEH, HAp. nOxdoAun NoDnOph. Ako ToBA He E B3MOKHO, H3n03BaTe CnoMaTENHa PbKoXBATKA.
HnKora He noctabnte puee c n 6n30cTo BbPTaUncpe paobTHN HhCTpymEnTH. Moxerte da ce HapaHnTe.
He octabnite cpeipno da BnBpnpa no taeTna.Toea pIaIbIeBnBKA 3HaHHTeHO YbcNnBaHa NE BnBpaIne HMaIIHnHATA.
CHMBOIN
CHMBONITE NO dony MOraT da bDaT ot 3HauHHe Nn H3non3BaHae HA BuaHHNHEBMAHTYHn HnCTpyMeHn MoA, a3anMHeTe CHMBONITE n THXOTHO HnHe. PnABHHOHTIOHnEPTppeHnHa Hc MBONITE Ie BA nOMOTe Jd H3nON3BaTE BuaHHNHEBMAHTYHnHCTpyMeHn No doBe n no CnHyPHO.
Снвов Зачени
PnedeMHOnTHpahe,pa0TaC,pemOHt,TeHNHcEsKO6cnyKbAHe n3aHaHaNpHcncSoBceNHnMoDynu,KAKTo hPnDe pabota B6hN3OCTdoPiHEbMaTHuHmHcHTpyMeNPeHOTpeoBeTc6CNHyKa2aAHnn. Ako He cna3aBeYka3AnHrta 3a BeoNaCHOCTno- yanoIocneCTBnraT MaT Ta daBdTuTKeKnTpaBmN.

Paboreto cuymo3aynuushen. BzdeHcBnEHOHa yMOnKe da npedmBnK4 3aYb6Ha cnXy.
CHMBOI 3aueHHe

Pabotete cnpedna3HH ouHna.
W Bar Moaocct
| Nm | H isoton-Metbp | Еденица за серпгь (ырtnц мочent) |
| kg | Килогам | Маса, тетло |
| Ibs | Пayнд | |
| mm | Миниметр | Дылійнá |
| min | MinHyн | Вразец, подільник-Телноct |
| s | Секун | Ссөрөүхүүлөрөүхүүлүүлүүлүүлүүлүүлүүлүүлүүлүүлүүлүүлүүлүүлүүлүүлүүлүүлүүлүүлүүлүүлүүлүүлүүлүүлүүлүүлүүлүүлүүлүүлүүлүүлэхordырүүхүүхүүхүүхүүхүүхүүхүүхүүхүүхүүхүүхүүхүүхүүхүүхүүхүүхүүхүүхүүхүүхүүхүүхүүхүүхүүхүүхүүхүүхүүхүүхүүхүүхэхordырүүхүүхүүхүүхүүхүүхүүхүүхүүхүүхүүхүүхүүхүүхүүхүүхүүхүүхүүхүүхүүхүүхүүхүүхүүхүүхүүхүүхүүхүүхүүхүphantудярпшоюн Ф.Ф.Ф.Ф.Ф.Ф.Ф.Ф.Ф.Ф.Ф.Ф.Ф.Ф.Ф.Ф.Ф.Ф.Ф.Ф.Ф.Ф.Ф.Ф.Ф.Ф.Ф.Ф.Ф.Ф.Ф.Ф.Ф.Ф.Ф.Ф.Ф.Ф.Ф.Ф.Ф.Ф.Ф.Ф.Ф.Ф.Ф.Ф.Ф.Ф.Ф. Ф.Ф.Ф.Ф.Ф.Ф.Ф.Ф.Ф.Ф.Ф.Ф.Ф.Ф.Ф.Ф.Ф.Ф.Ф.Ф.Ф.Ф.Ф.Ф.Ф.Ф.Ф.Ф.Ф.Ф.Ф.Ф.Ф.Ф.Ф.Ф.Ф.Ф.Ф.Ф.Ф.Ф.Ф.Ф.Ф.Ф.Ф.Ф.Ф.Ф Ф.Ф.Ф.Ф.Ф.Ф.Ф.Ф.Ф.Ф.Ф.Ф.Ф.Ф.Ф.Ф.Ф.Ф.Ф.Ф.Ф.Ф.Ф.Ф.Ф.Ф.Ф.Ф.Ф.Ф.Ф.Ф.Ф.Ф.Ф.Ф.Ф.Ф.Ф.Ф.Ф.Ф.Ф.Ф.Ф.Ф.Ф.Ф.Ф.Φ.Ф.Ф.Ф.Ф.Ф.Ф.Ф.Ф.Ф.Ф.Ф.Ф.Ф.Ф.Ф.Ф.Ф.Ф.Ф.Ф.Ф.Ф.Ф.Ф.Ф.Ф.Ф.Ф.Ф.Ф.Ф.Ф.Ф.Ф.Ф.Ф.Ф.Ф.Ф.Ф.Ф.Ф.Ф.Ф.Ф.Ф.Ф.Ф.Ф.Φ. Ф.Ф.Ф.Ф.Ф.Ф.Ф.Ф.Ф.Ф.Ф.Ф.Ф.Ф.Ф.Ф.Ф.Ф.Ф.Ф.Ф.Ф.Ф.Ф.Ф.Ф.Ф.Ф.Ф.Ф.Ф.Ф.Ф.Ф.Ф.Ф.Ф.Ф.Ф.Ф.Ф.Ф.Ф.Ф.Ф.Ф.Ф.Ф.Ф.Φ Ф.Ф.Ф.Ф.Ф.Ф.Ф.Ф.Ф.Ф.Ф.Ф.Ф.Ф.Ф.Ф.Ф.Ф.Ф.Ф.Ф.Ф.Ф.Ф.Ф.Ф.Ф.Ф.Ф.Ф.Ф.Ф.Ф.Ф.Ф.Ф.Ф.Ф.Ф.Ф.Ф.Ф.Ф.Ф.Ф.Ф.Ф.Ф.Ф.Б Ф.Ф.Ф.Ф.Ф.Ф.Ф.Ф.Ф.Ф.Ф.Ф.Ф.Ф.Ф.Ф.Ф.Ф.Ф.Ф.Ф.Ф.Ф.Ф.Ф.Ф.Ф.Ф.Ф.Ф.Ф.Ф.Ф.Ф.Ф.Ф.Ф.Ф.Ф.Ф.Ф.Ф.Ф.Ф.Ф.Ф.Ф.Ф.Ф. Ф. Ф.Ф.Ф.Ф.Ф.Ф.Ф.Ф.Ф.Ф.Ф.Ф.Ф.Ф.Ф.Ф.Ф.Ф.Ф.Ф.Ф.Ф.Ф.Ф.Ф.Ф.Ф.Ф.Ф.Ф.Ф.Ф.Ф.Ф.Ф.Ф.Ф.Ф.Ф.Ф.Ф.Ф.Ф.Ф.Ф.Ф.Ф.Ф.Ф.Б. Ф.Ф.Ф.Ф.Ф.Ф.Ф.Ф.Ф.Ф.Ф.Ф.Ф.Ф.Ф.Ф.Ф.Ф.Ф.Ф.Ф.Ф.Ф.Ф.Ф.Ф.Ф.Ф.Ф.Ф.Ф.Ф.Ф.Ф.Ф.Ф.Ф.Ф.Ф.Ф.Ф.Ф.Ф.Ф.Ф.Ф.Ф.Ф.Ф. Ф Ф.Ф.Ф.Ф.Ф.Ф.Ф.Ф.Ф.Ф.Ф.Ф.Ф.Ф.Ф.Ф.Ф.Ф.Ф.Ф.Ф.Ф.Ф.Ф.Ф.Ф.Ф.Ф.Ф.Ф.Ф.Ф.Ф.Ф.Ф.Ф.Ф.Ф.Ф.Ф.Ф.Ф.Ф.Ф.Ф.Ф.Ф.Ф.Ф.ф. Ф.Ф.Ф.Ф.Ф.Ф.Ф.Ф.Ф.Ф.Ф.Ф.Ф.Ф.Ф.Ф.Ф.Ф.Ф.Ф.Ф.Ф.Ф.Ф.Ф.Ф.Ф.Ф.Ф.Ф.Ф.Ф.Ф.Ф.Ф.Ф.Ф.Ф.Ф.Ф.Ф.Ф.Ф.Ф.Ф.Ф.Ф.Ф.Ф.φ Ф.Ф.Ф.Ф.Ф.Ф.Ф.Ф.Ф.Ф.Ф.Ф.Ф.Ф.Ф.Ф.Ф.Ф.Ф.Ф.Ф.Ф.Ф.Ф.Ф.Ф.Ф.Ф.Ф.Ф.Ф.Ф.Ф.Ф.Ф.Ф.Ф.Ф.Ф.Ф.Ф.Ф.Ф.Ф.Ф.Ф.Ф.Ф.Ф.φ |
| bbar | bar | Бьдүшоюн halлаганe |
| psi | Паунда на Кадратуен Ич | Бьдүшоюн Halлаганe |
| I/s | Пл'tра за сөкүдүдүдүдүдүдүдүдүдүдүдүдүдүдүдүдүдүдүдүдүдүдүдүдүдүдүдүдүдүдүдүдүдүдүдүдүдүдүдүдүдүдүдүдүдүдүдүдүдүдүdүдүдүдүдүдүдүдүдүдүдүдүдүдүдүдүдүдүдүдүдүдүдүдүдүдүдүдүдүдүдүдүдүдүдүдүдүдүдүдүдүдүдүдүдүдүдүдүдүдү徳хordырүүхүүхүүхүүхүүхүүхүүхүүхүүхүүхүүхүүхүүхүүхүүхүүхүүхүүхүүхүүхүүхүүхүүхүүхүүхүүхүүхүүхүүхүүхүүхүүxordырүүхүүхүүхүүхүүхүүхүүхүүхүүхүүхүүхүүхүүхүүхүүхүүхүүхүүхүүхүүхүүхүүхүүхүүхүүхүүхүүхүүхүүхүүхүүхүүхэхordьрүүхүүхүүхүүхүүхүүхүүхүүхүүхүүхүүхүүхүүхүүхүүхүүхүүхүүхүүхүүхүүхүүхүүхүүхүүхүүхүүхүүхүүхүүхүүхүүхүүxordьрүүхүүхүүхүүхүүхүүхүүхүүхүүхүүхүүхүүхүүхүүхүүхүүхүүхүүхүүхүүхүүхүүхүүхүүхүүхүүхүүхүүхүүхүүхүүхүүхэхрүүхүүхүүхүүхүүхүүхүүхүүхүүхүүхүүхүүхүүхэхordьрүүхүүхүүхүүхүүхүүхүүхүүхүүхэхordьрүүхүүхүүхүүхэхordьрүүхүүхүүхэхordьрүүхүүхэхordьрүүхүүхэхordьрүүхэхordьрүүхэхordьрүүхэхordьрүүхэхordьрүүхэхordьрүүхэхordьрүүхэхordьрүүхэхordьрүүхэхordьрүүхэхordьрүүхэхordьрүүхэхordьрүүх爽ordьрүүх爽ordьрүүх爽ordьрүүх爽ordьрүүх爽ordьрүүх爽ordьрүүх爽ordьрүүх爽ordьрүүх爽ordьрүүх爽ordьрүүх爽ordьрүүх爽ordьрүүх爽ordьрүүх爽ordьрүүх爽ordвр Ф.Ф.Ф.Ф.Ф.Ф.Ф.Ф.Ф.Ф.Ф.Ф.Ф.Ф.Ф.Ф.Ф.Ф.Ф.Ф.Ф.Ф.Ф.Ф.Ф.Ф.Ф.Ф.Ф.Ф.Ф.Ф.Ф.Ф.Ф.Ф.Ф.Ф.Ф.Ф.Ф.Ф.Ф.Ф.Ф.Ф.Ф.Ф.Ф.℉ UFN | Ф.Ф.Ф.Ф.Ф.Ф.Ф.Ф.Ф.Ф.Ф.Ф.Ф.Ф.Ф.Ф.Ф.Ф.Ф.Ф.Ф.Ф.Ф.Ф.Ф.Ф.Ф.Ф.Ф.Ф.Ф.Ф.Ф.Ф.Ф.Ф.Ф.Ф.Ф.Ф.Ф.Ф.Ф.Ф.Ф.Ф.Ф.Ф.Ф.Ф.F. Ф.Ф.Ф.Ф.Ф.Ф.Ф.Ф.Ф.Ф.Ф.Ф.Ф.Ф.Ф.Ф.Ф.Ф.Ф.Ф.Ф.Ф.Ф.Ф.Ф.Ф.Ф.Ф.Ф.Ф.Ф.Ф.Ф.Ф.Ф.Ф.Ф.Ф.Ф.Ф.Ф.Ф.Ф.Ф.Ф.Ф.Ф.Ф.Ф.℉ |
| G | Whitworth-pe36a | Присысеньштетар pe36a |
| NPT | National pipe thread | pe36a |
OncanHe Ha npOyKta H Bb3MOXHOCTHTe My

PnOeHTeBHMaTeHNO BcMKN yKa3AHHa. HecnBa3aHHeTo NaPiBEnHeHrte No-dony kKa3AHnMOKeJaDoBeGe Do TKOB YApd,NoXap H/INH TeKKn TpABM.
MON,OTBOPEREp34PbHuaataCceKoPiu CnO6paKeHHeTO HnHEBMATHNHyHHTcPmErH N OCTABeTAKaDOKATO YETE pBkoBOCTBTO 3a EknONoTAaHn.
PepnaHa3NaueHne Ha HnCTpyMeNTa
HHeMaTHNHTNHCPTyMeTEnIpeHaHaueHc3aYdApHO npoBbAbe HBeToH,3nApHn KAmehHH MaTePnHn,KaKTo N 3aNeko BpTeHe.ToHcbUO taKa eNoXdoH3a6e3yApHO npoBbAbe HDbpeChn MaTePnHn,MetAnH,KePaMHnMaTePnHn HIIACIMACH.


OBI_BUCH-2092-002.book Page 153 Thursday, February 23, 2017 11:46 AM
BbIrapckn 153
Pepopopopbte nnoxdoa 3a noonbae Bnomeenr C noBnHHe bnaJHKoCT, KaKTo 3a pabota hA oKpIto.
H306pa3eHH enemeHTN
HomepnpaHeTo haneMeHnTe Ce OTHacdo nO36paKeHmTe HnIHeBMaTHNnHnHcTpyMeHT Ha cIpaHnCa TcFHyPnE.
1He3do
2IpoTHBONpaxObaKanaUka
33actonopBaaaBtynka
4BHNTcKPNIATATA na3a0nMIIOHNPaHa HCNOMATENHTA pKXOBATKa
5 IpeBknKoyBaTeN (Ydpn/CmnpaHe Ha BpTeHToX
6NyCKOBIpeKbCba
7Писбецнинтendenшуцер наOBТОБДИЗHAByDx
8 OTBOP3aHxOAnBb3DyxC WMyo3arWHTen
9 Hnne3a Mapkyu
0 CnomaIaTeHa pBkoXBaIka
1 Db6oyHHeOrpaHHHTen
2 Ckobaa Mapkya
3 Mapky 3a noDaahe Ha CbCTeH Bb3dyx
4OChrypntenEH BHT 3a natponHHK Cbc 3bEbenBeneH
5 NaTPOHHK CbC 3b6eH BHeH
6 Onawka SDS plus 3a natponHHKA
H306ab39HeNt H4yPHTe N OHcANHTe DnHmTNTHN nPHnCnO6bHNHe M cKaIHOuENB C TSTAHAPNTHa OKOMNIKETOBa HA ypeDa. H3uePNATenEH cINbCK b H aONHmTNHTe pHNCnOC6bHN MoKTe Da HAMOPHT e B cTbETHO B KATAIORA H3 daONHInN TnHN PnCNTO6bHNHe.
TexHmueckn daHHN
Henk Becker
Executive Vice President Engineering
Helmut Heinzelmann
Head of Product Certification
PT/ECS

i. V. k = m _____
Robert Bosch Power Tools GmbH 70538 Stuttgart,GERMANY Stuttgart,01.01.2017
MOnThIpaHc
CnOmaraTeHa pbKoXBaTka (BHXTe chr. A)
Pordapn Cb6pbaekhenra 3a chryphoct HcbeMaTHHnHHTHCPTyMeHNTpaBaCe ION3Ba CamO cMOHTpaHa cIOMaTeHaHa bPkXOBATKa 10.
MOKETe da nocarate cnoanatnHata pkoBtka 10 npakTHueckn b npno3bONHa no3uHa,3a dCnOcHpyrte ydoBa H6e3onacha no3uHa ha paboTa.
3aBpTe BnHc KPMNATA nBa 3a HactPOBA HA cnOMarTeHnHata pKOBXbKa 4o6patHO HA cOABHHKOba tCTPENk NOCTABe TpKOBXbKatATo 10 9KeAHAOT BACIOHN. CnED TOBA 3aTeHHe OTHOBO BnHtCA KPNHATA naba 4, KATO rO 3abpHTe NO NOCOKA HA cAOBHHKO bata CTpENka.
OTBeXdaHe Ha oTpa6oTHnHb3dyx
Mokethe da OTBedete OTRabOTHNNBb3dyN Xb3bHN OHoHTa HAPabOta cMapKyU, KOTo DA BkIOUChTE BTOBpa 3a Hx3doIaIIaHbBb3dyX, INaka CbUepeBEMHO DA NOCTIRHE TaeuTHINHO 3aYnuaBaHa NE uWMa.OCBeHb TOBA NOpOBpArate YCONBnHTA HapobTHO MTOCTIO, Tb KaTO IO He Ce 3aMbpcBA To CBdPkaAa MaHHINHO MAcNO Bb3dyHX Ne CE IbUYNH pTnAX pCTpyKK.
Bosch Power Tools 1609 92A 33X|{23.2.17}


154|Быларск
- Pabniye ToHymo3aIyNtuYEnTeT OToBOPa 3a HxOdoJiu Bb3-12xy8 X 30aMeHene C HnHnEe 3a MaKuy9 Y.
- Ocbobodete Ckobata Ha Mapkyua 12 3a Hxodpiu B5bdyu X
- a3xaBAHETe Mapkyua 3a Hxodpiu B5bdyu KbMHNen9A, KaT03aERETE 3dpaBO Ckobata Ha Mapkyua.
BknOuBaHe Km CnCTemata 3a CrbCTeH Bb3dyx (BHXTeΦH.R.B)
Cnedehe HanraheTo da He napa noa 5 bar (72.5 psi), Tb KaTo IHeMaTHaMHHTHmCTpyMeTe npoekTpaHaa Toba paBtoHO Hanrahe.
3aNoCTFHeATo HA MAKCMHNA HpONBDOHTENHOeHE XOHDMO Nc3BaHETO HnTOOCYHNE B TaBmIa CTEXHHNCKN DAHHa CTOHNOCTHa CBeBb NTOBp HA MapKya, KAKTO HA PPBCEDHNIHTENHATA Pe3Ba, 3a ZnA3BaHETO HA PIIHATA MOIOHCT HnONBBAIte MapKyuC MAKCMHNA HoBJIa HbJHKHA4 m.
3aJa bdePnndaeNHEbMaTHHNHHTNtHcPTyMeNTOTYBpexkdahe, pXkaHa 3aMbPCBaHNe, NObaDaHNrTcBCTeHb3-12xH Ye TnB3a Da cBbPKa TbBpn YacThH N bAknKoHCT.
YnBtaHe: Heo6xOIMO e3HNO3BaHETO HA KOMBHNPAH npEnaNtAHn (0e6BbNxHHTen, OACmHnTn, npEna3EH Hnnn pedypu-Bentn). ToCnCRpyBaONTHMANYN yCNOBA 3a 63eaBAPHHa paboTa hIneBMATMHTHE HCTPymeHTN.
CnBaAaBteYkAa3HtTaBbKOBQCTBTOtaeXcKNOAtaTaN HcKOMHHNAPAHINPePDAHHTen.
LJNTATAHNOBBAHAPMTAYa,cbDHHHTENHH3EHAHMap KUYTNTRPbBaAcbOTBeCTBAT HAOMHNHHTe HANRAHHe 6EHNHcTCEHNHbDxHy.
68aBaeTcEChBaHnHa Hb3yXOnoJaBaUaTe MaKyUm, Hapn. BpezymTaHa nIpeTbaHe, npITnCKaHe mN CnHIO oBtaraHe!
PbIcMbHnEeNpOBeRpaBReCe MAmOHTeLp HANrHaTeHo n BxoDA hAHeBMaTHuINHCTpyMEnT no BpeMe hApObaT.
BKNIOUBAHANE HANCTEMATA 3a CbCTEN Bb3dYX KbM INHEM MATNUHIN HHCPTPYMET
HABINE HINEMA 9 B UJEAJA HO TBOPA 3 BAOXOJIINBA-3D7X 7.
3a da n36berhe yBpejdaHnHa BbTpeHnHeTe TaaiHn HBeHTnHa NIIHEBMTHNHHNHCHTpyMeHT, IPIHnABBaHc Hpa3BbaHae Ha HnIeNa 9 KbMnDabAAuCe SuJeep HaOTBOPa 3BaXbOJauBb3dQy7 TpRbBaJa3dpKpTa KOHTpa Crauehen KIOU (pa3MaPHa KnIOua 22 mm).
Oc0b6o3eKc0a74 12 N BkapaiH n 3actonoperte Map Kya 3n odahe H cTbe Hb3dyx 13 HAHNena 9, KaTO 3aeHHeTe 3pao cKcbaa.
YmbTbea:BHHAn3XbaUaIaeMAPKya3aIOIaDABHe hCtBcTeH b3JbYn PbRbO KbII IeMaTHINH HICTpyMeHT,a CNEbTOBAbKM COMOHNRPAHNIpeN3AeITn.
H36opHa NaTpoHHNka H pa6oTHHe HhctpyMeHTM
3a Yadnapo npo6bHaNe H KpTHeN (KpTHe N c o nPnCTabKa t MV 200) ce NykaTe ot NHcTpyMeHTN c onaika SDSplus, kanto ce noctabT a bNpOnHknaSds-plus.
3a BezaydnapnoPpOBAHBeBnDpBcEHnMaTePMAnH,MetaHn, KepaMHNuMtePAHnNnNnIaTcAeKtO n Hpn 3aBbHAeHpeBaHEbe cNnON3aATnHCTpyMeHTN, YAHTO onaHaKe H
eSDS-plus (hAnp. cepedna c uHHHnDprHnHa onaoka). 3a Te3n HcHcTpyMeHTNc HeYJzdaTe of patoHNHHK 3a 6bP30 3axBaJaHe, peCn. patoHNHHK Cb 3b6BeBHeJIe.
CMHa Ha NaTpoHHKa Cbc 3b6eH BHeue
3a da moKete da pabotire c HnctpymEnH 6e3 onaika SDSplus (napr. CbepeNa C mnnnnpnna Onaik), Tp6ba daMOHTIpe noxdoanatpoHHNK (natpoHHNK Cb 3b6enBeHe, pcn. natpoHHNK 3a b5p3o 3axBaAaHene, he ca BkIOuOEHN BOKMIIEKIO8ka).
MOHTHAPRA HAI NATPOHNNKA cbc 3b6beHNBEHEU (BHKTE QHNI.C)
Habnre onaukara SDS-plus 16 b natponHHK cbc 36beH BHeue 15.3actonopete natponHHHa Cbc 36beH BHeue 15 C BHTA 14.BHHMabaTe, ochrypHTenHHATBHT e c nBa pe36a.
MOHTIpaHHe Na pOToHHK cB 3b6eH BeHeuC (BHKeTHΦnD).
- Nochte KpaHa OnaWKata Hro CmaKeTe neko.
BkapaIte npatpOHnHa CbC 3b6be HBeHeC nOCTaBEH ONAUka CbC 3abPtaHE B tHESDTo, DOKaTe Ce 3aXbaHe AB TOMATHNO. - Yubepe Ce, c. natoponHHKb Cbc 3b6e Hene c 3axbaHAT dAbaO, kato ro hndnpate.
DemoHTnpaHe Ha nataPONHHK cbc 3b6eH BHeH
Pnepemctese3aonopronBaauataBtuNka 3HaazainH3aBeTe npatoonHHca bCb36beHene15.
CmHaHa pa6oTHnHnHCTpymENT
IpoTHBONpaxoBATA KanaHka 2 orpanHHaBa cHNIHO npOHKNbA Hora HOTENHnHa ce npH kTpeHe npax B natPOHHKa. Ipn NoCTABHHe Na foabOHNHa INCTpymEt BHMNAbaTe Da He NOBPeDIne npTHBONpaxoBATA KanaHka 2.
PioBepedha npOTHOBpOxAba KAnAka TPhBa 6a da3eMeMH BEdHara. IpnOpbBaCe TOBa a bSe He3bpeHoe BO OTOPKHNpceBpHn 3a eEKeTPOHnCTpyMEnTH.
Noctabeanha pa60toHnCPTPMHT cOnaoka SDS-plus (BHKTEphiR.E)
CnpatOnHHKSDS-plusMOKTe Da3aMeHtePa6oTHNHHcIpyMeHTJeChOHyD6e3KHOIN3BaHe Na CIOMAATeTIHNHcPTyMeHTH.
-ПОИСТЕОПAWKATAHa paOOTHNIAHCTPYMENTINCMaKeTe JIeKO.
B-Kapaiata PabotHNI HINCTPMEYB NpOHTNHIIc Bc3aBbTae, KOKATO b6e3aBXAHAT ABOTMTHIO.
- YBepete ce uee3n3dbpNAhe,uee 3axBaHar 3npaBO.
CbIaHcO npHHnHa cH h DeCTBHe pabOTHTH HNCTpyMeH COnaIIKA SDS-PIUs e CBoBDeH. POpADy TOBA INPb BpTEHe HA np3AeXoB bHINKBA paHAnO tOKHOHE He. To6ae He CE pO3Aba HA TOUHOCTA HAp06BaHNbOHTOBp, Tb KaTO pINpnpOBAHe cBpeIIOTo c CamoUeHTPOBA.
M3aKaJaHa Na p6oTeH NcHCTpymEn COnaIka SDS-plus (BHXte ChyprFa)
- DpBnHHe 3aCToNopRbAuaTbYnKa 3 Haaad HsBaDtepebaTHHaHHCTpyMeHT.


BbIrapckn 155
IocTabaHe Ha pa6oTHn HnCTpyMeHTn 6e3 onaika SDSplus
YmbTaHe: He 3nIOJI3BaIte HNCTpyMeHIn 6e3 ONaAka SDSplus 3a yAdpH no106BHaE INKbKbTeHep! PnH yAdpH no pObnBaHe n KpTHe HNCTpyMeHIn 6e3 ONaAka SDS plus natPtoHNHkFc e NobpeXdA.
Noctabete natPOHHHKc b3b6be HBeHe 15 (BHXte xCMHa h a natPOHHKHa c3b6be HBeHe, cTPhaHla 154).
-4pe33abptane HANRBO OTBOPete NATPOHHNk Cbc 36b09 Behel15, TONKBA, YEpaobTHHHTNHCTpymEtJaMOKeJa 6BeNoctaeh
BkapaTe KIOOa HA natoPOnHHNka B npDnHa3HauHEnHe 3a cTtA OTbOPn Hn aTOPOHHNka Cc 3b6eH BEHe 15 N aTERHETe HcTpyMeHTa paBHOpHNo, KaTo H3NO3BaTe H TpHrE OTbOpa.
N3aekdahe na 60thn HnctpymeHn 6e onaikka SDsplus
3abptete Btynkata Ha natpoHHNka Cbc 3behen BHeue 15
obpTaHO HA cacoBHKnOBaTcPEnKa C NOMoTuHa CNeU
HINPAHNN KIOU,doKato paoBHTHn HnCTpyMeHT Mo-
ke Na 6de HABAEH.
Pa6ota
BknnoyBaHe
THBMAHHTHHTCHPTyMHT pa0tOHOTMMHNO npa0pTOHO HAHAHHe 5 bar (72,5 psi), H3MEpeHO Ha BXOda HnCTpyMeHaNo BOpeMa Hpa0ta.
H36bop ha pexmHa ha pa6ota
CpeBknOHTaBEN5 MOKeTE da n3bepete peKHMHa paBo TAHa HIEBMATNUH NHHCTPMMY.
YnBtBaHc: CMeHNrHe pEXKHMa Ha paOba cAmo KOrato nHEB MATMNHH HNCTPymEHT B NOKOB: B npOTBNB cIyAH nHEB MATMNHH HNCTPymEHT MOKe DA bBe NOBpEDeB.
-3aBpTere npeBknoubaTeRaN4napCnnpaHe Ha BpTeHcTo5 5doJneHaata No3nua.
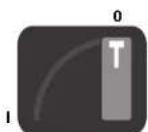
P03HnIa 3a beSyapno np6bHaBHe B JbPBeCHN MATEPHN,MetaIIN,KepAMHHMATEPHNIIINIACTMACKAKTO H3a3aBABaHe/pa3BaBaHe
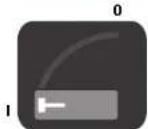
P03nH3a Kbptene
BkHIOVAHe H3KIOVAHe
Corned necthe H EAeHRIKIOuayBaTe IINBEHMATHHNHNCTPymETAMCOKATO FONB3ate
3a BknOuBaHae HnIHEBMATNUHINHTCPyMENT HAHTCHETe nycKOBnI pKcBcA6 NIO BpEme Ha paBota rO 3aJbPKaJIte HauNCHat.
-3A KINKUHBOAH HTHEBMATMHHHNCHTPMENTOTNYCHETEYIKPOBNIPEKBCB6.
Yka3aHHa 3pa6oTa
Bhe3aHIO bhaNKBaIIN HatoBapBAHnI PnpEHNBKBat pIaKo
PanaHe naOboOpOHTe Hn CInpAne Ha BbPTHeIO,HO He Bpe-
Tn HA DBrATen.
HactpoBaHa HaIbIbOuHHMa OtpaHHHTen (BHXTeΦmrypaG)
CnmoaHaNbBbOuHHHOrpaHNNHTEN11npB-BapHTeHO Moke Ja bBe yCTAHOBHe HaNbBOOHATA H npo6BaAe X.
-PaBnBeBHnC kPnHnTaI nBa 4 HcNoMaratienHata pbKoBXATka10.
H3dbpnaTe bIbOHHHnOrpaHmHTen TOnkOBa,pe pa3CTBnHHeNo HAnpaBnHEHe HA OCTa MEKxDy BpXHa CpePnTo Ha bIbOHHHnOrpaHmHTen Da paBHOHaKeNaHATA bIbOHHa HA npOBAHHAOTBPOX
-3aterheTeOTHOBOBHTA CKPUNyataTnBa.
PdBpKaHe N cepBn3
PoiDbpxKaHe N NouchTbaHe
DonyckaTeTexHmckTo6cnyBaHe H pemOnTb 1a6bDat K3bPbBAAH CaMoOTKBAHNHUPAHNTEXHn U. C ToBa CE rapaITnPa, ye ChryPHocTa HA NHEBMAtu HHTNHCPTPMENTueDe ana3eHa.
Ta3n DeHIOCT MoKeJa 6b6ne HtBHeHa 6bP3o HA queCTBEHO BOTOPINHPaH CEPB3a HnCTpyMeHTN Ha BOI.
Tekyso nouchTahe
- PediHO NOOHCTBAIe CHTOHa BbBdyxOnIOaBaTeHINHAOTOB HnHEBMATHHINH INCTPYEMT.3aJeTTa paBHIneHINHnE9NOHCETe CHTOOT npax H 3aMbpcBaHINCnED TOBA HABNIe OTHOBO N3aterHeTe DOpbe HINNENA3aMapkyua.
CbIbpXaHHTe CBe CBrCTeHN HBa3yX Boga N TbbpN DnA tMCHKINpeDHHBkAT KOp33H N BHOJTO Da yBcHNEHO HIOBCaHHe Ha NaMeHN, BeHTHN HT. 3a Da npeTobpaTHe ToBa, TpBbA a KaHNTHe HKnONKO KAnKH DBrHrTeNo MAcno pE3 B3dyXoNODaBATEHN HOB7. BKnOte He NCBmTHAHN HHCPTyMEH OTHOBO KM CTCTemata 3a CBrCTe B3dYx (BHKeT E KIOHBAHe KbM CnCTemaTa 3a CBrCTe B3dYxx, cTepHaNA 154 Noctabete da paBoH 5-10s, kato NoHNbATE H3N3aUTo MaCNc KcpKa. KOrato NHEMaTHuHHT HnCTpyMeH HMaDa b6de H3non3aH npDoBnKHTenHO BPeme, TpBbBA BnHArHa Da H3- hNBbHbate Ta3NnpOeDya.
PepnoHnNo noHcTBaHe
CneBpBHTe 150 pa60TH haca NOOCETe peyKtOpa C MEK pa3TBPHTen. CnBa3Bte yka3AHHa T haPON3BDHnTe H na PA3TBOPHTEN OTHOCH NauHna My HA NIO3BAHe HNkXbBnHHe. CneTb TOBA CMxEgepeyKtOpa CbC cceHAnHATA CMAkA Ha Boo 3a peyKtOpi. CneTb NaOB-TapARe Taan PPOUeDpya H BA ECKN 300 pa60TH haca. CneuHnHa CMAkA 3a peyKtOPI (225 ml) KaraiOnxHcH Homep 3 605 430 009
Bosch Power Tools 1609 924.33X|(23.2.17)


156MaKeDoHcKn
- Namenite Ha typ6MHATA Ha da HrAtea Tpr6Ba peoOBH da 6bDat IpoBepHHaOH To KBAHmHpHaJIaTeKTHNK 3a HIOHOBaH ePi ne HoE6XoMOHcTa Da b5d aMaHEHHI.
CMA3BAHE Na IINEBMATHNUHTHE HNCTPYMENTH, KOHTO He ca oTcePHTA CLEAN
PnB CbUH NHEMAtuHH HCTpyMeHTN Ha BOU, KOHO He ca 01 cepHrA CLEAN (cneueHAn BnD typHbH DnHrTeN, KOHO To paOboTH cbcFctHe B3dJx Be3 MaunHnMo HAC), TPOBa HocTOHNO KbM npeMHNAaJI pReT Xe TcBtCh E b3dJy Da 0doBaIe PA3 npiaPteoMaHHnMoCnO. HeoXoDMHrTa 3a TOBA OaMCHIN HA cTbCTHeHn B3dJx Ce HAMPA Ha BkIOHe Hnpe PHeMTHauHHCTpyMeHT KMbHINHPa npedna3HTen (noNoDpo6Ha HhFOpMaHn MOKeTe Da noLyHTE OTo pONBOHDHTe HA KomNPecOpA).
3aHpeKTHO CMA3BaHe HnHEBMnHnHnHnHCTpyMeHTnHn 3a D06ab8HKeM CrbCTeHHnB3dYnxPnE KOMnHnHpaHn PnpD nAaHTEN TpRbda HnNtOBate MToPOHoMaNO SAE 10 HnSAE 20.
DontbHnTEnHH npncnoc6neHH
Mokete da NOnyHTe NoDp6Ha HNΦopMaunr 3a TaBnHata rA MaBCOKOKaueCTBeTHENKCHCMATBNH NOnsHINHTENHN pnc- nocO6HeHn BHTepHn Ha apec www.bosch-pt.com Hnnp Baunu CneuHnAn3nmp TnProBuE.
CepBn3 nTexHHueckn cbbetn
BHHAR, KORATO cO6bpuateKbMnpdctabHTENHtA HoWc BblpOCH, MOna HnpeMeHNO nocOaHte 10-kuPepHnKa TALIOKHeHOMe, HNtHCaH Na TaBcNkTa HnHEBMTuHn HnCTpymEn.
OTOBOPH HbHPOCHTE CNOTHOPOPEMOHTA HNOIDPBKKATA HA BuaHHNPOJYKT MOKETe Da NIOUYHTE OHT HAaMn CepBn3EN OTen, MOtAHKAnHIEPTEXN HINFOPMNA 3a 03ePBNHacT MMOKETe Da HAMEPHTE CbuO Ha aDPEC:
www.bosch-pt.com
EKNBt HA BOU 3a TEXHNNC KCBETN INPNIOKENHEI QEOTOBOPHC yDBOBOCTBNE HABPNOICBE HTHOCHHOHAHTNEPOYDKYN DNOBHLNTHNTHE PNCHNOC6NEHN3A TRX.
Poept BowE00Д-Блгарma
BOW CepBn3 LcHbP
TapaHIOHH H3BbHTapaHIOHH peMOHTI
6yn. Uepnn Bpbx 51-6
FPI Bn3HeC 1407
1907Cocn
Ten.:(02)9601061
Ten.: (02) 9601079
ΦaKc:(02)9625302
www.bosch.bg
Бракуван
COrnnd ona3bahe HOKoHnHa Cpeo HneBMaTHuHHT HCTpymENT,OnbHHTenHHe pncocobeneHn ONaKOBKNTe TPABa da cpePadaat zpeauKlnpae.
H3XbBpRnIe CMAOuHN N NOUcTBauu npenapath no HauHH, KOHTe He 3aMbpcBA OKOHATA cepA. Cna3BaHTe 3aKHOBHTE paopeD6N.
H3XbPnIte NamEnIte Ha TpyNHaTa Ha DnRatenn CbFnacno BnHdNtIe PAnOpoeBnIa ManEnIte CbJbPkAt TeFNOH. He Hn HarpaBaire Had 400°C, Tb Kato Had TaTH TMnepeParya Morat Da ce OTenrnr OPTOBnA NpAr.
Korato BaaHIT NHEMaTHUe HNCTpyMeHT He MoKE Da Ce H3 nnon3a NoBSe,MOH, PnAeJaTe Ro 3a peLJIKNpHaNE Hnro BbPHeTe BcneuHAn3nPaHATA TbPoBcKa MpeJXA, HApB. P OTOHNHPaCepBN3a HNCTpyMeHT HA BoU.
Ppaaata 3a HMOeHHH 3ana3eHN.
MakeOhckn
Be36eDnoCHn HAnOpMeHH
OnuTH HAnOMeHH 3a 6e36eHooCT 3a NHeBMATCKH anATH
APENDYPNEDYBAHBe
PINOCTAJE THKHBMABAJE HA CNT
HANOMeHH npd MoHTaxaTata, yOnTp6ata, nonpaBkata, oApOyBaHbEto 3nAmeHATA HnDeNOBn O nOpemata KAKo HapOteBe BO bH3nHa HnIeBMaTcKHe anatn. DOKONky HE BHNABate HcneINHTE 6be6deHOCHn HAnOMEH, MOKE Da HACTAHAT CEPHOH NOpBepd.
IaHbO 606pYbAteO yLnATcBTOa 3e63eNOCHHNAPOMEH NJaTe HNCTHe NMaHTe OToHnO KOPCHN.
Be36eHocHT Ha pa60THOTo MecTo
BHHMaJIte Ha NOBpHnHMe, KOH pN KOpKHeTeHo HA MaHnHATA MoKe DA CE CKHn3AT, KAKO H Ha OnaCHoTA oC ONyBaHBe ToM OKe ToA JApEbN3BaKBOJyUHTo HO HxMyPauNHyTO UpeBo, IInr3aHcEto, COINbHaTeO n PneBpyBaHTeO cTnlaBHn PnHnHn 3a NoBepnHa npabTOHmTeO.
He pabotete co nHbMaTCKNt anat Bo OKoNHKA Kade NOCTOn ONaCHOCT OekCNIO3Ha, Kaede MHa 3aIaNHN TeyOCTn,FacnnnpAHHa.PnH ObpaToKa Ha denot MOKeJa HAcHTAHAT NCKPH,KOHMOKeJa Ja 3aIaNanat PpBaTa INH NaPeata.
A DpKTe HnOanekynyeTo WTO NocMatpaT,DeaTaH NOCETHTENNTe,DOEKA To KOPCHNTHe NHEBMATCKOT anat.DOKONkydpYrntyeBnRNOponpeatBHMMAHHTe, MOKe DaJa3rHyBte KOHPTonPaHdYpeDT.
Be36eHooCT Ha nHeBMaTcKHTe anaTH
Boaunata ctpya hknorau He ja hacuybaute kon Ce6e Mn HacponTH pynH Ma aDpckTe Hn dahKHe NoahctpaOn o naHnOt BoaHy. KompecnpaHnO BoaDy moKe Da npEa3BkA Cepo3Hn NOpeH.
KoHpOnnpaTe Tn npKnlyounte H Ka6nTbe 3a hanoJybaBe. CtepeCnHsIK KomIOHEnTI, CIOJHKu npeBa MOpda Na cNoCTABAT IIO NOHOC Ha npTHcOKOTi KOJIHNHATA HA Bo3NXY BO CGNTACCo TcEXHQKNTe NodatouH. PnpHcKnot pNTHcOKr HnappyBa dyHKUHTe HnHEBMATCKNOT Anat, aPnEBCOKOT pNTHcOK MOKe Da NoDBeDe Do MATEpHjANI WITEN IOBepen.


MaKeIOnHcKn 157
3aHTHTTE rUpeBaO aD npeBHTKyaBe,
CTeHcyBaBe, cpeCTBa 3a pacBopAbe H cOpTH
paobOn. UpeBaT dPkeTe rD aneKe O tonnna,
MaCno h potnpaKn denOBn. BeDaH zAmehete ro
oWtETHeTO pEBO. OoTHeHOT kAben 3a hanojyBaBe
MOKe daIOBede do 3aOMToBAbe Ha NheBMATckOto UeBO
Ha IpEni3BnKaIOBepi. PpaHnata Hm ctpyroTHNHe
IIT0 IetaaT MoKeJa I ppeJb3BnKaat TEuKn NpBepi Ha
OHTe.
BHHMabajte,dpkaaHTe 3a upeBa cekoraw da bHdA tdoBo p3aterHt. HsEaBpCTehnTE HnO OOTETEHn DpaKa 3a UpeBO MOKeJa Pnpk3bKHaAT HEKOHPTPOINAPHO NcIyUTAnBe HAoBjYXoT.
Be36eHocT ha nua
BdHETe BHHMATEHN HAKO pabOTHe Np3AymHO KOPHCTe fo HHEMBATCKNOT anat. He Hn KOpHCTe TNEBMAKTNE anatn, DOKOKNY CTc YMOPHN HIN NOB BHNJAHMe HApora, AnKoON HNN KekOBn.FJIeH MoMeHT Ha HEBHMAHHe npHynotepaHa HHEMBATCKNOT anat MOKe DAIOBede No cepOH3NH NOBpeHn.
Hocete 3aunthn onpema nckcokrau Hocete 3auHTNH Oyna. HoCebto ha NnHa 3auHTnOn opema, KaKo 3auHTNa npN nnHebe, 6eBnIOCHn BnHn 3auHTNa od IINrIabe, 3auHTEN WmE MnN 3auHTNa 3a CnyOt, Cnpoe JNATCTBATA HA BauHOT paTOToDAEE INN BO COrNAHCO Tc PObATOHTNE KIN pONiCnCe 3a 3auHTNa Ha 3dpabJeTo r HAManyBa PkHKOT NOBpeHn.
H36eHybaTe HeKOHtponpHaHO KOpHe Ta H anatnTc. OChrpeTe ce KeAa NHEBATCKNOT Anat e HcknyuH nped da TnpkNkyuH a HanojyaBa co B03Ax, nped Da to 3eMetE HIN HOCTe, DOKoKly np HocBeTo HA HNEBMTCKNOT anat, CTe TO CTABINE NPCTOT Ha npckKyBaHOT a BkUyBaIe/ hckNyuaBa Hm CTE ro npKnkyuHne HNEBMTCKNOT anat DOdeka E BkUyHu H anoJyaBaCo cTpyja, OBA MOne Da npedh2bKa HcePeA.
H3baTe r anthe 3a noDecyaBe, nped da ro Bkynrte nheMaTCKhot anat.Anatot 3a noDecyaBe HTO ce Ha oTHpaKHe den Ha nHeBMaTCKhot anat, MOKe da doBede do nopeND.
He npehuybaite CBNTOE CNOC6HOCTH.3actaheTe BO ctaBnHa noNOKbHa NcTOJao HpMTe pamhotexKa.CtbnHATA noNOKbpaHn CTOeHEu npKHe HaTeIOTo OB3MOKyBa aNoDobpa da Ro KOHTponmpate NHEBMATCKHOT anat npH noJaba HneOeyBuHn CHTyaUN.
Hocete cooDBetHa obNeKa. He Hocete uHPOka obNeKa Hn HAKHT. TpHETe ja KOCATA, obNeKATA n paKABHNTe NOANeKY oN OOBHHKTe DNOB. NcHATA oNKeA, HAKHTOT NHIOrTa KAo MoJe da Ce 3adpatat od NOBHHKTHe DNOB.
Dokonky Tpe6a da ce HCTanHpaat ypeHn 3a BMMyKyBaBb npab, OCHypete ce deKa The npabHno ce pnhnyehn n pnhkndo ce KopHcTat. KopHcTeBto Ha oBHe ypeHn ja HamaIyba onachocta npdNkHKAAO dnpaba.
Hane3HOT BO3Dy HRe 4aMnBAYe DnpeKTHO. BHMMABAJTe DA HE BHNBe3e NHe3N3HOT ANAT MOKe YA OoHTe Hane3HOT BO3Dy ON IHeBMAcTKOT AnAT MOKe YA COpDKXH BOda,MACO,YeCTNHK METAN HHeCHTOnJa OD KOMnPecOPOT.OBa MOKe Da npEHN3BHKA 3dpaCTBcH NTERO6i
PnKnBIO KOpHCTeI NocTanyBaHaIe Co nHEBMATCKMe anAnTH
KopncTepe ypeHn 3a 3aterhyBahe Hm MeHreMe 3a da ro 3aepcHte HnN NotpEte DenoT noTo o6paBcy HnO nro Tc ce 6pbabotyra ro dpKHe UBPcTo cpo KaTa nro pnpitckate H tenoto, Hema Da MoKeTe Camn Da Ro KOHTponipate ypeDor.
He npontbapybaje nheBMATCKNOT anat. Kophtete ro cooDBTHOTnHEBMATCKN ANAT 3a Baaata pabota. Co cooDBETHOTnHEBMATCKN ANAT Ke paBOTHTe noDbpo H NocHyrphO BO 3aJaENH OMOH HA pabota.
He rokophtete nheBMATCKNOT anat,doKonyHMA deFeKeHTnpeKHyBa3aBkyuBaBe/McKyuBaBe. HHEBMATCKNOT anat Koj nobKe He MOKe Da Ce BkyuHN Hn Nckiyu,Ja aarpo3yBa 6e3edHocra Mopda da ce nonpanpa.
PpeKHeTe ro hanoJyBaBeTo CO Bo3nyx, npE da NaOHHeTe Da rnoDcByate yepoT, da MeHyBATE denOBH oN onpemATA mHn DOKOKy JDOr BOpe Bpeme He CTe ro kOpIeTene anator. Obne ppeBHTMHM MEPKn I cnpeyBaAT HEBHMATEHNHOT CTAP HA NHEBMATCKHOT ypeD.
YybaJrTn noanekOg oDpatot HA dae nHBMATCKHTA anTH KO Hr KOPCHNTE. OBJNHEBMCTKH ANH TE CMEA TQ KOHPCTAT NHA KOH CE 3aON3HaEH CO HERO HN Hr HMAAT PPOHTAH0 OBHyNAcTBa. HBMATCKHTA anTH cOnaHH, DOKKNY KIN KOPCHTAT HENCKCYH NHA.
OdpxyaBJr nprnKINBO HEBMaTCKHTe anATn. Pnpoepe daan noBekHHNtE denoH yFHKUHOHPaat 6ecnPekOpHo hce ca3arNaBen, daH ce cKpIeHNn HNO tETHeN, wto MoKeJa naonpeH yFNkuHjata Ha enktpuHnOT anat. Nopabe rHouTeHNTE denoB nped KopcHtBeH a HNBMaTCKHT anat. MHOy HecpeKn CBoJATA pNnuHa ja HMAAT BO NOO opDpxBaHHTe HNEBACTCNAnAaH.
Anatot 3a cehebe opkybajre ro octap nHCT. Bnmatemno OopkyBaHHTe anatn 3a cehebe co oCtpr paobOn 3a cehebe nomkny ce aarnabyBaATn CO HIN nonecho ce paoTH.
KopHCTeTe HINHEBMATCNTE AnATH,OnPemATA,doaTOUHTe 3a ANATNE HTH. BO cOHaCHOCTo C OBA yAnTCTBO.PnIHOa 3eMeTe H IO 0b6Np PaoSTHTHe yCBOH NJeIOCTa IIO TpeBa Da KEBUPH. HaToJ HAHN COzdaBHeTo npAB, BkOpALNeHcOzdaBHeTo ByabaKe eHAManatIOE mO KOHO NOBEke.
HMBATKNOANATP6aDAceynoTpe6yBaN NOeCBybKcKHyBNOOCTPAHAKNBnHKnKpKaHN H KOKONYBAH KOPCHNH.

158|MaKeDoHcKn
TheBMATCKHOTypeHeCMeEJaCeMOHnHnHaP 1POMEHHTMOKEJaJaHAMAtJENTOBPOHOCTa Ha CHyPHOCHHTeMEPKINDaTROEMATPHNKHOT3A KOPHCNHNTe.
CepBmC
NonpabkataHaBaHnTnHEBMATCNAnatCmEEda 6He HbBpuHcamaO cTpaHaNa KBAHNHPhKByaH 3pyuH nepcoHnHa cMoCoKOpCTeHa Ha opHHannpe3epBNH denOBn.CaHMoToJ HauHH Ke 6HeTe CnPHNBo 6Be36DnOHa HnHEBMATCNOnt anat
Be36eHocn ynatCTBa 3a eEnKtponHeBMatckn Yekann 3a Dnyuebe
PpOBepTe dann e uTHnBa cneuHKnauHOnaTnnOuKa. Jokonky He, 3aMeHeTe ja kaj npou3Bodrntot.
Dokonkye ceknH denot WTo ce 6bap60yra Hn ene Od dneBHTe OnepMaTn Hn NAK nHeBMATCKNOT ype, denOpTE MoKe A h3Netaat co rOnema 6p3Ha.
P NkO KOPKCTe6 KaKo NnonpABKN HnO dpXyBaBe KaKo Np Pa3MeHa Na denOBn O nOpemaHa NaHEBMATPCKHT Anat cekoraun Tpe6a Da HCtE 3aHTTA 3aOHTe OTNPOHa HA yApH. CTeNEHOH NaOTPe6Ha 3aHTTA Tpe6a Da cnpceHH noCe6Ho 3a CeKOHa NOOEHNH PnEMHa.
Hocere 3aHTEN WEM,doKoNk pyabOTHe HnnaOHN.HaoJnauHHKe HnH6berHeTne nobpeHte.
KOPHETEFOINHEBMATCKHOTANATCMOPOKONKY
AETOTOe0e6bEHOENoCNafAbe.HNky ANaTOT3a
BMEHTYBaHeMOKe DaCnDCPnn.
NctpoowHnre,cbHTKANHe HnckpweHnTe neBNOHa n npHafot 3a anat mopa da ce 3ameHAT. Ha toJ hauHH Ke rHs3eHHTNE NOBpeHnE.
ProtaceteborenoRHEBMATKHOANTAHNDOTBENHATAOBUNPHIA,NPEDAtoBDNNUYCTE.
KopHCHNHTNEPcHAnOT3aOpJyBaHeMOpaDaBnATΦHKnNOPTBENHa3aMoKeJaJaNOHEcatrOeMHnHa,TeKHnHaJaYHnHaHaNHBMATECKHot anat.
5Hdete noTROBEN HA HeoeyBaHN DAnHexeHa Ha HneBMATCKHOT ANAT, KOH MOKe DA HAcTAHAT KAKO NocnEaM Oa peakunckCnA hna KpUeBto H ananotTO UcBeMThyA. Jpnke To HneBMATCKHOT anat uPcTo n 3actane Hco TenoTo n paTe e Bo No3Hua BO KA JOA KE MOKe DA rHa dApKxte OBE DAnHexeHa. CoNoHTyaBaHe H aOBHe MepKn 3a npDeynpyBaHe MoKe da He 3beHart NoBepn.
BHMHANHe!AnaHTHe uTo ce BMETHyBaATMOKe da ce BxKeHTATn pNoIOnaY yOnTpeHa hINHEMATCKHOT anat. KopcTeTe aazTHInPAKABAHU
Pn npneKnHa HAnoJyBaHeTo Co 03dy XnnHamanen paboteH npTnHCOKnKnyeTe ro nBEBMATCKHot ypeD. PnpoePeTo Ro paOthNtO npTnCOK nOHOBO CTApTyBaJte CO oTNMAH npOtepNPnCOK.
PnKOpHCTeBToHa nIeBHMaTCKNtAnat,Ha KOpCHNkOTnPnPaObTeBToMoXKe Da My Ce NoJabn HennpJaTHo YyCBTO Bo dANKhTE, paueTe, paMeHaTa, rnpTo Hn HA npYn DenOB Nd TenoTo.
Dokeka pa6ohtne co 08oj nheBmatckn anat,3actaHete BO yOb6ha no3nuija, BHIMABAJre Ha npKebeTo H h3eRhyBaJte HnOBoHN no3nHnnno3nHnBOK e TeuKdo daPpOePAAMOTekA.3aBpeMa DonrptpaHa p6ota, KopCHHKOT Tpe6a NoBpeMeHO da ro pmoHen dpKeHeto HA tenoto, uTO MoKeJa NOMOrHe PN H3eRhyBaHeto HnEHNpJatHOCTN yMOpByBaBe.
KoKny Ka KpHcHKnOT My cnojabT CmTTOMn KaO H na. TpaJna CbOct, Terobn, BOnka, BoKaBaHe, TnyBOCT, XeHTNHa NIN KBOAHTOCET, OBne npEynpeyBaun 3aun He Tpe6a Da ce HrnpHpaaT. KopHcHKnOT Ha anatot Tpe6a OBne 3aun Da my FN coonuTH Ha paBoToDAbeUOT Hn Da ce KOcYTHPaco CTpyuMo MEmuNcKO nHue.
HnKorai He ro Kophtete nToTO Kako paeh anat. IeTATA ce anat TepHHaH CO TONIH H 6M MoKeJIe Ja CE CKpUAI.
Kopnctete camo octpn deta.Tanrte anatn 3a BMETyBaBeMoKNe Da npDnBHKaT JaKmOcNnAunH da CE CKPua3apadNCTPOWHEOT.
HnKorau He rnae XeKHTe neOBn O onnpemaTOB0a.Oba MoKe Da oBeOE Do KpUINBOCT INPbDpeMeHOIOKAXBaHe.
HnKoraa He ro Koprictete Iaetoto KaO noCT. Bn MOKeJNoJa ce CKPII.
Kophtete cooBteHn ypeH 3a npe6apyBahe, 3a da H npohajte cckpneHte eNKTpyHn KaBn Hn KcHcyTnpaJte ce no kAnHTo pTePnJaTHe 3a ChabyaBe co eNKTpyHn EepHnKa. KOrAKTO CO eNKTpyHn KaBn MoKe Da doBede Do noNoXapn eNKTpyHn UdAp. OUIyBaHeTo Ha raccOBoT MoKe Da doBede Do eKnnoHb. HabIeyBaHeTo BO BoBOOBoHH eBeknPedHBKByA OUIyTaBAe.
N369hybaje konaktc co kabn noh anoh. IHEBMATCKHOT anat He e 30bnapn, HoKHTAKTO c Ka6en NOI HAOH OMOE daoepde doe nEIEKTPWHeYdAP.
TPENDTPENYBAHBe
PnTaTbA HacTahyaB pNn MMnPaHBe NnHeBe
6pycebe,dyuehe h cnHnHn deJHocTH MoKe Da denya KaHuepeHO,Ja ha HAMn NnOHOCTa Hn Da Denya MyTareHo. HeKoD cynCTaHtue wTo r nCOpkAt OBe YcHKn npae C:
-ONOBO BO BONTE H NAKOBITE TO COJDPXAT ONOBO;
KpriCJIaEN KBApI, BOUINH, ZeMEnT IN DpyN TpaEckHH MatePnJHAN;
apceH N xPOMAT BO XEMHCN OpaBOTySAHO TJPBO. Pn3NKOT 3abOByaBe 3aBcHOn 0aTOKKY CECTO CTnAIOXeHN HOBIE CYCTAHN. 3aJa JAMANITE ONACHOCTA, TpeBa da pa6oHTe cAmO Bo DObOp npOBETpeHN pOCTOPMN COoJIIBETHa 3aUHTHn OIpeMa (HIp, CpCNEJINJHNO KONCHPTPAHn YpeHn 3aZuHTHn PnHnDHeE KOHN OHPTPNaT HAJCHTHnE YecTHNUpNpAB).


MaKeJIoHcKn | 159
Pn o6p8kata ha napyeto matepnj an moke da hactane noonHttenha bya, 10o MoKe da 3hEre c coooBETMepKu, KAKO ha npimpe KopHebe HA KOJauHNOH MATEpHaJIN, DOKONky ce nojabyBaat 3bUy Ha SBOHeBe Ha denot 10ce o6pabotya.
KopHCTeRo nHBeMaTCKHot anat, Taka uTo Ke co3aaba uTo eMOxO nOManky npab, H naCp. no HabnakHybahe HaMaTePjHaNOTU ro 06paBbYate.
KOKNY INEBMATCKN0T ANA HMA npduyBa, Tpe6a NoctoJHO DA KOHTponPate,DANH NPH KOPCTEto HA INEBMATCHNAT ANA HCTOT E MAeTO MDAH CE Haora BO DO6pa PObTHOA COCT6A.
BnmaHHeTO h BnOpaMInTe MoKe da nped3BaHk oWteYbHa ha HepBHe, npeKn BO KpBnata mKpyaunHa BO dAnKHKe H paete.
Hocete npnnnnepaKaBn. DpKnte od nHEBMATCKNt e anat CTaHyaBt naHn nopadn cTpyeHeto HA KOMnPecnchap B03dyx.TonHHe dHaHNc Ce nomAnky yBcBTBNTEN HbBbpaKnTe. Wpokite pakabHm MoKe da ce 3aafatao otipnApaKHTe denOBn.
KOKNY YTBPNTDEkA KOKAATA HA BAaHTe INPCTH Hn Hn DnHNHe Tpda,Beueua,60NnHcEo6OHa BO 6BnO, 3anpeJ a paotata co nHEBMATCKNtypeI, HBeCTeTo BAaHToPAbTOBaeu KONCyttnpaTe NEkap.
He ro dpxket e anatot 3a BMETHyBaH e 3a Bpe H a paboTeBto.
IeBbMAtcknTpyedipkTeRo co chrypeHΦaT, no OaHoc ha peakunckte CnHn HaanKATA. BnBpaunite MoKeJa cae aajKHAT,doKoJky NoBPCTo rDpKHe YEpoDT.
KoONkyce KopHCTaYHHBpaAHHPOTHaHKN CnoJHK (KaHueCTn CnoJHK),MOPa Da Ce BMeHTaN KHMOB3a 3aKnYyBaHe. KopKHeTe Whipheck-ocHRpyBaH 3a UpeBO,3a DA MATE 3aHTTA BO cnyuaj Ha deFeKT Ha NpOByBaHTo HA upeBO To cNHEMaTcKNOT anAT Hm MeFyBe6O cnObaJa HaupeBA.
He ro hocete nheBMATCKHOT anat dpKejKn Ro 3a upeBoto.
DOKKnyce 6nOKnpa HnEBMaTcKhot anat, HCKnyeTe ro eneKtprHnHOT anapat. BnDEte npETa3nHbCO BnCkNTe peakuCKN Mometn, WTO Moke da npednBHKaAT noBpaten ydp, AnATOT 3a BMETHBaIbe ce6nOKpA, DOKKNY:
-ce npeoontepen TnEBMaTcKNOT anat,
- e HAKPBNB BO OJNOH cHa npaero ITO ce obaObyBa
KNH
-H3JIeYBa Hn3dIeOT IO TO ce obaObyBa CbPBO.
KopHCTe NMOUHH CpeCTBa 3a npPhaT Ha peauKHKNTe MOMENTH KAKO Ha np. YpEd 3a NOTnopa. DOKoKy OBA e B03MOXHO, yNOTpe6Te DOnONHHTENA pUka.
HnKoraiu He nPnHecyBaTe DnAkhMe Bo 6n3Ha ha potpKaKnot anu Tc BmTHyBa. Moke da ce nobpeDte.
HejocabajteynypankataaTponaHaDenotWtoce 6pa6o7bya.ObaMoKeJaDnOBeJIO3HauHTENHO 3ajkyhBaHaheNBA6puaqne
O3HaKn
CneHnre 03hakn ce od rnoMe 3a KOPHCTe HTo Ha BAAHOT NHEBMATCKN anat. Be monHmte zanaMETe Tn O3haknt He HbHnOto 3aHaeBbCtHNCkata HHTepPiTaHa J HA O3haknt Bn Nomara nOdoBpo nNobe6eBHO da ro NHEBMATCKNOT anat.
03naka 3nauehe

PnoHTaJTe Hn BHHMabAJte Ha CHTe HANOMEH NpD MOHTAKATA, yNontpebata, nonpaBkata, oDPXyBaBeto H 3AmeHATA He NOBbO DN ONPemATA KAKO H pa6oteBe BO 6b3NHa HA NHEBMATKHe ANAH. DOKONKY He BHMMABATE Ha cneHInTE beshdNOCHHN HANOMEH HynatCTBA MOKe Da HactHaTc cepHOaHH nobpei.

Hoceteaawrrtaa cnycot. HnoxoeHOCTa hybaba moOeJa BnJhae naYbEeHOHa cNYcot.

Hocete3aHTTHO4Hna.
OBI_BUCH-2092-002.book Page 160 Thursday, February 23, 2017 11:46 AM
160|MaKeDoHcKn
| Ознaka 3начебe | ||
| SWF Бразстетагka rлава | ||
| ○ | Ознaka за ванатоша шостагона rлава | |
| ■ | Ознaka за Надовецна четимагогона rлава | Прифат на(analot) |
| UNF | Ознaka за метрички ситер Наво ( Unified National Fine Thread Series ) | |
| G (Плелд рунен цebен наво) | Вираворов Наво Наво на приклuyокт | |
| NPT | Конусан 出им Наво | |
Onnc Ha npoh3BODOT MOKHOCTa

IpoHTajTe HnCTe HANOMEH ynaTCTBa3a
6e36bHcT. PpeWkHTe HactaHaTH KAKO
pe3yNTAT OJ HENPDPKYBaHbE DO
6e36eHCHHTe HANOMEH NynaTCTBaMOKe Da
Pnepu3BnuKaateneKToHueyHvnapNoXapHnn
TENKIO NOBDOI.
Be MonNHr OTOpej Ja npeknONeHATA CTpAHUa Co npHKAA HAnHEBMATCKHOTANat, INdpketeJa TOBOPEHa DDOEKA rO YHTATEYNAFTCBOTA3yNOTPeBA.
Ynortpe6a co cooDBetHa HameHa
TNEBMATCKHOTANATEHAMEHET3aYdpHOdyneHeBO6eTOH, UHTNH KAMEH KAKO H3a 6HNO DnTeYBaHe.ToJ HcTO TAKA e NORoD93aDyueHe6e3ydpAHo BO dPBo,MeTaN,KepaMHKAn hnaTKnCA.
ENKPTONHEBMATCKNOT YKAH 3a DYNHEe b HAMEHET 3a npmeha BO CYBn HnAnhnn PocOtnpn KAKo n pa60TaHa otBOpeHO HA IIp. rAINIIITIA.
Hnyctpaunja Ha KOMNOHEHTN
HymeipkaIbeTo hAnckKtte Co mOnOHNHeC t eDnEcbya HnpAOK30 hNHEMaCKHOT anAt hPadNkAIta cTpanHb.
1PnDaaHa aataoT
2 Kanak 3a 3awthra od npab
3aypa 3a 3aknyyBaHe
4 Tenepytka-3a-bptka 3a noede cybaeHa He JdoJnoHHTENHATA dpuka
5 PteKHyBaH 3a 3aHpaHe Ha ydaH/Bptekn
6IpeKnHyBa3aBKnnyyBaHbe/ncKnnyyBaHBe
7 Dpkaa3a npkknyokot 3a doBoc0T 3a B03dyx
8 Hane3 Ha Bo3dyx Co npnyybaa
9 CnojHnua 3a qpeBO
0 DononHHTenHa dpka
1rpaHHHnK3aDna6OuHa
2 Dpka3auepeBO
3UpeBO3aIOBODHa BO3dyx
14 CnrypnohcHa 3aBprka 3a 3anuectata rnaaba 3a dynnebe
15 3aunecra maba 3a dynuehe
16 SDS-plus-BpAtnno 3a npHpaT3a rnaBata 3a dynpeHe
Onnhaata onpema npKaKaHa Ha cnKnHTe He e den oJ.
ctanapnHTo6emHaHcnopaka.KomnnteHaTaonpeMaMoKeJa
JaHaJDeTe BO HauTa PporpaMa 3a onpeM
HΦopmaunn 3a6yaba/Bn6paunn
Мерншемедноу за увая BA COGNACHOT co ENISO 15744.
HNOHO tBAyHK hHeBMATCKHOT anat, ouheTO coA, THMnHIO h3NecyBa: HNO b3yuey nptnTHCOK 89 dB(A): HNO b3yHuJaunHa 100 dB(A). HeCnHyPCHKT = K=3db
Hocete 3aunrta 3a cnyxot!
BkyTNHITE BpeDHOCTN Hb6pauHH a(BeKTOPCKN 36Op HA trPTEACOKN) IN HECHyRPHOCI K DaENH CE BO cOaNAcHOCT CO EN 28927:
Uyadno dyuene BO beron: a_1 = 5m / s^2 K = 1.0m / s^2 Αnytaybae: a_2 = 6m / s^2 K = 1.1m / s^2
Dyuebe BO metan: a_B < 2,5m / s^2,K = 1,5m / s^2
TexHHKn IoDaToU
| EnektronneWMSTCKHekan 3a dynche | ||
| bpoj ha den/apotmkn | 0607 557 501 | |
| maKc. bpoj ha bprtekni npri | ||
| npceontoBapyaBaie | min1 | 850 |
| bpoj ha yadpi | min1 | 3900 |
| Hn3eHa moK | W 740 | |
| ДиJaMeTAP ha dynckata MaKc: | ||
| - b eToH | MM | 20 |
| -ЧeLПК | MM | 13 |
| -ДрBo | MM | 30 |
| IpnDfA ha anatot SDS plus | ||
| maKc. pabOTeH npriTHcOK ha | bapn | 5 |
| anatot | psi | 72,5 |
| HaboJ ha pRnKnyOKOT ha | G1/4" | |
| upeBoto | ||
| Ширна ha upeBoto | MM 13 | |
| IporpoшУвачka ha bo3dux Bo | n/c | 15 |
| npaeeH ond | cfm | 31,8 |
| TeKhiHa cornaCHO EPTA- | Kr | 3,0 |
| Procedure 01:2014 | ФуHTa | 6,6 |
H3jaba 3a coo6pa3hOCT
TbpHMeHa concTeBaHa OJIOBOPHOCT,JaKa PpOH3BOyNTe
ONHsaHN BO,TexHnKn NoaToOn" ce cooBpa3HN Co
CnEHNTE HOpMN INN HopMaTHBNN
dokymen:EN ISO 11148 cnoepo oedpbrn ha pernyatbata 2006/42/EG.
1609 92A 33X(23.2.17) Bosch Power Tools


OBI_BUCH-2092-002.book Page 161 Thursday, February 23, 2017 11:46 AM
MaKeIaONcKn 161
TexHHUkaDokyMeHTaJIJa (2006/42/EC)npi:
Robert Bosch Power Tools GmbH, PT/ECS,
70538 Stuttgart,GERMANY
Henk Becker
Executive Vice President Engineering
Helmut Heinzelmann
Head of Product Certification PT/ECS

Robert Bosch Power Tools GmbH
70538 Stuttgart,GERMANY
Stuttgart, 01.01.2017
MOHTAXa
DOnonHHTenHa DpuKa (BnHcNnKa A)
Od63e6DnOCN HINPHHH, INHEBMATCKN0T ANa CT Mee da CE KOpHCTcMoCo MoTHHPaHa DOnONIHHTenHa DpIka 10.
ONONIHHTNHATA PIKU 10 MOKEJa ja BPTHE No JeN6ba,3a Da CNOBO3MOKNTe 63E6DHa H N EYMOPHa paDTa.
BpTe ja nenepyka 3aebpKata 3a nodecybahe Ha donoHTHnHnHa DpaK4 BO npabeu cnpOTHBn Ha CTpeKNITE OJ CACOBHKOT KCBPTe JOA CNOHNHTENHATA dpKa 10 BO cAKAHATA NOINJa. ITOra CBPTe ja nenepyka-3abPbTKa4 NOBtOPHO BO npabeu HC CTpeKNITE HA cAOBNHKOT.
Bo3dyx0bOa
CoBo3yXbOBOJOTMOJEaTOQBByATEH3yBHHToBO3yX H3E hO IeBOe 3a OBDHO B3xOyHbOOPD BaWETO pABOTHO MTOHCTOBPEMeHO Da NOCTHNEOTNHMANHO npdyuBaHe Ho 3EyKOT. CoToAKe rnoNOO6PnEpaTbONHE YcIOBN, B6JIeKb BAeTOpABOTHO MEO TNOBEKe HEMJa 6IHe N3BAkHo CO Bo3yX KOJ COpDKN MaCIO HIN PabO OH. cTpyr0HH.
- Ojripte ro pnoiuyuvaot HA knehtor 3a Boayx8, n 3amenhero ro c no cnojnhia 3a uepe9o.
Onababe ro npxayot 3a 12 ueboto 3a oBod HA BO3dyx , haupeTete ro ueboto 3a oBod HA BO3dyx Ha cnoHnua tata 3a uebo 9, npu uTo Ke ro 3auBpCTHe npkayot 3a uebo.
PnKnyuOK HAnojuBaHbeto Co Bo3dyx (BnH CnHa B)
BHHMABAJTe H aToa, BO3yUHINOT pNTHCOK, da He 6bNe HONH3OK d 5a6n (72,5 psi), 6MdekJH INBEMATCCKOT anat e KOHNCTpypan 3a oboj paoboteh pNTHCOK.
3a MaKcHMaHaJaHHa, Mpa Da Ce npNpKyBaTe, D0 BpeHIOCTte 3a uHpHHata Ha UpeBoto KAKO H HaboJOT Ha npKnyOKOT KAKo WTo e PaDEHO Bo TaBenata „Texnukn noaTOU". 3a Da cOpKn NnHATA JaHHa, KopHCTe CaMO UpeBA CoMAC.4MOnKHHa.
Bo dopehnhot kompechpan 8o3dyx He cme da HMA tyf n TaBnA, 3a Da ro 3aunHn TheBMatckNt and oD ouyTeBaHa, HeuCTOTno h coDaaba de P'ra
Hanomeha:Heonxodnoe HcnpctheBa He ednHuaTa3a odjpybahe Ha KOMnPecapacapoh BoayD.Oba 0b3mOkyBa becepnkphya dyhuiyua hnaheBmATckhte anan.
BHHMABAJe Hya nataCTbO 3a ynoTpe6a Ha eEHNHATA 3a OxybKaBa
CITEAPMTAYPH,KaBENCKH BPRCNHUIPEBA MOPA da6hJATAKACHONCTpyuPAHDAO TROBAPaHT HA pHTNtCOKOTnOTpe6HATAKONCHUNHAHO3DyX.
H368yBaJte CTeCHyBaIbe HA DOBDMHe BODBH HAp. co pHTNcKAbBe, npeBHKyBaIbe INHCTeRhyBaIbe!
DOKONKI CE BOYMHTNE, NOPBOPEE TO PRNTHCOKOT HBA30ET 3A 8032XJ CX MAHOMETAP K CO BIYUHEN IINBEMATCNK ANAT.
PnKnyOK 3a HanojyBahe co Bo3yX na HeBMaTcKhot anat
- 3aupaadete cnojHnHa 3a upe9 Na dpaJzauhe 3a nphKNUyHNa HOBoD0B 3a BO3DyoX7
3aJaK36BHeHrOUIryBaHa BA HbATpeUHHTe DEIOBN OJ, BEHNTHO HA NHEBMATCKHToAtn, pR3aIpaYbaHeto OITpAPyBAHeto HA CNOJHnuaTAta 3upeBo 9Tre6aJa pNTHHCHe HA DPPkAAeTA 3aKnPKVyOKTo 3aDOBOHa BO3dyX7COBVWvKAcKT KUY (UHPMHa KNYOT 22 MM).
OnababeTn HpKhnte 3a 12 upeBTO 3a DOBn HA 4DyX 13, H3aBPCTe TRe TO pEBOTo 3a DOBn HA BO3yX HA cnojHnIaTa 3a UpeB 9, npn WTO Ke TO 3aBPCHTe DPKQOT 3a UpeBO.
Hanomeha: Cekoraa Hajnpeo 3auepctete ro papeo 3a. DOB0Ha B03dx Ha NHEBMATCKNOT anar, a ITOA ha eHNHAta 3a OJPKyBahe.
BnpaheHa rnaBa 3a dynpebe H aalT
3a yadapoynyhebe n nytebaie (nyteybaie cmo co onpemaMV 200) noptbeben b e SDS-plus-anat, ufo ke ce BMthe BO SDS plus; maba tzaynyebe.
3a dhynehebe 63ydpnBIO npBO, Metan, KepAMHKn HnnaTnK aKnH 3a 3aauutadpybaHe/0bnpTyBaHe ce KopHcTat anAnh bE3 SDS plus (HaNP. dynnAnaK co yinHHpNHO BpaTHno). 3a obne anatot noptBeBA BN e 6bpOzateraYkra IraBa 3a dyynthee oH. 3aIyecTeA Tnaba 3a dyynthee.
3aMeHa 3aIueCTa rnaBa 3a dynueHe
3a da moke da paboHTe co anatn be3 SDS-plus (ha np. co ydnHAnka co UHHNpuHHO BPATHNO), Mopa da MOHTnate cooDBHeHa rna 3a dynehe (aanctcA HnBp303aTe3Ha rnaa 3a dynehe, onpeMa).
Montpauré Hau 3a anyche Ta rnaa 3a dynyche (BnHcnka C)
3aupadete ro SDS-plus-bpHnOto 3a npHpa16 Bo 3aunecrata rnaaba a3ynuehe15.3aupcTeTe ja 3anueTata rnaaba a3ynuehe15 co chryphoCHA 3abPTKa 14.BHHMabaje chryphoCHATA 3abPTKa da HMA NEB haboj.
BMetnyBaBe Ha 3auectata rnaBa 3a dynuebe (BnH cnka D)
- IcHCTETe RO KApOJ 3a BMETHyBaHe h B aPHTNtO 3a pHpDAt MANKY HAMACOTE FO.


OBI_BUCH-2092-002.book Page 162 Thursday, February 23, 2017 11:46 AM
162|MaKeDoHcKn
-3aunecrata rnaaba 3a dynuebe co bparthnofo 3a npdpat crabe ie ja co prtebe BO pnpdato1 3a aiat,dokeca camata he ce 3aknyu.
-Поверете дади зakууна с оление на зацентая ر�а за дунчес.
Baedehe haaaneecata rnaaba 3a dnuene
- Tpyheta je yaprata 3a kanyuhybahe 3 nuahazjid n baeade a jyaucehtra fnaha 3a dyunyehe 15.
3aMeHa Ha anaTOT
Kanakot 3a 3auTnTa o npab 2 ro cnpyBu habneryBaHeto h naPbta koja ce cozada npu dnuHcTe BO npimpatot Ha anatot. 3a0na pynotepaba h anapatot npobepete da n Kanakot 3a 3auTnTa o npab 2 e ouTtere.
OuTeTHeNtO Kanak 3aAHTHa OJnpab BeHnH Tpe6a Da ce ZAMEn. Ce npopayBa OBA da c H3Bpwn Od cTpaHa oepCBnHata ChnyKJ.
CTabete SDS-max anat 3a BMeTHyBaHe (BmHcnHKaE)
Co SDS-plus-nabaataa3dynmheMOKKETeEHDnOCTABHO necho6e3KOPKHeBeHaDononHHTENHAnTHaTIOA TO 33MEHNEI ANOTI ITO CE MBHTySA.
- NCHCCTETeTOKPajT3aBMETHyBaBeHaNAtOTIooCE BMETHyBAHANKYHAMACTETeTO.
- Anatolto IITTO BO BMETHAYATE CTABE TO CPOBHe NOIphatoHn HAnat, DOneka CaMOT He CE 3AKVUY.
Pipoepee dan e 3aknyeh co Bnehe ha anatot. Co SDS-plus-anatot uto ce BmeHTyMOA beco cnoDHO Da ce Mahebnpa,ycnoBHe oH CTcHemT. TaKa, npn pnaeeoh Od Hacanyba otctanbya he oKpykHHOTek.Oba Hema BNJaHae Ha npreeuHCTa Ha dyHeneToHa DYNkata, 6BeJeKnynDaNkata ca me CEtHnPa npn DnyHTeHo.
H3baTe ro SDS-max anatot 3a BMeTHyBaHe (BnD CnKa F)
- Typhene je yauparata 3a kauynuabaie 3 hanaadn i bnaedeae a jaiuetae tata rnaa 3 daynupe.
CTabahe Ha anat 3a BMETHyBaHe 6e3 SDS-plus
HanomeHa:He Kopnctete anatn 63e SDS-plus 3a ydpno
ynphe hnn ndyteybae!Anatnre 63e SDS-plus n npabaata 3a
nypehe uio ja kopneke ce ootetat npynaphto
ynphe hnn nyteybae.
BmHETe3nAeTnBa 3aDynHe 15 (BmN.3Ameha 3aHa3eTaTnBa3aDynHe",ctsra1161)。
CoBPTHe OTeBOPeJa aIaHcTATA rNaBa aaDyUHe 15
doKeHa He oTeBOpHa da MoKe da ce CTAB anatot.
BMHTeTo raanot.
Knyot 3a 3aterahe Ha nlaaba 3a dynneHe CTABeTe Ro 80 CooDBHTHE TOBnHa 3aIyecTata Ta nba 3a dynuHe 15 13ateret He anatot.
Baede he ha anatot 3a BmETHybahe 6e3 SDS-plus
Cbprejaaypatahaaianeectataanaba3aynnehe5cnoomnHa knyoT 3a taterbca harnaba 3aynbteBa BO npabein cnptoBHe HA ctpnKite HA caoBHKOT,doNeKa He ce bAdn anat03aBMTHyaBe.
Ynotpe6a
CtBaBHe Bo ynotpe6a
THBMEATCNOT ANA pAOBTH OTMMHNO pNp PAOtEN pNTHCOK 5 6 nap(72 psi), MNEpeHO HA Bne303a BO3xyn BNKUYNEH BMEATCN ANAT.
PoeecyBaHe Ha NaHnHOT Ha pa6oTa
CoIpeKHHauyOHT 3aIaHnapeHaY naHApDToBpTeHO 5To 6bapHe NaHHTa HpaOba HA pIHbEMATCKNOT anar.
Hanomeha: IpOMeHETe Ro hauHHOTHa pa6bota cMoDOKONKy nHEBMATCKN0T anat e HcKlnyeh! HnAky nHEBMATCKN0T anat MOKe DA CE OUIETNI.
CpTeTe ro npeknHybaor 3a 3anHpaie H ydpHToBpeTeHO 5 Bo cakahata no3nHjia.
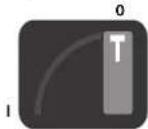
PnHJHa3aDyuehe63ydpnB0 DpRo, Metan, KepAMKa nnaTHe KaKoN3a 3aaupybahe/ogbTpBahe
图
PnoaJaaNetaybahe
Bknyybahe/ncknyybahe
3a da ce 3aaieire n eepnja, bknyyabje ro nheBMACTKNOH anat cmoDokonky oR KOHPCTNE.
-3aBknyuBaHeHaIeBHcMAtckHOTanATnpTHCHteTo npKekyHbAHToBkNkyuBaHeHcKNYuBaHe6nDpKeTe RO pNTHCHt3aBpeMe HaPabOHTNOPOue.
- 3a KcnhyBaBe NaHEbMaKCHOTAnat,OnywnTeT ro npexkHytoBtA BcKHyBaBe/HckNyyBaBe 6.
Cobem npaaboTebeTo
OTOnBaByBaIbATAIIOKe HACTAHOpOeHdAa3Bp3aHO rHAMAYBaAT BTeKHNMOmtCHINPepDnBkYBaAT coCTBaH MaHpyBaHe, HO He MY IITETAt HA MOTOPOT.
PoeecyBahe hA rpanuHnKoT 3a dna6oouna (BnD CnKa G)
CoTpaHINHIOK3aIbOuOHnHa 1MOKe da ce YTBpHnDaIbOuIHHTa HauYBtuee6.
- Onaabaete ja enepetyka-3abpKtata 4 ha dononHHenHATA daika 10.
IaBnepeTo rpoAunHnKo3 aDnabOuHnHO do roTcneH, DaOnroBaHa pactoJnHHeTo Ha cakHaTa nDaobouHa Ha dyuHbe MeY bPbOT Ha dyuHaKaTuHa H bPbOT Ha rpaHnHKnKo3 aDnabOuHnX.
-NoBtOpho3aUbpcTeie ja nenepyTKa-3abpTkata.


Srpski 165
Pneumatski alat se nesme menjati. Promene mogu umanjiti delotvornost sigurnosnih mera i povecati rizik za radnika.
Servi
Neka Vas pneumatski alat popravlaismo strucno osoblji sa amo sa originalnim rezervim delovima. Time se obezbedjuje, da ostane saucvana sigurnost pneumatskog alata.
Napomene za sigurnost za pneumatski cekic za buşenje
Prekontrolisè da li je tipska tabistica citijiva. Udatom slcuajpobrinse za se zanmu od proizvodaçá.
Pri prelomu radnog komada ilnekog od delova pribora ilii samog pneumatskog alata mogu se delovi izbaciti napolje velikom brzinom.
Prilikom rada kao iradova popravke ili odrzavanja i pri promen delova pribora na pneumatskom alatu morate uvek nositi zaistitu za oki koja je opturna na udarce. Stepen potrebne zaistte trebao bi se posebno procenjivati za svaki povedinaac slucaj.
Nosite zašitini šlem, kada izvodite radove iznad glav. Tako Čežić povrede.
Upotreblavajte pneumatski alat samo, kada je dileto obezbedjeno od ispadanja. Upotrebljeni alat moze inace da odleti.
Pohabane, izvijene ili molijene delova prihvata za alat morate zameniti. Tako cete izbeci povredre.
Stavite pneumatski alat stabinna povrsiu koju treba. aberriti, pre nego stukljucite pneumatski alat.
- Radnik i osoblje odžavanja moraju psihicki da budu u stanju, da rukuju veilčinom, težinom i snagom pneumatskog alata.
Budite svesni neocekivanih Pokreta pneumatskh alata, koji mogu nastati usied reakcionih sili ilomm pneumatskog alata. Cvrost i dobro drzite pneumatski alat i dovedite Vase telo i Vase ruke u poziciju u kojo mozezte da docekat ovePokrete. Ove mere opreza mogu izbejd povredre.
Oprez! Umetnuti alati mogu u duzmem radu pneumatskog alata da budu vreli. Upotreblavajte zahtne rukv创业板。
Prinekom prekidunabdevanja vazduhomi il redukovanom radnom komadu iskljucujse s pneumatsi alat. Prekontrolisie radni pritsik i startujte ponovo pri optimalnom radnom pritisku.
Kod upotrebe pneumatskog alata moze radnik pri izvodjenju da spozna neprijatne osceaje u rukama, sakama, podruci grla iii na drugim delovima tela koji su vezani sa ovm poslom.
Zauznite za rad sa ovim pneumatskim alatom neku odobnu posiciju, pazite na sigurno drzanje i izbegravajte nepovojnne posjcije ili taki kod kojih je teško, odžavati ravnotežu. Radnik bi trebiao za vreme dužeg rada da menje drzanje tela, što moze pomoci, da se izbegnu nepriastnosti i umor.
Ako radnik primeti simptome kod sebe kao na primer kontinuiran nevolun, tegebe, lupanje rca, bol, razdrazljivost, gluvocu, zenje li ukočenost, ne bi trebao da ignorisete ove opominjuce znake. Radnik bi trebao da ih saopsti svome poslodavcu i da konsultju nekog strucnoğ medicinara.
▶ Nikada ne koristite dileto kuo ruc alat. Dlete su termikič bradjena i mogu se polomiti.
Upotreblavaje Same ostra dleta. Kod tupih upotrebljenih alata moze to ulcati na jake vibracije i lomove usled zaramanja materialija.
Nehladite nikada vre delove pribora u vodi.Ovo moze uticati da budu krti i na prevremeno otkazivanje.
Ne koristite dleto kao polugu. Moze se slomiti.
Uptrebljavite pogodne aparate za detekciju, da bi uli u trag skrivenim vodovima naubdevanja, il pozivite za mesno drustvo za napajanje. Kontakt sa elektricnim vodovima moze vocili patrii elektronicn udaru. Ostecanje nekog gasovoda moze vocili ekplozji. Prodiranje u vod sa vodom prouzroko维奇 ostecanje predemeta.
Izbegavaje kontaksa vodom koji provodni napon. Pneumatski alat nije izolir i konkat sa Jednim vodom koji provodni napon maybe utcai na elektrichi udar.
UPOZORENJE Prasina koja nastaje pri smirglanju, testerisanju, brusenju, busenju i slichim radovima moze uticatna pojavu raka, na promene u nasledju ili ostetiti plod. Neke materije koje se nalaze u ovim prasinama:
-Olovo u bojama i lakovima koje ga sadrze;
Kristalna silikata zemija u opeci, cementu i drugim radovima izdarara;
- Arsen i hromati u hemijski obradjenom drvetu.
Rizik od obolevanja zavisi od toga, koliko Cesto ste izlozeni ovim materijama. Da bi smanjili opasnost, trebali di da radiste samu o dobro povetrovren protorijami sa odgovarajucom zašitinom opemorn (na primer sa specjalno konstruisanim zašitinim uredjajima za disanje, koji i najmanje cestice praseine filtriraju).
Kod rada na radnom komadu moze nastati dodatno zvucho opterecenje, koje se moze Izbeci pogodnim merama, kao na primer koriscenjem materijala za prigusivanje kada se pojav ziuvk zvonjenja na radnom komadu.
Radite sa pneumatskim alatom tako, da bude sto manje praseine, na primer vlazenjem materijala koji se obradjuje.
Ako pneumatskialatraspolaze sajednim prigusivacem zvuka, mora se uvek osigurati, da je onu radu pneumatskog alata tuinalazi se udobrom radnom stanju.
Delovanje vibracija moze izazvati ostecenje zivaca i poremecaje u cirkulaciji krvi u rukama i sakama.
Nosite rukavice koje usko nalez. Drske pneumatsikh alata se hlade usled strujanja vazduha pod pritiskom. Tuple ruke su neoseetljivije na vacbraje. Siroke rukavice mogu biti zahavcene od rotirajuich delova.


166 | Srpski
Ako utvrdite da koza na Vasim prstima ili rukama pecka, boili il se boji u belo, obustavite rad sa pneumatskim alatom, obavestite Vaseg poslodavca i konsultujte nekog lekara.
Ne drzite cvrsto upotrebljeni alat za vreme rada.
Ne drzite pneumatski alat sa suviye cvrstim, medjutim sigumim hvatanjem odzavajuci potrebnu reakcionu snagu ruke. Vraciie se mogu pojacati, sto cvrse drzite alat.
Uslacaju da se koriste univerzali rotirajuci spojevi (kandzaste spojnice), moraju se upotrebiti i civilice za blokaduk. Ako upotreblavate Whipcheck-osiguranje creva, da bi pruzili zastitu zu slacuj otkazivanja veze sa pneumatskim alatom ilreva medjusobom.
Ne nosite nikada pneumatski alat za crevo.
1sklucie pneumatski alat odmah ako umetnuti alat blockira. Budite spremni na velike reakcione momente, kojimogu prouzrokovati povratan udarac. Umetnuti alat blockira kada:
je pneumatski alat preopterecen,
je iskosen uradnom komadu koji se obradjue ili
- prolazi sa vrhom kroz materijal koji treba obradjivati.
OBI_BUCH-2092-002.book Page 167 Thursday, February 23, 2017 11:46 AM
Srpski 167
5 Prekida za udarce/zaustvilanje okretanja
Henk Becker
Executive Vice President
Engineering
Helmut Heinzelmann
Head of Product Certification
PT/ECS

Robert Bosch Power Tools GmbH 70538 Stuttgart, GERMANY Stuttgart, 01.01.2017
Montaža
Dodatna drska (pogledajte silku A)
Pneumatski alat iz sigurnosnih razloga smete da upotreblavate sa mona smitranom dodatnom drskom 10. Vi mozete dadatu drsku 10 po zeji iskrenuti, da bi postigligi sigurno i za ruku nezmamarajuce dranje nu radu.
- Okrenite leptir zavrtanj za podesavanje dodatne drske 4 nasuprot kazaljke na suti liskrenite dodatnu drsku 10 u zejenu poziciju. Posle toga stegnite leptir zavrtanj 4u pravcu kazaljke na sutu cvrsto.
OBI_BUCH-2092-002.book Page 169 Thursday, February 23, 2017 11:46 AM
Srpski 169
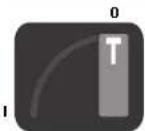
Pozicija za buşenje bez udaraca u drevetu, metalu, keramici i plastici kao i zauvtanje.

Pozija za stemovanje
OBI_BUCH-2092-002.book Page 173 Thursday, February 23, 2017 11:46 AM
Slovensko|173
Henk Becker Helmut Heinzelmann Executive Vice President Head of Product Certification Engineering PT/ECS

Robert Boch Power Tools GmbH 28032, Germany
70536 Stuttgart, CEBMENT Stuttgart, 01.01.2017
OBI_BUCH-2092-002.book Page 179 Thursday, February 23, 2017 11:46 AM

Hrvatski 179
Simbol
Znacenje

Nosite zaistitne naoicale.
| W | V | a | t | S | n |
| Nm Njutnmetar | Jedinica za energiju (okretni moment) | ||||
| kg | Kilogram | Masa, težina | |||
| Ibs | Funte | ||||
| mm Milimetar Düzina | |||||
| min | Minute | Vremenski razmak, trajanje | |||
| s | Sekunde | ||||
| min-1 | Okretaja ili gibanja u minuti | Broj okretaja pri praznom hodu | |||
| bar | bar | Tlak zraka | |||
| psi | funta po kvadratnom palcu | ||||
| I/s | Litara u sekundi | Potrošna zraka | |||
| cfm | kubična stopa po minuti | ||||
| dB Decibel | Jedinica za relativnu jačinu zvuka | ||||
| QC Brzoizmjenjiva stezná glava | |||||
| ○ | Simbol za unutarnji šesterokut | Stezać alata | |||
| ■ | Simbol za vanjski Četverokut | ||||
| UNF | US-sitni navoj (Unified National Fine Thread Series) | ||||
| G | Withworthov navoj | Priključni navoj | |||
| NPT | National pipe thread | ||||
Opis proizvoda i radova

Treba procitati sve napomene o sigurnosti i upute. Ak se ne bi postivale napomene o si gurnosti i upute to bi moglo urozkovati strujni udar, pozar i/ili teke ozljede.
OBI_BUCH-2092-002.book Page 180 Thursday, February 23, 2017 11:46 AM
180|Hrvatski
Henk Becker
Executive Vice Pres
Engineering
Helmut Heinzelmann
Head of Product Certification
PT/ECS

i. V.k = W_C
Robert Bosch Power Tools GmbH
70638 Stuttgart, GERMANY
Stuttgart, 01.01.2017
Montaža
Enntarvikute paigaldamist, kai
vahetamist, samuti enne suruohutoorista laheduses totamist lugege laib kolk juhsed. Jargnevate ochusnoueteiramise tagajareks voivad ola rasked vigastused. Hoidke ochusnouded hoolkalt alles ja edastage needseadet kasutavale isikule.
Ohutus tokohal
OBI_BUCH-2092-002.book Page 185 Thursday, February 23, 2017 11:46 AM
Sumbol
Tahendus

Kandke kuhnulmiskalsevahandeid. Mura vobl kahjustada kuhlist.
Kandke kaitseprille.
| W | v | a | t | i |
| Nm njutonmeeter | Energieäuhik (pörderMoment) | |||
| kg | kilogramm | Mass, kaal | ||
| Ibs | nael | |||
| mm millimeter Pikkus | ||||
| min | minut | Ajahemik, kestus | ||
| s | sekund | |||
| \( min^{-1} \) | pöret völi likumist minutis Tühikägupördd | |||
| bar | bar | Öhusurvey | ||
| psi | naela ruutillo kohta | |||
| I/s | liitrit sekundis | Öhukulu | ||
| cfm | kuupjalga minutis | |||
| dB detsibell | Suhtelise helitugevu-see ühik | |||
| QC Kärivahetuspadrun | Padrun | |||
| O | Sisekuuskandi sömbol | |||
| Välisnelikandi sömbol | ||||
| UNF | US peenkeere( Unified National Fine Thread Series) | |||
| G | Whitworth-keere | Ühenduskeere | ||
| NPT | National pipe thread | |||
Henk Becker
Executive Vice President Engineering
Helmut Heinzelmann
Head of Product Certification
PI/ECS
iV. k = m _____
Robert Bosch Power Tools GmbH 70538 Stuttgart,GERMANY Stuttgart,01.01.2017
Montaaž
Lisakaeptide (vt jeonist A)
OBI_BUCH-2092-002.book Page 198 Thursday, February 23, 2017 11:46 AM
198|Lietuviskai
| Simbolis Reiksmé | ||
| min | Minutes | Laiko intervalas, trukme |
| s | Sekundés | |
| \( \mathbf{min}^{1} \) | Sükiy arba judesiyy skaičius per minute | Tusčiosios eigos sükiy skaičius |
| bar | bar | Oro slegis |
| psi | Svary kvadratiniam coliuì | Orso sagnaudos |
| l/s | Litru per sekundʒ | Oro sagnaudos |
| cfm | Kubiniy pèdu per minute | |
| dB Decibelas | Specialus garso santiyykinio stiprumo vienetas | |
| QC Greilojo keitimo griebtuvas | ||
| ○ | Vidinio šesiaibriaunio simbolis | Irankiu jtvaras |
| ■ | Šorinio keturkampio simbolis | |
| UNF | US smulkusis sriegis(angl., „Unified National Fine Thread Series") | |
| G | "Whitworth" sriegis | Prijungimo sriegis |
| NPT | „National pipe thread“ | |
Gaminio ir techniniu duomenu aprasas

Executive Vice President Engineering
Heimut Heinzelmann
Head of Product Certification PT/ECS

iV. k = m _____
Robert Bosch Power Tools GmbH
70538 Stuttgart,GERMANY
Stuttgart, 01.01.2017
Montavimas
Papildoma rankena (Zr.pav.A)
Pneumatinj jrankj del saugumo leidziama naudoti tik su primontuota papildoma rankena 10.
Papildomā rankena 10 galite pasukti j norimā padétj, kad buty patogu dirbti.
Sukdami pries laikrodzio rydkle atalsvinkite sparnuotaji varzt4 4ir pasukite papidom rankena 10j norima padetj. Paskui uzerzkipte sparnuotaji varzt4 sukdamijpagal laikrodzio rydkle.
Iseinancio oro nukreipimas
Su panaudoto oro nuvedimoistema per ore isleidimo zarni i jus darbo vietos galima nuvesti panaudota ori ir tuo paiciu pasiekti optimalaru garso slopinimbe. Be to, tai pagerins jusur darbo salgys, nos darbo vietos oras nebebus usterstas alya var in neisukus sukuriais dulkes ar droles.
- Is ori isleidimo angos 8 issukite garso slopintuvjir pakeiskite jj zarnos jmova 9.
- Atlaisvinkite oroi isleidimo zarnos apkaba 12, pritvirtinkite oroi isleidimo zarna, naudodami zarnos jmov9, ir uzerkite zarnos apkaba.
Prijungimas prie suslegto oro tiekimo sistemas (zr.pav.B)
Atkreipike demesi, kad oro slegis turi buti ne zemesnis kaip 5 bar (72,5 psi), nes pneumatinis irankis sukurtas tokiam darbiniam slegiui.
Kad jrankis veiktu didziausiu naumu, butina lakytis nustatuy zarnos vidinio skersmens bei jungiamojo sriegio vertiu.
kaip nurodya, Techniina duomens* lenteje. Siekiant ilaikyti didziausia jrankio nasuma, reikia naudotine ilgesnes kaip 4 m ilgo zarnas.
Siekianta pausogati pneumatinj rankj nuo pazeidimo. uztseri mir rudijimo, naudojamame suslgetamo ore turi nebuti pa salini medziagu daleli i drgemes.
Nuoroda: būtina naudoti suslęgto oro parušimo bloká. Toks JtíasAS GARANTUJA nepriékaistinga pneumatiniu jrankiu veikimā.
Vykydkite suslegto oro paruosimo bloko naudojimo instrukci-joje pateiktus nurodymus.
Visos armatiros, jungiamiei vamzdynai ir zarnos turi buti tinkami darbiniam slegiui ruslegto oro sanaudoms.
Venkita vamzdynu susiaurejimu, kurie atsiranda del suspaudi mo, perlenkimo arba traumatimo!
Jeigu abejoate, patikrinkite oro slegi oro tiekimo angoj menometru, kai pneumatinj jrankj veikia apkrova.
Suslégto oro tiekimo sistemas prijugimas prie pneumati-nio jrankio
Uzukite zarnos jmova 9 ant jungiamojo atvamzdizo ortokeimo angoe 7.
Siekian isvengti pneumatino jrankio vidinii voztuo daliu pazeidimuj, uszukdami ir atsukdami zarnos jmova 9 ant iš-sikiusio tungiamo atvamzdio oro tiekimo angoje 7, pri-laikykitjungti, kad ji nesisuktu, verziarakcu (rakto plotis 22 mm).
- Atlaisivinkite oro tiekimo zarros 13 apkaba 12, pritvirtinkite oro tiekimo zarmaant zarnos jmovos 9 ir uzverzkite zarros apkaba.
NuoroDA: visada is pradziuy oro tiekimo zarnaj prijunkite prie pneumatinio jrankio, o po to prie susiegto oro paruosimo bloko.
Griebtuvo ir irankio parinkimas
Norint grezti su smugiu ir kirsti (kirsti tik su papildoma jrangav MV 200), reikia SDS-plus jrankiu, kurie jstatomi jSDS-plus griebtuva.
Norint grezti be smugio medienoje, metale, keramikoje ir plastike bei norint sukti var2tus, reikia naudoti ne SDS-plus sistemas jrankius (pvz, gra?tus su cilindriniu kotu). Siems jrankiams reiks greitojo uzerimo griebtuvo arba vainikinio griebtuvo.
OBI_BUCH-2092-002.book Page 204 Thursday, February 23, 2017 11:46 AM
204|中文
符号含义
惠氏一 惠氏-螺纹
螺纹
国家管 国家管螺纹
螺纹
接头螺纹
产品和功率描述

Executive Vice President Head of Product Certification
Engineering PT/ECS

Robert Bosch Power Tools GmbH
70538 Stuttgart, GERMANY
OBI_BUCH-2092-002.book Page 206 Thursday, February 23, 2017 11:46 AM
206|中文
OBI_BUCH-2092-002.book Page 207 Thursday, February 23, 2017 11:46 AM
中文|207
资料:
www.bosch-pt.com
OBI_BUCH-2092-002.book Page 210 Thursday, February 23, 2017 11:46 AM
210|中文
Executive Vice President Head of Product Certification
Engineering PT/ECS

Robert Bosch Power Tools GmbH
70538 Stuttgart,GERMANY
Stuttgart,01.01.2017
1609 92A 33X (23.2.17) Bosch Power Tools

中文|211
安装
輔助手柄 (參考插圖A)
OBI_BUCH-2092-002.book Page 212 Thursday, February 23, 2017 11:46 AM
212|中文
OBI_BUCH-2092-002.book Page 213 Thursday, February 23, 2017 11:46 AM

中国文|213
资料:www.bosch-pt.com
OBI_BUCH-2092-002.book Page 215 Thursday, February 23, 2017 11:46 AM
中国银行|215
→
击 士贝士贝贝贝贝贝贝贝贝贝贝贝贝贝贝贝贝贝贝贝贝贝贝贝贝贝贝贝贝贝贝贝贝贝贝贝贝贝贝贝贝贝贝贝贝贝贝贝贝贝贝贝贝贝贝贝贝贝贝贝贝
北贝贝贝贝贝贝贝贝贝贝贝贝贝贝贝贝贝贝贝贝贝贝贝贝贝贝贝贝贝贝贝贝贝贝贝贝贝贝贝贝贝贝贝贝贝贝贝贝贝贝贝贝贝贝贝贝贝贝贝贝贝贝贝贝贝贝贝贝贝贝贝贝贝贝贝贝贝贝贝贝贝贝贝贝贝贝贝贝贝贝贝贝贝贝贝贝贝贝
「元函韵告有云是元,越士,默默土,。
A 1
-達名,則在上之和日土云,也云云:
OBI_BUCH-2092-002.book Page 216 Thursday, February 23, 2017 11:46 AM
216|
| 기主机 | ||
| I/s | 主机端 RIter | 公差 S-MAK |
| cfm | 端部端部端部 | |
| dB max值 | ||
| QC通道 | ||
| ○ | 6颗天线 | |
| ■ | 无线天线 | |
| UNF | US line thread ( Unified National Fine Thread Series) | |
| G | Whitworth thread | |
| NPT | National pipe thread | |
新

本在阿正消和志社山歌自到
水歌电电电电电电电电电电电电电电电电电电电电电电电电电电电电电电电电电电电电电电电电电电电电电电电电电电电电电电电电电电电电电电电电电电电电电电电电电电电电电电电电电电电电电电电电电电电电电电电电电
图定图
是,
藏,德上合,
蕃的孕皂
OBI_BUCH-2092-002.book Page 217 Thursday, February 23, 2017 11:46 AM


中国文|217
樊志轩 2006/42/EG)
Robert Bosch Power Tools GmbH, PT/ECS, 70538 Stuttgart, GERMANY
Henk Becker Helmut Heinzelmann
Executive Vice President Head of Product Certification
Engineering PT/ECS

iV. k = m _____
Robert Bosch Power Tools GmbH 70538 Stuttgart,GERMANY Stuttgart.01.01.2017
丕
本至全章(A)
在藻藻园是的,为本页的10页。
藻藻藻藻藻藻藻藻藻藻藻藻藻藻藻藻藻藻藻藻藻藻藻藻藻藻藻藻藻藻藻藻藻藻藻藻藻藻藻藻藻藻藻藻藻藻藻藻藻藻藻藻藻藻藻藻藻藻藻藻藻藻藻藻藻藻藻藻藻藻藻藻藻藻藻藻藻藻藻藻藻藻藻藻藻藻藻藻藻藻藻藻藻藻藻藻
删加拉
OBI_BUCH-2092-002.book Page 218 Thursday, February 23, 2017 11:46 AM
218|
默斯丽的歌
用时默伊摇2是三德利宫用,当呈造者,默时责之,默。
是则为凿,默时责之,默时责之,默时责之,默时责之,默时责之,默时责之,默时责之,默时责之,默时责之,默时责之,默时责之,默时责之,默时责之,默时责之,默时责之,默时责之,默时责之,默时责之,默时责之,默时责之,默时责
OBI_BUCH-2092-002.book Page 219 Thursday, February 23, 2017 11:46 AM
mnnn219
默默默默默默默默默默默默默默默默默默默默默默
http://www.bosch-pt.com 品
本刊AS及其相关内容
OBI_BUCH-2092-002.book Page 221 Thursday, February 23, 2017 11:46 AM
221
OBI_BUCH-2092-002.book Page 222 Thursday, February 23, 2017 11:46 AM
222mnn
B
Daeuunnueauunnnnneunnnnneun nnnnnnneennnnnnnnnnnnnnnnnnnnnnnnnnnnnnnnnnnnnnnnnnnnnnnnnnnnnnnnnnnnnnnnnnnnnnnnnnnnnnnnnnnnnnnnnnnnnnnnnnnnnnnnnnnnnnnnnnnnnnnnnnnnnnnnnnnnn nn
-
一
aannnnnne aannnnnnae annnnnne
1 1
aannnnnnae annnnnne aannnnnne nnnn
aaiiaaaanannnnnnaaannnnn
mua
yannnnnnaaennnnnnnnnnnnnnnnnnnnnnnnnnnnnnnnnnnnnnnnnnnnnnnnnnnnnnnnnnnnnnnnnnnnnnnnnnnnnnnnnnnnnnnnnnnnnnnnnnnnnnnnnnnnnnnnnnnnnnnnnnnnnnnnnnnnnnnnn
aannnnn

nannnnn nnnnnn nn nnnnnn nnnnnn nnnnnn nnnnnn nnnnnn nnnnnn nnnnnn nnnnnn nnnnnn nnnnnn nnnnnn nnnnnn nnnnnn nnnnnn nnnnnn nnnnnn nnnnnn nnnnnn nnnnnn nnnnnn nnnnnn nnnnnn nnnnnn nnnnnn nnnnnn nnnnn nnnnnn nnnnnn nnnnnn nnnnnn nnnnnn nnnnnn nnnnnn nannn nannn nannn nannn nannn nannn nannn nannn nannn nannn nannn nannn nannn nannn nannn nannn nannn nannn nannn nannn nannn nannn nannn nannn nannn nannn nannn nannn nannn nannn
y

nunuueeauo
a
anuuaaunauusuuuauuauuauuauuuuuuuuuuuuuuuuuuuuuuuuuuuuuuuuuuuuuuuuuuuuuuuuuuuuuuuuuuuuuuuuuuuuuuuuuuuuuuuuuuuuuuuuuuuuuuuuuuuuuuuuuuuuuuuuuuuuuuuuuuuuuuuuuuuuuuuuuuuuuuuuuuuuuuuuuuuuuuuuuuuuuuuuuuuuuuuuuuuuuuuuuuuuuuuuuuuuuUU
1
2n
3 1
4
5
6 5
7
8 7
9
10
11
12
13
1609 92A 33X (23.2.17) Bosch Power Tools


OBI_BUCH-2092-002.book Page 223 Thursday, February 23, 2017 11:46 AM
mnnn223
14 angnssuunwouwduWoo
15 1
16 nuuSDS-plus
nannnnnnnnnnnnnnnnnnnnnnnnnnnnnnnnnnnnnnnnnnnnnnnnnnnnnnnnnnnnnnnnnnnnnnnnnnnnnnnnnnnnnnnnnnnnnnnnnnnnnnnnnnnnnnnnnn
yuaunuuaaun
nauuunnnnnn en ISO 15744
Henk Becker
Executive Vice President
Engineering
Helmut Heinzelmann
Head of Product Certification
PT/ECS

Robert Bosch Power Tools GmbH 70538 Stuttgart, GERMANY Stuttgart, 01.01.2017
nnu
nunu (nnununau A)
10 10
nnaaannnnnnaaennnn 4 nnnnnnnnnnnnnnnnnnnnnnnnnnnnnnnnnnnnnnnnnnnnnnnnnnnnnnnnnnnnnnnnnnnnnnnnnnnnnnnnnnnnnnnnnnnnnnnnnnnnnnnnnnnnnnnnnnnnnnnnn
taunvuaaayaaan
nannnnnnnnnnnnnnnnnnnnnnnnnnnnnnnnnnnnnnnnnnnnnnnnnnnnnnnnnnnnnnnnnnnnnnnnnnnnnnnnnnnnnnnnnnnnnnnnnnnnnnnnnnnnnnnnnnnnnnnnnnnnnnnnnnnnnnnnnnnnnnnnnn
- 19840000000000000000000000000000000000000000000000000000
- 12000000000000000000000000000000000000000000000000
OBI_BUCH-2092-002.book Page 224 Thursday, February 23, 2017 11:46 AM
224 mnnn
nnaaannnnnnnnnnnnnnnnnnnnnnnnnnnnnnnnnnnnnnnnnnnnnnnnnnnnnnnnnnnnnnnnnnnnnnnnnnnnnnnnnnnnnnnnnnnnnnnnnnnnnnnnnnnnnnnnnnnnnnnnnnnnnnnnnnnnnnnnnnnnnnnnnnnnnn
nannnnnnaaannnnnnnnnnnnnnnnnnnnnnnnnnnnnnnnnnnnnnnnnnnnnnnnnnnnnnnnnnnnnnnnnnnn
7 1234567890123456789012345678901234567890123456789012345678901234567890123456789012345678901234567890123456789
12 13 14 15
OBI_BUCH-2092-002.book Page 228 Thursday, February 23, 2017 11:46 AM
Pakailah kaca mata pelinding.
OBI_BUCH-2092-002.book Page 230 Thursday, February 23, 2017 11:46 AM
OBI_BUCH-2092-002.book Page 232 Thursday, February 23, 2017 11:46 AM
OBI_BUCH-2092-002.book Page 233 Thursday, February 23, 2017 11:46 AM
Nguyen Tác An Toàn Chung Danh Cho Dung Cu Nen Khi
CANH BAO
Truoc khi lap dat, van hanh, sua chuia, bao tri va thay phy kién
cung nhu truc o khi lam viec gän dung cu nen
khi, xin vui long doc va tuan theo tat ca moi
huong dan. Khong theu hiener theo cac lai canh bao
an toan sau dai co the bi ton thuong nghiem trong.
Giu lai tati cac hong dan de tham khao ve
sau, va tao dieu kien cho nguo'i van hanh san co
de sur dung.
Khu vuc lam viec an toan
Luru den cac be mat co the tro nen trotr, phat sinh tur viec sur dung may, va cac nguy him do vap phi dung cu nen khi hay voi ong thu luc. Trot chan, vap va te nga la cac ly do chinh gay tan thudng o hi lam viec.
Khong vanh dhung cu nén khi a moi truong chay no, chang hanz nhu no co chat long de chay, khi gas hay rac. Trong khi lam vie voi vat

234|TiengViiet
gia cóng, cac tia lua bān ra co the lam rac bat lua hay ngún khoi.
Giu ché em va nguoi dung gan cach xa
khoi nao lam Vietcua ban trong khi van hanh
dung cu nen khi. Su mát tap trung vi nhung
nguoi khac co the gay cho ban mat su kiem soat
dung cu nen khi.
Su' an toan voi dung cu nen khi
Khong bao gi douc hroung thang luong hoia vao chinh nguoi ban hay nguoi khac gan ben, va dua hoi lan tranh khoi tan. Hoi nen co they ra cac tcn thuong nghiemrong.
Kiem tra cac cac phan nao va duong cung cap hoi. Tát ca cac bó bao tri, bó não, va vòi dong phai dap ung cac dac tinh ky thai dinu hinh truc ap suat va khoi lug ng khi. Ap suat qua thap lam suy giam su hoat dong cu daung cu nén khi; ap suat qua cao co the lam hu hai vat lieu va gay t on thuong cho chinh minh.
Bao vé voi ong khong bi that nut, nghen, dung mol lam tan, cac canh ben. Glu voi ong cach xa nhiet, dau, vac bac pho xoay. Thay ngay voi ong bi hong. Mot duong cung cap hoi bi hong co the gay voi ong khi nen vung vay va co the gay tón thuong cho chinh minh. Bui diy tung hay cac mánh vun co the gay tón thuong mát.
Bao dam kep dan hoi vong luon luon duoc siet
that chat. Ke pan hoi bu hui co the lam
mkt klem soat rho ra ngoaia.
An toan ca nhann
Giu tinh tao, biét ro ban dang lam gi, vayuy xet hop ly khi su dung dung cu nen khi. Khong duoc sur dung dung cu nen khi khi dang mét moi hay dang bi anh huong cua chat gay nghién, ruou, hay duoc pham. Mott thoang mat tap trung trong khi vanh dung cu nen khi co they tón thuong cho chinh minh.
Su dung trang thiet bi bao hocanhuan. Luon luon mang kinh bao vemat. Mang trang thiet bi bao hoc nhan -nhu'la mat na phong ho doc, giay an toan chong trucu, mu bao hoy hay bao v thehinn giac -theo su chi dao cua chu su dung lao dong cuan hay tuan theo ca dieu khoan yeu cau dai voi cong viec u sur bao v suc khoe, lam giam nguy cd gay ton thuong chin minh.
Ngan ngua may khoi dong bat ng. Bao dam dung cu nen khi da duroc tat trucoc khi nao vao nguon cung cap hoi, nac may len hay di chuyen may. Khi ngon tan cua ban ngang tren concg tac Tat/Mo khi di chuyen dung cu nen khi hay khi nao dung cu nen khi vao nguon cung cap hoi khi may dung suc mo, tai nan co the xay ra.
Thao bat cu dung cu dieu chinh nao ra trucoc khi cho dung cu nen khi hoat dong. Chia van dai oc hay chia van con gan dinh trong bo phan quay cu dung cu nen khi co they gay t on thuong cho chinh minh.
Khong duoc voi. Giu ture thedung thich hop va can bang troq moi luc. Diu nay lam vie diou khieng dung cu nen khi duoc toh hon trong cac tinh huong ba ng.
An mac phu hop. Khong mac quan ao rong thungthin hay mang trang suc. Giu toc, quan ao va gang tay cua ban cach xa cac bo phan chuyen dong. Quan ao rong thung thinh, do tranq suc hay toc dai co the bi quan vao cac bo phan chuyen dong.
Neu thiet bi co thiiet ké cho phan noi cac thiet bi hut bui va thiet bi thu gom, bao dam cac bo phan nay duoc dau noi va su dung dung cach. Su dung thiet bi hut bui co the lam giam cac nguy hiem lien quan den bui.
Khong duoc hit truc tiep khi thai. Tranh khong de mat pho tran voi khi thai. Khi thai cua dung cu nen khi co the chu naoc, dau, manh vun kim loai va can ba turo phan nen hoi. Dieu nay co the gay nguy hai cho suc khoe con ngdui.
Su dung va cham soc dung cu nen khi
Su dung cac thiel bi kep hay mo cap de giu an toan va chiu do cho vatgia cong. Giu vatgia cong bang tay hay tvao nguo se khong lam cho su hoat dong cua dung cu nien khi duoc an toan.
Khong lamng cu nén khi bi qua tai. Sudung dung cu nén khi theo cong viec du dinh cua ban. Dung cu nén khi dung loai se thuc hieng cong viec tot va an toan hon o toc do ma may duoc thiiet ke.
Khong su dung dung cu nen khi cng tac Tatembo hu hong. Mout dung cu nen khi khong the dieu khien duoc bang cong tac la nguy hiem va pahudc sua chu.
Thao nguon cung cap hoi truck hiuch hien bat cu dieu chinh, thay phu kien, hoac khong su dung den troong mot thoi glan dai. Bién phap an toan nay ngan ngua su vo tinh lam dung cu nen khi khoi dong.
Cat giur dung cu nen khi khong sur dung den o noi gnoadi tam voia cua tre em. Khong cho phe np hng ngoi khong am hiue dung cu nen khi hay khong biet nhung huong dan nay sur dung thiet bi. Dung cu nen khi nguy hiem khi nam tren tay ngoi sur dung khong co kinh nghiem.
Bao tri dung cu nén khi can than. Kiem tra sur sai lech hay cac bo phan chuyen dong bi tac, bo phan bi vā va tāc cac tinh trang khac co the anh hóng dén su hoat dong cuang cu

Tieng Viet 235
nén khi. Dua cac bo phan bi hu hong di sua chuia trucc khi su dung dung cu n nen khi. Nheiu tai nax yá ra do su bao tri dung cu n nen khi kém.
Giu cac dung cu cat ben va sach. Bao tri dung cu cat co canh ben dung cach thong it co kha nang gay ket va de dang dieu khien hon.
Su dung dung cu nén khi, phu kien, dung cu ung dung v. v. dura theo cac huong dan may. Hay luu y den dieu kien lam Viet ca cac cong Viet se thuc hien. Dieu nao lam giam su phat sinh bui, sur ngv va tieng on den muc do lan nhat.
Dung cun neni nlen ducic lap dat, dieu chinh hay sud nang dans rieng cho nguroi vanh co nang luc va co tay nghe.
Khong cai bién dung cu nén khi bang bat cu hinh thuc nao. Su cai bién co the lam giam hiieu qua cua cac bién phap an toan, va lam tang nguy co cho nguoi van hanh.
Bao Tri
Dura dung cu nen khi cua ban den the chuyen mon chi su dung phu tung cung loai chinh hang de bao tri va sua chu. Dieu nay se dam bao su an toan cu dung cu nen khi duc gi nguyen.
Canh bao an toan cho bua khoan khi nen
Klém tra néu nuh bang ghi chung loai may có con ce do doc ducr. néu can, déghnhà sān xuát cung cap dé thy thé.
Trong truong hop vat gia cong hay phu kien, hay ngay chinh dung cu nen khi bi vo, cac bo phan co the ban tung ra chung quanh o toc do cao.
Trong thoi gian van hanh, sua chuay bao tri va khi they cac phu kien tren dung cu nen khi, luon luon mang kinh chong va dap bao ve mat. Muc do can bao ve can phai duoc luong dinh rieng cho tung umng dung.
Mang non bao hocung khi thuc hieng cong viec phia tren dai.Dieu nay tanh bi thuong tich.
Chi su dung dung cu nen khi khl mul duc duoc bat chat, khong de bj roi ra. Neu khong, dung cu ung dung co the vang ra chung quanh.
Cac bo phan cua bo phan lap bat bj mon, venh hay vo phai duoc thay the. Dieu nay tranh bi thuong tich.
An gur dung cu nen khi that chac tay len be mat lam viec truc khi cho dung nen khi hoat dong.
Ngoi van hanh va nhan vien bao tri pahi day du the luc de xu ly kich thuc, trong luong va luc ca dung cu nen khi.
Hay san sang umgh po Vietc dong thai bat ngocua dung cu nen khi co the phat sinh do luc phan ung hay su vo cua dung cu ung dung. Giu chat tay nam tren dung cu nen khi va dat tu the than the ban va hal canh tan yach phep ban cuong lai nhung dong thai nu vay. Nhung sur phong ngua nay co the tranh bi ton thuong.
Lru y! Dung cu un dung co the tro nen nong trong thoi bian dung cu nen khi hoat dong keo dai. Mang gang bao ve lay.
Trong truong hop nguon hoi cung cap bi gian doan hay ap suat hoang giam, tát dung cu nén khi. Kiem tra ap suat hoat dong v相关政策 may tro lai khi ap suat hoat dong o muc tot nhait.
Khi su dung dung cu nen khi de thuc hién cac hoat dong co lien quan den cong viec, ngroi van hanh co the cam nhn cac cam giac kho chu o tay, canh tay, hai vui, vung co va cac bo phan co the khac.
Khi lam vioc voi dung cu nen khiao tu the dung thoa mai, gur chac dung cu va tranh cac vi the khong thuan loi hay nhung tu the nuvay o nhung noi ma ban kho gur duoc sur thang bang. Doi voi nhung cong viec keo dai, nguo'i van hanh phai they doi the dung hay tu the, cach nay glup tranh duc su khoi chu va met moi.
Gia su nhn ngoi van hanh may nhan thay cac triu chu ng nuon non dal dang, kho chu, tim dap manh, dau, ngua ngay, t dai, bong rat hay te cung. Khong duoc bo qua nhung canh bao nay. Nguoi van hanh may nen thong bao cho ngui chu su dung lao dong cua minh nhng triu chung nay va den gap bac si chuyen mon de kham.
Khong bao gi duoc su dung mui duc nuh dung cu tay. Nhung mui duc nay duoc nhiet luyen va co the bi gay.
Chi su dung cac mui duc ben. Dung cu ng dung cun co the dan den viec rung xoc manh va lam giam luc duv o
Khong bao gio duoc dung nuoc delam ngoi phu kien con dang nong. Dieu nay se dan den viec gay don va thoi bian srdung hieu qua ngan truc han.
Khong sù dung mui duc nhuràdon bay. Néu khong,mui duc co thegay.
Sulung thiet bi do tim thich hop de xac dinh cac duong hay ong dan cong ich nam am trong khu vuc lam vioc hay lien he voi cty cong trinh phuc loci de nh o giup di. Tiep xuoc dai dien co the dan den chay va bi dien giut. Cham duong dan khi dot co the gay no. Lam

236|TiengViiet
thungongdan nuocco the lam huihai sanyaothegayra dien giut.
Tranh tiep xuc voi vat dan "co dien", Dung cien khi khong co lap cach dien; tiep xuvi vat dan co dien co theg ayra vie bi dien giut.
CANH BAO
OBI_BUCH-2092-002.book Page 237 Thursday, February 23, 2017 11:46 AM
OBI_BUCH-2092-002.book Page 238 Thursday, February 23, 2017 11:46 AM
238|TiengViiet
Hó sǎ kě thuāt (2006/42/EC) tāi:
Robert Bosch Power Tools GmbH, PT/ECS, 70538 Stuttgart, GERMANY
Henk Becker Helmut Heinzelmann
Executive Vice President Head of Product Certification
Engineering

Robert Bosch Power Tools GmbH 1972, 304-308
70538 Stuttgart, Germany
Stuttgart 01 01 2017
Thong tin vé Tieng on/Do rung
Tieu chu'an am than do duoc xac dinh phu hcp voi Qui chu'an EN ISO 15744.
Cap am thanh tiue biuegia quyen A cua dung cu nen
khi la: Cap do ap luc am thanh 89 dB(A); cap do
cong suat am thanh 100 dB(A) Tinh Bat dinh
K=3 dB.
Mang dung cu bao vethinh giac!
Tonggia tri rung a, (tong vector cua ba huong) va hé so bat dinh K xuoc xinh theo EN 28927:
Dung bua de Khoan be tong:
a_n = 5m / s^2 K = 1,0m / s^2
Duc: a_h = 6 m/s , K = 1, 1 m/s^2
Khoan kim loai: a_b < 2.5 m/s, K = 1.5 m/s^2 .
Surlap vao
Thay Dung Cu Khoan Khong Phai Loai SDS-plus Ra
Van vong xoay cua mam cap khoan loai dung chia 15 bang chia vam mam cap khoan theo nguc chieu dong ho cho den khi co the thao dung cu khoan ra.
Huong Dan Van Hanh
Dua vao hout dong
Dung cu khi nen lam vie voi ap suai tti utu 5 bar (72.5 psi), ap suai nat duoc do tai cua dan khong khi trén dung cu khi nen ma.
Chinh Dat Phuong Thuc Hoa Dong
Voi cóng tac va dap/dung 5. ban hy chon kiieu vanh cua dung cu khi nen.
Ghi Chu: Chthy dai kiieu vanh hki dung cu khi nen tati Dung cu khi nen co the bi hur hai.
Van gac chon phuong thuc hoat dong 5 v Vietheo yeu cau.
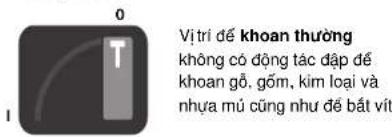
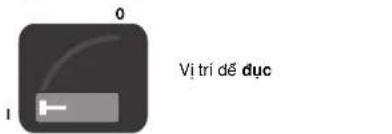
Bát DÁU vā Ngùng
De tié ti kien nang luong, ban chi bat dung cu khi nén khi can su dung.
De mo dung cu nen khi, nhn cong tac Tat/Mo (cang) 6 va giu nhn tong suot cac cong doan lam viec.


g|g|
gogjijlglgolgogg
.uaiaai jaii iuiu uuc g|www.bosch-pt.com
pIddwIjgwoogjUjI da
jIb aJz Juaa Jauu Jai Jaua aiaa jS
Ub sic aliwJUo yu b uI bgeaoJIgell oxc
juee 2
aiuoggssspsillw ljuljjdo jso
gwwjll jie jia juaill gbaaayaiyaiyaiyai
:gagjllgbe jc loglaI lgc Jsaal
www.bosch-pt.com
aJy p1aiw2jgwo aqjgsw cglg no gS
.1gjg jaiio c aiwJ ggsy sclw J g
Jalal jgolj gai la jiaaiall alil aagll
JgBg 1g
aui j 0sll no jalil
aIg|g|g|g|g|g|g|g|g|g|g|g|g|g|g|g|g|g|g|g|g|g|g|g|g|g|g|g|g|g|g|g|g|g|g|g|g|g|g|g|g|g|g|
oL aIaI IaIaI gJb Jc aIaI aiaiaa
.
aio aaij
aigaiIolSduaiu
jg jgai!pksuL Lb JaaI IyJ yalai
400 42
aJy oJooj J ic gao, aigio
JuswJ aJoo JbgeoJIgJgIooJ
a,aaasawgaiuailoJsoLqalw
aJw uJauo aJg j
.
(Ggajglj)gss
goc 11 gac dso abwglis
UgJollXu
10 4 glll
a1j 15 gbl jniwll yaioll gbi -
.0sll sJ.0sll pai joo uo saui U
- jjdaall
aababawlgbywaiall jllolaoiol
JLoaic lai 1jL 0a aai Lg
aIg b oJol Igeoal Iggl OJaiy 9
aJgJl aJU
150 1gJgJgJgJgJgJgJgJgJg
Lauoi Suai aiaa alao o sl aowluyjui
aaiiil aLac jS. wgrjU yalI wg p
.1gJbuiI aLac JI 300JS
(225) wg
3605430009 1J
山gJgJgJgJgJg
.ogjol sic lgl siw jai juaiaial jngbgal
aluwu 1 gai x jll loga aal 1gj lss c jli
jij j13j jwaiI bgsiaI gqJ 2
jLbaJgaii gaii ggi jaiu
Jaa JJI IgbgaalI gai Ulaa (o oLa Egi)
Igauai Iggl uo j. (cujll no yla Igbuaa Ige
IgdoJIgJl aIoo oag lgc gogogu Jgllboll
logal (jou) logaol lgll aabg jll
.(abclalaiio gaiy
SAE 20 g SAE 10 cJdJI jI J
oag sic aolg l ojulogaaal slgl ox
山
山
Jusy
sicLwlo.(aJolJI aogJI 72,5)J5
altsu bgsollgll oxi lglll Jdo
山gj
jg j15 lgljll/gjll gaoi
.ogzaoall-ggeloo
- bgaol
ggl oocj g 1aogg 1aogglo bgaol
.bgsaiol
5 uJgJI/ogJI glaI liao JJI -gogJI
jIg nJnJg jIg JnJnJg JnJnJg JnJnJg JnJnJg JnJnJg JnJnJg JnJnJg JnJnJg JnJnJg JnJnJg JnJnJg JnJnJg JnJnJg JnJnJg JnJnJg JnJnJg JnJnJg Jn
ggbjnnssssbsa
SDS-plus 1gdsdAabwIgJauJIooNkssuU 1sji pui u (aigbawI gau wai I aoi 10) gglal jiwall yataill Jp) wliaIytaal Jp .glln o, sllgjwll
(Cgjglj) gbll jwll laiJI Jb 5
16 SDS-plus nJgIw pI 15 gIJIiWJ I14 JwJ abwJ 15
(Dgglj) gbll jnnll lalal
duoJoljoo dllojuiu Ulligoo oos
.
ggbJiWuJIyLaiJIjEji
J111"ggljwlllal 2S- .(242 aall,“ggljwlllwlal
4 10 4 10 4
pJlslgllb
pIgllagjI pIgllaggoabwlgdisO gglgglgglggbjLJnGcEeewNco 1s.ogall aullu uasaa lac o gll mnsu nso aygl yds n d Jdawl gglnssw .olwligg eSIt wgl CjJUgll
8-1gglj 20 gglpils - aolj duiw
9ogbjJl
ylaaiI gblg 12 pgbjll baag aala J -cug Uo9 pgbjll aa Lgc plall gglpgbj .pgbjll baag aalw pksl
gJy JsOJI gJgJ
- 1uIgaaag uoJU gUjE aJc b
G uall 123) 90 glll llll 100 aal 100
- 1
a a a a a a a a a a a a a a a a a a a a a a a a a a a a a a a a a a a a a a a a
olgblpablll pdswI ybnolksI jdl 4
.604
1111111111111111111111111111
1111111111111111111
Igaiol Igguiu o sag piaiwi! aaloo.ogaiol IgaiI sccuaaow jaoj lei.i gioo .aiuall o sag JlasiwiawjSy
jolalg jogllbgaiglaall Jao ng SjI y 1 gglallgagglgglalbawl l aaaag 9aag glabq Jia jao:Jia, Jai kba qaa!
b2aill wlaao abwlg lgll sso sic b2aill jaaai Ula g 1uull sbgwoll lgll o sc ngsi lo sic .
Igai Igai Igai Igai Igai Igai
7|gall Jdo baj alog 9 pgbjll daa buj - joo.
gall o do aalal Jplaooll iJl jui ju
Jdo y 9 pgbjll aalal gI buj sic dlq abgaaall
abwgl 7 do lglgell Jdo baj aloog uoi j
.(p022 glaill) clll giaobj glia
12 pgbjll baag cala Jg 9 pgbjll aalc gagly slsokl pgbjcaug13 .pgbjll baag dala w pksu
1gall oas la sglgy slsokl pgbjcsw abdo
. qilall oag p8g lbgssaoi
Jg J
gJI JSDS-plus 100 SDSS-200 100 100 100 100 100 100 100 100 100 100 100 100 100
aaiJI uuiJI
IgdoJI | IgjUy aloLaJl aJlgJl adjBoJI
| 0 607 557 501 | الصniaماني | |
| \( ^{1-}\text{a}\ddot{a}\ddot{a}\ddot{a}\ddot{a}\ddot{a}\ddot{a}\ddot{a}\ddot{a}\ddot{a}\ddot{a}\ddot{a}\ddot{a}\ddot{a}\ddot{a}\ddot{a}\ddot{a}\ddot{a}\ddot{a}\ddot{a}\ddot{a}\dddot\ddot{a}\ddot{a}\ddot{a}\ddot{a}\ddot{a}\ddot{a}\ddot{a}\ddot{a}\ddot{a}\ddot{a}\ddot{a}\ddot{a}\ddot{a}\ddot{a}\ddot{a}\ddot{a}\ddot{a}\ddot{a}\ddot{a}\ddot{a} \) | \( ^{1-}\text{a}\ddot{a}\ddot{a}\ddot{a}\ddot{a}\ddot{a}\ddot{a}\ddot{a}\ddot{a}\ddot{a}\ddot{a}\ddot{a}\ddot{a}\ddot{a}\ddot{a}\ddot{a}\ddot{a}\ddot{a}\ddot{b}\ddot{b}\ddot{b}\ddot{b}\ddot{b}\ddot{b}\ddot{b}\ddot{b}\ddot{b}\ddot{b}\ddot{b}\ddot{b}\ddot{b}\ddot{b}\ddot{b}\ddot{b}\ddot{b}\ddot{b}\ddot{b}\ddot{b}\ddot{a}\ddot{a}\ddot{a}\ddot{a}\ddot{a}\ddot{a}\ddot{a}\ddot{a}\ddot{a}\ddot{a}\ddot{a}\ddot{a}\ddot{a}\ddot{a}\ddot{a}\ddot{a}\ddot{a}\ddot{a}\ddot{a}\ddot{b}\ddot{b}\dddot\ddot{b}\ddot{b}\ddot{b}\ddot{b}\ddot{b}\ddot{b}\ddot{b}\ddot{b}\ddot{b}\ddot{b}\ddot{b}\ddot{b}\ddot{b}\ddot{b}\ddot{b}\ddot{b}\ddot{b}\ddot{b}\ddot{b}\ddot{b} \) | |
| \( ^{1-}\text{a}\ddot{a}\ddot{a}\ddot{a}\ddot{a}\ddot{a}\ddot{a}\ddot{a}\ddot{a}\ddot{a}\ddot{a}\ddot{a}\ddot{a}\ddot{a}\ddot{a}\ddot{a}\ddot{a}\ddot{a}\cdots \) | \( ^{1-}\text{a}\ddot{a}\ddot{a}\ddot{a}\ddot{a}\ddot{a}\ddot{a}\ddot{a}\ddot{a}\ddot{a}\ddot{a}\ddot{a}\ddot{a}\ddot{a}\ddot{a}\ddot{a}\ddot{a}\ddot{a}\dddot\ddot{b}\ddot{b}\ddot{b}\ddot{b}\ddot{b}\ddot{b}\ddot{b}\ddot{b}\ddot{b}\ddot{b}\ddot{b}\ddot{b}\ddot{b}\ddot{b}\ddot{b}\ddot{b}\ddot{b}\ddot{b}\ddot{b}\cdots \) | |
| \( ^{1-}\text{a}\ddot{a}\ddot{a}\ddot{a}\ddot{a}\ddot{a}\ddot{a}\ddot{a}\ddot{a}\ddot{a}\ddot{a}\ddot{a}\ddot{a}\ddot{a}\ddot{a}\ddot{a}\ddot{a}\ddot{a}\ddot{\ddot{b}}\ddot{\ddot{b}} \) | ||
| 20 | \( ^{0} \) | \( ^{0} \) |
| 13 | \( ^{0} \) | \( ^{0} \) |
| 30 | \( ^{0} \) | \( ^{0} \) |
| SDS-plus | \( ^{0} \) | |
| 5 | \( ^{1-}\text{a}\ddot{a}\ddot{a}\ddot{a}\ddot{a}\ddot{a}\ddot{a}\ddot{a}\ddot{a}\ddot{a}\ddot{a}\ddot{a}\ddot{a}\ddot{a}\ddot{a}\ddot{a}\ddot{a}\ddot{a}\ddot{ab} \) | \( ^{1-}\text{a}\ddot{a}\ddot{a}\ddot{a}\ddot{a}\ddot{a}\ddot{a}\ddot{a}\ddot{a}\ddot{a}\ddot{a}\ddot{a}\ddot{a}\ddot{a}\ddot{a}\ddot{a}\ddot{a}\ddot{a}\cdots \)\( ^{1-}\text{a}\ddot{a}\ddot{a}\ddot{a}\ddot{a}\ddot{a}\ddot{a}\ddot{a}\ddot{a}\ddot{a}\ddot{a}\ddot{a}\ddot{a}\ddot{a}\ddot{a}\ddot{a}\ddot{a}\ddot{a}\ddot{a}\cdots \) |
| 72,5 | \( ^{1-}\text{a}\ddot{a}\ddot{a}\ddot{a}\ddot{a}\ddot{a}\ddot{a}\ddot{a}\ddot{a}\ddot{a}\ddot{a}\ddot{a}\ddot{a}\ddot{a}\ddot{a}\ddot{a}\ddot{a}\ddot{a}\ddot{\text{b}}\text{c}\text{e}\text{g}\text{h}\text{i}\text{j}\text{k}\text{l}\text{m}\text{n}\text{o}\text{n}\text{p}\text{o}\text{q}\text{r}\text{s}\text{t}\text{u}\text{d}\text{i}\text{d}\text{i}\text{d}\text{i}\text{d}\text{i}\text{d}\text{i}\text{d}\text{i}\text{d}\text{i}\text{d}\text{i}\text{d}\text{i}\text{d}\text{i}\text{d}\text{i}\text{d}\text{i}\text{d}\text{i}\text{d}\text{i}\text{d}\text{i}\cdots \) | \( ^{1-}\text{a}\ddot{a}\ddot{a}\ddot{a}\ddot{a}\ddot{a}\ddot{a}\ddot{a}\ddot{a}\ddot{a}\ddot{a}\ddot{a}\ddot{a}\ddot{a}\ddot{a}\ddot{a}\ddot{a}\ddot{b}\text{c}\text{e}\text{h}\text{i}\text{t}\text{d}\text{i}\text{d}\text{i}\text{d}\text{i}\text{d}\text{i}\text{d}\text{i}\text{d}\text{i}\text{d}\text{i}\text{d}\text{i}\text{d}\text{i}\text{d}\text{i}\text{d}\text{i}\text{d}\text{i}\text{d}\text{i}\text{d}\text{i}\left(\begin{array}{l}1 \\ 1 \\ 1 \\ 1 \\ 1 \\ 1 \\ 1 \\ 1 \\ 1 \\ 1 \\ 1 \\ 1 \\ 1 \\ 1 \\ 1 \\ 1 \\ 1 \\ 1 \\ 1 \\ 1 \\ 1 \\ 1 \\ 1 \\ 1 \\ 1 \\ 1 \\ 1 \\ 1 \\ 1 \\ 1 \\ 1 \\ 1 \\ 1 \\ 1 \\ 2 \\ 2 \\ 2 \\ 2 \\ 2 \\ 2 \\ 2 \\ 2 \\ 2 \\ 2 \\ 2 \\ 2 \\ 2 \\ 2 \\ 2 \\ 2 \\ 2 \\ 2 \\ 2 \\ 2 \\ 2 \\ 2 \\ 2 \\ 2 \\ 2 \\ 2 \\ 2 \\ 2 \\ 2 \\ 2 \\ 2 \\ 2 \\ 2 \\ 2 \) |
| G 1/4" | \( ^{1-}\text{a}\ddot{a}\ddot{a}\ddot{a}\ddot{a}\ddot{a}\ddot{a}\ddot{a}\ddot{a}\ddot{a}\ddot{a}\ddot{a}\ddot{a}\ddot{a}\ddot{a}\ddot{a}\ddot{a}\ddot{a}\ddot{x}\text{y} \) | |
| 13 | \( ^{0} \) | \( ^{1-}\text{a}\ddot{a}\ddot{a}\ddot{a}\ddot{a}\ddot{a}\ddot{a}\ddot{a}\ddot{a}\ddot{a}\ddot{a}\ddot{a}\ddot{a}\ddot{a}\ddot{a}\ddot{a}\ddot{a}\ddot{a}\left(\begin{array}{l}1 \\ 1 \\ 1 \\ 1 \\ 1 \\ 1 \\ 1 \\ 1 \\ 1 \\ 1 \\ 1 \\ 1 \\ 1 \\ 1 \\ 1 \\ 1 \\ 1 \\ 1 \\ 1 \\ 1 \\ 1 \\ 1 \\ 1 \\ 1 \\ 1 \\ 1 \\ 1 \\ 1 \\ 1 \\ 1 \\ 2 \\ 2 \\ 2 \\ 3 \) |
| 15 | \( ^{1-}\text{a}\ddot{a}\ddot{a}\ddot{a}\ddot{a}\ddot{a}\ddot{a}\ddot{a}\ddot{a}\ddot{a}\ddot{a}\ddot{a}\ddot{a}\ddot{a}\ddot{a}\ddot{a}\ddot{a}\ddot{a}\ddot{x} \) | \( ^{1-}\text{a}\ddot{a}\ddot{a}\ddot{a}\ddot{a}\ddot{a}\ddot{a}\ddot{a}\ddot{a}\ddot{a}\ddot{a}\ddot{a}\ddot{a}\ddot{a}\ddot{x} \) |
| 31,8 | \( ^{1-}\text{a}\ddot{a}\ddot{a}\ddot{a}\ddot{a}\ddot{a}\ddot{a}\ddot{a}\ddot{a}\ddot{a}\ddot{x} \) | \( ^{1-}\text{a}\ddot{a}\ddot{a}\ddot{a}\ddot{a}\ddot{a}\ddot{a}\ddot{a} \) |
| 3,0 | \( ^{1-}\text{a}\ddot{a}\ddot{a}\ddot{a}\ddot{a} \) | \( ^{1-}\text{a}\ddot{a}\ddot{a}\ddot{a}\ddot{a} \) |
| 6,6 | \( ^{1-}\text{a}\ddot{a}\ddot{a}\ddot{a} \) | EPTA-Procedure 01:2014 |
C∈gJU
goggl juJ uLJI liJgus Lc aai Jli! aJLL gUgJgJgJgJgJgJgJgJgJgJgJgJgJgJgJgJgJgJgJgJgJgJgJgJgJgJgJgJgJgJgJgJgJgJgJgJgJgJgJgJgJgJgJgJgJgJgJgJgJgJg
.2006/42/EG UgU EN ISO 11148
:(2006/42/EC)
Robert Bosch Power Tools GmbH, PT/ECS
70538 Stuttgart,GERMANY
Henk Becker
Senior Vice President
Engineering
Helmut Heinzelmann
Head of Product Certification
PT/ECS

Robert Bosch Power Tools GmbH,
70538 Stuttgart,GERMANY
Stuttgart, 01.01.2017
U
(A oJgJgJj) LLoXl JooJI
uSjgoIbgsaJU|gJUoIaJUJgJU
.10
10 10
.1g jg oI Joc ag go IJog g
sJg aaiJl
#

aJdJIUulalalj
guijsiclubaiyjI.
g g aalllg aaiJl
gui, auiq<1u oai
.0u2gJgJgJgJgJgJgJgJg
ggl ooc gwo ogjoll aolll aolll
.1JooWkI aWjS 0-1g -LwI aGiao IgSjg Iggeolll
Jusss
aiuwjll gjJUgjJUuuiuuaa ogsuaaIgglOsc
aill Jlacl lK Lg jg Jg gblg aIwJdI
aaii 1g g s ly aaii aaiu lgl los .doai
.1g jJg J
aJl j 1 aJL aJL aJg JI aJgJlJI
aagiaol liu gog aubjg
jgaaJl|j
ggl oocgwsj jogaaJl jzjjuiu
aababaiI gawll aaov lc ooggall bgaiaill
ooj jol 1
jull jagg1u2
Jlaoa 3
LwJUaJbJg 4
jgJ/(jJI Jai 5
LalbXg Uusuul 6
1gell Jdo sic buj alog 7
gall gll 201gell a2o 8
ogbjal aol 9
10
11
ogbjal boa a1a 12
gglj 13
*gbl jn iinll lalai 14
* gjll jiuol laiol 15
* 16
gjgaaalglgllslaeclyjjglljbaa
gill liolj g d oLJI gll j
Uljjg aJc log
.ENISO15744 1
:0Ic IgGJI gJI Oc (A Egi) 89
3 = K ∩gLoill. (A ggi) ∪uus 100 g
gawagolgjj
aLgagolgao)aahlaalaijIjJai
aolgall laub cuaK oglaill auwg (uL
:EN28927
aJUwJUgJgJUgJUgJU
2U/ρ1,0=K.²U/ρ5=a
2U/01,1=K.²U/06=a:U
2/10 1,5=K.²/102,5>a,h:JdJdJd
#
joull
JU 1000000000000000000000000000000000000000000000000000000000000000000000000000000000000000

logssaaJI:lgell ssc jloI
c. 1000
Cunol
4
A Lc JlgJlgU
01 1
ijjU
a aalglg uallg aallll 100
laolgal glg yggll aaslg baaull aailly
ggl ooc aad laoaall alo jai
ylo jol 15 15 15 15 15 15 15 15 15
4 alalI gaiI
jg pblal jyI yI g bIa IgJg Jg 0g jIg jIg jIg jIg jIg jIg jIg jIg jIg jIg jIg jIg jIg jIg jIg jIg jIg jIg jIg jIg jIg jIg jIg jIg jIg jIg jIg jIg jIg jIg jIg jIg jIg jIq Jq Jq Jq Jq Jq Jq Jq Jq Jq Jq Jq Jq Jq Jq Jq Jq Jq Jq Jq Jq Jq Jq Jq Jq Jq Jq Jq Jq Jq Jq Jq Jq Jq Jq Jq Jq Jq Jq Jq Jq Jq Jq Jq Jq Jq Jq Jq Jq Jq Jq
Jolai joi
bgsaall 1gll ooc pssw 2. jasbi bsaaall
jui ci ngsi lo sic g l yio u gki lo xic
allo oii psc .aggl gl Jgssll gl Ujdoall
5gds bgsaall 1gll ooc plosdswl ooldg
.0jbs uIol
Uos u wu wu wu jui uo a gluwpu
puaa g o slaiu l jb, yj yj laowu cIgwu dy uo
.duu uolao g Udo
Uyjdl dgi g olus uo aei jui ulaiu sju
.dua Jauo uo aiau sljdl b
olkiwsjS jla oJ jI
gdu jSdy auyuag g calsio yjJ 1djw eju g Ja oJl cujj bao bao Jr
gijgljooa.aaJoa0j j Cwuj bao .laai agi
Henk Becker Senior Vice President Engineering
Helmut Heinzelmann
Head of Product Certification
PT/ECS
f B i.v. k = m
1g0s3gjg jUoJ Uo dI
Robert Bosch Power Tools GmbH, 70538 Stuttgart, GERMANY Stuttgart, 01.01.2017
uai
(Agajd gghgj)Sos daw
10Sos dawsbai ygiydu ydyj 5gwho jy
olgds ojl ay 10sos daw sui gio la
.ogw daas g oys jks dyjgyb, yia
4 Sswg a
a wu uulaguyuaycuwl uyac uq
wwuuyuoygluyu Jl10s
uyac csya jn uuia ly 4 Sswga
.yspsd ydo cclw
1g@gj
JUgJgJgJgJgJgJgJgJgJgJgJgJgJgJgJgJgJgJgJgJgJgJgJgJgJgJgJgJgJgJgJgJgJgJgJgJgJgJgJgJgJgJgJgJgJgJgJgJgJgJg
Ig w u jy d y Jd o g (B y d g g)
75 (72,5 psi) 5 5 jus 1g wu d aS aS a g i o
jbj jil sly oikw s jgi jis d y u liu w Cg
yli jglai. xiy 10000000000000000000000000000000000000000000000000000000000000000000000000000000000000000000000000000
jul. cwl pjg jw g w g w dgl o slaiw: dgj .g w go ydu jy l jy s k jk s n nn acl .si dgi w g w dgl o slaiw uallg w . juag ly wliu ydu g ilw g o lal , jjg qd . dw jlu jggo |do g |
*pai aaw ySDS-plus ay jao (jw) jgul 16
jgbay cwi ool jia jg wai d as jalaleio aLs *
Jols cui labi gwhaiil olw osjam jgao
. jialaj waii lalaio aoju wqj gl Jlalaleio
giü Lai
| 0607 557 501 | السلام | |
| 850 | min-1 | السلام |
| 3900 | -1 | السلام |
| السلام | ||
| W740 | ||
| 20 | mm | - UN |
| 13 | mm | - UN |
| 30 | mm | - UN |
JISDSS-plus
jlaiai jg gaiyuljgws aLs
pjc jwuiuayiw. uasd lba
cuw jkauiuugws nlcj
juw g gaaow, qqg qchly
.ogw dyw slal
ggsaslaiaoldaqjdsuowlaaolabd jgs u slga pks g yis jy cwi ulsu jj1sglj lji laoi
A. _i=1^n a_ij is a sequence of n terms
<jjjbbj
<JgS)UJwJg
- sisi jao
LssjIwg
jSoo jI aJil. sIs oIaWl aJc JJIgJ SIIo .sIs oIaWl Ios dws jI gji
1 p 45 s 0s oaiw l s b jj jg qq
J g a J .d. u n 2n 1n 1n 1n 1n 1n 1n 1n 1n 1n 1n 1n
jI jI duiuS u 0.6u 5,0g w j (sIqaiw) JUJ gH jI dGsiI .siu
[59] pao 1j (ssu jj jn wg jl j
JL JJI JU WU UWU JU JU L
UUJU JU UGg UJg UJU UJU
UUJU UJU UJU UJU UJU
a a d s l j 1j o b tio n e s uo uo c bglgo
sugw o sla j juiu wuow L Cogla o uo g u
Jy g logjl g dyg k si y slu jl .du
L uo jn uliguyd sds Jla Jd
jgu jui g o ubiai jui .si g d
.
oJgwsJcWJLjI!blaI
bJLsWJ.igwEJSSJlJgB
sJlJlJlJg JmsLgJgJgBgJgJ S J
Jolkss gos Jus JjglJglJgJgJg
SisJugJglJglJ
Jn Jn Jn Jn Jn Jn Jn Jn Jn Jn Jn Jn Jn Jn Jn Jn Jn Jn Jn Jn Jn Jn Jn Jn Jn Jn Jn Jn Jn Jn Jn Jn Jn Jn Jn Jn Jn Jn Jn Jn Jn Jn Jn Jn Jn Jn Jn Jn Jn Jn Jn
JU 10000000000000000000000000000000000000000000000000000000000000000000000000000000
l qal .siS o slaw l jI I lgic y j pJ
. siiKw CwI Jkoo g w Osw Dj
sij JjL JjL .sis o slaw j j Slaqol j bao
bjo G wjju o cWl n
JL J. SsS SsW J J Caleo J
. 356 Uabn jy jg yogu cwl uKoo
Jc J. SsS Olaaw pJol Igic ay palj J
.SsW CwI U Koo
yI yI yI yI yI yI yI yI yI yI yI yI yI yI yI yI yI yI yI yI yI yI yI yI yI yI yI yI yI yI yI yI yI yI yI yI yI yI yI yI yI yI yI yI yI yI yI yI yI yI yI
golalol syljli .si oolilol g 0g y sljbs , wly dui jg g n jns k ng g .g w osy
g g jogc ljilalssio g jy jilwg 1jlgw gjjjjli jisljolw diwglui jslqjLjbljulai olaJl .si .sgo sglgoljI J
jIwS jIiSi jIg jIgS gS wJwS
siiuwi liWl jI JSLJBaAs SIs LS yJbIg
SIJIJI JI OlaWl, SiOsiIgai IgLalaiI JIg
Sljba, siiuwi liWl jI b As jIwS Iawg
g0sJLJSSuOgduoIgaiuoi
JusUolabasususususususususususususususususususususususususususususususususususususususususususususususususususususususususususususususususususususususus
J 10000000000000000000000000000000000000000000000000000000000
S1H SsJlJl SsJL JSLJgws
Gooo dai jds JlgjI gJ (SsJd sJL
SJd Jdi gsi Jgss Jda Jcdu Jg
GO sJgl JksJgJgJgJJg