AD 4390 - Coffee machine ADLER - Free user manual and instructions
Find the device manual for free AD 4390 ADLER in PDF.
User questions about AD 4390 ADLER
0 question about this device. Answer the ones you know or ask your own.
Ask a new question about this device
Download the instructions for your Coffee machine in PDF format for free! Find your manual AD 4390 - ADLER and take your electronic device back in hand. On this page are published all the documents necessary for the use of your device. AD 4390 by ADLER.
USER MANUAL AD 4390 ADLER
natural_image
Exterior view of a modern espresso machine with control panel and lever (no visible text or symbols)| AD 4390 | |||||
| EN | User Manual | 5 | PL | Instrukcja obsługi | 97 |
| DE | Bedienungsanleitung | 10 | IT | Manuale d'uso | 103 |
| FR | Mode d'emploi | 16 | SV | Bruksanvisning | 110 |
| ES | Manual de usuario | 22 | BG | Ръководство за употреба | 115 |
| PT | Manual de Instruções | 28 | DA | Brugsanvisning | 121 |
| LT | Naudojimo instrukcija | 34 | SK | Používatel'ská príručka | 127 |
| LV | Lietošanas instrukcija | 40 | BS | Korisnički priručnik | 132 |
| ET | Kasutusjuhend | 45 | MK | Упатство за употреба | 138 |
| HU | Használati útmutató | 50 | HR | Korisnički priručnik | 144 |
| RO | Manual de utilizare | 56 | UK | Керівництво користувача | 150 |
| CS | Návod k použití | 62 | SR | Упутство за употребу | 156 |
| RU | Руководство пользователя | 67 | AR | دليل المستخدم | 162 |
| EL | Еүхειρίδιο хрήσης | 74 | AZ | İstifadəçi tõlimatı | 165 |
| NL | Gebruikershandleiding | 80 | SQ | Manuali i përdorimit | 171 |
| SL | Navodila za uporabo | 86 | KA | Общегزطلاوي | 176 |
| FI | Käyttöohje | 92 | |||

text_image
A 4 5 7 12 6 9 8 10 11
flowchart
graph TD
    A["Espresso"] --> B["ON/OFF"]
    B --> C["2 X Espresso"]
    D["Americano"] --> E["Steam"]
    F["F"] --> G["Steam"]
    H["E"] --> I["Steam"]
C

text_image
2 cup filter 1-cup filterD
natural_image
Technical line drawings of a mechanical device with multiple views and components, no text or symbols present.E

natural_image
Technical line drawing of a mechanical device with lever and handle (no text or symbols)
text_image
OFF ONUser Manual (EN)
GENERAL SAFETY CONDITIONS IMPORTANT SAFETY INSTRUCTIONS FOR USE READ CAREFULLY AND KEEP FOR FUTURE REFERENCE
- Before using the device, read the instruction manual and follow the instructions contained therein. The manufacturer is not responsible for damages caused by using the device contrary to its intended use or improper operation.
- The device is for domestic use only. Do not use for other purposes incompatible with its intended use.
- Connect the device only to a grounded outlet 220-240V \~ 50-60Hz.
In order to increase the safety of use, multiple electrical appliances should not be plugged into a single circuit at the same time.
-
To provide additional protection, it is advisable to install in an electrical circuit, a residual current device (RCD) with a rated residual current of not more than 30 mA. In this regard, consult a specialist electrician.
-
Take special care when using the device when children are around. Do not allow children to play with the device do not allow children or anyone unfamiliar with the device to use it.
-
WARNING: This equipment may be used by children over 8 years of age and persons with limited physical, sensory or mental ability, or persons without experience or familiarity with the equipment, if this is done under the supervision of a person responsible for their safety or they have been given instructions on the safe use of the equipment and are aware of the dangers associated with its use. Children should not play with the equipment. Cleaning and maintenance of the equipment should not be performed by children unless they are over 8 years of age and these activities are performed under supervision.
-
WARNING: Do not use the device if its housing is cracked.
- WARNING: Do not leave the device plugged into an outlet unattended.
- WARNING: Keep the device out of the reach of children.
- WARNING: Improper use of the device, may result in injuries such as cuts, abrasions or electric shock, among others.
- WARNING: Always remove the plug from the power outlet after use by holding the outlet with your hand. DO NOT pull on the power cord.
- WARNING: Do not move the unit while it is in use.
- Do not immerse the cord, plug or entire unit in water or other liquid. Do not expose the unit to weather conditions (rain, sun, etc.) or use in high humidity conditions (bathrooms, humid motor homes).
- Periodically check the condition of the power cord. If the power cord is damaged, it should be replaced by a specialized repair facility to avoid danger.
- Do not use the device with a damaged power cord or if it has been dropped or damaged in any other way or is not working properly. Do not repair the device yourself, as there is a risk of electrocution. Return a damaged device to a competent service center for inspection or repair. All repairs may be made only by authorized service centers. Improper repair may cause serious danger
- Place the appliance on a cool stable, level surface, away from hot kitchen appliances such as an electric stove, gas burner, etc....
- Do not use the device near flammable materials.
- The power cord must not hang over the edge of the table or touch hot surfaces.
- This equipment is intended for domestic and similar use, such as: staff kitchen areas in stores, offices and other working environments, farm rooms, by customers in hotels, motels and other residential environments of this type, in sleeping and breakfast
rooms.
- Always take special care when making coffee. Do not touch the housing of the coffee maker.
- The coffee maker must not be placed in a cabinet when in use.
- Do not fill the coffee maker above the MAX level or below the MIN level, as this may burn or damage the coffee maker.
- Do not turn on the coffee maker without water, as this may cause damage to the coffee maker.
- Do not use the coffee maker without a filter or with the lid open.
- Periodically, the coffee maker should be descaled using the products intended for this purpose. Using the coffee maker with a calcified heater will damage it and void the warranty.
- Do not use aggressive detergents to wash the housing of the coffee maker, which may damage the coffee maker or remove the applied markings.
- The machine is not designed to operate with external timers or a separate remote control system.
- Do not wash the coffee maker directly in water, only wipe it with a dry cloth.
- Every time you pick up the espresso machine, remove the plug from the power outlet.
Product description pressure coffee maker Illustration A page 2:
-
Tank cover
-
Water tank
-
Steam knob
-
Top plate
-
Control panel
-
Cup tray and drainer
-
Steam nozzle
-
Single coffee filter
-
Double coffee filter
-
Portafilter
-
Portafilter holder
-
Coffee spoon and beater
Control panel description Illustration B page 2:
A. Single hot espresso B. ON/OFF. C. Double hot espresso
D. Americano E. Espresso Cool F. Para
Normal operation
-
Make sure the espresso machine is turned off and unplugged from the main power outlet.
-
Hold the water tank carrying handle and remove the water tank (2).
-
Fill the tank (2) with fresh and cold water. DO NOT exceed the maximum fill level "MAX".
-
Reinsert the water tank, And make sure the tank is properly connected.
-
Insert the filter (8,9) into the filter holder (10). Pour the ground coffee into the brewing filter (8,9), using the provided spoon (12). Always make sure that the espresso filter is clean and does not contain any coffee residue.
- If the grind is too fine, over-extraction and bitter, spotty and uneven foam on top will occur.
- If the grind is too coarse, the water will flow too quickly and there will be insufficient foam on top of the espresso.
- If necessary, add more ground coffee to keep the brewing filter full.
- Whisk the coffee again with the beater(12).
- Clean excess coffee from the edge to ensure proper fit under the brewing head and avoid leaks.
- Whisking coffee is an important process in espresso preparation.
- If the coffee is heavily whipped, the espresso will flow more slowly and there will be more cream.
- If the coffee is too poorly whipped, the espresso will flow faster and there will be less cream.
-
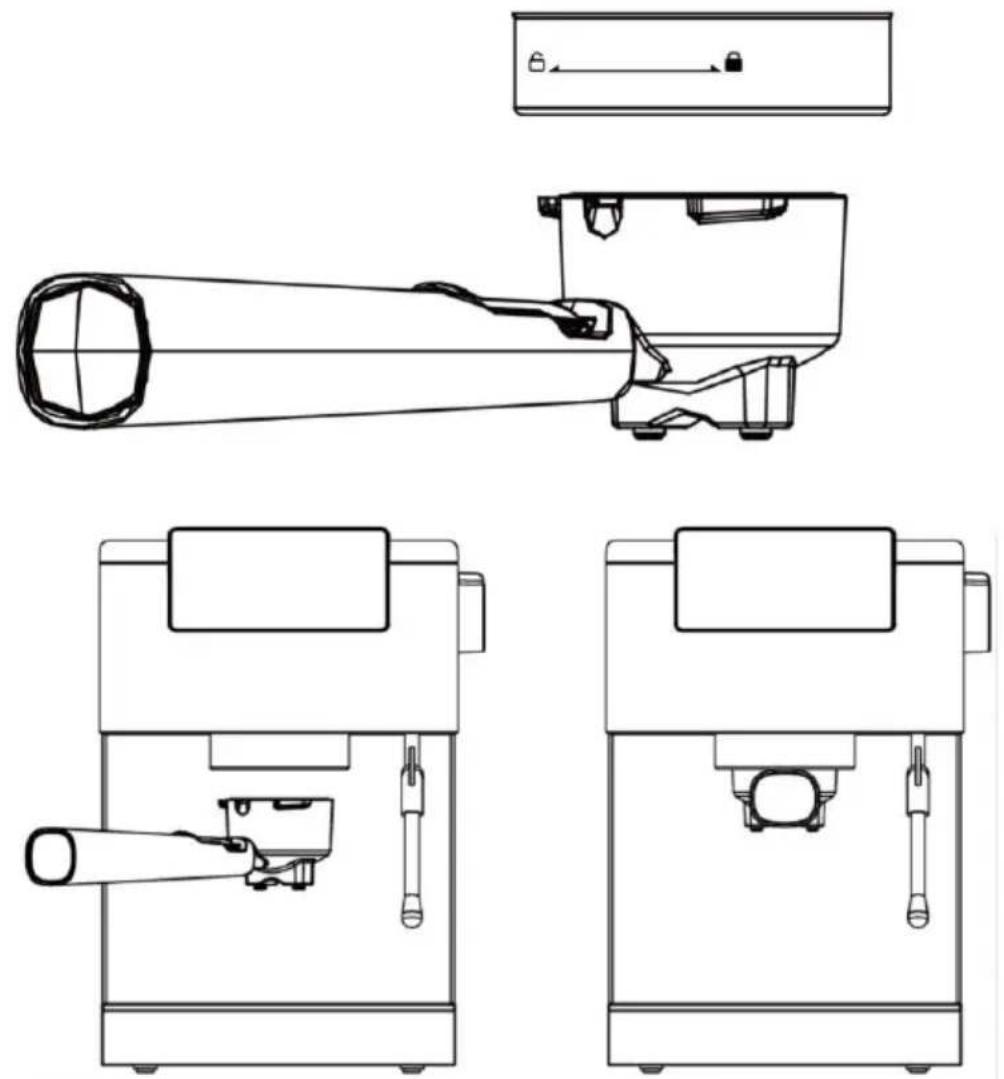
Secure the filter holder in the brewing head. See illustration D page 3. Slide the handle to the left, then turn the handle to the right until it locks into place. Release the handle, the filter handle must be securely seated in the brewing head and facing forward at a 90° angle.
-
Place one or two heated cups under the coffee spout.
See page 2 frame B for a description of the control screen.
NOTE: TO EXTEND THE OPERATION / EXTRACTION PROCESS PRESS AND HOLD THE SELECTED FUNCTION. THE MAXIMUM OPERATING TIME ON THE BOTTOM FUNCTION IS GIVEN IN THE DESCRIPTIONS BELOW.
-
After connecting, press the ON/OFF button. B. icon, all indicators are stable.
-
Cold Espresso Icon E: Put ice cubes into the water tank, press the Espresso Cool button for cold espresso, the longest time is 22 seconds.
Tip: Always use ice-cold water for best results.
-
Single hot espresso A icon: press the button, the light will start flashing, indicating that the machine is heating up. When the light stops flashing and stays on continuously, the machine is ready to brew coffee and pour coffee, the longest time is 16 seconds.
-
Double hot espresso C icon: press the button the lamp will start flashing, indicating that the unit is heating up. When the lamp stops flashing and shines continuously, the unit is ready to brew coffee and pour coffee, the longest time is 25 seconds.
Tips: the ideal coffee is dark and caramel with red highlights.
Tips:
-
After brewing hot espresso, allow the machine to cool completely before preparing cold espresso.
-
Turn the "Steam" knob to the ON position to release hot water to cool the machine. After a moment, press the button again and turn the knob to the OFF position. The espresso machine is ready for use again.
-
Americano: press the button, the light will start flashing, indicating that the machine is heating up. When the light stops flashing and shines continuously, the machine is ready to brew coffee and pour coffee, the longest time is 34 seconds.
-
Steam: You can do two things with "steam". You can heat the milk and mix it with air to get a foamy consistency. But you have to be patient if you want to be perfect in the milk frothing process.
Here are useful steps to get good quality frothed milk:
ONE: Determine how much milk is needed based on the number of cups you are preparing.
Tip: Remember that the volume of milk will increase during the frothing process.
TWO: Pour cold/cooled milk into the stainless steel frothing jug, to fill it about 1/3 full.
THREE: When you press the steam button, it will start flashing. It will stabilize when ready to use.
FOUR: Clean the water in the steam nozzle. The steam function is activated by pressing the Steam button (F icon), and turning the steam control knob (3) to the ON position. You can turn the control knob (3) to the OFF position when there is no more water.
FIVE: Turn the steam nozzle on the side of the coffee maker.
SIX: Place the steam nozzle in the milk so that the nozzle is about 1 cm below the surface of the milk and activate the steam function by turning the steam control knob (3) to the ON position.
SEVEN: Turn the jug so that the steam nozzle is just below the surface of the milk. Frothing will begin in the milk.
Note: Do not let the steam gush unevenly, as this will result in unevenly aerated foam/large bubbles. If this happens, lift the cup so that the steam nozzle is lowered deeper into the milk.
EIGHT: As the steam heats and froths the milk, the milk level in the cup will begin to rise. When this happens, keep track of the milk level by lowering the cup, always keeping the steam nozzle tip just below the surface.
THEN: Once the foam has formed, raise the cup until the steam nozzle is in the center of the milk.
Tip: Each drink requires a certain amount of foam. For example, a cappuccino requires more foam than a latte.
THEN: You must turn off the steam control knob to stop the steam immediately.
IMPORTANT: Do not boil the milk.
ONE: Remove the cup, wipe the steam nozzle and tube with a clean, damp cloth and immediately remove the small amount of steam.
CLEANING AND MAINTENANCE
When cleaning, turn off the coffee maker and unplug from the electrical outlet. DO NOT immerse any part of the coffeemaker in water or other liquid. To clean, simply wipe with a clean, damp cloth and dry before storing.
CLEANING THE FILTERS, PORTAFILTER HANDLE AND BREWING HEAD
Clean the stainless steel filters thoroughly. Rinse the portafilter holder under water immediately after use to remove coffee residue.
Periodically rinse the machine with water with the portafilter holder installed but without ground coffee to rinse out any coffee residue.
Use a damp, clean cleaning cloth and wipe the inside of the brewing head thoroughly to remove any coffee residue.
CLEANING THE OUTER HOUSING/ CUP WARMING PLATE
Do not use any aggressive cleaning agents to clean the outer cover. Use a soft and damp cloth to clean the outer cover and cup warming plate.
CLEANING THE DRIP TRAY
You must frequently remove, clean and empty the drip tray (6), especially when the drip tray is full. The tray can be thoroughly washed and rinsed in warm soapy water. Use a non-abrasive dishwashing liquid (do not use abrasive cleaners, sponges or cloths that may scratch the surface).
CLEANING THE DRIP TRAY
You must remove the drip tray after removing the tray. Then you must clean it with a soft and damp cloth (do not use any harsh cleaners or scouring agents).
NOTE: Do not wash any parts or accessories in the dishwasher.
CLEANING THE FROTHER TUBE
You need to clean the steam tube after the milk frothing process. Wipe the steam nozzle with a damp cloth, and then direct it back to the drip tray, briefly set the steam control knob to ON. At this point, the milk residue will be released from inside the steam nozzle. Make sure the steam nozzle and the control knob are in the OFF position. Turn off the machine, unplug the power cord and let the machine cool down. If the steam nozzle remains blocked, clean the hole with a pin.
Cooling function
You must let the machine cool down if you want to brew coffee again after the milk frothing process or brew coffee again directly after the milk frothing process or frother tube cleaning. Otherwise, the coffee will be burnt and splattered. You can continue to make new coffee after the cooling process of the machine.
The temperature rises after cleaning the steam pipe and the milk frothing process. To stop the steam function, you must press the corresponding button. Set the "steam knob" to ON to release hot water to cool the machine. After a while, switch the knob to the OFF position. The coffee maker is ready to use again.


For the sake of the environment. Information about used electrical and electronic equipment In accordance with Article 13(1) and (2) of the Law of September 11, 2015 on waste electrical and electronic equipment, we inform you about the proper handling of waste electrical and electronic equipment:
- It is forbidden to place waste electrical and electronic equipment together with other waste - this is confirmed by marking in the form of a "crossed out basket", ordering selective collection of this type of waste.
- Electrical and electronic equipment may contain hazardous substances, mixtures and components that, when released into the environment, can cause serious danger to the health and life of humans and living organisms. They can lead to numerous health ailments, such as vision, hearing and speech disorders, and can also damage the kidneys, liver and heart, and cause skin diseases. Harmful substances, can also have adverse effects on the respiratory and reproductive systems and lead to cancerous changes. Consumption of plants growing on contaminated soils, and products made from them, can risk the aforementioned health effects.
- Waste electrical and electronic equipment should be handed over only to authorized collection points, a list of which should be included on each Municipality's website.
- The household plays an important role, in contributing to the reuse and recovery, including recycling, of waste equipment. It also plays a key role in the waste electrical and electronic equipment management system due to the possibility of direct delivery to authorized collection points and the elimination of undesirable social habits resulting in leaving waste equipment in places not intended for it.
In addition, Donate waste electrical and electronic equipment at the point of delivery. A distributor, when supplying equipment intended for households to a purchaser, is obliged to take back used household equipment free of charge at the place of delivery of such equipment, provided the used equipment is of the same type and performed the same functions as the supplied equipment.
Cardboard packaging and polyethylene (PE) bags should be placed in the appropriate containers for separate collection of municipal waste according to their description. If there are batteries in the equipment, remove them and separately dispose of them at a collection and storage facility.
Do not dispose of the device in the municipal waste container!!!
Service If you wish to purchase spare parts or report any complaints, please contact directly with the seller who issued the receipt.
C. Espresso chaud double
D. Americano
E. Espresso Cool F. Para
ت Connectivity Marketing و Wholesale Marketing Quarterly and Online
Camb화 aged: provinces of Ghana, 1935, 2010; provinces of Georgia, 1940; provinces of South Africa, 1945; provinces of Hungary, 1950; provinces of Romania, 1960; provinces of Indonesia, 1970; provinces of Pakistan, 1980; provinces of Bangladesh, 1990; provinces of Thailand, 2000; provinces of Vietnam, 2010; provinces of Malaysia, 2020; provinces of Singapore, 2030; provinces of New Zealand, 2040; provinces of Russia, 2050; provinces of Canada, 2060; provinces of the United Kingdom, 2070; provinces of Sweden, 2080; provinces of Denmark, 2090; provinces of Iceland, 2100; provinces of Norway, 2110; provinces of Finland, 2120; provinces of Greece, 2130; provinces of the Netherlands, 2140; provinces of Luxembourg, 2150; provinces of Austria, 2160; provinces of Belgium, 2170; provinces of Ireland, 2180; provinces of Switzerland, 2190; provinces of the UK, 2200; provinces of the Netherlands, 2210; provinces of the Netherlands west, 2220; provinces of the Netherlands east, 2230; provinces of the Netherlands west, 2240; provinces of the Netherlands east west, 2250; provinces of the Netherlands west east west, 2260; provinces of the Netherlands west west east west, 2270; provinces of the Netherlands west west east west, 2280;
§300m35b0 yx60u 35h4960s
§390mm3560 yx60u 3564960s
ywxbou sdmngdou dgaqg, f3gomzbo yx6s ybqs sdmqmon. dgaqg ol bdoqno qos bgljosbo fumzomon ybqs zsfndbcom (sf gsdmygbmon ybdn lsfdybcno lsadysmgdjo sb sdsbonymo hozmoghdgdo).
dsgol dornol 364860s
饅 bol jsgol 36m2g1ou 3d4q2 g m6m7mou 3dmo 3b6os 3s6d06pom. m6m7mou 1s6f8bo 3b5y0sbo jlmz0cmom 3s6d06pom, 3d4q2 o1g3 f3g0ng1ou 3x6sdo 3s6pom 3s m6m7mou 3s6m2o1 3pmszo q6m7d0om 3s6m2pom. sd g3s3bg, m6m7mou 3b6pou 3d2boc5 bndol 3s6h6bd0 3sdmoymgs. q6m7d2pom, kmd m6m7mou 1s6f8bo 3s ds6m2o1 ponszo 3s d4m7mynw 3dqzmdsgmadsos. 3s d4m7mom 3s6f8bs, zsdm7mom 33g1ou 3s6pno 3s d2g2om 3s6f8sbu 3s6m7m0g1ou 1s6y5mgs. on y m6m7mou 1s6f8bo 33msz q6dm7m0mos, 3s6d06pom 3b6pno 3b6mno jobdolmszom.
^8586009805 ^8586009805
饅 dōu jsgol ámd bsggjdoi 36m3glou ájd qgg yszol bgsbms ámls qyqdmsq, sb ouy yszol bgsbms ámd bsggjds ámd jsgol ámd bsggjdoi 36m3glou sb jsgol áom ol a5m gbgolssbsg zhyfmm, s3shsbl
g_3g_0g_1g_2g_3g_4g_5g_6g_7g_8g_9g_10g_11g_12g_13g_14g_15g_16g_17g_18g_19g_20g_21g_22g_23g_24g_25g_26g_27g_28g_29g_30g_31g_32g_33g_34g_35g_36g_37g_38g_39g_40g_41g_42g_43g_44g_45g_46g_47g_48g_49g_50g_51g_52g_53g_54g_55g_56g_57g_58g_59g_60g_61g_62g_63g_64g_65g_66g_67g_68g_69g_70g_71g_72g_73g_74g_75g_76g_77g_78g_79g_80g_81g_82g_83g_84g_85g_86g_87g_88g_89g_90g_91g_92g_93g_94g_95g_96g_97g_98g_99h
s3s6s80u 3s36m7g0u 3d4q9g 3d8odmnom 3ss36dgmom sbsmo yszol dmd6sogds.
natural_image
Exterior view of a modern silver kettle with blue liquid, no visible text or symbolsElectric Kettle AD 1282

natural_image
Close-up of a dark glass grainer with powder spilling out, next to a small container (no text or symbols visible)Burr Coffee Grinder AD 4450

Milk Frother
AD 4491

natural_image
Black rectangular electronic device with a handle and ventilation slots (no visible text or symbols)Sandwich Maker AD 3055
natural_image
Silver standard 200 kitchen toaster with two handles and a visible brand logo (no text or symbols on the device itself)TOASTER 2 SLICE AD 3222

natural_image
Exterior view of a modern office building (no signage)ELECTRIC GRILL AD 3052

natural_image
White ADLER juice shaver with orange liquid and a white squee stick (no text or symbols visible)CITRUS JUICER AD 4009

natural_image
Product photo of a blender with orange juice and fruit in foreground (no visible text or symbols)PERSONAL BLENDER AD 4081
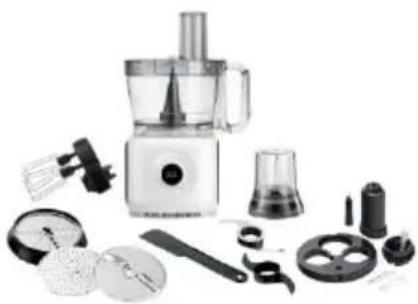
natural_image
Assorted kitchen utensils including a blender, spatula, and kitchen tools (no text or labels visible)FOOD PROCESSOR AD 4224

natural_image
Hand mixer with two coiled wires attached (no text or symbols visible)MIXER AD 4225

natural_image
Black air fryer with control panel and side door (no visible text or symbols)AIR FRYER AD 6310

natural_image
Exterior view of a modern silver coffee maker with black lid and side handles (no visible text or symbols)PASTEURIZATION POT AD 4496

natural_image
White portable air conditioner unit with visible branding and wheels (no text or symbols on device body)AIR CONDITIONER AD 7916
natural_image
Black and white portable water dispenser with a lid, no visible text or symbols on the device itself.AIR HUMIDIFIER AD 7966

natural_image
White portable heating fan with heat sink and ventilation grille (no visible text or symbols)FAN HEATER AD 7725
natural_image
Top-down view of a stainless steel kitchen pan with digital display (no visible text or symbols)KITCHEN SCALE AD 3166
ADLER
EUROPE

COFFEE GRINDER
AD 4446

natural_image
Exterior view of a modern stainless steel toaster with a digital display (no visible text or symbols)TOASTER 2 SLICE AD 3214

HAND BLENDER
Ad4625

natural_image
Modern stainless steel kitchen appliance with a digital kitchen scale and control knob (no visible text or symbols)MIXER WITH BOWL AD 4222

natural_image
Exterior view of a modern kitchen appliance with digital display (no visible text or symbols)AIR FRYER OVEN AD 6309
natural_image
Front view of a white microwave oven with control knobs and a blank screen (no visible text or symbols)MICROWAVE OVEN AD 6205

natural_image
Black rectangular electronic device with ports and lid (no visible text or symbols)WAFFLE MAKER AD 3049
natural_image
White digital kitchen scale with LCD display and control buttons (no visible text or symbols)KITCHEN SCALE AD 3170

natural_image
Glass water heater with blue splashing effect, no visible text or symbolsELECTRIC KETTLE AD 1286
natural_image
Black rectangular electronic device with a red indicator light, no visible text or symbols on the body.SANDWICH MAKER
AD 3043

natural_image
Exterior view of a silver and black industrial device (no visible text or symbols)PORTABLE FRIDGE AD 8077
natural_image
Black four-w Lisbon electric toaster oven with two top ovens and control knobs (no visible text or labels)Electric Oven With HOB AD 6020

natural_image
White electric heater with grid-patterned fan and control knobs (no visible text or symbols)FAN HEATER AD 7728

natural_image
Black electronic device with a blue mesh screen and antenna, no visible text or symbolsMOSQUITO LAMP AD 7938

natural_image
Close-up of a dark textured fabric with a white earband on the side (no text or symbols visible)HEATED PAD AD 7433

ORAL IRRIGATOR
AD 2176
AFTER SALE SERVICE NOTICE
| GB | If you want to buy spare parts or make any complaints, please contact the seller who issued the receipt directly. |
| DE | Wenn Sie Ersatzteile kaufen oder reklamieren möchten, wenden Sie sich bitte direkt an den Verkäufer, der die Quittung ausgestellt hat. |
| FR | Si vous souhaitez acheter des pièces de rechange ou faire des réclamations, veuillez contacter directement le vendeur qui a émis le reçu. |
| ES | Si desea comprar repuestos o presentar alguna queja, comuníquese directamente con el vendedor que emitió el recibo. |
| PT | Se você quiser comprar peças de reposição ou fazer alguma reclamação, entre em contato diretamente com o vendedor que emitiu o recibo. |
| LT | Jei norite jsigyti atsarginių dalių ar pateikti nusiskundimų, susisiekite tiesiogiai su kvitą išdavusiu pardavėju. |
| LV | Ja vēlaties iegādāties rezerves daļas vai izteikt pretenzijas, lūdzu, sazinieties tieši ar pārdevēju, kurš izsniedza čeku. |
| EST | Kui soovite osta varuosi või esitada pretensioone, võtke otse ühendust kviltungi väljastanud müūjaga. |
| HU | Ha pótalkatrészeket szeretne vásárolni, vagy panaszt szeretne tenni, forduljon közvetlenül a bizonylatot kiàllitó eladóhoz. |
| BS | Ako želite kupiti rezervne dijelove ili napraviti reklamaciju, obratite se direktno prodavaču koji je izdao račun. |
| RO | Если вы хотите купить запчасти или предъявить какие-либо претензии, пожалуйста, свяжитесь напрямую с продавцом, выдавшим чек. |
| CZ | Chcete-li zakoupit náhradní díly nebo uplatnit jakoukoli reklamaci, kontaktujte přímo prodejce, který účtenku vystavil. |
| RU | Dacă dorīti să cumpărati piese de schimb sau să faceți vreo reclamație, vă rugăm să contactați direct vânzătorul care a emis chitanța. |
| GR | Eáv θέλετε να αγοράσετε ανταλλακτικά ή να κάνετε οποιαδήποτε παράπονα, επικοινωνήστε απευθείας με τον πωλητή που εξέδωσε την απόδειξη. |
| MK | Ако сакате да купите резервни делови или да поднесете какви било поплаки, контактирајте директно со продавачот кој ja издал сметката. |
| NL | Als u reserveonderdelen wilt kopen of een klacht wilt indienen, neem dan rechtstreeks contact op met de verkoper die de bon heeft afgegeven. |
| SL | Če želite kupiti nadomestne dele ali vložiti reklamacije, se obrnite neposredno na prodajalca, ki je izdal račun. |
| FI | Jos haluat ostaa varaosia tai tehdä valituksia, ota yhteyttä suoraan kuitin antaneeseen myyjään. |
| PL | W przypadku chęci zakupu części zamiennych lub zgłoszenia ewentualnych reklamacji należy kontaktować się bezpośrednio ze sprzedawcą, który wystawił paragon. |
| IT | Se desideri acquistare pezzi di ricambio o presentare reclami, contatta direttamente il venditore che ha emesso la ricevuta. |
| HR | Se desideri acquistare pezzi di ricambio o presentare reclami, contatta direttamente il venditore che ha emesso la ricevuta. |
| SV | Om du vill köpa reservdelar eller göra nàgra reklamationer, vänligen kontakta säljaren som utfärdat kvittot direkt. |
| DK | Hvis du ønsker at købe reservedele eller reklamere, bedes du kontakte sælgeren, som har udstedt kvitteringen, direkte. |
| UA | Якщо ви хочете придбати запчастини або подати будь-які претензії, зверніться безпосередньо до продавця, який видав чек. |
| SR | Ако желите да купите резервне делове или да уложите рекламацију, обратите се директно продавцу који је издао рачун. |
| SK | Ak si chcete kupit' náhradné diely alebo uplatnit' akúkolvek reklamáciu, kontaktujte priamo predajcu, ktorý účtenku vystavil. |
| AR | إذا كنت ترゴب في شراء قطع غيار أو نتقديم أي شكوى، فيرجي الاتصال باليابع الذي أصدر الإيصال م็บشرة. |
| BG | Ако искате да закупите резервни части или да направите оплаквания, моля, свържете се директно с продавача, който е издал касовата бележка. |
| AZ | Ehtiyat hisseleri almaq ve ya her hansı šikayet etmek isteyirsinizse, qebzi veren satici lle birbaşa əlaqe saxlayın. |
| ALB | Nëse dëshironi të blini pjesë këmbimi ose të bëni ndonjë ankesë, ju lutemi kontaktoni drejtpërdrejt shitësin që ka lëshuar faturën. |
| KA | ση βυγμοι υσσαρσμηση μβσημσμόνι βσχρδις σδ φισηθι ζιθιζιβθης, δονθηση φυσγυσθησηφοση γσδυησιζιμι, φισηθισμόνι βσχρδις φυσγυσθηση ζιθιζιβθης. |