
Universal Humid - Measuring equipment BOSCH - Free user manual and instructions
Find the device manual for free Universal Humid BOSCH in PDF.

| Product type | Moisture meter (measuring equipment) |
| Brand / Model | Bosch Universal Humid |
| Dimensions (L x W x H) | 187 x 56 x 44 mm |
| Weight | 0.16 kg |
| Power supply | 3 AAA 1.5 V batteries (LR03) |
| Battery life | Approx. 10 hours |
| Measurement method | Resistance measurement (electrical conductivity of wood) |
| Measuring range (group A) | 7.1% ... 74.7% moisture |
| Measuring range (group B) | 6.4% ... 61.9% moisture |
| Typical accuracy (conductivity) | ±1% |
| Typical accuracy (temperature) | ±2 °C |
| Operating temperature | -5 °C ... +50 °C |
| Storage temperature | -20 °C ... +70 °C |
| Wood groups | Group A (maple, larch, Douglas fir...); Group B (ash, oak, beech...) |
| LED indicator | Green (<12% dry), Yellow (12-20% critical), Red (>20% damp) |
| Measurement memory | Up to 2 values with wood group and assessment (water drops) |
| Automatic shut-off | After 5 minutes of inactivity |
| Self-test function | Via the metal contacts of the protective cap |
| Care and cleaning | Soft, damp cloth; avoid solvents and immersion |
| Spare parts and repairability | Batteries, protective cap, wrist strap; repair by Bosch customer service |
| General information | Indoor/outdoor use; not protected against water splashes; max altitude 2000 m |
Frequently Asked Questions - Universal Humid BOSCH
User questions about Universal Humid BOSCH
0 question about this device. Answer the ones you know or ask your own.
Ask a new question about this device
Download the instructions for your Measuring equipment in PDF format for free! Find your manual Universal Humid - BOSCH and take your electronic device back in hand. On this page are published all the documents necessary for the use of your device. Universal Humid by BOSCH.
USER MANUAL Universal Humid BOSCH
YkpaHcbka ..CtoPiKa 213
Ka3ak. 225
Romana.. 237
Былгарский.. 249
MaKeIOnHcKn. 261
Srprski. Strana 272
Slovenscina Stran 284
All instructions must be read and observed. The safeguards integrated into the measuring tool may be compromised if the measuring tool is not used in accordance with these instructions. STORE THESE INSTRUCTIONS IN A SAFE PLACE.
Have the measuring tool serviced only by a qualified specialist using only original replacement parts. This will ensure that the safety of the measuring tool is maintained.
Do not use the measuring tool in explosive atmospheres which contain flammable liquids, gases or dust. Sparks may be produced inside the measuring tool, which can ignite dust or fumes.

Keep the magnet away from implants and other medical devices, e.g. pacemakers or insulin pumps. The magnet generates a field that can impair the function of implants and medical devices.
- Keep the measuring tool away from magnetic storage media and magnetically-sensitive devices. The effect of the magnets can lead to irreversible data loss.
- Only use batteries listed in this operating manual. Do not use any other button cells or other forms of electrical power supply.
- Handle the measuring tool carefully if the protective cap has been removed. Careless handling of the measuring tool when the protective cap has been removed can result in injuries.
The measured values may differ from the actual values. Measured values can be influenced by environmental factors (e.g. dust or steam in the measuring range), temperature fluctuations (e.g. through a fan heater) and the nature and condition of the surfaces being measured (e.g. uneven distribution of moisture).
Product Description and Specifications
Intended Use
The measuring tool is used for approximate determination of the wood moisture content. The moisture content of the object to be measured is determined by means of resistance measurement via the electrical conductivity of the object. The displayed measured value indicates the wood moisture content as a percentage. It is based on the dry mass of the wood.
The measuring tool is not suitable for determining the wood moisture content of objects to be measured that are thinner than 5mm .
The measuring tool is suitable for indoor and outdoor use.
The measuring tool is neither splash-proof nor dust-proof.
Example calculations
Wood moisture content:
The wood moisture content is calculated according to the following formula, or alternatively, it can be conveniently determined with the present measuring tool:
Wood moisture content in % = (mass of water contained in the wood / dry mass of the wood) x 100
Water content of the wood:
The water content of the wood is calculated according to the following formula:
Water content in % = (wood moisture content/ (100 + wood moisture content)) x 100
Example 1: 100% wood moisture content
Water content in % = (100 / (100 + 100))× 100 = 50%
20 | English
Example 2: 50% wood moisture content with 1kg of wet wood:
Water content in % = (50 / (100 + 50)) × 100 = 33.3% , corresponds to approx. 333.3g of water.
The dry mass of the wood amounts to 666.6g
Product features
The numbering of the product features refers to the diagram of the measuring tool on the graphics page.
(1) On/off/hold button
(2) Select button for wood groups
(3) Display
(4) LEDindicator
(5) Pins
(6) Protective cap
(7) Carrying strap
(8) Serial number
(9) Battery compartment cover
(10) Magnets on the measuring tool
(11) Magnets on the protective cap
(12) Metallic contacts on the protective cap
Display elements
(a) Current measured value
(b) Saved measured values
(c) Warning symbol
(d) Temperature indicator
(e) Battery charge indicator
Technical data
| Moisture meter UniversalHumid | |
| Article number | 3 603 F88 0.. |
| Measuring procedure Resistance measurement | |
| Measuring range | |
English | 21
Moisture meter UniversalHumid
Wood moisture content A 7.1% to 74.7%
Wood moisture content B 6.4% to 61.9%
Ambient temperature -5^ to +50^
Unit of measurement
Wood moisture content %
Ambient temperature ^ C
Measuring accuracy (typical)
Temperature ± 2^
Conductivity ± 1%
Wood group selection
Wood group A Maple, birch, larch, Douglas fir,
cherry tree, spruce
Wood group B Ash, pine, oak,
walnut, beech
Reference values for the wood moisture content
Dry < 12%
Concerning 12 % to 20 %
Moist >20%
General
Operating temperature -5^ to +50^
Storage temperature -20^ to +70^
Relative air humidity max. 85%
Max. altitude 2000 m
Pollution degree according to IEC 61010-1
2^B )
Batteries
3 × 1.5 VLR03 (AAA)
Approx. operating time
10h
Weight according to EPTA-Procedure 01:2014
0.16 kg
22 | English
Moisture meter UniversalHumid
Dimensions 187× 56× 44mm
A) At an operating temperature of 25^
B) Normally only non-conductive pollution occurs, although occasional temporary conductivity caused by condensation can be expected. Allow the measuring tool to acclimatise and remove condensation from the pins before taking a measurement.
The serial number (8) on the type plate is used to clearly identify your measuring tool.
Assembly
Inserting/changing the Batteries
It is recommended that you use alkaline manganese batteries to operate the measuring tool.
To open the battery compartment, remove the battery compartment cover (9). Insert the batteries.
When inserting the batteries, ensure that the polarity is correct according to the illustration on the inside of the battery compartment.
Always replace all the batteries at the same time. Only use batteries from the same manufacturer and which have the same capacity.
Tip: To easily remove the batteries, pull the strap in the battery compartment.
Slide the battery compartment cover (9) back on again.
Take the batteries out of the measuring tool when you are not using it for a prolonged period of time. The batteries can corrode and self-discharge during prolonged storage in the measuring tool.
Battery Indicator in the Display
The following table shows the correlation between the capacity/operating time of the batteries and the battery charge indicator (e) in the display (3).
| Display Capacity/operating time | |
| 75% to 100% | |
| 50% to 75% | |
| 25% to 50% | |
| < 25% | |
| ≤ 15 minutes of operating time |
When the battery symbol is flashing, no further measurements are possible. Change the batteries.
Operation
Start-Up
Protect the measuring tool from moisture and direct sunlight.
- Do not expose the measuring tool to any extreme temperatures or variations in temperature. For example, do not leave it in a car for extended periods of time. In case of large variations in temperature, allow the measuring tool to adjust to the ambient temperature before putting it into operation. The precision of the measuring tool may be compromised if exposed to extreme temperatures or variations in temperature.
Make sure that the measuring tool has sufficiently acclimatised to the ambient temperature. In case of large variations in temperature, acclimatisation can take up to 30 minutes. This may be the case, for example, if you first perform a measurement in a cool basement and then head upstairs to take a measurement in a warm attic.
Avoid hard knocks to the measuring tool or dropping it. After severe external influences and in the event of abnormalities in the functionality, you should have the measuring tool checked by an authorised Bosch after-sales service agent.
Tip: Affix the enclosed sticker with the wood groups and the corresponding wood types in the required language to the battery compartment cover (9).
Switching on/off
To switch on the measuring tool, press the on/off/hold button (1) or the select button for wood groups (2). The ambient temperature is shown for two seconds on the display (3) and the symbols for wood group selection, A and B flash in the line (a). When starting the tool for the first time, wood group A is selected by default.
To switch off the measuring tool, press and hold the on/off/hold button (1) for approx. 1.5 seconds. When the measuring tool is switched on again, the last selected wood group is preset in the measuring tool.
Following five minutes of inactivity after the last measurement or the last button press, the measuring tool will switch itself off automatically to conserve battery life.
24|English
Measurement Preparations
Setting the Wood Group
For optimum measuring results, the wood group must be set before each measurement. Select the appropriate wood group with the button (2). The selected wood group is shown in the display (3).
Tip: If the wood you are using does not appear in either of the two wood groups or you are unsure which type of wood is closest to the wood you are using, use wood group A. This generally indicates a higher value. This ensures that you are not processing your wood too early or too moist.
When switching off the measuring tool, the set wood group is saved. When the measuring tool is switched on again, the last selected wood group is preset in the measuring tool.
Object to be Measured
The area in the wood to be measured must be untreated and free of branches, dirt, resin, rot, knurls or other defects. The wood should be free of chemical surface treatment.
Do not perform any measurements on end surfaces, since the wood here dries out particularly quickly. This could lead to incorrect measurement results.
For measuring the humidity of fuels, it is advisable to split up the wood sample before measuring and then take measurements at three different points. Measuring points: 5cm from the left and right cut edges respectively, and in the centre of the piece of wood (see figure B).
Measuring process
Take off the protective cap (6). To do this, lightly pull on both sides of the protective cap (6). Attach the protective cap to the rear of the measuring tool (magnetic), see figure on page 3.
Before taking the measurement, ensure that the ambient temperature corresponds to the temperature of the object to be measured. If required, wait until the measuring tool has acclimatised to the ambient temperature.
Carry out the moisture measurements at least 5cm from the cut edges, since the wood on the edge dries out quicker than in the centre (see figure B).
Do not measure the surface of the wood. Water that may have accumulated here as a result of rain or dew can affect the measurement.
Always measure across the grain. Do not measure parallel to the grain or along the growth rings (see figure A).
The measurement is taken at the depth at which the pins (5) are inserted. Optimum measuring results are achieved when the pins are inserted approx. 4 - 5mm into the
piece of wood. The detents on the pins that have been placed at a depth of 5mm can be used for alignment.
To start the measuring procedure, insert the pins into the wood. Caution: Do not use force to do this. You should refrain from using other objects to knock the measuring tool into the wood. Insert the pins into the wood using left-right motions.
The measurement begins as soon as the pins (5) make contact with the wood. The measured wood moisture content is shown in the display (3) on the line (a). The measured wood moisture content is also indicated via the LED (4):
- Green: Non-critical wood moisture content (< 12%)
- Yellow: Concerning wood moisture content (12% to 20%)
- Red: Critical wood moisture content (>20%)
Saving Measured Values
To save the measured value, briefly press the on/off/hold button (1). The saved measured value is displayed in the bottom line (b) of the display (3). A new measured value is shown in line (a) of the display (3). After saving the new measured value in the bottom line (b), the previous measured value is transferred to the line above (b), and so forth. Two measured values (b) can be shown on the display (3) at any one time. The saved measured values (b) are shown with the selected wood group and a moisture symbol in the form of water droplets:
- One water droplet (corresponds to green LED): Non-critical wood moisture content (< 12%)
- Two water droplets (corresponds to yellow LED): Concerning wood moisture content (12% to 20%)
- Three water droplets (corresponds to red LED): Critical wood moisture content (>20%)
Tip: This indicator can be helpful if the display (3) is not visible from a certain angle or if comparative measurements need to be taken.
When the measuring tool is switched off, the stored measured values are deleted.
Application Examples and Reference Values for the Wood Moisture Content in Timber Construction
Wood moisture content measurement of:
- Firewood before is set alight: Prevents smoke formation and reduces emissions
- Parquet flooring before it is installed: Prevents gaps from forming after it is laid
- Wood for furniture manufacturing: Prevents deformation, mould formation, insect infestations and cracks
26 | English
- Wooden houses/garden sheds: Prevents the formation of mould and reveals any water damage
- Wooden caravans: Can be used to inspect a caravan for mould or unsound areas before purchase/rental
The following table shows the typical wood moisture content for various applications.
| Application range Wood mois- | Examples |
| ture content [%] | |
| Completely enclosed structures with heating | 9 ± 3 e.g. tables, chairs, cabinets in the living room/kitchen (when heated in winter) |
| Completely enclosed structures without heating | 12 ± 3 e.g. basement shelves (without heating) |
| Covered, open structures 15 ± 3 e.g. carports | |
| Structures that are completely exposed to weather from all sides | 18 ± 6 e.g. external walls of summer houses/garden sheds |
| Other examples of wood moisture content: - Wooden house construction: max. 18% - Parquet floors: 9% ±2% -Floors: max. 12% - Subfloors: max. 20% - Substrates: max. 15% -Staircases: 9% ±3% -Firewood: max. 22% (optimum < 17%) | |
Self-Test Function
The self-test function checks the functionality of the measuring tool.
Switch the measuring tool on (see "Switching on/off", page 23).
Take off the protective cap (6).
Hold the pins (5) against the metallic contacts (12) on the rear of the protective cap (6) (see figure C).
Compare the value on the display with the values printed on the protective cap (6) according to the wood group you have selected:
Wood group A: 11.1% - 11.9%
- Wood group B: 9.8% - 10.4%
1609 92A 5EY | (29.04.2020) Bosch Power Tools
Should the values not match, send the measuring tool via your dealer to be checked by an after-sales service agent for Bosch.
Practical advice
Influences on the Measurement Result
The accuracy of the measured values is greatest when the ambient temperature corresponds to the temperature of the piece of wood to be measured.
The measurement result can be influenced by:
- The wood group and wood subgroup
- The temperature of the piece of wood to be measured
- The division of the piece of wood to be measured into heartwood and sapwood
- The insertion depth of the pins in the piece of wood to be measured
- The surface treatment of the piece of wood to be measured (e.g. oils or coatings)
- Whether the measurement is carried out parallel or perpendicular to the structure/ grain of the piece of wood to be measured
- The distribution of moisture
- The measuring point (i.e. whether this is in the centre or at the end of the piece of wood)
- The condition and type of the piece of wood: The wood should be free from rot, knurls or defects of any other kind
Caution: If exact values are required, a measurement should be taken according to the Darr method (exact laboratory procedure as per DIN 52183).
Errors - Causes and Corrective Measures
| Cause Corrective measures | |
| Warning symbol (c), temperature indicator (d) and "Err" in the display | |
| Ambient temperature is outside of the op- erating temperature range of -5 °C to +50 °C. | Wait until the measuring tool has reached operating temperature. |
| For wood group A: > 74.7 % and "HI" in the display | |
| For wood group B: > 61.9 % and "HI" in the display | |
| Wood moisture content is outside the measuring range (too high) | Take the measurement again in another area on the wood. |
| Indicator "- - .-" on the display | |
28 | English
Cause Corrective measures
Wood moisture content is outside the Take the measurement again in another measuring range (too low) or measurement area on the wood. has not been performed correctly
The measuring tool monitors the correct operation in each measurement. When a defect is determined, "Err" and the warning symbol (c) are shown in the display. Switch the measuring tool off and on again. If the error persists, remove the batteries and then reinsert these after a few seconds. If the aforementioned corrective measures cannot correct an error, send the measuring tool via your dealer to be checked by an after-sales service agent for Bosch.
Maintenance and Service
Maintenance and Cleaning
Check the measuring tool before each use. If the measuring tool is visibly damaged or parts have become loose inside the measuring tool, safe function can no longer be ensured.
Only store and transport the measuring tool in a suitable container, such as the original packaging.
If repairs are required, send in the measuring tool in its original packaging.
Do not affix any stickers over the pins.
Keep the measuring tool clean at all times.
Never immerse the measuring tool in water or other liquids.
Wipe off any dirt using a damp, soft cloth. Do not use any detergents or solvents.
When cleaning the measuring tool, ensure that no liquids enter the tool.
After-Sales Service and Application Service
Our after-sales service responds to your questions concerning maintenance and repair of your product as well as spare parts. You can find explosion drawings and information on spare parts at: www.bosch-pt.com
The Bosch product use advice team will be happy to help you with any questions about our products and their accessories.
In all correspondence and spare parts orders, please always include the 10-digit article number given on the nameplate of the product.
Great Britain
Robert Bosch Ltd. (B.S.C.)
P.O.Box 98
Broadwater Park
North Orbital Road
Denham Uxbridge
UB95HJ
At www.bosch-pt.co.uk you can order spare parts or arrange the collection of a product in need of servicing or repair.
Tel. Service: (0344) 7360109
E-Mail: boschservicecentre@bosch.com
Ireland
Origo Ltd.
Unit 23 Magna Drive
Magna Business Park
City West
Dublin 24
Tel. Service: (01) 4666700
Fax: (01) 4666888
Australia, New Zealand and Pacific Islands
Robert Bosch Australia Pty. Ltd.
Power Tools
Locked Bag 66
Clayton South VIC 3169
Customer Contact Center
Inside Australia:
Phone: (01300) 307044
Fax: (01300) 307045
Inside New Zealand:
Phone: (0800) 543353
Fax: (0800) 428570
Outside AU and NZ:
Phone: +61 3 95415555
www.bosch-pt.com.au
www.bosch-pt.co.nz
Republic of South Africa
Customer service
Hotline: (011) 6519600
30 | English
Gauteng - BSC Service Centre
35 Roper Street, New Centre
Johannesburg
Tel.: (011) 4939375
Fax: (011) 4930126
E-Mail: bsctools@icon.co.za
KZN - BSC Service Centre
Unit E, Almar Centre
143 Crompton Street
Pinetown
Tel.: (031) 7012120
Fax: (031) 7012446
E-Mail: bsc.dur@za.bosch.com
Western Cape - BSC Service Centre
Democracy Way, Prosperity Park
Milnerton
Tel.: (021) 5512577
Fax: (021) 5513223
E-Mail: bsc@zsd.co.za
Bosch Headquarters
Midrand, Gauteng
Tel.: (011) 6519600
Fax: (011) 6519880
E-Mail: rbsa-hq.pts@za.bosch.com
Disposal
Measuring tools, accessories and packaging should be recycled in an environmentally friendly manner.
Do not dispose of measuring tools or batteries with household waste.
Only for EU countries:
According to the Directive 2012/19/EU, measuring tools that are no longer usable, and according to the Directive 2006/66/EC, defective or used battery packs/batteries, must be collected separately and disposed of in an environmentally correct manner.
François
Robert Bosch (France) S.A.S.
Lea y observe todas las instrucciones. Si el aparato de medicación no se usa según las presentes instrucciones,SEOSEOSEOSEOSEOSEOSEOSEOSEOSEOSEOSEOSEOSEOSEOSEOSEOSEOSEOSEOSEOSEOSEOSEOSEOSEOSEOSEOSEOSEOSEOSEOSEOSEOSEOSEOSEOSEOSEOSEOSEOSEOSEOSEOSEOSEOSEOSEOSEOSEOSEOSEOSEOSEOSEOSEOSEOSEOSEOSEOSEOSEOSEOSEOSEOSEOSEOSEOSEOSEOSEOSEOSEOSEOSEOSEOSEOSEOSEOSEOSEOSEOSEOSEOSEOSEOSEOSEOSEOSEOSEOSEOSEOSEOSEOSEOSEOSEOSEOSEO SEOEO SEOEO SEOEO SEOEO SEOEO SEOEO SEOEO SEOEO SEOEO SEOEO SEOEO SEOEO SEOEO SEOEO SEOEO SEOEO SEOEO SEOEO SEOEO SEOEO SEOEO SEOEO SEOEO SEOEO SEOEO SEOEO SEOEO SEOEO SEOEO SEOEO SEOEO SEOEO SEOEO SEOEO SEOEO SEOEO SEOEO SEOEO SEOEO SEOEO SEOEO SEOEO SEOEO SEOEO SEOEO SEOEO SEOEO SEOEO SEOEO SEOEO SEOEQ
Robert Bosch Argentina Industrial S.A.
Calle Blanco Encalada 250 - San Isidro
B1642AMQ
Calle Robert Bosch No. 405
C.P. 50071 Zona Industrial, Toluca - Estado de Mexico
Tel.: (52) 55 528430-62
Tel.: 800 6271286
Bosch Service Center
Telegrafvej 3
2750 Ballerup
På www.bosch-pt.dk kan der online bestilles reservedele eller oprettes en reparations ordre.
TIf. Service Center: 44898855
Fax: 44898755
E-Mail: vaerktoej@dk.bosch.com
Bortskaffelse
Bosch Service Center
Telegrafvej 3
2750 Ballerup
Danmark
Tel.: (08) 7501820 (inom Sverige)
Fax: (011) 187691
Avfallshantering
Forberedelse for maling
Tonoetnon/aalaynunatapov
Tia Tn Ieitoupyia Tou opyavou meptnoang ouviotatai n xpnoaakaiikwv maataipw vayaviou.
Tia to avoivma tnc oiknc twv mataipiaw apaipote To kALmu TnC thknc twv mataipiW (9).Toothetahote mea tic mataapiec.
PiooeEe 6w tn owt noikotnta oupwa me tnv npdaon otnv eowtepk nleupa Tc hknct wv mataipiwv.
Avtkaoiatae navtoe tautoxpova oec tic matapiec. Xpnaiopoiiteoivo npataiec evocataaokeuaotn kal e Tny ibia xwpntikotnta.
Robert Bosch Sp. z o.o.
IpouHTaTe N BbINOHnYe BCE yKa3aHn. IcNoB3OBAHne H3MePHTeNbHO rHCTpyMeHTa He B COOTBeTCTBnC HAcTOAUMN yKa3aHnAMn UpeBaTo NOBpeXdEHNEM HHTerpnpoBaHHbIX 3aunTHbIX MexaHn3MOB. I0XaANYCTA, HADEXHO XPAHNT ETN YKA3AHnA.
PemOHn3MepHTeNbHO HHCTpyMeHTa pa3peWaeTcBbINONHtB TOnbKO KBAHNΦHnPOBaHHOMy NepcoHany HToBko C HCNoB3OBAHmEOpHRnHaNbHbIX 3aNa-cteN.3TNMO6ecneuBaETc6eONaCHOCTb N3MEpHTeNbHO HHCTpyMeHTa.
He pa6oTaIe C H3MepHTeBHBIM HHCTpyMeHTo M BO B3pbIBOONacHOcpe, NO- 6n30CTN OT rOpUChx KndKocTe, ra3OB H nbInn. B H3MepHTeBHom HHCTpyMeHTo MOrYt O6pa3oBAtbcra NCKpbl, OT KOTOpbIX MOKeT BOCnIaMeHHTbcra NbIb HnI napbl.
He yctahabnBaIte MarHHT B6nn3n HmnnAHTaHTOB n npOuNX Me- dNcHcknx aannapATOB, HAp., KapdnoCTMMyJATOPOB HHCyHNOBbIX HAcOCOB. MaHHT co3daet NOle, KOtOpoe MOKET BO3JeCTBOBaTb Ha pa60Ty MMnAHTaHTOB n MednHCKNX aannapATOB.
Depxnte H3MepntbHbI HHCTpyMeHT BdAnOT MaHHTbIX HocHTeNe DaHHbIX N OT np6oB, yBcTBnTeMbIX K MaHHTOMy NOIO. Bo3JeCTBne MaHHTOB MoKET pINBOINTb K HeBOCNOHMoN OTepe daHHbIX.
NcnoIb3yIe TOnbKO 6aTapeH, yka3aHHbIe B HactoIeM pyKOBODCTBE NO 3KcNnyatauH. He nCnoIb3yIe HbIE MHHaTHOpHbIe 3JIeMeHTbl NITaHry IINn INHbIe NCTOUHKN PNTAHN.
Octopoxho 6paauTecb c n3MeptelbHbIM HnCTpyMeHTOM npn CHrTOM 3aunHOM KOnnaKe. Heoctopoxhoe 6paueHne c n3MeptelbHbIM HnCTpyMeHTOM 6e3 3aunTHoro KOnnaKa MoXe TpNBcTn K TpaBMam.
3haueHnHa3MepeHn Moryr otTnHuatbca ot fakTucecknx 3haueHn. KaKTOpbl OkpykaIoUeI cpebl (HanpHmep, nbInb nnn nap Ha H3MepeHmom yuactke), nepenadbl temnpaTypbl (HanpHmep, BcneCTBne pa60tBe TENOBENTNlTopOB), a TaKKe KaueCTBO N COCTOHNHe H3MepeMbIX NOBepxHOcte (HepaBHomepHa BnaXHOCTb) Moryr OTpuataEnbHO cKa3aTbcra Ha pe3yNbTaTAX H3MepeHn.
Onncahne npodukta n ycnyr
PpHMeHeHnNoHa3HaueHnIO
H3MePHTbHb HnCTpyMeHt HcNoIb3yETc Dn I npOBepKn pnpMEpHO BnaxHoTH dpeBecnbl. BnaXHoCTb HccNeIyEMo O6BeKta ONpeIeJIeTc, NcxOJa n3 H3MepeHHoro CoIpoTHBLeHn MExdy 3JeKtpnueckmN KOHTaMn. OTo6paKaemoe 3HaueHne H3MepeHn BnaxHOCTn dpeBecnbl BblpaKaETcB IIpoUeHTax. OTHCHTbHO cyxOu MaCcbI dpeBecnbl.
I3MePHTeHbHbI HcTpyMeHT He NOxOHT dJa ONpeJeHnBnAaXHOCTN DpeBeCnHbI TOJIuHoi MeHee 5 MM.
I3mepntbHbI HnCTpyMeHT npHroeH dIpa60tBhTyPi NOMEueHn Ha OTKpbITOM BO3dyxe.
HCTpymEnTH He HMeet 3aunTbI OT Nblnn 6pb13 BObl.
202 | Pycckn
PpMepbI BblncJIeHn
BnaxHoctb dpeBecnHbl:
BnaXhoctb dpeBecnbl paCCuHtBiaetcNo cneIyOuEe fOpMyne, a TaKxe ee MOxHO IerKO onpeDenTb C nOMoUb DaHHoro N3MePnteHoro IHCTpyMeHTa:
H3o6paXeHHbIe coCTaBHbIe yactn
Hymepaun npedctabHeHHbIX COCTaBbIX qacte BblONHeHa NO H3OpaXeHNIO N3MepnTeNbHOro INHcTpymEnTa Ha cTpaHnue C nllIOCTpaunmN.
(1) BbIKIIOuATEnb / KHOJa yIepKaHn
(2) KhoNka BbIbopa npoDJI dpeBecnHbI
(3) DnCnnne
(4) CBeToDnOHaHnHnKaua
(5) KOHTaKTbI
(6) 3aunTHna KpbiWka
(7) Tnna npehockn
(8) CepnHbH Homep
(9) Kpbiuka 6atapeHoro OTeceka
(10) MarHnTbHa n3MepeHTeBHom HnCTpyMeHTe
(11) MarHnTbHa 3aUHTHO KnpIiKe
(12) MeTaNueckne KOHTaKTbHa 3aUHTHO KpbIuKe
3nemEmtbi Hndkaun
(a) Tekyuch pe3ynbTaT n3MepeHH
1609 92A 5EY | (29.04.2020) Bosch Power Tools
(b) CoxpaHeHHbIe 3HaueHn I3MepeHn
(c) IpeynpeinteHbI CNMBOI
(d) HndkaTOp TempepaTypbI
(e) HndkaTop 3apJxKeHHOCTN
TexHnueckne daHHbIe
OTHOCHTeBHa BnaxKHOCTb BO3dyxa He 6one 85%
MaKc. BbICota npImeHHeHa nD pepeHOB BBICOTOn 2000 M
CTepeh3aepnHeHNoCOrnachoIEC61010-12 B)
Barapen 3 x 1,5 B LRO3 (AAA)
BpempaobTo npm.10u
Macca cornacno EPTA-Procedure 01:2014 0,16 K
Pa3Mepbl 187 x 56 x 44 MM
A)Пи рабочеи Temперatype 25°C
B) O6bHNO npCcyTCTByeToNbKO HnpoBOJAAee 3aRpa3HeHHe. Ondako, KaK npaBnIO, Bo3HnKaet BpemeHHa NPOBOMOCTb, BblBaHHa KOHeHcaUne. IpeE n3MepeHem DaTe n3MePHTeHbHOMy IHCTpyMeHTy aKKlHMaTH3nPoBAtBCr U ydaJIte KOHeHcAT C KOHTAKTOB.
OndH3aHaHnIeHTnKauHn3MePHTeNbHO IHCTpyMeHtBa BO3MOxHa No cepHOMy Homepy (8) Ha 3aBOdCKoT a6nue.
C6opka
YctahOBka/3ameHa 6atapeek
B n3mepntelbHOM nHcTpymHeIpeKOMeHdyetc HcNoIb30BaTb IeNoUHO-MapraHcEbbie 6batapeyn.
YTO6bI OTKpbITb KpbIuKy 6batapeHoro OTceKa, CHIMnTe KpbIuKy 6batapeHoro OTceKa (9).BcTaBbTe 6batapeH.
CneHnTe npH 3a npabHbIM HnPaBHeHem NOHOCOB B COOTBEcTBn C n306paJxHHeM C BHyTpeHHe CTOpOHb 6batapeHoro OTceKa.
MeHnTe cpa3y Bce 6bapeKu OndHOBpeMeHHo. HcnoIb3yIe ToIbKO 6bapeKu OndHOro Ipon3BOJNTeJI N OINHaKOBoE MKOCTN.
Cobet: 6aTapeH MoXHO IeKo N3BNeUb, Notry B 3a NeHTy B 6aTapeHOM OTceKe.
CHOBA yCTaHOBIne KpbIuKy BaTapeHOro OTceKa (9).
H3BneKaTe 6aTapeKn H3 H3MePHTeBHO rHCTpyMeHTa,ecn npoDOnXHTeBHOe Bpem He 6yTe pa60TaTb c Hm. Pn dInTeBHom XpaHeHH B H3MePHTeB-HOM IHCTpyMeHTe BO3MOxHa KoppO3n I camOpa3pIka 6aTapeek.
Hndkatop 3apra6aatapeh na dncnnee
B Tabnue Hnke noka3aHO COOTHOWeHne MeKdy emKOCTbIO / BpeMeHem pa60TbI baTapei HnDnKaTopOM 3apra (e) Ha DnCnlee (3).
| Инд�示ерЕмкость/Bрemies pa60ы | |
| 75%...100% | |
| 50%...75% | |
| 25%...50% | |
| <25% | |
| ≤15 minут pa6осяв ремен |
Ecnncmbon 6bapen Mnaet, npoJOnKeHne H3MepeHn 60one HeBO3MOxHo. 3aMeHHte 6bapen.
Pa60Ta c HnCtpymeHTOM
BkIoueHne 3NeKtpOnHcTpymEHTa
3aunuaTe H3MePHTeBHBHn HHCTpyMeHT OT BnARn n npAmbix CONHeuHbIX ny-uen.
He noDBepraTe H3MepntbHbI NHCTpyMeHT BO3DeEChTBIO 3KCTpeMaIbHbIX TemnepaTpy N TemnepaTpybIX nepenaOb. Hanpimep, He ocTaBnIte ero Ha dInTeNbHO BPEMA B aBTOMo6nIe. Pn3NaHTeJIbHbIX KOleBaHNx TemnepaTpy Bi nepei Haayanom HCNoJIb30BaHHa DaIte TemnepaTpye H3MepNTeBHO INHCTpyMeHTa Cta6NIn3HPOBaTcBcA. 3KCTpeMaJIbHbIE TemnepaTpyBI N TemnepaTpyHbIe nepenadMoYr OTPnuaTeNbHO BnIyTb HA ToUHOCT b H3MepNTeBHO INHCTpyMeHTa.
CneHnTe 3a DoCTaTOOH aKKHMaTH3aUHe N3MepHTeBHO HNCTpyMeHTa. Pn cnIbHbIX nepenadaX Temnepatypbl BpemA aKKHMaTH3aUIMoKet IOCTnRaTb 30 MmH. HanprHmep, KOrda H3MepENHa Ipon3BOJrTCB XOIOHOM IOBaIe, a NOTOM HNCTpyMeHT npeHocHTcra Ha TeNbIy ePdak.
H36eRaTe CnIbHbIX TOnUcKOB HnaJeHHa N3MePHTeBHO HHCTpyMeHTa. Pocne CnIbHbIX BHeuHNX BO3DeiCTBn Ha N3MePHTeBbHbIN HNCTpyMeHT, a TaKxe npH Heo6bIyHOM NOBeHenn erO cyHKun, IpexKe Yem npOdoJkaTb pa60TaTc H3MePHTeBbHbIM HNCTpyMeHTOM, CNeDyET npOBepNTb erO B aABTOpOBAHHO CepBnCHO MaCTepCKoB Bosch.
Cobet: npKneTe HaKneKy n3 KOMnKeTc nOpoaMn H COOTBETCTByuUIMN COPTAMn DpeBecnHbHa BaWeM a3bIke Ha KpbIwky batapeHoro OTCeKa (9).
BkIIOueHne/BbIKIOueHne
ДяВКIOUeHЯИЗМерптелбНОИнСТРУМЕТаHAЖMITEБыКПЮЧATENB/KNONKYyepKJAHNA(1)иИKHONKY BbIbopa nopoDbIДpeBecHNb(2).TemnepaTypa OKpykaIoцeN
Bosch Power Tools 1609 92A 5EY| (29.04.2020)
206 | Pycckn
cpebl OTo6paXaetcHa DnCnnee (3) B TeueHne 2 cekyHd, a CnMBonbl BbIbopa nopoDbl dpeBecnbl, A n B MnraT B CTpOke (a). Pocne BBoDa B EKcnnyatauNIO no yMOnuHaNIO yctahOBHeHa nopoda dpeBecnbl A.
Дя BBKIOUeHЯ n3MepHTeHbHO rHCTpyMeHtA yIepXHaIte BblKIOuAteNb / KHOKNy yIepKaHn npm. 1,5 cekyn (1). Nocne nobTOpHOro BkIOUeHn coxpaHReTc yTa-HOBka nOcneHn Bbl6paHHo nopoDbl dpeBecnbl Iry n3MepHTeHbHO rHCTpyMeHtA.
EcnH He HcNoIb3OaTb IHCTpyMeHT B TeueHne 5 MmHyT H He HaXIMaTb HNKaKHe KHONKn, TO H3MepnteIbHbI INHCTpyMeHT aBTOMaTHueCKn OTKIIIOaETcR C cIeJIbIO EKOHOmn 3apraDa 6atapei.
IoproTOBka Kn3MepeHIO
YctaHOBKa npoDby dpeBecnHbI
Дллллучehнг ONTIMaJIbHbIX pe3yIbTaTOB n3MpeHnH, nopOdy dpeBeCnHb CneJyET yCTaHaBnBaTb nepeK kaxdblm n3MpeHnEM. KhoNkoI (2) Bby6epHTe noxOAnuIIO npOdy dpeBeCnHb. Bby6paHHa nOPOda dpeBeCnHb OTO6pa3ntc Ha dnCnIee (3).
Cobet: ecn HcnoB3yemaJpeBecnHa, He BXoHt HN B OHy N3 DByX rpynn npoD, nHn ecn Bbl He 3HaTe, K KaKoI npOe JpeBecnHbI OTHCNTcBaW MaTePnA,IcNoB3ynte yCTaHOBky dpeBecnHbI npoDbI A; obuHOB TaKOM cnyae nOlyaeTc Hau6onee Blicokn POKa3aTeNb. TaKIM o6pa30M, Bbl MoKeTe 6b1b yBepHebl, uTo hauAn o6pa6otKy dpeBecnHbI BOBpemr HnI qTO OHa He CInsKOM BlaXkHa.
Pn BbIKIOueHn I3MepHTeNbHO INCTpyMeHt a yCTaHOBJIeHHa NOPOda IpeBeCINbI coXpaHReTc. Iocne IOBTOpHOro BKIOUeHn COxpaHReTc YCTaHOBka NocJeHne Bbl6paHHo nopoDbI dpeBeCINbI dnn I3MEpHTeNbHO INCTpyMeHt a.
06beKTn3MepeHn
Yactb dpeBecnbl, noJnxaJnH3mepeHHo, DOnxHa 6bItb Heo6pa6oTaHHo n OunuH Hoi OT Bcok, rpr3n, cmoJI, cneIOB rHHeHHa, cyKOB nnDpynx DepeKToB. NobepxHOCTb dpeBecnbl He DoJnxHa 6bItb XmNueckn 6pa6oTaHa.
He npoBoiTe n3MepeHnHa cInnaX, nockoIbky dpeBecnHa 3decb ocObeHHO bIcTpo coxHet. I3-3a 3TOBO Bbl MoKeTe NOnyUHTb HeBepHbIe pe3yNbTaTbI n3MepeHn.
Ipn H3mepeHHn BnaXHOCTn B npOBax HmeeT Cmbl pa3dennb 6pa3euc DpeBeCHhbl neped H3mepeHem H3meptb Btpex Mectax. Toukn H3mepeHHN: 5 cm OT IeBOH INpap BOH KpOMKn pe3a nnocepEHNHe 6peBHa (cm. pnc. B).
Прочедура Измерени
ChnHmTe 3aunTHyKpblkky (6).Ira 3TOrO cnerka notAHnTe 3auHTHyo KpbliKy (6) C dByx CTOpOH. PnKpeHnTe 3auHTHyo KpbliKy K 3aHHeu qactn H3MepntelbHoro INCTpyMeHTa (Ha MaHnTbI), CM. pnc. Ha CTp. 3.
Ipeed hauanom n3mepenhy y6eHntecb, yTo temnepaTpa OkpykaIOUe Cpebl COOTBETCTByet TemnepaType n3mepreMoro o6bekta. Ppn Heo6xOIMOCTH NOOJNTe, noka n3-Mepntelhbl INHTpyMeHT aantnpyETc K TemnepaTpe OkpykaIOUe Cpebl.
I3mepbTe BnaXHOCTb Ha paCtOHHn He MeHee 5 cm OT KpOMOK pe3a, NOCKoJIbKy Ha KpOMkax IpeBecHnca CoxHet 6bICTpee, yem B cepeHnHe (cm. pnc. B).
He npoH3BOJTe H3MepeHHHa NOBepXHOCTn DpeBecHb. 3-3a DoJy nn pOcbi Ha noBepxHOCT MoKeT HaKaJIINBaTc BnAra N BnIaTb Ha H3MepeHH.
Bcerda npo3BOJTe 3aMepbl nonepeK BOLOKOH. He npo3BOJTe 3aMepbl npaJIeNbHO BOLOKOH HIN BDOJIb rOINHbIX KOJIeC (CM. pIc. A).
I3MepeHne npOxCoDnT Ha rny6nHe BBeDeHHa KOHTaKToB (5). ONTMaJIbHbIe pe3yNbTaTbI H3MepeHna DOCTraOTcA, ecn KOHTaKtBb IBBeDeHb I npHM. Ha 4-5 MM Brny6b dpeBeCnHbI. HaceuKa Ha KOHTaKtax IO3BOJAreOpHeHTnpOBaTbcr npn NOMEueHHn Ha rny6nHy 5MM.
Дянана замера Вставы Контakсы Вдревсану.Внимане: He npinaraite ychinn He nCnoIb3yIte pyrgne npedmetbl, uTo6bl 3a6nbl n3Mepntelhbl nHCTpymertB DepeBO! BcTaBte KoNTaKtbl Bдревсану Движеним ВпраBO-BNeBO.
BapnaHbI npHMeHeHHa N opHeHTnpOBouHbI noka3aTeHN BnaXHOCTN dpeBeCnHbI pHi cTpOHTeNbCTBe H3 dpeBeCnHbI
I3mepenHe BnaXHOCTn DpeBecInHbI:
-Дров перд схигаимem:празOTВрацет образованные дым и умени.TСТВО поруковсcropаян.
- napketa neped yknadko: npedotbpaaaet oba3oBaHne unei noce yknadkn
-Древсаны Дя ИЗТROВLEнЯ Meбел:празOTВрааET Deфорmaцио,образоване Ппесен,ПOMORAET BblBNTb HaCEKOMbIX N TpeunHbI
-DepeBHHbIX DOMOB/dauHbIX DOMNKOB: PpeIOTBpaaet O6pa3OBAHne IJIeCEHN BblIyRAJET NOBpeKdEHH, Bbl3BaHHbIe BnaRoI
-DepeBHHbIX KINbIX cyprHOHOB: NOMOKeT BbIaBITb DeΦeKT (NneceHb Hn NOBpeKdEHNbIe yuaCTKN) Do NOKyπKn / apehdbI
B cneyuoue Ta6nue npBedeHa TINHua BnaXHoCTb DpeBeCnHb np pa3nHOM NC- nOlb3OBaHH.
Pn ouHCTKe H3MepeHTeBHO rHCTpyMeHTa B HeO He DOnJxHa IOnaTb KKnKocTb.
CepBnKoHcyIbTnpOBaHne no BOpocam npImeHeHH
CepBnchbI OTdE IOTBeTHT Ha Bce Baun Bonpocbi no peMOHTy n 06cnyKbAHIO BaWero npOdykTa, a TAKKe no 3aunactram. N3o6paXeHna C npoctpaHCTBeHHbIM pa3deJeHem DeIaTe HnHOpMaUHO NO 3aunactram MOxHO NOCMOTpeTB TAKKe no aDpecy: www.boschpt.com
KoIneKTHB COTpydHnKOB Bosch, npedocTablaIOuN KOHCyNbTaUH Ha npedMeT nCNoJIb-3OBAHn IPOdyKUnn, cyIOBOJbCTBnEM OTBeHT Ha BCE BaUN BONpOcBi OTHOcHTeJIbHOrO HauE IPOdyKUnn Iee npHaADNeXHoCTeN.
IoxanyiCTa, BO Bcex 3anpocax n 3aka3ax 3aunacte o6raTeNbHO yka3bBaIte 10-3naHbTOBAPHbHOMep no 3aBOdckoTbNnueKe H3dEIny.
ДлpernoHa: PoccH, Benapycb, Ka3axCTaH, YkpanHa
IapaHTnHoe 06cnyKbAHne n peMOHT 3NEkTPoHHCTpyMeH-Ta, C CO6JIIOHeHem Tpe6OBAHn HOpM 13rTOBtTeNa IPO- 13BOJATCn Ha TeppHTOpHN BCEX CTpaH ToJIbKO BΦnmeHHbIX nnn ABTOpN3OBaHHbIX cepBnCHbIX ueHTpax «PObepT BoW」. PPEyIPPEXDEHNE! NcNoIb3OBaHne KOHTpaKaTHOH npo- Dukunn OAnCHO B EKCnPyatauH, MoKeT npHBecn K yUepe6y dIra BaWeRo 3dOpOBb. 13rTOBHeHne n pacnpocTaHeHne KOHTpaKaTHOH npOdyKUnn ppecNeDyETcno 3aKohy B aad-MMHnCTpaTHBOM n yroLOBHOM nopAKe.
Pocch
YIONHOMOeHHa H3ROTOBtTeJEM OprAHn3aun:
OOO «Po6epT BoW» BauyTHNcKoe Wocce, Bn. 24
141400, r. XmKn, MockOBcka o6n.
TeL.: +7 800 100 8007
E-Mail: info.powertools@ru.bosch.com
www.bosch-pt.ru
212|Pycckn
Benapycb
ИП«РберТБош»OOO
СервicHyицentpo no obcnyKuBaHnIO əJIeKtpoHnCTpyMeHTa
yn.Tmnpa3eBa,65A-020
220035,r.MHHCK
Te..+375(17)2547871
Te..+375(17)2547916
Фakc:+375(17)2547875
E-Mail:pt-service.by@bosch.com
Офпцальний саT:www.bosch-pt.by
Ka3axCTah
LcHTKoHcyIbTnpoBaHnI npHeMa npTeH3n
TOO «Робет Б ow» (Robert Bosch)
I.AImatbl, Pecny6nka Ka3axctaH 050012
yn.Mypar6aeba,180
BU «Fepmec», 7иэтж
Ten.: +7 (727) 331 31 00
ΦaKc: +7 (727) 2330787
E-Mail: ptka@bosch.com
IOnHyIO n aKtyaJIbHyIO HhOpMaunIO O paCnOJKeHN cep-BnCHbIX ceHTPOB n npHemHbIX NyHKTOB Bbl MoKeTe NOnyUHTb Ha oOpNuaJIbHOM caHTe: www.bosch-professional.kz
MondoBa
RIALTO-STUDIO S.R.L.
П. KaHTeMnpa 1, 3Tax 3, ToproBbI ueHtp TOIa3
2069KuHHeB
Ten.: +37322840050/840054
ΦaKc: +373 22 840049
Email: info@rialto.md
YTNn3aCna
OtcnykBwne cBoN cPoK n3MeHnTeNbHbIe HnCTpyMeHTbl, npHaJNeXHOCTn uYnakOBky CneDyET CdaBaTb Ha 3KOLOrHuECKn UHCTyIO peKyepaunIO OTXoIDOB.

He BbIbpaCbIbAaTe N3MePnteHbHbIe HNCTpyMeHTbl N 6aTapeKn B 6bITOBoMycop!
Tolbko dIra cTpaH-ueHOB EC:
B COOTBETCTBHN C EBPOENCKO INHepeKTHBOI 2012/19/EU HeoHbIe H3MepntbHbIe np6op n B COOTBETCTBHN C EBPOENCKO INpeKTHBOI 2006/66/EC HeoHbIe Nn OTcLyXHBWNE CBOI cPOK aKKyMylTOpHbIe 6aTapeN/6aTapeNk DoJxHbIc Co6npaTbcra pa3-DeNbHO n CdaBaTbcHa 3KOLOrHuCckn UHCTUo peKynepaunio.
YkpaIHcbka
Bka3iBkn 3 Texhikn 6e3neKn

IpoountaTe BcI Bka3IBKn I doTpmyTecn IX. BHKOpncTaHnB HmipobanbHoro inctpyMeHa 6e3 doTpmaHH nX iHCTpyKciM OMe np3BecTu Do noWkoJKeHH nTERpObaHHx 3axnCHnx MexaHI3MiB. HADINHO 36EPIAITE L bBA3IBKN.
BidaBaTe BHMipIOBaIbHn IHcTpymeHT Ha pemOH IINe KBAiΦIKOBaHm 0axIBzM Ta IINe 3 BHKOpHCTAHHm OPHrIHANbHNx 3anactHH. TInbKN 3a TaKnx yMOB BaW BHMipIOBaIbHn npnaI i Hadani 6ye 3aIIuATnc 6e3neuHm.
He npaiothe 3 BmipobalbHm iHctpymeHToy cepeoBnui, de ichye He6e3neka B6byx BhaCniOk npncythocTi ropouhpiin, ra3iB a60 nnny. Y BmipobalbHomy npnaDi MOxyt yTBOPOBaTnca iCKpn, BiJAKnx MoKxe 3aMAtnca nnapn.
He BCTaHOBNIOte MarHIT NO6HN3y IMNnAHTIb iIHmNX MeuHHx anapatIB, HApP., KapIOCTMMyTOpB i IHCyniHOBX NOMn. MarHIT CTBOPIOC NONE, 10 MoKHe HeRaTHBHO BnHBaTH Ha cyHKioHaJIbHy 3dATHiCTb IMNnAHTIb i IHCyniHOBX NOMn.
TpmaTe BmipIOBaIbHn IHcTpymENT Ha BiIcTaHI BiI MarHITHX HocIIB daHnx I cyTINBHX Do MarHITHX noniB npnaib. BnHB MarHITIB MOKe npu3BeCTn Do Heo6OpOTHO BpATN daHnx.
BnKOpNCTOByTe NHe 6aTapei, Bka3aHi B ui iHcTpkyu 3 ekCnnyatau. He BnKOpNCTOByTe 6yd-ri KI iHsi MHiAtIOphI eIeMeHTN JKNBneHHa a6o iHsi dKepeNa CTpyMy.
06epeXHO NOObTeC3 BmipIOBaIbHM IHCTpymeHTOM, KOH 3HATN 3axnCHn KOBNaOpK. Heo6epexHe IOBOJKeHHa 3 BmipIOBaIbHM IHCTpymeHTOM 6e3 3axnCHO RO KOBNaUka MoKe npn3BecTn Do TpaBM.
214|yKpaHcbKa
3haueHHB BMipIOBaHb MOxytb BiDiPI3HrTcHc BID 6aKTnUHx 3haueHb. FakTopn HABKoHNHbOre cepEOBua (HanpIKnA, nIa6o npapa Ha dInAHci BMIPIOBaHH), nepenad Temnepatypn (HanpIKnA, BHaCniOk po60TH TENNOBEHTnAToPiB), a TAKOX JKiCTb i CTah nobepXOHb BMipIOBaHH (HepiBHOMipHa BONorictb) Moxytb HeratNBHO BnHHyTuHa pe3yJbTaTH BMIPIOBaHH.
Bmict BONORy depeBuHi:
Bmict Bonoruy depeBnHi po3paxOByc8a TaKOIO fOpMynIO:
BmictBoIOny%=(BoIoricbDiepeBHH/(100+BoIoricbDiepeBHH))x100
PnKla1: BONorictb depeBHH 100%
BmictBOIOny%=(100/(100+100))×100=50%
PnKla2:BONorictb DepeBHH 50% Ha 1 Kr BOnoroi DepeBHH:
Bmict BONOR y % = (50 / (100 + 50)) x 100 = 33,3%, BiДиоВидэгпрИб. 333,3 Гови.
Cyxa Maca depeBHH cTahOBHT npH6n. 666,6r.
3o6paxeHi KOMnoHeHTN
Hymepaia 3obpaXeHX KOMnoHeHTIB NOCHnaCTbCn Ha 3obpaXeHHB NMipIOBaIbHOI HcTpyMeHa hCTOpIHci 3 MaIIIOHKOM.
(1) BUNMkau/kHONka yTpmyBaHHa
(2) KhoNka Bn6opy BnDIBpeBHH
(3)
(4) CbitnoioiDHH iHnkaTOp
(5)
(6) 3axnchnn KOBnaQoK
(7) PTeTnIe nppeHeceHH
(8) CepiHn Homep
(9) Kpnka cekuii dna 6atapeok
(10) Marhit Ha BHMipIOBaIbHOMy iHCTpyMeHTi
(11) Marhit Ha 3axnchomy KOBnaCy
(12) MeTaJIeBI KOHTaKTn Ha 3axHCHOMy KOBnaUky
Enementn iHdkauii
(a) AKtyaIbHn pe3yIbTaBmIpOBAHH
(b) 36epexehi 3haeHHBnMipIOBAHH
(c) PonepeJxByBaIbHn CmB0N
(d) Ioka3HnK Tempepatypn
(e) IHHaTop 3apJxKeHocti
TexhiuHdani
| Вимиробач Вологи UniversalHumid | |
| Товарни Homep | 3 603 F88 0.. |
| Спосiod вимиробachie Вимиробachie onору | |
| ДIANAZON BHMIRIOBANNA | |
| Волoricitь деревин A 7,1% ... 74,7% | |
| Волoricitь деревин B 6,4% ... 61,9% | |
| Tempepatура наковлшього се peobица -5°C ... +50°C | |
| Однения вимиробachie | |
| Волoricitь деревин % | |
| Tempepatура наковлшього се peobица °C | |
| Точnic第六遍 (Тинова) | |
Bosch Power Tools 1609 92A 5EY| (29.04.2020)
216|yKpaIHcbKa
IpnBnMipIOBaHHI BONrny Tropoux MaTePianax Mae ceHc po3dInHT 3pa3OK DepeBHHI nepeBnMipIOBaHHI BnKoHaTH BnMipIOBaHHB Tpbox Tockax. TouKn BmIpIOBaHHa: 5cm BiD IiBoi Ta npaboipixkyoik pKaIKN Ta nOcepeHHI KOIoN (INB.MaI.B).
Ppoeypa BmipIOBHaH
3himitb 3axnchn KOBnaqok (6).Длгцboro 3nerka NOTaHrHtB 3axnchn KOBnaqok (6) 3 06ox 6okIB.3aФikcyte 3axnchn KOBnaqok 3 aHboro 6oky BmipBoBaIbHOro IHctpymeHTa (MaHITOM),Mn.MaI.Ha cTOpIHUi 3.
Ipeed noaTkom BmipobahnnepekoHaTeC, 10 TeMnpaTypa HaBKOHNbOro cepeoBnla BiNobidae Temnepatypi 6'ekTa BmipobAHn. 3a Notpebn 3auekaite, nOKn BmipobalbHn iHCTpyMeNT npHCTOCyETbcr DO TemnepaTypn HABKONHbOro cepeoBnla.
BnKohyTe BmipIOBAHHBaIIOrOCTi Ha BiIDctahi npHaHmHI 5 cm BiD pIXyUnx KpaIK, OcklbKn DepeBnHa WbNdWe BucnXaE cKpaIO, HIX NocpeDnHi (INB. Man. B).
He BnMipIOHTe Ha NOBepxHl DepeBHH.Boa, 10 MoKe HAKoNCHTcHcYepe3 DoU cHPOcy,BnINBaE Ha BmIPIOBAHH.
3aBxN BmipOte nonepeK BOLOKOH. He BmipIOte npaIeIbHO DO BOLOKOH a60 B3doBx piHnx Kineu (INB. Man. A).
BmipHOBAHH BID6yBaetbC B 0bnacti rnn6HH BCTaHOBHeHH WTHΦTIB (5).
OnTnMaJIbHnx pe3yIbTaTIB BnMIpiIOBaHHa MOxHa DoCgTTN, RaKIO BCTaHOBHTN WTHΦTN np6n. Ha 4-5 MM y DepeBHy. BImka Ha SttNΦTx, kpa KpInntbcra Ha rnn6HHi 5 MM, 3abe3neue opieHTauio.
IIO6 NOaTH BnMIpIOBaHHN, NocyHbTe 7TNΦTH y DepeBHy. YBara: He 3aCTOCOBYte Cnny i He BnKOpNCTOByTE iHsi IpeMmTn, 106 BTCHyTH BnMIpIOBaJIbHNI IHCTpyMeHT y DepeBHy! BcTaBTE 7TNΦTH y DepeBHy pyxAmn BnIO-BnpaBO.
220|YkpaHcbKa
BnMipIOBaHH po3NouHaεTbcA, 00HNO uTnΦTb (5) yBiydyb y KOHTaKT 3 DepeBnHO. BnMipHa BOnorictb DepeBnH BiO6paKaTbcra Ha nCnnei (3) y pAnky (a). Ipo BmIPIOBaHy BoNOrictb DepeBnH TaKoX CNrHaI3yec Cbitnoio4:
-3eIeHn:HeKpHTuHaBOIogicTbJepeBHH(<12%)
-ЖОВТИ: He6e3neuHa BONIOCTb DepeBHH (12% ... 20%)
-червонкрптуна ВОлогICTьдеревин (>20%)
36epexeHHpe3yNbTaTy BmipIOBaHH
36epeTn pe3yIbTaB HmipOBaHH, KOpOTKoaycho HaTNCHTb BmHKaU/KHONky UTPMByAHN (1). 36epeXeHn pe3yIbTaB HmipOBaHH BiO6paXaCTbcB HNXHBOMy PAnKy (b) DnCnne (3). HOBn pe3yIbTaB HmipOBaHH BiO6paXaCTbcB PAnKy (a) DnCnne (3).PiCn 36epeXeHH HOBO pe3yIbTaTy BmipOBaHH B HNXHBOMy PAnKy (b) PonepeHni pe3yIbTaB HmipOBaHH BiO6pa3NTbcY BepxHBOMy PAnKy (b). To6To MoKyTB BiO6paXaTncA Dba pe3yIbTaTH BmipOBaHH (b) HaDnCnnei (3). 36epeXeHi pe3yIbTaTH BmipOBaHH (b) BiO6paXaHTbc3 OpaHm BIDOM DepeBHN Ta CnMBOLOM BOLOROCTI y BNJIaIKPaeNB BoDi:
-1Kpann(BIDIOIa3eHOMyCBITNOIOy):HEKpTNuHaBOIorictbdepeBHH<12%
-2Kpanni BOIN(BiINOBiJaE KOBTOMy CBITIOIOy):He6e3neuHa BONorictb DepeBHH (12%...20%)
-3Kpanni BOHn (BiINOBiJaE uePBOHOMy CBITNOIOIOny): KpHTNuHa BONorictb DepeBHHN (>20%)
Iopada: iHnkaic KOpncHa, kUo dncnn (3) He moXHa noaHTn nID neBHM KyTom a60 kUO notpi6Ho 3pObHTn nopIBHJIbHi BHMIPIOBaHH.
Iicra BmKHeHHB MmipOBaHOro IHcTpymeHa 36epexeHi pe3yNbTaTn BmMipOBAHH BuaJrTOBCa.
PpHKnIaH3acTocyBaHH Ta opiEHTOBHI 3HaueHHBONorOCTi DepeBHH npn 3BeHeHHi DepeB'Anx KOHcTpkyKci
BmipioBaHHBOIoroCTiDepeBHNH:
-ДрOBперспалюваннam:зanobiraeytBopeHHIOДIMyTa3MeHwYeKINbKicTb BIDnpaцьованxra3iB
- napkety nepeq MOHTaxem: 3ano6irae yTBopeHHIO WBIB nicra yknadaHn
-DepeBHHnI MaNCTpyBaHnMa6nIB:3anobirae deOpmaui,pocty uBii, N0sKoJKeHHIO KOMaxaMn Ta TpiuHaM
-ndepeB'AHnx 6yHnHKiB/caObHX 6yHnKiB:3anobiraC yTBopeHHIO uBINI Ta BnABnIe NOWKoJKeHHBaD BOIN
-DepeB'YHnx KEmnepiB: OONOMOKe He npnd6aTH/opeHdyBaTH KEmnep 3 UBiINIO a60 HAnIB3pyHOBaHmN dIINHKamN
Y hactynhi Ta6nuii Habeenei Tnnobi pibH BOIorocti IpeBHN dI py i3Hx 3aocyBaHb.
TpMaIte 5)Ha MetaneBHX KOHTaKTax (12) Ha 3BOpOTHomy 6oCi 3axnCHOrO KOBNaUka (6) (INB. Man. C).
IopibHnIte 3haeHHHa dncnnei 3HaueHHa, HApyKOBaHmHa 3axnCHomy KOBnauchy (6), BiIOBIDHO do Bn6paHOro Bamn BNDy DepeBHH:
-BnIepeBHHA:11,1% -11,9%
-BnDpeBHHN B:9,8% -10,4%
Bosch Power Tools 1609 92A 5EY| (29.04.2020)
222|YkpaHcbKa
JaKIO 3NaueHHe 36iraotbcra, nepeaTe BmipioBaIbHn iHCTpyMeHT Do ueHTpy 06cnyroByBaHHa KInCTiB uee3 CBOrO dInepa Bosch.
Bka3iBkn icoso p60tn
ΦaKTopn BnNBy Ha pe3yNbTaT BmipIOBaHH
TouHicb BnMipIOBaHnx 3HaueHb MaKcHMaJIbHa, KOHI TEMpepatya HaBKOJIuHbOcrepeoBnua BiNobIaC Temnepatypi UMaTka DepeBHH, IO BnMipIOeTbcra.
Ha pe3yIbTaBnMipIOBaHH MoKyTb BnIINHyTN:
-BnTaPiBnDJepeBHH
- TemnepaTpa WMaTKa DepeBHHN, IO BmipIOETbC
- po3noiI n DepeBHH, IIO BnMipIOeTbC8a HcepueBHy Ta 3a6oNoHb
-ΓH6HnBa BCTAHOBHeHH 8HTbY yMaTOK DepeBHH, Oo BVMIPOETbC
-obpo6ka noBepxhi ⅢMaTka DepeBHH,IO BnMipioetbCra (HaPnKlaIa,Macna a6o fap6n)
BnMipIOBaHH npaJIeIbHO a6o nepneHnKynpH O KOHCTpyKci i 60 TeKcTypi MaTka DepeBHN, Ioo BnMipIOeTbcra
-po3nojin B0Iogn
-TOUka BnMipIOBaHHa (HapnKlaI, nOcepeHNHi a6oB KInu i WMaTka DepeBNH)
-CTaTtIIMatka DepeBHH:DepeBHa Ma6bytn 6e3 rHnI,By3nIB Ta iHux Deefekti
YBara: JIIO NOTPIHITouHI 3HaueHH, CII BIKOHyBaTHBIMIPIOBAHHaMeTOOM 3BaJyBaHHJaPPa (ToHa Ia6opatopHa npoepdya 3riDnO 3 DIN 52183).
Hecnpabhocti - Ppunnn i ycyhenn
PpUHa YcyHenn
PonepeJxBbHn CmB0n (c), noka3Hk TemnepaTypn (d)Ta «Err» Ha dncnnei
TemnepaTypa HABKONHbOro cepeOBu3haoDHTc83aMekamn diaNa3OHy po6ooyi TemnepaTyprn Bi-5°C do+50°C.
3auekaTe, nOKn BmipIOBaIbHn IInCTpyMeHT He DoCraHe po6oOit Tempepatypn.
Длвду DepeBHH A: >74,7% ta «H» ha dučnnei
Длвду DepeBHH B: >61,9% ta «H» ha dinpnei
Bolorictb depeBHH 3a Mexamn diaana3ohy BmipIOBaHHa (3aHaTO BnCoka)
HObe BmipIOBaHHHa iHOMy Micci UMaTKa DepeBHH.
Pnunna Ycyhenn
IIndkaizg(-.-)HaDncnnei
Bolorictb DepeBHH 3a Mexamn diana3ohy Hobe BmipioBaHH Ha iHOMy Micci BmipioBaHH (3aHaTo Hn3bKa) a6o WMATka DepeBHH. BmipioBaHH BHKOHaHO He npabNbHo
BmipobbHn iHctpMeHT BiDcTeKyE npaBnIbHicTb po60t npi KoxHomy BmipobHH. RaIO BnABHeHO HeCnpabHicTb, Ha DCnPJIe 3'ABNCTbcra [Err] Ta nonepdkyBaHbHn CNMBO1 (c). BmKHiTB BmipobaBbHn IHcTpMeHT Ta 3HOBy yBIMKHITb. RaIO NOMIIka He 3HNKaE, BnIMtB 6aTapeNk Ta BCTaBe IX uepe3 KInbKa cekynd. RaIO Bnue3a3NaheH 3axOOn 3 ycHyENH He CnpabHocTi He DonomaraOTb, nepeaTe BmipobaBbHn IHcTpMeHT Do ceHTpy 06cnyroBvBaHHK NlIeHTIB uepe3 CBORO dInepa Bosch.
Texhie o6cnyroBybAHnI cepBic
Texhiue o6cnyrobyBaHHia ouHneHH
Ipebiprte BmipobanbHn iHctpymeT nepeKDOKHN M BNKOpNCTaHHM. KaHO Ha HbOMy BnHi NnKOJKeHHa 6o BCEpENi PO3XHTaJInca Detani, HadiHa po6ota BmipOBaBHorO iHctpymeHa He rapaHTycBa.
36epiraTe i TpaHcnpOpyTe BmIpIOBbHn IHCTpymeHT IINwe y npHaTHOMy KOHTeHepi, HAp., BOpHrHaIbHi yNaKOBci.
HaCnnaIte BmipIOBaJIbHI iHCTpMEnTH Ha pemOH T B opriHaJIbHi yIaKOBUci.
He 3aKJIeIOHTe KOHTaKTn.
3aBxDn TpHMaTe BmipIOBaIbHn npHaIb YnCTOTi.
He 3aHypioTe BmipIOBaIbHn npna y bOy a6o iHsi piHN.
BHTnpaTe 3a6pydHeHHa BONoToM'koTo raHcyipkoTo. He BnKOpncTObyTe KODHmNoux 3ac06iB a6o po3uHHNKiB.
Pn ouHHe HmipIOBaIbHOro IHcTpMeHTy B HbO Ro NOBHHa npOHKaTH pIDHa.
Cepbic KOHCyNbTaCiII 3 NHTaHb 3acTocyBaHHA
B cepbichin MaictepHi Bn OTPmaTe BiDnobiHa BaWi 3aHHTAHNcTOCOBHO peMOHTy i texhuiHoro 06cnyroByBaHHra BaWo r npOdykTy. ManHKn B DeTAnx i InOpMaIIO uOdo 3aIuaCTIH MoKHa 3HaHTn 3a aAdpecoIO: www.bosch-pt.com
Komahda cnibpobitHnkiB Bosch 3 hadaHHa KOncylbTaui 0do BnKOpncTAHn npodykii i3 aIOBOJENHM BiINOBicTB Ha Baui 3aIHTAHN CTOCOBHO Hauoi npodykui Ta npniladny do Hei.
224|YkpaHcbKa
Pn BCixdoataKOBHX 3aHTaHHx Ta 3amOBHeH H 3auaactH, 6yNb NaCKa, 3a3NaayTe 10-3NauHn Homep dIg 3aMOBHeH, IIO CToITb Ha nacnpTHI Ta6nuci npOdykTu.
TapaHTiNe O6cnyroByBaHHI pEMONT eJeKTPOIHCTpyMeHTy 3dInCHIOUBc BIDNOBIOHO
DO BmOr I HopM BnROTOBIOBAUHa TepHTopII BCIX KpaIN NlWe y fipMOBnx a6o
ABTOPN3OBAHNX cepBichNX ueTpax fipMN «Po6ePT BoW>. PONPEJXEHH!
BnKOpNCtAHHKOHTpaKaTHOI IpOdyKuII He6e3neueH Be EekCnlyatauii I MoKe MaTH
HeratNBHI HacNIdkn DnIg 3dOpOB'B. BnROTOBHeH I po3NoBcOJKeHHN KOHTpaKaTHOI
IpOdyKuII nepeCniDyETbcra 3a KaOHOM B aAdMinICTpaTHBHomY kPmIMHaJIbHOMy nopAky.
YkpaHa
Bow Cepbichn LcHrpeKtpoHCTpyMeHTIB
Byn.KpaHNa1
02660 KniB 60
Ten.: +380 44 490 2407
a c: + 380445120591
E-Mail: pt-service@ua.bosch.com
www.bosch-professional.com/ua/uk
Apeca PerioHbHx rapaHTiHx cepBichx MaicTepeHb 3a-3HaueHa B
HaiohaHomy rapaHTiHOMy TaHOi.
Ytunlaia
BnMipIOBaIbHI npINaH, npINaIyI ynaKOBky Tpe6a 3daBAtn Ha ekONOriHNo YnCTy NOBTOPhy nepepo6Ky.

He BnKndaTe BmipIOBaJIbHI iHCTpyMeHTn i 6aTapeKeB N no6yToBe CMITIa!
Пише дя Краин EC:
BidnoiDn do Ebponecboi DnpeKTHBn 2012/19/EU Bmipobalbi iHCTpyMeHTn,io Bnwn i3 BxNBaHHa, Ta BiNoBDn do Ebponecboi DnpEeTbn 2006/66/EC nowkoJxehi a6o BiPauBoaHi akymyIaTophi 6aTaapei/6aTaapeNkn NobHHi 3daBaTHca OKpemoi ytni3yBatncra ekoloruHOn uHCTm cnocobom.
Ka3aK
Eypa3nЯ 3KoHOMNKaIbIK OdaftbHa (KeJeH OdaftbHa) Mywe MemneKeTTep ayMaftbIHda KOnDaHbIaIbI
OHHdpuyinH eHIM yuH KapactbipfAH naHaIaHa KyKaTapbIbH KypamblHa naHaIaHy XeHHeI OcbI HcKaynbIK, coBImeBipre KocbIMsaIap Da bonyi MymKiH.
CaikectiktpactaykaibaknapatKocbIma6ap.
OHiMi eHdipreH MemIeKet TypaIbI aKnapaT eHIMHIn KOpNycbHda XHe KOcBIMuaJa KepceTinreH.
EHipinreH Mep3iM HyckayIbIK Myka6acbIHbIH COHfbl 6eTIHe XaHE OHIM KOpNycbIHda KepceTinreH.
Hmnpotepre KaTbIcTb6aHnHaBic aKnapaT eHIM KaTtAmCbIHda KepCetIInReH.
Thimpi naiandaHy MEP3iMi
HIMHIN Kbl3metety Mep3imi 7KbIn. HndipinreH Mep3imHeh 6actan (OHDipy KyHi 3aybit TaTaNacBHaJka3bIFAH) icTeTne 5KbIN caKaTaFAHHaH COH, OHIMTi TeKcepyci3 (cepBnctIK TeKcepY) naDanaHy YcbHbIMaDbI.
Kb3MeTKepe Hemece naaHnyuHBn KaTeiKTepi MeH icTeH uby ce6entepinhi T3iIMI
- OHIM KOPnycbIHHaH TikeNe TYIiH 1bIKca, naJaIaHa6aHbI3
-kaibH -waibH Ke3iHde cbiptTaa (ana) naIanaHa6aHb3
- Kopnyc iwihe cy kipce KypbIfblHbl Kocybl 60MaHb3
Uekti kyn 6enrinepi
-0HIM KOpnycbHbH 3aKbMdaNybl
Kb3MeT Kepcety Typi MeH Xniriri
p naiandahydahcoh eHimdi Ta3aay ycbihbnaibl.
CaKray
Kpyfak Kepde caKTay KepeK
KOFapbI TemnepaTypa K03iHeH XaHE KyH caynepePiH acepiH anbIC caTay KepeK
- cakTay Ke3iHne TemnepaTypaHbIH KeHeT aybITKybiHaH KOpFay KepeK
-erep KypaJXymCaK CemKe Hemece PnactNK KeiCTe XeTki3iNCE OHbI OcbI e3iHIOKopraBbI Ka6bIHda caKTay YcbIHbIaNabi
- caKray ⅢapTapbl TypaIbI KocbIMsa aKnapaT any ywiH MEMCT 15150 (Lap1) KyKaTbIH KaPaHbI3
226|Ka3aK
TacbImanay
-TacbImaJday Ke3iHne eHIMI KyNaTyFa JxHe Ke3 KeJIReH MExaHnKaIbIK bIKnAeTyrE KaTaH TblbIM CaIbHaDbl
-6ocaty/xyktey Ke3iHne NaKeTTi KbicaTbIH MaunHaIapDbI NaJaIaHaYFa pyKcat 6epinmei.
-TacbImaJday wapTTapbTaIanTapbH MEMCT 15150 (5 wapt) KxKaTbH OkbHb3.
Kayinci3ik HycKaynapbI

Bapnbik KycckaynbikTapdbI OKbIN, opbIHday KepeK. Θnwey Kypabih OCbl HYCKaynapra cai naHdaan6ay enwey Kypabihdafti kipictipinreH kayinc3dk WapanaPbHa XaFbIMcbI3 acep etedi.OCbl HYCKAYbIKTAPDbI TOJIbIK OPbIHDAHbl3.
Ounwey kypanbH TeK biikTi mAmHa Fxhe apHaynb6eKeTepMe Hohdeti3. Con apkblnbl Ounwey kypan Kayinci3diirH caKaTaeCbI3.
XaHaTbIH cyNbIKTBkTap, ra3dap Hemece wah XnbInraH xapbInbc kayni 6ap optada enwey KypanbIn naDanaH6aHbI3. OJwey Kypanbl yWkbH WbIfapbIn, WAnDbI XaHdbIpBn, oP TdybIPybl MymKIN.
MarHnTTI HmPnAHTaTAPbIH HeMece KapNocTHMynrTop HeMece HhCyHH copfbicbl CnKtbl 6acka Da MeHNuHaBik KypblfblapdbIH KaHbIH KOImHaB13. MarHnT HmPnAHTaTAPdbIH HeMece MeINuHaBk KypblfblapDbIH KymblicbHa acep etetih epic Tydbipadbl.
Onwey KypanbIMarHHTI DepeK TacbImaIaywbInap MeH MarHNTke ce3imTan acnantapdaH anbc yctahbi. MarHHTepdiH acepi KaIbHa KeNTipyre 6oMaTbH DepeKTeP KofaIybiHa aBbIN Kenyi MymKiH.
TekocbnaHany Hcckaynbihda 6epinreH 6atapeaapdbn naDanaHbHb3. Baca tymeikti ynapdbn hemce baca 3heprn Koperin naDanaHbHb3.
Koprahbi KaTama anbHraH XaFda, enwey KypanbIme H abaan Jxymbic icTei3. Koprahbi KaTamaCbI KOK eNwey KypanbIme H MyKnRTcb3 Jxymbic icTey XapaKaT anyFa eKenyi MymKin.
Θишehren MAndep SwbHaBmMAnepDn 03reWeeneHyi MymKIn. KopwaraH opTa acepnepi (Mbicanbl, enwey aAmfBnDaFbI waH HeMece by), TempeatypaHbH wYfbIN 03repictepi (Mbicanbl, Xbiny JeNDeTkiW apKblnbl) XHe enwey 6etTepin HcnaTbMIe Kyni (Mbicanbl, bInrAdbn YnecTipinyi) enwey HtNxJenepineacep etyi MymKin.
Ohim Xhe KyaT CnnaTamaCbl
MaKcaTbI 6OyblHwa KOndaHy
OJnwey KypaIbI Cypek bINfaIbIbIFbIH WAMAmeh aHbIKay yWIn KOJaHbIaNbI. KapcblbIKtbl OJnwey cyHKUcBbIH, KOMeIMeH oJIWeHETIH HbICAHbIH,OTKI3rIITiri apKbIbIOhIH KypaMbIHdAfbI bINFa aHbIKtanAbI. KepceTInreH eJnwey MHi Cypek bINfaIbIbIFbIH NaBbI3 BoBHHa KepCteDi. On cypeKTIn KypraK MaccacbHa KaTbICTbl 60bn IN KeNdi.
Oney Kypanbl 5 MM WamacbHaH Xhiwke enweheTIN HbcahdapdbH cypeK bIfaIbIbIfbH aHbIKay ywiH japaMaNbl.
Oney KypaIbI iKIMeH cbIpTKbl aMakTapda naJaIaNHyFa apHaIFaH.
OJnwey KypaIbI WaabipaHdbI CydaH KopFaImaHaH XHe WaHaH KopFaImaHaH.
EcenTeyMbicanapbl
Cypek bInfandbInbfbl:
Cypek bllfaIbIbIbI bIe TEmehderi foOpmya boBihua eceTenej kHe OHbI bap enwey KpaIbIHbN KEMerImeKoJaNbIb Type aHbIKayfBaonadbl:
CypeK bllfaIbIbIbIbI, % = (cypeKteri cy MaccabI/cypeKTih Kypfak MaccabI) x 100
Cypektih cy kypambl:
Cypekti cy Kypambl TemeHderi fopmya 60bHwa ecntenei:
Cy Kypambl, % = (cypek bInFaIdbInbIfbl/(100+cypek bInFaIdbInbIfbl))x 100
1-Mbican: 100% cypek bIJaIbIbIbIbIbI
[ \text{Cy kypambl,}\% = (100 / (100 + 100))\times 100 = 50\% ]
2-Mbican: 1 Kr bilfandblcypeKteri 50% cypek bilfandblnblfbl:
Cу Куразы, % = (50 / (100 + 50)) x 100 = 33,3%, Ша мени 333,3 Гуся сөнүдү.
CypeKtiH Kypfak MaccabI IaMamEn 666,6 KypaIbI.
Kopcetinren Kypamdbi 6eektep
KepcetinreH Kypamdbi 6oIwekTeepin Hemipnepi rpaqnkabik beTteri oIwey KypanbHbH KepcetiniMe He KaTbICTbI 60bnk Keledi.
(1) Kocy/ewipy/Hold tymeci
(2) Cypek tonTapbH TaHday TuMecci
(3)
(4) KapbIK dNoDTb HnDnKaTOp
228|Ka3aK
(5) Ictiktep
(6) KopFaHbIi KaTtAmA
(7) Bendlik
(8) CepnIbIK Hemip
(9) BaTaper 6enimihKaknafbI
(10) ΘπωeγκραλβιHαδαβιΜαθΗτ
(11) KopraHbIi KaITaMaJaFbI MaHHT
(12) Kopfahbli KaTtAmadafbI MeTaII Tynicneep
Hnkaaun 3neMeHTepi
(a) AfbIMdaFbI eHJey MHi
(b) CakTanFaH eIwey mHepi
(c) Eckenpy 6enrici
(d) TemnepaTypa HndNkaTopbI
(e) 3apn dneHreHHnHnHnKaTOpbl
BcypeKTo6bIUJafaH,kaPafAe,EmeH
KaHaKa aFaBbHbHdiHi, WAmuAt
Cypek bInFaIbIbIFbIHbIH,6aKbIay MAnDiepi
Kypfak < 12%
Kayinti 12% ... 20%
blnfaanbi >20%
Xannbl
Xymbic temnepatypacbi-5°C...+50°C
CaKaay Temnepaypacbl-20°C...+70°C
CanbcTbIpMaIbI aya bInFaIbIbIfbI, MaKc. 85%
Herizri 6niktikin yctiHderimakc.nainanany 6niktiri 2000 M
IacTaHy dApexKeci IEC 61010-1 cTaNapTbI 6OyblHwa
2
Баразерлар 3х1,5ВLR03(AAA)
XyMbIC y3aKtBtfbl wam.10 car
CaImaftbEPTA-Procedure 01:2014 KyaKaTbHa caH 0,16 K
OIIeMepi 187 x 56 x 44 MM
A) 25^ C JyMbIc TemIepaTypacbHa
B) TeK kaHa TOK eTKi36eHIn Kip naIda 60anabI, 6ipak Kei6ip KaFaIaIapDa epy HtNHexcHte TOK eTKi3y kabinei naIda 60nybkyTineI. Θnwey kypalbHa 6eimDenye MymkiHik 6epiH3 xHe enweyden 6ypbIH icIKTepeHn KOHehcaunHbKeTIpiH3.
OJyey KpaHbIH 3aybiTTbIK TaKaTaaCbIHdaFbI cepnabIK HcMip (8) OHbl Dpypbic aHbIKayFa KMeKTEceJI.
Mоntаждay
Xbblityxyneci6ap6apnblK XaFbIHAnXa6blKfmapaTTap
9±3Mbicanbl,TypbH6eImeeri/ac ynderi yTeenep,opbIHbIKTap,
234|Ka3aK
| Колдану canacbl Cypeк | Mbıcanlag bɪnfənʌblɪnbl fbl [%] |
| шkaфтар ( Kblicьу укытta Жылітkaн Keзде) | |
| Жыліту жуineri сok барлык Жагынан жабblк рима партap | 12 ± 3Mbıcaны,Jerркоиma серелeri (Жыліту жуinerсíнiz) |
| Yctîнен жабblɪfaH, aшык гима партap | 15 ± 3Mbıcaны, abTOMOБильге aphanfahn шатырлар |
| Aya paÎы δарлык жаflын осяр етetiн конструкцялар | 18 ± 6Mbıcaны,бakша уйеріин сыrtka Каырfasлары |
Baca cypek bInrandbinbIKtapbl:
-Afawtah kacaIHaY:MaKc.18%
- NapkeT: 9% ± 2%
-Επενη: mακε. 12%
-TocemTe6e:MaKc.20%
-TykoMa:MaKc.15%
-Ta6aandbipbIK:9%±3%
- OtbiH: MaKc. 22% (OHTaHnbl < 17%)
O3iHdkcbHaKaФyHKnAcbI
O3iNikcbiHaKfynKcIaRcbIeIwey KypaIbIbHbIHfynKcIaRcbI TeKcepei.
Oney Kypaibn KocbHb3 (KapaHb3, Kocy/ewipy", Bet 231).
KopfaHbi KaTtAmHbI (6) aNbIn TaCtHaHbI3.
Ictiktepi (5) KopraHbI KAnTaMaHbIH (6) apTKbl XaFbHdaFb MeTaN TYiicnepepe (12) yCTaHb3 (C cypetih kapaHb3).
IncnneHderi MAnDi KopFaHbIa KanTaMaDa (6) 6acbInFaH MAnHepeMeh peTtenreH cypeK To6bHa cAke THeCTipiH3:
-AcypekTo6bl:11,1%-11,9%
-BcypeKTo6bl:9,8% -10,4%
Erep mAnep caikec keMece, eIwey KpaBnH dIaBbHb3 apKbbl Bosch Kb13Met Kepcety optaBbHa xi6epihi3.
Painanany 6oynbHwa HycKaynap
Othey hTHe eep ety
OJnwey mAndepinH dAndiKopwaarOpTa TemnepaypacbI eNweH aFaW KeceriH, TemnepaypacbHa caikec Keireh Ke3de eH Xofapbl 6oala.
Oney HataxkeineMbHaΦakTopnapacepetyi MymkiH:
CypekTo6bIJxHe CypeKTHiKi To6bI
- Θιηνεπετια ἀλαύ Kεερείπι έμεπηρατypacβ
-0nueHiet afaaw kecerihin 3ekke Xahe wenka6bikka 6einiHyi
- Θινηθετια ἀλακεπείνηδεις ἀντερείνης ἀντερείνης ἀντερείνης
- Θιηνεπετιαν κεcerī γετιπίσι δετιπίσι Θευδηγί (Mbicalbl, Maɪnap Hemece naKTap)
- ΘιηνεHετιναίων KeceriHεικυρbινβIMbɪHa Hemece TeKCTypacbɪHa npapannēb επιδeY
-blnrandbin ynectipinyi
- Θιηωγ HγκTeci (Mbicanbl, afaa KeceriH, opTacbHda Hemece WetiHde)
-AraaKeerinH Kyi MeH Typi: CyeKeTe wipireh Kepnep, TyiHep MeH baKa da KemwiikTep 6oImaybI Tnic
Ha3ap aydpbIbI3: an MAnep KaKet 6oNfAan KafdaJa, eNweydi KeNKeH Kynde enwey aicinH Kemerimn opbHday kepek (DIN 52183 cTaNdaptbI 6oBihua daIeptXaHbIK npOeDpya).
Akaynap-Ce6entepiXaHeWeSiIMdepi
Ce6e6i Ieewimi
"RepMec" BO, 7 ka6aT
Ten.: +7 (727) 331 31 00
ΦaKc: +7 (727) 2330787
E-Mail: ptka@bosch.com
CepBnctik Kbl3MeT KepeTy opTaIbIKTapbI MeN Ka6blnday nyHKTePiH, MeKeH-KaBl
TypaIbToJIkXHee3EKTiaknapaTbCi3:www.bosch-professional.kz pecmncaiTTan ana anacbl3
Kədere xapaty
OJIwey KypaIbIH, OHbIH Jx6DbIKTapbi MeH KaITaMaCbIH KOpUaFaH OpTaHbI KOpFaHTbIH Kdere Xapaty OphBaHa Tancbipy KaXeT.

Kniuey KypannapbH He 6aTapeaapnbI y KOkbicbHa TaCTaMaHb3!
Tek KaHa EO endepi yuH:
Eypona 2012/19/EU epexeci 6oynihwa kapaamcb3 eIiwey KpaanapbKxhe Eypona
2006/66/EC epejekci 6oBbHsa 3aKbIMdaIFaH Hemece ecki akkymyITop/6ataperaIap
6eKeK KHaBbI KaJeRe KapaTbIybl KaXeT.
Româna
Instruţiuni de siguranta

Service scule electrice
Strada Horia Macelariu Nr. 30-34, sector 1
013937 Bucuresti
Yka3aHn8 3a cnryphnoct

IpoyeTe n cna3BaIte BcHKn yKa3aHn. Ako n3MepBaTeHNrT ypei He 6bJe H3non3BaH cbO6pa3Ho HactoJrTe yKa3aHn, BrpaedHtE b Hero 3aunTHm MexAHN3Mn Moar da 6bDat YBpeeHn. CbXPAHRAITE TE3N YKA3AHN HA CNYPHO MRCTO.
Donyckaite H3MepBaTeHHrT ypeIa 6bIe peMOHTnpaH cMo OT KBaHnHnpuHN texHnHc mao C n3noJ3BaHe Ha opHnHaHn Pe3epBHN qactN. C ToBa ce ra-paHTnpa 3ana3BaHTo Ha fynKuHrTe, OCHpyraHs 6e3oNaChOCTTa Ha n3MePbaTeHnHypeI.
He pa6oTeTe c n3MepBaTeHnHa ypeB CpeDa c NOBnWeHa ONaCHOCT OT EKcNIO-3HH, B KOrTO HMa IeCHO3aIaNMM TeUHOCTH, Ra3OBe HnnpaxOBe. B n3MepBaTeHnHa ypeD MoT a Bb3HNKHAT NCKPn, KOnTO dA Bb3PiAmEHr Tpaxa nn npHTe.
He noctabraIte MaHHTa B 6n3OCTdo HmPAAHTN dpyrMaMeHNckn ypei, KaTO HAp. NeCmeKbpH Nn HhCylnHOBn NOMn. MarHbT reHepnpa none, Koeto moKe da hapuSh yHKUHOHPaHeTo Ha mPAAHTe nn MeDUnHCKnTe ypei.
IpbjTe H3MepBaTeHnHa ypeHa pa3CTOHHe OT MaHHTHn HOCHTEHn Ha daHHn MyBCTBHTeHH KbMaHHTHn noneta ypeHn. BcneCTBHe Ha Bb3JeCTBHeTo Ha MaHTHTO NOle MoKe Da ce CTnHe Do HeBb3BpATmHa 3aYba Ha HHOpMaunr.
H3non3BaTe cmo 6atepHnTe, nocoueHN B TOBa pbkoBOcTBO 3a ekcnnoataun. He n3non3BaTe dpyn 6ytoHHn 6atepn nn npyr n3TOUHK Ha TOK.
IpoeHpaTe BnMaTeNHO c H3MepBaTeHnHa ypei, aKo 3aHTHO To Kanae e cBaneHo. Be3rpHXHTo 6opabeHe c H3MepBaTeHnHa ypei 6e3 3aHTHO KaNaue MoKe da IOBeJe Do HapaHbAHn.
N3MepeHnte cToHocTH MORat Da ce OTKIOHOBArOT DeIcTBHTENHrTe CToHOCTN. N3MepeHnte cToHocTH MORat Da ce NOBnA rT OT BnA HrO T OKONHaTa CpeDa
250 |Былгарский
(hanp. 3apaaehocT nHn HANHue Ha npa B 30HaTa Ha n3MepBaHe), TemnepaTyPhN KOle6aHn (hAnp. Nopadn BetnnaTopHN neuKN), KaKTo n CtpyKtypata NcbCToHHeTO Ha n3MepBaHnte NOBbpxHOCTn (Hanp. HepaBHomephO pa3npedeneHne Ha BlaXHoCTTa).
I3mePbATEHnT ypeI He e 3aunTeH OT npbCKN BODn H e 3aunTeH OT npax.
PpHmepn 3a n3uHcneHne
BnaXHocT Ha dbpBeCnHaTa:
BnaJHocTtHa Ha IbPBeCnHaTa ce H3uHcIyBa no CneHata fOpMyna, pecn. MoKe yIo6Ho Da ce yCTaHOv C HAnuHnI N3MePbATEeH epe:
BlaJXHocT ha nbpBeCnHaTa B % = (cbIbPkaa Ce B nbpBOTo BOHa Maca / cyxa Maca Ha nbpBOTo) x 100
CbDpKahne Ha Boda BdbpBecnHaTa:
CbDpKaHHeTo Ha BODa BDbPBeCNHaTa Ce H3UcNlBa No CneHnTaΦOpMyla:
CbIbpxaHne Ha BOna B % = (BnaxHOCT Ha IbPBeCNHaT / (100 + BlaxHOCT Ha IbPBeCNHaT)) x 100
Pnmep 1: 100% BnaKHOCT HaDbpBeCnHaTa
CbДьржане на вoda b % = (100 / (100 + 100)) × 100 = 50%
PpHmep 2: 50% BnaxKHOCT Ha DpbBecnHaTa np1 Kr BlaXHa DpbBecnHa:
Сыдьржане на вoda b % = (50 / (100 + 50)) x 100 = 33,3%, отравая на ok. 333,3 g вoda.
Cyxata Maca Ha IbpbBecnHa Ta Bb3n3a Ha OK.666,6g.
I3o6pa3eHn enemeHTn
HomepnpaHeTo Ha enemEnTe ce OTHacn DO n3oPaxKeHHeTo Ha n3MePbTeHNy ypeHa cTpaHnCata CnHyprnte.
(1) ByToH BkN/ImKn/3aIbPkaHe
(2) BytoH 3a n36op 3a rpynn DpbBecnHa
(3)
(4) CBeToIIOIHN HINKaTOpN
(5)
(6) PpeiHa3Ha KaIauKa
(7) Hocsei knyn
(8) CepneH Homep
(9) Kanak Ha rHe3doTo 3a 6aTeepu
(10) MaHHTN Bbpxy H3MePbTeJIHHyypeI
(11) MarHHTN Bbpxy 3aunTHOTKaanae
(12)MetaJIHn KOHTaKTb Bbpxy 3aunTHOTo KaNaue
EnementHa dncnne
(a) Tekyuza n3mepena cToHocT
(b) 3anaMeTeHN cToHocTH Ha n3MepeBaHe
(c) PpeDynpeDHTeHcHMBOI
(d) HndkaTOp 3a TeMnepeatypa
(e) INdkaTOp 3a cTeNEHTa Ha 3apeDeHocT Ha akymyIaNTOphata 6atePn
TexHHueckn daHHN
BkIIOUBaHe Hn3KIOUBaHe
3a BKNIOUbaHe Ha n3MepBaTeHnHa ypei HaTnCHete 6yToHa BKn/IN3Kn/3aIbpxKaHe (1) Hnn 6yToHa 3a H36op Ha rpyn DpbBecnHa (2).Ha dncnne (3) 3a 2 cekynIe ce noka Je temnepaTypata Ha OKoHnA t Cpea N CmBONITE 3a H36op Ha rpyn DpbBecnHa A n B B pei (a) Mrrat. Cnei PbBOHaayanHO BbbEkahe B EKCnloataunr rpyna DpbBecnHa Ae npedBaHTeHn HactpoeHa.
3a n3KnIOUbaHe Ha n3MePbATEHnYpeHaTncHeTe 6yToHa BkN/V3Kn/3aNbPkaHe (1) Hau-MaIko 3a 1,5 cekyn. Cnei nobTOpHO BKNIOUbaHe npEBApHTeHnHO hAcTpOeHa B n3 MePbATEHnYpeE nocJeHNO n36paHata rpyna nbPBecnHa.
Cne 5 MNHTH HeaKTHBHOCT CneI NOcNEHOTO H3MEpBaHe HIN NOcNEHOTo HAtNCKaHa Ha6yTOH N3MEpBAteJIHHrY Vpe CE H3KJIIOUbA ABTomATNUHO 3a UaJeHe Ha 6atePnnte.
IoiroTOBka Ha H3MepBaHeTo
Hactpoika ha rpyna dbpBecnHa
3a ONTHMaHn pe3yIaTn OT h3MepBaHeTo Tp8Ba IpeiN BcAko h3MePbaHe Da ce Hactpon rpynata DbPBecnHa. N36epete C 6byToHa (2) nOxOJaTa rpyna DbPBecnHa. N36paHata rpyna DbPBecnHa ce POKa3Ba Ha dncnJe (3).
CbBET: Ako n3non3BaHata ot Bac dbpBeCnHa He cnaa KaM HnTo eHa ot DBeTe rpynn nAko He 3haete KOI copT dbpBeCnHa e Han-6n3bK Do n3non3BaHata ot Bac, n3non3BaHTe rpyna DbpBeCnHa A. Ta TeHdENo3HO mA No-BnCOKa CToHocT. Taka MoKeTe da CTe cnryphN, ye Hma Da o6pa6OTte dbpBeCnHaTa CN TBbpDe paHO Hn DOkato e TBbpDe BnaxHa.
IpiHn3KnIOUbaHe Ha n3MepBaTeHNHa ypeH hAcTpoEHaTa rpyNa DbPBeCnHa ce 3anaMeTBA.CneI NOBTOpHO BKNIOuBaHe ppeBapHTeHnHO HAcTpoEHa B n3MepBaTeHNHa ypeI e NocJeHNO n36paHATA rpyNa DbPBeCnHa.
H3mepBaH 06ekt
MnCTOTO 3a n3MePBAHe B DbPBOTo Tp6Ba Da e Heo6pa6OteHo N 6e3 KIOH, MpbCOTn, CMOnA, 3aRnBaHe, YenIbucn HnN dpyrN DepeKTH. DbPBeCNHaTa Tp6Ba Da e 6e3 XmNHuecko TpeTnpaHe Ha NOBbPxHOCTTa.
He n3BbPbBaTe n3MepBaHn no ueHNte cTpaHn, TbKATO bpbBeCnHaTa Tam CbxHe oO6eHo 6bp30. Toba MoKeJa DoBede Do rpeHn pe3yIaTn OT n3MepBaHTo.
Iprn n3mepBaHHa HbnaXHocTTa B rOpBa e pa3yMHO IbpbHeHa T npo6a npedn n3mepBaHe da ce pa3eenn Ha da ce n3mepB b TpN ToKn. TouKn Ha n3mepBaHe: Ha no 5 cm pa3cToHHne OT neBn N deChn p6 ha pR3aHe N BCpeData (Bk. qnr. B).
H3mepBaHe
CbaNETe 3aunTHOTOKanaye (6).3a ceTaNeko H3TeTne TBeTe CtpaHn Ha 3aunTHOTOKanaye (6).3akpenete 3auHTOtoKanayeOTaHaCTpHaHaN3MepBATEHnYpeD(MaHHTHO),Bx.Φn.Ha Ctp.3.
YBepete Ce npedn H3MepBaHeto, ye TemnepaTypaHa OKoHaTa CpeDa CbOTBeTCTBa Ha TeMnepaTypaHa H3MepBaTeHHra OeKT. Ako e HxKHO, N3uKaAte DOkato H3MepBaTeHNrT ypeD ce aantnpa KbM TemnepaTypaHa OKoHaTa CpeDa.
H3BbPwTe H3MepBaHnHa BnaxKocTt Ha-MAkHO Ha 5 cm OT pb6oBeTe Ha cpr3BaHe, TbN KaTO DpBecHnata No Pb6a N3cbXba NO-6bp3O OTKoJIKO TO CpeIaTa (BX. fNr. B). He H3MepBaIte NOBbPxHcTTa Ha DpbEcnHata. Iopadn DbxN nn Poca Tk MoKe da ce c6paNa BOda n da Nobnne Ha H3MepBaHeto.
BnHaHn n3MepBaIte HappeHo Ha 6pTe. He n3MepBaIte npaIeHNo Ha 6pTe nn no DbJxHATA Ha rOINHHTe pbcTeHN (BxK. qnr. A).
256 |Былгарский
I3MepBaHTo ce I3BbPbBa B 30HaTa Ha IbIbOuHnHa Ta H IbXaHe Ha IuΦTOBete (5).OnTmAmHpe3yIaTn npn I3MepBaHc ce NoCTnRa, aKo IuΦTOBete ce IbXaT Ha OK.4- 5 mm B IbPbOTO.OpHeHTnp 3a TOBa IpeIaRa MapKnIpOBkata BbpxU uΦHTOBete, KOrTo e NoCTaBeHa Ha IbIbOouHa 5 mm.
3a cTAPtnpaHe Ha npOeDpypata No H3MepBaHe nbxHete uNΦTOBete B dbpbOTO. BHnmaHne: He n3noI3BaIte hacnnne H36yraTe n3noI3BaHe Ha npyTu npedMeTN 3a ha6bVaHe Ha n3MepBaTeHNH ypeB DbPBOTo! PbXheTe uNΦTOBete C dBHXeHnHaJIBO nHaJrCHO B dbPBOTO.
I3MepBaHTo 3aNoUba KOrato UTOBTe (5) Bne3HaT B KOHTc DbPBOTo. I3MepeHaTa BnAHHoCT Ha DbPBecHnHaTa Ce NOKa3Ba Ha DNcNpEe (3) B pei (a). I3MepeHaTa BnAHHoCT Ha DbPBecHnHaTa OCBEH TOBa CE CnHn3npa OT CBETOHOJa (4):
-3eNEHO: HeKpTnUHa BnJxHocT Ha IbPBeCnHaTa (< 12%)
-Жылто:Знayntелна Влжноct на ДьрвесиhaТа (12%... 20%)
- YepBHeO: KpHTnUHa BnaXHoCT Ha IbPBeCnHaTa (>20%)
3anametrahe Ha cToHocTtHa n3MepBaHe
3a 3anametrahe Ha ctoHocTt Ha n3mepaHe, HATNCHEte 3a KpaTko 6byToHa Bk/13Kn/ 3aIbpxaHe (1). 3anametehata ctoHOCT OT n3mepbaHeto Ce noka3Ba B donnna peD (b) Ha nCnner (3). Hobata ctoHOCT OT n3mepbaHeto Ce noka3Ba B peD (a) Ha nCnner (3). Cnei 3anametrahe Ha HOBATA cTOHOCT OT n3mepbaHeto B donnna peD (b) npexoHa- tA cTOHOCT CE noka3Ba B T.H. IBe cTOHOCTn OT n3mepbaHe (b) Morat Da ce noka3Bat Ha nCnner (3). 3anametehite ctoHOCTn Ha n3mepbaHe (b) ce noka3- Bat c n3bpaHata rpyna dbpbecnHa n CMBON 3a Blara noD fOpMaTa Ha BOHa KaHa:
-1 BODHa KaIIKa (OTROBAP Ha 3eHcBeToIOI): HeKpHTuHa BlaXHoCT Ha IbPBeCNHaTa (< 12%)
-2 BODH KANK (OTROBAP Ha XbIcBToIDNo): 3HaHTeINHa BlaXHOCT Ha IbPBeCnHa-Ta (12% ... 20%)
-3 BODH KANK (OTROBAP Ha uePBEN CBeToNDo):KPHTuHa BnaJXHOCT Ha IbPBeCNHa-Ta(>20%)
CbBET:To3n INHdkatopeOTNOMOaKOINcIIeT(3)OTONpeIeENbIbHeMOKe da ce BnKdaNNaKO Tp6BaDaCe N3BbPWBat CpaBHHTeHNu3MePBAHNA.
Pn H3KIOUBaHe Ha H3MepBaTeJIHHypeI CE H3TpNBaT 3aNaMeTeHITe CToHOCTHa H3-MepBaHe.
BnaXHOCTTHa HbPBeCHHaTa e N3BbH dna- n3OHa Ha n3MepBaHe (TBbpDe HnCKa) nIi n3MepBaHeTo He e n3BbpSeHo npaBNHO
HOBO n3MePbaHe Ha npyTo MrcTo B DbPBeCnHaT.
I3MepBaTeHnHrT ypeI cIeIN 3a npaBnHToC n cyHKIOHnpaHe npn BcKO H3MepBaHe. Ako ce ycTaHOBn DeEeK,Ha IncIIeI ce nokaBAt,Err" n ppeDynpdntenH CNMBO (c). I3KnIOUeTe I OTHOB WKnIOUeTe H3MepBaTeHNHryeA.Ako rpeSKaT npoDbNk, H3Ba-Te 6atePHTe I nnoCTabTe o6paTH CneI HAKOLKO cekynI. Ako nocouHnte no-rope MepKn He IOBeDat DO OTCTpaHbAhe Ha rpeWkaT, npdaTe H3MepBaTeHNHnHCTpyMeHT 3a peMOHT B OTOpHnPAH cepBn3 3a eJekTPoIHCTpyMeHTn Ha Bosch.
Подьрхан серви3
PoiDbpxKaHe n nouchTbaHe
BnHaH npEi ynoTpe6a npOBepBaIe n3MePbTeIHHy ypeI. PnBnIMn noBpeH nn pa3Xna6eHN enemeHTN BbTpe B Hero n3No3BaHeTo My He e 6e3oNaCHO.
CbxpaHbAte n npehacnTe n3MepBaTeHnYpeD cMo BbB BKIOueHaTa B OKOMNKeKTOBKata npedna3Ha yaHTa.
Pn Heo6xOIMOCOT pemOH TpeIOCTaBMy Te N3MePBteHnY ypeB OpRHaHata onakOBka.
He IeneTe cTnkepa Bbpxu uHTOBete.
IodbpxkaTe n3MepeTnHn ypeD BnHaN uHCT.
He noToonBaTne H3MePBeTENHn ypeD BbB BOa IIN dpyrTeuHOCTN.
260 |Быларски
I36bpcBaTe 3aMbpcaBHaHraTc MeKa, IeKo HAbJaxHeHa Kbpna. He n3no3BaTe no- uNCTBaU npenapatn nn pa3TBOpHTeN.
Pn nouchBaHe B n3MeBateHn ypeI He Tp6Ba Da nonaDa Boda.
Knnehtcka cnyx6a n koncyntaun oTHocno ynotpe6ata
CepBn3bT 1e OTROBOp Ha Bbnpochte Bn OTHOcH pEmoHTn IIOdpBXka Ha 3akypeHn O T Bac npOyKT, KaKTo n OTHOcH pe3epBHN qactn. POKOMnoHENTn YepTeKn INHOpMaun 3a pe3epBHNte qactn 1e OTKpneTe H a: www.bosch-pt.com
Ekntno Koccytaun OTHOCHOynotpe6ata Ha Bosch ue Bn nomorhe cydoBONCTBne npn BbnpoCn 3a HaHTe npOdyKTn TExHnte akcecoapn.
MOnI, npn Bbnpocn n npn npbpyBaHe Ha pe3epBn qactn BnHa n noocBaTe 10-ncppeHHa KaTalOKeH HOpE, N3PiNcaH Ha Tabekata Ha ypeDa.
Быларна
Robert Bosch SRL
Service scule electrice
Strada Horia Macelariu Nr. 30-34, sector 1
013937 Bucuresti, Romania
TeN.: +359(0)700 13667 (Блгарский)
ΦaKc: +40 212 331 313
Email: BoschServiceCenterBG@ro.bosch.com
www.bosch-pt.com/bg/bg/
БракуВанe
I3mepBaTeHnHrT ype,doBnHrTeHnHrTe npncnoc6neHn H onakOBKnte Tpr6Ba da 6b- dat IopIOJKeHN Ha ekOJIOrHnHa npepa6OTka 3a ycBOraBaHe Ha cbDbpKaunte Ce B Tnx cyPOBHH.
He n3xBpIyTe n3MepBaTeHnTe ypeN H batePnTe npn 6ntOBnTe OTnabu!
Cama 3a ctpanH ot EC:
Cbflacno eBponeNcKa dHpeKTnBa 2012/19/EC n3MepBaTeHNte ypeNi, KOHTo He MoRat da ce non3Bat noBeue, a cbflacno eBponeNcKa dHpeKTnBa 2006/66/EO nobpeEnn nn H3xa6eHN obHKHOBeH nn akymyIaTOPHn batePn Tpr6Ba Da ce cb6npaT npedeAba 3a onON3OTBOPraBaHe Ha cbDbpxaUHTe Ce B T8xCypOBHH.
MaKeDoHcKn
БeЗб endocnHaNoMeHn

CnTe yNaTCTBa Tpe6a Da ce npOHTaAT Ha da Ce BHMaBa Ha HNB. DOKoIky MEPHnot YpeJ He CE KOpNCTn corlaCHO npHIOXeHNTe HHCTpyKcHH, MoKe Da CE HApUH ΦyHKcnjata Ha BrpaDeHNTe 3aHTTHMexAHm3MBO MEPHnot YpeJ. IO5PO UYBAJTE N OBNE YIATCTBA.
MepHnot ypeI cMee da ce nonpaBa caMo od CtpaHa Ha KBaHnФHKyBaH CtpyuH nepcoHaI cMo co opHrHaHn pe3epBHN deIOBn. CaMo Ha ToJ haun HKe 6nTe cnrypHb BO 6e36eHocTa Ha MEPHnot ypeI.
He pa6oTeTe co MEPnOypeB BO OKOnHa Kaede NoCTOn OnaCHOCT Oeknno3nJa, Kaede HMa 3anAnHB TeuHcTn, RaC Hnn npaunHa. MePNOT ypeD co3daBa nckpn, KOn MoKe da ja 3anAnat ppabTa nn Napeata.
He ro npnhecybajte marheTOT BO 6n3nHa Ha HmnpaHTn Hn dpyrn MeuHcN ypeH,Ha np. nejcmejkepn Hn HhcynnHcKa nymna. MarHeTOT co3daBnOne, Koe MoKe da ja hapuyn FyHKnJaTa Ha HmnpaHTnTe nn MeDnHcKnTe ypeH.
IpxkTe ro MepHnot ypei noaaleky od MarHeTHn HocauHa nOaTOuH uyepn cyBCTBNTENHaMarHT. Iopan BnJaHneTo Ha MarHeTOT MOKe da dojde Ho HnoBpAtoHO r6eHe Ha noaTOUte.
Kopnctete n camo 6aTepeHnTe HabeDeHn BO OBA yNaTCTBO 3a KopncteBe. He Kopnctete npuRn konuectn 6aTeepn nn npyro cnaDyBaHe co ctpya.
PaKybaJTe BHHMaTeHNO co MEPHnot ypeKORA 3aHTHTHO TKAaue e OTCTpaHETo. Be3rpNxHTo paKyBaHe co MEPHnot ypeD 6e3 3aHTHTHO Kanaue MoKe da DoBeDe do NOBpei.
ИзмеренITEВредноМожеда ce pa3нkyBaat od peaHHTeВpeHOCTH. Мернite ВрEDHocTH MoKAT da 6nDat noB BnJaHne Ha BnJaHnJaTaHa OKoHHata(Ha np.npaunHa nI Napea BO MepHTo NOpaJy,TeMnepaTpyHn pa3nKn(Ha np.nopadn rpean) KaKO NocobHNTe H coctoj6aTaHa MEPHTe NOBpUnn(Ha np.HepamHomepHa pacnpeden6a Ha BnaraT).
Опис на поживODOTи поформансichte
Hameheya ynoTpe6a
MepHnOT ypeI cnJxN 3a np6bnXHO onpeDenyBaIbe Ha BnaraTHa dpBO.Co nOMoH MapeHe Ha OTnpHocTa, CoPknHaTHa BnAra Ha npEmdToT 3a MepeHe ce OndpeDyBa npeky eNEktpnHa cnpobOdInBocT. PpKacKaHaTAp MepHa BpeDnOCT ja npKacKyaB BnArata Ha dpBO BO npoentn. Ce odHecyBa Ha cyBaT Maca Ha dpBOTO.
MepHnot ypeI He e HameHET 3a OndpeDyBaIbe Ha cOpJxHaTa Ha Bnara Ha IpBo Ha npEmdTeN 3a MepeIbe NoTeHKn oD 5 mm.
MepHnOT ypeI e noroHeN 3a KOpncTeHe Bo BHaTpeUeH N HaBOpEWeH npocToP.
Mepnnot ype n e 3aunTeH oD npab H npckaHe Ha Boda.
Ppimepn 3a npecMeTyBaBe
Bnara ha dpbo:
Bnara tHa nIpbTO Ce npecMeTyBa cnopei CneHata fOpMyna Hn MoKe IeCHO da ce odpei co npInIOxHeHOT MepeH ypei:
Bnara Ha npBO BO % = (Maca Ha BOda BO dpBOTo / cyBa Maca Ha dpBOTo) x 100
CoDpxHnHa HbOa Ha DpBOTo:
CopxHaTa Ha BodaTa ce npecMeTyBa cnopei CneHaTa oopMaIa:
CopxHa HbOa Bo % = (Bnara Ha npBo/(100+BnaRa Ha npBo))x 100
Ппмер 1: 100 % Влага на дрво
[ \text{CopaKaHa Ha Borda BO}\% = (100 / (100 + 100)) \times 100 = 50\% ]
Ппмер 2:50 % Влага на дрво BO 1 kg Влажно дрво:
PenaTINBHA BnaxKHOCT Ha BO3dyxOT MaKc. 85%
MaKc. onepatNBHa BnCnHa npeky pepepeHTHaTa BnCnHa
2000 m
CtenenHa n3BaIkaHocT cnopeID IEC 61010-12
B)
Batepnn 3x1,5VLR03(AAA)
BpeMeTpaeHeHa pa6ota oKony 10h
TeKHa cornacHo EPTA-Procedure 01:2014 0,16 kg
ДиMuHEn3HH 187x56x44mm
A) Ha pa6oTHa TempepaTpa 0d 25^
B) HactaHybaatcmoHecnpoBOINBnHeuHCTOTnH,HO NobpeMeHo Ce OuekyBa npHBpeMeHa cnpoBOINBOCT npeH3BnKaHa oKOHDeH3aunJa. OctaBeTe rO MEPHNOT ypeJ da ce aKImMaTH3npa IOTcPaHETe rO KOHDeH3aTOT oNIIuKHTe ppeMepeHBeTO.
3a jacha ndeHTnФнkaunja ha Baunot mepeh ypeed cnykn cepcknoT 6poj (8) Ha cneuФнkaunohata nnouka.
MONTAXA
CTaBaHbe/MeHyBaHBe Ha 6aTepeHH
3a pa6oTa co MepHnOT ypeI ce npenopayBa KOpncTeHe Ha aIKaIIHO-MaHraHcKb 6aTePnn.
3a da ja otbopnte nperpada tata 3a 6atepnn nBneye ro kanakot ha nperpada tata 3a 6atepnn (9). Ctabete rna 6atepnnte.
PnToa BnMaBajTe Ha nOIOBte cNopei npKa3OT Ha BHaTpeHHaTa CtpaHa oI npEpaData 3a 6atepn.
1609 92A 5EY| (29.04.2020) Bosch Power Tools
Cekoraa 3amehybajte rncnte 6atepnn oedha. Kopnctete camo 6atepnn od een npon3bOndTe n co nct kanaunet.
Cobet: 3a nonecno otctpaHbBe Ha 6atepuTe nobneueTe ja nHTata BO npepraDATA 3a 6atepn.
PnHTncHeTe ro NOBtOHO KanaKoT Ha npepaData 3a 6ateHH (9).
Ako He ro KopnCTHte MepHHOT ypeI noJOnrO BpeMe, H3BaTe rH 6aTePHnte.
Pn noJIOIro cKnaIpaHBe BO MepHnot ypeI, 6aTepeHnte MoKe da KopoDnpaat n da ce Hcnpa3HaT.
No 5 MInHyTN HeaAKTHBHOCT NO IocJIeHOTo MepeIbe HIN IocJIeHOTo IpNTNCKaIbe Ha KOJIeTO, MEPHIOT ypeI ce NcKJIyUyBa aBTOMaTcK 3apAin 3aHTITa Ha 6aTePnIte.
Iodrotobka 3a Mepehe
NoctabyBaBeHa rpyna Ha npBO
3a onTImaIeH pezytat OJ MepebeTo, nped ceKoe Mepehe Mopa da CE noCTaBn rpyna Ha npBO. Co konueTo (2) n36epete ja cooDbetHa ra pyna Ha npBO. N36paHaTa rpyna Ha npBO ce npKaKyBa Ha ekpaHot (3).
CObeT: aKO BaIeTo KOpHcTeHO npBO He ce noJaByBa BO HneHa OJ DBeTe rpyn Ha dpBO nn aKO He 3Haete, KOJ BnD Ha npBO e BaIeTo KopHcTeHO npBO, KopHcTeTe rpyna Ha npBO A. OBaa nMa TeHdEunja Da yKaKe Ha IorOnema BpeHocT. Taka MoKe da ce ocHrypate, deKa He ro o6pa6OyBaTe BaIeTo npBo npepaHo nn npBnaxHo.
При ИСКЛУЧВАБЕ на уреюТ, NOCTавенATA Гупа на ДРВО ce 3aЧуВы. ПО NOВТOPНВКЛУЧВАБЕ на Мернnot уреД петхODно се NOCTавьВа NOСLEДно ИЗБранATA Гупа на ДРВО.
Mepen ojeKT
MecToTo 3a MepeHe BO npBoto Tpe6a Da 6nDe Heo6pa6oTeHo n 6e3 rpaHKn, HeuNcTOTnJa, CMOla, rHnIeK, ja3nn nn Dpyr HnOocTaou. DpBoto He Tpe6a Da nMa Xemncka o6pa6oTKa Ha NOBpUnHaT.
He n3BpWyBaJte MepeHa Ha npEHNTE cTpaHn, 6nJeKn TyKa IpbTO ce cyuHn ocObeHo 6p30. Oba MoKe da DoBeNe do rpeHn pe3yIaTHo d MepeHbeto.
Ipi MepeHa Ha BnaraT a Bo ropnBO npenopauHbO e nped MepeBeTo da ce nOeHn npimepokot od npBO n da ce n3Mepn Ha Tprn TouKn. TouKn 3a MepeHe: cekon 5 cm Ha pactoJahne od neBnot n DecHnot Hceueh pa6 kaKo N BO CpeDnHaTa Ha denOT od dpBoTO (BnuCnka B).
PpoecHaMepeBe
I3BaTe ro 3aHTHOTOKanue (6).3a Taa ceN, MaNKy NOBHeyeTe rN DBeTe CTpaHN Ha 3aHTHTOTo Kanaue (6).PnucBpCTeTe ro 3aHTHTOTo Kaane Ha 3aHaTa CTpaHa Ha MePHNOr ypei (MaHETcKn), BnDn CnKa Ha CTpaHnCata 3.
IpeMepeHbTo, ochypajTe ce daHn OKoHaTa TempepaTpa Ondrobapco Tempepatpata Ha MEPHnot Objekt. DOKOLky e nOtpe6Ho, NouekaJte DoJeKa MepHnotype He ce npnilaRoiHa OKoHaTa TempepaTpa.
I3mepete ja BnaraTHa HajMaNky 5 cm od nceueHnte pa6OBn, bndejKn dpBoto no6p30 ce cyuHa pa6OT otKoNkY Bo cpeiHaT (BnDn CnKa B).
He MepeTe Ha NOBpuHnHa Ha DpBoTo. Ppr DoJn Hn Poca MoKe TyKa Da ce c6paNo BOda n da BInJae Bp3 MepeHbeto.
Cekoraaw Mepete npeky koheot. He mepete napaneHNO co KOHeoT nIN NO rOobnte (BnN cInka A).
MepebeTo ce OdbnBa BO npedeNoT Ha Ila6OuHnHaTa HA BMeTHyBaBe Ha IrInuKHe (5). OnImaHn pe3yntaTn OD MepebeTo ce NoCTnHyBaat Kora IrInuKHe CE BMeTHyBaat OKony 4-5 mm BO napeto dpBO. Xne6OT Ha IrInuKHe, Koj e NoctabEH Ha Ida6OuHa od 5mm, daBa opneHTaunja.
3a da 3anoohete co MePHHOT npoec, npHTNCHEte rHrIHNKHTe BO DpBOTO. BHIMAHHe: npHTOA He ynoTpe6yBaJTe cna n BO3dpxyBaJTe ce od ynoTpe6a Ha dpyr n ppeMeTHa da ro npobneTe MEPHOT ypeD BO DpBOTO! BmETHeTe rHrIHNKHTe BO DpBOTO co DBNKeHe KOH IeBO N DECHO.
MepebeTo 3aOnuHyBa BeHaaw WToM HnUknte (5) ce DonpaT co npBoto. N3mepeHata Bnara Ha dpBoto Ce npKaKya Ba Ha ekpaHOT (3) BO DeIOT (a). N3mepeHata Bnara Ha npBO ncknyuBO ce cnHaann3npa npeky LED (4):
-3eIeHo: HeKpTnHa Bnara Ha npBoTo (< 12%)
- KONTO: anapMaHTha Bnara Ha npBoto (12%... 20%)
Pn uHCTeHBeTO BO MepHNOt aIaT He CMee Da HaBNe3e TeuHOCT.
CepBncha cnyx6a n coBeT np KOpNCTeHe
CepBnchata cnyk6a Ke odroBOpn Ha BaunTe npaaBa BO Bpcka Co nonpaBkaTa n OndjyBaHbeto Ha Baunot npo3BOD kako n pe3epBnTe DeNoB. O3nKn 3a ekCnIoo3na I INΦopMaun 3a pe3epBnTe DeNoBn HcTo Taka Ke HajDeTe Ha: www.bosch-pt.com
TMMOT 3a COBetyBaHBe npn KOpNCTeHb He Baosch Ke Bn NOMOHe DOKOJIky HMaTe npaaHa 3a HaWnte npOn3BODn n Onpema.
3a cnte npaaha n hapaayn ha pe3epBn deNoBn, Be monime habeTe ro 10- uΦpeHnot 6poj od CneuKauHOHa TIOUka Ha pOIN3BOJOT.
CebepHa MaKeDoHja
Д.Д.Еnéкрс
CabaKobayek47H,6poj3
1000 Ckonje
E-nowta: dimce.dimcv@servis-bosch.mk
HHTepHeT: www.servis-bosch.mk
Ten./daKc:02/2467610
Mo6.:070595888
Д.П.T.Y“POJKA"
JaHn NykpOBcKn 66;T.LA BToKOMaHaJIOKaI 69
1000 Ckonje
E-nowta: servisrojka@yahoo.com
Bosch Power Tools 1609 92A 5EY| (29.04.2020)
272|Srpski
Ten: +389 2 3174-303
Mo6: +389 70 388-520, -530
OtctpaHyBaHbe
Mepnnte ypei, onpemata n ambaanxte Tpeba da ce otctpaHAT ha ekonouKn npaTnB naHH.
He rH pPnajTe MepHnTe ypeN n 6aTePNrte BO DOMaunHaTa KaHrta 3a otnao!
Cama 3a 3emjnte oEY:
CnopeE EBpOcKaT a DnpeKTHBa 2012/19/EU MepHt e ypei wTo ce BOH yNoTppe6a H deFeKTHIe Hn NCKOpHCTeHt e BaTePN CnopeD npeKTHBaTa 2006/66/EC mopa OndenHO da ce cobepa H da ce peuKnnpaAT 3a NOBTOHa ynoTppe6a.
Srpski
(12) An ant in a corner of the room.
DispleReI内容
徴이상사용ALTH수重點공구고 썸일이 기다사용한 썸선용버터리/버터리는유류가이드라��2012/19/EU及유류가이드라��2006/66/EC等urface of the surface of the surface of the surface of the surface of the surface of the surface of the surface of the surface of the surface of the surface of the surface of the surface of the surface of the surface of the surface of the surface of the surface of the surface of the surface of the surface of the surface of the surface of the surface of the surface of the surface of the surface of the surface of the surface of the surface of the surface of the surface of the surface of the surface of the surface
#
lloI 1sI
pI 1 I. g .J. J. J. J. J. J. J. J. J. J. J. J. J. J. J. J. J. J. J. J. J. J. J. J. J. J. J. J. J. J. J. J. J. J. J. J. J. J. J. J. J. J. J. J. J. J. J. J. J. J. J.

goofoo
.1JlJIgBpIaWlIcJlaTkXlcabglalJ .wJall osc jlo
g 1J
aIgsw kJbIaIg aIJIaIaIaIaIaIaIaIaIaIaIaIaIaIaIaIaIaIaIaIaIaIaIaIaIaIaIaIaIaIaIaIaIaIaIaIaIaIaIaIaIaIaIaIaIaIaIaIaIaIaIaII aII aII aII aII aII aII aII aII aII aII aII aII aII aII aII aII aII aII aII aII aII aII aII aII aII aII aII aII aII aII aII aII aII aII aII aII aII aII aII aII aII aII aII aII aII aII aII aII aII aII
(aJgJIJIaliKJIx100
:UJL JI 1
:ddlll alalol 19g uall jal slal a wu wu ( /wlll a g b) = % lall a
Joo1:100uag
= % LJ100)/100+100
:1 1jg jy Jy yj yj % 50:2
Jg△ 33,3 = 100 × ((50 + 100) / 50) = % LJI aji
.1J333,3
666,6 1g aJlJI aJIJI b
Jgaaal 1jX
a a o gagall wll ooc gww j 1gaaal ljai j siiw .abubssil gwjl
UuUg LbXlg UuuUJJ (1)
UJUJJ (2)
(3)
gJUJ WgO (4)
360
)5(ugw
6(aLauIubc
7(psssalb)
8(1wuiJpJU
9(1JUJIJI 2J
10(ulol
11(duu)
12(aLvU|Ub
unuljolic
a(aUUUwUUUa
)b(abgaasJUuL
)c(jaillj0j
)d(0JJd
JUa Jg0 e
aaiuui
aagog aIblll lss s/aaal I gg
(3) jolg (e)
| الإستعمال محيى | الترجمة |
| 75...% 100% | ### |
| 50...% 75% | ### |
| 25...% 50% | ### |
| >25% | ### |
| ### 15≥ | ### |
p . 15.15.15.15.15.15.15.15.15.15.15.15.15.15.15.15.15.15.15.15.15.15.15.15.15.15.15.15.15.15.15.15.15.15.
山
山
.00000000000000000000000000000000000000000000000000000000000000000000000000000000000
4.6gawgldu
JU 1 JI 1 JI 1 JI 1 JI 1 JI 1 JI 1 JI 1 JI 1 JI 1 JI 1 JI 1 JI 1 JI 1 JI 1 JI 1 JI 1 JI 1 JI 1 JI 1 JI 1 JI 1 JI 1 JI 1 JI 1 JI 1 J
aB Bosch.
aaijLc a ggejll aill
UJUJI 9(
LbXlg
g1 (1) cuiuIg lobxlg uusll jj yle bdoI wuall osc uuswJ g buill ojla (3) 0r jd sag jp .(2) aai jiaaiJJ
(a) BgA aai jgojogig, uol bll .aagaa A aai i 1g Jgll s ic .Igjj 1,5 oal wll .Lab! .d .(1) g.
jll lccabdo jal gI wgljdlpdsuWl psc no gla5 5. UJbll Ic blll lalwlooll ooc abii
wU
wJl aig b
. 154 aLac U S Jg wll aig bps yB aillw g aI Lc Ugall 9 oJlal lwhll aig jb .aW liA I Wsll aig jd (2) JJI pdsawly )3jolld
uall u g no s g do aai y l l i h j g p d a J g:dd
uall eg bi jg o pc dla g gl uall n n g g gl gdo all
ll o o A uall aig po aai wdo aai wgl b
yol all uall aal oocn no slll li k ay g .gl qd quj
.qlj daa bgs
Jl 100000000000000000000000000000000000000000000000000000
awgJlajwJl
Jn Jn Jn Jn Jn Jn Jn Jn Jn Jn Jn Jn Jn Jn Jn Jn Jn Jn Jn Jn Jn Jn Jn Jn Jn Jn Jn Jn Jn Jn Jn Jn Jn Jn Jn Jn Jn Jn Jn Jn Jn Jn Jn Jn Jn Jn Jn Jn Jn Jn Jn
d aal no gg k ao dssall algll ggybll gguol lwag sic 1c: waii bai .blai sic lwlqg wiaaill qwai aiuc paow
agw05wJI waiJd gJbil)B.(
wJJI aJoc
(6) aIaJI IbC yIy pIaII. (6) aIaJI IbC gIaI (IuIblso) wIaII oSc jep Ic aIaII Ibc C uI . 1000 3.
a aal o jd aag abaaall ojll d aag b jn wlaall l q sli 111111111111111111
aIwO Lc aBbU UwUg 5bUg OJgul) cuiiyy aJoo gUgUgUgUgUgUgUgUgUgUgUgUgUgUgUgUgUgUgUgUgUgUgUgUgUgUgUgUgUgUgUgUgUgUgUgUgUgUgUgUgUgUgUgUgUgUgUgUgUgUgU
gI jIJI IJI JIJI 1000000000000000000000000000000000000000000000000000000
jgo uksu wulal y. 2. guc uusu buiu uauu uuuu
uiguiI IaJgac gIbJgWlaI p)5( 1
.05-4 UgaiI JdaSic dUaI Iwla
.05 uagc Uc uiguiI Uc sggall jally sljwwl nS
gai gai i 1i jai i jai i jai i jai i jai i jai i jai i jai i jai i jai i jai i jai i jai i jai i jai i jai i jai i jai i jai i jai i jai i jai i jai i jai i jai i jai i jai i jai i jai i jai i jai i jai i jai i jai i
.1111 1111 1111 1111 1111 1111 1111 1111 1111 1111 1111 1111 1111 11
:4)JJJJJJJJJJJJJJJJJJJJJJJJJJJJJJJJJJJJJJJ J12).a20a20a20a20a20a20a20a20a20a20a20a20a20a20a20a20a20a20a20a20a20a20a20a20a20a20a20a20a20a20a20a20a20a20
wlaal
CulIg lObXlg Jj Ic oag alogl bdoI wll a
.(3) (b) abgaa.1
paa.3) joll oag (a) jbwl g od ydu wda
aIwI wIwI aoe b) IowI JbwI g o s dI wI
jolll oag (b) wla qiaq joc ksa.1sog (b) gall bawll
jog oJiaall afo (b) abgossll uolll p q jc p.3
$$ : \therefore l a \cup l b g \ddot {o} j g o \dot {l} \dot {a} g b j l $$
$$ \begin{array}{l} - 1 >) \dot {a} a \mu \dot {c} \omega \dot {u} \ - 2 \bar {a} \bar {d} \bar {o} \bar {o} \quad \mathrm {c u s} \bar {u} \mathrm {a g k} \ ) 12 \dots \% 20(\%) \ - 3 < ) \ddot {a} _ {j} \dot {a} _ {j} \dot {c} _ {i} \dot {w} _ {i} \dot {a} _ {j} \ \end{array} $$
(3) 0dag aeg aikol p dla f sdo julll
.ajjao lwwg aJl JnJnJnJnJnJnJnJnJnJnJnJn
.abbgaoJUwuaJI p8o poUuuaIooC lab! Si
A 1
aui
:uJd gj wLg
pJJI Jg jIJI gSj gai:jjll jqabll
JSSaIg gaiIg gaiIg gai:uiuui Iu
yIg jgSjg Jswl oogg g:ulll aclal pssall
gawluggul
jIe g jg jggi:dlw/aa
aI I 1
g joc 1n JgJgJgJgJgJgJgJgJgJgJgJgJgJgJgJgJgJgJgJgJgJgJgJgJgJgJgJgJgJgJgJgJgJgJgJgJgJgJgJgJgJgJgJgJgJgJgJgJgJgJg
aUlJ
.0o 1
aol
a
a8b
[%]
XgUJUJUW
aeg culjll
aag sill jic) aboll/daasoll
(LulU
gai jia jil jll jw
(a)gj(jgJ)
JJIJI JIJI JIJI
3 ± 9
jaoaolssollljall
U
3 ± 15
aalaaJolgdoJjLJI
U
agwSallgolalJlJIJI
366
duol
JuswIgUbi
aBj []
gJlJwJz
18 ± 6jigaball laiuuiuJgllq
20 1000000000000000000000000000000000000000000
:uJg aBjU LjA uji
-0g:
- :duSJU9 ± % 2%
-10g]
-
-0g:duow
9 10
(% 17 > Jull)% 22
JJI JIaBg
.
.(363aJl,“LbIg JIJI,j)UJIoo
.(6)laJI Ubc glA
(12) aJdJlUwJlU (5) uWu
.(Cgjglj)6)laJI
(6) aIaI I bgsbI aaggI y JyJg 0d g ggJgJgJgJg
:abguoJU uJU aol Iaog
:JyUwUaIlaaJuWJUJNJs
auiu auii aaii g uai
LgWgJolJIcawJIaebOjIJa aJ 1
-ggugu
-uwuJolU
-ggjUJlAL
(U|U|U|U
-wwJ aobg U
LgWgJal
-ugjglgj
-(uunl aobg
-10g jooj1 j0
UgJg
:dui jioiJ aJb J
aolgaI I aJJI aJJI aJJI) jgJgDIN 52183.
$$ e l l g \left. \left| \omega^ {k} \right| - \left| \omega^ {k} \right| \right. $$
g (1) "Err, (d) dJdJ (c) Jj j
JUWJL000000000000000000000000000000000000000000000
.1J 1J JJ JJ
· ^50 + g^5 -
JJI 10g 已 "HI, g % 74,7 < :A a
J 61,9 <:B
Lggo no yuul g uall glj aagbll w
(aL
J 1
uJggo no sua uLg uIJI glbi jla a gj cwi
pU pUuUg (aLul
Jkuuogj
. 1wglg aloc JSG go Lgbgl |Lklaowdoljos wlll oogai
oag (c) joljog (la)"Err, uJU JkC Jgka
Jl Jjaiw l. g wu oI .
dclwlll lJgai jI .jlg ooc s y Lg 1g uJI bll
Bosch lac ao Jl wal oxc palw y aol
.ao Jolai jiljlll j0
aJg dUJI
#
gag ggljooaogdaal .JlsswI JsLg wlaol ooc
ooj jn jnnn n nn 8, uol ooc aSgsoo
UuIaJI
.1g 1000000000000000000000000000000000000000000
.
.ugwll lcc laalo 5
Luloo 0oc aolj Lc laIa
JgWJ 10gJgJwJgJsc Jbs
gI cIbI JIg o p dsswX. aIbJg aJb aBb abwI g Iwol
.aa sJgO
.
pIaWlUJluuWlg 10
aLx y, dIg aai I aol y aal lai J do sa jpo
jIJI IgaiI loglaII g auiiaI ggiJ JIJI baJI
:gogwww.bosch-pt.cc
Bosch
.qlaoIog liuaio ygduy UJluo
aJUwJ sic gaiIgauagu Iogjusllulalg jksj pJL
jLc gbo UuBgI UJwai
auiuiei 10
aill l c abafao aagbpybgyg g gglg s qo jy
aill oIcK aIol IaIol jSlaI qalw JbJc
iJ111111111111111111111111
gX1JgJb
gjgJd gUUw2012/19/EU
gjgJdungjjwag,JJaaWJdJIaJI2006/66/EC
Lgio yalaii piui o jsc aIgaiuoll gaijll/psjoll
yIaIJI UlaIJI jIqJlQ JaUw JgBn c aII Ic abol ao
.
GwJ
Igss
g jy j yj yj yj yj yj yj yj yj yj yj yj yj yj yj yj yj yj yj yj yj yj yj yj yj yj yj yj yj yj yj yj yj yj yj yj yj yj yj yj yj yj yj yj yj yj yj yj yj yj yj y

40jS E9yJ S1 a
. 10000000000000000000000000000000000000000000
4
. 1JL JI LJI 1JLg g Jg JI JI JI JI JI JI JI JI JI JI JI JI JI JI JI JI JI JI JI JI JI JI JI JI JI JI JI JI JI JI JI JI JI JI JI JI JI JI JI JI JI JI JI JI JI JI
JUo 8g 1
JgLkss Jw L qilaiy jj 1 Jn Jn Jn Jn Jn Jn Jn Jn Jn Jn Jn Jn Jn Jn Jn Jn Jn Jn Jn Jn
.
4g uubliso u jksol yjimjui
4.sis oJaiw la
.1Jg j g s lcbI gla Ig kss J .Jgog ngslgS slawgj UcIcbI n jn jy j
.
4u oJdJlJ 1g JsOjJlJj
()
J L Jg g J (J) 1s j J d s J d J J J J J J J J J J J J J J J J J J J J J J J J J J J J J J J J J J J J J J J J J J J J J J J J J J J J J J J J J J J J J J J J J J J J
370|
sJgUgs
olssjl oJlaWl sJlgo
25°C L S L S l o s J (A
aaiw gag yu uuy L aS s G o j n w lil uj yg jygl bao (B g jis jlw lg jyjol jj. gj o jlbui n w liuw cug ygb .jai jui yg jll jn loo jl jola uj yk ojl jl jq .joi olaow olcs w yj yg (8) yaw olaw jgs ojwl jjvcbog ywu sl
wai
Lg jy/
Gd gjg jnJl sI yjI jOlaaw Iy jI JI JI JI JI JI .Sg W 19 (9) yjI dfoa oog yjI dyfoa oJy jI JI
J 59 Jg j g j 51 50
.1sS a gj sjiu gj
usu 1slo jI qui .uS oge JooaJ I u sjiU s dao ojgao
.
:diSj. uWuJ j sju d
1s01 9.
A
.1gj0jJj
.igw Lda gda d gga gogawjLqjyl cwlJ Soo
jai laa aao j 5jilai
jIw Cg jilw g l y JyJL JLOJ/ Cg jn nn dabJyJUg J)e(
jawloi dawo j)3.(wlo o w o
J 1 J 1 J 1 J 1 J 1 J 1 J 1 J 1 J 1 J 1 J 1 J 1 J 1 J 1 J 1 J 1 J 1 J 1 J 1 J 1 J 1 J 1 J 1 J 1 J 1 J 1 J 1 J 1 J 1 J 1 J 1 J 1 J 1 J 1 J
Jg:ggj. g j 1 J 1 J 1 J 1 J 1 J 1 J 1 J 1 J 1 J 1 J 1 J 1 J 1 J 1 J 1 J 1 J 1 J 1 J 1 J 1 J 1 J 1 J 1 J 1 J 1 J 1 J 1 J 1
GgJ. gW Lo gRw Gs oJl, u g L (5) 1u wai Joo oJL a (a) Jw J (3) Jw lao d o W g J oJl LED eJbWgUgJ J Ow UgBj Jn Jpoglc. gW
:sgwooosuA
- gijjie
- jou1 u ouog j
-1Jduuogj
oJjI Joo
dsj/ugol/s/ugjdoosoowgsojxlldaoonjsdgsj 1bws (b) osw ojz gsojxlldao. dss jwogS | (1) nn
jwloai dao (204)3(s y
jw j w. g w (3) k wai d a (a) jw jw j w oj il jdo (b) u ly jw j w y do y jw
Sj oJ jI Joo g CwI Joo.0g g w Jo OJ Lai (b) 2
Sj 0j sij jao. jgwh oJs wai (3) Jswai daa Jb (b) dsh jkw d Cgbj c g ow l aai ogg S b) ooh
:Jgwho0dsuulaj
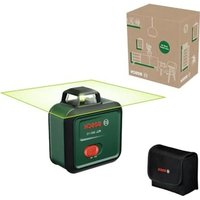
- Product Description and Specifications
- Intended Use
- Example calculations
- Wood moisture content:
- Water content of the wood:
- | English
- Product features
- Display elements
- Technical data
- Moisture meter UniversalHumid
- Unit of measurement
- Measuring accuracy (typical)
- Wood group selection
- Reference values for the wood moisture content
- General
- Assembly
- Inserting/changing the Batteries
- Battery Indicator in the Display
- Operation
- Start-Up
- Switching on/off
- 24|English
- Measurement Preparations
- Setting the Wood Group
- Object to be Measured
- Measuring process
- Saving Measured Values
- Application Examples and Reference Values for the Wood Moisture Content in Timber Construction
- | English
- Self-Test Function
- Practical advice
- Influences on the Measurement Result
- Errors - Causes and Corrective Measures
- | English
- Cause Corrective measures
- Maintenance and Service
- Maintenance and Cleaning
- After-Sales Service and Application Service
- Great Britain
- Ireland
- Australia, New Zealand and Pacific Islands
- Republic of South Africa
- Customer service
- | English
- Disposal
- Only for EU countries:
- François
- Bortskaffelse
- Avfallshantering
- Forberedelse for maling
- Tonoetnon/aalaynunatapov
- Onncahne npodukta n ycnyr
- PpHMeHeHnNoHa3HaueHnIO
- | Pycckn
- PpMepbI BblncJIeHn
- BnaxHoctb dpeBecnHbl:
- H3o6paXeHHbIe coCTaBHbIe yactn
- 3nemEmtbi Hndkaun
- TexHnueckne daHHbIe
- C6opka
- YctahOBka/3ameHa 6atapeek
- Hndkatop 3apra6aatapeh na dncnnee
- Pa60Ta c HnCtpymeHTOM
- BkIoueHne 3NeKtpOnHcTpymEHTa
- BkIIOueHne/BbIKIOueHne
- | Pycckn
- IoproTOBka Kn3MepeHIO
- YctaHOBKa npoDby dpeBecnHbI
- 06beKTn3MepeHn
- Прочедура Измерени
- BapnaHbI npHMeHeHHa N opHeHTnpOBouHbI noka3aTeHN BnaXHOCTN dpeBeCnHbI pHi cTpOHTeNbCTBe H3 dpeBeCnHbI
- CepBnKoHcyIbTnpOBaHne no BOpocam npImeHeHH
- ДлpernoHa: PoccH, Benapycb, Ka3axCTaH, YkpanHa
- Pocch
- 212|Pycckn
- Benapycb
- Ka3axCTah
- MondoBa
- YTNn3aCna
- Tolbko dIra cTpaH-ueHOB EC:
- YkpaIHcbka
- Bka3iBkn 3 Texhikn 6e3neKn
- 214|yKpaHcbKa
- Bmict BONORy depeBuHi:
- 3o6paxeHi KOMnoHeHTN
- Enementn iHdkauii
- TexhiuHdani
- Ppoeypa BmipIOBHaH
- 220|YkpaHcbKa
- 36epexeHHpe3yNbTaTy BmipIOBaHH
- PpHKnIaH3acTocyBaHH Ta opiEHTOBHI 3HaueHHBONorOCTi DepeBHH npn 3BeHeHHi DepeB'Anx KOHcTpkyKci
- 222|YkpaHcbKa
- Bka3iBkn icoso p60tn
- ΦaKTopn BnNBy Ha pe3yNbTaT BmipIOBaHH
- Hecnpabhocti - Ppunnn i ycyhenn
- PpUHa YcyHenn
- Pnunna Ycyhenn
- Texhie o6cnyroBybAHnI cepBic
- Texhiue o6cnyrobyBaHHia ouHneHH
- Cepbic KOHCyNbTaCiII 3 NHTaHb 3acTocyBaHHA
- 224|YkpaHcbKa
- YkpaHa
- Ytunlaia
- Пише дя Краин EC:
- Ka3aK
- Eypa3nЯ 3KoHOMNKaIbIK OdaftbHa (KeJeH OdaftbHa) Mywe MemneKeTTep ayMaftbIHda KOnDaHbIaIbI
- Thimpi naiandaHy MEP3iMi
- Kb3MeTKepe Hemece naaHnyuHBn KaTeiKTepi MeH icTeH uby ce6entepinhi T3iIMI
- Uekti kyn 6enrinepi
- Kb3MeT Kepcety Typi MeH Xniriri
- CaKray
- 226|Ka3aK
- TacbImanay
- Kayinci3ik HycKaynapbI
- Ohim Xhe KyaT CnnaTamaCbl
- MaKcaTbI 6OyblHwa KOndaHy
- EcenTeyMbicanapbl
- Cypek bInfandbInbfbl:
- Cypektih cy kypambl:
- Kopcetinren Kypamdbi 6eektep
- 228|Ka3aK
- Hnkaaun 3neMeHTepi
- Cypek bInFaIbIbIFbIHbIH,6aKbIay MAnDiepi
- Xannbl
- Mоntаждay
- O3iHdkcbHaKaФyHKnAcbI
- Painanany 6oynbHwa HycKaynap
- Othey hTHe eep ety
- Akaynap-Ce6entepiXaHeWeSiIMdepi
- Ce6e6i Ieewimi
- Kədere xapaty
- Tek KaHa EO endepi yuH:
- Româna
- Instruţiuni de siguranta
- Yka3aHn8 3a cnryphnoct
- |Былгарский
- PpHmepn 3a n3uHcneHne
- BnaXHocT Ha dbpBeCnHaTa:
- CbDpKahne Ha Boda BdbpBecnHaTa:
- I3o6pa3eHn enemeHTn
- EnementHa dncnne
- TexHHueckn daHHN
- BkIIOUBaHe Hn3KIOUBaHe
- IoiroTOBka Ha H3MepBaHeTo
- Hactpoika ha rpyna dbpBecnHa
- H3mepBaH 06ekt
- H3mepBaHe
- |Былгарский
- 3anametrahe Ha cToHocTtHa n3MepBaHe
- Подьрхан серви3
- PoiDbpxKaHe n nouchTbaHe
- |Быларски
- Knnehtcka cnyx6a n koncyntaun oTHocno ynotpe6ata
- Быларна
- БракуВанe
- Cama 3a ctpanH ot EC:
- MaKeDoHcKn
- БeЗб endocnHaNoMeHn
- Опис на поживODOTи поформансichte
- Hameheya ynoTpe6a
- Ppimepn 3a npecMeTyBaBe
- Bnara ha dpbo:
- CoDpxHnHa HbOa Ha DpBOTo:
- MONTAXA
- CTaBaHbe/MeHyBaHBe Ha 6aTepeHH
- Iodrotobka 3a Mepehe
- NoctabyBaBeHa rpyna Ha npBO
- Mepen ojeKT
- PpoecHaMepeBe
- CepBncha cnyx6a n coBeT np KOpNCTeHe
- CebepHa MaKeDoHja
- 272|Srpski
- OtctpaHyBaHbe
- Cama 3a 3emjnte oEY:
- Srpski
- DispleReI内容
- #
- lloI 1sI
- 山
- LbXlg
- wU
- awgJlajwJl
- wJJI aJoc
- wlaal
- A 1
- aui
- JJI JIaBg
- aJg dUJI
- pIaWlUJluuWlg 10
- auiuiei 10
- gX1JgJb
- GwJ
- Igss
- sJgUgs
- olssjl oJlaWl sJlgo
- Lg jy/
- jai laa aao j 5jilai
- oJjI Joo
Brand : BOSCH
Model : Universal Humid
Category : Measuring equipment