
GFM 1000 Professional - Measuring equipment BOSCH - Free user manual and instructions
Find the device manual for free GFM 1000 Professional BOSCH in PDF.


| Product type | Professional laser rangefinder |
| Brand | Bosch |
| Model | GFM 1000 Professional |
| Dimensions | 120 x 55 x 30 mm |
| Weight | 200 g (with batteries) |
| Power supply | 2 AAA batteries (1.5 V) |
| Measuring range | 0.05 to 100 m |
| Accuracy | ± 1.5 mm (typical) |
| Units | m, cm, ft, in |
| Main functions | Distance measurement, area, volume, Pythagoras, continuous measurement, addition/subtraction |
| Display | Backlit LCD screen |
| Maintenance and cleaning | Clean with a soft, dry cloth; avoid solvents |
| Storage | Temperature: -20 °C to +70 °C |
| Safety | Laser class 2; do not look directly into the beam |
| Protection | IP54 rating (splash and dust resistant) |
| Spare parts and repairability | Standard batteries; repair by Bosch authorized center |
| Warranty | 2 years (online registration possible) |
| Included accessories | Batteries, carrying strap, protective case |
Frequently Asked Questions - GFM 1000 Professional BOSCH
User questions about GFM 1000 Professional BOSCH
0 question about this device. Answer the ones you know or ask your own.
Ask a new question about this device
Download the instructions for your Measuring equipment in PDF format for free! Find your manual GFM 1000 Professional - BOSCH and take your electronic device back in hand. On this page are published all the documents necessary for the use of your device. GFM 1000 Professional by BOSCH.
USER MANUAL GFM 1000 Professional BOSCH
English ...... Page 24
1 609 92A B0H | (21.01.2025) Bosch Power Tools
5


1 609 92A BOH | (21.01.2025) Bosch Power Tools
6


1 609 92A BOH | (21.01.2025) Bosch Power Tools
J
K
CAT II 1000 V
CAT III 1000 V CAT IV 600 V
8
L
M

German
Safety instructions


www.bosch-pt.com/serviceaddresses
Transport
All instructions must be read and observed. The safeguards integrated into the measuring tool may be compromised if
the measuring tool is not used in accordance with these instructions. STORE THESE INSTRUCTIONS IN A SAFE PLACE.
▶ Do not perform any measurements on electric circuits with voltages exceeding 1000 V. ▶ Take extra care when working with voltages over 30 V AC or 60 V DC! Even at these voltages, contact with live cables can cause life-threatening electric shocks. ▶ Remove the test leads from the input terminals, before you take a measurement of current. There is a risk of an electric shock. ▶ Do not apply more than the rated voltage, as marked on the measuring tool, between terminals or between any terminal and earth ground. ▶ Only use test leads that have the same voltage, category, and amperage ratings as the measuring tool.
▶ Check the insulation of the test leads regularly. Damaged insulation of the test leads can lead to an electric shock. ▶ Do not use the measuring tool in explosive atmospheres which contain flammable liquids, gases or dust. Sparks may be produced inside the measuring tool, which can ignite dust or fumes. ▶ Verify the function of the measuring tool by measuring a known voltage. If in doubt, have the measuring tool serviced. ▶ Use the measuring tool only as specified in this manual. The protection provided by the measuring tool might be impaired. ▶ Use the measuring tool or the test leads only if they do not appear damaged. ▶ Have the measuring tool repaired only by a qualified specialist using only original replacement parts. This will ensure that the safety of the measuring tool is maintained. ▶ Do not modify or open the battery. There is a risk of short-circuiting. In case of damage and improper use of the battery, vapours may be emitted. The battery can set alight or explode. Ensure the area is well ventilated and seek medical attention should you experience any adverse effects. The vapours may irritate the respiratory system. If used incorrectly or if the battery is damaged, flammable liquid may be ejected from the battery. Contact with this liquid should be avoided. If contact accidentally occurs, rinse off with water. If the liquid comes into contact with your eyes, seek additional medical attention. Liquid ejected from the battery may cause irritation or burns. The battery can be damaged by pointed objects such as nails or screwdrivers or by force applied externally. An internal short circuit may occur, causing the battery to burn, smoke, explode or overheat. When the battery is not in use, keep it away from paper clips, coins, keys, nails, screws or other small metal objects that could make a connection from one terminal to another. A short circuit between the battery terminals may cause burns or a fire. ▶ Only use the battery with products from the manufacturer. This is the only way in which you can protect the battery against dangerous overload. ▶ Only charge the batteries using chargers recommended by the manufacturer. A charger that is suitable for one type of battery may pose a fire risk when used with a different battery.


Protect the battery against heat, e.g. against continuous intense sunlight, fire, dirt, water and moisture. There is a risk of explosion and short-circuiting.
▶ Use personal protective equipment if there is a risk that you may touch live parts in the system in which the current is to be measured.
Symbols
Symbols and their meaning
| Device with double or reinforced insulation | |
| Caution: Risk of electric shock! | |
| Use in the vicinity of non-insulated dangerous live conductors permitted | |
| Connection for earth |
Product Description and Specifications
Please unfold the fold-out page with the diagram of the measuring tool and leave it open while reading the instruction manual.
Intended Use
The measuring tool is intended for measuring alternating current, voltage (including with a lower input impedance [LoZ]) and resistance, and for continuity testing. It can also be used for measuring the frequency of alternating voltage and for non-contact voltage testing of alternating voltages between 24 and 1000 V.
The measuring tool may only be used in circuits with a rated voltage ≤ 1000 V DC/AC.
The measuring tool is suitable for indoor use.
Product Features
The numbering of the product features refers to the representation of the measuring tool in the images.
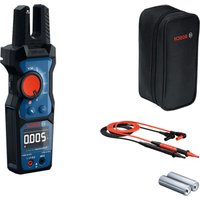
(1) Display (2) Rotation switch (for selecting the measuring function) (3) Tab for fixing the magnetic hanger (4) Torch (5) Test probe for non-contact voltage testing (6) Measuring fork (7) Arrows for cable positioning (8) Hold button (holding of the measured value on the display or sound on/off)
(9) Torch on/off button
(10) Sel button (second assignment of measuring function)
(11) (+) input terminal (input terminal for measuring voltage, continuity and resistance)
(12) COM input terminal (earth connection (return conductor) for measuring voltage, continuity and resistance)
(13) Red test lead
(14) Black test lead (15) Screw (2×) for attaching the battery compartment cover (16) Battery compartment cover (17) Inlay in the battery compartment cover (18) Battery pack locking mechanism (19) Li-ion battery pack 4 (20) Locking mechanism of the Li-ion battery pack 4 (21) Magnetic hanger 4 (22) Protective bag (23) Protective caps
A) This accessory is not part of the standard scope of delivery.
Display Elements
(a) Measurement with lower input impedance (b) Measured value "frozen" (c) Continuity testing (d) Sound off (e) Battery warning (f) Measured value (g) Unit of measurement (h) Direct current/alternating current display (i) Sign of measured value (polarity) (j) Warning if voltage > 30 V
Technical data
Fork Meter GFM 1000-15
| Article number | 3 601 K77 4.. |
| Measuring range for voltage 1000 V AC/DC | |
| Measuring range for voltage with lower input impedance (LoZ) | 1000 V AC/DC |
| Measuring range for current 200 A AC | |
| Measuring range for frequency | 10 Hz to 50 kHz |
| Measuring range for resistance | 60 MΩ |
| Continuity testing ● | |
| Non-contact voltage testing (NCV) | ● |
| True RMS (root mean square measurement) | ● |
| General | |
| Operating temperature -10 °C to +50 °C | |
| Storage temperatureA) | -40 °C to+70 °C |
| Relative air humidity max. 90 % | |
| Max. altitude 2000 m | |
| Pollution degree according to IEC 61010-1B) | 2 |
| Automatic switch-off after approx. | 20 min |
Bosch Power Tools 1 609 92A BOH | (21.01.2025)
28 | English
| Fork Meter GFM 1000-15 | |
| Weight c) | 297 g |
| Protection rating IP 54 | |
| Safety class CAT III 1000 V | CAT IV 600 V c) |
| Dimensions 69.1 × 49.6 × 226.3 mm | |
| Test lead MS 90 | |
| Safety class with protective cap | CAT III 1000 V d) CAT IV 600 V d) |
| Safety class without protective cap | CAT II 1000 V d) |
| Non-rechargeable batteries | 2 × 1.5 V LR06 (AA) |
| Battery pack (accessory) Li-ion | |
| Recommended ambient temperature during charging | +10 °C to +35 °C |
| Recommended ambient temperature during operation and during storage | -10 °C to +45 °C |
| Type BA 3.7V 1.0Ah A | |
| Article number | 1 607 A35 ON8 |
| USB charging connection Type-C g | |
| Recommended USB Type-C cable g) | 1 600 A01 6A8 |
| Rated voltage | 3.7 V--- |
| Capacitance 1.0 Ah | |
| Number of battery cells 1 | |
| Power supply (accessory) | |
| Output voltage | 5.0 V--- |
| Output current 500 mA | |
| Recommended power sup-ply h) | 2 609 120 713 (EU)2 609 120 718 (UK)1 600 A01 3A0 (ARG)1 600 A01 3A1 (MEX) |
Fork Meter GFM 1000-15
1600A013A2
(BRL)
A) Without batteries and/or rechargeable batteries B) Only non-conductive deposits occur, whereby occasional temporary conductivity caused by condensation is expected. C) Weight without batteries D) MEASUREMENT CATEGORY III is applicable to test and measuring circuits connected to the distribution part of the building's low-voltage mains installation. E) MEASUREMENT CATEGORY IV is applicable to test and measuring circuits connected to the supply point of the building's low-voltage mains installation. F) MEASUREMENT CATEGORY II is applicable to test and measuring circuits connected directly to utilization points (socket outlets and similar points) of the low-voltage mains installation. G) USB Type-C® and USB-C® are trademarks of USB Implementers Forum. H) For additional technical data, visit: https://www.bosch-professional.com/ecodesign
Operation
Starting Operation
▶ Never leave the measuring tool unattended when switched on, and ensure the measuring tool is switched off after use. ▶ Protect the measuring tool from moisture and direct sunlight. ▶ Do not expose the measuring tool to any extreme temperatures or variations in temperature. For example, do not leave it in a car for extended periods of time. In case of large variations in temperature, allow the measuring tool to adjust to the ambient temperature before putting it into operation. The precision of the measuring tool may be compromised if exposed to extreme temperatures or variations in temperature. - Avoid substantial knocks to the measuring tool and avoid dropping it.
Switching On and Off
» Turn the rotary switch (2) to the required measuring function to switch on the measuring tool. » Turn the rotary switch to the position to switch off the measuring tool.
If no value is measured for approx. 20 min or no button is pressed or the rotary switch is not adjusted, the measuring tool will automatically switch itself off to preserve the non-rechargeable batteries. To disable automatic shutdown, press and hold the Hold button while switching on the measuring tool (e.g. by turning the rotary switch to any position). d.APO will then appear in the display.
30 | English
You can then switch the measuring tool back on by turning the rotary switch (2) or pressing one of the buttons.
Buttons
Hold Button
"Freezing" a Value on the Display
Briefly press the Hold button to "freeze" the measured value on the display (1). Hold is shown on the display and an audio signal is output. Briefly press the Hold button again to re-enable the display (1).
Switching Sound Off/On
Press and hold the Hold button to switch off the sound output. The symbol is shown on the display. Press and hold the Hold button again to switch on the sound output again.
Do not use the Hold button when determining the voltage. The voltage displayed does not change and there is a risk of injury due to electric shock.
Sel Button
Second assignment of measuring function on rotary switch
Briefly press the Sel button to switch between two measuring functions that have the same position on the rotary switch (2). The respectively selected measuring function is shown on the display (1).
If the position on the rotary switch is not doubly assigned, an audio signal is output when the Sel button is pressed.
Torch
Press the Button to switch the torch on or off. If the measuring tool is not used for approx. 5 min, the torch will automatically switch off.
Connecting/Disconnecting Test Leads
Always connect the black test lead (14) to the COM input terminal first, and then connect the red test lead (13) to the (+) input terminal. Proceed in reverse when disconnecting the test leads.
To avoid electric shocks, injuries or damage to the measuring tool before performing resistance or continuity tests, ensure that the mains power connection is disconnected and all high-voltage capacitors are discharged.
Measuring functions
The measuring tool offers the following measuring functions:
- Measurement of alternating current
- Measurement of alternating or direct voltage with lower input impedance (approx. 3 kΩ) to suppress reactive voltages (inductive/capacitive)
- Measurement of resistance
- Continuity testing
- Measurement of alternating voltage
- Measurement of the frequency of alternating voltage
- Measurement of direct voltage
- Non-contact voltage testing
Measuring Process
▶ Use for measurements always the proper input terminals, switch position and measuring range. ▶ Check the test leads for continuity before use. Do not use if the readings are high or noisy. ▶ Keep your fingers behind the finger guards while using the test leads. » Turn the rotary switch (2) to the position in the figure. » Press the Sel button when it is shown in the figure.
When Using Test Leads:
Connect test leads (14) and (13) as shown in the figure. Contact the test points with the test probes. The measured value is shown on the display (1).
When using the measuring fork:
Enclose the cable to be measured with the measuring fork (6) (maximum cable diameter 16 mm). Position it between the arrows (7). The measured value is shown on the display (1).
Measurement of Alternating Current (see Fig. A, page 4) (see Fig. B, page 4)
Keep your fingers behind the finger guard when using the measuring fork. Do not take any measurements if the open-circuit potential to earth is more than 1000 V. Take the measurement with the measuring fork (see "Measuring Process", page 30).
Measurement of Alternating Voltage with Lower Input Impedance (see Fig. C, page 4)
Take the measurement with the test leads (see "Measuring Process", page 31).
Measurement of Direct Voltage with Lower Input Impedance (see Fig. D, page 5)
Take the measurement with the test leads (see "Measuring Process", page 31).
Measurement of resistance (see Fig. E, page 5)
Take the measurement with the test leads (see "Measuring Process", page 31).
Continuity test (see Fig. F, page 5)
Take the measurement with the test leads (see "Measuring Process", page 31). If the continuity test is successful, a continuous tone is output.
Measurement of alternating voltage (see Fig. G, page 6)
Take the measurement with the test leads (see "Measuring Process", page 31).
Measurement of the Frequency of Alternating Voltage (see Fig. H, page 6)
Frequency measurement is only carried out with alternating voltage.
Take the measurement with the test leads (see "Measuring Process", page 31).
Measurement of direct voltage (see Fig. I, page 6)
Take the measurement with the test leads (see "Measuring Process", page 31).
Non-contact voltage testing (see Fig. J, page 7)
Turn the rotary switch (2) to the n (see Fig. J, page 7) position. EF is shown on the display. Hold the test probe (5) near the test object or the plug socket with AC voltage. An audio signal will sound and the LED at the rotation switch position will flash red when it detects an AC voltage ≥ 40 V AC.
Accuracy Specifications
| Measuring function | Measuring range | Resolution Accuracy ± ([% of the measured value] + [count values]) |
| Alternating voltage (AC V) | 600.0 V 0.1 V ± (1.5 % + 5) | |
| 1000 V 1 V | ||
| LoZ V (DC/AC) | 600.0 V 0.1 V ± (2.0 % + 3) | |
| 1000 V 1 V | ||
| Alternating current (AC A) | 200.0 A 0.1 A ± (3.0 % + 3) | |
| Direct voltage (DC V) | 600.0 V 0.1 V ± (1.0 % + 2) | |
| 1000 V 1 V | ||
| Frequency (AC V) | 99.99 Hz 0.01 Hz ± (0.1 % + 2) | |
| 999.9 Hz 0.1 Hz | ||
| Measuring function | Measuring range | Resolution Accuracy ± ([% of the measured value] + [count values]) |
| 9.999 kHz 0.001 kHz | |
| 50.00 kHz 0.01 kHz | |
| Resistance (Ω) | 600.0 Ω 0.1 Ω ± (1.0% + 5) |
| 6.000 kΩ 0.001 kΩ ± (1.0% + 2) | |
| 60.00 kΩ 0.01 kΩ | |
| 600.0 kΩ 0.1 kΩ | |
| 6.000 MΩ 0.001 MΩ | |
| 60.00 MΩ 0.01 MΩ ± (2.0% + 5) |
| Continuity 600.0 Ω 0.1 Ω ± (1.0% + 5) | ||
| ≤30 Ω:Sound signal≥50 Ω:No sound signal | ||
| NCV 40 V | to600 V | ≤20 V: No sound signal,no flashing≥40 V: Sound signal and flashing |
Accuracy is guaranteed for a period of one year from calibration at operating temperatures of -10 °C to 50 °C and a relative humidity of 0 % to 90 %.
Protective Caps
To ensure safety when using test leads, make sure that the corresponding CAT measurement category is set. You can change the safety class of the test leads ((13)/(14)) by attaching the protective caps (23) to the test probes of the test leads or removing them from the test probes of the test leads (see Fig. K, page 7).
Inserting/Changing the Battery
The battery compartment cover (16) may only be opened with the test leads ((14) / (13)) removed. There is a risk of electric shock.
It is recommended that you use alkaline manganese non-rechargeable batteries to operate the measuring tool.
Remove the test leads ((14)/(13)). Unscrew the two screws (15) on the battery compartment cover (16) and remove the cover (see Fig. L, page 8). Insert the non-rechargeable batteries. Reinsert the battery compartment cover (16) and secure it with the two screws (15).
The measuring tool can only be switched on if the battery compartment cover (16) is screwed down correctly. Always replace all the non-rechargeable batteries at the same time. Only use non-rechargeable batteries from the same manufacturer and which have the same capacity. When inserting the batteries, ensure that the polarity is correct according to the illustration on the inside of the battery compartment.
When the battery symbol first appears on the display and an audio signal is output, only a few measurements will still be possible. When the non-rechargeable batteries are completely discharged, an audio signal is output and the measuring tool switches off.
Take the batteries out of the measuring tool when you are not using it for a prolonged period of time. The batteries can corrode during prolonged storage in the measuring tool.
Never store the measuring tool without an inserted battery compartment cover (16), particularly in dusty or humid environments.
Lithium-ion battery pack (accessory)
The battery compartment cover (16) may only be opened with the test leads ((14) / (13)) removed. There is a risk of electric shock.
Inserting/changing the lithium-ion battery pack (accessory)
Remove the test leads ((14)/(13)). Unscrew the two screws (15) on the battery compartment cover (16) and remove the cover. Unscrew the locking mechanism (18) in the battery compartment cover by approx. 1/2 revolution and remove the inlay (17). Insert the lithium-ion battery pack (19) (accessory) and re-tighten the locking mechanism (18) by approx. 1/2 revolution. Insert the battery compartment cover together with the lithium-ion battery pack (19) and secure the cover with the 2 screws (15). To remove the lithium-ion battery pack (19) (accessory), unscrew the two screws (15) on the battery compartment cover (16) and open the locking mechanism (18). Remove the lithium-ion battery pack (see Fig. M, page 8).
The measuring tool can only be switched on if the battery compartment cover (16) is screwed down correctly.
Charging the lithium-ion battery pack (accessory)
For charging, use the recommended USB power supply unit or a USB power supply unit whose output voltage and minimum output current comply with the requirements in the "Technical data" section. Observe the operating manual of the USB power supply unit. Recommended power supply unit: See "Technical data". Pay attention to the mains voltage. The voltage of the power source must match the voltage specified on the rating plate of the power adaptor. Power adaptors marked with 230 V can also be operated with 220 V.
Never recharge the lithium-ion battery in the measuring tool.
Lithium-ion rechargeable batteries are supplied partially charged according to international transport regulations. To ensure full rechargeable battery capacity, fully charge the rechargeable battery before using your tool for the first time.
The lithium-ion battery pack (19) must be removed from the battery compartment cover (16) to charge it (see Fig. M, page 8).
The USB port for connecting the USB cable and the charging indicator light can be found under the flap for the USB port on the lithium-ion battery pack (19) (accessory).
Open the flap of the USB port. Connect the USB cable.
During charging, the charging indicator light lights up yellow. When the lithium-ion battery pack (19) (accessory) is fully charged, the charging indicator light will light up green. A red charging indicator light indicates that the charging voltage or charging current is unsuitable.
Magnetic Hanger (Accessory)
The magnetic hanger (21) can be used to attach the measuring tool to metallic surfaces (see Fig. N, page 9).
The magnet of the hanger (21) must not get close to the measuring fork (6) during the measurement.
Troubleshooting
Battery warning
The symbol for battery warning appears and an audio signal is output
Cause: Battery voltage is dropping (measurement still possible)
Remedy: Change the non-rechargeable batteries or the lithium-ion battery pack (accessory) or charge the lithium-ion battery pack (accessory) outside the measuring tool
An audio signal is output and the measuring tool switches off.
Cause: Non-rechargeable batteries or lithium-ion battery pack (accessory) drained.
Remedy: Change the non-rechargeable batteries or the lithium-ion battery pack (accessory) or charge the lithium-ion battery pack (accessory) outside the measuring tool.
Measuring tool cannot be switched on.
Cause: Non-rechargeable batteries or lithium-ion battery pack (accessory) drained.
Remedy: Change the non-rechargeable batteries or the lithium-ion battery pack (accessory) or charge the lithium-ion battery pack (accessory) outside the measuring tool.
Maintenance and Service
Maintenance and Cleaning
Keep the measuring tool clean at all times.
Never immerse the measuring tool in water or other liquids.
Wipe off any dirt using a damp, soft cloth. Do not use any detergents or solvents.
If the measuring tool needs to be repaired, send it off in the protective bag (22).
After-Sales Service and Application Service
Our after-sales service responds to your questions concerning maintenance and repair of your product as well as spare parts. You can find explosion drawings and information on spare parts at: www.boschpt.com
The Bosch product use advice team will be happy to help you with any questions about our products and their accessories.
In all correspondence and spare parts orders, please always include the 10-digit article number given on the nameplate of the product.
Great Britain
Robert Bosch Ltd. (B.S.C.)
P.O. Box 98
Broadwater Park
North Orbital Road
Denham Uxbridge
UB95HJ
At www.bosch-pt.co.uk you can order spare parts or arrange the collection of a product in need of servicing or repair.
Tel. Service: (0344) 7360109
E-Mail: boschservicecentre@bosch.com
You can find further service addresses at:
www.bosch-pt.com/serviceaddresses
Transport
The recommended lithium-ion batteries are subject to legislation on the transport of dangerous goods. The user can transport the batteries by road without further requirements.
When the batteries are shipped by third parties (e.g. air transport or forwarding agency), special requirements on packaging and labelling (e.g. ADR regulations) must be met. A dangerous goods expert must be consulted when preparing the items for shipping. Dispatch battery packs only when the housing is undamaged. Tape or mask off open contacts and pack up the battery in such a manner that it cannot move around in the packaging. Please also observe the possibility of more detailed national regulations.
Disposal

Measuring tools, rechargeable/non-rechargeable batteries, accessories and packaging should be sorted for environmental-friendly recycling.
Do not dispose of the measuring tools or battery packs/batteries with household waste.

Do not dispose of the measuring tools or battery packs/batteries with household waste.
Measuring tools that are no longer suitable for use and defective or used rechargeable batteries/batteries must be disposed of separately. Use the designated collection systems.
Measuring tools that are no longer suitable for use and defective or used rechargeable batteries/batteries must be disposed of separately. Use the designated collection systems.
If disposed of incorrectly, waste electrical and electronic equipment may have harmful effects on the environment and human health, due to the potential presence of hazardous substances.
According to The Waste Electrical and Electronic Equipment Regulations 2013 (SI 2013/3113) (as amended) and the Waste Batteries and Accumulators Regulations 2009 (SI 2009/890) (as amended), products that are no longer usable must be collected separately and disposed of in an environmentally friendly manner.
According to The Waste Electrical and Electronic Equipment Regulations 2013 (SI 2013/3113) (as amended) and the Waste Batteries and Accumulators Regulations 2009 (SI 2009/890) (as amended), products that are no longer usable must be collected separately and disposed of in an environmentally friendly manner.
Li-ion:
Please observe the notes in the section on transport (see "Transport", page 37).
Please observe the notes in the section on transport (see "Transport", page 37).
Robert Bosch (France) S.A.S.
Robert Bosch (France) S.A.S.
www.bosch-pt.com/serviceaddresses
Transport
Calle Robert Bosch No. 405
www.bosch-pt.com/serviceaddresses
Transport
www.bosch-pt.com/serviceaddresses
Transport
www.bosch-pt.com/serviceaddresses
Transport
www.bosch-pt.com/serviceaddresses
106 | Danish
Transport
Bosch Service Center
Telegrafvej 3
2750 Ballerup
Spare parts can be ordered online or a repair order can be created at www.bosch-pt.dk.
Service Center phone: 44898855
Fax: 44898755
E-Mail: vaerktoej@dk.bosch.com
Further service addresses can be found under:
www.bosch-pt.com/serviceaddresses
Transport
Bosch Service Center
Telegrafvej 3
2750 Ballerup
Denmark
Tel.: (08) 7501820 (within Sweden)
Fax: (011) 187691
Further service addresses can be found under:
www.bosch-pt.com/serviceaddresses
Transport
www.bosch-pt.com/serviceaddresses
Transport
www.bosch-pt.com/serviceaddresses
Transport
www.bosch-pt.com/serviceaddresses
Transport
www.bosch-pt.com/serviceaddresses
Transport
Robert Bosch Sp. z o.o.
www.bosch-pt.com/serviceaddresses
Transport
www.bosch-pt.com/serviceaddresses
Transport
www.bosch-pt.com/serviceaddresses
Shipping
www.bosch-pt.com/serviceaddresses
Transportation
www.bosch-pt.com/serviceaddresses
Transportation
Power tool service
Strada Horia Măcelariu Nr. 30-34, sector 1
013937 Bucharest
www.bosch-pt.com/serviceaddresses
Transport
Power tool service
Strada Horia Măcelariu Nr. 30-34, sector 1
013937 Bucharest, Romania
www.bosch-pt.com/bg/bg/
www.bosch-pt.com/serviceaddresses
Transporting
www.bosch-pt.com/serviceaddresses
Transport
www.bosch-pt.com/serviceaddresses
Transport
The contained lithium-ion batteries are subject to the requirements of the law on dangerous goods. The user can transport the batteries by road without additional conditions.
When sending via a third party (e.g., by air transport or freight forwarding), special requirements regarding packaging and labeling must be observed. In this case, it is necessary to involve a dangerous goods expert when preparing the shipment.
Only send batteries if the housing is undamaged. Tape off open contacts and pack the battery so that it does not move in the packaging. Please also observe any additional national regulations.
Disposal

Measuring tools, rechargeable batteries/batteries, accessories, and packaging should be handed in for recycling that is in line with environmental protection.

Do not dispose of measuring tools and rechargeable batteries/batteries in household waste!
Only for EU countries:
Measuring tools that can no longer be used and defective or worn-out rechargeable batteries/batteries must be disposed of separately. Use the designated collection systems.
www.bosch-pt.com/serviceaddresses
Transport
www.bosch-pt.com/serviceaddresses
Transport
www.bosch-pt.com/serviceaddresses
Transport
www.bosch-pt.com/serviceaddresses
Transport
www.bosch-pt.com/serviceaddresses
Transport
https://www.bosch-professional.com/ecodesign
Operation
Starting operation
Robert Bosch Morocco SARL
www.bosch-pt.com/serviceaddresses
Transport
https://www.bosch-professional.com/ecodesign
How to operate the device
www.bosch-pt.com/serviceaddresses
Transport
1 608 M00 C43


- GERMAN
- SAFETY INSTRUCTIONS
- TRANSPORT
- SYMBOLS
- PRODUCT DESCRIPTION AND SPECIFICATIONS
- INTENDED USE
- PRODUCT FEATURES
- DISPLAY ELEMENTS
- TECHNICAL DATA
- FORK METER GFM
- OPERATION
- STARTING OPERATION
- SWITCHING ON AND OFF
- ENGLISH
- BUTTONS
- HOLD BUTTON
- FREEZING" A VALUE ON THE DISPLAY
- SWITCHING SOUND OFF/ON
- SEL BUTTON
- SECOND ASSIGNMENT OF MEASURING FUNCTION ON ROTARY SWITCH
- TORCH
- CONNECTING/DISCONNECTING TEST LEADS
- MEASURING FUNCTIONS
- MEASURING PROCESS
- WHEN USING TEST LEADS
- WHEN USING THE MEASURING FORK
- MEASUREMENT OF ALTERNATING CURRENT (SEE FIG. A, PAGE 4) (SEE FIG. B, PAGE 4)
- MEASUREMENT OF ALTERNATING VOLTAGE WITH LOWER INPUT IMPEDANCE (SEE FIG. C, PAGE 4)
- MEASUREMENT OF DIRECT VOLTAGE WITH LOWER INPUT IMPEDANCE (SEE FIG. D, PAGE 5)
- MEASUREMENT OF RESISTANCE (SEE FIG. E, PAGE 5)
- CONTINUITY TEST (SEE FIG. F, PAGE 5)
- MEASUREMENT OF ALTERNATING VOLTAGE (SEE FIG. G, PAGE 6)
- MEASUREMENT OF THE FREQUENCY OF ALTERNATING VOLTAGE (SEE FIG. H, PAGE 6)
- MEASUREMENT OF DIRECT VOLTAGE (SEE FIG. I, PAGE 6)
- NON-CONTACT VOLTAGE TESTING (SEE FIG. J, PAGE 7)
- PROTECTIVE CAPS
- INSERTING/CHANGING THE BATTERY
- LITHIUM-ION BATTERY PACK (ACCESSORY)
- INSERTING/CHANGING THE LITHIUM-ION BATTERY PACK (ACCESSORY)
- CHARGING THE LITHIUM-ION BATTERY PACK (ACCESSORY)
- MAGNETIC HANGER (ACCESSORY)
- TROUBLESHOOTING
- BATTERY WARNING
- AN AUDIO SIGNAL IS OUTPUT AND THE MEASURING TOOL SWITCHES OFF
- MEASURING TOOL CANNOT BE SWITCHED ON
- MAINTENANCE AND SERVICE
- MAINTENANCE AND CLEANING
- AFTER-SALES SERVICE AND APPLICATION SERVICE
- GREAT BRITAIN
- YOU CAN FIND FURTHER SERVICE ADDRESSES AT
- DISPOSAL
- MEASURING TOOLS THAT ARE NO LONGER SUITABLE FOR USE AND DEFECTIVE OR USED RECHARGEABLE BATTERIES/BATTERIES MUST BE DISPOSED OF SEPARATELY. USE THE DESIGNATED COLLECTION SYSTEMS
- ACCORDING TO THE WASTE ELECTRICAL AND ELECTRONIC EQUIPMENT REGULATIONS 2013 (SI 2013/3113) (AS AMENDED) AND THE WASTE BATTERIES AND ACCUMULATORS REGULATIONS 2009 (SI 2009/890) (AS AMENDED), PRODUCTS THAT ARE NO LONGER USABLE MUST BE COLLECTED SEPARATELY AND DISPOSED OF IN AN ENVIRONMENTALLY FRIENDLY MANNER
- LI-ION
- ROBERT BOSCH (FRANCE) S.A.S
- SHIPPING
- TRANSPORTATION
- TRANSPORTING
- ONLY FOR EU COUNTRIES
Brand : BOSCH
Model : GFM 1000 Professional
Category : Measuring equipment