
STS 325 R - Saw Fein - Free user manual and instructions
Find the device manual for free STS 325 R Fein in PDF.
| Product type | Pneumatic tube saw |
| Brand | Fein |
| Model | STS 325 R |
| Power supply | Compressed air (pneumatic) |
| Maximum air pressure | 6 bar |
| Max. tube diameter (standard) | 325 mm |
| Max. tube diameter (with extension) | 440 mm |
| Recommended blade length | 500 mm or 600 mm (depending on device) |
| Blade thickness | Up to 2 mm |
| No-load stroke rate | Not specified |
| Air consumption | Not specified |
| Weight | Not specified |
| Sound pressure level | Not specified |
| Vibration level | Not specified |
| Additional handle | Yes, included |
| Recommended clamping device | 9 07 02 001 00 1, 9 07 02 004 00 6, etc. |
| Recommended lubricant | FEIN special oil 3 21 32 045 00 0 |
| Maintenance | Every 300 h or 6 months |
| Warranty | According to legal regulations + FEIN manufacturer warranty |
| Intended use | Dry cutting of metals and plastics |
| Required safety equipment | Eye, hearing protection, gloves, etc. |
Frequently Asked Questions - STS 325 R Fein
User questions about STS 325 R Fein
0 question about this device. Answer the ones you know or ask your own.
Ask a new question about this device
Download the instructions for your Saw in PDF format for free! Find your manual STS 325 R - Fein and take your electronic device back in hand. On this page are published all the documents necessary for the use of your device. STS 325 R by Fein.
USER MANUAL STS 325 R Fein
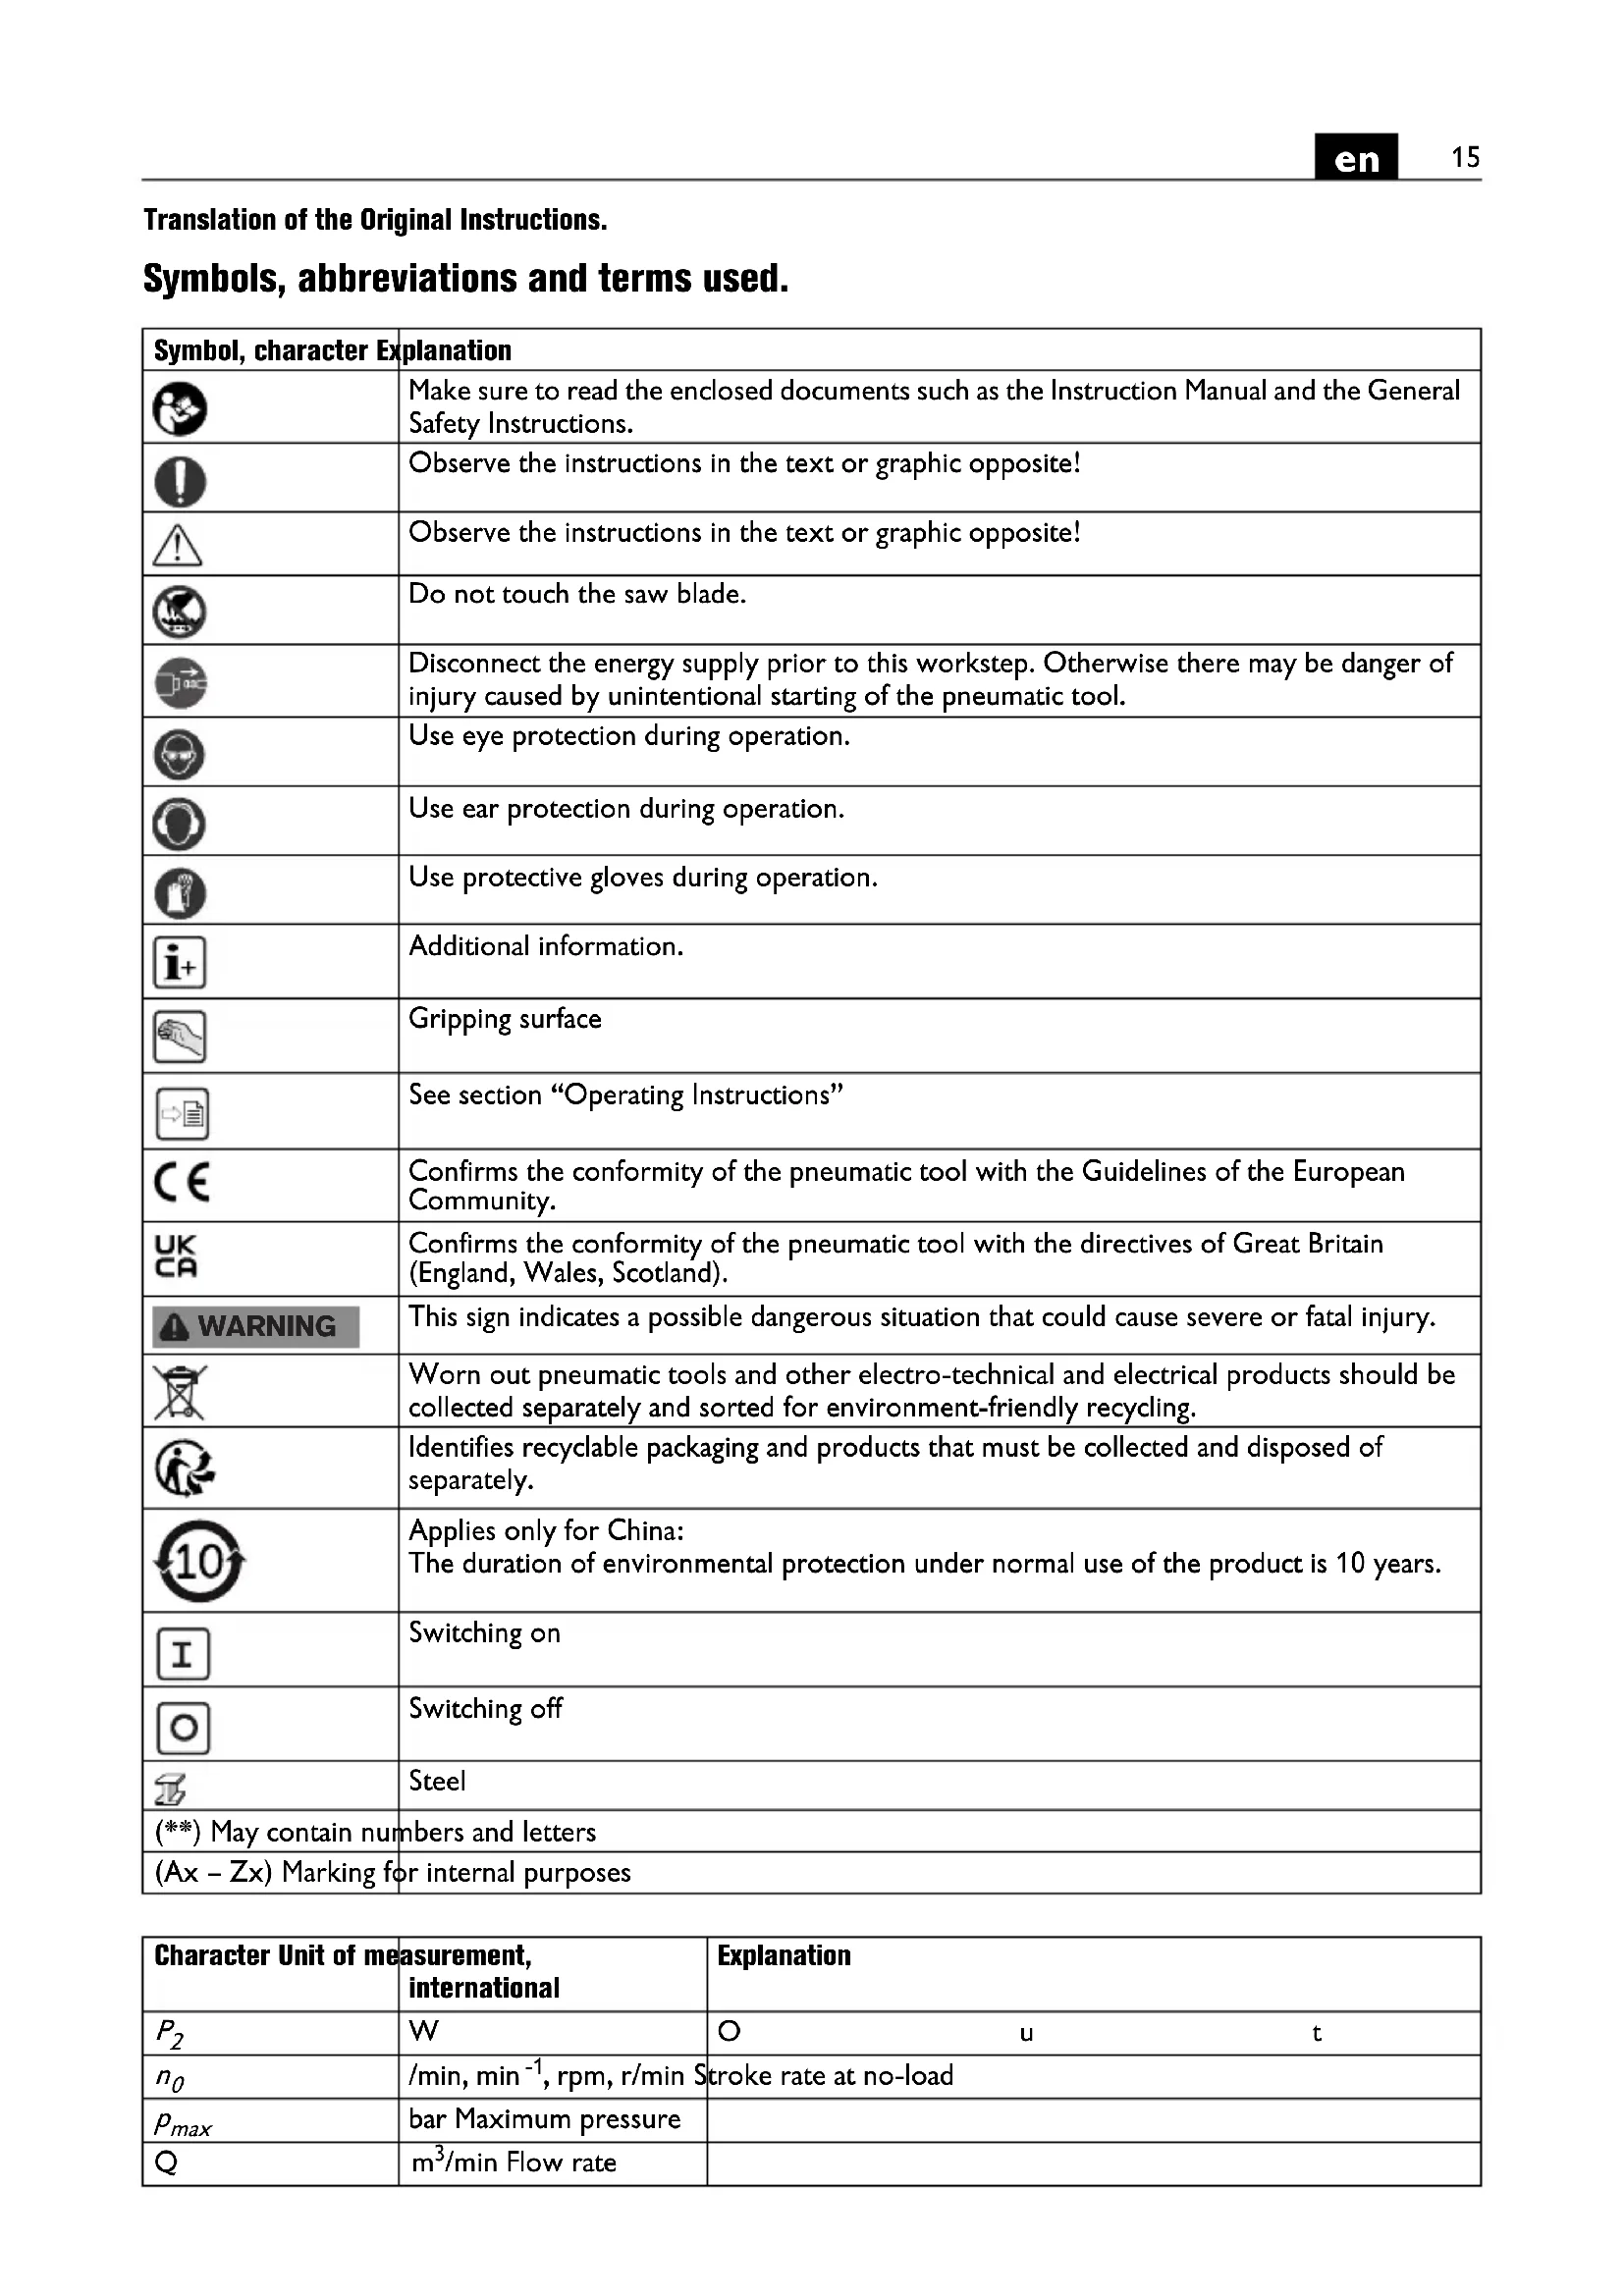
natural_image
3D rendered image of a mechanical tool with a long, elongated blade and cylindrical body (no text or symbols visible)3 41 01 062 06 0 2025-06-02
| STS325R (**) | ||
| 7 534 ... | ||
| P_2 | W 1100 | |
| n_0 | /min 330 | |
| p_max | bar 6 | |
| Q | m3/min 1,25 | |
| mm 60 | ||
| mm 13 | ||
| mm 325/440 | ||
| mm 290/550 | ||
| kg 6,1 | ||
| L_pA | dB(A) 81,7 | |
| K_pA | dB | 3 |
| L_wA | dB(A) 94,7 | |
| K_wA | dB | 3 |
| L_pCpeak | dB 96,2 | |
| K_pCpeak | dB | 3 |
| a_h,D | m/s2 | 4,9 |
| K_a | m/s2 | 1,5 |


9 07 02 001 00 1
9 07 02 004 00 6
9 06 06 002 00 9
9 07 02 003 00 8
9 07 02 005 00 0
Translation of the Original Instructions.
Symbols, abbreviations and terms used.
| Symbol, character Explanation | |
 | Make sure to read the enclosed documents such as the Instruction Manual and the General Safety Instructions. |
 | Observe the instructions in the text or graphic opposite! |
 | Observe the instructions in the text or graphic opposite! |
 | Do not touch the saw blade. |
 | Disconnect the energy supply prior to this workstep. Otherwise there may be danger of injury caused by unintentional starting of the pneumatic tool. |
| [KDS3] | Use eye protection during operation. |
 | Use ear protection during operation. |
 | Use protective gloves during operation. |
 | Additional information. |
 | Gripping surface |
 | See section “Operating Instructions” |
 | Confirms the conformity of the pneumatic tool with the Guidelines of the European Community. |
 | Confirms the conformity of the pneumatic tool with the directives of Great Britain (England, Wales, Scotland). |
| [86AB] WARNING | This sign indicates a possible dangerous situation that could cause severe or fatal injury. |
 | Worn out pneumatic tools and other electro-technical and electrical products should be collected separately and sorted for environment-friendly recycling. |
 | Identifies recyclable packaging and products that must be collected and disposed of separately. |
| [GDTB] | Applies only for China:The duration of environmental protection under normal use of the product is 10 years. |
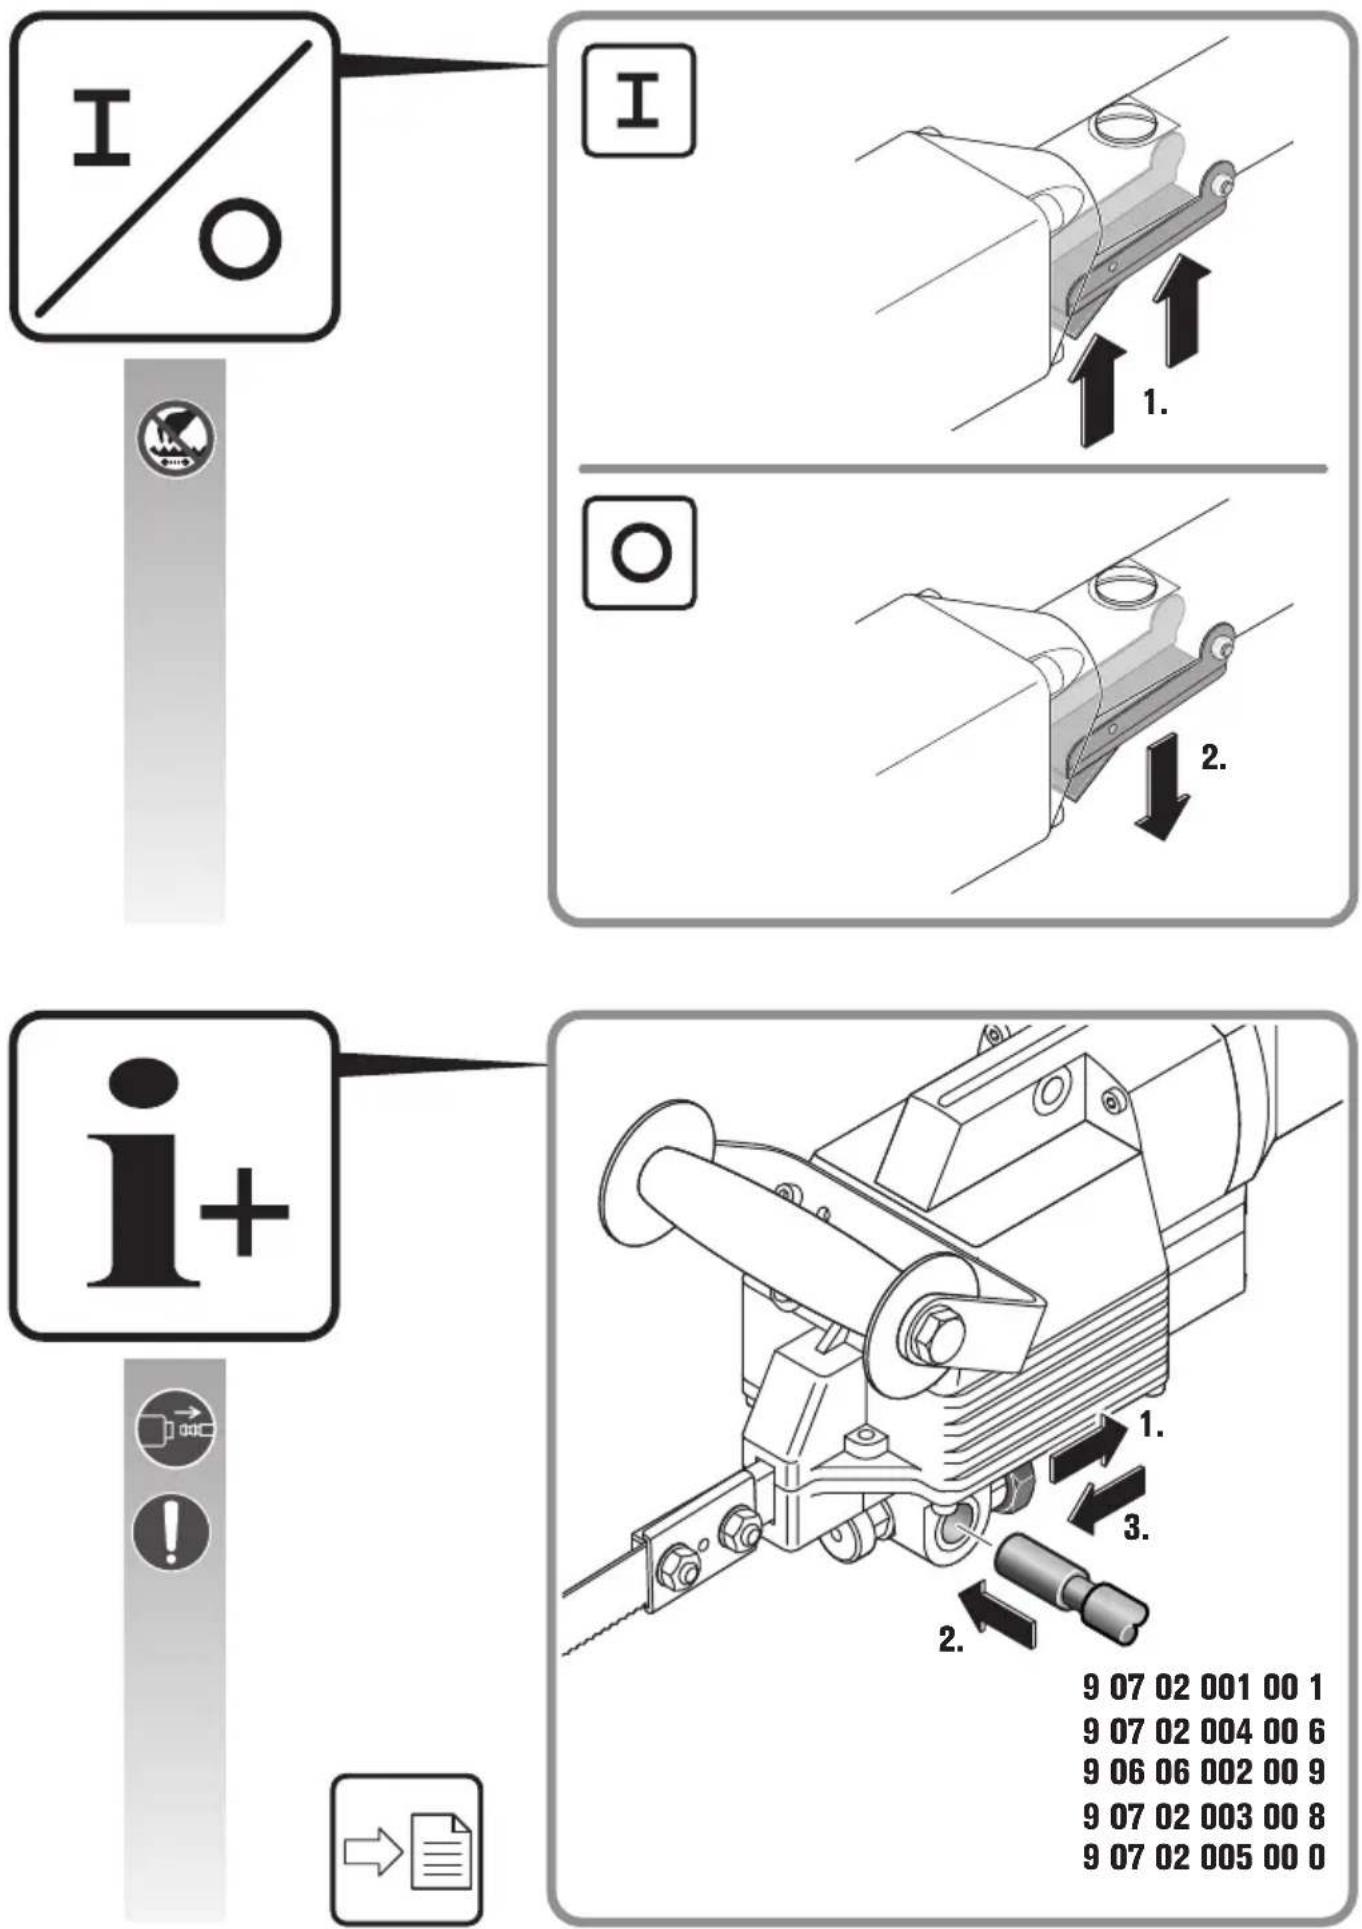
 | Switching on |
 | Switching off |
 | Steel |
| [WHK5] May contain numbers and letters | |
| (A - Zx) Marking for internal purposes | |
| Character Unit of measurement, international | Explanation | |
| P_2 | W | O u t |
| n_0 | /min, min ^-1 , rpm, r/min | stroke rate at no-load |
| p_max | bar Maximum pressure | |
| Q | m ^3 /min Flow rate | |
| Character Unit of me | measurement,international | Explanation |
 | mm Stroke length | |
| M... | mm Size of metric thread | |
| ∅ mm Diameter of a | round part | |
 | mm Hose diametre | |
 | mm Maximum outside diameter for pipes/with chain extension | |
 | mm Maximum work piece dimensions | |
 | kg Weight according to EPTA-Procedure 01 | |
 | dB(A) Sound pressure level | |
| [BGTK] | dB(A) Sound power level | |
| [80TD] | dB Peak sound pressure level | |
 | Uncertainty | |
| [0000] | m/s ^2 | Vibrational emission value according (vector sum of three directions) |
 | m/s ^2 | Mean vibrational value for sawing |
| m, s, kg, A, mm, V, W, Hz, N, °C, dB, min, m/s ^2 | Basic and derived units of measurement from the international system of units SI. | |
For your safety.
WARNING
Read all safety warnings and all instructions. Failure to follow the
warnings and instructions may result in electric shock, fire and/or serious injury.
Save all warnings and instructions for future reference.

Do not use this pneumatic tool before you have thoroughly read and completely understood this Instruction Manual. The documents mentioned should be kept for later use and enclosed with the pneumatic tool, should it be passed on or sold.
Please also observe the relevant national industrial safety regulations.
Intended use.
The pneumatic pipe cutting saw STS325R ( ^** ) is intended for commercial use for cutting round and other shaped workpieces of metal and plastic without water supply in weather-protected environments using the application tools and accessories recommended by FEIN (see www.fein.com).
The portable pipe cutting saw must not be used as a hand-guided tool. Always use a clamping fixture.
The machine may only be operated by qualified personnel or instructed persons.
Foreseeable improper use.
For safe operation of the product and to exclude misuse, the following is prohibited:
- Unauthorized modifications
- Use not as intended for
- Non-observance of the operating instructions.
- Automated industrial continuous use
- Exceeding the use in accordance with local occupational safety regulations
Safety instructions.
Workplace
Keep work area clean and tidy. Cluttered or dark work areas invite accidents.
Remove spilled oil immediately and dispose of it according to the manufacturer's instructions (see data sheet).
Do not operate the pneumatic tool in explosive atmospheres, such as in the presence of flammable liquids, gases or dusts. Pneumatic tools create sparks which can ignite the dust or fumes.
Keep children and bystanders away while operating the pneumatic tool. Distractions can cause you to lose control over the pneumatic tool.
Safety when handling compressed air
Clean the compressed-air supply regularly. Protect the hose from kinks, contraction, heat, and sharp edges. Firmly tighten the hose clamps. Have damaged hoses and couplings repaired immediately. In case of malfunctions to the air supply, the compressed-air hose can be thrown about and lead to injury. Raised dust or chips may cause serious eye injury.
Personal safety
Stay alert, watch what you are doing, and use common sense when operating a pneumatic tool. Do not use a pneumatic tool while tired or under the influence of drugs, alcohol, or medication. A moment of inattention while operating a pneumatic tool may result in personal injury.
Use personal protective equipment. Always wear eye protection. Protective equipment such as dust mask, non-skid safety shoes, hard hat, or hearing protection used for appropriate conditions will reduce personal injuries.
Prevent unintentional starting. Make sure that the switch is in the "OFF" position before connecting the pneumatic tool to the compressed-air supply. When your finger is on the switch while carrying the pneumatic tool or when connecting the pneumatic tool to the compressed-air supply while it is switched on, accidents can occur.
Remove any adjustment tools or spanners before switching on the pneumatic tool. An adjustment tool or spanner left attached to a rotating part of a pneumatic tool may result in personal injury.
Do not overreach. Keep proper footing and balance at all times. This enables better control of the pneumatic tool in unexpected situations.
If you experience tingling, numbness or pain while working, inform your supervisor and consult a doctor.
Dress properly. Do not wear loose clothing or jewellery. Keep your hair, clothing and gloves away from moving parts. Loose clothes, jewellery or long hair can be caught in moving parts.
If devices are provided for the connection of dust extraction and collection facilities, ensure these are connected and properly used. Use of dust collection can reduce dust-related hazards.
Pneumatic tool use and care
Do not exceed the maximum air pressure specified on the tool.
Do not overload the pneumatic tool. Use the application tool intended for your work. The correct pneumatic tool will do the job better and safer at the rate for which it is designed.
Do not use a pneumatic tool that has a defective switch.
A pneumatic tool that cannot be controlled with the switch is dangerous and must be repaired.
The pneumatic tool is initially lubricated. During initial commissioning, excess oil may escape and come into contact with the operator.
Disconnect the energy supply before making any pneumatic tool adjustments, changing accessories, or placing the pneumatic tool aside. This safety measure prevents accidental starting of the tool.
Store idle pneumatic tools out of the reach of children. Do not allow persons unfamiliar with the pneumatic tool or these instructions to operate the pneumatic tool.
Pneumatic tools are dangerous in the hands of untrained users.
Maintain the pneumatic tool with care. Check for misalignment or binding of moving pneumatic tool parts, breakage of parts and any other condition that may affect the pneumatic tool's operation. Have damaged parts repaired before using the pneumatic tool. Many accidents are caused by poorly maintained pneumatic tools.
Keep cutting tools sharp and clean. Properly maintained cutting tools with sharp cutting edges are less likely to bind and are easier to control.
Check the saw blade for damage before starting work. Use only undamaged saw blades.
If the saw blade jams, switch off the tool and hold it steady. Determine and correct the cause for the jamming. Use splitting wedges.
Use the pneumatic tool, accessories, application tools, etc. according to these instructions and as specified for this specific type of pneumatic tool. Take into consideration the working conditions and the activities to be carried out. Use of pneumatic tools for operations different from those intended could result in hazardous situations.
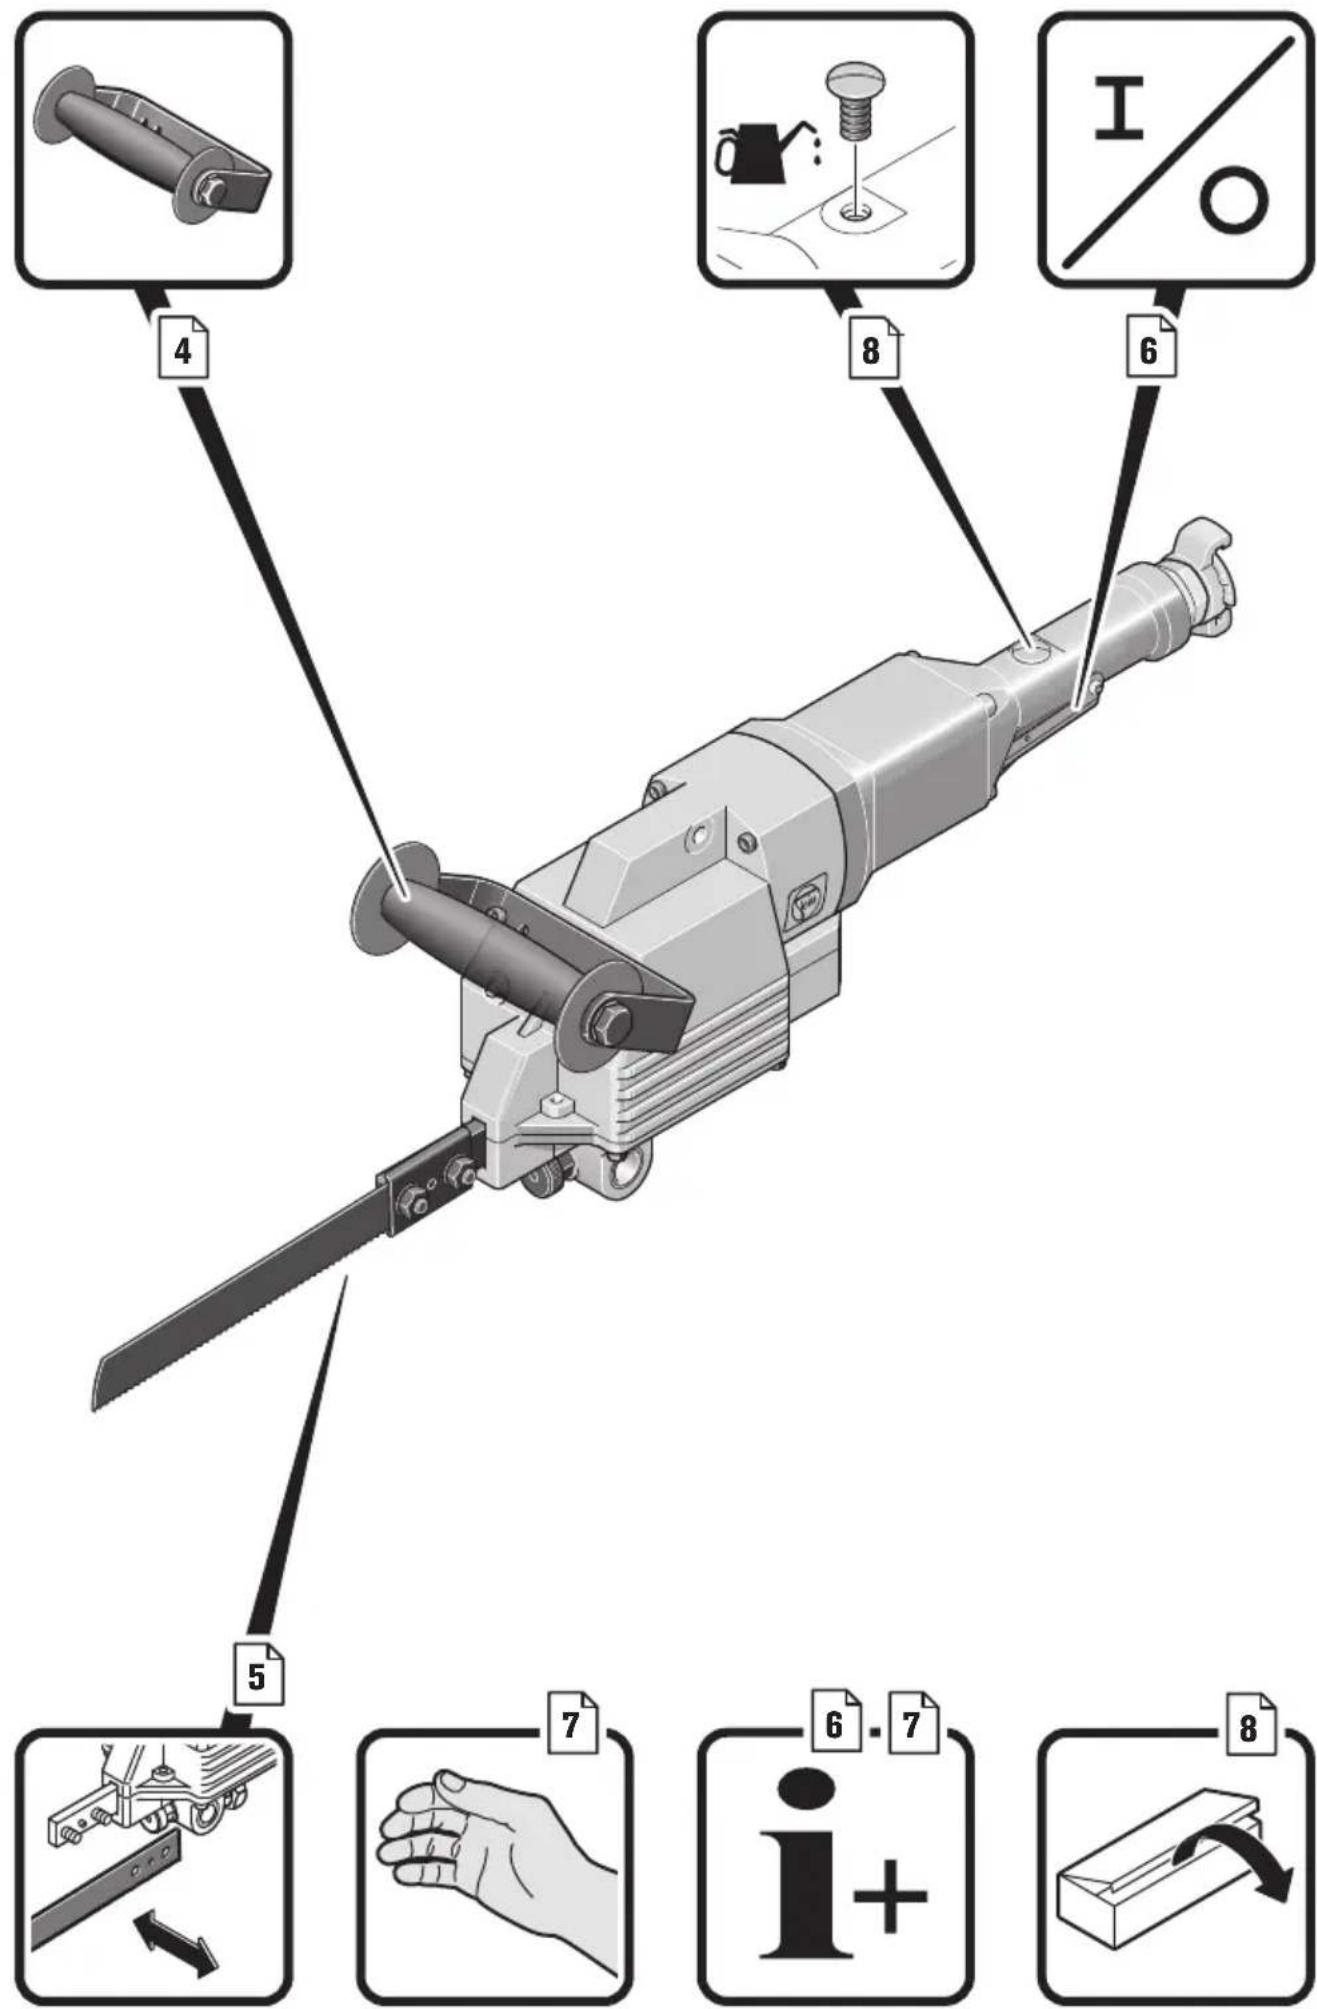
Use the auxiliary handle provided with the pneumatic tool. Loss of control over the pneumatic tool can cause injuries.
Hold the pneumatic tool firmly with both hands and keep proper footing and balance at all times. The pneumatic tool is guided more secure with both hands.
Do not work materials containing asbestos. Asbestos is considered carcinogenic.
Make sure that the saw blade is firmly clamped.
Keep your hands well away from the saw blade. Do not place your hands in front of or underneath the saw blade. Any contact with the saw blade can cause personal injuries. The saw blade can become very hot during the sawing process.
Apply the pneumatic tool to the work piece only when switched-on. Danger of kickback or loss of control over the pneumatic tool.
Do not rivet or screw any name-plates or signs onto the pneumatic tool. Adhesive labels are recommended.
Do not use accessories that have not been especially designed or released by the pneumatic tool manufacturer. Safe operation is not ensured only because an accessory fits your pneumatic tool.
Pay attention to hidden conductors/leads, gas and water pipes. Before beginning to work, check the working area, e. g., with a metal detector.
Service
Have your pneumatic tool repaired only through a qualified repair person and only using original replacement parts. This will ensure that the safety of the pneumatic tool is maintained.
Special safety instructions.
Hold the tool by the insulated gripping surfaces when performing operations where the application tool could contact hidden wires. Contact with a “live” wire will also make exposed metal parts of the tool “live” and shock the operator.
Never carry the pneumatic tool by the hose.
Secure the work piece firmly. A work piece that is gripped tightly in a clamping device or vice, is more secure than if held by hand.
Wear personal protective equipment. Depending on application, use face shield, safety goggles or safety glasses. As appropriate, wear dust mask, hearing protectors, gloves and workshop apron capable of stopping small abrasive or workpiece fragments. The eye protection must be capable of stopping flying debris generated by various operations. The dust mask or respirator must be capable of filtrating particles generated by your operation. Prolonged exposure to high intensity noise may cause hearing loss.
Renew stickers and warning indications on the pneumatic tool when aged and worn.
Do not direct the application tool against yourself, other persons or animals. Danger of injury from sharp or hot application tools.
Handling hazardous dusts
For work procedures with this tool where material is removed, dusts develop that can be hazardous to one's health.
Contact with or inhaling some dust types, e. g., asbestos and asbestos-containing materials, lead-containing coatings, metal, some wood types, minerals, silicate particles from materials containing stone, paint solvents, wood preservatives, antifouling paints for vessels, can trigger allergic reactions to the operator or bystanders and/or lead to respiratory infections, cancer, birth defects or other reproductive harm. The risk from inhaling dusts depends on the exposition. Use dust extraction matched appropriately for the developing dust, as well as personal protective equipment and provide for good ventilation of the workplace. Leave the processing of asbestos-containing materials to specialists.
Wood and light-metal dust, hot mixtures of sanding dust and chemical materials can self-ignite under unfavourable conditions or cause an explosion. Avoid sparking in the direction of the dust collector as well as overheating of the pneumatic tool and the materials being sanded, empty the dust collector/container in time, observe the material manufacturer's working instructions, as well as the relevant regulations in your country for the materials being worked.
Starting Operation.
Carry out the following steps each time before using the product.
-Check the proper condition and operation of the product.
-Check the tight seating of the application tool.
Connecting to the compressed-air supply.
For trouble-free operation of the pneumatic tool, use a maintenance unit consisting of water separator, oil lubricator and compressed-air regulator. Please check whether the pressure in the compressed-air supply corresponds to the pressure indicated on the rating plate of the pneumatic tool.
-Blow out the hose before connecting.
Always use locking pins and hose safety cables when using universal rotary couplings (baronet couplings).
The hose should have a minimum diameter of 13 mm. The opening of the valve and the coupling should have a diameter of at least 8 mm.
Before beginning to work, check if the oiler installed in the handle is filled.
The correct setting of the oiler and a sufficient supply of oil is required for optimal function of the oiler.
External oilers are only effective to a hose length of 5 m (max.), as otherwise the oil remains in the hose and does not reach the machine.
Fill the oil reservoir as required with FEIN special motor oil 3 21 32 045 00 0 (high-quality hydraulic oil, grade: HLP/ISO-VG46). Do not use automotive engine oils, as these are not suitable for pneumatic tools.
Vibration and noise emission values
The vibration and noise emission values given in these instructions have been measured according to a measurement method standardized in EN 62841 and can be used to compare pneumatic tools with each other.
They are also suitable for a preliminary assessment of vibration and noise exposure.
The given vibration and noise emission values represent the main applications of the pneumatic tool.
However, if the pneumatic tool is used for other applications, with deviating application tools or insufficient maintenance, the overall vibration values and the noise emission values may differ. This can significantly increase the vibration and noise exposure over the total working period.
For an accurate estimation of vibration and noise exposure, the durations when the equipment is switched off or running but not actually in use should also be taken into account. This may significantly reduce the vibration and noise exposure over the total working period.
Identify additional safety measures to protect the operator from the effects of vibration and noise such as: Maintain the pneumatic tool and the accessories, keep the hands warm, organization of work patterns.
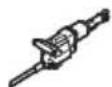
Operating Instructions.
Guide the pneumatic tool toward the work piece only when switched on.
Guide the pneumatic tool uniformly and with light feed in the cutting direction. Excessive feed considerably reduces the tool life of the application tools.
Hold the pneumatic tool by the gripping surface during the complete sawing.
Switch off the pneumatic tool immediately after sawing.
To increase the tool life of the saw blade when sawing metal, it is recommended to use a lubricating agent:
-for cuts in steel sheet: Cutting oil,
-for cuts in aluminium: Petroleum.
As an alternative, cutting paste can also be applied to the cutting line.
When uncoupling hose couplings, first shut the ball valve, then actuate the pneumatic tool, and then uncouple. Do not uncouple the hose coupling until after the compressed air has been completely relieved.
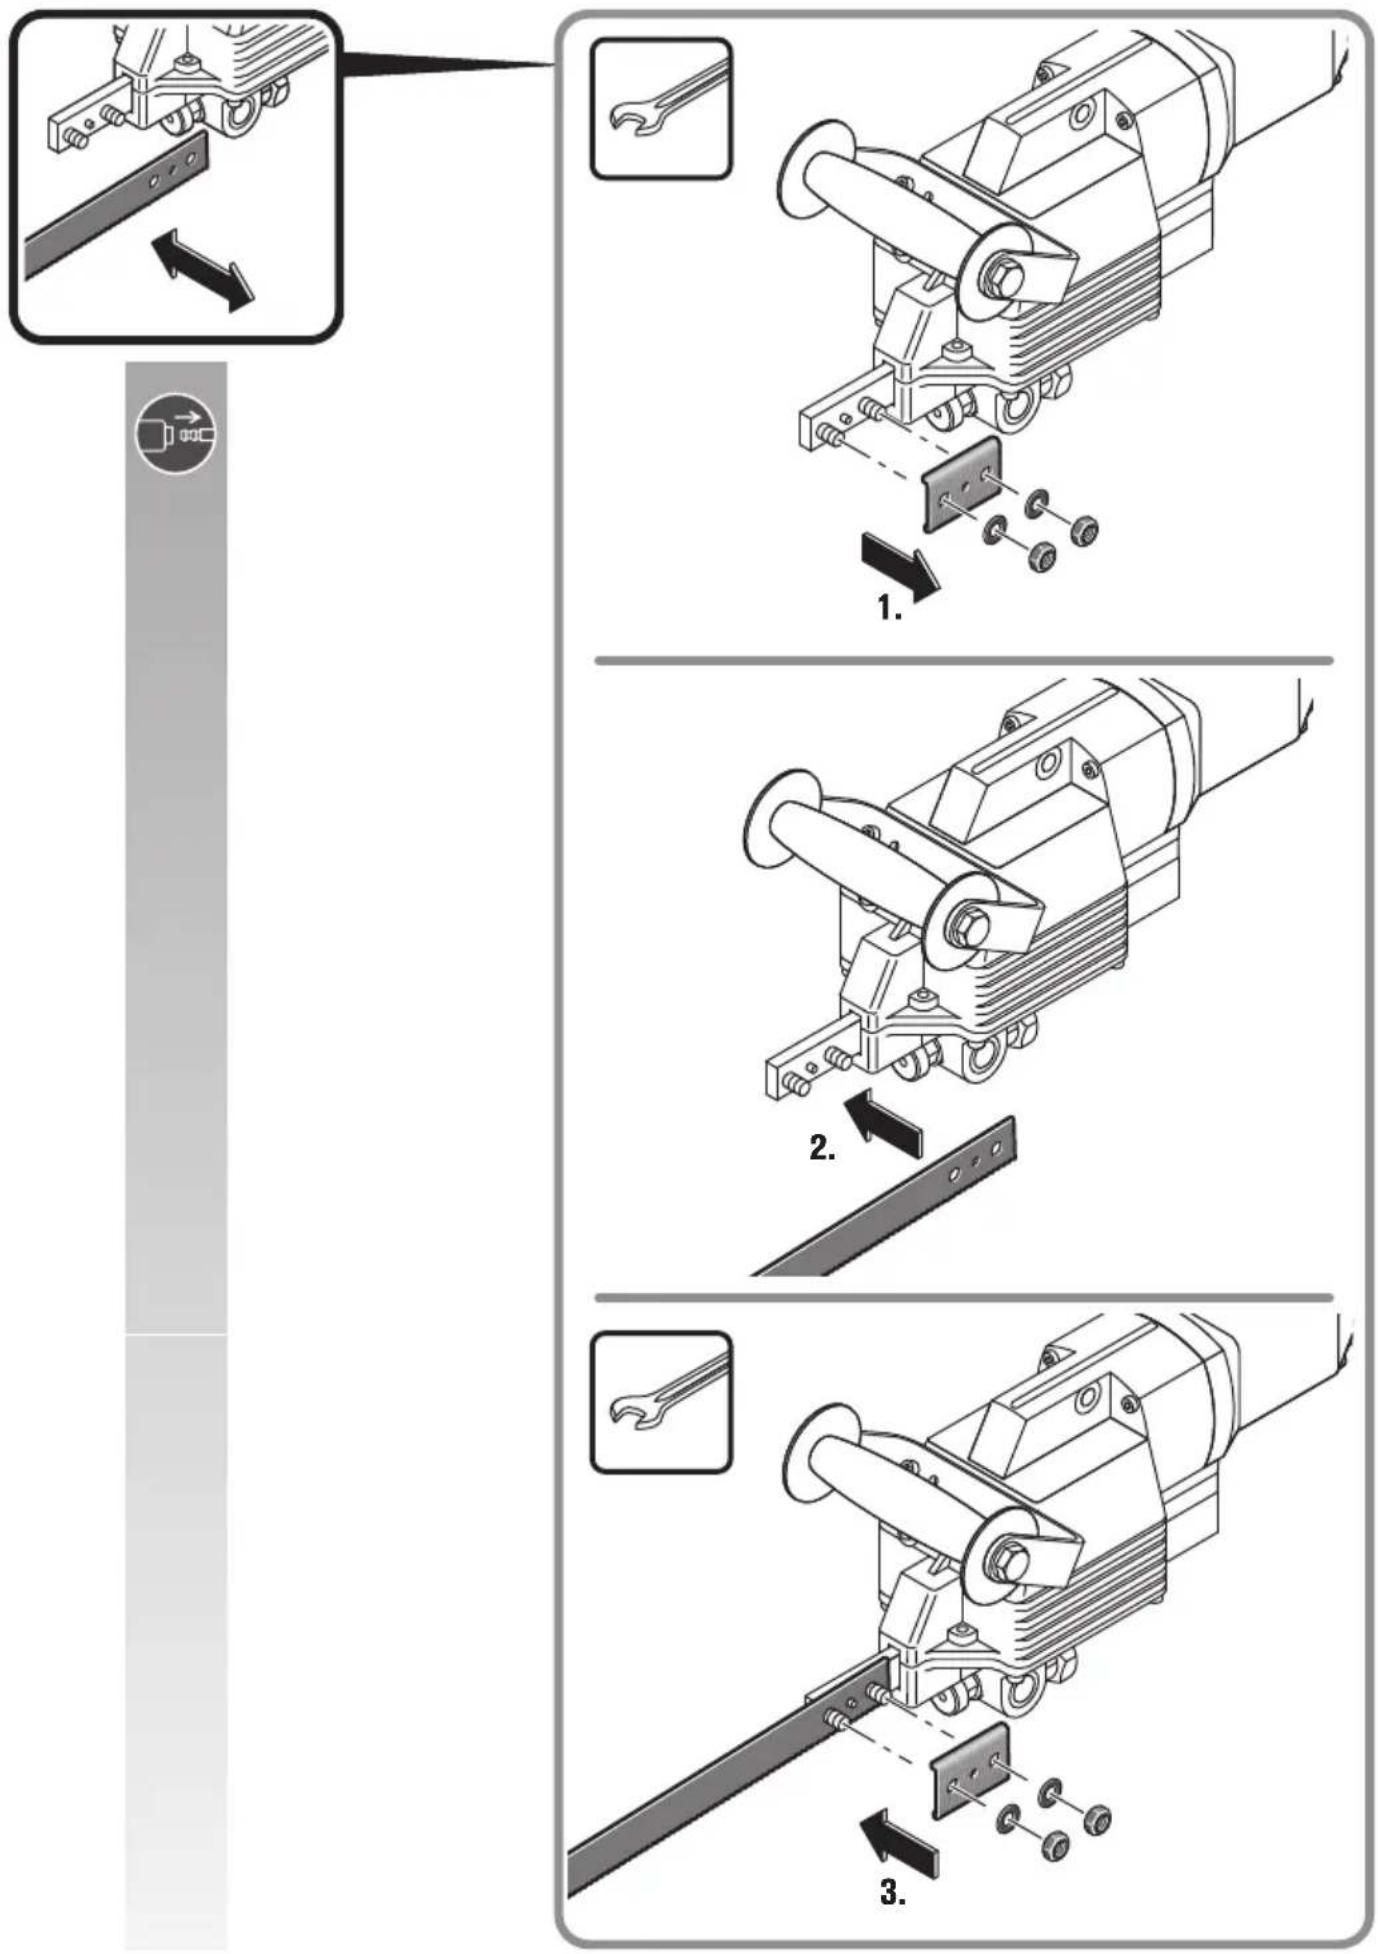
Use the recommended clamping devices and guides.
Mount clamping devices in the position shown as far as possible (see page 7).
Clamping fixture 9 07 02 001 00 1
For pipes and round material with a maximum diameter of 159 mm.
—Place the clamping chain around the work piece and insert the hooks of the grabber in the clamping chain.
-Tension the chain with the clamping-fixture handle.
-Mount the pipe cutting saw to the retaining bolt.
-Lock the pipe cutting saw with the locking bolt.
Clamping fixture 9 07 02 004 00 6
For pipes and round material with a diameter from 100 ... 325 mm. Only use with saw blades with a length of 500 mm or 600 mm and a thickness of 2 mm.
—Place the clamping chain around the work piece and insert the hooks of the grabber in the clamping chain.
-Tension the chain with the clamping nut.
-Mount the pipe cutting saw to the retaining bolt.
-Lock the pipe cutting saw with the locking bolt.
By extending the clamping chain, work pieces with a maximum diameter of 440 mm can also be cut (chain 3 02 31 003 00 3 and bolt 3 02 16 130 00 4 required).
Saw blade guide 9 06 06 002 00 9
For pipes and round material with a maximum diameter of 325 mm. Only use with saw blades with a length of 530 mm and a thickness of 1.6 mm.
-Dismantle the auxiliary handle of the saw.
—Fasten the saw blade guide to the hole on the gear head of the saw.
—The fine adjustment of the saw blade is set using the two eccentric nuts.
-Insert the pre-load spring into the holes on the gear head.
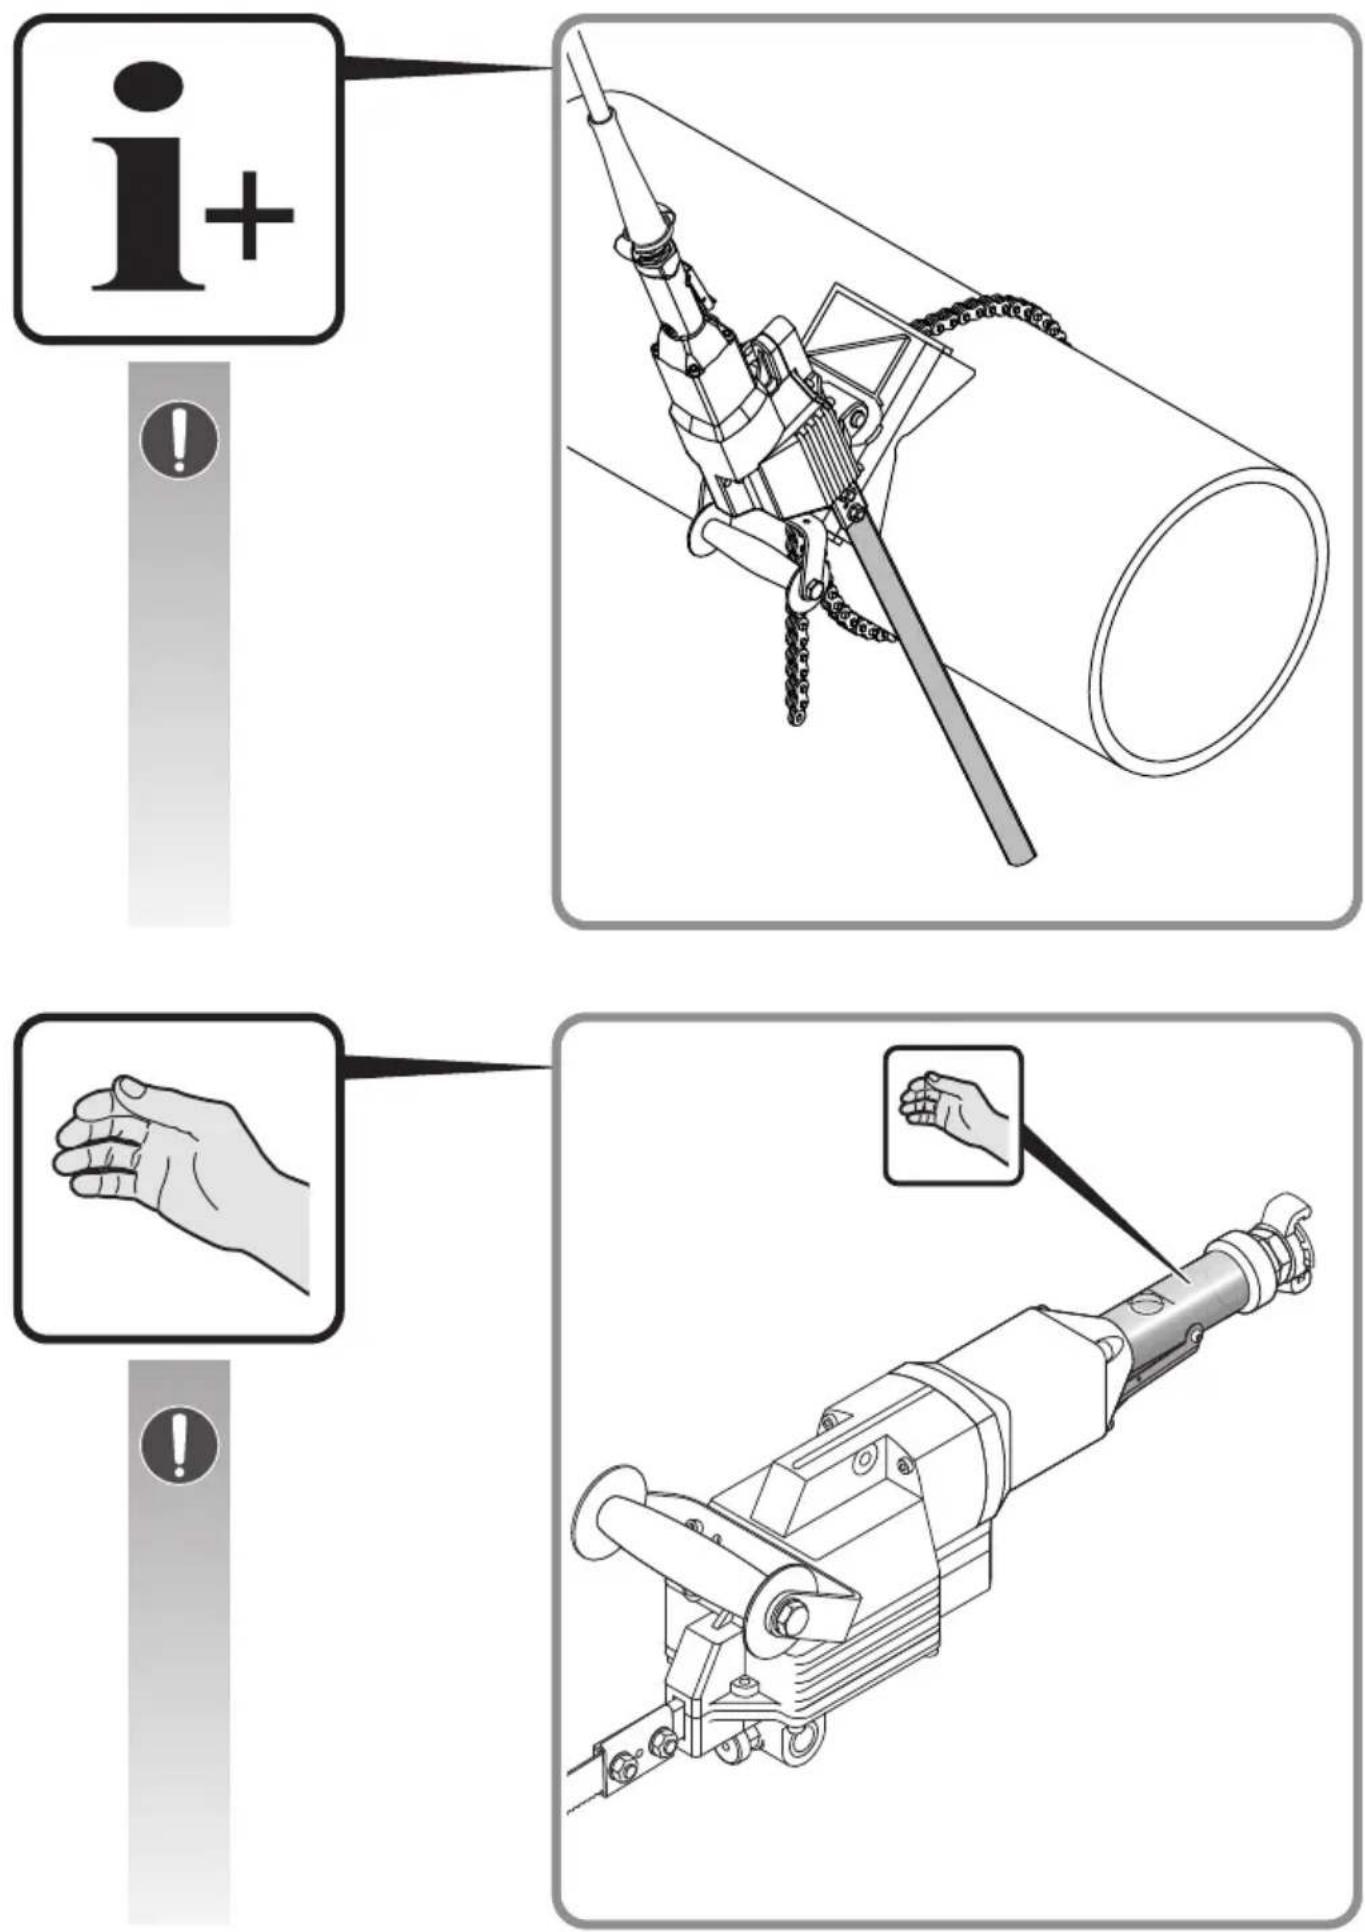
Clamping fixture 9 07 02 003 00 8
For profiles with a maximum width of 310 mm and a maximum height of 550 mm. The design corresponds to that of a parallel vice. The clamping jaws and the clamping head are adjustable.
-Adjust the clamping jaw to the desired clamping range.
-Apply the clamping device to the workpiece.
-Close the clamping jaws pipe-clamp handle.
-Mount the pipe cutting saw to the retaining bolt.
-Lock the pipe cutting saw with the locking bolt.
Clamp and feed device 9 07 02 005 00 0
For pipes and round material with a diameter from 80 ... 400 mm.
For detailed information, please refer to the corresponding Instruction Manual 3 41 00 898 06 8.
Support for free hand working 3 27 14 062 02 3
To saw materials such as corrugated sheet, use the support for free hand working 3 27 14 062 02 3.
Remove the auxiliary handle and mount the support for free hand working to the hacksaw via the clamping head and the two gear head mounting holes for the auxiliary handle. The saw blade goes through the opening.
Repair and customer service.
Carry out the following steps once per week:
-Pour a small quantity of petroleum directly into the air intake of the pneumatic tool.
- Start the pneumatic tool for 10 to 15 seconds. In this period, the petroleum will seep out of the pneumatic tool along with the accumulated debris.
- Adding a small quantity of oil into the air intake after the cleaning will benefit the performance of the motor.
Further lubrication is covered by the oiler installed in the handle.
Maintain and clean the pneumatic tool every 300 work hours or every 6 months.
When the pneumatic tool's hose is damaged, it must be replaced with a specially prepared hose, available from your FEIN customer service agent.
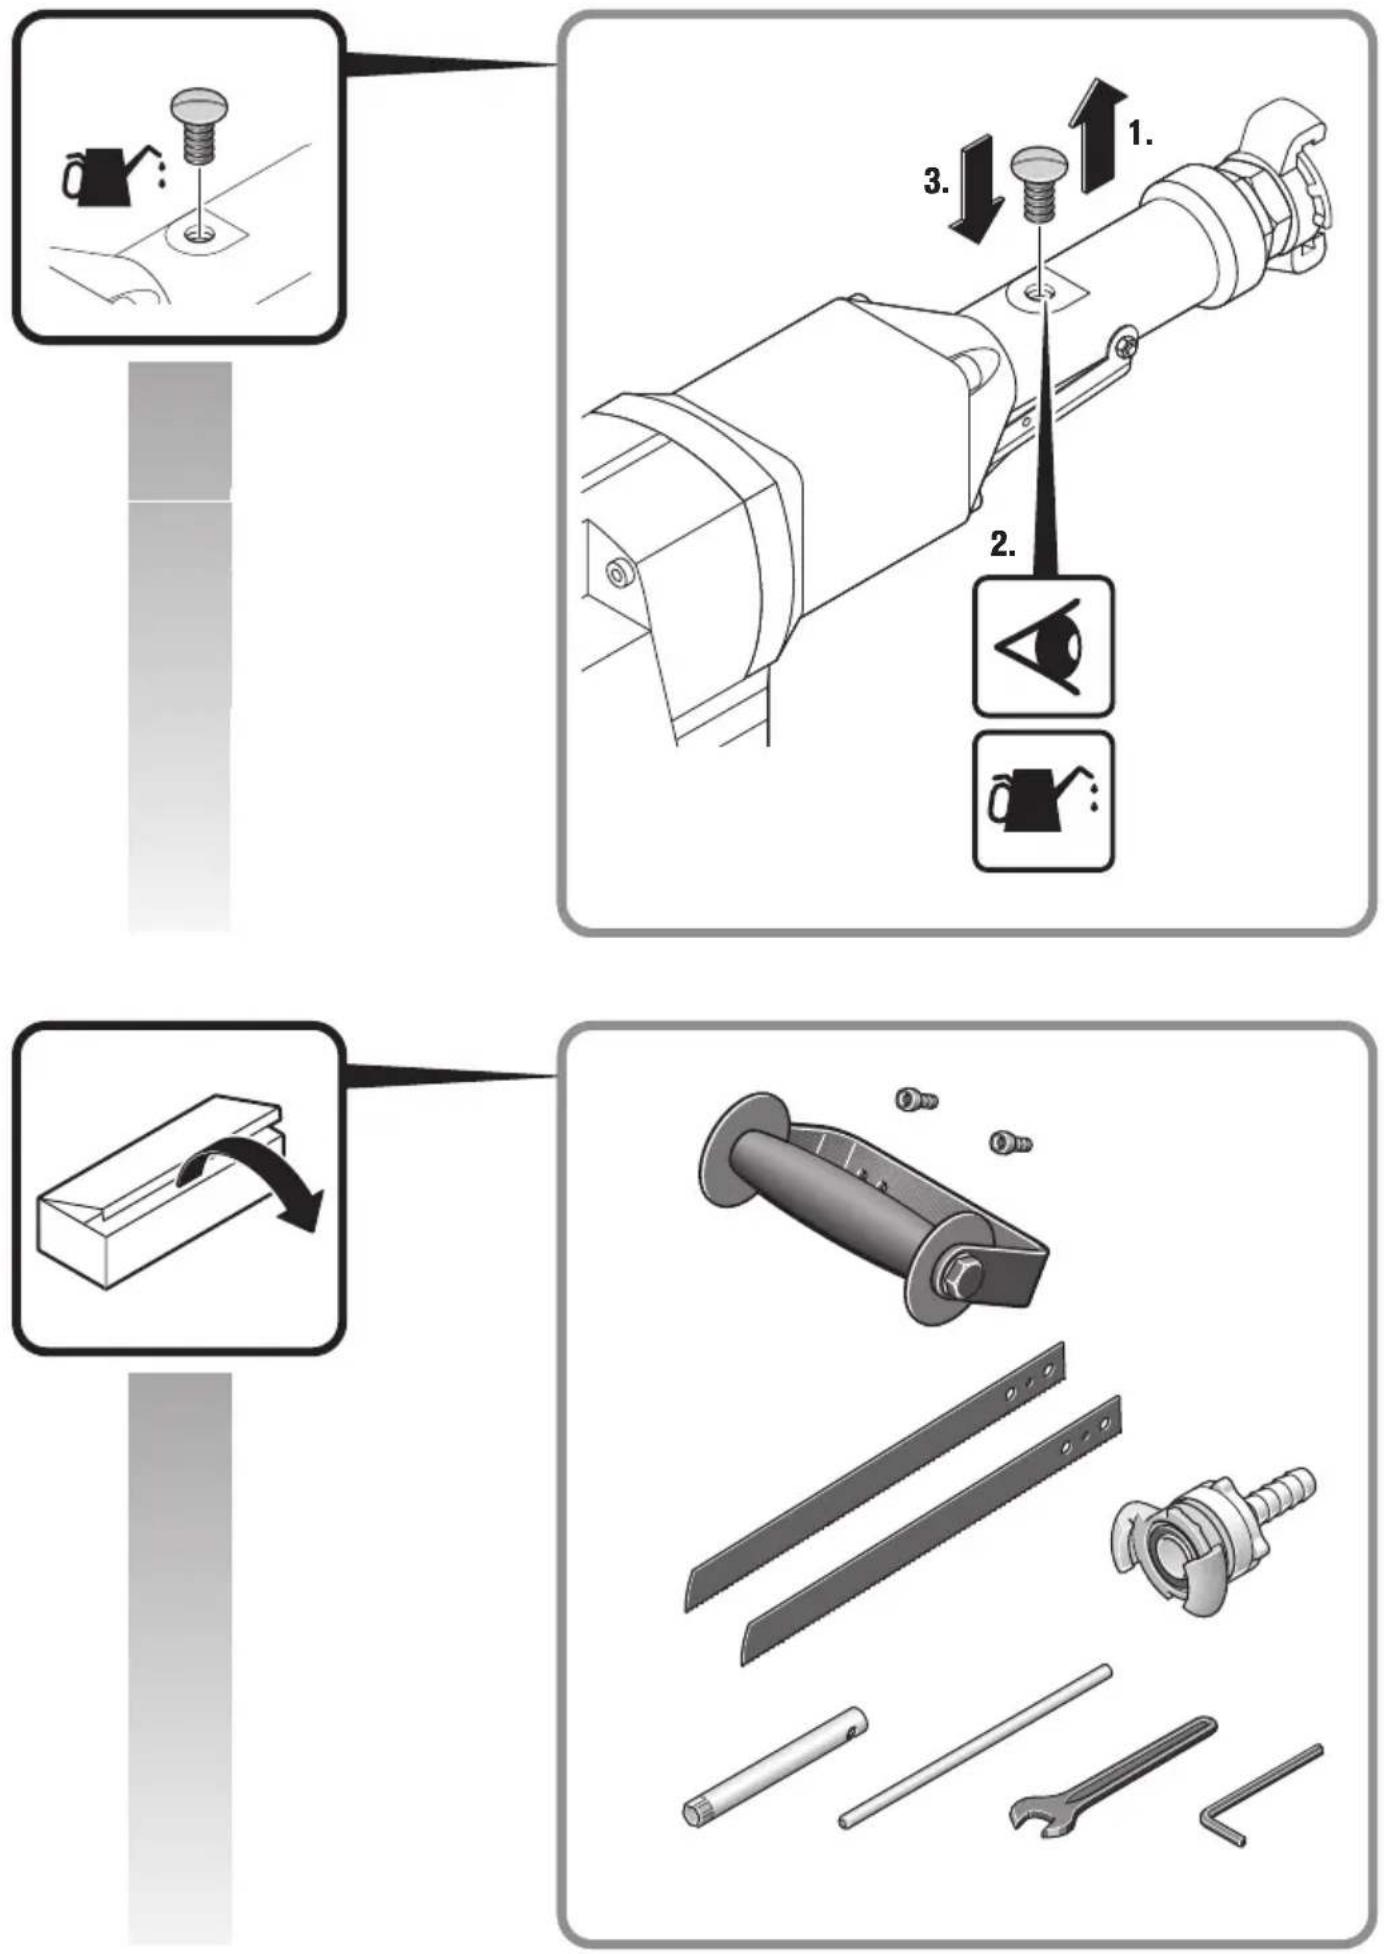
Correct setting of the oiler:
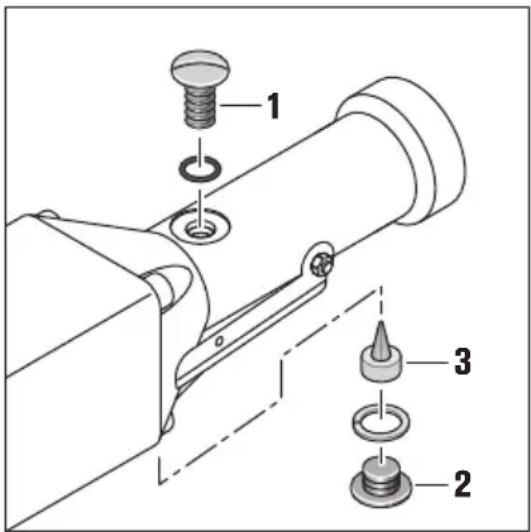
Under operating pressure (6 bar) and with the filler plug (1) open, the oil must bubble.
One oil filling is sufficient for approx. 8 operating hours.
After removing the screw plug (2), the setting screw (3) can be accessed.
Tightening (turning clockwise) the setting screw reduces the oil feed, releasing (turning anticlockwise) the setting screw increase the oil feed to the machine. In most cases, tightening or releasing by 14 to 12 thread will be sufficient.
Allow a ∅ 2 mm clearance in the passage hole.
Check the correct oiler setting by applying a paper test: Hold a white sheet of paper in front of the air outlet of the machine; the oil film being expelled may not start to drip off.
The spare parts list can be found on the Internet under www.fein.com.
If required, you can change the following parts yourself:
Auxiliary handle, application tools, hose
Warranty and liability.
The warranty for the product is valid in accordance with the legal regulations in the country where it is marketed. In addition, FEIN also provides a guarantee in accordance with the FEIN manufacturer's warranty declaration.
The delivery scope of your pneumatic tool may include only a part of the accessories described or shown in this instruction manual.
Declaration of conformity.
This CE declaration is only valid for European Union and EFTA (European Free Trade Association) countries and only for products intended for the EU or EFTA market. After placing the product on the EU market the UKCA mark loses its mark validity.
The UKCA declaration is only valid for the Great Britain market (England, Wales and Scotland) and only for products intended for the Great Britain market. After placing the product on the Great Britain market the CE mark loses its mark validity.
Environmental protection, disposal.
Packaging, worn out pneumatic tools and accessories should be sorted for environment-friendly recycling.
Accessories.
Only use original accessories from FEIN intended for the product. Approved accessories for the product can be found at www.fein.com.
Pod radnim pritiskom (6 bar) ulje mora da mehuri kada je čep za punjenje otvoren (1).
Pod radnim tlakom (6 bar) kada je vijak za ulijevanje (1) otvoren, ulje mora stvarati mjehuriće.


- Symbols, abbreviations and terms used.
- For your safety.
- WARNING
- Intended use.
- Foreseeable improper use.
- Safety instructions.
- Workplace
- Safety when handling compressed air
- Personal safety
- Pneumatic tool use and care
- Service
- Special safety instructions.
- Renew stickers and warning indications on the pneumatic tool when aged and worn.
- Handling hazardous dusts
- Starting Operation.
- Connecting to the compressed-air supply.
- Vibration and noise emission values
- Operating Instructions.
- Use the recommended clamping devices and guides.
- Clamping fixture 9 07 02 001 00 1
- Clamping fixture 9 07 02 004 00 6
- Saw blade guide 9 06 06 002 00 9
- Clamping fixture 9 07 02 003 00 8
- Clamp and feed device 9 07 02 005 00 0
- Support for free hand working 3 27 14 062 02 3
- Repair and customer service.
- Correct setting of the oiler:
- If required, you can change the following parts yourself:
- Warranty and liability.
- Declaration of conformity.
- Environmental protection, disposal.
- Accessories.
Brand : Fein
Model : STS 325 R
Category : Saw