DC40RB - Battery charger MAKITA - Free user manual and instructions
Find the device manual for free DC40RB MAKITA in PDF.
| Product type | Battery charger |
| Brand | Makita |
| Model | DC40RB |
| Compatible batteries | Makita Li-ion 40 V max (BL4xxx series) |
| Number of batteries chargeable simultaneously | 2 |
| Input voltage | 100-240 V AC, 50/60 Hz |
| Charging time (examples) | 22 min (2.0 Ah), 45 min (4.0 Ah), 76 min (8.0 Ah) |
| LED indicators | Green (ready), blue (charging), red (fault) |
| Cooling system | Built-in fan to cool the battery |
| Safety protections | Double insulation, overheat shutdown, short-circuit protection |
| Wall mounting | Possible (4 screws, bracket included) |
| Permissible charging temperature | 10°C to 40°C |
| Approximate weight (with battery) | 6.0 kg |
| Additional features | Customizable end-of-charge melody, silent mode |
| Maintenance | Clean ventilation slots with an air blower; do not use solvents |
Frequently Asked Questions - DC40RB MAKITA
User questions about DC40RB MAKITA
0 question about this device. Answer the ones you know or ask your own.
Ask a new question about this device
Download the instructions for your Battery charger in PDF format for free! Find your manual DC40RB - MAKITA and take your electronic device back in hand. On this page are published all the documents necessary for the use of your device. DC40RB by MAKITA.
USER MANUAL DC40RB MAKITA
natural_image
Technical line drawing of a mechanical component assembly, showing two housing parts and a final assembled housing (no text or symbols)
text_image
1 II II III II 2 Fig.2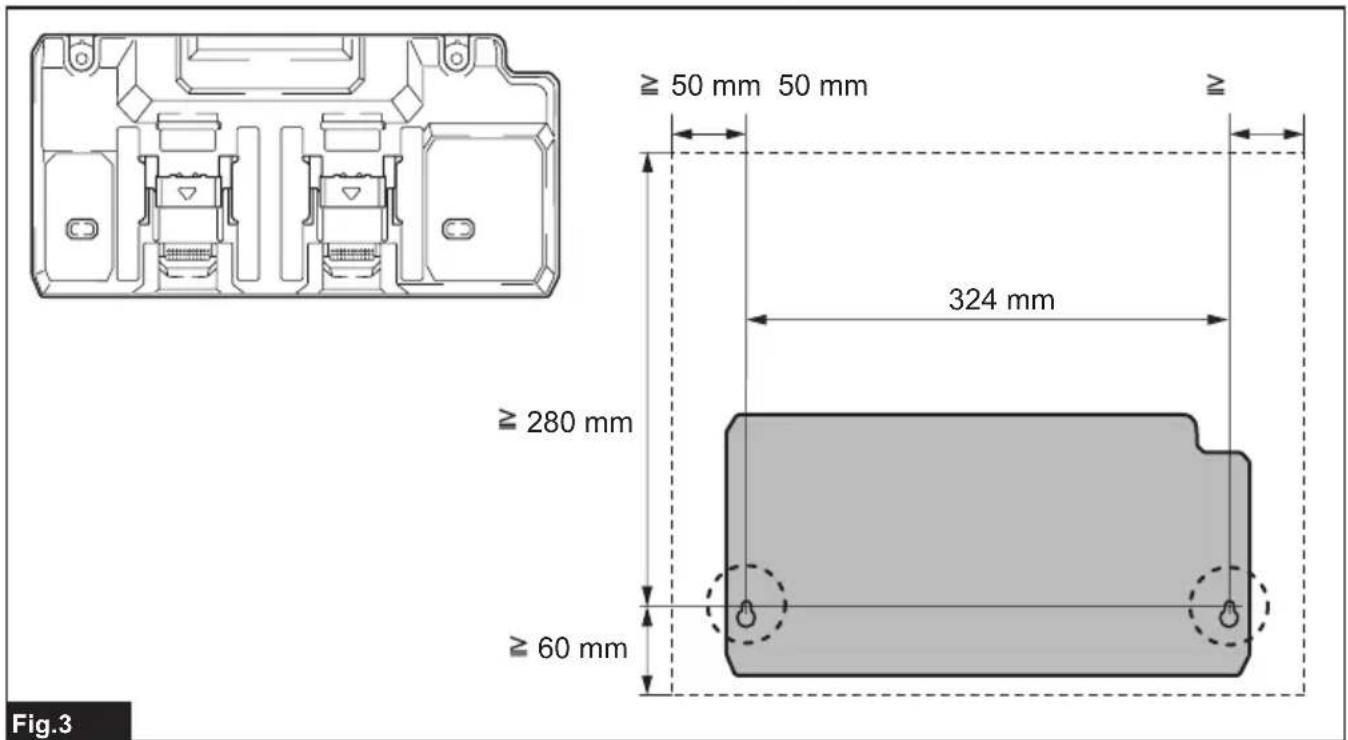
text_image
≥ 50 mm 50 mm ≥ 280 mm ≥ 60 mm 324 mm Fig.3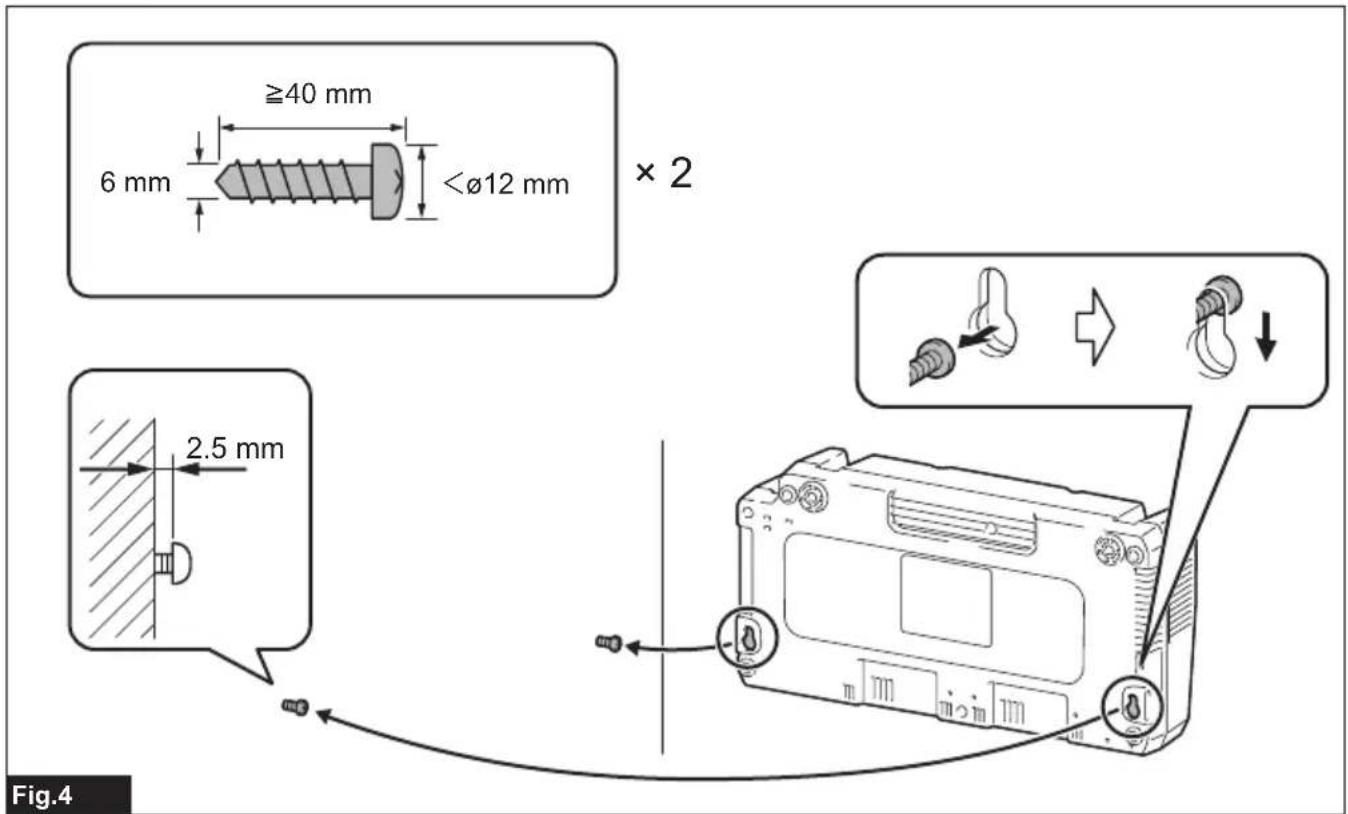
text_image
≥40 mm 6 mm <ø12 mm × 2 2.5 mm Fig.4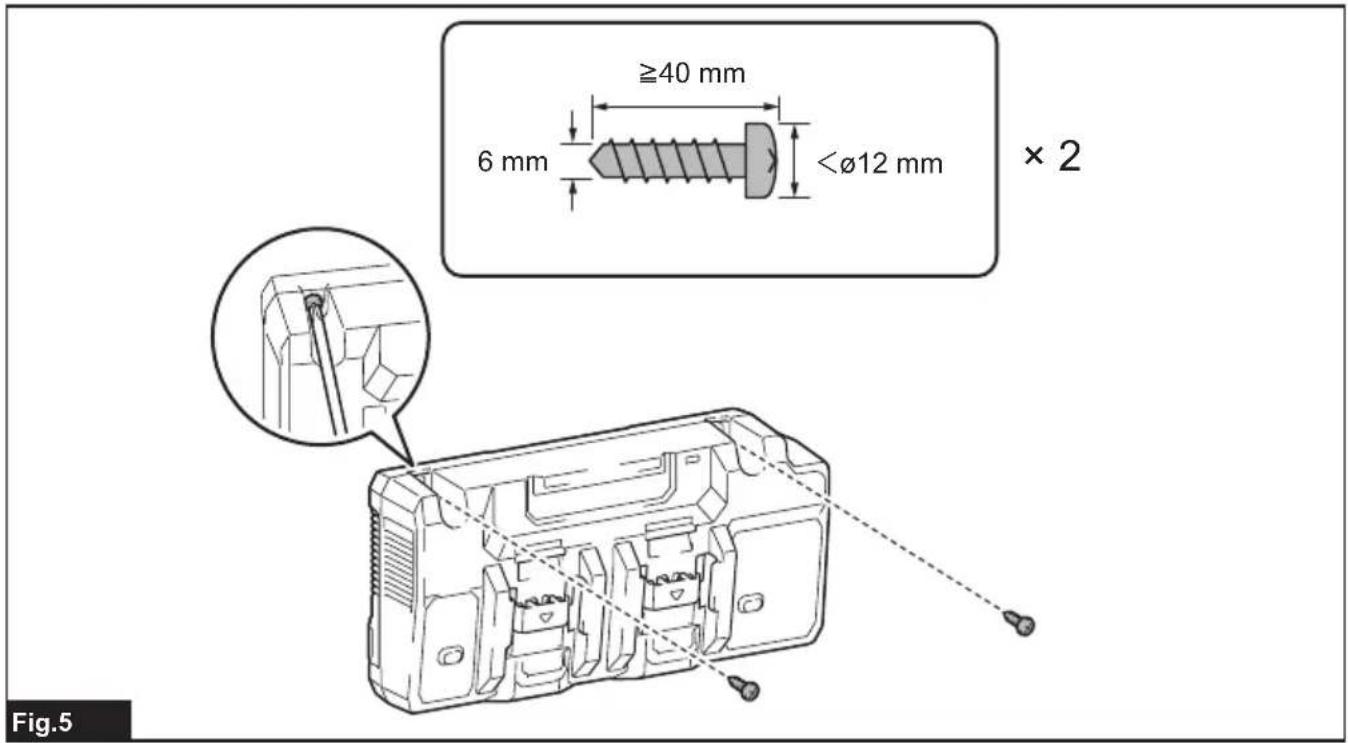
text_image
≥40 mm 6 mm <ø12 mm × 2 Fig.5WARNING
This appliance can be used by children aged from 8 years and above and persons with reduced physical, sensory or mental capabilities or lack of experience and knowledge if they have been given supervision or instruction concerning use of the appliance in a safe way and understand the hazards involved. Children shall not play with the appliance. Cleaning and user maintenance shall not be made by children without supervision.
Symbols
| The followings show the symbols which may be used for the equipment. Be sure that you understand their meaning before use. | |
| Indoor use only. | |
| Read the instruction manual. | |
| DOUBLE INSULATION | |
| Do not short battery. | |
| Do not expose battery to water or rain. | |
| Do not destroy battery by fire. | |
| Always recycle battery. | |

Li-ion
Only for EU countries
Due to the presence of hazardous components in the equipment, waste electrical and electronic equipment, accumulators and batteries may have a negative impact on the environment and human health. Do not dispose of electrical and electronic appliances or batteries with household waste!
In accordance with the European Directive on waste electrical and electronic equipment and on accumulators and batteries and waste accumulators and batteries, as well as their adaptation to national law, waste electrical equipment, batteries and accumulators should be stored separately and delivered to a separate collection point for municipal waste, operating in accordance with the regulations on environmental protection.
This is indicated by the symbol of the crossed-out wheeled bin placed on the equipment.
| Ready to charge. | Charging (80 - 100 %). |
| Delay charge (Battery cooling, too cold battery, or waiting for charging). | Charging complete. |
| Charging (0 - 80 %). | Charging (Cooling abnormality). |
| Defective battery. |
CAUTION
- SAVE THESE INSTRUCTIONS – This manual contains important safety and operating instructions for battery charger.
- Before using battery charger, read all instructions and cautionary markings on (1) battery charger, (2) battery, and (3) product using battery.
- CAUTION – To reduce risk of injury, charge only Makita type rechargeable batteries. Other types of batteries may burst causing personal injury and damage.
- Non-rechargeable batteries cannot be charged with this battery charger.
- Use a power source with the voltage specified on the nameplate of the charger.
- Do not charge the battery cartridge in presence of flammable liquids or gases.
- Do not expose charger to rain, snow, or wet condition.
- Never carry charger by cord or yank it to disconnect from receptacle.
- Remove the battery from the charger when carrying the charger.
-
After charging or before attempting any maintenance or cleaning, unplug the charger from the power source. Pull by plug rather than cord whenever disconnecting charger.
-
Make sure cord is located so that it will not be stepped on, tripped over, or otherwise subjected to damage or stress.
- Do not operate charger with damaged cord or plug. If the cord or plug is damaged, ask Makita authorized service center to replace it in order to avoid a hazard.
- Do not operate or disassemble charger if it has received a sharp blow, been dropped, or otherwise damaged in any way; take it to a qualified serviceman. Incorrect use or reassembly may result in a risk of electric shock or fire.
- Do not charge battery cartridge when room temperature is BELOW 10^ C ( 50^ F) or ABOVE 40^ C ( 104^ F). At the cold temperature, charging may not start.
- Do not attempt to use a step-up transformer, an engine generator or DC power receptacle.
- Do not allow anything to cover or clog the charger vents.
- Do not plug or unplug the cord and insert or remove the battery with wet hands.
- Never use gasoline, benzine, thinner, alcohol or the like to clean the charger. Discoloration, deformation or cracks may result.
Charging
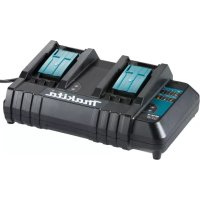
This charger can charge two batteries at the same time.
- Plug the battery charger into the proper AC voltage source. Charging lights will flash slowly in green color repeatedly.
- Insert the battery cartridge into charger until it stops adjusting to the guide of charger.
▶ Fig.1
The terminal cover of the charger can be opened with inserting and closed with pulling out the battery cartridge.
- When the battery cartridge is inserted, the charging light color will change from green to blue and charging will begin. The fast blue flashing light indicates charged condition in 0–80 % and the blue charging light will keep lighting up steadily indicate 80–100 %. The 80 % indication mentioned above is approximate value. The indication may differ according to battery temperature or battery condition.
- With finish of charge, the charging light will change from blue one to green one and the melody sound or buzzer sound (a long beep) comes out to notify completion of charge.
- After charging, remove the battery cartridge from charger and unplug the charger.
NOTE: Charging time varies by temperature (10°C (50°F)–40°C (104°F)) that battery cartridge is charged at and conditions of the battery cartridge, such as a battery cartridge which is new or has not been used for a long period of time.
| Voltage | Number of cells | Li-ion battery cartridge | Capacity (Ah) | Charging time (Minutes) |
| 40 V (max.) 10 BL4 | 020 2 22 | |||
| 40 V (max.) 10 BL4 | 025 2.5 28 | |||
| 40 V (max.) 10 BL4 | 040 / BL4040F 4 45 | |||
| 40 V (max.) 20 BL4 | 050F 5 50 | |||
| 40 V (max.) 20 BL4 | 080F 8 76 |
NOTICE: The battery charger is for charging Makita-battery cartridge. Never use it for other purposes or for other manufacturer's batteries.
NOTE: If the charging light flashes slowly in blue color, charging may not start due to the condition of the battery cartridge as below:
— Battery cartridge from just-operated tool or battery cartridge that has been left in a location exposed to direct sunlight for a long time.
— Battery cartridge that has been left for a long time in a location exposed to cold air.
NOTE: When the battery cartridge is too hot, charging does not begin until the battery cartridge temperature reaches the degree at which charging is possible.
NOTE: If the charging light changes to red color, charging is not possible. The terminals on the charger or battery cartridge are clogged with dust or the battery cartridge is worn out or damaged.
Changing melody upon completion of charging
- Inserting the battery cartridge into charger brings out last preset brief melody sound of completed charging.
- Removing and re-inserting it within five seconds after this action makes the melody sound change.
- Every time removing and re-inserting it within another five seconds after this, the melody sound changes in order.
- When the desired melody sound comes out, leave the battery cartridge being inserted and the charge will begin. When a "short beep" mode is selected, no completed charging signals comes out. (Silent Mode)
- With finish of charge, the charging light will light up in green and the melody sound preset at the insertion of battery cartridge or buzzer sound (a long beep) comes out to notify completion of charge. (In selected silent mode, no sounds come out.)
- Preset melody sound remains stored even when the charger is unplugged.
Cooling system
This charger is equipped with cooling fan for heated battery in order to enable the battery to prove its own performance. Sound of cooling air comes out during cooling, which means no trouble on the charger.
Blue and red light will flash alternately for warning in the following cases.
- Trouble on cooling fan
- Incomplete cool down of battery, such as, being clogged with dust
The battery can be charged in spite of the alternate blue and red light. But the charging time will be longer than usual in this case. Check the sound of cooling fan, vent on the charger and battery, which can be sometime clogged with dust.
Always keep clean the vent on charger and battery for cooling.
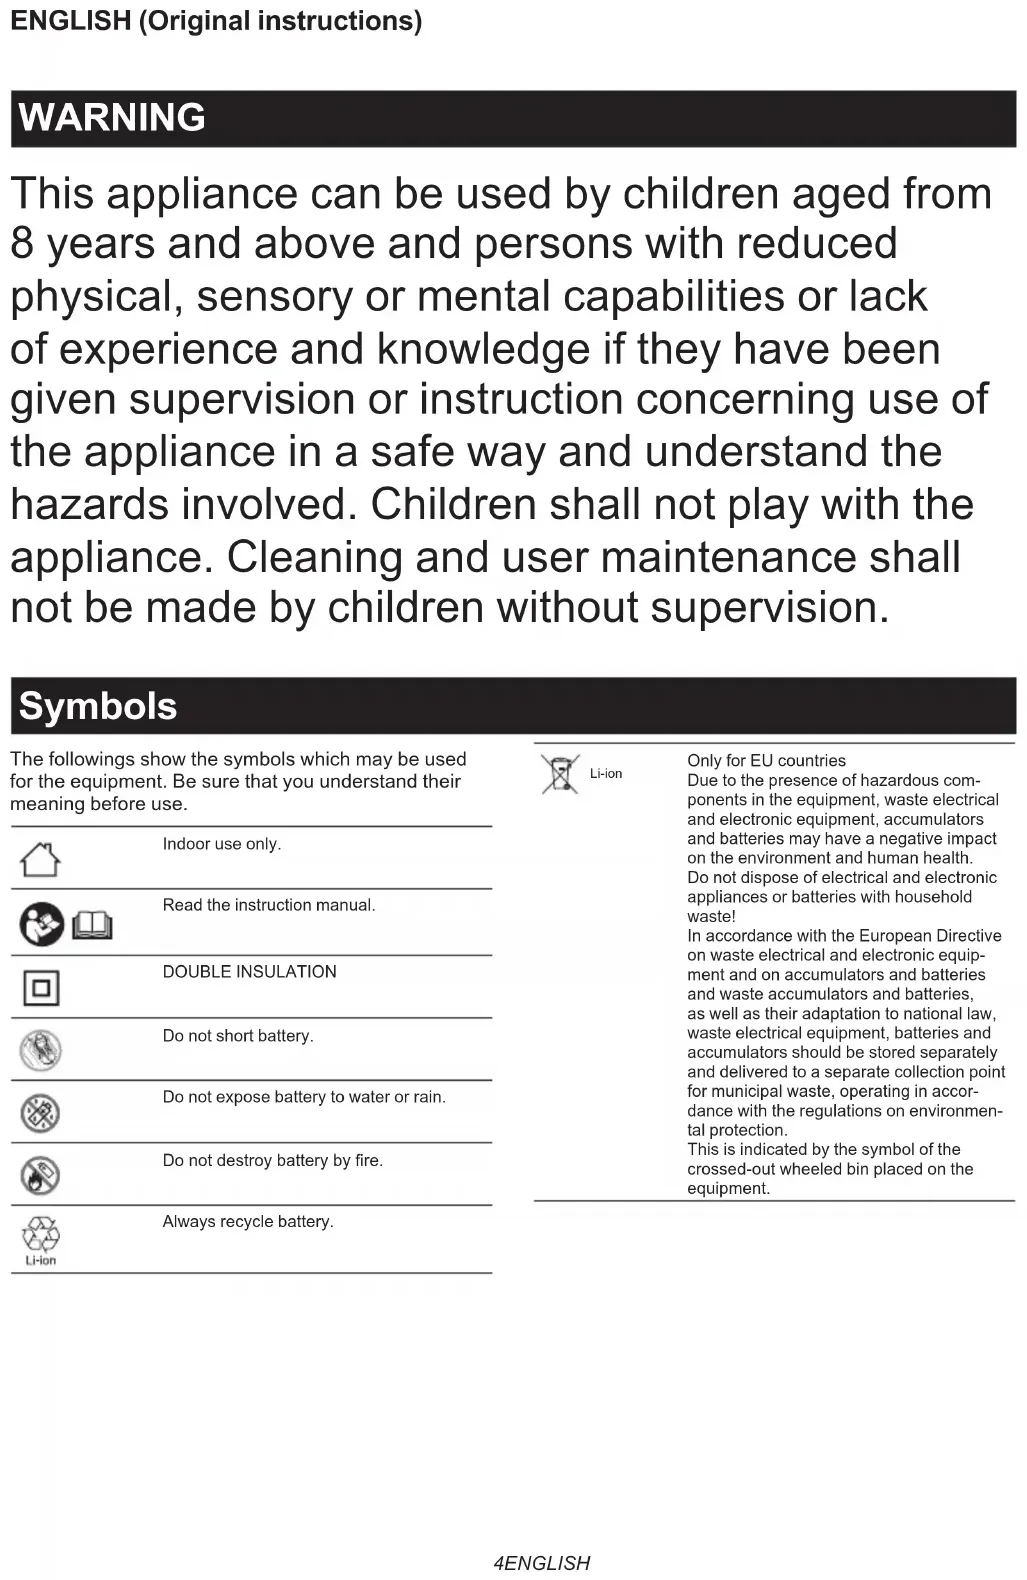
▶ Fig.2: 1. Exhaust vent 2. Intake vent
NOTE: The cooling system is in order although no sound of cooling fan comes out, if the blue and red light will not flash.
NOTE: The products should be sent to repair or maintenance, if the blue and red light flashes alternately so often.
Wall mounting
WARNING: Make sure to use four screws when mounting the charger on the wall. Otherwise the charger may fall and cause serious injury.
⚠ WARNING: Always be sure that the charger is unplugged and all the batteries are removed from the charger before performing wall mounting work.
WARNING: Follow the steps instructed in this manual, and complete the whole procedures at once. The charger may fall and cause injury or damage if you stop the work in the half way.
⚠ WARNING: Check tightness of the screws on regular basis. Otherwise the charger may fall because of loosen screw.
WARNING: Clean the terminal parts of the charger on regular basis with an air duster etc.
CAUTION: Carefully choose a stable wall for mounting the charger. Make sure there is no hindrance to mounting work or charging operation. The gross weight of the charger and battery reach approximately 6.0 kg (13 lbs). Provide sufficient reinforcement for the wall if necessary.
⚠️CAUTION: Be careful not to drop the battery cartridge when inserting or removing the battery from the wall-mounted charger. Hold the battery cartridge firmly and keep a stable posture.
You can mount the charger on the wall. Make a clearance around the charger as shown in the figure.
▶ Fig.3
NOTE: Things you need to prepare:
— Four screws - two for hanging and two for anchoring
Screw size : 6 mm x more than 40 mm.
Screw head size : Less than 12 mm.
— Tools - for tightening screws
- Fix two screws for hanging on the wall.
- Remove the rubber feet (four pieces) from the bottom of the charger.
- Hang the charger with the screws fixed in step 1.
▶ Fig.4
- Mount the charger on the wall by tightening two anchoring screws completely.
▶ Fig.5