191A642 - Battery charger MAKITA - Free user manual and instructions
Find the device manual for free 191A642 MAKITA in PDF.
| Product Type | Portable power supply (battery charger) |
| Brand and Model | Makita 191A642 |
| Supply Voltage | 18 V DC (via lithium-ion battery) |
| Output Voltage | 18 V, 36 V (18 V x 2), 36-40 V max depending on adapter |
| Compatible Batteries | BL1815N, BL1820B, BL1830B, BL1840B, BL1850B, BL1860B |
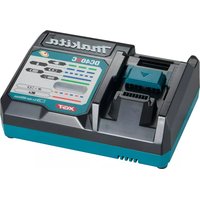
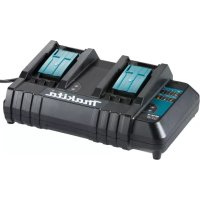
| Compatible Chargers | DC18RC, DC18RD, DC18RE, DC18SD, DC18SE, DC18SF, DC18SH |
| Weight (approx.) | 1.5 kg (without battery) |
| Dimensions (approx.) | 300 x 200 x 100 mm |
| Housing Material | Reinforced plastic |
| Main Functions | Portable power supply for cordless tools, automatic battery switching, remaining charge indication |
| Safety Protections | Overload, overheating, deep discharge, short circuit protection; cover lock |
| Maintenance and Cleaning | Clean with a dry cloth; do not use solvents |
| Repairability | Repair only by Makita authorized service center with genuine parts |
| Included Accessories | Waist belt, shoulder strap, adapter pouch, cord holder |
| Areas of Use | Makita 18 V and 36 V cordless tools (chainsaw, blower, hedge trimmer, etc.) |
Frequently Asked Questions - 191A642 MAKITA
User questions about 191A642 MAKITA
0 question about this device. Answer the ones you know or ask your own.
Ask a new question about this device
Download the instructions for your Battery charger in PDF format for free! Find your manual 191A642 - MAKITA and take your electronic device back in hand. On this page are published all the documents necessary for the use of your device. 191A642 by MAKITA.
USER MANUAL 191A642 MAKITA
The portable power pack enables the batteries and the tool or machine to be separated, making it suitable for a long time work by switching the installed batteries.
This unit can be used with the following tools or machines.
18 V battery-powered tool or machine
36 V (18 V x 2) battery-powered tool or machine
36 V - 40 Vmax battery-powered tool or machine
- Battery-powered tool or machine (direct connection to portable power pack)
About this instruction manual
The term "unit" in this instruction manual refers to portable power pack.
Compatible tool or machine category
- Cordless Chain Saw *1
- Cordless Pole Saw
- Cordless Blower
- Cordless Grass Trimmer
- Cordless String Trimmer
- Cordless Multi Function Power Head
- Cordless Hedge Trimmer
- Cordless Grass Shear
- Cordless Pole Hedge Trimmer
- Cordless Angle Grinding
- Cordless Rotary Hammer *2
- Cordless Power Scaper
- Cordless Demolition Hammer
- Cordless Earth Auger
- Cordless Lawn Mower (only for connector type)
USB Adapter *3
The compatible category of tool or machine is subject to change without notice. Refer to the latest instruction manual for the information on the compatible category of tool or machine.
WARNING: Never use this unit with tools or machines categorized below. Using this unit with non-compatible tools or machines may cause personal injury or malfunction.
- Cordless Garden Sprayer, Battery Powered Pruning Shears, Battery Powered Wheelbarrow, Motor-Assisted Bicycle, Cordless Backpack Vacuum Cleaner, Robotic Cleaner, Cordless Fan Jacket, Cordless Heated Jacket
Applicable battery cartridge and charger
| Battery cartridge BL1815N | / BL1820B / BL1830B / BL1840B / BL1850B / BL1860B |
| Charger DC18RC / DC18R | D / DC18RE / DC18SD / DC18SE / DC18SF / DC18SH |
- Some of the battery cartridges and chargers listed above may not be available depending on your region of residence.
WARNING: Only use the battery cartridges and chargers listed above. Use of any other battery cartridges and chargers may cause injury and/or fire.
Symbols
The followings show the symbols which may be used for the equipment. Be sure that you understand their meaning before use.
| Read instruction manual. | |
| To reduce the risk of injury, keep the cord away from obstacles. | |
| Close the cover securely for protection against ingress of water or rain. |
Due to the presence of hazardous components in the equipment, waste electrical and electronic equipment, accumulators and batteries may have a negative impact on the environment and human health. Do not dispose of electrical and electronic appliances or batteries with household waste!
In accordance with the European Directive on waste electrical and electronic equipment and on accumulators and batteries and waste accumulators and batteries, as well as their adaptation to national law, waste electrical equipment, batteries and accumulators should be stored separately and delivered to a separate collection point for municipal waste, operating in accordance with the regulations on environmental protection.
This is indicated by the symbol of the crossed-out wheeled bin placed on the equipment.
SAFETYWARNINGS
Portable power pack safety warnings
- Be sure to read the instruction manual of the tool or machine before use.
- Do not pick up or carry this unit by holding only the cord. Do not pull the cord while you are wearing or using this unit.
- Before wearing or putting off the unit, remove the socket from the tool or machine.
- When you leave the tool or machine, be sure to remove the adapters from the tool or machine, or remove the unit from your body.
- Be careful not to trip over the cord during operation.
- Do not use this unit on an unstable surface, or unstable high places.
- Do not use multiple units by connecting one unit to another unit.
- During operation, keep the cord away from obstacles. The cord caught by obstacles may cause serious injury.
- Do not insert the adapters into the charger.
- Do not install the adapters to the battery ports of this unit.
- This unit is designed exclusively for use with 18 V batteries. Do not use the batteries other than 18 V batteries.
- Inspect the unit, cords, and harness before use. If they are damaged, ask your local Makita Authorized Service Center for repair.
- When attaching the cord to the cord holder, be sure to attach it slowly and securely.
-
Always make sure that the tool or machine is switched off and the adapters are removed before attempting to perform inspection or maintenance of the tool or machine.
-
When using this unit with a tool equipped with a blade, be sure to keep the cord away from the blade.
- When wearing the unit, do not put on anything, such as safety harness or shoulder belt, which may interfere the emergency detachment function of the unit.
- Do not use this unit while you are climbing up in a tree.
- Do not use this unit when you are wearing cordless fan jacket or cordless heated jacket.
- Do not expose this unit to sparks.
- When using this unit without wearing it, be sure to lay down the unit.
- Do not let water enter into the cover.
- Do not disassemble, repair, or modify the unit.
- Be careful not to entangle the harness or belt by the tool or machine.
- When using the unit, be careful not to cut the cords with the tool or machine.
- Keep foreign objects such as metal chips and water away from the plug of the unit.
- Do not use the tool or machine near high-voltage power lines.
- Do not damage the case of the battery or place anything on the unit.
- Do not step on the unit or sit on the unit.
- Store the unit indoors.
Important safety instructions for battery cartridge
- Before using battery cartridge, read all instructions and cautionary markings on (1) battery charger, (2) battery, and (3) product using battery.
- Do not disassemble or tamper with the battery cartridge. It may result in a fire, excessive heat, or explosion.
- If operating time has become excessively shorter, stop operating immediately. It may result in a risk of overheating, possible burns and even an explosion.
- If electrolyte gets into your eyes, rinse them out with clear water and seek medical attention right away. It may result in loss of your eyesight.
- Do not short the battery cartridge:
(1) Do not touch the terminals with any conductive material.
(2) Avoid storing battery cartridge in a container with other metal objects such as nails, coins, etc.
(3) Do not expose battery cartridge to water or rain.
A battery short can cause a large current flow, overheating, possible burns and even a breakdown.
-
Do not store and use the tool and battery cartridge in locations where the temperature may reach or exceed 50^ (122°F).
-
Do not incinerate the battery cartridge even if it is severely damaged or is completely worn out. The battery cartridge can explode in a fire.
- Do not nail, cut, crush, throw, drop the battery cartridge, or hit against a hard object to the battery cartridge. Such conduct may result in a fire, excessive heat, or explosion.
- Do not use a damaged battery.
- The contained lithium-ion batteries are subject to the Dangerous Goods Legislation requirements.
For commercial transports e.g. by third parties, forwarding agents, special requirement on packaging and labeling must be observed.
For preparation of the item being shipped, consulting an expert for hazardous material is required. Please also observe possibly more detailed national regulations.
Tape or mask off open contacts and pack up the battery in such a manner that it cannot move around in the packaging.
- When disposing the battery cartridge, remove it from the tool and dispose of it in a safe place. Follow your local regulations relating to disposal of battery.
- Use the batteries only with the products specified by Makita. Installing the batteries to non-compliant products may result in a fire, excessive heat, explosion, or leak of electrolyte.
- If the tool is not used for a long period of time, the battery must be removed from the tool.
- During and after use, the battery cartridge may take on heat which can cause burns or low temperature burns. Pay attention to the handling of hot battery cartridges.
-
Do not touch the terminal of the tool immediately after use as it may get hot enough to cause burns.
-
Do not allow chips, dust, or soil stuck into the terminals, holes, and grooves of the battery cartridge. It may result in poor performance or breakdown of the tool or battery cartridge.
- Unless the tool supports the use near high-voltage electrical power lines, do not use the battery cartridge near high-voltage electrical power lines. It may result in a malfunction or breakdown of the tool or battery cartridge.
- Keep the battery away from children.
SAVE THESE INSTRUCTIONS.
CAUTION: Only use genuine Makita batteries. Use of non-genuine Makita batteries, or batteries that have been altered, may result in the battery bursting causing fires, personal injury and damage. It will also void the Makita warranty for the Makita tool and charger.
Tips for maintaining maximum battery life
- Charge the battery cartridge before completely discharged. Always stop tool operation and charge the battery cartridge when you notice less tool power.
- Never recharge a fully charged battery cartridge. Overcharging shortens the battery service life.
- Charge the battery cartridge with room temperature at 10^ - 40^ (50°F - 104°F). Let a hot battery cartridge cool down before charging it.
- When not using the battery cartridge, remove it from the tool or the charger.
- Charge the battery cartridge if you do not use it for a long period (more than six months).
PARTS DESCRIPTION
Fig.1
| 1 | Base plate | 2 | Battery box | 3 | Cord holder | 4 | Adapter pocket |
| 5 | Power button | 6 | Plug | 7 | Adapters for 36 V (18 V x 2) (optional accessory) | 8 | Adapter for 18 V (optional accessory) |
| 9 | adapter for 36 V - 40 Vmax (optional accessory) | 10 | Width adjustment belt | 11 | Waist belt | 12 | Shoulder harness |
| 13 | Socket | - | - | - | - | - | - |
FUNCTIONAL DESCRIPTION
CAUTION: Always be sure that the unit is switched off and the battery cartridge is removed before adjusting or checking function on the unit.
Installing or removing battery cartridge
CAUTION: Always switch off the unit before installing or removing of the battery cartridge.
CAUTION: Hold the unit and the battery cartridge firmly when installing or removing battery cartridge. Failure to hold the unit and the battery cartridge firmly may cause them to slip off your hands and result in damage to the unit and battery cartridge and a personal injury.
CAUTION: When installing or removing the battery cartridge, place the unit on a flat and stable surface. Otherwise, the battery cartridge may fall accidentally and cause an injury.
- Pull up the lever and open the cover of the battery box.
- Push the lock button, and then lock the cover with the lock button.
Fig.2: 1. Lock button 2. Lever
CAUTION: Make sure that the cover is locked with the lock button securely. Otherwise, the cover may close accidentally, and cause an injury.
- Install the battery cartridges.
- Raise the cover to release the lock button, and then close the cover and lock the cover with the lever.
CAUTION: Make sure that the cover is closed securely and locked. Otherwise, water or rain may enter inside the battery box and cause an electric shock or malfunction.
NOTICE: When using this unit with 36V (18 V x 2) battery-powered tool or machine, install at least one battery to battery port 1 or 2, and at least one battery to battery port 3 or 4.
NOTE: This unit automatically switches the batteries to be used among the installed batteries. The unit selects the appropriate battery every time the tool or machine is turned on.
NOTE: When using this unit with 18V battery-powered tool or machine, install at least one battery cartridge to one of the battery ports.
To install the battery cartridge, align the tongue on the battery cartridge with the groove in the housing and slip it into place. Insert it all the way until it locks in place with a little click. If you can see the red indicator on the upper side of the button, it is not locked completely.
Fig.3: 1. Battery port 2. Battery cartridge
To remove the battery cartridge, slide it from the unit while sliding the button on the front of the cartridge.
CAUTION: Always install the battery cartridge fully until the red indicator cannot be seen. If not, it may accidentally fall out of the unit, causing injury to you or someone around you.
CAUTION: Do not install the battery cartridge forcibly. If the cartridge does not slide in easily, it is not being inserted correctly.
Indicating the remaining battery capacity
Only for battery cartridges with the indicator
Fig.4: 1. Indicator lamps 2. Check button
Press the check button on the battery cartridge to indicate the remaining battery capacity. The indicator lamps light up for a few seconds.
| Indicator lamps Remaining | capacity | ||
| Lighted Off | Blinking | ||
| 75% to 100% | |||
| 50% to 75% | |||
| 25% to 50% | |||
| 0% to 25% | |||
| Charge the battery. | |||
| The battery may have malfunctioned. | |||
NOTE: Depending on the conditions of use and the ambient temperature, the indication may differ slightly from the actual capacity.
NOTE: The first (far left) indicator lamp will blink when the battery protection system works.
Tool / battery protection system
The tool is equipped with a tool/battery protection system. This system automatically cuts off power to the motor to extend tool and battery life. The tool will automatically stop during operation if the tool or battery is placed under one of the following conditions:
Overload protection
When the tool or battery is operated in a manner that causes it to draw an abnormally high current, the tool automatically stops without any indication. In this situation, turn the tool off and stop the application that caused the tool to become overloaded. Then turn the tool on to restart.
Overheat protection
When the tool or battery is overheated, the tool stops automatically. In this case, let the tool and battery cool before turning the tool on again.
Overdischarge protection
When the battery capacity is not enough, the tool stops automatically. In this case, remove the battery from the tool and charge the battery.
Power button and battery indicator
CAUTION: Make sure that the tool or machine is turned off before turning on the unit. Otherwise, the tool or machine may start suddenly and cause an injury.
Fig.5: 1. Main power lamp 2. Power button
To turn the power on, press the power button. The main power lamp lights up in green. To turn the power off, press the power button for a few seconds.
NOTE: If the unit and connected tool or machine are left unattended for 8 hours, the unit automatically turns off.
If the main power lamp blinks in green, the adapter is not connected to the unit, or the batteries are empty. In this case, connect the adapter to the unit, or charge the batteries. If the lamp keeps blinking in green, refer to the troubleshooting.
If the main power lamp blinks in red and green alternately, turn the power off, and then turn the power on. If the main power lamp keeps blinking in red and green alternately after turning the power on, ask your local Makita Authorized Service Center for repair.
NOTE: If you turn on the main power switch of the tool or machine just after turning on the portable power pack, the indicator(s) on the tool or machine may show that the protection system is working. In this situation, start the tool or machine once. If the indicator(s) turns off, you can operate the tool or machine. If the indicator(s) is still on, check the main power lamp of the portable power pack and refer the section "TROUBLESHOOTING" to solve the problem.
Press the power button to indicate the remaining battery capacity. The indicator lamp that corresponds to each battery port lights up for approximately 5 seconds.
| Indicator lamps Remaining | capacity | ||
| Lighted Off | Blinking | ||
| 50% to 100% | |||
| 0% to 50% | |||
| Charge the battery. | |||
NOTE: The indicator lamps for remaining battery capacity is just for a reference. The actual battery capacity may differ depending on the usage conditions.
NOTE: If the tool or machine has indicator lamps for remaining battery capacity, do not refer to the indicator lamps of the tool or machine but to the indicator lamps of this unit.
Low battery indication lamp of Adapter for 36 V - 40 Vmax
Optional accessory
This adapter features the indication lamp that notifies you of low or no battery capacity.
When the indication lamp is blinking, the remaining battery capacity gets low.
When the indication lamp lights up, the battery protection system is activated.
NOTE: Depending on the battery status, the tool/machine may automatically stop without blinking the indication lamp during continuous operation.
NOTE: The timing when the indication lamp blinks varies depending on the ambient temperature and battery status.
NOTE: The indication lamp does not lights up even when the battery cartridge currently used is depleted. The indication lamp lights up while PDC01 is switching the battery cartridges to use.
Fig.6: 1. Low battery indication lamp
Using the adapter pocket
CAUTION: Do not use this unit with the cord fixed using the hook and loop fastener of the adapter pocket.
You can put the adapters into the adapter pocket as shown in the figure.
Fig.7: 1. Adapter 2. Adapter pocket
Fig.8: 1. Adapter 2. Adapter pocket
ASSEMBLY
CAUTION: Always be sure that the unit is switched off and the battery cartridge is removed before carrying out any work on the unit.
Assembling the unit
- Attach the battery box to the base plate as shown in the figure. Be sure to lock the levers on both sides of the base plate after attaching the battery box.
Fig.9: 1. Lever 2. Battery box 3. Base plate
CAUTION: Make sure that the battery box is securely fixed to the base plate, and locked with levers. Otherwise, the battery box may fall when you wear the unit or use the unit, and cause an injury.
- Adjust the position of the waist belt. Pull up the height adjustment lever, then adjust the position of the waist belt by sliding the base plate, and then return the lever.
Fig.10: 1. Height adjustment lever 2. Base plate 3. Waist belt
NOTICE: If the height adjustment lever is loose, tighten the nut of the height adjustment lever.
When tightening the nut, do not tighten it excessively. Otherwise, the height adjustment lever will not move.
Fig.11: 1. Nut
- Attach the adapter pocket to the waist belt with the hook and loop fastener as shown in the figure.
Fig.12: 1. Adapter pocket
NOTE: The adapter pocket can be attached on either left or right side of the waist belt.
- Adjust the width of the shoulder harness using the width adjustment belt.
Fig.13: 1. Width adjustment belt - Wear the unit, then lock the buckle of the waist belt, and then adjust the length of the waist belt.
Fig.14: 1. Buckle
NOTE: You can fold and fix the belt with the hook and loop fastener as shown in the figure.
Fig.15: 1.Belt
- Adjust the length of the shoulder harness.
Fig.16: 1. Shoulder harness
NOTE: You can fold and fix the belt with the hook and loop fastener as shown in the figure.
Fig.17: 1.Belt
OPERATION
CAUTION: When wearing the unit, be sure to put shoulder harness on your both shoulders.
Otherwise, the unit may fall when you wear the unit or use the unit, and cause an injury.
CAUTION: When wearing the unit, be sure to wear the unit on your back. Otherwise, the unit may fall during operation and cause an injury.
CAUTION: Always switch off the tool or machine before turning on the unit, or connecting the plug of the adapter or power tool/machine to the socket of the battery box. Otherwise, the tool or machine may start suddenly and cause an injury.
Connecting the unit to the tool or machine
-
Pull out the cord from either left or right side of the battery box. When pulling out the cord, be sure to set the cord in the holders as shown in the figure.
Fig.18: 1. Cord 2. Holder -
Wear the unit.
- Insert the plug of the adapter or power tool/ machine into the socket of the battery box all the way so that the arrow mark on the plug is aligned with that on the socket.
Fig.19: 1. Plug 2. Socket 3. Arrow mark
NOTICE: When disconnecting the plug and socket, do not hold the cords but hold the plug and socket. Otherwise, the cords may be damaged and cause a malfunction of the unit.
NOTE: The plug and socket are disconnected if a certain load is applied.
- Install the adapters to the tool or machine in the same way as the battery cartridge.
Fig.20: 1. Adapter
NOTICE: For 18 V battery-powered tool or machine, use the adapter for 18 V. For 36 V (18 V x 2) battery-powered tool or machine, use the adapters for 36 V (18 V x 2). For 36 V - 40 Vmax battery-powered tool or machine, use the adapter for 36 V - 40 Vmax.
For direct connection type tool or machine, no adapter is required.
NOTICE: When installing adapters to the tool or machine, be sure to install the adapter equipped with 2 cords to the location shown in the figure. If you install the adapters incorrectly, the adapter equipped with 2 cords cannot be inserted all the way. In this case, do not insert the adapter forcibly. Otherwise, the tool or machine may be damaged.
Fig.21: 1. Adapter with 2 cords
Fig.22: 1. Adapter with 2 cords
NOTE: The direction of the cord of the adapter can be changed in the range of approximately 180 degrees.
- Press the power button to turn the power on. To turn the power off, press the power button for a few seconds.
Fig.23: 1. Power button
Using the cord holders
CAUTION: Attach only the cord of the battery box to the cord holders. Do not attach the cord of the adapters to the cord holders. Attaching the cord of the adapters may invite accident and cause an injury.
Fig.24
Fig.25
You can attach the cord of the battery box to the cord holders as shown in the figure.
Fig.26: 1. Cord holder
You can also attach the cord using only the cord holder of the waist belt as shown in the figure.
Fig.27: 1. Cord holder
The cord holders can be attached on either left or right side of the shoulder harness and waist belt.
Fig.28: 1. Part to be attached the cord holder
CAUTION: Be sure to attach the cord to the shoulder harness on the left side only or right side only so that the cord does not cross the shoulder harness.
Fig.29
Using the hanging band
Optional accessory
CAUTION: Before operation, make sure that the hanging band is properly attached to the hanger on the tool.
You can use the hanging band for cordless grass trimmer, cordless string trimmer or cordless pole saw with this unit.
Attaching the hanging band
- Attach the hooks of the hanging band to the rings of the shoulder harness or waist belt as shown in the figure. Select the type of band and the connecting method appropriate for your usage.
Fig.30: 1. Ring 2. Hook
Fig.31: 1. Ring 2. Hook
Fig.32: 1. Ring 2. Hook
Fig.33: 1. Ring 2. Hook
NOTE: If the tool is bike handle type, attach the band so that the band passes through inside of the waist belt as shown in the figure.
Fig.34: 1. Waist belt 2. Band
- Attach the hook to the tool.
Fig.35: 1.Hook
Detaching the tool
Push the levers on the buckle to unlock the buckle.
Fig.36: 1. Lever
NOTE: The buckle is not equipped depending on the type of band.
Emergency detachment
-
Push the levers on the buckle of the waist belt to unlock the buckle.
Fig.37: 1. Buckle 2. Lever -
Take off the shoulder harness to release the tool and the unit.
Fig.38: 1. Shoulder harness
MAINTENANCE
CAUTION: Always be sure that the unit is switched off and the battery cartridge is removed before attempting to perform inspection or maintenance.
NOTICE: Never use gasoline, benzine, thinner, alcohol or the like. Discoloration, deformation or cracks may result.
To maintain product SAFETY and RELIABILITY, repairs, any other maintenance or adjustment should be performed by Makita Authorized or Factory Service Centers, always using Makita replacement parts.
TROUBLESHOOTING
Before asking for repairs, conduct your own inspection first. If you find a problem that is not explained in the manual, do not attempt to dismantle the tool, machine, or unit. Instead, ask Makita Authorized Service Centers, always using Makita replacement parts for repairs.
| State of abnormality Main power lamp Cause Remedy | |||
| The tool or machine does not start. | The lamp lights up in green. | The adapters are not installed to the tool or machine. | Install the adapters to the tool or machine. Check that the adapters are installed securely. |
| The tool or machine, or the cords of the adapters are overheated. | Cool down the tool or machine, unit and adapter. After cooling down, power off and then power on again. | ||
| The tool or machine, or the unit is broken. | Ask Makita Authorized Service Centers for repair. | ||
| The lamp blinks in green. | The plug of the adapter or power tool/machine and the socket of the battery box are not connected. | Connect the plug and the socket. Check that the plug and socket are connected securely. | |
| The remaining battery capacity is not enough. | Charge the batteries, or replace the batteries with charged ones. | ||
| Two batteries are not installed to the unit when using the unit with the battery-powered tool or machine with higher voltage than 18V. The remaining battery capacity of two batteries is not enough. | Install at least one battery to battery port 1 or 2, and at least one battery to battery port 3 or 4. Charge the batteries, or replace the batteries with charged ones. | ||
| The unit needs to switch the battery. Switch off the tool or machine, and then back on. Press the power button of the unit. | |||
| The cord of the unit is overheated. Cool down the unit. | |||
| The lamp blinks in red and green alternately. | The unit has detected an abnormality. Turn off the unit, and then back on. | ||
| The tool or machine, or the unit is broken. | Ask Makita Authorized Service Centers for repair. | ||
| The lamp does not light up. | The unit is not turned on. Turn on the unit. | ||
| The batteries are not installed to the unit. | Install the batteries to the unit. | ||
| The remaining battery capacity is not enough. | Charge the batteries, or replace the batteries with charged ones. | ||
| The unit is broken. Ask Makita Authorized Service Centers for repair. | |||
OPTIONAL ACCESSORIES
CAUTION: These accessories or attachments are recommended for use with your Makita tool specified in this manual. The use of any other accessories or attachments might present a risk of injury to persons. Only use accessory or attachment for its stated purpose.
If you need any assistance for more details regarding these accessories, ask your local Makita Service Center.
- Makita genuine battery and charger
Adapters for 36 V (18 V x 2) - Adapter for 18 V
Adapter for 36 V - 40 Vmax
NOTE: Some items in the list may be included in the tool package as standard accessories. They may differ from country to country.
ESPECIFICAções
Indicação de uso
Fig.20: 1.Adaptataur
ACCESSIONS EN OPTION
VEILIGHEIDSWAARSCHUWINGEN
OPTIONELE ACCESSOIRES
▶ Fig.3: 1. Batteriport 2. Akku
DC18SD/DC18SE/DC18SF/ DC18SH
▶ Fig.2: 1. Lasknapp 2. Spak
▶ Kuva23: 1. Virtapainike
Abra7: 1. Adapter 2. Adapterzseb
Abra8: 1. Adapter 2. Adapterzseb
ÖSSZESZERELEŠ
Abra30: 1. Gyuru 2. Horog
Abra31: 1. Gyuru 2. Horog
Abra32: 1. Gyuru 2. Horog
Abra33: 1. Gyuru 2. Horog
TYTO POKNY USCHOVEJTE.
AUPOZORNENI: Pouziveje foupe originni akumulatory Makita. Pouzivani neoriginalnich nebo upravenych akumulatoru muze zpusobitexplozi akumulatoru a nasledny pozar, zraneni a jine poskozeni. Zanika tim take zaruka spolecnosti Makita na na radi a nabijecka Makita.
Tipy k zajisteni maximálniživot-nosti akumulátoru
3aKbCBAHeTo Ha akymylaTopHa 6aTePnMoKe Da DOBeDe Do npOTnHa He MHOrO CIneH ToK, Do npPerpBaHe, Do Bb3MOxHN n3raPpHn H daKe Do pa3nDaHe Ha 6aTePnTa.
- He cIbXpaHbAaTe n He n3nOJ3BaIte nHcTpymeHTa n akymyIaNtOpHnTe 6aTePnHa MeCTa, KbDeTo TeMnepaTypaTa MoKe Da DocTnHe nnHaDMnHe 50^ (122°F).
7.He n3rapnTe akymyIaTOPHnTe 6aTepeHH daKe n aKO Te ca cepno3HO NOBpeDeHN HnHn HnHO n3HOceHN. AkymyIaTOPHaTa 6aTepeHH MOKe Da eKcnIOJnpa B OfH. - He 3a6nBaIte nipoHn, He pexKeTe, He cMaKBAIte, He XBbpIaIe, He N3NyckaIte I He ydpAITe TBbPd npEIMet akymyIaTOPHaTa 6aTepyra. Toba noBeHeHne MoKe Da npEIN3BnKa noXap, npEprBaHe nn B3pNb.
- He n3noJ3BaIte NOBpeJeHn akymyJNaTOPHn 6aTeepn.
- CbIbPkaUnte ce NITneBO-IOHn aKymytaTOpHN 6aTePN ca 06eKT Ha 3NCKBaHnraTa Ha 3aKOHOdaTeJCTBOTO 3a ONACH CTOKN.
PnTbproBcN npeBo3n, HAp. OT TpeTn cTpaHn, CneIHTOpN, Tpr6Ba Da ce Cna3BaT CneuNaHn N3NCKBAHn 3a OnakOBaHe n eTuKeTnpaHe.
3a noIroTobKa Ha aptnkyuna, KoTo Tpr6Ba da 6bJe n3npaTeH, e Heo6xOdIma KOHCyntaunca c EKcnept No onacnte MaTePnAnu. MoJra, cna3- BaiTe N eBentyaHNO No-noDpO6HnTe HauNoHaHn pa3nopee6n.
3aIeTe C IeHTa NIN NOKPnITe OTKpNTte KOH TAKTN ONAKOBAITE aKymyNaTOPHaTa 6aTepyn NO TaKB HauHH, Ye Da He MOKe Da ce PneMeCTBa B ONAKOBkata.
- Pn n3xBbPnHe Ha akymyNaTopHaTa 6aTepe na 3BaTeOT HnCTpyMeHTa N Ra 3XBbPnTe Ha NOxOJaIO MAcTo.Cna3BaIte MeCTHnTe pa3nope6n 3a n3XBbPnHe Ha akymyNaTopHn 6aTeepn.
- 3no3BaTe 6aTePnTe cmo C npOyKTnTe, onpeDenen ot Makita. NocTabraHTo Ha 6aTePnTe KbM HeoO6peHn npOyKTH MoKe Da npeu3BnKa noXap, npeprBaHe, B3pNB INN IN3TuHa HaeNeKtpoNT.
-
Ako nHCTpyMeHTbT HMa Da ce n3noJ3Ba npoDbJnxTeHNO BpeMe, 6aTepeNa Tp8Ba da ce n3BaAn OT Hero.
-
IopBpeMeHa n CneI ynoTpe6a akymyIaTopHata 6atepna MoKe Da noeMe TOnnHa, KOrTo MOKe Da npuHn H3rapHn Hn HnckKoTeMnepaTyPhn H3rapHn. BnMaBaIte, Korato 6opabnte c ropeunTe akymyIaTopHn 6atepn.
- He DoKocBaIte KJIeMaTa Ha HnHCTpyMeHTa BeDHa rCne yNoTpe6a, TbN KaTo e Bb3MOxHO Da e DOCTaTBuHO HarpTa, 3a Da npeDu3BnKa n3rapHn.
- He no3B0JBAaIte cTpyKn, npax nIn noUBa da noJenBaT NO KIeMnte, OTBOpHTe N KaHaJIte Ha akymyIaTOPHaTa 6aTePna. Toba moKe Da doBeDe Do loiPi pa6oTHn XapaKTepNCTnKn IIn NoBpeDa Ha IHCTpymEHTa INn AkymyIaTOPHata 6aTePna.
- Ocben ako nHcTpymeHTbT noaBpka H3noi3BaHeTo B 6n3OCT Do BnCOKOBJTOBn eektponpoBOu, He n3noi3BaTe aKymaTOpHaTa 6aTePn8 6n3o Do BnCOKOBJTOBn eektponpoBOu. Toba MoKe Da IOBePeDo HEn3npaBHOCT NIn NOpeDa Ha INHcTpymeHTa NIn aKymyNaTOPHaTa 6aTePn8.
- Na3eTe 6aTePnraTa OT deca.
3AIIA3ETE HACTOUINTEHNCTPYKLI.
A BHIMAHNE: N3non3BaIte caMo opnHaHnHaKymyIaTOPH6aTePN Ha Makita. PnN 3noJ3BaHe Ha pa3JNUHn OT aKymyIaTOPHnTE 6aTePn Ha Makita nIcTAPn akymyIaTOPH6aTePN MoKe Da ce noyu npbCKaHe Ha aKymyIaTOPHaTa 6aTePn, KoTo Da doBeDe Do noXkap, HapahraBaHe IIN nobpeDa. Toba cbUo 1e anHynpa rapaHnra Ta Ha Makita 3a IHCTpymeHTa n 3apAnHOTo yCTPOInCTBO Makita.
CbBETn 3a noDbpxaHe Ha maKcImaJIHO Dblr XNBOT Ha aKyMyIaTOPHnTe 6aTepnn
- 3apekdaaTe akymyIaTOPHnTe 6aTeepu, npei Te da ca ce pa3peDnHn HanbJHo. Korato 3a6eNeXKeTte, ye MoUHOCTTa Ha IHcTpymeHTa HamaJaBa, BnHaRn CnpaTe pa6oTaTa C IHcTpymeHTa N 3apeDeTe akymyIaTOPHaTa 6aTeepu.
- HnKora He npe3apekdaTe HanbIHO 3apeHa akymylaTopha 6aTepy. Ipe3apdlt CkbcBa ekcnloatauOHnXIBOT Ha 6atepyra.
- 3apejdaTe akymylaTophata 6atepnpn cTaimHa TeMnepeAtya ot 10^ - 40^ (50^ - 104^) .OctaBeTe 3arpeTnte akymyIaTopHn 6aTeepn da ce oxlaAraT, nped n da rN 3apexdaTe.
- Korato He n3non3BaTe akymynaTophata 6aTepe, n3BaTeTe oT nHCTpyMeHTa nn 3apdHOTO yCTpoiCTBO.
- 3apeTe aKymyataOpHaTa 6aTePnA, aKO He CTe rN3NoI3BaJIN DbJIbT NepNOd OT BpeMe (noBeeOT WecT Meceua).
ОпИСАнеHAЧАТ Norte
_nr.1
HdkaunHa ocTaBaun KaanuTeHa akymyNaTOPHaTa 6aTeprn
Camo 3a akmyamopHu 6amepuu c uhdukamop
Φur.4: 1. CBeTnHHn HnDnKaTOpn 2. ByToH 3a npoBepka
HaTnchete 6yToHa 3a npoBepKa Ha aKymyIaTopHaTa 6aTePn 3a NOKa3BaHe Ha OCTabaUH 3apJd Ha 6aTePnTa. CBeTNIHHNte HndNKaTopn ige CBeTHat 3a HraKOJIko CekyHdi.
| Сbvетлини похд Oстац | ||
| Сbvети Изк. Мига | Зарад на батерияа | |
| 75% до 100% | ||
| 50% до 75% | ||
| 25% до 50% | ||
| 0% до 25% | ||
| Зар每一天е батерияа. | ||
| Бастени та може за неботи правиши. | ||
3A6ELEKKA: B 3aBnCIMoCT OYcNOBnTa Ha yNoTpe6a N OKoJHaTa TEMnepaTypa e Bb3MOxHO NOKa-3aHnra Ta IeKO da ce pa3JIuHaBaT O DeiCTBntEnHnKa nauNTeT.
3A6EENKKA: PpBnT (Kpaeh nB) CBeTnHeH INNkATOp ige Mna, KOraTO CnCTeMaTa 3a 3aunTa Ha 6aTePnra Ta yHKUOnHnpa.
CnCTema 3a 3aunTa Ha NHCTpyMeHa /akymyIaTopHaT aTepeH
HCTpyMeHTbTe o6OpUdbaH CbC CnCTema 3a 3auNTa Ha HnCTpyMeHTa/akymyIaTOPHaTa 6aTePra. Ta3n CnCTema ABTomAtuHO npeKbcBA 3axpaHbAHeTo KbM eNEKTPOMOTopa, 3a Da OCnrypn No-DbNbr XNBOT Ha HnCTpyMeHTa aKymyIaTOPHaTa 6aTePra. IHCTpyMeHTbT ige cnpe ABtomAtuHo nO Bpeme Ha pa6oTa, aKO HnCTpyMeHTbT mN 6aTePraTa ce HAMnPaT B eEDHO OT CJIeHNITE yCNOBIA:
3aunTa Cpeu npeTOBapBaHe
Korato INHCTpyMeHTbT Ce n3NOJ3Ba NO HaunH, KOITo BODn Do HeOBuayAinHO BnCOKA KOHCyMaCnRA HA TOK, Toi Cnnpa ABTomatNuHo 6e3 HnKaKBa INDnKaCnRA. B To3n CnyauN I3KnIOUte INHCTpyMeHTa N ppeYCTaHOBeTe npINOxKeHHeTo, KOEt OPeTOBAPBa INHCTpyMeHTa. CneI TOBa BKNIOUte INHCTpyMeHTa 3a NOBTOpHO CTapTnpaHe.
3aunTa cpeu nperpBaHe
Korato nHCTpymeHTbT/akymyNatopHaTa 6aTepe na pperee, nHCTpymeHTbT cnpa abTomauHo. B To3n cnuya octabeTe nHCTpymeHaN akymnyatopHaTa 6aTepe na n3cTuHaT, npedn da BKIOuHTe nHCTpyMeHTa OTHBO.
3aunTa cpeu npekomephopa3pekdaHe
Korato kanaunTebHa akymyataopHata 6aTepye He e doctaTbeH, nHCTpyMeHTb T cnpa abTomatnuHO. B TO3n Cnyauh n3BaTe 6aTepyra OT nHCTpyMeHa n a 3apeDeTe.
Бутон Ha 3axpaHbaHeTo И ИнданkaTOp Ha akymylaTOpHaTa батерия
BHUMAHNE: Ppei Da n3non3BaTe MoDya, ce yBepTe, Ye HnCTpyMeHTbT NIn MaunHaTa ca n3KnOChEn. B npOTnBEH cnUyai nHCTpyMeHTbT NIn MaunHaTa MOKe Da CTapTnpaT BHe3aAnHO N da npuHnHrT HapaHraBaHe.
Φn.r.5: 1.ΓJIaBeH CBeTINHeH INHДИKaTOP 3a 3axpaHBaHeTo 2. ByToH 3a 3axpaHBaHeTo
3a da BkIIOUHTe 3axpaHbaHETo, HATNCHETe 6yToHa 3a 3axpaHbaHETo. INaBnIrT CBeTJIINHeH INDnKaTOp 3a 3axpaHbaHETo CBETBA B 3eJIeHO. 3a da N3KIIIOUHTe 3axpaHbaHETo, HATNCHETe 6yToHa 3a 3axpaHbaHETo B npOdbJKeHne Ha HAKOJIKO CeKYHdN.
3A6ELEKKA: Ako MoDyIbT n CBbp3aHnT nHCTpyMeHT nn MaunHa ce ocTabrT 6e3 HaI3Op B npOdbJxKeHne Ha 8 yaca, MoDyIbT aBtOMaTHNo n3KnIOBa.
Ako rnaBnraT CBttnHe HndnKaTOp Ha 3axpaHbAteo Mira B 3eNo, aanTept He e Cbbp3aH KbM Moynla nn 6aTePnTe ca pa3peHn. B To3n cnyaC bbpKxete aanTepa KbM Moynla nn 3apeDeTe 6aTePnTe. Ako nDnkaTOpB T npOdbJnxaba Da mRa B 3eNo, BxTe pa3deHa 3aOTcpanBaHe Ha Hen3npaBHOCTN. Ako rnaBnraT CBttnHe HndnKaTOp Ha 3axpaHbAteo Mira NocJeDoBaTeHb 3eHen UcpBeH cBrt, INKHOte 3axpaHbAteTo n CneT TOBa ro BKIOueTe. Ako rnaBnraT CBttnHe HndnKaTOp Ha 3axpaHbAteTo Mira NocJeDoBaTeHb 3eHen UcpBeH cBrt CneD BkIOUBAhe Ha 3axpaHbAteTo, O6bPHeTe Ce KbM MeCTHn yIbIhOMoSeH cepBn3eH ueHTbp Ha Makita 3a peMOHT.
3A6ELEKKA: Ako n3KJIIOUHTe rIaBnHn IpeB-KIIOuBaTeHa 3axpaHBaHeTo Ha IHCTpyMeHTa IIIMaUnHata HENOCpeDCTBeHO CNeI KaTO BKNIOUHTe IpeHOCIMN 3axpaHBaU MoIyI, INHdNKATOpBT(NTe) HA IHCTpyMeHTa IIIMaUnHata MOKe Da NOKa-Ke(aT), Ye CnCTeMaTAt 3a 3auIta FOHKcNoHnpa. B TaKB CnyaB KBNOHTe IHCTpyMeHTa IIIMaUnHata BeHbXk. Ako INHdNKATOpBT(NTe) yrache(aT), MOKeTe Da pa6oTHe C INHCTpyMeHTa IIIMaUnHata. Ako INHdNKATOpBT(NTe) npOdbLJxKaBa(T) da CBETn(ayT), IOBepTe rIaBHN CBeTIINHEH INHdNKATOp Ha Ipe-HocmMra 3axpaHBaU MoIyI N BVXkTe pa3deJa "OTCTPAHRABE HA HEIN3IPABHOCTN", 3a da pa3peWnte npo6nema.
HaTnchete 6yToHa 3a 3axpaHbHeTo 3a npOBepKa Ha ocTaBaunnaTet Ha akymyNatopHaTa 6aTepy. CBeTnnHHnT nHnKAtOp, cBtBcTCTBaN Ha BCEKn nopT 3a 6aTepy, CBeN B npOdbJxKeHne Ha OKoNo 5cekyHn.
3A6ELEKKA: CBeTnHHnTnHnKaTOp He CBeTaBdoPn KOrato akymyNaTOpHaTa 6aTePn, KOTo B MOMeHTa ce n3NoJ3Ba, e n3ToUeHa. CBeTnHHnTnHnKaTOp CBeTn, DOKato PDC01 npEbKnUoYBa akymyNaTOpHnTe 6aTePn 3a n3NoJ3BaHe.
Φur.6: 1. CBeTnHeH nHdNkatOp 3a n3ToueHa 6aTepey
I3noJ3BaHe Ha JxO6a 3a aJaANTepn
BHIMAHHE: He n3noI3BaIte To3n MoIyI c noCTaBeH Ka6eI, 3akpeenC BcIKpo JeHTata Ha dko6a 3a aadantepu.
MoxTe Da noCTaBnTe aanTepnTe B dxko6a 3a aanTepn, KaKTo e noka3aHo Ha cnrgypata.
Φur.7: 1.Aaantep 2. Jxko63a aadantepn
Φur.8: 1.AaanTep 2. Jxob 3a aadantepu
CΓΙΟΥBAHE
BHUMAHNE: PpeDn Da n3BbPwBaTe KaKBaTo N da e pa6oTa no Modyna, BnHaRn To n3KnIOyBaIte n n3BaJdaIte akymylatopHata 6aTePn.
CrIIO6BaHe Ha MoDyJa
- MoHTpaIte akymlyaTOPHaTkaTn KaM OCHOBHATA nIOUa, KaKTo e NOKa3aHO HaФИrgypaTa. 3aKnOyTe loCTOBeTe OT DBeTe CTPaHn Ha OCHOBHATA nIOUa, CneD kato CTe MOHTpaJIu akymlyaTOPHaT a KyTnJ.
Phur.9: 1. IocT 2. AkymyNaTopHa KyTna 3. OCHOBHa nnoya
BHIMAHNE:YBepete ce,yeakymynatopHaTa Kytna e 3dpaBO 3aKpeNeHa KbM OCHOBHaTnloya n e 3aKnUoyeHa C NOCTOBeTe. B npOTuBeH cnuyaay akymynatopHaTAt KyTna MoKe Da naDHe, DOKaTO Hocnte NnN N3NON3BaTe MOnyNa, N TOBaMOKe Da npuHHn HapaHraBaHe. - PerynpaTe noNoxKeHneTo Ha KOJaHa.
N3dbpnaTe Harope NoCTa 3a KopurnpaHe Ha BUCOuHNaTa, cNeD KOeTO KopurnpaTe noNoxKeHneTo Ha KOJaHa, KaTo Nb3HeTe OCHOBHaTa IIoOa, N CNeD TOBa BbPHeTe NoCTa.
Φur.10: 1. Ioc3a Kopurupahe Ha BucounHaTa 2.OchOBHa nOua 3.KoJah
BENKKA: AkoNoctb3a KopurnapaHa BucOHnHaTa e Xna6ab, 3aTeHHeTe raiKaTa Ha NoCTa 3a KopurnapaHa BucOHNHa. Korato 3aTaraTe raikata, He 3aTaraTe npeKaJIeHO cINHO. B npOTUBeh CnyauJ Noctb3a KopurnapaHa BucOHNHa HMa da Ce DnXn.
Φm.11:1.Faika
- 3akpenete Jxko6a 3a aanTepn KbM KOJHa C NOMOHTa Ha BeNkpo JeHTaTa, KaKTo e NOKa3aHO Ha fHypata.
Φur.12: 1.Джбзаадпетер.
3ABENEXKA:ДжбтзаадаNTepmMoKe da 6bde 3akpenenOT JЯВATA UNI JYCHATA CTpaHa Ha KOJaHa.
-
KopinpuanTe wipnHaTa Ha peMbunte 3a pamO c nOMoUta Ha KOJHa 3a Kopinpuane Ha WipnHaTa.
Phur.13: 1. Konah 3a kopnupahe Ha wipnHaTa -
Cnoxete moyla Ha rbp6a cn, cneT Oba 3akon- yaine KOHa H KopnnpaTe BnCOunHaTa Ha KOHa.
Φur.14: 1. KaTapaMa
3A6EJIEXKKA: MoXeTe Da cTbHeTe n 3aKpeNITepembKa C BeJIkpo JeHTaTa, KaKTo e NOKa3aHO HaФnrypata.
Φur.15:1.PembK
- KopnnpaTe DbJnxHaTa Ha peMbUte 3a pamo.
Φn.r.16: 1.Pembu3a paMo
3A6EJIEXKKA: MoKeTe da cRbHeTe n 3aKpeNITe peMbKa C BeJIkPo JeHTaTa, KaKTo e NOKa3aHo Ha cnrgypata.
Φur.17:1.PembK
Ekcnnoataza
ABHIMAHHE:Korato Hocnte MoDyna, NoctaBraIte pembIe 3a pAMo Ha DBete cn pameHa. B IPOTNBEH CnyaM MOyIbT MOKe Da naHe, DOKaTO ro Hocnte NnN n3NoJ3BaTe, N TOBa MOKe Da npuHHn HapaHBAhe.
BHIMAHHE:Korato Hocnte Moyna, HocTe Ro Ha rbp6a cn. B npotnbH cnyaH ToH MOKe Da naHe no Bpeme Ha pa6ota n da npuHH HapaHaBaHe.
BHIMAHHE:BnHaHnN3KNIuOyBaIte NHCtpymeHTa HmMaunHaTAppeH Da BKNIOUHTe MoDyNa HnDa CbBpXeTe UeKepa Ha aanTepa Hn eNEKtpueckn HAhCTpyMeHT/MaunHa KbM KOHTa Ha akymyNaTophata Kytna. B npotnbEn CnyaHnHcTpymeHTbT HnMaunHaTa MoKe da cTapTnpat BHe3aHNo I da npuHrt HapaHraBaHe.
Cbbp3BaHe Ha Modyla KbM INHcTpymeHaNJMaunHaTa
- ⅢaBpnaTe Ka6eJa OT JIbata NIN IaChata cTaHa Ha akymyNaTophata KyTna. KOrato n3dbpNbate Ka6eJa, yBepeTe ce, ye nocTabaTe Ka6eJa B dbpxa- uHTe Taka, KaKTo e noka3aHo Ha fHyypata.
Φur.18: 1.Ka6eI2.IbpxkaU
- CnojKeMoDyHaHaBp6a cn.
- BmBkHeTe DOKpa Ncekepa Ha aadTepa HnENEKTPueckn HAHCTpymeHT/MaunHa B KOHTaTa HaakMyIaTOPhata Ktura Taka Ye CTpeJkata Ha igekepa da 6bnde npabHeHa C Ta3n Ha KOHTaTa.
MoKeTe Da n3nOJ3BaTe BnCraUaTa JnEHTa 3a pa6oTa Ha aKymyIaTOPHa KocAua Ka 3a TpeBa, aKymyIaTOPHa pBvHa KocAua Ka IIN aKymyIaTOPHa pe3auKa 3a KNoHc TTo3n MoDyI.
OtkauneHaHnHcTpymeHTa
HaTnchete Jnoctobete Ha KaTapaMaTa, 3a Ja pa3KoNyaTe.
Φnr.36:1.Loct
3A6EENKKA: B 3aBcHMOCT OT Tnna Ha JeHTaTa e Bb3MOxHO Da Hma KaTapaMa.
AByapuHOno OTKaUaHe
- HatncheTe IIOCTOBete Ha KaTapaMaTa Ha KOJaHa, 3a Da pa3KoNuaTe.
Φur.37:1.Katapama2.Loct - Cbanepe pmbuTe 3a paMo, 3a da ocbo6oIte HnCTpyMeHTa mOduJa.
Φn.r.38:1.Pembun 3a paMo
ПОДДРьЖКА
BHIMAHHE:Ппдда ce npuctbnte KbmpOBepkn nIteXHnuecko 06cnykBaHe, BnHarnpOBepBaTe daJI N MoDyIbTe n3KIOUeHnakymylatophata 6aTepeRn eOTCTpaHeHa.
BENKKA: He n3noJ3BaIte 6eH3nH, HαΦTa, pa3peiTeI, cnpT n dp. NoO6Hn. ToBa MoKe Da npuHH o6e3cBETBAHe, DeΦopMaunu nnnyKHATnHn.
3a da ce noDlbpka B3OINTA n HADEKHOCTTA Ha npodykta,peMOHTte,noDpckka Ta nn perynipaheto Tpr6Ba Da ce n3BbpuBaT ot ynbHOMOeH cepBn3 nn pa6pnHn cepBn3Hn cHTPOBe Ha Makita, kaTO BNHaT pr6Ba Da n3PON3BaTe pe3epBn Yactn OT Makita.
OTCTPAHЯBAHE HA HEN3ПРABHOCTN
Ipei Da 3aBnte peMOHT, camn n3bPseTe npOBepka. Ako OTkpneTe np6nem, KOTo He e o6rCHe B pKoBOOCTBOTO, He ce ONTBAite Da pa3rno6BaTe IHcTpMeHa, MaunHata nnMoyn. BmecTo TOBa ro 3aHeceTe BnKo ot OtopuHpaHnte cepBnHa Ha Makita, konTO BuHaru n3non3Bat 3a peMOHTte pe3epBnuaactn ot Makita.
Cobetn 3a OndpkyBaHbe MaKcImaJIeH pa6OTeH BeK Ha 6aTepnjata
- 3aMeHete ja Kacetata 3a 6aTepujata nped ceNocho da ce nCnpa3n. Cekoraaw 3annpajte ja pa6oTaT co anatot n 3aMeHeTe ja Kacetata 3a 6aTepujata KORA Ke 3a6eKnte deka anatot daBa NOMaJ MOKHOCT.
- Hnkoraaw HeoJTe da nonHnnte eIIOcHO nonHa kaceta 3a 6aTepuja. IpeKymepHTo nONHeBe ro cKpaTyBa pa60THnOT BEK Ha 6aTepnjata.
- Nonhe ja kacetata 3a 6atepujata Ha co6Ha TemnepaTypa od 10^ - 40^ .IozBoJeTe 3arpeahata kaceTa 3a 6atepujda ce onaHn peD da ja cTabnte Ha nonHebe.
- Kora He ja KopnCTnte kacetata 3a 6atepnja, n3BaTe ja aJatOT nn noHaoyt.
- Nonhe ja kacetata 3a 6atepnjata dokonky he ja Kopncntte nooJro BpeMe (noBeKe oJ wect meceu).
ОПИС HA ДЕЛOBΥТЕ
Cn.1
Iobp3yBaHbe Ha ypeDoT co aNaTOT IIN MaunHaTa
- ɪn3BJIeueTe ro Ka6eJIoT oJ neBaTa nɪn deChata cTpaHa ha KytjuJaTa 3a 6aTeprɪn. Kora ke ro n3BJIeKyBaTe Ka6eJIoT, noctaBeTe ro BO dPrKaUHe TKe kako wTo e npɪkʌkaHo Ha cɪnkɑta.
Cn.18: 1. Ka6e n 2. Dpxkau
2. Hocete ro ypeoT.
3. BmetheTo npKnyokot Ha aanTepot nJn anaTOT/MaunHaTa 3a HanojyBaHe BO uTEkepot Ha kyTuJaTa 3a 6aTePmN do Kpaj, Taka wTO O3HaKaTa CO CTpeJIka e nopamHeta co OHaa HA uTEkepot.
Cn.19: 1. Пиклuyok 2. Штейр 3. Oзнaka co CTpeпka
3A6ENEWKA:KoraKe rN ncknyuBaTe npNKnyOkOT uTKepeo,He dpXeTe rN Ka6nIte, Tyky dpxKeTe rN npNKnyOkOT uTKepeo.Bo cnpoTHBHO,Ka6nIte MoKeJa ce OwTeTa N da npEdn3BnkaaT DeΦeKT Ha ypeIoT.
HANIOMEHA: PnKnyOkOT uTKePOT ce nckIyUbaaT aKO ce npImeHn OndepEno ONTOBAPyBaHe.
- Montpajte n aandaTepnTe Ha aJatot nn MaunHaTa Ha nCT HauH KAKO N KaceTata 3a 6atepujata.
Cn.20:1.AanTep
3A5ENEUKA: 3a aanat ha 6atepnn nnn MaunHa o18V, KopncTeTe ro aanTepo3a 18V.3a anat Ha 6atepnn nnn MaunHa o36V (18Vx2), KopncTeTe rnaanTepuTe 3a 36V (18Vx2).3a anat nnMaunHa HanojyBaHn co 6atepnja od 36V-40VMaKc.,kopncTeTe rnaanTepuTe 3a 36V-40VMakc.
3a aanatn nn MaunHc co dnpkTHo nOBp3yBaHe He e notpe6eH aanTep.
3A6ENEWKA: Kora MOHTnpaTe aadantepn Ha anatot nnn MaunHaTa, MOHTnpajTe ro aanTepo co 2 ka6na Ha JOKaunjata wTo e npKakKaHa Ha cnkkata.
Dokolky HnnpabunHO mOHTnpate Ka6Jnte, aanTepot co 2 ka6Ja He MoKe da ce BMeThe Dokpaj. Bo OoJ cnUyaj, He BMeTHyBajTe ro aanTepot co cna. Bo cnpOTnBHO, aJatot nnn MaunHaTMOKe da ce OWTeTn.
Cn.21: 1.AdaanTep co 2 ka6na
Cn.22: 1.AdaanTep co 2 ka6na
HANOMEHA: Hacokata Ha Ka6eIoT Ha aanTepoT MoKe Da ce CMeHN BO ONCe OJ OkOJy 180 cTepeHn.
- PnTnCHeTe ro KonyTe 3a HanojyBaHe 3a da ce Bknyu HanojyBaHeTo. 3a NcknyuBaHe Ha HanojyBaHeTo, 3aDpxKeTe ro KonyTe 3a HanojyBaHe npTnCHaTO HeKoNky CekyHdN.
Cn.23:1.Konue 3a HanojyBahe
KopncTeHbe Ha dpXaUHTe 3a Ka6eJ
BHIMAHHE: Pnkaute ro caMo Ka6eNoT oKytjata 3a 6atepujata Ha dpXaHTe 3a Ka6eH. He npkaaybajte ro Ka6eNoT od aanTepeHtHa dpXaHTe 3a Ka6eN. PnkaayBaHeTo Ha Ka6eNoT Od aanTepeHt MoKe da npedn3BnKa HecpeKa n dadoje do nobpega.
Cn.24
Cn.25
MoKe Da ro npKauHte Ka6eNoT Ond KyTuJaTa 3a 6aTepuJa Ha dpXkaUOT 3a Ka6eJ KAKO uTo e npKakKaHo Ha cNkata.
Cn.26: 1.Држача ka6e9
IcTo Taka, MoKe Da Iro npKauHTe Ka6eJOT KOpNCTejKn ro cAmO dpKaayOT 3a Ka6eH Ha NojacOT 3a peMeH KaKO uTO e npKakHa HcNkata.
Cn.27: 1.Држача ka6e9
ДржачиTe 3a Ka6eI MoKe Да ce npiKaayat ИИн HaJIeBaTAt ИИн Ha DeChaTa CTpaHa Ha peMeHOT 3a paMo IpeMeHOT 3a noJac.
TEXHIYHXAPAKTEPNUCTNKN
Pn3HaueHn
IopTaBn6KKnBHeHnae3Mory BiDOKpemntn akMyJrTopn BiD iHCTpyMeHTa a6o MaunHn, 10o p6nTb ix npdaTHmN dnn Tpnbanoi po60Tu Jxom 3amHn BCTaHOBNeHnx AkMyJrTopiB.
Ley npucpi MoKHa BnKOpNCToBbATN 3 yKa3aHMM dani IHCTpymeHTAm a6o MaunHAM.
IHCtpymeHT a6o MaunHa 3 eJektpoxnBneHHaM BiakmyjTopa 18 B
IHCtpymeHT a60 MaunHa 3 eNeKtpOKNBneHHaM BiakmyJrTopa 36 B (18 B x 2)
IhctpymEnT a60 MaunHa 3 eNeKtpoKnBneHnM BiD akymyIaTopa 3 makcunMaNbHO HanpyroIO 36-40 B
- IHCTpymEnT a6o MaunHa 3 eNEKTOXNBHeHHaB iD akymyIaTopa (6e3nocepedHim npueHaHHaM Do nOpTaUNBHO 6Joka XNBJIeHHa)
3axnct BiD nepeBaHTaXeHHN
KIO IHCTpymeHT a60 akyMylTOp BkOpncTOBycTBcB yMObax HAdmipHoro CNOXINBaHHc CTpyM, IHCTpymeHT ABTomaTHNo BmIKKaETbc8 6e3 6yDb-koRo nonepdIXeHH. Y TAKOMy pa3i BmKHITb IHCTpymeHT i npnnHITb po60Ty, NiD Yac BnKOHaHHraKOI IHCTpymeHT 3a3HAB nepeBaHTaxeHH. Ioo6 nepe3anycttN IHCTpymeHT, yBIMKHITb NOrO 3HOy.
3axnct BiD neperpiBaHHa
KoH iHcTpyment a60 akymyIaTOp neperpieTbcra, HCTpyment 3ynHHbCRA ABtOMaTHUHO. Y Takomy BnnaKy Do3BOJIte iHCTpymeHTy AkymyIaTOp OxONOHyTN, nepu HIX 3HOBy BBIMKHytN iHCTpymENT.
3axnct BiD haMipHoro po3pIKeHHa
KoI3apJd akymyIaTopa cTae HeIOCTaTHIM dIra nOanbIooi po60n, IHCTpymeHT aBtOMaTHUHO 3ynHReTbcra. Y TAKOMY BUNaIKy BNIMITb akymyIaTOp 3 IHCTpyMeHTa Ta 3apJdItb Ioro.
KhONka XINBJIeHHra Ta iHdNKaTOP aKymyIaTopa
OBEPEXHO: Nepu Hix BkHouaTu npctpi, nepekoHaTeCBy TOMy, 0io IHcTpymeT a6o MaunHy BmKHeHO. B iHwOMy BnAky IHcTpymeHT a6o MaunHa MoKyTB pAnTOBO BBIMKHyTnc Ta 3ano- diTn TpaBMy.
Pnc.5:1.IHnKaTOpXnBHeHH2.KhONKa XNBHeHHa
U6 yBIMKHyTN KNBHeHH, HATNCHTb KHONKY KNBHeHH. IHNkATOp KNBHeHH 3acBiNTbC3eJIeHM. U6 BIMKHyTN KNBHeHH, HATNCHTb Ta yTPMMyTe KHONKY KNBHeHH npOTAROM KINbKOx CEyHd.
PIMITKA: RaKo npctpi i nikNoeHn iNCTpyMeHT a6o MaunHa He BnKOpNCtOBaTmUyTbCn POTAROM 8 rOuH, npctpi ABtOMaTHNO BmKHeTbcr.
KJIO OCHOBHn iHnKaTOp XnBJIeHHa 6nMaac 3eHnHM,ue O3Haac,io aadantep He niDKIouHeo Do npNCTPOO aOo akMyJrTOpn PO3PraKeHi. U bOMy BnnaKny iNkIooHTb aadantep Do npNCTPOO aOo 3apAITb akymJrTOpn. Jxu oamna npodobxye 6nImTa 3eHnM, DNB.p03dIN Nowky Ta yCyHeHH HecnpabHocTei. KJIO iHnKaTOp OCHOBHO XnBLeHHa 6nMaec NonepeMiHNO YepBOHm I 3eHnM, BIMKHITb XnBJeHHa, a NOTIM YBMKHITb Horo 3HOB. Jxu OCHOBHn iHnKaTOp XnBJIeHHa npodobxye 6nImTa YepBOHm I 3eHnM NO cep3i nicra BBIMKHeHHa XnBLeHHa, 3BepHITbc DO MicceBOrO cepBicHoro ceHTpy Makita dJa npoBeDeHHa peMOHTy.
INPIMITKA: RaKIO BBIMKHyTn NpeMnKaU JNKBHeHHI INCTpymeHTa a60 MaunHn Opa3y Nicra BBIMKHeHHI NOPTaNBHO 6boka XuBHeHH, IHNkaTOPn IHCTpyMeHTa YMaunHn MOxYb Yka3yBaTu Ha p6oTy CnCTemn 3axncty. Y Taki ciTuayi cnpo6ynte 3anyCTTN IHCTpymeHT a60 MaunHy. RaKIO iHNkaTOPn 3rachYb, IHCTpymeHTom a60 MaunHO MOxHa KOpNCyBaTnc. RaKIO iHNkaTOPn npODBKyOTb RopITN, NepeBipTe oChOBHm iHNkaTOP xuBHeHHa H nOpTaNBHomy 6bouci XuBHeHH I yCyNbTe npo5JeMy 3riDHO 3 peKomeHdaucim Po3diJy «UCYHEHHI HECPNPABHOCTEIN
HaTnCHiB KONky JxNJIeHHa IJnepeBipKn pIBH 3apAky akymyIaTopa. HndkaTOp IJKoKHO aKymyIa- Tophoro BiCiKy 3aropaeTbcra np6bn3Ho Ha 5ceynd.
Puc.6: 1. CbiTIOBNI iHdNkaTOP Hn3bKOro 3apAky aKymyIaTopa
BukopncTaHnB iDinEnn Dna aanTepa
OBEPEXHO: He BnKOpncToByTe uei npncpti, KOJI WHyp 3aΦikcObaH 3acti6ko 3 IInnyuKo 3 BiDineHHI dIra aanTepa.
AanTepn MoKHa noklaTn Do BiDineHHn aan- Tepa, k NOKa3aHO Ha pncyHky.
Pnc.7:1.AanTp 2.BiDineHnIy Iy anaTepa
Pnc.8:1.AanTp 2.BidineHnIy anaTepa
3BOPKA
OBEPEXHO: Nepu Hix BnKohyBaTu 6yDb-aki pOboTu 3 npncTpoE M, nepekoHaItecA, 10 npucTiPi BmKHeHO, a KaceTy 3 akymyIaTOPoM 3HrTO.
36npaHnI npncTpoK
- PnKpinitb akymyIaTOPHn yuNK do onopHOI nactHH, k noka3aHo Ha pucHyKy. 3a6NokyTe BaxeJI 3 o6x cToPiH onopHOI nactHH niCn pynkpinJeHHAkyMnyaTOPHOrO aUkna.
Puc.9: 1. BaxiJIb 2. AkymyIaTOpHnЯцИK
3. OnopHa nlaCTnHa
OBEPEXHO: IpekoHaTeC8 B Tomy, 10 aKymIaTOPnI RaUN K HAdiHOn 3akpinHeHO Ha onOpHi nactnHt Ta 3aikcoBaHO BaKeJMaN. AkymIaTOPnI RnK MoKe Bnactn NiD Yac nepeHeceHHa6o BnKOpNCtAHn npncptpO Hi CTAtn pnpHHO TpaBMn.
- BiDpyeHIOte noLoXeHHn noChORo peMeHn. NotarHtB Bropy BaXiNb peryIIOBaHHn BnCOTn,notim BiDpyeHIOte noLoXeHHn noCHORo peMeHn,3CyHyBwn onOpHy nlaCTnHy,i NobepHiB BaXiNb y BuxiDHe noLoXeHHn.
Pnc.10: 1.BaxkibpeyHOBaHHB BUCOTn2.OnopHa nnaTnHa3.Noarchn peMHb
YBAFA:KaBaxinbperynIOBaHHBACOTN nocna6JeHo,3aTnHtbrayky BaxeJpeyIHO BAHHBACOTN.He 3aTarynte raKy HADTO CnIbHO. Upe3ue Baxinb perynIOBaHHBACOTN He 3MOKe pyxatncra.
Pnc.11:1.
3.Пикпіпь BiДiIeHнДЯаIaNTepa Do noC-Horo peMeH 3acti6ko3 NInyUko,ЯK noka3aHoHa pucyHKy.
Pnc.12: 1.BiDineneHnIaIaIantepa
ПРИМТКА: BiДиЛeнгЯ дя aanTepa можна npinkpɪnɪtu Na liBOMу abo npabOMy boci nochoro peMeHЯ.
-
BiDpyrIIOte wnpHy nIeOBOrO pEmeHra 3a donomoroIO pEmeHrypIIOBaHHra WnpHn.
Pnc.13: 1.Pemihb peryioBaHHaHn -
HanaHntb npucptpi, 3aikcyu Te npkky nochoro peMeHa BIDperyIouTe NOro DOxNHy.
Pnc.14: 1. PpJxka
PIMITKA: Pemihb MoKHa cKJaCTn 3aKpInNTn 3acti6ko 3IynykuO, Jk NOKa3aHO Ha pncyHky.
Puc.15: 1.PemHb
- BiDperyIIOte IneUOBn peMih 3a DOBXHIOJ.
Puc.16:1.IIpeOboN peMInb
INPIMITKA: Pemihb MoKHa CkJaCTn 3aKpInNTn 3acti6ko 3linnyko, kNoka3aHO Ha pncyHky.
Puc.17: 1. Pemihb
POBOTA
OBEPEXHO:Пдчacнадягнгпсстpoю po3taowobnyte pemihb ha o6ox npeax. B iHOMy BnnaKpy npucptpi MOKe Bnactn Pd qac nepheceHHa6o BnKOpNCtahHry n CTAtn pnpuHNO TpaBMn.
OBEPEXHO: Y pa3i HaJraHn npncIpoo po3aowByte noRo ha cnnHi. B iHwomy Bnpanky npictpi MoKe Bnactn nic yac po60Tu CTATN npHHO TOpaBMn.
OBEPEXHO: 3aBXn BmKaNte iHcTpymeHT a6o MaunHy nepey yBIMKHeHHM npncTpoo a6o nikNoueHHM wTekepa aadTepa a6o iHcTpMeHTa /MaunHn DO rHi3da akymnyTopHoro Rnka. B IHOMy pa3i iHcTpymeHT a6o MaunHa MOkytb panTOBO BBIMKHyTnca Ta 3anOiaRn TpaBMy.
Bi'd'cHaHHIhCTpyMeHTa
HaTnchItb Baxeni Ha npjxu, 06 po36IokyBatn ii.
Pnc.36:1.Baxinb
PIMITKA: DeaKi TnPi peMiHcIb He OchaueHi npKko.
3HraTBAbapiHiNcTuayaui
- 106po36nokybatnpkky, HATNCHTb Baxkei Ha npkui norCHoro pemeH.
Puc.37:1.PpKa2.BaxiNb - 3HIMITb nIeOBN peMHb, 06 BiD'edHaTH iHCTpyMeHT i npucptpi.
Pnc.38:1.IneOboI peMihb
TEXHlYHE OBCJyYOBvBAHHa
OBEPEXHO: NepeBnKoHaHnM nepeBipKn a6o 06cnyroByBaHHa 3aBXdN BmHKaTe npnctpi i BnMaTe Kacety 3 akymyIaTOpOM.
YBAG: Hikon He BnKOpncToByte ra30iH, 6eH3nH, po3piJxvBaU, cnIPT Ta noDi6Hi peoBHN. IX BnKOpncTaHH MoKe npN3BeCTn Do 3MiHN KObOpy, deOpmaui a6o nOaB TpiuH.
Дяза3a6e3neueHЯБE3NEKInTa HADINHOCTI npodykii, II peMOHT, a TAKOXpo6Otn 3 o6cnyroByBaHHa6o peryNHOBAHH NOBHHI BIKOHyBaTncb yNOBHOBaKeHNMa a6o 3aBOcBKMn cepBICHmU cEHtpamMakita i3 BHKOpNCtAHHm 3aHactnH BINO6HNTBa KOMNaHII Makita.
UCYHEHHH HECNPABHOCTE
Iepw Hix 3BepTaTc3 npBODy pemOHTy IHCTpymeHTA, npoBeiTy Noro nepeBipKy camocTiHo. Y pa3 BnABnHHeCnpaBHOcti, kA He NoRCHIOEbCBy iNCTpyKuii 3 ECKnPyataui, He HamaraIteCpa036paTu IHCTpymeHT, MaunHy a6o npucpii. Hatomictb 3BepHITbcDo abTOPu3OBaHnx cepBicHx ceHTpB Makita, B kux dny pemOHTy BNkOpncToByOTbc TINbKn 3anachi qactHn BpuO6HnUcTBa KOMnaHII Makita.
KhONka NHTaHnI n HdNkATop aKKymyJrTopa
BHUMAHNE:прждчEBKJIIOUaTb yCTpOINCTBO,y6eIInTeCbBTOM,HTO INHCTpyMeHT NIM MaUNHa BbIKNIOUeHa.B npOTnBHom cnyaee INHCTpyMeHT NIN MaUNHa MOKeT cNYaHOB KNIIOHTbcrN CTaTb pNUnHO TpaBMbl.
Pnc.5: 1.OCHOBHOn HndNKaTOP nHTAHN2.KHOHnKa nHTAHN
YTo6bI BKNIOUHTb NITaHHe, HAXMNTe KHOKNy NITaHn. OCHOBHO INDNKATOP NITaHn 3arOpNTc 3eNEhBM CBETOM. YTo6bI BbIKNIOHTb NITaHHe, HAXMNTe KHOKNy NITaHn I yDepXINBaIte ee B TeueHne HeCKOJIbKnx CeKyHd.
INPMMEUHNE:EcInyCTpOncTBO NODKNIOUeHNb INHCTpyMeHT INN MaUNHa He NCNOB3YOTcB TeueHne 8 YacOB, yCTpOncTBO ABTomATnuecknOTKJIOHTCra.
EcnoocOBHOHnDnKaTOp nHTaHnMaRae3eJeHbIM, 3TO 3NaHT, YTO aAnTep He noKIOUeH K yCTpoiCTBy nnAkkymyIaTOpbl pa3pJKeHb. B 3ToM cLyuee noKIOUHTe aanTep K yCTpoiCTBy nn3apJInTe aKKymyIaTOpbl. Ecnn NaMa nPpOOnkaeT MIRat b3eJeHbIM, cm. pa3deN noncKa n ycTaPHeHnOJaOK.
Ecnn HndkaTop oCHOBHO ng TaHnMa rnaet nonepemeho KpaChbIM n 3eJeHbIM, BblKnIOuHTe NITaHne, a 3aTeM BkIIOUHTe erO. Ecnn OCHOBHO uHdKaTOp nITAHN IPOdoJXaeT MIRATb KpaChbIM n 3eJIeHbIM nonepemeho NocNe BkIOUeHn PNTAHN, o6paTntEcB MecTHbI ABTOpN3OBAHHbI cepBnchbI ueTp Makita dIpeMOHTa.
INPIMEUYAHNE: EcnBbl BkHIOUHn rnaHBn nepeKIOUaTeNb nHTANHn IHCTpymEnTa NnMaunHbI cpa3y nocne BkIOUeHNn NOPtaTnBHO 6NoKa nITaHn, INDnKAToPb I NcHCTpymEn Ta Nn MaunHbI MOrY Yka3bBaTb Ha pa6Oy 3aunTHoCnCTembl. B 3tOM Cnyae nonpo6ynte 3aynCTnB IHCTpymENT Nn MaunHy. Ecn INDnKAToPb I noracHy, MoXHo npctynaTb K nCNOB3OBaHN ONCTpymEnTa Nn MaunHbI. Ecn INDnKAToPb I npdoJxqAOT ropTe, npOBepbTe OCHOBHO INDnKAToP nITaHnHa nop-taTNBHom 6JIOKe nITaHn I yCTpaHnte HENOnaKnv B COOTBeTCTBnn C peKOMeHaauMn pa3deJa "PONCK N YCTPAHEHNE HENCnPABHOCTeN".
Hakmte KhoNky nHTaHnI npOBepKn yPoBn 3apya akKymyTopa. HndkaTOp IJn KaKdoRo aKMyTApHorO oTeKa 3aropaeTc np6n3nteNbHO Ha 5 cekyHd.
Pnc.21: 1.AanTepe 2 Hypamn
Pnc.22:1.AanTepe 2 uHypamn
ПРИМЕЧАНЕ: HanpaBHeHne shHypa aДanTepe MoKHO n3MeHЯrB B dIaNa3OHe npi6JIu3NtEJIbHO 180 rpaJycOB.
- HaxMnte KhoNky NtAHHa, YTO6bI BkJIOHHTb NtAHHe. YTO6bI BbIKHOHTb NtAHHe, HAXMnte KhoNky NtAHHa N ydePknBaJIte ee B TeueHHe HeCKOJIbKnx CeKYHd.
Puc.23:1.KhONka nTaHnA
IcnoJb3OBaHne depXaTeNei shHypa
BHUMAHNE: PnpcoeHnHnTe K depXaTeJnmpoBOOB TOnbKO npBOoAkkymyTOpHOrO otceKa. He npcoeHNHnTe K depXaTeJnmpoBOB npBOoDa nepexoDHnKOB. 3To MoKET pPUBecTn K aBapnn nnn TpaBme.
Pnc.24
Pnc.25
PpOBoAkkyMylTOpHOrO OTeKa MoXHo PpUcOeDHHHT K DePkaTeJAm PpOBoB, KaK Noka3aHo Ha pncuHke.
Pnc.26: 1.Дерхаельшура
Takke MoXHo npKpeNtB uHyp c NOMOuToTbKO DePkaTeIaUHyp dIy NoAChORo pEmH, KaK NOKa3aHO Ha pucyHke.
ChyTne B abapnHOn cnTyauznn
- TTo6bl pa36JIOKupOBaT npjKKy, HaxMITE pbyarHa npjXke nOCHORo pemHra.
Puc.37:1.3amok2.Pbuiar - CHIMITE nIeueBOI peMeHb, YTO6bl OTcoeINHTb INCTpyMeHT uYcTpoNCTBO.
Puc.38:1.PnneyeBOIpeMeHb
OBCJNYXINBAHNE
BHIMAHNE: Ipeed npoBeHem npoBepKn nn pa60 nO Texo6cnyxuBaHIO Heo6XODMO BbIKNoHTb yCTPOINCTBO n ChrTb 6NOKaKymyIaTopa.
PIMMEUHNE:3anpeuaeTcNcnoB3oBaTb 6eH3nH,paCTbOpHTeN, cnprt n dpyrne noo6- HbIe XnKocTN.3To MOKeT npNBecT N oBeCuBe- YnBaHIO,deOpMaunn TpueHHaM.
Дя obecneeye H3OJACHOCTN i HADEXHOCTI obopydOBaHnpeMOHT,IO6oe dpyroe texo6cnykBaHne nnn peryIpOBky Heo6xOdmo npOn3BOuNTb B yONHomOeHHbIX cepBuc-ueHTpax Makita nINCEPBVC-ueHTpax pEepnTnC nCnOJIb3OBAHnEM TOJIbKO CMeHHbIX uacte INpON3BODCTBa Makita.
ПОИСК И YYSTPAHEHNE HENCПAPBHOCTEIN
Ipejde yem obaaatabcr no noBODy pemOHta, npoBeiTe OCmOTp cAmOCTeJIbHO. Ecnn OcbnapaBHOCTb, He yka3aHHa B pyKOBOCTBe, He nbTAntecb pa3o6paTb IHCTpyMeHT, MaunHy nHn ycTPOINCTBO. O6paNTecbB OIN H3 ABTopu3OBaHHbIX cepBnCHbIX ueHTPOB Makita, B KOtOpBX drr peMOHTa NcNoJIb3yOTc TOnbKO opuHHaHbHbIe DetanMakita.
| Немрмalthoe состаянée | Осовнои Иndикa- Top пitaимя | Прочина Способ устара Е�юя | Yuctановпа addanterpbi на inhchestу мел ил машини. Убадпесь в наджноctи установки адапетов. |
| Инданайт заго- рается залий ц�betом. | Ha inhсттумент ялmaшини не установ- лени举报а addanterры. | ||
| Инданайт, машини ялшунь радал- торов посторпсь. | Даite остын inhсттумент ялmaшини, а тося устричны и addanterу. Посте хлажения Великийities и сныв Вели- чITE пitaима. С breasts c abtopиизовahlс мервics- ныم цentром Makita дя вальеня pemonота. | ||
| Ламма мигаet Зелегим. | Штека addanterpa ял inhсттумента / maшинь не вставлиь в гесло akкумен- торно яшка. | Пождουнite устек к гесло. Проберные наджноctь coeditеля гесло и.stеkeра. | |
| Остшө�ся за рада akкументopa не достаточи. | Зардпente akкументobл ил заменite akкументы заржени. 34. | ||
| При escлььзованный устричны с inhstyrimentом ялmaшини сиз__ питаним ot akкументopa с нарра__ пимышпюно два akкументopa. Остшө�ся за рада в устричны не в; установленью два akкументopa. Ostashig�ся за рада в дых akкументopa. пх не doстаточи. | Установпо краийей мера од: akкументВ в akкументь отся 1 ил 2 и{kak минимуIM од: akкументВ отся 3 ил 4. Зардпente akкументы ял заменite akкументы заржени. п. Yield of the work of the work of the work of the work of the work of the work of the work of the work of the work of the work of the work of the work of the work of the work of the work of the work of the work of the work of the work of the work of the work of the work of the work of the work of the work of the work of the work of the work of the work of the work of the work of the work of the work of the work Yield of the work of the work of the work of the work of the work of the work of the work of the work of the work of the work of the work of the work of the work of the work of the work of the work of the work of the work of the work of the work of the work of the work of the work of the work of the work of the work of the work of the work of the work of the work of the work of the work of Yield of the work of the work of the work of the work of the work of the work of the work of the work of the work of the work of the work of the work of the work of the work of the work of the work of the work of the work of the work of the work of the work of the work of the work of the work of the work of the work of the work of the work of the work of the work of the work of the work Yield cf the work of the work of the work of the work of the work of the work of the work of the work of the work of the work of the work of the work of the work of the work of the work of the work of the work of the work of the work of the work of the work of the work of the work of the work of the work of the work of the work of the work of the work of the work of the work of the work of the work of Yardshig�. Yield of the work of the work of the work of the work of the work of the work of the work of the work of the work of the work of the work of the work of the work of the work of the work of the work of the work of the work of the work of the work of the work of the work of the work of the work of the work of the work of the work of the work of the work of the work of the work of the work 30. | ||
| Ustpoichstby Neobxodimo nepekliquitchbcs с одогу о Akkuументopa на дугов. | Бухлочи netнсту'ment ялmaшиу, a 3atem сныв Великий Hajkmite Кноку пitaимя на устричсы. Hajkmite Кноку пitaимя на устричсы. Hajkmite Кноку пitaимя на устричсы. Hajkmite Кноку пitaимя на устriчсы. Hajkmite Кноку пitaимя на устriчсы. Hajkmite Кноку пitaимя на устriчсы. Hajkmite Кноку пitaимя на устriчсы. Hajkmite Кноку пitaимя на устriчсы. Hajkmite Кноку пitaимя на устriчсы. Hahmigдя валь的所有 Hahmigдя валь的所有 Hahmigдя валь的所有 Hahmigдя валь的所有 Hahmigдя валь的所有 Hahmigдя валь的所有 Hahmigдя валь的所有 Hahmigдя валь的所有 Hahmigдя валь的所有 Hahmigдя валь的所有 Hahmigдя валь的所有 | ||
| Ustpoichstby Neobxodimo Nepekliquitchbcs с одогу о Akkuументopa на дугов. | Yield cf the work of the work of the work of the work of the work of the work of the work of the work of the work of the work of the work of the work of the work of the work of the work of the work of the work of the work of the work of the work of the work of the work of the work of the work of the work of the work of the work of the work of the work of the work of the work of the work of Yield cf the work of the work of the work of the work of the work of the work of the work of the work of the work of the work of the work of the work of the work of the work of the work of the work of the work of the work of the work of the work of the work of the work of the work of the work of the work of Yield cf the work of the work of the work of the work of the work of the work of the work Yield cf the work of the work of the work of the work of the work of the work of the work of the work of the work of the work of the work of the work of the work of the work of the work of Yield cf the work of the work of the work of the work of the work of the work of the work of the work of the work of the work of Yield cf the work of the work of the work of the work of the work of the work of the work of Yield cf the work of the work of the work of the work of the work of the work of Yield cf the work of the work of the work of the work of Yield cf the work of the work of the work of Yield cf the work of the work of Yield cf the work of the work of Yield cf the work of Yield cf the work of Yield cf the work of Yield cf the work of Yield cf the work of Yield cf the work of Yield cf the work of Yield cf the work of Yield cf the work of Yield cf the work of Yield cf the work of Yield cf the work of Yield cf the work of Yield cf the work of Yield cf the工作 Yield cf the工作 Yield cf the工作 Yield cf the工作 Yield cf the工作 Yield cf the工作 Yield cf the工作 Yield cf the工作 Yield cf the工作 Yield cf the工作 Yield cf the工作 Yield cf the工作 Yield cf the工作 Yield cf the工作 Yield cf the工作 Yield cf the工作 Yield cf the工作 Yieldcf the工作 Yieldcf the工作 Yieldcf the工作 Yieldcf the工作 Yieldcf the工作 Yieldcf the工作 Yieldcf the工作 Yieldcf the工作 Yieldcf the工作 Yieldcf the工作 Yieldcf the工作 Yieldcf the工作 Yieldcf the工作 Yieldcf the工作 Yieldcf the工作 Yieldcf the工作 Yieldcf the工作 y stp Yieldcf the工作 Yieldcf the工作 Yieldcf the工作 Yieldcf the工作 Yieldcf the工作 Yieldcf the工作 Yieldcf the工作 Yieldcf the工作 Yieldcf the工作 Yieldcf the工作 Yieldcf the工作 Yieldcf the工作 Yieldcf the工作 Yieldcf the工作 Yieldcf the工作 Yieldcf the工作 Yield(cf the工作 Yieldcf the工作 Yieldcf the工作 Yieldcf the工作 Yieldcf the工作 Yieldcf the工作 Yieldcf the工作 Yieldcf the工作 Yieldcf the工作 Yieldcf the工作 Yieldcf the工作 Yieldcf the工作 Yieldcf the工作 Yieldcf the工作 Yieldcf the工作 Yieldcf the工作 Yieldcf the工作 YNL Yieldcf the工作 Yieldcf the工作 Yieldcf the工作 Yieldcf the工作 Yieldcf the工作 Yieldcf the工作 Yieldcf the工作 Yieldcf the工作 Yieldcf the工作 Yieldcf the工作 Yieldcf the工作 Yieldcf the工作 Yieldcf the工作 Yieldcf the工作 Yieldcf the工作 Yieldcf the工作 Yield cf the工作 Yieldcf the工作 Yieldcf the工作 Yieldcf the工作 Yieldcf the工作 Yieldcf the工作 Yieldcf the工作 Yieldcf the工作 Yieldcf the工作 Yieldcf the工作 Yieldcf the工作 Yieldcf the工作 Yieldcf the工作 Yieldcf the工作 Yieldcf the工作 Yieldcf the工作 YNL Yieldcf Yieldcf Yieldcf Yieldcf Yieldcf Yieldcf Yieldcf Yieldcf Yieldcf Yieldcf Yieldcf Yieldcf Yieldcf Yieldcf Yieldcf Yieldcf Yieldcf Yieldcf Yieldcf Yieldcf Yieldcf Yieldcf Yieldcf Yieldcf Yieldcf Yield(cf Yieldcf Yieldcf Yieldcf Yieldcf Yieldcf Yieldcf Yieldcf Yieldcf Yieldcf Yieldcf Yieldcf Yieldcf Yieldcf Yieldcf Yieldcf Yieldcf Yieldcf Yieldcf Yieldcf Yieldcf Yieldcf Yieldcf Yieldcf Yieldcf Yield cf Yieldcf Yieldcf Yieldcf Yieldcf Yieldcf Yieldcf Yieldcf Yieldcf Yieldcf Yieldcf Yieldcf Yieldcf Yieldcf Yieldcf Yieldcf Yieldcf Yieldcf Yieldcf Yieldcf Yieldcf Yieldcf Yieldcf Yieldcf Yieldcf Yieldc Yieldcf Yieldcf Yieldcf Yieldcf Yieldcf Yieldcf Yieldcf Yieldcf Yieldcf Yieldcf Yieldcf Yieldcf Yieldcf Yieldcf Yieldcf Yieldcf Yieldcf Yieldcf Yieldcf Yieldcf Yieldcf Yieldcf Yieldcf Yieldcf Yieldf Yieldcf Yieldcf Yieldcf Yieldcf Yieldcf Yieldcf Yieldcf Yieldcf Yieldcf Yieldcf Yieldcf Yieldcf Yieldcf Yieldcf Yieldcf Yieldcf Yieldcf Yieldcf Yieldcf Yieldcf Yieldcf Yieldcf Yieldcf Yieldcf Yieldmf Yieldcf Yieldcf Yieldcf Yieldcf Yieldcf Yieldcf Yieldcf Yieldcf Yieldcf Yieldcf Yieldcf Yieldcf Yieldcf Yieldcf Yieldcf Yieldcf Yieldcf Yieldcf Yieldcf Yieldcf Yieldcf Yieldcf Yieldcf Yieldcf Yielddf Yieldcf Yieldcf Yieldcf Yieldcf Yieldcf Yieldcf Yieldcf Yieldcf Yieldcf Yieldcf Yieldcf Yieldcf Yieldcf Yieldcf Yieldcf Yieldcf Yieldcf Yieldcf Yieldcf Yieldcf Yieldcf Yieldcf Yieldcf Yieldcf Yieldef Yieldcf Yieldcf Yieldcf Yieldcf Yieldcf Yieldcf Yieldcf Yieldcf Yieldcf Yieldcf Yieldcf Yieldcf Yieldcf Yieldcf Yieldcf Yieldcf Yieldcf Yieldcf Yieldcf Yieldcf Yieldcf Yieldcf Yieldcf Yieldcf Yieldfc Yieldcf Yieldcf Yieldcf Yieldcf Yieldcf Yieldcf Yieldcf Yieldcf Yieldcf Yieldcf Yieldcf Yieldcf Yieldcf Yieldcf Yieldcf Yieldcf Yieldcf Yieldcf Yieldcf Yieldcf Yieldcf Yieldcf Yieldcf Yieldcf Yield Cf Yieldcf Yieldcf Yieldcf Yieldcf Yieldcf Yieldcf Yieldcf Yieldcf Yieldcf Yieldcf Yieldcf Yieldcf Yieldcf Yieldcf Yieldcf Yieldcf Yieldcf Yieldcf Yieldcf Yieldcf Yieldcf Yieldcf Yieldcf Yieldcf YieldCF Yieldcf Yieldcf Yieldcf Yieldcf Yieldcf Yieldcf Yieldcf Yieldcf Yieldcf Yieldcf Yieldcf Yieldcf Yieldcf Yieldcf Yieldcf Yieldcf Yieldcf Yieldcf Yieldcf Yieldcf Yieldcf Yieldcf Yieldcf Yieldcf Yield CF Yieldcf Yieldcf Yieldcf Yieldcf Yieldcf Yieldcf Yieldcf Yieldcf Yieldcf Yieldcf Yieldcf Yieldcf Yieldcf Yieldcf Yieldcf Yieldcf Yieldcf Yieldcf Yieldcf Yieldcf Yieldcf Yieldcf Yieldcf Yieldcf Yieldof Yieldcf Yieldcf Yieldcf Yieldcf Yieldcf Yieldcf Yieldcf Yieldcf Yieldcf Yieldcf Yieldcf Yieldcf Yieldcf Yieldcf Yieldcf Yieldcf Yieldcf Yieldcf Yieldcf Yieldcf Yieldcf Yieldcf Yieldcf Yieldcf Yieldpf Yieldcf Yieldcf Yieldcf Yieldcf Yieldcf Yieldcf Yieldcf Yieldcf Yieldcf Yieldcf Yieldcf Yieldcf Yieldcf Yieldcf Yieldcf Yieldcf Yieldcf Yieldcf Yieldcf Yieldcf Yieldcf Yieldcf Yieldcf Yieldcf Yieldaf Yieldcf Yieldcf Yieldcf Yieldcf Yieldcf Yieldcf Yieldcf Yieldcf Yieldcf Yieldcf Yieldcf Yieldcf Yieldcf Yieldcf Yieldcf Yieldcf Yieldcf Yieldcf Yieldcf Yieldcf Yieldcf Yieldcf Yieldcf Yieldcf Yieldxf Yieldcf Yieldcf Yieldcf Yieldcf Yieldcf Yieldcf Yieldcf Yieldcf Yieldcf Yieldcf Yieldcf Yieldcf Yieldcf Yieldcf Yieldcf Yieldcf Yieldcf Yieldcf Yieldcf Yieldcf Yieldcf Yieldcf Yieldcf Yieldcf Yieldbf Yieldcf Yieldcf Yieldcf Yieldcf Yieldcf Yieldcf Yieldcf Yieldcf Yieldcf Yieldcf Yieldcf Yieldcf Yieldcf Yieldcf Yieldcf Yieldcf Yieldcf Yieldcf Yieldcf Yieldcf Yieldcf Yieldcf Yieldcf Yieldcf Yieldsf Yieldcf Yieldcf Yieldcf Yieldcf Yieldcf Yieldcf Yieldcf Yieldcf Yieldcf Yieldcf Yieldcf Yieldcf Yieldcf Yieldcf Yieldcf Yieldcf Yieldcf Yieldcf Yieldcf Yieldcf Yieldcf Yieldcf Yieldcf Yieldcf Yieldci Yieldcf Yieldcf Yieldcf Yieldcf Yieldcf Yieldcf Yieldcf Yieldcf Yieldcf Yieldcf Yieldcf Yieldcf Yieldcf Yieldcf Yieldcf Yieldcf Yieldcf Yieldcf Yieldcf Yieldcf Yieldcf Yieldcf Yieldcf Yieldcf Yieldce Yieldcf Yieldcf Yieldcf Yieldcf Yieldcf Yieldcf Yieldcf Yieldcf Yieldcf Yieldcf Yieldcf Yieldcf Yieldcf Yieldcf Yieldcf Yieldcf Yieldcf Yieldcf Yieldcf Yieldcf Yieldcf Yieldcf Yieldcf Yieldcf Yieldcert Yieldcf Yieldcf Yieldcf Yieldcf Yieldcf Yieldcf Yieldcf Yieldcf Yieldcf Yieldcf Yieldcf Yieldcf Yieldcf Yieldcf Yieldcf Yieldcf Yieldcf Yieldcf Yieldcf Yieldcf Yieldcf Yieldcf Yieldcf Yieldcf YieldCf Yieldcf Yieldcf Yieldcf Yieldcf Yieldcf Yieldcf Yieldcf Yieldcf Yieldcf Yieldcf Yieldcf Yieldcf Yieldcf Yieldcf Yieldcf Yieldcf Yieldcf Yieldcf Yieldcf Yieldcf Yieldcf Yieldcf Yieldcf Yieldcf Yieldsf Yieldsf Yieldsf Yieldsf Yieldsf Yieldsf Yieldsf Yieldsf Yieldsf Yieldsf Yieldsf Yieldsf Yieldsf Yieldsf Yieldsf Yieldsf Yieldsf Yieldsf Yieldsf Yieldsf Yieldsf Yieldsf Yieldsf Yieldsf Yieldsf Yields f Yieldsf Yieldsf Yieldsf Yieldsf Yieldsf Yieldsf Yieldsf Yieldsf Yieldsf Yieldsf Yieldsf Yieldsf Yieldsf Yieldsf Yieldsf Yieldsf Yieldsf Yieldsf Yieldsf Yieldsf Yieldsf Yieldsf Yieldsf Yieldsf Yieldsfa Yieldsf Yieldsf Yieldsf Yieldsf Yieldsf Yieldsf Yieldsf Yieldsf Yieldsf Yieldsf Yieldsf Yieldsf Yieldsf Yieldsf Yieldsf Yieldsf Yieldsf Yieldsf Yieldsf Yieldsf Yieldsf Yieldsf Yieldsf Yieldsf Yieldsr Yieldsf Yieldsf Yieldsf Yieldsf Yieldsf Yieldsf Yieldsf Yieldsf Yieldsf Yieldsf Yieldsf Yieldsf Yieldsf Yieldsf Yieldsf Yieldsf Yieldsf Yieldsf Yieldsf Yieldsf Yieldsf Yieldsf Yieldsf Yieldsf Yieldsfc Yieldsf Yieldsf Yieldsf Yieldsf Yieldsf Yieldsf Yieldsf Yieldsf Yieldsf Yieldsf Yieldsf Yieldsf Yieldsf Yieldsf Yieldsf Yieldsf Yieldsf Yieldsf Yieldsf Yieldsf Yieldsf Yieldsf Yieldsf Yieldsf Yieldsfl Yieldsf Yieldsf Yieldsf Yieldsf Yieldsf Yieldsf Yieldsf Yieldsf Yieldsf Yieldsf Yieldsf Yieldsf Yieldsf Yieldsf Yieldsf Yieldsf Yieldsf Yieldsf Yieldsf Yieldsf Yieldsf Yieldsf Yieldsf Yieldsf Yieldsl Yieldsf Yieldsf Yieldsf Yieldsf Yieldsf Yieldsf Yieldsf Yieldsf Yieldsf Yieldsf Yieldsf Yieldsf Yieldsf Yieldsf Yieldsf Yieldsf Yieldsf Yieldsf Yieldsf Yieldsf Yieldsf Yieldsf Yieldsf Yieldsf Yieldsff Yieldsf Yieldsf Yieldsf Yieldsf Yieldsf Yieldsf Yieldsf Yieldsf Yieldsf Yieldsf Yieldsf Yieldsf Yieldsf Yieldsf Yieldsf Yieldsf Yieldsf Yieldsf Yieldsf Yieldsf Yieldsf Yieldsf Yieldsf Yieldsf Yields |
ДОПОЛНТЕЛБHBIE ПИнадлEXЖHOCTN
ABHIMAHNE: DaHHbIe npHaJNeXHOCTn HnnpncnOco6JeHnpeKOMeHdyOTcTdNHCNoJIb-3OBaHnC nHCTpyMeHTom Makita, yKa3aHHbIM BHaCToRJaem pyKOBOdCTBe. NcNoJIb3OBAHne dpyrnx npHaJNeXHOCTe Hn npCnOC6JeHn MoKeT npNBecTn K NOJyEHNIO TpaBMbl. NcNoJIb3yIte npHaJdJIeXHOCTb Hn npCnOC6JeHn ToJIbKO no yKa3aHHOMy Ha3HaueHInO.
EcnBAM Heo6xOIMO cOeICTBNE B noJyehnDOnONHHTeBHOIN HΦOpMaUN NO 3TUM npHaIeXHoCTaM, CBxKITecCBaUIM cepBVC-ueHTpOM Makita.
OpunHaBnaiKkymyIaTOp n 3apAnHoe yctpoi-CTBO Makita
AanTepbI 36B(18B×2)
AanTep 18B
AanTep, paccunTaHHbHa npedeJbHoe Hapra- XeHne 36-40 B
PIMMEUHNE: HeKOTOpbIe 3JIemENTbI CNNCKa MOryT BXODNTB KOMNNEKT INHCTpymEHTa B KaueCTBe CTAndaptThbIX npucnocO6JIeHNI. OHN MOrYr OTNn- YatbCBy 3aBNCmOCTu OT cTaPbI.
TEXHnKajbIK CNIATTAMAJAPbl
KoIpaHy MaKcaTbI
IopTaTnBti kyat 6epy 6Iorbl aKkMyrAToPdbI kHe KypaJIbI Hemece MaunHaHbI 6eIN, opHaTbINFaH aKkMyJrAToPJIapDbI aybICTbpBn-KOcy apKbJIbI OJApDbI y3ak yaKbIT Kymbic icTeyre KapamDbI eTei.
Ocb6noktbKeNeci KypaIapMeH XaHe MaunHaIapMeH naDaIaHyra 60JaDbI.
18 B akkymyIaTOpIbI Kypan Hemece MaunHa
36B(18B×2)akKymyIaTOpIbI Kypan HeMece MaunHa
36B-40BMakc.akkymyIaTOpKyaTbI6apKypan HemeceMaunHa
- AkkymytnaTOPnbl Kypan Hemece MaunHa (nopTaNTBti Kyat 6epy 6IorbHa TikeJeN KoCbiny)
PaindanaHy HycKayIbIfbl TypaIbI
HyckaynbikTaBf "6nok" cezi nopTaNtBi Kyat 6epy 6norbH 6inipei.
KypaJI Hemece MaunHaBbH yInecimdiNik caHaTbI
AkkymyTOpnb6atapeaHaKyaattHaTbH 1bIHkbipnIAPA*1
AkkymyIaTOpJIb6nIKTeKKeckiU
- Akkymytnopnblyaaya ypneri
AkkMyJrTopnI waNfbl
AkkymyIaTOpNbI KeraI WaNkbiW
BaKwa canTamaIapbHa apHaIFaH KeNpyHKUHOHaIbI AkKyMylTopJIbXeTeK
AkkymyIaTOpIb6TaKeckiI
- Wenke apHaIFaH AkkymyIaTOpNb KaIbIaNap
AkkymyIaTopnbI WtahraIbIK ByTaKeckiU
AkkymyIaTOpnb6ypbIbTBk axapnafbll MaunHa
- AkkyMnyTopnb i nepoopatop *2
KeHin woi6aIra
AkkymyIaTOpnbI KIoI6aIFa
AkkymyTOpblk6ypbl
- AkkymyntopnbI keran wankbIw (KanrafbIw TypiHe rHa aPhaIraH)
USB aanterpi *3
1. YctiHri TyTkacbi 6ap 乌bHkbipnb apaHb (DUC121 / DUC122 / DUC204 / DUC252 / DUC254 / DUC254C / DUC256 / DUC256C / DUC302 / DUC306 / DUC352 / DUC356 / DUC406) kocnaHa
2. DHR280 / DHR281 / DHR282 / DHR283 ynlirinepiH Kocnafahda
*3. ADP05 ynlricih Kocnafahda
KypanDbH HeMeCe MaunHaBHy yInecimdiNik caHaTbI eceptyci3 e3reptinyi MymkiH. KypanDbH HeMeCe MaunHaBHy yInecimdiNik caHaTbI TypaNbApapaTbI COHfbl IbIfapblnfaH naJaDaNaHy HycKaylbIbHaH KapaHbI3.
ECKEPTY: Byn 6Joktb TeMeHde KeTtipinre KypanapMeH Hemece MaunHaapMeH 6ipre ewkaah naDanaaHb3. BOKtby yIneCneTih KypaapanMeH Hemece MaunHaapMeH naDanahy aybp Jkapakattap Hemece akay Tydbpybl MymkIH.
AkkymyIaTOpbl6akwabikwaabipatkbli, aKKymyIaTOpblceKaTOp,aKKymyIaTOpbl e3dirinHen Kypetih ap6a,3neKtpi MoTOpbl BEnocnneid,cemkei aKKymyIaTOpbl IwHcopfbll,3neKtpkendtkiu6ap KypTe, aKKymyIaTOpblXbInbTaBn KypTe
KapamDbI aKKymyJrTop KapTpndXi MeH 3aprTay Kypblfbcbl
| Актуларов karрtnджí | BL1815N / BL1820B / BL1830B / BL1840B / BL1850B / BL1860B |
| Зарайтый курьлгысы DC1 | 18RC / DC18RD / DC18RE / DC18SD / DC18SE / DC18SF / DC18SH |
Korapbida6epiIreH akkymyIaTOp KaptpnJxJdepi MeH 3apdTay KypblfblnapbIHbH Kei6ipi ci3iH TypbIn KaTkaH xepiH3re 6aIIaHbICTbI KOXKeTImci3 6onybl MyMkiH.
ECKEPTY: Tek xorapbida aTaJraH aKKymyIaTOp KaTpNdxJepi MeH 3apdTay KpyblfblnapbIH rHa naJaAnaHbIHbI3.
AkkymyIaTOp KapTpIckepi MeH 3apraTay KpybIINbIaPbIHbIH 6acka TyppeH naIdaHaHcHbI3, JapaKaT aIybiHbI3 KeHe/Hemece ept WbIFybl MyMKIH.
Bennrinep
TeMeHne Jka6bIKTa naIdaIaNbIybl MyMKH 6eJIriep KepceTirreH. NaIdaIaHy aIdbIHDa oIapDbH MaftbHaCbH TyciHn aIbIHbI3.

PaiDanaHy XeHiDiErI HyCKayIbIKtBIOKbIN IblfblHb3.

KapakatanyKayniHaayuHcIMdbKeeprinepeHanwak yCTaHb3.

Cy Hemece XaHbipDbH Kipin KeTyiHeN Kopray yuH KaKnakTbMbIKTan Xa6bHb3.
TeK EO endepine aphanfaH
Ka6blkTa kayinti KypamdaCTapdbH
60nybHa 6aIaNbHcTbI, 3NeKTpNIk
KHe 3NEKTPOHdbIK Ka6blkTAPdbIH,
akymyIaTopnap MeH 6atapeenapdbIH
KanblkTapbI KOpIaFAn optara XHe aIaM
DeHCayIbIbHa Kepeepin Turi3iy MyMKIN.
3NeKTpNIk XHe 3NEKTPOHdbIK
KpyblfBnapdb HeMece 6atapeenapdbI
TyPmbICTbIK KaNbIKTapmen 6ipre Tactayfa
60MaIbI!
3NEKTpNIk XHe 3NEKTPOHdbIK
Ka6blkTAPdbIH KaNbIKTapbIXeHe
aKKMyIaTopnap MeH 6atapeenap XHe
aKKMyIaTopnap MeH 6atapeenapdbIH
KaNbIKTapbI, CoHaI-aK OlanDbIH YTTbIK
3aHHamaF 6eIMDenyI TypanbEyponaIIbIK
DneKeTNBaRa CeKEc, 3NEKTpNIk
Ka6blkTAPdbIH, 6atapeenapdbIH XHe
aKKMyIaTopnap KaNbIKTapbI BeJIeK
KHNanybXeHE KopWafAN opTaHb KoprFay
epexenePiCe KcMBC icTeHTIH
TyPmbICTbIK KaNbIKTapdbXIHHay NyKTIHe
KetKI3Inyi KePEK.
ByJ Ka6blkKa opHanactbIPlnrAahKac
cb3bKnEh cb3bnFaH deHReNekTI KOKbc
Kewirih Benrici apkbnlb Kpcetinei.
KAYINCI3ДИK BOYbIHSHA ECKEPTUJIEP
NopTaNTBti Kyat 6epy 6nOrbIHbH JaaNNbl Kayinci3dk eckepTynepi
- KypanDbI Hemece MaunHaBn naDanaHydaH 6ypbH, OHbH naDanaHy HcKayJbIFbIH OKbIN WbIKKaHbIHb3Fa Ke3 JeTki3iH3.
- Byn 6noktbcbimbHaH yctay apkbinbI KeTepeMei3 Hemece TacbImaHbI3. ENoKtBn naJaNaHy Hemece KIO 6apbcihDa OHbI cbIMbiHaH TapTnaHbI3.
- Ka6dbkTbI TaY Hemece WeydiH anDbIHda KypaJHaH Hemece MaunHaan 6actneKti aJIbIHbI3.
- KypanDbI Hemece MaunHaHbI KaIbIpy Ke3IHDe OHbIH aadTepJepiH iA bIHFaHbHa Ke3 XeTKi3H3 Hemece 6nOKTbApKaHbI3dAn Weewhi3.
- Xymbic icterenehe6JOKTBIN cbIMbHa 7aIbHydaH caK 60nbHbI3.
- ENoKtBi Teric eMec 6eTTe Hemece TypaKcb13, 6nIK JepNepDe naDaanH6aHb13.
- Bip 6noktb6acka 6nokka kocy apkblb6ipheweyih naDanaH6aHb13.
- Kymbic ictey ke3iHde cbIMbI KeedeprinepeH anwak yctaHbI3.CbIM Keedeprinepre iniHce, aybp xapaKaTka eKenyi MymkiH.
- Aanterepnepi 3apraTay KypblfblnapbHa eHri36eHi3.
- AanTepJepdi 6JOKtbH aKKyMyJrTop nopTTapbHa opHaTnAb3.
-
6Jok TeK 18 B aKKymyIaTOPbI naJaIaNHyFa apHaJIFaH. 18 B aKKymyIaTOPnapdAn 6acKa aKKymyIaTOPbI naJaIaN6aHbI3.
-
PnIaHaHydAn 6ypbH, KpyblnfbHbl, cbIMapdbI XeHe acna 6endiKTI TeKcepiH3. Erep onap 3akbIMdaJFaH 60ncA, Makita KomnaHcBHBn HKeprinikTI eKineTTi KbImET KepcTeOpTaIbIFbIHan XeHDen 6epyih cypaHbI3.
- CbIMdbI cbIM yCTaFBiWka akbipbH xHe 6epik 6ekitkeHHi3re Ke3 XETki3iHi3.
- Tekcepy Hemece TexHnKaIbIK Kbl3MeT Kepcety KymbIcTapbIH Kypri3yDen 6ypbIH, apdaibIM KypaIbIH Hemece MaunHaBbIH oWipyJI eKeHdiRiHe XeHe aanTepePepiH aBbIHFaHbHa Ke3 XeTKi3iHi3.
- BnOKtIy36eH Ka6DbikTaJFaH KypaJMeH naJaHaHaH Ke3De, cbIMdbI xy3deH aIwaK yCTaraHbHbI3Fa Ke3 XeTki3iHi3.
- BLOKtB KINrEe Ke3De, 6NOKTBH TeTeHwe KaFdaa da axbipaty yHKcuaCbHa Keepri Kentipy biKTmam Kayinci3dk 6en6eyi Hemece nbIK6ay cnaKtB eWkaHdaa KepeK-XapaKtB i naDaJah6aHb3.
- Arauka epmeJeReHde 6JokTbI naJaIaHa6aHbI3.
- 3NeKtpKeJdTeKiWi 6ap KypTeHi Hemece aKKyMylTOpNbI XbblTaTbIH KypTeHi KnreH Ke3De 6JOKTbI naJaHaH6aHbI3.
- BnOKtby WkBihapdah CaKaTahb3.
- BLOKtbI KIMeN naJaHaHFaH Ke3De OHbI 6etimeH opHaJnactbipbIHbI3.
- KaKnaFbHbH iWHe cy kipyIe JxJ 6epMeHi3.
- ENoKtbi 6eJIWeKTeMeHi3, XeHdEmeHi3 Hemece e3reptnHi3.
- Kypanra Hemece MaunHara acna 6eJdiKTiH Hemece 6eJdiKTiH opanbIN kaImaybIH KaDaFanaHbI3.
- KypbInfbHbI naJaHaHraH Ke3e, KypaIbIH Hemece MaunHaHbIH cbIMapDbI Kecin Ketneyi KaadafanaHbI3.
- MetanXoHkaIapbl Hemece cy cnaKtb6e3aTapbl 6IOKtbIH aawacbHaH anbc yCTaHb13.
- KypaNbI HeMeCe MaunHaHbIXoFapbl KepHeynI Kyat XeJIepi XaHbIHda naJaIaN6aHbI3.
- Akymyntop KopnycbH 3aKbIMan anMaHbI3 Hemece 6JOKka eWTeHe opHaNactbIPMaHbI3.
- ENoK yCTiHeH 6acnHaB13 Hemece OHbIH yCTiHe OTbIPMaHbI3.
- BnoktbI 6eIme iwiHde caKaTahb3.
AkkymyITop KapTpndxIhe apHaIFaH MaHbI3dbl Kayinci3dk HycKaynapbl
- AkkymyIaTOp KapTpIaXin naIaIaNb6ac 6ypbH, (1) akKymyIaTOpDbIH 3aprIay KpybIrfbcIbHaRbl, (2) akKymyIaTOpdaRbl XeHe (3) akKymyIaTOpDbI naIaIaNHaTbIH eHIMderi 6apNbIK Hcckaynap MeH cKepty 6ilrinepiH Okbln WbIfbHbI3.
-
AkkymyIaTOp KapTpNdxKIn 6JIuWeKeTEmeH3 Hemece e3 6etih3we aubin XeHdEmeH3. OJ ePT, Wamadaan TbIC Kbl3y Hemece Jkapbiny KaFdaunapbHa anbIN KeNyi MymKiH.
-
Erep akkymyIaTOp KapTpndKdIn naIdaIaNHy yaKbITbI 6iptana KbICkapFaH 6onca, naIdaIaNHydbI Depey TOKtaTBiB13. Byn KbI3bIN KeTy, bIKTmAl N KyIKTeP Hemece TiNti Xapblbc Kayin Tdybipybl MymkIH.
- Erep 3neKtpoNT Ke3iH3re Tureh 60nca, Ke3iH3di Ta3a Cyme HwaBbH3 XHe Depey MeduHahBik KEmekke KyriHiz. Bykepy Kaibetine H aBipbIyra eken cokTbipybl MymkiH.
- AkkymyIaTOp KapTpndJiH KaIfacynapbIH 6ip 6ipimeH MaTAcTbIPMaHbI3:
(1) KlemmaJapbKe3 KeJreH ToK eTki3riu MaTePnAnApFa Turi36eHi3.
(2) AkkymnyTop KaptpnJxih iwiHde Wererelep, TnbIHap, T.6. 6acka Metann 3aTApbl 6ap KOHTeHepDe caKTamaHbI3.
(3) AkkymyIaTOp 6nOrbIH cyra caImMaHbI3 Hemece XaHbIbP acTbIHDa KaIDbIPMaHbI3. AkkymyIaTOp tyicnepeiH tybIKTaNybl YJKeH TOK aFBiHBiBn naJa 6OnybHa, KbI3bIN KeTyre, bIKTMaN KynIKTepre XaHe TiNTi 6y3bInyra ce6en 6Onybl MyMKIn.
- KypanDbI xHe aKKyMyJrTop 6nOrbIn TempeatypacbI 50^ -den (122 F ) WAmacbIHah acaTbIH XepJIepDe caKTaMaHbI3 XHe naJaJaHa6aHbI3.
- AkkymyIaTOp 6Iorbl KaTbI 3aKbIMdaIraH Hemece TOJIbIFbIMeH To3FaH 6oNca Da, OHbl OTka XaKaNaHbI3. AkkymyIaTOp 6Iorbl OTTa XapblbIN KeTyI MymKiH.
- AKKyMylTOp KapTpDxH WereJeYre, Kecyre, 6acyra, NaKtbyPfA, KyNaTyFa Hemece OHbl KaTbI 3aTneH cOryfa 6oMaIdbI. Byn apekETep eP, IamaHaN TbIC KbI3y Hemece Xapblny XaFdaNapbHa aBIn KeNyIMMKIN.
- 3aKbIMdaIraH aKKyMyJrTopdbI naJaIaN6aHbI3.
- XnHaKa KaipTeIH NtHNoHbI aKKymJrTopnap DeHCayNbIka XaHe KOpShaA HOpTaF3NHAbl 3aTTap 3aHMaCbl TaTaNTapbHa Caikec KapacTbIPbIaDbI. KompeuJIbIK TacsBImaJdAy yuiH, MbicabIy uHti TapanTp, kCneDITopnp ayuH KaTamaJa Xe He Ta6anayda apHaBt TaTaNTap caTaNybI Tnic. Xi6epinetIH eHIMdi DaBbIHday yuiH Kayinti 3aTTap 6oBbHsa capanBbMmaHMeH KeHecy KepeK. CoHbIme KaTAP YNTbIK epExepepi De ToIbIK Kapan UbIFbIHbI3. AdbIK Tynicnepepi KaybIn, aKKymJrTopbl KaTAMara Ko3raJMaTbIHdae etin opHaNaCTbIPbIHbl3.
- AkymyTop KaptpdKin KaDere kapaKaH Ke3de OHbl KypanDaH WbIrapBn anBIn, Kayinci3 Kepde KaDere kapaTbHbI3. AkymyTopbI KaDere kapaTyra KaTbICTbI KepriikTi epexepeDi opbHaHbI3.
-
AkkymyTopnapbI Tek Makita KomnnaHcbl KepcTeKHeHimDepmeh 6ipre naDanaHbHb3. AkkymyTopnapdbI yInecimdi emec eHimdepre opHaTy eptKe, Kb3bIN KeTyrE, KapbIbICKa Hemece 3NeKTpOJNT aRbHa aeK cOKtbpYbIMykH.
-
Erep Kypan y3ak yaKbIT 60nbl naDanaHbIMMaTbIH 60nca, KypaIaNarbl aKKMyJrTopDbI anBIn TacTay KepeK.
- AkymyIaTOP KapTpIckn naIaIaNy Ke3iHde XaHe naIdaIaNHaHHaH KeIH, ON KbI3bIN, KyIKke HemeCe TEmeH TempepaTpaNbl KAYIKke eKenyI MmKIn. bIcTBk AkymyIaTOp KapTpIckdepimeH Kymbc icTeReHde caK 6OJIbIbI3.
- KypaIbIH KneMmacih NaIdaHaHraHHa KeiH, OHBI 6ipDeH yCTamaHbI3, ON KYHore ce6en 6oNaTbIHdai bICTbIK 6onybl MymKiH.
- AkkymyIaTOp KapTpNdxKihKnemMaIapbHa, caHbIaynapbHa XHe OnbIKTapbHa KOHka, WAn HeMece KipDIn TypbIn KaYbH 6oNdbIpMaHbI. Byn KypanDbH HeMece aKKymyIaTOp KapTpNdxKih CbHybHa HeMece eHIMdInirH HawapnaybHa anBn Kenyi MyMkiH.
- Erep KypaJXOFapbI BONbTTbI 3neKtpnIK Kyat XeJIinepi KaHbIHDa naJaIaNHyra JkapAmdbI 6oImaca, aKKyMylrTopPbIK KapTpndxdi XOFapbIBONbTTbI 3neKtpnIK Kyat XeJIinepi XaHbIHda naJaIaNbHaBIs. ByN KypaJIbIH Hemece akKymJrTOp KapTpndxKiH IHCTEH 5bIFybiHa Hemece CbIHbHa aIbIN KeJyIMyMKiH.
- AkkymyIaTOpIbI 6aIaIapdaH ayJaK yCTaHbI3. OCbl HYCKAYAPDbI CAKTAHbI3.
CAK BOJIbIbI3: Tek TynHcKa Makita akymTOpnapbIn naDanaHbIbI3. TynHcKa emec Makita akymJrTOpnapbIn Hemece e3reptinreH akymJrTOpnapdbI naDanaHy hTeNkeciDe ept, japaKat any Hemece 3akbIMdanyra ce6en bonaTbIH akymJrTOp kapblNyibaHa Keenyi MymkiH. On coHdaa-ak Makita Kypanbi Meh 3apdTay Kypblfbcbl yiwH Makita kenindirih KywH XoRabi.
AkkymyIaTOPdbIH MaKcIMaJIdbI Kbl3MeT eTy MEP3iMH caKTay 6oYbIHwa KeHeCTep
- AkkymyIaTOp KapTpNdxH KyaTbToJbIbIme Taycblmac 6ypbln3apraTaHbI3. 3neKtp KypalbHbIH KyaTb a3 eKeHdirn 6aKaFaH Ke3de, Kypal KMybIcbH ToKTaTbIn, AkkymyIaTOp KapTpNdxH 3apraTaHbI3.
- TOnbIfbImeH 3apAaTaNfAH aKKMyJrTop KapTpudKin eWkaaHaN KaTa 3apAaTaMaHbI3. ApTbIK 3apAaTay aKKMyJrTopDbIH KbI3MeT ety MEP3imH KbICApTaDbI.
- AkkymnyTop KaptpnDxin 10°C - 40°C (50°F - 104°F) 6aIme TemnepaTypaBHa 3apAaTaHbI3. 3apAaTamaC 6ypbIn akKmyJrToP KaptpnDxin cyblHbI3.
- AkkymyIaTOp KapTpNdxKin naJaIaN6araH yaKbITTa OHbI KypaJdAnH HeMeCe 3aprTay KypblfBcIHah anbIn TaCTaHbI3.
- Erep aKKymyIaTOp KApTpIaXIn y3ak yaKbIT 6oNbl (aNTbl aHaH apTbIK) naJaIaN6aFaH 6oJcaHbI3, OHbl 3aprTaHbI3.
БэлшКТЕРСИПATTAMACы
Cyper1
Cyper3: 1. AkkyMnyTop nopTbI 2. AkkyMnyTop KapTpudji
AkkymyIaTOp KApTpIaXIH any yuH KApTpIaXdIH aNbIHbI XaBbIHdaftbTyMeHi cbIpItbIn, OHbI 6nOKTaH cbIpItbIN WbIFapbIn aNbHbI3.
CAK BOJIbIbI3: AkkymyTOp KapTpNdxin apdaiBIM KbI3bl INHdkaTOp KepiH6eTIHei etin, TOJIbIFbIMeH OPhaTBHbI3. Onai XacamaHan XaFdaJa, on 6NoKTaH Ke3deuCOK Tycin KaIbIn, ci3di Hemece aHaHaHaBlaDaBla aAdMaDapDbJXapaKaTTaybl MymkiH.
CAK BOJIbIHbI3: AkkymyJTop KapTpNdxin KywTeOpHaTnaHbI3. Erep KapTpNdxJxehin cbIpblmaca, demek on dypbc canbH6araH.
AkkymyIaTOpDbIH KaJIFaH KyaTbIH Kepcety
Tek uHoukamopb6ap akKymyarnop Kapmpudxine apHaHaH.
CypeT4: 1. Иndикатop уамдары 2. Текеру
Туймeci
AkkymyIaTOpdbIH KaIraH KyaTbIH KepeTy yUH aKkyMnyIaTOp KapTpIaXiHderi TeKcepy TyImeCIN 6acbIb3. INdIKaTOp waMdpbl 6ipHeWe ceKyHJ KaHbIn TpaIbl.
| Инданатор Шадары Калfax куот | ||
| Жанын Туру | Өшэрүлүхүлүйытay | |
| 75% - 100% | ||
| 50% - 75% | ||
| 25% - 50% | ||
| 0% - 25% | ||
| АKKулайторды зарядваи. | ||
| АKKулайтор akayны бolyы мyxкinh. | ||
ECKEPTNE: KOndaHy KaFdaNapbHa KeHe KopwaFaH opTaHbIH TemnepaTypacbHa Kapai KepceTkiu HaKtBu KyaTTan 6ipwama epeKWeIeHyi MymkIH.
ECKEPTNE: AkkymyIaTOpdbH KoprFaHbC JyNeci JyMbIC icTeReHne, bipinui (Wetki coJ KaK) HndKaTOp WaMbI XblblbIKTaIbI.
KypaIbIH/aKKymyIaTOPdbIH KOpFaHbICxuNeci
Kypan KypanDbI/aKKymyraTOpdbI KopfahbcxJyueCimeH
Xa6dbkTAanFAn. Byn Kyyne Kypan MeH aKKymyraTOpdbIH
Kb3MeT eTy Mep3imH y3apTy yuiH Ko3faNTkbIuTBiH Kyat
Ke3iH ABTomaTTbI Tpyde eWipeDi. Erep Kypan Hemece
aKKymyraTOp TeMeHderi XaFaDnapDbH 6ipeYine Tan
6oNca, Kypan KymbIC 6apbcBHa aBTOMaTTbI Tpyde
TOkTaIbI.
UamadaH TbIC KyKTeMeDeH KopraHbIC
Kypan Hemece aKKymyIaTOp TbIM KOFapbl TOK
WbIFapaTbH Kynde Kymblc icTeReHde, Kypan ABToMaTTbI
Typpe ew6ip ciRHaNcb3 ToKtaIdbI. Byn KaFdaJa
KypaIdbI eupiH3 XeHe KypaIdbH WamaDaH TbIC
KyKTeyiHe ce6en 6oNfAH KymblcTb1 TOKtaTbHbI3.
CodaH Kein KaTa icKe Kocy yuHIn KypaIdbI KocbHbI3.
Kbl3bin KeTyDeH KopFaHbIc
Kypan Hemece aKKymyIaTOp KbIbI KeTce, Kypan ABTomaTTbI TypDe ToKtaNbI. Byn KaIaNda KypanDbI XHe aKKymyIaTOpdbI icKe KaITa KocyDah 6ypbH, OHbIH, CyybHa MymkiHik 6epiH3.
3apTbH,waMaHaN TbIC TaycbIybiHaN KopraHbIC
AkkymyIaTOPbIH KaIFaH KyaTbIXeKtIKcI3 60IFaH Ke3De, KpaJI aBToMaTTbI Type ToKtaIbI. OcbI Ke3De aKKymyIaTOPdbI KpaJIdaH aIbIN Tactan 3apraTahbl3.
KyaT TynMeci XeHe aKKymyIaTop INHdkaTopbl
CAK BOJIbIbI3: BnOKTbIKocydaH 6ypbIH, KypaIbI HeMece MaunHaBbI eWipreHiizre Ke3KeTki3iH3. Θntnece KypaI Hemece MaunHa Ke3deCOK icke KocblbIN, Japakat TydbipyMymKiH.
Cypet5: 1. Kyaṭ šaMbī 2. Kyaṭ TynMeci
Bnoktbkocy yuih, KyaT tyMecin 6acbHb3. KyaT wambl Xacbl TycTI 6onbl XaHaDbI. Bnoktbieipy yuiH, KyaT tyMecin 6ipHeWe cekyHd 6oNbI 6acbl TypbHb3.
ECKEPTNE: BnOK neH KypaJI HemeCe MaUNHa 8 caFaTka KapayCbI3 KaIbIpbIInca, BnOK aBTOMaTTbI Tpyde eWedi.
Kocy IaMbI XacBIn TycTI 60JbIN KbInbIBIKTaca, 6nOKKa aanTeepH KocbImaHaBH Hemece aKKymyIaTopnapdbH 6oc ekeHH 6inipei.
OcbI Ke3e6IoKKa aadTepi KocbHb3 Hemece
aKKymyTOpnapDb3apraTaHb3. KyaT WAmbl
Xacbl TycTI 6oJIbn XbINbIKaybIH TOkTaTnaca,
aKaylbIKTapbl KOIO TaKbIPbIBn KaPaHb3.
Kyat WAmbl Xacbl XHe KbI3bl TycneH Ke3EKTecin
XbINbIKTAcA, 6NoKbIeipin, CoaH KeiH KaHTa
KocbIHb3. BOKTB KoCAHHaH KeiH Kyat WAmbl Xacbl
XeHe KbI3bl TycneH Ke3EKTecin XbINbIKaybIH
TOkTaTnaca, XeHDey XyMbICbHa 6aJNaHbICTbl Makita
KomnaHnrcbIHn EKIeTTI KbI3Met Kepcety OptaBIFbHa
xaabpNaCbIHb3.
ECKEPTNE:Erep ci3 KypaIbIH HeMece MaunHaHbIH 6actbl Kyat aybcIbipIN-KockblWBIN NOPTaTnBti KyaT bepy 6Iorbl KocKaHHaH KeiH rHa KoccaHbI3, KypaIaFbl HeMece MaunHaDaFBI INDkaTOpnap) KopraHbIC kYueciHkMbic icTeN TyprAhl Kepcetyi MymKIn. ByJ KaJaIa, KypaIbI HeMece MaunHaHbI 6ip pet icKe KocblbI3.Erep HndnKaTOp nap) ceHce, ci3 KypaIaMeh HeMece MaunHaMeH KymbIC icTei anacbl. Erep HndnKaTOp nap) kocynbl6onca, nopTaTnBtI Kyat bepy 6IorblHKn Kyat wambl TeKcepIn, meceleni weu yuiH "AKAYlbIKTAPDbI KOHO"6eimih KapaHbI3.
AkkymyIaTOpdbIH KaJIFaH KyaTbIH KepeTy ywiH Kyat TyImeCIN 6acbIHbI3. Op6ip AKKMyIaTOpFa CaiKeC KeJeTI HnDnKaTOp WAmbl WamMaMeH 5ceKHyNka KaHaIbI.
| Инданковшamдары Калган куат | ||
| Жанынтур | Өшэрпix | Өлбийтay |
| 50% - 100% | ||
| 0% - 50% | ||
| АKKулайковы заряданы3. | ||
ECKEPTNE: AkKymyIaTOpDbIH KaIFaH KyaTbIH Kepcetyre apHaIraH INDnKaTOp 7aMbI TeK anbIKTaMa ysiH naJaIaNbIaNbIaDbI. AkKymyIaTOpdbIH KaIraH HaKTbI KyaTbI naJaIaNaHy XaFdaiNapbHa6aIINaHbIcTb Ie3repYi MymKiH.
ECKEPTNE: KypaI HEmeCe MaunHaHbIH aKkymyIaTOpDbIH KaIFaH KyaTbIH KePcTyre apHaIHaH INdNKaTOp WAmbl 6oJCa, KypaI HEmeCe MaunHaHbIH eMec, 6nOKTBIn INdNKaTOp WAmdaPbHa KapaHbI3.
36B-40BMakc.apHaIraH aDaNTepDIn INHdNkaTOP waMbIHbIH aKKyMylrTopbITeMeH
KocbImwa Kepek-kaapan
Byn aanTep akkymynayTopdbH kaTaN KyaTbI TeMeH Hemece kok ekehdiirih xa6apnaTbIH INdkaTOp waMbIme Hxa6dbkTaNfAH.
HnKATOp WAmbI XbInbIbIKTaFaH Ke3de aKKMyJTopDbIH KaJFaH KyaTbTeMeHnei.
HnKaTOp WAmbl KaHaFAnKe3De, AkkymyIaTOpdbIH KopFaHbIC KnyEci icke KocBInaDbI.
ECKEPTNE: AKKymyIaTOpdbH KyiHe 6aIIaNbICTbl, Y3diKci3 JyMbIC 6apbcbIHda Kypan/Jka6dbIK INdNKaTOP WAmbl KbiNbIbIKTaMaCTah ABTomattbl TypDe TOKTaybl MymKiH.
ECKEPTNE: INHnkaTop 7aMbI XbInbIbIKTaNTbIH yaBt, Kopwaah OpTa TEMepaTypacb MeH aKKymyIaTOp KynHe 6aIIaNbIcIb IeReWeJeHeJI.
ECKEPTNE: NaДanaHbIaTbIh AkKymyIaTOp
kapTpIxJiH 3apIbI TayCbInca Da, INHdNkaTOp
waMbI KaH6aIbI. PDC01 6IorbIH AkKymyIaTOp
kapTpIxJxDepiH naIdaIaHy yuH KocKaH Ke3de
INHdNkaTOp waMbI KaHaDbI.
Cypet6: 1. AkkymyTOp KyaTbI TeMeH INHdkaTOp WAmbl
Aaantep kaTacbH naJaIaNHy
CAK BOJIbIbI3:БIoKtbl aanTep KaNTacbIHbI Xa6bIcKa iInReK 6eKitkiWi apKblbl 6eKitinreH cbIMapMeH naДanaH6aHbI3.
AanTepnepi aanTep kaTacbHa cypTe KepcetinreHde caIbHb3.
Cyper7: 1. Aaantep 2. Aaantep kaanTacbl
Cypet8: 1. Aaantep 2. Aaantep kaanTacbl
KYPACTbIPV
CAK BOJIbIHbI3:БLOKneH Ke3 KeJrReH Kymbic icTeMeC 6ypbH,ApdaNbIM OHbIH Owipyni EkeHHe XaHe aKKyMnyTOp KapTpNdxHIn H bIrapblraHaBHaKe3 KeTki3iH3.
BnoktbI KypacTbipy
- Akkymyntop Kopa6bIH Ta6ah nlaactnHa cbiHa CypETte KepcetinReHd eTin TipkeH3. Akkymyntop Kopa6bIH 6ekiTKeHHeH KeiH, Ta6ah nlaactnHa cbiHbEki KaftbIHdaftI TeTikTepeI KyNbINTaHaHbI3Fa Ke3 XeTKi3iH3.
Cype9: 1. Tetik 2. AkkyMnyTop kopa6b3. Ta6aH nlaactnHaCbl
CAK BOJIbIbI3: AkkMyJrTOP Kopa6bIHbIH Ta6ah NJaCTHaCbHa MbIKTan 6eKITiIN, TeTikTepeMeH KyblntaraHbHa Ke3 XeTKi3iH3. ΘNtnece 6nOKtbl TaKaH Ke3De HemeCe NaJdaNaHfAaH Ke3De, AkkMyJrTOP Kopa6bl Kylan KaBbIn, JapaKaTTaybl MyMkiH. - Ben 6yaTbH 6eNdiKTI peTteHi3. BnIKti peTteihi TeteKi KeTepiH3, cOaH KeiH TabaH nactnHaCbiH cbipby apkblb 6eN 6yaTbH 6eNdiKTI peTten, teiKti opbHa TycipiH3.
Cypet10: 1. Bniikti piTteTin Ttik 2. Ta6an nlaactnHa3i 3. BeI 6yataH 6eNik
HA3AP CAIbIHbI3: BnIKtikpi peTteiTH
TeIK 6oc 6ekITiJIce, OHbIH COMbIHbIH 6ekITiHi3.
COMbIHdbI WAmadaH TbIC KaTbI 6ekITneH3. OHTnCe
6nIKtKi peTteiTH TeIK XblJXbIMaIdbI.
Cyper11: 1. CombIH
- AanTep KaTacbH 6en 6yaTbH 6eNdiKke Xa6bIcKa iInrE 6ekITkiiApKblb CypETe KepCetinreHdei TipKeH3.
Cyper12: 1. AdaanTep KaTacbl
ECKEPTNE: AanTep kantacbH 6en 6yaTbH 6enDikTH OH Hemece coJ XaBHa opHaTyra 6oNabl.
- EHH peTTeiTIH 6eNdiKiTi naIaIaNbIIN, NbIK 6eN6eYiHiE HIn peTTeH3.
Cyper13: 1. EHH petTey 6eJdiiri - 5noktb TaftbHb3, cdaH KeiH 6en 6yaTbH 6enikTH aibin6acbH KynbINTan, OHbH y3bHdbfB H pettehi3.
Cyper14: 1. Aïbīn6ac
ECKEPTNE: Benikti xia6bickak inreK 6eKitkiwi apkblcypette kepctinreHdei XnHayra XaHe 6ekityre 6oanaBl.
Cyper15: 1. Béniik
- Nbik 6e96eyiH y3bHdbfbH peTTeH3.
Cyper16: 1. N_bik6en6eyi
ECKEPTNE: Benikti xia6bickak inreK 6eKitkiwi apkblcypette kepceinreHdei XnHayra Xhe 6ekityre 6onabbl.
Cyper17: 1. Bendaik
Пайдалану
CAK BOJIbIbI3: BIOKTbI KNIO Ke3IHDe, OHbI eKI nbIFbIHbI3ra KUREHlHi3re Ke3 XeTKi3iHi3. ΘηTnece 6IoKtbl TaKkAn Ke3de Hemece naJdaJaanFaH Ke3De, 6nOK KJNaN KaBIn, JapakATaybIMyMKIN.
CAK BOJIbIbI3: EIOKTBI KINO Ke3iHDe, OHbl apKaHbI3Fa KInreHiH3re Ke3 XeTki3iH3. ΘItnce 6NoK Ke3deNcoK KJlan KaJbIn, JapaKaATTayb MyMKiH.
CAK BOJIbIHbI3: BIOKtbl KocyaH 6ypbH He Mece aanTep aawacBn H e 3neKtp KypaJIbH/MaunHaHbAkkymyIaTOP Kopa6bHbH pO3eTKacBaHa KocyaHd 6ypbH KypaIbH He Mece MaunHaHbApdaBIM eWipiH. OHTnece KypaI Hemece MaunHa Ke3deNcK icKe KocblBn, JapaKaT Tydbpyb MyMKIn.
Блokтbl Кралга Hemece MaunHaFA kocy
-
AkkymyITop Kopa6bIbIH COI Hemece OH KaftbIHaTcBIMbIH apTbIN WbIFapbIH3. CbIMbl WbIFapy Ke3IHDe OHbIH CypETTE KepeCTIReHEny YCTaftbIHTapda opHaTbJIFaHbIH Ke3 KEtK3iHi3.
Cyper18: 1. CbIM 2. YcTaftbll -
BnoktbI TaftbHb3.
- AanTep aacbH HeMece 3NeKtp KpaJIbH/ MaunHaHbI akMyJrTop Kopa6bHbH po3eTKacbHa aahBnKepcETKI 6enrici po3eKaJaFbI 6enrimeH cKeck KeletiHdE etin canbHbI3.
Cyper19: 1. Awa 2. Po3eTka 3. KepcTeKi 6enrici
HA3AP CAJbIHbI3: AwaHbI po3eTKaadAn axbipaty Kezihne, cBIMdapdaH yCTamai, aHaHbIXHe po3eTKaHbI yCTan axbipatbIHbI3. OHTnece cbIMdap 3akmbdAbln, 6NOK akayNbIfbHa ce6en 6onybl MymkIn.
ECKEPTNE:Awa meh po3etka 6eJriri 6ip kkyktem KOJaHaBnFaHa aKbipaTbnaDbI.
4.Aaantepnepi Kypanra Hemece MaunHaFA aKkyMnyITop KapTpNkCnKaTbOpHaTbIHb3.
Cyper20: 1. Aaanterp
HA3AP CAIbIHbI3:18B aKKymyIaTopbl Kypan HeMece MaunHa ywiH 18 B apHaIraH aIaITePdi naIaIaNbIHbI3.36B(18Bx2) aKMyIaTOpbl Kypan HeMece MaunHa ywiH 36B(18Bx2)apHaIraH aIaITePJIepdi naIaIaNbIHbI3.36B-40BMakc.aKKymyIaTOp KyaTbI 6ap Kypan HeMece MaunHa ywiH,36B-40BMakc.apHaIraH aIaITePdi naIaIaNbIHbI3.
Tikee KocbinaTbH KypaH HeMece MaunHa Typi aanterpki KaKet etnei.
HA3AP CAJbIbI3: Aaantepnepi Kypajra Hemece MaunHara opHaTy Ke3iHne, 2 cbIMMeH Ka6bIKtanraH aanTepdi CypETeKpctinre Xepre OPhATKaHbIbI3ra Ke3 KeTki3iHi3.
Erep ci3 aanTepnepdi dypbc opHaTnaHan 6oIcaHb13, OHda 2 cbIMMeH xa6dbkTaJFaH aanTep tonbHbImeH caNbHa anMaJDbI. ByJ XaFdAa, aanTepdi KwTe n cAmHaB13.
OHTnce, KypanFa HemeCe MaunHaF aKbIM KeNiyi MymKiH.
Cypet21: 1.2cbIMdblaaanTep
Cypet22: 1.2cbimdbiaaandTep
ECKPTNE: Aaantep cbmbihb6afbltbH waamMeH 180 rpaync aykbmbihda e3repTyre 6oJaBl.
- ENoKtBI KOCy yIiH, KyaT TYMeciH 6acbHbI3.
ENoKtBI eWipy yIiH, KyaT TYMeciH 6ipHeWe cekyHd
6oBbl 6acbl TpybHbI3.
Cyper23: 1. KyaT TymEci
CbIM yCTaftbIHTapbIH naJaHaHy
CAK BOJIbIHbI3: CbIM yCTaftbIHTapFa Tek aKKMyJrTOp KOpNycbIHbIH CbIMbIH XaJrHaHbI3. CbIM yCTaftbIHTapFa cBIM aAnTepNepiXanfayfa 6oImaiDbI. CbIM aAnTepNepiXanfay Xa3aTaibIM OKIFara XeHe XapaKaTka EKeI COFybl MymkiH.
Cyper24
Cyper25
AkkymyIATOP KOpnycbHbH CbIMbH CypTe KepeTInreHdE CBIM YCTaBbUbHa XaJfayfa 60anaJI.
Cyper26: 1. CbIM yCTarblwbl
CoHdaa-ak cbIMdb6eI 6yatbIH 6eNdiKTHcBIM yCTaftbUWBn naDalaHbIn, cypETTE KepceTINReHdei 6ekityre 6oJadbl.
Cyper27: 1. Cbim yCTaftbllwbl
CbIM yCTaftbIITapdbI 6en 6yaTbIH 6eNdiKTIH XHe NbIK 6en6eyiH IH Hemece con KaftbHa opHaTyfa 6onaDbI.
Cypet28: 1. Cbim yctarbiuha 6ekitinerih 6eik
CAK BOJIbIbI3: CbIMdbI NBIK 6eJI6eyiHe TEK COJ XaKKa HeMece TK OH XaKKa, CBIM NBIK 6eJI6eyimEn aHKacnaTbIHdAn etin 6ekITHi3.
Cyper29
Inriu 6eJdkti naDanahy
KocbIMwa Kepek-kaapan
CAK BOJIbIHbI3: Kymblctbl 6actamac 6ypbH, inriw 6endiKTiH Kypan iInriWHe Dpybc opHaTbINFaHBHa Ke3 XeTKi3iHi3.
Inrii 6enikti akymyIaTOpbl waIbIme, aKymyIaTOpbl keraJ wankbIuNeH Hemece aKymyIaTOpbl 6nIKtIK KeckiwneH naJaIaHyra 6oana.
Ilniiw 6eNdiKti 6ekity
- Inrii6eJIikTH imerH 6en 6yaTbH 6eJIikTH Hemece nBk 6en6eyiHcaknHaIapbHa cypTe KepctiJreHed etin iH3. PauJaAnyFa caiKec KeJeTIH 6eJIik Tpyi MeH Kocy aDicIH TaHaHb3.
Cypet30: 1. CaKHa2. IInMeK
Cypet31: 1. CaKHa 2. ImMeK
Cypet32: 1. CaKHa 2. IInMeK
Cypet33: 1. CaKHa2. IInMeK
ECKEPTNE: KypaI Typi BeNoocnneI TyTkacbl CnKtbl 6oIca, 6enIikTI 6en 6yatbH 6enIikTIi iuKi Xaftbl apkblbl eTeiHdei 6ekitih3.
Cypet34: 1. Bei6byaTBH 6eJik 2. BeJik
- Inmekti kypanra inihi3.
Cyper35: 1. IJMEK
KypaIbI aXbIpaTy
AaBbIn6actb6ocaty yuiH, aBbIn6ac TeTikTeepiH 6acbHbI3.
Cyper36: 1. Terik
ECKEPTNE: AaBn6ac 6eNdiKtiH Typine 6aINaHbICTbl 6epiImei.
TeteHwe KaFdaIa aXbIpaTy
- Aynb6actb6ocaty yuih, 6en 6yaTbH 6eJIqKTH aynb6ac TeIKTePiH 6acBHyI3.
Cyper37: 1. Aиьлбac 2. Tetik - KypaJIbI XaHe 6JIOKTbI 6OcAty yuH NbIK 6eJI6eyIH WueHH3.
Cyper38: 1. Nblk6en6eyi
TEXHINKAJIbIK Kbl3MET KΘPCETY
CAK 50JIbIbI3: Tekcepy HeMece
TEXHnKaJIbIK Kbl3MeT KOpCeTy KymbICTapbIH
Jyprizre apeKeTTeH6ec 6ypbIH, apdaiBIM
6NoKtbiH eWipPyi eKeHdiirHe XeHe aKKymyIaTOp
KapTpndXiHIn AblHfAhbHa Ke3 JeTeKl3iH3.
HA3AP CAIbIHbI3:KaHapMaIdbI,6eH3nHi, cyIbITKbIWTbI,CnIPTTI Hemece corah yKcac 3aTApDbI eWkaaH naIdaIaNbHaB13. HAtnxkeciHe Tycci3deHy,6yInHy Hemece JapbIKTap naIda BoNyBaHa eKeJyIMyMKiH.
OHIMHI KAYINC3DII MEH CEHIMDIJIINH
kAMTaMaCbI 3 ety ywiH,KeHDey KymbICTapbl,Ke3 KeJIReH
6acka TexnKaIbIK KbI3MeT KepCteY Hemece petTey
epaMakita Kocalkb6eJWeKTePi naiDaHaHy
apKbIbMakita KomnaHraCbIHbH eKinetTI HeMece
3aybITbIK KbI3MeT KepCteTy OptaIbIKTapbl TapanbHaH
OpbIHdanybKepeK.
AKAYIbIKTAPdbI JXOIO
KeHney kymbicTapbHa Tancbipbc 6epyden 6ypbH, TeKcepyep Kypri3iH3. HcKaynbkTa KepceTinmeren Mecenepe aHbIKtanca, KypanDbI, MaunHaHbI Hemece 6nOKtbI 6eWKeTeMeH3. Makita KomnaHrcBbH eKiletTi Kbl3Met Kepcety opTalbIKTapbHa xa6apnacbHb3 XeHe XeHdey ywiH apKaaah Makita KocankbI 6eWKeTepin naDanaHbIH3.
KOCbIMWA KEPEK-ЖAPAKTAP
CAK BOJIbIHbI3: Byn Kepek-JkapaKTap MeH KOHdbIpMaJap OcbI HycKayNbIKTa KepcTeINreH Makita KypaJIbIMeH 6ipre naJaIaHaYra YCbIHbIaIbI.Ke3 KeIreH 6acka KepeK-JkapaKTap MeH KOHdbIpMaJAPbI naJaIaHa aamdApDbH JapaKaattahyibaHa eKeJy IymKiH.KepeK-JkapaTbI Hemece KOHdbIpMaHbI TEK e3 MaKcaTbIHda fHa KaJIdaHbIHbI3.
Ocbi Kepek-KapaKtap TypaIbIKocbIMwa Mmimet any yuH KEMeK KaKET 6oNca,KeprilikTi Makita KbImet Kepcety optaJIbIFbHa xa6apJaacbIHb3.
- Makita Tynhycka aKKymyIaTOpbIXeHe 3aprTay Kypblfblcbl
36B(18B×2)apHaIraH aanTepeep
18BaphaIraH aanTep
36B-40BMakc.aphaHaHa aanTepe
ECKEPTNE: Tizimderi keibip 3JemeHTTep cTaHapTTbKepeK-kaPaKTap petiHe KypaIbIH KaTamaCbHaDa 6OlybIMyMkiH. OJap eJre 6aJIaNaHbCTb epTypJI 6OlybIMyMkiH.
规格
用途
Ie 1 E 1 E 1 E 1 E 1 E 1 E 1 E 1 E 1 E 1 E 1 E 1 E 1 E 1 E 1 E 1 E 1 E 1 E 1 E 1 E 1 E 1 E 1 E 1 E 1 E 1 E 1 E 1 E 1 E 1 E 1 E 1 E 1 E 1 E
Gbr.23: 1. Tombol daya
May Cua Xich Chay Pin 1
May Cua Canh Trén Cao Càm Tay Hoat Dong Bäng Pin
May Thoi Cam Tay Hoat Dong Bang Pin
May Tia Hang Rao Cam Tay Hoat Dong Bang Pin
May Cat Co Cam Tay Hoat Dong Bang Pin
May Da Nang CAm Tay Hoat Dong Bang Pin
May Tia Häng RAO CAm Tay Hoat Dong Bang Pin
May Tia Häng RAO CAm Tay Hoat Dong Bang Pin
May Cát Tia Háng RAO Càm Tay Hoat Dong Bang Pin
May Mai Goc Cama Tay Hoat Dong Bang Pin
May Khoan Dong Lyc Cam Tay Hoat Dong Bang Pin2
May Cao Dong Luc Cam Tay Hoat Dong Bang Pin
May Duc Bé Tóng Càm Tay Hoat Dong Bäng Pin
May Khoan Dat Cam Tay Hoat Dong Bang Pin
May Cat Co Day Cam Tay Hoat Dong Bang Pin (chi dānh cho loài dαu noi)
- Bô chuyén dài USB *3
Hinh3: 1. Cong pin 2. Hop pin
De thao hop pin, vua truot pin ra khoi thi et bi vua truot nut o' phia truc hop pin.
THANTRONG:Luon lap hop pin khop hao
toan vao vi tri cho den khi khong the nhin thay
den chi bao mau do. Neu khong, hop pin co the vo
y roi ra khoi thiet bi, gay thuong tich cho ban hoac
nguoi khac o xung quanh.
THANTRONG:Khong duoc dung suc lap hop pin.Neu hop pin khong nhe nhang truot vao tri,co nghia la pin van chu a duoc lap dung.
Chi bao dung luong pin cön lái
A 1600u: uuuuuuuuuuuuuuuuuuuuuuuuuuuuuuuuuuuuuuuuuuuuuuuuuuuuuuuuuuuuuuuuuuuuuuuuuuuuuuuuuuuuuuuuuuuuuuuuuuuuuuuuuuuuuuuuuuuuuuuuuuuuuuuuuuuuuuuuuuuuuuuuuuuuuuuuuuuuuuuuuuuuuuuuuuuuuUU
#
y


yHn7y

Wnwnnnnnnnnnnnnnnnnnnnnnnnnnnnnnnnnnnnnnnnnnnnnnnnnnnnnnnnnnnnnnnnnnnnnnnnnnnnnnnnnnnnnnnnnnnnnnnnnnnnnnnnnnnnnnnnnnnnnnnnnnnnnnnnnnnnnnnnnnnnnn

yannnnnnaaennnnnnnnnnnnnnnnnnnnnnnnnnnnnnnnnnnnnnnnnnnnnnnnnnnnnnnnnnnnnnnnnnnnnnnnnnnnnnnnnnnnnnnnnnnnnnnnnnnnnnnnnnnnnnnnnnnnnnnnnnnnnn

Li-ion
n
W
- 1
- 1
-
nauwwnnnaaannnnn nn nnnnnnnnnnnnnnnnnnnnnnnnnnnnnnnnnnnnnnnnnnnnnnnnnnnnnnnnnnnnnnnnnnnnnnnnnnnnnnnnnnnnnnnnnnnnnnnnnnnnnnnnnnnnnnnnnnnnnnnnnnnnnnnnnnn
-
4
- aunnnnnaaannnnnnnnnnnnnnnnnnnnnnnnnnnnnnnnnnnnnnnnnnnnnnnnnnnnnnnnnnnnnnnnnnnnnnnnnnnnnnnnnnnnnnnnnnnnnnnnnnnnnnnnnnnnnnnn
- 7
- 1uunununununununununununununununununununununununununununununununununununununun
- aJ7n 2u 3u 4u 5u 6u 7u 8u 9u 10u 11u 12u
- aunnnaanannnnnnaaennnnnnnnnnnnnnnnnnnnnnnnnnnnnnnnnnnnnnnnnnnnnnnnnnnnnnnnnnnnnnnnnnnnnnnnnnnnnnnnnnnnnnnnnnnnnnnnnnnnnnnnnnnnnnnnnnnnnnnnnnnnnnnnnnnnnnnnnnnnnnnnnnnnnnnn
- 11111111111111111111111111111111111111111
- 电
- 1
- 电
- 1
- 1
- aunnnnnaa n nn nnnnnnnnnnnnnnn
-
1
-
nnuuunuaan uauu uuuuunuaaunuunuunuun
- 1
29.
nunnnnnnnnnnnnnnnnnnnnnnnnnnnnnnnnnnnnnnnnnnnnnnnnnnnnnnnnnnnnnnnnnnnnnnnnnnnnnnnnnnnnnnnnnnnnnnnnnnnnnnnnnnnnnnnnnnnnn
- nauvnuuun uuuuun 1nunnuuua
1920nnnunnuuunnuu (1) 1920nuu (2) uuuu (3) nnnuu - 2
- nnnnnaaannnnaanennnnaaannnnn nnnnnnae
- nnnnnaaannnnnnnnnnnnnnnnnnnnnnnnnnnnnnnnnnnnnnnnnnnnnnnnnnnnnnnnnnnnnnnnnnnnnnnnnnnnnnnnnnnnnnnnnnnnnnnnnnnnnnnnnnnnnnnnnnnnnnnnnnnnnnnnnnnnnnnnnnnnnn
5.
(1)
(2) nanaanannnnaaunnnnnaaennnnnnae nnnae
(3) 1
- 50°C (122°F)
- 77777777777777777777777777777
- 177777777777777777777777777777777777777777777
-
甲
-
Dangrous Goods Legislation 77777777777777777777777777777777777777777777777777777777
- 1
- 1
- 1
- 1
- 1
- 1
- nnnnnae nnne nnnn
A 1000000000000000000000000000000000000000000000000000000000000000000000000000000000000
- 1
-
2
-
10C-40°C
- 电电电电电电电电电电电电电电电电电电电电电电电电电电电电电电电电电电电电电电电电电电电电电电电电电电电电电电电电电电电电电电电电电电电电电电电电电电电电电电电电电
- WwWwWwWwWwWwWwWwWwWwWwWwWwWwWwWwWwWwWwWwWwWwWwWwWwWwWwWwWwWwWwWwWwWwWwWwWwWwWwWwWwWwWwWwWwWwWwWwWwWwWw
#
1
| 1 | uuuununu | 2 | uuuununu | 3 | uuuununu | 4 | uuuununu |
| 5 | uuuununu | 6 | uuuunu | 7 | uuuununu | 8 | uuuununu |
| 36 V (18 V x 2) | 18 V (auunununu) | ||||||
| 9 | uuuununu | 10 | uuuununu | 11 | uuuununu | ||
| 36 V - 40 Vmax | |||||||
| (auunununu) | |||||||
| 13 | uuuununu | - | - | - | - | - | - |
#
20752V: 172aHnHnHnHnHnHnHnHnHnHnHnHnHnHnHnHnHnHnHnHnHnHnHnHnHnHnHnHnHnHnHnHnHnHnHnHnHnHnHnHnHnHnHnHnHnHnHnHnHnHnH
m
A 1
A 173727: 1000000000000000000000000000000000000000000000000000000000000000
A 177777777777777777777777777777777777777777
- nHnHnHnHnHnHnHnHnHnHnHnHnHnHnHnHnHnHnHnHnHnHnHnHnHnHnHnHnHnHnHnHnHnHnHnHnHnHnHnHnHnHnHnHnHnHnHnHnHnHnH
2: 1. 2.
A 1
- 4
NNTTNN: NNTNNNNTNNNNNNNNNNNNNNNNNNNNNNNNNNNNNNNNNNNNNNNNNNNNNNNNNNNNNNNNNNNNNNNNNNNNNNNNNNNNNNNNNNNNNNNNNNNNNNNNNNNNNNNNNNNNNNNNNNNNNNNNNNNNNNNNNNNNNNNNNNNNNNNNNNNNNNNNNNNNNNNNNNNNNNNNNNNNNNNNNNNNNNNNNNNNNNNNNNNNNNNN
WwWwWwWwWwWwWwWwWwWwWwWwWwWwWwWwWwWwWwWwWwWwWwWwWwWwWwWwWwWwWwWwWwWwWwWwWwWwWwWwWwWwWwWwWwWwWwWwWwWwW
| ยงinelicitadhye ยงinelicitadhye | ยงinelicitadhye | ||
| 50 % 50 100 % | |||
| 0 % 50 % | |||
201707: nnnnnuuunnuuunnuu uuuuauu uuuuuuuuuuuuuuuuuuuuuuuuuuuuuuuuuuuuuuuuuuuuuuuuuuuuuuuuuuuuuuuuuuuuuuuuuuuuuuuuuuuuuuuuuuuuuuuuuuuuuuuuuuuuuuuuuuuuuuuuuuuuuuuuuuuuuuuuuuuuuuuuuuuuuuuuuuuuuuuuuuuuuuuuuuuuuuuuuuuuuuuuuuuuuuuuuUU
11: 1.
- 1
12: 1.
20202020: 20202020202020202020202020202020202020202020202020202020202020202020202020202020
n7n7n29
m
ylnnnnne
y7529: nuiuuiu uunnnnnae 17
y
7 7
- 1
| aanananaananaananaananaananaananaananaananaananaananaananaananaananaananaananaananaananaananaananaananaananaananaananaananaananaananaananaananaananaananaananaananaananaananaananaananaananaananaananaananaananaananaananaananaananaananaananaananaananaananaanaraananaananaananaananaananaananaananaananaananaananaananaananaananaananaananaananaananaananaananaananaananaananaananaananaananaananaananaananaananaananaananaananaananaananaananaananaananaananaananaananaananaananaananaananaananaananaananaananaananaanataaaaaaaaaaaaaaaaaaaaaaaaaaaaaaaaaaaaaaaaaaaaaaaaaaaaaaaaaaaaaaaaaaaaaaaaaaaaaaaaaaaaaaaaaaaaaaaaaaaaaaaaaaaaaaaaaaaaaaaaaaaaaaaaaaaaaaaaaaaaaaaaaaaaaaaaaaaaaaaaaaaaaaaaaaaaaaaaaaaaaaaaaaaaaaaaaaaaaaaaa aaaaaaaaaaaaaaaaaaaaaaaaaaaaaaaaaaaaaaaaaaaaaaaaaaaaaaaaaaaaaaaaaaaaaaaaaaaaaaaaaaaaaaaaaaaaaaaaaaaaaaaaaaaaaaaaaaaaaaaaaaaaaaaaaaaaaaaaaaaaaaaaaaaaaaaaaaaaaaaaaaaaaaaaaaaaaaaaaaaaaaaaaaaaaaaaaaaaaaaaaaaaaaaaaaaaaaaaaaaaaaaaaaaaaaaaaaaaaaaaaaaaaaaaaaaaaaaaaaaaaaaaaaaaaaaaaaaaaaaaaaaaaaaaaaaaaaaaaaaaaaaaaaaaaaaaaaaaaaaaaaaaaaaaaaaaaaaaaaaaaaaaaaaaaaaaaaaaaaaaaaaaaaaaaaaaaaaaaaaaaaaaaaaaaaaaaaaaaaaaaaataaaaaaaaaaaaaaaaaaaaaaaaaaaaaaaaaaaaaaaaaaaaaaaaaaaaaaaaaaaaaaaaaaaaaaaaaaaaaaaaaaaaaaaaaaaaaaaaaaaaaaaaaaaaaaaaaaaaaaaaaaaaaaaaaaaaaaaaaaaaaaaaaaaaaaaaaaaaaaaaaaaaaaaaaaaaaaaaaaaaaaaaaaaaaaaaaaaaa aaataaaaaaaaaaaaaaaaaaaaaaaaaaaaaaaaaaaaaaaaaaaaaaaaaaaaaaaaaaaaaaaaaaaaaaaaaaaaaaaaaaaaaaaaaaaaaaaaaaaaaaaaaaaaaaaaaaaaaaaaaaaaaaaaaaaaaaaaaaaaaaaaaaaaaaaaaaaaaaaaaaaaaaaaaaaaaaaaaaaaaaaaaaaaaaaaaaaaaaaaataaaaaaaaaaaaaaaaaaaaaaaaaaaaaaaaaaaaaaaaaaaaaaaaaaaaaaaaaaaaaaaaaaaaaaaaaaaaaaaaaaaaaaaaaaaaaaaaaaaaaaaaaaaaaaaaaaaaaaaaaaaaaaaaaaaaaaaaaaaaaaaaaaaaaaaaaaaaaaaaaaaaaaaaaaaaaaaaaaaaaaaaaaaaaaaaaaaaaataaaaaaaaaaaaaaaaaaaaaaaaaaaaaaaaaaaaaaaaaaaaaaaaaaaaaaaaaaaaaaaaaaaaaaaaaaaaaaaaaaaaaaaaaaaaaaaaaaaaaaaaaaaaaaaaaaaaaaaaaaaaaaaaaaaaaaaaaaaaaaaaaaaaaaaaaaaaaaaaaaaaaaaaaaaaaaaaaaaaaaaaaaaaaaaaaaaaaaatataaaaaaaaaaaaaaaaaaaaaaaaaaaaaaaaaaaaaaaaaaaaaaaaaaaaaaaaaaaaaaaaaaaaaaaaaaaaaaaaaaaaaaaaaaaaaaaaaaaaaaaaaaaaaaaaaaaaaaaaaaaaaaaaaaaaaaaaaaaaaaaaaaaaaaaaaaaaaaaaaaaaaaaaaaaaaaaaaaaaaaaaaaaaaaaaaaaaaagataataataataataataataataataataataataataataataataataataataataataataataataataataataataataataataataataataataataataataataataataataataataataataataataataataataataataataataataataataataataataataataataataataataataataataataataataataataataataataataataataataataataataataataataataataataataataataataataataataataataATAAA | |||
Jn
gai 2 jge yduy dyaoyd yda y
2g j gj 4 j j j j j j j j j j j j j j j j j j j j j j j j j j j j j j j j j j
111 1
24 1:21
24 1:22
180 180
.
5
2
gol 1:23
paa gla ojjgki jolal
115 100000000000000000000000000000000000000000000
J 1
1 1
24
25
1 1
1:26
J 1
1:27
4 1
中
28
jibai yu caw jbi 1 ayas dus jda jiajai jui
gj j 1
A
29.5
jgl j0
1
y j 45 jda jabab jg jj
a 10000000000000000000000000000000000000
s j 1 s 1 s 1 s 1 s 1 s 1 s 1 s 1 s 1 s
aS aalal al y jy
g
1
1 234567890
在 Rt ABD 中:
2.4.1 :30
2.1 :31
2.1 :32
2.2a1:33
3
1:12
iJ 1
J
4
jiee 1:13
5
12x - 1 > 0
S.1:14
s 1
- iS
1:15
.6
1:16
s 1
2153
.1:17K
#
A
45 gaa a 1
j3y 1 y 2015 2015 2015 2015 2015 2015
12a 45 a 45
J5 j 1
J 1
01 1111111111111111
yolj y jy j 10000000000000000000000000000000000000
1.2g 1
oL
jssy 1
J 1
j.2 1:18
2
3
j 1
.
15 3.3 2 19
ydy dy dy dy dy dy dy dy dy dy dy dy dy dy dy dy dy dy dy dy dy dy dy dy dy dy dy dy dy dy dy dy dy dy dy dy dy dy dy dy dy dy dy dy dy dy dy dy dy dy dy dy dy dy dy dy dy dy dy dy dy dy dy dy dy dy dy dy dy dy dy dy dy dy dy dy dy dy dy dy dy dy dy dy dy dy dy dy dy dy dy dy dy dy dy dy dy dy dy dy dy
1 1
g 12 12 g 12 g
J 1 J 1 J 1 J 1 J 1 J 1 J 1 J 1 J 1 J 1 J 1 J 1 J 1 J 1 J 1 J 1 J 1 J 1 J 1 J 1 J 1 J 1 J 1 J 1 J 1 J 1 J 1 J 1 J 1 J 1 J 1 J 1 J 1 J 1 J
J 1 J 1 J 1 J 1 J 1 J 1 J 1 J 1 J 1 J 1 J 1 J 1 J 1 J 1 J 1 J 1 J 1 J 1 J 1 J 1 J 1 J 1 J 1 J 1 J 1 J 1 J 1 J 1 J 1 J 1 J 1 J 1 J 1 J 1 J
jg02yj j1j1j1j g jyj jz jz jz jz jz jz jz jz jz jz jz jz jz jz jz jz jz jz jz jz jz jz jz jz jz jz jz jz jz jz
12 1 1 1 1 1 1 1 1 1 1 1 1 1 1 1 1 1 1
olalilu lglau ggi oaiia gla olieus ly la gjily 12
j 1 j 2
j1 jy jdy dgyai oiai yj jj jj j 13
julz jz
olirius ly jyly Ly aas as yu ly dgy jolstal olis .24
Agi gai g jil g jia gai jia jia plu .25
.
.26
27
28
.29
a gaaal 1 a a a a a a a a a a a a a a a a a a a a a a a a a a
#
1
1.2 1.1 :30
1.2 1:33
j 134
.2
a_1 = 23,a_2 = - 43,b_2 = 56
Aai 1:36J5
yj 1
s
1
237
.2
1:38
aill cslg ilalil plaii aag gljll k
S_ ACD = 12 · AQ · CD = 12 × 2t × 5
1.1:17
J
aie 1
i 1
J 1
a121 031.121 8
lll 1
.2
aJie aiaSly ay jySll aySlal/olj 3
aJell sllay yaiIg Aaiall gale yjy Jy
Jyall Ie 50gai
gaile .3 19
a csl 1 1 1 1 1 1 1 1 1 1 1 1 1 1 1 1 1 1 1 1 1 1 1 1 1 1
Jn Jn Jn Jn Jn Jn Jn Jn Jn Jn Jn Jn Jn Jn Jn Jn Jn Jn Jn Jn Jn Jn Jn Jn Jn Jn Jn Jn Jn Jn Jn Jn Jn Jn Jn Jn Jn Jn Jn Jn Jn Jn Jn Jn Jn
4 120
18 a 18 a 18 a 18 a 18 a 18 a 18 a 18 a 18 a 18 a 18 a 18 a 18 a 18 a 18 a 18 a 18 a 18 a 18 a 18 a 18 a 18 a 18 a 18 a 18 a 18 a
j 2
gall jiauee aeg yagay baiy gll 1
gall aill oag gao jas dai yd2 gai
gill jgal gaiy gaaa 2 2
d2 22
180 1
5 5
a aaa
jdlal jdl lglg gall 1uuaa aagaae
A. a1b2 = 4,a2b3 = 8
yjlllal jgssnlaiee gaaagall cnaa e 2:4
PDC01 5
y
yjgl jg jzj1 6
#
aalil plasilyll cpi pll lss gl oiae aee
gall jay aalldaal caiy slg
J 1
j 2 j 1:7
j 2 j 1:8
#
a 1
.
8
Lg 1
aie 1
3 29
jai jia jia jia jia jia jia jia jia jia jia jia jia jia jia jia jia jia jia jia jia jia jia jia jia jia jia jia jia jia jia jia jia jia jia jia jia jia jia jia jia jia jia jia jia jia jia jia jia
1
1.1:14
ailll ciil, illll plalldy aai, p jall say:
Jusu
1.1:15
a51 a6e 6
:16
aagaae aee
o 1
a
i
jji allal oia g jlll sbl jai jai jai jai jai jai
1
yj
y 1
y
a12 5
j j 1
y
aai jn jy gall ay 1j ai y gll jipj:
8
y
yall lal all oai y aylll aai y
j 1 j 1 j 1 j 1 j 1 j 1 j 1 j 1 j 1 j 1 j 1 j 1 j 1 j 1 j 1 j 1 j 1 j 1 j 1 j 1 j 1 j 1 j 1 j
Jd jnnn nn nnnnnnnnnnnnnnnnnnnnnnnnnnnnnnnnnnnnnnnnnnnnnnnnnnnnnnnnnnnnnnnnnnnnnnnnnnnnnnnnnnnnnnnnnnnnnnnnn
y j 1
1
aill makiMakita 1234567890
j 1
()
000000000000000000000000000000000000000000000
()jssall jssllal all g. jglal slal alal
jai (ci jai) jai gali selal ala. jai jai jai jai kai
a
Aikaiia 1a JgJxuI g Jbcil
jssll cuaa aay Aasell y jlll aaw waaal lll
i j 5 s d y j k j
jaaa aae aee ae aee aee aee aee aee aee aee
j 1
| الإستعمال الحرفية | سيلة الحرفية | ||
| الإستعمال | الإستعمال | الإستعمال | |
| 100% ↦ 75% | ↦ ↦ ↦ ↦ ↦ ↦ ↦ ↦ ↦ ↦ ↦ ↦ ↦ ↦ ↦ ↦ ↦ ↦ ↦ ↦ ↦ ↦ ↦ ↦ ↦ ↦ ↦ ↦ ↦ ↦ ↦ ↦ ↦ ↦ ↦ ↦ ↦ ↦ ↦ ↦ ↦ ↦ ↦ ↦ ↦ ↦ ↦ ↦ ↦ ↦ ↨ ↨ ↨ ↨ ↨ ↨ ↨ ↨ ↨ ↨ ↨ ↨ ↨ ↨ ↨ ↨ ↨ ↨ ↨ ↨ ↨ ↨ ↨ ↨ ↨ ↨ ↨ ↨ ↨ ↨ ↨ ↨ ↨ ↨ ↨ ↨ ↨ ↨ ↨ ↨ ↨ ↨ ↨ ↨ ↨ ↨ ↨ ↨ ↨ ↨ ↢ ↨ ↨ ↨ ↨ ↨ ↨ ↨ ↨ ↨ ↨ ↨ ↨ ↨ ↨ ↨ ↨ ↨ ↨ ↨ ↨ ↨ ↨ ↨ ↨ ↨ ↨ ↨ ↨ ↨ ↨ ↨ ↨ ↨ ↨ ↨ ↨ ↨ ↨ ↨ ↨ ↨ ↨ ↨ ↨ ↨ ↨ ↨ ↨ ↨ ↠ ↨ ↨ ↨ ↨ ↨ ↨ ↨ ↨ ↨ ↨ ↨ ↨ ↨ ↨ ↨ ↨ ↨ ↨ ↨ ↨ ↨ ↨ ↨ ↨ ↨ ↨ ↨ ↨ ↨ ↨ ↨ ↨ ↨ ↨ ↨ ↨ ↨ ↨ ↨ ↨ ↨ ↨ ↨ ↨ ↨ ↨ ↨ ↨ ↨ ↡ ↨ ↨ ↨ ↨ ↨ ↨ ↨ ↨ ↨ ↨ ↨ ↨ ↨ ↨ ↨ ↨ ↨ ↨ ↨ ↨ ↨ ↨ ↨ ↨ ↨ ↨ ↨ ↨ ↨ ↨ ↨ ↨ ↨ ↨ ↨ ↨ ↨ ↨ ↨ ↨ ↨ ↨ ↨ ↨ ↨ ↨ ↨ ↨ ↨ ↂ ↨ ↂ ↨ ↂ ↨ ↂ ↨ ↂ ↨ ↂ ↨ ↂ ↨ ↂ ↨ ↂ ↨ ↂ ↨ ↂ ↨ ↂ ↨ ↂ ↨ ↂ ↨ ↂ ↨ ↂ ↨ ↂ ↨ ↂ ↨ ↂ ↨ ↂ ↨ ↂ ↨ ↂ ↨ ↂ ↨ ↂ ↨ ↂ ↨ ↨ ↂ ↨ ↂ ↨ ↂ ↨ ↂ ↨ ↂ ↨ ↂ ↨ ↂ ↨ ↂ ↨ ↂ ↨ ↂ ↨ ↂ ↨ ↂ ↨ ↂ ↨ ↂ ↨ ↂ ↨ ↂ ↨ ↂ ↨ ↂ ↨ ↂ ↨ ↂ ↨ ↂ ↨ ↂ ↨ ↂ ↨ ↂ ↂ ↨ ↂ ↂ ↂ ↂ ↂ ↂ ↂ ↂ ↂ ↂ ↂ ↂ ↂ ↂ ↂ ↂ ↂ ↂ ↂ ↂ ↂ ↂ ↂ ↂ ↂ ↂ ↂ ↂ ↂ ↂ ↂ ↂ ↂ ↂ ↂ ↂ ↂ ↂ ↂ ↂ ↂ ↂ ↂ ↂ ↂ ↂ ↂ ↂ ↂ ↂ ↁ ↂ ↂ ↂ ↂ ↂ ↂ ↂ ↂ ↂ ↂ ↂ ↂ ↂ ↂ ↂ ↂ ↂ ↂ ↂ ↂ ↂ ↂ ↂ ↂ ↂ ↂ ↂ ↂ ↂ ↂ ↂ ↂ ↂ ↂ ↂ ↂ ↂ ↂ ↂ ↂ ↂ ↂ ↂ ↂ ↂ ↂ ↂ ↂ ↂ ↄ ↄ ↄ ↄ ↄ ↄ ↄ ↄ ↄ ↄ ↄ ↄ ↄ ↄ ↄ ↄ ↄ ↄ ↄ ↄ ↄ ↄ ↄ ↄ ↄ ↄ ↄ ↄ ↄ ↄ ↄ ↄ ↄ ↄ ↄ ↄ ↄ ↄ ↄ ↄ ↄ ↄ ↄ ↄ ↄ ↄ ↄ ↄ ↄ ↄ Ↄ ↄ ↄ ↄ ↄ ↄ ↄ ↄ ↄ ↄ ↄ ↄ ↄ ↄ ↄ ↄ ↄ ↄ ↄ ↄ ↄ ↄ ↄ ↄ ↄ ↄ ↄ ↄ ↄ ↄ ↄ ↄ ↄ ↄ ↄ ↄ ↄ ↄ ↄ ↄ ↄ ↄ ↄ ↄ ↄ ↄ ↄ ↄ ↄ ↄ ↆ ↄ ↄ ↄ ↄ ↄ ↄ ↄ ↄ ↄ ↄ ↄ ↄ ↄ ↄ ↄ ↄ ↄ ↄ ↄ ↄ ↄ ↄ ↄ ↄ ↄ ↄ ↄ ↄ ↄ ↄ ↄ ↄ ↄ ↄ ↄ ↄ ↄ ↄ ↄ ↄ ↄ ↄ ↄ ↄ ↄ ↄ ↄ ↄ ↄ ↇ ↄ ↄ ↄ ↄ ↄ ↄ ↄ ↄ ↄ ↄ ↄ ↄ ↄ ↄ ↄ ↄ ↄ ↄ ↄ ↄ ↄ ↄ ↄ ↄ ↄ ↄ ↄ ↄ ↄ ↄ ↄ ↄ ↄ ↄ ↄ ↄ ↄ ↄ ↄ ↄ ↄ ↄ ↄ ↄ ↄ ↄ ↄ ↄ ↄ ↣ ↣ ↣ ↣ ↣ ↣ ↣ ↣ ↣ ↣ ↣ ↣ ↣ ↣ ↣ ↣ ↣ ↣ ↣ ↣ ↣ ↣ ↣ ↣ ↣ ↣ ↣ ↣ ↣ ↣ ↣ ↣ ↣ ↣ ↣ ↣ ↣ ↣ ↣ ↣ ↣ ↣ ↣ ↣ ↣ ↣ ↣ ↣ ↣ ↣ ↳ ↣ ↣ ↣ ↣ ↣ ↣ ↣ ↣ ↣ ↣ ↣ ↣ ↣ ↣ ↣ ↣ ↣ ↣ ↣ ↣ ↣ ↣ ↣ ↣ ↣ ↣ ↣ ↣ ↣ ↣ ↣ ↣ ↣ ↣ ↣ ↣ ↣ ↣ ↣ ↣ ↣ ↣ ↣ ↣ ↣ ↣ ↣ ↣ ↣ ↝ ↣ ↣ ↣ ↣ ↣ ↣ ↣ ↣ ↣ ↣ ↣ ↣ ↣ ↣ ↣ ↣ ↣ ↣ ↣ ↣ ↣ ↣ ↣ ↣ ↣ ↣ ↣ ↣ ↣ ↣ ↣ ↣ ↣ ↣ ↣ ↣ ↣ ↣ ↣ ↣ ↣ ↣ ↣ ↣ ↣ ↣ ↣ ↣ ↣ ↟ ↣ ↣ ↣ ↣ ↣ ↣ ↣ ↣ ↣ ↣ ↣ ↣ ↣ ↣ ↣ ↣ ↣ ↣ ↣ ↣ ↣ ↣ ↣ ↣ ↣ ↣ ↣ ↣ ↣ ↣ ↣ ↣ ↣ ↣ ↣ ↣ ↣ ↣ ↣ ↣ ↣ ↣ ↣ ↣ ↣ ↣ ↣ ↣ ↣ ↔ ↣ ↣ ↣ ↣ ↣ ↣ ↣ ↣ ↣ ↣ ↣ ↣ ↣ ↣ ↣ ↣ ↣ ↣ ↣ ↣ ↣ ↣ ↣ ↣ ↣ ↣ ↣ ↣ ↣ ↣ ↣ ↣ ↣ ↣ ↣ ↣ ↣ ↣ ↣ ↣ ↣ ↣ ↣ ↣ ↣ ↣ ↣ ↣ ↣ ↕ ↣ ↣ ↣ ↣ ↣ ↣ ↣ ↣ ↣ ↣ ↣ ↣ ↣ ↣ ↣ ↣ ↣ ↣ ↣ ↣ ↣ ↣ ↣ ↣ ↣ ↣ ↣ ↣ ↣ ↣ ↣ ↣ ↣ ↣ ↣ ↣ ↣ ↣ ↣ ↣ ↣ ↣ ↣ ↣ ↣ ↣ ↣ ↣ ↣ ↰ ↣ ↣ ↣ ↣ ↣ ↣ ↣ ↣ ↣ ↣ ↣ ↣ ↣ ↣ ↣ ↣ ↣ ↣ ↣ ↣ ↣ ↣ ↣ ↣ ↣ ↣ ↣ ↣ ↣ ↣ ↣ ↣ ↣ ↣ ↣ ↣ ↣ ↣ ↣ ↣ ↣ ↣ ↣ ↣ ↣ ↣ ↣ ↣ ↣ ↻ | ||
aaii jie bia li xia jilai aaiy ie ai yaiy i aixiy i aibaiy i abaiy i ayjay g yaiy g yaiy gie 1 saei dgi yaiill
pLai jie dic (jlll) Jll lal jao y:
A
y1/0125y1pbi
Lgolgl 120 g ayjllal/olxl aylas pblby jao sl210 00 00 00 00 yag yal yag yal yag yal yag yal yag yal yag yal yag yal yag yal yag yal yag yal yag yal yag yal yag
aill jll aaln no aal
J 10000000000000000000000000000000000000000000000000000000000000
g
a 1
1.
aai jg aiee
OE = 23
aalalalalalalalalalalalalalalalalal
jll jll jll lalai gaaa aai jai 2
A
10 Cglgllg 3
40-
.
a 4
duiy jiy jiy jiy jiy jiy jiy jiy jiy jiy jiy jiy jiy jiy jiy jiy jiy jiy jiy jiy jiy jiy jiy jiy jiy jiy jiy jiy jiy jiy jiy jiy jiy jiy jiy jiy jiy jiy jiy jiy jiy jiy jiy jiy jiy jiy jiy jiy jiy jiy jiy juyjuy 24
J 25
.
algal 13y yg lgsn y jally a g i dai pssu .26
.27
1.25 28
.29
y
jglg jgljgljgljgljgljgljgljgljgljgljgljglj
(3)g 2)g (1)
A. AB, ball, plumbly Jao jil
2
j 1 j 1
Jaaa aagaae aae aee aee aee
jiaaiall gajgaiial 1y j j 1i
Jg g
1111 1
aaii i 1
y 5
jill aagaa g yiaagai jai 1
aalalalalalalalalalalalalalalalalalal
| / BL1830B / BL1820B / BL1815N BL1860B / BL1850B / BL1840B | سيلةالطيرة |
| / DC18SF / DC18SE / DC18SD DC18SH | الإستعمال |
a a a a a a a a a a a a a a a a a a a a a
aalbally yg jll dgd ydaalld aodl l
a
1
/DUC356/DUC352/DUC306/DUC302/DUC256C
(DUC406)