
L 840 LED iHF - Lighting STEINEL - Free user manual and instructions
Find the device manual for free L 840 LED iHF STEINEL in PDF.
| Product type | LED wall light with iHF motion detector |
| Model | L 840 LED iHF SC/C |
| Brand | Steinel |
| Dimensions (W x H x D) | 110 x 110 x 133.5 mm |
| Weight | Approx. 0.8 kg |
| Power supply | 220-240 V, 50/60 Hz |
| Power consumption | 9.1 W |
| Light source | Integrated LED, non-replaceable |
| Luminous flux | 319 lm (model L 840 SC/C) |
| Luminous efficacy | 35 lm/W |
| Color temperature | 3000 K (warm white) |
| Color rendering index (Ra) | 82 |
| Average lifespan (L70B50) | > 60,000 h at 25°C |
| Detection technology | iHF (high frequency 5.8 GHz, ≤ 1 mW) |
| Detection range | 1 to 5 m (adjustable) |
| Detection angle | 160° |
| Time delay | 5 s to 60 min (adjustable via app) |
| Trigger threshold | 2 to 2000 lx (adjustable) |
| Orientation light function | Yes (off, 10 min, 30 min, all night) |
| Energy efficiency class | F |
| Protection rating | IP44 |
| Protection class | II |
| Operating temperature | -20°C to +40°C |
| Connectivity | Bluetooth (via Smart Remote app) |
| Manufacturer's warranty | 36 months |
| Maintenance | Clean with a damp cloth, no detergent |
Frequently Asked Questions - L 840 LED iHF STEINEL
User questions about L 840 LED iHF STEINEL
0 question about this device. Answer the ones you know or ask your own.
Ask a new question about this device
Download the instructions for your Lighting in PDF format for free! Find your manual L 840 LED iHF - STEINEL and take your electronic device back in hand. On this page are published all the documents necessary for the use of your device. L 840 LED iHF by STEINEL.
USER MANUAL L 840 LED iHF STEINEL
3. L 830, L 835, L 840, GL 80 SC/C
Please read carefully and keep in a safe place.
- Under copyright. Reproduction either in whole or in part only with our consent.
- Subject to change in the interest of technical progress.
Symbols


1
2. General safety precautions

Disconnect the power supply before attempting any work on the unit.
- During installation, the electric power cable being connected must not be live. Therefore, switch off the power first and use a voltage tester to make sure the wiring is off-circuit.
- Installing the sensor-switched light involves work on the mains voltage supply. This work must therefore be carried out professionally in accordance with national wiring regulations and electrical operating conditions.
Only use genuine replacement parts. - Repairs may only be made by specialist workshops.
3. L 830, L 835, L 840, GL 80 SC/C
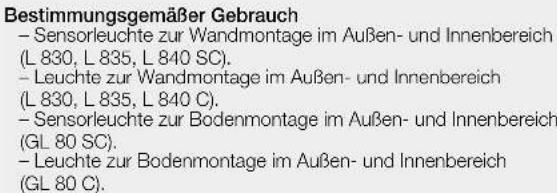
Proper use
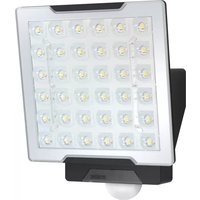
- Sensor-switched light for mounting on indoor and outdoor walls (L 830, L 835, L 840 SC).
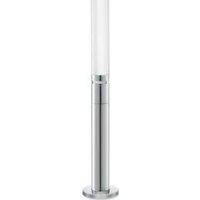
Light for mounting on indoor and outdoor walls (L 830, L 835, L 840 C). - Sensor-switched light for mounting on indoor floors and outdoor ground surfaces (GL 80 SC).
Light for mounting on indoor floors and outdoor ground surfaces(GL 80 C).
The sensor-switched lights (SC) feature an active motion detector. The integrated HF sensor emits high-frequency electromagnetic waves (5.8 GHz) and receives their echo. Any movement by persons in the sensor switched light's detection zone is noticed by the sensor as a change in echo.
A microprocessor then issues the switch command "switch light ON". Detection is possible through doors, panes of glass or thin walls. Analysing the signal, the sensor distinguishes between moving persons and moving objects, such as bushes or small animals. This rules out any inadvertent triggering by small animals as well as interference from extreme temperatures. The functions of the sensor-switched light can be set via smartphone and tablet or control dial. Bluetooth interconnection is only possible via smartphone or tablet.
Note: The high-frequency output of the iHF-sensor is approx. 1 mW – that's 1000 times less than the transmission power of a mobile phone or the output of a microwave oven.
Package contents L 830, L 835, L 840 SC/C (Fig. 3.1)
Luminaire
-Three screws
- Three wall plugs
Three spacers
Product dimensions L 830 SC/C (Fig. 3.2)
Product dimensions L 835 SC/C (Fig. 3.3)
Product dimensions L 840 SC/C (Fig. 3.4)
Product components L 830, L 835, L 840 SC/C (Fig. 3.5)
A Wall mount
B Connecting terminal
C Sealing plug
D Plug connection
E Light cube
Package contents GL 80 SC/C (Fig. 3.6)
Luminaire
-Profile
-Base plate
Four floor/ground screws
- Four wall plugs
- Four connecting screws
Product dimensions GL 80 SC/C (Fig. 3.7)
Product components GL 80 SC/C (Fig. 3.8)
A Cover cap
B Connecting terminal
D Plug connection
E Light cube
F Earth terminal
Luminous intensity distribution (Fig. 3.9/3.10/3.11/3.12)
Reach (SC only) (Fig. 3.13)
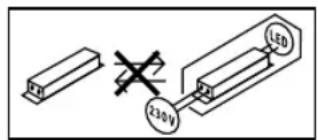
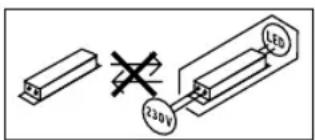
Note: If lights are mounted too close together, switching errors may occur as the high-frequency signals emitted will interfere with each other. (Fig. 3.14 A)
The following measures will help to avoid switching errors of this kind:
- Allow a distance of at least 5 m between lights.
- Interconnect lights via the Smart Remote app and selectively deactivate the sensor in individual lights via the Sensor-Off function (Fig. 3.14 B + C). As a result of interconnection, movement will also switch lights ON in spite of their sensor being deactivated.
4. Electrical connection
Wiring diagram (Fig. 4.1)
The mains supply lead is a 2 to 3-core cable:
L = phase conductor (usually black or brown)
N = neutral conductor (usually blue)
PE = protective-earth conductor (green/yellow)
If you are in any doubt, identify the conductors using a voltage tester; then disconnect from the power supply again. Connect phase (L) and neutral conductor (N) to the terminal. Insulate protective-earth conductor (PE) and place it next to terminal block.
For GL 80 SC/C, the protective-earth conductor must be connected to the earth terminal (PE).
Important: Incorrectly wired connections will produce a short circuit later on in the product or your fuse box. In this case, you must identify the individual cables and re-connect them. A mains power switch for turning the light ON and OFF may of course be installed in the mains supply lead.
Important: The light source of this luminaire cannot be replaced. If the light source needs to be replaced (e.g. at the end of its service life), the complete luminaire must be replaced.
5. Mounting
- Check all components for damage.
Do not use the product if it is damaged. - When installing the sensor-switched light, make sure the installation site is not exposed to vibration.
- Select an appropriate mounting location, taking the reach and motion detection into consideration.
Mounting procedure (L 830, L 835, L 840 SC/C)
- Switch OFF power supply. (Fig. 4.1)
- Undo retaining screws and detach light cube from the wall mount. (Fig. 5.1)
- Mark drill holes (Fig. 5.2)
- Drill holes and fit wall plugs. (Fig. 5.3)
- Pierce sealing plug.
- Installation with concealed power supply lead (Fig. 5.4)
- Installation with surface-mounted power supply lead (Fig. 5.5)
- Connect conductors (Fig. 5.6)
- Fit light cube onto wall mount (Fig. 5.7)
Screw in retaining screws (Fig. 5.7) - Switch ON power supply (Fig. 1)
Make settings via app (SC only)
"6. Function
Mounting procedure (GL 80 SC/C)
- Switch OFF power supply (Fig. 4.1)
- Undo retaining screw and remove light cube from the cover (Fig. 5.8)
Pull cable through base plate and profile (Fig. 5.9)
Screw base plate to profile (Fig. 5.10)
Mark base plate drill holes (Fig. 5.11) - Drill holes and insert screw anchors (Fig. 5.12)
- Screw base plate to the floor/ground (Fig. 5.13)
Screw cover onto profile (Fig. 5.14) - Connect conductors (Fig. 5.15)
- Fit light cube to cover (Fig. 5.16)
- Screw in retaining screw (Fig. 5.16)
- Switch ON power supply (Fig. 5.16)
Make settings via app (SC only)
"6. Function"
6. Function
The functions can be set for the SC types.
Functions are set via the Smart Remote app.
Smart Remote app
To configure the light via smartphone or tablet, you must download the STEINEL Smart Remote app from your app store. You will need a Bluetooth-capable smartphone or tablet.

Android iOS

Functions that can be set via Smart Remote app are:
Time setting
-Reach adjustment
Twilight setting
Night-light function
- Main light / night light level can be adjusted
Extended reach adjustment
Group interconnection
Twilight setting by teach-in
Time setting (stay-ON time)
The light's ON time can be set to any period from approx. 5 seconds to a maximum of 60 minutes. Any movement detected before this time elapses will restart the timer.
This function only ever applies to the C types in combination with a
Bluetooth sensor-switched product.
Note:
After the light switches OFF, it takes approx. 1 second before it is able to start detecting movement again. The light will only switch ON in response to movement once this period has elapsed.
The shortest time setting is recommended when adjusting the detection zone and performing the functional test.
Reach setting (sensitivity)
Reach is the term used to describe the diameter of the more or less circular detection zone produced on the ground after mounting the sensor-switched light at a height of 2m .
- Control dial set to maximum = max. reach (5 m)
Control dial set to minimum = min. reach (1 m)
This function only ever applies to the C types in combination with a Bluetooth sensor-switched product.
Twilight setting (response threshold)
The chosen response threshold can be infinitely varied from approx. 2 to 2000 lux.
- Control dial turned fully clockwise = daylight mode (depending on ambient brightness)
Control dial turned fully anti-clockwise = twilight operation (approx. 2 lux)
This function only ever applies to the C types in combination with a Bluetooth sensor-switched product.
The control dial must be turned fully clockwise when adjusting the detection zone and performing the walk test in daylight.
Night-light function
The night light provides illumination at approx. 10% of full light output. The light only switches to maximum output (100%) in response to movement in the detection zone (see Time setting). The light then switches to the activated night light level.
Night light is ON when the level of light falls below the brightness threshold. Night light is always ON when daylight mode is activated.
0 min = soft light start / no night ON from twilight setting selected
10 min = soft light start + night light for 10 minutes
30 min = soft light start + night light for 30 minutes
=softlightstart+nightlightallnightlong
This function only ever applies to the C types in combination with a Bluetooth sensor-switched product.
What is soft light start?
The sensor-switched light features a soft light start function. This means that when turned ON, the light is not switched directly to maximum output but constantly builds up brightness to 100% within a short period of time. Brightness is also gradually reduced when the light is switched OFF.
This function only ever applies to the C types in combination with a Bluetooth sensor-switched product.
Manual override function (Fig. 6.1)
If an optional mains switch is installed in the mains supply lead, the following functions are available in addition to simply switching light ON and OFF:
1) Activate manual override:
Switch OFF and ON twice. The light is set to manual override for 4 hours. Then it returns automatically to sensor mode.
2) Deactivate manual override:
Switch OFF and ON once. Light switches OFF or switches to sensor operation. Important: Switching must take place within 0.2 to 1 second.
7. Maintenance / care
The product requires no maintenance.
The light can be cleaned with a damp cloth (without detergents) if dirty.
Important note: the control gear cannot be replaced.
8. Disposal
Electrical and electronic equipment, accessories and packaging must be recycled in an environmentally compatible manner.

Do not dispose of electrical and electronic equipment as domestic waste.
EU countries only:
Under the current European Directive on Waste Electrical and Electronic Equipment and its implementation in national law, electrical and electronic equipment no longer suitable for use must be collected separately and recycled in an environmentally compatible manner.
9. Manufacturer's warranty
This Steinel product has been manufactured with utmost care, tested for proper operation and safety and then subjected to random sample inspection. Steinel guarantees that it is in perfect condition and proper working order. The warranty period is 36 months and starts on the date of sale to the consumer. We will remedy defects caused by material flaws or manufacturing faults. The warranty will be met by repair or replacement of defective parts at our own discretion. The warranty shall not cover damage to wear parts, damage or defects caused by improper treatment or maintenance. Further consequential damage to other objects shall be excluded.
Claims under the warranty will only be accepted if the unit is sent fully assembled and well-packed with a brief description of the fault, a receipt or invoice (date of purchase and dealer's stamp) to the appropriate Service Centre.
Repair service:
If defects occur outside the warranty period or are not covered by the warranty, ask your nearest service station for the possibility of repair.

10. Declaration of Conformity
Hereby, STEINEL Vertrieb GmbH declares that the radio equipment type L 830, L 835, L 840, GL 80 SC/C is in compliance with Directive 2014/53/ EU. The full text of the EU declaration of conformity is available at the following internet address: www.steinel.de
| 11. Technical specifications | |
| Dimensions W x H x D | |
| L 830 SC/C, L 835 SC/C | 110 mm x 110 mm x 131.5 mm |
| L 840 SC/C | 110 mm x 110 mm x 133.5 mm |
| GL 80 SC/C | 110 mm x 633 mm x 130 mm |
| Power supply 220 - 240 V, 50 / 60 Hz | |
| Power consumption (Pm) 9.1 W | |
| iHF sensor system power consumption | 0.67 W |
| L 830, L 835, L 840 SC | 0.67 W |
| GL 80 SC | |
| Standby (network (Pm)) | |
| L 830, L 835, L 840 SC | 0.45 W |
| L 830, L 835, L 840 C | 0.45 W |
| GL 80 SC | 0.45 W |
| GL 80 C | 0.45 W |
| Light output (lm) | |
| L 830 SC | 493 lm (anthracite), 523 lm (silver) |
| L 830 C | 493 lm (anthracite) |
| L 835 SC | 616 lm (anthracite), 616 lm (silver) |
| L 835 C | 616 lm (anthracite) |
| L 840 SC | 319 lm (anthracite), 319 lm (silver) |
| L 840 C | 319 lm (anthracite) |
| GL 80 SC | 650 lm (anthracite), 650 lm (silver) |
| GL 80 C | 650 lm (anthracite) |
| Efficiency (lm/W) | |
| L 830 SC | 54 lm/W (anthracite), 57 lm/W (silver) |
| L 830 C | 54 lm/W (anthracite) |
| L 835 SC | 68 lm/W (anthracite), 68 lm/W (silver) |
| L 835 C | 68 lm/W (anthracite) |
| L 840 SC | 35 lm/W (anthracite), 35 lm/W (silver) |
| L 840 C | 35 lm/W (anthracite) |
| GL 80 SC | 71 lm/W (anthracite), 71 lm/W (silver) |
| GL 80 C | 71 lm/W (anthracite) |
| Lamp LED | |
| Colour temperature 3,000 K | |
| Colour rendering index R | a = 82 |
| Average rated life expectancy L70B50 at 25°C: > 60,000 hours | |
| Colour consistency SDCM Starting value: 3 | |
| Night light Yes (OFF, 10 min, 30 min, all night, always) For C: only ever in combination with a Bluetooth sensor-switched product. | |
| Sensor technology (SC only) (5.8 GHz, ≤ 1 mW) | |
| Detection zoneAngle of coverage | 160°For C: only ever in combination with a Bluetooth sensor-switched product. |
| Angle of aperture | 160°For C: only ever in combination with a Bluetooth sensor-switched product. |
| Reach 1 - 5 m | For C: only ever in combination with a Bluetooth sensor-switched product. |
| Time setting 5 s - 60 min | For C: only in combination with a Bluetooth sensor-switched product. |
| Twilight setting 2-2,000 lux | For C: only in combination with a Bluetooth sensor-switched product. |
| Light source energy efficiency classL 830, L 835, L 840 SCL 830, L 835, L 840 CGL 80 SCGL 80 C | FFF |
| IP rating IP44 | |
| Protection classL 830, L 835, L 840 SC/CGL 80 SC/ C | II |
| Ambient temperature | -20°C to +40°C |
| Bluetooth frequency | 2.4 - 2.48 GHz |
| Bluetooth transmitter power | 5 dBm / 3 mW |

Technical documentation at www.steinel.de
- Troubleshooting
| Malfunction Cause Remedy | ||
| Light without power■Fuse has tripped, not switched ON, break in wiring■ Short circuit■ Check connections | ■ Activate, change fuse turn ON mains switch, check wiring with voltage tester■ Check connections | |
| Sensor-switched light will not switch ON (SC only)■ Twilight setting in night-time mode during daytime operation■ Mains switch OFF■ Fuse has tripped■ Switch ON■ Activate, change fuse check connection if necessary■ Set reach via app | ■ Set twilight via app | |
| Sensor-switched light will not switch OFF (SC only)■ Continued movement within the detection zone■ Check detection zone and readjust if necessary | ■ Check detection zone and readjust if necessary | |
| Sensor-switched light will not switch OFF completely (SC only)■ Night light selected■ Set night light to "0 min" | ||
| Sensor-switched light switching ON when it should not (SC only)■ Wind is moving trees and bushes in the detection zone■ Change detection zone■ Change detection zone | ||
| Sensor-switched light switches ON and OFF in an uncontrolled manner (SC only)■ Large metal objects, such as cars or metal walls, in the detection zone■ Change detection zone■ E.g. park car somewhere else | ||
FR
1. A propos de ce document
3. L 830, L 835, L 840, GL 80 SC/C
Utilisation conforme aux prescriptions
Application Smart Remote
3. L 830, L 835, L 840, GL 80 SC/C
Montagestappen (L 830, L 835, L 840 SC/C)
Montagestappen (GL 80 SC/C)
3. L 830, L 835, L 840, GL 80 SC/C
3. L 830, L 835, L 840, GL 80 SC/C
Uso previsto
3. L 830, L 835, L 840, GL 80 SC/C
Utilização prevista
3. L 830, L 835, L 840, GL 80 SC/C
3. L 830, L 835, L 840, GL 80 SC/C
Korrekt anvendelse
Monteringstrin (L 830, L 835, L 840 SC/C)
Monteringstrin (GL 80 SC/C)
3. L 830, L 835, L 840, GL 80 SC/C
3. L 830, L 835, L 840, GL 80 SC/C
Forskriiftsmessig bruk
- Sensorlampe for monitoring pà vegg ute og innate (L 830, L 835, L 840 SC).
Lamp for monitoring p a vegg ute og inner (L 830, L 835, L 840 C).
- Sensorlampre for monitoring pa gulv ute og innate (GL 80 SC).
Permanent lys (ill. 6.1)
Dersom det monteres en nettbyter (ekstrautstyr) pa nettledningen, har man folgende funksjoner i tillegg til enkel inn- og utkoblig:
1) Tenne permanent lys:
3. L 830, L 835, L 840, GL 80 SC/C
XpHAn ouoWVa e Touc kavoviaouc
AioHtnPioc, auiTnPac yia EyKatatao an Toxio eEeTepiKouc, KAI eWTeepiKocXwupoc (L 830, L 835, L 840 SC)
- Aaunnpac yia ekyataoan o8 danedeo oEeTepikoC kai eotepkoC xwpoc (L 830, L 835, L 840 C).
-AioBntnpoic, aajtnipac, yia ekyataotaon oe daeneo oe oowtepkockai EeWTEpikooc xwpoc (GL 80 SC).
- Aaprrnpa yia ykataoan oae danoe oo eWtepiokoc kai eowtepiokoc xwpoc (GL 80 C).
O ai08npiia laaunnpiec (SC) npiaqabavouv evpyo avxveut knvnnc. O evauwatauueoc aaiotnpac uanlnc auovmtac (HF) ektnmuie nAektpayawntka kupata (5,8 GHz) kai vivetae kcn tnc nXOC TWU KUPATW autuw, Me Tny napaqknp kwnv EvTC oTAW opiwu kauuNPiuv laauntriPwv, o ai08nmpac Evtonkei TNY aALAYN TNC nXOC.Evac mikoepieEepyaoTNE dyTe NTV EVOYONIOI pTOC". H avxveonmuo ano npote, uaoTIVAKEC kai aeTTouc ToIOX eivai eFikTK. Meow avaluoanc anjatoc o aoaHnTpacciaipooei metauKIVOUVEV atouk wkiKVOUEV AVNTKEEV WOnC 8auvo n ikpu Cwa. Eta atokLeioVTa EaFAUVEc eTAYWye cEartiac iKpUw CwU ovuc kai diataopaxec, Eaariac apaiuv bepkoapauw. O I aetoupyie.tou ai08nnpiauauapnnipra mtapovv va puoiotouv meow Smartphone nTablet noBuiotm. Mia dktowan Bluetooth eivai eFikTmovo
YtOBeIeH I xoUc uiunnc ouuvotntac Tou aoTnpa uynuW ouuvotntuv IHF avexetai nep. 01 mQ - qutio evou ovo 1000to cnc iXuoc Ektonc IvOC KINTOU TnEAPVou nuiac ouokceikpukpokpatuw.
Pepexoevo oukeuaiaC L830, L 835, L 840 SC/C (EK.31)
- Aqnnnpac
- Tpeic BiEc
- Tpia Takakia
-piia diaotapia
Aiaotaoic npoiovtoc L 830 SC/C (EK.3.2)
Aiaotaoic npoiovtoc L 835 SC/C (EK.3.3)
Aataaegic npoiovtoC 840 SC/C (Eik.3.4)
Enokonnon ouokurc L 830, L 835, L 840 SC/C (EK. 3.5)
Bnata ykataaana (GL 80 SC/C)
- AikokTTETpOphiooia peuIaTOc (EUK. 4.1)
AUVETa aaoiaionc kai apapeite FOIOTIKO KBO ano TO KAITAKI (EUK.5.8)
TpaBATEKALWIOEa ano otnpiydaanedou kai npoia (EK.5.9)
Biodwa otnpivmuatoc danedou kai npoipA (EIK.5.10) - 2npaedEETpuneCdiatpnone, oTo otnpiydaanoeou (Ek.5.11)
Avoiyete Tpuiec kai tonotheite ounat (Eik. 5.12)
BiswveTe Otnpiyda danedou danedou oTo danedso (Eik. 5.13)
BiodweTe Kanaki oTo npoipia (EIK.5.14) -
ZUVDETE KAWIOO OUVDEONC (EK. 5.15)
-
PooapocTe FwTIOK KBO OTo KAaKi (EiK.5.16)
BiodwTe Bida aocpaianc (Eik. 5.16) - Evpeyoonoeire Tpoepoosia peuuratoc (Eik. 5.16)
- Ppayatantoionpuθpiεw μεω εφapouyrc (óvo SC)
3. L 830, L 835, L 840, GL 80 SC/C
3. L 830, L 835, L 840, GL 80 SC/C
Méretek Sz × Ma × Mé
L 830 SC/C, L 835 SC/C 110 mm × 110 mm × 131.5 mm
L 840 SC/C 110 mm × 110 mm × 133.5 mm
GL 80 SC/C 110 mm × 633 mm × 130 mm
3. L 830, L 835, L 840, GL 80 SC/C
Preeled zarizeni L 830, L 835, L 840 SC/C (obr. 3.5)
A Nastenny drzak
B Pripojovaci svorka
C Uteshovaczata
D Zasuvne spojeni
E Teleso svitidla ve tvaru kosto
Rozsah dodávky GL 80 SC/C (obr. 3.6)
Svitidlo
-Profil
-Spodni deska
- Ctyni podlahove srouby
-CTyn hmozdkny
-CTyni spojovaci srouby
Rozmeryyrobku GL 80 SC/C (obr.3.7)
Preehled zairen(GL 80 SC/C (obr.3.8)
A Krytka
B Pripojovaci svorka
D Zasuvne spojeni
E Teleso svitidla ve tvaru kosky
F Zemnici svorka
Razlozeni svitivosti (obr. 3.9/3.10/3.11/3.12)
Dosah (jen SC) (obr. 3.13)
Upozorneni:
3. L830, L835, L840, GL 80 SC/C
Správné použivanie
3. L 830, L 835, L 840, GL 80 SC/C
3. L 830, L 835, L 840, GL 80 SC/C
3. L 830, L 835, L 840, GL 80 SC/C
Namenska uporaba
- Senzorska svetilka za stensko montažo zunaj in znotraj stavb. L 830, L 835, L 840 SC).
- LED-svetilka za stensko montažo zunaj in znotraj stavb
(L830,L835,L840C). - Senzorska svetilka za talno montažo zunaj in znotraj stavb (GL 80 SC).
Svetilka za talno montazo zunaj in znotraj stavb (GL 80 SC).
3. L 830, L 835, L 840, GL 80 SC/C
Namjenska uporaba
2. Udised ohutusjuhised

Katkestage enne igasuguseid toid seadme kallal pingetoide!
3. L 830, L 835, L 840, GL 80 SC/C
Nouetekohane kasutus
- Sensorvalgusti sce- ja valstingumstes seintele paigaldamiseks (L 830, L 835, L 840 SC).
- Valgusti on moeldud paigaldamiseks sise- ja valisruumide seintele (L 830, L 835, L 840 C).
- Sensorvalgusti sise- ja vallistingimustes porandale paigaldamisesk (GL 80 SC).
- Valgusti on moeldud paigaldamiseks sise- ja valisruumide seintele (GL 80 C).
Toote moatmed L 830 SC/C (joon. 3.2)
Toote mootmed L 835 SC/C (joon. 3.3)
Toote mootmed L 840 SC/C (joon.3.4)
Paigaldussammud (GL 80 SC/C)
3. L 830, L 835, L 840, GL 80 SC/C
L 830 SC/C, L 835 SC/C
L 840 SC/C
GL 80 SC/C
110mm×110mm×131.5mm
110mm×110mm×133.5mm
110mm× 633mm× 130mm
Prijungimas prie elektros tinklo 220-240 V, 50/60 Hz
Galios suvartojimas (P_)9,1 W
3. L 830, L 835, L 840, GL 80 SC/C
Pareiza lietosana
- Sensorgaismeklis montazai pie sienas ara un iekstelpas (L 830/L 835/L 840 SC)
-Gaismeklis montazai pie sienas aruniekstelpas (L 830, L 835, L 840 C). - Sensorgaismeklis montazai zeme aru un iekstelpas (GL 80 CS).
Gaismeklis montazai zeme aruniekstelpas (GL 80 C).
Sensorgismekji (CS) ietver aktivu kustibu zinotaju. lebuvetais infrasarkanais augstrefvekences sensors raida augstas frevences magnetetskis vijus (5,8 GHz) un uztver to atstarojumu. Cilveku kustifbas gadjumā sensorgismekla uzterves zona sensors fiks e atbalss izmainas. lebuvets mikroprocesors tad aktivize komando "lesegt gasmu". Sensors var uztvert a n kustifbas az durvīm, stikla rutīm vai planām sienām. Analizējot signalus, sensors atskir cilveku kustifbas no tadiem kustigemi objektimi ka krumi un neilei dzvniék. Tadejadi teik izslegta
kudaina ieslegsanas, kuru izraisa nelieli dzivnieki, ka antraucejumi sevijski augstu temperaturu gadijuma.
Sensorgaismekla fungcjas var iestatil ar viedtalruni un planstedatru vai iestatisanas sledzi. Saslegsana tikla carur Bluetooth ir ispejama tikai ar viedtalruni vai planstedatoru.
Norade:
iHF sensora augstfrevences jauda ir aptuveni 1 mW - tas ir tikai 1/1000 dala no mobila Telefona vai mikrovijnu krasns raidjaudas.
Piegades apjoms L 830, L 835, L 840 SC/C (3.1. att.)
-gaismeklis
-trs skruves
-tris dibeli
-tris starplikas
Produkta izmeri L 830 SC/C (3.2. att.)
Produktajzmeri L835 SC/C (3.3.att.)
Produkta izmeri L 840 SC/C (3.4. att.)
Ierices komplektacija L 830, L 835, L 840 SC/C (3.5. att.)
A Sienas stiprinajums
B Piesleguma azspiednis
C Blivaizbacznis
D Kontaksavienojums
E Gaismekla kubs
Piegades apjoms GL 80 SC/C (3.6. att.)
-gaismeklis
-profils
-gridasplaksne
-etras gridas skruves
-ctetri dibeli
-etras savienojuma skruves
Produkta izmeri GL 80 SC/C (3.7. att.)
lerices komplektacija GL 80 SC/C (3.8. att.)
A Parsegs
B Piesleguma azspiednis
D Kontaksavienojums
E Gaismekla kubs
F Zemejuma klemme
Gaismas stipruma sadafijums (3.9/3.10/3.11/3.12 att.)
Sniedzamiba (3.13 att.)
Norade:
Ja gaismekli ir uzmonteti blakus, tie var izraisit nepareizu slegsanos, ta karaidtie augstfrekvences signali tauce viens otram. (3.14. A att.)
Sadi pasakumi paifdz apiet so kldu:
Uzmontejiet gaismeklus ar vismaz 5 m atstatumu.
- Sasledziet gaismeklus tikla ar Smart Remote lietotni un izsledziet merktieci atseviisku gaismeklus sensorus ar Sensor Off funkciu (3.14B + C att.). Sasledzot tikla, kustibas gadjumai tek iesegtiar tie gaismki, kurusensori ir deaktiveti.
3. L 830, L 835, L 840, GL 80 SC/C
PnmuHeHne nHa3HaeyHIO
- CenhopbI CBETINbHIK IIA HACTEHHO MOHTaKa Ha yInJax N B NOMeueHnax (L 830, L 835, L 840 SC).
-CBETANbHINKJN HACTEHORO MOHTaXa HAUYIaX IN B NOMEJIeHHAX (L830,L835,L840C).
—CecnOpHbIcBtINbHbIKdIHaHApONbHOrMOHTaKaHa yMuaX N B NOMeue-HmAx(GL80SC).
-CBtIbHnKnHaHnOblHO MOHTaXa Hnyuax n NOMeUeHmX (GL 80 C).
CehcOpHie CBtINbHnK (SC) 7AIAKOTc AKTNBbIM DaTmKAMDN BmKeHn.
BCTpoEHn B4-CEHCOP NOCbIaET BICOKOaCToTHBe 3NEKTPOMaTHNtBle
BOHHb (5,8TTu) nIOyAAeT INx 3xo. PnD DmKHeH NIOeB 3Obe ObehApYKeHn
CBtINbHnKa CEBtINbHk BOCpNIHMaET N3MeHEHn 3xo. PnD
DmIKHeH NIOeB 3Ote ObehApXeHn CEBtINbHnKa CECOP BOCpNIHMaET
N3MeHEHn 3xo. MMkponpoecccop daet KOMaHypeKJIOUeHn ,BKnIOuytB
CBTe, Bo3MOxHO OBehApXeHn Yepez DBepi, OKOHbIE CTekJa nn TcEhbl.
PyTe mAnIm3a cmHana ceHCOP pa3NHaee tBnKyUxCrNIOeJ nn BnKyU
Uepec OB6BeKti, Taikke KAc KyTe IIn MEnKne XJIBOTHBe. TaikM Obpa30
NCKIOHaTcO OLIMBOHb EKJIIOHeHn N3-3a MeNKx JKNBOTbIX IN C60eB NO
PnpHHe kCTpeMaNBHX TempeaTyp.
Фнки CECOPHO CBtINbHnKa MoXHO HACPToBt CMaprTOHa n PnaH
Weta nnnocpeCTBOM yTaHOBOHOro peryIHTopo.ObbeHNHeB B cetb No
Bluetooth BO3MOxHO ToNko CO CMAPrTOHa nnnauHua.
YkaaHne:MOHOCbIHF-CeHCopa COCTABnREt OK.1MBT-3TO BCERO NINUBOANTHCIRHHA MOHOCN, H3NYaEOM COTOBIM TENEPOHOM INIM MAKPOBOHHOBOHNEHbO.
06bemIOCTaBnL830,L835,L840SC/C(pnc.3.1)
-CBETNJIbHnK
- TpN BnHTa
-TPnJIO6e
Tpn npocTaBKn
Pa3MepbI npOyKta L 830 SC/C (pnc. 3.2)
Pa3mepbl npodykta L 835 SC/C (pnc.3.3)
Pa3mepb npoykTa L 840 SC/C (pnc. 3.4)
O630npoodyktaL830,L835,L840SC/C(pnc.3.5)
A yronbHMK
B KIeMa nOdkNIOHeHn
C YNNOTHHTENB
D TEKeepHoe coeHHeHne
E CBeTAAUeNcKy6bl
Osbem noctabn GL 80 SC/C (puc.3.6)
CBETNbHnK
-npod
-ПЛNTA OCHOBAHIN
-YeTbipe JOHHbIX BNHTa
-4106
-YeIbpe COeINHHTeJIbHbIX BnHTa
Pa3mepbipnpoyktaGL80SC/C(pnc.3.7)
063op npodykra GL 80 SC/C (pnc.3.8)
A Naoh
B KJIEMMa NOKJIOYHn
D UTeKepeHoe coeMHHeHne
E CBeTuaeK Ky6bl
F KneMa 3a3eMHeHn
PacnpedeneHne cnilb caTa (puc.3.9/3.10/3.11/3.12)
Pdmyc DeIeCTBnra (TolbKO SC) (pnc. 3.13)
Ykaaahne: cBn CBTANHNIYcTAAOBHeHbCINILKOM 6N3KO dpYK dpyR, B03MOXHHI OUHIOHbYepeKNIOHeHnOckONyICNcyKaembIe BbcOKoHa-CTOTHIcGnHrAeTOB3AaMMHbIe NmEXn. (puc. 3.14 A)
Cneyuoune MepbH nomorakot 06oTu 3Ty OuM6Ky:
CBETANbHnKyCTaHaBnBaTb Ha pacCToRHM KaK MmHMyM 5M.
ObeHNbCTBcETINbHnKnB CTe bNCpeCTBOM npINIOXHeNMaSmart Remote nCeNEHAnpABeHNO kTNIOHb CeHCOP NocpeCTBOM cyHKm Sensor-Off Ha OTeJIbHX CBeNTINbHnKax (PNC.3.14 B+C).3a cHT obEHNHeB CTe bPn DnIKHeM BKNIOHcTACKte CBeNTINbHnK, CECOP KOTOpBX DeAKTNIBPOBAH.
4. 3neKtpnueckoe noKnloueHne
Cxema coeHHEnHn (pnc.4.1)
Cetebn npoBocOCTOnT u3 2 nn 3 knn:
L =Φa3a(uae Bcero yepHbuiu KOpnHebbi)
N =HynEBoI npOBoI (Haue Bcero CnHnI)
PE = npoBOD 3a3eMnEHHy (3eneHbI/KenTbI)
B cIyae comHHeHHn IeHTnHnnpoBaTb Ka6eIb C nOMOuBo HnNkAtopa, 3aTEM CHOBA OTKJIOHTb HApRKeHHe. PpCoeiMHITb Ph3Hb (L) n HnyeBOI npBOO (N) K KEMME CBeTnBnHa. PpOBd 3a3emHeHr (PE) n30npoBaTb n pOcTo nPNOKnITb pAOM. Ha GL 80 SC/ C HeoXoIMMo nKJIOHTb npOBd 3a3emHeHr (PE) K KEMME 3a3emHeHr.
Bakho: BCNECTBEH NHPABINHbHOTN PNPDCOEHNHEH NPOBOHO B PNIOBOP ENI B PACPpeNTIELHOM RIKKIE C npDOXPaHHTENMI MOKETPNOH KOKTOPTK3aMbIKAHNE. B TAKOM ciayue pekOMeHJeTcN PPOEBITN PPOBOA IN 3aHOBO NOKNIHOHTb IN. Camo COOB pa3yMeTcN, B pNOBD, pnpcoeHNHEH K CETN MOKET BMOHTNPOBAH BbKNIOaTeNb DnB BKIOHOHN BbKIOHeHH CeteBO TOKA.
Baxho: HCTOCHN KBETA 3TOF CEBTJALHbNA HE NOJNEKHT 3AMHe. Pn HEO6xoDMIOCTN 3AMEHbI HCTOCHN KCBTA (HAPNMEP, B KOHLE ERO cPOKA cnKbI), HEO6xoDMIO 3AMEHITb BECB CBETINblHbIK.

5. MoHTax
- PpOBePHTB BCE KOHCTpyKTHBHeIe DetaiJH Ha npEIMET NOBpeKDeHnA.
- PpN NOBpeKdEHnX He BKIOHaTb pOpyKT.
- Pn MOHTaKe CEHCOPHOro CBETINbHnka Cnepntb 3a TEM, YTO6bl OH KpeINrca 6e3 Bn6paui.
Bb6paTb noXoJauee MeTO dIa MOHTaKa C yHcTOM paMyca DeCTBn perCTpaun DmKHeH.
ToprO MoTAtKa (L 830, L 835, L 840 SC/C)
OTKIOHHTb 3NEKTPoNTaHHe. (pnc.4.1)
OTNYCTNTB CTONOPHBE BINTBI CHRTB CBETRIIEC KY6bl C yTOLBHNA. (pnc.5.1)
- Hametntb OTBepCTnIa CBepeHn (Pnc. 5.2)
- PpocBepnntb OTBepCTn IN BCTaBnTb IIO6eNN. (Pnc. 5.3)
- PpO6Bb yNnOHTnTEnb.
- MoHTaX npn noDBoe Ka6eIa KcPbToI npoBdoKo (pnc. 5.4)
- MoHTaX npn noBDOe KaBEnr OTKpbTOn npOBoJko (pnc. 5.5)
IopKnHHTb coeHHnHbHbKaben (pnc.5.6)
HaetbCBETRnuecKy6bHa yrobnHk (puc. 5.7)
BkpyTtB cTOnOpHbIe BnHTbl (pnc.5.7)
BKnIOHTb 3eKtponrTaHne (pnc.5.7)
BbnoJHnTb perynipOBKn c nmoosio npnoxhenr (ToIbKO SC)
"6.3Kcnnyataun"
IopraokMOHTaxa(GL80SC/C)
-OTKIOHHTb 3JIeKTPoNTaHHe (pnc.4.1)
- Otnyctntb kpenexhbl BNHT n CHrTB nlaoh (puc. 5.8)
- Ppotaunb kaebnb cheep3dohbl depkatae b npocn (pnc. 5.9)
- PnukpyTntb DoHHbI DepeKataIb n npocnB (pnc.5.10)
- Hametntb OTBepCTnIa CBepHeHnHa nIITe OCHOBAHn (pnc. 5.11)
PpocBepnTb OTBepCTN N BCTaBnTb DIO6eN (pnc.5.12)
PnKpyTntb DOHHbI depKaTeB K dHy (pnc.5.13)
- PnKpyTb nnafoH K npoepnIO (pnc. 5.14)
PonKnHHTb CoeHNHTeHBn Ka6enb (pnc.
HaetbCBETRAeCkY6bHa nlafoh (pnc.5.16)
BkpyTuMb KpeneKhbBnHT (pnc.5.16)
BkIIOHTb 3NEKTPoNTaHHe (PNC.5.16)
BbnoHnHb perynipOBKn c nOmoaBIO npnNoxehn (TolbKO SC)
→"6.3Kcnnyataun
6. 3Kcnnyataa
Функш мохно OtpуглmpoBaTдЯВаMuHToB SC.
PerynilobkA kHkiy BblnoIhreTc c nOIObI npInokHeNg Smart Remote.
PpIIOxKeHne Smart Remote
Дян KOHDPYRpyaIbIc BcTnBnHka C nOMOsbIO cMaPTpOHa nINnAHIETa
EOxOIMMO cKa4aTb npINOKeHHe STEINEL Smart Remote nAe AppStore.
HEoXoIMM cMAPTpO hNnAHIET e Bluetooth.

Android iOS

Функци, KOtOpbIe MOrTy peRyIINpOBaTbCЯ NOcpeIcTBOM npInIOxKeHn
Smart Remote:
BpemBAKIOeHn
-YCTaHOBka daJIbHOCTn DeIcTbM
- YCTaHOBkaCyMepeHOro BKNIOHeHn
-ФyHKHHOHHOOCBHeH
-Bo3MOxHOCTb perynipOBKn ypoBnOCHOBHOr / HOHOrO OCBeEHH
- PacupeHHa yCTaHOBka dabHoCTn DeIcTBn
-06beneHHeB rpynny
- YctaHObKa cyMepeHHoro nopora nocpeCTBOM 6yHeHn
BpMa BkHoueHn (BpMa octatoHoro BKIOueHn)
Heo6xOIMMOBpEMMAOCEBEHINMAKOTbYCTAHOBHEA CBTNIBHNIKE nIaBHO Bnana30NEOTcK. Do mKAC. 60 MM. KaKdoe aepertnCPPOBaHHOE DIIKHEE NO INTcEHHM 3TTO BPEMeHN 3aHOBO HAAHNAETOTCHBPEMeHN.
3Ta cyHKJnI DeHCTByET IINBapnAHTOB C Bcerda TOnbKO B KOMnHaUNC npOyKTOM C cEHcopOM Bluetooth.
Yka3aHHe: nocJe KaXdOro npouecca OTKIOHcHnCBETNbHnKa OsbHApKe Hne HOBO BnKHeHn ppeBbAeTc npHM. Ha 1 cekyHy. TOnbKO no NCTeHc Hm 3TOrO BpEmeHn CBtNbHnM KOeTc CHBaBKnIOHbCBET npn DnBxKeHm. Pnp YcTaHOBKe 30hIb OsbHApKeHn npn PpoBeHn 3cknIpyaTaNHO Tecta peKoMeHdyETcRyctaHaBnBaTb Han6bonee KopotKoe BpEma.
Perynnpobka padmyca deiCTBna (yBCTBnteIbHOCTn)
NoHnTneMpaNc DeCTBnaNOHMaKOT noHTn Kpyro06pa3HbI DnAmETp
Ha 3eMHe, KOToBpI pR MoHTaXe Ha BbICote 2 M o6pa3yET 3OHy o6HapyKeHn.
-YctahOBouHbpeyIaTOpHaMaKc. MaKC.paMyc DeIeCTBn(5M)
- YCTAHOBOCHHbI peryTATOP Ha MHH. = MHH. paDyUC deJeCTBn (1M)
3Ta cyHKJnI DeIcTByET nI BapnAHTOB C BCERda TOnbKO B KOMnHaUMC npOyKTOM C cEHcopOM Bluetooth.
YcTaHOBcCyMepeHOro BkIOHeHn (nopor cpa6aTbHAHn)
Heo60xDnHmN porop cpa6aBtBAnHc BcTeIbHnIKA MoKET 6bITyCTAHOBJIe HpAHO B Dnna3OHe OT 2 Jk Do 2000 Jk.
- YCTAHOBHOHpyerIPOT, NOBEPHYtIO pyynopa BnPABO = PEXKIM DHEBHOTOCBSEHUN (HE3ABNCUMO OT JPKOCTU)
-YCTAHOBO HbHpyENOP, NOBePHTyBtdo ynopa BHeBO = pckm cymepeHOrO OcBcEHN (ok 2 k)
3Ta cyHKyIeCTByETnBapnAHTOB C Bcerda TOnbKO B KOMnHaumC npOyKTOM C cEHcOpOM Bluetooth.
Pn yctaHOBKe 30HbO6hApyKHeN N I nI npOBeEHHkCNlyataUIOHO HTOCTa Pn nDHEBOM CBeTcYTHAOCHHy peryrAToPpeKOMeHyETcRc yctAHABMBtDo ynpora Bpao.
Функлuar HOHORO OCEueHnA
HoHHeO CBEUeHHe OecneHbAeT CBEUeHHe C pNIM. 10% MOUHOCTn CBeta. Pm DnKHeHn B 30He O6HApYKeHn CBET BKIOHOaETc H yCTaHOBHeHn BpEm (CM. PPODJOIKTeJIbHOCTb BKIOHOeHn) Ha MAKC. MOUHOCTb OCEeHn (100%) 3aTEM CBETNIbHn KCHOBapeKIOHOaETc HA AKTIIBPDBAOHHe HOHOE OCEeHHe
HoHHOO cBHeIeHBE BKL, eJIM ypOBeHb OyckAeTc HmKe RpkocTHOro Nopora. PnKAtNtBnpoBaHHOM peKHMpeDHEBHORO oCBeIeHn HHOHOeOCBHeIeHecerda BKL.
0 MmH. = nnaBHOe BkIOueHne CBeta / 6e3 BKJI. HocHoro OCBeuEHHa
HauHHa C yCTAHOBNEHHORO 3HAueHHy CyMEpeHHORO NOPORA
10MHN. = PnabHoe BKNIOUeHHe CBeTa + HOuHoe OCBeUeHHe 10 MmH.
30 MHN. = Плавhoe BKNIOHHe CBeTa + HOHoe OCBeIeHne 30 MNH.
= PnabHOE BKNIOHcHME CBeta + HOHOE OCBELHE MEOHO
3Ta cyHKJyIeCTBByET IaBapHaHTOB C Bcerda TOnbKO B KOM6HALIMC npOyKTOM C cEHcOpOM Bluetooth.
YTO TAKOE PJIABHOE BKJIOUeHHe CBeta?
CeHcOpHbCBTINbHKOCHaueh FyHKUeN PnABHO BKNHOHcBaTa.
BlaOaepa daHHoFyHKUeMkACKIOKCTCBNTINbHNA yCTAHANbMAeTC
MeIeHHoB T CEteHHe HENPOJOKNTEnbHO R BoPEMeH. TaKM J6pAb3OM
peYnnpTeC MOuHcTB CBea npBbKIOHcEHN CBETINbHNA.
3Ta cyHKnIeCTbYeT IINBapnAHTOB C BcERda TOnbKO B KOMBuHaUNC npOyKTOM C cEHcopOM Bluetooth.
PexnM NOCToHHORO OCBeueHnA (pnc.6.1)
B CNYae OIUMHbNBOYCTAOHBK CETBBO R BYIKHOATER B CETBOB npBOD, NOMMO 6a3OBHX FHKUIN BKIOHEH N BYIKHOHCBETA pnp DKBIXHN DOCTYTHBi CNEYIOHUE FHKUIN
1) BknoeHne noctoHHoro oCbeHn:
BbIKIOHATeB BbIKIOHHTB N BIKIOHHTB 2 p3a. CBeTnIbHK Ha 4 haca yCTAHABINBAETc H NoCTOHHBcET. IIO nCTeEHN BPEMeHN PPOIN3BOIDNTC AOTOMATAHECKOE NEPEKJIHOHHe B cEHOCPH bpeKM.
2) BbIKIOuHTb NOCTOARHHoe OCEeHHe:
BbIKIOHATeIb BbIKIOHTb N BkIOHHTb 1 pa3. CBeTINbHVK BbIKIOHaETc HINNEpeKIOHaETcB CEHCOPHbI pEKHM.
Baxho: PpoeccbnepeKIOeHn DOJXHBy BbINHtbcB Dnaana3OHe OT
0,2do1cekyHdb.
7. TexHHueckoe 06cIyKuBaHne/yxOa
PpOdyKT He Tpe6yeT TexHnueckoro 0cbIyKnBaHna.
3aTpR3eHnAH BA CbETIbNHKe MOKHO YdaJIrB bIaXkbHm CYKHOM (He NCN0NbY MaOOLiue cpECTBa).
Baxho:Pa6ooye H3dJIne 3aMeHHTb HeIb3r.
8. YtJIN3aun
3NeKtpponp6opbl, KOMnIeKtyIOUne n ynaKOBky cneNyET HappaBnHa 3KoJorHHyIO BTOPHHyo nepepa60Ky.

He bIbpaBbTa 3neKtpponpA6OpBb 6bToBbE otXoBb!
Tolko dIcTpaH EC: cornacho DeIcTByOuIe EbponeNcko DNpeKTHBE no OTpa60TAHOMy 3IeKTPnHECKOMy n 3IeKTPoHOMy 6OpdyOBaHIu N ee peaIIN3AUMB HauHOHbIbX 3AKoHOaTeIbCTbX OTpa60TaHHe 3IeKTPoPn60pbl DOnJIbHbCoPAbCBy OTrdJIbHO HAnpaBnITbCBy HA 3KOIOHHHy BTOPHHHy nepepa6OTky.
9. TapaHTnI npOn3BODnteJIa
JaHHeO H3dJIe NpOn3BODCTBa SteInel 6bIIO C Oc06bIM BHNMaHnEM N3rTOBHeNIO NcBtHaHO Na pOToCNOoBCHOCTb 6BeOaNACHOCTKcNlYATAUUM COOTBeTcBEHO DeCTByOuMM INHCTpyKUIM, A NOTOM NOBeprHgTYBbOPOOHMO KHOPTPOIO KAHECTBA. FfPMA STEINEL. rapAHNPyET BICOKOE KauEChTBO N HaedkHyopapBo TY hENDA. TaPANTHnBcPCKNlYatauM cOCTABHTET 36 MeCAUEB Cdo HJ PpOAdKNi NDENDA. FfPMA 063yETcY cTpaHnB HeOCCTAaK, KOtOpbe BO3NHKnB ECNECTBNE DEpckTA MATEpNA uNIM KOHCTPyKUIM. DepeKTb YcPAnHOTCR NTyETPeMOHTA hENDA. N5o ZAMEHn HcnpaBHBx DetaleNo yCMOTpeHIO QPMbM. TaPANTHnBcPCKNlYATAUIM He paCpOcTpaHReTc HA NobPexDeHNI ANDePekBT, BO3NHKnW Epe3yblate H3Noca DetaleNo, HeAaNeKaUeE KcNlPyAUYXoDA. FfPMA He HcEET OTBETCBHHOCTNa MATEpAmNbHb Uyep6 TpTeBx NLI, HANecHHB N I pOceCE 3KcNlYatauM h3dINIA. FapAHNTNpEOCTABnRETC TOJIKB B TOM CnYae, ECN H3dJIe B CO6paHHOM YNAKOBAHHOM BnDE C KpATKM OMCAHnEM HcNCPaBHOCTN bOLO OTPABnEO BMcTe C nPINOxEHnBM KACCOBbIM YekOM NIK KSHaTHaUe (C dAton PpOaDN NneHATbIO TOPROBO TnpDnPiTn) No aDpcy CePBCHOH MaTEpCKO.
PemOHTHb cepn: NOCTEHmRAPaHTHNOcPOKaIINpHnHaHIMHeNoIaOK, NCKIOHCHOLIX rapaHTHIO, O6paTIVTeB 6bnKxJaUeE cepBNCHoePnpdIHNrTHne, YTO6bI NaYHbN HOPOpMaHIO O B03MOXHOCTN PemOHTa.

10. CeptnФнкAT COOTBETCTBn
HaCToIIM KOMnHn STEINEL Vertrieb GmbH sAaBnaet, YTO paIIOAnnapaTpya Tnla 1830, L 835, L 840, GL 80 SC/CG tBeHaETTre6BaHnM DInpeKTHB12014/53/EU. NOnHH TeKT cepTmKATA COOTBeTCTBnE EC DOCTyNEH NO cnDyIOUeMcy apecy B INHTepHe: www.steinel.de.
| 11. Texnliche DaHbIe | |
| Габашиные размени by L × B × Γ | |
| L 830 SC/C, L 835 SC/C | 110 MM × 110 MM × 131,5 MM |
| L 840 SC/C | 110 MM × 110 MM × 133,5 MM |
| GL 80 SC/C | 110 MM × 633 MM × 130 MM |
| Сетево падкlioочице | 220-240 B / 50/60 Гι |
| ПOTравлиая мошноctь (Pm) 9,1 BT | |
| ПOTравлиая мошноctь iHF-ceнсора | 0,67 BT |
| L 830, L 835, L 840 SC | 0,67 BT |
| GL 80 SC | |
| Standby (cetb (Pm)) | |
| L 830, L 835, L 840 SC | 0,45 BT |
| L 830, L 835, L 840 C | 0,45 BT |
| GL 80 SC | 0,45 BT |
| GL 80 C | 0,45 BT |
| Сетовая мошноctь (ЛМ) | |
| L 830 SC | 493 ЛМ (аHTрацNT), 523 ЛМ (cepeбpo) |
| L 830 C | 493 ЛМ (аHTрацNT) |
| L 835 SC | 616 ЛМ (аHTрацNT), 616 ЛМ (cepeбpo) |
| L 835 C | 616 ЛМ (aHTрацNT) |
| L 840 SC | 319 ЛМ (aHTрацNT), 319 ЛМ (cepeбpo) |
| L 840 C | 319 ЛМ (aHTрацNT) |
| GL 80 SC | 650 ЛМ (aHTрацNT), 650 ЛМ (cepeбpo) |
| GL 80 C | 650 ЛМ (aHTрацNT) |
| Дф做完�пинтолье (ЛМ/BT) | |
| L 830 SC | 54 ЛМ/BT (aHTрацNT), 57 ЛМ/BT (cepeбpo) |
| L 830 C | 54 ЛМ/BT (aHTрацNT) |
| L 835 SC | 68 ЛМ/BT (aHTрацNT), 68 ЛМ/BT (cepeбpo) |
| L 835 C | 68 ЛМ/BT (aHTрацNT) |
| L 840 SC | 35 ЛМ/BT (aHTрацNT), 35 ЛМ/BT (cepeбpo) |
| L 840 C | 35 ЛМ/BT (aHTрацNT) |
| GL 80 SC | 71 ЛМ/BT (aHTрацNT), 71 ЛМ/BT (cepeбpo) |
| GL 80 C | 71 ЛМ/BT (aHTрацNT) |
| Овetedенье средство | СИД |
| Temperatурацenta | 3 000 K |
| Коафшиентцетонердун | Rg=82 |
| Сразни расhevный срок сухьы | L70B50 рп 25°C: > 60 000ч |
| Консentеляцenta SDCM | Началhoe занениe: 3 |
| Hochhoe ocbeuhenie | Да (Быкл., 10 мин., 30 мин., BSCЮноь, BSCERDA) |
| ДдзС: Всерда толък в komбиони спюуктм c cehcopom Bluteoth. | |
| Сechорна Теника ( tolerьк SC) | (5,8 ITU, ≤ 1 MBT) |
| Зona oxвatable | 160° |
| Угл oxвatable | ДдзС: Всерда толък в komбиони спюуктм c cehcopom Bluteoth. |
| Угл pactвора | 160° |
| ДдзС: Всерда толък в komбиони спюуктм c cehcopom Bluteoth. | |
| Радиус.Deяства | 1-5 M |
| ДдзС: Всерда толък в komбиони спюуктм c cehcopom Bluteoth. | |
| Врея Величесna | 5sec. - 60min. |
| ДдзС: TOLьКВ komбиони c рюук- ТOM c cehcopom Bluteoth. | |
| Устовka sympeсного Величесna | 2-2000 Лж |
| ДдзС: TOLьКВ komбиони c рюук- ТOM c cehcopom Bluteoth. | |
| КлASSЕРOSTФЕKTINIBHOCSTN | |
| Источиca CBETA | |
| L 830, L 835, L 840 SC | F |
| L 830, L 835, L 840 C | F |
| GL 80 SC | F |
| GL 80 C | F |
| Вidд зашльчILP 44 | |
| КлASSS ZAUHTB | |
| L 830, L 835, L 840 SC/ C | II |
| GL 80 SC/ C | I |
| Температура okружаншей среды | -20° - +40°C |
| Частота Bluteoth | 2,4-2,48 ITU |
| Мошеньettingесядуна Bluteoth | 5 dBm / 3 MBT |
| 12. Henonadкnpri ekcnnyatau | ||
| Hapyшени PrinunnaHa YctpaHene | ||
| Ha cBeTINbHnke HET HanpЯженя | ■ П dedoxpanitel срботал, He BKNIO- hen, HeNCpabNochtb п探测у | ■ ВknIOCHITb, 3amEHNITb P dedoxpanitel, BknIOCHITb CTeBOI BbKIOCHATEL, npObe- pIb T pOBOD nHdNka- TopOM HaprpoJHEnry ■ PobOeRyt b noDknIO- chenry |
| ■ KopotKoe 3ambKaHne | ||
| CencoRbHs CBtINbHnK He BkIOHcAeTcR (TolbKO SC) | ■ Пи ДнEVHOM peKIMme, yCTaHOBKa cymepehHO rno pora yCTaHOBIneBA HOnHO peKIM ■ BbKIOCHEN CTeBOI BbKIOHcAeTb ■ Cpa6OTan P dedoxpa- HITeJIb | ■ OtperynipovabT cymepeHoe ocBe- UeHene NocpeDCTBOM PnlnOKeHnry ■ BknIOCHITb ■ BknIOCHITb, 3amEHNITb P dedoxpanitel; PnIM Hec6xOdMOCTHn Ppo- BepRyt b COeYHEnry OtperynipovabT daLbHOCb T deIcTBn NocpeDCTBOM PnILO- KekHnry |
| ■ HcnpABINbHo yCTaHOBIneBA 30Ha obHApUckHnry | ||
| CencoRbHs CBtINbHnK He BbIKIOHcAeTcR (TolbKO SC) | ■ ПocSTORHnOE ДВИКЕнE B 30He obHApUckHnry | ■ PioBepRyt b yactOK n, PnIM Heo6XoDMOCTHn, BHOBy OTperynipovBaTb |
| CencoRbHs CBtINbHnK BbIKIOHcAeTcR He PoIHO- CTbI (TolbKO SC) | ■ ВьбраHO HocHoe OCBeUeHnne | ■ UcTaHOBcHbI pyEr- JIyTOp Ha "0MH." |
| CencoRbHs CBtINbHnK BbIKIOHcAeTcR prOu3BOJb- HO (TolbKO SC) | ■ B 3OHe DvIXeHnE PpOcXoDHT DvIXeHnE depeBbE B kycTob ■ BbIKIOHcAeTcB pe3yIbTaTe DvIXeHnE ABTOMaUHH Na DOpore | ■ V3MeHITb 3OHy ■ V3MeHITb 3OHy |
| CencoRbHs CBtINbHnK HEKONTPOIpNyEMO BkIOH- OaETcR II BbIKIOHcAeTcR (TolbKO SC) | ■ KpyIhIbe MetaIIIM- YeCKNe PpeDMeTb, HapIMeP, TakaIe KaK ABTOMoBII INIIM Me- TaIIINeCKHe CTeHbI, B 3OHe OxbaTae | ■ V3MeHITb 3OHy HapIMeP, PpIMap- KOBaTb ABTOMoBIIb IVaHe |
BG
1. 3aTo3nDOKyMeH
MoJ npOyTeTe ro BHMATEJHO n r na3eTe!
- Bcunkpaba 3ana3eHn. IpeneHaTbaHe, npn OTKbcneHNO, cmo C haupe pa3peuHme.
- 3aIa3BaMe cn npABOTo 3a npOMeHn, KOITO cIyKAT Ha TExHHeCKOTO pa3BHTNe.
06aChHeHnHa CmBbONITE


KpTaKa KbMa Yactn OT TEKCTa B DOKyMeHTa.
2. 06u yka3aHn 3a 6e3oNaChOCT

IpeDn da npeDnpneMeTe KaKBToNo Ja e pa60Tu no ypeDa, npeKbChete eJeKTpUeCKOTo 3axpaHbAhe!
PnMO MOnTAg ENEKTPUHeCKATA CNTCTEMA TpR6BaJa e 6e3 HANPEKHEME. TpBPO CnpTe ENEKTPUHeCKA TOK, cneI KoTo pNoBepete CNTCTEMATAC ypeD 3a npOeBPKa HA NpHApEeKHeMTO.
MoTAtkBt Ha CE3HOpHATA JAMTA N3MCKBa pAbOta C eIeKTPmECTBO. 3aToBa TPr6Ba Da n cEBbPn IPOcpeCnOHAnHO, Cnpoe, CBOTBHTHe TbPKAHN PnepnncAHN IN3MCKBAHN.
- 3nnon3BaIe cAmO opuHnHaHn pe3eOBHn HaCTn!
- Pemontte Tpr6Ba da ce n3BbPwBaT caMo OT cneuaHn3npaHn cepBu3n.
3. L 830, L 835, L 840, GL 80 SC/C
Ynotpe6a no npedHa3HaueHne
—Ceh3opHa namna 3a MOHTax Ha BbHua HnBbTpHa cTeHa (L 830, L 835, L 840 SC).
- JAmna 3a MOHTax Ha BbHsHa nn BbTpewHa cTeHa (L 830, L 835, L 840 C).
— Cen3opHa nAMn 3a MOHTax B Iocda,OTBbH NIM BBTppe (GL 80 SC).
- lamna 3a MOHTAX B NOda, OTBbH uNN bTpe (GL 80 C).
Ceh30pHnTE naHn(SC) npTeKabat akTmBHe daTHM 3a DnKHeMe. VHTerpn paHnRT BnCOKOHECTOTBE Ceh30P nIbHBa BnCOKOHECTOTHN ENEKTPOMAHNTHBA bHn(5,8GHz) n npXbaA TxAHOxO. PnDnKHeMe HA xopBa OxbaHa cEH30pHATA nnA, ceHc30pBT OHnPA pOMhAba B exTO. MkponpoeCop n3da BOMaHa 3a BKNIOBaHE Ha OCBeTHeHMe. 3acHnA Hpe3BPaTI, CTbKnA
IIN TBHKN CTEHN E B53MOXHO. NocpeCTBOM aHaHn3 Ha cHrHana ceH3OpbT InpaBn PA3JIMNA MEKdy DBeKHeJIe CE xOpa N DmEKeJIe CE o6Ekn, Kato XpactN IN MAni MAJIK XJBOHTNI. NO To3N HAAHn CE eMIMMHnAT pReHn CMHR NT ON MAnIK XJBOHTNI, KAKTO n CmUyEHHN Nopadn EKCPTpeHMn TEMNEPAtPN. FHyHKNTNE HA CeHOPHATA NaMaN MoRat da 6bDat perYNIPAHn PNe3 CMAPT PhoH n TabNet INI peryIAtOn 3a HAcToPKA. BKnHOBaHEto B Bluetooth-MpeKa e B53MOXHO CAMO NocpeCTBOM CMAPTDPON INI TabNet.
CSeHHe:MoUHcTTa HA UHdpAeHPBENH BUCOKOueCToTeH C93Op e OKOJIO 1 mW -TOBa e cAmo 1/1000 auct OT MOUHcTtHa MOuJIeH TenePCHIIMMKPOBJIHOBA NeKa.
CbtpkaHHe Ha komnneKta L830, L 835, L 840 SC/C (pnc. 3.1)
-naMna
-TPN BHTA
-TPNIO6e
TPOIPOLOKKN
Pa3mepn L 830 SC/C (pnc. 3.2)
Pa3mepn L 835 SC/C (pnc. 3.3)
Pazmepu L 840 SC/C (pnc.3.4)
IperneHa ypeLa L830, L 835, L 840 SC/C (pnc. 3.5)
A CToaKa 3a cTeHa
B KneMa 3a Cbbp3BaHe
C YnNbTHNTeN
D Cbpka
E OcbetnteneH 3ap
CbIbpxaHHe Ha KOMnneKta GL 80 SC/C (pnc.3.6)
- -npocpn
-NOOBAIIaTKa
-HTINH - 费图DIOBENA
-HeTmPnCBbp3BaUINBnHTa
Pa3Mepn GL 80 SC/C (pnc.3.7)
IperneHa ypea GL 80 SC/C (pnc.3.8)
A Kanak
B KneMa 3a Cbbp3BaHe
Ccbp3ka
E Ocbetnteneh 3ap
F 3a3emntenHa KneMa
Pa3npedeeneHne Ha CBetmHaTa (pnc. 3.9/3.10/3.11/3.12)
06xBAT (cAmo SC) (pnc. 3.13)
CBeHeHKe:Korato JAMnITe CE MOHTVPaT TBbPde 6mIO EJHa Do npryra,MOKe Da Ce CTnHE Do rpeuHN BKNIOUHBAHINr,3aIcTO I3XoDnHTe YecOTNI B3AMHO Cn PneHAT. (pnc.3.14A)
CneHHTe Mepkn nomarat 3a n36raBaHeto Ha Te3n rpeuKn:
Jaamnte ce MOHTnpaHa pa3cTOrHne noHe 5 M.
JaMnITE ce Cbbp3BaT B MPexa npe3 Smart Remote App, a cEH3Opnte HA OTdEHNITe JAMNNE C3KIOHOBA ueBOe npes 4yHKUHTA Sensor-Off (pnc.3.14B+C).Pn3aceHcEO DINKeHMe, MPekata BOJIO BKNIOUBAHe H Na JAMNITE, HIMTO CEBH3OP e DeAKTIBIPAH.
4. EneKtpnuecko Cbbp3BaHe
Cxema Ha cBbp3BaHe (pnc. 4.1)
Ka6eBbTcbnbpka2do3npoBOnHka
L =da3a(o6nKHOBHeO HepeHnnKaΦraB)
PocneobatEnoCT 3a MoHTax (L 830, L 835, L 840 SC/C)
Ja ce n3KIOUeIeKtpo3axpAHBaHTo. (Pnc. 4.1)
Ja ce OTBHTRT 063eONATENHITE BIN-TOBE INOCBETNTENHNA 3ap Da ce OTdEMI TOCTOKATA 3a CTHEA. (puc.5.1)
- Na ce MapKipat MeCTaTa 3a npo6nBaHe (KaptnHka 5.2)
Ja ce npobnT dynknte n da ce noctabT kboenTe. (pnc. 5.3)
- ynnbTHnTeTnPa ce npobne.
MoHTaX CbC CKpTu Ka6eN (Pnc. 5.4)
MoHTaxCOTKPHTN Ka6enn (pnc.5.5)
Kabenite da ce cbbpkata (pnc.5.6)
OCBETNTENHMT 3ap da ce noCTaBn Ha CToukata 3a CTeHa (pnc.5.7)
- Na ce 3aBnHTrO6e3oNacntenHHTe BnHTOBe (pnc.5.7)
- EneKtpo3axpaHbHaHeTo Da ce BKNIOHn (pnc. 5.7)
Ja ce HappaBt HactpoiKn (cMo SCl)
→"6.Функун"
PocneDobateJIHOCT 3a MOHTax (GL 80 SC/C)
Ja ce n3KIOHn ENEKTPO3aXpAHBaHTo (Pnc. 4.1)
063oNacIaTeHNHHTI INH T Da cOTBnHTI NOCBTIeHNHHTI 3ap Da Cn3dPbna OT KANAKA (pnc.5.8)
Kaebnt da ce npokapa npe3 ctoikkata 3a noi npoofina (pnc.5.9)
- CToaKaTa 3a nOu n npoФmnt Ta ce 3aBnHTT (Pnc.5.10)
- Mectata Ha npobmb da ce Mapkupat Ha noobata Ta IaTka (pnc.5.11)
- Na ce npo6nRT dynknte u na ce noctabrt kio6ennte (pnc. 5.12)
CToikata 3a noD da ce 3aBnHTn 3a nOda (pnc.5.13)
KanakbTa ce 3aBHTn 3a npoDna (pnc.5.14)
Ka6eHnTe da ce cbbpxkT (puc. 5.15)
OcbetntenHnT 3ap da ce noCTaHa KaNaka (pnc.5.16)
- 06e3onacntenHnrt BnHT da Ce 3aBnHTn (pnc.5.16)
EneKtpo3axpaHbAHeTo da ce BKNIOH (pnc.5.16)
- Na ce HappaBt HAcTpoiKn (cAmo SC)
"6.Функци"
6.Функлma
FyHKcIMTe ce perynipat 3a BepCmTe SC. FyHKcIMTe ce perynipat npes Smart Remote A
Smart Remote App
3a KOHfynpyiapahe HA JAMnata CbC cMpTfoH nn Ta5net Tp6Ba da CBaNTe npINOxKeHTo STEINEL Smart Remote ot BAunmaarAnHa 3a npINOxKeHH, Heo6XoDM e cMpTFOH nn Ta5net C Bluetooth.

Android iOS

CneHnTe cyHKuIm ce perynpatae3 Smart Remote App:
Hactoonka Ha 6bBcTe Hactoonka Ha 06bXbata
-HactpOka HcBETNOyHBCTBHTNHOCTTA 一YHKUHOLHua CEBTNHA
- Perynipahe HnBO Ha OCHOBHa CBETnHa / HOUHa CBTnHa
- Pa3wIpena HacTpoiKa Ha 06xBaTa
-GBbp3aHocB rpyna
- Hactponka Ha cBeTNOyBCTBnTeNHOCTTa c leach-In
HaCtpoNka Ha BpeMeTo (BpeMe Ha DOnbJIHnTeJHo OCBeTBAHe)
KeJHaHATA PPOBbIKHTHe HcBeTeHe Ha JAMnata Moke Da ce peryImpa 6e3cteneHHoOT OKOLO5 CekYHDo MAKc.60 MMHyTN.BcKO 3aceHeHO DINKEHNE PpEi N3THaHe HA BPemeto BpbluHa cOBHnKa B TpbBOHaJIHa NO3UHn
Tasn yHKnna e HAnHa npi C-Bepcnnte cmo B Kombnaa Cbc ceH3open npodytc Bluetooth.
CBeHHe: CnEi BcKIOIIOHO He IaAMNATA 3acNAHTo HbHOINBnKHeMnCe npEkbca 3a OKNO 1 cekyHa. EBa CnE ToBA nAmnata MoKe na
PnHAcTpoKaHa 06xBaTa H3a npOBepKa Ha FyHKmnte Ce npenopbYBa da 6bde N36paHn-KpATKm INTEPBan.
Hactpoika Ha 06xBata (yBCTbntenHOCT)
NoHHTMeTO 06XBAT Bn3npa npBn3mTeHNO KpbIATA o7laCT Ha NOda, KOHOce 06pa3yBa pnp MOHTax HA BnCOHnHa 2 M.
- PerynaTop Ha MaKc. = MaKcHMaJeh 0xbat (5 M)
-PerynaTopHaMH=MHHMaeneo6xBaT(1M)
TaaHpyHKiHa e HAMHa npC-Bepcmtte cAmo B KOMbHaJy Cbc CeH3opeH npodyKT C Bluetooth.
HacTpoNka Ha CBETNoHyBCTBnTeHOCCTTa (npar Ha 3aJeIcTBaHe)
XeNaHnTnIpaarHa3aedcTaBeHnaJaamnPATAOMeJa dbIpepyuPAnb 6be3eBENHOt OKoN2 do 2000 nykca.
-PerynataopMAKCMAMHO B DRCHO=HHeBEH PEXMM (HC3ABNCMOOTOCBTeHOCTTA)
- PerynaTOp MaKcMaHb B JnBO = Cna6a CBETmHa (OKONO 2 NyKca)
TaaH KyHKnue HauHa npC-Bepcnte cmo B KOMbHaua Cbc ceH3open npodyKT c Bluetooth.
IpiHnAcTpoKaHaOxbaTaNpnpnoBepKaHa cyHKmTe Ha dHeBa CBeTMHa peryIaTcPbT Tpa6Ba Da E B DACHO.
ФУнкИHA CBETINHa
HOHATA CBTMNA DABA BB3MOXHOCT 3a OCBETRAHa cOKoNo 10% OT
OCBETTNEHATA MOU, EDbA PnD BIKKHeB B Oxbata CBTNHaTa Ce BKIOHaBA
HA MAKCIMAJIA MOUHOCT (100%) 3a N6paHOTo Bpeme (BHK HAcTPOHa Ha
BPEMeTO). CNeI KOeTo lamnata npemHHaba Ha AKTNbPAHATA HOHa CBTMHa.
HOHATA CBTMHa e BKJI, KORAto ppara HA OCBETHOCT 6bJe NOmHHa. Pn
AKTNbPAHAn DHeEH peKM HOuHa TcBTMHa BHArH e BKJI.
0 MNH = ME CNTAP / 6E3 HOJNA CBETINHA BKTIYBA CE PNI DOCTIHAGA H N3pDAHATA CTENH HA OCBETHOCT
10 MmH = MEK CTapT + HOUHa CBETMnHa 10 MmHyTN
30 MHN = MEK CTapT + HOUHa CBetTNHa 30 MNHyTN
= MEK CTAP + HOUHa CBETINHau HOU
Tazn dyHKUe HAMHHa npi C-BepCmTE cAmo B KOMBHaJr CbC cEH3OpEn npodyKT C Bluetooth.
KaKBO npedctabnraBnlaBHOTOBKIOUOBAHe?
Ceh30pHATA JAMNA PA3N0NARc C FyHKJU 3a NABHO BKNUOBAHE (MEK CTAP). Toba O3HaHABA, Ye pIN BKNIOHA BcETNIHATA He DCOTRA CBOH MAKCHYM BEDHARA.3a KPATKO BPEMEOCBETEHCTA c NOBNIABA do 100% NOCTENHCO. BcIIO TAKCA BcETNIHATA 6abHO yrACBa PnN3KNUOBAHe.
Tazn dyHKuH e HAIHa npi C-BepCmTe cMo B KOMbHaun Cbc ceH3opeH npodyc C Bluetooth.
Функця NOCTOHHa CBETIMHa (pnc.6.1)
Ako KbM CNTemata ONUHOAHIO BbIe BKIOHEn PneKbCbaH,OCBEN BKNIOHABe H N3KIOHABe, Ca Bb3MOXHN CNEHMTe FyHKUN:
1)BkIIOUbaHe:
KJIIOHTJa CSe N3KIOHn I BKNIOHn DBA NTa. JAmNATA OCTAB A NOCTOHHa CBETTINHa 3a 4 Yaca.CJeI TOBa aBtOMaTHHO npEMHHo OTHOBO B cEH3OpEH pEKMH.
2)ИЗКЛЮВанe:
KIOHbT Da CE KIOHcU HIKIOU BENJbX. LaMnTa Ce I3KIOHOBA, CbOTBEHO NpEPMHBA CE 3OHpeP EKIM.
BaxHo:BkIOuBaHnraTa Tp6Ba Da ce n3BbpuBaT 3a 0,2do1ceKyHa.
7. PdPbXka/tpnXa
PpOdykTbT He ce HyKdAe OT nOpdpbXka.
Pn3aBpcBaHe, lamnata MoKe da 6bde noHCTeHa C BnaXHa Kbpna (6e3 nOHTBaU npenapat).
Baxho: ypebt He moKe da 6bde 3aMeHH.
8. OToTpaHbAhe
Enektpoypei, npHnAeNkHocTn nOaKOBKn Tp8Ba Da 6bDat peuKnpaHn, c en Ona3BaHe Ha OKoHaTa Cpeja.

He n3xBbPnIeEneKTPoyppei
C O6UHTe DOMaUH N OTNaBbU!
Cama 3a cTpaHn ot EC:
Cnped n dctbuaata DnpektnBa ha EC 3a cnap eneKtpOHn n eneKtpOpyPe n TpaHcNHOHPaHToB HALIOHJHO npaBO, eNeKTPOpyEi, KOITIO NobeHe He Morat da bDat yOnTpeBAHn, TpBaDa ba TaDpAeJIHO cb6pHaHn I peuKnPAHn, C cen OAn3BaHe Ha OkONHATA cpeA.
9. FapanznoT npOn3BODnteIa
To n npdykT ha Steinel e npon3beH c hainrnoMc TaapanHe, npoBepe H 3a dyHKUOAnHOHOCn 6e3OnACNCHOT, cnope dneCTBaUHTpe paopeB6n, cnE KO. Ee noPONKeH a KaueCTBEH KOHTPO, Ha npHUNHa cnyAHHn H360. STEINEL rapaHnpa nepfekTHa n3pABOTKa nFyHKnI. rapaunrae e npobJIKTeHNOCT 36 Meceua n 3anoHb O T DeH a NOKynkata. Hne OTCPaHBAme DEpKIn, npuHNEH o T rpeKn B PNO3BOCTBOTo Hm KAAeCTBOTO HA MATEPMana, pemOHNTpaKN IIM ZAMAEHNK JIDeEPKHTte qactn, No Hau H360. RapaHUNrTa He BaxKn 3a UETn NO H3NOCBaUNCe Auctn, KAKTOn H3a UETn N DEpKIn, nOlyuHn B pesyjntaH Na HnPaBnHa yNtpeBa HnIOpDxKka. NocedBaunu Suetn Ha YyKdn pepMeTn Ca N3knIOHeH ON rapaHUNrTa.
IapauHnra e Bannna cama, ako Hepa3rno6enHr ypeD bde n3npaTeH Ha cbTOBtTHNc cepBn3, do6pe ONaKOBaH nPpUpyKeH OT kPaTko ONICAHHe HA depekTa, Kacoba beJekka nn pKaKTypa (DaTa Ha NOKyKn NeYat Ha TBpOBeU).
PemOHTeH cepBn3:
CJeIINHTNAHe Ha rapAHJrA Tn NpN DecEeKTH, HENOKPITN OT rapAHJrTA, nonTATRE B HAI6JIIM3KIA 3aOJDCK CEPB13 3a BB3MOXHOCTMTE 3a PEMOT.

10.ДeКларацязбOTBetCTBnE
C hactoio STEINEL Vertrieb GmbH deknapnpa, He To3n Tn npdmoobpckhene L830, L835, L840, GL 80 SC/ e B cBtBeTCTBme C dapektnBa2014/53/EC. LiocntHnT TeKCT Ha EC deknapuTa aCbOTBeTCTBme MoKe da Ce Hamepe Na cneDnH INHePHT appec: www.steinel.de
| 11. Texnueckn dānni | |
| Размени × B ×Д | |
| L 830 SC/C, L 835 SC/C | 110 MM × 110 MM × 131,5 MM |
| L 840 SC/C | 110 MM × 110 MM × 133,5 MM |
| GL 80 SC/C | 110 MM × 633 MM × 130 MM |
| Връcka c Мөжата | 220-240 V, 50/60 Hz |
| Консуmp irreнноюп (Pon) 9,1 W | |
| Консуmp irreнноюп iHF сензор | |
| L 830, L 835, L 840 SC | 0,67 W |
| GL 80 SC | 0,67 W |
| Standby (мөжа (Pnet)) | |
| L 830, L 835, L 840 SC | 0,45 W |
| L 830, L 835, L 840 C | 0,45 W |
| GL 80 SC | 0,45 W |
| GL 80 C | 0,45 W |
| Мошноct на осветаяне (lm) | |
| L 830 SC | 493 lm (анtrрацит), 523 lm (сpeбристо) |
| L 830 C | 493 lm (анtrрацит) |
| L 835 SC | 616 lm (анtrрацит), 616 lm (сpeбристо) |
| L 835 C | 616 lm (анtrрацит) |
| L 840 SC | 319 lm (анtrрацит), 319 lm (сpeбriсто) |
| L 840 C | 319 lm (анtrрацит) |
| GL 80 SC | 650 lm (анtrрацит), 650 lm (сpeбriсто) |
| GL 80 C | 650 lm (анtrрацит) |
| Ефektинhoct (lm/W) | |
| L 830 SC | 54 lm/W (анtrрацит), 57 lm/W (сpeбriсто) |
| L 830 C | 54 lm/W (анtrрацит) |
| L 835 SC | 68 lm/W (анtrрацит), 68 lm/W (сpeбriсто) |
| L 835 C | 68 lm/W (анtrрацит) |
| L 840 SC | 35 lm/W (анtrрацит), 35 lm/W (сpeбriсто) |
| L 840 C | 35 lm/W (анtrрацит) |
| GL 80 SC | 71 lm/W (анtrрацит), 71 lm/W (сpeбriсто) |
| GL 80 C | 71 lm/W (анtrрацит) |
| ОсветітENEн eLEMENT | |
| Temпература на цьета | 3 000 K |
| Индес на цьетовто otразочице | Rₐ = 82 |
| Среда подьлжittелhoct на жьBOT | L70B50 рп in 25°C: > 60.000 чаа |
| Консістенія на цьета SDCM | Начална сстіност: 3 |
PpO6nEM PmUHa PeuHHe
| Ламма 63нанрекене | ■Задистел ce epedлалтел, He e BKNIOYEN,пгькCHAT Ka6eI | ■Предлдатentуд ce BKNIOHилзамени,шал�ерьда ce BKNIOH, поворDNИц-Te Дa ce поверетс уразд.За наhanрекене |
| ■Кьсо сбедиене | ■Дa ce поверетВрькITE | |
| Сehзорна лamма неce вкlioоча (camo SC) | ■пri дnevешен ржим,настошкatingа на CBET-NOHYBCTBNTENHOCCTTa e Ha HOSEн ржим■пгьсвсвчыт eИЗKILOЧEN | ■Севлочьстел-HOCCTA ce pERYЛIMа празд пілочьене |
| ■Предлдатentуд ce EЗд兵свал | ■Вкlioочанe | |
| ■ОБха��ьт He e Hactpoenцel BO | ■Предлдатentуд ce BKNIOH, замени,евETHУАПОДа ce поверет Врьз凯Тa | |
| ■Фюдлжително ДвИЖЕнne B OxbaТа | ■ОБха��ьт ce pERYЛIMa празд пілочьене | |
| Сehзорна лamма неce ИЗКlioоча (camo SC) | ■Избрана НÓШаCBETПИHA | ■Дa ce поверети ob-xbaота и ewETHУАПОДа ce pERYЛIMa OTHOBO |
| Сehзорна лamма неce BKNIOHа повизьнho (camo SC) | ■Вятыр дVINиДьрВета и xpacttn b OxbaТа | ■ОБха��ьт д ce повени |
| ■Засуне Na ABTomO-6bIMn Ha ПьТЯ | ■ОБха��ьт д ce повени | |
| Сehзорна лamма неce BKNIOHи ИЗКlioOHа reKoHTpOLOPINAHO (camo SC) | ■Големи Металini Ппсдmetи, КATO Hanр.КOLINи Металлин CTEHN, B OxbaТа | ■ОБха��ьт д ce повени |
| ■Hanр. Kolata da ce napкURA дpyraDE |
CN
1. 关于本文件
请仔细阅读并妥善保管!
版权所有。未经我方批准禁止翻印或摘录。
-保留技术更改的权利。
符号说明
危险警告!
资料中文本位置上的参引。
2. 一般安全性提示

在设备上进行任何作业前均须断开电源!
3. L 830, L 835, L 840, GL 80 SC/C
按规定使用

- L 830, L 835, L 840, GL 80 SC/C
- Symbols
- General safety precautions
- Proper use
- Electrical connection
- Mounting
- Mounting procedure (L 830, L 835, L 840 SC/C)
- Mounting procedure (GL 80 SC/C)
- Function
- Smart Remote app
- Functions that can be set via Smart Remote app are:
- Time setting (stay-ON time)
- Note:
- Reach setting (sensitivity)
- Twilight setting (response threshold)
- Night-light function
- What is soft light start?
- Manual override function (Fig. 6.1)
- Maintenance / care
- Disposal
- EU countries only:
- Manufacturer's warranty
- Declaration of Conformity
- FR
- A propos de ce document
- Utilisation conforme aux prescriptions
- Application Smart Remote
- Uso previsto
- Utilização prevista
- Korrekt anvendelse
- Monteringstrin (L 830, L 835, L 840 SC/C)
- Monteringstrin (GL 80 SC/C)
- Forskriiftsmessig bruk
- Permanent lys (ill. 6.1)
- XpHAn ouoWVa e Touc kavoviaouc
- Dosah (jen SC) (obr. 3.13)
- Upozorneni:
- L830, L835, L840, GL 80 SC/C
- Správné použivanie
- Namenska uporaba
- Namjenska uporaba
- Udised ohutusjuhised
- Katkestage enne igasuguseid toid seadme kallal pingetoide!
- Paigaldussammud (GL 80 SC/C)
- Pareiza lietosana
- Norade:
- 3neKtpnueckoe noKnloueHne
- MoHTax
- 3Kcnnyataa
- Perynnpobka padmyca deiCTBna (yBCTBnteIbHOCTn)
- YcTaHOBcCyMepeHOro BkIOHeHn (nopor cpa6aTbHAHn)
- Функлuar HOHORO OCEueHnA
- YTO TAKOE PJIABHOE BKJIOUeHHe CBeta?
- PexnM NOCToHHORO OCBeueHnA (pnc.6.1)
- 1) BknoeHne noctoHHoro oCbeHn:
- 2) BbIKIOuHTb NOCTOARHHoe OCEeHHe:
- TexHHueckoe 06cIyKuBaHne/yxOa
- YtJIN3aun
- TapaHTnI npOn3BODnteJIa
- CeptnФнкAT COOTBETCTBn
- BG
- 3aTo3nDOKyMeH
- MoJ npOyTeTe ro BHMATEJHO n r na3eTe!
- 06aChHeHnHa CmBbONITE
- 06u yka3aHn 3a 6e3oNaChOCT
- IpeDn da npeDnpneMeTe KaKBToNo Ja e pa60Tu no ypeDa, npeKbChete eJeKTpUeCKOTo 3axpaHbAhe!
- Ynotpe6a no npedHa3HaueHne
- EneKtpnuecko Cbbp3BaHe
- 6.Функлma
- CneHnTe cyHKuIm ce perynpatae3 Smart Remote App:
- HaCtpoNka Ha BpeMeTo (BpeMe Ha DOnbJIHnTeJHo OCBeTBAHe)
- Hactpoika Ha 06xBata (yBCTbntenHOCT)
- HacTpoNka Ha CBETNoHyBCTBnTeHOCCTTa (npar Ha 3aJeIcTBaHe)
- ФУнкИHA CBETINHa
- KaKBO npedctabnraBnlaBHOTOBKIOUOBAHe?
- Функця NOCTOHHa CBETIMHa (pnc.6.1)
- 1)BkIIOUbaHe:
- 2)ИЗКЛЮВанe:
- PdPbXka/tpnXa
- OToTpaHbAhe
- Cama 3a cTpaHn ot EC:
- FapanznoT npOn3BODnteIa
- PemOHTeH cepBn3:
- 10.ДeКларацязбOTBetCTBnE
- CN
- 关于本文件
- 符号说明
- 一般安全性提示
- 在设备上进行任何作业前均须断开电源!
- 按规定使用
Brand : STEINEL
Model : L 840 LED iHF
Category : Lighting