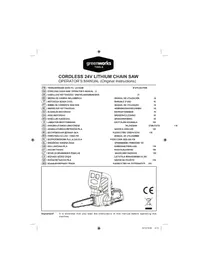
GD40TCS - Saw GREENWORKS - Free user manual and instructions
Find the device manual for free GD40TCS GREENWORKS in PDF.
User questions about GD40TCS GREENWORKS
0 question about this device. Answer the ones you know or ask your own.
Ask a new question about this device
Download the instructions for your Saw in PDF format for free! Find your manual GD40TCS - GREENWORKS and take your electronic device back in hand. On this page are published all the documents necessary for the use of your device. GD40TCS by GREENWORKS.
USER MANUAL GD40TCS GREENWORKS
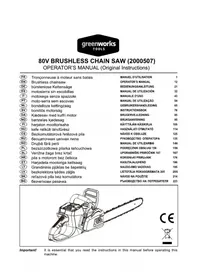
English (original instructions)
WARNING
Read all safety warnings and all instructions. Failure to follow the warnings and instructions may result in electric shock, fire and/or serious injury.
Save all warnings and instructions for future reference.
WARNING
- Keep supply and extension cords away from cutting means.
- The first-time user should, as a minimum practice, cutting logs on a saw-horse or cradle.
SPECIFICATIONS
| Voltage 40V DC | |
| No Load Speed 16.2 m/s | |
| Guide bar length 254mm | |
| Chain stop < 0.15s | |
| Chain oil capacity | 120 ml |
| Weight without battery pack | 2.4 kg |
| Emission sound pressure level LpA | 84 dB(A) |
| Uncertainty KpA | 3.0dB(A) |
| Sound power level LwA | 98.6 dB(A) |
| Guaranteed sound power level LwA(G) | 102 dB(A) |
| Vibration total value ah | 4.4 m/s ^2 |
| Uncertainty K | 1.5 m/s ^2 |
REMARKS:
■ The declared vibration value has been measured with a standard test method and may be used to compare one tool with another.
■ The declared vibration value may be used in a preliminary assessment of exposure.
WARNING
The actual vibration values during use of the tool can be different from the above stated and depend on the use of the tool; and the need to identify safety measures to protect the operator are based on an estimation of exposure in the actual conditions of use (taking account all parts of the operating cycle such as the times when the tool is switched off and when it is running idle in addition to the trigger time).
CHAIN&BAR INFORMATION
| 2003807 | ||
| Manufacture | Saw chain | Guide bar |
| Oregon | 25AP058X | 100SDAA041 |
| Oregon's chain must be fitted with Oregon's bar. | ||
DESCRIPTION
- Guide bar cover
- Front handle guard / chain brake
- Front handle
- Safety lock-off button
- Switch trigger
- Oil tank cap
- Oil level gauge
- Spike bumpers
- Saw chain
- Guide bar
English (original instructions)
-
Wrench
-
Top handle
-
Sprocket cover tighten nuts
-
Sprocket cover
-
Chain tensioner adjustment screw
-
Bolt for saw chain tension
-
Sprocket
-
Battery release button
-
Oil outlet
-
Bar groove
-
Chain drive links
-
Cutter
-
Felling direction
-
Danger zone
-
Escape route
-
Direction of fall
-
Notch
-
Felling back cut
-
Hinge
-
Limb cut
-
Keep work off ground leave support limbs until log is cut
-
Log supported along the entire length
-
Cut from top (over buck) avoid cutting earth
-
Log supported one end
-
Under buck
-
Over buck
-
Log supported both ends
-
Bucking a log
-
Stand on uphill side when cutting because log may roll
ASSEMBLY
This top handle saw requires no assembly, but user should know how to assemble the guide bar and saw chain. Check the chain tensioning and add oil as described later in this manual before each operation.
ASSEMBLING THE GUIDE BAR AND SAW CHAIN See figure 2 - 7
Make sure remove the battery pack from the unit. Wear protective gloves.
■ Unscrew the sprocket cover tighten nuts and remove the sprocket cover.
■ The saw chain should face in the direction of chain rotation. If they face backwards, turn the loop over.
■ Place the chain drive links into the bar groove.
■ Position the chain so there is a loop at the back of the bar.
- Hold the chain in position on the bar and place the loop around the sprocket and make sure it is correctly mounted. Make sure the bar hole fits well with bolt for saw chain tension.
■ Replace the sprocket cover, turn the chain tension adjust bolt clockwise until the saw chain is properly tensioned. The guide bar must then be pushed upwards, check chain tension again, do not tension the chain too tight.
■ After the chain is well-tensioned, tighten the nuts again.
NOTE: The saw chain is properly tensioned if, in the middle of the guide bar, it can be lifted 3mm to 4mm from the edge of the guide bar. Start the saw again with a new saw chain, allowing it to run-in for 2\~3 minutes.
WARNING
After the run-in time, check the chain tension and retighten the chain if necessary.
English (original instructions)
OPERATION
For complete charging instructions, refer to the Operator's Manuals for your Greenworks tools battery pack and charger models.
NOTE: To avoid serious personal injury, always remove the battery pack and keep hands clear of the lock-out button when carrying or transporting the tool.
BEFORE EACH USE CHECK THE CHAIN TENSION
■ Pull the chain in the middle of the lower side of the bar away from the bar. The gap between the cutter in the chain and the bar should be between 3mm - 4mm.
If you need to adjust the chain tension, please refer to the section "ADJUSTING THE CHAIN TENSION" later in this manual.
TO INSTALL BATTERY PACK
See Figure 2.
■ Align the battery pack with the battery compartment on the top handle saw.
■ Grasp the top handle saw firmly.
■ Push the battery pack into the battery compartment until the latch locks into place.
■ You should hear a "click" once the battery is installed.
TO REMOVE BATTERY PACK
See Figure 2.
■ Press the battery release button on the battery.
■ Grasp the top handle saw firmly, and pull the battery pack out of handle.
CHECKING THE CHAIN LUBRICANT
See Figure 1.
■ Check the amount of oil in the top handle saw by looking at the oil level
gauge. If the oil level is low, follow the steps shown in section "ADDING CHAIN & BAR LUBRICANT" of this manual.
WARNING
Check the chain tension before each use of the saw.
WARNING
Never operate the top handle saw without sufficient chain lubrication as this might damage the saw and is a threat to safety. Check the chain lubricant level before each use!
In order to prevent kickback, please follow these safety instructions:
■ Never cut with the tip of the guide bar! Be careful when continuing from previous cuts.
■ Always start cutting only when the top handle saw is already running.
■ Make sure that the saw chain is always properly sharpened.
■ Never cut through more than one branch at a time! When lopping off branches, be careful not to touch any other branches.
■ When cross-cutting, pay attention to trunks standing very close to each other. If possible, use a sawing trestle.
HOLDING THE TOP HANDLE SAW
See figure 8
Grip both handles with the thumbs and the fingers around. Ensure that your left hand is holding the front handle so that your thumb is underneath.
STARTING OPERATION
■ Before starting for operation, you should install the battery pack in the machine.
English (original instructions)
■ Start the machine: Press the Safety lock-off button, and then press the switch trigger.
STOPPING OPERATION
■ Release the switch trigger to stop the top handle saw.
Check the operating condition of the chain brake prior to each use.
■ Engage the chain brake by rotating your left hand around the front handle, allowing the back of your hand to push the chain brake lever/hand guard toward the bar while the chain is rotating rapidly. Be sure to maintain both hands on the saw handles at all times.
■ Reset the chain brake back into the RUN position by grasping the top of the chain brake lever/hand guard and pulling toward the front handle.
WARNING
If the chain brake do not stop the chain immediately, or if the chain brake will not stay in the run position without assistance, take the saw to an authorized service center for repair prior to use.
USING THE TOP HANDLE SAW
Always be sure of your footing and hold the top handle saw firmly with both hands while the motor is running.
BASIC FELLING, LIMBING, AND CROSS-CUTTING TECHNIQUES See figure 9
FELLING A TREE
When bucking and felling operations are being performed by two or more persons at the same time, the felling operation should be separated from the bucking operation by a distance of at least twice the height of the
tree beingfelled.
Trees should not be felled in a manner that would endanger any person, strike any utility line or cause any property damage. If the tree does make contact with any utility line, the utility company should be notified immediately. The top handle saw operator should keep on the uphill side of the terrain as the tree is likely to roll or slide downhill after it is felled. An escape path should be planned and cleared as necessary before cuts are started. The escape path should extend back and diagonally to the rear of the expected line of fall. Before felling is started, consider the natural lean of the tree, the location of larger branches and the wind direction to judge which way the tree will fall. Remove dirt, stones, loose bark, nails, and staples from the tree.
NOTCHING UNDERCUT (A NOTCH CUT IN A TREE TO DIRECT THE FALL) See Figure 10
Make the notch 1/3 in diameter of the tree, perpendicular to the direction of falls. Make the lower horizontal notching cut first, this will help to avoid pinching of either the saw chain or the guide bar when the second notch is being made.
FELLING BACK CUT (THE FINAL CUT IN A TREE FELLING OPERATION, MADE ON THE OPPOSITE SIDE OF THE TREE FROM THE NOTCHING UNDERCUT)
See Figure 10
Make the felling back cut at least 50mm higher than the horizontal notching cut. Keep the felling back cut parallel to the horizontal notching cut. Make the felling back cut so as to leave enough wood to act as a hinge. The hinge wood keeps the tree from twisting and falling in the wrong direction. Do not cut through the hinge.
As the felling cut gets close to the hinge, the tree should begin to fall. If there is any chance that the tree may not fall in the desired direction or it may rock back and bind the saw chain, stop cutting before the felling back cut is complete and use wedges of wood, plastic or aluminium to open the
English (original instructions)
cut and drop the tree along the desired line of fall. When the tree begins to fall, remove the top handle saw from the cut, stop the motor, put the top handle saw down, and then use the retreat path as planned. Be alert of overhead limbs falling and watch your footing.
LIMBING A TREE See figure 11
Limbing is removing the branches from a fallen tree. When limbing, leave the larger lower limbs to support the log off the ground. Remove the small limbs in one cut. Branches under tension should be cut from the bottom up, to avoid binding the top handle saw.
BUCKING A LOG See figure 12 - 15
Bucking is cutting a log into lengths. It is important to make sure your footing is firm and your weight is evenly distributed on both feet. When possible, the log should be raised and supported by the use of limbs, logs or chocks.
Follow the simple direction for easy cutting:
■ When the log is supported along the entire length, it is cut from the top (over buck).
■ When the log is supported on one end, cut 1/3 of the diameter from the underside (under buck). Then make the finished cut by over bucking to meet the first cut.
■ When the log is supported on both ends, cut 1/3 of that diameter from the top (over buck). Then make the finished cut by under bucking the lower 2/3 to meet the first cut.
■ When bucking on a slope, always stand on the uphill side of the log. When cutting through, to maintain complete control, release the cutting pressure near the end of the cut without relaxing your grip on the top handle saw handles.
Do not let the chain contact the ground. After completing the cut, wait for the saw chain to stop before you move the top handle saw. Always stop the motor before moving from tree to tree.
MAINTENANCE
WARNING
Always remove the battery pack from the machine before checking the chain tension or making adjustments to the chain. Wear protective gloves while touching the chain, bar or areas around the chain.
ADJUSTING THE CHAIN TENSION
See figure 2 and figure 7
■ Loosen the chain cover lock nuts with the supplied wrench. The chain cover lock nuts do not have to be completely removed in order to adjust the chain tension.
■ Rotate the chain adjustment screw clockwise to increase the chain tension and rotate counterclockwise to decrease the chain tension.
■ Once the chain is at the desired tension, tighten the chain cover lock nuts.
REPLACING THE BAR AND CHAIN
See Figure 3-7
■ Remove the battery from the top handle saw.
■ Remove the chain cover lock nut from chain cover by rotating them counterclockwise with the wrench.
■ Remove the chain cover from the mounting surface.
■ The bar and chain can now be removed by lifting it away from the main body of the saw and releasing the chain from the sprocket.
■ Remove the old chain from the bar.
■ Lay out the new saw chain in a loop and straighten any kinks. The cutters should face in the direction of chain rotation. If they face backwards, turn the loop over.
English (original instructions)
■ Place the chain drive links into the bar groove.
■ Position the chain so there is a loop at the back of the bar.
■ Hold the chain in position on the bar and place the loop around the sprocket.
■ Fit the bar flush against the mounting surface so that the bar studs are in the long slot of the bar. Ensure that the chain is over the sprocket. Replace the chain cover.
■ Remove all slack from the chain by turning the chain adjustment screw clockwise until the chain seats snugly against the bar with the drive links in the bar groove.
■ Lift the tip of the guide bar up to check for sag.
■ Release the tip of the guide bar and turn the chain adjustment screw 1/2 turn clockwise. Repeat this process until sag does not exist.
- Hold the tip of the guide bar up and tighten the chain cover lock nuts by turning them with the wrench. The chain is correctly tensioned when there is no sag on the underside of the guide bar, the chain is snug, but it can be turned by hand without binding.
ADDING CHAIN & BAR LUBRICANT
■ Unscrew and remove the cap from the oil tank.
■ Pour the oil into the oil tank and monitor the oil level gauge. Ensure that no dirt enters the oil tank while filling the oil in.
■ Put the oil cap back on and tighten it up.
■ One full oil tank will enable you to use the saw for 20-40 min.
TRANSPORTING THE TOP HANDLE SAW
Before transporting the top handle saw, always remove the battery pack from the top handle saw and slide the chain cover over the bar and chain. If several cuts are to be performed with the top handle saw, the saw
must be switch off between cuts.
GUIDE BAR COVER
See figure 1
The chain cover must be clipped onto the chain and bar as soon as the sawing work has been completed and whenever the machine has to be transported.
When the chain penetrates into wood with difficulty, it needs sharpening as follows:
■ Put the chain under tension.
■ Fasten the bar in a vice so that the chain can slide.
■ Fasten the file to the file holder and place it on cutter at 35^ angle.
■ File with forward strokes only until all the worn out parts of the cutting edge are taken away.
■ Count the number of strokes given to the cutter as a reference and file away with the same number of strokes on all other cutters.
If the depth gauge protrudes from the template after sharpening a few times, reset its level. Use a flat file. Finally, round off the depth gauge.
NOTE: It is recommended to have the deep or important sharpening carried out by a service agent who is equipped with electric sharpener.
GUIDE BAR MAINTENANCE
■ When you have finished working, clean out the groove and the oil passages with a scraping hook.
■ Periodically trim the sides of rails using a flat file. If not done in the long run, the feather edges might break away and damage the bar.
If one rail is higher than the other one, it is necessary to make it even with a flat file then smooth it with a file or fine grain abrasive paper.
English (original instructions)
WARNING
When servicing, use only identical replacement parts. Use of any other parts may create a hazard or cause product damage.
WARNING
To avoid serious personal injury, always remove the battery pack from the tool when cleaning or performing any maintenance.
GENERAL MAINTENANCE
Before each use, inspect the entire product for damaged, missing, or loose parts such as screws, nuts, bolts, caps, etc. Tighten securely all fasteners and caps and do not operate this product until all missing or damaged parts are replaced. Please call Customer Service for assistance.
Avoid using solvents when cleaning plastic parts. Most plastics are susceptible to damage from various types of commercial solvents and may be damaged by their use. Use clean cloths to remove dirt, dust, oil, grease, etc.
WARNING
Do not at any time let brake liquids, gasoline, petroleumbased products, penetrating oils, etc., come in contact with plastic parts. Chemicals can damage, weaken or destroy plastic which may result in serious personal injury.
Only the parts shown on the parts list are intended to be repaired or replaced by the customer. All other parts should be replaced at an authorised service centre.
STORAGE
STORING THE PRODUCT
■ Remove the battery pack from the unit before storing.
■ Clean all foreign material from the unit.
■ Store it in a place that is inaccessible to children.
- Keep away from corrosive agents such as garden chemicals and de-icing salts.
■ Store and charge your batteries in a cool area. Temperatures above or below normal room temperature will shorten battery pack life.
■ Never store batteries in a discharged condition. Store battery packs in a 30%-50% charged condition.
■ Store the battery pack where the temperature is below 27 C and away from moisture.
■ All batteries gradually lose their charge. The higher the temperature, the quicker they lose their charge. If you store your unit for long periods of time without using it, charge the pack as normal every six months of storage. This practice will prolong battery pack life.
TRANSPORTATION
For transportation, secure the machine against movement or falling to prevent injury to persons or damage to the machine.
English (original instructions)
DISPOSAL
Separate collection. This product must not be disposed of with normal household waste. Should you find one day that you Greenworks tools product needs replacement, or if it is no further use to you, do not dispose of it with household waste. Make this product available for separate collection.

Separate collection of used products and packaging allows materials to be recycled and used again. Re-use of recycled materials helps prevent environmental pollution and reduces the demand for raw materials.
Batteries
At the end of their useful life, discard batteries with due care for our environment. The battery contains material which is hazardous to you and the environment. It must be removed and disposed of separately at a facility that accepts lithium-ion batteries.
English (original instructions)
TROUBLESHOOTING
| PROBLEM POSSIBLE CAUSE SOLUTION | ||
| Bar and saw chain running hot and smoking. | Check saw chain tension for overtightened condition. | Tension saw chain. |
| No oil in the oil tank. Refill oil | into the oil tank. | |
| The discharge port is blocked by debris. | Refer to the manual to remove the bar and clean out the debris. | |
| Oil tank is blocked by debris. | Clean out the oil tank and refill with clean oil. | |
| Bar and chain oil tank cap is blocked by debris. | Clean the debris off the oil cover. | |
| The sprocket or guide wheels is clogged with debris. | Clean and remove debris from sprocket and guide wheel. | |
| Motor runs, but chain is not rotating. | Saw chain tension is too tight. | Refer to Saw Chain Tension Guide earlier in this manual. |
| Check guide bar and saw chain assembly. | Refer to Page 5. | |
| Check guide bar and saw chain for damage. | Remove the battery from the unit. Take the bar cover off, and remove the bar and saw chain. Clean all debris from the top handle saw. After all debris is cleared, insert battery and run the top handle saw. If the sprocket is spinning your motor is okay. If the sprocket is not spinning, call customer service. | |
| Motor runs, chain rotates but does not cut. | Dull chain. Sharpen or replace | the saw chain. |
| Chain on backwards. Refer to | Replacing the Bar and Saw Chain assembly earlier in this manual. | |
| Chain tension could be overtightened or too loose. | Refer to Re-tensioning the saw chain in the manual. | |
English (original instructions)
| Top handle saw does not start. | The chain brake is engaged. | Pull the chain brake towards you until the chain brake is disengaged. |
| No electrical contact between the top handle saw and battery. | To secure the battery, make sure the latches on the battery compartment snap into place. | |
| The battery pack is depleted. | Charge the battery pack. | |
| The battery and power tool is too hot or too cold. | Refer to the battery and charger maintaince part in the manual. | |
| Motor running, but cutting abnormal. | Motor stops after about 10 seconds. | Recharge the battery. |
| If the unit cuts off and beeps during a cut, it went into protection mode. This protects the PCB from damage. | Release the trigger and restart the top handle saw. Let the top handle saw do the work and do not force the cut. | |
| Battery is not charged. Charge | the battery. Refer to the battery and charger manual for correct charging procedures. | |
| The saw chain needs lubrication, and will increase friction if not properly maintained. | Make sure the chain is always lubricated by never letting the bar and chain oil run low. | |
| Incorrect battery storage temperature. | Allow the battery pack to cool until it drops to room temperature. |
CARACTÉRISTIQUES DU PRODUIT
TUOTTEEN TEKNISET TIEDOT
BYTA UT SVÄRDET OCH KEDJAN
Se fi gur 3-7
VEDLIKEHOLD AV SVERDET
GENERELT VEDLIKEHOLD
KORREKT AVHENDING AV DETTE PRODUKTET
OPBEVARING AF PRODUKTET
RZAZ ŚCINAJACY (KOŃCOWE
NACIĘCIE WYKONANE PO PRZECIWNEJ STRONIE DRZEWA NIŻ RZAZ PODCINAJĄCY)
Patrz rysunek 10
| הכלההכלההכלההכלההכלההכלההכלההכלההכלההכלההכלההכלההכלההכלההכלההכלההכלההכלההכלההכלההכלההכלההכלההכלההכלההכלההכלההכלההכלההכלההכלההכלההכלההכלה | ||||
| הכלההכלההכלההכלההכלההכלההכלההכלההכלההכלההכלההכלההכלההכלההכלההכלההכלההכלההכלההכלההכלההכלההכלההכלההכלההכלההכלההכלההכלההכלההכלההכלההכchia. | הכchia,הכchia,הכchia,הכchia,הכchia,הכchia,הכchia,הכchia,הכchia,הכchia,הכchia,הכchia,הכchia,הכchia,הכchia,הכchia,הכchia,הכchia,הכchia,הכchia,הכchia,הכchia,הכchia,הכchia,הכchia,הכchia | הכchia,הכchia,הכchia,הכchia,הכchia,הכchia,הכchia,הכchia,הכchia,הכchia,הכchia,הכchia,הכchia,הכchia,הכchia,הכchia,הכchia,הכchia,הכchia,הכchia,הכchia,הכchia,הכchia,הכchia,הכeria,הכchia,הכchia,הכchia,הכchia,הכchia,הכchia,הכchia,הכchia,הכchia,הכchia,הכchia,הכchia,הכchia,הכchia,הכchia,הכchia,הכchia,הכchia,הכchia,הכchia,הכchia,הכchia,הכchia,הכchia,הכalia,הכalia,הכalia,הכalia,הכalia,הכalia,הכalia,הכalia,הכalia,הכalia,הכalia,הכalia,הכalia,הכalia,הכalia,הכalia,הכalia,הכalia,הכalia,הכalia,הכalia,הכalia,הכalia,הכalia,הכalia,הכemia,הכemia,הכemia,הכemia,הכemia,הכemia,הכemia,הכemia,הכemia,הכemia,הכemia,הכemia,הכemia,הכemia,הכemia,הכemia,הכemia,הכemia,הכemia,הכemia,הכemia,הכemia,הכemia,הכemia,הכemia,הכalia,הכalia,הכalia,הכalia,הכalia,הכalia,הכalia,הכalia,הכalia,הכalia,הכalia,הכalia,הכalia,הכalia,הכalia,הכalia,הכalia,הכalia,הכalia,הכalia,הכalia,הכalia,הכalia,הכalia,הכ Race,הכ Race,הכ Race,הכ Race,הכ Race,הכ Race,הכ Race,הכ Race,הכ Race,הכ Race,הכ Race,הכ Race,הכ Race,הכ Race,הכ Race,הכ Race,הכ Race,הכ Race,הכ Race,הכ Race,הכ Race,הכ Race,הכ Race,הכ Race,הכ Race,הכ race,הכ race,הכ race,הכ race,הכ race,הכ race,הכ race,הכ race,הכ race,הכ race,הכ race,הכ race,הכ race,הכ race,הכ race,הכ race,הכ race,הכ race,הכ race,הכ race,הכ race,הכ race,הכ race,הכ race,הכ race,הכ Race,הכ race,הכ race,הכ race,הכ race,הכ race,הכ race,הכ race,הכ race,הכ race,הכ race,הכ race,הכ race,הכ race,הכ race,הכ race,הכ race,הכ race,הכ race,הכ race,הכ race,הכ race,הכ race,הכ race,הכ Race,הכ Race,הכ Race,הכ Race,הכ Race,הכ Race,הכ Race,הכ Race,הכ Race,הכ Race,הכ Race,הכ Race,הכ Race,הכ Race,הכ Race,הכ Race,הכ Race,הכ Race,הכ Race,הכ Race,הכ Race,הכ Race,הכ Race,הכ Race,הכRace,הכRace,הכRace,הכRace,הכRace,הכRace,הכRace,הכRace,הכRace,הכRace,הכRace,הכRace,הכRace,הכRace,הכRace,הכRace,הכRace,הכRace,הכRace,הכRace,הכRace,הכRace,הכRace,הכRace,הכRace,הכ Race,הכ Race,הכ Race,הכ Race,הכ Race,הכ Race,הכ Race,הכ Race,הכ Race,הכ Race,הכ Race,הכ Race,הכ Race,הכ Race,הכ Race,הכ Race,הכ Race,הכ Race,הכ Race,הכ Race,הכ Race,הכ Race,הכ Race,הכ Race,הכ Party,הכ Party,הכ Party,הכ Party,הכ Party,הכ Party,הכ Party,הכ Party,הכ Party,הכ Party,הכ Party,הכ Party,הכ Party,הכ Party,הכ Party,הכ Party,הכ Party,הכ Party,הכ Party,הכ Party,הכ Party,הכ Party,הכ Party,הכ Party,הכ Party,הכParty,הכParty,הכParty,הכParty,הכParty,הכParty,הכParty,הכParty,הכParty,הכParty,הכParty,הכParty,הכParty,הכParty,הכParty,הכParty,הכParty,הכParty,הכParty,הכParty,הכParty,הכParty,הכParty,הכParty,הכParty,הכ Party,הכ Party,הכ Party,הכ Party,הכ Party,הכ Party,הכ Party,הכ Party,הכ Party,הכ Party,הכ Party,הכ Party,הכ Party,הכ Party,הכ Party,הכ Party,הכ Party,הכ Party,הכ Party,הכ Party,הכ Party,הכ Party,הכ Party,הכ Party,הכ Political,הכ Political,הכ Political,הכ Political,הכ Political,הכ Political,הכ Political,הכ Political,הכ Political,הכ Political,הכ Political,הכ Political,הכ Political,הכ Political,הכ Political,הכ Political,הכ Political,הכ Political,הכ Political,הכ Political,הכ Political,הכ Political,הכ Political,הכ Political,הכ Political,הכPolitical,הכ Political,הכ Political,הכ Political,הכ Political,הכ Political,הכ Political,הכ Political,הכ Political,הכ Political,הכ Political,הכ Political,הכ Political,הכ Political,הכ Political,הכ Political,הכ Political,הכ Political,הכ Political,הכ Political,הכ Political,הכ Political,הכ Political,הכ Political,הכ Political,הכ political,הכ political,הכ political,הכ political,הכ political,הכ political,הכ political,הכ political,הכ political,הכ political,הכ political,הכ political,הכ political,הכ political,הכ political,הכ political,הכ political,הכ political,הכ political,הכ political,הכ political,הכ political,הכ political,הכ political,הכ political,הכ Political,הכ Political,הכ Political,הכ Political,הכ Political,הכ Political,הכ Political,הכ Political,הכ Political,הכ Political,הכ Political,הכ Political,הכ Political,הכ Political,הכ Political,הכ Political,הכ Political,הכ Political,הכ Political,הכ Political,הכ Political,הכ Political,הכ Political,הכ Political,הכ政治,הכ政治,הכ政治,הכ政治,הכ政治,הכ政治,הכ政治,הכ政治,הכ政治,הכ政治,הכ政治,הכ政治,הכ政治,הכ政治,הכ政治,הכ政治,הכ政治,הכ政治,הכ政治,הכ政治,הכ政治,הכ政治,הכ政治,הכ政治,הכ政治,הכPolitical,הכPolitical,הכPolitical,הכPolitical,הכPolitical,הכPolitical,הכPolitical,הכPolitical,הכPolitical,הכPolitical,הכPolitical,הכPolitical,הכPolitical,הכPolitical,הכPolitical,הכPolitical,הכPolitical,הכPolitical,הכPolitical,הכPolitical,הכPolitical,הכPolitical,הכPolitical,הכPolitical,הכPolitical,הכ Political,הכ Political,הכ Political,הכ Political,הכ Political,הכ Political,הכ Political,הכ Political,הכ Political,הכ Political,הכ Political,הכ Political,הכ Political,הכ Political,הכ Political,הכ Political,הכ Political,הכ Political,הכ Political,הכ Political,הכ Political,הכ Political,הכ Political,הכPolitical,הכPolitical,הכPolitical,הכPolitical,הכPolitical,הכPolitical,הכPolitical,הכPolitical,הכPolitical,הכPolitical,הכPolitical,הכPolitical,הכPolitical,הכPolitical,הכPolitical,הכPolitical,הכPolitical,הכPolitical,הכPolitical,הכPolitical,הכPolitical,הכPolitical,הכPolitical,הכPolitical,הכ political,הכ political,הכ political,הכ political,הכ political,הכ political,הכ political,הכ political,הכ political,הכ political,הכ political,הכ political,הכ political,הכ political,הכ political,הכ political,הכ political,הכ political,הכ political,הכ political,הכ political,הכ political,הכ political,הכ political,הכPolitical,הכPolitical,הכPolitical,הכPolitical,הכPolitical,הכPolitical,הכPolitical,הכPolitical,הכPolitical,הכPolitical,הכPolitical,הכPolitical,הכPolitical,הכPolitical,הכPolitical,הכPolitical,הכPolitical,הכPolitical,הכPolitical,הכPolitical,הכPolitical,הכPolitical,הכPolitical,הכPolitical,הכPOLY, | (1) | (2) |
| (3) | (4) | (5) | ||
| (6) | (7) | (8) | ||
| (9) | (10) | (11) | ||
| (12) | (13) | (14) | ||
| (15) | (16) | (17) | ||
| (18) | (19) | (20) | ||
| (21) | (22) | (23) | ||
| (24) | (25) | (26) | ||
| (27) | (28) | (29) | ||
| (30) | (31) | (32) | ||
| (33) | (34) | (35) | ||
| (36) | (37) | (38) | ||
| (39) | (40) | (41) | ||
| (42) | (43) | (44) | ||
| (45) | (46) | (47) | ||
| (48) | (49) | (50) | ||
| (51) | (52) | (53) | ||
| (54) | (55) | (56) | ||
| (57) | (58) | (59) | ||
| (60) | (61) | (62) | ||
| (63) | (64) | (65) | ||
| (66) | (67) | (68) | ||
| (69) | (70) | (71) | ||
| (72) | (73) | (74) | ||
| (75) | (76) | (77) | ||
| (78) | (79) | (80) | ||
| (81) | (82) | (83) | ||
| (84) | (85) | (86) | ||
| (87) | (88) | (89) | ||
| (90) | (91) | (92) | ||
| (93) | (94) | (95) | ||
| (96) | (97) | (98) | ||
| (99) | (100) | (101) |
KĒDES BREMZES ĜLIETOŠANA (22. att.)
Greenworks Tools Warranty Policy for DIY machines
PERIOD OF WARRANTY
All new Greenworks Tools machinery is supplied with a 2 year parts and labour warranty from original date of purchase. A 30 day warranty is available for machines used professionally as Greenworks Tools are designed primarily to be used by DIY consumers. This warranty is non-transferable.
LIMITATIONS
This warranty applies only to defective parts/components and does not cover repairs due to:
- Normal wear and tear.
- Routine tune up or adjustment.
- Damage caused by improper handling/abuse/misuse or neglect.
- Overheating due to lack of maintenance.
- Damage due to fittings/fasteners becoming loose/detached through lack
of maintenance. - Damage caused by cleaning with water.
- Machines serviced or repaired by non-authorised Greenworks Tools service centres.
- Machines incorrectly assembled or adjusted.
- Damage caused by improper use of the machine.
- Damage caused by improper winterisation (pressure washers)
- Items considered as consumable parts are not normally covered by the warranty, including but not limited to:
- Batteries
• Electric cables
- Blade and blade assemblies
- Belts
- Filters
• Chucks and tool holders
- Certain products may contain components such as engines, transmissions from an alternative manufacturer, these items will be subject to the appropriate manufacturer's warranty policy except where Greenworks Tools Europe GmbH agrees to underwrite any claims outside the said manufacturer's warranty period.
- Second hand goods are not covered under this warranty policy.
- The fitting of spares, replacements or extra components which are not supplied or approved by Greenworks Tools Europe GmbH.
Warranty
To claim a warranty on any product under this policy a proof of original purchase is required. Credit card statement do not qualify as sufficient proof of purchase. In the first instance of a warranty event occurring the consumer should return the product to the original place of purchase with their proof of purchase. The machine will be sent to our central service facility and an inspection made. If the machine be found to be at fault it will be repaired and sent back to the address of the consumer free of charge. Machines that retail for less than €100 euros including sales taxes will generally be replaced.
If the central service facility finds that machine is not found to be at fault then the consumer will be advised they will need to pay for the cost of the repair.
This warranty policy is subject to change from time to time to accommodate the needs of new products. A copy of the latest warranty policy will be available at www.greenworkstools.eu.

Greenworks Tools (DIY)
نامضلا قدم
قُمْتَالِكَ عَلَى دَيْمَ عَلَى نَيْمَ مِنْ عَلَى دَيْمَ وَجَرْدَ بِعْ كَذَوَرْمٌ وَقَيْدِيْ لِجُّةً GreenWorks Tools فَلَّكَ عَلَى دَيْمَ عَلَى نَيْمَ مِنْ عَلَى دَيْمَ وَجَرْدَ بِعْ كَذَوَرْمٌ وَقَيْدِيْ لِجُّةً الاتِ الآزّاً عَلَى دَيْمَ عَلَى نَيْمَ 30 نُجُضْ لِجُّهِ رفُواوتِ يُكْ. يُلْحِ صُالًا عَلَى نَيْمَ وَجَرْدَ بِعْ كَذَوَرْمٌ وَقَيْدِيْ لِجُّةً تُكُفْرُش تَأِجْتُبِهُ مِنْ نُأْتُحِ يُفْهِارُتُ حَا فِيْدِتُ سِكُ Greenworks Tools اسَاسً قُمْصُم كُسْرُفُنِ بِعْ وَجَرْدَ بِعْ كَذَوَرْمٌ وَجَرْدَ بِعْ كَذَوَرْمٌ (DIY). لِكُفْرُش بِعْ وَجَرْدَ بِعْ كَذَوَرْمٌ وَجَرْدَ بِعْ كَذَوَرْمٌ لِكُفْرُش بِعْ وَجَرْدَ بِعْ كَذَوَرْمٌ وَجَرْدَ بِعْ كَذَوَرْمٌ
دويقا
Greenworks Tools "הכלה"
תְקָרִי אַרְהָה
EN EC DECLARATION OF CONFORMITY
Manufacturer: Changzhou Globe Co., Ltd.
Address: No. 65 Xinggang Rd., Zhonglou Zone, Changzhou, Jiangsu, China
Name and address of the person authorised to compile the technical file:
Name: Ted Qu Haichao (Quality Director)
Adress: Greenworks Tools Europe GmbH,
Wankelstrasse 40. 50996 Cologne Germany
Herewith we declare that the product
Category 40V CORDLESS CHAINSAW
Model 2003807
Serial Number ...... See product rating label
Year of Construction ...... See product rating label
■ is in conformity with the relevant provisions of the Machinery Directive (2006/42/EC)
■ is in conformity with the provisions of the following other EC-Directives
EMC Directive (2014/30/EU),
Noise Emission Directive (2000/14/EC amended by 2005/88/EC)
And furthermore, we declare that
■ The following (parts/clauses of) European harmonised standards have been used EN 55014-1, EN 55014-2, EN 60745-1, EN ISO 11681-2, EN 60745-2-13, EN ISO 3744
Measured sound power level 98.6 dB(A)
Guaranteed sound power level 102 dB(A)
Conformity assessment method to Annex V / Directive 2000/14/EC
The EC type-examination certificate number: 17SHW0694-01 issued by
Place, date: Changzhou, 04/20/2016
Quality Director
Signature: Ted Qu Haichao
Ted Qu
DE
Adresse: No. 65 Xinggang Rd., Zhonglou Zone, Changzhou, Jiangsu, China
Indirizzo: No. 65 Xinggang Rd., Zhonglou Zone, Changzhou, Jiangsu, China
FR DÉCLARATION DE CONFORMITÉ EC
Fabricant : Changzhou Globe Co., Ltd.
Adresse : No. 65 Xinggang Rd., Zhonglou Zone, Changzhou, Jiangsu, China
Endereço: No. 65 Xinggang Rd., Zhonglou Zone, Changzhou, Jiangsu, China
Local, data: Changzhou, 04/20/2016
Adres: No. 65 Xinggang Rd., Zhonglou Zone, Changzhou, Jiangsu, China
Osoite: No. 65 Xinggang Rd., Zhonglou Zone, Changzhou, Jiangsu, China
Adress: No. 65 Xinggang Rd., Zhonglou Zone, Changzhou, Jiangsu, China
Adress: Greenworks Tools Europe GmbH,
Wankelstrasse 40. 50996 Cologne Germany
Adresse: No. 65 Xinggang Rd., Zhonglou Zone, Changzhou, Jiangsu, China
Adresse: No. 65 Xinggang Rd., Zhonglou Zone, Changzhou, Jiangsu, China
Adres: No. 65 Xinggang Rd., Zhonglou Zone, Changzhou, Jiangsu, China
Adresa: No. 65 Xinggang Rd., Zhonglou Zone, Changzhou, Jiangsu, China
Adresa: No. 65 Xinggang Rd., Zhonglou Zone, Changzhou, Jiangsu, China
Naslov: No. 65 Xinggang Rd., Zhonglou Zone, Changzhou, Jiangsu, China
Adresa: No. 65 Xinggang Rd., Zhonglou Zone, Changzhou, Jiangsu, China
Ime i prezime, i adresa osobe ovlaštene da sastavi tehničku datoteku:
Ime i prezime: Ted Qu Haichao (Direktor odjela za kvalitetu)
Adresa: Greenworks Tools Europe GmbH,
Wankelstrasse 40. 50996 Cologne Germany
Cím: No. 65 Xinggang Rd., Zhonglou Zone, Changzhou, Jiangsu, China
Adresa: No. 65 Xinggang Rd., Zhonglou Zone, Changzhou, Jiangsu, China
Adres: No. 65 Xinggang Rd., Zhonglou Zone, Changzhou, Jiangsu, China
Yer, tarih: Changzhou, 04/20/2016
Kalite Müdürü
Imza: Ted Qu Haichao
Ted Qu
'ַלְרָה: Changzhou Globe Co., Ltd.
תְרָה: No. 65 Xinggang Rd., Zhonglou Zone, Changzhou, Jiangsu, China
Adresas: No. 65 Xinggang Rd., Zhonglou Zone, Changzhou, Jiangsu, China
Adrese: No. 65 Xinggang Rd., Zhonglou Zone, Changzhou, Jiangsu, China
Aadress: No. 65 Xinggang Rd., Zhonglou Zone, Changzhou, Jiangsu, China
Aadress: Greenworks Tools Europe GmbH,
Wankelstrasse 40. 50996 Cologne Germany
Kinnitame, et see toode
Nimetus AKUGA KETTSAAG 40V
Mudel 2003807
Seerianumber ...... vaadake toote tehasesilti