CSE 2240 - Saw Wolf Garten - Free user manual and instructions
Find the device manual for free CSE 2240 Wolf Garten in PDF.
| Product type | Electric chainsaw |
| Brand | Wolf Garten |
| Model | CSE 2240 |
| Power | 2200 W |
| Supply voltage | 230 V / 50 Hz |
| Idle speed | 7600 min⁻¹ |
| Guide bar length | 40 cm |
| Cutting length | 350 mm |
| Chain pitch | 3/8" (9.53 mm) |
| Chain thickness (drive link) | 0.05" (1.27 mm) |
| Sprocket teeth number | 6 |
| Weight | 4.7 kg |
| Sound power level (Lwa) | 106.1 dB(A) (K=3) |
| Guaranteed sound power level | 109 dB(A) |
| Vibration level (handle) | 5.3 m/s² (K=1.5) |
| Recommended guide bar | Oregon 160SDEA041 |
| Recommended chain | Oregon 91PJ057X |
| Lubrication system | Automatic pump (integrated oil tank) |
| Chain brake | Yes, safety (immediate stop in case of kickback) |
| Throttle lock | Yes (lock-off button) |
| Hand guard | Yes (brake lever / front hand guard) |
| Power supply | Mains (power cord with plug) |
| Protection class | IPX (not specified, but protected against water splashes) |
| Warranty | 2 years (according to legislation) |
| Included accessories | Guide bar, chain, tensioning tool, user manual |
Frequently Asked Questions - CSE 2240 Wolf Garten
User questions about CSE 2240 Wolf Garten
0 question about this device. Answer the ones you know or ask your own.
Ask a new question about this device
Download the instructions for your Saw in PDF format for free! Find your manual CSE 2240 - Wolf Garten and take your electronic device back in hand. On this page are published all the documents necessary for the use of your device. CSE 2240 by Wolf Garten.
USER MANUAL CSE 2240 Wolf Garten
Additional information on the operating instructions for the unit, section entitled "For your safety".
This appliance is not intended for use by persons (including children) with reduced physical, sensory or mental capabilities, or lack of experience and knowledge, unless they have been given supervision or instruction concerning use of the appliance by a person responsible for their safety.
Children should be supervised to ensure that they do not play with the appliance.
fr
- General informations 26
- Symbols 26
- General safety norms 26
- Electrical safety 29
5.Description of machine parts 29
6.Bar and chain assembly 29 - Lubrification system 29
- Safety chain brake 30
- Switching on/off 30
- Maintenance 30
- General suggestions for cutting 31
- Technical data 32
INHALT DE
CAJPKAJ SR TPAHCJIATEIΦPOMOPINHANYNTCTBO
- Onthe nHopmaueje 224
2.Cmboi 224 - Onstn cnpyhocn npoicn 225
- EneKtpnHa cnrypHocT 227
- Onic denoba ypehaja 227
- MoThIpaHBe BoHnue n IaHua 228
7.CnCTeM IOMa3NbHa. 228
8.CnryphocnaKoynuJaHa. 228 - YKByuBaBe u NCKbyuBaBe 228
- Odpkabahe 229
- OnuTa ynyTcBa 3a pe3ahe 229
- Texnukn noaun 231
OBSAH SK PRELOZENE Z PÖVODNEHO NÁVODU
- Vseobecné informácie 242
- Symboly 242
- Vseobecnbezpecnostnormy 242
4.Normy elektricnej bezpečnosti 245
5.Opis casti pristojo 245 - Montáz IiSty a refaze 245
- System mazania 246
- System bezpečnostnej brzdy 246
- Spustenie a zastavenie 246
10.Udrzba 246 - Vseobecne rady pre rezanie 247
- Technicke udaje 248
INNEHÄLLSFORTECKNING SE OVERSATT FRAN DE URSPRUNGLIGA BRUKSANVISNINGEN
Before using your power tool read carefully the manual instructions
1. GENERAL INFORMATION
Dear client, may we congratulate you for having chosen one of our products for your garden.
The chainsaw has been manufactured in accordance with the current safety regulations which protect the consumer.
This manual describes and illustrates the various operations for assembly, use and maintenance which are required in order to keep your chain saw in perfect condition.
TO FACILITATE READING
The illustrations about the assembly are to be found at the beginning of this booklet. Keep this pages open while reading the assembly instructions.
Should your chainsaw need servicing or repair, please contact your retailer or an authorised service centre.
2. SYMBOLS
The following symbols are used throughout this manual. Before read it they must be known.

Denotes risk of personal injury, loss of life or damage to the tool in case of non observance of the instruction in this manual.
Denotes risk of electric shock

Use always: safety helmet, noisedamping earplugs, protective gagglers or visor

Use always sturdy shoes not sliding.

Use always protective gloves.

Read the instruction manual.

Do not expose to rain.
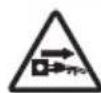
Remove plug from the mains immediately if cable is damaged or cut.

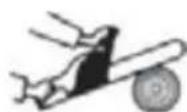
Hold the chain saw with both hands.
Suggested way of operating.
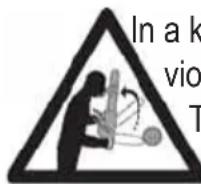
Danger of kickback.

Maximum guide bar length.
utilizable.

Cleaning.
Shows the picture linked with the manual's text
Discarded electrical appliances contain recyclable materials and should therefore not be disposed of along with household waste.
3. GENERAL SAFETY NORMS
All users of the chain saw must first carefully read the maintenance and operating manual and familiarise themselves fully with all controls for correct operation of the device.

Do not let children come into contact with the tool. Keep all the people away from the work area
Using electric tools, basic safety precautions
should always be followed to reduce the risk of fire, electric shock and personal injury.
Guard against electric shock. Avoid body contact with earthed or grounded surfaces.
Store idle tool. When not in use the tools should be stored in a dry, hight or locked up place, out of reach of children.
Do not force the tools. It will do the job better safer at the rate for which it was intended.
Cluttered areas and benches can cause accident.
Read the following safety instruction and tool's labels before attempting to operate this product. Be aware of tool's operation range and limitations as well as its dangers.
When not in use, power tools must be stored in a dry place and locked up securely, out of reach of children.
Never allow the chain saw near your body or your clothing when starting or using it.
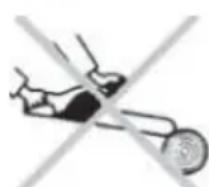
Do not switch your machine on when it is upside down.
When starting the chain saw ensure the chain is not touching anything.
Remember that the machine continues to run for a short period after it is switched off.
Beware of objects hurled by the line head.
Do not use and do not start up and do not use the chain saw near people, other animals or obtrusive objects.
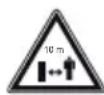
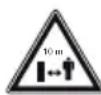
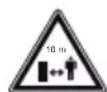
During operation we recommend keeping a minimum distance of 10 m between the machine and other people.
Always hold the device with both hands.
Stand in a safe and steady position on both legs.
Never carry the chainsaw by the cable or when it is connected to the mains or with your fingers on the trigger.
Avoid accidental starting. Ensure the switch is in the off position before plugging in.
Carrying power tools with your finger on the switch or plugging in power tools that have the switch on invites accidents.
Keep the cable away from heat sources, oils or sharp edges.
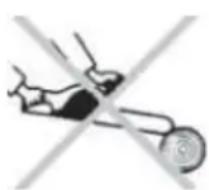
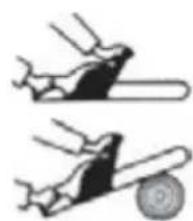
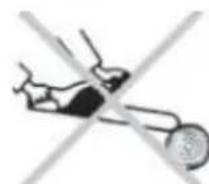
When sawing, do not use chainsaw above shoulder height.
The operator is responsible for any accidents or hazards that may occur to other persons or their belongings.
Do not operate a chain saw in a tree. Operation of chain saw while up a tree may result in personal injury.
Dress properly. Do not wear loose clothing or jewellery. Keep your hair, clothing and gloves away from moving parts.
Loose clothes, jewellery or long hair can be caught in moving parts.

Wear clothing and safety gear suitable for chain saw cutters operations.
We suggest wearing:
safety helmet
noise-damping earplugs
protective goggles or visor
protective gloves
protective trousers
sturdy shoes not sliding

Always use an extension cable with high insulation characteristics and which meets all current legislation requirements.
When operating a power tool outdoors, use an extension cord suitable for outdoor use.
Use of a cord suitable for outdoor use reduces the risk of electric shock.
Before starting the motor, ensure that the extension cable is clear of the cutting zone.
Any damaged cable must be replaced immediately by authorized staff.
Remove the plug from the packet before
carrying out any adjustment, servicing or maintenance.
For safety reasons, the socket used to power the unit should be backed up by a residual current device-operated (FI) circuitbreaker which can be tripped by a max. current of 30mA .
Check damaged parts. Before further use of your chainsaw, a guard or other part that is damaged should be carefully checked to determine whether it will operate properly and perform its intended function. Check for alignment of moving parts, binding of moving parts, breakage of parts, mounting and any other conditions that may affect its operation. A guard or other part that is damaged should be properly repaired or replaced by an authorised service agent. Do not use your chainsaw if the switch does not turn it on and off.
Maximum attention is urged towards any possible dangers, warning signs of which may not be heard because of the noise of the equipment.
- Eliminate any hazards from the work zone and check that there are no hazards such as trees in dangerous positions, roads, railways or electric cables.
Use the ELECTRIC CHAINSAW only for cutting wood.
Do NOT use the equipment for any other purpose
Prolonged use of the equipment may cause disturbances to blood circulation in the hands (white finger disease) attributable to the vibrations.
Factors that influence the appearance of this condition include the following:
- Personal predisposition of the operator to reduced blood flow in the hands.
- Use of the equipment in cold conditions (warm gloves are therefore recommended).
- Long periods of uninterrupted use (use at intervals is recommended).
- It is recommended that a doctor be consulted
in the event of tingling or numbness.
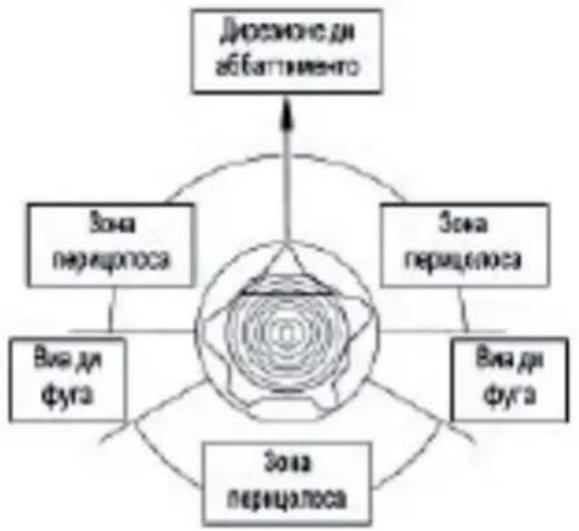
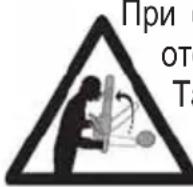
DANGER FROM KICKBACKS
Kickbacks can cause lethal wounds.
1) Start of the cut with the point of the bar.
2) Accidental contact with other branches, trunks, solid bodies, or metalwork.
3) Cut with the top part of the bar.
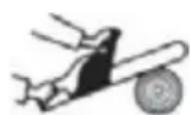
-
Keep the spike (Fig.11) against the wood while cutting.
-
Cut with the chain sharp and taught.
- Into a cut that has already been started, insert the chain at top speed and very attentively.
- Extract the bar from the cut only with the chain in movement.
The chainsaw must be held with the left hand on the front handle and the right on the rear handle (this applies to left handed people, too).
The safety devices have been designed to function with the hands in those positions.
Your chainsaw is provided with the following safety devices.
THROTTLE TRIGGER LOOK-OUT (fig. 1, det. 2) prevents accidental operation of the throttle trigger.
THROTTLE TRIGGER DANGER (fig. 1, det. 3): Warning. The cutting chain may continue to rotate for a certain time after the throttle trigger has been released.
SAFETY CHAIN BRAKE (fig. 1, det. 10) Your chainsaw is provided with a safety chain brake which can stop the chain in a fraction of a second (in the event of a kickback).
On each occasion, before use check that all the safety devices function perfectly.
4. ELECTRICAL SAFETY
Voltage: make sure your machine is correct for your mains supply
Current: your machine is suitable for AC supply only.
Plugs/extension leads: we recommend the use of PVC or rubber covered plugs, connectors and leads with your machine.
Power point: the machine must be connected to a power point and not a lighting socket.
5. DESCRIPTION OF MACHINE PARTS
The package contains the following items:
- Rear handle
- Lock off safety button
- Start lever
- Chain oil tank
- Bar with toothed pinion
- Chain
- Front handle
- Air intakes
- Power supply cable with plug
- Brake-hand guard engaging lever
- Chain guard
- Bar locking hand wheel + chain tension adjustment hand wheel
- Bar locking pin
- Chain pinion
- Oil tank inspection gauge
- Spiked bumper
- Cable strain relief
NOTE: make sure that the power tool and accessories in the package are not damaged
NOTE: read these operative instructions carefully before attempting to operate the drill
6. BAR AND CHAIN ASSEMBLY

FIG. 1-2-3-4-5-6
Check that the chain brake (10) has not been
engaged, and the brake lever is in position '1'.
Unscrew the bar locking hand wheel (12) and also remove the chain guard (11).
Fit the bar (5) onto the locking pin
(13). Turn the adjustment flange in the direction shown by the arrow of fig. 5, then push the bar back all the way toward the pinion (14).
Slide the chain (6) through the bar slot, starting from the top section, making sure that the teeth cutting edge is facing forward, on the blade top side.
Fit the chain around the pinion (14).
Fit the chain guard and partly tighten the bar locking hand wheel (12) by hand, as shown in fig.6.
Tension the chain by using the chain tension adjustment hand wheel (12), fig. 7.
The tension is correct when the chain remains inside the slot around the bar and can be turned with the fingers. At this stage, fully tighten the bar locking hand wheel, as shown in fig. 8.
Too much tension on the chain will reduce the life of the chain, the bar and the engine.
Too little tension of the chain may cause the chain to fall from the bar, and create a dangerous condition for the user.
An automatic pump allows the chain lubrication.
Use only new oil for chains. The choice of the oil viscosity depends on the air temperature. Never use waste oil or second rate oil that could damage the pump, the bar and the chain.
Contact an authorised service centre in order to choose good oil.
Never use the chainsaw without oil. Check oil level regularly, refill if less than 14 full.
If the lubrication system doesn't work properly, check that the oil filter is clean, eventually contact an authorised service centre.
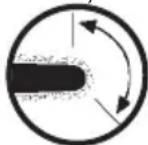
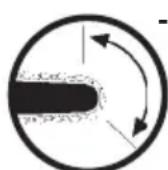
8. SAFETY CHAINBRAKE

FIG. 2-9
This area shows the part of chainsaw most likely to cause kickback (fig. 9).
In the event of kickback, the left hand will come into contact With chain brake lever, that incorporates a separate electrical switch to cut out the current to the motor, stopping the chain immediately ('O' position).
To reset after operation of the chain brake, disconnect from power supply and release the brake by pulling the brake lever into the rearward position ('1' position).
Check chain tension before restarting.
9.SWITCHING ON/OFF
- SWITCH ON -
Hold the front handle with the left hand and the rear handle with the right hand.
Press the lock off safety button (2) with the thumb and press the start button (3).
- SWITCH OFF -
To stop the chainsaw, release the trigger.
ELECTRIC MOTOR SAFETY SYSTEM
This chainsaw has a device that protects the motor by disconnecting it when the effort is too high. To restart, release the trigger.
Check that the chain is able to rotate.
Push the trigger and the lock-off button to start again.
10. MAINTENANCE
The following suggestions deal with the daily maintenance of the chainsaw. If they could not be exhaustive, contact an authorised service centre.

FIG. 1-2-6-8-10
Ensure that the electric power lead (9) is not damaged.
Ensure that the motor and air slots (8) are free and unobstructed.
Check that the lubrication system is
adequate.
Clean the chain brake and ensure that it works properly.
Turn the bar over everyday.
Check the bar wear.
Ensure that the oil flow hole is unobstructed.
Clean the chain guide on the bar.
Check the chain tension, sharpen the blades and check their conditions eventually removing irregularities.
Check the guide bar sprocket conditions.
Ensure that the oil reservoir and the oil filter are clean.
This chainsaw meets all current legislation requirements; in order to avoid injuries while repairing, every repairing has to be done by qualified staff in an authorized service centre.
CHAIN SHARPENING

FIG. 8
Disconnect the cord from the mains supply.
Wear protective gloves.
Ensure the chain is correctly tensioned and not too loose.
Engage the chain brake (10) to block the chain on the bar when sharpening.
Use a round file for chain sharpening, diameter equivalent to 1.1 times the cutting tooth depth.
File at a horizontal angle, 30^ to the bar.
File from inside towards outside of the tooth only.
Sharpen each tooth equally by using the same number of strokes.
File at an angle of 90^ to the bar.
Check the safety depth gauge height every 5 chain sharpenings. Use depth gauge measuring instrument to check the height of the depth gauge.
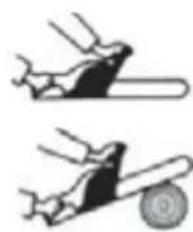
11.GENERAL SUGGESTIONS FOR
CUTTING


We recommend to cut by using the bottom of the bar, a technique to pull the chain, so the electric chainsaw tends to move towards the trunk, decreasing the danger for the operator. Be careful when cutting with the top of the bar, because the electric chain saw would tend to move towards the operator.
Make sure to the cutting length.
Avoid cutting of thin twigs and bushes.
The twigs can be grabbed by the chain, set in rotation and cause injury.
Pay particular attention to branches in tension: they might be dangerous for the operator.
Be especially careful when working on slopes, uneven and slippery ground.
Do not cut wire mesh.
Do not proceed with detailed jobs without first having made the necessary experience.
In case of doubt and uncertainty, consult an expert.
It is recommended to cut logs upon tripods or clamps to gain experience.
CUTTING LOGS
Cutting a log resting on the two extremities

FIG. 12
First cut 1/3 of a diameter from the top.
Next cut from below using the top of the bar. This will avoid pinching of the bar in wood. Avoid touching the ground with the bar.
Cutting from a saw horse

FIG. 13
First cut 1/3 of a diameter from below.
Next cut from the top using the bottom of the bar.
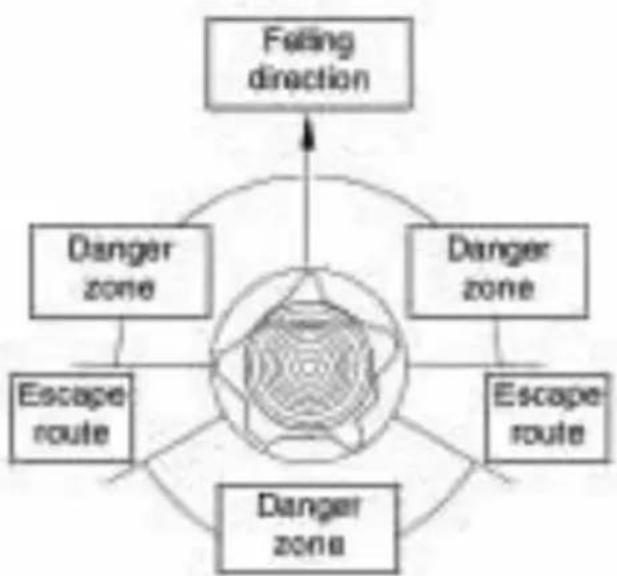
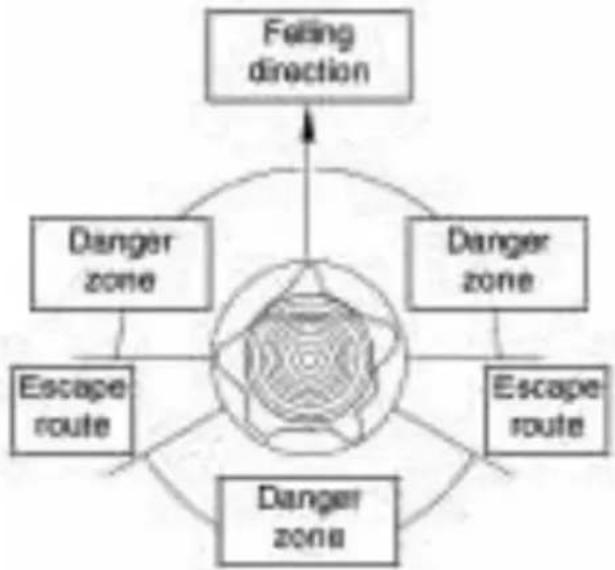
FELLING A TREE
Before felling a tree, consider carefully all conditions including the intended direction of the fall, the natural lean of the tree, surrounding trees and obstacles, the wind direction and speed.
Directional cut

FIG. 14
Cut a wedge (1/3-1/2 of tree diameter) out of the trunk on the side which you want the tree to fall.
Felling cut

FIG. 15 - 16
Cut into the trunk from the other side 1"-2"/3-6 cm above the wedge.
Use a felling wedge to help control felling and prevent binding the guide bar and saw chain in the cut.
Safety distance is 2.5 times the height of the tree to fell. Be sure that nobody is in the danger zone before and during the felling.
CUTTING PREPARED TIMBER
When cutting prepared, use clamps or shocks to secure wood.
12. TECHNICAL DATA
| CSE 2035 | |
| Voltage - Power 230 V - 2000 W | |
| Power frequency 50 Hz | |
| Sprocket speed (no load) 7600 | min -1 |
| Bar length 35 cm | |
| Cutting length 300 mm | |
| Chain pitch 3/8"/9.53 | inch/mm |
| Chain (guide thickness) 0,05"/1 | 27 mm |
| Pignone motore 6 teeth | |
| Mass 4,6 kg | |
| Sound pressure level Lwa 106 | 3 dB(A) K=3 |
| Sound pressure level Guaran- teed Lwa (2000/14/EC) | 109 dB(A) |
| Vibration 4,7 m/s | 2 K=1,5 |
| Bar: Oregon 140SDEA041 Chain: Oregon 91PJ052X | |
| CSE 2240 | |
| Voltage - Power 230 V - 2200 W | |
| Power frequency 50 Hz | |
| Sprocket speed (no load) 7600 | min -1 |
| Bar length 40 cm | |
| Cutting length 350 mm | |
| Chain pitch 3/8"/9.53 | inch/mm |
| Chain (guide thickness) 0,05"/1 | 27 mm |
| Pignone motore 6 teeth | |
| Mass 4,7 kg | |
| Potenza sonora misurata Lwa | 106,1 dB(A) K=3 |
| Potenza sonora Garantita Lwa (2000/14/EC) | 109 dB(A) |
| Vibration 5,3 m/s | 2 K=1,5 |
| Bar: Oregon 160SDEA041 Chain: Oregon 91PJ057X | |
| PERIODIC MAINTENANCE:This periodic maintenance table refers to a standard use. For particu- larily rough and intense terms of use, the maintenance intervals must be consequently reducedFOLLOW THE SPECIFIC INSTRUCTIONS CONTAINED IN THIS MANUAL | before each job | after each job | each 50 hours | each 100 hours | every year | anomalies ; wear ; damages | |
| Machine | Visual check X | ||||||
| General cleaning X | |||||||
| Air cooling slots cleaning X | |||||||
| Chain brake | Working check X | ||||||
| Check at service centre X | |||||||
| Throttle trigger lookout; throttle trigger; engine stop switch. | Working check X | ||||||
| Screws | Tightening check: - Accessibile screws - Handles fixing screws | X | |||||
| Chain | Lubrication check X | ||||||
| Sharpness check X | |||||||
| Tension check X | |||||||
| Replacement | X | ||||||
| Drive sprocked | Wear and damages check. Bearing check and lubrication | X | |||||
| Replacement | X | ||||||
| Bar | Cleaning | X | |||||
| Wear and damages check X | |||||||
| Replacement | X | ||||||
L'emballage contient:
No permitted to be used in any way. No permit to use, sell or distribute. No permit to use, sell or distribute for commercial or personal use. No permit to use, sell or distribute for commercial or personal use for profit or commercial advantage.
TIA NA DIYKOAYNETAI H ANAΓNΩΣH
Oi EIKOVc TOU AVIOTOIxOUV OTN Ouvapuoloynon KAI TEPIypaqn TNS mXavns Bpiokovtai oTO KAUmuTou EeWpuAou, OTNV apnTou TAPoVTOc FuAiaou.
Kpatnoate avoixte ts oelides kata tn diapkeia tns avaywosn twv oyiw ouvapouoynons kai xphons.
TnV TepiTTwON Tou To NkETPOPTpiov Oac Xpeiaotei TexviKn Bontheia n EtnoKEun, Oac Tnapakaloume va mny TpoaAnoe Tc EtnoKEuAoTe TN BApN kai va aTeuOuvEite OTov PwAntn mac n oe Eeouoiobotnevo Kevtpo TexviKn YTOOTnpicns.
2. SYMBOAA
Kata n qacn kottnc m n eepvate to uos Tou wou ca.
Mn xpnciioiEte to aluocpiivo cE vtpo. HLeitoupyia Tou aluocpiovou evw Bpicike Ttavw cEeVtpo mTOpei va TpokaIeI TPOCSIWIKo Tpaumaticu
Kpatnte to oovtwto amuaki (EK.11) Kovtpa cTo luO evw to KoBETE.
Koptye Tny aLusida kaIa akoviciEvn KAI TEVTwEvn.
Bcerda noIb3ObaTbc8 3aUHTHOKacKO, npOTNBOWUMOBblMN HayuHKAMn,OcKaMn nn 3aUHTbIM KO3blpbkOM.

Bcerda noIb30BaTbcra npouHoi obyBbIO npOTNB cKoJIbXeHn.

IOnb30BaTbcra IpoHbIMn nepaatkam.

IpoHTaTb INHCTpyKcNn. He BbICTaBnTb Ha DoXDb.

OTKIOUHTb UTencelb OT 3NEKTPOCETN, ecn npoBOD NOBpeJdEHN Jnnope3aH.

ceTda DepxaTb 3JIeKTPoNnIy DByMpaKaMn.
PekomeHnyembIcnoc6 paCnIKN.
Onachoctb KOHTpydapOB.
MaKcImaJIbHaДIINHa nOJe3Hoi/pa6OeH uINbI. maKc.400MM

Yka3bIbaetpncyHOK,HaKOTOpbIN daETcCcblnKaBTEKCTe.
BbIweDnne n3 ynoTpe6nna
3JIeKtpnueckne yCTpOInCTBa COCToT N3 NOBTOPO HcNOJb3YeMbIX MaTePnaIOB, PO3OMy He DOJXHbI Bbl6paCbIBaTbCBA X03rICTBeHHbIE OTXoDbI.
3. OБциЕ ПAPВILA TEXHNUKINBE3ONACHOCTN
До начANA NOьзOBаня эл ektrponиLOH Heo6xODnMo BHNMaTeIbHo nPoouNTaTb pyKOBODCTBO nO 3KcPnyatauN IN OCBOINTb NOJIHOCTbIO KOMaHdbI nO KoppeKTHomy NOJb3OBaHnIO INHCTpyMeHTOM, KpOME TOrO, Heo6xODnMO xpaHnTB NaCTOЯшe pyKOBODCTBO dIg 6yduux KOHCyIbTaU.

He no3B0Jb T noIb3OBAHne 3JIeKTpONnOJ DetY M nIIOJAM, He O3HaKOMJIeHHbIM NOnHOCTbU C HAcTOraUMN INHCTpyKZnAMyN.
Iolb3yrcb 3JIeKTPnueckmnpexyuImn HnCTpymentamn, Heo6xOIMOBcerda co6IIOaTbOCHOBHbIE MepblnpedocTopoxHOCTn IJyUmHeBSeHnpyNcKaNoXapOB,ydapOB 3JIeKTPnueckm TOKOM npaHEnlIIOdei.
IpeoxpaTbC8OTyapOB3JIeKtpueckm TOKOM N36eratb KOHTaKaTea C 3a3emHbIMN NOBepXHOCTaMn, IIN NOBepXHOCTaMn,3AMKHyTbIMN Ha KOpnyc.
ybnpaTb Ha xpaHHe HeNCnOJIb3YeMbI pexyuIINHCTpMEnT. KOrda He nCNoIb3yETcra, pexyuIINHCTpMEnT DOJKeH 6bITb y6paH BCyXoe MeCTO HaxOHTbcRA Ha BbICOTE, 6bITb 3aKpbITbIM, BHe DoCTyNa IdI DeTei.
He fopcnpoBaTb pexyuHnHCTpyMeHT. Oh 6ydet BblnoJHrTaPBoTy lyuwe n 6ydet 6oJee 6e3OpacHbIM Ha cKOpocTN,ДЯ KOTopoI npedymotpeH.
ГяЗньсpeдаи paбоче CTОЛы MORYT cnOCO6CTBOBaTb 6ра3OBaHnIO NOXapOB.
He noDBepratb pexyuyn nHcTpyment BnaJxHocTn. He nCnoB3OBaTb pexuyne INHCTpyMeHTbIB MeCTax C 3ara3npoBaHHoN uIN BOCnIaMeHraUoSeiCra aTMocFepoN.
He 3anyckaTbH He noIb30BaTbcra 3neKtpoNIOB B6n3n IIOdeJ, XINBOTbIX INI INpeDMeTOB.
BoBpemyHKnOHOPOBaHnpeKOMeHdyetc MNHmAlbHaJINCTaHcyB10MmexNyMaunHOIN DpyrMMIIODbM.
ПодержИВаТь yстpoиCTBO BCERda DBумяpyКам.
PnHMaTb cTa6nIbHyU n yBepeHHyIO H03NcHIO HO.
IepemeaTb 3JIeKtpOnnly nocpeDCTBOM pykoTOK, n36eRaTb BONoUeHn eE 3a npoBOd 3JIeKtpOnHTaHn, n36eRaTb TpaHCnOpTnPOBky, KOrda OHa CoedInHeHa C 3JIeKtpocetbIO n C naIbCuAMn Ha BvIKnOuAtene.
He pa6oTaIe c nIoOn Ha depeBe.Pa6oTa C nIoOnHa DepeBe MoKcT CTaTb PnUHOn HeCuaCThblXcIyuaEB.
6. MOHTAX WINHbI N CEPI
Pnc.1-2-3-4-5-6
Y6eIITbC8,HTO TOpMo3 (10) cENHe BkJIIOueH, pblur cENI DOJKeH 6bITB NNoJoxeHn '1'.
Ocna6ntb kpeexHbI BnHT (12) uHHbl, CHB TaKxekox cenn (11).
YcTaHOBnTb 5)Ha KpeNexHbI WTHoPT (13).PiobepHyTB perylnpoBOUHbI cPnaHeu B HnpaBLeHne, yka3aHHoe CTpeKoH Ha pnc. 5, n OTBeCTn 5HH MaKcImMaJIbHo Ha3aD B
CTOPOHy 3y6uatoKoJeca (14).
ПponуctntbцeNB(6)Впa3шинbl,нан纳CверхнeчactN,Tak,чTOбblpeжушяКрOMka3y6beB 6blnaобацeha Впeped,Kверхнeчactnлe3BnI.
HaTeB 3y6aToe Koneco (14).
YcTaHOBnTb KoxyX cenn n CnErKa 3aTayTb KpeKxHbI BnHT cenn (12) ot pykn, pnc.6.
HaTayb cenb npn nomou nperynpoBHOpykoTkn HataxkeHna (12), pnc.7.HatxkeHne npabnlbHoe, kOrda cenbocTaetc B na3e BOKpyr shnbl. Kpome toro,Heo6xoDIMO, YTO6bl cenb MoXHo 6blIODBnRaTb nalbuamn. Iocne 3toro, 3aTaNHTe DO KOHca KpeENKhbl BNHT ceni, pnc.8.
Upe3MepHoe HaTjXeHne cenn yMeHbShaet cPok Cnyx6bl cenn, UINbI n DnBraTeIa.
HeIOCTaTOHoe HATXKeHne cEN MoKet npINBeCTN K ee COCKaKNBaHNo C sINhbl, YTO CO3daET ONaCHOCTb DnI NOB3OBATEJI.
7.CNCTEMA CMA3KN
Pnc.10
Cma3kaIeNrapaHTnpoBaHa aBTOMaTnueckm HaCOCOM.
PeKOMeHnyeTc npImeHЯTb HOBoe Macno dIra IeIeN. BbIbOp B83KoCTn Macna 3aBncnt OT TempepaTypbI BO3dyxa. He npImeHЯTb HIKOrda MacNo NOBTOPOrO NcNOJIb3OBAHn IIN HN3KOrO KaueCTBa, YTO MOKeT NOBpeDHTb HaCOC, peKyuU OacTb (Je3BVe) n cIeNb.
ДЯ Bыбopa macna CB3aTbCуннOMOeHHbIM LcHTpOM TexHueckoro 06cnyKBAHn.
HnKOrda He nCNoIb3oBaTb cenb 6e3 Macna. PeryIaRHO KOHTpOINPOBaTb yPoBeHb MaCna, DOJIbA Tb MaCNo KaJdbI pa3, KOrDa erO yPoBeHb 6ydt NOKa3bIBaTb MeHbWe OndHou YeTBepTu OT obEMA.
B cnyuae noBpeKdHnna CnCTeMbI cMa3Kn npOBepntb uNCTOTy MaCJHOro qnIbTp a BHyTp n pe3epByapa nNo Heo6xOaMocTn DoCTaBnTb 3NeKTpOnnny B YnoHHomOeHHb IeHTp
TexnueckoO 6cnyxuBaHna.
8.CNCTEMA ABAPINHbIXTOPMO3OB
Pnc.2-9
Korda 3neKtponna pa6oTaET B 3Toi 3OHe (Pnc.9), cyueCTByeT eue Onda BO3MOxHocTb KOHTpydapOB.
B clyuae KOHTpydapa, IeBaI pyka nIeT B KOHTaKT C pblaROM TOPMO3a, 3axBaTbIBaCneUΦnueckn 3JIeKTPoBbIKJIOuAteIb, YTO6bl CHaTB HAnpJxKeHHe C MOTOpa N KOnOJky DnM rHOBeHHoN OCTaHOBKn ZEN (No3nZn“0").
ДЯ NOBTOPHORO 3aNyCKa TOPMO3a ZeHIN ONCNE BMeWATEbCTBa Heo6xOdIMo OCTaBNTb BBIKIQUaTeIb, NOOJXdTb OCTaHOBKn MOTOPA IN BBIBeCTn PbUar NOnHOCTbH Ha3aD (No3nue"1").
Пюверпь натужени сени до зауckeэлектponиbl.
12. TEXHnueCKNE DAHHbIE
Ia ce Hocat COJIINH NyeBn, ITO He Ce Jn3raaT

Cekoraaw da ce ctaBaat COJnHn HapaKBuCuN
Da ce chTa npnpaunKoT.

Ha He ce octaba Ha doxk

Да ceшсмболк Да ce ncknyuBa uTekepot Od МржkaTdoKoJky Ka6eIOT e OwTeTeH nI npceueH

EneKtpnHaTaNla ceKoraTpe6a Da ce dpxN CO DBeTe paue
IpenopaunB nauH naCeuehe
3. ONIHTN HOPMN 3A B6E3BEdHOCT
IpeJa ja KopnCTte eJekTpnuHaTa nila, HeONXoHOb e BHNMaTeJIHO da ce npOHTa nppaunKOT 3a KOpNCTeHe i ODPxUBaHe i Do6po Da ce Hayat INCTpyKUnTe 3a KOpeKTHOTO ynoTpe6yBaHe Ha cnpabata. NotpeHo e ncto Taka OBOj nppaunK Da ce cyBa 3apaDi NOHaTaMOuHa KOHCyJTAuJa.

Ja He Ce 03BOJyBa KOpNCTeHBe Ha eJeKtpnHaTa IINa Od Deca NIN JINCA KOI He Ce 3aNo3HaTcOHHCTpyKUInTe 3a ynoTpe6a
Ipn KOpncTeHe Ha eJekTpHn CnpaBn Tpe6a cekoraW da ce NoHTyBaat OCHOBHnte 3aHTTN Mepk 3a 6e36eHocT co ueI da ce OrpaHnHi pN3IKOT od noXap, ctpyeH yadap nOBpeHa.
a ce yBaMe od cTpyeH yAp n da ce n36erHyBa dOnnp Ha TeIOTo DO B3emjeHn NOBpUnHn NIn eJekTpnuHa Maca.
Дokолку He ce ynoTpe6yBa,
CnpaBaTa Tpe6a Da Ce CTaBn Ha CyBO MecTo,Ha BnCOKo,NJN 3aTBoPeHa Ha MecTo HEnpncTaNHO 3a Deca.
CnpabaTa He Tpe6a Da ce fOpcnpa.
NcTata pa60Tu noDobpo nno6e36eNo co 6p3nHaTa 3a Koja e npedBnDeHa.
BaIIkaHa cpeHnHa nIpa6oTHa IOBpUnHa MoXaT Da IpeHn3BnKaT He3roDn.
CnpabaTa He Tpe6a Da ce octaba Ha BnaXHo MeCTo. He Tpe6a Da ce KOpIcTn BO aTMocΦepa Co racOBn IJN 3anaJIbA aTMocΦepa.
KorajaynoTpe6yBaTeeNeKtpnHaTa nIa Tpe6a Da CTe BO Do6pa fOpMa. He Tpe6a Da ce yNoTpe6yBa Kora Cte yMOPHn, HepacnoJoxKeHN nn NOD DejcTBO Ha Dporn.
3a BpeMe Ha pa6oTa eJekTpnuHaTaNIIa Tpe6a Da 6nDe Ha HeonXoHOTOPacTojaHne Od TeIoto N od ObNeKaTAtHa Toj wTo pa6oTu co CnpabaTata.
EneKtpnHaTa nHa He Tpe6a da ce CTaba BO DnXKeHbe DOKOJky e BO 06paTHa noNox6a.
Ппстабе BOДвиже,Тpe6ада cte сгурн DeKa HnшTo He e BO KOHTaKT CO LaHeцOT.
Да He ce 3a6opaba Deka, no nCKnyyBaHbe, eNeKTpnuHaTa nIIa npoDoJxMyBa Da pa6OTn yWTe HekOJIky CeKyHdN.
Да ce Bнмaba Ha MaTepnjaJIoT NcФрлан Od ceHnIOTO.
EneKtpnHaTaNlaHe Tpe6aDa ce CTaba BO DnXeHBe N Da Ce KOpNCTn BO 6n3nHa Ha Lyre, XNBOTn n npedmetn.
3a Bpeme Ha pa6oTa npenopaynBa e MmHmajHa oDJaIeJeHocT od 10 m. mery cnpabaTa n dpyrnnnca
CnpabaTaeKoraaw Tpeba da ce dpxnco DBeTe paue.
ПOTpe6Ho e cekoraaДа ИмamecTa6nHa n cnrypha noJox6a HaHO3eTe.
EneKtpnHaTaNla Tpe6a Da ce cTaBa BO DnXKeHBe CO paKNTe, Da ce Od6erHe BLeueHBe CO eNeKtpnHnot Ka6eI, Kako N IpemecTyBaHbe Kora nCTaTa e BKnyeHa BO eNeKtpnHaTAmpeKa N npCTnte Ce Bp3 PpeKNHyBaOT.
Kabenot Tpeba da ce yyBa od TOnnHa, MacNo n PpeMeTn wTo ceuT.
3a BpeMe Ha ceyeHe He Tpe6a Da Ce HauMHyBa BnCOuHata Ha paMeHnTe.
Ondrobohocta 3a noxap nIOnachoct 3a lyre n npedmetn jaCHOCN Toj wTO pa6OTn CO nnlaTata.

O6JIeKaTa n 6e36eHocHaTa onpeMa Tpe6a Da 6nDaT a DeKBaTHn Ha yNoTpe6yBaHbeTo Ha eJekTpnuHaTa nJa.
Oco6eHo ce npenopayBa ynoTpe6a Ha:
Wcsm60nlk Kauna
6e36eHochn HayshnCn
6e36eHOCn HaOchApN nJI NCEHHK 3a OCH
HapaKBrUcN CO 3aWtNTa
POTINBceyehe
6e36eHOCn NaHTaHOH CO 3aHTNTa npOTNB CeYeHe
COniHn YeBn, KOn He Ce JIn3raaT


Iolnt Ka6eTpe6a da 6nde CO BnCoka n3oNaJia N BO CKJaD CO cTaHdapNTe.

Дokолky eJektpnHaTа nla
ce ynotpe6yBa BO HaBopeHn YcNoBn, Kopntete NCKnyuBO npoJxHn Ka6n npKnaHn 3a TaKBn ycNoBn. Ynotpe6aTa Ha Ka6n HameHETn 3a HaBopeHn YcNoBn To HamaNyBa pN3NKOT Od CTpyjHn ydapn.
Kora eIeKtpnHaTa nla ce cTaba BO dBNxKeHBe, Tpe6a Da ce npOBepyBa daJIeKtpnHnot DoJIr Ka6eI e HaBOP OJ 30HaTa Ha CeueHe i daJIH Hema DeΦeKTH BO HerOBata n3OJaNja, Ha npIMep Ncehen IJIco abpa3nn.
OwTeTehnOT Ka6e Tpe6a BeHaaw Da 6nnde CmHeT OJ CneuJaJIncTn.
Ppečekoe perylnpaHe, cepBnncpaHBe n noDprka, wTekepot Tpe6a Da ce n3BaAn od npNKnyokuKOT.
OД пчини 3a 6e36eHocT Obaacnpaba Tpe6a da ce BKnyuBa BOeJIeKtpuHEN pIKnyOK, 3aHTITeHco DnΦepenCupan PpeKHyBauch MaKcImaJHa cTpyja od 30 mA.
Iorpndete ce da Hema OwTeHn DeJIOBn. PpeynoTpe6a Ha eJeKtpuHaTa Nila, IpoBepTe DaJIIMa OwTeTeHN DeJIOBn (Ha npimep 3aWtntata), 3a Da yTbpNTe DaJInc Ce BO cocToj6a Da ja n3BpUyBaat CBOJaTa fynKcNja. IpoBepTe ro nopeDOKOT Ha DBnDeuchKe Te DeJIOBn I norpndete ce Da Hema 3actOn, OwTeTyBaHa ha DeJIOBn n/Inn DpyrY ycNOBn KOn MOaT Da rO KOMnpomITnpaAT fynKcNoHpaHbETo Ha cnpabata. Ioprabkata INn 3amehata Ha EBENTyaJALHO OwTeTeHN DeJIOBn, Ha npimep Ha 3aWtnteh DeJ INn dpyro, Tpe6a Da 6ndat DoBepEHn Ha OBlaCTeH zentap 3a TexHnUKN
cepBnC.He ja ynoTpe6yBajTe eJekTpnuHaTa nIa DOKoNky He e BO3MoJHO nCTaTa Da ce BKnyn NCKnyn npeky npeknHybaOT.
4. HOPMn 3A EJEKTPNUHA B6E6H0CT
Hanoh: BONTaKaTa Ha MpeKaTa e yKaKaHa Bp3 etNKeTaTa CO NOdaTOU.
Ctpyja: eJekTpnuHaTa nIpa60Tu co Hau3MeHnUHa cTpyja.
WTekep n DoJr Ka6eI: ce npenopayBaat 6e36eHocn npKnyoU, Ka6IOBn WTeKepeo OD PBU nn OJ npKnaDHa rMa.
EneKtpuHn pNknyO: Tpe6a da ce yNoTpe6yBa npNKnyOc co aDeKBaTHa MOKHOCT.
5. ONIC HA DEJIOBITE HA EJEKTPNUHATA NIIJA
ΦHΓ.1-A
CopdHa Ha naKyBaHeTo:
- 3aHa paUka
2.Бe36eHocHo KOnue loK oΦΦ
3.Пolyra 3a BknyBaHbe - Pe3epBoap 3a macNo Ha IaHeoT
- loct co 3aunheHnK
- Janaheq
- Празда рачka
- BeHTnJI3a DOBOJ Ha BO3dUx
- EneKtpnueH ka6eN co wTeKeP
- loct 3a aKtBnpaHbe Ha KOUHncaTa
- KapTeP Ha IaHeIcOT
- 3aBpTKa 3aФИКСИРа№ He NaOCTOT + 3aBpTKa 3apeRyIINpa№ He NaTeRHaTOcTa Ha NaHeCtO
-
Ⅲapka 3a ФИКсираНe Ha loCTOT
-
3aŋchŋk
- Kaoko IITO ce IIPOBepKa Ha HauTape3epBoap
- xapФn
- CnpoBoHnKOT
HANOMEHA! Da ce npOBepn daJIncpabaTa, Hej3HHte DeIOBn IJINDaTeH np6Op ce OwTeTeHn 3aBpeMe Ha TpaHCnpTupaHe.
HANOMEHA!прдстаье на cnpaBaTа BO DBNXKeHbe Tpe6a Ha Mnpa И MHOrY BHNMaTeJIHo Da ce npOHTa OBOJ npPauHnK.
6. MOHTAXA HA JIOCTOT N IIAHELOT
ΦNΓ.1-2-3-4-5-6
IorpiTe ce KoHncaTa (10) OJ IaHeoT Da He e aKTHBnpaHa, loCTOT Da e BO No3njuBa B1r.
OdBpTeTe ja 3aBpTKaTa 3aФнкupaHe (12) Ha loCTOT,OTcTpaHyBajKn ro n KapTepeJaHeqOT(11).
NocTaBeTe ro loCTOT (5) Bp3
waPkata 3a 0nkCpaHbe (13).
3aBpTeTe ja 0nAnWata 3a
NoDecyBaHBe BO npaBeOTo Ha
ctpeIkata KaKO Bo 0nIgypa 5, n
IOBJeTe Ro loCTOT MaKcImaJIHO
HaHa3aD cnpema 3aIneHKnOT (14).
Hamectete ro IaheoT (6) BO dIe60r Ha loCTOT, NoHyBajKn Od rOpHnot DeJ, Taka Da ocTpnoT DeJ OD 3annte 6nDE CBPTen Hanapei, Bp3 rOpHnot DeJ OD ceuNOTO.
NocTaBete ro IaHeuTo OKOJy 3anYeHnKOT (14).
MOnTnpajTe ro KapTep IaHeuOT n 3aBpTeTe ja BHNMaTeJHNo 3aBpTkata
3aФИКСИРаНeHa JIOCTOT (12) CTerHyBaJKn ja co paKa,ФИГУРА 6.
3aterhe ro naheot cnydejK n ce co 3aBpTkata 3a perynilpaHe ha 3aterHaTOcTa Ha IaHeoT (12), FNYPA 7.HanHatoCTa e npabnHa Kora IaHeOT OCTaHyBa NOLOdEN BO dIe6OT OKOly loCTOT. PnToa Tpe6a da e BO3MOdHO IaHeoT da ce npdBnDyBa co npctn. Toraw Tpe6a da ce cTerHe do Kpaj 3aBpTkata 3a fNkCupaHe Ha loCTOT, FNYPA 8.
ПпекумернанноталарсOT roHaMaIyBa BpeMeTpaEHeTo Ha nCTNOT, KaKo N TpajHocTa Ha loCTOT nHa MOTOPOT.
Bo cnyaj Ha HeIOBOLHa HAnHaTOcT Ha IaHeuOT, NCTNOT MoDe Da NaIHe OJ IOCTOT, DOBeyBajKn Ro pa60THNKOT BO ONaCHOCT
7.CNCTEM 3A IOdMAUkyBAHbE
ΦΓ.10
ПодмачуваъTo Ha ЛанecOT ce octВapyBa co aBTOMaTCKa пymna.
CepenopayBa ynoTpe6a Ha HOBO MacNo 3a IaHn. N3bOpOT Ha BnCKo3ntET Ha MacNoTo e BO 3aBnCHOCT Od TemnepaTypata Ha BO3dyXOT. He Tpe6a HnkoraW Da Ce KopnCTn BeKe ynoTpe6eHo MacNo nIi Co Iow KBaJIHTet, Koe 6n MoKeIOn Da rN OWTeTn PymNaT, HOKOT nIaHeOt.
3a n360pOT Ha yIbe Tpe6a da ce 6o6paTnTe Ha HekoJ Oblacten LcHtap 3a TEXnUKO ONCnyKyBaHe.
Laheqot He Tpe6a HNKORAaJa pa60tn 6e3 MacNo. HnBOTO Ha MacNoto Tpe6a peoBHO Da ce npOBepyBa n Da ce Doaba HOBO Kora
HNBOTO Ke ce cnyuTn Ha NOMaJky Od eHa YetBpTnHa.
ДOKOLky CNTeMOT 3a NOdMaUKyBaHBe He cyHKcNoHnpa Do6po, Tpe6a Da ce npOBepn DaJIHФINTEpO3aMacNoBOBHaTpeuHocTa Ha pe3epBoapoTe uNCT.EBeHTyaIHO eJeKTPuHaTAt NIIa MoKe Da ce OdHece BO OBlaCTeH ZeHTap 3a TEXHNyKn cepBnC.
8. БЕЗБЕДHOCEH СИСТЕМ 3A KOΥЕНБE
ΦNΓ.2-9
Прп работelveHa eileKtpnHaTа Пиla BO Obaa 3OHa (ФИг.9) NOCTOnIpyra BepojaTHOCT 3a npOTnBydapn.
ДOKOLky ce Do6ne npOTnBydap,JIeBaTa paKa ce CTaBa Bp3 loCTOTHa KOUHncaTa, KoJa BKnyuBaCneJiaJeH eJeKtpuYe HpeKnHyBa3a NOHnTsyBaHBe Ha BOITaxKaTaOD MOTOpOT N eDeH CIn3rau 3aMOMeHTaJIHo CTOnnpaHBe Ha JIaHeIcOT (No3nju 0).
Co ceI KoUHnUaTa Ha JaHeuOT NOBTOPOHa Da Ce CTaBN BO DnXKeHBe, Tpe6a Da Ce OTnyuTn npeKnHyBaUOT, Da Ce NcYeKa CToNnpaHbETo Ha MOTOPN IOCTOT Da Ce CTaBN BO KpaJHa 3aHa No3nUja 1.
Да ce npOBepn pacterHaTnot LaHeu npei Da ce CTaBn BO dBNXeHbe eJeKtpnHaTa NiJa.
9. BKJnyUBaHbE INCKJnyUBaHbE
- BKЛУЧУBA№E -
ΦaTeTe ja npedHaTa paKa co neBaTa paka, a 3aHaTa co deChata paka.
IpnTnCHete ro 6e36eHOCHTO KOncye louK oΦΦ (2) co naJeTO n npTnCHete ro KOnyTe 3a BKnyBaHe (3).
- INCKЛУЧУBAHFe -
EneKtpnHaTa nnla ce ncknyBa Kora KnyOT 3a CTabaHe BO DBNXeHBe Ke ce OTnyTn.
10. MAHYTEH3NOHE
CeryoHO aIcyHn 0HcNrln nep La MaHyTeH3NOHe lyOTnDaHa deJIeEJIeTTpOcera. H caco dN dy66n O lyecNTn, 0HTaTTape nn LcHTpo Dn AccnCTeH3a AyTopn33aTo.
ΦNΓ.1-2-6-8-10
3a da He ce 3arnaBn loCTOT,ce ceue eHa TpeTnHa oD nJaMaTeapOT Ondope HaOly, a OCTaHaTnot DeI OndOly.
Tpynn dpBa nOtnpenHa .Marape. nn Co eDeH cNo6oDen KpaJ
ΦHΓ.13
Ce ceye eHa TpeTnHa od DnJaMetapOT Ondony Harope, a OCTaHaTnot JeI Odrope.
CEUHbE HA dPBO
3a npabnHcceHe Ha dpBO Tpe6a Da ce OeHaT CHTe YcNoBn, KaKo Ha npimep n36paH npabeC Ha naHaBe Ha dpBOTO, HerOBNt npropdH NaKLOH, eBeHTyaHn npenpeKn OKOly Hero, KaKo n npabecOT n 6p3HaTa Ha BetapOT.
HacouyBaHo ceehe
ΦNΓ.14
Да ce habрвп pe3ka od CTpaHaTa BO npaBeц Ha Koja ДрВOT Ke ce ceue. Toa ce npabn 3apadn HacouyBaHO ceueHe Ha rOpHnot DeJ npBO, a NotoA Ha DoJHnot DeJ Ha HacouyBaHO ceueHe, Koe Tpe6a Da 3aBpSh Tamy, KaDeWTO 3aBpShyBa rOpHnot DeJ.
Длбочинata Ha HacoyBaHOTO ceYeHe Tpe6a Da 6nDE eHa cheTbPTnHa Od DnAmETapoT Ha OCHObata Ha DpBOTO CO aRoj HajMaJky Od 45 CTeNeHmery roPHOTO n DOJIHO ceYeHe.
ЛинijaТаHaNpeceKmerуpaMHnHaTa Ha rOpHOTOnДОЛHo CeYeHBe Ce BnKaЛинijaHa HAcOчYBaHO CeYeHBe.ЛинijaТрЕбаДаБиDE COBpSeHO XOpN3OHTaJIHa NHa 90CTeNeHn Bo OdHocHa npaBecOT Ha naFaHBe
Ceehe 3a npcekyBaHe
ΦNΓ.15-16
CeeheTo 3a npcekyBaHe Tpe6a Da ce Bpwn Od pyraTa CtpaHa, Ha 3 Do 5 m HnIHHjaTa Ha HacOuyBaHO CeueHe.
Да ce KOpIcTaT KInHOBn 3a OJIeCHyBaHBe Ha KOHTpOJaTa Ha IpeCeKyuBaHBe n Da ce CnpeHu, Ha OBOJ NaUH, 6JOKaHa loCTOT 3a BPeMe Ha CeYeHBe.
Ceyeheto 3a npcekybahe Tpeba Da 3aBpuyBa napaleHNO Ha IINHjata Ha HAcOyBaHO ceye He Ha pactojaHne MeIy HNB HajMaIKy edHa DeceTnHa OD dNaMetapOT Ha OCHObATAHaDpBOTo. Henpecehenot DeI Ha OCHObTa Ce HapekyBa Onopa I e CnoJOT KoJ To BODn DpBOTo pni HEROBOTO naHaBe.
Бe36eHTo pactoJahne Ha dpBOTo 3a npceKyBaHe e 2,5 natn BnCOuHaTa Ha camOTO dpBO. Ppei 3a Bpeme Ha npceKyBaHbeto Tpe6a Da ce BHIMaba BO OnaChaT a 30Ha da Hema lyre.
CEUHe HA DACKN
3a cehe He Ha daCKn DOBOJHO e Tne Da Ce fNkCupaat Co MeHreMe nn peMeHn.
12. TEXHnUcKn IODATOcN CSE 2035
HapbUHHkaMHCTpyKcnn.

OnachocT OT TOKOB ydap. 3aIbJxKTeHNO e HOCHeTo Ha npedna3Ha KACKa, IpOTnBOuMHN HayuHnU, npedna3H N OUYa n MaCKa.

Ia ce HocT BnHaN CTa6uHn, HeIb3raun Ce o6yBkn.

Ia ce HocrT 3dpabn pbkabu.

Ppoetete HapbHnka.

Ha He ce n3naHa IbKJ.
Ako Ka6eIbTe e nobpeDen nnHap3aH, 3BaTe Te enCeNa OTeNEKtpo3axpaHbaHeTo.
Bnarn DpbkTe eKeTpueckn TpnoH C dBete. pue.
IpenopbYnteH naHn Ha p3aHe.
OnachocT ot obpaten yap. Makcimalna nOle3Ha IbIKNHaHaHa npabBaata uHa MaKc.

IouncBaHe.
O6o3nauaba qnrypa, KbM KOrTO B
TEKCTa mHa npenpaTka.
I3BaDeHnTe OT ynoTpe6a
eIektpnueckn HNCTpymEnTn capeuKnpyEmN, CNeIOBaTeJHo, He Tp6Ba Da ce N3XBbPnT, 3aEDHO C 6ntOBtE OTnAdbU.
3.ObuHOPM3A B6E3OJACHOCT
IpeNi Da 3aNochHeTe Da N3nOJ3BaTe eNeKtpuYeCKnra TpNOH, Tpr6Ba Da npOyTeTe BHNMaTeJIHO HApbUHnKa C INHCTpyKcN 3a EKCnIooatauN I NOdPbXka N da Ce 3aNo3HaTe N3ZaIIO C KOMaHdnte 3a npabInHOTo N3nOJ3BaHe Ha INHCTpyMeHTa. CbxpaHЯBaTe To3n HapbUHnk, 3a Da ce KOHCyPTnpaTe C Hero n 3a B6bDeJe.

3a6paheNo e N3noJ3BaHeTo Ha eJIeKtpnueckn TpNOH OT Deca N OT IuCa, KOnTO He ca HAnbJIno 3aNo3HaTn C HaCTOaNTe INHCTpyKUn.
Ipn n3noJ3BaHe Ha eNeKtpueeKn HnCTpymEnT Tpr6Ba BnHaRn Da ce Cna3BaT OCHOBHInTe IpeDynpexKdEHHa 3a 6e3OanacHocT, 3a Da Ce HamaJI npCKa OT NOxapN, TOKOB ydap Nn HapaHЯBaHe Ha Xopa.
B3emete Mepkn 3a npedna3BaHe ot TOKOB ynap n 36raBaiTe KOHTaKT Ha TAnOTo Cbc 3a3eMeHn INN 3aMaCEHN NOBbpXHOCTN.
Приберete Инстсремпа, korato He ce n3no13Ba.В takiva сунан ИстсремтТгябвдаce CBxpanya Ha cyxo MЯСTO, BbB BnCOKa ИЗATBOpeHa ПОИЦЯ, HeIoCTbNHa 3a Deцa.
Heo6xoJMOe da ce pa6OTn c MaKcImaJIHO BHMaHne NO OTHOSeHne Ha Bb3MOxHN ONaCHOCTN, KOHTO He Morat Da 6bDaT CyTN, Nopadn npON3BExKaHna OT MOTopa Wym.
EInmHnpaTe BCNUKn ONaCHOCTN OT pa6oTHaTa 30Ha N npOBepTe DaIN HrMa ONaCHOCTN, KaTO HAnpIMep ONaCHO pa3NoJIOXeHN DbPBeTa, PbTnUa, X.N. JInHH, eNeKtpnueckn Ka6eN.
MOTOPHJrTTPNOH moKe da ce
n3NoJ3Ba eHnCTBeHO 3a p3aHe Ha DbPBA. HnCTpyMeHTbT He Tp6Ba Da ce n3NoJ3Ba 3a dpyr n cen.
ПрбьлжnteнhaTapabotacnHCTpymehaMOxekda npedn3Bnka HapyseHnaKpbBo06paueHneTo Ha pbcTe (6oJecTHa 6eJIte npbctn), BCJeDcTBne HaBn6paunTe.
Фaktopи,Влгеши Вьрху порвеленята на takINA hapшени, MORaTдабдат:
-Лична педраЗнохеньост Ha onepaTopa KbM HeIo6po KpbBooPocBaHe Ha pbute.
-ИЗПОЛЗВАЕНИСТРУМЕNTапи НИСКИ TemпepаТун (пpenopьчBa ce ИЗПОЛЗВАЕ Ha TOnПи рБКаВиц).
-Дьлгп nepиои Ha pa6Ota 6e3 npeKbcBaHe (npenopbUba ce no BpeMe Ha pa6Ota da ce npaBrt NOuVBKn).
-Припява на мразукан ИИЗТрьпва се обьпсTe КБМ Лекap.
ONACHOCT IPN OBPATEH ydAP (KICKBACK)
06paTHnT ynap MoKe da npedn3BnKa CmbpTOHOChn HapaHbAHn.
1) Pязанeto 3anoyBa c Bbpxa Ha HappaBnBaAata shHa.
2) CnyuaeH KOHTaKT C npyN KIOHn, IbpeHn TpyN, TBbpN TeNa, MeTaHn MpeKn.
3)Pra3aHe cTropHaTa yAcT Ha HAnpaBnaBaUaTa ⅢHa.
-ДрькTeшарнupa(ФИr.11) cpeuуДьрВОТо NOВpeMeHa pЯзаHe.
- Pexete c do6pe 3aToyeHa n HanperHaTa Bepura.
-Ako pa3pe3bTe Beue 3aNoUHaT, BbBeJeTe BepnraTa C MaKcImaJIHa CKOpOCT N I3KNIOHTeJHO BHIMATEJHO.
-ИЗвадаиTe HappaBnaBaцаТа StHa OT pa3pe3a CamOпрдвЖeца ce Bepura.
MOTOPHNYT Tpnoh Tp86Ba Da ce Ibpxn KaTO JIABaTa pKa e Bbpy npedHaTa
pBkoXBaTKa, a DЯCHaTа - Bbpy 3aHaTa (BKNIOHTeHNo 3a Xopa, cnykeu n Cn C JIABaTa pKa).

IpeDna3HnTe yctpoNCTBa ca pa3pa6OteHn, Taka Ye da fynkunohnpat cnopeTakaba No3nua Ha pbcTe.
Baunr MOTOpEN TpNOH e cHa6dEn CbC cJeHNTe npeDn3Hn yCTPOIcTBA:
- BLOKIPOBKA HA YCKOPNTJI (BIXKФИ.1 DetaII 2) npedotbpaTBA cnyaHNO3aIeICTBaHe Ha loCTa Ha yckOpNTJI.
-JOCT HA YCKOPUTEN (ФИ.1 DeTaN 3). ONACHOCT: BHMaHne, pexeuaTa Bepira npoDbJIkaBa Da ce DnKu OnpedeJeHo BpeMe cIeD OTNyckaHeTo Ha IIOCTa Ha YCKOpUTEN. - INPEДПА3HA CПИРАКA HA BEPИГATA Baшят моторен Трон e санбдeн CпpeДПа3Ha CПИРЧа Na BepURA t (Фиг.1 detaɪn 10), kɔято 6blokupa BepURA t (В слуай Ha obpaTeH yap) 3a ча't ot cekuHdata.
ПпсдИ BCЯКО n3NoJ3BaHe npOBepraBaTeДаJIHn BCuKn npeJna3HN yCTpoIcTBA ca BПьЛнA n3nPaBHOCT.
4. HOPM3A EJEKTPNUCHEKA B3ONACHOCT
HapexeHne: MpeXOBOTo HapexeHne e TOBa, NocOyeHO Ha etNKeTa C daHHnte.
ToK: eNeKtpnuecknT TpnoH pa60Tu C npOMeHnB TOK.
6. MOHTAX HA HANPABJIBAUATA UHHA N HA BEPNIATA
ΦNΓ.1-2-3-4-5-6
Поберете далспраккata (10) на Верига т He e akTNВираза, T.e. loCTbT Ha спраккata eВ поця '1'.
Pa3BnIe 6Kpaun DaCK (12) Ha HnpaBnaaata WnHa, KaTO OTCTpaHnTe n KapTepa Ha BepnraTa (11).
MoNTpaIte HappaBnaBaUaTa 5) BbpxyΦnKcnpaunu nT
(13). Bbptete perylnupauniae PhanaheuB Nocokata, noka3aHa Cbc CTpeJka HaΦn. 5, KATO NO TO3N HauHH NOCTaBHTe HaprablaBaUata UHb3MOxHO HaHa3aD KbM PnHbOHa (14).
NocTabete Bepurata (6) B KaHajna
Ha HaprablaBaAata 3nHa, 3anOyBauKu OT rohpata yact, Taka ye pe3eUbT Ha 3b6nte Da 6bDe o6bpHAT Hanpei, Bbpxy rohpata CtpaHa Ha 5HHata.
MoHTnpaIte BepnraTa OKOJIO NINHbOHa (14).
MOnTnpaIe KapTeHaBepnraTaN3aBnIte IeKoΦnKcnpaunIaNckHaHapBaIbRaUaTa ⅢnHa(12),KaTo ro 3aTeHHe Ta pBkaΦnR.6.
Happerhe Bepurata c Dncka 3apeynilpaHe Ha HapprarHeTo Ha Bepurata(12),pIr.7.
HanpraheTo e npabnHOb, Korato Bepnata octaba B KaHaJa OKoJIO HaprablaBaaata ShaHa. Ocben ToBa, Bepnata Tp6Ba Da MoKe Da ce nIb3ra C npbCTn. B To3N MOMeHT Tp6Ba Da 3aterHeTe DOKpaN PnKcnpaunu DnCK Ha HaprablaBaaata ShaHa, pnr.8.
П配电器HANPRAHаBepraHamaJIbza JIBOTA Ha Beprata,Ha HaprablaBaaata uHa nHa DBiratela.
HeoctaTbHOTo Hnnprahe Ha BepnraTa MoKe Da NpeIN3BnKa IN3IN3aHeTo N OT HnpaBnBaUata UHa, IN3IarauKn IOn3BaTeNa HA ONaCHOCT.
7.CMA3OUHA CNTCTEMA
ΦNΓ.10
Cma3BaHeTo Ha BepnraTa ce ocNrypRa oT abTOMaTnUHa NOMna.
Да ce n3noI3Ba HOBO macNo 3a BepnI.
H36OpbT Ha BnCKO3HTet Ha MacJIoTO 3aBnCnOT TemnepaTypata Ha Bb3dUxa. Hnkora He N3NoI3BaIte peuNKIpauHO MacJIO NJItnAKOBa C Heo6po KaueCTBO, TbJ KaTO MoKeJa NOBpeN NOMnata, UHHATA N Bepurata.
ПиИЗБОРHA MacNo ce OБьрHeTe KbM OTOpI3IpaH TexHnueckn cepBn3.
Hnkora He n3noJ3BaIte BepnraTa 6e3 MacNo. PeoBHO npOBepaIte HNBOTHa MacNoto, 3apeXdaIte BCEKN Tb, KOrato HNBOTO cnaIHe eoEHa YeTBbPf.
Принен3правноctВсma30чнаТСИCTema,проверете дал Масленит ФиNTьВБВьтpeшноctтаHa pe3epBoapa e NOчnteh Иприн Heo6xOДМОCT
3aHeceTe eIekTpueeckn TpnoH Ha OTOpN3npaH TexHnueeKn cepBn3.
8.CNCTEMA HA INPEIIN3HA CINPAUKA
ΦNΓ.2-9
Korato eIektpnuecknT TpnoH pa60nB Ta3n 3OHa (9), CbueCTByBa rOJMaBepoTHocOT O6paTeH yap.
Ako ce npoBn o6paTeH ydap, IyBaTa pBka Bn3a B KOHTaKT C JIOCTa Ha CnpuapKaTa, B KOnTo e INHKOpnpuaH CneUaJIe H eJKeTpueckn PpeKbCBAu 3a PpeKbCbaHe Ha eJKeTpO3axpAHBaHeto Ha DBrTaTeI N cnpaTeIe H 6Jok 3a MOMHTaJIHO cnpaHa Ha Bepurata (no3n7 "0").
3a Da pectapntpate CnpaKaTa Ha Bepnata CneI INHTepBHeuraTa, e Heo6xOIMO Da OTnycheTe PpeKbCBAua, Da n3yakate CnpaHTo Ha DBrarTeLa I da NoCTabNTe NocTa N3qJIO B 3aHa N03nU (no3n7 "1").
ПоберетеНарягHeToHaВepnraTa npedn da nychete eJektpuyecknTpnoH.
9. ПУСКАЕ И СПИРАЕ
- NYCKAHE
XbaHete npedhata pbkoXBaTka c JraBata
pbka, a 3aHaTa - C JЯCHaTa.
HaTnchTe npedna3Hn8 6yToH (2) c naneu HataChTe locta 3a 3aBnKBaHe (3).
- CINPAHE -
EneKtpnuecknT TpnoH cnnp npn OTnyckaHe Ha loCTa 3a 3aDbNkBaHe.
10.ПОДДРьЖКА
No-dony ca npedctaBeHn HAKON CbBETn 3a
exeJHeBHata nOdPbXka Ha eJeKTPnueckn
TpnoH. Ako mATE CbMHeHn IIN BbIproCn,
obpbuaTe ce KbM OToPn3npaH TexHnueckn
cepBn3.
ΦNΓ.OT1-2-6-8-10
ПюверeteцелocTTaHaKa6eNaHa
Ueencela
Ha3axpaHbHeTo (9).
Проверетe CBCTOЯнeto Ha Bb3dUшня OTBOP (8).
Пюверете Дали Сма3BaHeTo Ha BepnraTa (6)иHa HaprabЯBaцata Shna (5)e DOCTaTbUHO.
Bcnya,ye nMaTe cBmHnI N ce yvBCTBaTe HecnrypHn, KOHCyPTnpaIte ce ceknept.
Пpenopbua ce da pejkeTe nbHepnte Bbpxy Maape 3a pr3aHe Ha dbpBa nIi MeHreMe, 3a Da npndo6neTe onNT.
PRAHE HA IbHEP HA YACTN IbHep, noDpRnB DbaTa Kpa
ΦNΓ.12
3a Da 36berhe Te 6noknpaHe Ha HnpaBnaBaAata UHbPBOTo, OtpexTe 1/3 OT dHaMeTbpa OTrope HaDoIy, a OCTaHaJaTa Yact -OTdoIy.
Дьнер, onран Вьрху marape 3a рязан He ДьрВа ИИС CBС CBОбоден Край
ΦNΓ.13
1/3 ot Диаметьра ce pexe OTdony, a octaHaJaTачс - OTrope.
PRAHE HADbPBO
3a da OTpexeTe npabnHOn DbPBO, Tp6Ba Da npeuenTE BCnUKN yCNOBn, HApnpMeR, N36paHaTa Nocoka Ha naDaHe Ha DbPBOTo, ECTeCTBeHnMy HAKnloH, HAnuNe Ha eBEHTyaHn npenTCTBn HaOKONo, KaKTo N Nocokata n CKOpOCTTa Ha Btbpa.
HacouheNo p3aHe

ΦHΓ.14
Hapabete pa3pe3 Bbpxy cTpaHata, KbM KOrTO DbPbOTo ige naHe. Onpaunra TnpedBnKda n3nbHHeHne Hau-HanpeHa rohata qact Ha Hacouehna pa3pe3, Cnei KoETO ce N3NbHRA DOHATA qact Ha Hacouehna pa3pe3, KOITo Tp6Ba Da CBbpHn TaM, KbDeTo CBbpWA rohpata qact.
ДьлбочинатаHaHacoueHnpa3pe3 Tpr6Ba da 6bde 14 OTДиametbpaHaДьHEpa,C bIbI Mexky roHnI ndoHnPa3pe3 He no-MaIKO ot 45^
ПиняТаHaпесчанe Мжdy ropHataИdoннata paBnHa Ha pa3pe3a ce hapuHaПинЯHa hacoyeHo pr3aHe.ПиняТа trpa6Bada 6bde B nDeaHa XOpN3OHTaHa nO3nua ИHa 90^ cnPMA NOcOKaTHa nIaHa.
PraheHa dIpeema

FIG. 15-16
Pa3pe3bT 3a OTPra3BaHe Ha nbpBO ce npabN OT dpyrata cTpaHa, 3-5 cm Had JINHnra Ta Ha HacoyeHTo p3aHe.
ИЗпОЛЗВайтЕ КлиноBE,за Дa улеснITE KOHTрОla Ha OTPЯВаHTo И NO TOn HauNДа пededOTВРаТte 6ЛOKираНeHa HanpaВЯВацata 於Hа NO ВpeMe Ha pЯ3анeto.
Pa3pe3bT 3a OTPra3BaHe Tp6Ba Da CbPm
napaJIHNO Ha JINHnra Ta Ha HAcOueHnpa3pe3, KaTO pa3CToRHeTo MeJdy DBeTe Tpr6Ba Da 6bDe Ha-MAkO 1/10 ot dNaMeTbpa Ha DbHepa. Heotp3aHaTa qact OT dbHepa ce HapuHa OnOpHa ToKa n Irpae pOnrTa Ha NaHTa, KOrTO HApRaBnBa DbPBOTo N0 BpeMe Ha NaDaHeTo My.
Бe30nachOTo pa3cTOnHne 3aДbPBOTO, KoTo Ⅲe ce otpr3Ba, e 2.5 nbTn BncoUHaTHa cAMOTO DbPBO. BhImaBaIte 3a npncbCTBHe Ha xopa B 3OHaTHa OnaCHOCT npedn n no BpeMe Ha pr3aHeto.
PRA3AHE HADbCKN
3a Da OtpexeTe Dbcka, e DoCTaTbUHO Da
ra 6noknpate, kaTo a Kcnpate C MeHreMe
nn cKob.
- TEXHnueCKn DAHHNI
Eemaldada pistik steplist.
Kanda tookindaid.
He n3naXnTe ypehaj KnsI.
I3ByuHte yTuKaU n3 cTpyje, yKoNko je ka6aI OwTeHen nn npepe3aH.
EneKtpnHy TecTepy yBek Mopate dpXaTH oBepyKe.
IpeDIOXeH Naunn pe3aHa.
3. ONU T N C H P H O C H N I P O N M C N
Ipe Hero ITO NOUHeTe KOpNCTHTe eJeKtpnHy TecTepy, Mopate NaJbNBO npOHTaTI npRpyHnK ca ynyTCTBnMa 3a yNoTpe6y n OdpXkABaHBe NCTe N y NoTnyHOCTN Ce yNo3HaTI ca KOMaHdAmA 3a npabInHy yNoTpe6y TecTepe; OCIM TOrA, Mopate CaCyBaTn OBaj npRpyHnK 3a HapeDne KOHCyTTaCnJe.

He cmeTeOnyCTnDa ce eJektpnHOM Tectepom nrgaj deca N Iua koja y NOTnyHOCTN HNCy yNo3HaTa ca OBm yIpyTCTBnMa.
Pn KopnshheBy eNeKtpnHnx anapata, HeonxOndoJe npndpXaBaTnCe yBekCnpyhOCHnx Mepa y cNby CMaHeBa pN3nKa oD noXapa, eNeKtpnHor ydapa n TeleChnx nobpeda.
Uybajte ce ctpyjhor ydapa n na3nte da Bam TeNo He dohe y doinp ca y3embeHm NOBpHHama.
YcknaiHHTte ypehaj KoJn He KopncTte. KaJa ypehaj He KopncTte, Tpe6a Da ra OndnoKnte Ha CyBO I TO Ha BVCOKO N 3aKbUaHO MecTo, BaH DomaJaja Deue.
He npitnckajte Tectepy npnilkom pe3aHa. Tectepa he 6oJIe n ciIpyHnje paIITn npn OHOJ 6p3HH 3a KoJy je n ppeBnHjena.
ПрьаBa cpeiHa n paHne NOBpUHe Mory DOBeCTN Do He3RoJe.
He n3naXnTe ypehaj Bna3n. He kOpncTne ypehaje Ha MeCTnMa ca racOBnTom nn 3anaBnBOM aTMocOpePOM.
Дабисте коростил eilektprunhy TeCTepy, mopate 6ntu y do6poj φopm. Hemojte koprnsttu eilektprunhy TeCTepy ykoNko cTe yMOPH, ykoNko ce lose ocehaTe nnn ykoNko cTe noD DejCTBOM dpore.
Пи пье hy eNeKtpnHe TecTepe nпрлнkom pa da ca hOM,dpxNte ncty yBek Ha odpehJehoj
ydaIbeHocTn od BaIer TeIa n OdeH.
HemojTe napiHTn Tectepy ykoNko ce OHa Hana3n y npoeOKpeHyTom noIoxajy.
3aHTnThe HaOape nnMacky