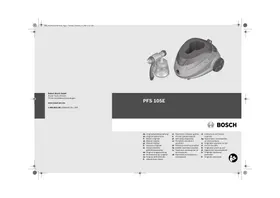
USER MANUAL PFS 65 BOSCH
Power Tools Division
70745 Leinfelden-Echterdingen
www.bosch-pt.com
1609929 R18 (2008.02) PS / 289
PFS 65

BOSCH
de Originalbetriebsanleitung en Original instructions fr Notice originale es Manual original pt Manual original it Istruzioni originali nl Oorspronkelijke gebruiksaanwijzing da Original brugsanvisning sv Bruksanvisning i original no Original driftsinstruks fi Alkuperäiset ohjeet
el Πρωτότυπο οδηγίες χρήσης tr Orijinal işletme talimatı pl Instrukcja oryginalna cs Původním návodem k používání sk Pôvodný návod na použitie hu Eredeti használati utasítás ru Оригинал руководство по эксплуатации uk Оригінальна інструкція з експлуатації
ro Instrucțiuni de folosire originale bg Оригинално ръководство за експлоатация sr Originalno uputstvo za rad sl Izvirna navodila hr Originalne upute za rad et Algupärane kasutusjuhend lv Originala lietošanas pamācība lt Originali instrukcija

Deutsch . 7
English. 17
Français. 27
Español. Página 38
Português. 49
Italiano . 60
Nederlands.. 71
Dansk. 81
Svenska Sida 91
Norsk . 101
Suomi. .Sivu 111
Eληνικά Σελδα 121
Türkce Sayfa 132
Polski . Strona 142
Cesky Strana 153
Slovensky. Strana 163
Magyar .Oldal 174
Pycckn .. CtpaHua 185
YkpaHcbka. CtopiHa 196
Romana . 207
Dr. Egbert Schneider Senior Vice President Engineering
Dr. Eckerhard Strötgen, Head of Product Certification
19.12.2007, Robert Bosch GmbH, Power Tools Division, D-70745 Leinfelden-Echterdingen
Assembly
WARNING
Read all safety warnings, instructions including Material Safety Data Sheets (MSDS), and container labels provided with the paints and solvents.
Safety Data Sheets (MSDS), and container labels provided with the paints and solvents.
Save all warnings and instructions for future reference.
Save all warnings and instructions for future reference.
The term "power tool" in the warnings refers to your mains-operated (corded) power tool or battery-operated (cordless) power tool.
a) Keep children and bystanders away while operating a power tool. Distractions can cause you to lose control.
a) Keep children and bystanders away while operating a power tool. Distractions can cause you to lose control.
a) The plugs of power tools must match the outlet. Never modify the plug in any way. Do not use any adapter plugs with earthed (grounded) power tools. Unmodified plugs and matching outlets will reduce the risk of electric shock. b) Protect the machine from rain and moisture. The penetration of water in a power tool increases the risk of electric shock. c) Do not misuse the cord. Never use the cord for carrying, pulling or unplugging the power tool. Keep cord away from heat, oil, sharp edges and moving parts. Damaged or entangled cords increase the risk of electric shock. d) When operating a power tool outdoors, use an extension cord suitable for outdoor use. Use of a cord suitable for outdoor use reduces the risk of electric shock.
a) The plugs of power tools must match the outlet. Never modify the plug in any way. Do not use any adapter plugs with earthed (grounded) power tools. Unmodified plugs and matching outlets will reduce the risk of electric shock. b) Protect the machine from rain and moisture. The penetration of water in a power tool increases the risk of electric shock. c) Do not misuse the cord. Never use the cord for carrying, pulling or unplugging the power tool. Keep cord away from heat, oil, sharp edges and moving parts. Damaged or entangled cords increase the risk of electric shock. d) When operating a power tool outdoors, use an extension cord suitable for outdoor use. Use of a cord suitable for outdoor use reduces the risk of electric shock.
e) When operating the power tool in damp or moist environments is unavoidable, use a residual current device (RCD). Use of a residual current device reduces the risk of electric shock.
3) Personal safety
a) Use safety equipment. Always wear eye protection. Safety equipment such as dust mask, non-skid safety shoes, hard hat, or hearing protection used for appropriate conditions will reduce personal injuries.
a) Do not use the power tool if the switch does not turn it on and off. Any power tool that cannot be controlled with the switch is dangerous and must be repaired. b) Store idle power tools out of the reach of children and do not allow persons unfamiliar with the power tool or these instructions to operate the power tool. Power tools are dangerous in the hands of untrained users. c) Use the power tool, accessories and application tools etc. in accordance with these instructions, taking into account the working conditions and the work to be performed. Use of power tools for operations different from those intended could result in a hazardous situation.
5) Service
a) Have your power tool serviced by a qualified repair person using only identical replacement parts. This will ensure that the safety of the power tool is maintained.
Safety Warnings for Fine-spray Systems
- Keep area clean, well lit, and free of paint or solvent containers, rags, and other flammable materials. Spontaneous combustion may occur. Fire extinguisher equipment shall be present and working at all times.
- Provide for good ventilation in the spraying area and for sufficient fresh air in the complete room. Evaporating inflammable solvents create an explosive environment. Do not use materials with a flashpoint below 21°C for spraying and cleaning. Use water-based materials, non-volatile hydrocarbons or similar materials. Fast evaporating solvents create an explosive environment.
- Do not spray in the vicinity of ignition sources, such as static electricity sparks, open flames, pilot lights, hot objects, engines/motors, cigarettes and sparks from plugging in or unplugging power cords or operating switches. Such spark sources can ignite the spraying vicinity/environment. Do not spray any liquid of unknown hazard potential. Unknown materials can create hazardous conditions.
- Wear additional protective equipment such as appropriate protective gloves and protective masks or respirators when spraying or handling chemicals. Wearing protective equipment for the appropriate conditions reduces the exposure to hazardous substances.



- Never point the spray jet against yourself, towards other persons or animals. Keep your hands and other body parts away from the spray jet. If the spray jet should penetrate the skin, seek medical attention immediately from a doctor. The material being sprayed can even penetrate the skin through a glove and be injected into your body. Do not treat injection as a simple cut. High-pressure spray is able to inject toxins into the body and cause serious bodily injury. In the event that injection occurs, seek medical attention immediately.
- Be aware of possible hazards from the spray material. Observe the information on drums/tanks/tins as well as manufacturer information of the spray material, including the request to wear personal protective equipment. The manufacturer's instructions are to be observed in order to reduce the risk of fire as well as injuries caused through toxins, carcinogens, etc.
- Use only nozzles/nozzle inserts specified by the manufacturer. Never spray without the nozzle protection mounted. Use of a special nozzle insert with the corresponding nozzle protection reduces the probability that a high-pressure jet penetrates the skin and injects toxins into the body. Exercise caution when cleaning and changing nozzle inserts. If the nozzle insert should become clogged during spraying, follow the manufacturer's instructions for switching off the system and relieving the pressure before removing the nozzle. Fluids under high pressure can penetrate the skin, inject toxins into the body and lead to serious injury.
- Keep the plug of the mains cord and the trigger switch of the spray gun clear of paint and other fluids. Never hold the cord by its connectors to support it. Failure to follow the instruction can lead to electric shock.
Functional Description

Read all safety warnings and all instructions. Failure to follow the warnings and instructions may result in electric shock, fire and/or serious injury.
Intended Use
The power tool is intended for atomising solvent-based and water-dilutable paints, finishes, primers, clear finishes, automotive finishes, staining sealers, wood sealer-preservatives, plant protectives, oil and disinfection agents. The power tool is not suitable for spraying dispersions and latex paint, caustic solutions, acidic coating materials, coating materials with granules or solids as well as spray and drip-impeding materials.
Use the machine only when you can fully assess all functions and handle them without limitation, or after having received appropriate instructions.
Measured values determined according to EN 60745.
Typically the A-weighted sound pressure level of the product is 74 dB(A). Uncertainty K = 3 dB. The noise level when working can exceed 80 dB(A).
Wear hearing protection!
The hand-arm acceleration is typically below 2.5 m/s^2
Product Features
The numbering of the components shown refers to the representation of the power tool on the graphic pages.
1 Spray gun
2 Air cap 3 Union nut 4 Mark for SDS connection 5 Thumbwheel for spraying capacity 6 Hose port (spray gun) 7 Handle extension (only for 800 ml container) 8 Container for spray material, 600 ml Container for spray material, 800 ml* 9 Trigger switch
10 Suction tube with container seal 11 Nozzle 12 Nozzle seal 13 Air hose 14 SDS connector 15 Base unit 16 Holding clamp 17 Eyelet for carrying strap 18 On/Off switch 19 Hose connection (base unit) 20 Carrying strap 21 Measuring cup 22 Air filter cover
*The accessories illustrated or described are not included as standard delivery.
Technical Data
| Fine-spray System | PFS 65 |
| Article number | | 3 603 B06 1.. |
| Rated power input | W | 280 |
| Spraying capacity | g/min | 130 |
| Atomising output | W | 65 |
| Required time for 5 m² paint application | min | 10 |
| Container capacity for spray material | ml | 600 |
| Length of air hose | m | 1.8 |
| Weight according to EPTA-Procedure 01/2003 | kg | 2.8 |
Protection class
□/II
Please observe the article number on the type plate of your machine. The trade names of the individual machines may vary.
We declare under our sole responsibility that the product described under "Technical Data" is in conformity with the following standards or standardization documents: EN 60335 according to the provisions of the directives 2004/108/EC, 98/37/EC (until Dec. 28, 2009), 2006/42/EC (from Dec. 29, 2009 on).
Technical file at:
Robert Bosch GmbH, Dept. PT/ESC,
D-70745 Leinfelden-Echterdingen
Dr. Egbert Schneider
Dr. Eckerhard Strötgen
Senior Vice President
Head of Product
Engineering
Certification
ppa. 11. i.v. uogcu
19.12.2007, Robert Bosch GmbH, Power Tools Division
D-70745 Leinfelden-Echterdingen
Assembly
Before any work on the machine itself, pull the mains plug.
Connecting the Air hose
- Open the holding clamp 16 and unreel the air hose 13.
- Remove the protective caps from both ends of the air hose.
Connecting to the spray gun:
- Firmly insert an SDS connector 14 of the air hose, in alignment with the arrow mark, into the hose port of the spray gun 6.
- Turn the SDS connector until the lock can be heard to latch.
Connecting the base unit:
- Firmly insert the second SDS connector of the air hose, in alignment with the arrow mark, into the port of the base unit 19.
- Turn the SDS connector until the lock can be heard to latch.
Note: After use, reattach the protective hose caps to the hose ends.
In order to reach all surfaces to be sprayed and maintain flexibility, you can sling on the base unit with the carrying strap 20. Attach one strap end to each eyelet 17.
Operation
Preparing for Operation
Spraying on the sides of water bodies (lakes, rivers, etc.) or neighbouring surfaces in the direct catchment area is not permitted.
When purchasing paint, varnish and spray material, pay attention to their environmental compatibility.
Preparing the Spray Surface
Note: Cover off the vicinity of the spray surface thoroughly and generously.
The spray mist contaminates the environment. When spraying in enclosures, surfaces not covered can become contaminated.
The spray surface must be clean, dry and grease-free.
- Roughen smooth surfaces and then remove the sanding dust.
Diluting Spray Material
- When diluting, pay attention that the spray material and the diluting agent correspond. When using a faulty diluting agent, lumps can develop that can lead to clogging of the spray gun.
| Spray material | Recommended dilution |
| Wood preservatives, strippers, oils, finishes | undiluted |
| Disinfectants, plant protectants | undiluted |
| Solvent- or water-dilutable paints, primers, automobile spray paint, thick-coat finishes | At least 10 % diluted |
For spray material that needs to be diluted, proceed as follows:
Take the measuring cup 21. - Stir the spray material thoroughly. - Fill a sufficient quantity of spray material into the spray-material container 8. (see “Filling in Spray Material”, page 21) - Dilute the spray material by 10% with paint thinner. Examples:
| Amount of spray material [ml] | 200 | 300 | 400 | 500 |
| Paint thinner [ml] | 20 | 30 | 40 | 50 |
- Stir the spray material thoroughly.
- Carry out a test-spray run on a test surface. (see "Spraying", page 22)
When the spraying pattern is perfect, start the spray job.
or
When the spraying result is not satisfactory or when no paint comes out, please continue as described under "Correction of Malfunctions" on page 24.
Before any work on the machine itself, pull the mains plug. - Unscrew the container 8 from the spray gun. - Turn the suction tube 10 so that the spray material can be sprayed with almost no residue.
| For spray jobs on horizontal surfaces/objects | toward the front in nozzle direction |
| For spray jobs overhead | toward the rear in handle direction |
- Fill the spray material into the container and screw the container firmly to the spray gun.
Starting Operation
Observe correct mains voltage! The voltage of the power source must agree with the voltage specified on the nameplate of the machine. Power tools marked with 230V can also be operated with 220V. Pay attention that the base unit cannot draw in dust or other contamination during operation. Make sure never to spray on the base unit.
Switching On
- Plug the mains plug into a socket outlet.
- Grasp the spray gun by the handle and point it at the spray surface.
- Firstly, press the On/Off switch 18.
- Pull the trigger switch 9 on the spray gun.
Note: When the base unit is switched on, air always flows out at the nozzle 11.
Switching Off
- Release the trigger switch 9 and press the On/Off switch 18.
- Pull the mains plug from the socket outlet.
Working Advice
Note: Observe the wind direction when operating the power tool outdoors.
- Firstly, carry out a test-spray run and adjust the spray pattern and the spray material quantity according to the spray material. (For adjustments, see the following sections)
- Make sure to hold the spray gun vertical to the spray object at a uniform clearance between 5 - 15cm .
- Begin the spraying procedure outside the target area.
- Move the spray gun evenly cross-wise or up-and-down, depending on the spray pattern setting.
An even surface quality is achieved when the paths overlap by 4 - 5cm
- Avoid interruptions inside the target area.
An even movement of the spray gun results in an even surface quality.
Non-uniform clearance and spray angle lead to heavy formation of paint mist and thus to an uneven surface.
- End the spraying procedure outside the target area.
Never spray the container completely empty. When the suction tube no longer immerses in the spray material, the spray jet will break off, resulting in a non-uniform surface.
When coating material builds up on the nozzle and air cap, clean both parts with the corresponding solvent.
- Never actuate the trigger switch 9 while adjusting the air cap 2.
- Loosen the union nut 3.
- Turn the air cap 2 to the requested position.
- Firmly retighten the union nut.
Air cap Jet Application
| A
Vertical flat jet for
horizontal working
direction |
| B
Horizontal flat jet for ver-
tical working
direction |
| C
Round jet for corners,
edges and hard to reach
locations |
English | 23
- To adjust the requested spraying capacity, turn the thumbwheel 5:
I: Min. spraying capacity,
III: Max. spraying capacity.
Spraying capacity
Too much material on target area:
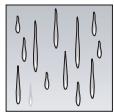
Not enough material on target area:
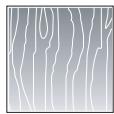
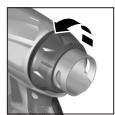
The spraying capacity must be reduced.
- Turn the thumbwheel 5 in direction I.
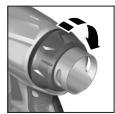
The spraying capacity must be increased.
- Turn the thumbwheel 5 in direction III.
For breaks, the spray gun can be hung in the holding clamp 16.
Hang the spray gun with the union nut 3 into the holding clamp 16.
Maintenance and Service
Maintenance and Cleaning
Before any work on the machine itself, pull the mains plug.
Proper cleaning is the requirement for flawless operation of the spray gun. Improper or lack of cleaning voids warranty claims.
Always clean the spray gun and the container with the respective diluting agent (paint thinner or water) for the spray material being used.
Never immerse the complete spray gun into the cleaning agent.
Never clean the nozzle and air holes of the spray gun with pointed metal objects.
Do not pour diluted spray material back into the original spray material drum/tin for storage.
Clean the spray gun thoroughly after having sprayed material hazardous to one's health.
- Switch the base unit off and pull the trigger switch 9 of the spray gun so that the spray material can flow back into the container.
- Unscrew the container 8 and empty the remaining spray material.
- Fill diluting agent (paint thinner or water) into the container and screw it to the spray gun.
- Shake the spray gun several times.
- Switch the base unit on and spray the diluting agent into an empty material tin.
- Repeat the last three steps until clear diluting agent emerges from the spray gun.
- Switch the base unit off again.
- Completely empty the container 8.
- Check if the suction tube with the container seal 10 is free of spray material and undamaged.
- Clean the outside of the container and the spray gun with a cloth moistened in paint thinner.
- Unscrew the union nut 3 and the air cap 2.
- Clean the nozzle 11 and the nozzle needle with diluting agent.
From time to time, the nozzle seal 12 must also be cleaned.
- Remove the nozzle 11 and the nozzle seal 12. If required, use a pointed object, as the nozzle seal is seated firmly to the spray gun.
- Clean the nozzle seal with diluting agent.
- Reinstall the nozzle seal in the spray gun. Pay attention that the groove points away from the spray gun.
- Mount the nozzle onto the spray gun body and turn it to the correct position.
- Mount the air cap 2 onto the nozzle and tighten with the union nut 3.
The air filter must be replaced when soiled.
- Remove the air filter cover 22.
- Change the air filter.
- Remount the air filter cover.
Material Disposal
Diluting agent and remainders of spray material must be disposed of in an environmentally-friendly manner. Observe the manufacturer's disposal information and the local regulations for disposal of hazardous waste.
Chemicals harmful to the environment may not be disposed of into soil, groundwater or bodies of water. Never pour chemicals harmful to the environment into the sewerage system!
Correction of Malfunctions
| Problem | Cause | Corrective Measure |
| Spray material does not cover properly | Spraying capacity too low | Turning the thumbwheel 5 in direction III |
| Clearance to target area too large | Reduce spray distance |
| Not enough spray material on target area, too few spray paths sprayed over target area | Apply more spray paths over target area |
| Spray material too viscous | Thin down the spray material by 10% again and carry out a test-spray run |
| Spray material runs off after coating | Too much spray material applied | Turning the thumbwheel 5 in direction I |
| Clearance to target area too close | Increase spray distance |
| Viscosity of spray material too low | Add original spray material |
| Spray material applied too often over same spot | Remove spray material; reduce number of spray paths over same spot |
| Atomisation too course | Spraying capacity too high | Turning the thumbwheel 5 in direction I |
| Nozzle 11 soiled | Clean nozzle |
| Too little pressure build-up in container 8 | Screw container firmly against spray gun |
| Spray material too viscous | Thin down the spray material by 10% again and carry out a test-spray run |
| Air filter heavily soiled | Changing the Air Filter |
| Too much fog of coating material | Too much spray material applied | Turning the thumbwheel 5 in direction I |
| Clearance to spray surface too large | Reduce spray distance |
| Problem | Cause | Corrective Measure |
| Spray jet pulsates | Not enough spray material in container | Refill spray material |
| Venting hole on suction tube 10 clogged | Clean suction tube and hole |
| Air filter heavily soiled | Changing the Air Filter |
| Spray material too viscous | Thin down the spray material by 10% again and carry out a test-spray run |
| Spray material drips from the nozzle | Build-up of spray material on nozzle 11 and air cap 2 | Clean nozzle and air cap |
| Nozzle 11 worn | Replace nozzle |
| Nozzle 11 loose | Tighten union nut 3 |
| No spray material emerges from the nozzle | Nozzle 11 clogged | Clean nozzle |
| Suction tube 10 clogged | Clean suction tube |
| Venting hole on suction tube 10 clogged | Clean suction tube and hole |
| Suction tube 10 loose | Insert suction tube properly |
| No pressure build-up in container 8 | Screw container firmly against spray gun |
| Spray material too viscous | Thin down the spray material by 10% again and carry out a test-spray run |
Maintenance
If the machine should fail despite the care taken in manufacturing and testing procedures, repair should be carried out by an after-sales service centre for Bosch power tools.
In all correspondence and spare parts order, please always include the 10-digit article number given on the type plate of the machine.
WARNING! Important instructions for connecting a new 3-pin plug to the 2-wire cable.
The wires in the cable are coloured according to the following code:

Do not connect the blue or brown wire to the earth terminal of the plug.
Important: If for any reason the moulded plug is removed from the cable of this power tool, it must be disposed of safely.
After-sales Service and Customer
Assistance
Our after-sales service responds to your questions concerning maintenance and repair of your product as well as spare parts. Exploded views and information on spare parts can also be found under:
Our customer consultants answer your questions concerning best buy, application and adjustment of products and accessories.
Great Britain
Robert Bosch Ltd. (B.S.C.)
P.O.Box 98
Broadwater Park
North Orbital Road
Denham
Uxbridge
UB 95HJ
Tel. Service: +44 (0844) 736 0109
Fax: +44 (0844) 736 0146
Australia, New Zealand and Pacific Islands
Robert Bosch Australia Pty. Ltd.
Power Tools
Locked Bag 66
Clayton South VIC 3169
Customer Contact Center
Inside Australia:
Phone: +61 (01300) 307 044
Fax: +61 (01300) 307 045
Inside New Zealand:
Phone: +64 (0800) 543 353
Fax: +64 (0800) 428 570
Outside AU and NZ:
Phone: +61 (03) 9541 5555
www.bosch.com.au
1609929R18|(31.1.08)
Disposal
Spray gun, base unit, accessories and packaging should be sorted for environmental-friendly recycling.
The plastic components are labelled for categorized recycling.
Only for EC countries:

Do not dispose of power tools into household waste! According to the European Guideline 2002/96/EC for Waste Electrical and Electronic Equipment and its implementation into national
right, power tools that are no longer usable must be collected separately and disposed of in an environmentally correct manner.
Subject to change without notice.

Dr. Egbert Schneider Dr. Eckerhard Ströttgen Senior Vice President Head of Product Engineering Certification
19.12.2007, Robert Bosch GmbH, Power Tools Division D-70745 Leinfelden-Echterdingen
Montage
Robert Bosch (France) S.A.S.
Robert Bosch GmbH, Dept. PT/ESC,
D-70745 Leinfelden-Echterdingen
Dr. Egbert Schneider
Dr. Eckerhard Strötgen
Senior Vice President
Head of Product
Engineering
Certification
19.12.2007, Robert Bosch GmbH, Power Tools Division
D-70745 Leinfelden-Echterdingen
Assembly
Robert Bosch GmbH, Dept. PT/ESC,
D-70745 Leinfelden-Echterdingen
Dr. Egbert Schneider
Dr. Eckerhard Strötgen
Senior Vice President
Head of Product
Engineering
Certification
19.12.2007, Robert Bosch GmbH, Power Tools Division
D-70745 Leinfelden-Echterdingen
Assembly
- Before any work on the power tool, pull the mains plug from the socket.
Connect the air hose (see figures A1-A2)
Robert Bosch GmbH, Dept. PT/ESC,
D-70745 Leinfelden-Echterdingen
Dr. Egbert Schneider
Senior Vice President
Engineering
Dr. Eckerhard Strötgen
Head of Product
Certification

19.12.2007, Robert Bosch GmbH, Power Tools Division
D-70745 Leinfelden-Echterdingen
Assembly
Dr. Egbert Schneider Dr. Eckerhard Ströttgen Senior Vice President Head of Product Engineering Certification

19.12.2007, Robert Bosch GmbH, Power Tools Division D-70745 Leinfelden-Echterdingen
Assembly
Robert Bosch GmbH, Dept. PT/ESC,
D-70745 Leinfelden-Echterdingen
Dr. Egbert Schneider
Dr. Eckerhard Strötgen
Senior Vice President
Head of Product
Engineering
Certification
Bosch Service Center
Telegrafvej 3
2750 Ballerup
Tel. Service Center: +45 (04489) 8855
Fax: +45 (04489) 87 55
E-Mail: vaerktoej@dk.bosch.com
Disposal
Dr. Egbert Schneider Senior Vice President Engineering
Dr. Eckerhard Ströttgen Head of Product Certification
19.12.2007, Robert Bosch GmbH, Power Tools Division D-70745 Leinfelden-Echterdingen
Assembly
Pull the mains plug out of the socket before carrying out any work on the power tool.
Connect the air hose (see figures A1 - A2)
Dr. Egbert Schneider Senior Vice President Engineering
Dr. Eckerhard Ströttgen Head of Product Certification
19.12.2007, Robert Bosch GmbH, Power Tools Division D-70745 Leinfelden-Echterdingen
Assembly
Dr. Egbert Schneider Senior Vice President Engineering
Dr. Eckerhard Ströttgen Head of Product Certification
19.12.2007, Robert Bosch GmbH, Power Tools Division D-70745 Leinfelden-Echterdingen
Installation
Instructions for use and safety
The measurement values were determined in accordance with EN 60745.
The characteristic sound pressure level of the machine is determined according to the standard and is 74 dB(A).
Uncertainty K = 3 dB.
When working, the noise level may exceed 80 dB(A).
Wear ear protection!
The characteristic hand-arm vibration value is less than 2.5 m/s².

Declared data
The numbering of the declared data is based on the illustration of the power tool on the pages with the graphics.
Dr. Egbert Schneider Senior Vice President Engineering
Dr. Eckerhard Strötgen Head of Product Certification
Paa.
i.v. mojgcu
19.12.2007, Robert Bosch GmbH, Power Tools Division D-70745 Leinfelden-Echterdingen
Bosch Power Tools


Euvaρολόγησ
ByaTeTo pic ano TnV npizapiv ano onoiadhnoTe epyaia oTo nAektpiko epyaleio.
Tnpoume to 6ikaiwa aalayov.
Greece
Robert Bosch A.E.
Knphioo' 162
12131 Tepiotepi-Ahva
Tel.: +30 (0210) 57 01 200 KENTPO
Tel.: +30 (0210) 57 70 081 - 83 KENTPO
Fax: +30 (0210) 57 01 263
Fax: +30 (0210) 57 70 080
www.bosch.gr
ABZ Service A.E.
Tel.: +30 (0210) 57 01 375 - 378 SERVICE
Fax: +30 (0210) 57 73 607
Bosch Power Tools
1609929R18|(31.1.08)


Dr. Egbert Schneider Senior Vice President Engineering
Dr. Eckerhard Strötgen Head of Product Certification
19.12.2007, Robert Bosch GmbH, Power Tools Division D-70745 Leinfelden-Echterdingen
Montage
Bosch San. ve Tic. A.S.
Ahi Evran Cad. No:1 Kat:22
Polaris Plaza
80670 Maslak/Istanbul
Customer Service: +90 (0212) 335 06 66
Customer Service Hotline: +90 (0212) 335 07 52
Bosch Power Tools
1609929R18|(31.1.08)
142 | Polish
Robert Bosch GmbH, Dept. PT/ESC,
D-70745 Leinfelden-Echterdingen
Dr. Egbert Schneider
Dr. Eckerhard Strötgen
Senior Vice President
Head of Product
Engineering
Certification
19.12.2007, Robert Bosch GmbH, Power Tools Division D-70745 Leinfelden-Echterdingen
Bosch Power Tools
1609929R18|(31.1.08)
146 | Polish
Assembly
Robert Bosch Sp. z o.o.
Robert Bosch GmbH, Dept. PT/ESC,
D-70745 Leinfelden-Echterdingen
Dr. Egbert Schneider
Dr. Eckerhard Strötgen
Senior Vice President
Head of Product
Engineering
Certification
i.v. Mojgcu
19.12.2007, Robert Bosch GmbH, Power Tools Division
D-70745 Leinfelden-Echterdingen
Assembly
Before any work on the power tool, pull the plug out of the socket.
Bosch Service Center PT
K Vapence 1621/16
692 01 Mikulov
Tel.: +420 (519) 305 700
Fax: +420 (519) 305 705
E-Mail: servis.naradi@cz.bosch.com
www.bosch.cz
Slovak | 163
General Safety Warnings and Instructions
WARNING
Senior Vice President Head of Product Engineering Certification
ppa. Mee e i.v. Nogcu
19.12.2007, Robert Bosch GmbH, Power Tools Division D-70745 Leinfelden-Echterdingen
1609929R18| (31.1.08)
Bosch Power Tools
Assembly
Dr. Egbert Schneider Dr. Eckerhard Ströttgen Senior Vice President Head of Product Engineering Certification
a) Do not work with a power tool with a faulty switch.
A power tool that cannot be switched on or off is dangerous and must be repaired.
b) Store unused
Power tools out of the reach of children. Do not allow persons unfamiliar with the power tool or these instructions to operate the power tool.
Power tools are dangerous in the hands of untrained users.
Explosive atmosphere.
Do not use in the presence of flammable
liquids, gases, or
dust. Power tools create
sparks which may ignite
the dust or fumes.
Switch off. Such sources of ignition
can cause a fire.
The materials may be hazardous, the danger
of which is unknown. Unknown
materials may create separate conditions.
riangleright Use additional,
individual, protective equipment, such as
appropriate protective gloves
and protective or respiratory masks
when working with chemicals. Use
of protective equipment for appropriate
conditions reduces the possibility of exposure
to hazardous substances.
Do not direct the spray stream at yourself, other people, or animals.



Keep away from the spray stream.
If the spray stream penetrates the skin,
Contact a doctor immediately. The jet can
penetrate the skin even through gloves and
inject a stretchable substance into you.
Russian | 187
Do not consider such spraying as a simple skin wound. The high-pressure jet can inject harmful substances and lead to serious injuries. In case of injection through the skin, contact a doctor immediately for help. Consider the possible dangers arising from the sprayed substance. Consider the labeling on the containers or the manufacturer's information for the sprayed substance, including the requirement for using appropriate protective equipment. Follow the manufacturer's instructions to reduce the risk of injuries caused by fire, flames, or explosions, etc. Use only the nozzle sets specified by the manufacturer. Never work with the sprayer without the installed protective nozzle. Using an unapproved nozzle set with the corresponding protective nozzle reduces the likelihood of jet blockage and injection injuries.
Be careful when cleaning and replacing nozzle sets. If the sprayer becomes clogged with a nozzle set, before removing the nozzle for cleaning, follow the manufacturer's instructions for depressurizing the tool. Under high pressure, liquid can penetrate the skin and inject into the body, leading to serious injuries. Keep the power cord and the switch of the sprayer away from paint and other liquids. Do not hold the cord for support at the connection. Failure to comply may result in electric shock.
Function description

Follow all safety instructions and warnings. Failure to comply with the safety instructions and warnings may result in electric shock, fire, and serious injuries.
Intended use
This electric tool is intended only for spraying primers and aerosol paints, primers, clear varnishes, automotive topcoats, marine coatings, wood and plant protection agents, oils, and resin-based agents on the basis of solvents and water. This electric tool is not suitable for spraying dispersion and latex paints, adhesives, acid-containing materials, coatings with hardening components, and materials that are difficult to spray and tend to form lumps.
Data on noise and vibration
Measured in accordance with standard EN 60745.
The measured A-weighted sound pressure level of the electric tool is typically 74 dB(A). Measurement uncertainty K = 3 dB.
The noise level at the workplace may exceed 80 dB(A).
Use hearing protection!
The weighted acceleration is typically less than 2.5 m/s².
Illustrated components
The numbering of the components corresponds to the illustration and the pages with illustrations.
1 Spray gun
13 Air cap
15 Base block
2 Air cap O-ring 3 Marking for SDS 4 Marking for SDS 5 Setting wheel for paint quantity 6 Locking screw for spray gun 7 Suction tube extension (only for 800 ml cup) 8 Cup for spray material, 600 ml 8 Cup for spray material, 800 ml* 9 Trigger 10 Cup seal 11 Nozzle 12 Nozzle seal 14 SDS lock 16 Retaining clip 17 Strap for carrying 18 Switch 19 Connection for hose (base block) 20 Carrying handle 21 Measuring cup 22 Air cap cover *Illustrated or described accessories are not included in the standard delivery.
Technical data
Dr. Egbert Schneider Dr. Eckerhard Ströttgen Senior Vice President Head of Product Engineering Certification
ppa. Maaee i.v. Nooey
19.12.2007, Robert Bosch GmbH, Power Tools Division D-70745 Leinfelden-Echterdingen

Russian | 189
Assembly
Before carrying out any maintenance work on the power tool, pull the plug out of the socket.
Surface treatment of the applied paint
Note: The surrounding area of the surface to be treated must be carefully protected.
Aerosol mist contaminates the surroundings. When working in enclosed spaces, all unprotected surfaces may become contaminated.
The surface to be treated must be clean, dry, and degreased.
- Give such surfaces a rough texture and then clean them of dust.
Dilution of the material to be applied
When diluting, pay attention to the combination of the material to be applied with the solvent. If an inappropriate solvent is used, lumps may form, which clog the spray gun.
Material to be applied
Recommended dilution
Wood protection agent, stain, oil, and etching paints
Undiluted
Degreasing agent, plant protection agent
Undiluted
Dilutable
Diluted by at least 10%
Paints, enamels, and automotive coatings,
primers, automotive topcoats, spray paints for thick-film coatings
Bosch Power Tools
1609929R18|(31.1.08)

Dilute the material as follows:
Stir the paint thoroughly. Add sufficient thinner to the material. (See "Filling the spray gun", p. 190) Dilute the spray material by 10% with thinner. For example:
| Исхоздец К-Вор
разылая мого
мaterияа [мλ] | 200 | 300 | 400 | 500 |
| Расъворитуль [мλ] | 20 | 30 | 40 | 50 |
Stir the paint thoroughly. Perform a test spray on a test surface. (See "Spraying", p. 191)
If you obtain an uneven spray pattern, you can correct it by adjusting the spray.
If the spray result is unsatisfactory and the paint does not come out, proceed according to "Troubleshooting", described on p. 193.
Filling the spray material (see fig. C1-C2)
Before starting maintenance or adjustment work on the power tool, disconnect the plug from the power supply. Remove the cup 8 from the spray gun. Turn the nozzle 10 so that the material can be sprayed without residue.
Be careful not to spray the base cup.
Switching on
Insert the plug into the power outlet. Hold the spray gun and point it at the surface to be coated. First press the switch 18. Then press the trigger 9 of the spray gun.
Note: When using the base unit from the compressor, constant air output is provided.
Switch off
- Release the trigger 9 and press the switch 18. Pull the power plug out of the socket.
Technical data | 191
Operating instructions
Spraying (see fig. D-E)
Note: When using the power tool outdoors, take into account the direction of the wind.
- First perform a test spray to adjust the spray pattern and the spray rate for the material to be sprayed. (The adjustment values are given in the following sections.)
- Hold the spray gun vertically at a distance of 5 to 15 cm from the surface to be painted. -Start spraying and move the spray gun evenly over the surface. -Move the spray gun back and forth evenly, depending on the spray pattern. An even surface quality is achieved by moving the spray gun evenly at a distance of 4-5 cm.
- Do not interrupt spraying within the area to be treated.
Even movement of the spray gun ensures uniform surface quality.
Uneven distance and spray angle lead to the formation of mist and consequently to an uneven surface.
- Finish the spraying process by releasing the trigger over the surface that has already been treated.
Do not completely empty the spray material from the container. If the spray material is not stirred, the spray mist is interrupted and an uneven surface results.
Accumulation of spray material on the nozzle or cap: Clean the used spray gun.
Adjust the pattern of the spray (see Fig. F).
Do not pull the trigger 9 when adjusting the air cap 2.
- Release the locking ring 3. Turn the air cap 2 to the desired position. Tighten the locking ring firmly.
Air flow adjustment knob

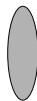
A
Vertical flat spray for horizontal working direction
Horizontal flat spray for vertical working direction


B
Horizontal flat spray for vertical working direction
Working direction


C
Round spray for corners and hard-to-reach places
Adjusting the amount of material sprayed (see Fig. G)
Turn the adjustment knob 5 to set the desired amount of material: I: minimum amount, III: maximum amount.
Set the installed coefficient 5 to install the required amount of sprayed material: I: minimum amount, III: maximum amount.
A list of a lot of material for processing:
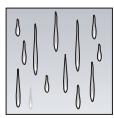
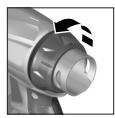
A list of little material for processing:
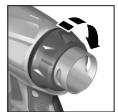
Adjustment
Reduce the amount of sprayed material.
Increase the amount of sprayed material.
-Turn the adjusting screw 5 in the direction of the arrow.
Storage of the spray gun (see figure H)
198188, Saint Petersburg
Tel: +7 (0812) 7841307
Fax: +7 (0812) 7841361
E-Mail: rbru.pt_asa_spb@ru.bosch.com
LLC "Robert Bosch"
Service center for maintenance
of power tools
TopcKmMkpopaHOn,53
630032, HOBOSHUPCK
TeA.:+7(0383)3599440
Fax: +7 (0383) 3599465
E-Mail: rbru_ct_asa_nob@ru.bosch.com
OOO «Робет Бош»
CepBnchbl ueHtp T0 o6cLyXnBaHnIO 3AeKTPoHHCTpymeHa
YI.ΦoHToBbIX 6pIrαd,14,
620017, EkaTepeHb6ypr
TeA.: +7 (0343) 3658674
TeA.:+7(0343)3787756
Fax: +7 (0343) 378 79 28
Bénapycb
ACU YI-18
220064 MInHcK, yI. KypuTaToBa, 7
Tel.: +375 (017) 2 10 29 70
Fax: +375 (017) 2 07 04 00
Recycling
The product, the basic unit, and the packaging must be handed over for environmentally friendly recycling of waste.
Disposal of waste
Products made of synthetic materials
are marked accordingly.
Only for EU member states:

Do not dispose of electrical tools in household waste!
According to the European Directive 2002/96/EC on waste electrical and electronic
equipment and on the transposition of this directive into national law, electrical tools that have reached the end of their service life must be collected separately and handed over for environmentally friendly recycling.
We reserve the right to make changes.
Safety instructions for the spray gun
Illustrated components
The numbering of the illustrated components refers to the illustration of the spray gun on the pages with figures.
1 Spray gun
2 Trigger lock nut 3 Trigger 4 SDS adapter 5 Cap for adjusting the amount of sprayed material 6 Trigger guard (spray gun) 7 Handle (basic unit) 8 Container for sprayed material, 600 ml Container for sprayed material, 800 ml* 9 Switch
10 Pipe for filling the tank with a funnel
11 Nozzle 12 Filling hose 13 Filter 14 SDS adapter 15 Base body 16 Indicator 17 Switch for mode selection 18 Switch 19 Socket for base body 20 Belt 21 Measuring cup 22 Cover of the filter *The figure or description of the device does not belong to the standard delivery scope.
Ukrainian | 199
Robert Bosch GmbH, Dept. PT/ESC,
D-70745 Leinfelden-Echterdingen
Dr. Egbert Schneider
Senior Vice President
Engineering
Dr. Eckerhard Strötgen
Head of Product
Certification
19.12.2007, Robert Bosch GmbH, Power Tools Division
D-70745 Leinfelden-Echterdingen
MOUNTING
Before any work on the machine, pull the plug out of the socket.
Type of base unit:
- To properly install another SDS drill according to the direction arrow in the base unit section 19. - Turn the SDS drill, the lock should engage.
Note: Before using again, close the drill chuck with the protective caps.
Fastening the accessory (see fig. A, B)
For deeper processing of all treated surfaces and for flexibility in base unit operation, you can use belt 20.
- Thread the belt through each buckle 17.
Operation
Preparation for work
Do not work with the device immersed, as adjacent surfaces may be directly affected in the water basin; this is not allowed.
When using abrasive, lacquers, and spray paints, pay attention to their environmental friendliness.
Spraying the treated surface
Note: Thoroughly and generously cover the surrounding area of the surface to be sprayed.
Spray paint can contaminate the surrounding area. When used indoors, uncovered surfaces may become dirty.
The surface to be sprayed must be clean, dry, and free of grease.
- Apply a thin coat to the surface and let it dry, then apply another coat if needed.
Sprayed material
When spraying, follow the instructions for the sprayed material and spray one by one.
Using an unsuitable sprayer may cause lumps, as the sprayer will clog.
Sprayed material
Recommended
Concentration
solution
Products for wood protection, marine varnishes
Undiluted
Disinfectants, plant protection products
Lacquers, varnishes that can be diluted with solvents or water, primers, automotive
Minimum dilution 10%
Coatings, thick-layer varnishes
Perform loosening of the sprayed material as follows:
- Take the measuring cup 21. - Mix the sprayed material well. - Pour enough sprayed material into the tank of the sprayer 8. (See "Filling the sprayed material", page 201) - Dilute the sprayed material with the sprayer by 10%. Example:
HikoI He HataNcKaTe Ha IpeMnKau 9 Niadac IpeMsiueHHa NobITpHaHoro KOBtauka 2.
TObitpHn Ctpy- BnkOpncTaHHa KOBtauOK MInb

A
BepTKaIbHn IIOCKN CTpyMInb DnI ROpN3OHTaIbHO HO HAIIpRMypo6OTn

B
Topn3OHTaBHH TLOCKN CTpyMInb AIA BepTKaNbHO Haipmkypo60Tu

C
KpyrAn CTPyMiHb ABy KytB, KpaIB i BaxkOoCTynHx MiCb
HactpoIOBAHH KIAbKOci po3pncyBaHOro MaTepiAly (MnB.MaG)
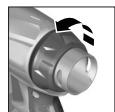
-Поверніть колицатko 5,юбhaltpoiTи 6рахану kiыкICTb po3прсkyBaHOro mATEpiaIy:
I:MinImaMbHa KIAbKICTb po3PnCkYBaHOro MaTepiA,
III: MaKcHMaAhBa KIbKiCTb pO3PnCkYBaHOro MaTepiAny.
KilbkiCTb HactpoobHHa po3npnckybaHOro matepiany
3a6araTo
po3πpnckyBaHOro MaTepiany Ha
06πpncybaHi NOBepxHi:

MaTepiAly.
Haexhe ouHennE o6OB'3KoBOU yMOBOO 4863dOraHHoPiobOTnPiCToLa- pO3PpncyBaay. Pn HemaekHomoy OunSeHHi a60 Myo BicTyHocTi rapaHTiHi PiTeH3ii He pInMaIOTBcA.
3aBxAn OuyuYte NiCToAeT-PO3PnCKyBaU i 6aOk AIA PO3PnCKyBaHO MaTepiAly 3a D0TOMOrO BIDIOBIAHORo PO3pIXyBaA (po3HHnka a6o BOH), 10 NaCyE DO BnKOpNCtAHORo PO3PnCKyBaHO MaTepiAly.
HikoAn He 3aHpyIOte BeCb TiIcToAEpo3pncyBa y 3acioA OunueHH.
HikoHa He ouHuyTe OTBOPn COIIa I OTBOPn AIOBITpr NiCTOLeTa-PO3PnCKyBaVa RoCTpIMM MeTaeBmN TpeDMeTamN.
He nepelunBaIte 3 MeToIO 36epirAHnHa pO3piJxKeHn PO3pNcKUbaHm MaTePiaA Ha3aD OOpriHaBHoro PO3pNcKUbaHOrO MaTePiaAly.
AyuKe peTeIbHo OuyuYte NiCToIeTpo3PiNcKByauchio Bn BV NKOpNCTOBvBaHnkiAINBi IAA 3DOPOB'po3PiNcKByaHipeOBOHH.
BIMKhitb6a3OBHBy3oIHaTNCHTbHa TepeMnKau 9 NiCTOLeTa-po3PnCKyBaCu,io6 po3PnCKyBaHm MaTepiA MIR PepeTeKTn Ha3aD B 6aQK. Bikpyitb 6aoyk 8 i BnHne 3aHnKn po3npncyBaHoro MaTepiay. - 3aHnIte po3piJxBya (po3uHHNK a6o BDOy) B 6aOk i O6pe pIpuKpyiTb Noro Do nictoAeTa-pO3pncKyBa4. - DekiIbKa pa3iB CTpyCITb NiCToIeTpo3IpiNcKBya. - YbIMKHiTb 6a3OBn By3oI i po3PiuNcKaIte po3piJxJyBaU y IopOxHIO 6aHky 3-πiMaTepiAly.
-Повторів OCTангі TrпДи Heо6xIDHy KIAbKICTb pa3iB, ПOKи 3пICToTe-a-р03пprnСkyBaЧа He BHXOaHTmE Пpo3Opи pO3piJxBuay. 3HOBy BmKHiTb 6a3OBn By3oA. -Повситю сторожитббayok8. IpeBipTe, HHe MICTNb Tpy6ka DAA 3aCMOKtYBaHHaPiINH 3 yUINbHIOBauem 6aUka10po3nPnCKyBaHOro MaTepiAly iHn He ITOWKoJKeHa BOHa. - Ptoptb 6aok i nictoaeT-po3npckyBauch30Bhi rAniipkoIO, 3MoueHO ypo3piKyyBaui. -BiKpyiTb haknHy raiKy 3 i IOBipraHn KOIpaQk 2. IpoNCTiB coNIO 11 i roANK coNla 3a AOtonOMOrO PO3piJxKyBaA.
Yac BiD yacy Heo6xiaHDoaATKOBO OUnuataN yuihOBau cOIIa 12.
- 3HimiTb cOnIa 11 i yuiIbHOBaC cOnIa 12. 3a Heo6XiDiHCTO cKOpNCTaItec rOCTPm IpeMeTOM, oCKIaBKn yuiIbHOBaC cOnIa MiUHO cNAtb Ha TiOToI-po3PiPcKyBaI. OuHCTITb yuiBnOBa cOTIa 3a DOITOMOHO p03piJxUyBa. 3HOBy BCTpOMiTb yuIaHbHOBa cOIIa y nICToIe-PO3nPcKyBa. CIAkYte 3a Tm, 06 n3 DNVBcR y HaIPrMky BiD nICToIeTa- po3nPcKyBaça. HaiaHbTe coTmo Ha nictolet-po3npckyBaui TOBepHt bIoro B IpaBnBe NIOLOXeHHa. HaIbTe IOBITpHnKOBtauOK 2 Ha cOIIo i MiHO 3aTARHTb NOrO 3a DOnOMOHorO NaKnADHOI raiKn 3.
Robert Bosch GmbH, Dept. PT/ESC,
D-70745 Leinfelden-Echterdingen
Dr. Egbert Schneider
Senior Vice President
Engineering
Dr. Eckerhard Strötgen
Head of Product
Certification
i.v. Mojgcu
19.12.2007, Robert Bosch GmbH, Power Tools Division
D-70745 Leinfelden-Echterdingen
Assembly
Bosch Service Center
Str. Horia Macelariu Nr. 30-34,
013937 Bucuresti
Tel. Service scule electrice: +40 (021) 4 05 75 40
Fax: +40 (021) 4057566
E-Mail: infoBSC@ro.bosch.com
Tel. Technical consulting: +40 (021) 4 05 75 39
Fax: +40 (021) 4057566
E-Mail: infoBSC@ro.bosch.com
www.bosch-romania.ro
Disposal
Dr. Egbert Schneider Senior Vice President Engineering
Dr. Eckerhard Strötgen Head of Product Certification
19.12.2007, Robert Bosch GmbH, Power Tools Division D-70745 Leinfelden-Echterdingen
Mounting
Before any work on the power tool, remove the battery from the tool. To do so, press the battery release button and pull the battery out.
Inserting the Air Nozzle (see Figures A1-A2)
- Open the clamping bracket 16 and insert the air nozzle 13. Press the two locking caps on both sides of the air nozzle.
Connecting to the Spray Gun:
- Insert the nozzle with SDS holder 14 into the spray gun 6, turning it until it locks into place.
- Turn off the SDS switch until the spray application is stopped.
Switching to the main nozzle:
Insert the SDS switch into the marking at 19, following the direction of the marking arrow. - Turn off the SDS switch until the spray application is stopped.
Do not allow spraying on the shore of the water basin or into the water zone.
Spraying (see group D-E)
Caution: When using the power tool outdoors, read and follow the safety instructions.
First select the spray type and adjust the spray intensity according to the material being sprayed. (See the adjustment instructions in the relevant section.) Hold the spray gun at a constant distance of 5-15 cm perpendicular to the surface being sprayed. Finish spraying outside the surface when you are done. Depending on the adjustment of the spray pattern, move the gun evenly in a horizontal or vertical direction. An even surface is achieved when the strokes overlap by 4-5 cm. Avoid spraying the already treated surface.
Constant surface quality is achieved with even movement of the spray gun.
Uneven distance or any spray movement leads to a change in the spray pattern and this results in differences in the quality of the treated surface.
- Finish spraying outside the treated surface.
Never empty the reservoir completely. When the suction tube is no longer fully immersed in the liquid, the spray pattern is interrupted and the quality of the sprayed surface deteriorates.
If the lower and upper membranes become dirty, clean them with the supplied cleaning agent.
Adjusting the spray pattern (see Figure F)
Never press the trigger 9 while adjusting the air membrane 2.
- Loosen the locking nut 3.
- The membrane for air outlet 2 is inserted in the rear position.
- Tighten the adjusting screw for the air outlet.
Membrane for air outlet, tube

A
Vertical flat jet for horizontal spraying


B
Horizontal flat jet for vertical spraying


C
Tube end for pipes, rods, and hard-to-reach places
Bosch Power Tools
1609929R18|(31.1.08)


224 | Bulgarian
Adjusting the amount of spray liquid (see figure G)
- To set the desired amount of liquid, when the pistol is spraying, turn the adjusting screw: I: minimum amount of liquid, III: maximum amount of liquid.
Amount of liquid
Hard material surface:
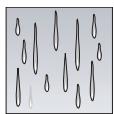
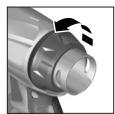
Setting
The quantity must be reduced.
-Turn the regulator to high.
Hard material surface:
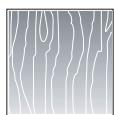
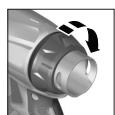
The quantity must be increased.
-Turn the regulator to high III.
Remaining on the piston (see figure I)
- Remove the air filter cover 22. -Replace the air filter.
- Reinstall the air filter cover.
Disposal of used materials
The packaging and residues of the painting material must not be disposed of in the environment.
Paint residues must not penetrate into the soil, groundwater, or open water basins. Never dispose of paint residues in the household sewage system!
Troubleshooting
Robert Bosch GmbH, Dept. PT/ESC,
D-70745 Leinfelden-Echterdingen
Dr. Egbert Schneider
Dr. Eckerhard Strötgen
Senior Vice President
Head of Product
Engineering
Certification
ppa. 11. i.v. uogcu
19.12.2007, Robert Bosch GmbH, Power Tools Division
D-70745 Leinfelden-Echterdingen
Assembly
Pull the mains plug out of the socket before carrying out any work on the power tool.
Connecting the hose
(see pictures A1-A2)
- Open the retaining clip 16 and unwind the air hose 13.
- Slide the protective caps onto both ends of the air hose.
Connection to the spray gun:
- Firmly insert the first SDS coupling 14 of the air hose, following the arrow marking, into the connection of the spray gun 6.
- Turn the SDS coupling until the lock engages with a click.
Dr. Egbert Schneider Senior Vice President Engineering
Dr. Eckerhard Ströttgen Head of Product Certification
19.12.2007, Robert Bosch GmbH, Power Tools Division D-70745 Leinfelden-Echterdingen
Assembly
Dr. Egbert Schneider Senior Vice President Engineering
Dr. Eckerhard Ströttgen Head of Product Certification
19.12.2007, Robert Bosch GmbH, Power Tools Division D-70745 Leinfelden-Echterdingen
Assembly
Before any work on the power tool, pull the mains plug out of the socket.
General safety instructions
Dr. Egbert Schneider Senior Vice President Engineering
Dr. Eckerhard Strötgen Head of Product Certification
i.v. 107gcu
19.12.2007, Robert Bosch GmbH, Power Tools Division D-70745 Leinfelden-Echterdingen
Assembly
Dr. Egbert Schneider Dr. Eckerhard Strötgen Senior Vice President Head of Product Engineering Certification
ppa. Mee e i.v. Nogcu
19.12.2007, Robert Bosch GmbH, Power Tools Division D-70745 Leinfelden-Echterdingen
272 | Latvian
Assembly
Before adjusting or servicing the power tool, pull the plug of the power cable out of the socket.
Dr. Egbert Schneider Senior Vice President Engineering
Dr. Eckerhard Strötgen Head of Product Certification
i.v. uoJycu
19.12.2007, Robert Bosch GmbH, Power Tools Division D-70745 Leinfelden-Echterdingen
Montavimas