
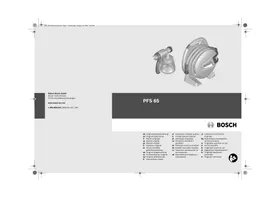
PFS 55 - Paint gun BOSCH - Free user manual and instructions
Find the device manual for free PFS 55 BOSCH in PDF.
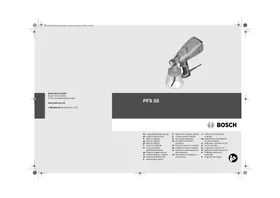



| Brand | BOSCH |
| Model | PFS 55 |
| Product type | Paint spray gun |
| Rated power input | 280 W |
| Spraying power | 55 W |
| Flow rate | 0 - 110 g/min |
| Container volume | 600 ml (800 ml optional) |
| Weight (according to EPTA 01/2003) | 1.3 kg |
| Protection class | II (double insulation) |
| Sound pressure level | 74 dB(A) (uncertainty K=1.5 dB) |
| Vibration (hand-arm) | < 2.5 m/s² |
| Permitted applications | Paints (solvent and water-based), glazes, varnishes, stains, oils, plant protection products, disinfectants |
| Prohibited applications | Dispersion paints, latex, alkaline cleaners, acidic products, granular products |
| Spray pattern adjustment | Vertical flat spray, horizontal, round spray (via air valve) |
| Quantity adjustment | Preselection dial from 0 to max |
| Recommended spraying distance | 5 - 15 cm |
| Time for 5 m² | 12 minutes |
| Cleaning | With thinner (solvent or water) depending on product used; do not immerse the electrical unit |
| Maintenance | Clean nozzle, air valve, nozzle gasket, air filter, ventilation tube regularly |
| Safety | Wear PPE (gloves, mask, goggles); do not spray towards yourself or others; risk of skin injection |
| Spare parts | Nozzle, nozzle gasket, air valve, membrane, air filter, ventilation tube |
| After-sales service | Robert Bosch France S.A.S. - Toll-free: 0800 05 50 51 |
Frequently Asked Questions - PFS 55 BOSCH
User questions about PFS 55 BOSCH
0 question about this device. Answer the ones you know or ask your own.
Ask a new question about this device
Download the instructions for your Paint gun in PDF format for free! Find your manual PFS 55 - BOSCH and take your electronic device back in hand. On this page are published all the documents necessary for the use of your device. PFS 55 by BOSCH.
USER MANUAL PFS 55 BOSCH
Power Tools Division
70745 Leinfelden-Echterdingen
www.bosch-pt.com
1609929L54(2008.02)PS/302
PFS 55

BOSCH
de Originalbetriebsanleitung en Original instructions fr Notice originale es Manual original pt Manual original it Istruzioni originali nl Oorspronkelijke gebruiksaanwijzir da Original brugsanvisning sv Bruksanvisning i original no Original driftsinstruks fi Alkuperäiset ohjeet
el Πρωτότυπο οδηγιών χρήσης tr Original işletme talimatı pl Instrukcja oryginalna cs Původním návodem k používání sk Pôvodný návod na použitie hu Eredeti használati utasítás ru Оригинальное руководство по эксплуатации uk Оригінальна інструкція з експлуатації
ro Instrucțiuni de folosire originale bg Оригинално ръководство за експлоатация sr Originalno uputstvo za rad sl Izvirna navodila hr Originalne upute za rad et Algupärane kasutusjuhend lv Originala lietošanas pamācība lt Originali instrukcija

Deutsch . 7
English. 18
Français. 28
Español. Página 39
Português. Página 51
Italiano . 63
Nederlands.. 74
Dansk. 85
Svenska Sida 95
Norsk . 105
Suomi. .Sivu 115
Eληνικά Σελδα 125
Türkce Sayfa 137
Polski . Strona 148
Cesky Strana 160
Slovensky. Strana 170
Magyar .Oldal 182
Pycckn .. CtpaHua 193
YkpaHcbka. CtopiHa 205
Româna . 217
Dr. Egbert Schneider Senior Vice President Engineering
Dr. Eckerhard Strötgen, Head of Product Certification
ppa. Maee i.v. Nogcu
18.02.2008, Robert Bosch GmbH, Power Tools Division, D-70745 Leinfelden-Echterdingen
Assembly
General Power Tool Safety Warnings
WARNING
Read all safety warnings, instructions including Material Safety Data Sheets (MSDS), and container labels provided with the paints and solvents.
Safety Data Sheets (MSDS), and container labels provided with the paints and solvents.
Save all warnings and instructions for future reference.
Save all warnings and instructions for future reference.
The term "power tool" in the warnings refers to your mains-operated (corded) power tool or battery-operated (cordless) power tool.
a) Keep work area clean and well lit. Cluttered and dark areas invite accidents. b) Keep children and bystanders away while operating a power tool. Distractions can cause you to lose control.
a) Keep work area clean and well lit. Cluttered and dark areas invite accidents. b) Keep children and bystanders away while operating a power tool. Distractions can cause you to lose control.
a) Power tool plugs must match the outlet. Never modify the plug in any way. Do not use any adapter plugs with earthed (grounded) power tools. Unmodified plugs and matching outlets will reduce risk of electric shock. b) Avoid body contact with earthed or grounded surfaces, such as pipes, radiators, ranges and refrigerators. There is an increased risk of electric shock if your body is earthed or grounded. c) Do not expose power tools to rain or wet conditions. Water entering a power tool will increase the risk of electric shock. d) Do not abuse the cord. Never use the cord for carrying, pulling or unplugging the power tool. Keep cord away from heat, oil, sharp edges and moving parts. Damaged or entangled cords increase the risk of electric shock.
a) Power tool plugs must match the outlet. Never modify the plug in any way. Do not use any adapter plugs with earthed (grounded) power tools. Unmodified plugs and matching outlets will reduce the risk of electric shock. b) Avoid body contact with earthed or grounded surfaces, such as pipes, radiators, ranges, and refrigerators. There is an increased risk of electric shock if your body is earthed or grounded. c) Do not expose power tools to rain or wet conditions. Water entering a power tool will increase the risk of electric shock. d) Do not abuse the cord. Never use the cord for carrying, pulling, or unplugging the power tool. Keep the cord away from heat, oil, sharp edges, and moving parts. Damaged or entangled cords increase the risk of electric shock.
e) When operating a power tool outdoors, use an extension cord suitable for outdoor use. Use of a cord suitable for outdoor use reduces the risk of electric shock. f) If operating a power tool in a damp location is unavoidable, use a residual current device (RCD) protected supply. Use of an RCD reduces the risk of electric shock.
3) Personal safety
a) Stay alert, watch what you are doing and use common sense when operating a power tool. Do not use a power tool while you are tired or under the influence of drugs, alcohol or medication. A moment of inattention while operating power tools may result in serious personal injury. b) Use safety equipment. Always wear eye protection. Safety equipment such as dust mask, non-skid safety shoes, hard hat, or hearing protection used for appropriate conditions will reduce personal injuries. c) Prevent unintentional starting. Ensure the switch is in the off-position before connecting to power source and/or battery pack, picking up or carrying the tool. Carrying power tools with your finger on the switch or energising power tools that have the switch on invites accidents. d) Do not overreach. Keep proper footing and balance at all times. This enables better control of the power tool in unexpected situations. e) Dress properly. Do not wear loose clothing or jewellery. Keep your hair, clothing and gloves away from moving parts. Loose clothes, jewellery or long hair can be caught in moving parts.
4) Use and care of the power tool
a) Do not force the power tool. Use the correct power tool for your application. The correct power tool will do the job better and safer at the rate for which it was designed. b) Do not use the power tool if the switch does not turn it on and off. Any power tool that cannot be controlled with the switch is dangerous and must be repaired. c) Disconnect the plug from the power source and/or the battery pack from the power tool before making any adjustments, changing accessories, or storing power tools. Such preventive safety measures reduce the risk of starting the power tool accidentally. d) Store idle power tools out of the reach of children and do not allow persons unfamiliar with the power tool or these instructions to operate the power tool. Power tools are dangerous in the hands of untrained users. e) Maintain power tools. Check for misalignment or binding of moving parts, breakage of parts and any other condition that may affect the power tool's operation. If damaged, have the power tool repaired before use. Many accidents are caused by poorly maintained power tools. f) Use the power tool, accessories and application tools etc. in accordance with these instructions, taking into account the working conditions and the work to be performed. Use of power tools for operations different from those intended could result in a hazardous situation.
5) Service
a) Have your power tool serviced by a qualified repair person using only identical replacement parts. This will ensure that the safety of the power tool is maintained.
Safety Warnings for Fine-spray Systems
Workplace safety
- Keep the area clean, well lit, and free of paint or solvent containers, rags, and other flammable materials. Spontaneous combustion may occur. Fire extinguisher equipment shall be present and working at all times.
- Provide good ventilation in the spraying area and sufficient fresh air in the complete room. Evaporating inflammable solvents create an explosive environment. Do not use materials with a flashpoint below 21°C for spraying and cleaning. Use water-based materials, non-volatile hydrocarbons, or similar materials. Fast evaporating solvents create an explosive environment.
- Do not spray in the vicinity of ignition sources, such as static electricity sparks, open flames, pilot lights, hot objects, engines/motors, cigarettes, and sparks from plugging in or unplugging power cords or operating switches. Such spark sources can ignite the spraying vicinity/environment. Do not spray any liquid of unknown hazard potential. Unknown materials can create hazardous conditions.
Personal safety
Wear additional protective equipment such as appropriate protective gloves and protective masks or respirators when spraying or handling chemicals. Wearing protective equipment for the appropriate conditions reduces the exposure to hazardous substances.



- Never point the spray jet against yourself, towards other persons, or animals. Keep your hands and other body parts away from the spray jet. If the spray jet should penetrate the skin, seek medical attention immediately from a doctor. The material being sprayed can even penetrate the skin through a glove and be injected into your body. Do not treat injection as a simple cut. High-pressure spray is able to inject toxins into the body and cause serious bodily injury. In the event that injection occurs, seek medical attention immediately.
- Be aware of possible hazards from the spray material. Observe the information on drums/tanks/tins as well as manufacturer information of the spray material, including the request to wear personal protective equipment. The manufacturer's instructions are to be observed in order to reduce the risk of fire as well as injuries caused through toxins, carcinogens, etc.
Use and Handling of the Power Tool
- Use only nozzles/nozzle inserts specified by the manufacturer. Never spray without the nozzle protection mounted. Use of a special nozzle insert with the corresponding nozzle protection reduces the probability that a high-pressure jet penetrates the skin and injects toxins into the body. Exercise caution when cleaning and changing nozzle inserts. If the nozzle insert should become clogged during spraying, follow the manufacturer's instructions for switching off the system and relieving the pressure before removing the nozzle. Fluids under high pressure can penetrate the skin, inject toxins into the body and lead to serious injury.
- Keep the plug of the mains cord and the trigger switch of the spray gun clear of paint and other fluids. Never hold the cord by its connectors to support it. Failure to follow the instruction can lead to electric shock.
Functional Description

Read all safety warnings and all instructions. Failure to follow the warnings and instructions may result in electric shock, fire and/or serious injury.
Intended Use
The power tool is intended for atomising solvent-based and water-dilutable paints, finishes, primers, clear finishes, automotive finishes, staining sealers, wood sealer-preservatives, plant protectives, oil and disinfection agents. The power tool is not suitable for spraying dispersions and latex paint, caustic solutions, acidic coating materials, coating materials with granules or solids as well as spray and drip-impeding materials.
Noise/Vibration Information
Measured values determined according to EN 60745.
Typically the A-weighted sound pressure level of the product is 74 dB(A). Uncertainty K = 1.5 dB. The noise level when working can exceed 80 dB(A).
Wear hearing protection!
The hand-arm acceleration is typically below 2.5 m/s².
Product Features
The numbering of the components shown refers to the representation of the power tool on the graphic pages.
1 Electrical unit
9 Spray gun
2 Cable clamp 3 Air filter cover 4 SDS release button 5 Mains cable 6 Handle extension (only for 800 ml container) 7 Screw for air-filter cover 8 Air filter 10 Suction tube with container seal 11 Container for spray material, 600 ml Container for spray material, 800 ml* 12 Vent cover 13 Air cap 14 Union nut 15 Thumbwheel for spraying capacity 16 Trigger switch 17 Venting hose 18 Venting valve 19 Membrane 20 Nozzle 21 Nozzle seal 22 Measuring cup
*The accessories illustrated or described are not included as standard delivery.
Technical Data
| Fine-spray System | PFS 55 | |
| Article number | 3 603 B06 0.. | |
| Rated power input | W | 280 |
| Spraying capacity | g/min | 0-110 |
| Atomising output | W | 55 |
| Required time for 5 m² paint application | min | 12 |
| Container capacity for spray material | ml | 600 |
| Weight according to EPTA-Procedure 01/2003 | kg | 1.3 |
| Protection class | ☐/II | |
Please observe the article number on the type plate of your machine. The trade names of the individual machines may vary.
Declaration of Conformity
C
We declare under our sole responsibility that the product described under "Technical Data" is in conformity with the following standards or standardization documents: EN 60745 according to the provisions of the directives 2004/108/EC, 98/37/EC (until Dec. 28, 2009), 2006/42/EC (from Dec. 29, 2009 on).
Technical file at:
Robert Bosch GmbH, Dept. PT/ESC,
D-70745 Leinfelden-Echterdingen
Dr. Egbert Schneider
Dr. Eckerhard Strötgen
Senior Vice President
Head of Product
Engineering
Certification
18.02.2008, Robert Bosch GmbH, Power Tools Division
D-70745 Leinfelden-Echterdingen
22 | English
Assembly
Before any work on the machine itself, pull the mains plug.
Mounting the Spray Gun and the Electrical Unit (see figures A1 - A2)
Connecting the Electrical Unit with the Spray Gun
- Insert the spray gun 9 onto the electrical unit 1 until it can be heard to engage.
Removing the Electrical Unit
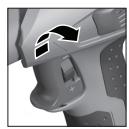
- Press and hold the two red SDS release buttons 4 and pull the spray gun 9 out of the electrical unit.
Operation
Preparing for Operation
Spraying on the sides of water bodies (lakes, rivers, etc.) or neighboring surfaces in the direct catchment area is not permitted.
When purchasing paint, varnish, and spray material, pay attention to their environmental compatibility.
Preparing the Spray Surface
Note: Cover the vicinity of the spray surface thoroughly and generously.
The spray mist contaminates the environment. When spraying in enclosures, surfaces not covered can become contaminated.
The spray surface must be clean, dry, and grease-free.
- Roughen smooth surfaces and then remove the sanding dust.
Diluting Spray Material
- When diluting, pay attention that the spray material and the diluting agent correspond. When using a faulty diluting agent, lumps can develop that can lead to clogging of the spray gun.
| Spray material | Recommended dilution |
| Wood preservatives, stripers, oils, finishes | undiluted |
| Disinfectants, plant protectants | undiluted |
| Solvent- or water-dilutable paints, primers, automobile spray paint, thick-coat finishes | At least 10 % diluted |
For spray material that needs to be diluted, proceed as follows:
Take the measuring cup 22. - Stir the spray material thoroughly. - Fill a sufficient quantity of spray material into the spray-material container 11. (see "Filling in Spray Material", page 23) - Dilute the spray material by 10% with paint thinner. Examples:
| Amount of spray material [ml] | 200 | 300 | 400 | 500 |
| Paint thinner [ml] | 20 | 30 | 40 | 50 |
- Stir the spray material thoroughly.
- Carry out a test-spray run on a test surface. (see "Spraying", page 23)
When the spraying pattern is perfect, start the spray job.
or
When the spraying result is not satisfactory or when no paint comes out, please continue as described under "Correction of Malfunctions" on page 25.
Filling in Spray Material (see figures B1-B2)
Before any work on the machine itself, pull the mains plug. - Unscrew the container 11 from the spray gun. - Turn the suction tube 10 so that the spray material can be sprayed with almost no residue:
For spray jobs on horizontal surfaces / objects
toward the front in nozzle direction
For spray jobs overhead
toward the rear in handle direction
- Fill the spray material into the container and screw the container firmly to the spray gun.
Starting Operation
Observe correct mains voltage! The voltage of the power source must agree with the voltage specified on the nameplate of the machine. Power tools marked with 230V can also be operated with 220V . Pay attention that the power tool cannot draw in dust or other contamination during operation.
Switching On
- Plug the mains plug into a socket outlet.
- Grasp the power tool and point it at the spray surface.
The power tool is equipped with a two-step trigger switch 16. The first step starts the turbine. The second step transports the spraying material. Pull the trigger switch 16 until spraying material starts to come out.
Switching Off
- Release the trigger switch 16.
- Pull the mains plug from the socket outlet.
Working Advice
Spraying (see figures C-D)
Note: Observe the wind direction when operating the power tool outdoors.
- Firstly, carry out a test-spray run and adjust the spray pattern and the spray material quantity according to the spray material. (For adjustments, see the following sections)
- Make sure to hold the spray gun vertical to the spray object at a uniform clearance between 5 - 15 cm.
- Begin the spraying procedure outside the target area.
- Move the spray gun evenly cross-wise or up-and-down, depending on the spray pattern setting. An even surface quality is achieved when the paths overlap by 4 - 5 cm.
- Avoid interruptions inside the target area.
An even movement of the spray gun results in an even surface quality.
Non-uniform clearance and spray angle lead to heavy formation of paint mist and thus to an uneven surface.
- End the spraying procedure outside the target area.
Never spray the container completely empty.
When the suction tube no longer immerses in the spray material, the spray jet will break off, resulting in a non-uniform surface.
When coating material builds up on the nozzle and air cap, clean both parts with the corresponding solvent.
Note: Only place down the power tool on a level and clean surface so that it can not tip over.
Adjusting the Spray Pattern (see figure E)
- Never actuate the trigger switch 16 while adjusting the air cap 13.
- Loosen the union nut 14.
- Turn the air cap 13 to the requested position.
- Firmly retighten the union nut.
Air
Jet
Application


A
Vertical flat jet for horizontal working direction


B
Horizontal flat jet for vertical working direction


Round jet for corners, edges and hard to reach locations
Adjusting the Spraying Capacity (see figure F)
- To adjust the requested spraying capacity, turn the thumbwheel 15:
: Min. spraying capacity, +: Max. spraying capacity.
Spraying capacity
Adjustment
Too much material on target area:
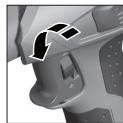
The spraying capacity must be reduced.
- Turn the thumbwheel 15 in direction -.
Not enough material on target area:
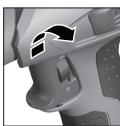
The spraying capacity must be increased.
- Turn the thumbwheel 15 in direction +.
Maintenance and Service
Maintenance and Cleaning
Before any work on the machine itself, pull the mains plug. Never immerse the electrical unit into solvent or water. Clean the housing using only a moist cloth.
Cleaning (see figures H-1)
Proper cleaning is the requirement for flawless operation of the spray gun. Improper or lack of cleaning voids warranty claims.
Always clean the spray gun and the container with the respective diluting agent (paint thinner or water) for the spray material being used.
Never clean the nozzle and air holes of the spray gun with pointed metal objects.
Do not pour diluted spray material back into the original spray material drum/tin for storage.
Clean the spray gun thoroughly after having sprayed material hazardous to one's health.
- Unplug the mains plug and pull the trigger switch 16 so that the spraying material can flow back into the container.
- Remove the electrical unit. (see page 22)
- Unscrew the container 11 and empty the remaining spray material.
- Fill diluting agent (paint thinner or water) into the container and screw it to the spray gun.
- Shake the spray gun several times.
- Connect the spray gun to the electrical unit again. (see page 22)
- Plug the mains plug into a socket outlet, pull the trigger switch and spray the diluting agent into an empty material tin.
- Repeat the process until clear diluting agent emerges from the spray gun.
- Unplug the mains plug and remove the electrical unit.
- Completely empty the container 11.
- Check if the suction tube with the container seal 10 is free of spray material and undamaged.
- Clean the outside of the container and the spray gun with a cloth moistened in paint thinner.
- Unscrew the union nut 14 and the air cap 13.
- Clean the nozzle 20 and the nozzle needle with diluting agent.
From time to time, the nozzle seal 21 must also be cleaned.
- Remove the nozzle 20 and the nozzle seal 21. If required, use a pointed object, as the nozzle seal is seated firmly to the spray gun. Clean the nozzle seal with diluting agent.
- Reinstall the nozzle seal in the spray gun. Pay attention that the groove points away from the spray gun.
- Mount the nozzle onto the spray gun body and turn it to the correct position. Mount the air cap 13 onto the nozzle and tighten with the union nut 14.
Cleaning the Venting Hose (see figure G)
When the venting hose 17 is contaminated with spraying material, it must be cleaned.
- Remove the vent cover 12. Pull off the venting hose 17.
- Unscrew the venting valve 18.
- Remove the membrane 19. Clean the venting hose, the venting valve and the membrane with an appropriate paint thinner.
- After cleaning, reinsert the membrane again first. Pay attention that the longer rod faces upward.
- Screw the venting valve on again.
- Afterwards, attach the venting hose to the valve first, then at the top on the spray gun.
- Reattach the vent cover again.
Changing the Air Filter (see figure L)
Note: Never operate the power tool without the air filter. Without the air filter, dirt/contamination can be drawn in and can influence the operation of the power tool.
The air filter must be replaced when soiled.
- Loosen screw 7.
- Remove the air filter cover 3.
- Replace the air filter.
- Reattach the air filter cover and screw in the screw again.
Material Disposal
Diluting agent and remainders of spray material must be disposed of in an environmentally-friendly manner. Observe the manufacturer's disposal information and the local regulations for disposal of hazardous waste.
Chemicals harmful to the environment may not be disposed of into soil, groundwater or bodies of water. Never pour chemicals harmful to the environment into the sewerage system!
Correction of Malfunctions
| Problem | Cause | Corrective Measure |
| Spray material does not cover properly | Spraying capacity too low | Turning the thumbwheel 15 in direction + |
| Clearance to target area too large | Reduce spray distance | |
| Not enough spray material on target area, too few spray paths sprayed over target area | Apply more spray paths over target area | |
| Spray material too viscous | Thin down the spray material by 10% again and carry out a test-spray run |
| Problem | Cause | Corrective Measure |
| Spray material runs off after coating | Too much spray material applied | Turning the thumbwheel 15 in direction - |
| Clearance to target area too close | Increase spray distance | |
| Viscosity of spray material too low | Add original spray material | |
| Spray material applied too often over same spot | Remove spray material; reduce number of spray paths over same spot | |
| Atomisation too course | Spraying capacity too high | Turning the thumbwheel 15 in direction - |
| Nozzle 20 soiled | Clean nozzle | |
| Too little pressure build-up in container 11 | Screw container firmly against spray gun | |
| Spray material too viscous | Thin down the spray material by 10% again and carry out a test-spray run | |
| Air filter heavily soiled | Changing the Air Filter | |
| Too much fog of coating material | Too much spray material applied | Turning the thumbwheel 15 in direction - |
| Clearance to spray surface too large | Reduce spray distance | |
| Spray jet pulsates | Not enough spray material in container | Refill spray material |
| Venting hole on suction tube 10 clogged | Clean suction tube and hole | |
| Air filter heavily soiled | Changing the Air Filter | |
| Spray material too viscous | Thin down the spray material by 10% again and carry out a test-spray run | |
| Spray material drips from the nozzle | Build-up of spray material on nozzle 20 and air cap 13 | Clean nozzle and air cap |
| Nozzle 20 worn | Replace nozzle | |
| Nozzle 20 loose | Tighten union nut 14 | |
| No spray material emerges from the nozzle | Nozzle 20 clogged | Clean nozzle |
| Suction tube 10 clogged | Clean suction tube | |
| Venting hole on suction tube 10 clogged | Clean suction tube and hole | |
| Suction tube 10 loose | Insert suction tube properly | |
| No pressure build-up in container 11 | Screw container firmly against spray gun | |
| Spray material too viscous | Thin down the spray material by 10% again and carry out a test-spray run |
Maintenance
If the machine should fail despite the care taken in manufacturing and testing procedures, repair should be carried out by an after-sales service centre for Bosch power tools.
In all correspondence and spare parts order, please always include the 10-digit article number given on the type plate of the machine.
WARNING! Important instructions for connecting a new 3-pin plug to the 2-wire cable.
The wires in the cable are coloured according to the following code:

Do not connect the blue or brown wire to the earth terminal of the plug.
Important: If for any reason the moulded plug is removed from the cable of this power tool, it must be disposed of safely.
After-sales Service and Customer Assistance
Our after-sales service responds to your questions concerning maintenance and repair of your product as well as spare parts. Exploded views and information on spare parts can also be found under:
www.bosch-pt.com
Our customer consultants answer your questions concerning best buy, application and adjustment of products and accessories.
Great Britain
Robert Bosch Ltd. (B.S.C.)
P.O.Box 98
Broadwater Park
North Orbital Road
Denham
Uxbridge
UB95HJ
Tel. Service: +44 (0844) 736 0109
Fax: +44 (0844) 736 0146
Australia, New Zealand and Pacific Islands
Robert Bosch Australia Pty. Ltd.
Power Tools
Locked Bag 66
Clayton South VIC 3169
Customer Contact Center
Inside Australia:
Phone: +61 (01300) 307 044
Fax: +61 (01300) 307 045
Inside New Zealand:
Phone: +64 (0800) 543 353
Fax: +64 (0800) 428 570
Outside AU and NZ:
Phone: +61 (03) 9541 5555
www.bosch.com.au
Disposal
Spray gun, electrical unit, accessories and packaging should be sorted for environmental-friendly recycling.
The plastic components are labelled for categorized recycling.
Only for EC countries:

Do not dispose of power tools into household waste!
According to the European Guideline 2002/96/EC for Waste Electrical
and Electronic Equipment and its implementation into national
right, power tools that are no longer usable must be collected separately and disposed of in an environmentally correct manner.
Subject to change without notice.
Dr. Egbert Schneider Dr. Eckerhard Strötgen Senior Vice President Head of Product Engineering Certification
18.02.2008, Robert Bosch GmbH, Power Tools Division D-70745 Leinfelden-Echterdingen
Montage
Robert Bosch GmbH, Dept. PT/ESC,
D-70745 Leinfelden-Echterdingen
Dr. Egbert Schneider
Dr. Eckerhard Strötgen
Senior Vice President
Head of Product
Engineering
Certification
18.02.2008, Robert Bosch GmbH, Power Tools Division
D-70745 Leinfelden-Echterdingen
Assembly
Dr. Egbert Schneider Senior Vice President Engineering
Dr. Eckerhard Ströttgen Head of Product Certification
i.v. 100gcu
18.02.2008, Robert Bosch GmbH, Power Tools Division D-70745 Leinfelden-Echterdingen
Assembly
- Before any work on the electric tool, pull the mains plug out of the socket.
Robert Bosch GmbH, Dept. PT/ESC,
D-70745 Leinfelden-Echterdingen
Dr. Egbert Schneider Senior Vice President Engineering
Dr. Eckerhard Ströttgen Head of Product Certification
Robert Bosch GmbH, Dept. PT/ESC,
D-70745 Leinfelden-Echterdingen
Dr. Egbert Schneider
Senior Vice President
Engineering
Dr. Eckerhard Strötgen
Head of Product
Certification

18.02.2008, Robert Bosch GmbH, Power Tools Division
D-70745 Leinfelden-Echterdingen
Montage
Senior Vice President
Head of Product
Engineering
Certification
18.02.2008, Robert Bosch GmbH, Power Tools Division D-70745 Leinfelden-Echterdingen
Danish | 89
Assembly
Bosch Service Center
Telegrafvej 3
2750 Ballerup
Tel. Service Center: +45 (04489) 8855
Fax: +45 (04489) 8755
E-Mail: vaerktoej@dk.bosch.com
Disposal
Dr. Egbert Schneider Dr. Eckerhard Ströttgen Senior Vice President Head of Product Engineering Certification
18.02.2008, Robert Bosch GmbH, Power Tools Division D-70745 Leinfelden-Echterdingen
Swedish | 99
Assembly
Pull the plug out of the mains socket before carrying out any work on the power tool.
Dr. Egbert Schneider Dr. Eckerhard Ströttgen Senior Vice President Head of Product Engineering Certification
18.02.2008, Robert Bosch GmbH, Power Tools Division D-70745 Leinfelden-Echterdingen
Norwegian | 109
Assembly
Dr. Egbert Schneider Dr. Eckerhard Ströttgen Senior Vice President Head of Product Engineering Certification
18.02.2008, Robert Bosch GmbH, Power Tools Division D-70745 Leinfelden-Echterdingen
Finnish | 119
Assembly
The declared vibration total value and the declared noise emission value have been measured in accordance with the standard test method EN 60745.
The vibration emission value of the power tool may be used to compare one tool with another.
The vibration emission value may also be used for a preliminary assessment of exposure.
Uncertainty K = 1.5 dB.
The noise level at the workplace can exceed 80 dB(A).
Wear ear protection!
The vibration emission value for the handle is typically less than 2.5 m/s².
Technical specifications
Robert Bosch GmbH, Dept. PT/ESC,
D-70745 Leinfelden-Echterdingen
Dr. Egbert Schneider Senior Vice President Engineering
Dr. Eckerhard Strötgen Head of Product Certification

18.02.2008, Robert Bosch GmbH, Power Tools Division D-70745 Leinfelden-Echterdingen
Sigma
Remove the plug from the socket before carrying out any work on the power tool.
Connecting the tool and the electric unit (see figures A1-A2)
Connecting the electric unit to the tool
Place the tool onto the electric unit until it engages.
Removing the electric unit
- This is a garbled OCR passage and should be removed.
Aetroupyia
We reserve the right to make changes.
Turkish | 137
Dr. Egbert Schneider Dr. Eckerhard Ströttgen Senior Vice President Head of Product Engineering Certification

18.02.2008, Robert Bosch GmbH, Power Tools Division D-70745 Leinfelden-Echterdingen
Turkish | 141
Assembly
Bosch San. ve Tic. A.S.
Ahi Evran Cad. No:1 Kat:22
Polaris Plaza
80670 Maslak/Istanbul
Customer Advisor: +90 (0212) 335 06 66
Customer Service Line: +90 (0212) 335 07 52
Disposal
Robert Bosch GmbH, Dept. PT/ESC,
D-70745 Leinfelden-Echterdingen
Dr. Egbert Schneider Senior Vice President Engineering
Dr. Eckerhard Strötgen
Head of Product
Certification
18.02.2008, Robert Bosch GmbH, Power Tools Division D-70745 Leinfelden-Echterdingen
1609929L54|(18.2.08)
Bosch Power Tools


Polski | 153
Montaž
Robert Bosch Sp. z o.o.
Dr. Egbert Schneider Senior Vice President Engineering
Dr. Eckerhard Strötgen Head of Product Certification
18.02.2008, Robert Bosch GmbH, Power Tools Division D-70745 Leinfelden-Echterdingen
164 | Czech
Assembly
Before any work on the power tool, pull the plug out of the socket.
Bosch Service Center PT
K Vapence 1621/16
692 01 Mikulov
Tel.: +420 (519) 305 700
Fax: +420 (519) 305 705
E-Mail: servis.naradi@cz.bosch.com
www.bosch.cz
Waste disposal
Dr. Egbert Schneider Dr. Eckerhard Ströttgen Senior Vice President Head of Product Engineering Certification
18.02.2008, Robert Bosch GmbH, Power Tools Division D-70745 Leinfelden-Echterdingen
Assembly
Dr. Egbert Schneider Dr. Eckerhard Strötgen Senior Vice President Head of Product Engineering Certification
Measured values determined in accordance with EN 60745.
The A-weighted sound pressure level of the power tool is typically 74 dB(A). Measurement uncertainty K = 1.5 dB.
The noise level at the workplace may exceed 80 dB(A).
Use hearing protection!
The weighted acceleration is typically less than 2.5 m/s².
Technical data
Senior Vice President
Head of Product
Engineering
Certification
18.02.2008, Robert Bosch GmbH, Power Tools Division D-70745 Leinfelden-Echterdingen
Assembly
Before any work on the power tool, disconnect the plug from the mains socket.
Spray gun with electric drive (see fig. A1-A2)
Connect the electric drive to the spray gun.
Press the spray gun 9 onto
the electric drive until it locks into place.
Removing the electric drive
Press both red buttons SDS 4, hold them down and pull the spray gun 9 out of the electric drive.
Working with the tool
Preparation for operation
Do not allow spraying work to be carried out near water reservoirs or on adjacent areas directly in the water catchment basin.
When purchasing paints, varnishes, and spraying agents, pay attention to their environmental friendliness.
Preparing the surface for painting
Note: The surroundings of the surface to be treated should be carefully protected.
Aerosol spraying pollutes the environment. When working in enclosed rooms, all unprotected surfaces may become contaminated.
The surface to be treated must be clean, dry, and degreased.
Give the surfaces a rough texture and then remove the dust from them.
Spreading of material
When spreading, pay attention to the combination of the material being spread with the solvent. If the wrong solvent is used, lumps may form that will clog the spray gun.
Material to be spread
Recommended dilution
Wood preservative, stain, mastic, impregnating paint
Undiluted
Disinfectant, wood preservative
Undiluted
Dilutable with solvent: alkyd paints, primers, topcoats, automotive alkyd paints, disinfecting paints for thick-layer coating
Dilute at least 10%
Dilute the material as follows:
Take a measuring cup.
Stir the paint well.
Pour into the container a sufficient amount of
material. (See "Application of material to be spread", p. 199)
Dilute the material 10% with thinner. For example:
| Исховные К-Вор pacIBLE морог мaterpillar [мг] | 200 | 300 | 400 | 500 |
| Раствор沌л [мг] | 20 | 30 | 40 | 50 |
Mix the paint thoroughly.
Perform a test spray on a test surface. (See "Spraying", p. 199)
The spray pattern can be adjusted by turning the spray.
NOTE
If the spray result is unsatisfactory and the paint does not come out, perform the operations according to "Troubleshooting", described on p. 202.
Fill the spray material (see fig. B1-B2)
Before carrying out maintenance or adjustment of the electric tool, disconnect the plug from the mains socket.
Remove the cup 11 from the spray gun.
Turn the cup 10 so that the material can be sprayed almost without residue:
Spraying horizontal objects
Forward direction of the nozzle
Spraying with the head
Backward direction of the handle
Center the spray material in the cup 11 and screw it onto the spray gun.
Connect the external power source. The external power source must match the data on the type plate of the power tool. Power tools rated for 230 V can also operate at 220 V. When using an extension cord, make sure it is suitable for the power tool to prevent the intake of solvents or vapors.
Switching on
Insert the mains plug into the socket.
Hold the power tool in your hand and guide it toward the surface to be processed.
The power tool's trigger switch has two stages, 16. At the first stage, the turbine starts. At the second stage, the material to be sprayed is fed.
Press the trigger switch 16 to start the spray of material.
Switching off
Release the trigger switch 16. Pull the mains plug out of the socket.
Application instructions
Spraying (see figures C-D)
Note: When using the power tool outdoors, take the wind direction into account.
Do not interrupt the spraying within the area to be coated.
Uniform movement of the spray gun ensures consistent surface quality.
Uneven distance and angle of spraying lead to heavy fog formation and, as a result, to an uneven surface.
The spray gun must be cleaned after each use.
Do not use the spray material from the cup completely. If the cup is not tilted with the spray material, the spray material flow is interrupted and an uneven surface occurs.
Remove the spray material from the cup and the suction tube using the used thinner.
Note: Place the power tool only on a flat, clean surface so that it does not tip over.
200
Russian
Adjusting the spray pattern (see Fig. E)
Do not actuate the trigger 16 when adjusting the air regulator 13.
Release the locking lever 14.
Cleaning (see Fig. H-1)
Proper cleaning is a prerequisite for trouble-free operation of the spray gun. If cleaning is insufficient or incorrect, the warranty claims expire.
Clean the spray gun and the paint cup always with the appropriate thinner (solvent or water) for the material used.
Do not use sharp metal objects for cleaning the air nozzles of the spray gun.
Thinned spray material must not be poured back into the original material container.
Very thoroughly clean the spray gun after using a material harmful to health.
Unplug the power cord from the socket and activate the control switch 16.
Pour the paint back into the cup.
Remove the cup 11 and empty it of any remaining material to be sprayed.
Insert the cup and dilute it
(thinner for water-based paint) and attach it to the spray gun.
Shake the spray gun several times.
Connect the spray gun to the power supply again. (See page 197)
Insert the power cord plug into the socket, press the control switch and spray the thinner into an empty container until the material is gone.
Repeat this process until the spray gun only emits clean thinner.
Unplug the power cord from the socket and remove the spray gun.
Completely empty cup 11.
Check the empty container 10 for cleanliness and damage.
Clean the cup and the spray gun externally with a cloth dampened with thinner.
Remove the nozzle cap 14 and the air cap 13.
Dilute the paint again with 20 parts of water.
At the same time, the filter should be additionally checked in accordance with clause 21.
Remove the filter 20 and the filter 21.
If necessary, use a sharp object, since the filter is tightly sewn to the dispenser.
Clean the filter with a brush.
Insert the filter into the dispenser. Make sure that the gas outlet is facing outward.
Put the filter on the dispenser and turn it to the correct position.
Put the air hose 13 on the filter and then tighten the nut 14.
Cleaning the purge valve (see Fig. G)
Put the cover back in place.
Replacing the air filter (see Fig. L)
Note: Do not operate
The power tool without the air filter. Without the air filter, contaminants may be sucked in, which can lead to malfunctions of the power tool.
A contaminated air filter must be replaced.
Unscrew screw 7.
Remove the air filter cover 3.
Replace the air filter.
Close the air filter cover and tighten the screw.
Disposal
Residues of sprayed material must be disposed of in an environmentally friendly manner. Follow the manufacturer's instructions and local regulations for the disposal of special waste.
Hazardous substances for the environment must not enter groundwater or bodies of water. Do not discharge hazardous substances into the sewage system!
Troubleshooting
198188, Saint Petersburg
Tel.: +7 (0812) 7 84 13 07
Fax: +7 (0812) 7 84 13 61
E-Mail: rbru.pt_asa_spb@ru.bosch.com
Robert Bosch LLC
Service center for power tools
Gorky Microdistrict, 53
630032, Novosibirsk
630032, HOBOSHUPCK
Tel.: +7 (0383) 3599440
Fax: +7 (0383) 3599465
E-Mail: rbru_ct_asa_nob@ru.bosch.com
OOO «Robert Bosch»
Service center for power tools
ul. Fontannykh Brigad, 14,
620017, Yekaterinburg
Tel.: +7 (0343) 3658674
Tel.: +7 (0343) 3787756
Fax: +7 (0343) 3787928
Belarus
ACU YI-18
220064 Minsk, ul. Kuriatova, 7
Tel.: +375 (017) 210 29 70
Fax: +375 (017) 207 04 00
Used power tools, electrical equipment, and accessories must be handed over for environmentally friendly recycling of waste.
Only for EC member states:

Do not dispose of power tools in household waste!
According to the European Directive 2002/96/EC on waste electrical and electronic equipment
and its implementation in national law, used power tools must be collected separately and handed over for environmentally friendly recycling.
We reserve the right to make changes.
General power tool safety warnings
Read all safety warnings
and all instructions, including the figures and specifications provided with this power tool. Failure to follow the warnings and instructions may result in electric shock, fire and/or serious injury.
Save all warnings and instructions for future reference.
The term "power tool" in the warnings refers to your mains-operated (corded) power tool or battery-operated (cordless) power tool.
Illustrated components
The numbering of the illustrated components refers to the illustration of the power tool on the pages with the figures.
1 Electric spray gun 2 Spray gun hose 3 Cover of spray container 4 SDS release button 5 Spray gun handle 6 Extension pieces (for 800 ml containers) 7 Spray gun trigger 8 Spray gun 10 Hose for suction with container 11 Container for spray material, 800 ml* 12 Air release valve 13 Air relief valve 14 Cap nut 15 Container for spray material 16 Handle 17 Spray gun hose 18 Air relief valve 19 Membrane 20 Nozzle 21 Suction hose 22 Measuring scale *Shown and described accessories are not part of the standard delivery scope.
Ukrainian | 209
Technical data
| Mikropo3ПИЮВаьнacnctema | PFS 55 | |
| Товарни homер | 3 603 B06 0.. | |
| HOM. сpoоживаHAпOTужнICTь | Вт | 280 |
| ПOTужнICTь пОдчi | r/xВИ. | 0-110 |
| ПOTужнICTь рОЗПИЕннЯ | Вт | 55 |
| ВИtrpatи часу на 5 м2фapбовоGO рОКрNTТя | XBИ. | 12 |
| ОБ'ем бачka дЯpoЗпри scykваногomateriptaу | МА | 600 |
| Bara вidповідно доEPTA-Procedure01/2003 | КГ | 1,3 |
| Клас зaxисту | ☐/II | |
Please note the product number on the nameplate of your power tool. The trade name of some tools may vary.
Declaration of Conformity
We declare under our sole responsibility that the product described in the Technical Data complies with the following standards or normative documents: EN 60745 in accordance with the provisions of Directives 2004/108/EG, 98/37/EG (until 28.12.2009), 2006/42/EG (from 29.12.2009).
Technical documents at: Robert Bosch GmbH, Dept. PT/ESC, D-70745 Leinfelden-Echterdingen
Dr. Egbert Schneider Dr. Eckerhard Strötgen Senior Vice President Head of Product Engineering Certification
Assembly of the electric spray gun
Install the spray gun, 106 mm, into the container and tighten it.
Disassembly of the electric spray gun
Press the SDS button 4, hold it pressed and remove the spray gun from the electric tool.
Operation
Pirotobka do po6otn
IIpaIOBAtn 3 po3IINIOBAuem KOIO BooIMMnA 6oHa cyciAnix Do Hnx IIOuaX 6e3IOcepeHbO y BOo36ipHomy 6aceHi He AO3BOAETbCra.
KoIb6yTe KnyBaTHaap6n, IaKnip03PnCkYBaHipeOvBHH, 3BeptaIte yBary HaixHO ekOAnoriuHICTb.
TIIaTOBka 06tpncyBaHOI IOBePxHI
BkaibKa:pyHTOBHO i 3aTacom PnKpnTe OTOeHHN O6PncKyBaHoI IOBepxHi.
Tymah BiD po3PnckyBaHO peoBHN 3a6pydHIOE oTOeHHPO6OToMicu. Ppi BHKOpNCtAHHi y BHyTpIiHIX PpIMiueHHx MOxyTb 3a6pydHInTCBcHe 3akpTi TOBepxHi.
O6πpnckyBaHa TOBepxH MaE 6yTH uHcToIO, cyXoI HeKnHPOHO.
Haata WopctKicTB IaAkm TOBepxHm i IICAY bOro BnTpiTB nA, 0yTBOpHBcB BId wIyBaHHa.
210 | Ykpaɪhcbka
Po36aBHeHH po3PpncKyBaHOro MaTepiAly
Pn po36abEHHi cIkyte 3a Tm, o6 po3npncybaHm MaTepiA i po3piKyBau TiXoAHN OAnH DO OAnHO. Pn
BHKOPNCaHHI HeNpHaTHOro po3piJxByBa. aMOXnBE yTBOpEHnRApyoK, 60 6ydyTb 3a6nBaTH nictoAe-t-pO3nPncKyBa.
Poztpnckybann MaTepiAn
PekomeHDoBaHa KOHcENTpaia po3uHy
3ac06n dAa 3axncTy
Unbreakable
wood, paints, varnishes
Disinfectants, protective agents
Unbreakable
Lacquer paints, 10 can be diluted
Minimal
with solvents or water, primers, automotive
diluents
Covering varnishes,
10%
thickened varnishes
Dilute the sprayed material as follows:
Take a measuring cup 22.
Before mixing, stir the sprayed material.
Pour enough diluted material into the container for diluting the material 11. (N.B. «Pour the diluted material», p.210)
After drawing, the material shrinks by 10%. Example:
Turn the pipe for sealing and tightening
10 so, when drawing the material
it can be sprayed even without a lock:
the drawn material.
Turn the connector 15 in the direction-.
Necessary
increase
the amount
of drawn material.
Turn the connector 15 in the direction+.
Technical service and repair
Technical service and evaluation
Before any manipulation with the electric drive, unplug it from the socket. Never immerse the electric drive in water or other liquid. Wipe the housing only with a damp cloth.
Evaluation (see manual-1)
Use only original spray material for trouble-free operation. For improper use or poor quality, warranty claims are not accepted.
Fill the sprayer tank with the material to be sprayed using the appropriate sprayer (funnel or similar), according to the instructions for the sprayed material.
Never clean the openings and air vents of the sprayer with sharp metal objects.
Do not overfill to preserve the spray material; follow the original spray material instructions.
Very carefully clean the sprayer if you have used chemicals for plant protection spraying.
Remove the pressure from the hoses by pressing the trigger to ensure the spray material for the tank is empty.
Turn off the electric drive. (See page 209)
Unscrew the tank cap and pour out the remaining spray material.
Fill the sprayer (funnel or similar) with the tank and screw it on tightly to the sprayer.
Shake the sprayer several times.
Check the tightness of the tank cap.
Check that the hose for locking the handle with the tank cap 10 of the spray material is not damaged.
Wipe the tank and sprayer with a cloth dampened with spray liquid.
Unscrew the pressure valve 14 and the air filter cap 13.
Rinse the nozzle 20 and the nozzle holder with the help of the spray liquid.
Yac BiD yacy Heo6xiaHDo aTkoBO OunuataN yuihOBaC oIIa 21.
3HimItb COITAO 20 i yuiabHIOBaCOTIIa 21.
3a Heo6xHicTIO cKOpNCaHTecA rOCTPMIpeMeTOM, OCKiMbKN yuiziBbHOBaCOTIIaMiUHO CnDntb Ha NiCTOLeTI-po3PiPcNcKyBaui.
OuHCTITb yuiNbHOBa c0IIa 3a dONOMOIO pO3piJxvBaA.
3HOBy BCTpOMiTb yuiBHBoBa cOIIa y NiicToIe-PO3PnCkYBaU. CIAkyIte 3a THM, 106Pi3AnBvBCy HnIpyMky BiD NiICToIeTa- PO3PnCkYBaA.
HaiaHbTe cOIIa Ha nictoAeT-PO3nprncyBaU i IOBepHt b Ioro B IIpaBnAbHe IIOLOKeHHa.
HaiaHbTe NOBITpHnKOBtauOK 13 Ha coTlO i MiUHO 3aTARHIb NORo 3a DOnOMrOHO HAKNDHOI rAKN 14.
OuHHeHHaHaHaRaAaBbIaBeHHeNHOBITpR (AIB.MaA.G)
JaKIO WAAHr BiABeDeHHN IOBITpR 17 3a6pydHnBCr po3PnPKcKyBaHOIO pIDHNO, Ioro Tpe6a PPOUHCHTn.
3Himits Kpnkny DAn BnpyKa NOBITp 12.
3HimitsuHaBnBiBeDeHHNTOBITP17.
BiKpyiTb NOBITpAHN KlaPAn 18.
BnMItb Mem6paHy 19.
ПочптьшангдЯ BiDAБЕДHЯ ПОВITРЯ, ПОВITРУН КАТАн Та МЕБрау 3a ДOTOMORO BIДTOBIAHORO PO3piJxByBaay.
Iicra ouHnHb BcTaHOBitb Iepsoo Mem6paHy. CaiKyHe 3a Tm, 0o6 DoBwn HnT DnBnBCa DOrOpn.
3HOby npnKpyiTb TOBiTpHm KlaTaN.
TITIM HaIiHbTe ⅢA HnI BIABeDeHnI TOBITPcIOaTKy HA KlaIaH, a TOTIM 3BepxHa NiCTOLeT-po3PiNcKBya.
3HOBy HaDiInBe KpnuKy.
3amHa IOBITpHoro foIbTp(aNB.MaA.L)
BkaibKa: HikOn He ekTnyaTyte eIeKTPoIPnAAd 6e3 IOBITpHoro fIbTa. Be3 IOBITpHoro fIbTa moKe BCMOKTuBaTHc TIIA Ioo HeATINBO IIO3HaHTbcra Ha po6OtI eIeKTPoIPnAAdy.
JaKuo IOBITpHn HJIbTp 3a6pydHnBCa, IHO Tpe6a TomiHtN.
BiIpyctItb rBnHT 7.
3Himitb KpniuKy IOBITprHoro qIbtra 3.
TOMiHnTe TOnBITRpHi φiNbTpN.
3aKpnIte KpnIku NOBITpHaHOro fIbTpa i 3HOBy 3aKpyITb TBnHT.
BndaenHaMaTepiAIB
Po3piJxkyBaui i 3aIuKn po3pncyBaHm MaTepiAIB Tpe6a BuaAHTN eKOIoIHy O uCTHM cTocO6om. 3BaJaTe Ha Bka3iBKn Bpuo6HnKa 10Do BuaAaHeHH a MiueeBi Iprnncn 10Do BuaAaHeHH OcO6AnBOrO CmTTT.
Ximikatn, kidNbi Dn HABKoHnHbOre cepeOBnua, He IOBHHI IOTpaIANTn B 3eMIO, rpyHTOBi BOi i y BOOnMHnua. HikoN He 3InBaTe ximikatn, kidNbi Dn HABKoHnHbOre cepeOBnua, B kaHaJIa3auio!
214 | ykpaɪhcbka
YcyHenHHeCtpaBHOcte
Dr. Egbert Schneider Senior Vice President Engineering
Dr. Eckerhard Ströttgen Head of Product Certification
ppa. Maee i.v. Nogcu
18.02.2008, Robert Bosch GmbH, Power Tools Division D-70745 Leinfelden-Echterdingen
Montare
Bosch Service Center
Str. Horia Macelariu Nr. 30-34,
013937 Bucuresti
Tel. Service scule electrice: +40 (021) 405 75 40
Fax:+40(021)4057566
E-Mail: infoBSC@ro.bosch.com
Tel. Consultanta tehnica: +40 (021) 4 05 75 39
Fax: +40 (021) 405 7566
E-Mail: infoBSC@ro.bosch.com
www.bosch-romania.ro
Safety instructions
WARNING Read all safety warnings and all instructions, including those for the power tool and the battery pack, and the warnings written on the product. Failure to follow the safety instructions may result in electric shock, fire, and/or serious injury.
Save all safety instructions for future use.
The term "power tool" in the safety instructions refers to your mains-operated (corded) power tool or battery-operated (cordless) power tool.
1) Work area safety
a) Keep your work area clean and well lit. Cluttered or dark areas can lead to accidents. b) Keep children and bystanders at a safe distance while operating the power tool. If you are distracted, you may lose control of the power tool.
2) Electrical safety
a) The plug of the power tool must fit the outlet. Never modify the plug in any way. When working with earthed power tools, use extension cords with earthed plugs. Using original plugs and outlets reduces the risk of electric shock. b) Avoid body contact with earthed surfaces, such as pipes, radiators, stoves, and refrigerators. When your body is earthed, the risk of electric shock is greater.
c) Do not expose power tools to rain or wet conditions. Water entering a power tool increases the risk of electric shock. d) Do not use the cord for purposes it is not intended for, e.g., to carry the power tool by the cord or to pull the plug out of the outlet. Keep the cord away from heat, oil, sharp edges, or moving parts. Damaged or entangled cords increase the risk of electric shock. e) When working with a power tool outdoors, use only extension cords suitable for outdoor use. Using a cord suitable for outdoor use reduces the risk of electric shock. f) If operating the power tool in a damp environment is unavoidable, use a residual current device (RCD) protected supply. Using an RCD reduces the risk of electric shock.
3) Personal safety
a) Stay alert, watch what you are doing, and use common sense when operating a power tool. Do not use the power tool while you are tired or under the influence of drugs, alcohol, or medication. A moment of inattention while operating power tools may result in serious personal injury. b) Use personal protective equipment. Always wear eye protection. Protective equipment such as a dust mask, non-skid safety shoes, hard hat, or hearing protection used for appropriate conditions will reduce personal injuries.
Bulgarian | 229
B) Avoid switching on the tool unintentionally. Before connecting the battery pack or before carrying the tool, make sure that the switch is in the "off" position. If you carry the power tool with your finger on the switch or if you connect the battery pack while the switch is on, accidents may occur. C) Avoid awkward body positions. Always keep a firm footing and maintain your balance while working. This will enable you to control the power tool better in unexpected situations. D) Work with appropriate clothing. Do not wear loose clothing or jewelry. Keep your hair, clothing, and gloves away from moving parts. Loose clothes, jewelry, or long hair can be caught in moving parts.
The measurements were made in accordance with EN 60745.
The noise level of the tool is typically 74 dB(A). The uncertainty is K=1.5 dB. During operation, the noise level can exceed 80 dB(A).
Wear ear protection!
The vibration emission value is typically below 2.5 m/s².
Technical Data
Please pay attention to the type plate on your power tool. The trade name of your power tool may vary.
Declaration of Conformity

We declare under our sole responsibility that the product described in "Technical Data" complies with the following standards or normative documents: EN 60745 according to the provisions of Directives 2004/108/EC, 98/37/EC (until 28.12.2009), 2006/42/EC (from 29.12.2009).
Technical file at: Robert Bosch GmbH, Dept. PT/ESC, D-70745 Leinfelden-Echterdingen
Dr. Egbert Schneider Senior Vice President Engineering
Dr. Eckerhard Strötgen Head of Product Certification
i.v. Moju
18.02.2008, Robert Bosch GmbH, Power Tools Division D-70745 Leinfelden-Echterdingen
Mounting
The tool is designed for electrical tools and is protected against the mains supply.
Mounting the spray gun and electrical module (see group A1-A2)
Connect the spray gun and electrical module
Place the spray gun on the electrical module until it clicks into place.
Removing the electrical module
Press the button, hold it, and pull the spray gun away from the electrical module.
Operation
Preparation for operation
Do not spray near the edge of water or into water zones.
When using paints, lacquers, and materials for spraying, pay attention to their flammability and the surrounding environment.
Preparing the surface for spraying
Note: Stir thoroughly and widen the area around the surface before spraying.
Spray around the area to be painted, and the spray mist settles on the surrounding area. When working in enclosed spaces, it is possible to inhale the mist on uncovered surfaces.
Remove the protective cap 22.
The spray gun is well adjusted.
Make sure there is enough paint in the reservoir.
Release the trigger lock 16.
Keep the spray gun away from contact.
Operating instructions
Spraying (see figure C-D)
Note: When using
the electric tool outdoors, read and follow the instructions in the manual.
Perform a test spray and adjust the spray pattern and paint flow rate according to the material being sprayed. (For correct settings, see the section below)
Hold the spray gun at a constant distance of 5-15 cm perpendicular to the surface being sprayed.
Start spraying from the surface, moving the spray gun.
Depending on the adjustment of the spray pattern and the material, move the spray gun evenly and horizontally over the surface.
An even surface layer is formed when the spray gun is moved at a speed of 4-5 cm per second.
Avoid interruptions on the surface being processed.
A constant surface quality is achieved by moving the spray gun evenly.
The spray distance and the angle of the spray relative to the surface are not the only factors that affect the quality of the treated surface.
Turn off the spray and remove the treated surface.
Never empty the reservoir completely. When the suction hose is not immersed in the liquid, the spray may sputter and the quality of the sprayed surface may deteriorate.
If the suction hose and the filter membrane become clogged, clean them with a suitable solvent.
Caution: Place the power tool on a flat and clean surface to avoid the risk of tipping over.
Bulgarian | 235
Adjusting the spray pattern (see fig. E)
Never press the trigger 16 until the air regulating membrane 13 is closed.
Loosen the knurled ring 14.
Close the air regulating membrane 13 in the inserted position.
Then tighten the knurled ring again.
Spraying for edges, ribs, and hard-to-reach areas
Adjusting the amount of spray liquid (see figure)
To set the desired amount of liquid, while spraying, turn the adjusting wheel 15: minimum amount of liquid, +: maximum amount of liquid.
Amount of liquid
The surface of the material to be painted:
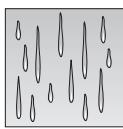
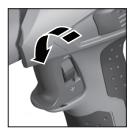
Setting
The amount of paint should be reduced.
Turn the regulator 15° clockwise.
The surface of the material to be painted:
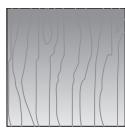
The amount of paint should be increased.
Turn the regulator 15° counterclockwise.
Maintenance and service
Cleaning and maintenance
Before performing any maintenance or repair on the electric tool, disconnect it from the power supply. Never immerse the electric tool in solvent or water.
Clean the housing with a damp cloth.
Cleaning (see figure H-1)
Proper cleaning is essential for trouble-free operation of the spray gun. If the spray gun is not cleaned or is not cleaned properly, the warranty will not be accepted.
Clean the spray gun thoroughly through the air cap (solvent or water) for the material used.
Never clean the openings of the spray gun with sharp metal objects.
Do not use the device if the recommended pressure is not released.
If you have requested material, take time for your health, carefully follow the instructions.
Exclude the contact of the trigger switch 16 to release the accumulated amount of oil back into the reservoir.
Disconnect the electrical plug. (See page 232)
Empty the reservoir 11 and the liquid contained in it.
Remove the reservoir cap (unscrew it) and pour it onto the pistol.
Press the pistol several times. Reconnect the pistol to the electrical plug.
(See page 232)
Insert the nozzle into the contact, press the trigger switch for a known time to dissolve the solvent in the spray gun.
Clean the markings and the valve of the ventilation system and the membrane with a suitable solvent.
After cleaning, install the first membrane. The piston tip must be turned upward.
Again press the valve of the ventilation system.
Follow the markings on the valve and then the pistol for spraying.
Again install the cap.
Intake air filter (see fig. L)
Warning: Never work with power tools without a mounted intake air filter. Without the intake air filter, debris can be sucked in and damage the power tool.
When the intake air filter becomes clogged, it must be replaced.
Loosen screw 7.
Remove the intake air filter cover 3.
Replace the intake air filter.
Close the intake air filter cover and tighten screw 7 again.
Disposal of used materials
Dispose of the used materials and leftover materials in an environmentally friendly manner.
Do not let waste oil penetrate into the soil, groundwater, or open water bodies. Never dispose of waste oil in household drains!
Troubleshooting
| ПюбLEM | Пючима | Одстразноаиоуоуоуоуоуоуоуоуоуоуоуоуоуоуоуоуоуоуоуоуоуоуоуоуоуоуоуоуоуоуоуоуоуоуоуоуоуоуоуоуоуоуоуоуоуоуоуоуоуоуооуоуоуоуоуоуоуоуоуоуоуоуоуоуоуоуоуоуоуоуоуоуоуоуоуоуоуоуоуоуоуоуоуоуоуоуоуоуоуоуоуоуоуоуоуоуоуоуоуо КолочьOTO на пьсkaнata 608e MaANO | 3авьртete рergларopa 15Впосoka + |
| Разосторниetodo пьсkaната Повьрхнocт e ТБьрдe Глamyо | Скбсerte разсторниeto do пьсkaната пьсьрхнocт | ||
| ТБьрдe малко 608пога на пьсkaната пьсьрхнocт, пьсckиite са ТБьрдe наядко | П repimeneti розецпьтпп пьсkaната пьсьрхнocт | ||
| Пьсkaната чуност e ТБьрдe Гьста | Отоною разcadete 608а т c 10% и извьршete рожбно рьсkaне | ||
| След на пьсckвае 608а прOTИЧА | КолочьOTO пьсkaна 608e ТБьрдe Глamyо | Задосторниeto do пьсkaната Повьрхнocт e ТБьрдe малko | |
| Разostорниeto do пьсkaната Повьрхнoct e ТБьрдe малko | Уveелчete разсторниeto | ||
| Баята e пазcadенa пьсчесot ножното | Добавete нераздени. пючсerte 608а и при с平方检п�оу пьсkaне пьсkaнтToALKOBA MHOGO Na eEDH и СБДО МЯСТО | ||
| Пьсkaим STe пьчесot hyжнотo над сдно и сьщ място | Почисторе 608а и пri с平方检п�оу пьсkaне пьсkaнтToALKOBA MHOGO Na eEDH и СБДО МЯСТО |
Contact the customer service of your dealer for questions regarding operation, maintenance, and adjustment possibilities of various products from the manufacturer's range and accessories for them.
Rejected
With regard to environmental protection, the device, accessories, and packaging must be handed over for recycling in accordance with the applicable regulations.
3a 06kekuabaHe Ha peuKlnpaHTo DaTaiNtE, IpnounBeHn OT n3kyCTBeHn MaTePnaHn, ca 06o3NaueHn IO cbOyBeteH NaHH.
Camo 3a ctpaHH ot EC:

He n3xBpIaIe eIekTPOHnCTpyMeHTn IIpi 6ntOBHTe OTIaDbu! CbIaCHO AnpeKTHBaTa Ha EC 2002/96/EG OTHoCHo 6paKaYBaHn eIekTPrueeCKN I eIekTPOHHyCTPOHCTBA H YTBpXDaBaHeto
KaTo HaunohaIeH 3aKoh eLeKTPoHnHCTpymHeNTte, KOHTo He MoTa Da Ce H3IOA3BaT IOBeue, Tpr6Ba Da ce Cb6Hpata OTdeHO Na 6bDaT IOdaRaHHa ITOxOJa7a IIpepa6Otka 3a OTOIA3OTBOPraBaHe Ha Cb4bPxaIHTe Ce B T8X BTOpuHN CyPOBHN.
IpaBaTa 3a n3MeHeHn 3aTa3eHn.
PobepT BoW EOOD - BbIrapn
BouCepBn3 LcHbP
TapaHauOHHHn H3BbHpaHauOHHH peMOHTN
yI.Cpe6bpaN03-9
1907 Codma
TeA.: +359 (02) 962 5302
TeA.: +359 (02) 962 5427
TeA.: +359 (02) 962 5295
ΦaKc: +359 (02) 62 46 49
240 | Srpski
General Power Tool Safety Warnings
WARNING Read all safety warnings and instructions, as well as
the safety data sheets and warning labels on the packaging of paints and solvents. Failure to follow the safety warnings and instructions could result in electric shock, fire, and/or serious injury.
Save all safety warnings and instructions for future reference.
The term "power tool" used in the following text refers to power tools operated from the mains (with a power cord) and to power tools operated from a battery pack (without a power cord).
1) Work area safety
a) Keep your work area clean and well lit. Cluttered or dark work areas can lead to accidents. b) During use of the power tool, keep children and other people away from the work area. If distracted, you could lose control of the device.
2) Electrical safety
a) The power tool plug must match the outlet. Never modify the plug in any way. Do not use any adapter plugs with earthed (grounded) power tools. Unmodified plugs and matching outlets will reduce the risk of electric shock. b) Avoid body contact with earthed surfaces such as pipes, radiators, stoves, and refrigerators. There is an increased risk of electric shock if your body is earthed. c) Keep the device away from rain or moisture. Water entering a power tool will increase the risk of electric shock.
d) Do not abuse the cord. Never use the cord for carrying, pulling, or unplugging the power tool. Keep the cord away from heat, oil, sharp edges, or moving parts. Damaged or entangled cords increase the risk of electric shock. e) When operating a power tool outdoors, use only extension cords suitable for outdoor use. Use of a cord suitable for outdoor use reduces the risk of electric shock. f) If operating a power tool in a damp location is unavoidable, use a residual current device (RCD) protected supply. Use of an RCD reduces the risk of electric shock.
3) Personal safety
Assembly
Pull the mains plug out of the socket before carrying out any work on the power tool.
Assembling the spray gun and the electric nozzle (see figures A1 - A2)
Dr. Egbert Schneider Senior Vice President Engineering
Dr. Eckerhard Strötgen Head of Product Certification
ppa. Maee i.v. Nogcu
18.02.2008, Robert Bosch GmbH, Power Tools Division D-70745 Leinfelden-Echterdingen
254 | Slovenian
Assembly
Dr. Egbert Schneider Dr. Eckerhard Ströttgen Senior Vice President Head of Product Engineering Certification
ppa. 1i.v. uogcu
18.02.2008, Robert Bosch GmbH, Power Tools Division D-70745 Leinfelden-Echterdingen
264 | Croatian
Assembly
Pull the mains plug out of the socket before carrying out any work on the power tool.
Assembling the spray gun and electric unit (see figures A1 - A2)
Connecting the electric unit to the spray gun
Slide the spray gun 9 onto the electric unit 1 until it noticeably clicks into place.
Removing the electric unit
Press both red SDS buttons 4, keep them pressed, and pull the spray gun 9 off the electric unit.
Operation
Preparation for operation
General safety instructions
Dr. Egbert Schneider Dr. Eckerhard Ströttgen Senior Vice President Head of Product Engineering Certification
18.02.2008, Robert Bosch GmbH, Power Tools Division D-70745 Leinfelden-Echterdingen
274 | Estonian
Assembly
Dr. Egbert Schneider Dr. Eckerhard Ströttgen Senior Vice President Head of Product Engineering Certification
ppa. Maee i.v. Nogcu
18.02.2008, Robert Bosch GmbH, Power Tools Division D-70745 Leinfelden-Echterdingen
Saliksana
Before assembling or servicing the power tool, pull the plug of its power cord out of the mains socket.
Dr. Egbert Schneider Dr. Eckerhard Ströttgen Senior Vice President Head of Product Engineering Certification
ppa. Maee i.v. Nogcu
18.02.2008, Robert Bosch GmbH, Power Tools Division D-70745 Leinfelden-Echterdingen
296 | Lithuanian
Assembly
Before carrying out any adjustment or maintenance work on the power tool, pull the plug out of the mains socket.
Mounting the spray gun and the power unit (see figures A1-A2)
Connecting the power unit to the spray gun
Insert the power unit into the spray gun until you hear it click into place.
Removing the power unit

- PFS
- BOSCH
- ASSEMBLY
- GENERAL POWER TOOL SAFETY WARNINGS
- WARNING
- SAFETY WARNINGS FOR FINE-SPRAY SYSTEMS
- WORKPLACE SAFETY
- PERSONAL SAFETY
- USE AND HANDLING OF THE POWER TOOL
- FUNCTIONAL DESCRIPTION
- INTENDED USE
- NOISE/VIBRATION INFORMATION
- WEAR HEARING PROTECTION
- PRODUCT FEATURES
- ELECTRICAL UNIT
- SPRAY GUN
- TECHNICAL DATA
- DECLARATION OF CONFORMITY
- C
- MOUNTING THE SPRAY GUN AND THE ELECTRICAL UNIT (SEE FIGURES A1 - A2)
- CONNECTING THE ELECTRICAL UNIT WITH THE SPRAY GUN
- REMOVING THE ELECTRICAL UNIT
- OPERATION
- PREPARING FOR OPERATION
- PREPARING THE SPRAY SURFACE
- DILUTING SPRAY MATERIAL
- OR
- FILLING IN SPRAY MATERIAL (SEE FIGURES B1-B2)
- STARTING OPERATION
- SWITCHING ON
- SWITCHING OFF
- WORKING ADVICE
- SPRAYING (SEE FIGURES C-D)
- ADJUSTING THE SPRAY PATTERN (SEE FIGURE E)
- NEVER ACTUATE THE TRIGGER SWITCH 16 WHILE ADJUSTING THE AIR CAP
- AIR
- JET
- APPLICATION
- A
- B
- ADJUSTING THE SPRAYING CAPACITY (SEE FIGURE F)
- SPRAYING CAPACITY
- ADJUSTMENT
- MAINTENANCE AND SERVICE
- MAINTENANCE AND CLEANING
- CLEANING (SEE FIGURES H-1)
- CLEANING THE VENTING HOSE (SEE FIGURE G)
- CHANGING THE AIR FILTER (SEE FIGURE L)
- MATERIAL DISPOSAL
- CORRECTION OF MALFUNCTIONS
- MAINTENANCE
- WARNING! IMPORTANT INSTRUCTIONS FOR CONNECTING A NEW 3-PIN PLUG TO THE 2-WIRE CABLE
- AFTER-SALES SERVICE AND CUSTOMER ASSISTANCE
- WWW.BOSCH-PT.COM
- GREAT BRITAIN
- AUSTRALIA, NEW ZEALAND AND PACIFIC ISLANDS
- DISPOSAL
- ONLY FOR EC COUNTRIES
- MONTAGE
- THE DECLARED VIBRATION TOTAL VALUE AND THE DECLARED NOISE EMISSION VALUE HAVE BEEN MEASURED IN ACCORDANCE WITH THE STANDARD TEST METHOD EN
- WEAR EAR PROTECTION
- SIGMA
- CONNECTING THE TOOL AND THE ELECTRIC UNIT (SEE FIGURES A1-A2)
- REMOVING THE ELECTRIC UNIT
- AETROUPYIA
- MONTAŽ
- WASTE DISPOSAL
- USE HEARING PROTECTION
- SPRAY GUN WITH ELECTRIC DRIVE (SEE FIG. A1-A2)
- CONNECT THE ELECTRIC DRIVE TO THE SPRAY GUN
- REMOVING THE ELECTRIC DRIVE
- WORKING WITH THE TOOL
- PREPARATION FOR OPERATION
- PREPARING THE SURFACE FOR PAINTING
- SPREADING OF MATERIAL
- MATERIAL TO BE SPREAD
- RECOMMENDED DILUTION
- NOTE
- FILL THE SPRAY MATERIAL (SEE FIG. B1-B2)
- APPLICATION INSTRUCTIONS
- ADJUSTING THE SPRAY PATTERN (SEE FIG. E)
- CLEANING (SEE FIG. H-1)
- CLEANING THE PURGE VALVE (SEE FIG. G)
- REPLACING THE AIR FILTER (SEE FIG. L)
- BELARUS
- ONLY FOR EC MEMBER STATES
- READ ALL SAFETY WARNINGS
- THE TERM "POWER TOOL" IN THE WARNINGS REFERS TO YOUR MAINS-OPERATED (CORDED) POWER TOOL OR BATTERY-OPERATED (CORDLESS) POWER TOOL
- THE NUMBERING OF THE ILLUSTRATED COMPONENTS REFERS TO THE ILLUSTRATION OF THE POWER TOOL ON THE PAGES WITH THE FIGURES
- ASSEMBLY OF THE ELECTRIC SPRAY GUN
- DISASSEMBLY OF THE ELECTRIC SPRAY GUN
- PIROTOBKA DO PO6OTN
- TIIATOBKA 06TPNCYBAHOI IOBEPXHI
- YKPAꞮHCBKA
- PO36ABHEHH PO3PPNCKYBAHORO MATEPIALY
- POZTPNCKYBANN MATEPIAN
- PEKOMEHDOBAHA KOHCENTPAIA PO3UHY
- TECHNICAL SERVICE AND REPAIR
- TECHNICAL SERVICE AND EVALUATION
- EVALUATION (SEE MANUAL-1)
- OUHHEHHAHAHARAAABBIABEHHENHOBITPR (AIB.MAA.G)
- AMHA IOBITPHORO FOIBTP(ANB.MAA.L)
- BNDAENHAMATEPIAIB
- MONTARE
- SAFETY INSTRUCTIONS
- WARNING READ ALL SAFETY WARNINGS AND ALL INSTRUCTIONS, INCLUDING THOSE FOR THE POWER TOOL AND THE BATTERY PACK, AND THE WARNINGS WRITTEN ON THE PRODUCT. FAILURE TO FOLLOW THE SAFETY INSTRUCTIONS MAY RESULT IN ELECTRIC SHOCK, FIRE, AND/OR SERIOUS INJURY
- THE TERM "POWER TOOL" IN THE SAFETY INSTRUCTIONS REFERS TO YOUR MAINS-OPERATED (CORDED) POWER TOOL OR BATTERY-OPERATED (CORDLESS) POWER TOOL
- KEEP YOUR WORK AREA CLEAN AND WELL LIT. CLUTTERED OR DARK AREAS CAN LEAD TO ACCIDENTS. B) KEEP CHILDREN AND BYSTANDERS AT A SAFE DISTANCE WHILE OPERATING THE POWER TOOL. IF YOU ARE DISTRACTED, YOU MAY LOSE CONTROL OF THE POWER TOOL
- THE PLUG OF THE POWER TOOL MUST FIT THE OUTLET. NEVER MODIFY THE PLUG IN ANY WAY. WHEN WORKING WITH EARTHED POWER TOOLS, USE EXTENSION CORDS WITH EARTHED PLUGS. USING ORIGINAL PLUGS AND OUTLETS REDUCES THE RISK OF ELECTRIC SHOCK. B) AVOID BODY CONTACT WITH EARTHED SURFACES, SUCH AS PIPES, RADIATORS, STOVES, AND REFRIGERATORS. WHEN YOUR BODY IS EARTHED, THE RISK OF ELECTRIC SHOCK IS GREATER
- STAY ALERT, WATCH WHAT YOU ARE DOING, AND USE COMMON SENSE WHEN OPERATING A POWER TOOL. DO NOT USE THE POWER TOOL WHILE YOU ARE TIRED OR UNDER THE INFLUENCE OF DRUGS, ALCOHOL, OR MEDICATION. A MOMENT OF INATTENTION WHILE OPERATING POWER TOOLS MAY RESULT IN SERIOUS PERSONAL INJURY. B) USE PERSONAL PROTECTIVE EQUIPMENT. ALWAYS WEAR EYE PROTECTION. PROTECTIVE EQUIPMENT SUCH AS A DUST MASK, NON-SKID SAFETY SHOES, HARD HAT, OR HEARING PROTECTION USED FOR APPROPRIATE CONDITIONS WILL REDUCE PERSONAL INJURIES
- MOUNTING
- MOUNTING THE SPRAY GUN AND ELECTRICAL MODULE (SEE GROUP A1-A2)
- PREPARING THE SURFACE FOR SPRAYING
- OPERATING INSTRUCTIONS
- SPRAYING (SEE FIGURE C-D)
- NEVER PRESS THE TRIGGER 16 UNTIL THE AIR REGULATING MEMBRANE 13 IS CLOSED
- ADJUSTING THE AMOUNT OF SPRAY LIQUID (SEE FIGURE)
- AMOUNT OF LIQUID
- SETTING
- CLEANING AND MAINTENANCE
- CLEANING (SEE FIGURE H-1)
- INTAKE AIR FILTER (SEE FIG. L)
- DISPOSAL OF USED MATERIALS
- REJECTED
- CAMO 3A CTPAHH OT EC
- POBEPT BOW EOOD - BBIRAPN
- WARNING READ ALL SAFETY WARNINGS AND INSTRUCTIONS, AS WELL AS
- SAVE ALL SAFETY WARNINGS AND INSTRUCTIONS FOR FUTURE REFERENCE
- WORK AREA SAFETY
- ELECTRICAL SAFETY
- ASSEMBLING THE SPRAY GUN AND THE ELECTRIC NOZZLE (SEE FIGURES A1 - A2)
- ASSEMBLING THE SPRAY GUN AND ELECTRIC UNIT (SEE FIGURES A1 - A2)
- GENERAL SAFETY INSTRUCTIONS
- SALIKSANA
- MOUNTING THE SPRAY GUN AND THE POWER UNIT (SEE FIGURES A1-A2)
- CONNECTING THE POWER UNIT TO THE SPRAY GUN
- REMOVING THE POWER UNIT
Brand : BOSCH
Model : PFS 55
Category : Paint gun