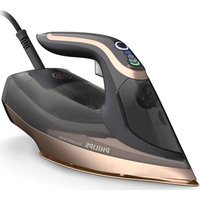
Azur 8000 Series DST8070 - Iron PHILIPS - Free user manual and instructions
Find the device manual for free Azur 8000 Series DST8070 PHILIPS in PDF.

 FR
FR
 AZ
AZ
 BG
BG
 CS
CS
 DA
DA
 DE
DE
 EL
EL
 EN
EN
 ES
ES
 ET
ET
 FI
FI
 HU
HU
 HY
HY
 ID
ID
 IT
IT
 KA
KA
 KK
KK
 KO
KO
 KY
KY
 LT
LT
 LV
LV
 MK
MK
 NL
NL
 NO
NO
 PL
PL
 PT
PT
 RO
RO
 RU
RU
 SK
SK
 SL
SL
 SQ
SQ
 SV
SV
 TG
TG
 TH
TH
 TK
TK
 TR
TR
 UK
UK
 UZ
UZ
 VI
VI
 ZH
ZH
| Product Type | Steam Iron |
| Brand | Philips |
| Model | Azur 8000 Series DST8070 |
| Ironing Technology | OptimalTEMP (no temperature setting) |
| Steam Settings | AUTO, 3 clouds, 1 cloud, dry ironing |
| Press Effect | Horizontal and vertical (powerful steam jet) |
| Tank Capacity | Approximately 300 ml (estimated) |
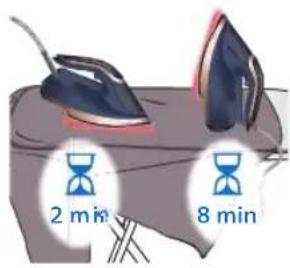
| Auto-off | 2 min on soleplate, 8 min on heel |
| Cleaning and Maintenance | Removable Quick Calc Release tank for descaling; soleplate cleanable with a damp cloth |
| Power Supply | 220-240 V ~, power approx. 2400 W (estimated) |
| Dimensions (approx.) | 30 x 15 x 20 cm |
| Weight (approx.) | 1.5 kg |
| Recommended Water Type | Tap water, or mix 50% distilled water if hard water |
| Safety | Auto-off; do not use chemicals; do not point towards yourself |
| Spare Parts and Repairability | Available from Philips service |
| General Information | 2-year warranty; registration possible at www.philips.com/welcome |
Frequently Asked Questions - Azur 8000 Series DST8070 PHILIPS
User questions about Azur 8000 Series DST8070 PHILIPS
0 question about this device. Answer the ones you know or ask your own.
Ask a new question about this device
Download the instructions for your Iron in PDF format for free! Find your manual Azur 8000 Series DST8070 - PHILIPS and take your electronic device back in hand. On this page are published all the documents necessary for the use of your device. Azur 8000 Series DST8070 by PHILIPS.
USER MANUAL Azur 8000 Series DST8070 PHILIPS
Congratulations on your purchase and welcome to Philips! To fully benefit from the support that Philips offers, register your product at www.philips.com/welcome. Read this user manual, the important information leaflet, and the quick start guide carefully before you use the appliance. Save them for future reference.
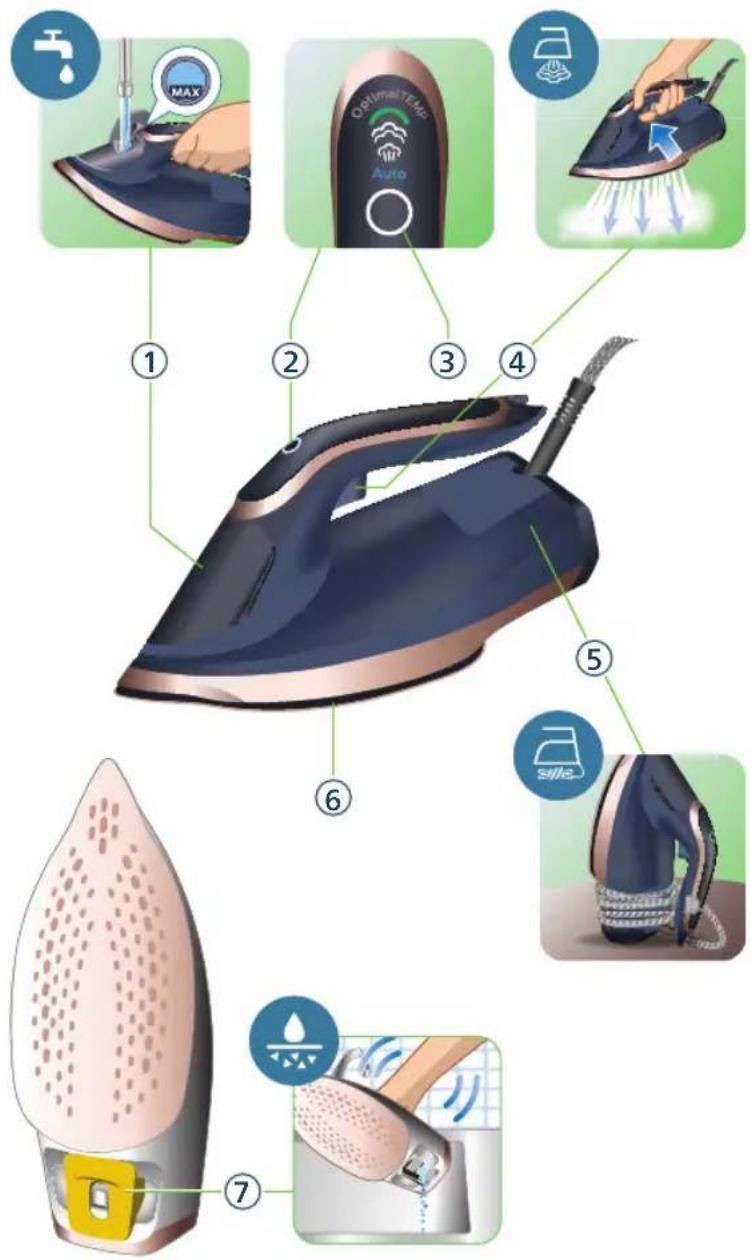
Product overview
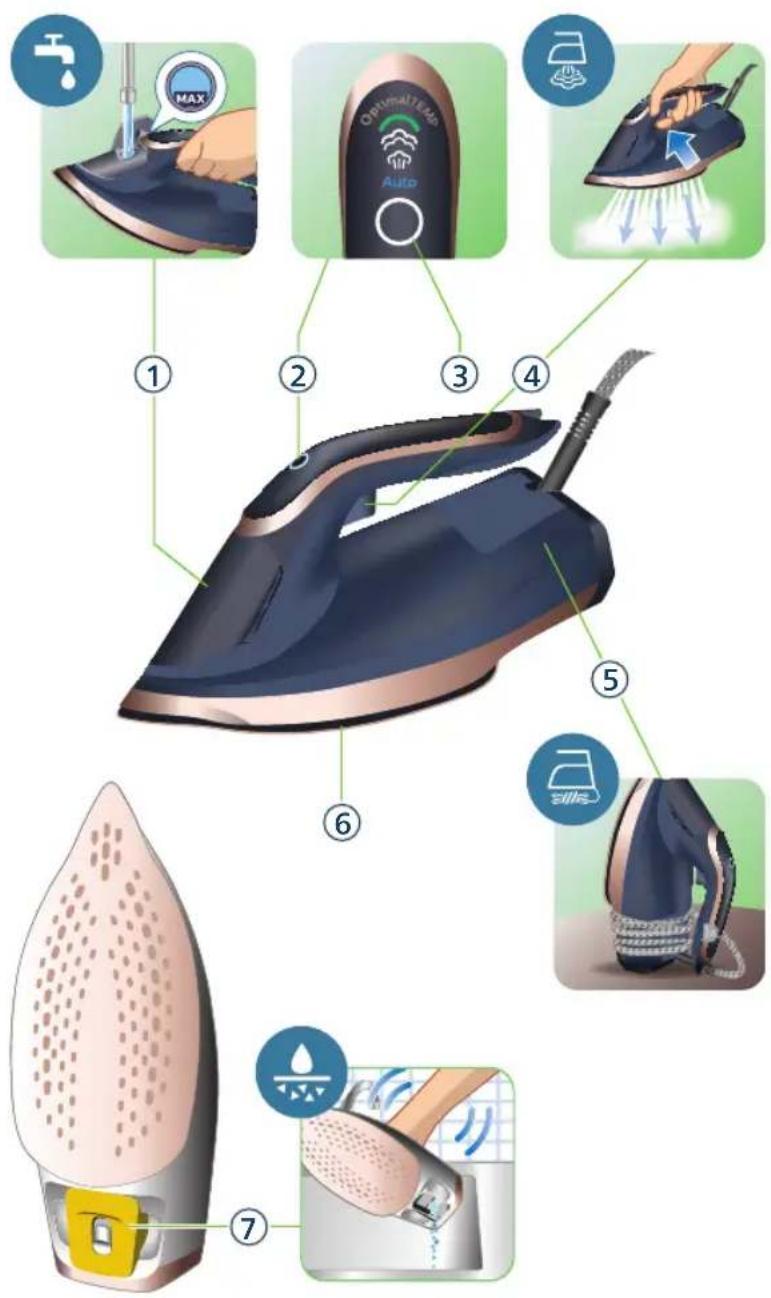
4 English
1 Water tank lid
2 Steam selector button
3 Indicator light
4 Steam boost trigger
5 Cord winding
6 Soleplate
7 Quick Calc Release collector
Using the appliance
Note: The iron may give off some steam when you use it for the first time. This stops after a short while.
Type of water to use
The appliance is suitable to be used with tap water. However, if you live in an area with hard water, we recommend that you mix an equal amount of tap water with distilled or demineralized water. This will prevent fast scale build up and prolong the lifetime of the appliance.
Do not add perfume, water from the tumble dryer, vinegar, starch, descaling agents, ironing aids, chemically descaled water or other chemicals, as they may cause water spitting, brown staining or damage to your appliance.
OptimalTemp technology
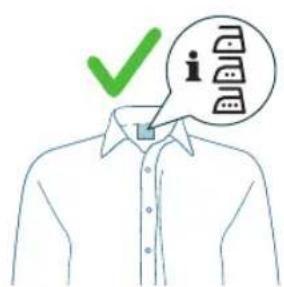
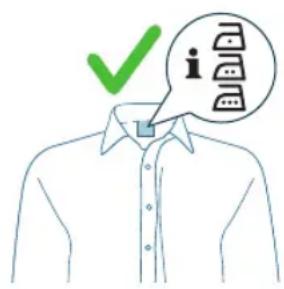
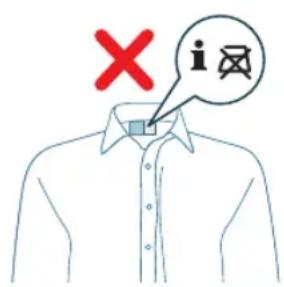
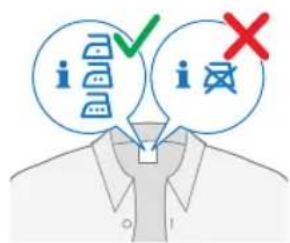
The OptimalTemp technology enables you to iron all types of ironable fabrics, in any order, without adjusting the iron temperature setting.
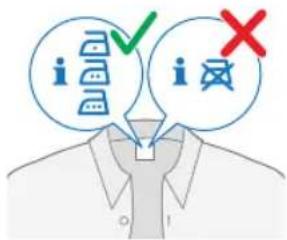
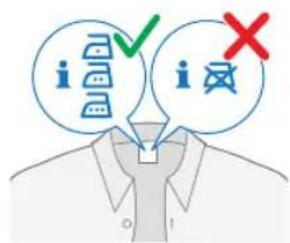
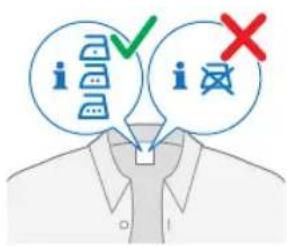
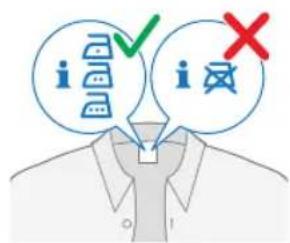
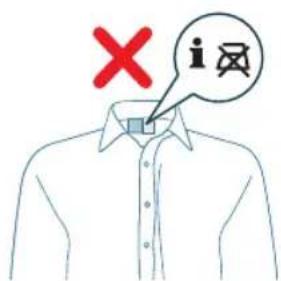
Fabrics with these symbols are ironable, for example linen, cotton, polyester, silk, wool, viscose and rayon.
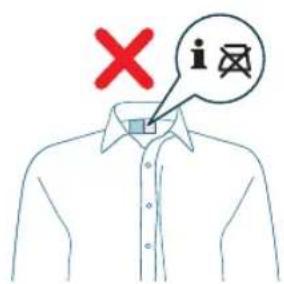
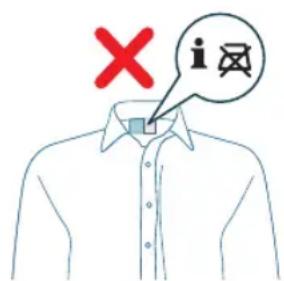
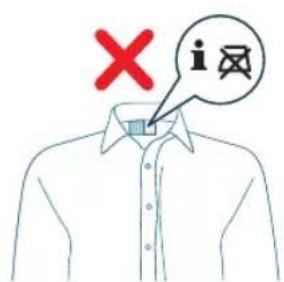
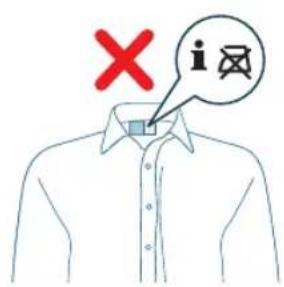
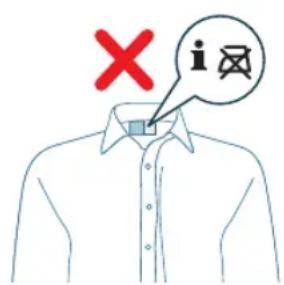
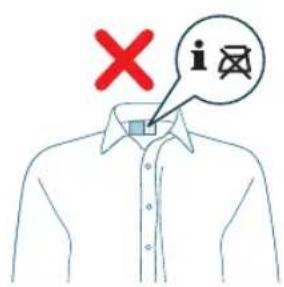
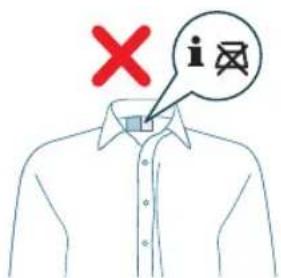
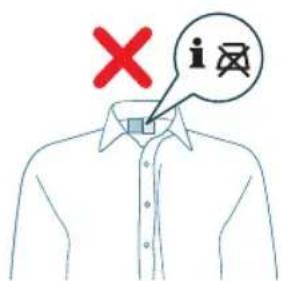
Fabrics with this symbol are not ironable. These fabrics include synthetic fabrics such as Spandex or elastane, Spandex-mixed fabrics and polyolefins (e.g. polypropylene), but also prints on garments.
Filling the water tank
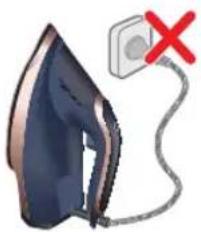
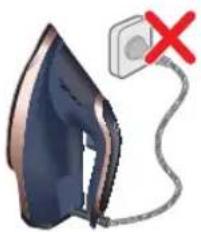
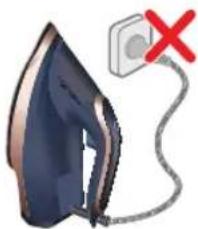
1 Do not plug in the iron.
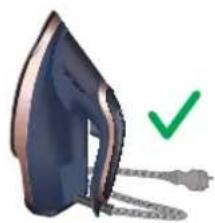
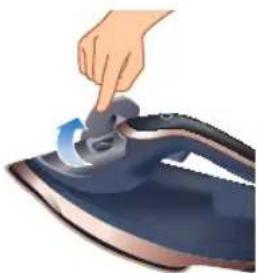
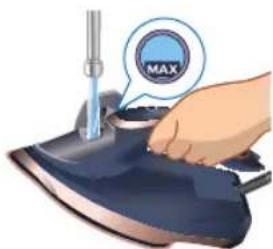
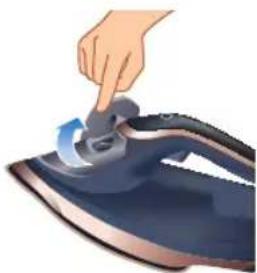
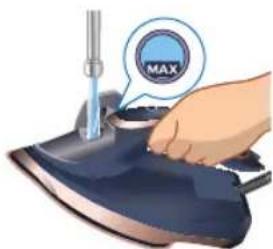
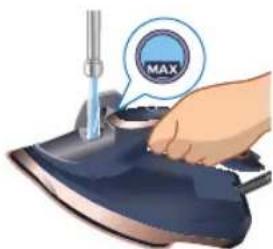
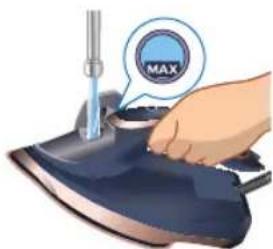
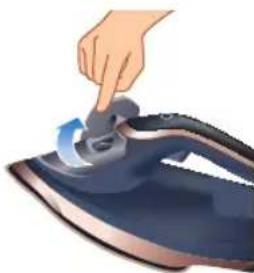
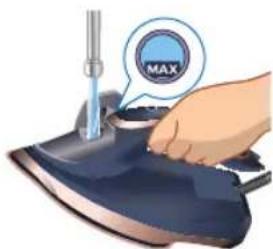
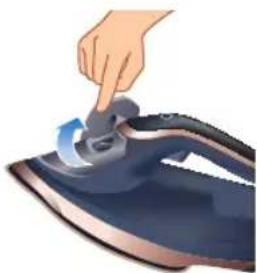
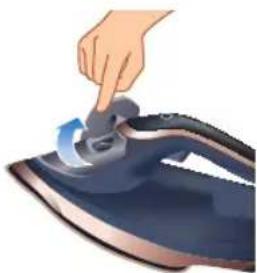
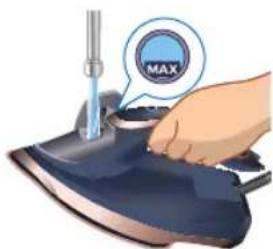
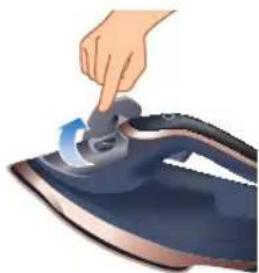
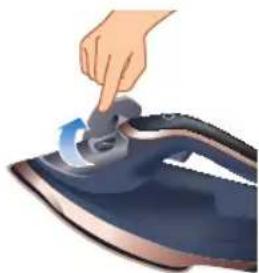
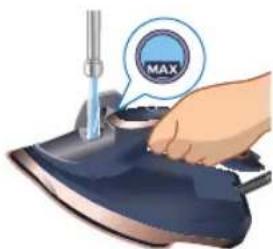
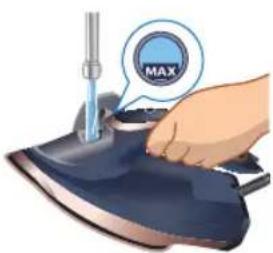
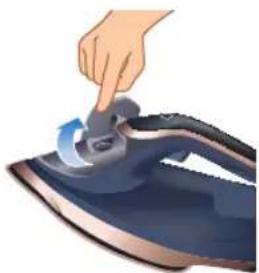
2 Flip open the water tank lid.
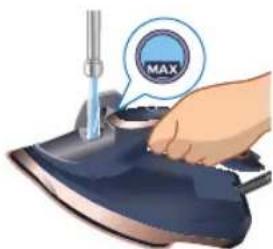
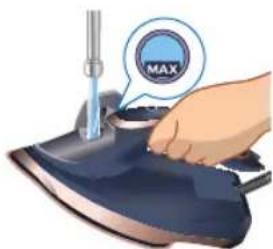
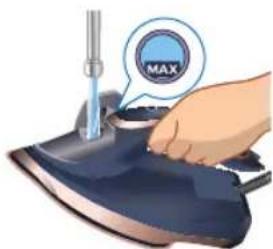
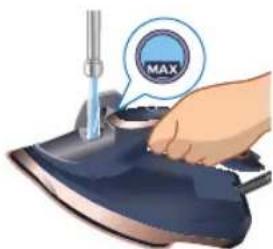
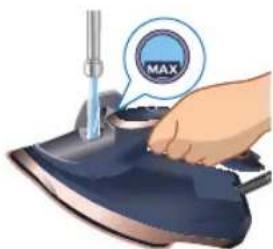
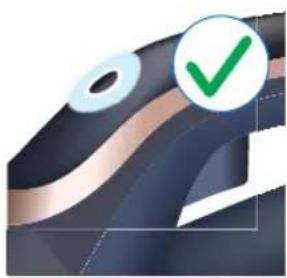
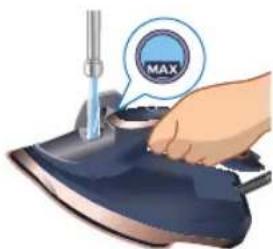
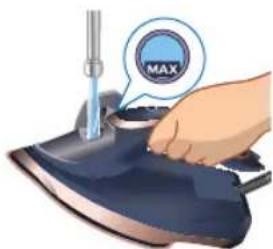
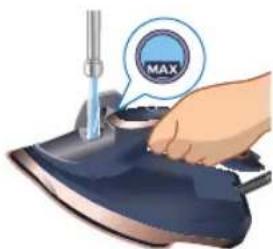
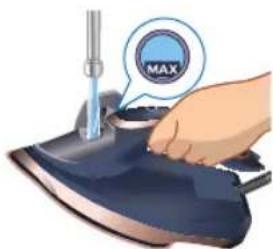
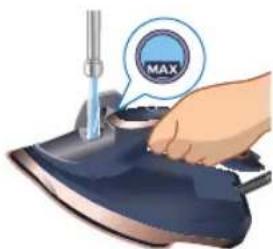
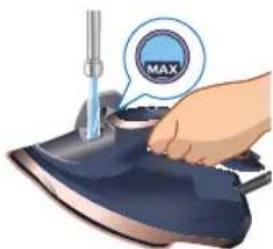
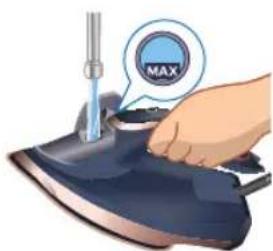
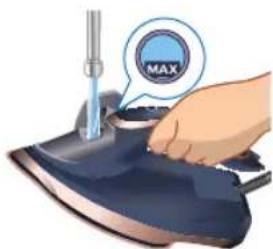
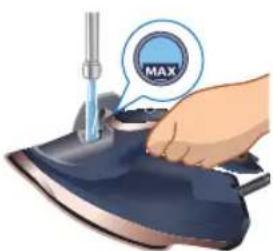
3 Fill water tank up to the MAX indication mark. Do not add any additives like perfume, fragrances, soap or vinegar.
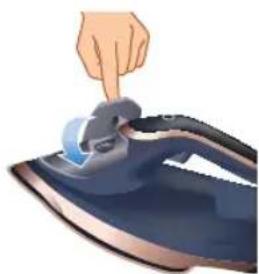
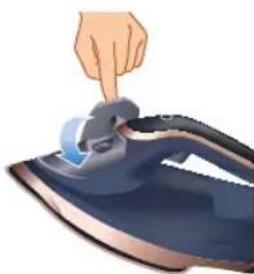
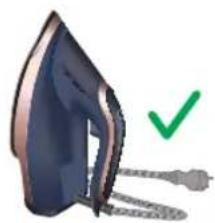
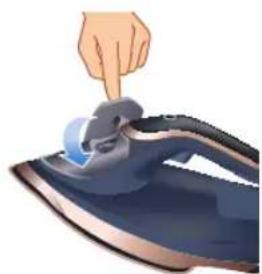
4 Close the water tank lid firmly.
6 English
Preparing for use
Smoke can be visible during the first use, and it is normal. This ceases after a short while.
1 Check the garment label for the required ironing temperature.
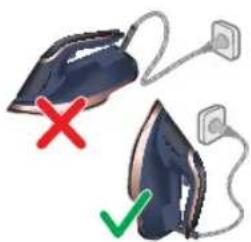
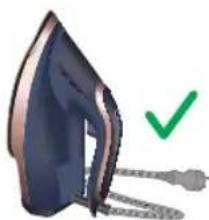
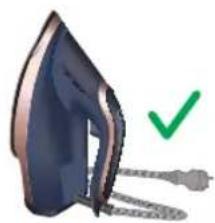
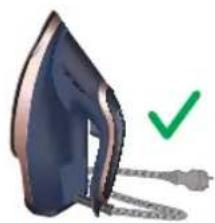
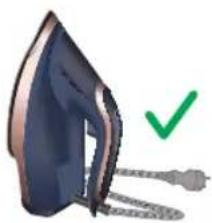
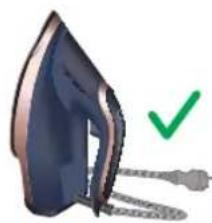
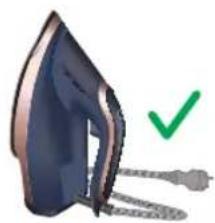
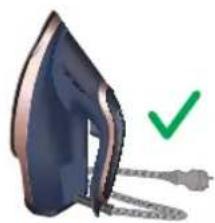
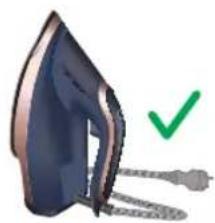
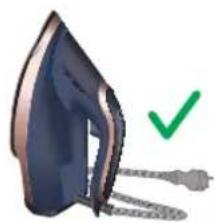
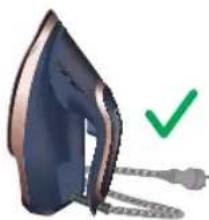
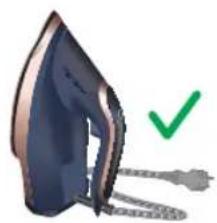
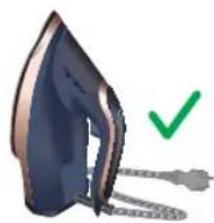
2 Insert the plug into an earthed socket and allow the iron rest on its heel. If using an extension plug, ensure that the power rating of the extension plug is suitable for the iron.
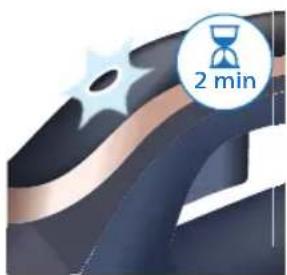
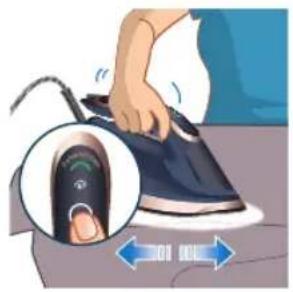
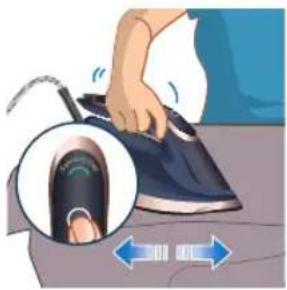
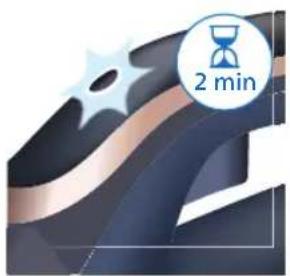
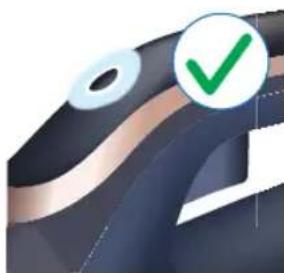
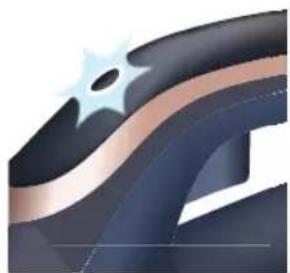
3 Wait for the iron to heat up. The indicator light will breathe/blink slowly while it is heating up.
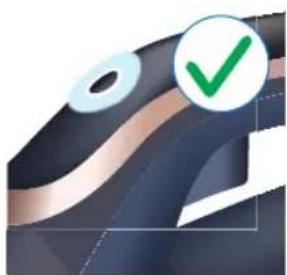
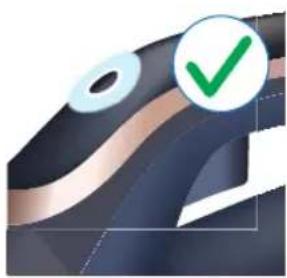
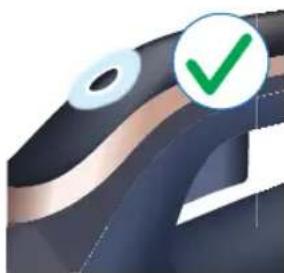
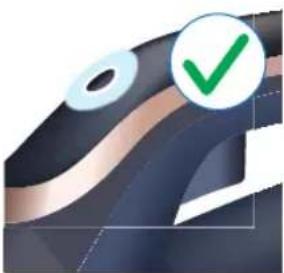
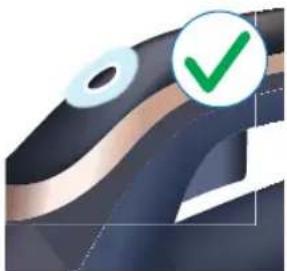
4 Once the iron is ready to be used, the indicator light will remain steadily lit.
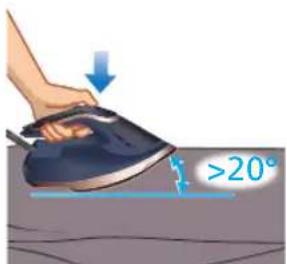
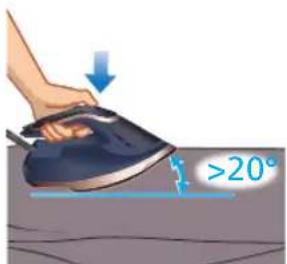
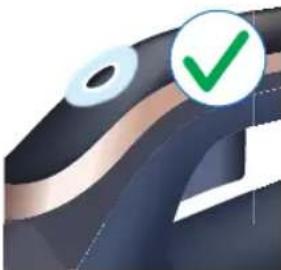
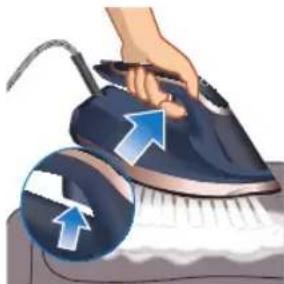
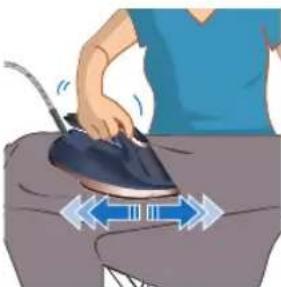
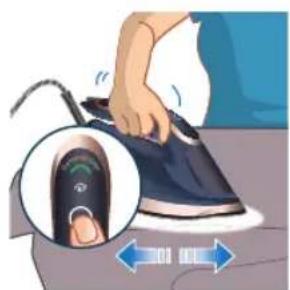
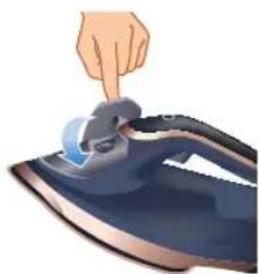
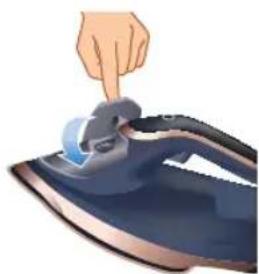
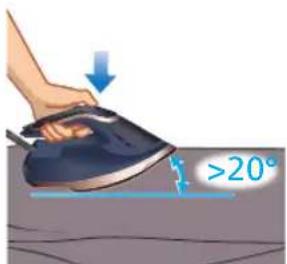
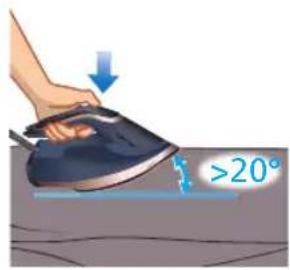
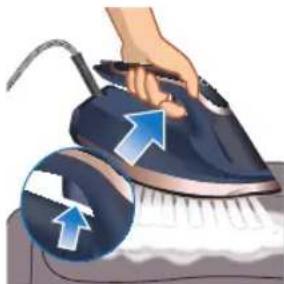
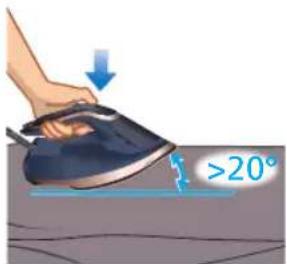
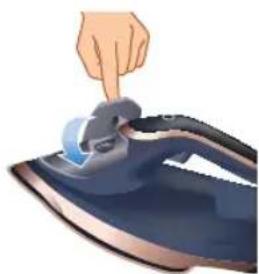
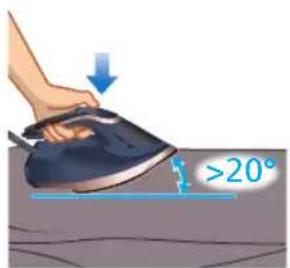
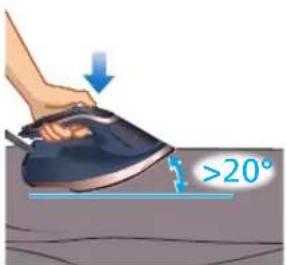
5 To change steam settings, tilt iron up slightly ( >20° ) and press steam selector button on the handle.
Changing steam settings
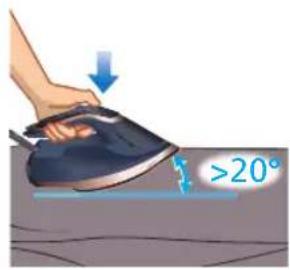
To change steam settings, tilt iron up slightly ( >20° ) and press steam selector button on the handle.
![graph TD A["Top Phone Interface"] --> B["Signal icon"] B --> C["App icon"] C --> D["Bottom Phone Interface"] D --> E["App icon"]](/content/2026/05/754551/images/2625d606c110e9589a55cc8d563b37f5431e8701ed6cef54f007090a9e78cd29.jpg)
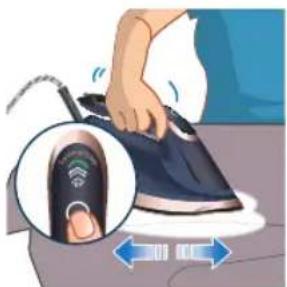
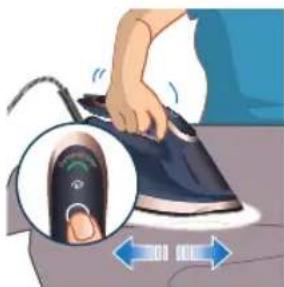
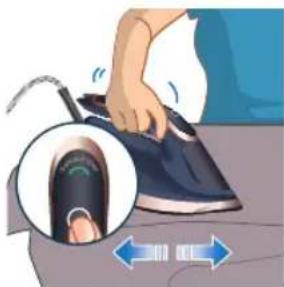
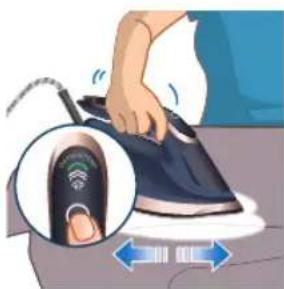
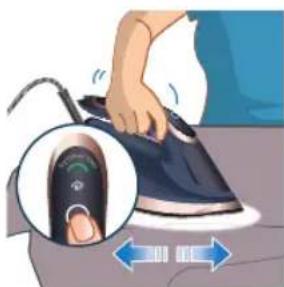
There are 4 steam settings that are activated in this order: AUTO setting, 3-cloud setting 🏠 -cloud and drying ironing setting .
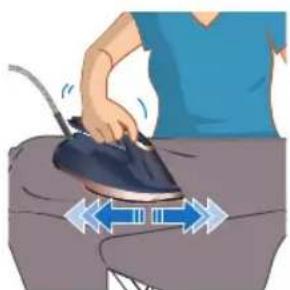
Note: All settings are safe to use on all ironable fabrics. A pumping sound can be heard with vibration on the handle while moving the iron.

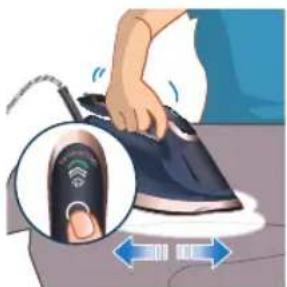
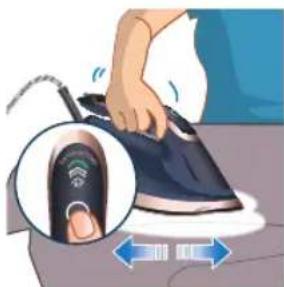
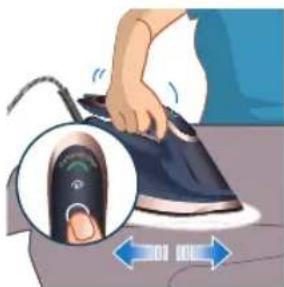
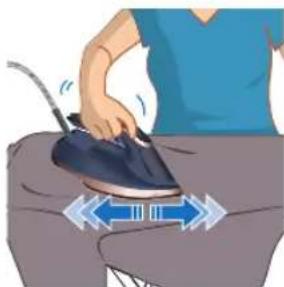
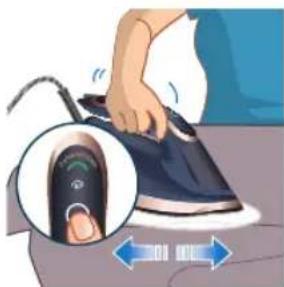
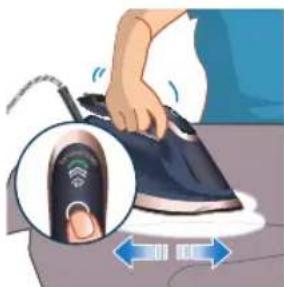
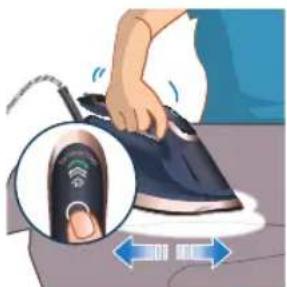
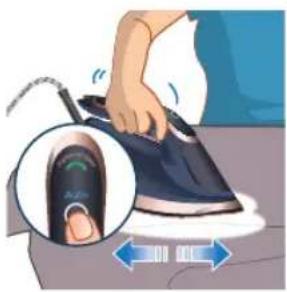
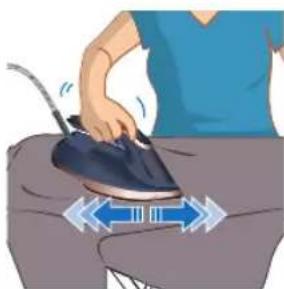
AUTO setting: Steam will be delivered while moving the iron. The steam will stop when the iron is at a stationary position.
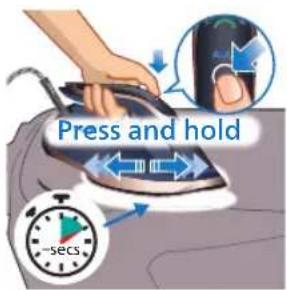
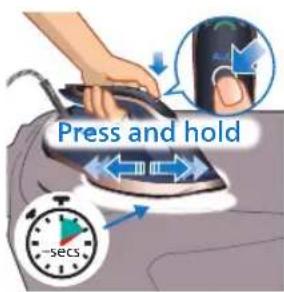
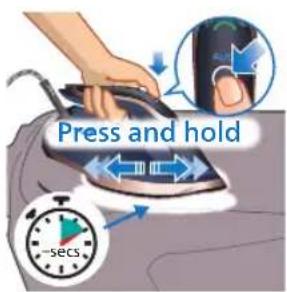
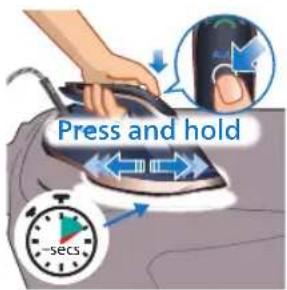
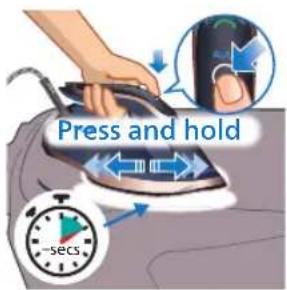
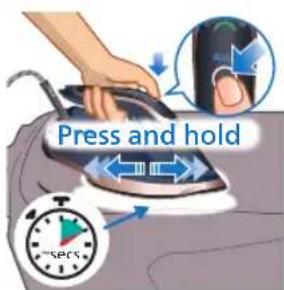
AUTO setting * : While on this setting, press and hold the button and the steam boost trigger to release slightly more steam for a short period of time.
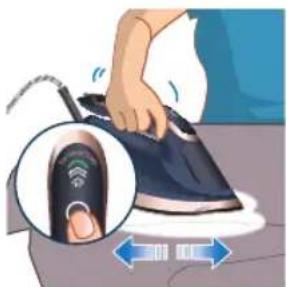
3-cloud setting ⚡Maximum constant steam is delivered continuously for stubborn creases. Steam will still be constantly emitted when the iron is stationary at the horizontal position.
8 English
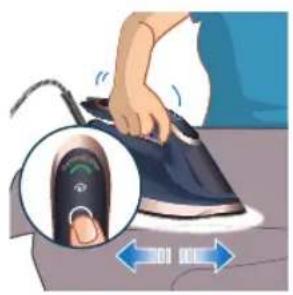
1-cloud setting Minimum constant steam is delivered continuously for garments with less creases. Steam will still be constantly emitted when the iron is stationary at the horizontal position.
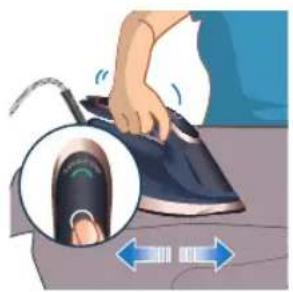
Dry ironing setting ☑ select this setting to iron without steam.
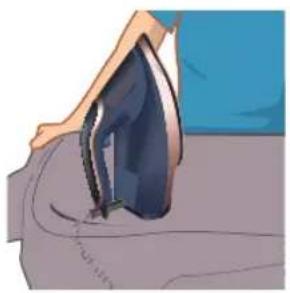
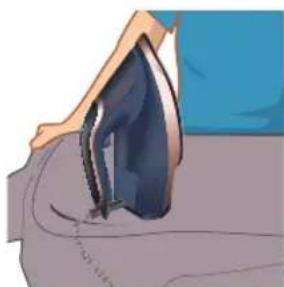
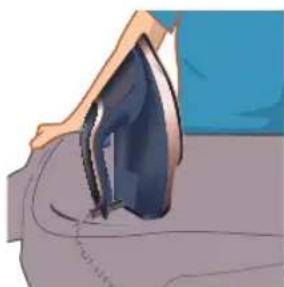
Note: Steam stops when iron is tilted to vertical position.
Horizontal & vertical steam boost
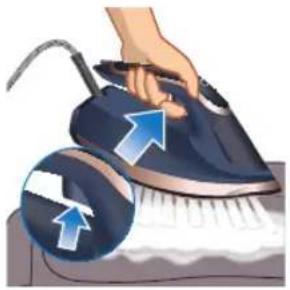
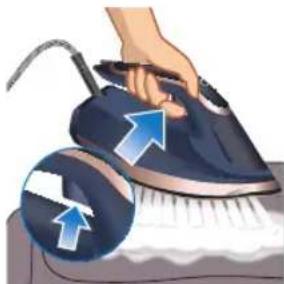
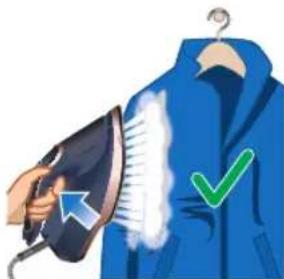
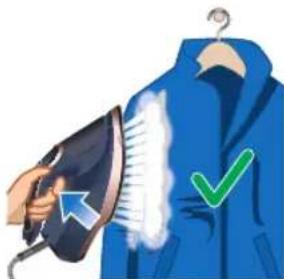
1 Press and release the steam boost trigger for a powerful shot of steam to remove stubborn creases.
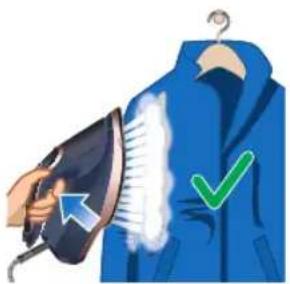
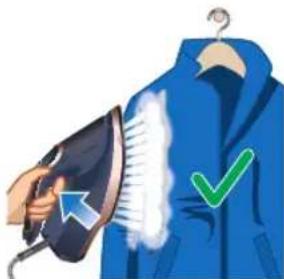
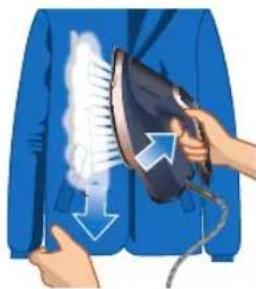
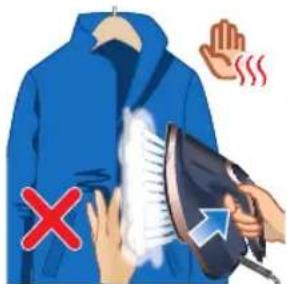
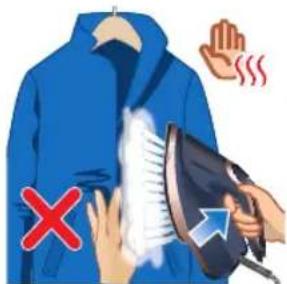
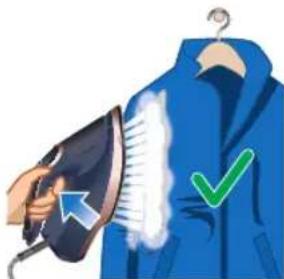
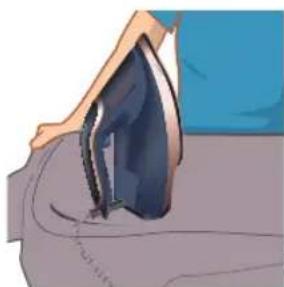
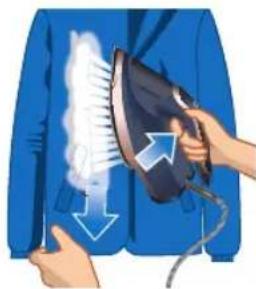
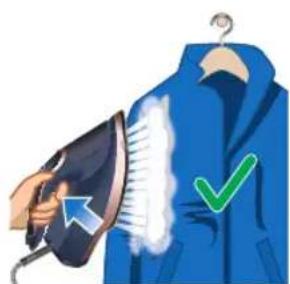
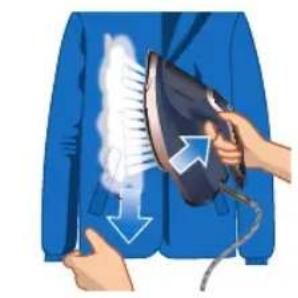
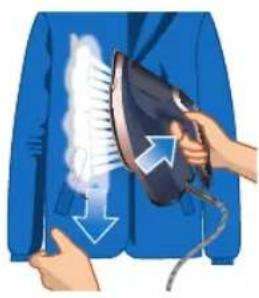
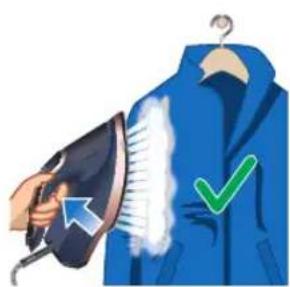
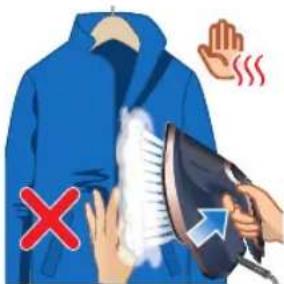
2 Press and release the steam boost trigger in the vertical position to remove creases from hanging garments using the steam boost. Holding down the steam boost trigger in the vertical position will not deliver constant steam.
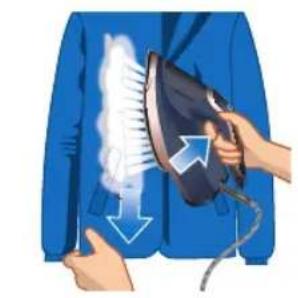
3 Pull and stretch your hanging garment while using the steam boost to remove creases.
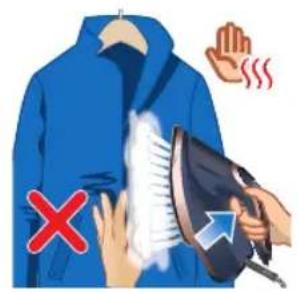
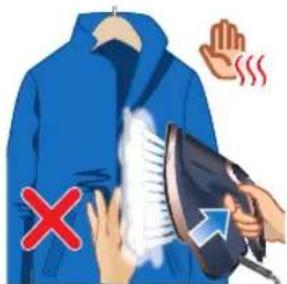
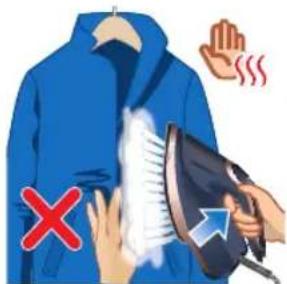
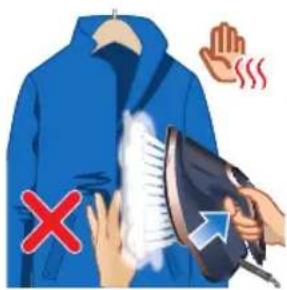
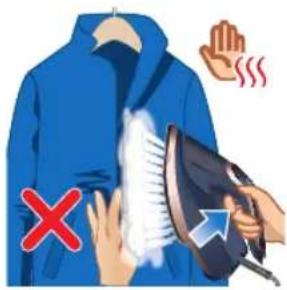
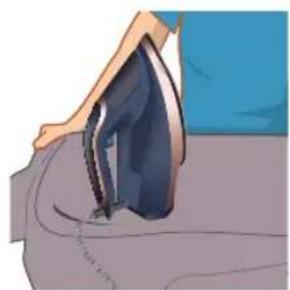
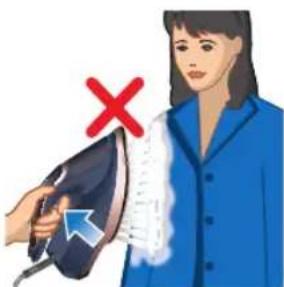
4 Do not use your bare hand as a supporting surface when you iron.
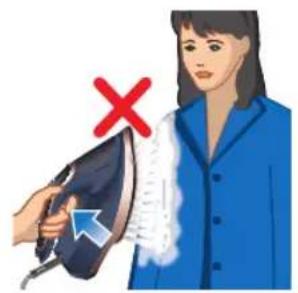
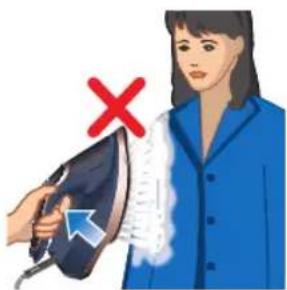
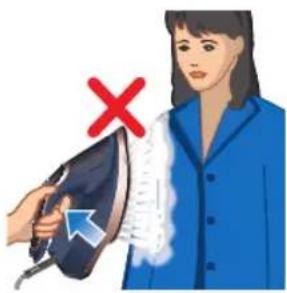
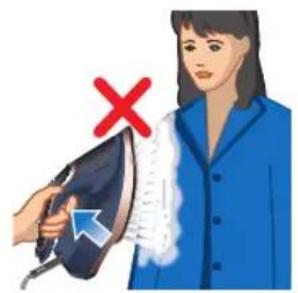
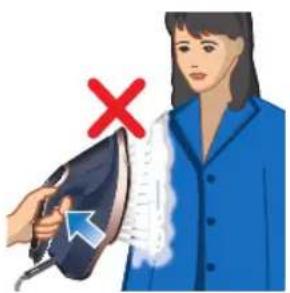
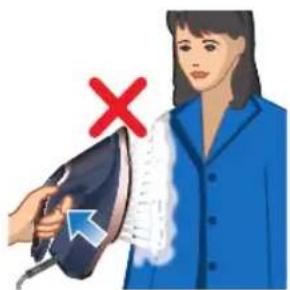
5 Do not position the iron towards yourself or others.
Auto shut off
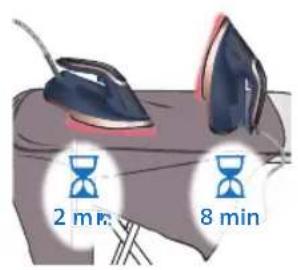
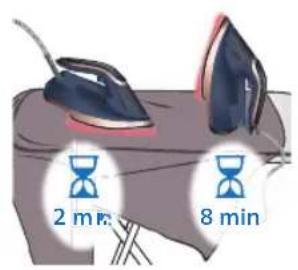
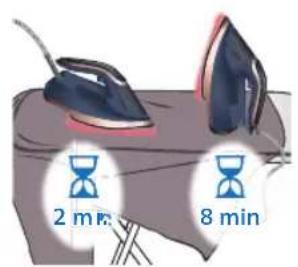
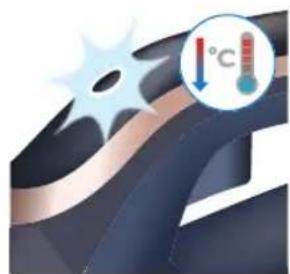
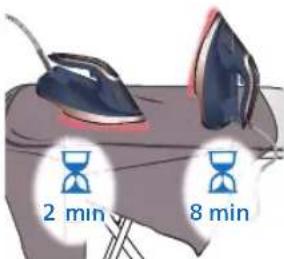
1 To give you a peace of mind, the appliance is able to cool down on its own if it is left unattended for a period of time.
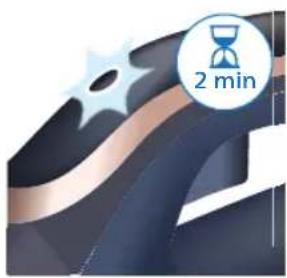
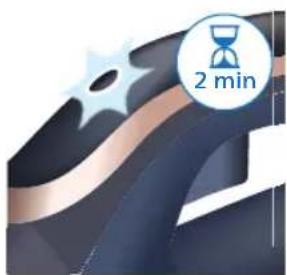
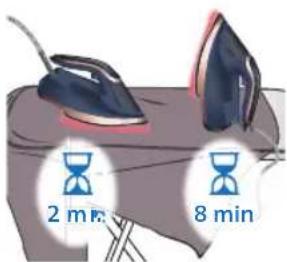
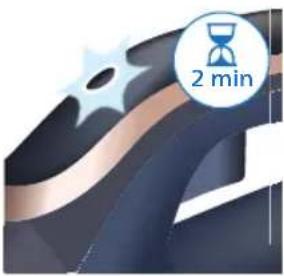
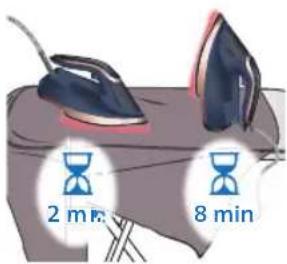
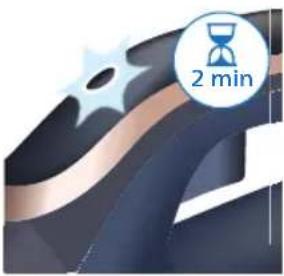
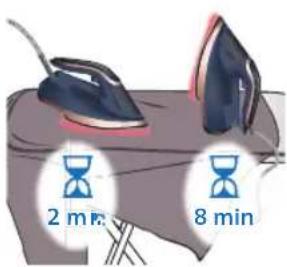
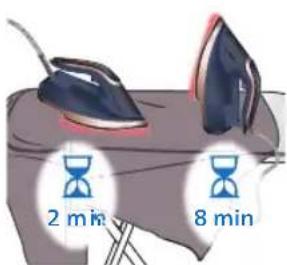
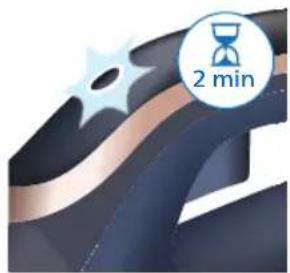
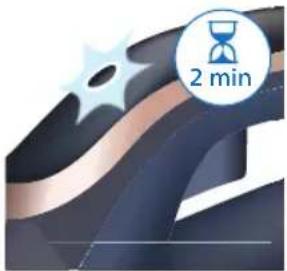
2 When the iron is not in use for more than 2 minutes resting on its soleplate or 8 minutes resting on its heel/ base, the iron will enter auto shut off mode.
10
English
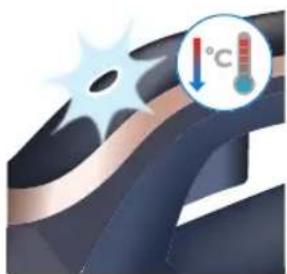
3 The auto shut off mode will be indicated by a rapid blinking of the indicator light, and the iron will start to cool down.
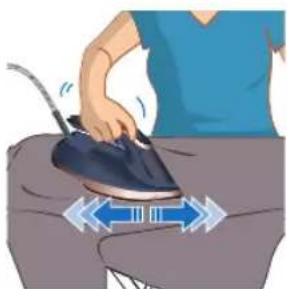
4 Picking up or moving the iron will reactivate it.

5 The indicator light will start to breathe/blink slowly, indicating that the iron is heating up again.
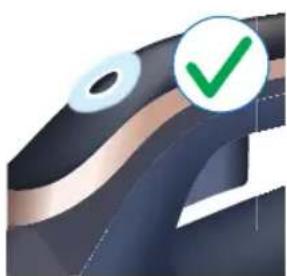
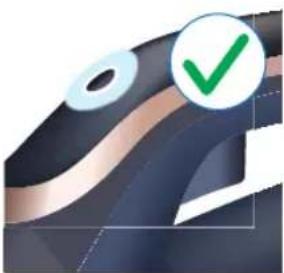
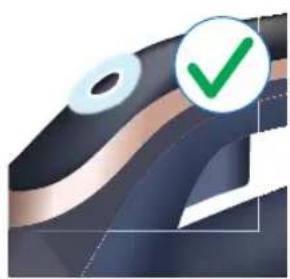
6 Once the indicator light remains steadily lit, the iron is ready for use.
Cleaning and maintenance
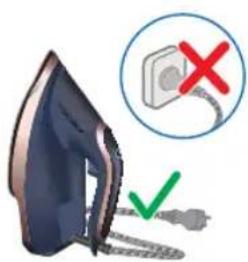
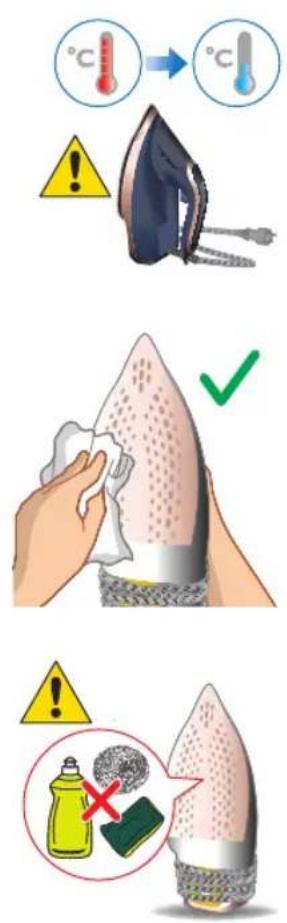
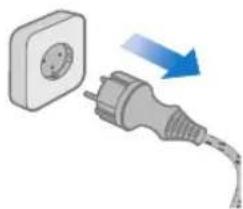
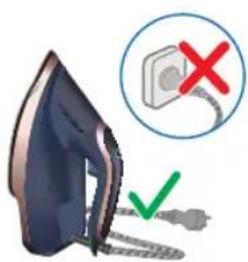
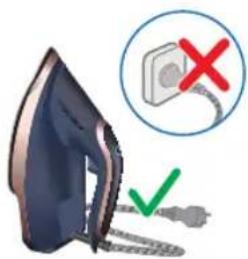
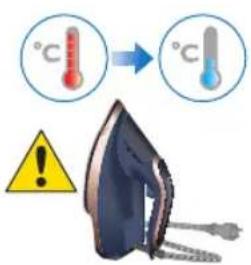
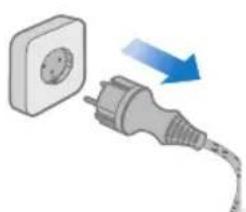
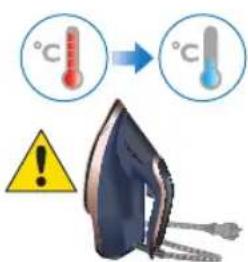
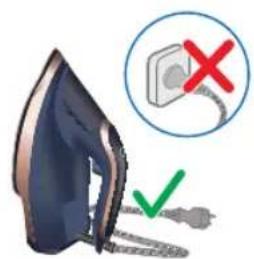
1 Ensure the iron is not plugged in.
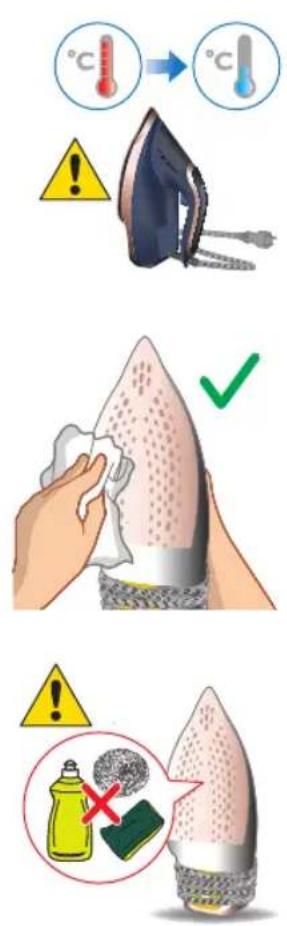
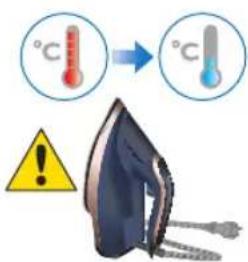
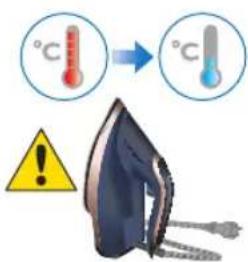
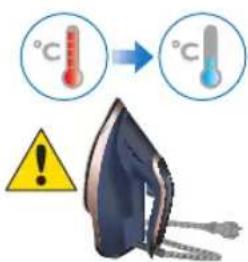
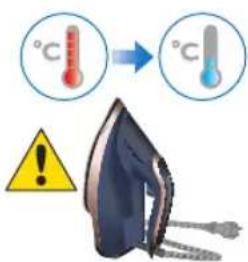
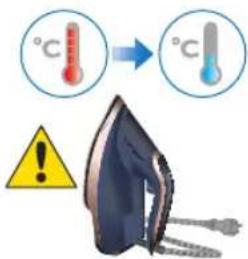
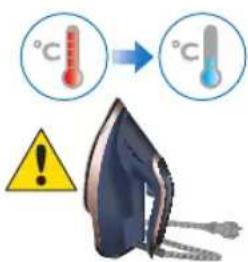
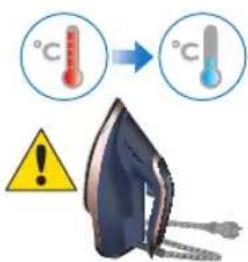
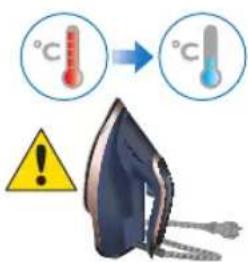
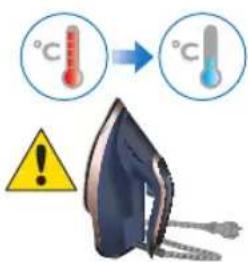
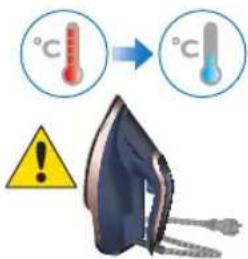
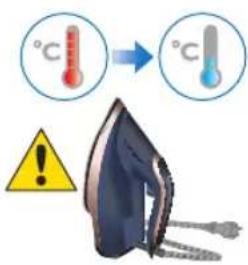
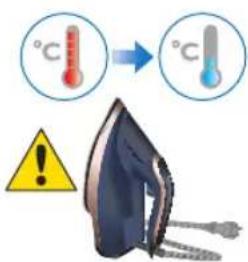
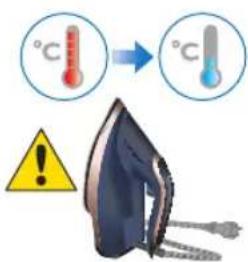
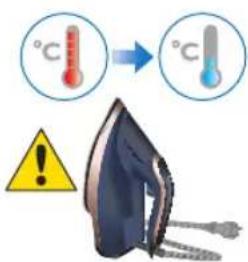
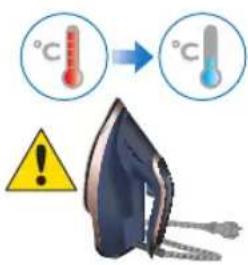
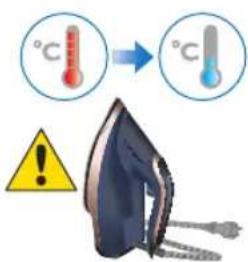
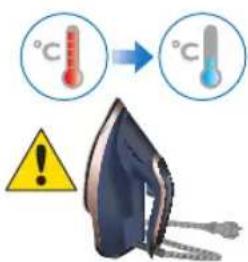
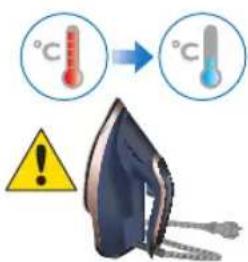
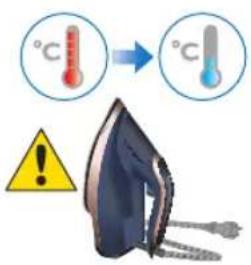
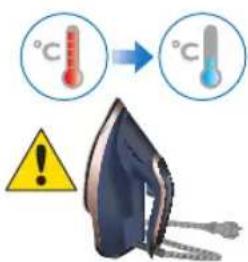
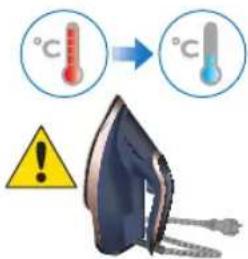
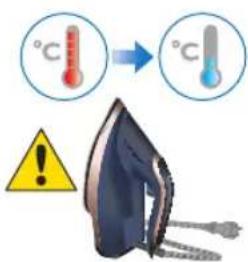
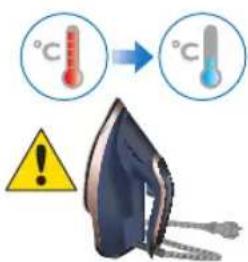
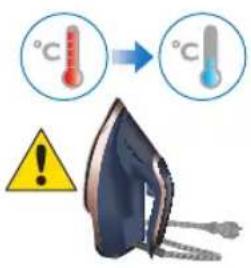
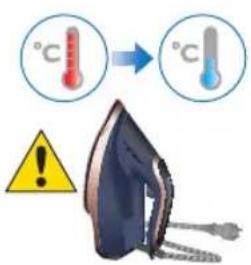
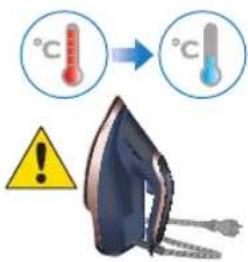
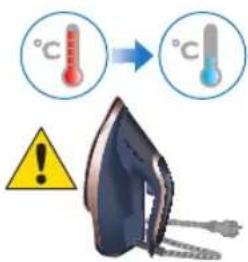
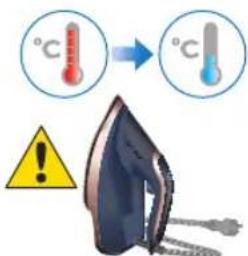
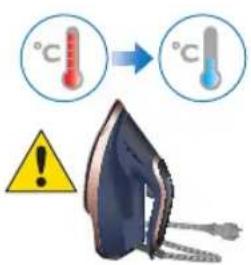
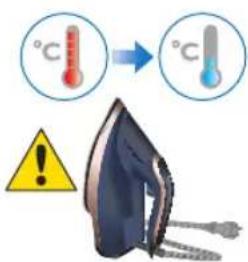
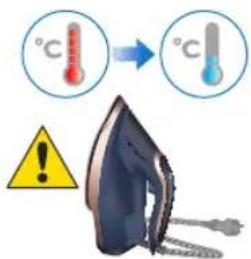
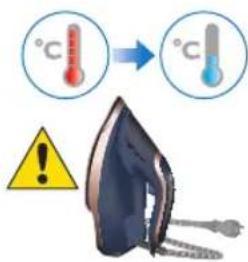
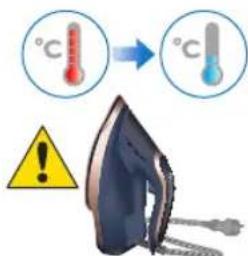
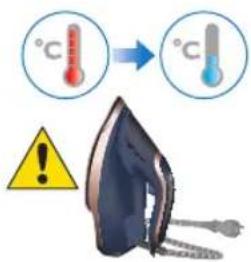
2 Ensure the iron is cooled down.
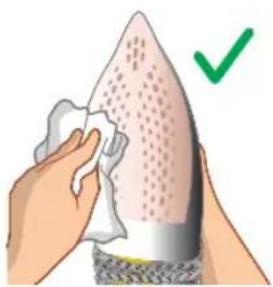
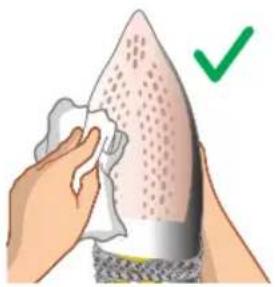
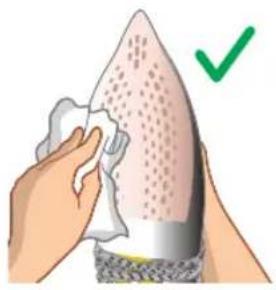
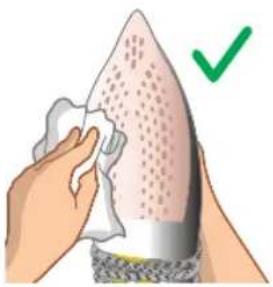
3 Wipe the soleplate with a damp cloth.
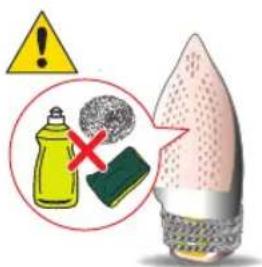
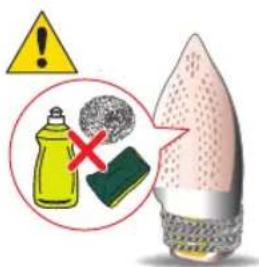
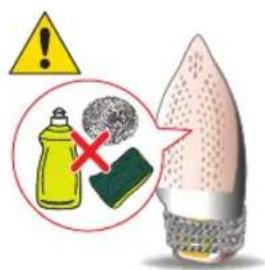
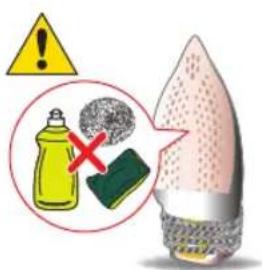
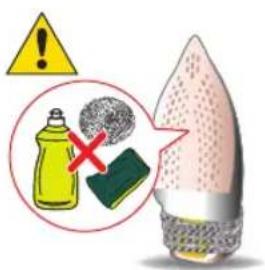
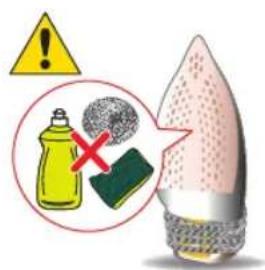
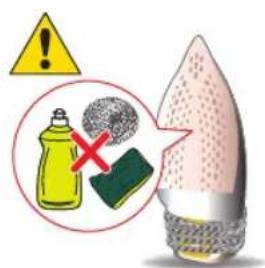
Note: To keep the soleplate smooth, avoid hard contact with metal objects. Never use a scouring pad, vinegar or other chemicals to clean the soleplate.
Calc_Clean
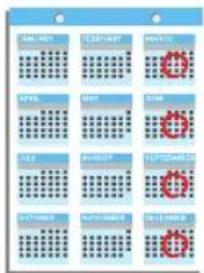
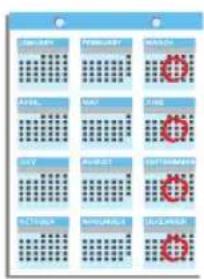
Tip: The Quick Calc Release function can be used at any time when the iron is cold. If you live in a hard water area, use the function more frequently.
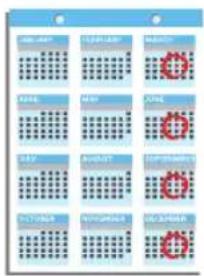
1 It is recommended to descale your iron after every 1 to 3 months of use to prolong its lifetime, or when brown stains/water is observed.
IMPORTANT: The Quick Calc Release automatically collects loose scale particles during ironing.
12 English
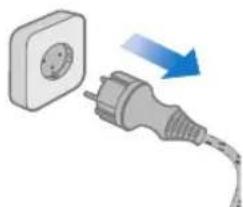
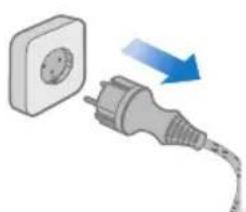
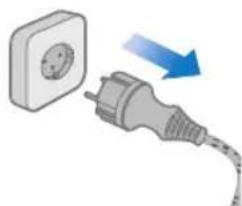
2 Ensure the iron is not plugged in.
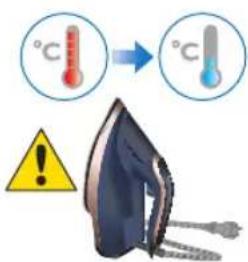
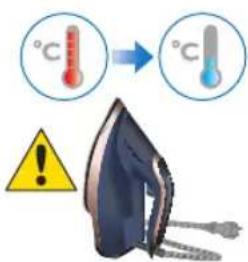
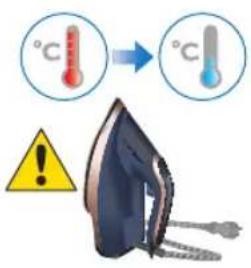
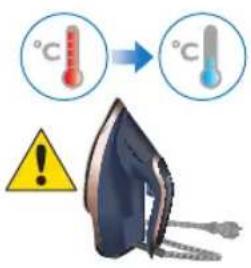
3 Ensure the iron is cooled down.
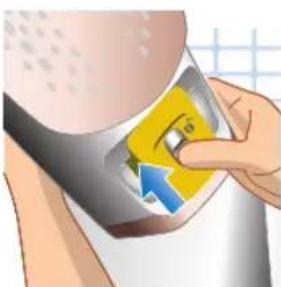
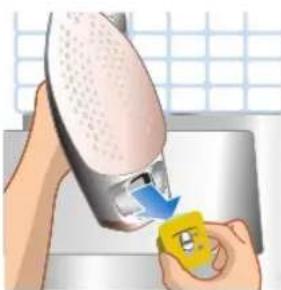
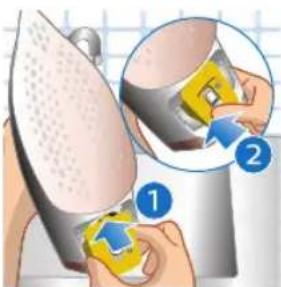
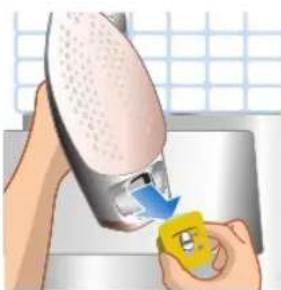
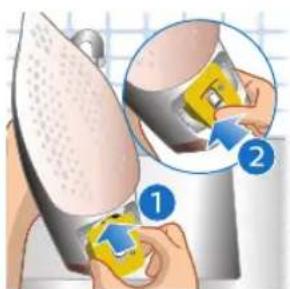
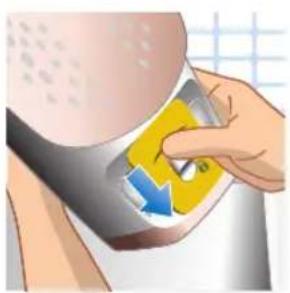
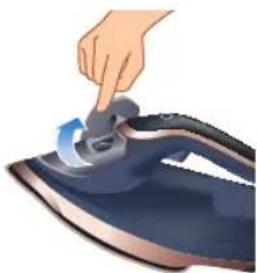
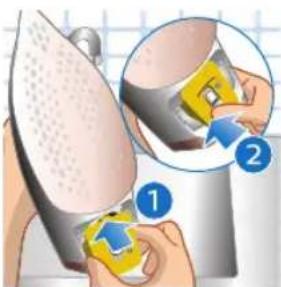
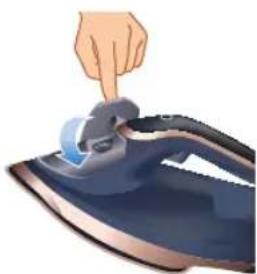
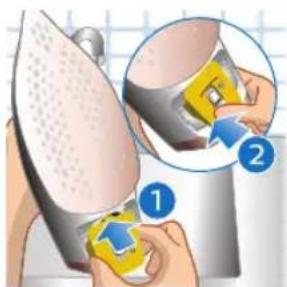
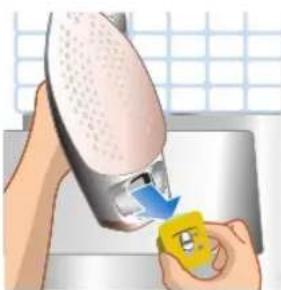
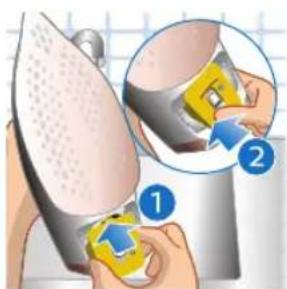
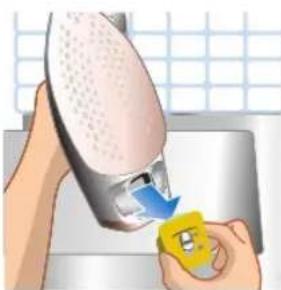
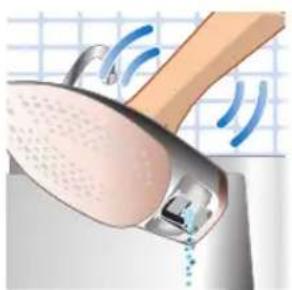
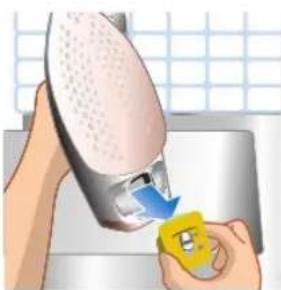
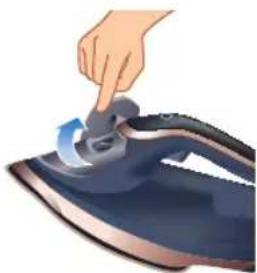
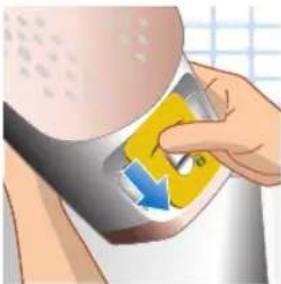
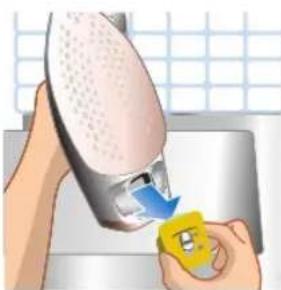
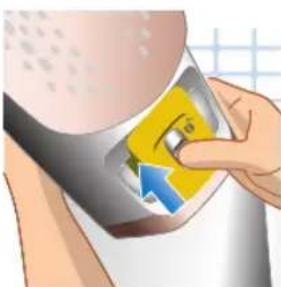
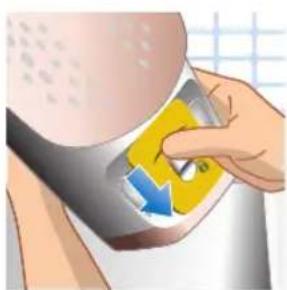
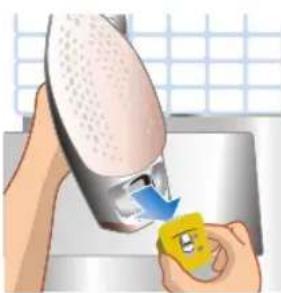
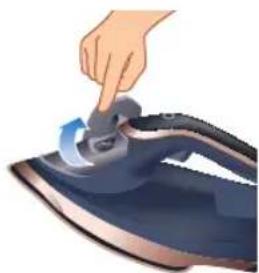
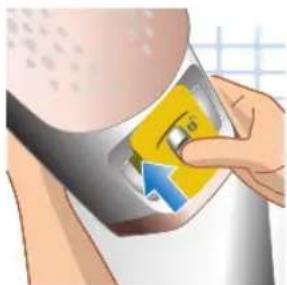
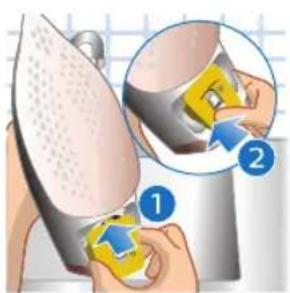
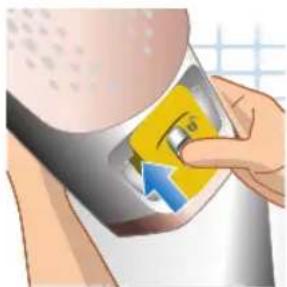
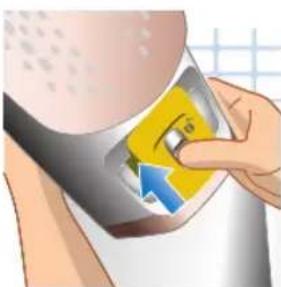
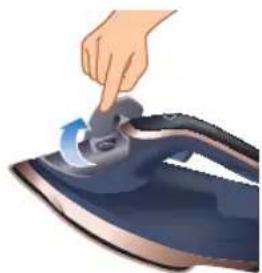
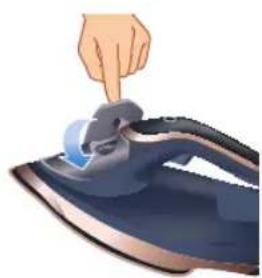
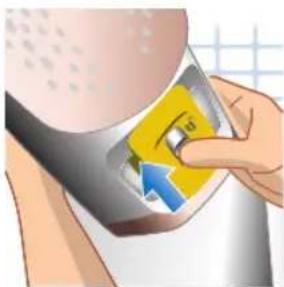
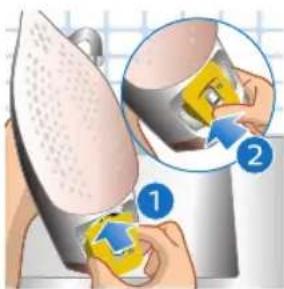
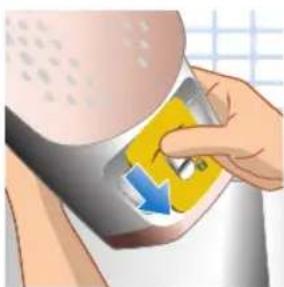
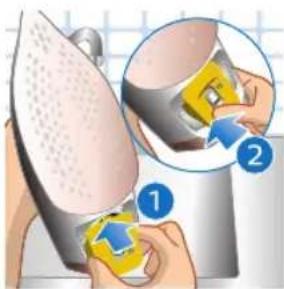
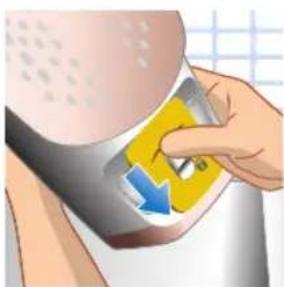
4 Slide up the Quick Calc Release collector lever.
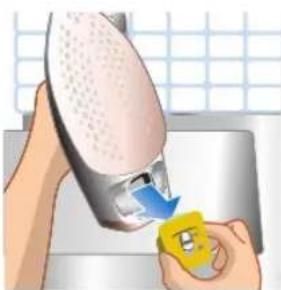
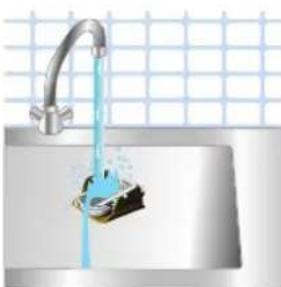
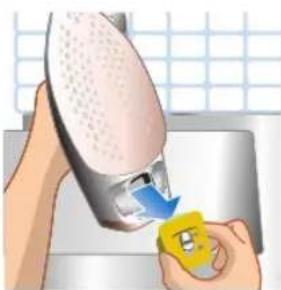
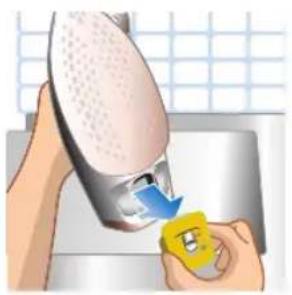
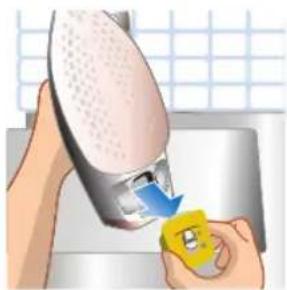
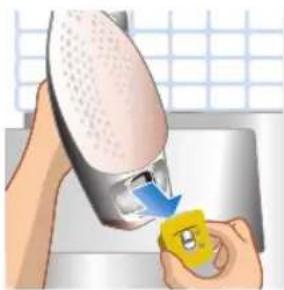
5 Pull out the Quick Calc Release collector lid.
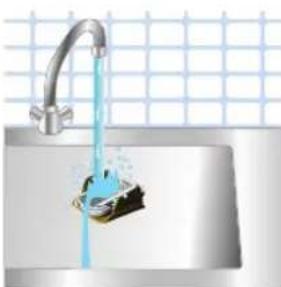
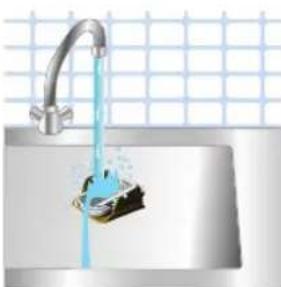
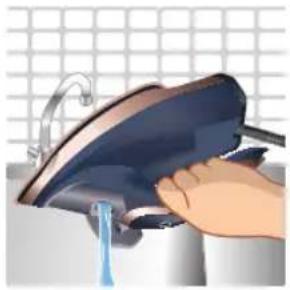
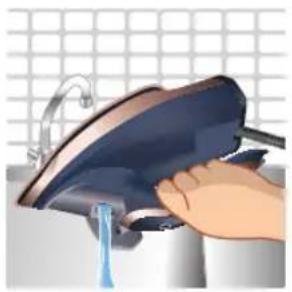
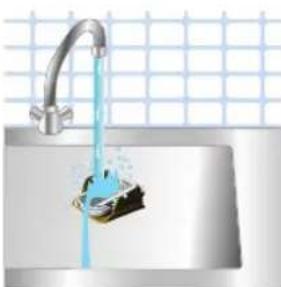
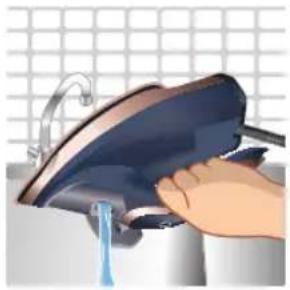
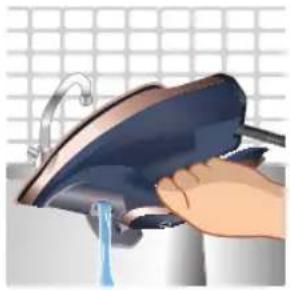
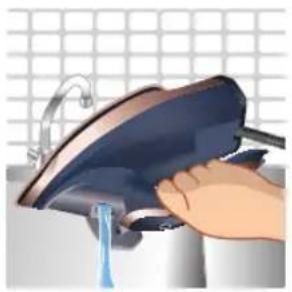
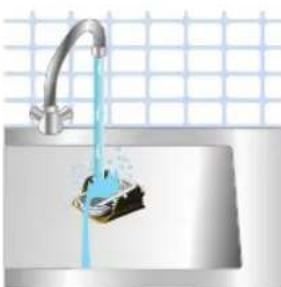
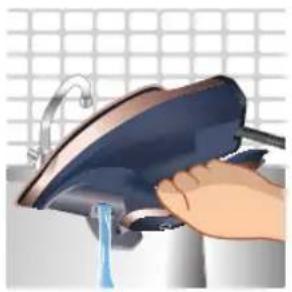
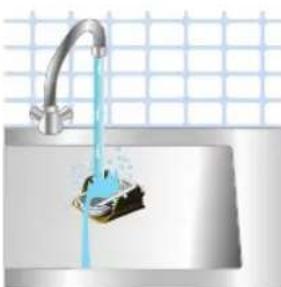
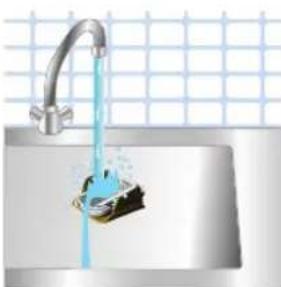
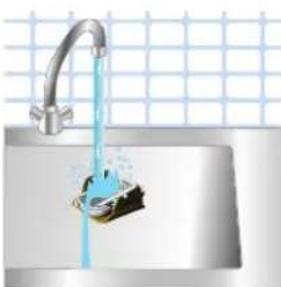
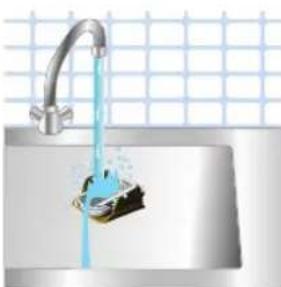
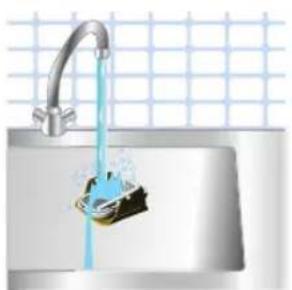
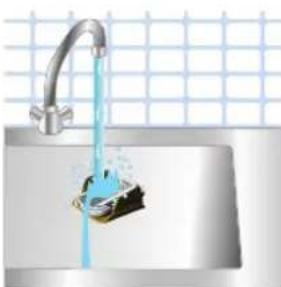
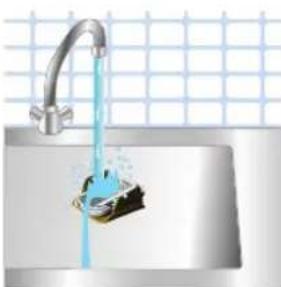
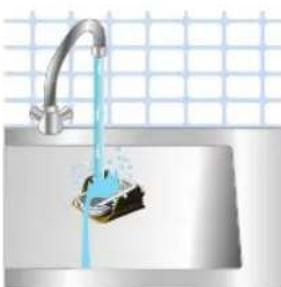
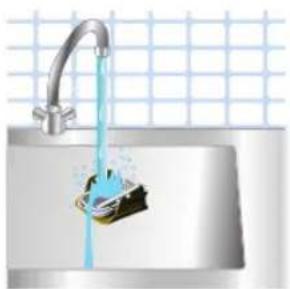
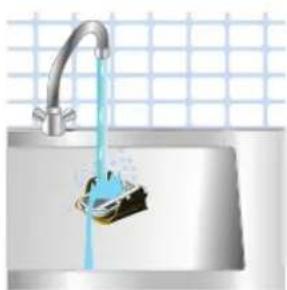
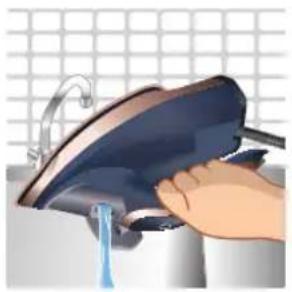
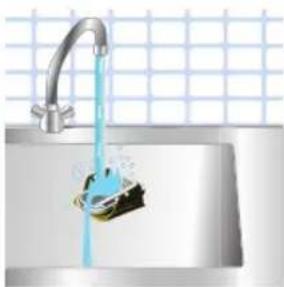
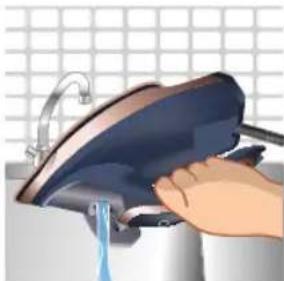
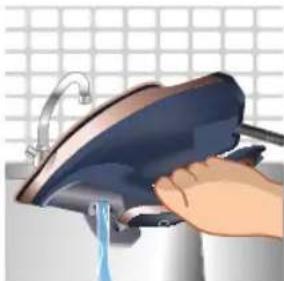
6 Clean the Quick Calc Release collector lid with water.
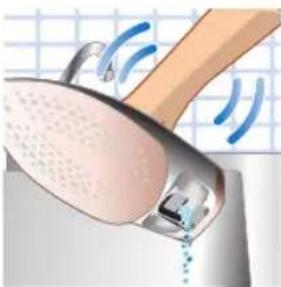
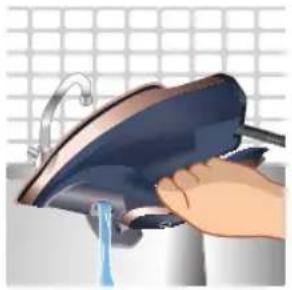
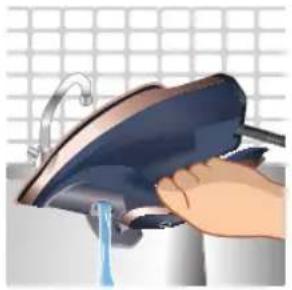
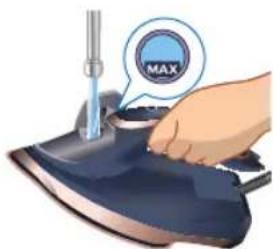
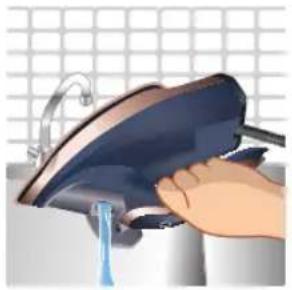
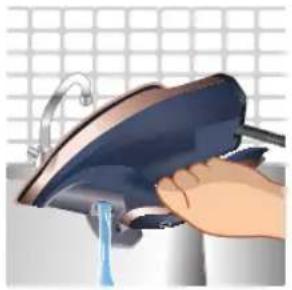
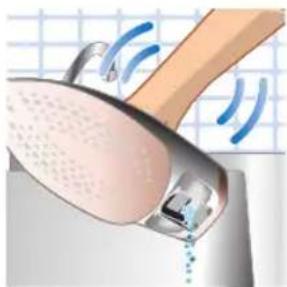
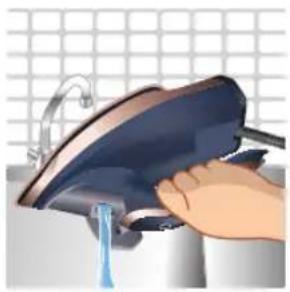
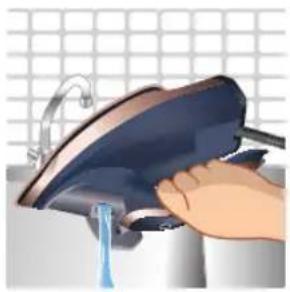
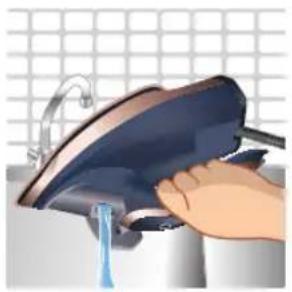
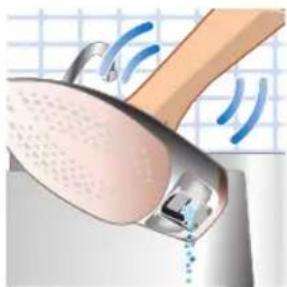
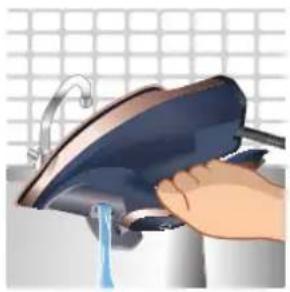
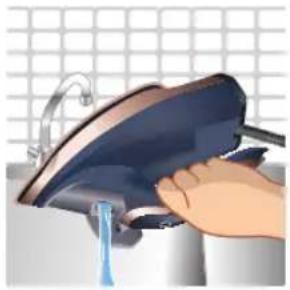
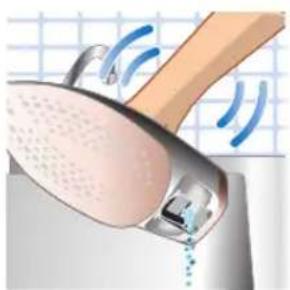
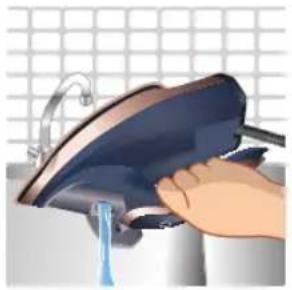
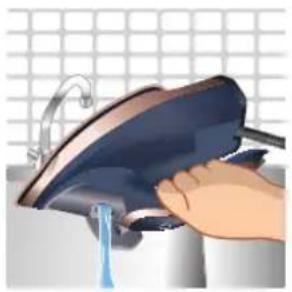
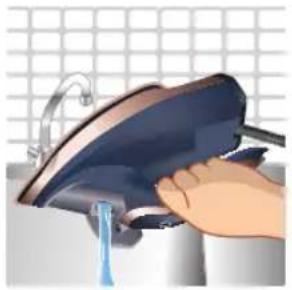
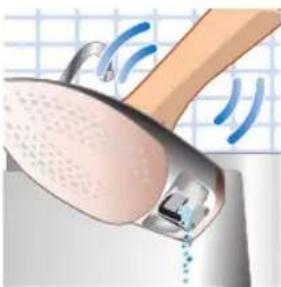
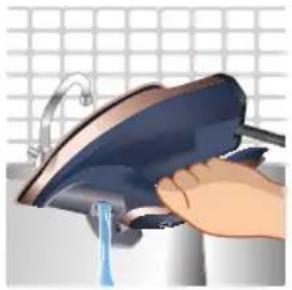
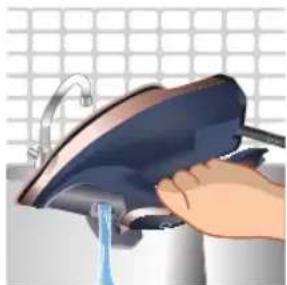
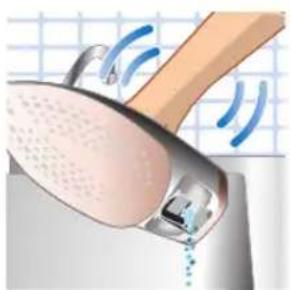
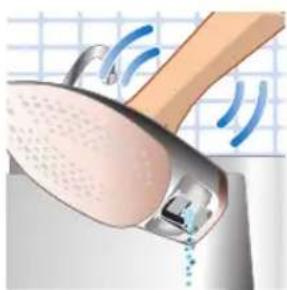
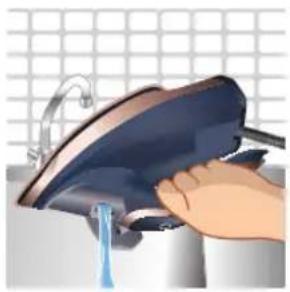
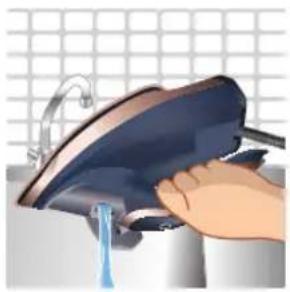
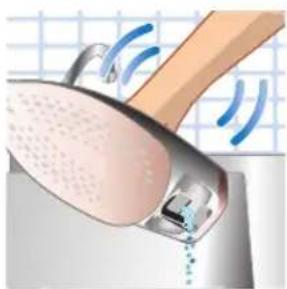
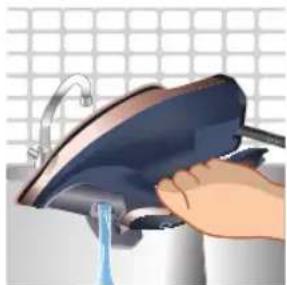
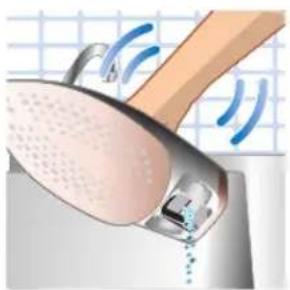
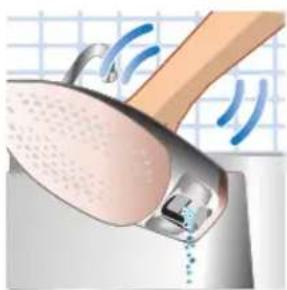
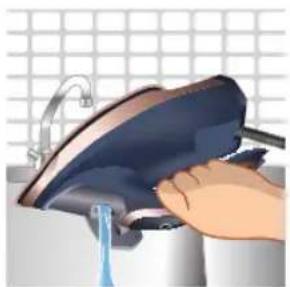
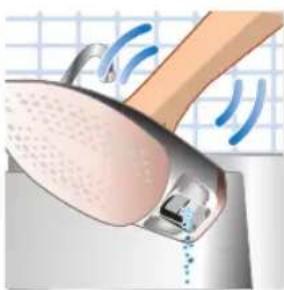
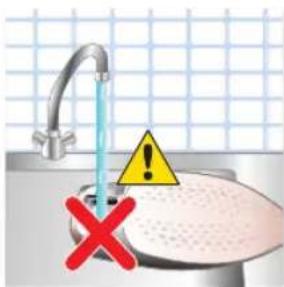
7 Shake the iron to drain the water and scale particles from the opening of the iron.
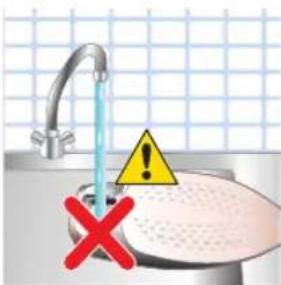
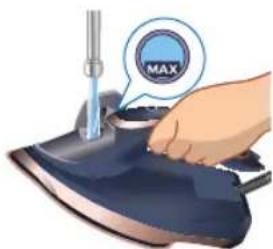
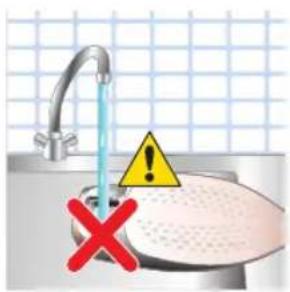
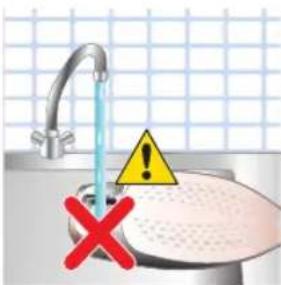
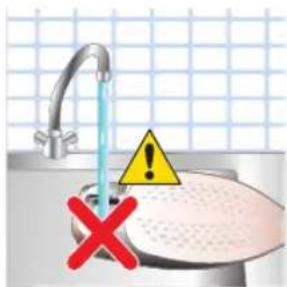
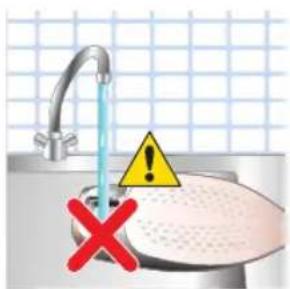
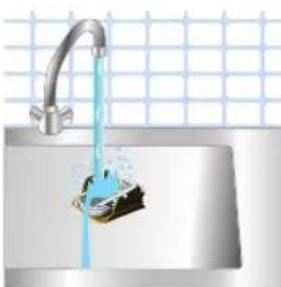
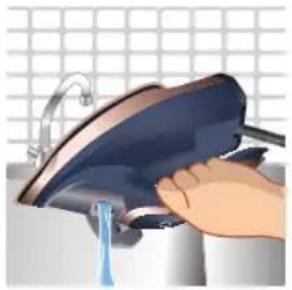
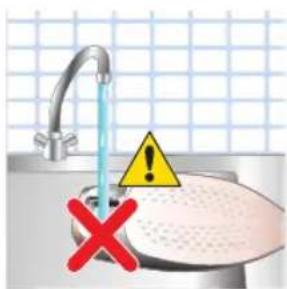
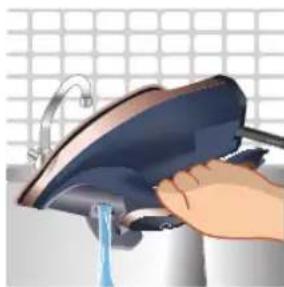
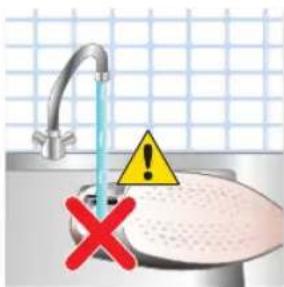
8 Do not run water into the opening of the iron.
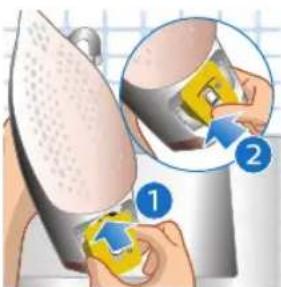
9 Shake the iron to drain the water and scale particles from the opening of the iron.
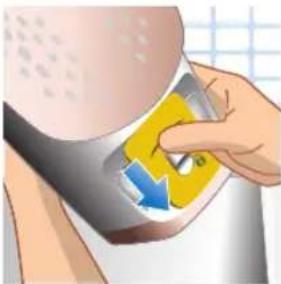
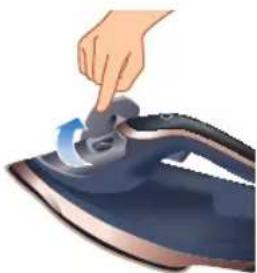
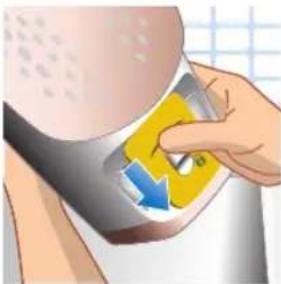
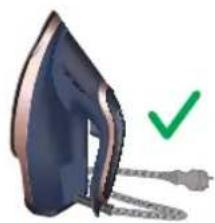
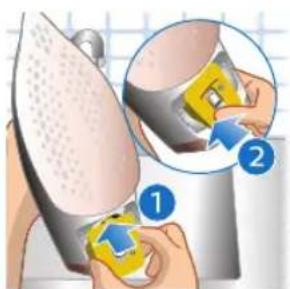
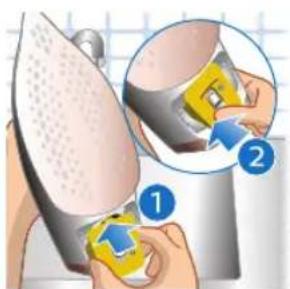
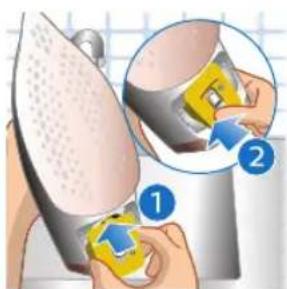
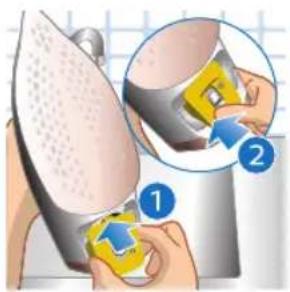
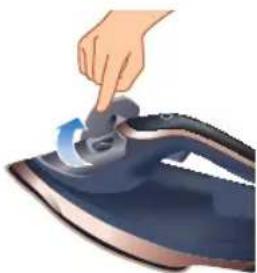
10 Push down the lever to lock the Quick Calc Release collector. You will hear a 'click' sound.
Storage
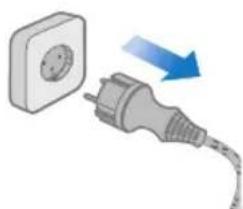
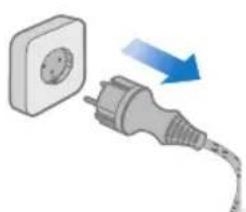
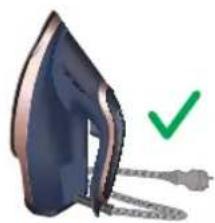
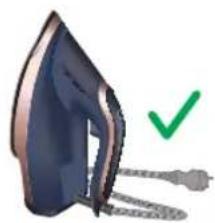
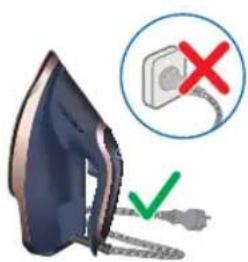
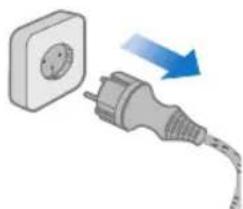
1 Unplug the iron.
14
English
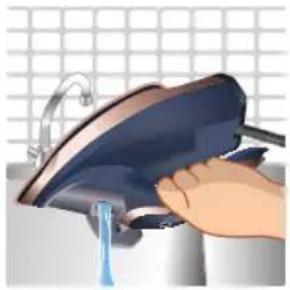
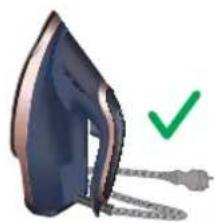
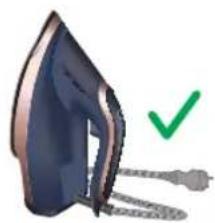
2 Pour any remaining water out of the water tank.
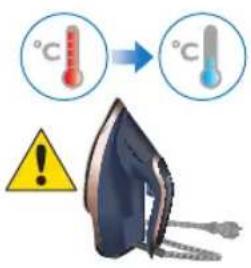
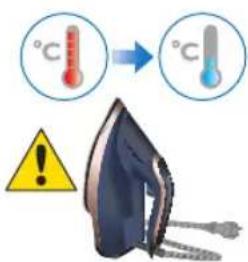
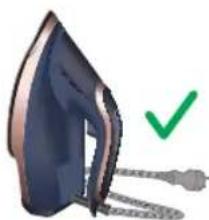
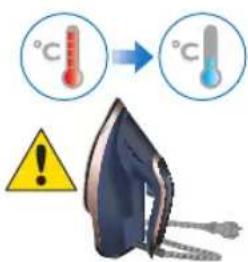
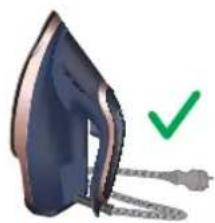
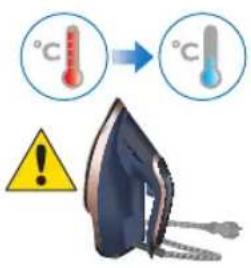
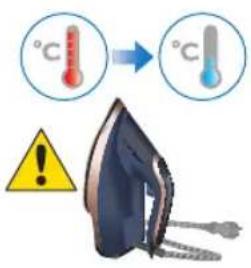
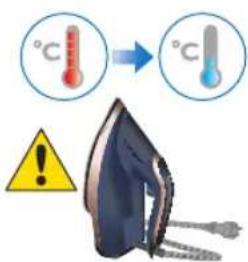
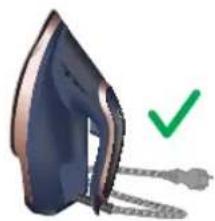
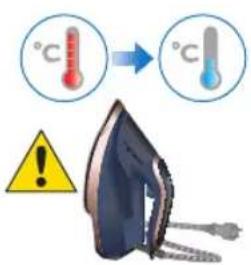
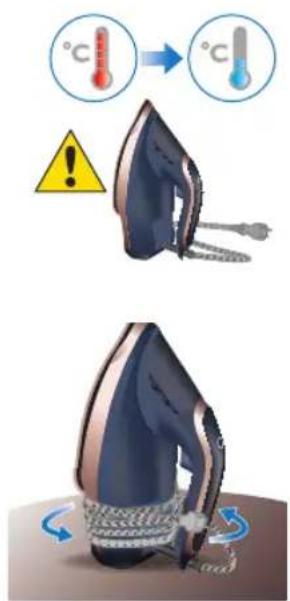
3 Let the iron cool down.
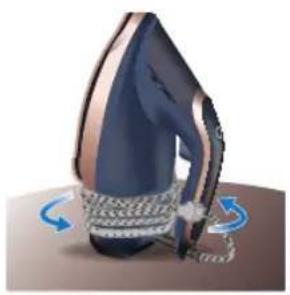
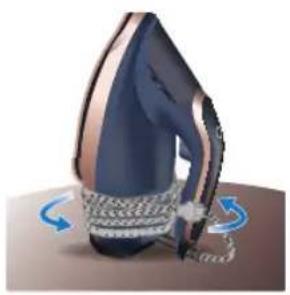
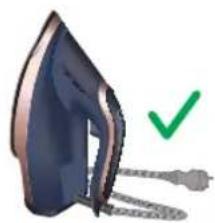
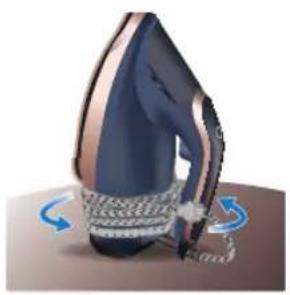
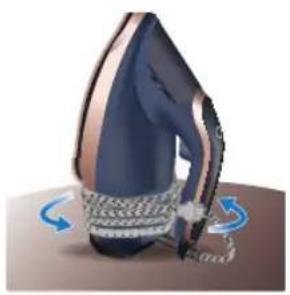
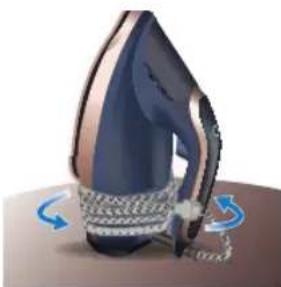
4 Coil the power cord neatly before storing it.
Trouble shooting
This chapter summarizes the most common problems you could encounter with the appliance. If you are unable to solve the problem with the information below, visit www.philips.com/support for a list of frequently asked questions or contact the Consumer Care Center in your country.
Problem Possible cause Solution
| My Philips Steam Iron produces smoke when heating up. | First usage During production, some parts of the iron have been slightly greased. As a result of this, your iron may produce some smoke when it is switched on for the first few times, this is normal and should dissipate shortly. | |
| There is water in the soleplate.My iron is still producing smoke even after checking the above. | Sometimes, there might still be some remaining water in your iron's soleplate after the last usage. This water will evaporate when your iron's soleplate heats up, and the steam generated may look like smoke. This is normal and should dissipate shortly.There could be an issue with the iron, we recommend you to contact us. | |
| My Philips Steam Iron does not remove creases. | Steam is not used. Set the steam setting to AUTO setting, 1-cloud setting 📄3-cloud setting . 🏠You can get more steam by changing to a stronger steam setting, or using the steam boost function to help remove tough wrinkles. Press the steam boost trigger or button to increase the steam rate. Note that repeated usage of the steam boost in a short period of time may cause spitting or a reduction in the amount of steam produced. If this happens, wait for a short while before using the steam boost function again. | |
| My Philips Steam Iron does not produce steam. | There is no water/not enough water in the tank. | If there is no water in the water tank of your Philips Steam Iron, your iron is not able to generate steam. Please refill the water tank with water. After this, your iron should produce steam again. |
| The steam slider is set to no steam mode/dry ironing mode 🏠 | Set the steam setting to AUTO setting, 1-cloud setting 📄3-cloud setting . 🏠 | |
| The iron is not ready to steam. | Your iron is ready to produce steam when the indicator light remains steadily lit. | |
| The steam boost in my Philips Steam Iron is not working | The steam boost trigger has not been pressed and released. | To activate the steam boost in your Philips Steam Iron, press the steam boost button/trigger. |
| The steam boost function was used too often within a short period of time. | When you use the steam boost function of your Philips Steam Iron too often within a short period, the steam boost function will stop working for a while.In this case, please wait a couple of minutes until you use the steam boost again. | |
| The iron is not ready to steam. | The indicator light will remain steadily lit when the iron is ready. The indicator light will breathe/blink slowly when it is not ready. | |
| There are water droplets/leaking on my garment during ironing. | First time usage. If you experience leaking/spitting during your first usage, perform the Calc Clean function once. If this does not resolve the leaking on your next use, we recommend you to contact us. | |
| The steam boost function was used too often within a short period of time. | Continue ironing in horizontal position and wait a while before you use the steam boost function again. | |
English
| There is a build up of scale/calcification in the iron. | If there is brown water or white flakes coming out of the iron, this may indicate a build up of calcification in the iron. Perform the Calc Clean function to clear this. If you live in an area with hard water, we recommend to use distilled water (or 50% distilled and 50% tap water) and perform the calc clean function once a month to prolong the lifetime of the iron.Note: the presence of white flakes on the very first use of the iron is normal. | |
| You have added other chemicals or additives into the water tank. | Fragrances/oils/chemicals/additives/descaling solutions should not be added into the water tank as they are damaging to the device. Please rinse the water tank, fill it up with water and descale your iron. | |
| You have not closed the water tank lid properly. | Close the lid firmly after filling. | |
| Steam has condensed onto the ironing board. | Steam may condense on the board cover, particularly when using irons that produce powerful levels of steam for a prolonged period of time. This can look like your iron is leaking from the soleplate. To prevent this, you can do the following:1 Select a lower steam setting than the setting you have been using or use steam during the first ironing strokes and then finish up with the dry-ironing strokes.2 You can also put an extra layer of cloth between the ironing board and the ironing board cover to minimize condensation.3 Replace the ironing board cover if the sponge material has worn out. | |
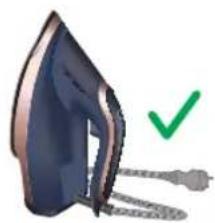
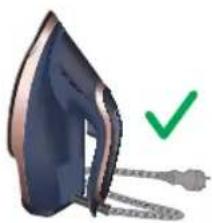
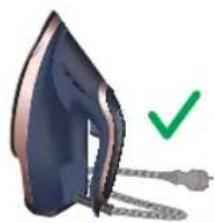
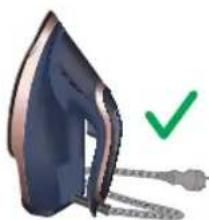
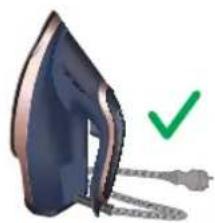
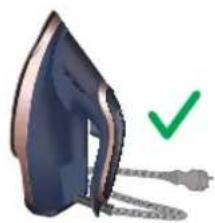
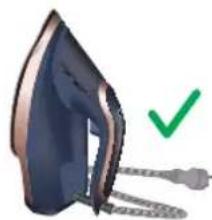
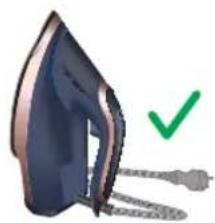
| The iron leaks after ironing. | Set the steam selector to no steam mode/dry ironing mode before unplugging. Empty the water tank and place the iron in the vertical position when cooling down/for storage. | |
| The iron leaves a shine or an imprint on the garment. | The surface to be ironed was uneven. | The iron is safe to use on all ironable garments. The shine or imprint is not permanent and disappears when you wash the garment. Avoid ironing over seams or folds. You can also place a cotton cloth over the area to be ironed to avoid imprints. |
| The indicator light on the iron is blinking/breathing. | The iron is heating up. The indicator light will breathe/blink slowly when the iron is heating up. It will turn steady to indicate that the iron is ready for use. | |
| Auto shut-off has been activated. | The indicator light will start to blink quickly when the iron remains stationary for for 2 minutes in horizontal position and 8 minutes in vertical positions. This indicates that the iron has entered the Auto shut-off (ASO) state.While in ASO state, the iron will stop heating up and start to cool down. When the iron is moved, the indicator light will start to breathe/blink slowly, indicating that it is heating up again. Once the indicator light stops blinking and remains steadily lit, the soleplate is heated, and the iron is ready to be used. | |
| The iron has stopped heating up. | There is a power connection problem. | Please check the mains cord, the plug and the wall socket. Ensure that everything is properly connected. If you are using an extension plug, please ensure that power rating is suitable for the iron. |
| Auto shut-off has been activated. | The indicator light will start to blink quickly when the iron remains stationary for for 2 minutes in horizontal position and 8 minutes in vertical positions. This indicates that the iron has entered the Auto shut-off (ASO) state.While in ASO state, the iron will stop heating up and start to cool down. When the iron is moved, the indicator light will start to breathe/blink slowly, indicating that it is heating up again. Once this indicator light stops blinking and remains steadily lit, the soleplate is heated, and the iron is ready to be used. | |
| The iron does not switch on anymore (I have tried the above but my iron still does not heat up). | If this is the case, there might be a problem with your iron. We recommend you to contact us. | |
| I hear a pumping sound or feel a slight vibration from my iron. | It is normal for Philips Steam Iron models DST8030, DST8040, and DST8050 to produce some sound and vibration during use. These models use a pump system to draw water from the tank, which can create a noticeable noise. The sound and vibration may become more pronounced when the water tank is nearly empty. This is expected behavior and not a cause for concern.If you still suspect that your iron is not working properly, please contact us for further assistance. | |
Giriş
34 Bahasa Indonesia
1 Tutup tangki air
2 Tombol pemilih uap
3 Lampu indikator
4 Pemicu semburan uap
5 Tempat menggulung kabel
6 Tapak setrika
7 Penampung Quick Calc Release
Menggunakan alat
1 Jangan colokkan steker setrika ke stopkontak.
5 Jangan arahkan setrika menghadap Anda atau orang lain.
Mati otomatis
4 Geser tuas penampung Quick Calc Release ke atas.
5 Tarik tutup penampung Quick Calc Release ke luar.
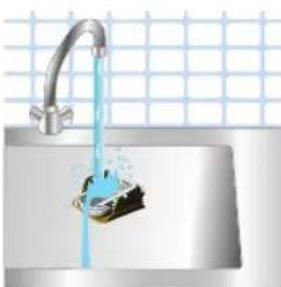
8 Jangan mengisi air melalui lubang setrika.
9 Goyangkan setrika untuk mengeluarkan air beserta partikel kerak melalui lubang setrika.
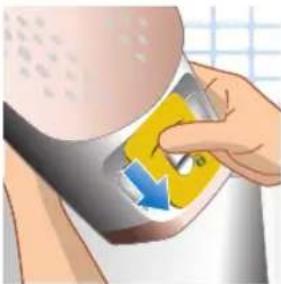
10 Dorong tuas ke bawah untuk mengunci penampung Quick Calc Release. Pastikan terdengar bunyi "klik".
Penyimpanan
Bahasa Indonesia
1 Penutup tangki air
2 Butang pemilih stim
3 Lampu penanda
4 Picu galak stim
5 Menggulung kord
6 Tapak
7 Pengumpul Pelepasan Kerak Pantas
2 Selak buka penutup tangki air.
5 Keluarkan penutup pengumpul Pelepas Kerak Pantas.
2 Odklopte víčko nádržky na vodu.
2 Åbn läget til vandtanken.
4 Skub dækslet til Quick Calc Release-opsamleren op.
2 Keerake veepaagi kaas lahti.
8 Ärge valage triikraua avasse vett.
1 Poklopac spremnika za vodu
2 Gumb za odabir pare
3 Indikator
4 Okidač za dodatnu količinu pare
5 Namotavanje kabela
6 Grijaća ploča
7 Odjeljak Quick Calc Release
Uporaba aparata
Napomena: Prilikom prve uporabe glačala možda ćete primijetiti malo pare. To će ubrzo prestati.
Vrsta vode koju treba upotrebljavati
1 Nemojte ukopčavati glačalo.
2 Otvorite poklopac spremnika za vodu.
3 Napunite spremnik za vodu do oznake MAX. Nemojte dodavati parfeme, mirise, sapun ni ocat.
4 Čvrsto zatvorite poklopac spremnika za vodu.
Priprema za uporabu
2 Utikač umetnite u uzemljenu utičnicu i postavite glačalo u uspravan položaj. Ako upotrebljavate produžni kabel, provjerite odgovaraju li njegove specifikacije glačalu.
3 Pričekajte da se glačalo zagrije. Indikator će sporo pulsirati/bljeskati dok se zagrijava.
4 Kada glačalo bude spremno za uporabu, indikator će početi svijetliti.
5 Kako biste promijenili postavke pare, lagano nagnite glačalo prema gore (>20°) i pritisnite gumb za odabir pare na dršci.
Postavka AUTO*: u ovoj postavci pritisnite i držite gumb i okidač za dodatnu količinu pare kako biste otpustili nešto više pare u kraćem vremenu.
Postavka suhog glačanja odaberite ovu postavku za glačanje bez pare.
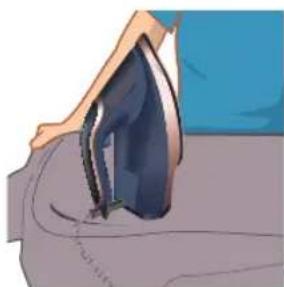
Napomena: para se zaustavlja kad se glačalo nagne u uspravan položaj.
Dodatna količina pare u vodoravnom i okomitom položaju
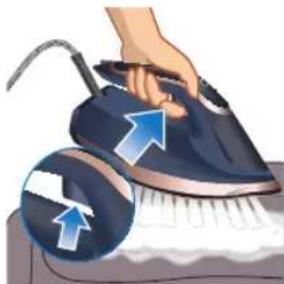
1 Pritisnite i otpustite okidač za dodatnu količinu pare kako biste dobili snažan mlaz pare za uklanjanje tvrdokornih nabora.
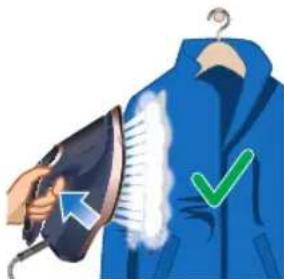
2 Pritisnite i otpustite okidač za dodatnu količinu pare dok je glačalo u uspravnom položaju kako biste dodatnom količinom pare uklonili nabore s odjeće koja visi. Ako stalno držite okidač za dodatnu količinu pare dok je glačalo u uspravnom položaju, konstantna para neće se ispuštati.
Hrvatski
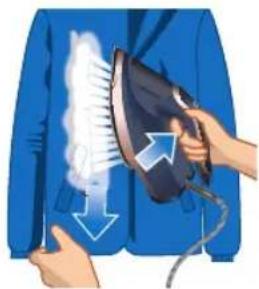
3 Povucite i razvucite odjevni predmet koji visi dok upotrebljavate dodatnu količinu pare za uklanjanje nabora.
4 Nemojte golom šakom podržavati odjevni predmet prilikom glačanja.
5 Indikator će početi sporo pulsirati/bljeskati, naznačujući da se glačalo ponovo zagrijava.
6 Kada indikator počne svijetliti, glačalo je spremno za uporabu.
3 Provjerite je li se glačalo ohladilo.
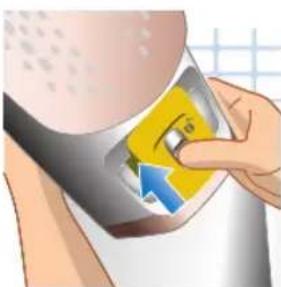
4 Ručicu odjeljka Quick Calc Release povucite prema gore.
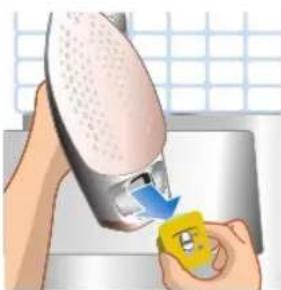
5 Izvucite poklopac odjeljka Quick Calc Release.
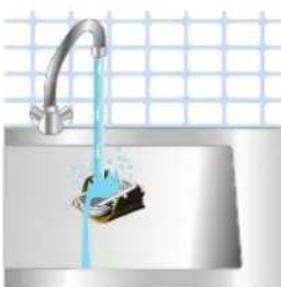
6 Poklopac odjeljka Quick Calc Release očistite vodom.
Hrvatski
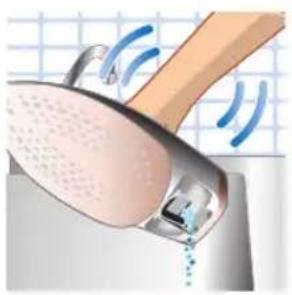
7 Protresite glačalo kako biste ispustili vodu i čestice kamenca iz otvora glačala.
9 Protresite glačalo kako biste ispustili vodu i čestice kamenca iz otvora glačala.
2 Ispraznite ostatak vode iz spremnika za vodu.
3 Pustite glačalo da se ohladi.
4 Uredno namotajte kabel za napajanje prije spremanja glačala.
Rješavanje problema
U ovom poglavlju opisani su uobičajeni problemi vezani uz uporabu aparata. Ako problem ne možete riješiti s pomoću informacija u nastavku, posjetite www.philips.com/support kako biste pronašli popis čestih pitanja ili se obratite centru za korisničku podršku u svojoj državi.
1 Nepievienojiet gludekli strāvas avotam.
1 Pärliecinieties, ka gludeklis nav pievienots elektrotiklam.
5 Iznemiet Quick Calc Release savacêja vacinu.
7 Pakratiet gludekli, lai izlietu üdeni un katlakmens dalinas pa gludekla atveri.
8 Nelejiet üdeni gludekja atverē.
9 Pakratiet gludekli, lai izlietu üdeni un katlakmens dalinas pa gludekla atveri.
1 Atvienojiet gludekla kontaktdakšu.
200 Latviešu
2 Atidarykite vandens bakelio dangtj.
4 Lygindami nelaikykite plikomis rankomis.
220 Magyar
236 Nederlands
252 Norsk
3 Vent til strykejernet er varmet opp. Indikatorlyset vil pulsere / blinke sakte när den varmer opp.
3 skyer-innstilling Maksimum konstant damp tilføres kontinuerlig for plagg med vanskelige skrukker. Det vil fortsatt komme konstant damp när strykejernet står horisontalt.
Norsk
1 skyer-innstilling Minimum konstant damp tilføres kontinuerlig for plagg med lite skrukker. Det vil fortsatt komme konstant damp när strykejernet står horisontalt.
262 Norsk
1 Suv baki qopqog'i
2 Bug'ni tanlagich tugmasi
3 Indikator chirog'i
4 Bug' kuchaytirgich triggeri
5 Shnurni o'rash
6 Asos plita
7 Cho'kmani tezkor tozalash kollektori
Jihozdan foydalanish
1 Dazmolni ulamang.
2 Suv baki qopqog'ini chertib oching.
3 Suv bakini MAX belgisigacha to'ldiring. Atir, hid taratuvchi vosita, sovun yoki sirkaga o'xshash qo'shimchalarni qo'shmang.
4 Suv baki qopqog'ini mahkam yoping.
2 Shtekerni yerlantirilgan rozetkaga kiriting va dazmolni o'z tirgagiga qo'yib turing. Agar siz uzaytirgichdan foydalanayotgan bo'lsangiz, uning elektr tok ko'rsatkichi dazmolga mos kelishiga amin bo'ling.
AUTO sozlamasi: Dazmolni harakatga keltirishda bug' beriladi. Dazmol statsionar holatda bo'lganda bug' to'xtaydi.
AUTO sozlamasi *: Ushbu rejimda qisqa vaqt ichida biroz ko'proq bug' chiqarish uchun bug' zarbasi tugmachasini va triggerini bosib turing.
3 bulut sozlamasi Qattiq burmalar uchun maksimal o'zgarmas bug' muntazam ta'minlab turiladi. Dazmol harakatsiz va horizontal holatda bo'lsa ham, bug' doimiy ravishda chiqib turadi.
Quruq dazmollash sozlamasi bug'siz dazmollash uchun ushbu sozlamani tanlang.
Eslatma: Dazmol vertikal holatga qo'yilsa, bug' berish to'xtaydi.
Bug'ning horizontal va vertikal chiqarilishi
1 Qattiq burmalarni ketkazish uchun kuchli bug' chiqaradigan bug'ni kuchaytirish ilgagini bosing va qo'yib yuboring.
2 Osiq turgan kiyim-kechakdagi burmalarni kuchli bug' oqimi bilan bartaraf qilish uchun bug' chiqarish ilgagini vertikal holatda bosing va qo'yib yuboring. Vertikal holatda bug' chiqarish ilgagini bosib turish doimiy bug' chiqarilishini ta'minlamaydi.
272 O'zbek
3 Burmalarni ketkazish uchun bug'li zarba funksiyasidan foydalanish paytida osilgan kiyimlarni cho'zib tekislang.
3 Avtomatik o'chirish rejimi indikator chirog'ining tez miltillashi bilan ko'rsatiladi va dazmol soviy boshlaydi.
5 Indikator chirog'i dazmol yana isiy boshlaganini bildirib, sekin miltillashni boshlaydi.
1 Dazmol tarmoqqa ulanmaganiga amin bo'ling.
274 O'zbek
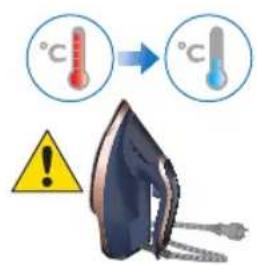
2 Dazmol soviganiga amin bo'ling.
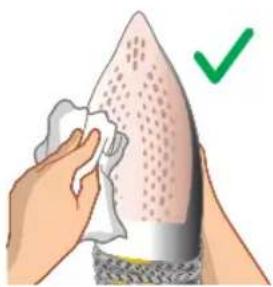
3 Asos plitasini nam mato bilan arting.
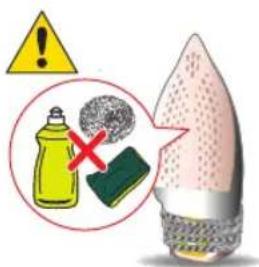
Eslatma: Dazmol plitasi silliq bo'lishini ta'minlash uchun metall obyektlarga tekkizmang. Idish yuvish matosi, sirka yoki boshqa kimyoviy moddalardan dazmol plitasini tozalash uchun foydalanmang.
Calc_Clean
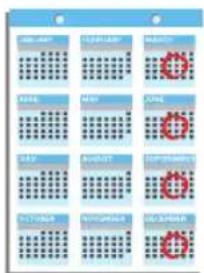
Maslahat: Cho'kmani tezkor tozalash funksiyasi dazmol sovuq bo'lgan har qanday vaqtda qo'llanilishi mumkin. Suvi qattiq mintaqada yashasangiz, ushbu funksiyadan tez-tez foydalaning.
1 Dazmolning yaroqlilik muddatini uzaytirish maqsadida yoki jigar rang dog'lar/suv hosil bo'lganida dazmolni ishlatish davomida har 1 oydan 3 oygacha bir qasmoqlardan tozalash tavsiya etiladi.
MUHIM: Cho'kmalarni tezkor tozalash funksiyasi dazmollash vaqtida bo'sh cho'kma zarralarini avtomatik yig'ib oladi.
2 Dazmol tarmoqqa ulanmaganiga amin bo'ling.
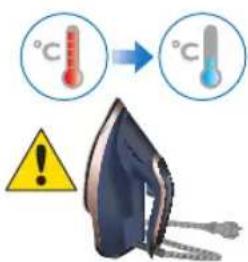
3 Dazmol soviganiga amin bo'ling.
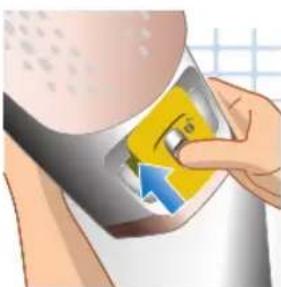
4 Cho'kmani tezkor tozalash kollektori richagini yuqoriga suring.
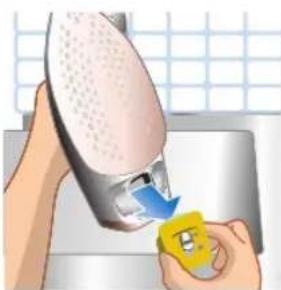
5 Cho'kmani tezkor tozalash kollektori qopqog'ini chiqaring.
6 Cho'kmani tezkor tozalash kollektori qopqog'ini suv bilan tozalang.
276 O'zbek
7 Suvni oqizish uchun dazmolni silkiting va dazmolning teshigidan zarrachalarni chiqarib tashlang.
8 Dazmolning teshigiga suv quymang.
9 Suvni oqizish uchun dazmolni silkiting va dazmolning teshigidan zarrachalarni chiqarib tashlang.
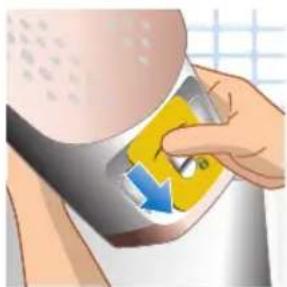
10 Cho'kmani tezkor tozalash kollektorini qulflash uchun richagni pastga suring. Siz "tiq" etgan tovushni eshitasiz.
Saqlash
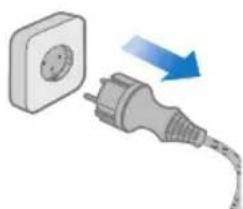
1 Dazmolni rozetkadan uzing.
4 Saqlashdan oldin quvvat simini ehtiyotkorlik bilan o'rang.
Nosozliklarni aniqlash
Bu bobda jihozda uchraydigan eng keng tarqalgan muammolar umumlashtirilgan. Agar quyidagi ma'lumotga asoslanib muammoni hal qila olmasangiz, savol-javoblar ro'yxati uchun www.philips.com/support manziliga kiring yoki mamlakatingizdagi mijozlarga xizmat ko'rsatish markazi bilan bog'laning.
Muammo Ehtimoliy sabab Yechim
3 Puxe e estique a peça de roupa pendurada enquanto usa o jato de vapor para remover os vincos.
1 Pressione e solte o acionador de vapor extra para disparar um poderoso jato de vapor para remover os vincos persistentes.
5 Retire a tampa do coletor do Quick Calc Release.
4 Marrja ose lëvizja e hekurit do ta riaktivizojë.

4 Rrèshqisni lart levën e kolektorit Quick Calc Release.
5 Tërhiqni kapakun e kolektorit Quick Calc Release.
6 Pastroni kapakun e kolektorit Quick Calc Release me ujë.
356
Shqip
1 Hiqni hekurin nga priza.

2 Derdheni ujin e mbetur nga depozita e ujit.
1 Likalnika ne priključujte v električno omrežje.
2 Odprite pokrov posode za vodo.
4 Trdno zaprite pokrov posode za vodo.
2 Priključite vtič v ozemljeno vtičnico in likalnik postavite na njegovo peto. Če uporabljate podaljšek, se prepričajte, da je njegova nazivna moč primerna za likalnik.
3 Počakajte, da se likalnik segreje. Med segrevanjem bo počasi utripal indikator.
Nastavitev AUTO: med premikanjem likalnika se dovaja para. Para se neha dovajati, ko likalnik obmiruje.
Nastavitev 3 oblačkov neprekinjeno dovajanje največje količine pare za trdovratne gube. Ko bo likalnik miroval v vodoravnem položaju, se bo para še vedno dovajala.
Opomba: para se neha dovajati, ko likalnik postavite navpično.
5 Likalnika ne usmerjajte vase ali v druge osebe.
Samodejni izklop
4 Če likalnik dvignete ali premaknete, se bo ponovno vklopil.

5 Indikator bo začel počasi utripati, kar pomeni, da se likalnik ponovno segreva.
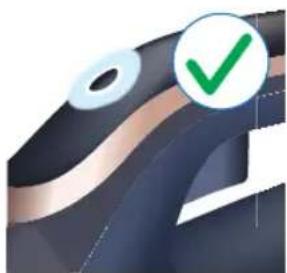
1 Prepričajte se, da likalnik ni priključen v električno omrežje.
370 Slovenščina
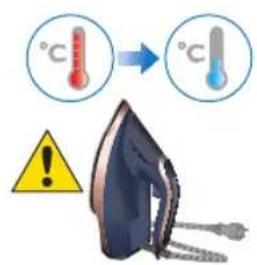
3 Likalno ploščo obrišite z vlažno krpo.
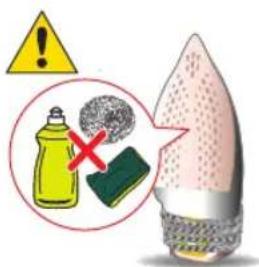
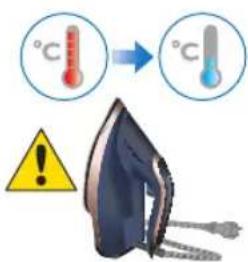
8 V odprtino likalnika ne vlivajte vode.
2 Iz posode za vodo izlijte preostalo vodo.
3 Pustite likalnik, da se ohladi.
4 Preden likalnik shranite, okoli njega skrbno navijte napajalni kabel.
Odpravljanje težav
4 Veko zásobníka na vodu pevne zatvorte.
380 Slovensky
Poznámka: Para sa zastaví, ked'sa žehlička nakloní do zvislej polohy.
4 Páčku zberača funkcie Quick Calc Release posuňte nahor.
5 Vytiahnite veko zberača funkcie Quick Calc Release.
6 Veko zberača funkcie Quick Calc Release očistite vodou.
10 Stlačte páčku, aby ste zaistili zberač funkcie Quick Calc Release. Budete počut kliknutie.
Odkladanie
1 Žehličku odpojte zo siete.
1 Poklopac posude za vodu
2 Dugme za izbor pare
3 Indikator
4 Okidač za dodatnu količinu pare
5 Namotavanje kabla
6 Grejna ploča
7 Quick Calc Release sakupljač
Upotreba aparata
Napomena: Pri prvoj upotrebi, pegla može da izbaci malo pare. To će ubrzo prestati.
Tip vode koji bi trebalo koristiti
Tehnologija OptimalTemp omogućava peglanje svih vrsta tkanina koje mogu da se peglaju, bilo kojim redosledom, bez podešavanja temperature pegle.
Tkanine sa ovim simbolima se mogu peglati, na primer lan, pamuk, poliester, svila, vuna, viskoza i veštačka svila.
Tkanine sa ovim simbolom se ne mogu peglati. U te tkanine spadaju sintetičke tkanine, kao što je spandeks ili elastin, tkanine sa sadržajem spandeksa i poliolefina (npr. polipropilen), ali i odštampani motivi na odevnim predmetima.
394 Srpski
Punjenje rezervoara za vodu
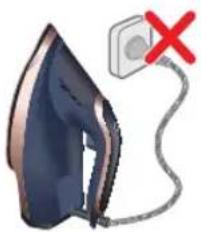
3 Napunite rezervoar vodom do oznake MAX. Ne dodajte nikakve dodatke kao što su parfem, mirisi, sapun ili sirće.
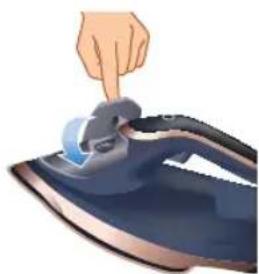
4 Čvrsto zatvorite poklopac rezervoara za vodu.
Pre upotrebe
Tokom prve upotrebe možda ćete videti dim, to je normalna pojava. To će ubrzo nestati.
2 Uključite utikač u uzemljenu utičnicu i ostavite peglu da stoji na postolju. Ako koristite produžni kabl, postarajte se da nominalna snaga produžnog kabla odgovara pegli.
3 Sačekajte da se pegla zagreje. Indikator će sporo pulsirati/treperiti dok se zagreva.
Podešavanje AUTO*: Dok ste na ovom podešavanju, pritisnite i držite dugme i okidač za dodatnu količinu pare da biste na kratko ispustili malo više pare.
Podešavanje za suvo peglanje žaberite ovo podešavanje za peglanje bez pare.
Napomena: Para prestaje da se ispušta kada je pegla nagnuta u vertikalni položaj.
Horizontalni i vertikalni mlaz pare
1 Pritisnite i otpustite okidač za dodatnu količinu pare da biste dobili snažan mlaz pare i uklonili uporne nabore.
2 Pritisnite i otpustite okidač za dodatnu količinu pare dok je pegla u vertikalnom položaju da biste uklonili nabore sa odeće koja visi koristeći dodatnu količinu pare. Držanje okidača za dodatnu količinu pare dok je pegla u vertikalnom položaju neće ispuštati neprekidnu paru.
Srpski
3 Zategnite viseći komad odeće dok koristite mlaz pare da biste uklonili nabore.
3 Režim automatskog isključivanja biće označen brzim treptanjem indikatorske lampice, a pegla će početi da se hladi.
5 Indikator će početi sporo da treperi, što ukazuje na to da se pegla ponovo zagreva.
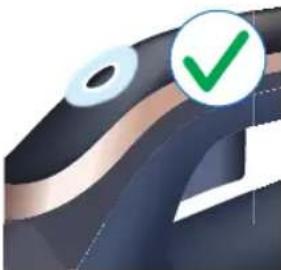
6 Kada indikator počne stalno da svetli, pegla je spremna za upotrebu.
3 Očistite grejnu ploču vlažnom krpom.
3 Uverite se da se pegla ohladila.

4 Gurnite nagore ručicu Quick Calc Release sakupljača.
6 Očistite poklopac Quick Calc Release sakupljača vodom.
402 Srpski
7 Protresite peglu da biste ispraznili vodu i čestice kamenca iz otvora.
8 Ne sipajte vodu u otvor pegle.
9 Protresite peglu da biste ispraznili vodu i čestice kamenca iz otvora.
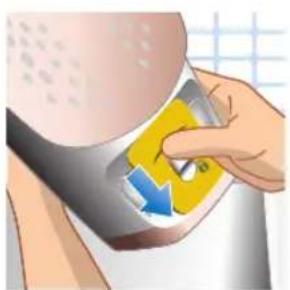
10 Gurnite ručicu nadole da biste zaključali Quick Calc Release sakupljač. Čućete zvuk „klik”.
Odlaganje
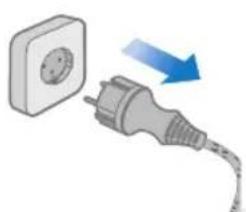
1 Isključite peglu iz zidne utičnice.
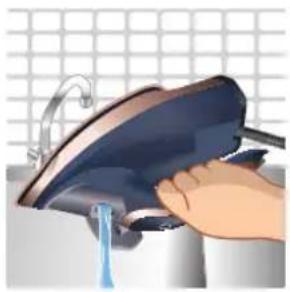
2 Prospite preostalu vodu iz rezervoara za vodu.
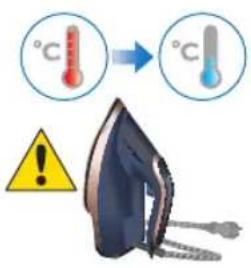
3 Ostavite peglu da se ohladi.
4 Uredno namotajte kabl za napajanje pre odlaganja.
Rešavanje problema
U ovom poglavlju ukratko su navedeni najčešći problemi do kojih može da dode sa aparatom. Ako ne uspete da rešite problem pomoću informacija navedenih u nastavku, posetite www.philips.com/support da biste pronašli listu najčešćih pitanja ili se obratite centru za korisničku podršku u svojoj zemlji.
1 Irrota silitysraudan pistoke pistorasiasta.
1 Vattenbehållarlock
2 Ångvalsknapp
3 Indikatorlampa
4 Ångpuffsaktivator
5 Linda sladden
6 Stryksula
7 Quick Calc Release-uppsamlare
Använda apparaten
5 Dra ut Quick Calc Release-uppsamlarens lock.
1 Koppla ur strykjärnet.
1 Suw gabynyň gapagy
2 Bugy saylaýyş düwmesi
3 Görkeziji çyrasy
4 Güyçli bug goýberiji
5 Kabeli saramak
6 Ütügiň dabany
7 Çökündileri çalt ayyrían yygnaýjy
Enjamy ulanmak
Bellik: Birinji gezek ulananyñyzda ütükden birneme bug çykmagy mümkin. Bu gysga wagtdan soň ýitirim bolar.
1 Ütügi toga dakmaň.
AUTO sazlamasy: Ütük hereket etdirilýärkä bug berler. Bug hereketsiz yagdayda wagty buguň berilmegi kesiler.
AUTO sazlamasy * : Bu sazlamada wagty gysga wagtlyk sähelçe köprak bug goýbermek üçin düwmäni we güçli bug goýberijini basyp saklaň.
3 bulut sazlamasy Âýrylmasy kyn ýygyrtlar üçin añryçak möçberde bug üznüksiz berilyär. Ütük keseligine hereketsiz ýagdaýda wagty bug üznüksiz görnüşde çykar.
472 Türkmençe
Bellik: Ütük dik yagdaÿda yerleşdirileninde buguň berilmegi kesilýär.
1 Aýrylmasy kyn ýygyrtlary aýrymak maksady bilen güýçli bug bermek üçin güýçli bug beriş düwmesine basyp goýberiň.
2 Asylgy duran geyimlerden güýçli bugy ulanmak arkaly ýygyrtlary aýryrmak üçin dikligine ýagdayda wagty güýçli bug düwmesini basyp goýberiň. Dikligine ýagdayda wagty güýçli bug düwmesi baslylp saklanylsa, üznüksiz bug berilmez.
4 Bugy ulanyan wagtyñyz yakañaç eliñizi söyget tekizligi hökmünde ulanmaň.
5 Enjamy özüñize yá-da başga birine yakyn yerleşdirmän.
Awto öçürmek
1 Rahatlygyñyz üçin enjamyñyz belli bir wagt gözegçiliksiz galdyrylan yagdaýynda öz-özünden sowap bilýär.
2 Enjam özüniň dabanynda durka 2 minutdan köp ulanylmasa ya-da ökjesinde/esasynda durka 8 minutdan köp ulanylmasa, enjam awto-öçürmek tertibine geçyär.
474 Türkmençe
6 Görkeziji çyra öçeninde ütük ulanya taýyar bolýar.
Arassalamak we abatlamak
5 Çökündileri çalt aýyrían íygnaýjyny çekip çykaryň.
9 Suwuň we çökündiniň bölejikleriniň ütüğü ne desiginden dökülmegi üçin ütügi silkelään.
2 Suw gabynda galan suwy dökün.
3 Ütügiň sowamagyna maý beriň.
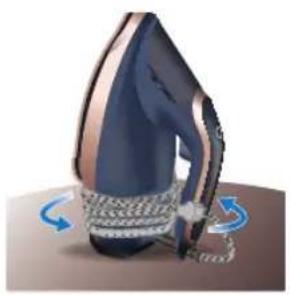
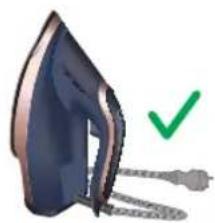
4 Ammarda saklamazdan ön elektrik kabelini ykjam edip saraň.
Näsazlyklary anyklaýys
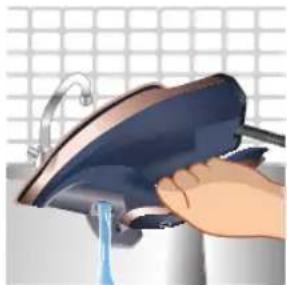
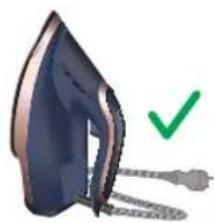
6 Почистете с вода капачето на колектора Quick Calc Release.
5 Бат кебээр тазалоо топтогучунун капкагын чыгарыңыз.
10 Бат кебээр тазалоо топтогуч рычагын ылдый жылдырыңыз. Сиз "чыкылдаган" үндү угасыз.
Сактоо
1 Утукту розеткадан суурунуз.
4 Сактоодон мурун электр шнурун тыкан ороп коюнуз.
Көйгөйлөрдү жоюу
5 Извлеките крышку контейнера Quick Calc Release.
Матоъхо бо ин рамз дарзмолнашавандаанд. Ба ин матоъхо матоъхои синтетики ба монанди Спандекс ё эластан, Матоъхои омехтаи Спандекс ва полиолефинхо (масалан, полипропилен), балки инчунин навиштачот дар либос дохил мешаванд.
3 Зарфи обро то аломати МАКС пур кунед. Хеч гуна иловагиро ба монанди атр, хушбуйкунанда, собун ё сиркоро илова накунед.
5 Дарзмолро ба худ ё шахси дигар равона накунед.
Хомўшкунии худкор
1 Барои оромии шумо, агар дарзмол ба муддати тўлоні бехаракат нигох, дошта шавад, он метавонад ба таври худкор хунук мешавад.
4 Бардоштан ё харакат додани дарзмол онро дубора фаьол мекунад.

6 Вакте нишондихандаи чарофак устувор фурузон шуд, дарзмол барои истифода омода аст.
Тозакунй ва нигохдорй
Шарх: Барои хамвор нигох доштани сатхи поёни тахта, нагузоред, ки он бо ашёхои металлі тамос гирад. Барои тоза кардани зери поя исфанчхои абразиві, сирко ва дигар маводи кимиёвиро истифода набаред.
Calc_Clean
4 Мехвари Контейнер барои чамъкунии карахш Quick Calc Release -ро ба боло кашед.
5 Сарпуши Контейнер барои чамъкунии карахш Quick Calc Release-ро хорич кунед.
6 Сарпуши Контейнер барои чамъкунии карахш Quick Calc Release-ро бо об тоза кунед.
574 Точикий
8 Обро ба сурохии дарзмол равона накунед.
Uwnwuph nunhwunin punipawqhn
1 2nh unwnwjh ywhwnhz
2 9n1nn2ni úwunwlywnwnúwù ntīdhúh pǔunnipajwù lynǎwù
3 8nighsh inyu
4 9n1nn2ni nidtn uŋúwù lynǎwù
5 Lwnh hughy
6 Swyh hwnuwr
7 Чнwrwnh wnwq hwylwphs
Uwnph oqunwqnpndnln
L2niú. Unnniú uunwghù wùquwú oqunwqnǎtǐhu hùwnwūn p ʒ uhn p pwùwlnuŋwúp qnnn2h wnàwlyh: ʒwnǎ dāwùwǔw y wǔg wju ʒbīnwùnú t ʒ:
Hüntuwih gün wtpup 5 oqunwanndti
Uwnpn hwnúwn 5 δnnwlyh gnnu oqunwqnndúwù hwnúwn: Uwlywju, tja tniip wynnniú tip wjúwuhuh unwnwópniu, nnuntn gnh lynzunnijajwù wunhǎwùn pwnàn 5, hunphninn tiúp unwihu δnnwlyh gniŋn hwnúti jænpwò lyuú ntúhútnwihqwugluò gnh htun hwnlwwwn puìuwlynipajwúp: Tw lywùhuh uwnylwóph lyniunwlyniuń u ytnplwnwgùh uwnph ljuwùpn:
Uh wultlwqntp odwùtihp, znpwùngh gnn, pwgwhu, oulu, uunuqwóph úwpnúwù, wnnniúyúwù odwùnwly úhngùtn, phúhwlywù úhngùtnnyú úwpnúwò gnn lyuú phúhwlywù wll üjniatn, pwùh nn ηnwùp lyuunn tǔ wnwwgutl gnh gwjuntn, 2wqwùwlywqnju pòtn lyuú yüwutl àtn uwnpn:
OptimalTEMP unthuunnqhw
OptimalTemp unthùnǐnghuì hùwùwǔnniǎniù ٤ unwìhu wùnnǐyī pìn n unbuwùh wùnnǐyùnn qnpòuówòpùtn gǔùlǚwgwǒ hṭnēwùwùnīpīwúp` wùnwùg wùnnǐh gṭnúwùnhǎwùh lǚwnqwǔnnúwù:
Uju u2wùnú qnnóu wǒpùtní ywntǐ h ʒ wnnníyti, onhǔwǔ ylnižti qnnóu wǒpùn, pwwúpwǔn, wnhtúpātní, útúnwpùn, pninní, yhuìynq n l wnhtuunwǔwǔ útúnwpùn:
Uju u2wunl qnnδuωδριτη sh ywntih wnηnityi: Ujuuntn utnwzulω δ tü uhupatinhly qnnδuωδριτη, onhüwly' uwwüntipun, tluwinwün, uwwüntipu lwu winlnitφhüwjhü üwünwpättn wwnniuwynn qnnδuωδριτη (on. 'wnihwnnwhltu), hüwutu üwli hwqnwnh ynujh uylwnütηn:
Ωnh hughlyh lgünwùn
1 Uh uhwgntp wnnnln:
2 Cngtlnylpwgtp qnh hughyh ywwhwnhyn:
3 2nh hughyn Igntip uh#u MAX u2wqhàn: Uh wultwqntip nnut hwultwujnja, h#zwhuhp bu odwutihpn, pninwultunh#utnp, o#wnp ywi pugwuhn:
4 Uünin yhuyltp qnh unwnwjh ywhwnhyn:
Lwhwwwnwnwnni
2 Uhwqntp hunngn hnwnuuguwd uwnnwlyhg l wwnniyn nntip hn nnuwluh ynu: tnlywnwguwu jwn oqnwnqnndjhu, hwunqutp, nn tnlywnwguwu lwnh hqnnniajniun hwuwwwwnnwuhuwah wnnniyh:
3 Uwutp, shu wunnln unwpuu: Snighsh injuh nuuunh yawuh unwpuguu npawgpni:
4 Enp wnnnlnp wnwnnwnun jhuh oqnwnqnnduwu, gnighzh iniyun lywnzuh ywwniu:
5 9n1nn2ni ywnqwylnnniutinq ynhutini hwuwun wnnniln uh uhnpn jatptip ntuwh ultn (>20°) u utnútp pràuwyh ynwjh qn1nn2ni lynǎwlyn:
9n1nn2ni ywnqwylnniwutph yhnhhunlajniù
9nnn2ni ywnqwynnnwutnp yhnfutni hwuwn wnnnlyp uh yhnp petiptp ntuiyh utp (>20°) u utnútp prùwuh ynwjh qnnn2ni ynǎwylp:
![graph TD A["Stage 1: Signal icon"] --> B["Stage 2: Signal icon"] B --> C["Stage 3: Signal icon"] C --> D["Stage 4: Signal icon"] D --> A](/content/2026/05/754551/images/a49db2ceada1d2427d2442dda64cd27e6b909ec0dfcd8d84f93f1445ffce1b48.jpg)
9n1nn2ni 4 ywnqw1nnniú lww, npnúp wlnhúwgyniú tǔ wju htnpawlywùnupjwúp. AUTO ywnqw1nnniú, 3-qn1nn2nu ywnqw1nnniú 1-qn1nn2nu 1u2nn wpnnlúwù ywnqw1nnniú :
L2niú. Pninn lwnqwwlnnnwuttng wùlnuwúq tǔ pninn wnnnliylnn qnnδuwrωδρutph ynw lhnwnntini hwiśwn: Unnnliy 2wndtihu pnùwuh ynwjhg lwnnn tip juti wnúwih āwjù pananniúnj:
AUTO ntidhu. Unnnln 2undtihu qnnnn2h nninu lyqu: tnp wnnnln uuu wu2wnd, qnnnn2hlu ynwnwnh:
AUTO ntduhú*. Uju lwnqwulnnu wù dwu wù wly utn utp lu wuhtp lynówyn lu qninnzni ni dtn wugui wù àqu wù` lwnǎ dwu wù wln yu úh zhnp wyl bǐ h 2wn qninnzh wnàwyltjni hwúwn:
3-qnlnn2nu lwnqnwlnpniu 9nlnn2ni wnwultiwqnyu puuwlyh wuntnutg uwnwylwnwnniu 5wuhwquug hunn dwiptpn hwnpatgutni hwuiun: tn p wnnnliyu wizwpnd jih hnhqnluwlyu 9hnpiu, qnlnn2hu l2wnniuwyh wuntnhwun wnawlvti:
1-qnlnn2nu lwwqnwlnnniu wnlnn2ni uluwquqnju puàwuh wùnànútɕ ǔwnwlywnwnniu phɛ ðwiptn niutignh hwqniunu wnnniytjni hwiūwn: 6np wnnniŋu wùzwpd jħuh hnphqnüwlywù nħnpniu, qnlnn2ħu l2wnniüwuh wùnànhwn wnàwylvti;
2nn wnnniyüwü lwnqwiynnniü 2untp wju lwnqwiynnniün' wzwüg qnnn2ni wnnniybini hwwün:
1 2niú. 9nlnp2ni úwinnwlywnwnniúŋ ηwnwnniú t, tnp wnnniúŋ rætpu niú t; ntúwh nnnwhuwjwg nhnp:
3nphqnùwlywù u niŋŋwhwjwg ŋħnpniś qnìnn2ni niđtŋwgniś
1 Nidtn qinn2hnu wutuwpwnn dwiptnn hwnpetgutni hwuwn ubntup lu pwg pantip qinn2ni uŋuwi lynawyn:
2 Utnúbp lu puq pnntp nidtn qinnp2ni únuwù lynówyn ninnwhwjug nhnpniú' nidtn qinnp2hnu lywhuwò hwqnwnh dwiptpn hwnatgútni huwúwn: Nidtn qinnp2ni únuwù lynówyn ninnwhwjug nhnpnu wuhftp qinnp2ni wùnünhwun úwwnwlywnwnpuś zh wwwwhnúniú:
Ruijtntu
3 Pu2tp u dqtp lwhuulw6 hwqnwnn' uhwduwuwly oqnwqnndtnu qninn2ni nidtnwgnighn' dwiptnn hwnatgutni hwun:
5 Uh wuhap wnnnlnn atn lwwf wjl uwnnywug dww:
hùpùw2huàn wùqwùnniú
3 Ujunnúwùn wùqwùnúwù ntìdhúh nǐwīpniú gnìghz ľnjuù wùnwq lǐwānwāh, lǚ wùnniūn lǐyúh uwnzti:
4 Unnniun qingutini ywi untnwuhnhutini ntwpniu wju ynlyh uwlunhyluw:

5 Snighsh injun lyuh njuunw pwneti gnyg unwinu, nn wnnniyn unwpwnui 5 ynlyhu:
6 Unnnlnp uwwnnwwn 5 oqnwnqnndúwù, bnp gnighsh lnjuŋ lwwniù 5 uwnzlniú:
Uwpnniú u unthuúhlywlywi uwwuwnyniú
1 3wúnqúp, nn wnnnln yhwgluwó zhùh uwnnwlyhg:
620 Ruijtntu
2 Rwúnqutp, nn wnnnilyn uwnzgl:
3 Unnnih unwih hwnuwon unptp hunuwul 2nnnl:
U2niú. Upnniynn úwlytntbup hwnp æwuhtni hwiúwn funnhhniŋn 5 unnu niú funiu wuhbl útunwnwlywù wwnpywùtnh htun lyn2n 2yhnuihg: Upnniyh unwlj hwnulwoh úwpnúwù hwiúwn tnptp úh oqinwqnndtp útunwnwlywù wwnniynnú uwniúq, pwgwhu lywú wjl phúhwlywù ujnipatn:
Calc_Clean
funnhnnn. Unwq Calc Release uwnuqwoph uwpnuiwu qnpouwnnyjen lwnnn t oqnuwqnndyl gwulwugwod wwhh, bnp wnnnilyn uwnu t: bpt wwnniu tip wjuwhuh unwnwdpniu, npuntin gninn lyn2n t, wju qnpouwnnyjen wultih hwawhu oqnuwqnndtp:
1 lonphnnn 5 unpniu dwpnti wppnlih lynwwpnp jninwpwutynin 1-3 wuhu oqunwqnpttning htunn' nnu ljuwupn tnlywnwgutini hwuiwn, yuw bnp ulywnunniu tzu 2wqwuwlywqniju pdtin/qnin:
3 Rwùnqūtp, nn wùnniyn uwwzāl l:
4 40nlu uwhtgntap Quick Calc Release hwylwphsh lòwyn:
5 Rwutp Quick Calc Release hwulwphsh ywwhwnhyn:
6 Uwpntp Quick Calc Release hwylwphsh ywwhwnhyn gnnu:
622 Ruijtntu
7 əwuhwhwntp wnnnilyn` gnin n u lynwpwnh uwwuhlyutnp wnnnilyh wugphg nninpu rəwuhtni huuuwn:
8 2nɪn ʊh ɪɡntp wɒnnɪlyh wʊɡph ʊtəg:
9 əwuhwhwntp wnnnilyn` gninq u lynwpwnh əwuhhyuttnn wnnnilyh wugphg nninpu jowhtini hwiun:
10 Utnpl utnútp lówyn` Quick Calc Release hwulwphpn ̈hwlytjni hwüwn: ἢnip lyutip «lununngh» āwju:
اللهمني
1 Unnnilyu wugwuntp:
2 2nh hughlyhg pawhtp uuuwgwδ gninn:
630 ภาษาไทย
3 robotic behavior training software for a 20% of the 20% of the 20% of the 20% of the 20% of the 20% of the 20% of the 20% of the 20% of the 20% of the 20% of the 20% of the 20% of the 20% of the 20% of the 20% of the 20% of the 20%.
1 6yμηνι μηδγκηγυσην υψθηση
2 mmonjmnbl dgmhjznl mnqnszn
3 ηδρησιθμήνη δγρη
4 mMngdmmol gsdgngfngdnl gnnmuzn
5 3500000000000000000000000000000000
6 dōfēn
7 600000000000000000000000000000000000000
650
sā lūndāmmmbl dʒm6ʒ glumznmgànb yosyomgòs syfmdsmgmns. glu glumznmgòn dmnys3b lunbongfuzym glumznmgòb, mnmgmnnyss luzs6qgdbn sb gmsubghbn, luzs6qgdbnss6 bsfmgzn glumznmgòn qas 3mnmnmgmgn6gàn (dʒs., 3mnm3fm3nmg6n), slg3g 3fm6ghàn fshbsy3dgm8j.
Debunun mgugmuzmuk dugdus
4 Finland, 2013, 2014, 2015, 2016, 2017, 2018, 2019, 2020, 2021, 2022, 2023, 2024, 2025, 2026, 2027, 2028, 2029, 2030, 2031, 2032, 2033, 2034, 2035, 2036, 2037, 2038, 2039, 2040, 2041, 2042, 2043, 2044, 2045, 2046, 2047, 2048, 2049, 2050, 2051, 2052, 2053, 2054, 2055, 2056, 2057, 2058, 2059, 2060, 2061, 2062, 2063, 2064, 2065, 2066, 2067, 2068, 2069, 2070, 2071, 2072, 2073, 2074, 2075, 2076, 2077, 2078, 2079, 2080, 2081, 2082, 2083, 2084, 2085, 2086, 2087, 2088, 2089, 2090, 2091, 2092, 2093, 2094, 2095, 2096, 2097, 2098, 2099, 2100
5 mM monjmnbl 35m3d2g0m0n0n 38u3z3m0m0n m06s3 g0p0b5m0n j0nm 8g0mm (>20°) ωs1a6g0m0m8g ωssf0m0n mmonjmnbl 38m0h2n0n m0m0s3n.
3am2dghm "3phdsghm": mmonjmn dmbcgjds mbcgjds yoml gouwqgnngdnlsl. mmonjmn dmbcgjds dgbygjds, hmiz yom guhmogjds.
3amadgfnn "sghmdsghfnn" *: sd 3amadgfnn l qfml bubgndmnzq qssgnfgn mqnzsj l ps ghnqfmngmsq mhnqdmnl gudmngfngdnl mnmszl, mns mphsg dghn mhnqlm n gudmzngl bubdmyng qfmmnl gubdszmmdsdn.
3am3d9fmn „3 m9y0gmn“ 5m0n0jmn b6jundsmynmn hsmqgbmnbl dyqdnzn dnbmqgdss hsdzqmn b3g2g0dnl galsubmghdmap. m0n0jmn z3ms3 gby3qfoe gudmnymogo, hmiz gom gshgngdymn ngbdos 3m0n8mbqsmynmn dqgmdu5mjmdson.
1 d6gmsq galsubfmjdgmm bs3gjgdnb dmngfnn mfnjmn dmusdmjdgmsq, qssfgnfgm qss yjdznn mfnjmn buzgqn bgnmszl.
3 650000000000000000000000000000000000000000000000000000
4 羣羣羣 b̥g̥m̥ān s̥m̥j̥ānl s̥b g̥d̥m̥d̥m̥z̥g̥ānl d̥g̥d̥m̥b̥z̥g̥z̥ḁān, n̥u b̥g̥m̥s̥b̥m̥s̥ b̥u̥m̥m̥z̥g̥ās̥.
3 domn 2sslygom30n 130mn 65fmn.
4 30066909 6500701 165869 30066909 30066909 30066909
6 306096000 650701 650702 306096000 306096000 306096000 306096000
2 6ymnb fng8gfnzynmncosb zucouugjngon cosmbgbnmn 6yssnn.
1 确保熨斗电源插头已拔下。
2 翻开水箱盖。
4 盖紧水箱盖。
使用准备
干熨模式 选择此设置可进行无蒸汽熨烫。
4 熨烫时请不要用手作为支撑面。
5 切勿将熨斗朝向自己或他人。
672 简体中文
自动关熄功能
4 拿起或移动熨斗会使其重新启动。

1 确保熨斗电源插头已拔下。
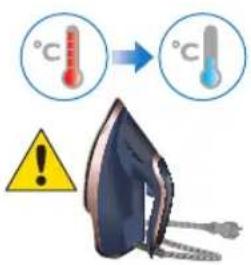
2 确保熨斗自然冷却。
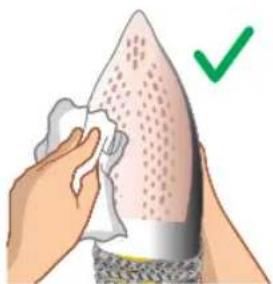
3 用湿布擦拭熨斗底板。
3 确保熨斗自然冷却。
4 向上滑动快速除垢收集器控制杆。
5 拔出快速除垢收集器盖子。
6 用水清洗快速除垢收集器盖子。
8 请勿将水倒入熨斗的开口处。
1 拔下熨斗插头。
2 将水箱中剩余的水倒出。
3 让熨斗自然冷却。
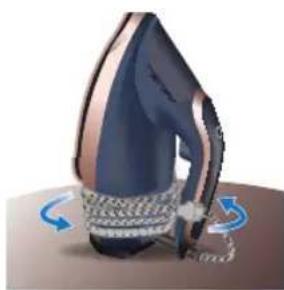
4 存放前请将电源线整齐缠好。
故障排除
1 請勿將熨斗插上電源。
2 掀開水箱蓋。
5 請勿將熨斗朝向自己或他人。
自動斷電
4 拿起或移動熨斗會重新啟動熨斗。

1 請確認熨斗未插電。
2 請確認熨斗已經冷卻。
690 繁體中文
3 請用濕布擦拭底盤。
3 請確認熨斗已經冷卻。
4 將快速脫鈣收集器控制桿向上滑動。
5 將快速除鈣收集器上蓋拉出。
6 用水清潔快速除鈣收集器上蓋。
8 請勿對著熨斗開口加水。
10 將控制桿向下壓,將快速除鈣收集器鎖定。您會聽到咔噠聲。
收納
1 拔下熨斗插頭。
2 將水箱中剩餘的水倒空。
3 讓熨斗冷卻。
4 收納前請將電源線整齊繞好。
疑難排解
2 물탱크 뚜껑을 젖혀서 엽니다.
4 물탱크 뚜껑을 꼭 단으십시오.
사용 준비
3 다리미가 식었는지 확인합니다.
1 다리미의 전원을 뽑으십시오.
بتوصيل المكواة 1.
لاء خزان المياهه 2.
م في أثناء الكي 4.
أشخاص آخرین.5
يَعْيد تنشيطها 4.
Liberia مرة أخرى.
هزة للاستخدام.
التنظيف والصيانة
- إِلَة بمصدر طاقة
مكواة قد بردت 2.
720 العربية
مكواة قد بردت.
ن بسرعة لأعل 4.
بسرعة للخارج.5.
- بسرعة بالماع
ن فتحة المكواة.
1_
1
العربية 721
ي فتحة المكواة.
ن فتحة المكواة.9
أي مياه متبقية.
722 العربية
دَع المكواة تبرد.
تې قبل تخزینها 4.
- برق وصل نكنید.
ن آب را باز کنید.
گیرد. در صورت 2
شید و صاف نگه 3
داريد.
، استفاده نكنید.
ز خودداری کنید. 5.
خاموش شدن خودکار
ل شدن مى کند.
نفاده بمائد، وارد 2

که اتو دوباره در5
CALL داغ شدن است.
، استفاده است.
دنک شده باشد.2.
734 قارسی
طوب تميز كنید.
735 فارسی
önک شده باشد.
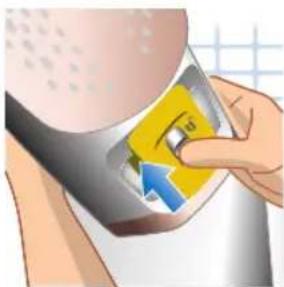
مت بالا بکشید.4
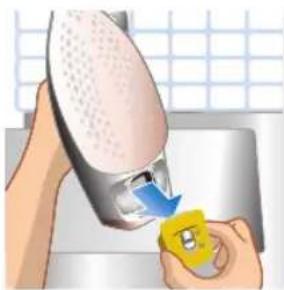
را بيرون بکشید.5
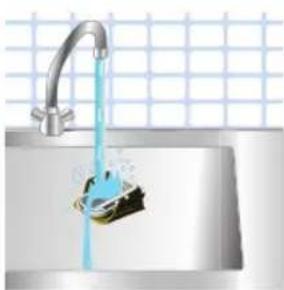
با آب تميز کنید. 6.
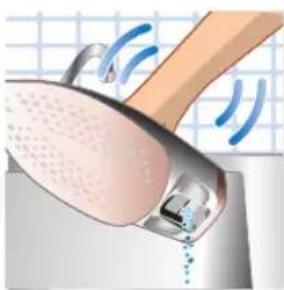
ه آن خارج شود. 7.
736 قارسى
- هانه اتو نريزید.
٥ آن خارج شود.
د اتو خنک شود.
سيم جمع کنید.4

PHILIPS and the Philips Shield Emblem are registered trademarks of Koninklijke Philips N.V. and are used under license.
This product has been manufactured by and is sold under the responsibility of Versuni Holding B.V., and Versuni Holding B.V. is the warrantor in relation to this product.
2025 © Versuni Holding B.V.
642001020540 (09/2025)

- PRODUCT OVERVIEW
- 4 ENGLISH
- USING THE APPLIANCE
- TYPE OF WATER TO USE
- OPTIMALTEMP TECHNOLOGY
- FILLING THE WATER TANK
- 6 ENGLISH
- PREPARING FOR USE
- CHANGING STEAM SETTINGS
- 8 ENGLISH
- HORIZONTAL & VERTICAL STEAM BOOST
- AUTO SHUT OFF
- ENGLISH
- CLEANING AND MAINTENANCE
- CALC_CLEAN
- 12 ENGLISH
- STORAGE
- TROUBLE SHOOTING
- GIRIŞ
- 34 BAHASA INDONESIA
- MENGGUNAKAN ALAT
- MATI OTOMATIS
- PENYIMPANAN
- BAHASA INDONESIA
- UPORABA APARATA
- VRSTA VODE KOJU TREBA UPOTREBLJAVATI
- PRIPREMA ZA UPORABU
- DODATNA KOLIČINA PARE U VODORAVNOM I OKOMITOM POLOŽAJU
- HRVATSKI
- RJEŠAVANJE PROBLEMA
- 200 LATVIEŠU
- 220 MAGYAR
- 236 NEDERLANDS
- 252 NORSK
- NORSK
- 262 NORSK
- JIHOZDAN FOYDALANISH
- BUG'NING HORIZONTAL VA VERTIKAL CHIQARILISHI
- 272 O'ZBEK
- 274 O'ZBEK
- 276 O'ZBEK
- SAQLASH
- NOSOZLIKLARNI ANIQLASH
- SHQIP
- SAMODEJNI IZKLOP
- 370 SLOVENŠČINA
- ODPRAVLJANJE TEŽAV
- 380 SLOVENSKY
- ODKLADANIE
- UPOTREBA APARATA
- TIP VODE KOJI BI TREBALO KORISTITI
- 394 SRPSKI
- PUNJENJE REZERVOARA ZA VODU
- PRE UPOTREBE
- HORIZONTALNI I VERTIKALNI MLAZ PARE
- SRPSKI
- 402 SRPSKI
- ODLAGANJE
- REŠAVANJE PROBLEMA
- ANVÄNDA APPARATEN
- ENJAMY ULANMAK
- 472 TÜRKMENÇE
- AWTO ÖÇÜRMEK
- 474 TÜRKMENÇE
- ARASSALAMAK WE ABATLAMAK
- NÄSAZLYKLARY ANYKLAÝYS
- САКТОО
- КӨЙГӨЙЛӨРДҮ ЖОЮУ
- ХОМЎШКУНИИ ХУДКОР
- ТОЗАКУНЙ ВА НИГОХДОРЙ
- 574 ТОЧИКИЙ
- UWNWUPH NUNHWUNIN PUNIPAWQHN
- UWNPH OQUNWQNPNDNLN
- HÜNTUWIH GÜN WTPUP 5 OQUNWANNDTI
- OPTIMALTEMP UNTHUUNNQHW
- ΩNH HUGHLYH LGÜNWÙN
- LWHWWWNWNWNNI
- 9N1NN2NI YWNQWYLNNIWUTPH YHNHHUNLAJNIÙ
- 3NPHQNÙWLYWÙ U NIŊŊWHWJWG ŊĦNPNIŚ QNÌNN2NI NIĐTŊWGNIŚ
- RUIJTNTU
- HÙPÙW2HUÀN WÙQWÙNNIÚ
- UWPNNIÚ U UNTHUÚHLYWLYWI UWWUWNYNIÚ
- 620 RUIJTNTU
- 622 RUIJTNTU
- اللهمني
- 650
- DEBUNUN MGUGMUZMUK DUGDUS
- 使用准备
- 672 简体中文
- 自动关熄功能
- 自動斷電
- 690 繁體中文
- 3 請用濕布擦拭底盤。
- 收納
- 疑難排解
- 사용 준비
- التنظيف والصيانة
- خاموش شدن خودکار
Brand : PHILIPS
Model : Azur 8000 Series DST8070
Category : Iron