GLI18V-5000 Professional - Lamp BOSCH - Free user manual and instructions
Find the device manual for free GLI18V-5000 Professional BOSCH in PDF.

User questions about GLI18V-5000 Professional BOSCH
0 question about this device. Answer the ones you know or ask your own.
Ask a new question about this device
Download the instructions for your Lamp in PDF format for free! Find your manual GLI18V-5000 Professional - BOSCH and take your electronic device back in hand. On this page are published all the documents necessary for the use of your device. GLI18V-5000 Professional by BOSCH.
USER MANUAL GLI18V-5000 Professional BOSCH
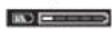
natural_image
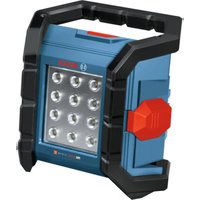
3D rendered image of a gray portable lighting fixture with adjustable arms and a central display (no visible text or symbols)Safety Instructions for Worklights

Read all the safety information and instructions. Failure to observe the safety information and follow instructions may result in electric shock, fire and/or serious injury.
Save all warnings and instructions for future reference.
▶ Please read and observe all safety and general instructions included with the battery or with the power tool supplied with the battery.
▶ Handle the worklight with care. The worklight generates a lot of heat, which can lead to an increased risk of fire and explosion.
▶ Do not use the worklight in potentially explosive atmospheres.
▶ Do not press the on/off switch again after the worklight has switched off automatically. This can damage the rechargeable battery. Ensure that the rechargeable battery is charged and that the worklight has cooled down before switching the worklight on again.
▶ Use only original Bosch accessories.
The light source cannot be replaced. If the light source is defective, the entire worklight has to be replaced.
▶ Do not use the worklight in road traffic. The worklight is not permitted for lighting in road traffic.
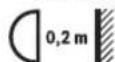
Maintain the minimum distance between the worklight and all illuminated surfaces and objects. Illuminated objects may overheat
if this distance is not maintained.

NOTE: Do not look into the light beam for prolonged periods. The optical radiation may harm your eyes.
▶ Do not cover the worklight head while the light is in operation. The worklight head warms up during operation and can cause burns if this heat accumulates.

Only use the worklight in indoor areas.
- Avoid dust accumulation at the workplace. Dust can easily ignite.
In case of damage and improper use of the battery, vapours may be emitted. The battery can set alight or explode. Ensure the area is well ventilated and seek medical attention should you experience any adverse effects. The vapours may irritate the respiratory system.
10 | English
If used incorrectly or if the battery is damaged, flammable liquid may be ejected from the battery. Contact with this liquid should be avoided. If contact accidentally occurs, rinse off with water. If the liquid comes into contact with your eyes, seek additional medical attention. Liquid ejected from the battery may cause irritation or burns.
The battery can be damaged by pointed objects such as nails or screwdrivers or by force applied externally. An internal short circuit may occur, causing the battery to burn, smoke, explode or overheat.
When the battery is not in use, keep it away from paper clips, coins, keys, nails, screws or other small metal objects that could make a connection from one terminal to another. A short circuit between the battery terminals may cause burns or a fire.
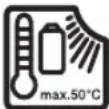

Protect the rechargeable battery against heat, e.g. including prolonged sun exposure, fire, water, and moisture. There is a risk of explosion and short circuit.
▶ Only charge the batteries using chargers recommended by the manufacturer. A charger that is suitable for one type of battery may pose a fire risk when used with a different battery.
▶ Only use the battery in the manufacturer's products. This is the only way in which you can protect the battery against dangerous overload.
▶ Do not modify or open the battery. There is a risk of short-circuiting.
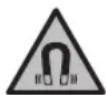
Do not place the worklight near implants or other medical devices such as pacemakers or insulin pumps. The magnet on the worklight generates a field that can impair the function of
implants and medical devices.
▶ Keep the worklight away from magnetic data carriers and magnetically sensitive devices. The effect of the magnet can lead to irreversible data loss.
▶ Do not mount the worklight overhead using the mounting magnet. There is a risk of injury if it falls down.
▶ Check whether the mounting magnet can support the worklight permanently. There is a risk of injury if it falls down.
▶ Do not secure the worklight to electrical cables or other non-secure objects. There is a risk of fire and injury.
If the worklight is secured with a magnet or utility hook, do not strain it with additional weight and check that the hold is secure. The magnet and utility hook are designed to solely bear the weight of the worklight and an inserted rechargeable battery. If there is additional weight, the worklight could break or fall down.
▶ If the worklight is secured with a magnet or utility hook, do not move the worklight or the object to which it is secured. The worklight could fall down.
When using the worklight in an elevated position, secure it adequately with a fall protection system. This will enable you to avoid material damage and personal injury if you inadvertently drop the worklight.
Product Description and Specifications
Please observe the illustrations at the beginning of this operating manual.
Intended Use
The worklight is intended for mobile illumination of indoor areas in a limited space and for a limited time and is not suitable for general room lighting.
Product Features
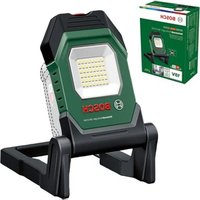
The numbering of the product features refers to the diagram of the worklight on the graphics page.
(1) Lamp head
(2) Brightness indicator
(3) On/off button
(4) Battery charge indicator
(5) Carrying handle
(6) Stand
(7) Attachment area for fall protection system
(8) Utility hooks
(9) Battery cover
(10) Locking mechanism of the battery cover
(11) Magnets
(12) 5/8" tripod mount
(13) Rechargeable battery ^a)
(14) Battery release button ^a)
(15) Hinges
a) This accessory is not part of the standard scope of delivery.
Technical Data
| Light GLI18V-5000 | |
| Article number | 3 601 JP5 1.. |
| Rated voltage V= 18 | |
| Max. rated power input W 43 | |
| Lighting duration, approx. ^A)(B) | min/Ah 25 |
| Total luminous flux ^B) | |
| – Level 1 lm 1000 | |
| – Level 2 lm 2500 | |
| – Level 3 lm 5000 | |
| Recommended ambient temperature during charging | °C 0 to +35 |
Light GLI18V-5000
| Permitted ambient temperature during operation ^C) and during storage | °C -20 to +40 |
| Compatible rechargeable batteries(≤ 8 Ah) | GBA18V...GBA 18V...ProCORE18V...EXPERT18V...EXBA18V...CORE18V... |
| Recommended battery chargers GAL18... | GAL 18...GAL 36...GAL12V/18...GAL 12V/18...GAX 18...EXAL18... |
| Protection class /III | |
| Protection rating IP54 |
A) At full brightness (excluding remaining operating time in dimmed mode)
B) Measured at 20–25 °C with rechargeable battery ProCORE18V 8.0Ah
C) Limited performance at temperatures < 0 °C
D) Applies only when battery cover is closed and locked Values can vary depending on the product, scope of application and environmental conditions. To find out more, visit www.bosch-professional.com/wac.
The colour rendition of illuminated objects can be distorted.
Rechargeable battery
Bosch also sells worklights without a rechargeable battery. You can tell whether a rechargeable battery is included with the worklight by looking at the packaging.
Charging the battery
▶ Use only the chargers listed in the technical data. Only these chargers are matched to the lithium-ion battery of the worklight.
Note: Lithium-ion rechargeable batteries are supplied partially charged according to international transport regulations. To ensure full rechargeable battery capacity, fully charge the rechargeable battery before using your tool for the first time.
Inserting and Removing the Rechargeable Battery (see figure A)
Unlock the locking mechanism (10) of the battery cover (9) and fold back the battery cover.
Insert the charged battery (13) into lamp head (1) until it can be felt to engage and faces flush against the lamp head.
To remove the rechargeable battery, press the battery release button and pull the battery out. Do not use force to do this.
The rechargeable battery has two locking levels to prevent the battery from falling out if the battery release button is
pressed unintentionally. The rechargeable battery is held in place by a spring when inserted in the worklight.
Close the battery cover.
▶ Make sure that the rubber lip is seated correctly when closing the battery cover. Otherwise protection against dust and splash water will not be ensured.
Battery charge indicator
When the rechargeable battery is inserted, you can see the state of charge of the battery on the battery charge indicator (4) of the worklight.
If the 18 V rechargeable battery is removed from the worklight, you can also have the state of charge indicated on the battery.
Battery Charge Indicator on the Worklight
The five LEDs on the battery charge indicator (4) indicate the state of charge of the rechargeable battery when the worklight is switched on.
Battery Charge Indicator on the 18 V Rechargeable Battery
Note: Not all battery types have a battery charge indicator.
The green LEDs on the battery charge indicator indicate the state of charge of the rechargeable battery. For reasons of safety, it is only possible to check the state of charge when the worklight is switched off.
Press the button for the battery charge indicator or to show the state of charge. This is also possible when the rechargeable battery is removed.
If no LED lights up after pressing the button for the battery charge indicator, the rechargeable battery is defective and must be replaced.
Rechargeable battery type GBA 18V... | GBA18V...

LED Capacity
| 3× continuous green light 60–100 % |
| 2× continuous green light 30–60 % |
| 1× continuous green light 5–30 % |
| 1× flashing green light 0–5 % |
Battery model ProCORE18V... | EXPERT18V... | EXBA18V... | CORE18V...

LED Capacity
| 5 × continuous green light 80–100 % |
| 4 × continuous green light 60–80 % |
| 3 × continuous green light 40–60 % |
| 2 × continuous green light 20–40 % |
| 1 × continuous green light 5–20 % |
12 | English
LED Capacity
1 × flashing green light 0–5 %
Battery defect risk detection
EXPERT18V... | EXBA18V...
In addition to the state of charge of the rechargeable battery, the LEDs on the battery charge indicator can also indicate the risk of a battery defect.
To activate the function, press and hold the button for the battery charge indicator for 3 seconds. The analysis of the battery is signalled by a moving light on the battery charge indicator. The result of is shown on the battery charge indicator.
1 LED: The rechargeable battery has a high defect risk. Performance and runtime may
already be reduced. Replacing the rechargeable battery is recommended.
5 LEDs: The rechargeable battery is in good condition and has a low defect risk.
Please note: The rechargeable battery defect risk assessment works in a binary manner and offers a simplified status assessment, indicating either that the rechargeable battery is in good condition or that the rechargeable battery has an increased defect risk. A percentage of the battery status is not shown.
Recommendations for Optimal Handling of the Battery
Protect the battery against moisture and water.
Only store the battery within a temperature range of -20 to 50 °C. Do not leave the battery in your car in the summer, for example.
Occasionally clean the ventilation slots on the battery using a soft brush that is clean and dry.
A significantly reduced operating time after charging indicates that the battery has deteriorated and must be replaced. Follow the instructions on correct disposal.
Operation
Starting Operation
Remove the battery cover (see figure B)
A very large rechargeable battery will prevent the battery cover (9) from closing. In this case, the battery cover can be removed.
Push the two hinges (15) inwards against the spring force. Remove the battery cover. There is no IP protection whilst the battery cover is not in place!
To refit the battery cover (9), push the two hinges (15) inwards against the spring force again. Place the battery cover on the housing. Allow the two hinge pins to engage in the openings on the housing.
Setting up
Place the worklight on a stable, level surface. Make sure it is secure.
Switching on/off and adjusting the brightness
| On/off button (3) | Function |
| Press 1× Switch on the light, low brightness(1st level) | |
| Press 2× Switch on the light, medium brightness(2nd level) | |
| Press 3× Switch on the light, full brightness(3rd level) | |
Press 4× Switches off the worklight
If the worklight has been dimmed for approx. 5 minutes, it is switched off immediately with the next press.
Temperature Dependent Overload Protection
If the permissible operating temperature is exceeded, the worklight switches off. Allow the worklight to cool down and switch the worklight on again.
Practical Advice
The worklight will flash three times and light up with reduced brightness just before it is about to switch off due to an empty battery.
Tilting the Lamp Head
You can tilt the lamp head (1) by up to a maximum of 135^ in seven settings.
Utility hook
You can use the utility hooks (8) to hang up the worklight.
▶ Do not use the utility hooks to pull objects. The utility hooks or the worklight could break.
▶ Always use both utility hooks to hang up the work-light.
Magnetic attachment
You can use the magnets (11) to attach the worklight to ferromagnetic surfaces.
When attaching, make sure that all magnets are always in contact with the ferromagnetic surface.
▶ Keep your fingers away from the back of the stand when attaching the worklight to surfaces. The strong pulling force of the magnet may trap your fingers.
When attaching the cordless worklight, take care not to leave scratches on delicate surfaces.
Fastening to the tripod
You can use the tripod mount (12) to attach the worklight to a tripod.
Tighten the 5/8" screw. Ensure that the tripod has a firm footing.
Securing the Worklight Against Falling
Note: A fall protection system that is suitable for the weight of the entire system should be used to prevent the worklight
from falling. The maximum permitted length of the fall protection system is 0.5 m.
It is best to use the fall protection system with a tape loop secured by an anchor knot on the handle or a fall protection system with fall damper.
Please always refer to the operating instructions when attaching the fall protection system.
▶ Select the fixed anchorage point such that the work-light can fall freely into the fall protection system without putting the user at risk of harm in the event of a fall. You must secure the opposite side of the fall protection system to a stable structure (e.g. a building or scaffolding). The fall protection system must be able to move freely and may only be attached to the light in the permitted attachment area (7).
Maintenance and Service
Maintenance and Cleaning
Remove the rechargeable battery from the worklight before carrying out any work on the worklight (e.g. installation, maintenance, etc.) and during transport and storage. There is risk of injury from unintentionally pressing the on/off switch.
The worklight is maintenance-free and contains no parts that need to be replaced or serviced.
Only clean the plastic pane of the worklight with a dry, soft cloth to avoid damage. Do not use any detergents or solvents.
The light source cannot be replaced. If the light source is defective, the entire worklight has to be replaced.
After-Sales Service and Application Service
Great Britain
Tel. Service: (0344) 7360109
Malaysia
Tel.: (03) 79663194

You can find our service addresses and links to the repair service and spare parts ordering at www.bosch-pt.com/serviceaddresses
In all correspondence and spare parts orders, please always include the 10-digit article number given on the nameplate of the product.
Disposal
The worklights, batteries, accessories and packaging should be recycled in an environmentally friendly manner.
Do not dispose of worklights and rechargeable batteries/batteries in the household waste.
Only for EU countries and United Kingdom:
Electrical and electronic equipment or used batteries that are no longer suitable for use must be collected separately and disposed of in an environmentally friendly manner. Use the designated collection systems. Incorrect disposal may cause harmful effects on the environment and human health, due to the potential presence of hazardous substances.
Français
Calle Robert Bosch No. 405
C.P. 50071 Zona Industrial,
22 | Português
Toluca - México, RFC: RBO910102QJ9
Tel.: (52) 55 528430-62
Tel.: 800 6271286
España
www.bosch-pt.com/serviceaddresses
Risicoherkenning accudefect
EXPERT18V... | EXBA18V...
Tlf. Service Center: 44898855
Du kan finde vores serviceadresser og links til reparationsservice og bestilling af reservedele på: www.bosch-pt.com/serviceaddresses
www.bosch-pt.com/serviceaddresses
www.bosch-pt.com/serviceaddresses
www.bosch-pt.com/serviceaddresses
www.bosch-pt.com/serviceaddresses
www.bosch-pt.com/serviceaddresses
www.bosch-pt.com/serviceaddresses
Molimo da kod svih pitanja i naručivanja rezervnih delova neizostavno navedete broj artikla sa 10 brojčanih mesta prema tipskoj pločici proizvoda.
Odlaganje na otpad
www.bosch-pt.com/serviceaddresses
U slučaju upita ili naručivanja rezervnih dijelova, molimo vas obavezno navedite 10-znamenkasti kataloški broj s tipske pločice proizvoda.
Zbrinjavanje
Svjetiljke, aku-baterije, pribor i ambalažu treba dovesti na ekološki prihvatljivo recikliranje.
www.bosch-pt.com/serviceaddresses
www.bosch-pt.com/serviceaddresses
Tombol on/ Fungsi off (3)
1× tekan Menyalakan lampu, kecerahan rendah (level pertama)
2× tekan Menyalakan lampu, kecerahan sedang (level kedua)
3× tekan Menyalakan lampu, kecerahan penuh (level ketiga)
4× tekan Mematikan lampu
www.bosch-pt.com/serviceaddresses
https://www.bosch-pt.com/serviceaddresses
Garantiebedingungen Guarantee Conditions Conditions de Garantie Condiciones de Garantía

https://www.bosch-pt.com/guarantee/202507