
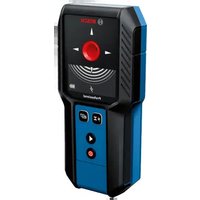
GMS 120-27 Professional - Detector BOSCH - Free user manual and instructions
Find the device manual for free GMS 120-27 Professional BOSCH in PDF.

 FR
FR
 BG
BG
 CS
CS
 DA
DA
 DE
DE
 EL
EL
 EN
EN
 ES
ES
 ET
ET
 FI
FI
 HR
HR
 HU
HU
 IT
IT
 KK
KK
 LT
LT
 LV
LV
 MK
MK
 NL
NL
 NO
NO
 PL
PL
 PT
PT
 RO
RO
 RU
RU
 SK
SK
 SL
SL
 SV
SV
 TR
TR
 UK
UK
| Product Type | Digital Detector |
| Brand | Bosch |
| Model | GMS 120-27 Professional |
| Dimensions (L × W × H) | 186 × 86 × 33 mm |
| Weight | 0.24 kg (without battery) |
| Power supply | Lithium-ion battery 3.7 V or LR6 (AA) batteries 2×1.5 V |
| Battery life | Approx. 5 h (lithium-ion), 6 h (alkaline), 7 h (NiMH) |
| Max. detection depth (non-ferrous metals) | 120 mm |
| Max. detection depth (ferrous metals) | 100 mm |
| Max. detection depth (live cables) | 50 mm |
| Max. detection depth (wood studs) | 30 mm |
| Main functions | Detection of metals, live cables, wood studs |
| Protection rating | IP54 |
| Operating temperature | -10 °C to +50 °C |
| Storage temperature | -20 °C to +70 °C |
| Cleaning | Soft, dry cloth, no detergents |
| Safety | Do not use in explosive atmospheres, have repairs carried out by a professional |
| Spare parts | Lithium-ion battery (ref. 1 607 A35 ON8), mains charger (ref. 2 609 120 713 EU) |
| Repairability | Repair by authorized Bosch service center |
| General information | Indoor and outdoor use, manual calibration possible |
Frequently Asked Questions - GMS 120-27 Professional BOSCH
User questions about GMS 120-27 Professional BOSCH
0 question about this device. Answer the ones you know or ask your own.
Ask a new question about this device
Download the instructions for your Detector in PDF format for free! Find your manual GMS 120-27 Professional - BOSCH and take your electronic device back in hand. On this page are published all the documents necessary for the use of your device. GMS 120-27 Professional by BOSCH.
USER MANUAL GMS 120-27 Professional BOSCH
Transport
All instructions must be read and observed. The safeguards integrated into the measuring tool may be compromised if the measuring tool is not used in accordance with these instructions. STORE THESE INSTRUCTIONS IN A SAFE PLACE.
Have the measuring tool repaired only by a qualified specialist using only original replacement parts. This will ensure that the safety of the measuring tool is maintained. - Do not use the measuring tool in explosive atmospheres which contain flammable liquids, gases or dust. Sparks may be produced inside the measuring tool, which can ignite dust or fumes. Do not modify or open the battery. There is a risk of short-circuiting. In case of damage and improper use of the battery, vapours may be emitted. The battery can set alight or explode. Ensure the area is well ventilated and seek medical attention should you experience any adverse effects. The vapours may irritate the respiratory system. If used incorrectly or if the battery is damaged, flammable liquid may be ejected from the battery. Contact with this liquid should be avoided. If contact accidentally occurs, rinse off with water. If the liquid comes into contact with your eyes, seek additional medical attention. Liquid ejected from the battery may cause irritation or burns. The battery can be damaged by pointed objects such as nails or screwdrivers or by force applied externally. An internal short circuit may occur, causing the battery to burn, smoke, explode or overheat. When the battery is not in use, keep it away from paper clips, coins, keys, nails, screws or other small metal objects that could make a connection from one terminal to another.
A short circuit between the battery terminals may cause burns or a fire.
Only use the battery with products from the manufacturer. This is the only way in which you can protect the battery against dangerous overload. - Only charge the batteries using chargers recommended by the manufacturer. A charger that is suitable for one type of battery may pose a fire risk when used with a different battery.

Protect the battery against heat, e.g. against continuous intense sunlight, fire, dirt, water and moisture. There is a risk of explosion and short-circuiting.
The measuring tool may not be 100% accurate for technological reasons. To eliminate hazards, familiarize yourself with further sources of information, such as building plans and photographs taken during construction, etc., before carrying out any drilling, sawing, or routing work on walls, ceilings, or floors. Environmental influences, such as humidity, or proximity to devices that generate strong electric, magnetic, or electromagnetic fields, moisture, metallic building materials, foil-laminated insulation materials, or conductive wallpaper or tiles may impair the accuracy of the measuring tool. The number, type, size, and position of the objects may distort the measuring results. If there are gas pipes in the building, check to ensure that none of them have been damaged after completing any work on walls, ceilings, or floors. - When attaching objects to dry walls, and in particular when attaching them to the substructure, check to ensure that both the wall and the fastening materials have a sufficient load-bearing capacity.
Safety instructions for power supply
This power supply is not intended for use by children or persons with physical, sensory, or mental limitations or a lack of experience or knowledge. This power supply can be used by children aged 8 or older and by persons who have physical, sensory, or mental limitations or a lack of experience or knowledge if a person responsible for their safety supervises them or has instructed them in the safe operation of the power supply and they understand the associated dangers.
Otherwise, there is a risk of operating errors and injuries.

Do not expose the power supply to rain or wet conditions. Water entering the
power supply will increase the risk of electric shock.
Keep the power supply clean. Dirt poses a risk of electric shock. Always check the power supply before using it. Stop using the power supply if you discover any damage. Do not open the power supply yourself, and have it repaired only by Bosch or by an authorized after-sales service center using only original replacement parts. Damaged power supplies increase the risk of an electric shock.
Product Description and Specifications
Please observe the illustrations at the beginning of this operating manual.
Intended Use
The measuring tool is intended for the detection of metal (ferrous and non-ferrous metals, e.g., reinforcing steel), wooden beams, and live wires in walls, ceilings, and floors. The measuring tool is suitable for indoor and outdoor use.
Product features
The numbering of the product features shown refers to the illustration of the measuring tool on the graphic page.
(1) Light-up ring (2) Marking hole (3) Display (4) Metal/electricity button (5) Wood button (6) Audio signal button (7) On/off button (8) Gripping surface (9) Protective bag (10) USB Type-C® cable a) b) (11) Lithium-ion battery pack locking mechanism a) (12) Lithium-ion battery pack (13) USB Type-C® port a) (14) Charge indicator of the battery pack a) (15) Locking mechanism of the battery compartment cover
(16) Battery compartment cover (17) Sensor area (18) Contact pads (19) Serial number
a) This accessory is not part of the standard scope of delivery. b) USB Type-C® and USB-C® are trademarks of USB Implementers Forum.
Display Elements (see figure A)
(a) Object centre indicator (b) Measuring indicator (c) Audio signal status indicator (d) Battery charge indicator (e) Non-metallic object indicator (f) Live cable indicator (g) Magnetic metal indicator (h) Non-magnetic metal indicator (i) Radio interference indicator (j) Warning indicator (k) Temperature monitoring indicator
Technical data
| Digital detector GMS 120-27 | |
| Article number | 3601K817.. |
| Max. detection depthA) | |
| - Non-ferrous metals (copper) 120 mm | B) |
| - Ferrous metals 100 mm | C) |
| - Live wires 100–230 V (with voltage applied) 50 mm | D) |
| - Wooden beams in dry walls 30 mm | E) |
| Operating temperature -10 °C to +50 °C | |
| Storage temperature -20 °C to +70 °C | |
| Operating frequency range 50 ± 2 kHz | |
| Max. magnetic field strength (at 10 m) 42 dBμA/m | |
Digital detector GMS 120-27
| Max. altitude 2000 m | |
| Relative air humidity max. | |
| - For detecting objects 90% | |
| - For classifying live cables 50% | |
| Pollution degree according to IEC 61010-1 2 | F) |
| Energy supply | |
| - Lithium-ion battery pack 3.7 V | |
| - Non-rechargeable batteries (alkaline manganese) 2 × 1.5 V LR6 (AA) | |
| - Rechargeable batteries (NiMH) 2 × 1.2 V HR6 (AA) | |
| Operating time, approx. | |
| - With lithium-ion battery pack 5 h | |
| - With non-rechargeable batteries (alkaline man-ganese) | 6 h |
| - With rechargeable batteries (NiMH) 7 h | |
| Weighta) | 0.24 kg |
| Dimensions (length × width × height) 186 × 86 × 33 mm | |
| Protection rating IP54 | |
| Lithium-ion battery pack (accessory) BA 3.7V 1.0Ah A | |
| Article number | 1607 A35 ON8 |
| Charging connection USB Type-C® | |
| Rated voltage 3.7 V | - |
| Capacity 1.0 Ah | |
| Recommended ambient temperature during charging | +10°C to +35°C |
| Recommended ambient temperature during operation and during storage | -10°C to +45°C |
| Power supply (accessory) | |
| Output voltage | 5.0V - |
| Minimum output current | 500 mA |
| Recommended power supplyb) | |
| - EU | 2609 120 713 |
A) Depends on material and size of the objects, as well as material and condition of the substrate B) For a copper pipe with a 15 mm diameter C) For reinforcing steel with a 12 mm diameter D) Lower detection depth with non-live wires E) For wooden beams with a width of 54 mm, behind 30 mm thick plasterboard F) Only non-conductive deposits occur, whereby occasional temporary conductivity caused by condensation is expected. G) Weight without lithium-ion battery pack/non-rechargeable batteries/rechargeable batteries/battery compartment cover H) For additional technical data, visit: https://www.bosch-professional.com/ecodesign The serial number (19) on the type plate is used to clearly identify your measuring tool.
The accuracy and detection depth of the measuring result may be negatively affected if the condition of the substrate is unfavorable.
Measuring Tool Power Supply
The measuring tool can be operated either with a Bosch lithium-ion battery pack (12), with commercially available non-rechargeable batteries or with commercially available NiMH rechargeable batteries.
Note: Never store the measuring tool without an inserted battery compartment cover (16) or lithium-ion battery pack (12), particularly in dusty or humid environments. The battery charge indicator (d) will indicate the state of charge of the lithium-ion battery pack (12), non-rechargeable batteries or NiMH batteries on the display.
Operation with Lithium-Ion Battery Pack
Inserting/Replacing a Lithium-Ion Battery Pack
To switch from non-rechargeable or NiMH batteries to a lithium-ion battery pack (12), press on the locking mechanism (15) of the battery compartment cover. Remove the battery compartment cover (16) and the inserted non-rechargeable or rechargeable batteries.
Insert the lithium-ion battery pack (12) and let the locking mechanism (11) click into place.
To remove the lithium-ion battery pack (12), press the locking mechanism (11) and take the lithium-ion battery pack out of the measuring tool.
Charging a Lithium-Ion Battery Pack
For charging, use the recommended USB power supply unit or a USB power supply unit whose output voltage and minimum output current comply with the requirements in the "Technical Data" section. Observe the operating manual of the USB power supply unit. Recommended power supply unit: See "Technical Data". Pay attention to the mains voltage. The voltage of the power source must match the voltage specified on the type plate of the power supply. Only use the USB connection to charge the battery at an ambient temperature of between +10°C and +35°C. Charging outside of this temperature range can damage the battery and increase the risk of fire.
Note: Lithium-ion rechargeable batteries are supplied partially charged according to international transport regulations. To ensure full rechargeable battery capacity, fully charge the rechargeable battery before using your tool for the first time.
Open the flap for the USB Type-C® port (13). Connect the USB port to a USB power supply unit using the USB cable (10). Connect the USB power supply unit to the mains supply.
Colour of charge indicator (14) Meaning
Yellow: Lithium-ion battery pack is being charged.
Green: Lithium-ion battery pack is fully charged.
Red: Charging voltage or charging current is unsuitable.
It is not possible to take measurements during the charging process because the measuring tool cannot be fully placed on the surface.
Remove the USB cable (10) after completing the charging process. Close the flap for the USB Type-C® port (13) to protect it from dust and splashes.
Operation with Batteries/Rechargeable Batteries
To switch from a lithium-ion battery pack (12) to non-rechargeable/NiMH batteries, remove the lithium-ion battery pack (12).
Using alkali-manganese non-rechargeable batteries or NiMH rechargeable batteries is recommended for operation of the measuring tool.
Insert the non-rechargeable batteries/rechargeable batteries.
When inserting the batteries, ensure that the polarity is correct according to the illustration on the inside of the battery compartment.
Insert the battery compartment cover (16) and let it click into place.
Always replace all the batteries at the same time. Only use batteries from the same manufacturer and which have the same capacity.
Take the batteries out of the measuring tool when you are not using it for a prolonged period of time. The batteries can corrode during prolonged storage in the measuring tool.
Operation
Protect the measuring tool from moisture and direct sunlight. Do not expose the measuring tool to any extreme temperatures or variations in temperature. In case of large variations in temperature, leave the measuring tool to adjust to the ambient temperature before switching it on. The accuracy of the measuring tool and the functionality of the display may be compromised if exposed to extreme temperatures or variations in temperature. Avoid hard knocks to the measuring tool or dropping it. After severe external influences and in the event of abnormalities in the functionality, you should have the measuring tool checked by an authorised Bosch after-sales service agent. Hold the measuring tool by the intended gripping surface (8) only, so as not to influence the measurement. Do not attach any stickers or labels to the sensor area (17) on the rear of the measuring tool. Metal labels in particular will affect measuring results.

Do not wear gloves when taking measurements and make sure that you are properly earthed. If you are not properly earthed, the identification of live wires may be impaired.
When taking measurements, avoid getting close to devices that emit strong electric, magnetic or electromagnetic fields, such as mobile telephones, laptops or tablets. If possible, deactivate all tools whose radiation could interfere with the measurement and switch off the corresponding functions or tools.
tions or tools.
Starting Operation
Switching on/off
Before switching on the measuring tool, ensure that the sensor area (17) is dry. If necessary, use a cloth to dry the measuring tool.
If the measuring tool has been exposed to a significant change in temperature, leave it to adjust to the ambient temperature before switching it on.
To switch on the measuring tool, press the on/off button (7).
To switch off the measuring tool, press the on/off button (7) again.
If no button on the measuring tool is pressed for approx. 5 minutes and no objects are detected, the measuring tool will automatically switch off.
Switching audio signal on/off
The audio signal can be switched on or off with the audio signal button (6). When the audio signal is switched off, the audio signal status indicator (c) will appear on the display.
How it works (see figure B)
The measuring tool checks the base material of the sensor area (17) in the measurement direction A up to the maximum detection depth.
Metal objects (e.g. copper pipe or reinforcing steel) and live cables (50-60 Hz) are automatically searched for during each measurement. The metal/electricity button (4) will light up to provide confirmation.
To also search for wood in dry walls, press the wood button (5). This function is confirmed by the wood button (5) lighting up. To switch off the wood detection function, press either the wood button (5) or the metal/electricity button (4) so that the wood button (5) turns off.
Note: Only switch on the wood detection function for searching in dry walls with a wooden substructure. On other surfaces, the measurement result may be impaired.
Measuring Process (see figure C)
Position the measuring tool on or against the surface being inspected. The light-up ring (1) will light up to indicate readiness to measure.
Hold the measuring tool uniformly by the gripping surface (8). Do not change your grip during the measurement and, in particular, do not touch the sensor area (17).
Always move the measuring tool in a straight line in direction B over the surface, applying light pressure, without lifting it off or changing the pressure. The measuring tool should primarily be moved transversely to the object you are searching for. If you do not know how the object is aligned in the wall, perform a cross measurement (see figure C).
Important information for locating steel reinforcement: The measuring tool first needs to detect that it is a substrate with a meshed steel reinforcement. To do this, move the measuring tool in a circular motion (greater than 30 cm diameter) over the substrate before taking the actual measurement. Once this is done, do not lift the measuring tool off the substrate.
Then perform the measurement as usual. Ideally, the measurement should pass over an intersection point and a single mesh of the steel reinforcement.
Detection Indicators:
- If no object is detected below the sensor area, the light-up ring (1) will light up green. The measuring indicator (b) is empty and no audio signal will sound.
- When the measuring tool approaches an object, the light-up ring (1) will light up red. As the measuring tool gets closer, the amplitude in the measuring indicator (b) will increase and the audio signal will sound more quickly.
- Above the centre of an object, the measuring indicator (b) will indicate the maximum amplitude of the measurement, the object centre indicators (a) will light up and an audio signal will sound. The light-up ring (1) will continue to light up red.
- When the measuring tool moves away from the object, the object centre indicators (a) will turn off, the amplitude in the measuring indicator (b) will decrease and the audio signal will sound more slowly.
Objects are only displayed roughly the first time you move over the centre and boundaries of the object.
In order to then locate the exact centre of an object, move the measuring tool back in the direction of the object without lifting it off until the object centre is indicated again (the object centre indicators (a) will light up).
In order to locate the boundaries of the object with greater precision, continue to move the measuring tool in a straight line from the object's centre until the light-up ring (1) is no longer lit up red.
The marking hole (2) is located above the central measuring point. If necessary, you can use this to mark the centre or boundaries of the object.
Note: After you have marked an object through the marking hole (2) (e.g. with a pencil), you will need to start a new measurement because the measurement may be impaired by the pencil.
The type of object found is indicated on the display:

(h) Non-magnetic metal, e.g. copper pipe

(g) Magnetic metal, e.g. rebar

(f) Live, e.g. power lines

(e) Non-metallic, e.g. wooden beams
Information about Detecting Live Cables
- The cable must be live. You should therefore connect electricity consumers (e.g. lights, appliances) to the electricity cable you are trying to find. Switch on the electricity consumers to ensure that the electricity cable is live.
- The 50 - 60 Hz signal from the electricity cable must be able to reach the measuring tool. If the cable is in damp walls (e.g. > 50% humidity), behind metallic foil (e.g. thermal insulation) or in an empty metal pipe, the signal will not reach the measuring tool and you will not be able to find the cable.
- The measuring tool must be sufficiently earthed. To do this, hold it firmly (without gloves) by the gripping surface (8). Make sure that you are in good contact with the floor. Insulating shoes, ladders or platforms may compromise your contact with the floor. The floor must also be earthed in order for live cables to be detected.
- The 50 - 60 Hz signal from the electricity cable must be stronger along the cable than in its immediate vicinity. If the wall is very damp or poorly earthed, the signal will be the same strength throughout the wall. This will result in the measuring tool indicating that it has found a signal over a large area, but it will not be able to detect the exact location of the cable.
In this instance, it may be helpful to place your free hand on the wall 20 - 30 cm from the measuring tool in order to conduct the signal away from the wall. However, you should not change the position of your free hand during the measuring process.
- Multi-phase (known as three-phase current or heavy current) electricity cables cannot be detected as live cables because the signals from the different phases cancel each other out. You can, however, detect multi-phase electricity cables at shallow depths as metal objects.
- Conductive wall surfaces, such as certain tiles, may result in electricity cables no longer being indicated or the light-up ring (1) lighting up red over a large area.
- Flat lying electricity cables (up to max. 2 - 3 cm in depth) may also be indicated as metal objects. However, this does not apply to solid-wire cables.
Switch off power consumers and make sure that live cables are de-energised before drilling, sawing or milling into walls, ceilings or floors. After performing any kind of work, check to ensure that objects placed on the substrate are not live.
Information about Object Indication
- When the wood detection function is switched on, other objects, such as water-filled plastic pipes, power cables or gas lines, may be indicated as non-metallic objects in certain circumstances. Before drilling, sawing or milling, use other sources of information to check that the object found is actually a wooden beam and not another object (e.g. a plastic pipe, power cable, gas line).
34 | English
- Nails and screws in the base material may result in wooden beams being identified as metal objects.
- Wider objects can be identified by the light-up ring (1) lighting up red over a wide area. Under certain circumstances, wide objects may not be indicated to their entire extent.
Before drilling, sawing or routing into walls, refer to other sources of information to ensure that you eliminate hazards. As the measuring results can be influenced through ambient conditions or the nature of the wall, there may be a hazard even though the measuring indicator (b) does not indicate an object in the sensor area, no audio signal sounds and the light-up ring (1) lights up green.
Errors - Causes and Corrective Measures
Cause Remedy
Temperature monitoring indicator (k) and warning indicator (j) light up, it is not possible to take a measurement
| The measuring tool is outside of the operating temperature range, or has been subjected to large fluctuations in temperature. | Switch the measuring tool off and allow it to adjust to the ambient temperature before switching it back on. It is only possible to take exact measurements if the temperature inside the measuring tool remains constant. |
Radio interference indicator (i) and warning indicator (j) light up
| Measurements are impaired by electric, magnetic or electromagnetie fields (such as mobile phones, laptops or tablets near the measuring tool). | If possible, deactivate all tools whose radiation could interfere with the measurement and switch off the corresponding functions or tools. |
Warning indicator (j) flashes
The measuring tool has developed Send the measuring tool to an authorised Bosch a fault and is no longer functional. after-sales service centre.
Metal object indicator and continuously high amplitude in the measuring indicator (b), even though there is no metal object near the measuring tool
The factory calibration is no longer manually recalibrate the measuring tool (see "Recal-valid (e.g. if the measuring tool ibrating the Measuring Tool", page 35). falls from great height).
Light-up ring (1) does not light up when it is positioned on the surface
Cause Remedy
| The surface cannot be detected because the sensor area (17) is dirty. | Clean the measuring tool with a soft, dry cloth and re-start the measurement. |
| Contact with the wall or surface may not be detected due to partic-ular wall properties (e.g. a very dark surface). | Position the measuring tool on the surface. For manual wall detection, press and hold the metal/electricity (4) and wood (5) buttons simultaneously until the light-up ring (1) is lit (for approx. 3 s) and an audio signal sounds. Then perform a meas-ment as usual.Note: Before taking the next measurement on a dif-ferent surface, you must reset the manual wall de-tection. To do this, switch the measuring tool off and on again. |
Recalibrating the Measuring Tool
If a metal object is indicated and the measuring indicator (b) indicates a continuously high amplitude, even though there is no metal object near the measuring tool, the measuring tool can be manually recalibrated.
- Ensure that the battery charge indicator (d) still shows a capacity of at least 1/3.
- Switch the measuring tool off.
- Remove all objects near the measuring tool that could be detected (including watches or metal rings).
Hold the measuring tool up horizontally so that the rear side of the measuring tool is pointing towards the floor.
- To switch to calibration mode, simultaneously press the on/off button (7) and the audio signal button (6). Press and hold both buttons (for approx. 5-10 s) until the light-up ring (1) flashes red.
- To start recalibration, press and hold the audio signal button (6) (for approx. 5-10 s) until the light-up ring (1) lights up red.
- If the calibration was successful, the measuring tool will start automatically after a few seconds and will be ready for operation again.
Note: If the measuring tool does not start automatically, repeat the recalibration. If the measuring tool does not start, send it to an authorised Bosch after-sales service centre.
Maintenance and Service
Maintenance and Cleaning
- Check the measuring tool before each use. If the measuring tool is visibly damaged or parts have become loose inside the measuring tool, safe function can no longer be ensured.
Always keep the measuring tool clean and dry to ensure optimum, safe operation.
Never immerse the measuring tool in water or other liquids.
Wipe off any dirt using a dry, soft cloth. Do not use any detergents or solvents.
Do not remove the contact pads (18) on the rear side of the measuring tool.
Only store and transport the measuring tool in the protective bag provided.
After-Sales Service and Application Service
Our after-sales service responds to your questions concerning maintenance and repair of your product as well as spare parts. You can find explosion drawings and information on spare parts at: www.bosch-pt.com
The Bosch product use advice team will be happy to help you with any questions about our products and their accessories.
In all correspondence and spare parts orders, please always include the 10-digit article number given on the nameplate of the product.
Malaysia
Robert Bosch Sdn. Bhd.(220975-V) PT/SMY
No.8A, Jalan 13/6
46200 Petaling Jaya
Selangor
Tel.: (03) 79663194
Toll-Free: 1800 880188
Fax: (03) 79583838
E-Mail: kiathoe.chong@my.bosch.com
www.bosch-pt.com.my
Great Britain
Robert Bosch Ltd. (B.S.C.)
P.O.Box 98
Broadwater Park
North Orbital Road
Denham Uxbridge
UB95HJ
1609 92A 9PR| (04.07.2024) Bosch Power Tools
At www.bosch-pt.co.uk you can order spare parts or arrange the collection of a product in need of servicing or repair.
Tel. Service: (0344) 7360109
E-Mail: boschservicecentre@bosch.com
You can find further service addresses at:
www.bosch-pt.com/serviceaddresses
Transport
The recommended lithium-ion batteries are subject to legislation on the transport of dangerous goods. The user can transport the batteries by road without further requirements.
When the batteries are shipped by third parties (e.g. air transport or forwarding agency), special requirements on packaging and labelling (e.g. ADR regulations) must be met. A dangerous goods expert must be consulted when preparing the items for shipping.
Dispatch battery packs only when the housing is undamaged. Tape or mask off open contacts and pack up the battery in such a manner that it cannot move around in the packaging. Please also observe the possibility of more detailed national regulations.
Disposal

Electrical and electronic equipment, batteries, accessories and packaging should be sorted for environmentally friendly recycling.
Do not dispose of electrical and electronic equipment and batteries in the household waste!
Only for EU countries:
According to the Directive 2012/19/EU on waste electrical and electronic equipment and its transposition into national law, electrical and electronic equipment that are no longer usable, and, according to the Directive 2006/66/EC, defective or drained batteries must be collected separately and disposed of in an environmentally correct manner. If disposed incorrectly, waste electrical and electronic equipment may have harmful effects on the environment and human health, due to the potential presence of hazardous substances.
Only for United Kingdom:
According to The Waste Electrical and Electronic Equipment Regulations 2013 (SI 2013/3113) (as amended) and the Waste Batteries and Accumulators Regulations
2009 (SI 2009/890) (as amended), products that are no longer usable must be collected separately and disposed of in an environmentally friendly manner.
Battery packs/batteries:
Li-ion:
Please observe the notes in the section on transport (see "Transport", page 37).
Robert Bosch Morocco SARL
53, Rue Lieutenant Mahmoud Mohamed
20300 Casablanca
Tel.: +212 5 29 31 43 27
E-Mail: sav.outillage@ma.bosch.com
France
Robert Bosch (France) S.A.S.
www.bosch-pt.com/serviceaddresses
Transport
Calle Robert Bosch No. 405
C.P. 50071 Zona Industrial, Toluca - Estado de Mexico
Tel.: (52) 55 528430-62
Tel.: 800 6271286
www.bosch-pt.com/serviceaddresses
Transport
www.bosch-pt.com/serviceaddresses
86 | Portuguese
Transport
www.bosch-pt.com/serviceaddresses
Transport
www.bosch-pt.com/serviceaddresses
Transport
Bosch Service Center
Telegrafvej 3
2750 Ballerup
Spare parts can be ordered online or a repair order can be created at www.bosch-pt.dk.
Service Center phone: 44898855
Fax: 44898755
E-Mail: vaerktoej@dk.bosch.com
www.bosch-pt.com/serviceaddresses
Transport
Bosch Service Center
Telegrafvej 3
2750 Ballerup
Denmark
Tel.: (08) 7501820 (within Sweden)
Fax: (011) 187691
You can find more contact details for service here:
www.bosch-pt.com/serviceaddresses
Transport
The recommended lithium-ion batteries are subject to the requirements for dangerous goods.
Only for EU countries:
www.bosch-pt.com/serviceaddresses
Transport
www.bosch-pt.com/serviceaddresses
Transport
www.bosch-pt.com/serviceaddresses
Transport
The lithium-ion batteries are subject to the requirements for dangerous goods. The batteries can be transported by the user by road without further requirements. When, however, the batteries are sent by a third party (e.g., air transport or forwarding agency), special requirements for packaging and labeling must be observed. In this case, when preparing the consignment, the advice of an expert for dangerous goods must be sought.
Only dispatch the batteries if the packaging is intact. Tape the open contacts and pack the battery in such a way that it does not
move around in the packaging. Please also observe the possibly more stringent national regulations.
Disposal

Power tools, rechargeable batteries/batteries, accessories and packaging should be recycled in an environmentally friendly manner.
Do not dispose of power tools and rechargeable batteries/batteries in household waste!
Only for EU countries:
In accordance with European Directive 2012/19/EU on waste electrical and electronic equipment and its transposition into national law, used electrical appliances must be collected separately, and in accordance with European Directive 2006/66/EC, defective or spent batteries must be collected separately for recycling in an environmentally friendly manner.
www.bosch-pt.com/serviceaddresses
Transport
Robert Bosch Sp. z o.o.
www.bosch-pt.com/serviceaddresses
Transport
Bosch Service Center PT
K Vapence 1621/16
692 01 Mikulov
On www.bosch-pt.cz you can order the repair of your machine or spare parts online.
www.bosch-pt.com/serviceaddresses
Transport
Recommended lithium-ion batteries are subject to the requirements of the law on dangerous goods. These batteries can be transported by the user on the road without further conditions.
www.bosch-pt.com/serviceaddresses
Transport
Used lithium-ion batteries are subject to requirements for the transport of dangerous goods. The user can transport the batteries by road without further measures.
www.bosch-pt.com/serviceaddresses
Transport
Read and follow all instructions. Use of the measuring tool not in accordance with these instructions may result in damage to the integrated protective mechanisms. Please store these instructions carefully.
Repair of the measuring tool may only be carried out by qualified personnel and only with original spare parts. This ensures the safety of the measuring tool. Do not work with the measuring tool in explosive atmospheres, near flammable liquids, gases, or dust. Sparks may be generated in the measuring tool, which can ignite dust or vapors. Do not make any modifications to the battery or open it. This poses a risk of short circuit.
270|Russian
If the battery is damaged or used improperly, liquid may escape. The battery may heat up or explode. Ensure fresh air supply and consult a doctor if you feel unwell. Gases can irritate the respiratory tract. If the battery is used incorrectly, liquid may leak. Avoid contact with it. In case of accidental contact, rinse with water. If this liquid gets into the eyes, seek medical help immediately. Escaping battery liquid can cause skin irritation or burns. Sharp objects such as nails or screwdrivers, as well as external force, can damage the battery. This can lead to internal short circuit, fire with smoke, explosion, or overheating of the battery. Protect the unused battery from paper clips, coins, keys, nails, screws, and other small metal objects that could short-circuit the contacts. Short-circuiting the battery contacts can cause burns or fire. Use the battery only in products from the manufacturer. Only then is the battery protected from dangerous overload. Charge the batteries only with chargers recommended by the manufacturer. A charger intended for a specific type of battery may pose a fire hazard if used with other batteries.

Protect the battery from high temperatures, e.g., from direct sunlight, fire, dirt, water, and moisture. There is a risk of explosion and short circuit.
The TPO device cannot guarantee 100% certainty. To avoid the risk of overexposure, scattering, or freezing in walls, ceilings, and floors, inform yourself from additional sources, such as construction drawings and photographs taken during construction. Environmental factors (e.g., humidity), nearby electrical devices emitting strong electric, magnetic, or electromagnetic fields, moisture, building materials containing metal, additional insulating materials, as well as ceramic tiles with conductive properties may affect the accuracy of the measuring instrument.
The number, type, size, and position of objects may distort measurement results.
If buildings have gas pipelines, after all work in walls, ceilings, or floors, make sure the gas pipeline is not damaged. When attaching or mounting objects to plasterboard walls, ensure sufficient load-bearing capacity of the wall or mounting materials, especially when attaching or mounting heavy structures.
Safety instructions for the power supply unit with socket
This power supply unit with socket is intended for use by children and persons with reduced physical, sensory, or mental capabilities or lack of experience and knowledge. Use of this power supply unit with socket by children aged 8 and older and persons with reduced physical, sensory, or mental capabilities or lack of experience and knowledge is permitted only under supervision of a person responsible for their safety or after they have received instructions on safe use of this power supply unit and understand the dangers involved. There is a risk of incorrect use leading to injury.
Keep the power supply unit with socket away from moisture. Water ingress into the power supply unit with socket increases the risk of electric shock.
Keep the power supply unit with socket clean. Dirt poses a risk of electric shock. Check the power supply unit before each use. Do not use a damaged power supply unit. Do not open the power supply unit yourself; repairs should only be performed by qualified or authorized service personnel and only with original spare parts. Using a damaged power supply unit increases the risk of electric shock.
Product and service description
Please follow the illustrations at the beginning of the operating instructions.
Intended use
The measuring instrument is intended for locating metals (ferrous and non-ferrous metals, e.g., rebar), wooden beams, and live wires in walls, ceilings, and floors.
The measuring instrument is suitable for indoor and outdoor use.
Illustrated components
The numbering of the illustrated components corresponds to the illustration of the measuring instrument on the illustration page.
(1) Indicator ring (2) Marking opening (3) Display. (4) Operating mode button "Metal/Wire" (5) Operating mode button "Wood" (6) Acoustic signal button (7) Switch (8) Handle surface (9) Protective cover (10) USB Type-C® cable a) b) (11) Lock for the rechargeable battery (12) Rechargeable battery (13) USB Type-C socket (14) Battery charge indicator (15) Lock for the battery compartment cover (16) Battery compartment cover (17) Sensor zone (18) Slide switch (19) Serial number
a) These accessories are included in the standard delivery. b) USB Type-C® and USB-C® are trademarks of USB Implementers Forum.
Indication elements (see figure A)
(a) Indicator for metal objects (b) Measurement indicator (c) Acoustic signal indicator (d) Charge indicator (e) Indicator for non-metallic objects (f) Live wire indicator (g) Indicator for magnetic metals (h) Indicator for non-magnetic metals (i) Interference indicator (j) Warning (k) Temperature control indicator
Technical data
Wire detector GMS 120-27
-BRA
1600A013A2
A) Depending on the material and size of the object, as well as the material and condition of the substrate B) For wooden beams with a diameter of 15 mm C) For steel reinforcement with a diameter of 12 mm D) Maximum detection depth of wires without load E) For plasterboard walls with a width of 54 mm, with cardboard thickness of 30 mm F) Usually only non-conductive contamination is present. However, as a rule, temporary conductivity occurs due to condensation. G) Weight without rechargeable battery/power supply elements/battery compartment cover H) Additional technical data see at: https://www.bosch-professional.com/ecodesign
The measuring tool can be identified by the serial number (19) on the rating plate.
▷ Under unfavorable conditions, the measurement result may be worse in terms of accuracy and depth of investigation.
Charging the rechargeable battery
For charging, use a USB power supply or a USB power supply whose output voltage and minimum output current meet the requirements specified in the "Technical data" chapter. When doing so, observe the instructions for use of the USB power supplies. Recommended power supply: see "Technical data". Observe the mains voltage! The voltage of the power source must match the data on the rating plate of the power supply with the mains plug. Charge the battery via the USB port only at ambient temperatures from +10°C to +35°C. Charging at temperatures outside this range may damage the battery or increase the risk of fire.
Note: In accordance with international transport regulations, lithium-ion batteries are supplied partially charged. To ensure maximum battery power, charge it fully before first use. Open the USB Type-C port cover (13). Connect the USB port using the USB cable (10) to the USB connector of the power supply unit. Plug the power supply unit into the mains.
Remove batteries or accumulators from the measuring instrument if you will not be working with it for an extended period. During prolonged storage inside the measuring instrument, corrosion of batteries and accumulators is possible.
Working with the instrument
Protect the measuring instrument from moisture and direct sunlight. Do not expose the measuring instrument to extreme temperatures or temperature fluctuations. In case of significant temperature fluctuations, allow the instrument to stabilize its temperature first. Extreme temperatures and temperature fluctuations can adversely affect the accuracy of the measuring instrument and lead to display errors. Avoid strong impacts or drops of the measuring instrument. After strong external impacts on the measuring instrument, as well as in case of unusual behavior or malfunction, before continuing to work with the measuring instrument, it should be checked in an authorized Bosch service workshop. Hold the measuring instrument only by the designated surfaces (8) to avoid affecting measurement results. Do not attach stickers or labels to the sensor area (17) on the back of the measuring instrument. In particular, metal labels can influence the measurement result.

Do not use the device during measurements; ensure proper grounding. If grounding is insufficient, detection of live cables may be difficult.
During measurements, try to keep a distance from devices emitting strong electric, magnetic, or electromagnetic fields, for example, from mobile phones, laptops, or tablets. If possible, disable the corresponding functions of all devices emitting
278|Russian
fields that may affect the measurement result, or turn off such devices.
Switching on the instrument
To switch on the measuring instrument, press the switch (7).
To switch off the measuring instrument, press the switch (7) again.
If within approx. 5 minutes no buttons are pressed on the measuring instrument and no objects are detected, the measuring instrument switches off automatically.
Switching the acoustic signal on/off
Using the acoustic signal button (6), the acoustic signal is switched on or off. When the acoustic signal is switched off, the acoustic signal indicator (c) is shown on the display.
Operation (see figure B)
The operation of the measuring instrument is checked on the basis of the sensor zone (17) in the direction from the maximum depth.
During each measurement, the search for metal objects (for example, metal pipes or steel reinforcement) and live wiring (50-60 T) is carried out automatically. To confirm, press the operating mode button "Metal/Electrical wiring" (4).
To additionally detect wood in plasterboard walls, press the operating mode button "Wood" (5). The activity of the function is confirmed by the illumination of the operating mode button "Wood" (5). To turn off the wood detection, press either the operating mode button "Wood" (5) or the operating mode button "Metal/Electrical wiring" (4) so that the operating mode button "Wood" (5) goes out.
Note: Turn on the wood detection function only for plasterboard walls with wooden support structures. On other bases, the measurement results may deteriorate.
Scanning procedure (see Fig. C)
For this, place the measuring instrument on the surface to be checked. The green light ring (1) indicates readiness for measurement.
Hold the measuring instrument by the entire surface of the handle (8). Do not change your grip during the measurement, especially so that your hands do not get into the sensor zone (17).
Always move the measuring instrument straight in the direction with light pressure on the base, without lifting or changing the pressure. The movement of the measuring instrument should mainly be carried out across the object under investigation. If you do not know how the object is positioned in the wall, perform a cross measurement (see Fig. C).
Instructions for positioning reinforcement meshes: The measuring instrument must first recognize that this is a base with a reinforcement steel mesh. For this, before starting the measurement, move the measuring instrument around the circumference (diameter > 30 cm) on the base. After this, do not lift the measuring instrument from the surface and take measurements as usual. It is best if the intersection point of the grid passes over the reinforcement mesh.
Detection indication:
- If there are no objects under the sensor zone, the light ring (1) glows green. The measurement indicator (b) is empty and no audible signal is emitted. When the measuring instrument approaches an object, the light ring (1) lights up red. As the measuring instrument approaches, the amplitude of the measurement indicator (b) increases and the rhythm of the audible signal becomes faster.
- At the center of the object, the measurement indicator (b) has the maximum measurement amplitude, the object center indication (a) lights up and a continuous signal is emitted. The light ring (1) continues to glow red.
- When the measuring instrument is moved away from the object, the object center indication (a) goes out, the amplitude of the measurement indicator (b) decreases, and the rhythm of the audible signal slows down.
During the first pass, the detection of the object turned out to be difficult.
To determine the center of the object, move the measuring instrument back to the object, without lifting it, until the center of the object is displayed on the screen (the object center indicators light up) (a).
To display the object's edge, move the measuring instrument from the center of the object along the line further until the light ring goes out (1).
280|Russian
The marking hole (2) is located above the center of measurement. If necessary, it can be used for marking the center or edge of the object.
Note: after marking the object through the marking hole (2) (for example, with a pencil), a new measurement must be started, as the pencil may interfere with the measurement.
For a detected object, the following is displayed:

(h) Non-ferrous metal, e.g., copper pipe

(g) Ferrous metal, e.g., rebar

(f) Live wire, e.g., electrical cable

(e) Non-metallic, e.g., wooden beam
Instructions for detecting live wires
- The wire must be under voltage. Therefore, connect power-consuming devices (e.g., light bulbs or power tools) to the wire in question. Turn on the power-consuming devices to ensure that the wire is under voltage. The signal from 50 to 60 Hz from the electrical cable should reach the measuring instrument. If the electrical cable is laid in damp walls (e.g., humidity > 50%), behind metallized foils (e.g., thermal insulation) or in metal conduit, the signal does not reach the measuring instrument and the cable cannot be found. The measuring instrument must be properly grounded. To do this, hold it firmly by the handle surface (8) (without gloves). Make sure you have contact with ground. Wearing dielectric shoes, standing on a ladder or scaffold does not ensure the necessary contact. The surface on which you stand must also be grounded, otherwise the wire cannot be detected. The signal from 50 to 60 Hz from the wire should be stronger at the location of the wire than in the immediate vicinity. If the wall is very damp or poorly grounded, the signal will be reflected with similar strength across the entire wall. Then the measuring instrument shows a larger area to detect the signal, but cannot precisely determine the location of the wire.
In this case, to divert the signal from the wall, you can try pressing your
free hand against the wall at a distance of 20-30 cm from the measuring instrument. During this, hold your free hand still and do not change it during the measurement.
Multiphase electrical cables (three-phase AC high voltage) cannot be detected as current-carrying conductors because the signals of different phases cancel each other out. However, multiphase electrical cables at shallow depths can be detected as metallic objects. - Current-carrying surfaces of walls, for example on certain ceramic tiles, electrical cables may not be displayed or the light ring (1) may glow red over a large area. - Electrical cables located at shallow depths (no more than 2-3 cm) may additionally be displayed as metallic objects. This, however, does not apply to live wires.
Disconnect consumers of current and voltage from live conductors before drilling, sawing, or milling into walls, ceilings, or floors. After all work, check that all objects located in the foundation have been de-energized.
Indication of objects
- With the detection of wood turned off, in some cases other objects, for example water-filled plastic pipes, electrical cables, or gas pipes, may also be displayed as non-metallic objects. Before drilling, sawing, or milling, check from other sources of information that this is actually a wooden beam and not another object (for example, a plastic pipe, electrical cable, or gas pipe). - Nails and screws in the foundation may cause wooden beams to be displayed more as metallic objects.
- Wide objects can be recognized by the light ring (1) glowing red over a wide area. In some cases, wide objects are not displayed across their entire width. Before drilling, sawing, or milling into walls, you must inform yourself from other sources. Since the measurement results can be influenced by the wall's properties and structure, there is a possibility of danger even if the measurement indicator (b) does not display an object in the sensor zone and no signal sounds, and the light ring (1) lights up green.
Troubleshooting - Causes and remedies
Cause and remedy
The temperature control indicator (k) and warning (j) are lit, measurement is not possible
The measuring tool is outside the permissible operating temperature or is subjected to temperature fluctuations.
Switch off the measuring tool and allow it to stabilize to the ambient temperature before switching it on again. Accurate measurements are only possible if the temperature inside the measuring tool is constant.
The radio indicator (i) and warning (j) are lit
The measurement is distorted by electrical, magnetic, or electromagnetic fields (for example, from mobile phones, laptops, or tablets near the measuring tool).
If possible, switch off the corresponding functions of all devices whose radiation may affect the measurement, or switch them off.
The warning (j) flashes
The measuring tool is defective or has exceeded its service life.
Send the measuring tool to an authorized Bosch service center for repair.
The indication of a metallic object and the prolonged signal amplitude during measurement may be affected if there are no metallic objects near the measuring tool.
Calibration is no longer effective (e.g., due to a fall from a great height).
Perform a new calibration (see "Recalibrating the measuring tool", page 283) of the measuring tool manually.
The light ring (1) does not light up when lowered onto the base.
The base is not recognized due to contamination in the sensor area (17).
Clean the measuring tool with a dry, soft cloth and restart the measurement process.
Contact with the wall or base may not be recognized due to the specific properties of the wall.
Place the measuring tool on the base. For better wall recognition, simultaneously press the operating mode button.
Cause and remedy
(e.g., very dark surface).
Press and hold the "Metal/Electrical wiring" (4) and "Wood" (5) buttons (approx. 3 s) until the light ring (1) lights up and an audible signal sounds. Then perform the measurement in the usual manner.
Note: Before the next measurement on a different base, the manual wall recognition must be deactivated. To do this, switch the measuring tool off and on again.
Never immerse the measuring tool in water or other liquids.
Remove contamination with a dry, soft cloth. Do not use any cleaning agents or solvents.
He cHMaTe PON3yHOK (18) C 3aDHeN CTOpHObI N3MePHTeNbHO INHCTpyMeHtA.
XpaHnTe npeHocHTe H3MepHTeBHy INHCTpyMeHT TOIbKO B npNlaraIOUeMCs 3aunT-HOM qExJe.
CepBnC n KOHcyIbTHnpOBaHne no BOpocam npImeHnA
CepBnchbI OTdEN OTBeHrHa BCE Baun BOpocbi No pemOnTy nObcnyKbAHNo BaWero npOdykTa, a TAKKe IIO 3aNuaCTM. N3o6paXeHnC npocTpaHCTBeHHbIM pa3deneHnEM deNaTei HnΦopMaUNIO NO 3aNuaCTM MOxHO NOCMOTpeTB TAKKe IIO aDpecy:
www.bosch-pt.com
KoJIeKTHB COTpydHnKOB Bosch, npedocTabIouu KoHcybTaun Ha npedMeT HcNoB30BaHn IPOyKUn, cyBOBCTBnEM OTBeHT Ha BCE BaUN BOpocbI OTHOCTeJbHOro HaWe npOdyKUn n ee npHaNDexKHOtei.
Poxayncta, Bo Bcex 3anpocax n 3aka3ax 3anuacte o6ra3aTeNbHO yka3bBaIte 10-3naHbTOBapHbHOMep no 3aBODcKo Ta6nueKe H3dennr.
Длэpernoha: Pocca,Бenapycb,Ka3axctan
IapaHTnHoe 6cnyKbAHne n peMOHT 3NEKTPONHCTpyMeHTa, c COJIIOHeHem Tpe6oBaHn HOpM 13ROTOBtEnI npOn3BOJATCn Ha TeppHTOPHN BCex CTpaH ToIbKO BΦnpMeHbIX INN ABTOP3OBAHHbIX cepBNCbIX ceHTpax «PoBept BoU”. IPEyIPEXJEHNE! NcNoB3OBAHne KOHTpaKaTHOH npOdyKuNN ONaCHO B 3KcIIyatauNN, MoXeT pINBeCTN K yuepe6y dIra BaWero 3dOpOBb. 13ROTOBLeHne n pacnpoCTpaHEHne KOHTpaKaTHOH npOdyKcNn PpecJeDyETcno 3aKOHy BA dmHnHCTpaTHBOM H yROLOBHOM IopAKe.
Pocch
yHONHOUMOeHHa H3ROTOBtTeJem OprHaH3aun:
OOO《Po6epT Bou》BaWytHnHcKoe Wocce,Bl.24
141400, r. XmKn, MockOBcka o6n.
Ten.: +7 800 100 8007
1609 92A 9PR| (04.07.2024) Bosch Power Tools
E-Mail: info.powertools@ru.bosch.com www.bosch-pt.ru
You can find additional service center addresses at the following link: www.bosch-pt.com/serviceaddresses
Transport
The recommended lithium-ion batteries are subject to the requirements for the transport of dangerous goods. The batteries can be transported by the user by road without the need to comply with additional regulations.
When transporting by third parties (e.g., by air freight or forwarding agent), special requirements on packaging and labeling must be observed. In this case, when preparing the shipment, it is necessary to consult an expert for hazardous materials.
Only ship the battery if the housing is undamaged. Tape or mask off open contacts and pack up the battery so that it cannot move around in the packaging. Please also observe possible additional national regulations.
Disposal

Power tools, batteries/accumulators, accessories and packaging should be sorted for environmentally friendly recycling.
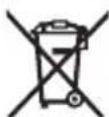
Do not dispose of power tools and batteries/accumulators in household waste!
Only for EU countries:
According to the European Directive 2012/19/EU on waste electrical and electronic equipment and its implementation in national law, power tools that have become unusable must be collected separately and, according to the European Directive 2006/66/EC, defective or exhausted batteries/accumulators must be collected separately and handed in for environmentally correct recycling.
If disposed of incorrectly, waste electrical and electronic equipment may have harmful effects on the environment and human health due to the possible presence of hazardous substances.
286|Ukrainian
Batteries/accumulators:
Lithium-ion:
IoxanyiSta, yuHtBaiTe yka3aHne B pa3dene TpaHcnpTnpoBka (cm. "TpaHCnoptnpoBka", Ctpanua 285).
YkpaIHcbka
Bka3iBkn 3 Texhikn 6e3neKn

IpoountaTe BcI Bka3IBKn iOToPmUyTeCg ix.BHKOpnCTaHnBbMIPIOBaIbHOro InCTpyMeNTa 6e3 DoTpMaHHaNx IHCTpyKciMOXe Pn3BecTHdo N0wKOJKeHHa INTErPoBaHnx 3axNCHXMexAHi3MiB.HADINHO 3BEPIAHTe Lb BKA3IBKN.
BidaBaTe BmipOBAhHn IHcTpymeH Ha pEmoHT hne KBaIiΦIOBAHm faxibTm Ta Hnwe 3 BnKOpHCTAHHM OpriHaBHX 3anactHH. TInbKn 3a TaKnx yMOB BaW BmipOBAhHn npnaI i HanaI 6yde 3aIIuatnc 6e3neuHm. He npaiothe 3 BmipobalbHm inctpymeHToM y cepeobnui, de ichye He6e3neka B6byx BhaCniDok npncythocTi ropouhx piHN, ra3iB a6o nny. Y BmipobalbHomy npnaDi MOxyt b YTbOpOBaTcA iCKpn, BiJAKX MoKe 3aMaTcN nn a6o napn. He BHOcBe KOHCTpyKTHBHX 3MIn B aKymyTOpHo 6aTapeIO Ta He BiKpNBaIte II. IChye He6e3neKa KOpOTKOrO 3aMKaHHa. Pn nookxehhi a6o HnpabnbH i ekcnnyataaikymyaTOpHOi 6aTapei MoKe BHXoHTn nap. AkymyAToPA 6aTapee MoKe 3aMAtncb a60 Bn6yxatn. Bnycttb cBIXe nobitpr i - y pa3i ckapr - 3BepHITbcdo nikapra. Nap moKe npda3HOBaTH dnxalhHi IJAXN. Pn HnpabHbHomy BkOpncTahHi 3 akymyIaTOpHOi 6aTaapei MoKe NOTeKTH pIDnHa. YnkaTe KOtAKTy 3 HeIO. Pn BnnaKObOMy KOtAKTi npomnTe BiIOBIDhe Micue BOIO. KsO pIDnHa NOTpannBa Ooy, DODaTKoBo 3BepHITbcr do nikapA. AkmyIaTOpHa pIDnHa MOKe cnpuHHTu NOpa3HeHHaWKipn a6o onIKN. TocpHmnpedMeTaHn,HaP.,rBi3dkamna6o BHKpykamn,a6o npKnaadaHHa 3OBHIshboi cHnn MoxHa Nookodntn akymyIaTOpy 6atapeo. MoJInBe BHyTpIHc KOpOTke 3AMKaHHra,3aropAHn,ytBopeHHa dmy,Bb6yx a6o nepepri bakymyIaTOphO 6atapei.
He 36epiraTe akymyIaTOpHy 6bapeIO, kKOIO Bu came He KopnctUeTecb, nopA i3 KaHcJIepcBKMn CKePikKaMn, KJIouAmN, rBi3dKaMn, rBHTAMN Ta iINHMn HEBeNKmM MeTaIeBMM npeMeTAMn, kI MOxYtB cnpuHHHTn nepeMHKaHH KOHTaKtIB. KopOTke 3amHKaHH MIX KOHTaKTAmn akymyIaTOpHOi 6bapeI MoKe cnpuHHrTH OnIKn abo noKexy. BnKOpHcTObyIte akymyIaTOpHy 6aTapeIO nIwe y Bnpo6ax Bnpo6Hnka. NIwe 3a TaKnx yMOB aKymyIaTOp 6yde 3axNueHn BiD Hebe3neuHoro nepeBaHTaKeHHra. 3apJxAte akymyIaTOPhi 6aTapei NWe B 3apJHnx npIcTPOx, peKOMeHIOBaHNbNpO6HHKOM. BnKOpNCtAHn 3apJxByBaIbHOro npIcTpoI OJIa akymyIaTOPHX 6aTapei, dIra kNX BiH He nepeIbauEHn, MoKe npI3BOHTn Do noXeki.
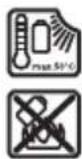
3axuatae akymytaopny 6atapeo BiTenna, 3okpema, Hnnp., Bi coHnHx npomeHIB, BOrHIO, 6pydy, BoN Ta BONr. IcHyE He6e3neKa B6byx i KOPOTKoro 3AMKAHHa.
The measuring instrument does not provide complete safety. To avoid unsafe, unverified, spilled or splashed liquids on walls, ceilings or floors, consult information from other sources, such as building codes, building materials for construction, and electrical appliances. Electrical appliances, which are close to or near electrical devices that create strong electric, magnetic or electromagnetic fields, moisture, building materials, materials with insulating properties, as well as conductive wires or cables, can negatively affect the accuracy of measuring techniques. The quantity, type, size and location of objects can affect measurement results. If the building has a gas pipeline, after all work on walls, ceilings and floors, make sure the gas pipeline is not damaged. When attaching objects to plasterboard walls, make sure the walls or mounting materials are sufficiently strong, especially when attaching to frame structures.
Safety instructions for the wall scanner with live wire detection
The wall scanner with live wire detection is not intended for use by persons with limited physical, sensory or mental abilities, or insufficient experience and knowledge. These
288|Ukrainian
Children aged 8 and above and persons with limited physical, sensory or mental abilities or insufficient experience and knowledge may use the wall scanner with live wire detection only under supervision or after they have received appropriate instructions for safe use of the wall scanner with live wire detection and understand the danger it poses. In this case, incorrect use and unsafe handling may result in injury.

Protect the wall scanner with live wire detection from moisture.
Using the wall scanner with live wire detection near water increases the risk of electric shock.
Keep the wall scanner with live wire detection clean. Dirty devices pose a risk of electric shock. Before each use, inspect the wall scanner. Do not use the wall scanner if it is damaged or defective. Do not open the wall scanner yourself; its repair should only be performed by qualified or authorized service centers using original spare parts. A damaged wall scanner increases the risk of electric shock.
The numbering of the illustrated components refers to the illustration of the measuring instrument on the page with the figure.
(1) Live wire detection (2) Marking hole (3) Display (4) "Metal/Stud" button
(5) "Wood" button (6) Acoustic signal button (7) On/Off button (8) Handle (9) Protective pouch (10) USB Type-C cable (11) Lock for the lithium-ion battery pack (12) Lithium-ion battery pack (13) USB Type-C port (14) Battery charge indicator (15) Lock for the battery compartment cover (16) Battery compartment cover (17) Sensor area (18) Slide switch. (19) Serial number
a) This accessory is not included in the standard delivery set.
b) USB Type-C® and USB-C® are trademarks of USB Implementers Forum, Inc.
Indication elements (see figure A)
(a) Object indicator (b) Measuring indicator (c) Sound signal indicator (d) Charge status indicator (e) Metal object indicator (f) Cable current indicator (g) Magnetic metal indicator (h) Non-magnetic metal indicator (i) Radio signal indicator (j) Cross indicator (k) Temperature control indicator
290|Ukrainian
Technical data
Measuring tool
The measuring tool can be operated with a Bosch Li-Ion battery pack (12), with standard batteries, or with a standard NiMH battery.
Note: Never store the measuring tool without the battery compartment cover (16) or the Li-Ion battery pack (12), especially in a damp or humid environment.
Charge level indicator (d) The charge level indicator shows the charge status of the Li-Ion battery pack (12), batteries, or NiMH battery.
Operation with Li-Ion battery pack
Inserting/replacing the Li-Ion battery pack
To insert a standard NiMH battery or a Li-Ion battery pack (12), press the release button (15) of the battery compartment cover.
Remove the cover (16) of the battery compartment and insert the batteries or the battery pack.
Insert the Li-Ion battery pack (12) and secure it with the release button (11).
To remove the Li-Ion battery pack (12), press the release button (11) and pull the Li-Ion battery pack out of the measuring tool.
Charge the battery using the recommended USB power supply. The output voltage and current of the USB power supply must meet the requirements specified in the "Technical Data" section. Follow the operating instructions for the USB power supply. Recommended USB power supply: see "Technical Data". Note the mains voltage! The voltage in the power source must match the data in the rating plate of the USB power supply. Charge the battery pack via the USB connection only at an ambient temperature of +10°C to +35°C. Charging at a temperature other than specified may damage the battery pack or increase the risk of fire.
Note: Lithium-ion batteries are supplied partially charged according to international transport regulations. To achieve full capacity of the battery before first use with the device, the battery must be fully charged.
Open the cover of the USB Type-C socket (13). Connect the USB socket to the USB cable (10) of the USB power supply. Plug the USB power supply into the mains supply.
Insert the batteries or rechargeable batteries.
When inserting, pay attention to the correct polarity as shown inside the battery compartment.
Insert the battery compartment cover (16) and close it.
Always replace all batteries/rechargeable batteries at the same time. Use only batteries or rechargeable batteries of the same type and capacity.
Remove the batteries or rechargeable batteries from the measuring instrument if you will not be using it for an extended period. During prolonged storage, the batteries or rechargeable batteries may corrode in the measuring instrument.
Operation
Protect the measuring instrument from moisture and direct sunlight. Do not expose the measuring instrument to extreme temperatures or temperature fluctuations. If the measuring instrument has been exposed to temperature fluctuations, wait until it has stabilized to its own temperature before switching it on. Extreme temperatures and temperature
fluctuations can affect the accuracy of the measuring instrument and the quality of the displayed image.
Clean the surfaces and lenses of the measuring instrument. After external influences and if the measuring instrument shows signs of malfunction, it should be sent to an authorized service workshop for inspection. Hold the measuring instrument by the designated gripping surface (8) to avoid affecting the measurement. Do not press on the sensor area (17) on the side of the measuring instrument with stickers or labels. Especially metallic labels can affect the measurement results.

Do not use gloves during measurement and ensure proper grounding. If grounding is insufficient, the measurement of live conductors may be impaired.
Do not operate the device at a distance from devices that emit strong electric, magnetic or electromagnetic fields, such as mobile phones, walkie-talkies or radios. If possible, use appropriate functions on all devices; operation may be affected.
affect the measurement results or cause the device to malfunction.
Getting started
Switching on/off
Before switching on the measuring device, check that the probe (17) is not damaged. If necessary, wipe the measuring device with a dry cloth. Do not switch on the measuring device after a temperature change for a short time until the device temperature has stabilized.
To switch on the measuring instrument, press the switch (7).
To switch off the measuring instrument, press the switch (7) again. If no button on the measuring instrument is pressed for approx. 5 minutes, the instrument switches off automatically.
Switching the acoustic signal on/off
Using the acoustic signal button (6), the acoustic signal is switched on or off. When the acoustic signal is switched on, the status indicator for the acoustic signal (c) appears on the display.
Measurement (see Fig. B)
Using the measuring instrument, the measuring probe (17) is moved in direction A to the maximum depth of penetration.
During measurement, automatic detection of metal objects (e.g. pipes, copper pipes or fittings) under voltage (50-60 V) takes place. To confirm, press the "Metal/Stud" button (4).
To detect wood in drywall, press the "Wood" button (5). To confirm this function, press the "Wood" button (5). To switch off the wood detection, press the "Wood" button (5) or the "Metal/Stud" button (4) until the "Wood" button (5) goes out.
Note: The wood detection function is switched on for detection in drywall with a wooden base. In the case of other bases, this may negatively affect the measurement result.
Measurement process (see Fig. C)
To do this, place the measuring instrument on the surface, if necessary, to check. The light ring (1) lights up, signaling readiness for measurement.
Hold the measuring instrument evenly against the surface of the holder (8). Do not change the position of the instrument during measurement, especially do not hold it by the sensor zone (17).
Move the measuring instrument smoothly in the direction of its base with light pressure, without lifting or changing the pressure. The movement of the measuring instrument must be straight and perpendicular to the object being measured. If you do not know the orientation of the object in the wall, perform cross measurement (see section 4.1).
Indication of the location of the reinforcement mesh: The measuring instrument must first recognize what is the base of the reinforcement mesh. Before measuring, move the measuring instrument over the base (diameter > 30 cm). After that, do not lift the measuring instrument from the surface and continue measuring as usual. It is best to move the probe and the rest over the mesh with reinforcement.
Detection indicator:
- If the sensor does not detect any object, the light ring lights up green (1). The measurement indicator (b) is low and no audible signal is heard.
- When the measuring instrument approaches an object, the light ring (1) turns red. The amplitude of the measurement indicator (b) increases and the frequency of the audible signal increases.
- At the center of the object, the measurement indicator (b) shows maximum amplitude, the center of the object indicator (a) lights up, and a continuous audible signal is heard. The light ring (1) continues to light red. - When the measuring instrument moves away from the object, the center of the object indicator (a) goes out, the amplitude of the measurement indicator (b) decreases, and the frequency of the audible signal decreases.
After the first pass, the center and edges of the object are roughly determined.
To precisely determine the center of the object, move the measuring instrument back over the object without lifting it until the center of the object is displayed again on the screen (the center of the object indicator (a) lights up).
To determine the edges of the object, move the measuring instrument from the center of the object in a straight line until the light ring (1) stops lighting red.
The marking hole (2) is located at the center of the measurement. Here you can mark the center or edges of the object, if necessary.
Note: Marking the object through the marking hole (2) (for example, with a pencil) should be done after the measurement, because the hand may negatively affect the result.
The detected object is displayed on the display:

(h) Metal pipes, metal cladding, and metal tubing

(g) Metal cladding, fasteners, and fittings

(f) Conductive objects, fasteners, and electrical wiring

(e) Non-metallic objects, fasteners, and wooden beams
Instructions for determining the location of wires under voltage
-The wire is under voltage. Therefore, before connecting energy consumers (fasteners, lights, devices) to the electrical network, which you are looking for, make sure that the electrical network is working.
-The walls must be sufficiently dry for the electrical wire to be found. If the wire is in damp walls (e.g., humidity > 50%), behind a metal plate (e.g., behind thermal insulation) or in a metal pipe, the walls are not sufficiently dry, and the wire cannot be found.
-The measuring instrument must be well grounded. To do this, hold it by the protected surface (8) (without gloves). Make sure that you yourself have good contact with the ground. Wet clothing, shoes, or platforms may interrupt the contact. The ground itself must also be grounded, otherwise the wire cannot be found.
The signal strength of the electrical network must be strong enough for the wires in the immediate vicinity. If the wall is very damp or poorly grounded, the signal will be weak along the entire wall. Then the measuring instrument will show that there is a signal, but it cannot accurately find the wire. In this case, the following method may help: slowly move your hand along the wall at a distance of 20-30 cm from the measuring instrument to obtain a signal from the wall. However, the movement of your hand should not change during the measurement process.
- A multi-phase electrical wire (known as three-phase or a wire with high current consumption) cannot be reliably detected by the wire detection method, because the signals are amplified at different times. The location of multi-phase lines can be determined on the surface, but not in metal objects.
- Conductive surfaces of walls, such as certain types of paint, may cause the electrical wires not to be displayed because the light ring (1) lights up in a different color over a large area.
- Electrical wires that lie on the surface (at a maximum depth of 2-3 cm) may be additionally displayed on metal objects. However, this does not apply to multi-core cables.
Before drilling, cutting or milling into walls, ceilings or floors, make sure there are no hidden electrical cables or conduits under voltage. After all work, make sure that the work surface is de-energized.
Notes on the detection of objects
If a wooden beam is detected, under certain conditions other objects, such as metal pipes, water-filled pipes, live cables or gas pipes, may also be detected as metal objects. Before drilling them,
298|Ukrainian
drilling or milling, check with other sources of information that the detected object is indeed a beam and not another object (e.g., plastic pipe, electrical cable, gas pipe).
Through joints and screws in the base of the wooden beam, metal objects may be detected on the following. - Wide objects can be recognized by the first color of the light ring (1) on the longer side in width. Under certain conditions, wide objects are not detected over the entire surface.
Before drilling, cutting or milling into walls, it is necessary to consult the information from their sources. Since the measurement results may be affected by the surrounding environment or wall properties, there may be a risk that the indicator (b) does not display the object in the sensor zone and does not emit a signal, and the light ring (1) lights up with green light.
Faults - Causes and remedies
Cause Remedy
The temperature control indicator (k) and the warning indicator (j) light up, measurement impossible
The temperature of the measuring tool is outside the operating temperature. Allow the tool to stabilize its temperature before switching it on again. The measuring tool can only be used again after it has been subjected to the specified temperature range. The measuring tool is ready for use.
The radio indicator (i) and the warning indicator (j) light up
The measurement can be negatively affected by moisture. Switch off all devices that may influence the measurement, such as electrical, magnetic devices, or electromagnetic fields, or switch them off (e.g., mobile phones, laptops or drills). Keep a distance from the measuring tool.
The warning indicator (j) lights up
The measuring tool is defective. The measuring tool must be repaired by an authorized service center.
Detection of metal object and maximum signal amplitude on the display (b), when working with the measuring tool there is no metal object.
Note: the measuring tool is not switched off automatically, calibration must be repeated. If the measuring tool is not switched off, send the measuring tool to the Bosch service center for repair.
Maintenance and service
Maintenance and service
Before using the measuring tool, check it. If damage or loose parts are found on it, the correct operation of the measuring tool is not guaranteed.
For safe operation, keep the measuring tool clean and dry. Do not immerse the measuring tool in water or other liquids.
Wipe off dirt with a dry, soft cloth. Do not use cleaning agents or solvents.
Do not remove the slide (18) from the side of the measuring tool.
Store and transport the measuring tool only in the protective pouch supplied.
After-sales service and application service
In the service center you will receive answers to your questions regarding repair and maintenance of your product. You will find detailed information and spare parts at: www.bosch-pt.com
The Bosch team of experts will be happy to answer your questions regarding the use of our products and their accessories.
For all questions and orders for spare parts, please quote the 10-digit order number on the type plate of the product.
Warranty service and repair of the power tool are carried out in accordance with the requirements and standards established in all countries only in authorized or certified service centers of Robert Bosch GmbH. LIMITED!
Warnings for counterfeit products. Counterfeit products are unsafe and may cause serious harm to health and property. Distribution of counterfeit products is prohibited by law in accordance with the administrative and criminal procedure.
Ukraine
Bosch Service Center for Power Tools
Krayny 1 St.
02660 Kyiv 60
To the national warranty service.
Addresses of authorized service centers are listed below:
www.bosch-pt.com/serviceaddresses
Transportation
The recommended Li-ion batteries are subject to the requirements for the transport of dangerous goods. Batteries can be transported by the user by road without further requirements.
When transporting by third parties (e.g., by air freight or forwarding agency), special requirements on packaging and labeling must be observed. For the preparation of the item being shipped, consulting an expert for hazardous material is required.
Dispatch the battery only if the housing is undamaged. Tape or mask off open contacts and pack up the battery such that it cannot move around in the packaging. Please also observe possibly more detailed national regulations.
Disposal

Power tools, batteries, accessories and packaging should be sorted for environmental-friendly recycling.
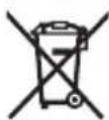
Do not dispose of power tools and batteries into household waste!
Waste from electrical and electronic equipment (WEEE)
In accordance with European Directive 2012/19/EU on waste electrical and electronic equipment and its transposition into national legislation, electrical appliances that are no longer usable must be collected separately. In accordance with European Directive 2006/66/EC, defective or used batteries/accumulators must also be disposed of separately and in an environmentally friendly manner.
If disposed of incorrectly, used electrical and electronic devices may have harmful effects on the environment and human health due to potentially hazardous substances.
Batteries/accumulators:
Lithium-ion:
Please note the instructions in the transport section (see "Transport", page 301).
Kazakh
Eurasian Economic Union (EAEU) Conformity Mark
The product may contain substances that are hazardous to health and the environment, which are listed in the list of hazardous substances.
The product must be disposed of separately.
The product is marked with the conformity mark on its body and packaging.
The conformity assessment procedure is indicated on the last page of the manual and on the product body.
The importer is indicated on the product packaging.
Product conformity mark
Thermometer. The thermometer must be installed in a place where the temperature is measured, and the thermometer must be protected from mechanical damage.
The thermometer must be installed in the pipeline and the temperature sensor must be installed in the pipe.
- If the thermometer is installed in the housing, the thermometer must be installed vertically or at an angle.
- Do not allow water to enter the housing.
Check the seals.
Close the housing.
Maintenance and repair.
The thermometer must be checked periodically.
Storage.
Store the thermometer in a dry, heated room at a temperature not lower than +5°C. Protect the thermometer from sudden temperature fluctuations. If the thermometer is stored in a package or container, it must be stored in accordance with the manufacturer's instructions. Storage conditions must comply with GOST 15150-69 (clause 1).
Transportation.
During transportation, the thermometer must be protected from mechanical damage. It is allowed to transport the thermometer in the manufacturer's packaging. Transportation conditions must comply with GOST 15150-69 (clause 5).
Safety instructions.

Read all instructions before installation. Failure to follow the safety instructions may result in injury. Follow these instructions strictly.
Install the thermometer only in a dry, heated room. The thermometer is not safe for use in explosive atmospheres. Do not install the thermometer in places where there is a risk of fire or explosion. Read the instructions carefully before installation.
Accumulators are dangerous electrical devices. There is a risk of explosion. If the accumulator is closed or damaged, it is possible. The accumulator may leak or become hot. If there are new parts and components, contact the manufacturer's service. This instruction can be translated. If the accumulator is damaged or closed, it is possible to remove the liquid from the accumulator. It is dangerous. If liquid gets on your skin, seek medical help. It is possible to translate or dispose of the liquid in the accumulator. The accumulator may be closed with sharp objects or external influences. This can lead to explosion, fire, heating, or short circuit. Damaged accumulators must be kept away from sparks, smoke, children, pets, and other metal objects. It is possible to short circuit or disconnect the accumulator terminals. This accumulator is only intended for the specified devices. Keep the accumulator away from additional loads. Charge the accumulator only with the specified charger. The charger is intended for one type of accumulator; using it for other accumulators may cause damage.
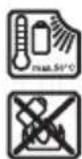
Protect the accumulator from heat, fire, direct sunlight, water, moisture, and other liquids. Avoid short circuits and explosion risks.
The device is based on modern technology and does not contain any hazards. To prevent hazards, do not place the device near flammable materials, liquids, or gases, or in dusty or humid environments. Do not expose the device to strong electromagnetic fields or high temperatures. Do not use the device near metal structures or materials that may cause short circuits. Do not use the device in explosive atmospheres or near flammable gases.
It is possible to use the device in accordance with the instructions for the number, type, and purpose of the batteries.
If there are gas cylinders, ensure that the cylinders are not closed when they are not in use. When the cylinders are connected to the device, check that the cylinders and connecting materials are in good condition.
The device must be operated by qualified personnel only.
This electrical device is intended for use by children aged 8 and above, as well as by persons with reduced physical, sensory, or mental capabilities, or lack of experience and knowledge, provided they have been given supervision or instruction concerning use of the appliance in a safe way and understand the hazards involved. Children shall not play with the appliance. Cleaning and user maintenance shall not be made by children without supervision.

The electrical device must not be damaged or dropped.
If water gets inside the electrical device, unplug it immediately.
Install the electrical device on a stable surface. Only plug it into a power outlet. Do not use the electrical device while it is in operation. If it is damaged, do not use the electrical device. Do not disassemble the electrical device; it should only be repaired by qualified service personnel. Damaged electrical devices should be disposed of properly.
Power supply specifications
Before use, read the safety instructions.
Do not use in wet conditions
Do not use this device for purposes other than those described in this manual (see the section on intended use, safety, and fittings).
This device is intended for use in medical facilities by trained personnel.
Minimum current 500 mA
Power supply unit
- EU 2609120713
-UK 2609120718
-ARG 1600A013AO
-MEX 1600A013A1
CaHdbik nokatop GMS 120-27
-BRA
1600A013A2
A) Written material and elements and spare parts material and accessories B) Diameter 15 mm for drilling holes C) Diameter 12 mm for reinforcing steel D) For marking, the marking depth should be slightly less E) For widths of 54 mm and above, use 30 mm guide F) Only for through holes, if the hole is blind, drilling must be done in several steps. G) Only with NHTN battery pack/batteries/accumulators/battery without cover H) For more technical details, see here: https://www.bosch-professional.com/ecodesign
The measuring tool is marked with the serial number (19) on the rating plate. Use it only for clear identification.
If the table is not correct, the measuring depth will not be correct.
Measuring tool energy supply
The measuring tool can be operated with a Bosch NHTN battery pack (12), standard batteries, or standard NiMH batteries.
Note: The measuring tool must not be operated with a battery without cover (16) or an NHTN battery pack (12) that is damaged (e.g., cracked or broken).
The charge level indicators (d) show the charge level of the NHTN battery pack (12), batteries, or NiMH batteries.
Working with the NHTN battery pack
Inserting/replacing the NHTN battery pack
To insert batteries or NiMH batteries into the NHTN battery
pack (12), remove the battery cover (15)
without cover. Remove the battery cover (16) and insert batteries or accumulators.
Plug the lithium-ion battery pack (12) into the charger (11).
To remove the lithium-ion battery pack (12), press the latch (11) and pull out the lithium-ion battery pack.
310|Kazakh
Charging the lithium-ion battery pack
Connect the USB power adapter to the charger using the USB cable. The charger can be connected to a USB power adapter that meets the minimum output specifications listed in the "Technical Specifications" section. The USB power adapter is not included. See the "Technical Specifications" section for the required power adapter. Be careful! If the charger is connected to a USB port that does not meet the specified requirements, it may not work correctly. Charge the battery only at an ambient temperature between +10°C and +35°C. Charging outside this temperature range may damage the battery or cause it to overheat.
Note: Lithium-ion batteries are subject to international transport regulations. To ensure the battery's full capacity, fully charge it before first use. Remove the USB Type-C cover (13). Connect the USB cable (10) to the USB power adapter. Connect the USB power adapter to a power outlet.
Charging indicator (14) status
Yellow: the lithium-ion battery pack is charging.
Green: the lithium-ion battery pack is fully charged.
Red: charging error or charger malfunction.
If charging is not possible, replace the battery with a new one or contact the service center.
After charging is complete, unplug the USB cable (10). Then, to protect against dust and moisture, close the USB Type-C cover (13).
Status indicators:
Power indicator (i) and charging indicator (j) are lit.
Do not place the device near strong electric, magnetic, or electromagnetic fields (e.g., microwave ovens, induction cooktops, mobile phones, notebooks, or tablets).
We have checked the device and confirmed that it is working properly. We have also verified the functions of the existing smokers.
Expert indicator (j) is blinking
316|Kazakh
Self-cleaning
During measurement, the device must be placed on a flat surface. The Bosch service and customer service are available for assistance. Do not immerse in water.
Even if the metal part is not present in the measurement chamber, the metal part indicator and the measurement indicator (b) will flash.
Calibration error: The device was calibrated without the calibration cap (e.g., in a dusty or dirty environment). See section 316.
The protective cap (1) must be removed before use.
If the battery (17) is low, accurate measurement is not possible. Even if the device is clean and dry, do not start a new measurement. Do not start a new measurement if the device has been dropped or exposed to moisture. The device must be placed on a flat surface and held firmly. To measure with the device, insert the metal tip (4) and the probe (5) into the protective cap (1) and press the signal button (6) simultaneously (for about 3 seconds).
Then release the button. Note: The measurement procedure must be performed in a well-ventilated area. The device must be held firmly during measurement.
Turn off the device and disconnect it from the power source.
Calibrating the device
If the metal part indicator and the measurement indicator (b) are lit (even if the metal part is not present in the measurement chamber), the device can be calibrated.
- Press the calibration indicators (d) three times in quick succession. - Turn off the device. - Remove any objects that may interfere with the measurement (such as coins or metal objects) from the device. - Place the device on a flat surface, away from any metal objects. - To start calibration, press the power button (7) and the signal button (6) simultaneously. Hold both buttons until the protective cap (1) is closed (about 5-10 seconds).
- To start calibration, press the signal button (6) and hold it for 5-10 seconds while the protective cap (1) is closed.
- Before using the tool, read all safety warnings and all instructions. Failure to follow the warnings and instructions may result in electric shock, fire and/or serious injury.
Save all warnings and instructions for future reference. The term "power tool" in the warnings refers to your mains-operated (corded) power tool or battery-operated (cordless) power tool.
Technical data and service
Service and cleaning
Before any work on the power tool, pull the mains plug out of the socket. If the power tool is not working properly, its switch may be defective.
To avoid accidents, do not use the power tool without the guard.
Do not immerse the power tool in water or other liquids.
Clean the power tool with a dry cloth. Do not use cleaning agents or solvents.
Do not operate the power tool without the auxiliary handle (18).
Store the power tool only in the protective cover or in the carrying case.
Service and cleaning advice
The service agent will answer your questions regarding repair and maintenance of your product as well as spare parts. Exploded views and information on spare parts can also be found under:
www.bosch-pt.com
The Bosch service team will be happy to answer any questions you may have regarding our products and their accessories.
Please state the product number printed on the nameplate (10 digits) when making enquiries or ordering spare parts.
This normative document is applied in the territory of the Republic of Kazakhstan in all organizations providing services, regardless of ownership and subordination, as well as in authorized organizations. EXCERPT!
It is possible to make changes to this document only with the permission of the developer. Changes to the document are made in accordance with the established procedure and are subject to registration.
318|Kazakh
Kazakhstan
The following regulatory documents are referenced in this standard:
"Robert Bosch" LLC
Almaty.
Republic of Kazakhstan
050012
Muratbayev K., 180
"Termes" LLP, 7 kabat
Tel.: +7 (727) 331 31 00
Fax: +7 (727) 2330787
E-Mail: ptka@bosch.com
Service centers and reception points
Typical tools only for use in Kazakhstan: www.bosch-professional.kz
For other service centers, see the following:
www.bosch-pt.com/serviceaddresses
Disposal
Used batteries and power tools must be disposed of separately from household waste. Dispose of batteries and power tools separately at collection points.
Third parties (e.g., dealers or repair shops) must be informed about the safe disposal of batteries. In case of improper disposal, hazardous substances may be released.
If the battery housing is damaged, do not use it. Do not open the battery and do not touch the battery contacts. If necessary, contact a qualified specialist.
Care

Power tools, batteries/accumulators, accessories, and packaging should be sorted for environmentally friendly recycling.
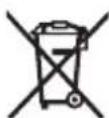
Do not dispose of power tools and batteries/accumulators in household waste!
For EU countries only:
According to the European Directive 2012/19/EU on waste electrical and electronic equipment and its implementation in national law, power tools that are no longer usable must be collected separately and disposed of in an environmentally friendly manner. According to the European Directive 2006/66/EC, defective or used batteries/accumulators must be collected separately and disposed of in an environmentally friendly manner.
If disposed of improperly, waste electrical and electronic equipment may have harmful effects on the environment and human health due to potentially hazardous substances.
Batteries/accumulators:
Li-ion:
Romanian
Safety instructions

All instructions must be read and followed. If the measuring tool is not used in accordance with these instructions, the protective devices integrated in it may be affected. KEEP THESE INSTRUCTIONS IN OPTIMAL CONDITION.
Power tool service
Horia Macelariu Street No. 30-34, sector 1
013937 Bucharest
www.bosch-pt.com/serviceaddresses
Transport
Storing the measuring tool
The measuring tool can be stored with the Bosch lithium-ion battery (12), with ordinary batteries, or with ordinary NiMH rechargeable batteries.
Note: Never store the measuring tool without the cap on the battery compartment (16) or the lithium-ion battery (12) (accessory), especially in a dry and damp environment.
The charge indicator (d) on the display shows the charge status of the lithium-ion battery (12), respectively of the NiMH batteries.
Working with the lithium-ion battery
Use/removal of the lithium-ion battery
To insert the lithium-ion battery (12), press the latch (15) on the battery compartment cover. Insert the battery compartment cover (16) normally, respectively the battery.
Insert the lithium-ion battery (12) and let the latch (11) engage.
__SUPPIMER__
To remove the lithium-ion battery (12), press the latch (11) and pull the lithium-ion battery out of the measuring tool.
Charging the lithium-ion battery
For charging, use the USB adapter or a USB power supply whose output voltage and minimum output current correspond to the requirements in the "Technical Data" section. Pay attention to the instructions for the USB adapter. Recommended adapter: see "Technical Data". Comply with the voltage of the power grid! The voltage of the power grid must match the data on the rating plate of the USB adapter. Charge the battery via the USB port only at ambient temperatures between +10°C and +35°C. Charging outside this temperature range can damage the battery or pose a fire hazard.
Note: The lithium-ion batteries are delivered partially charged according to international transport regulations. To ensure full battery capacity, fully charge the battery before first use. Open the cover of the USB Type-C® socket (13). Connect the USB socket via the USB cable (10) to the USB adapter. Connect the USB adapter to the power grid.
| цьгийнданкатор за зарожданe (14) |
| Жылт Питуев-ийонна та akумалаторна бateрna ce заржда. |
| Зелен Питуев-ийонна та akумалаторна сateрna e habлно за- раз dedа. |
| червен Нарөжени.To TOKьт Ha заржданe са неюхODДи. |
| По Врeme Ha пpoцени рata по заржданe He са Вьзmoхни Измерваши, Ть кato ИЗ- Мервашит ур徳 He моче дa ce постави habлно Bьрху земта. |
| Отстравete сддпрклочане Ha пpoцени рata по заржданe USВ кабena (10). 3at- Ворете калaka на USB Type-C® bykca tata (13) за堕URA ot прах и пьскИ ВODа. |
Working with alkaline batteries/NiMH batteries
To replace the lithium-ion battery (12) with alkaline/NiMH batteries, remove the lithium-ion battery (12).
For operation of the measuring tool, the use of alkaline-manganese NiMH batteries is recommended.
Insert the alkaline or rechargeable batteries.
Pay attention to the correct polarity, as shown in the figure on the inside of the battery compartment.
Insert the battery compartment cover (16) and let it engage.
Replace all batteries, respectively rechargeable batteries, at the same time. Only use batteries or rechargeable batteries from the same manufacturer and with the same capacity.
Store the measuring device in a dry place, away from batteries, respectively rechargeable batteries. Batteries and rechargeable batteries can corrode during prolonged storage and damage the measuring device.
Operation
Protect the measuring device from moisture and direct sunlight. Do not expose the measuring device to extreme temperatures or sudden temperature changes. In case of large temperature differences, allow the device to acclimate before switching it on. In case of extreme temperatures or sudden temperature changes, the accuracy of the measuring device and the display may be affected. Avoid strong impacts or dropping the measuring device. After strong impacts, if the device does not function properly, you should send the measuring device for inspection to an authorized service for electrical instruments. Use the measuring device only for the intended purpose (8) to avoid incorrect measurements. Do not place stickers or labels in the sensor area (17) on the back of the measuring device. Metal labels (metal) can strongly affect the measurement results.

Before measuring, pay sufficient attention to proper grounding. In case of insufficient grounding, the detection of live cables may be impaired.
Avoid being in the vicinity of devices that emit strong electric, magnetic, or electromagnetic fields, such as mobile phones, laptops, or tablets. If possible, keep a distance from such devices.
Interference that may affect the measurement should be eliminated by activating the corresponding functions or switching off the device.
Starting operation
Switching on/off
Before switching on the measuring device, make sure that the sensor area (17) is not damp. If necessary, dry the device with a soft cloth. If the device has been exposed to sudden temperature changes, allow it to acclimate before switching it on.
To switch on the measuring device, press the On/Off button (7).
To switch off the measuring device, press the On/Off button (7) again.
If no button is pressed on the measuring device for approx. 5 minutes, the measuring device switches off automatically to save the batteries.
Switching the acoustic signal on/off
With the acoustic signal button (6) you can switch the acoustic signal on or off. When the acoustic signal is switched off, the display shows the status indicator for the acoustic signal (c).
Function (see Fig. B)
The measuring tool checks the base in the area of the sensors (17) in the direction of measurement up to the maximum opening depth.
During every measurement, the tool automatically searches for metal objects (e.g., reinforcement bars, copper pipes). The metal detection function is indicated by the LED ring (4).
To additionally open the search for reinforcement bars and plasterboard, press the button
(5). The function is confirmed by the LED ring (5). To switch off the search for reinforcement bars, press button (5) or button (4) so that the LED ring (5) goes out.
Note: Switch on the function for searching reinforcement bars only for searching in walls made of plasterboard with a metal construction. Otherwise, the search result may be falsified.
Measuring procedure (see Fig. C)
Place the measuring tool on the surface to be examined. The LED ring (1) lights up to indicate the measuring position.
Hold the measuring tool evenly on the surface for scanning (8). Do not change the tilt during the measurement and do not cover the sensor area (17).
1609 92A 9PR (04.07.2024) Bosch Power Tools
Move the measuring tool in a straight line in the lateral direction over the base, without lifting it or changing the pressure. The movement of the measuring tool should be slow and steady. If you do not know the position of the object in the wall, perform a crosswise measurement (see Fig. C).
Note on locating reinforcement bars: The measuring tool must first detect that it is above a base with reinforcement bars. For this, move the measuring tool in a circular motion (diameter > 30 cm) over the base. After that, the measuring tool must not be lifted from the base; the measurement must be carried out according to the instructions. In the ideal case, the reinforcement bars are crossed during the circular movement.
Indications for locating:
- If no object is detected under the sensor area, the LED ring (1) lights up green. The measuring indicator (b) is empty and no acoustic signal sounds. - If the measuring tool approaches an object, the LED ring (1) lights up yellow. As the distance decreases, the amplitude in the measuring indicator (b) increases and the frequency of the acoustic signal becomes faster. - At the center of the object, the measuring indicator (b) shows the maximum amplitude of the measurement, the center indicator (a) lights up and a continuous signal sounds. The LED ring (1) lights up red. - If the measuring tool moves away from the object, the center indicators (a) go out, the amplitude in the measuring indicator (b) decreases and the frequency of the acoustic signal becomes slower.
During the first pass, the rough center and the boundaries of the object are displayed.
The detector will indicate the object's location. Move the detector back and forth without lifting it from the object's direction until the object's location is indicated again (the object's location indicators (a) light up).
For a more precise object boundary, move the detector slowly to the right or left until the light (1) just stops lighting in the red.
The marking hole (2) is the center of measurement. Here you can mark the center or boundary of the object.
Note: If you mark the object through the marking hole (2) (e.g., with a pencil), you must start a new measurement, as the measurement can be influenced by the pencil.
The type of detected object is shown on the display:

(h) Non-ferrous metal (e.g., copper pipe)
346 | Bulgarian

(g) Ferrous metal (e.g., reinforcing steel)

(f) Electrically conductive, e.g., electrical cable

(e) Non-metal, e.g., wooden beam
Instructions for detecting live electrical conductors
- The conductor must be under voltage. Therefore, connect consumers (e.g., lamps, devices) to the conductor. Connect the consumer to ensure the conductor is actually under voltage. - The signal of 50/60 Hz must reach the measuring device. If the conductors are in damp walls (e.g., humidity >50%), behind metal foil (e.g., on thermal insulation) or in a metal pipe, the signal does not reach the measuring device and the conductor cannot be detected. - The measuring device must be grounded. Hold it by the handle (without touching the contacts). Make sure you have good contact with the ground. Insulating shoes, ladders, or platforms can interrupt contact. The ground must also be grounded; otherwise, the conductor cannot be detected. The signal of 50 to 60 Hz must be stronger than the conductor, as in the immediate vicinity. If the wall is hard, dry, or well grounded, the signal on the wall surface is equally strong. Then the measuring device shows in the red zone that a signal is detected, but it cannot precisely locate the conductor. In such cases, it may help if you place the free hand at a distance of 20-30 cm from the measuring device to divert the signal from the wall. The position of the free hand, however, must not change during the measurement procedure. - Multi-phase current conductors (known as three-phase current or alternating current) cannot be localized as electrical conductors, as the signals from the different phases cancel each other out. You can, however, localize multi-phase current conductors on the surface as metal objects. - Electrical conductors on wall surfaces, such as certain phase conductors, may lead to this, electrical conductors are not shown or the light (1) lights in the red in the entire zone. - Flat-laid electrical conductors (up to max 2-3 cm depth) may additionally be shown as metal objects. This, however, does not apply to multi-core cables.
Before drilling, cutting or grinding walls, ceilings or floors, always consult the current consumer unit. Before switching on the device, make sure that the object is secured to the base and is not under voltage.
Indication of the object
- When the device is switched on for the first time, the display may show metallic objects and other objects, such as plastic pipes, electrical cables, and gas pipes. Before drilling, cutting or grinding, check with other sources of information that the object is actually a metal pipe or another object (e.g., plastic pipe, electrical cable, gas pipe). -Nails and screws in the base material may cause the display to show a metal object. -Wider objects are detected with a red light on the display (1) in a wide area. When detecting objects, wider objects are not shown in full or in detail. Before drilling, cutting or grinding in a wall, you must also inform yourself from other sources or from the danger indicator. Since the measurement result may be affected by environmental factors and the structure of the wall, there is a possibility of danger even if the measurement indicator (b) does not show an object, does not emit an acoustic signal, and the display (1) shows no light.
Precautions - Instructions for use and instructions for disposal
Auxiliary handle
The temperature monitoring indicator (k) and the warning indicator (j) light up, measurement is not possible
Measuring device temperature is outside the operating temperature range or has been subjected to strong temperature fluctuations.
Switch off the measuring device and let it acclimatize, then switch it on again. Accurate measurements are only possible if the temperature inside the measuring device remains constant.
Radio interference indicator (i) and warning indicator (j) light up
The measurement is affected by electric, magnetic or electromagnetic fields (e.g., from mobile phones, laptops or
Possibility of interference with the device, contact with radiation can affect the measurement, deactivate the corresponding functions or switch off the device.
Auxiliary handle
Table of measurement accuracy.
Warning indicator (j) lights up
Measuring tools must only be repaired by qualified specialists using original spare parts. This ensures that the safety of the power tool is maintained.
The indicator for metal detection shows the amplitude of the measuring tool's indicator (b), even if the metal object was close to the measuring tool.
Factory calibration: The measuring tool is calibrated at the factory in accordance with the specified accuracy (e.g., for horizontal lines). For calibration, the measuring tool should be placed on a level surface. See page 348.
The laser line (1) does not light up when the tool is switched on.
The surface is not recognized. Clean the measuring tool with a dry, soft cloth so that the sensor area (17) is not covered, and restart the measurement.
Contact with the wall or base may not be recognized due to special properties of the wall (e.g., very dark surface). Place the measuring tool on the base. For reliable recognition of the wall, press the metal detection button (4) and the laser button (5) simultaneously for about 3 seconds until the laser line (1) lights up and no acoustic signal sounds. Then perform the measurement as usual. Note: For measurements on a different base, the wall recognition must be reset. Switch the measuring tool off and on again.
For optimal and reliable operation, keep the measuring tool clean and dry. Do not immerse the measuring tool in water or other liquids.
Clean the measuring tool with a dry, soft cloth. Do not use cleaning agents or solvents.
Do not remove the battery (18) from the rear side of the measuring tool.
Store and transport the measuring tool only in the protective pouch provided.
Customer service and application consulting
The service department will answer your questions regarding repairs and maintenance of your product, as well as spare parts. Exploded views and information on spare parts can also be found at:
www.bosch-pt.com
The Bosch application consulting team will be happy to help you with questions regarding our products and their accessories.
Please state the 10-digit article number on the type plate of your tool when making enquiries or ordering spare parts.
350 | Bulgarian
Bulgaria
Robert Bosch SRL
Power tools service
Strada Horia Macelariu Nr. 30-34, sector 1
013937 Bucharest, Romania
Tel.: +359(0)700 13667 (Bulgarian)
Fax: +40 212 331 313
Email: BoschServiceCenterBG@ro.bosch.com
www.bosch-pt.com/bg/bg/
Other service addresses can be found at:
www.bosch-pt.com/serviceaddresses
Transport
The contained lithium-ion batteries are subject to the Dangerous Goods Legislation requirements. The batteries can be transported by the user on public roads without further restrictions.
When transporting by third parties (e.g. by air freight or forwarding agency), special requirements on packaging and labelling must be observed. For the preparation of the item being shipped, consulting an expert for hazardous material is required.
Remove the battery from the device before disposal. Select the open contacts of the battery terminals so that they cannot be placed in the packaging. Then, follow your local regulations.
Disposal

With the disposal of the end of the service life of electrical devices, ordinary or rechargeable batteries, accessories, and packaging must be handed over for recycling of the materials contained in them.
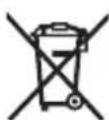
Do not dispose of electrical devices and rechargeable batteries/batteries with household waste!
Only for EU countries:
According to the European Directive 2012/19/EC on waste electrical and electronic equipment and its transposition into national law, electrical devices that
can no longer be used, as well as according to the European Directive 2006/66/EC, damaged or exhausted ordinary or rechargeable batteries, must be collected and handed over for recycling of the materials contained in them.
If you dispose of old electrical and electronic devices improperly, the possible presence of hazardous substances can have a negative impact on the environment and human health.
Rechargeable or ordinary batteries:
LITHIUM-ION:
Then, follow the instructions in the transport section (see "Transport", page 350).
Macedonian
Safety instructions

All instructions must be read and observed. If the measuring device is not used in accordance with the enclosed instructions, the protective mechanisms integrated in the measuring device may be impaired. Always keep these instructions.
The measuring device may only be repaired by qualified personnel using original spare parts. Only in this way can the safety of the measuring device be guaranteed. Do not work with the measuring device in environments where there is a risk of explosion, where there are flammable liquids, gases, or dust. The measuring device creates sparks that can ignite dust or vapors. Do not disassemble or open the battery. There is a risk of short circuit. In case of leakage and improper use of the battery, acid may escape. The battery may ignite or explode. Provide fresh air and consult a doctor. The acid may irritate the skin. In case of incorrect use or a damaged battery, flammable liquid may leak from the battery. Avoid contact with it. If you accidentally come into contact with the liquid, rinse with water. If
If symptoms persist or worsen, seek medical help. The battery material can cause irritation or burns.
The battery can be damaged by sharp objects such as knives or by strong impact. It may cause an internal short circuit, and the battery can leak, catch fire, explode, or overheat.
Keep the unused battery away from paper clips, coins, keys, nails, screws, and other small metal objects, which can cause bridging of the contacts. A short circuit between the battery contacts can cause burns or fire. Use the battery only in the product specified by the manufacturer. Only in this way will the battery be safely handled. Batteries supplied with the product are recommended exclusively by the manufacturer. If a battery of a different type is used, there is a risk of fire.

Protect the battery from heat, e.g., from prolonged exposure to sunlight, fire, dirt, water, and moisture. There is a risk of explosion and short circuit.
Due to technical conditions, the measuring device cannot guarantee absolute safety. To avoid danger, before each use, reading with a flashlight or in dimly lit rooms, basements, or similar, ensure another source of information such as floor plans, photos of the floor plan, etc. Environmental influences such as humidity or proximity to other electrical devices that generate strong electric, magnetic, or electromagnetic fields, humidity, building materials containing metal, insulating materials laminated with aluminum, and conductive tiles or panels can affect the accuracy of the measuring device. The color, texture, thickness, and condition of the object can affect the measurement results. If there is gas in the object, then after each work in rooms, basements, or similar, check that no gas has escaped. When working on surfaces in dry rooms, check the load-bearing capacity of the floor. For mounting materials, especially when mounting on drywall.
This device is not intended for use by persons (including children) with reduced physical, sensory, or mental capabilities, or lack of experience and knowledge, unless they have been given supervision or instruction concerning use of the device by a person responsible for their safety. Children should be supervised to ensure that they do not play with the device. There is a risk of incorrect use and injury.

Keep the device away from water and moisture. Water entering the device increases the risk of electric shock.
Read the instructions before use. The device is called a detector for electrical shock hazard. Use it correctly, check it before use. Do not use it before checking that it is working. Do not open it yourself; take it to a Bosch service center or an authorized service center for repair. Use only original spare parts. Improper use may cause risk of electric shock.
Product description and performance
Pay attention to the figures in the front part of the instructions for use.
Intended use
The device is intended for detecting metal (ferrous and non-ferrous metals, e.g., reinforcing steel), wooden beams, and live cables in walls, ceilings, and floors.
The device is intended for indoor use only.
Component illustration
The numbering of the figures with components corresponds to the order of the illustrated components.
(1) Light ring (2) Marking opening (3) Screen
354 | Macedonian
(4) Metal/stud mode button (5) Wire mode button (6) AC wire mode button (7) On/off button (8) Handle surface (9) Protective cap
(10) USB Type-C® cable (11) Locking mechanism for the lithium-ion battery pack (12) Lithium-ion battery pack (13) USB Type-C® port (14) Battery charge indicator (15) Battery pack locking latch (16) Battery pack release button (17) Sensor area (18) Laser (19) Serial number
a) The accessories shown are not included in the standard scope of delivery. b) USB Type-C and USB-C are trademarks of USB Implementers Forum.
Display elements (see figure A)
(a) Center of object indicator (b) Measurement indicator (c) AC wire status indicator (d) Fill level indicator (e) Non-ferrous metal indicator (f) Live cable indicator (g) Magnetized metal indicator (h) Non-magnetized metal indicator (i) Radio signal indicator (j) Warning indicator (k) Temperature indicator
| Дигитален detektop GMS 120-27 | |
| Б Proj на дол | 3601 K81 7.. |
| Мakс. ддбочина на PerinстрипаьеA) | |
| - Неталу (бака) 120 mm | B) |
| - Лениmetалу 100 mm | C) |
| - стужни кабли 100-230 V (при пrimенье на пон) 50 mm | D) |
| - Дравеля Гейни вор суба 30 mm | E) |
| Опатина Temпература -10°C ... +50°C | |
| Temпература рри скадираье -20°C ... +70°C | |
| Оncер на оратина Фразковецima 50 ± 2 kHz | |
| Мakс. щачина на магNETно поle (при 10 m) 42 dBμA/m | |
| Мakс. оратина висна поеку peферентна висна 2000 m | |
| Мakс. релатина влажност на boзduхот | |
| - заPreпознаваные наPreпдмétи 90% | |
| - за Класидашикада на Кабли под на пон 50% | |
| Стосян на ИЗвалканост според IEC 61010-1 2 | F) |
| Нanoювање се中医药а | |
| - Литун-m-jонскь батерскь пakет 3,7 V | |
| - Батери (алкални-mангацни) 2 × 1,5 V LR6 (AA) | |
| - Акуму latорскь батери (NiMH) | 2 × 1,2 V HR6 (AA) |
| Вremетраеве на павота okoly | |
| - со Литун-m-jонскь батерскь пakет | 5 h |
| - со-bатери (алкални-mангацни) | 6 h |
| - со akуму latорскьбатери (NiMH) | 7 h |
| ТекинаG) | 0,24 kg |
| Димензни (должнихххххххххх) | 186 × 86 × 33 mm |
| Вид на заштига | IP54 |
| Литун-m-jонскь батерскь пakет (опера) | BA 3.7V 1.0Ah A |
| Б Proj на дол | 1 607 A35 ON8 |
Digital detector GMS 120-27
The lithium-ion battery pack is fully charged.
The green LED on the battery pack lights up.
The red LED lights up when the battery is not fully charged.
Charging is not possible during the charging process, the measuring tool cannot be operated during charging.
When charging is complete, remove the USB cable (10). Close the USB Type-C port (13) with the cap to protect it from dust and water.
Working with batteries
To replace the lithium-ion battery pack (12) with alkaline/NiMH rechargeable batteries, remove the lithium-ion battery pack (12).
For working with the measuring tool, it is recommended to use alkaline-manganese batteries or NiMH rechargeable batteries.
Insert the batteries or rechargeable batteries inside.
Pay attention to the polarity according to the illustration on the inside of the battery compartment.
Insert the battery compartment (16) and close it.
Always replace all batteries at once. Use only batteries from the same manufacturer and with the same capacity.
▷ Before using the measuring instrument for the first time, remove the battery compartment cover and insert the batteries. Incorrect polarity, batteries, and battery compartment cover may cause the measuring instrument to malfunction.
Use
Do not expose the measuring instrument to direct sunlight. Do not expose the measuring instrument to extreme temperatures or temperature fluctuations. If there are temperature fluctuations, leave the
measuring instrument to acclimatize before switching it on. Extreme temperatures or temperature fluctuations may impair the accuracy of the measuring instrument and the readability of the display.
Avoid impacts and dropping the measuring instrument. After severe external influences and deviations in functionality, the measuring instrument must be checked by an authorized Bosch service center. ▷ Hold the measuring instrument only by the designated holding surfaces (8) to avoid affecting the measurement. Do not place stickers or signs on the sensor area (17) on the rear side of the measuring instrument. Especially metal signs can affect the measurement results.

Do not wear gloves during measurement and ensure proper grounding. Improper grounding may impair the detection of live cables.
During measurement, avoid being in the vicinity of devices that emit strong electrical, magnetic, or electromagnetic fields, such as mobile phones, laptops, or tablets. Before
if possible, deactivate the corresponding functions or switch off these devices to avoid affecting the measurement.
Starting operation
Switching on/off
▷ Before switching on the measuring instrument, check that the sensor area (17) is not wet. If it is wet, dry the measuring instrument with a cloth. ▷ If the measuring instrument was exposed to large temperature fluctuations, let it acclimate to the ambient temperature before switching it on.
To switch on the measuring instrument, press the on/off button (7).
To switch off the measuring instrument, press the on/off button (7) again.
After approx. 5 min. If you do not press any button on the measuring instrument and do not move the measuring instrument, the measuring instrument switches off automatically.
Switching on/off of the display illumination
To turn the tone (6) on or off, you can switch it on and off. When the tone is switched off, the status display for the tone (c) appears on the screen.
360 Macedonian
With the measuring device, the support of the sensor (17) is adjusted to the measuring height, from low to maximum height of the object being detected.
During each measurement, metal objects (e.g., copper wire or armored wire) and live cables (50-60 Hz) are automatically detected. The LED for metal/live wire (4) lights up.
To additionally detect wood in plasterboard, press the button for wood (5). The function is confirmed by the lighting of the button for wood (5). To deactivate wood detection, press the button for wood (5) or the button for metal/live wire (4) to switch off the button for wood (5).
Note: Activate the wood detection function exclusively for detection in plasterboard with wooden structures. The measurement result may be affected by the type of plaster.
Measuring procedure (see figure C)
Place the measuring device on the surface to be checked.
The LED ring (1) lights up to indicate readiness for measurement.
Hold the measuring device firmly by the handle (8). Do not move the handle during the measurement and especially do not touch the area of the sensor (17).
Slowly move the measuring device straight in the desired direction with light pressure on the surface, without lifting or changing the pressure. The movement of the measuring device must be perpendicular to the object being detected. If you do not know the direction of the object in the wall, then perform a crosswise measurement (see figure C).
Note for detecting armored wire mesh: The measuring device must first recognize that it is over an armored wire mesh. For this, place the measuring device in a circle (diameter >30 cm) on the surface before the actual measurement. Then do not move the measuring device from the surface and measure as usual. Ideally, the point of intersection of the wire mesh is located.
Display indications:
- If no object is found under the sensor, the LED ring (1) lights up in green. The measurement display (b) is empty and no tone is emitted.
- If the measuring device approaches an object, the LED ring (1) lights up in red. With closer approach, the distance indication of the measurement display (b) increases and the tone frequency becomes higher.
- The device detects the object, the readings for measurement (b) are used to calculate the maximum distance for measurement, the readings for the center of
the object (a) light up and the signal tone is continuous. The LED indicator (1) lights up when the center is reached.
If the measuring device is moved away from the object, the readings for the center and the object (a) are lost, the reading for measurement (b) is updated and the signal tone changes.
The center and boundaries of the object are roughly indicated at the first detection. For precise adjustment of the center of the object, move the measuring device without lifting it off the surface of the object until the center of the object is indicated again (see the readings for the center of the object (a)).
For precise boundaries of the object, move the measuring device with the center of the object in the right line until the LED indicator (1) no longer lights up in red.
The marking opening (2) is located on the top of the measuring device. You can use it to mark the center or boundaries of the object as needed.
Note: after marking the object through the marking opening (2) (e.g., with a pencil), you must start a new measurement, as the marking may affect the measurement.
The type of detected object is indicated on the display:

(h) Non-magnetizable metal, e.g., copper pipe

(g) Magnetizable metal, e.g., reinforcing iron

(f) Live cable, e.g., power cable

(e) Non-metal, e.g., wooden beam
Note on locating live cables
The cable must be live. Connect the live consumers (e.g., lamps, devices) to the live wire that is being traced. Turn on the live consumers to ensure there is current in the live wire. The signal from 50 to 60 Hz of the live wire must be detected by the measuring device. If the cable is in damp walls (e.g., humidity > 50%), behind metal pipes (e.g., heating pipes) or in a metal conduit, the signal of the measuring device may not be detected and the cable may not be found. The measuring device must be properly grounded. For this, hold the contact plate (without gloves) (8). Make sure you have good contact with the floor. Insulated shoes,
carpets or floors may impair the contact. The floor itself must also be properly grounded, otherwise the cable cannot be located.
The signal from 50 to 60 Hz can be interrupted by the cable before the cable is disconnected from the direct current. If the wall is very damp or has metal, the signal will be equally interrupted. Then the measuring device will show a large area where the cable is found, but it cannot precisely locate the cable. In this case, you can help by holding the free hand at a distance of 20-30 cm from the measuring device, to conduct the signal from the wall. However, the position of the free hand should not change during the measuring process. -Multi-phase cables (known as three-phase or high voltage) cannot be located as single cables, because the signals of the different phases cancel each other out. However, multi-phase cables can be detected at shallow depths, but as metal objects. -Lead the cable as it is defined, the depth can be caused to not show the cables and the light ring (1) to light a large area. - Properly placed single cable (up to a maximum depth of 2-3 cm) can additionally be detected as a metal object. However, this does not apply to cables with cable shields. Disconnect the power consumers and disconnect the electrical cables under voltage, before you work in walls, floors or ceilings, all types of rooms. After all work, check the floor for objects that are under voltage.
Display of objects
-When the detection of the object is enabled, other objects such as water pipes, filling pipes or gas pipes can also be detected as non-metal objects. Before drilling, sawing or cutting, check with another source of information that the object is a real wooden beam, not another object (e.g. plastic pipe, filling cable, gas pipe). - Nails and screws in the floor can cause the beams to be detected as metal objects. -Wide objects can be detected with the light ring (1) on a wide surface. Under certain circumstances, wide objects are not detected in their entirety. Before working in walls, ceilings or floors, you should protect yourself from dangers with the help of information sources. Because of the measurements
results can be affected by surrounding influences or the composition of the material, there is a danger that the measuring display (b) does not show an object in the sensor field (no audible signal and the light ring (1) lights green).
Detector principle help
Depth measurement
The temperature control display (k) and the pre-warning display (j) light up, measurement is not possible
| Мернnot урeding e haibov od разовата Temпература пою илобожен на силини Temпературуни функтуаши. | Искneyчete Ге Мернnot урeding и OCTabete Ге за ce Temперара, пeding NOВТорно да Ге ВКлuyчente. Точни Мерега се можни само,aKO Temперату рata в Воташноctа на Мернnot урeding OCTанe Консят ha. |
The radio reception display (i) and the pre-warning display (j) light up
| МеревETO e noД видахе на eilektpruchни, магн electни ини eilektpromarгетни пониа (на по. moьлни телегони, лантони ини tablenу bo sixiэни на мернот уpeд). | Дokолку e можно, Deaktnibpajte Го coodbeHTne фунжни кaj сITE урedenчпесрачени моче д вли joае на меревeto ппн Исклuyete Гурдан. |
The pre-warning display (j) beeps
The measuring device has defects. Send the measuring device to the service area, it is not functional. Bosch.
Display of metal object and constant beeping of the measuring display (b), although there is no metal object near the measuring device
| Фабрикata kaлибрациja noBEke пс e валдна (нa по. поади пад од rolема височина). | Рауно каллбр苹差别у у畴от (Види „Повторно Каллбр苹差别у мернnot у畴“, Стравица 364). |
The light ring (1) does not light when the floor is placed
The instrument can be connected to the mains supply only after you have started the measurement. The sensor (17) is empty.
Sensitive contacts or the base: Place the measuring device on the base. If early detection of leaks is not possible, simultaneously press the key for metal/stud (4) and
364 Macedonian
Remove the cover
on the leak (e.g., very dark surface).
Wood (5) (about 3 s), until the indicator light (1) does not light up and the signal tone is not activated. Then measure as usual.
Note: Before measuring another surface, reset the early leak detection. To do this, switch it off and then on again.
Recalibrate the measuring device
If a metal object is displayed and the measurement display (b) constantly flickers, even though there is no metal object near the measuring device, you may need to recalibrate the measuring device.
- Check the battery charge indicator (d); it should show at least 1/3 of the capacity.
- Switch off the measuring device. Remove all objects that could be detected from the vicinity of the measuring device (also remove watches or metal jewelry). Hold the measuring device horizontally in the air, so that the front side of the measuring device points downward. To switch to calibration mode, simultaneously press the on/off button (7) and the signal tone button (6). Hold both buttons (about 5-10 s) until the indicator light (1) flashes red. To start the new calibration, press the signal tone button (6) and hold it (about 5-10 s) until the indicator light (1) lights up red. When calibration is successful, the measuring device will automatically start after a few seconds and be ready for operation again.
Note: If the measuring device does not start automatically, repeat the calibration. If the measuring device still does not start, send it to an authorized service center.
Maintenance and service
Cleaning the device
Check the measuring device before each use. If there are signs of damage or loose parts inside the measuring device, safe functioning is no longer guaranteed.
Keep the measuring tool clean to ensure proper and safe operation.
Do not immerse the measuring tool in water or other liquids.
Wipe off dirt with a dry, soft cloth. Do not use cleaning agents or solvents.
Do not point the laser beam at persons or animals.
Store and transport the measuring tool only in the protective pouch provided.
Service and advice
The service department will answer your questions regarding repair and maintenance of your product as well as spare parts. Exploded views and information on spare parts can also be found at: www.bosch-pt.com
The Bosch advice team will be happy to help you if you have any questions about our products.
For all spare parts and warranty claims, please quote the 10-digit article number from the type plate of the product.
North Macedonia
D.D. Enzhtpres
SabbakovaueBnK 47H, broj 3
1000 Skopje
E-mail: dimce.dimcev@servis-bosch.mk
Internet: www.servis-bosch.mk
Tel./fax: 02/2467610
Mob.: 070595888
D.P.T.U. "ROJKA"
Jane Nukrovski 66; T.L.A. Vtokomanalokai 69
1000 Skopje
E-mail: servisrojka@yahoo.com
Tel: +389 2 3174-303
Mob: +389 70 388-520, -530
Additional service can be found at:
www.bosch-pt.com/serviceaddresses
Transport
The contained lithium-ion batteries are subject to the Dangerous Goods Legislation requirements. The batteries can be transported by the user without further requirements.
When transported by third parties (e.g. air transport or forwarding agency), special requirements on packaging and labeling must be observed. In this case, for preparation of the item, consulting an expert for hazardous material is mandatory.
Transport the batteries only if the housing is not damaged. Tape open contacts and cover the battery so that it cannot move in the packaging. Please also observe possibly more detailed national regulations.
Disposal

Electrical devices, batteries/accumulators, accessories and packaging should be disposed of in an environmentally friendly manner.
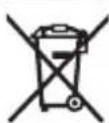
Do not dispose of electrical devices and batteries in household waste!
Only for EU countries:
According to the European Directive 2012/19/EU on waste electrical and electronic equipment and its implementation in national legislation, electrical devices that are no longer usable must be collected separately and recycled. Used batteries and accumulators must be disposed of separately according to Directive 2006/66/EC.
If disposed of incorrectly, electrical and electronic equipment can have harmful effects on the environment and human health due to the potential presence of hazardous substances.
Batteries:
Lithium-ion:
Please note the instructions in the transport section (see "Transport", page 366).
Serbian
www.bosch-pt.com/serviceaddresses
Transport
Recommended lithium-ion batteries are subject to the requirements of dangerous goods regulations. The user can transport the batteries by road without additional conditions. When shipping via third parties (e.g., air transport or forwarding), special requirements regarding packaging and labeling must be observed. In such cases, a dangerous goods expert must be consulted when preparing the shipment.
Only send batteries if the housing is not damaged. Tape off open contacts and pack the battery so that it cannot move in the package. Please also observe any further national regulations.
Disposal

Electrical devices, batteries/accumulators, accessories and packaging should be handed in for recycling in an environmentally friendly manner.
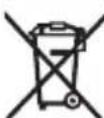
Do not dispose of electrical appliances and rechargeable batteries/batteries in household waste!
Only for EU countries:
According to the European Directive 2012/19/EU on waste electrical and electronic equipment and its implementation in national law, electrical appliances that can no longer be used, and according to the European Directive 2006/66/EC, defective or worn-out accumulators/batteries must be collected separately and included in recycling that meets environmental requirements.
If electronic and electrical appliances are disposed of improperly, possible hazardous substances can have a harmful effect on the environment and human health.
Rechargeable batteries/batteries:
Lithium-ion:
Please pay attention to the notes in the Transport section (see "Transport", page 380).
Slovenian
Safety warnings

www.bosch-pt.com/serviceaddresses
Transport
www.bosch-pt.com/serviceaddresses
Transport
Recommended lithium-ion rechargeable batteries are subject to the law on the transport of dangerous goods. The user can transport rechargeable batteries by road without any conditions. If transport is carried out by a third party (e.g. air transport or freight forwarding), special requirements for packaging and labeling must be observed. When preparing such shipments for transport, you should first consult with an expert for the transport of dangerous goods.
Send the rechargeable battery by any means of transport only if its housing is undamaged. Cover open contacts and pack the battery so that it cannot move in the packaging. Also observe any additional national regulations.
Disposal

Power tools, rechargeable batteries/batteries, accessories, and packaging should be brought to an environmentally friendly recycling facility.
Do not dispose of power tools and rechargeable batteries/batteries in household waste!
For EU countries only:
In accordance with the European Directive 2012/19/EU on waste electrical and electronic equipment and its implementation in national law, unusable electrical devices, and in accordance with the European Directive 2006/66/EC, defective or depleted rechargeable batteries/batteries must be collected separately and brought to an environmentally friendly recycling facility.
In the event of improper disposal, waste electrical and electronic equipment may have harmful effects on the environment and human health due to the possible presence of hazardous substances.
www.bosch-pt.com/serviceaddresses
Transport
www.bosch-pt.com/serviceaddresses
Transport
Lithium-ion rechargeable batteries are subject to the requirements of the Dangerous Goods Act. Users can transport batteries by road without additional conditions.
When shipping them through a third party (e.g., by air transport or other transport agency), special packaging and labeling requirements must be observed. Therefore, a dangerous goods specialist must be consulted during shipment preparation.
Only ship the battery if its housing is not damaged. Tape over the open contacts and pack the battery so that it cannot move around in the packaging. Please also observe any national regulations regarding battery transport, if applicable.
www.bosch-pt.com/serviceaddresses
Transport
The recommended lithium-ion batteries are subject to legislation on the transport of dangerous goods. No additional requirements apply to the user when transporting batteries by road.
If shipping is carried out by third parties (e.g., air transport, forwarding agent), special requirements regarding packaging and labeling must be observed. A specialist in the transport of dangerous goods must be involved in preparing the consignment.
USB Type-C (10)
(a) USB Type-C (11)
(a) USB Type-C (12)
USB Type-C (13)
(a) USB Type-C (14)
USB Type-C (15)
USB Type-C (16)
457
J 17
aJg| (18)
JuuuuaI pJI (19)
(b) USB Implementers
(A) USB Type-C
aunll cdoio jwgo (a)
wlaJ ufo (b)
dla jgol goljw (c)
Jwll dla Jwgo (d)
duoJ uC pLwXl wgo (e)
JUJI JIJI JIJI JIJI JIJI JIJI JIJI JIJI JIJI JIJI JIJI JIJI JIJI JIJI JIJI JIJI JIJI JIJI JIJI JIJI JIJI JIJI JIJI JIJI JIJI JIJI JIJI JIJI JIJI JIJI JIJI JIJI JIJI JIJI JIWI
aabisai jlaal jwgo (g)
auiu bixol jc uol ugo (h)
UwUuUuUuUuU (i)
j (j)
0JJIaJdQJgJpJwgo (k)
aJUUL
(AlqJLg aaijll aoijI (Bp015j (Coo 12 Jbaeulwll (D) (Eoo (F
(GUJUBJI JU:U2e/ (H:bljU aaiu
https://www.bosch-professional.com/ecodesign
2011 2011
a 35+ g 10+ jgjab
gUB USB uoo.USB Type-C (13) uoo
a USB USBJUUGUBGUSBJWALGBUSB (10)
(14)
__SUPPIMER__
461
(8)
(17)
a 15 15
U
.
Igblgbll jllj 15 yj g g p a la
LJUeSJI 1Lg

J 1
Joo a9g9 aunubliogjgS gl aunublioggl aIy
jglgolgogolgglgllg
wii yjgaiagkyiaqgljggl.
.0jgglwlaI Ic JU Lqic
山
g
4.1joo 17)
(4) 1/2 02 1/x 1/2 1/x2 1/2x3
Robert Bosch Morocco SARL
LJUJJ20300
+212529314327:
sav.outillage@ma.bosch.com:gJjSJI JJI
:duoJgluglicjosjoll
www.bosch-pt.com/serviceaddresses
Jai
(1) (2)




| GMS 120-27 | ### |
| 3601K817.. | ### |
| (A) ### | |
| (B) 120 mm | -(###) ### |
| (C) 100 mm | -### |
| (D) 50 mm | -100-230 V ### |
| ### | |
| (E) 30 mm | -### |
| -10°C...+50°C | ### |
| -20°C...+70°C | ### |
| 50±2 kHz | ### |
| 42 dBμA/m | (10 m Jd) ### |
| 2000 m | ### |
| % 90 | -### |
| % 50 | -### |
| (F)2 | IEC 61010-1 IEC JGK M#p#d## |
| 3,7 V | -### |
| 2 × 1,5 V LR6 (AA) | -(ji#s# ###) |
| 2 × 1,2 V HR6 (AA) | -(NiMH) |
| 5 h | -### |
| 6 h | -(ji#s# ###) |
| 7 h | -(NiMH) |
| 0,24 kg | (G)jg |
| 186 × 86 × 33 mm | (### × ### × ###) ### |
| IP54 | ### |
| BA 3.7V 1.0Ah A | ### |
| 1 607 A35 ON8 | ### |
| USB Type-C® | ### |
| =3,7 V | ### |
| 1,0 Ah | ### |
| +10°C... +35°C | ### |
| -10°C... +45°C | ### |
| ### | |
| ### | |
| =5,0 V | ### |
| 500 mA | ### |
| (H)sh# | |
| 2 609 120 713 | -### |
| GMS 120-27 | العربية رحيطال |
| 2609 120 718 | -العربية |
| 1600 A01 3A0 | -العربية |
| 1600 A01 3A1 | -العربية |
| 1600 A01 3A2 | -العربية |
https://www.bosch-professional.com/ecodesign
Operating temperature: 35°C to +10°C
Do not expose to rain or moisture.
Keep away from children.
Connect the USB cable.
Connect the USB Type-C (13) port.
Use the USB cable to connect to a USB port.
.
Press the power button (14).
The indicator light will turn on.
Wait for the device to start.
When the device is ready, it will beep.
Refer to the user manual for more details.
USB Type-C (13)
__SUPPIMER__

(CgJdSg) 0jdl
(1) jwj d. .g g g g g g g g g g g g g g g g g g g g g g g g g g g g g g g g g g g g g g g g g g g g g g g g g g g g g g g g g g g g g g gg
(h) (g) (f) (e)
8) 8) 8)
480|
The plant grows to a height of 20-30 cm. The leaves are green and glossy. The flowers are small and white.
The fruit is 15 cm long and has a sweet taste. The seeds are black and shiny.
.
482|
(a) (b)
.
www.bosch-pt.com
www.bosch-pt.com/serviceaddresses
.
484|w
(1)j y jy g j s l o) 1111111111111111111111111111111111111111111
oLsws jSgJl oJjI
Jl jI JI 150 syl/150 syl oJdil sl Okssu 150 JI JI Cwuj bdo hJrO qBb yL dSdu aWg .djg
1j jlw lgl sI /Ig g jol jil sl oJsw Jjw jSla dUj jBw jg

jLw Lg sU/lu
:gjgjj
"Jai g Jaa, d uis 1g) dgi Jai g Jaa uu bui jdu lboj .(483 da
Licenses
Copyright © 2009-2013 ARM LIMITED
All rights reserved.
Redistribution and use in source and binary forms, with or without modification, are permitted provided that the following conditions are met:
- Redistributions of source code must retain the above copyright notice, this list of conditions and the following disclaimer.
- Redistributions in binary form must reproduce the above copyright notice, this list of conditions and the following disclaimer in the documentation and/or other materials provided with the distribution.
- Neither the name of ARM nor the names of its contributors may be used to endorse or promote products derived from this software without specific prior written permission.
THIS SOFTWARE IS PROVIDED BY THE COPYRIGHT HOLDERS AND CONTRIBUTORS "AS IS" AND ANY EXPRESS OR IMPLIED WARRANTIES, INCLUDING, BUT NOT LIMITED TO, THE IMPLIED WARRANTIES OF MERCHANTABILITY AND FITNESS FOR A PARTICULAR PURPOSE ARE DISCLAIMED. IN NO EVENT SHALL THE COPYRIGHT HOLDERS AND CONTRIBUTORS BE LIABLE FOR ANY DIRECT, INDIRECT, INCIDENTAL, SPECIAL, EXEMPLARY, OR CONSEQUENTIAL DAMAGES (INCLUDING, BUT NOT LIMITED TO, PROCUREMENT OF SUBSTITUTE GOODS OR SERVICES; LOSS OF USE, DATA, OR PROFITS; OR BUSINESS INTERRUPTION) HOWEVER CAUSED AND ON ANY THEORY OF LIABILITY, WHETHER IN CONTRACT, STRICT LIABILITY, OR TORT (INCLUDING NEGLIGENCE OR OTHERWISE) ARISING IN ANY WAY OUT OF THE USE OF THIS SOFTWARE, EVEN IF ADVISED OF THE POSSIBILITY OF SUCH DAMAGE.
Copyright © 2008-2020 STMicroelectronics
All rights reserved.
Redistribution and use in source and binary forms, with or without modification, are permitted provided that the following conditions are met:
- Redistributions of source code must retain the above copyright notice, this list of conditions and the following disclaimer.
- Redistributions in binary form must reproduce the above copyright notice, this list of conditions and the following disclaimer in the documentation and/or other materials provided with the distribution.
- Neither the name of the copyright holder nor the names of its contributors may be used to endorse or promote products derived from this software without specific prior written permission.
THIS SOFTWARE IS PROVIDED BY THE COPYRIGHT HOLDERS AND CONTRIBUTORS "AS IS" AND ANY EXPRESS OR IMPLIED WARRANTY, INCLUDING, BUT NOT LIMITED TO, THE IMPLIED WARRANTY OF MERCHANTABILITY AND FITNESS FOR A PARTICULAR PURPOSE ARE DISCLAIMED. IN NO EVENT SHALL THE COPYRIGHT HOLDER OR CONTRIBUTORS BE LIABLE FOR ANY DIRECT, INDIRECT, INCIDENTAL, SPECIAL, EXEMPLARY, OR CONSEQUENTIAL DAMAGES (INCLUDING, BUT NOT LIMITED TO, PROCUREMENT OF SUBSTITUTE GOODS OR SERVICES; LOSS OF USE, DATA, OR PROFITS; OR BUSINESS INTERRUPTION) HOWEVER CAUSED AND ON ANY THEORY OF LIABILITY, WHETHER IN
486 | Licenses
CONTRACT, STRICT LIABILITY, OR TORT (INCLUDING NEGLIGENCE OR OTHERWISE) ARISING IN ANY WAY OUT OF THE USE OF THIS SOFTWARE, EVEN IF ADVISED OF THE POSSIBILITY OF SUCH DAMAGE.
Apache 2.0 License
Copyright © 2009-2020 Arm Limited. All rights reserved.
Version 2.0, January 2004
http://www.apache.org/licenses/
TERMS AND CONDITIONS FOR USE, REPRODUCTION, AND DISTRIBUTION
1. Definitions.
"License" shall mean the terms and conditions for use, reproduction, and distribution as defined by Sections 1 through 9 of this document.
"Licensor" shall mean the copyright owner or entity authorized by the copyright owner that is granting the License.
"Legal Entity" shall mean the union of the acting entity and all other entities that control, are controlled by, or are under common control with that entity. For the purposes of this definition, "control" means (i) the power, direct or indirect, to cause the direction or management of such entity, whether by contract or otherwise, or (ii) ownership of fifty percent (50%) or more of the outstanding shares, or (iii) beneficial ownership of such entity.
"You" (or "Your") shall mean an individual or Legal Entity exercising permissions granted by this License.
"Source" form shall mean the preferred form for making modifications, including but not limited to software source code, documentation source, and configuration files.
"Object" form shall mean any form resulting from mechanical transformation or translation of a Source form, including but not limited to compiled object code, generated documentation, and conversions to other media types.
"Work" shall mean the work of authorship, whether in Source or Object form, made available under the License, as indicated by a copyright notice that is included in or attached to the work (an example is provided in the Appendix below).
"Derivative Works" shall mean any work, whether in Source or Object form, that is based on (or derived from) the Work and for which the editorial revisions, annotations, elaborations, or other modifications represent, as a whole, an original work of authorship. For the purposes of this License, Derivative Works shall not include works that remain separable from, or merely link (or bind by name) to the interfaces of, the Work and Derivative Works thereof.
"Contribution" shall mean any work of authorship, including the original version of the Work and any modifications or additions to that Work or Derivative Works thereof, that is intentionally submitted to Licensee for inclusion in the Work by the copyright owner or by an individual or Legal Entity authorized to submit on behalf of the copyright owner. For the purposes of this definition, "submitted" means any form of electronic, verbal, or written communication sent to the Licensee or its representatives, including but not limited to communication on electronic mailing lists, source code control systems, and issue tracking systems that are managed by, or on behalf of, the Licensee for the purpose of discussing and improving the Work, but excluding communication that is conspicuously marked or otherwise designated in writing by the copyright owner as "Not a Contribution."
"Contributor" shall mean Licensor and any individual or Legal Entity on behalf of whom a Contribution has been received by Licensor and subsequently incorporated within the Work.
- Grant of Copyright License. Subject to the terms and conditions of this License, each Contributor hereby grants to You a perpetual, worldwide, non-exclusive, no-charge, royalty-free, irrevocable copyright license to reproduce, prepare Derivative Works of, publicly display, publicly perform, sublicense, and distribute the Work and such Derivative Works in Source or Object form.
- Grant of Patent License. Subject to the terms and conditions of this License, each Contributor hereby grants to You a perpetual, worldwide, non-exclusive, no-charge, royalty-free, irrevocable (except as stated in this section) patent license to make, have made, use, offer to sell, sell, import, and otherwise transfer the Work, where such license applies only to those patent claims licensable by such Contributor that are necessarily infringed by their Contribution(s) alone or by combination of their Contribution(s) with the Work to which such Contribution(s) was submitted. If You institute patent litigation against any entity (including a cross-claim or counterclaim in a lawsuit) alleging that the Work or a Contribution incorporated within the Work constitutes direct or contributory patent infringement, then any patent licenses granted to You under this License for that Work shall terminate as of the date such litigation is filed.
- Redistribution. You may reproduce and distribute copies of the Work or Derivative Works thereof in any medium, with or without modifications, and in Source or Object form, provided that You meet the following conditions:
- You must give any other recipients of the Work or Derivative Works a copy of this License; and
- You must cause any modified files to carry prominent notices stating that You changed the files; and
- You must retain, in the Source form of any Derivative Works that You distribute, all copyright, patent, trademark, and attribution notices from the Source form of the Work, excluding those notices that do not pertain to any part of the Derivative Works; and
- If the Work includes a "NOTICE" text file as part of its distribution, then any Derivative Works that You distribute must include a readable copy of the attribution notices contained within such NOTICE file, excluding those notices that do not pertain to any part of the Derivative Works, in at least one of the following places: within a NOTICE text file distributed as part of the Derivative Works; within the Source form or documentation, if provided along with the Derivative Works; or, within a display generated by the Derivative Works, if and wherever such third-party notices normally appear. The contents of the NOTICE file are for informational purposes only and do not modify the License.
You may add Your own attribution notices within Derivative Works that You distribute, alongside or as an addendum to the NOTICE text from the Work, provided that such additional attribution notices cannot be construed as modifying the License. You may add Your own copyright statement to Your modifications and may provide additional or different license terms and conditions for use, reproduction, or distribution of Your modifications, or for any such Derivative Works as a whole, provided Your use, reproduction, and distribution of the Work otherwise complies with the conditions stated in this License.
- Submission of Contributions. Unless You explicitly state otherwise, any Contribution intentionally submitted for inclusion in the Work by You to the Licensee shall be under the terms and conditions of this License, without any additional terms or conditions. Notwithstanding the above, nothing herein shall supersede or modify the terms of any separate license agreement you may have executed with Licensee regarding such Contributions.
- Trademarks. This License does not grant permission to use the trade names, trademarks, service marks, or product names of the Licensor, except as required for reasonable and customary use in describing the origin of the Work and reproducing the content of the NOTICE file.
- Disclaimer of Warranty. Unless required by applicable law or agreed to in writing, Licensor provides the Work (and each Contributor provides its Contributions) on an "AS IS" BASIS, WITHOUT WARRANTIES OR CONDITIONS OF ANY KIND, either express or implied, including, without limitation, any warranties or conditions of TITLE, NON-INFRINGEMENT, MERCHANTABILITY, or FITNESS FOR A PARTICULAR PURPOSE. You are solely responsible for determining the appropriateness of using or redistributing the Work and assume any risks associated with Your exercise of permissions under this License.
- Limitation of Liability. In no event and under no legal theory, whether in tort (including negligence), contract, or otherwise, unless required by applicable law (such as deliberate and grossly negligent acts) or agreed to in writing, shall any Contributor be liable to You for damages, including any direct, indirect, special, incidental, or consequential damages of any character arising as a result of this License or out of the use or inability to use the Work (including but not limited to damages for loss of goodwill, work stoppage, computer failure or malfunction, or any and all other commercial damages or losses), even if such Contributor has been advised of the possibility of such damages.
- Accepting Warranty or Additional Liability. While redistributing the Work or Derivative Works thereof, You may choose to offer, and charge a fee for, acceptance of support, warranty, indemnity, or other liability obligations and/or rights consistent with this License. However, in accepting such obligations, You may act only on Your own behalf and on Your sole responsibility, not on behalf of any other Contributor, and only if You agree to indemnify, defend, and hold each Contributor harmless for any liability incurred by, or claims asserted against, such Contributor by reason of your accepting any such warranty or additional liability.
END OF TERMS AND CONDITIONS
Warranty Disclaimer
This product contains Open Source Software components which underly Open Source Software Licenses. Please note that Open Source Licenses contain disclaimer clauses. The text of the Open Source Licenses that apply are included in this manual under "Licenses".
| de | Hiermit erklärt Robert Bosch Power Tools GmbH, dass der Funkanlageotyp GMS 120-27 der Richtlinie 2014/53/EU entspricht. Der vollständige Text der EU-Konformitätserklärung ist unter der folgenden Internetadresse verfügbar: |
| en | Hereby, Robert Bosch Power Tools GmbH declares that the radio equipment type GMS 120-27 is in compliance with Directive 2014/53/EU. The full text of the EU declaration of conformity is available at the following internet address: |
| fr | Le soussigné, Robert Bosch Power Tools GmbH, déclare que l'équipment radioélectrique du type GMS 120-27 est conforme à la directive 2014/53/EU. Le texte complet de la déclaration UE de conformité est disponible à l'adresse internet suivante : |
| es | Por la presente, Robert Bosch Power Tools GmbH declares que el tipo de equipo radioélectrique GMS 120-27 es conforme con la Diretiva 2014/53/EU. El texts complete de la déclaration UE de conformidade está disponible en la dirección In-ternet suivente: |
| pt | A abaixo assinada Robert Bosch Power Tools GmbH declares que o presente tipo de equipamento de rádio GMS 120-27 está em conformidade com a Diretiva 2014/53/EU. O texto integral da declaração de conformidade está disponível no segunte endereço de Internet: |
| it | Il fabbricante, Robert Bosch Power Tools GmbH, dichiara che il tipo di apparetti chiatura radio GMS 120-27 é conforme alla direttiva 2014/53/EU. Il testo completo della dichiarazione di conformità UE é disponible al segmente indirizzo In-ternet: |
| nl | Hierbij verklaar ik, Robert Bosch Power Tools GmbH, dat het type radioapparatuur GMS 120-27 conform is met Richtlijn 2014/53/EU. De volledige tekst van de EU-conformiteitsverklaring kan worden geraadpleegd op het volgende internetadres: |
| da Hermed erklærer Robert Bosch Power Tools GmbH, at radioudstyristypen GMS 120-27 er i overensstemmelse med direktiv 2014/53/EU. EU-overens-stemmelseserklæringsens fulde tekst kan findes på følgende internetadresse: | |
| sv | Härmed försakrar Robert Bosch Power Tools GmbH attenna typ av radiou-trustning GMS 120-27 overensstämmer med direktiv 2014/53/EU. Den fullstandiga texten till EU-försakran om overensstämme finns på følgande webb-adress: |
| no Robert Bosch Power Tools GmbH erklærer herved at radioutstyristypen GMS 120-27 er i overensstemmelse med direktivet 2014/53/EU. Den fullstandige teksten i EU-samsvarserklæringen er tilgengelig på følgende nettadresse: | |
| ii | |
| fi | Robert Bosch Power Tools GmbH vakuuttaa, etta radiolaitetyppi GMS 120-27 on direktivin 2014/53/EU mukainen. EU-vaatimustenmukaisuusvakuutuksen tãysimittainen teksti on saatavilla seuraavassa internetosoitteessa: |
| el Mê tnv napouca o/η Robert Bosch Power Tools GmbH, δηλωνει ὄτι o ραδioεξοπλομος GMS 120-27 πληροι ην σθηγία 2014/53/EE. To πληρες κειμενο της δηλωούς συμμόρφωούς EE διατιθεται Θην ακόλουθη ἀτοοελίδα ΑΤΟ διαδiktuo: | |
| tr | Robert Bosch Power Tools GmbH, GMS 120-27 radyo ekipmani tipinin Direktif 2014/53/EU ile uyumlu oldugunu borian eder. AB uygunluk borian in tam metni-ne asagidaki internet adresinden ulasabilirsiniz: |
| pl Robert Bosch Power Tools GmbH niniejszym oswiadcza, ze typ urzadzenia ra-diowego GMS 120-27 jest zgodny z dyrektywą 2014/53/UE. Peñny tekst dekl-racji zgodnosci UE jest dostepny pod dostepujacym adresem internetowym: | |
| cs | Tínto Robert Bosch Power Tools GmbH prohlasuje, ze typ rádioveho zařizení GMS 120-27 je v souladu se směrnici 2014/53/EU. Üplné zněni EU prohláşeni o shodě je k dispozici na títo internetové adrese: |
| sk Robert Bosch Power Tools GmbH týmtó vyhelasuje, ze rádiove zariadenie typu GMS 120-27 je v súlade so smernicou 2014/53/EU. Üplné EU vyhláşenie o zho-de je k dispozicii na títo internetovej adrese: | |
| hu | Robert Bosch Power Tools GmbH igazolja, hogy a GMS 120-27 típusú rádiobe-rendezés megfelela a 2014/53/EU irányelvnek. Az EU-megfeleloségi nyilatkozat teljes szövege elérhető a kõvetkežő internetes címen: |
| ru CnM Robert Bosch Power Tools GmbH 3aBnIeT, chTo pádnnoobopudobanhe Tnna GMS 120-27 COOTBETCTBVE TnipeKTbVe 2014/53/EU. C ПОЛньМ ТЕКТOM DeKlapaцио COOTBETCTBnE EU MoJxH O3NaKOMtbcry po SneduyUOeMy INTEPNet-Änpecy: | |
| uk | LcIM Robert Bosch Power Tools GmbH 3aBnIe, chTo pádnnoobpudanHЯ Tnpy GMS 120-27 BiNobIaC ΜipeKTbVi 2014/53/EU. 3 nobHIM TÉKCTOM DeKlapaцii BiNobIaHocTi EU MoJxHa O3NaHOMtncs 3a TaKOIO INTEPNet-Änpecio: |
| kk OcblMeR Robert Bosch Power Tools GmbH KOMnHnrcbI GMS 120-27 TpyiDerei paDNo JxabIckTapdbI 2014/53/EU DipeKTbBaCbIha caJIbIbH MaflymdaiNbI. EO cAayKeCTIK MaflymdAmacbI TemeHderi INTEPNet MeKENkaiBnDa KaIjXeTImDi: | |
| ro | Prin preventa, Robert Bosch Power Tools GmbH declara cà tipul de echipamen-te radio GMS 120-27 este in conformitate cu Direcita 2014/53/UE. Textul inte- |
| III | |
| gral al declaratiei UE de conformitate este disponibil la următoarea adresă inter-net: | |
| bg C nactoio Robert Bosch Power Tools GmbH Deklapnpa, che Tozni TnP padiocbopjxeHne GMS 120-27 e B cboTbETCTBHe c DnpeKTbBa 2014/53/EC. Zaioctniet Tekst ha EC Deklapaueta 3a cboTbETCTBHe moxe da ce hamepi ha cIeHNia INTEPNET aDPEC: | |
| mk Co oba, Robert Bosch Power Tools GmbH NOTBpduBa Deka Tnnot Ha padno oprema GMS 120-27 e BO coIacnocT co DnpeKTbBaTa 2014/53/EU. ZeIoNCHOT Tekst Ha N3jabata 3a coo6pa3nocT ha EU moxe da ro npouHtate Ha cIeHNa BnTEPNET CTpanNuca: | |
| sr Ovim Robert Bosch Power Tools GmbH izjavljuje da je radio-oprema tipa GMS 120-27 u skladu sa direktivom 2014/53/EU. Kompletan tekst EC izjave o usaglašenosti je dostupan na sledećoj vib-adresi: | |
| sl Robert Bosch Power Tools GmbH potrjuje, da je tip radijske opreme GMS 120-27 skladen z Direktivo 2014/53/EU. Celotno besedilo izjave EU o skladnosti je na voljo na naslednjem spletnem naslovu: | |
| hr Robert Bosch Power Tools GmbH ovime izjavljuje da je radijska oprema tipa GMS 120-27 u skladu s Direktivom 2014/53/EU. Cjeloviti tekst EU izjave o su- kladnosti dostupan je na sljedećoj internetskoj adresi: | |
| et Käesolevaga deklareerib Robert Bosch Power Tools GmbH, et käesolev raadio- seadme tüup GMS 120-27 vastab direktiivi 2014/53/EL nõuetele. ELi vastavus- deklaratsiooni täielik tekst on kättesaadav järgmisel internetaadressil: | |
| lv Ar šo Robert Bosch Power Tools GmbH deklare, ka radioiekārtga GMS 120-27 atbilst Direktivai 2014/53/ES. Pilns ES atbilstības deklarācijas teksts ir pieejams sādā interneta vietnē: | |
| lt Aš, Robert Bosch Power Tools GmbH, patvirtinu, kad radijo jrenginių tipas GMS 120-27 atitinka Direktvyą 2014/53/ES. Visas ES atitikties deklaracijos tek- stas prieinamas šiuo interneto adresu: | |
| -> http://eu-doc.bosch.com/ | |


Declaration of Conformity
Hereby, Robert Bosch Limited as authorised representative acting on behalf of Robert Bosch Power Tools GmbH declares that the radio equipment type GMS 120-27 is in compliance with the Radio Equipment Regulations 2017. The full text of the declaration of conformity is available at the following internet address:
- https://gb-doc.bosch.com



- TRANSPORT
- SAFETY INSTRUCTIONS FOR POWER SUPPLY
- PRODUCT DESCRIPTION AND SPECIFICATIONS
- INTENDED USE
- PRODUCT FEATURES
- DISPLAY ELEMENTS (SEE FIGURE A)
- TECHNICAL DATA
- DIGITAL DETECTOR GMS
- MEASURING TOOL POWER SUPPLY
- OPERATION WITH LITHIUM-ION BATTERY PACK
- INSERTING/REPLACING A LITHIUM-ION BATTERY PACK
- CHARGING A LITHIUM-ION BATTERY PACK
- COLOUR OF CHARGE INDICATOR (14) MEANING
- OPERATION WITH BATTERIES/RECHARGEABLE BATTERIES
- OPERATION
- STARTING OPERATION
- SWITCHING ON/OFF
- IF THE MEASURING TOOL HAS BEEN EXPOSED TO A SIGNIFICANT CHANGE IN TEMPERATURE, LEAVE IT TO ADJUST TO THE AMBIENT TEMPERATURE BEFORE SWITCHING IT ON
- SWITCHING AUDIO SIGNAL ON/OFF
- HOW IT WORKS (SEE FIGURE B)
- MEASURING PROCESS (SEE FIGURE C)
- DETECTION INDICATORS
- INFORMATION ABOUT DETECTING LIVE CABLES
- INFORMATION ABOUT OBJECT INDICATION
- ENGLISH
- ERRORS - CAUSES AND CORRECTIVE MEASURES
- CAUSE REMEDY
- RECALIBRATING THE MEASURING TOOL
- MAINTENANCE AND SERVICE
- MAINTENANCE AND CLEANING
- AFTER-SALES SERVICE AND APPLICATION SERVICE
- MALAYSIA
- GREAT BRITAIN
- YOU CAN FIND FURTHER SERVICE ADDRESSES AT
- DISPOSAL
- ONLY FOR EU COUNTRIES
- ONLY FOR UNITED KINGDOM
- BATTERY PACKS/BATTERIES
- FRANCE
- PORTUGUESE
- YOU CAN FIND MORE CONTACT DETAILS FOR SERVICE HERE
- RUSSIAN
- SAFETY INSTRUCTIONS FOR THE POWER SUPPLY UNIT WITH SOCKET
- PRODUCT AND SERVICE DESCRIPTION
- ILLUSTRATED COMPONENTS
- INDICATION ELEMENTS (SEE FIGURE A)
- WIRE DETECTOR GMS
- CHARGING THE RECHARGEABLE BATTERY
- WORKING WITH THE INSTRUMENT
- SWITCHING ON THE INSTRUMENT
- SWITCHING THE ACOUSTIC SIGNAL ON/OFF
- OPERATION (SEE FIGURE B)
- SCANNING PROCEDURE (SEE FIG. C)
- DETECTION INDICATION
- INSTRUCTIONS FOR DETECTING LIVE WIRES
- INDICATION OF OBJECTS
- TROUBLESHOOTING - CAUSES AND REMEDIES
- CAUSE AND REMEDY
- THE TEMPERATURE CONTROL INDICATOR (K) AND WARNING (J) ARE LIT, MEASUREMENT IS NOT POSSIBLE
- THE RADIO INDICATOR (I) AND WARNING (J) ARE LIT
- THE WARNING (J) FLASHES
- THE INDICATION OF A METALLIC OBJECT AND THE PROLONGED SIGNAL AMPLITUDE DURING MEASUREMENT MAY BE AFFECTED IF THERE ARE NO METALLIC OBJECTS NEAR THE MEASURING TOOL
- THE LIGHT RING (1) DOES NOT LIGHT UP WHEN LOWERED ONTO THE BASE
- CEPBNC N KOHCYIBTHNPOBAHNE NO BOPOCAM NPIMEHNA
- WWW.BOSCH-PT.COM
- ДЛЭPERNOHA: POCCA,БENAPYCB,KA3AXCTAN
- POCCH
- UKRAINIAN
- BATTERIES/ACCUMULATORS
- YKPAIHCBKA
- BKA3IBKN 3 TEXHIKN 6E3NEKN
- SAFETY INSTRUCTIONS FOR THE WALL SCANNER WITH LIVE WIRE DETECTION
- MEASURING TOOL
- OPERATION WITH LI-ION BATTERY PACK
- INSERTING/REPLACING THE LI-ION BATTERY PACK
- GETTING STARTED
- MEASUREMENT (SEE FIG. B)
- MEASUREMENT PROCESS (SEE FIG. C)
- DETECTION INDICATOR
- INSTRUCTIONS FOR DETERMINING THE LOCATION OF WIRES UNDER VOLTAGE
- NOTES ON THE DETECTION OF OBJECTS
- FAULTS - CAUSES AND REMEDIES
- THE TEMPERATURE CONTROL INDICATOR (K) AND THE WARNING INDICATOR (J) LIGHT UP, MEASUREMENT IMPOSSIBLE
- THE RADIO INDICATOR (I) AND THE WARNING INDICATOR (J) LIGHT UP
- THE WARNING INDICATOR (J) LIGHTS UP
- UKRAINE
- ADDRESSES OF AUTHORIZED SERVICE CENTERS ARE LISTED BELOW
- TRANSPORTATION
- WASTE FROM ELECTRICAL AND ELECTRONIC EQUIPMENT (WEEE)
- LITHIUM-ION
- KAZAKH
- EURASIAN ECONOMIC UNION (EAEU) CONFORMITY MARK
- PRODUCT CONFORMITY MARK
- THE THERMOMETER MUST BE INSTALLED IN THE PIPELINE AND THE TEMPERATURE SENSOR MUST BE INSTALLED IN THE PIPE
- CHECK THE SEALS
- MAINTENANCE AND REPAIR
- STORAGE
- SAFETY INSTRUCTIONS
- THE DEVICE MUST BE OPERATED BY QUALIFIED PERSONNEL ONLY
- THE ELECTRICAL DEVICE MUST NOT BE DAMAGED OR DROPPED
- POWER SUPPLY SPECIFICATIONS
- DO NOT USE IN WET CONDITIONS
- CAHDBIK NOKATOP GMS
- MEASURING TOOL ENERGY SUPPLY
- WORKING WITH THE NHTN BATTERY PACK
- INSERTING/REPLACING THE NHTN BATTERY PACK
- CHARGING THE LITHIUM-ION BATTERY PACK
- CHARGING INDICATOR (14) STATUS
- STATUS INDICATORS
- SELF-CLEANING
- EVEN IF THE METAL PART IS NOT PRESENT IN THE MEASUREMENT CHAMBER, THE METAL PART INDICATOR AND THE MEASUREMENT INDICATOR (B) WILL FLASH
- THE PROTECTIVE CAP (1) MUST BE REMOVED BEFORE USE
- CALIBRATING THE DEVICE
- TECHNICAL DATA AND SERVICE
- SERVICE AND CLEANING
- SERVICE AND CLEANING ADVICE
- KAZAKHSTAN
- FOR OTHER SERVICE CENTERS, SEE THE FOLLOWING
- CARE
- FOR EU COUNTRIES ONLY
- LI-ION
- ROMANIAN
- STORING THE MEASURING TOOL
- WORKING WITH THE LITHIUM-ION BATTERY
- USE/REMOVAL OF THE LITHIUM-ION BATTERY
- SUPPIMER
- CHARGING THE LITHIUM-ION BATTERY
- WORKING WITH ALKALINE BATTERIES/NIMH BATTERIES
- FUNCTION (SEE FIG. B)
- MEASURING PROCEDURE (SEE FIG. C)
- INDICATIONS FOR LOCATING
- BULGARIAN
- INSTRUCTIONS FOR DETECTING LIVE ELECTRICAL CONDUCTORS
- INDICATION OF THE OBJECT
- PRECAUTIONS - INSTRUCTIONS FOR USE AND INSTRUCTIONS FOR DISPOSAL
- AUXILIARY HANDLE
- THE TEMPERATURE MONITORING INDICATOR (K) AND THE WARNING INDICATOR (J) LIGHT UP, MEASUREMENT IS NOT POSSIBLE
- RADIO INTERFERENCE INDICATOR (I) AND WARNING INDICATOR (J) LIGHT UP
- WARNING INDICATOR (J) LIGHTS UP
- THE INDICATOR FOR METAL DETECTION SHOWS THE AMPLITUDE OF THE MEASURING TOOL'S INDICATOR (B), EVEN IF THE METAL OBJECT WAS CLOSE TO THE MEASURING TOOL
- THE LASER LINE (1) DOES NOT LIGHT UP WHEN THE TOOL IS SWITCHED ON
- CUSTOMER SERVICE AND APPLICATION CONSULTING
- BULGARIA
- OTHER SERVICE ADDRESSES CAN BE FOUND AT
- RECHARGEABLE OR ORDINARY BATTERIES
- MACEDONIAN
- PRODUCT DESCRIPTION AND PERFORMANCE
- COMPONENT ILLUSTRATION
- WORKING WITH BATTERIES
- USE
- SWITCHING ON/OFF OF THE DISPLAY ILLUMINATION
- MEASURING PROCEDURE (SEE FIGURE C)
- DISPLAY INDICATIONS
- NOTE ON LOCATING LIVE CABLES
- DISPLAY OF OBJECTS
- DETECTOR PRINCIPLE HELP
- DEPTH MEASUREMENT
- THE TEMPERATURE CONTROL DISPLAY (K) AND THE PRE-WARNING DISPLAY (J) LIGHT UP, MEASUREMENT IS NOT POSSIBLE
- THE RADIO RECEPTION DISPLAY (I) AND THE PRE-WARNING DISPLAY (J) LIGHT UP
- THE PRE-WARNING DISPLAY (J) BEEPS
- DISPLAY OF METAL OBJECT AND CONSTANT BEEPING OF THE MEASURING DISPLAY (B), ALTHOUGH THERE IS NO METAL OBJECT NEAR THE MEASURING DEVICE
- THE LIGHT RING (1) DOES NOT LIGHT WHEN THE FLOOR IS PLACED
- REMOVE THE COVER
- RECALIBRATE THE MEASURING DEVICE
- CLEANING THE DEVICE
- SERVICE AND ADVICE
- NORTH MACEDONIA
- ADDITIONAL SERVICE CAN BE FOUND AT
- BATTERIES
- SERBIAN
- RECHARGEABLE BATTERIES/BATTERIES
- SLOVENIAN
- SAFETY WARNINGS
- (14)
- JAI
- (CGJDSG) 0JDL
- W
- OLSWS JSGJL OJJI
- JLW LG SU/LU
- LICENSES
- COPYRIGHT © 2009-2013 ARM LIMITED
- COPYRIGHT © 2008-2020 STMICROELECTRONICS
- APACHE 2.0 LICENSE
- DEFINITIONS
- WARRANTY DISCLAIMER
- DECLARATION OF CONFORMITY
Brand : BOSCH
Model : GMS 120-27 Professional
Category : Detector