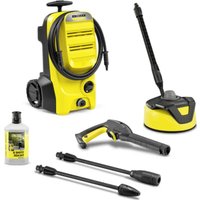
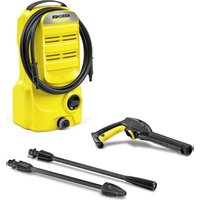
HD 517 CX Plus - Pressure washer Kärcher - Free user manual and instructions
Find the device manual for free HD 517 CX Plus Kärcher in PDF.
User questions about HD 517 CX Plus Kärcher
0 question about this device. Answer the ones you know or ask your own.
Ask a new question about this device
Download the instructions for your Pressure washer in PDF format for free! Find your manual HD 517 CX Plus - Kärcher and take your electronic device back in hand. On this page are published all the documents necessary for the use of your device. HD 517 CX Plus by Kärcher.
USER MANUAL HD 517 CX Plus Kärcher
natural_image
Technical line drawing of two industrial machines with wheels and control components (no text or symbols)Deutsch 6
English 18
Français 30
Italiano 43
Nederlands 56
Español 68
Português 81
Dansk 94
Norsk 106
Svenska 118
Suomi 130
Ελληνικά 142
Türkçe 155
Русский 167
Magyar 181
Čeština 193
Slovenščina 205
Polski 217
Românește 230
Slovenčina 243
Hrvatski 255
Srpski 267
Български 279
Eesti 292
Latviešu 304
Lietuviškai 316
Українська 328
中文 341
Register and win! www.kaercher.com/register-and-win


59668960 04/16
text_image
Technical diagram of a water purifier with numbered parts and exploded view, including component callouts and assembly details.
text_image
Technical diagram of a water purifier with numbered components and exploded view, including labeled parts and internal wiring.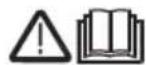
text_image
Technical diagram showing two mechanical assembly steps with numbered annotations indicating component placement.natural_image
Line drawing of a mechanical device with no visible text or symbols
S. Reiser
Head of Approbation
71364 Winnenden (Germany)
Tel.: +49 7195 14-0
Fax: +49 7195 14-2212
Winnenden, 2016/03/01
Technische Daten
Please read and comply with these original instructions prior to the initial
operation of your appliance and store them for later use or subsequent owners.
Contents
Device elements ..... EN 1
Safety instructions..... EN 1
Proper use ...... EN 2
Safety Devices ..... EN 2
Environmental protection .... EN 2
Before Startup..... EN 3
Start up ...... EN 3
Operation ...... EN 4
Transport..... EN 5
Storage ..... EN 6
Care and maintenance ..... EN 6
Troubleshooting ..... EN 7
Accessories and Spare Parts. EN 7
Warranty ...... EN 8
EU Declaration of Conformity. EN 8
Technical specifications ..... EN 9
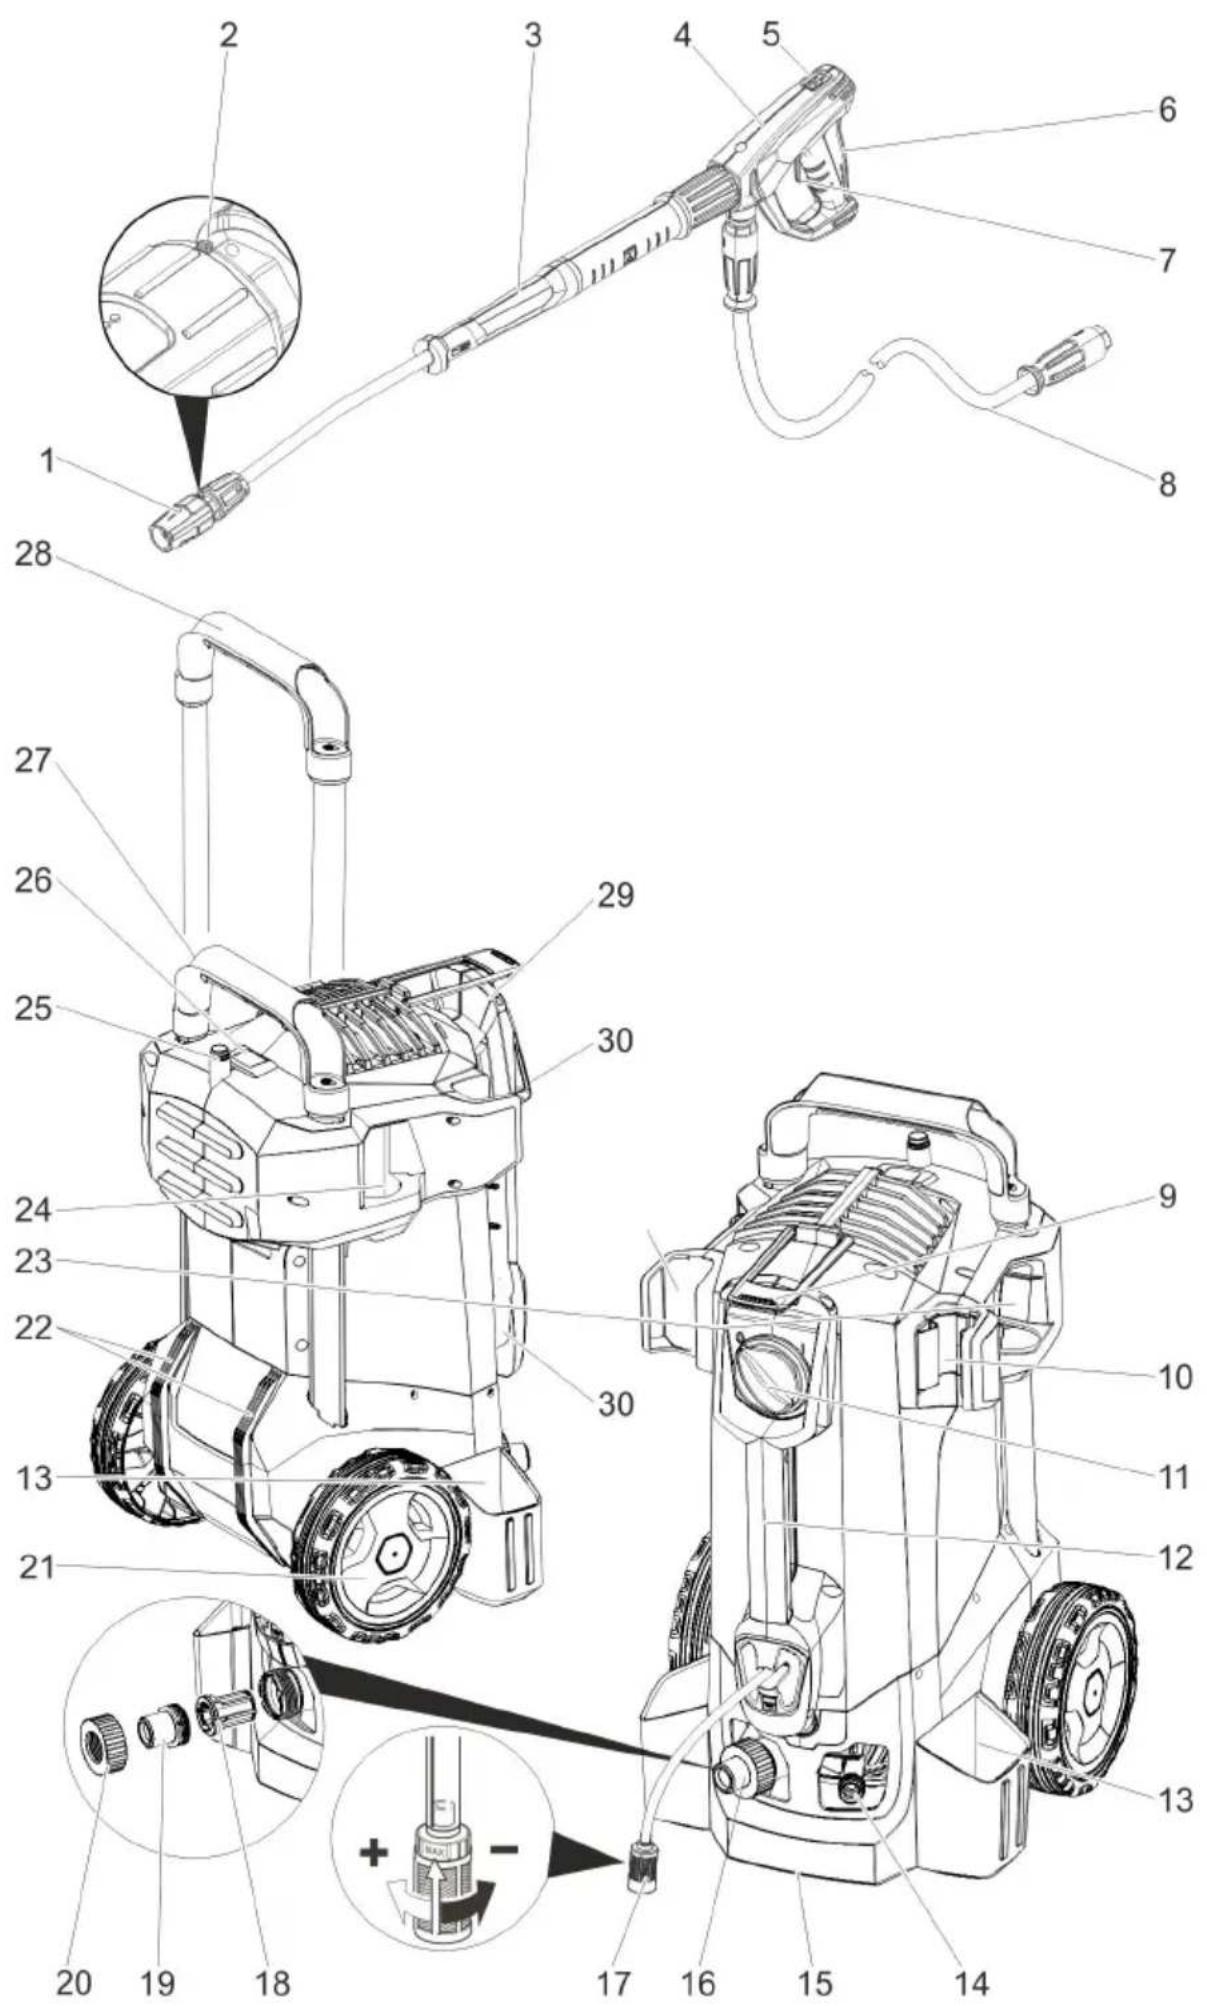
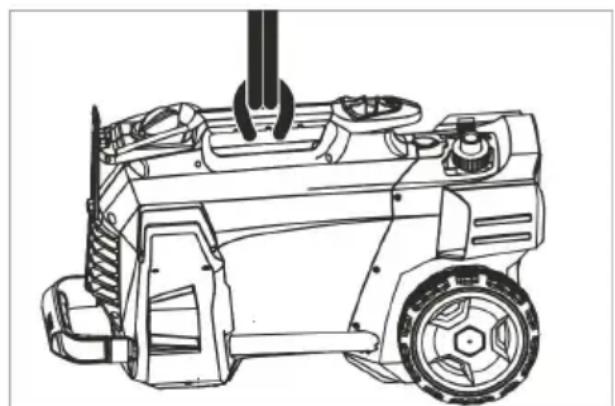
Device elements
Please unfold the front picture side
1 Nozzle
2 Marking of the nozzle
3 Spray lance EASY!Lock
4 Trigger gun EASY!Lock
5 Safety catch
6 Triggering lever
7 Safety lever
8 High pressure hose EASY!Lock
9 Rubber band (not with appliances with hose drum)
10 Spray lance holder with clamping, for transportation
11 Power switch
12 Carrying handle
13 Quiver for spray lance
14 High-pressure connection EASY!Lock
15 Handle
16 Water connection
17 Detergent suction hose with filter and detergent dosing
18 Sieve
19 Hose hub
20 Union joint
21 Wheel cap
22 Skid/parking runner
23 Nozzle rack for rotor nozzle (rotor nozzle is only included in the scope of delivery with model HD...Plus)
24 Nozzle rack for triple nozzle
25 Transport bracket for surface cleaner
26 Unlocking device push handle
27 Push handle, bottom (slid in)
28 Push handle, top (extended)
29 Storage compartment for hoses
30 Cable clamp
31 Spray lance holder without clamping
32 Hose drum
33 Crank
Colour coding
- The operating elements for the cleaning process are yellow.
- The controls for the maintenance and service are light gray.
Safety instructions
- Before first start-up it is definitely necessary to read the operating instructions and safety indications Nr. 5.951-949.0!
- Please follow the national rules and regulations for fluid spray jets of the respective country.
- Please follow the national rules and regulations for accident prevention of the respective country. Fluid spray jets must be tested regularly and the results of these tests must be documented in writing.
- The appliance/accessories must not be modified.
Hazard levels
⚠️DANGER
Pointer to immediate danger, which leads to severe injuries or death.
⚠ WARNING
Pointer to a possibly dangerous situation, which can lead to severe injuries or death.
△CAUTION
Pointer to a possibly dangerous situation, which can lead to minor injuries.
ATTENTION
Pointer to a possibly dangerous situation, which can lead to property damage.
Symbols on the machine
High-pressure jets can be dangerous if improperly used. The
jet may not be directed at persons, animals, live electrical equipment or at the appliance itself.
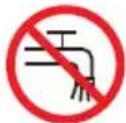
According to applicable regulations, the appliance must never be used on the drinking water net without a system separator. A suitable system separator by KÄRCH alternatively a system separator acc EN 12729 type BA must be used. Water that was flowing through a separator is considered non-drink
Proper use
Use this high pressure cleaner exclusively for
- Cleaning using low pressure jet and detergent (for e.g. for cleaning machines, cars, buildings, tools),
- For cleaning using high pressure jet without detergent (for e.g. for cleaning facades, terraces, garden appliances).
For stubborn soiling we recommend the use of a rotor nozzle (only included in the scope of delivery with model HD...Plus)
Quality requirements for water:
ATTENTION
Only clean water may be used as high pressure medium. Impurities will lead to increased wear and tear or formation of deposits in the appliance.
If recycled water is used, the following limit values must not be exceeded.
| pH value 6,5...9,5 | |
| electrical conductivity * Conductivity fresh water +1200 μS/cm | |
| settleable solids ** < 0,5 mg/l | |
| total suspended solids *** < | 50 mg/l |
| Hydrocarbons < 20 mg/l | |
| Chloride < 300 mg/l | |
| Sulphate < 240 mg/l | |
| Calcium < 200 mg/l |
| Total hardness < 28 °dH | < 50 °TH< 500 ppm(mg CaCO3/l) |
| Iron < 0,5 mg/l | |
| Manganese < 0,05 mg/l | |
| Copper < 2 mg/l | |
| Active chloride < 0,3 mg/l | |
| free of bad odours | |
| * Maximum total 2000 μS/cm** Test volume 1 l, settling time 30 min*** no abrasive substances | |
Safety Devices
Safety devices serve for the protection of the user and must not be put out of operation or bypassed with respect to their function.
Pressure switch
If the pulling lever on the trigger gun is released the pressure switch turns off the pump, the high-pressure jet is stopped. If the pulling lever is pulled the pump is turned on again.
Environmental protection
 | The packaging material can be recycled. Please do not throw the packaging material into household waste; please send it for recycling. |
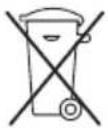 | Old appliances contain valuable materials that can be recycled; these should be sent for recycling. Batteries, oil, and similar substances must not enter the environment. Please dispose of your old appliances using appropriate collection systems. |
Electrical and electronic devices often contain components which could potentially pose a danger to human health and the environment if handled or disposed of incorrectly. However, these components are necessary for the proper operation of the device. Devices marked with this symbol must not be disposed of with regular household rubbish.
Notes about the ingredients (REACH)
You will find current information about the ingredients at:
www.kaercher.com/REACH
Before Startup
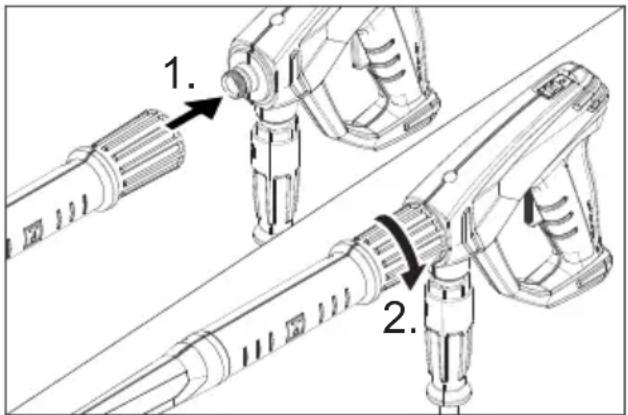
Attaching the Accessories
→ Attach the wheel caps.
Note: The EASY!Lock system joins components with a quick-fasten thread solidly and securely with just one turn.
text_image
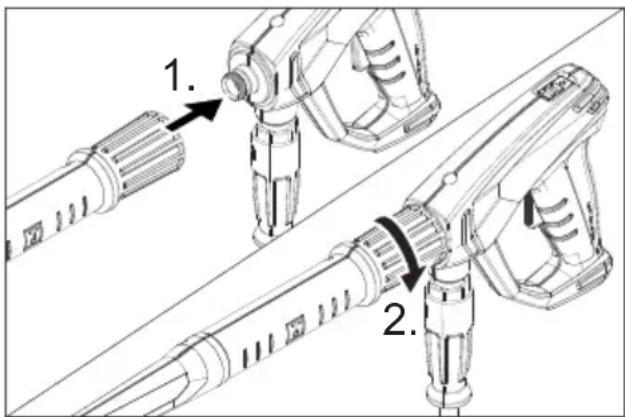
Technical diagram showing two mechanical assembly steps with numbered annotations indicating component placement.→ Mount the nozzle on the spray lance (marking on the adjustment ring at the top) and hand-tighten it (EASY!Lock).
→ Join the spray lance with the trigger gun and tighten until hand-tight (EASY!Lock).
→ Release the unlocking device of the push handle.
→ Pull the push handle out to its end position.
In devices without hose drum:
→ Join the high-pressure hose with trigger gun and high-pressure connection of the appliance and tighten until hand-tight (EASY!Lock).
In devices with hose drum:
→ Insert the crank in the hose drum shaft and lock it in.
→ Before rolling up, stretch out the high pressure hose.
→ Wind the high pressure hose in uniform layers on the hose drum by rotating the crank. Select the rotation direction in such a way that the high pressure hose does not get bent.
→ Join the high pressure hose with trigger gun and tighten until hand-tight (EASY!Lock).
Start up
⚠ WARNING
Risk of injury! Appliance, accessories, supply lines and connections must be in fault-free condition. If they are not in a perfect state then the appliance must not be used.
Electrical connection
△DANGER
Danger of injury by electric shock.
- It is imperative to connect the appliance to the electric mains by means of a plug. It is forbidden to permanently connect the appliance to the power supply. The plug serves for the disconnection from the mains.
- The plug and coupling of the extension cable used must be watertight.
- Use the extension cord that has an adequate cross-section (see "Technical Data") and unwind it fully from the cable drum.
For connection values, see type plate/technical data.
→ Unwind the mains cable and place it on the floor.
→ Insert the mains plug into a socket.
Water connection
Connection to the water supply
⚠ WARNING
Observe regulations of water supplier.
According to applicable regulations, the appliance must never be used on the drinking water net without a system separator. A suitable system separator by KÄRCHER or alternatively a system separator according to EN 12729 type BA must be used.
Water that was flowing through a system separator is considered non-drinkable.
△CAUTION
Always connect the system separator to the water supply, never directly to the appliance!
For connection values refer to technical specifications
→ Connect the supply hose (min. length 7.5 m, minimum diameter 1/2") to the water connection point of the machine and at the water supply point (for e.g. a tap).
Note:
The supply hose is not included.
→ Open the water supply.
Drawing in water from open reservoirs
→ Screw the suction hose with filter (order no. 4.440-238.0) to the water connection.
→ Appliance ventilation:
Unscrew the nozzle from the spray
lance.
Switch on the appliance and let it run
until the water exiting is bubble-free.
Let the appliance run for 10 seconds –
then switch off the appliance switch.
Repeat the procedure several times.
→ Switch off the appliance and fit the nozzle again.
Operation
⚠️DANGER
Risk of explosion!
Do not spray flammable liquids.
If the appliance is used in hazardous areas (e.g. filling stations) the corresponding safety regulations must be observed.
Risk of injury! Hold the hand spray gun and the spray pipe firmly with both hands.
Risk of injury! The trigger and safety lever may not be locked during the operation.
Risk of injury! Contact Customer Service if the safety lever is damaged.
Risk of injury from high-pressure water jet. Slide the safety catch on the trigger gun forward before performing any work with the appliance.
△CAUTION
Clean engines only at places with corresponding oil separators (environmental safety).
Opening/closing the trigger gun
→ To open the trigger gun: Actuate the safety lever and trigger.
→ To close the hand spray gun: Release the safety lever and trigger.
High pressure operation
The appliance can be operated in a vertical or horizontal position.
Note:
The appliance is equipped with a pressure switch. The motor starts up only when the trigger gun is open.
→ Device with hose drum:
Roll off the high pressure hose totally from the hose drum.
→ Set the appliance switch to "I".
→ Release the trigger gun. To do so, push the safety catch towards the back.
→ Open the hand spray gun.
Select spray type
→ Close the hand spray gun.
→ Turn the casing of the nozzle till the desired symbol matches the marking.
 | High pressure circular spray (0°) for specially stubborn dirt |
 | Flat low pressure spray (CHEM) for operating using detergents or cleaning at low pressure. |
 | High pressure flat spray (25°) for large dirt areas |
Operation with detergent
⚠ WARNING
Unsuitable detergents can cause damage to the appliance and to the object to be cleaned. Use only those detergents that have been approved by Kärcher. Observe the dosage and other instructions provided with these detergents. For considerate treatment of the environment use detergent economically.
Follow the safety instructions for using detergents.
Kärcher detergents ensure smooth functioning. Please consult us or ask for our catalogue or our detergent information sheets.
→ Take out detergent suck hose.
→ Adjust the suction volume of the detergent solution at the detergent filter.
→ Suspend end of suction hose in a container filled with detergent.
→ Set nozzle to "CHEM".
Recommended cleaning method
→ Spray the detergent sparingly on the dry surface and allow it to react, but not to dry.
→ Spray off loosened dirt with the high-pressure ray.
→ Set the suction flow on the detergent filter to the maximum quantity after operation.
→ Start the appliance and rinse for one minute.
Interrupting operation
→ Close the hand spray gun.
The appliance switches off.
→ Secure the trigger gun. To do so, push the safety catch towards the front.
Note:
When switching off the appliance, the water pressure is reduced by approx. 70%. This reduces the actuating force of the hand spray gun and the service life of the appliance is increased.
After the interruption:
→ Release the trigger gun. To do so, push the safety catch towards the back.
→ Open the hand spray gun.
The appliance will switch on again.
Turn off the appliance
→ Shut off water supply.
→ Open the hand spray gun.
→ Switch on the pump with the power switch and allow to run for about 5-10 seconds.
→ Close the hand spray gun.
→ Set the appliance switch to "0/OFF".
→ Pull main plug out of socket with dry hands only.
→ Remove water connection.
→ Activate hand spray gun until device is pressure less.
→ Secure the trigger gun. To do so, push the safety catch towards the front.
Storing the Appliance
→ Place the spray lance with the trigger gun into the quiver for the spray lance and snap it into place in the spray lance holder.
→ Wind the connection cable around the cable holder.
→ Coil up the high pressure hose, hang it over the hose rack and secure it by means of the rubber band. or Coil up the high-pressure hose on the hose drum. Fold down the handle of the crank.
→ Fasten the plug with the mounted clip.
→ Press the unlocking device of the push handle and slide the push handle in.
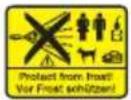
Frost protection
ATTENTION
Frost will destroy the not completely water drained device.
Store the appliance in a frost free area.
If you cannot store it in a frost-free place:
→ Drain water.
→ Pump in conventional frost protection agents through the appliance.
Note:
Use normal glycol-based anti-freezing agents for automobiles.
Observe handling instructions of the anti-freeze agent manufacturer.
→ Operate device for max. 1 minute until the pump and conduits are empty.
Transport
△CAUTION
Risk of personal injury or damage! Mind the weight of the appliance during transport.
ATTENTION
Protect the trigger from damage during transport.
→ In order to transport the appliance over longer distances, pull it behind you holding on to the push handle.
→ In order to carry the appliance, hold on to the handles.
→ In order to climb stairs, pull the appliance up step by step. The skids protect the casing from damage.
→ When transporting in vehicles, secure the appliance according to the guidelines from slipping and tipping over.
Transport bracket for surface cleaner
→ Attach the connecting piece of the surface cleaner to the bolt at the high-pressure cleaner.
→ Screw on the union nut by approx. 1 rotation.
Transport by crane
natural_image
Line drawing of a mechanical device with no visible text or symbols→ Attach the lifting device to the carrying handle of the appliance.
Safety information about cranes
⚠️DANGER
Risk of injury due to machine dropping.
- Adhere to the local accident prevention guidelines and safety notes.
– Check the carrying handle for damage prior to every transportation by crane. - Check the lifting unit for damage prior to each transport by crane.
- Only lift the appliance using the carrying handle.
- Do not use stop chains.
- Protect the lifting device from inadvertent load release.
- Remove spray lance with trigger gun, nozzles, surface cleaner and other loose objects prior to transportation by crane.
- Do not transport any articles on the appliance during the lifting process.
– The appliance must only be transported by properly trained crane personnel.
- Do stand below the load.
- Ensure that no persons are present in the immediate vicinity of the crane.
- Do not leave the appliance on the crane unattended.
Storage
△CAUTION
Risk of personal injury or damage! Consider the weight of the appliance when storing it.
This appliance must only be stored in interior rooms.
Care and maintenance
⚠️DANGER
Risk of injury by inadvertent startup of appliance and electrical shock.
Prior to all work on the appliance, switch off the appliance and pull the power plug.
Safety inspection/ maintenance contract
You can sign with your dealer a contract for regular safety inspection or even sign a maintenance contract. Please take advice on this matter.
Before each use
→ Check connection cable for damages (risk of electrical shock); get the damaged connection cable replaced immediately by an authorised customer service person/ electrician.
→ Check the high pressure hose for damages (risk of bursting).
Please arrange for the immediate exchange of a damaged high-pressure hose.
→ Check appliance (pump) for leaks. 3 drops per minute are permitted and can come out from the lower side of the appliance. Call Customer Service if there is heavy leakage.
Weekly
→ Clean the sieve in the water connection.
→ Clean filter at the detergent suck hose.
Every 500 operating hours, at least annually
→ Have the maintenance of the device performed by the customer service.
Clean the sieve in the water connection
→ Unscrew the covering nut.
→ Pull out the hose nipple with the sieve.
→ Clean the sieve from the outside and rinse it.
Note:
Align the hexagon of the hose nipple in the appliance for connection.
→ Insert the hose nipple with the sieve and tighten the union nut.
Troubleshooting
⚠️DANGER
Risk of injury by inadvertent startup of appliance and electrical shock.
– Prior to all work on the appliance, switch off the appliance and pull the power plug.
- Get the electrical components checked and repaired only by authorised customer service persons.
- Contact an authorised customer service person in case of problems not mentioned in this chapter or if you are in doubt or when you have been explicitly asked to do so.
Appliance is not running
→ Check connection cable for damages.
→ Check the supply voltage.
→ If the appliance is overheated:
Set the appliance switch to "0".
Allow machine to cool down at least for 15 minutes.
Set the appliance switch to "1".
→ Call Customer Service in case of electrical defects.
Pressure does not build up in the appliance
→ Set nozzle to "High pressure".
→ Deaerate the appliance (see "Start-up")
→ Clean the sieve in the water connection.
→ Check water supply level (refer to technical data).
→ Clean the nozzle.
→ Replace the nozzle.
→ Contact Customer Service if needed.
Pump leaky
3 drops of water per minute are permitted and can leak from the bottom of the appliance.
→ With stronger leak, have device checked by customer service.
Pump is vibrating
→ Check suction pipes for water and detergent and ensure that they are leak-proof.
→ Set the suction flow on the detergent filter to the minimum quantity.
→ Deaerate the appliance (see "Start-up")
→ Contact Customer Service if needed.
Detergent is not getting sucked in
→ Set nozzle to "CHEM".
→ Increase the suction flow at the detergent filter.
→ Check/ clean detergent suction hose with filter.
→ Contact Customer Service if needed.
Accessories and Spare Parts
Only use original accessories and spare parts, they ensure the safe and trouble-free operation of the device.
For information about accessories and spare parts, please visit www.kaercher.com.
Warranty
The warranty terms published by the relevant sales company are applicable in each country. We will repair potential failures of your appliance within the warranty period free of charge, provided that such failure is caused by faulty material or defects in manufacturing. In the event of a warranty claim please contact your dealer or the nearest authorized Customer Service centre. Please submit the proof of purchase.
EU Declaration of Conformity
We hereby declare that the machine described below complies with the relevant basic safety and health requirements of the EU Directives, both in its basic design and construction as well as in the version put into circulation by us. This declaration shall cease to be valid if the machine is modified without our prior approval.
Product: High pressure cleaner
Type: 1.520-xxx
Relevant EU Directives
2006/42/EC (+2009/127/EC)
2014/30/EU
2000/14/EC
Applied harmonized standards
EN 60335-1
EN 60335-2-79
EN 55014-1: 2006+A1: 2009+A2: 2011
EN 55014-2: 1997+A1: 2001+A2: 2008
EN 62233: 2008
EN 61000-3-2: 2006+A1: 2009+A2: 2009
EN 61000-3-3: 2008
Applied conformity evaluation method
2000/14/EC: Appendix V
Sound power level dB(A)
The undersigned act on behalf and under the power of attorney of the company management.

CEO

S. Reiser
Head of Approbation
Authorised Documentation Representative S. Reiser
71364 Winnenden (Germany)
Phone: +49 7195 14-0
Fax: +49 7195 14-2212
Winnenden, 2016/03/01
Technical specifications
| Type HD 5/12 C HD 5/12 C HD 5/12 C | ||||
| HD 5/12 CX | HD 5/12 CX | HD 5/12 CX | ||
| EU GB | CH | |||
| Main Supply | ||||
| Voltage V 230 230...240 230 | ||||
| Current type Hz 1~50 | ||||
| Connected load kW 2,5 2,5 2,2 | ||||
| Protection (slow, char. C) A 16 13 10 | ||||
| Type of protection -- | IPX5 | |||
| Extension cord 30 m | mm2 | 2,5 | ||
| Water connection | ||||
| Max. feed temperature | °C | 60 | ||
| Min. feed volume | l/min | 12 | ||
| Suck height from open container (20 °C) | m | 0,5 | ||
| Max. feed pressure | MPa | 1 | ||
| Performance data | ||||
| Operating pressure of water (using standard nozzle) | MPa | 12 12 | 11,5 | |
| Size of standard nozzle | -- 035 | 035 | 038 | |
| Max. operating over-pressure | MPa | 17,5 | 17,5 | 17,1 |
| Water flow rate | l/min | 8,3 | ||
| Detergent suck in | l/h | 0...25 | ||
| Max. recoil force of trigger gun | N | 21,3 | ||
| Values determined as per EN 60335-2-79 | ||||
| Hand-arm vibration value | m/s2 | 3,6 | ||
| Uncertainty K | m/s2 | 0,9 | ||
| Sound pressure level LpA (CX) | dB(A) | 72 (75) | ||
| Uncertainty KpA | dB(A) | 3 | ||
| Sound pressure level LWA + Uncertainty KWACX) | dB(A) | 88 (92) | ||
| Dimensions and weights | ||||
| Length | mm 380 | |||
| Width (CX) | mm | 360 (370) | ||
| Height | mm 930 | |||
| Typical operating weight (CX) | kg | 23,7 (26) | ||
| Type HD 5/12 C HD 5/12 C HD 5/12 C HD | HD 5/13 C | ||||
| HD 5/12 CX | HD 5/13 CX | ||||
| AU KAP | SA EU | ||||
| Main Supply | |||||
| Voltage V 240 220 230 | |||||
| Current type Hz 1~50 1~60 1~50 | |||||
| Connected load kW 2,2 | 2,4 | 2,6 | |||
| Protection (slow, char. C) | A | 10 | 15 | 13 | 16 |
| Type of protection | -- | IPX5 | |||
| Extension cord 30 m | mm2 | 2,5 | |||
| Water connection | |||||
| Max. feed temperature | °C | 60 | |||
| Min. feed volume | l/min | 12 | |||
| Suck height from open container (20 °C) | m | 0,5 | |||
| Max. feed pressure | MPa | 1 | |||
| Performance data | |||||
| Operating pressure of water (using standard nozzle) | MPa | 11,5 | 12 | 13 | |
| Size of standard nozzle | -- 038 | 036 034 | |||
| Max. operating over-pressure | MPa | 17,1 | 18 | 17,5 | |
| Water flow rate | l/min | 8,3 | |||
| Detergent suck in | l/h | 0...25 | |||
| Max. recoil force of trigger gun | N | 21,3 | 22,2 | ||
| Values determined as per EN 60335-2-79 | |||||
| Hand-arm vibration value | m/s2 | 3,6 | 4,2 | 3,6 | |
| Uncertainty K | m/s2 | 0,9 | |||
| Sound pressure level LpA (CX) | dB(A) | 72 (75) | 74 | 72 (75) | |
| Uncertainty KpA | dB(A) | 3 | |||
| Sound pressure level LWA + Uncertainty KWA (CX) | dB(A) | 88 (92) | 90 | 88 (92) | |
| Dimensions and weights | |||||
| Length | mm | 380 | |||
| Width (CX) mm 360 (370) | |||||
| Height | mm | 930 | |||
| Typical operating weight (CX) | kg | 23,7 (26) | 25,2 | 23,7 (26) | |
| Type HD 5/15 C HD 5/17 C HD 5/17 C | HD 6/13 C | ||||
| HD 5/15 CX | HD 5/17 CX | HD 5/17 CX | HD 6/13 CX | ||
| EU EU | KAP EU | ||||
| Main Supply | |||||
| Voltage V 230 220 230 | |||||
| Current type Hz 1~50 1~60 1~ | 50 | ||||
| Connected load kW 2,8 3,0 3,0 | 2,9 | ||||
| Protection (slow, char. C) A 16 | 15 | 16 | |||
| Type of protection | -- | IPX5 | |||
| Extension cord 30 m | mm^2 | 2,5 | |||
| Water connection | |||||
| Max. feed temperature °C | 60 | ||||
| Min. feed volume | l/min | 12 | 13 | ||
| Suck height from open container (20 °C) | m | 0,5 | |||
| Max. feed pressure | MPa | 1 | |||
| Performance data | |||||
| Working pressure of water using standard nozzle (CX) | MPa | 15 (15) | 17 (17) | 16,5 (16,5) | 13 (13) |
| Size of standard nozzle | -- | 032 | 027 | 030 | 038 |
| Max. operating over-pressure MPa | 20 | 19 | |||
| Water flow rate | l/min | 8,3 8,1 8,0 9,8 | |||
| Detergent suck in | l/h | 0...25 | |||
| Max. recoil force of trigger gun | N | 23,8 | 25,4 | 26,6 | |
| Values determined as per EN 60335-2-79 | |||||
| Hand-arm vibration value | m/s^2 | 2,4 | 4,1 | ||
| Uncertainty K | m/s^2 | 0,7 | 0,9 | ||
| Sound pressure level L_pA (CX) | dB(A) | 72 (74) | 72 (75) | 75 | 72 (75) |
| Uncertainty K_pA | dB(A) | 3 | |||
| Sound pressure level L_WA + Uncertainty K_WA (CX) | dB(A) | 88 (90) | 88 (92) | 91 (91) | 88 (92) |
| Dimensions and weights | |||||
| Length | mm | 380 | |||
| Width (CX) | mm | 360 (370) | |||
| Height | mm | 930 | |||
| Typical operating weight (CX) | kg | 25,2 (27,5) | |||
| Type HD 6/13 C HD 6/13 C HD 6/13 C | HD 6/13 C | ||||
| HD 6/13 CX | |||||
| AR GB | KAP SA | ||||
| Main Supply | |||||
| Voltage V 220 230...240 220 | |||||
| Current type Hz 1~50 1~60 | |||||
| Connected load kW 2,9 2,9 | 2,8 | ||||
| Protection (slow, char. C) | A | 16 | 13 | 15 | 13 |
| Type of protection | -- | IPX5 | |||
| Extension cord 30 m | mm2 | 2,5 | |||
| Water connection | |||||
| Max. feed temperature | °C | 60 | |||
| Min. feed volume l/min 13 | |||||
| Suck height from open container (20 °C) | m | 0,5 | |||
| Max. feed pressure | MPa | 1 | |||
| Performance data | |||||
| Operating pressure of water (using standard nozzle) | MPa 1 | 12,5 | |||
| Size of standard nozzle | -- | 038 | 042 043 | ||
| Max. operating over-pressure | MPa | 19 | 18 | ||
| Water flow rate | l/min | 9,8 | 10,0 | ||
| Detergent suck in | l/h | 0...25 | |||
| Max. recoil force of trigger gun | N | 26,6 | |||
| Values determined as per EN 60335-2-79 | |||||
| Hand-arm vibration value | |||||
| Hand-arm vibration value | m/s2 | 4,1 | 3,7 | ||
| Uncertainty K | m/s2 | 0,9 | |||
| Sound pressure level LpA (CX) | dB(A) | 72 (75) | 73 | ||
| Uncertainty KpA | dB(A) | 3 | |||
| Sound pressure level LWA + Uncertainty KWA (CX) | dB(A) | 88 (92) | 89 | ||
| Dimensions and weights | |||||
| Length | mm | 380 | |||
| Width (CX) | mm | 360 (370) | |||
| Height | mm | 930 | |||
| Typical operating weight (CX) | kg | 25,2 (27,5) | 25,2 | ||

www.kaercher.com/REACH
text_image
Technical diagram showing two mechanical assembly steps with numbered components and directional arrows indicating motion or assembly.natural_image
Line drawing of a mechanical device with wheels and a chimney (no text or symbols)2006/42/CE (+2009/127/CE)
2014/30/UE
2000/14/CE

S. Reiser
Head of Approbation
Responsable de la documentation:
S. Reiser
71364 Winnenden (Germany)
Winnenden, 2016/03/01
www.kaercher.com/REACH
natural_image
Line drawing of a mechanical device with wheels and a chimney (no text or symbols)2006/42/CE (+2009/127/CE)
2014/30/UE
2000/14/CE

S. Reiser
Head of Approbation
71364 Winnenden (Germany)
Tel.: +49 7195 14-0
Fax: +49 7195 14-2212
Winnenden, 2016/03/01
Dati tecnici
www.kaercher.com/REACH
text_image
Technical diagram showing two mechanical assembly steps with numbered components and directional arrows indicating motion or assembly.natural_image
Line drawing of a mechanical vehicle with no visible text or symbols
S. Reiser
Head of Approbation
71364 Winnenden (Germany)
Tel.: +49 7195 14-0
Fax: +49 7195 14-2212
Winnenden, 2016/03/01
Technische gegevens
www.kaercher.com/REACH
text_image
Technical diagram showing two mechanical assembly steps with numbered annotations indicating component placement.natural_image
Line drawing of a mechanical device with no visible text or symbols2006/42/CE (+2009/127/CE)
2014/30/UE
2000/14/CE
71364 Winnenden (Germany)
Tele.: +49 7195 14-0
Fax: +49 7195 14-2212
Winnenden, 2016/03/01
Datos técnicos
22 Patim/Patim vertical
www.kaercher.com/REACH
text_image
Technical diagram showing two mechanical assembly steps with numbered annotations indicating component placement.natural_image
Line drawing of a tractor with visible wheel, blade, and bucket (no text or symbols)2006/42/CE (+2009/127/CE)
2014/30/UE
2000/14/CE
71364 Winnenden (Germany)
Tel.: +49 7195 14-0
Fax: +49 7195 14-2212
Winnenden, 2016/03/01
Dados técnicos
www.kaercher.com/REACH
Inden ibrugtagning
text_image
Technical diagram showing two mechanical assembly steps with numbered annotations indicating component placement.natural_image
Line drawing of a tractor with visible wheel, wheels, and control panel (no text or symbols)2006/42/EF (+2009/127/EF)
2014/30/EU
2000/14/EF

S. Reiser
Head of Approbation
71364 Winnenden (Germany)
Tlf.: +49 7195 14-0
Fax: +49 7195 14-2212
Winnenden, 2016/03/01
Tekniske data
25 Transportholder for flaterengjører
www.kaercher.com/REACH
Før den tas i bruk
Montere tilbehør
→ Fest hjulkappene.
text_image
Technical diagram showing two mechanical assembly steps with numbered annotations indicating component placement.Transportholder for flaterengjører
natural_image
Line drawing of a tractor with visible wheel, dashboard, and front-mounted sensors (no text or symbols)2006/42/EF (+2009/127/EF)
2014/30/EU
2000/14/EF
2000/14/EF: Vedlegg V
Lydeffektnivå dB(A)
71364 Winnenden (Germany)
Tlf: +49 7195 14-0
Winnenden, 2016/03/01
Tekniske data
www.kaercher.com/REACH
Före ibruktagande
Montera tillbehör
→ Montera navkapslar.
natural_image
Line drawing of a tractor with visible frame, wheels, and mechanical components (no text or symbols)
S. Reiser
Head of Approbation
71364 Winnenden (Germany)
Tel.: +49 7195 14-0
Fax: +49 7195 14-2212
Winnenden, 2016/03/01
Tekniska data
www.kaercher.com/REACH
Ennen käyttöönottoa
Varusteiden asennus
text_image
Technical diagram showing two mechanical assembly steps with numbered annotations indicating component placement.natural_image
Line drawing of a mechanical device with no visible text or symbols
S. Reiser
Head of Approbation
71364 Winnenden (Germany)
Puh.: +49 7195 14-0
Winnenden, 2016/03/01
Tekniset tiedot
www.kaercher.com/REACH
text_image
Technical diagram showing two mechanical assembly steps with numbered annotations indicating component identification.natural_image
Line drawing of a mechanical device with wheels and a chimney (no text or symbols)
S. Reiser
Head of Approbation
71364 Winnenden (Germany)
Tηλ.: +49 7195 14-0
Φαξ: +49 7195 14-2212
Winnenden, 2016/03/01
www.kaercher.com/REACH
text_image
Technical diagram showing two mechanical assembly steps with numbered annotations indicating component placement.natural_image
Line drawing of a mechanical device with no visible text or symbols71364 Winnenden (Germany)
Tel.: +49 7195 14-0
Winnenden, 2016/03/01
Teknik Bilgiler
www.kaercher.com/REACH
text_image
Technical diagram showing two mechanical assembly steps with numbered annotations indicating component identification.natural_image
Line drawing of a tractor with visible wheel, roof, and exhaust pipe (no text or symbols)71364 Winnenden (Germany)
Тел.: +49 7195 14-0
Факс: +49 7195 14-2212
Winnenden, 2016/03/01
Технические данные
www.kaercher.com/REACH
Üzembevétel előtt
natural_image
Line drawing of a mechanical device with no visible text or symbols
S. Reiser
Head of Approbation
71364 Winnenden (Germany)
Tel.: +49 7195 14-0
Fax: +49 7195 14-2212
Winnenden, 2016/03/01
Műszaki adatok
www.kaercher.com/REACH
text_image
Technical diagram showing two mechanical assembly steps with numbered annotations indicating component placement.natural_image
Line drawing of a tractor with visible wheel, dashboard, and front-mounted sensors (no text or symbols)2006/42/ES (+2009/127/ES)
2014/30/EU
2000/14/ES
text_image
H. Jenner CEO iv. Reiser S. Reiser Head of Approbation71364 Winnenden (Germany)
Tel.: +49 7195 14-0
Fax: +49 7195 14-2212
Winnenden, 2016/03/01
Technické údaje
www.kaercher.com/REACH
Pred zagonom
Montaža pribora
→ Pritrdite pokrove koles.
Napotek: Sistem EASY!Lock s hitrim navojem omogoča spajanje komponent s samo enim obratom.
text_image
Technical diagram showing two mechanical assembly steps with labeled components and directional arrowsnatural_image
Line drawing of a tractor with visible wheel, dashboard, and front-mounted sensors (no text or symbols)2006/42/ES (+2009/127/ES)
2014/30/EU
2000/14/ES

S. Reiser
Head of Approbation
71364 Winnenden (Germany)
Tel.: +49 7195 14-0
Winnenden, 2016/03/01
Tehnični podatki
www.kaercher.com/REACH
text_image
Technical diagram showing two mechanical assembly steps with numbered annotations indicating component identification.natural_image
Line drawing of a tractor with visible wheel, blade, and bucket (no text or symbols)2006/42/WE (+2009/127/WE)
2014/30/UE
2000/14/WE

S. Reiser
Head of Approbation
71364 Winnenden (Germany)
tel.: +49 7195 14-0
faks: +49 7195 14-2212
Winnenden, 2016/03/01
Dane techniczne
www.kaercher.com/REACH
text_image
Technical diagram showing two mechanical assembly steps with numbered annotations indicating component placement.natural_image
Line drawing of a mechanical device with no visible text or symbolsDirective UE respectate:
2006/42/CE (+2009/127/CE)
2014/30/UE
2000/14/CE
Norme armonizate utilize:
EN 60335-1
EN 60335-2-79
EN 55014-1: 2006+A1: 2009+A2: 2011
EN 55014-2: 1997+A1: 2001+A2: 2008
EN 62233: 2008
EN 61000-3-2: 2006+A1: 2009+A2: 2009
EN 61000-3-3: 2008
71364 Winnenden (Germany)
Tel.: +49 7195 14-0
Fax: +49 7195 14-2212
Winnenden, 2016/03/01
Date tehnice
www.kaercher.com/REACH
natural_image
Line drawing of a mechanical device with gears and a tractor (no text or symbols)2006/42/ES (+2009/127/ES)
2014/30/EÚ
2000/14/ES
Uplatňované harmonizované normy:
EN 60335-1
EN 60335-2-79
EN 55014-1: 2006+A1: 2009+A2: 2011
EN 55014-2: 1997+A1: 2001+A2: 2008
EN 62233: 2008
EN 61000-3-2: 2006+A1: 2009+A2: 2009
EN 61000-3-3: 2008

S. Reiser
Head of Approbation
71364 Winnenden (Germany)
Tel: +49 7195 14-0
Fax: +49 7195 14-2212
Winnenden, 2016/03/01
Technické údaje
www.kaercher.com/REACH
Prije prve uporabe
Montaža pribora
→ Pričvrstite naplatke kotača.
text_image
Technical diagram showing two mechanical assembly steps with numbered annotations indicating component placement.→ Montirajte mlaznicu na cijev za prskanje (oznaka na prstenu mora biti gore) i zategnite je rukom (EASY!Lock).
→ Spojite cijev za prskanje s ručnom prskalicom i ručno ih pritegnite (EASY!Lock).
→ Otpustite bravicu potisne ručice.
→ Izvucite potisnu ručicu u krajnji položaj.
natural_image
Line drawing of a tractor with visible wheel, wheels, and mechanical components (no text or symbols)→ Mehanizam za podizanje pričvrstite na rukohvat uređaja.
Sigurnosni napuci vezani za transport kranom
⚠ OPASNOST
2006/42/EZ (+2009/127/EZ)
2014/30/EU
2000/14/EZ

S. Reiser
Head of Approbation
71364 Winnenden (Germany)
Tel.: +49 7195 14-0
Winnenden, 2016/03/01
Tehnički podaci
| Tip HD 5/12 C HD 5/12 C HD 5/12 C | ||||
| HD 5/12 CX | HD 5/12 CX | HD 5/12 CX | ||
| EU GB | CH | |||
| Priključak na električnu mrežu | ||||
| Napon V 230 230...240 230 | ||||
| Vrsta struje Hz 1~ 50 | ||||
| Priključna snaga kW 2,5 2,5 2,2 | ||||
| Osigurač (inertni, karakt. C) A 16 13 10 | ||||
| Zaštita -- IPX5 | ||||
| Produžni kabel 30 m | mm2 | 2,5 | ||
| Priključak za vodu | ||||
| Dovodna temperatura (maks.) | °C | 60 | ||
| Dovodni protok (min.) | l/min | 12 | ||
| Visina usisavanja iz otvorenih posuda (20°C) | m | 0,5 | ||
| Dovodni tlak (maks.) | MPa | 1 | ||
| Podaci o snazi | ||||
| Radni tlak vod (sa standardnom mlaznicom) | MPa | 12 | 12 | 11,5 |
| Veličina mlaznice za standardnu mlaznicu | -- | 035 | 035 | 038 |
| Maks. radni pretlak | MPa | 17,5 | 17,5 | 17,1 |
| Protok vode | l/min | 8,3 | ||
| Usisavanje sredstva za pranje | l/h | 0...25 | ||
| Povratna udarna sila ručne prskalice (maks.) | N | 21,3 | ||
| Utvrdene vrijednosti prema EN 60335-2-79 | ||||
| Vrijednost vibracije na ruci | m/s2 | 3,6 | ||
| Nepouzdanost K | m/s2 | 0,9 | ||
| Razina zvučnog tlaka LpA (CX) | dB(A) | 72 (75) | ||
| Nepouzdanost KpA | dB(A) | 3 | ||
| Razina zvučne snage LWA + nepouzdanost KWA (CX) | dB(A) | 88 (92) | ||
| Dimenzije i težine | ||||
| Duljina | mm 380 | |||
| Širina (CX) | mm | 360 (370) | ||
| Visina | mm 930 | |||
| Tipična radna težina (CX) | kg | 23,7 (26) | ||
| Tip HD 5/12 C HD 5/12 C HD 5/12 C HD | 5/13 C | ||||
| HD 5/12 CX | HD 5/13 CX | ||||
| AU KAP | SA EU | ||||
| Priključak na električnu mrežu | |||||
| Napon V 240 220 230 | |||||
| Vrsta struje Hz 1~50 1~60 1~50 | |||||
| Priključna snaga kW 2,2 | 2,4 | 2,6 | |||
| Osigurač (inertni, karakt. C) | A | 10 | 15 | 13 | 16 |
| Zaštita | -- | IPX5 | |||
| Produžni kabel 30 m | mm2 | 2,5 | |||
| Priključak za vodu | |||||
| Dovodna temperatura (maks.) | °C | 60 | |||
| Dovodni protok (min.) | l/min | 12 | |||
| Visina usisavanja iz otvorenih po-suda (20°C) | m | 0,5 | |||
| Dovodni tlak (maks.) | MPa | 1 | |||
| Podaci o snazi | |||||
| Radni tlak vod (sa standardnom mlaznicom) | MPa | 11,5 | 12 | 13 | |
| Veličina mlaznice za standardnu mlaznicu | -- 038 | 036 034 | |||
| Maks. radni pretlak | MPa | 17,1 | 18 | 17,5 | |
| Protok vode | l/min | 8,3 | |||
| Usisavanje sredstva za pranje | l/h | 0...25 | |||
| Povratna udarna sila ručne prskalice (maks.) | N | 21,3 | 22,2 | ||
| Utvrdene vrijednosti prema EN 60335-2-79 | |||||
| Vrijednost vibracije na ruci m/s | 2 | 3,6 | 4,2 | 3,6 | |
| Nepouzdanost K | m/s2 | 0,9 | |||
| Razina zvučnog tlaka LpA (CX) | dB(A) | 72 (75) | 74 | 72 (75) | |
| Nepouzdanost KpA | dB(A) | 3 | |||
| Razina zvučne snage LWA + nepouzdanost KWA (CX) | dB(A) | 88 (92) | 90 | 88 (92) | |
| Dimenzije i težine | |||||
| Duljina | mm | 380 | |||
| Širina (CX) mm | 360 | (370) | |||
| Visina | mm | 930 | |||
| Tipična radna težina (CX) | kg | 23,7 (26) | 25,2 | 23,7 (26) | |
| Tip HD 5/15 C HD 5/17 C HD 5/17 C | HD 6/13 C | ||||
| HD 5/15 CX | HD 5/17 CX | HD 5/17 CX | HD 6/13 CX | ||
| EU EU | KAP EU | ||||
| Priključak na električnu mrežu | |||||
| Napon V 230 220 230 | |||||
| Vrsta struje Hz 1~50 1~60 1~50 | |||||
| Priključna snaga kW 2,8 3,0 3,0 | 2,9 | ||||
| Osigurač (inertni, karakt. C) A 1 | 6 15 | 16 | |||
| Zaštita | -- | IPX5 | |||
| Produžni kabel 30 m | mm2 | 2,5 | |||
| Priključak za vodu | |||||
| Dovodna temperatura (maks.) | °C | 60 | |||
| Dovodni protok (min.) | l/min | 12 | 13 | ||
| Visina usisavanja iz otvorenih posuda (20°C) | m | 0,5 | |||
| Dovodni tlak (maks.) | MPa | 1 | |||
| Podaci o snazi | |||||
| Radni tlak vode, sa standardnom mlaznicom (CX) | MPa | 15 (15) | 17 (17) | 16,5 (16,5) | 13 (13) |
| Veličina mlaznice za standardnu mlaznicu | -- | 032 027 | 030 | 038 | |
| Maks. radni pretlak | MPa | 20 | 19 | ||
| Protok vode | l/min | 8,3 8,1 | 8,0 9,8 | ||
| Usisavanje sredstva za pranje | l/h | 0...25 | |||
| Povratna udarna sila ručne prskalice (maks.) | N | 23,8 | 25,4 | 26,6 | |
| Utvrdene vrijednosti prema EN 60335-2-79 | |||||
| Vrijednost vibracije na ruci | m/s2 | 2,4 | 4,1 | ||
| Nepouzdanost K | m/s2 | 0,7 | 0,9 | ||
| Razina zvučnog tlaka LpA (CX) | dB(A) | 72 (74) | 72 (75) | 75 | 72 (75) |
| Nepouzdanost KpA | dB(A) | 3 | |||
| Razina zvučne snage LWA + ne-pouzdanost KWA (CX) | dB(A) | 88 (90) | 88 (92) | 91 (91) | 88 (92) |
| Dimenzije i težine | |||||
| Duljina | mm | 380 | |||
| Širina (CX) | mm | 360 (370) | |||
| Visina | mm | 930 | |||
| Tipična radna težina (CX) | kg | 25,2 (27,5) | |||
| Tip HD 6/13 C HD 6/13 C HD 6/13 C HD 6/13 C | ||||
| HD 6/13 CX | ||||
| AR GB | KAP SA | |||
| Priključak na električnu mrežu | ||||
| Napon V 220 230...240 220 | ||||
| Vrsta struje Hz 1~50 1~60 | ||||
| Priključna snaga kW 2,9 2,9 | 2,8 | |||
| Osigurač (inertni, karakt. C) | A | 16 | 13 | 15 |
| Zaštita | -- | IPX5 | ||
| Produžni kabel 30 m | mm2 | 2,5 | ||
| Priključak za vodu | ||||
| Dovodna temperatura (maks.) | °C | 60 | ||
| Dovodni protok (min.) | l/min | 13 | ||
| Visina usisavanja iz otvorenih posuda (20°C) | m | 0,5 | ||
| Dovodni tlak (maks.) | MPa | 1 | ||
| Podaci o snazi | ||||
| Radni tlak vod (sa standardnom mlaznicom) | MPa 1 | 12,5 | ||
| Veličina mlaznice za standardnu mlaznicu | -- | 038 | 042 043 | |
| Maks. radni pretlak | MPa | 19 | 18 | |
| Protok vode | l/min | 9,8 | 10,0 | |
| Usisavanje sredstva za pranje | l/h 0...25 | |||
| Povratna udarna sila ručne prskalice (maks.) | N | 26,6 | ||
| Utvrdene vrijednosti prema EN 60335-2-79 | ||||
| Vrijednost vibracije na ruci | ||||
| Vrijednost vibracije na ruci | m/s2 | 4,1 | 3,7 | |
| Nepouzdanost K | m/s2 | 0,9 | ||
| Razina zvučnog tlaka LpA (CX) | dB(A) | 72 (75) | 73 | |
| Nepouzdanost KpA | dB(A) | 3 | ||
| Razina zvučne snage LWA + ne-pouzdanost KWA (CX) | dB(A) | 88 (92) | 89 | |
| Dimenzije i težine | ||||
| Duljina | mm | 380 | ||
| Širina (CX) | mm | 360 (370) | ||
| Visina | mm | 930 | ||
| Tipična radna težina (CX) | kg | 25,2 (27,5) | 25,2 | |
Pre prve upotrebe Vašeg uređaja pročitajte ove originalno
www.kaercher.com/REACH
Pre upotrebe
Montaža pribora
text_image
Technical diagram showing two mechanical assembly steps with numbered annotations indicating component placement.→ Montirati mlaznicu na cev za prskanje (oznaka na prstenu gore) i pritegnuti rukom (EASY!Lock).
→ Povezati cev za prskanje sa ručnom prskalicom i pritegnuti rukom (EASY!Lock).
→ Otpustite bravicu potisne ručke.
→ Izvucite potisnu ručku u krajnji položaj.
Kod uređaja bez doboša za namotavanje creva:
natural_image
Line drawing of a mechanical device with no visible text or symbols→ Pričvrstite mehanizam za podizanje na ručku za nošenje uređaja.
Sigurnosne napomene vezane za prevoz pomoću krana
⚠ OPASNOST
2006/42/EZ (+2009/127/EZ)
2014/30/EU
2000/14/EZ
Primenjene uskladene norme:
EN 60335-1
EN 60335-2-79
EN 55014-1: 2006+A1: 2009+A2: 2011
EN 55014-2: 1997+A1: 2001+A2: 2008
EN 62233: 2008
EN 61000-3-2: 2006+A1: 2009+A2: 2009
EN 61000-3-3: 2008

S. Reiser
Head of Approbation
71364 Winnenden (Germany)
Tel.: +49 7195 14-0
Winnenden, 2016/03/01
Tehnički podaci
| Tip HD 5/12 C HD 5/12 C HD 5/12 C | ||||
| HD 5/12 CX | HD 5/12 CX | HD 5/12 CX | ||
| EU GB | CH | |||
| Priključak na električnu mrežu | ||||
| Napon V 230 230...240 230 | ||||
| Vrsta struje Hz 1~ 50 | ||||
| Priključna snaga kW 2,5 2,5 2,2 | ||||
| Osigurač (inertni, karakt. C) A 16 13 10 | ||||
| Stepen zaštite -- IPX5 | ||||
| Produžni kabl 30 m | mm2 | 2,5 | ||
| Priključak za vodu | ||||
| Dovodna temperatura (maks.) | °C | 60 | ||
| Dovodni protok (min.) | l/min | 12 | ||
| Visina usisavanja iz otvorenih posuda (20°C) | m | 0,5 | ||
| Dovodni pritisak (maks.) | MPa | 1 | ||
| Podaci o snazi | ||||
| Radni pritisak vode (sa standardnom mlaznicom) | MPa | 12 12 | 11,5 | |
| Veličina mlaznice kod standardne mlaznice | -- | 035 | 035 | 038 |
| Maks. radni nadpritisak | MPa | 17,5 | 17,5 | 17,1 |
| Protok vode | l/min | 8,3 | ||
| Usisavanje deterdženta | l/h | 0...25 | ||
| Povratna udarna sila ručne prskalice (maks.) | N | 21,3 | ||
| Izračunate vrednosti prema EN 60335-2-79 | ||||
| Vrednost vibracije na ruci | m/s2 | 3,6 | ||
| Nepouzdanost K | m/s2 | 0,9 | ||
| Nivo zvučnog pritiska LpA (CX) | dB(A) | 72 (75) | ||
| Nepouzdanost KpA | dB(A) | 3 | ||
| Nivo zvučne snage LWA + nepouzdanost KWA (CX) | dB(A) | 88 (92) | ||
| Dimenzije i težine | ||||
| Dužina | mm 380 | |||
| Širina (CX) | mm | 360 (370) | ||
| Visina | mm 930 | |||
| Tipična radna težina (CX) | kg | 23,7 (26) | ||
| Tip HD 5/12 C HD 5/12 C HD 5/12 C HD | 5/13 C | ||||
| HD 5/12 CX | HD 5/13 CX | ||||
| AU KAP | SA EU | ||||
| Priključak na električnu mrežu | |||||
| Napon V 240 220 230 | |||||
| Vrsta struje Hz 1~50 1~60 1~50 | |||||
| Priključna snaga kW 2,2 | 2,4 | 2,6 | |||
| Osigurač (inertni, karakt. C) | A | 10 | 15 | 13 | 16 |
| Stepen zaštite | -- | IPX5 | |||
| Produžni kabl 30 m | mm2 | 2,5 | |||
| Priključak za vodu | |||||
| Dovodna temperatura (maks.) | °C | 60 | |||
| Dovodni protok (min.) | l/min | 12 | |||
| Visina usisavanja iz otvorenih posuda (20°C) | m | 0,5 | |||
| Dovodni pritisak (maks.) | MPa | 1 | |||
| Podaci o snazi | |||||
| Radni pritisak vode (sa standardnom mlaznicom) | MPa | 11,5 | 12 | 13 | |
| Veličina mlaznice kod standardne mlaznice | -- 038 | 036 034 | |||
| Maks. radni nadpritisak | MPa | 17,1 | 18 | 17,5 | |
| Protok vode | l/min | 8,3 | |||
| Usisavanje deterdženta | l/h | 0...25 | |||
| Povratna udarna sila ručne prskalice (maks.) | N | 21,3 | 22,2 | ||
| Izračunate vrednosti prema EN 60335-2-79 | |||||
| Vrednost vibracije na ruci | m/s2 | 3,6 | 4,2 | 3,6 | |
| Nepouzdanost K | m/s2 | 0,9 | |||
| Nivo zvučnog pritiska LpA (CX) | dB(A) | 72 (75) | 74 | 72 (75) | |
| Nepouzdanost KpA | dB(A) | 3 | |||
| Nivo zvučne snage LWA+ nepouzdanost KWA(CX) | dB(A) | 88 (92) | 90 | 88 (92) | |
| Dimenzije i težine | |||||
| Dužina | mm | 380 | |||
| Širina (CX) mm | 360 | (370) | |||
| Visina | mm | 930 | |||
| Tipična radna težina (CX) | kg | 23,7 (26) | 25,2 | 23,7 (26) | |
| Tip HD 5/15 C HD 5/17 C HD 5/17 C | HD 6/13 C | ||||
| HD 5/15 CX | HD 5/17 CX | HD 5/17 CX | HD 6/13 CX | ||
| EU EU | KAP EU | ||||
| Priključak na električnu mrežu | |||||
| Napon V 230 220 230 | |||||
| Vrsta struje Hz 1~50 1~60 1~50 | |||||
| Priključna snaga kW 2,8 3,0 3,0 | 2,9 | ||||
| Osigurač (inertni, karakt. C) A 1 | 6 15 | 16 | |||
| Stepen zaštite | -- | IPX5 | |||
| Produžni kabl 30 m | mm2 | 2,5 | |||
| Priključak za vodu | |||||
| Dovodna temperatura (maks.) | °C | 60 | |||
| Dovodni protok (min.) | l/min | 12 | 13 | ||
| Visina usisavanja iz otvorenih posuda (20°C) | m | 0,5 | |||
| Dovodni pritisak (maks.) MPa | 1 | ||||
| Podaci o snazi | |||||
| Radni pritisak vode sa standardnom mlaznicom (CX) | MPa | 15 (15) | 17 (17) | 16,5 (16,5) | 13 (13) |
| Veličina mlaznice kod standardne mlaznice | -- | 032 027 | 030 | 038 | |
| Maks. radni nadpritisak | MPa | 20 | 19 | ||
| Protok vode | l/min | 8,3 8,1 | 8,0 9,8 | ||
| Usisavanje deterdženta l/h | 0...25 | ||||
| Povratna udarna sila ručne prskalice (maks.) | N | 23,8 | 25,4 | 26,6 | |
| Izračunate vrednosti prema EN 60335-2-79 | |||||
| Vrednost vibracije na ruci | m/s2 | 2,4 | 4,1 | ||
| Nepouzdanost K | m/s2 | 0,7 | 0,9 | ||
| Nivo zvučnog pritiska LpA (CX) | dB(A) | 72 (74) | 72 (75) | 75 | 72 (75) |
| Nepouzdanost KpA | dB(A) | 3 | |||
| Nivo zvučne snage LWA+ nepouzdanost KWA(CX) | dB(A) | 88 (90) | 88 (92) | 91 (91) | 88 (92) |
| Dimenzije i težine | |||||
| Dužina | mm | 380 | |||
| Širina (CX) | mm | 360 (370) | |||
| Visina | mm | 930 | |||
| Tipična radna težina (CX) | kg | 25,2 (27,5) | |||
| Tip HD 6/13 C HD 6/13 C HD 6/13 C HD 6/13 C | |||||
| HD 6/13 CX | |||||
| AR GB | KAP SA | ||||
| Priključak na električnu mrežu | |||||
| Napon V 220 230...240 220 | |||||
| Vrsta struje Hz 1~50 1~60 | |||||
| Priključna snaga kW 2,9 2,9 | 2,8 | ||||
| Osigurač (inertni, karakt. C) | A | 16 | 13 | 15 | 13 |
| Stepen zaštite | -- | IPX5 | |||
| Produžni kabl 30 m | mm2 | 2,5 | |||
| Priključak za vodu | |||||
| Dovodna temperatura (maks.) | °C | 60 | |||
| Dovodni protok (min.) | l/min | 13 | |||
| Visina usisavanja iz otvorenih posuda (20°C) | m | 0,5 | |||
| Dovodni pritisak (maks.) | MPa | 1 | |||
| Podaci o snazi | |||||
| Radni pritisak vode (sa standardnom mlaznicom) | MPa 1 | 12,5 | |||
| Veličina mlaznice kod standardne mlaznice | -- | 038 | 042 043 | ||
| Maks. radni nadpritisak | MPa | 19 | 18 | ||
| Protok vode | l/min | 9,8 | 10,0 | ||
| Usisavanje deterdženta | l/h | 0...25 | |||
| Povratna udarna sila ručne prskalice (maks.) | N | 26,6 | |||
| Izračunate vrednosti prema EN 60335-2-79 | |||||
| Vrednost vibracije na ruci | |||||
| Vrednost vibracije na ruci | m/s2 | 4,1 | 3,7 | ||
| Nepouzdanost K | m/s2 | 0,9 | |||
| Nivo zvučnog pritiska LpA (CX) | dB(A) | 72 (75) | 73 | ||
| Nepouzdanost KpA | dB(A) | 3 | |||
| Nivo zvučne snage LWA+ nepouzdanost KWA(CX) | dB(A) | 88 (92) | 89 | ||
| Dimenzije i težine | |||||
| Dužina | mm | 380 | |||
| Širina (CX) | mm | 360 (370) | |||
| Visina | mm | 930 | |||
| Tipična radna težina (CX) | kg | 25,2 (27,5) | 25,2 | ||

www.kaercher.com/REACH
text_image
Technical diagram showing two mechanical assembly steps with numbered annotations indicating component placement.natural_image
Line drawing of a mechanical device with no visible text or symbols
S. Reiser
Head of Approbation
71364 Winnenden (Germany)
Тел.: +49 7195 14-0
Факс: +49 7195 14-2212
Winnenden, 2016/03/01
Технически данни
www.kaercher.com/REACH
natural_image
Line drawing of a tractor with visible wheel, dashboard, and front-mounted sensors (no text or symbols)Toode: Körgsurvepesur
Tüüp: 1.520-xxx
71364 Winnenden (Germany)
Tel: +49 7195 14-0
Winnenden, 2016/03/01
Tehnilised andmed
www.kaercher.com/REACH
text_image
Technical diagram showing two mechanical assembly steps with numbered annotations indicating component placement.natural_image
Line drawing of a mechanical device with no visible text or symbols71364 Winnenden (Germany)
Tālr.: +49 7195 14-0
Fakss: +49 7195 14-2212
Winnenden, 2016/03/01
Tehniskie dati
www.kaercher.com/REACH
Prieš pradedant naudoti
text_image
Technical diagram showing two mechanical assembly steps with numbered annotations indicating component placement.natural_image
Line drawing of a mechanical device with no visible text or symbols
S. Reiser
Head of Approbation
71364 Winnenden (Germany)
Tel.: +49 7195 14-0
Faksas: +49 7195 14-2212
Winnenden, 2016/03/01
Techniniai duomenys
www.kaercher.com/REACH
text_image
Technical diagram showing two mechanical assembly steps with numbered annotations indicating component identification.natural_image
Line drawing of a tractor with visible frame, wheels, and exhaust pipe (no text or symbols)
S. Reiser
Head of Approbation
71364 Winnenden (Germany)
Тел.: +49 7195 14-0
Факс: +49 7195 14-2212
Winnenden, 2016/03/01
www.kaercher.com/REACH
设备运作前
附件安装
→ 固定轮踏盖。
text_image
Technical diagram showing two mechanical assembly steps with numbered annotations indicating component identification.natural_image
Line drawing of a mechanical device with no visible text or symbols→ 将起重装置固定在设备的手提柄上。
起吊安全提示
危险
由于设备掉下而存在受伤危险。

S. Reiser
Head of Approbation
文件汇编负责人:
S. Reiser
71364 Winnenden (Germany)
电话:+49 7195 14-0
传真:+49 7195 14-2212
Winnenden, 2016/03/01
产品规格 / 参数
natural_image
Icon showing a gear and wrench inside a square frame (no text or symbols)http://www.kaercher.com/dealersearch