
K 5 Comfort Premium - Pressure washer Kärcher - Free user manual and instructions
Find the device manual for free K 5 Comfort Premium Kärcher in PDF.
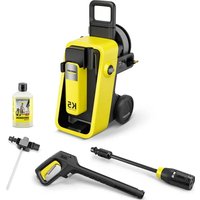


| Brand | Kärcher |
| Model | K 5 Comfort Premium |
| Product type | Domestic high-pressure cleaner |
| Dimensions (L × W × H) | 417 × 346 × 668 mm |
| Operating weight | 16.3 kg |
| Supply voltage | 230 V ~ 50 Hz |
| Current consumption | 9.1 A |
| Protection type | IPX5 |
| Max. operating pressure | 14.5 MPa |
| Nominal operating pressure | 12 MPa |
| Max. water flow rate | 7.5 l/min |
| Detergent flow rate | 0.3 l/min |
| Adjustable spray type | Detergent spray, wide flat, narrow flat, rotary |
| Safety functions | Auto-stop, motor thermal protection, trigger lock |
| Included accessories | Gun, lance, 7 m hose, hose reel, foam nozzle, detergent bottle |
| Water supply | Garden hose connection, suction possible (max. 0.5 m) |
| Sound level (guaranteed LwA) | 90 dB(A) |
| Maintenance | Clean water inlet screen, no regular maintenance |
| Warranty | According to country conditions, contact authorized service |
| Mobile app | Kärcher Home & Garden (iOS and Android) |
Frequently Asked Questions - K 5 Comfort Premium Kärcher
User questions about K 5 Comfort Premium Kärcher
0 question about this device. Answer the ones you know or ask your own.
Ask a new question about this device
Download the instructions for your Pressure washer in PDF format for free! Find your manual K 5 Comfort Premium - Kärcher and take your electronic device back in hand. On this page are published all the documents necessary for the use of your device. K 5 Comfort Premium by Kärcher.
USER MANUAL K 5 Comfort Premium Kärcher
71364 Winnenden (Germany)
Tel.: +49 7195 14-0
Fax: +49 7195 14-2212
H.Jenner Chairman of the Board of Management
S. Reiser Manager Regulatory Affairs & Certification
Winnenden, 2025/09/01
71364 Winnenden (Germany)
Technical data
| KARCHER Home & Garden App | 12 |
| General notes | 12 |
| Safety devices | 12 |
| Symbols on the device | 13 |
| Environmental protection | 13 |
| Intended use | 13 |
| Accessories and spare parts | 13 |
| Scope of delivery | 13 |
| Overview of the device | 13 |
| Mounting | 13 |
| Startup | 14 |
| Operation | 14 |
| Transport | 16 |
| Storage | 16 |
| Care and maintenance | 16 |
| Troubleshooting guide | 17 |
| Warranty | 17 |
| Declaration of Conformity | 17 |
| Technical data | 18 |
With the KARCHER Home & Garden app, you benefit from the following advantages when using your device: - Application tips & expert knowledge - Product information, overview of accessories and operating instructions - Support and service contact - Online shop - exclusive offers and much more Scan the code on the packaging or download the KARCHER Home & Garden app from your app store and conveniently register your product.
General notes

Read these original operating instructions and the enclosed safety instructions before using the device for the first
time. Proceed accordingly.
Keep both books for future reference or for future owners.
Safety devices
WARNING
Danger of injury!
Serious injuries due to missing, modified or ineffective safety devices.
Do not bypass or remove the safety devices and do not render them ineffective. Safety devices are provided for your own protection.
Power switch
The power switch prevents unintentional operation of the device.
Trigger locking button
The trigger locking button blocks the trigger and prevents the device from switching on unintentionally.
Auto-stop function
If the trigger of the high-pressure pump is released, the pressure switch turns off the pump and the high-pressure jet is stopped. The high-pressure pump switches on again when the trigger is pulled.
Motor circuit breaker
The motor circuit breaker shuts off the device if power consumption it too high.
Symbols on the device
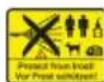
Do not aim the high-pressure jet may at persons, animals, live electrical equipment or the device itself.
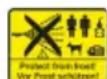
Protect the device against frost.

The device may not be connected to the public drinking water network.
Environmental protection

The packing materials can be recycled. Please dispose of packaging in accordance with the environmental regulations.

Electrical and electronic devices contain valuable, recyclable materials and often components such as batteries, rechargeable batteries or oil, which - if handled or disposed of incorrectly - can
pose a potential danger to human health and the environment. However, these components are required for the correct operation of the device. Devices marked by this symbol are not allowed to be disposed of together with the household rubbish.
Cleaning work producing in oily waste water, e.g. washing engines, washing undercarriages etc., may only be performed at washing stations with an oil separator. Working with detergents may only be performed on watertight surfaces with connection to the waste water sewage system. Do not allow detergent to enter waterways or the soil. Extraction of water from public waterways is not permitted in some countries.
Notes on the content materials (REACH)
Current information on content materials can be found at: www.kaercher.de/REACH
Intended use
Use the high-pressure cleaner in private households only.
The high-pressure cleaner is intended for cleaning machines, vehicles, buildings, tools, facades, terraces, garden machines etc. using a high-pressure water jet.
Accessories and spare parts
Only use original accessories and original spare parts. They ensure that the appliance will run fault-free and safely.
Information on accessories and spare parts can be found at www.kaercher.com.
Scope of delivery
The scope of delivery for the appliance is shown on the packaging. Check the contents for completeness when unpacking. If any accessories are missing or in the event of any shipping damage, please notify your dealer.
Overview of the device
For illustrations, refer to the graphics pages. Illustrations are examples; details may vary. Illustration A
- 1 Jet nozzle head, 2 Spray lance, 3 High-pressure gun, 4 High-pressure hose release button, 5 Trigger, 6 Trigger locking button, 7 High-pressure hose, 8 High-pressure gun holder, 9 High-pressure hose drum, 10 Crank handle, 11 Power switch, 12 Wheel, 13 Telescopic handle, 14 Telescopic handle unlocking button, 15 Mains cable holder, 16 Mains cable, 17 Mains plug, 18 Type plate, 19 Carrying handle, 20* Garden hose, 21 Coupling for the water connection, 22** KARCHER suction hose, 23 Screen, 24 Water connection, 25 Detergent bottle, 26 Foam nozzle, 27 Spray wand holder, 28 Foam nozzle release button, 29 Foam dosing lever. * additionally required, ** optionally available
Mounting
For the figures, please refer to the graphics page.
Fit the supplied loose parts onto the device before starting up the device.
Installing the telescopic handle
- Insert the telescopic handle into the device until it audibly clicks into place. Illustration B
Mounting the spray lance holder
- Mounting the spray lance holder: a Insert the spray lance holder into the openings on the device and
b press upwards until you hear it click into place. Illustration C
Installing the high-pressure gun holder
- Installing the high-pressure gun holder:
a Insert the high-pressure gun holder into the openings on the device and b press downwards until it clicks into place. Illustration D
Installing the mains cable holder
- Installing the mains cable holder:
a Insert the mains cable holder into the openings on the device and b fold it into the device until you hear it click into place.
Illustration E
Installing the water connection coupling
- Screw the water connection coupling onto the water connection on the device.
Illustration F
Installing the foam nozzle on the device
- Screw the foam nozzle onto the detergent bottle. Illustration G
- Snap the foam nozzle into place on the device.
- To remove, press the foam nozzle release button and remove the foam nozzle from the device.
Startup
- Place the device on a level, horizontal surface.
ATTENTION
Risk of damage during operation with wound-up high-pressure hose!
Damage on the high-pressure hose.
Unwind the high-pressure hose completely and lay it out without knots, loops or twists before operating the device. 2. Pull the high-pressure hose to fully unwind it from the hose reel. 3. Lay out the high-pressure hose without knots, loops or twists. 4. Mount the high-pressure hose on the high-pressure gun.
a Align the high-pressure hose and b insert it into the high-pressure gun until it audibly clicks into place.
Illustration H
- Check the secure connection by pulling on the high-pressure hose.
- Unwind the power cord completely.
Illustration I
- Insert the mains plug into a mains socket.
Connecting the water supply
ATTENTION
Risk of damage through contaminated water!
Contamination in the water can damage the high-pressure pump and accessories.
Operate the device only with clear fresh water without contamination or additives.
Never use contaminated water, waste water or salt water.
Kärcher recommends using the optional Kärcher water filter.
- Check the pressure, temperature and quantity of the supply water for compliance with the requirements, see Technical data.
Note
Observe the water distribution company regulations.
Connection to the water line
ATTENTION
Risk of damage when using hose couplings made of brass with AquaStop function from third-party suppliers.
Damage to the high-pressure pump.
Only use hose couplings with/without AquaStop function from Karcher, hose couplings without AquaStop function or hose couplings made of plastic with AquaStop function from third-party suppliers.
- Plug the garden hose onto the water connection coupling.
Note
Reinforced garden hose required: minimum diameter 1/2 inch (13 mm), minimum length 7.5 m, with standard quick coupling.
Illustration J
- Connect the garden hose to the water line.
- Open the water tap completely.
Suctioning water from the containers
This device with the KARCHER suction hose is suitable for sucking water from g. water butts or ponds (for maximum suction height, see Technical data).
- Unscrew the coupling on the water connection.
- Fill the KÄRCHER suction hose with water.
- Screw the KARCHER suction hose onto the water connection of the device and hang it in a water source.
Vent the device
Note
To vent the device, do not fit the spray lance or foam nozzle to the high-pressure gun.
- Switch on the device by turning the device switch to the "l" position.
To switch off the device, turn the device switch to the "0" position.
Illustration K
- Unlocking the trigger.
Illustration L
- Actuate the trigger. The device switches on.
- Allow the device to run for a maximum of 2 minutes until the water escaping from the high-pressure gun is free of air bubbles.
Note
If the foam nozzle is fitted to the device, detergent is added. 5. Release the trigger. 6. Lock the trigger.
Operation
CAUTION
Risk of injury from escaping water under high pressure!
Injuries
Only disconnect the high-pressure hose from the high-pressure gun or the device if there is no pressure in the system.
ATTENTION
Risk of damage due to the pump running dry!
Pump damage
Switch off the device if it does not build up pressure within 2 minutes.
Proceed according to the instructions in Troubleshooting guide.
Set spray type
- Lock the trigger.
- Align the spray lance and insert it into the high-pressure gun and lock it into position by turning it 90°. Illustration M
ATTENTION
Risk of damage if the jet nozzle head is turned during operation!
Damage to the spray lance
Release the trigger before turning the jet nozzle head.
- Turn the jet nozzle head to set a suitable spray type for the cleaning task and the object.
The corresponding pictogram must point upwards. Illustration N
Note
The sensitivity of materials can vary greatly depending on age and condition. The recommendations are therefore not binding.
| Pictogram | Spray form and pressure | Recommended fore.g. |
| Detergent spray with low pressure | All surfaces suitable for use with deter-gents | |
| Wide flat stream with medium pressure | Car/motorcycle, bi-cycles, brick / sand-stone surfaces, plastered walls, wood surfaces, plastic/rattan furni-ture | |
| Narrow flat stream with high pressure | Stone tiles, asphalt, metal surfaces, gar-den utensils (wheel-barrow, spade, etc.) | |
| Rotary jet with maxi-mum pressure | Particularly stub-born dirt on stone tiles, asphalt, metal surfaces, garden tools (wheelbarrow, spade, etc.) |
Operation with detergent
DANGER
Health hazards due to detergents!
Serious damage to health
Observe the detergent manufacturer's safety data sheet.
Wear the prescribed personal protective gear.
ATTENTION
Risk of damage from unsuitable detergents!
Material damage
Only use detergents that have been approved by Karcher and are suitable for the objects to be cleaned.
Observe the safety instructions, dosage recommendations and notes enclosed with the detergents.
Use detergents sparingly.
ATTENTION
Risk of damage due to detergents acting too long and drying out!
Material damage
Do not apply detergent to hot surfaces and observe the maximum contact time.
Do not allow detergent to dry on the surfaces being cleaned.
Note
KÄRCHER detergents ensure fault-free, effective operation. Please ask us for advice and observe our catalog or our detergent information sheets.
- The detergent can be mixed in or applied with the foam nozzle.
Mixing
a Install the foam nozzle on the device. The position of the foam dosing lever is not important. b Adjust the detergent spray at the jet nozzle head, see Set spray type. The detergent is mixed into the water stream during operation.
Using the foam nozzle
a Remove the foam nozzle from the device and install it on the high-pressure gun instead of the spray lance.
Use the foam dosing lever to set the desired amount of foam.
- Unlock the trigger.
- Pull the trigger and spray the detergent sparingly onto the dry surfaces.
- Allow the detergent to act (do not let it dry).
- Rinse off the loosened dirt using an appropriate spray type, see Operation without detergent.
Operation without detergent
ATTENTION
Risk of damage due to too close a spray distance or inappropriate spray type!
Damage to painted or sensitive surfaces.
Keep at least 30 cm spray distance when cleaning painted surfaces.
Do not clean car tires, paint, or delicate surfaces such as wood with the rotary jet.
- Set a suitable spray type for the cleaning task and the object, see Set spray type.
- Unlock the trigger.
- Pull the trigger and carry out the cleaning process.
Interrupting operation
- Release the trigger.
The device stops. The high-pressure in the system is maintained.
- Lock the trigger.
- Place the high-pressure gun in the high-pressure gun holder.
- For work breaks longer than 5 minutes, switch off the device.
Ending operation
CAUTION
Risk of injury from escaping water under high pressure!
Injuries
Only disconnect the high-pressure hose from the high-pressure gun or the device if there is no pressure in the system.
ATTENTION
Risk of damage due to frost!
Material damage
Empty the water completely from the device and accessories.
Always protect the device and accessories from frost.
- Release the trigger.
- Lock the trigger.
- Close the water tap.
- Disconnect the device from the water supply.
- Unlocking the trigger.
- Actuate the trigger for a maximum of 1 minute, until no more water escapes.
The pressure in the system is released.
The water is pumped out of the device to prevent frost damage.
- Release the trigger.
- Lock the trigger.
- Switch off the device.
- Pull the mains plug out of the mains socket.
- Dismantle the accessories, empty them and stow them on the device, see Storing the device.
Transport
CAUTION
Risk of injury or damage due to the weight of the device!
Injury and damage.
Be aware of the weight of the device during transport and storage.
ATTENTION
Risk of damage due to leaking detergent!
Material damage
Always transport and store the detergent bottle with the foam nozzle fitted upright, not lying down.
Transporting the device
Pulling/pushing the device
- Unlock the telescopic handle and pull upwards until it engages.
Illustration O
- Tilt the device onto the wheels and pull or push it. Carrying the device
- Unlock the telescopic handle and slide it together.
- Lift up and carry the device by the telescopic handle and the carrying handle.
Transporting the device in a vehicle
- Secure the device against slipping and tipping over.
Storage
CAUTION
Risk of injury or damage due to the weight of the device!
Injury and damage.
Be aware of the weight of the device during transport and storage.
ATTENTION
Risk of damage due to leaking detergent!
Material damage
Always transport and store the detergent bottle with the foam nozzle fitted upright, not lying down.
Storing the device
CAUTION
Risk of injury from escaping water under high pressure!
Injuries
Injuries
Only disconnect the high-pressure hose from the high-pressure gun or the device if there is no pressure in the system.
- Finish operation, see Ending operation.
- Remove the spray wand from the high-pressure gun.
- Engage or place the spray lance on a spray lance holder.
- Press the high-pressure hose release button and pull off the high-pressure hose on the high-pressure gun.
- Let the water drain from the high-pressure gun.
- Place the high-pressure gun in the high-pressure gun holder.
ATTENTION
Risk of damage if wound in the wrong direction!
Damage on the high-pressure hose
Only turn the high-pressure hose drum in the specified direction.
- Turn the crank handle clockwise to wind up the high-pressure hose. Illustration P
- Store the power cable on the power cable holder. Illustration Q Observe the additional notes before storing the device for a long period of time, see Care and maintenance.
Frost protection
ATTENTION
Risk of damage due to frost!
Material damage
Empty the water completely from the device and accessories.
Always protect the device and accessories from frost.
- Pump the water out of the device, see Ending operation.
- Dismantle the accessories and drain the water, see Storing the device.
- Store the device and accessories in a frost-proof room, see Storing the device.
Care and maintenance
DANGER
Danger of death!
Fatal injuries due to electric shock when touching live parts.
Do not touch any live parts.
Switch off the device.
Pull the mains plug out of the mains socket.
The device is maintenance-free, i.e. you do not need to perform periodic maintenance work.
Clean the sieve in the water connection
ATTENTION
Risk of damage due to missing or damaged sieve!
Damage to the high-pressure pump
Do not operate the device without a sieve.
Do not clean the sieve with hard, pointed objects.
Clean the sieve in the water connection if necessary.
- Unscrew the coupling on the water connection. 2. Pull out the sieve.
Illustration R
- Clean the sieve under running water.
- Insert the sieve into the water connection.
Troubleshooting guide
Malfunctions often have simple causes that you can remedy yourself using the following overview. When in doubt, or in the case of malfunctions not mentioned here, please contact your authorized Customer Service.
△DANGER
Danger of death!
Fatal injuries due to electric shock when touching live parts.
Do not touch any live parts.
Switch off the device.
Pull the mains plug out of the mains socket.
Device is not running
The voltage supply is interrupted.
- Check that the mains plug is plugged in.
- Switch the device on.
- Unlock and actuate the trigger. The device starts up, otherwise
- Check if the voltage specified on the type plate matches the voltage of the power source.
- Unplug the mains plug from the mains socket and inspect the mains cable and mains plug for damage. A damaged power cord must be replaced promptly by an authorized Customer Service.
The motor circuit breaker is active.
- If the motor is overloaded, the motor circuit breaker switches the device off.
- Switch off the device.
- Allow the device to cool off for 1 hour.
- Switch on the device and put it into operation. If the fault occurs several times, have the device checked by Customer Service.
Detergent is not sucked in
An unsuitable spray type is set.
- Turn the jet nozzle head to the "detergent spray" position. The foam nozzle with the detergent bottle is not installed on the device.
- Install the foam nozzle with the filled detergent bottle on the device. The detergent bottle is empty.
- Install a full bottle of detergent.
The device does not reach required pressure
An unsuitable spray type is set on the jet nozzle head.
- Set a spray type with a high-pressure jet. The water supply is too low.
- Open the water tap completely.
- Check the water inlet for sufficient flow rate.
- Lay the garden hose without kinks.
- Make sure that the maximum suction height is not exceeded.
The sieve in the water connection is contaminated. 1. Clean the sieve in the water connection.
There's air in the device.
- Vent the device.
Strong pressure fluctuations
The jet nozzle in the jet nozzle head is dirty.
- Clean the jet nozzle from the front using a needle and flush it through.
The water supply quantity is too low.
- Open the water tap completely.
- Lay the garden hose without kinks.
- Clean the sieve in the water connection.
- Check the water supply quantity and increase if necessary.
Device leaking
The device leaks a small amount for technical reasons.
- In case of severe leakage, contact the authorized Customer Service.
Warranty
The warranty conditions issued by our relevant sales company apply in all countries. We shall remedy possible malfunctions on your appliance within the warranty period free of cost, provided that a material or manufacturing flaw is the cause. In a warranty case, please contact your dealer (with the purchase receipt) or the next authorised customer service site.
(See overleaf for the address)
Further warranty information (if available) can be found in the service area of your local Kärcher website under "Downloads".
Declaration of Conformity
EU Declaration of Conformity
We hereby declare that the product named below complies with the relevant provisions of the directives and regulations listed. This declaration is invalidated by any changes made to the product that are not approved by us. The manufacturer shall bear sole responsibility for issuing of this declaration of conformity.
Product: High-pressure cleaner
Type: K 4 Comfort Premium,
K 5 Comfort Premium,
K 6 Comfort Premium
Directives and Regulations
2000/14/EC
2006/42/EC (+2009/127/EC)
2011/65/EU
2014/30/EU
2009/125/EC
Commission Regulation(s)
(EU) 2019/1781
Harmonised standards used
EN 60335-1
EN 60335-2-79
EN 62233: 2008
EN 55014-1:2017 + A11:2020
EN 55014-2: 1997 + A1: 2001 + A2: 2008
EN 61000-3-2: 2014
EN 61000-3-3:2013
EN IEC 63000:2018
Conformity evaluation procedure used
2000/14/EC: Annex V
Sound power level dB(A)
K 4 Comfort Premium
Measured: 85
Guaranteed: 88
K 5 Comfort Premium
Measured: 87
Guaranteed: 90
K 5 Comfort Premium (GB),
K6 Comfort Premium
Measured: 90
Guaranteed: 93
Name and address
Documentation supervisor:
S. Reiser
Alfred Karcher SE & Co. KG
Alfred-Karcher-Str. 28 - 40
71364 Winnenden (Germany)
Tel.: +49 7195 14-0
Fax: +49 7195 14-2212

H. Jenner
Chairman of the Board of Management
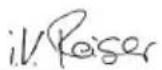
S. Reiser
Manager Regulatory Affairs & Certification
Winnenden, 2025/09/01
The undersigned act on behalf of and with the authority
of the Board of Directors.
Alfred Kärcher SE & Co. KG
Alfred-Karcher-Str.28-40
71364 Winnenden (Germany)
Ph.: +49 7195 14-0
Fax: +49 7195 14-2212
Declaration of Conformity (UK)
We hereby declare that the product named below complies with the relevant provisions of the directives and regulations listed. This declaration is invalidated by any changes made to the product that are not approved by us. The manufacturer shall bear sole responsibility for issuing of this declaration of conformity.
Product: High-pressure cleaner
Type: K 4 Comfort Premium,
K 5 Comfort Premium,
K6 Comfort Premium
Directives and Regulations
S.I. 2001/1701 (as amended) S.I. 2008/1597 (as amended) S.I. 2012/3032 (as amended) S.I. 2016/1091 (as amended) S.I. 2010/2617 (as amended)
Commission Regulation(s)
(EU) 2019/1781
Designated standards used
EN 60335-1 EN 60335-2-79 EN 62233: 2008 EN 55014-1:2017 + A11:2020 EN 55014-2: 1997 + A1: 2001 + A2: 2008 EN 61000-3-2: 2014 EN 61000-3-3: 2013 ENIEC63000:2018
Applied conformity assessment procedure
S.I. 2001/1701 (as amended): Schedule 8
Sound power level dB(A)
K 4 Comfort Premium Measured: 85 Guaranteed: 88 K 5 Comfort Premium Measured: 87
Guaranteed: 90
K 5 Comfort Premium (GB),
K 6 Comfort Premium
Measured: 90
Guaranteed: 93
Name and address
Documentation supervisor:
S. Reiser
Alfred Kärcher SE & Co. KG
Alfred-Karcher-Str. 28 - 40
71364 Winnenden (Germany)
Tel.: +49 7195 14-0
Fax: +49 7195 14-2212
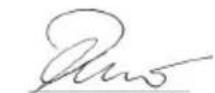
H.Jenner
Chairman of the Board of Management
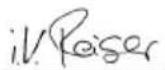
S. Reiser
Manager Regulatory Affairs & Certification
Winnenden, 2025/09/01
The undersigned act on behalf of and with the authority of the Board of Directors.
Alfred Kärcher SE & Co. KG
Alfred-Karcher-Str. 28 - 40
71364 Winnenden (Germany)
Ph.: +49 7195 14-0
Fax: +49 7195 14-2212
Technical data
| Comfort Premium | K 6 Comfort Premium | ||
| Electrical connection | |||
| Voltage | V | 230 | |
| Phase ~ 1 1 | |||
| Frequency Hz 50 50 | |||
| Current consumption A 9,1 9,6 | |||
| Protection type IPX5 IPX5 | |||
| Protection class I | I | ||
| Power protection (slow- blowing) | A | 10 | 10 |
| Water connection | |||
| Feed pressure (max.) | MPa | 1,2 1,2 | |
| Input temperature (max.) °C | 40 40 | ||
| Input amount (min.) | l/min | 9 9 | |
| Suction height (max.) | m | 0,5 0,5 | |
| Device performance data | |||
| Operating pressure | MPa | 12 12,5 | |
| Max. permissible pres- sure | MPa | 14,5 | 16 |
| Water flow rate | l/min | 7,5 7,5 | |
| Detergent flow rate | l/min | 0,3 0,3 | |
| High-pressure gun recoil force | N | 17 | 17 |
| Dimensions and weights | |||
| Typical operating weight | kg | 16,3 | 16,8 |
| Length | mm | 417 417 | |
| Width | mm | 346 | 346 |
| K 5 Comfort Premium | K 6 Comfort Premium | |
| Amount mm 668 668 | ||
| Values determined in accordance with EN 60335-2-79 | ||
| Hand-arm vibration value aHV | m/s² 1,2 1,1 | |
| Uncertainty K m/s | 2 0,6 0,6 | |
| Sound level LpA | dB(A) 73 77 | |
| Uncertainty K dB(A) 2,6 2,6 | ||
| Sound power level LwA | dB(A) 87 90 | |
| Guaranteed sound pow-er level LWA,d | dB(A) 90 93 | |
| Subject to technical modifications. | ||
Content
KARCHER Home & Garden app 19
General notes. 19
2006/42/EC (+2009/127/EC)
2011/65/EU
2014/30/EU
2009/125/EC
Applied ordinance(s)
(EU) 2019/1781
71364 Winnenden (Germany)
Tel.: +49 7195 14-0
Fax: +49 7195 14-2212
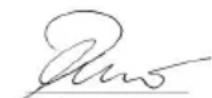
H.Jenner
Chairman of the Board of Management
S. Reiser
Manager Regulatory Affairs & Certification
Winnenden, 01/09/2025
71364 Winnenden (Germany)
Tel.: +49 7195 14-0
Fax: +49 7195 14-2212
Technical characteristics
71364 Winnenden (Germany)
Tel.: +49 7195 14-0
Fax: +49 7195 14-2212
H. Jenner Chairman of the Board of Management
S. Reiser Manager Regulatory Affairs & Certification
Winnenden, 01/09/2025
71364 Winnenden (Germany)
Tel.: +49 7195 14-0
Fax: +49 7195 14-2212
Technical data
Tip: K 4 Comfort Premium,
K 5 Comfort Premium,
K 6 Comfort Premium
2006/42/CE (+2009/127/CE)
2011/65/UE
2014/30/UE
2009/125/CE
71364 Winnenden (Germany)
H.Jenner Chairman of the Board of Management
S. Reiser Manager Regulatory Affairs & Certification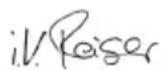
Winnenden, 01/09/2025
71364 Winnenden (Germany)
Tel.: +49 7195 14-0
Fax: +49 7195 14-2212
Technical data
Tip: K 4 Comfort Premium,
K 5 Comfort Premium,
K6 Comfort Premium
2006/42/EC (+2009/127/EC)
2011/65/EU
2014/30/EU
2009/125/EC
Applicable regulation(s)
(EU) 2019/1781
71364 Winnenden (Germany)
Telephone: +49 7195 14-0
Fax: +49 7195 14-2212
H. Jenner Chairman of the Board of Management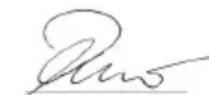
S. Reiser Manager Regulatory Affairs & Certification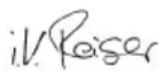
Winnenden, 01/09/2025
71364 Winnenden (Germany)
Tel.: +49 7195 14-0
Fax: +49 7195 14-2212
H.Jenner Chairman of the Board of Management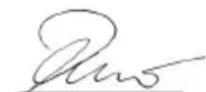
S. Reiser Manager Regulatory Affairs & Certification
Winnenden, 2025/09/01
71364 Winnenden (Germany)
Tel.: +49 7195 14-0
Fax: +49 7195 14-2212
Technical data
K5
K6
Comfort Comfort
Premium Premium
H.Jenner Chairman of the Board of Management
S. Reiser Manager Regulatory Affairs & Certification
Winnenden, 2025/09/01
71364 Winnenden (Germany)
Telefon: +49 7195 14-0
Fax: +49 7195 14-2212
H. Jenner
Chairman of the Board of Management
S. Reiser
Manager Regulatory Affairs & Certification
Winnenden, 01.09.2025
D-71364 Winnenden (Germany)
Tfn: +49 7195 14-0
Fax: +49 7195 14-2212
Technical data
71364 Winnenden (Germany)
Phone: +49 7195 14-0
Chairman of the Board of Management
S. Reiser
Manager Regulatory Affairs & Certification
Winnenden, 1.9.2025
71364 Winnenden (Germany)
Phone: +49 7195 14-0
2006/42/EC (+2009/127/EC)
2011/65/EU
2014/30/EU
2009/125/EC
Applied directive(s)
(EU) 2019/1781
Applied harmonized standards
EN 60335-1
EN 60335-2-79
EN 62233: 2008
EN 55014-1:2017 + A11:2020
EN 55014-2: 1997 + A1: 2001 + A2: 2008
EN 61000-3-2: 2014
EN 61000-3-3: 2013
EN IEC 63000:2018
71364 Winnenden (Germany)
Phone: +49 7195 14-0
Chairman of the Board of Management
S. Reiser
Manager Regulatory Affairs & Certification
Winnenden, 2025/09/01
71364 Winnenden (Germany)
Tel.: +49 7195 14-0
Transport of apparatus
2006/42/EF (+2009/127/EF)
2011/65/EU
2014/30/EU
2009/125/EF
Applied directive(s)
(EU) 2019/1781
2000/14/EF: Annex V
Sound power level dB(A)
K 4 Comfort Premium
Measured: 85
Guaranteed: 88
K 5 Comfort Premium
Measured: 87
Guaranteed: 90
K 5 Comfort Premium (GB),
K 6 Comfort Premium
Malt: 90
Guaranteed: 93
Name and address
71364 Winnenden (Germany)
Phone: +49 7195 14-0
Fax: +49 7195 14-2212
H. Jenner Chairman of the Board of Management
S. Reiser Manager Regulatory Affairs & Certification
Winnenden, 2025/09/01
71364 Winnenden (Germany)
Tel.: +49 7195 14-0
Fax: +49 7195 14-2212
Technical data
| K 5 | K 6 |
| Comfort | Comfort |
| Premium | Premium |
71364 Winnenden (Germany)
Tel: +49 7195 14-0
Chairman of the Board of Management
S. Reiser
Manager Regulatory Affairs & Certification
Winnenden, 2025/09/01
71364 Winnenden (Germany)
Tel: +49 7195 14-0
Chairman of the Board of Management
S. Reiser
Manager Regulatory Affairs & Certification
Winnenden, 01.09.2025.
H. Jenner, Chairman of the Board of Management
S. Reiser, Manager Regulatory Affairs & Certification
2006/42/WE (+2009/127/WE)
2011/65/EU
2014/30/EU
2009/125/EC
71364 Winnenden (Germany)
Phone: +49 7195 14-0
Chairman of the Board of Management

S. Reiser
Manager Regulatory Affairs & Certification
Winnenden, 01.09.2025
71364 Winnenden (Germany)
Tel.: +49 7195 14-0
Chairman of the Board of Management
S. Reiser
Manager Regulatory Affairs & Certification
Winnenden, 2025/09/01
2006/42/EC (+2009/127/EC)
2011/65/EU
2014/30/EU
2009/125/EC
2000/14/EC: Annex V
Chairman of the Board of Management
S. Reiser
Manager Regulatory Affairs & Certification
Winnenden, 2025/09/01
2006/42/EC (+2009/127/EC)
2011/65/EU
2014/30/EU
2009/125/EC
2000/14/EC: Annex V
71364 Winnenden (Germany)
Tel.: +49 7195 14-0
Fax: +49 7195 14-2212
H.Jenner
Chairman of the Board of Management
S. Reiser
Manager Regulatory Affairs & Certification
Winnenden, 01.09.2025
71364 Winnenden (Germany)
Tel.: +49 7195 14-0
Fax: +49 7195 14-2212
Technical data
| K 5 | K 6 |
| Comfort | Comfort |
| Premium | Premium |
Tip: K 4 Comfort Premium,
K 5 Comfort Premium,
K 6 Comfort Premium
Directives and regulations
2000/14/EC
2006/42/EC (+2009/127/EC)
2011/65/EU
2014/30/EU
2009/125/EC
Regulation(s) used
(EU) 2019/1781
H. Jenner Chairman of the Board of Management
S. Reiser Manager Regulatory Affairs & Certification
Winnenden, 1.9.2025
The signatories act on the instructions and with the authorization of the management.
Alfred Karcher SE & Co. KG
Alfred-Karcher-Str. 28 - 40
Type: K 4 Comfort Premium,
K 5 Comfort Premium,
K6 Comfort Premium
Directive regulations
2000/14/UE
2006/42/UE (+2009 / 127 / UE)
2011/65/UE
2014/30/UE
2009/125/UE
Regulation(s) used
(UE) 2019/1781
Harmonized standards applied
EN 60335-1
EN 60335-2-79
EN 62233: 2008
EN 55014-1:2017 + A11:2020
EN 55014-2: 1997 + A1: 2001 + A2: 2008
EN 61000-3-2: 2014
EN 61000-3-3: 2013
EN IEC 63000:2018
Procedure applied to assess conformity
2000/14/EC: Annex V
Sound power level dB(A)
K 4 Comfort Premium
Measured: 85
Guaranteed: 88
K 5 Comfort Premium
Measured: 87
Guaranteed: 90
K 5 Comfort Premium (GB),
K 6 Comfort Premium
Measured: 90
Warranty: 93
Name and address
71364 Winnenden (Germany)
Phone: +49 7195 14-0
Fax: +49 7195 14-2212
H. Jenner
Chairman of the Board of Management
S. Reiser
Manager Regulatory Affairs & Certification
Winnenden, 2025/09/01
Signatories acting on behalf of the company
71364 Winnenden (Germany)
Tel.: +49 7195 14-0
Fax: +49 7195 14-2212
Technical data
| K 5 | K 6 |
| Comfort | Comfort |
| Premium | Premium |
Electrical connection
Type: K 4 Comfort Premium,
K 5 Comfort Premium,
K 6 Comfort Premium
Directives and regulations
2000/14/EC
2006/42/EC (+2009/127/EC)
2011/65/EU
2014/30/EU
2009/125/EC
Applied regulations
(EU) 2019/1781
Applied harmonized standards
EN 60335-1
EN 60335-2-79
EN 62233: 2008
EN 55014-1:2017 + A11:2020
EN 55014-2: 1997 + A1: 2001 + A2: 2008
EN 61000-3-2: 2014
EN 61000-3-3: 2013
EN IEC 63000:2018
71364 Winnenden (Germany)
Tel.: +49 7195 14-0
Chairman of the Board of Management
S. Reiser
Manager Regulatory Affairs & Certification
Winnenden, 01.09.2025.
Tip: K 4 Comfort Premium,
K 5 Comfort Premium,
K 6 Comfort Premium
Directives and regulations
2000/14/EC
2006/42/EC (+2009/127/EC)
2011/65/EU
2014/30/EU
2009/125/EC
Applied provision(s)
(EU) 2019/1781
Applied harmonised standards
EN 60335-1
EN 60335-2-79
EN 62233: 2008
EN 55014-1:2017 + A11:2020
EN 55014-2: 1997 + A1: 2001 + A2: 2008
EN 61000-3-2: 2014
EN 61000-3-3: 2013
EN IEC 63000:2018
Chairman of the Board of Management
S. Reiser
Manager Regulatory Affairs & Certification
Winnenden, 2025/09/01
The signatories act on behalf of and with the authorization of the Executive Board.
Alfred Karcher SE & Co. KG
Alfred-Karcher-Str. 28 - 40
71364 Winnenden (Germany)
Tel.: +49 7195 14-0
71364 Winnenden (Germany)
Tel.: +49 7195 14-0
Fax: +49 7195 14-2212
H. Jenner
Chairman of the Board of Management
S. Reiser
Manager Regulatory Affairs & Certification
Winnenden, 2025/09/01
71364 Winnenden (Germany)
Tel: +49 7195 14-0
Fax: +49 7195 14-2212
Technical data
For components, see www.kaercher.de/REACH
Intended use
Use the high-pressure cleaner only indoors.
The high-pressure cleaner is intended for cleaning machines, vehicles, buildings, tools, facades, terraces, garden and outdoor equipment, etc. with a water jet under high pressure.
Mounting the high-pressure lance holder
- Mounting the high-pressure cleaner holder:
a Insert the high-pressure cleaner holder into the opening on the device and press it down until it clicks into place.
Figure D
Mounting the mains cable holder
- Mounting the mains cable holder:
a Insert the mains cable holder into the opening on the device and lay the cable on the device until it clicks into place.
Figure E
Installing the water inlet connector
- Screw the water inlet connector onto the water inlet pipe on the device. Figure F
Mounting the detergent nozzle on the device
- Press the detergent nozzle onto the container with the cleaning agent.
Figure G
- Secure the nozzle on the device until it clicks into place. For disassembly, press the release button on the nozzle and pull the nozzle off the device.
Commissioning
- Place the device on a flat, horizontal surface.
WARNING: Risk of damage when working with the high-pressure hose!
Check the high-pressure hose. Before operating the device, completely unroll the high-pressure hose and lay it out without kinks, loops, or twists.
- Pull the high-pressure hose to completely unroll it from the reel.
- Lay out the high-pressure hose without kinks, loops, or twists.
- Installing the high-pressure hose on the high-pressure cleaner:
a) Straighten the high-pressure hose and insert the high-pressure hose until it clicks.
Figure H
- Check the connection security by pulling on the high-pressure hose.
- Completely unroll the power cable. Figure I
- Insert the power plug into the socket.
Restoring water supply
WARNING
Risk of damage due to contaminated water!
Contaminants in the water can cause damage to the high-pressure pump and accessories.
Use only clean water with the device, without any additives or detergents. Never use contaminated water, standing water, or seawater. Karcher recommends using an additional Karcher water filter.
- Check the pressure, temperature, and quantity of supplied water against the requirements, see Technical specifications.
Note
Follow the regulations of the water supply company.
Connection to the water supply
CAUTION
Risk of damage when using garden hoses with the AquaStop function from third-party suppliers.
Damage to the high-pressure pump. Use only original hoses with or without the AquaStop function from Karcher, garden hoses without the AquaStop function, or plastic garden hoses with the AquaStop function from third-party suppliers.
- Screw the coupling onto the hose for the water supply.
Note
Reinforced hose, minimum diameter 1/2 inch (13 mm), minimum length 7.5 m with standard quick-release coupling. Figure J 2. Connect the garden hose to the water supply. 3. Fully open the water tap.
Suctioning water from reservoirs
This device is used with the KARCHER suction hose for drawing water, for example, from rain barrels or pools (maximum suction height, see Technical specifications).
- Unscrew the coupling on the connection piece for the water supply.
- Fill the KARCHER suction hose with water.
- Mount the device on a water supply pipe and suspend it in the water source.
Air removal from the device
Note
Do not install a spray gun or foam nozzle on the high-pressure pistol for air removal.
- Switch on the device by turning the device switch to the 'I' position. To switch off the device, turn the device switch to the '0' position. Figure K
- Unlock the trigger. Figure L
- Press the trigger. The device switches on. 4. Let the device run for a maximum of 2 minutes until water exits the high-pressure pistol without bubbles.
Note
If a foam nozzle is installed on the device, add detergent. 5. Release the trigger. 6. Lock the trigger.
Operation
CAUTION
Risk of injury from water jet with high pressure!
Injuries
Disconnect the high-pressure hose from the high-pressure pistol or the device only when the system is depressurized.
ATTENTION
Danger of damage when the pump is running dry!
Pump operation
Switch off the device if it does not build up pressure within 2 minutes.
Proceed in accordance with the instructions in the event of malfunctions.
Adjusting the nozzle type
- Lock the trigger.
- Align the nozzle tube, insert it into the high-pressure nozzle and secure it by turning it 90°.
Figure M
ATTENTION
Danger of damage when turning the nozzle head during operation!
Damage to the nozzle tube
Release the trigger before turning the nozzle head.
The device requires no maintenance.
It is necessary to carry out regular technical maintenance.
Cleaning the mesh filter in the water supply pipe
ATTENTION
Danger of damage due to omission or damage of the mesh filter!
Damage to high-pressure pumps. Do not operate the device without the mesh filter.
Do not clean the mesh filter with hard or sharp objects.
If necessary, clean the mesh filter in the water supply pipe.
- Unscrew the union nut on the water supply pipe.
- Remove the mesh filter. Figure R
- Rinse the mesh filter under running water.
- Insert the mesh filter into the water supply pipe.
TROUBLESHOOTING
Most malfunctions have simple causes, so with the help of the following overview you can fix them yourself. In case of doubt or if malfunctions not described here occur, contact an authorized customer service department.
DANGER
Danger to life!
Serious injuries or death can result from electric shock when touching live parts.
Do not touch live parts.
Turn off the device.
Remove the mains plug from the wall socket.
The device does not work
The power supply is interrupted.
- Check whether the mains plug is inserted into the wall socket. 2. Turn on the device.
- Unlock and press the trigger. The device will start, otherwise:
- Check that the voltage indicated on the rating plate matches the supply voltage. 5. Check the mains cable and mains plug for damage.
If the mains cable is damaged, it must be replaced immediately by an authorized service center.
The motor protection switch has tripped.
- If the motor overheats, the motor protection switch turns off the device.
- Turn off the device. 3. Let the device cool down for 1 hour.
- Turn on the device and put it into operation. If the fault occurs repeatedly, have the device checked by a service center.
The device does not suck
Install the appropriate nozzle tip.
- Turn the spray lance to the 'Spray lance' position. The nozzle with the detergent container is not installed on the device.
- Install the foam nozzle with the container filled with detergent on the device. The container for the detergent is empty.
- Install the container with the detergent.
Pressure is not being built up in the device.
The wrong nozzle tip is installed on the spray lance.
- Adjust the nozzle tip to the high-pressure jet.
Water supply is too weak.
- Fully open the water tap.
- Check the water supply for sufficient volume.
- Lay out the high-pressure hose without kinks.
- Make sure that the maximum suction height is not exceeded.
The filter in the water supply hose is clogged.
- Clean the filter in the water supply hose. Air is trapped in the device.
- Remove air from the device.
Pressure drops
The nozzle in the spray head is clogged.
- Clean the spray nozzle from the front with water. Too little water is being supplied.
- Open the water supply fully.
- Place the spray lance without kinks.
- Clean the filter screens in the water supply pipe.
- Check the water supply volume and increase it if necessary.
Device is not tight
Slight leakage of the device is due to technical characteristics.
- Report leakage to an authorized service center.
Warranty
In each country, the corresponding warranty conditions set by our sales company apply. We will repair any malfunctions of the device free of charge during the warranty period, if the cause is due to material defects or manufacturing faults.
In the event of a claim during the warranty period, please contact the dealer from whom you purchased the device, or the nearest authorized service center.
(Address is on the back)
Additional information about the warranty (if applicable) can be found in the service area of the local Karcher website under 'Downloads'.
Sound power level dB(A)
K 4 Comfort Premium
Measured: 85
Guaranteed: 88
K 5 Comfort Premium
Measured: 87
Guaranteed: 90
K 5 Comfort Premium (GB),
K 6 Comfort Premium
Measured: 90
Guaranteed: 93
Imprint
Person responsible for documentation:
S. Reiser
Alfred Kärcher SE & Co. KG
Alfred-Karcher-Str. 28 - 40
71364 Winnenden (Germany)
Tel.: +49 7195 14-0
Fax: +49 7195 14-2212
H. Jenner Chairman of the Board of Management
S. Reiser Manager Regulatory Affairs & Certification
Issued on 01.09.2025
This document is valid without signature and is issued on behalf of the management.
Alfred Kärcher SE & Co. KG
Alfred-Karcher-Str. 28-40
71364 Winnenden (Germany)
Tel.: +49 7195 14-0
Fax: +49 7195 14-2212
Technical specifications
With the KARCHER Home & Garden App you will receive the same functions for your device.
- Application area and expert knowledge
- Product information, device overview and operating instructions - Assistance and contacts for service
- Online store - exhibition models and much more
Scan the QR code or download the KARCHER Home & Garden App from the App Store and conveniently register your product.
General instructions

Before first use, familiarize yourself with the original operating instructions and
the safety instructions. Follow them accordingly.
Keep these instructions for future use or for the next owner.
Safety devices
WARNING
Unsafe operation
Serious injuries can occur due to absence, modification, or ineffectiveness of safety devices.
Do not ignore, modify, or deactivate safety devices. Safety devices are intended for your protection.
Safety device
The safety device prevents unintentional operation and the device.
Trigger lock button
The trigger lock button locks the trigger and prevents accidental operation of the device.
⑦ High pressure hose
8 High pressure hose holder
Pressure adjustment knob
10 Curved handle
① Device switch
12 Wheel
⑬ Telescopic handle
14 Telescopic handle release button
15 Mains cable holder
16 Mains cable
17 Mains plug
18 Rating plate
19 Carrying handle
2 MyfTaIJI niBedeHnB OBOI
22 **BCMOKtYBaJIbHnIJHaHr KARCHER
23Cituaactnphiinbtp
24 Natapy6ok nIy niBedeHn BOHN
25Пляшka3MmHm3ac6oM
26ΦopcyKaДЯOBpo6kn niHO
27 TpMaChCTpyMHHHOITpy6Kn
28 Khonka BiDnycky niHHOi HacaKn
29 Baxinbdo3yBaHHnH
- noTpi6Ho DoJaTaKOBO
** 3aMOBJIεTbCσ OKpeMo
MoHTax
PncyHKn DnB. Ha cTopiHci 306paKeHHaMn.
Ipeed BBeDeHnB M Eeknnyatauio BCTaHOBTN He3akpinneHi YacTnHi, 0o DoaIoTbcra, Ha npicntpoi.
INSTALLATION OF THE TELESCOPIC HANDLE
- Insert the telescopic handle into the opening on the device up to the click.
FIGURE B
INSTALLATION OF THE STRAIN RELIEF CLAMP
- Installation of the strain relief clamp:
a. Insert the strain relief clamp into the opening on the device and press it down until it clicks into place.
FIGURE C
INSTALLATION OF THE HIGH-PRESSURE PISTOL CLAMP
- Installation of the high-pressure pistol clamp:
a. Insert the high-pressure pistol clamp into the opening on the device and press it down until it clicks into place.
FIGURE D
INSTALLATION OF THE CABLE CLAMP
- Installation of the cable clamp:
a. Insert the cable clamp into the opening on the device and press it down until it clicks into place.
FIGURE E
Installation of the pressure hose
- Screw the hose onto the water supply pipe of the device.
Figure F
Installation of the spray lance on the device
- Screw the spray lance onto the gun by hand.
Figure G
- Secure the spray lance on the device. To disassemble, press the release button of the spray lance and remove the spray lance from the device.
Commissioning
- Place the device on a level, horizontal surface.
Attention
Danger of injury during work with high-pressure hoses!
High-pressure hoses require careful handling. Do not kink the high-pressure hose, do not drive over it, and do not pull it over sharp edges. 2. Unroll the high-pressure hose completely to fully unwind it from the drum. 3. Lay the high-pressure hose without kinks, twists, or tangles. 4. Installation of the high-pressure hose on the high-pressure pistol:
a) Screw the high-pressure hose and insert the high-pressure pistol into the coupling.
Figure H
- Check the connection, having pulled on the high-pressure hose.
- Lay the cable around the area. ManiohoK I
- Insert the fuse into the socket.
Water supply connection
WARNING
Risk of damage due to contaminated water! Contaminants in the water can cause damage to the high-pressure pump and accessories.
Operate the device only with clean water, without additives.
Never use contaminated water, standing water, or seawater.
Karcher recommends using a Karcher water filter.
- Check the pressure, temperature, and quantity of the water supplied against the requirements of the device. See Technical Specifications.
Instructions
Follow the regulations of the water supply company.
Connection to the water supply
WARNING
Risk of damage if using threaded fittings with AquaStop function from third-party manufacturers.
High-pressure pump damage. Use only the original threaded fitting with AquaStop function or a Karcher threaded fitting without AquaStop function, or a plastic threaded fitting with AquaStop function from third-party manufacturers.
- Connect the hose to the water supply.
Insert
Flexible reinforced hose, minimum diameter 1/2 inch (13 mm), minimum length
7.5 m with standard quick coupling. Figure J
- Connect the hose to the water supply.
- Open the water supply tap.
Operation
The Kärcher suction hose is intended for drawing water from a rain barrel or tank (maximum suction height, see Technical data).
- Screw the hose onto the water supply connection.
- Fill the Kärcher suction hose with water.
- Connect the Kärcher suction hose to the water supply connection on the device and immerse it in the water source.
Removing the device
Insert
To remove the device, do not disconnect it from the high-pressure hose or other accessory.
- Switch off the device by turning the switch to the OFF position. To switch off the device, turn the switch to the OFF position. Figure K
- Lower the trigger. Figure L
- Apply the trigger. The trigger is pressed.
4. Allow the device to run for at least 2 minutes until water starts coming out of the high-pressure pistol without pulsations.
Instructions
If the device is equipped with a nozzle length, add the mini-set. 5. Release the trigger. 6. Lock the trigger.
Operation
DANGER
Risk of injury from water escaping under high pressure!
Warnings
Do not direct the high-pressure jet from the high-pressure pistol or device at people or animals.
ATTENTION
Risk of damage from dry running of the pump!
Pump damage
Turn off the device if pressure is not built up within 2 minutes.
Follow the instructions in the manual in case of malfunction.
Remove the pressure hose.
- Lock the trigger.
- Insert the nozzle into the high-pressure pistol and secure it, turning it 90 degrees.
Figure M
WARNING
Risk of injury when turning the nozzle during operation.
Turning the nozzle
Release the trigger before turning the nozzle.
- Turn the nozzle, setting the spray pattern according to the cleaning task and object.
The spray pattern must be directed downwards.
Figure N
Tips
Cleaning agent effectiveness can vary greatly depending on the surface and condition. Therefore, recommendations are not binding.
Using cleaning agents
a) Remove the nozzle from the device and install it on the high-pressure pistol instead of the nozzle.
Pour the required amount of oil into the oil filler opening.
- Unscrew the drain valve.
- Press the drain valve and economically pour the oil product onto the fuel. 4. Place the oil product on the fuel (not to the brim).
- Remove the filled brush with the appropriate type of stream, see Operation without a washing device.
Operation without a washing device
WARNING
Risk of damage due to incorrect distance or unsuitable tool!
Damage to painted or varnished surfaces.
Keep a distance of at least 30 cm from painted surfaces.
Do not clean car bodies, painted or varnished surfaces, or wood with the sharp stream.
- Set the stream to the appropriate type for cleaning and the object, see Setting the stream type.
- Unscrew the drain valve.
- Press the drain valve and perform cleaning.
Interrupting operation
- Release the drain valve. The device stops. High pressure in the system is maintained.
- 3. Release the high-pressure hose. 4. During the first minutes of work, the device must be switched off.
End of work
CAUTION
Danger of injury from water escaping under high pressure!
Traces
Disconnect the high-pressure hose from the high-pressure cleaner or from the accessory, if the system is under pressure.
ATTENTION
Danger of damage during frost!
Material damage
Drain the water from the pump and the pump head.
Protect the device and accessories from frost.
- Release the trigger gun.
- Lock the trigger gun.
- Close the water supply tap.
- Disconnect the device from the water supply system.
- Press the drain valve.
- Press the drain valve for about 1 minute until the water stops flowing.
The appliance, when switched off, tilts. To prevent damage from freezing, water is drained from the appliance.
- Release the drain valve.
- Lock the drain valve.
- Switch off the appliance.
- Pull the mains plug out of the socket. 11. Disassemble the appliance, pour out the water and place it on the stand, see storage of the appliance.
Transport
STORAGE
Risk of injury and damage due to improper handling of the appliance!
Injuries and damage.
During storage and transport, take into account the weight of the appliance.
CAUTION
Risk of damage due to cleaning agent!
Material damage
The device must be stored in a dry place for at least 3 hours with the nozzle installed in a vertical position, not horizontal.
Transporting the device
Pulling/pushing the device
- Unlock the telescopic handle and pull it upward until it clicks.
Figure O
- Press the wheel release and pull or push it.
Carrying the device
- Unlock and fold the telescopic handle. 4. Adjust the telescopic handle and the handle for carrying and transport.
Transporting the device in a vehicle
- Secure the device against tipping over during transport.
Storage
STORAGE
Risk of injury and damage due to improper storage!
Rules and damage.
When storing and transporting, consider the device's weight.
Safety: Do not operate through an emergency device!
Material damage
Transport and store the device with the minimum tool and the established pressure in the vertical position, not in the horizontal position.
Storage of the device
CAUTION
Safety: Do not work with a device that is under high pressure!
Operation
Disconnect the high-pressure hose from the high-pressure cleaner or device only when the system is depressurized.
- Finish the work, then. Completion of work.
- Remove the spray lance from the high-pressure cleaner. 3. Insert the spray lance into the holder of the spray lance and close the cap.
- Press the trigger of the high-pressure gun and disconnect the high-pressure gun from the high-pressure cleaner.
- Remove the water from the high-pressure cleaner.
- Place the high-pressure cleaner in the storage position of the high-pressure cleaner.
WARNING
Danger of injury if the pressure is applied in the wrong direction!
Apply the high-pressure hose to the high-pressure fitting only in the intended direction.
- Turn the crank handle clockwise to wind the high-pressure hose. Figure P
- Keep the cable on the cable reel. Figure Q
Follow the basic instructions for storage, see. Care and maintenance.
Frost protection
WARNING
Danger of injury during frost!
Material damage due to water freezing in the device and accessories. Protect the device and accessories from frost.
- Drain the water from the device, see. Completion of work.
- Remove the accessory and drain the water, see. Storing the device.
- Store the device accessories and keep them in a frost-protected room, see. Storing the device.
Care and maintenance
Dangerous! Keep away!
Lethal electric shock hazard when touching current-carrying parts. Do not touch current-carrying parts. Disconnect the device.
Disconnect the power plug from the socket. The device does not require technical maintenance. The device does not require regular technical maintenance.
Cleaning the mesh filter in the water supply pipe
ATTENTION
Risk of damage due to absence or damage of the mesh filter!
Risk of damage. High risk. Do not operate the device without the mesh filter. Do not clean the mesh filter with hard or sharp objects. If necessary, clean the mesh filter in the water supply pipe. 1. Unscrew the coupling on the water supply pipe. 2. Remove the mesh filter. Figure R 3. Rinse the mesh filter under running water. 4. Insert the mesh filter into the water supply pipe.
Troubleshooting
Malfunctions often have a simple cause that can be eliminated independently with the help of the instructions provided below. If in doubt or in case of unspecified malfunctions, contact an authorized service center.
DANGER
Dangerous! Keep away!
Lethal electric shock hazard when touching current-carrying parts.
Do not touch current-carrying parts. Disconnect the device.
Disconnect the power plug from the socket.
PnncptiHne npauoc
IpeepBaHo eJekTPOXINBJIeHHa.
- Перевир,在 соку влков的基础上可以得到的
- YbIMKHyTn npncTpni.
- Po36nokyBaTu i HATNCHTu CNYCKOB BaxInb. Pnucptpi 3anyckaetbcra, B IHOWMy BUNaKy:
- IpeBipuTn BiDnOBiHicTh Hanpyr, 3a3HaueHoHa 3aBOcBki Ta6InuCi, Hanpy3i DkepeJa XNBJIeHHra.
- BuTaryHryTu WTeNCeBHy BuNky 3 po3eTKu i nepeBipuTu MepeXeBn Ka6eB uWTeNCeBHy BuNky Ha HauBHiCTb NOWKoDKeHb.
Y pa3i nowkoJxHHeHraaHOb 3BepHyTncA DnA 3amHn MepeXeBOrKa6EnIO Do aBTopu3oBAHIo cepBicHOI cnyK6n.
3axnchBmNkaDnBuHaakTbHn.
- RaKIO DnBHyN nepeRpiTm, 3axncHb BmNKaDnBryHa BmNKaE punctpri.
- BmKHyTn npctpi. 3.Датипсстpoю oxoIoHyTu BnpOIOBx 1 roDHH.
- Ybimkhny npucptpi i 3anyctntu noro. Raio HecnpaBnic7 3'ABnEeTbc6arato pa3iB, DopyuHTn nepeBipky npucptpo cepBichi cnjx6i.
MmHnn 3acio He BCMOKTyEcBcA
HanaTobao HeBIDNOBIDHn TIN CTpyMeHa.
Y npncptpoI He CTBOPoETbca Tnck
The nozzle of the jet pump is clogged.
- Fill the high-pressure pump. Weak water supply.
- Open the water tap fully.
- Check the water supply for sufficient flow.
- Lay the hose without kinks.
- Ensure that the maximum suction height is not exceeded.
Clean the filter in the suction hose.
- Clean the filter in the suction hose. The filter is dirty.
- Remove the filter from the device.
Large pressure difference
The nozzle of the jet pump is clogged.
- Clean the jet pump nozzle and rinse with water.
The water volume supplied is too low.
- Open the water tap fully.
- Lay the hose without kinks.
- Insert the plug into the socket before connecting to the mains.
- Check the mains voltage, and if necessary, increase it as needed.
Risk of leaks
Minor leaks are due to technical features.
- In case of severe leaks, contact an authorized service center.
Warranty
The warranty conditions set by our sales organization apply in every country. We will repair any malfunctions free of charge during the warranty period, provided that the malfunction is due to material or manufacturing defects. In the event of a claim during the warranty period, please contact the dealer or the nearest authorized customer service center with your proof of purchase. (Addresses are on the back.) You can find more warranty information (if applicable) in the service area of the Kärcher website under 'Service'.
Product: High-pressure cleaner
Type: K 4 Comfort Premium,
K 5 Comfort Premium,
K 6 Comfort Premium
Directives and regulations
2000/14/EC
2006/42/EG (+2009 / 127 / EG)
2011/65/EC
2014/30/EC
2009/125/EC
(EC) 2019/1781
Harmonized standards
EN 60335-1
EN 60335-2-79
EN 62233: 2008
EN 55014-1:2017 + A11:2020
EN 55014-2: 1997 + A1: 2001 + A2: 2008
EN 61000-3-2: 2014
EN 61000-3-3: 2013
ENIEC63000:2018
Applied standards
71364 Winnenden (Germany)
Tel.: +49 7195 14-0
Fax: +49 7195 14-2212
H. Jenner
Chairman of the Board of Management
S. Reiser
Manager Regulatory Affairs & Certification
M. BiHHeHdEh, 01.09.2025
Oco6n, 0o HxKye nDnncanncr, DIOb BiD imHi Ta 3a
DOBipeHicTIO KepiBnIcTBA.
Alfred Kärcher SE & Co. KG
Alfred-Karcher-Str. 28 - 40
71364 Winnenden (Germany)
Tel.: +49 7195 14-0
Fax: +49 7195 14-2212
Technical characteristics
The manufacturer reserves the right to make technical changes.
Contents
KARCHER and accessories 171 Safety instructions 171 Proper use 171 Environmental protection 171 Warranty 171 Accessories and spare parts 171 Correct use 172 Required tools 172 Safety devices 172 Operation 172 Starting up 172 Operation 173 Shutting down 173 Troubleshooting 175 Maintenance 175 Care and maintenance 176 Help with malfunctions 176 Spare parts 176 EU Declaration of Conformity 177 Technical data 177
KARCHER and accessories
With KARCHER and accessories, you are not limited in the use of the device:
For operation and safety information - Information about the device, inquiries and troubleshooting
For help and service - Spare parts - Internet shop - Special accessories and other items
You are fully responsible for the device and its accessories and use them at your own risk.
Safety instructions

Read the safety instructions before using the device for the first time.
Read the safety instructions in this manual. Follow them.
Keep the manual for future use or for the next owner.
Proper use
WARNING
Danger of injury!
The device is intended for continuous operation, provided that the operating instructions are followed.
The device must not be used if the power cord or plug is damaged, or if it is not working properly. The damaged device must be repaired by a qualified specialist.
Maintenance
Maintenance of the device should be carried out regularly.
Replacement of the fuse
The fuse replacement must be performed only when the device is disconnected from the power supply.
Automatic pipe welding function
When the fuse is blown, the welding current is interrupted and the welding process stops. If the fuse is blown, the welding current must be checked.
Protective maintenance of the device
Protective maintenance of the device must be carried out regularly.
Safety instructions
To avoid electric shock, do not touch the device with wet hands. Do not expose the device to moisture.

Do not use the device near flammable liquids or gases.
Protection against overheating

The device must be protected from overheating. Do not cover the ventilation openings.

Do not use the electric brush cleaner without reading the instructions.
The actual operation of the device, the brushes, and the materials, batteries, accumulators
or the device itself. Before use, the device must be fully assembled. Do not use the device together with the accessories supplied.
During operation, the device may only be used with the accessories listed in the operating instructions (brushes, nozzles, etc.). The use of other accessories is only permitted if they are intended for use with the device. The device must not be used with other accessories. In some cases, the use of the device with water is not permitted.
The device must not be used by persons (including children) with reduced physical, sensory or mental capabilities, or lack of experience and knowledge, unless they have been given supervision or instruction concerning use of the appliance by a person responsible for their safety. Children must be supervised to ensure that they do not play with the appliance. www.kaercher.de/REACH
Intended use
Use the device only for the purpose for which it is intended.
The device is intended for cleaning hard surfaces, such as tiles, floors, carpets, stairs, terraces, and similar surfaces.
Required and optional accessories
Only use the required or optional accessories. Otherwise, the device may be damaged and the warranty may be void.
Information about required and optional accessories can be found on the website www.kaercher.com.
Safety instructions
The safety instructions are shown on the device. When the device is switched on, the safety instructions must be followed. If the instructions are not followed, the device may be damaged. Please contact your dealer.
Device description
The figures show the device. The figures may vary depending on the model.
1. Adjustable feet 2. Attachment 3. Burner control knob 4. Burner ignition safety device 5. Old hose connection 6. Old hose connection maintenance 7. Burner control knob cover 8. Burner ignition device installation 9. Burner ignition device mounting
10. Hose connection 11. Adapter 12. Telescopic tube 13. Telescopic tube maintenance 14. Telescopic tube mounting (15) Cable installation 16. Cable 17. Clamp 18. Locking mechanism 19. Ventilation opening 20* Ventilation opening 21. Water connection adapter 22. ** KARCHER copy 23. Plug 24. Water outlet 25. Mounting bracket 26. Locking mechanism 27. Reactive cover installation 28. Locking mechanism release 29. Connection tube
*Mounting accessory
** Mounting tool
Installation
Check the surfaces for damage.
Do not install near the engine or heat sources.
Installing the telescopic tube
- Insert the telescopic tube into the opening and secure it. Figure B
Installing the adjustable feet
- Installation of the locking mechanism:
a) Insert the locking mechanism into the openings and secure it with the screws.
Figure C
Installing the burner ignition device
- Installation of the burner ignition device:
The device is intended for installation on stationary poultry farms and for use in the field, as well as for catching fish in reservoirs.
Figure D
Installation of the stationary device
- Installation of the stationary device:
Install the stationary device on poultry farms and in the field, and connect it to the power supply.
Figure E
Install the adapter for the water supply
- Install the adapter for the water supply onto the water supply pipe. Figure F
Install the filter
- Attach the filter to the inlet fitting.
Figure G
- Secure the filter with the clamp. 3. To replace the filter, loosen the clamp and remove the filter from the device.
Power supply
- Connect the device to the power supply.
ATTENTION
Do not open the device while it is connected to the power supply.
Do not open the device while it is operating.
If the device is used by children or persons with reduced physical, sensory or mental capabilities, or lack of experience and knowledge, they must be supervised.
- Do not use the device if it is damaged or malfunctioning.
- Do not use the device with wet hands, barefoot, or with wet feet.
- Do not place the device on a hot surface or near a heat source.
Do not place the device on a hot surface or near a heat source. If the device is used in a bathroom, ensure that the power outlet is protected by a residual current device (RCD). See Figure H
- Do not pull the device by the cord, and do not disconnect it by pulling the cord.
- Do not immerse the device in water. See Figure I
- Do not insert the plug into a socket with wet hands.
Place the device on a flat, stable surface.
CAUTION
Do not open the device while it is connected to the power supply!
The device must be disconnected from the power supply before cleaning or maintenance.
Do not use the device without the filter or with a damaged filter.
Ewkaawah nacmaHrah cydb, aRbIHObi cydbI Hemece my3dbI cydbI naDanaHa6aHb13.
Karcher KomnaHuraCbI KocBImuwa Karcher cy cy3aiciH KondaHyobI ycbHaobI.
- TananTapra caikec keletiHHe Ke3 KeTki3y yuih Kipic cybiHbIH KbICbIMbIH, TEMpeaTypacbIH XHe MeJIwepiH Tekcepini3, TexHuKaJIbIK MaFMyMammap KaapHaB3.
Hycay
CymeKabokmay KacinopHbIHbIH HycKaynapbiH caKaMaHbI3.
CyKy6bipbHaKocblny
HA3AP AYdAPbIHbI
Yuihui mapan xemki3yuiinepi Hen 60lan
AquaStop cyHKuucbI apKbJIbI eWeydeH
XacaIraH uHaMyfmaIapbIH naDanaHy Ke3iHdeaI 3akbIMdahy kayni
Korapbi KbcibIMbI copfbifa 3akbIM Keimipy. Karcher KomnauHcBihIn AquaStop yHKuucbI bap/ JOK wanaH2 MyfmanapbIH, AquaStop yHKUacbI JOK wanaH2 MyfmanapbIH Hemece yuiHwi mapan XemkiywnepinH AquaStop yHKuucbI bap nnacmukabIK wanaH2 MyfmanapbIH rHa naudanahbH3.
- BaKaHa Ka6bIpWerIH cy KeTki3yre apHaJIraH KaIraFbIUtBtH MyΦTaCbHa opHaTbIbI3.
Hycay
Mamamen Hbiraumnrah 6akwara aphanrau wana h kaxem, duamempi - keimhe 1/2 dioum (13 MM), cmaHapmmbl xbldam 6aunhaicmbipamBH XanfarbiuneH y3bHObfbl - keimhe 7,5 M.
Cyper J
- Remove the kink from the hose.
- Remove the kink from the hose.
Container for dirty water
The KARCHER spray lance is intended for use with clean water. Use only clean water, otherwise the spray lance may be damaged (see technical specifications for maximum water pressure).
- Turn the hose coupling to remove it.
- Fill the KARCHER spray lance with water.
- The KARCHER spray lance is designed for use with clean water. Do not use it with dirty water or other liquids.
For dry vacuuming
Instructions
For dry vacuuming, attach the appropriate nozzle or brush to the suction hose.
- Turn the suction hose to the left to remove it. To remove the suction hose, turn it to the left. Figure
- Open the dirt container lid. Figure L
- Pull the dirt container lid. The suction hose is removed.
- When using the spray lance with the high-pressure cleaner, do not exceed the maximum operating time of 2 minutes.
Instructions
The device is designed for operation, the device is installed. 5. Do not use the device. 6. Do not use the device.
Attention
WARNING
Before using the device, read the safety instructions carefully!
Safety instructions
Before using the device, read the safety instructions carefully and follow them.
CAUTION
There is a risk of injury when using the device without protective covers!
Protective covers
If the device does not start within 2 minutes, turn it off.
Do not use the device near flammable materials.
Do not use the device
- Do not use the device.
- Do not use the device if the power cord is damaged, and do not bend it at 90°.
Figure M
There is a danger of the head of the pump being blocked during operation!
Pump blocking
First, remove the two screws on the pump head and the body.
- To determine the type of contamination and the need for cleaning, remove the pump head.
The pictogram must not be removed.
Figure No.
Instruction
The selection of materials depends on their purpose and the required operating conditions. The recommended conditions are not specified.
| Пиктога Мма | Агынды пiwи ЖэHe Кьсым | Мыналар ушin Усынлады Мьс алы: |
| Темен Кьсымы бар Журыш Кчрал afыны | Журыш Кчралдын пайданура жарамыбарлык бетер | |
| Орташа Кьсымы бар кен жалпak afын | Женин ambokелik / MOTOUKNДер, Вelenocидахер, kipriш сөтөрі / Күмтасьтөрі, сыланган Каблргалap, оаяш бетер, пл actik / potanr кинаны | |
| Жorapы Кьсымы бар кишиke жалпak afын | Тас тайшалар, сас төрпалл acфалт, металл бетер, вakша ыдьстары (apba, КуPEC кени T. 6.) | |
| Ен чorapы Кьсымы бар aiналмы afын | Тас тайшалар, acфаллты, металл бетерд, металл ыдьстарында (apba, куPEC кени T. 6.)еpeksiе кattы постанлар |
Handling with cleaning devices
DANGER
Sharp cleaning devices are dangerous to health!
Health hazard
When handling the cleaning device, always observe the safety instructions.
Wear protective gloves when handling cleaning devices.
ATTENTION
Danger! Risk of injury from sharp blades!
Safety instructions
Only use the device for its intended purpose, as described in the operating instructions for the device and the accessories.
When working with the device, always wear sturdy shoes, long trousers, and protective goggles.
Do not use the device without the protective hood.
ATTENTION
There is a risk of injury if the device is used for a long time without a break!
Safety instructions
Do not use the device in the rain and do not leave it outdoors while it is raining.
Do not allow the device to be used by children. Instruction
KARCHER devices are designed for private use, not for commercial use. Please read the safety instructions and the operating instructions for the device and the accessories carefully.
- The device may be used for separating or cutting.
Separation
Place the device on a stable surface. The device must not be operated without the protective hood. Always guide the device with both hands on the handles. Do not cut above shoulder height.
Do not use the device if it is damaged.
If the device is damaged, it must be replaced by the manufacturer or a qualified person to avoid danger.
For the device to work properly, the device must be connected to the mains.
- Do not pull the power cord.
- Pull the power cord and plug the plug into the socket.
- Allow the plug to be inserted into the socket (do not force it).
- Wipe the device with a dry cloth, do not use water or cleaning agents.
Do not use water or cleaning agents.
WARNING
There is a risk of electric shock if the device is used incorrectly or if the user is not careful.
Do not use the device if it is damaged or has a defect. Keep it away from water and do not use it with wet hands.
Do not use the device with wet hands or when it is wet.
- Replace the device and the plug if they are damaged, and do not repair them yourself.
- Do not pull the power cord.
- Pull the power cord and perform the cleaning process.
Document contents
- Before using the device, read these instructions carefully. Keep the instructions for future reference.
- Read the instructions before use.
- Use the device only for its intended purpose as described in the instructions.
- Do not use the device for more than 5 minutes at a time. Allow it to cool down between uses.
Device description
Warnings
Do not use the device near water or in damp areas.
Accessories
Use only the accessories recommended by the manufacturer. Do not use damaged accessories.
ATTENTION
Risk of electric shock!
Important safeguards
Do not use the device if it is damaged or malfunctioning.
Keep the device out of reach of children.
- Do not touch the device.
- Do not touch the device with wet hands.
- Do not immerse it in water.
- Do not use the device near water.
- Do not touch the device with wet hands.
- Do not touch the device with wet hands. If water gets in, immediately unplug it. Do not use it if it has been damaged. To avoid electric shock, do not use it near water.
- Do not touch the device.
- Do not touch the device with wet hands.
- Do not use it.
- Do not place it near a power outlet.
- Do not use or store the device near flammable materials, and do not cover it.
Cleaning
Warning
Do not use or store the device near flammable materials, and do not cover it.
Do not use or store the device near flammable materials.
TacbMaJday XaHe KxKmey Ke3iHde KypbIrfBihH caJamfbiEckepiH3.
HA3AP AYdAPbIHbI
Ta3apmKbiu KypaIOnbIH aRybiHaH 3aKbIMdaHy Kayni 6ap!
Mynikmik 3aIanap
Ta3apMkbiu cyubik Kyubinrah 6emekhi Ke6ik canmamacpb ophambinaf KyyiHde mek mik Kyude (mypbin) macbimandaHb3 XHe caKmaHb3, KendeHeH kamkbityra 60Mauiabi.
KypbIrfHbI TaCbIMaIay
KypbIINfbIHb TaTpTy /ntepy
- TeNeckOnnIaIbIK TytKaHbIH KytIbIH aUbIHb3 XHeOpHbHa TyCKeHWe KOFapbl Kapai TapTbIHb3.Cyper O
- KypbIINfbIHb DeHReNEKTePiHe eHKeiTIn, TApTbIHb3 Hemece nTEpiH3.
Kypbilfbihki kowipy
- TepeckonnraIbIK tyTKaHbIH KynnbIH aWbIHbI 3 XHe OHbl bipre nTepiH3.
- Tepeckonnaibk TytKaHb JxHe TaCbMaJday TTKacbH naJaHaBn KypblfbiHb KeTepiH3 XHe KewipiH3.
ABTOMO6nIbMeH TaCbIMaIay
- KypblfblHbI KncaMaTbHdaJxHe KyJamMaTbHda etin 6ekitih3.
CaKay
Do not smoke or use open flames near the device!
Do not cover or block the device.
During installation and operation, keep the device away from heat sources.
ATTENTION
There is a risk of fire or burns!
Possible hazards
Do not place the device on soft surfaces such as carpets or beds, and do not cover it with cloth or other materials, as this may cause overheating.
Installing the device
Do not cover the device with high-temperature objects!
Warnings
Do not place the device near high-temperature equipment such as radiators or stoves.
- Do not block the vents; keep the vents clear.
- Do not insert any objects into the device's openings.
- The device is designed for safe operation and must be used in accordance with the instructions.
- Before starting the engine, ensure that the engine is properly grounded and that all safety devices are in place.
- The engine must be operated with the correct fuel and oil.
- The engine must be operated with the correct fuel and oil, and must be used in accordance with the instructions.
WARNING
Always wear protective gloves when handling the equipment.
Ensure that the equipment is properly grounded.
Always wear protective gloves when handling the equipment.
- Before starting the engine, ensure that the fuel tank is filled with the correct fuel. See Figure P
- The cable must be properly secured. See Figure Q
During operation, check the equipment regularly for any signs of wear, damage, or mechanical issues.
ANTIFREEZE
WARNING
There is a danger of fire!
Preventive measures
When using the device, rinse your mouth with clean water.
Keep the device away from fire and heat sources.
- After using the device, rinse it with water and check its cleanliness. 2. If the device is not working properly, turn it off and do not use it. 3. Store the device in a dry place away from fire and heat, and do not disassemble it.
Maintenance and technical service
DANGER
Danger of fire!
Do not use the device near flammable liquids or gases.
Do not use the device if it is damaged. Turn it off.
Do not leave the device unattended while it is in use. If the device requires technical service, contact a qualified specialist.
Electrical safety for water heating
ATTENTION
Do not touch the device with wet hands!
Do not immerse the device in water or other liquids.
Ensure that the device is unplugged from the power source before cleaning.
- Remove the water tank.
- Clean the electrical contacts. See figure R.
- Store the device in a dry place.
- Place the device on a flat surface.
Accessories
When the accessories are not in use, store them in a safe place out of reach of children. If the accessories are damaged or not working properly, contact the service center.
WARNING
Danger! Warning!
Do not use the device if the power cord or plug is damaged.
Do not touch the power cord with wet hands. Unplug the device.
Do not pull the cord to unplug the device. Unplug by holding the plug.
The device has been switched off.
- Disconnect the device from the power outlet.
- Unplug the device.
- Do not use damaged or worn power tools.
If the power tool is damaged, take it to:
- A service center authorized by the manufacturer for repair, using only original spare parts.
- Do not use the power tool if the switch does not turn it on and off.
If the switch is faulty, have it repaired at a service center.
Motor oil is flammable.
- If the motor emits sparks, do not use the power tool and have it checked.
- Do not use the power tool.
- Let the power tool cool for 1 hour.
- If the power tool is damaged, take it to a service center. If the user manual is lost, contact the service center.
Power tool safety
Do not use the power tool in explosive atmospheres.
- Do not use the power tool near flammable liquids or gases.
Do not use the power tool if the safety guard is not properly installed.
- Ensure the safety guard is securely attached before using the power tool.
Close the valve.
- Only close the valve manually.
Dry the device.
Place the device on a dry surface.
- Do not place the device on wet surfaces. Do not touch it with wet hands.
- Do not use the device in water.
- Do not touch the device with wet hands.
- Do not use the device without supervision.
- Do not expose the device to extreme temperatures.
Clean the device with a dry cloth.
- Clean the device with a dry cloth.
Dry the device.
- Do not dry the device.
Do not use the device near water.
Do not use the device near water.
- If you can install it yourself, then you can do it yourself.
The device is not a toy.
- Do not use the device for any other purpose.
- Do not use the device without supervision.
- Use the device only for its intended purpose.
- Do not use the device if it is damaged or if it is not working properly.
Safety instructions
The safety instructions must be followed without exception. 1. When unpacking, do not inform the service organization about the defects found.
Warranty
The warranty terms provided by the distributor or the manufacturer apply. In this case, material or other damages are excluded,
unless they are caused by gross negligence or intentional misconduct. If there are any defects in the warranty, please contact the service organization or the authorized service center. (See additional sheet) For warranty-related accessories (if any), please refer to the service information on the Karcher website under "Service".
Date of manufacture: indicated on the rating plate in MM/YYYY format, where MM is the month and YYYY is the year of manufacture. The date may be indicated as follows: Example: 30290
3rd digit from the end: 0, 2nd digit from the end: 9, 1st digit from the end: 0, 4th digit from the end: 2, 5th digit from the end: 0, 6th digit from the end: 3, so the date is 09/2023.
EU Declaration of Conformity
We hereby declare that the products mentioned below comply with the relevant EU directives and standards. This declaration becomes invalid if the product is modified without our consent. This declaration is issued under the sole responsibility of the manufacturer. Product: High-pressure cleaner, Type: K 4 Comfort Premium, K 5 Comfort Premium, K 6 Comfort Premium
2000/14/EC
2006/42/EC (+2009/127/EC)
2011/65/EU
2014/30/EU
2009/125/EC
Conformity with the following directives
(EU) 2019/1781
Conformity with the following standards
EN 60335-1
EN 60335-2-79
EN 62233: 2008
EN 55014-1:2017 + A11:2020
EN 55014-2: 1997 + A1: 2001 + A2: 2008
EN 61000-3-2: 2014
EN 61000-3-3: 2013
EN IEC 63000:2018
Conformity assessment procedure
2000/14/EC: Noise level
Measured sound power level dB(A)
K 4 Comfort Premium
Measured: 85
Guaranteed: 88
K 5 Comfort Premium
Measured: 87
Guaranteed: 90
K 5 Comfort Premium (GB),
K 6 Comfort Premium
Measured: 90
Guaranteed: 93
Kukatamany Kyrgyzstan yekinetti tulfa:
S. Reiser
Alfred Karcher SE & Co. KG
Alfred-Karcher-Str.28-40
71364 Winnenden (Germany)
Tel.: +49 7195 14-0
Fax: +49 7195 14-2212
H. Jenner Chairman of the Board of Management
S. Reiser Manager Regulatory Affairs & Certification
Winnenden, 2025/09/01
The company's management and
the technical documentation
| ЖúMbIC KBICbIMbl | MPa | 12 | 12,5 |
| Мakсималды колжетимdi KBICbIM | MPa | 14,5 | 16 |
| Беріnetін мәnlшeri, cy | l/min | 7,5 | 7,5 |
| Беріnetін мәnlшeri, kýfbιш KMралдap | l/min | 0,3 | 0,3 |
According to the requirements of the 17th directive
Owners and operators
| Тишик жуMbIC салмаfterы | kg | 16,3 | 16,8 |
| Узblыгы | mm | 417 417 | |
| Енi | mm | 346 346 | |
| Биiktiri | mm | 668 668 |
K5 K6
Comfort Comfort
Premium Premium
EN 60335-2-79 standard safety requirements and
and press down until it clicks into place.
Figure
Mounting the high-pressure lance
- Mounting the high-pressure lance:
a Place the high-pressure lance into the opening on the device and press down until it clicks into position.
Figure D
Mounting the holder for the spray lance
- Mounting the holder for the spray lance:
a Place the holder for the spray lance into the opening on the device and
b press down until it clicks into place.
Figure E
Mounting the water inlet hose
- Connect the water inlet hose to the faucet.
Figure F
Mounting the detergent dispenser drawer
- Insert the detergent dispenser drawer into the slot for the detergent. Figure G 2. Fix the drawer in place on the faucet.
- To remove the faucet, press the release button on the detergent drawer and pull the detergent drawer out of the faucet.
Starting the appliance
- Place the appliance on a horizontal, flat surface.
WARNING
Risk of injury when working with the high-pressure hose. Before starting work with the appliance, unwind the high-pressure hose completely and inspect it for kinks, cuts, or damage. 2. Unroll the high-pressure hose to unwind it fully. 3. Lay the high-pressure hose without kinks, cuts, or damage. 4. Mount the high-pressure hose to the high-pressure outlet: a. Align the high-pressure hose and b. push it onto the high-pressure outlet until it locks into place. Figure H 5. Check the security of the connection by pulling on the high-pressure hose. 6. Unwind the power cord completely. Figure I 7. Plug the power cord into an electrical outlet.
Creating water connection
WARNING
Risk of injury due to contaminated water! Contaminated water can cause injury to the high-pressure hose and accessories. Work with the appliance only with clean tap water without contaminants.
Use only clear water, distilled water or salt water. Karcher recommends using only original Karcher filters.
- Set the pressure, temperature and amount of water supplied according to the requirements, taking into account the technical data.
Note
Follow the regulations of the water supply company.
Connecting to the water supply
WARNING
Risk of injury when using the marking connectors, made of fabric.
Damage to the pump due to high pressure. Use only marking connectors with/without AquaStop function from Karcher, marking connectors without AquaStop function or marking connectors made of plastic with AquaStop function from third-party suppliers.
- Place the marking connector on the water outlet connection.
Note
A reinforced marking connector is required, minimum diameter 1/2 inch (13 mm), minimum
length 7.5 m, with a quick-release coupling.
Figure J
- Connect the marking connector to the water supply.
- Open the water tap.
Remove the device from the reservoir.
The device is equipped with a KARCHER suction hose for drawing water from a reservoir or a tank for rainwater (maximum suction height, see Technical data).
- Connect the suction hose to the water connection.
- Fill the KARCHER suction hose with water.
- Connect the KARCHER suction hose to the water inlet of the device and place it in the water source.
Deaerating the device
Note
To deaerate the device, do not point the spray gun or nozzle at persons or animals.
- Switch on the device by turning the device switch to position "I". To switch off the device, turn the switch to position "0". Figure K 2. Release the trigger. Figure L
- Activate the trigger. The device switches on. 4. Operate the device for a maximum of 2 minutes until water flows out without bubbles from the nozzle at high pressure.
Note
If the device is mounted with a nozzle for detergent, add detergent. 5. Release the trigger. 6. Lock the trigger.
Operation
DANGER
Danger of injury when drawing water under high pressure!
The device is designed for operation under high pressure from the sprayer for operation under high pressure and from the device only if the system has pressure.
WARNING
Risk of injury when working dry with the pump!
Pressure relief
Switch off the device if you do not find pressure within 2 minutes.
Proceed according to the instructions in the event of an error.
Adjusting the spray jet type
1. Close the trigger. 2. Point the nozzle, place it in the pistol with high pressure and fix it by turning it 90 degrees.
Figure M
WARNING
Risk of injury when turning the nozzle head during operation!
Check the requirements for spraying
Release the trigger before turning the nozzle head.
- Turn the nozzle head to adjust the spray jet type for the task of spraying and the object.
WARNING: Read the instructions before use. Figure N
Instruction
Sensitivity on the material may vary significantly depending on age and condition. Therefore, the products are not suitable.
| Пиктогра мa | Форma и наляганe на стурыта | Преторьчы се нар. |
| Стуры с поочствац прениат с поcke наляганe | Вс neurop пов[bpxhoc'tи, пожхдяши 3a използваене на почствац прениатn | |
| Ширoka пов[bpxhoc'tha стура със сре'dно наляганe | Леса副市长ули / MOTOUKNPETN, Велосинеди, Тухлени /пяс[buHy пов[bpxhoc'tи, Маэллka, д[bpBvEH пов[bpxhoc'tи, Meбелу OT Пл actmaca /paTah | |
| Тясан пов[bpxhoc'tha стура с високо наляганe | Каменни пioчки, acфалт,metални пов[bpxhoc'tи, градински приhalдөжhoeftс (р[buHa кoLlueka, лonaTu n T.H.) | |
| Рotaцонна стура с мakсимално наляганe | ocobeshу уpopити Зам[bpcraBaHnur В[bpxу kamehn пloчки, acfalnt, metalni пов[bpxhoc'tи, gadinhskii Инстчмени (р[buHa кoLlueka, лonaTu n T.H.) |
Working with cleaning agents
DANGER
Danger to health if cleaning agents are inhaled!
Serious damage to health
Observe the information sheet for
safety of the manufacturer's cleaning agents.
Wear the prescribed protective equipment.
CAUTION
Risk of damage from improper use of cleaning agents!
Material damage
Use only cleaning agents that are approved by Karcher and suitable for the items to be cleaned.
Follow the safety data sheets, dosing instructions, and instructions supplied with the cleaning agents.
Instructions for use of cleaning agents.
ATTENTION
Risk of damage due to improper use of cleaning agents and drying!
Material damage
Do not apply cleaning agents to hot surfaces and observe the maximum duration of action.
Do not let cleaning agents dry.
Note
KARCHER cleaning agents ensure trouble-free and efficient operation. Please follow the instructions and information sheets for cleaning agents.
1. Cleaning agent can be added to the water and applied by spraying.
Mixing
a Mount the nozzle for foam on the device. The position of the nozzle for foam is not important. b Press the trigger, the cleaning agent is mixed into the water jet during operation.
Use the nozzle for foam.
a Remove the nozzle for foam and mount it on the high-pressure gun instead of the spray lance.
Use the nozzle for foam to adjust the required amount of foam.
2. Release the trigger. 3. Press the trigger and spray the cleaning agent evenly onto dry surfaces. 4. Let the cleaning agent act (do not let it dry). 5. Rinse off the dissolved dirt with a suitable spray lance, see Operation without cleaning agent.
Work without pressure, preparation
WARNING
Danger of injury from the jet due to insufficient distance to the jet or necessary, see jet!
Never spray on electrical or live surfaces
Keep a distance of at least 30 cm from the jet when spraying on painted surfaces.
Do not spray on automotive parts, or electrical surfaces like wood with a high-pressure jet.
1. Select the nozzle for the cleaning task for the object TIN CTpyra, see Setting the jet type. 2. Release the trigger. 3. Hold the trigger and start the cleaning procedure.
Interrupting work
- Release the trigger. The high pressure in the system is maintained. 2. Lock the trigger.
- Place the nozzle for high pressure in the holder for the high-pressure nozzle.
- If you pause work for more than 5 minutes, switch off the device.
Ending work
DANGER
Danger of injury when water is ejected at high pressure!
Injection
Operation under high voltage from the mains or from the device only if the system is properly grounded.
WARNING
Danger of injury due to freezing!
Material damage
Drain the device completely of water and accessories.
Protect the device and accessories from freezing.
- Open the drain valve. 2. Close the drain valve.
- Close the water supply tap. 4. Disconnect the device from the water supply. 5. Open the drain valve.
- Press the drain valve for a maximum of 1 minute until water stops flowing. The remaining water in the system is released.
Water is drained from the device to prevent damage due to freezing.
- Open the drain valve. 8. Close the drain valve. 9. Disconnect the device. 10. Remove the plug from the contact socket. 11. Disassemble the accessories, drain them and store them in the device, then reassemble the device.
Transport
CAUTION
Danger of tipping and injury due to the weight of the device!
Tipping and injury.
Instructions for transporting and storing the device.
WARNING
Risk of injury from leaking cleaning solution
Material damage
When transporting or storing the bottle with cleaning solution, ensure it is in an upright position and not tilted.
Transporting the device
Carrying the device
- Remove the telescopic rod and pull out the handle until it stops. Figure O
- Place the device on the floor and pull out or push in the handle.
After use
- Remove the telescopic rod and push it in.
- Move and carry the device by holding it by the telescopic rod and the carrying handle.
Transporting the device in a vehicle
- Secure the device against slipping and tipping over.
Storage
Danger of injury and damage to health from the device!
Injuries and damage.
When transporting and storing, observe the device temperature.
WARNING
Danger of injury from escaping cleaning agent
Material damage
Transport and store the bottle with cleaning agent with the dosing pump in the upright position, not lying down.
Storage of the device
Danger of injury when cleaning with high pressure!
Injuries
Remove the high-pressure hose from the high-pressure gun or from the device if the system has pressure.
- Finish operation, disconnect the connected hose. 2. Disconnect the high-pressure hose.
- Place the high-pressure hose in the hose holder or fix it.
- Remove the plug for the high-pressure outlet and the high-pressure hose from the high-pressure outlet.
- Let the water drain from the high-pressure outlet.
- Place the high-pressure hose in the holder for the high-pressure hose.
WARNING
Risk of injury due to incorrect
operation!
Connecting the plug for high-pressure operation
Turn the plug for high-pressure operation only in the indicated direction.
- Turn the handle according to the arrow, to connect the plug for high-pressure operation.
Figure P
- Insert the supply hose into the holder for the supply hose.
Figure Q
For longer storage, pay attention to the instructions shown, see also the instructions and support.
Protection against freezing
WARNING
Danger! Risk of electric shock!
Material damage
Damage to the device and property due to flooding.
Flooding of the device and property due to flooding.
- Fill the device with water, check the operation. 2. Disconnect the accessories and drain the water, check the preservation of the device.
- Store the accessories in the device and place them in a place where there is no danger of flooding, check the preservation of the device.
Maintenance
DANGER
Danger to life!
Risk of injury due to electric shock when touching parts under voltage. Do not touch parts under voltage.
Disconnect the device.
Avoid contact with water.
The device is maintenance-free, i.e. you do not need to perform any maintenance activities.
Cleaning the device in the water inlet
ATTENTION
The device is designed for high voltage and should not be used without a plug.
Do not use the device with hard, sharp objects.
Connect the hose to the water inlet if necessary.
- Unscrew the connector from the water hose. 2. Remove the plug. FIGURE R 3. Press the plug to release the water.
- Place the plug in the water inlet.
Help with damage
Many times the cause of damage is elementary and with the help of the following instructions you can fix it yourself. If you are not sure or the damage is not described here, contact the authorized service.
DANGER
Danger to life!
Fatal electric shock from touching parts under voltage.
Do not touch parts under voltage.
Disconnect the device.
Remove the plug from the socket.
The device does not work
The device is switched off.
- Check that the plug is connected to the socket.
- Turn on the device.
- Release the trigger.
In the opposite case, the device will start:
- Check that the voltage indicated on the rating plate matches the voltage of the power source. 5. Remove the plug from the socket and check the power cord and plug for damage. If the power cord is damaged, it must be replaced immediately by an authorized service center.
The circuit breaker for the device is activated.
- If the device is activated, the circuit breaker trips and the device switches off. 2. Turn off the device.
- Leave the device to cool down for 1 hour.
- Turn on the device and let it run in idle mode. If the fault occurs repeatedly, take the device to a service center for inspection.
Do not use the device without cleaning agent.
The cleaning agent is required.
- Turn the nozzle head to the "Cleaning agent" position. The nozzle for cleaning agent is not mounted on the device.
- Mount the nozzle with the full bottle of cleaning agent to the device. The bottle of cleaning agent is empty.
- Place a full bottle of cleaning agent.
Do not over-tighten.
The pump head is not properly adjusted for the pressure.
- Set the pump to high pressure. The water pressure is weak.
- Open the inlet water tap. 2. Turn the water pressure adjuster counterclockwise.
- Install the pressure gauge without pre-adjustment.
- Make sure the maximum suction height is not exceeded.
The water inlet filter is clogged.
- Clean the filter in the water inlet. The pump has air. 1. Bleed the pump.
Pulsation of the pump
The pump head is clogged. 1. Clean the filter before the pump and reinstall. The inlet water volume is too small. 1. Open the inlet water tap. 2. Install the pressure gauge without pre-adjustment. 3. Clean the filter in the water inlet. 4. Check the inlet water volume and increase it if necessary.
The device is not sealed
The sealing gasket is technically defective. 1. Contact the authorized service center to replace the sealing gasket.
Warranty
All our products are covered by the warranty conditions of our authorized distributor. Any damage to your device within the warranty period will be repaired free of charge if it is due to a material defect or manufacturing defect. In case of warranty claim, contact your distributor or the nearest
authorized service center, presenting the cash receipt.
(Adpec, BK.3aHaTa cTpaHa)
You can measure the warranty period (if any) on the "Service" page of the local Karcher website under "Maintenance".
EU Declaration of Conformity
With this declaration, we declare that the product, described below, complies with the relevant basic requirements of the applicable directives and regulations. This declaration becomes invalid if the product is modified without our consent. The manufacturer bears sole responsibility for issuing this declaration of conformity.
Product: High-pressure washer TIN: K4 Comfort Premium,
K 5 Comfort Premium,
K 6 Comfort Premium
Applicable directives
2000/14/EC
2006/42/EC (+2009/127/EC)
2011/65/EU
2014/30/EU
2009/125/EC
Applicable regulation(s)
(EU) 2019/1781
EN 60335-1
EN 60335-2-79
EN 62233: 2008
EN 55014-1:2017 + A11:2020
EN 55014-2: 1997 + A1: 2001 + A2: 2008
EN 61000-3-2: 2014
EN 61000-3-3: 2013
EN IEC 63000:2018
Conformity assessment procedure
2000/14/EC: Annex V
Sound power level dB(A)
K 4 Comfort Premium
Measured: 85
Guaranteed: 88
K 5 Comfort Premium
Measured: 87
Guaranteed: 90
K 5 Comfort Premium (GB),
K 6 Comfort Premium
Measured: 90
Guaranteed: 93
Address
71364 Winnenden (Germany)
Phone: +49 7195 14-0
Fax: +49 7195 14-2212
H. Jenner
Chairman of the Board of Management
S. Reiser
Manager Regulatory Affairs & Certification
BInHeHdEn, 2025/09/01
IodnncBaunTe Nua DeiCTBaT OT IMeTo n KaTO IbHOMOuHnU Ha ynpaBntHnO oprA H.
Alfred Karcher SE & Co. KG
Alfred-Karcher-Str.28-40
71364 Winnenden (Germany)
Tei.: +49 7195 14-0
ΦaKc: +49 7195 14-2212
TexHHueckn DaHHN
| K 5 Comfort Premium | K 6 Comfort Premium | ||
| ЕléktRICTСВьрзове | |||
| Нар每一天ени | V | 230 | |
| Фаза ~ 1 | 1 | ||
| Чеб耗费Hz 50 50 | |||
| ПOTравлике на ток | A | 9,1 | 9,6 |
| Тил зашита IPX5 IPX5 | |||
| Клас зашита | I | I | |
| Предимацентли (иментени) | A | 10 | 10 |
| Изворд за ворда | |||
| Налаяген ha посънвацата ворда (makс.) | MPa | 1,2 | 1,2 |
| Температу ha посънвацата ворда (makс.) | °C | 40 40 | |
| Колочеву ha посънвацата ворда (mн.) | I/min 9 | 9 | |
| Висунна ha замужваце (макс.) | m | 0,5 | 0,5 |
| Данни за мошността на урEDA | |||
| РавOTно habягане | MPa | 12 | 12,5 |
| Мас. дочустимо налаяген | MPa | 14,5 | 16 |
| Дебит, ворda | I/min | 7,5 | 7,5 |
| Дебits, поочь buши пегаратi | I/min | 0,3 | 0,3 |
| Peaktribина сида ha пистолеса за работа пд виско habяганe | N | 17 | 17 |
| Размери и тergla | |||
| Тишично сбостveho тerglio | kg | 16,3 | 16,8 |
| Дыжина | mm | 417 417 | |
| Широчиha | mm | 346 346 | |
| Висунна | mm | 668 668 | |
| Установен STОДНОСТ N CБЛАСно EN 60335-2-79 | |||
| Стойост ha вибрацята рък-a-pamо ahv | m/s² | 1,2 | 1,1 |
| Heystоийвocst K | m/s² | 0,6 | 0,6 |
| Ниво на звково налаяген LpA | dB(A) | 73 77 | |
| Heystоийвocst K | dB(A) | 2,6 | 2,6 |
| K 5 Comfort Premium | K 6 Comfort Premium | |
| НИВО на 3БУКОВА Мошноct LWA | dB(A) 87 90 | |
| rapантураноНИВО на Мошноct на 3БУКа LWA,d | dB(A) 90 93 |
3ana3bame cn npaBTo Ha TexHueckn IpomEnH.
| الإستعمال | ||||
| K 6 | K 5 | |||
| Comfort | Comfort | |||
| Premium | Premium | |||
| together with the pleasure of driving! | ||||
| K 6 | K 5 | |||
| Comfort | Comfort | |||
| Premium | Premium | |||
| together with the pleasure of driving! | ||||
| K 6 | K 5 | |||
| Comfort | Comfort | |||
| Premium | Premium | |||
| together with the pleasure of driving! | ||||
| K 6 | K 5 | 11 | ||
| Comfort | Comfort | |||
| Premium | Premium | |||
| together with the pleasure of driving! | ||||
| K 6 | K 5 | |||
| Comfort | Comfort | |||
| Premium | Premium | |||
| together with the pleasure of driving! | ||||
| K 6 | K 5 | |||
| Comfort | Comfort | |||
| Premium | Premium | 10.40°C | ||
| together with the pleasure of driving! | ||||
| K 6 | K 5 | |||
| Comfort | Comfort | |||
| Premium | Premium | |||
| together with the pleasure of driving! | ||||
| K 6 | K 5 | |||
| Comfort | Comfort | |||
| Premium | Premium | |||
| together with the pleasure of driving! | ||||
alaaasllg jaglll Jg4. Jaglll 4. 1. 1. 1. 1. 1. 1. 1. 1. 1. 1. 1. 1. 1. 1. 1. 1. 1. 1. 1. 1. 1. 1. 1. 1. 1. 1. 1. 1. 1. 1. 1. 1.
J
g g g g g g g g g g g g g g g g g g g g g g g g g g g g g g g g g g g g g g g g g g g g g g g g g g g g g g g g g g g g g g g g g g g g g g g g g
aJll 10 aJlaJl
aui
1gaaal yjzol
\1,2,3\ k2 > 0.
AD
\bigtriangleup {LQ} = 0
a:
O a>la! o
a2ggl a2wgl u2oall jzll allo 2.
∴ y 1 = 2,y 2 = - 4
a22g2x a2sggKulll jaaall J3
gJaaagSuljaoaJglj4.
.ala>
jlaJgJgJd
UulUg.GUjUI jJJI 5.
#
aag
jglj jg jao jog aol egg jas
Jg
jgl jg olcr no jzll g jill uic uic
a
.2
IaiaI IJol> Jll IaiaI IaiaI gio .3
J
gl 5 20 J J 1J 1J 1J 1J .4
jL
Juswll elg!
a gg
Jc bdo cfo golll ooll y waa aull
U
jgl jlll aiai I JIaiaI gbrJ Jaai U
pIbJI 9ba20g>9 psc aJI>U|Jg>JI
a
all jolj 1
aJoljol
a>Jolg jgeJn oIolai olalll
Therefore, lg(a - b) = b/a^2 * a/b^2
∴ | x2| = 1/| x| · | r 12 + r 22| = 1/2
a
J 1 J
a a0g 00j j00j00j00j00j
aagalwaiall wrrllgjIaJl wrrll ggJrJ 3 .
JUJI JIJIJIJIJIJIJIJIJIJIJIJIJIJIJIJIJIJIJIJIJIJIJIJIJIJIJIJIJIJIJIJIJIJIJIJIJIJIJIJIJIJIJIJIJIJIJIJIJIJIJIJIJIJIJIJIJIJIJIJIJIJIJIJIJIJIJIJIJIJIJIJIJIJIJIJIJIJIJIJIJIJIJIJIJIJIJIJIJIJIJIJIJIJIJIJIJIJIJIJIJIJ
Na i > 1 - a i · 0jg( i)
Jl 1 JI 1 1 1 1 1 1 1 1 1 1 1 1 1 1 1 1 1
olal alog, aolal lgl j
olalllgogogolallllo
jIgJU
a>la|0g5
jglllgccjllaggss
aBglslgo a> j oGgJll aogj 1
a>la 0gG

e 100
.


J
(REACH) all JgJgJgJgJg
gall Jg>Jlogal
Lagai g>U1 pdsuW uJg uS, bla>UI uIc
JU
aollwJzjg>
j4 = 21.ci
∴ ai = 1( 2i - 1) ( 2i + 5)
REGISTER TO BENEFIT.

Scan QR Code for download and easy product registration in Home & Garden App or website.
karcher.com/register

EN - Download the Home & Garden App to register your device for full support in cleaning.
Control of smart products Application tips & expert knowledge Product information, overview of accessories and operating instructions Support and service contact Online shop - exclusive offers and much more
karcher.com/dealersearch
Alfred Kärcher SE & Co. KG
71364 Winnenden [Germany]

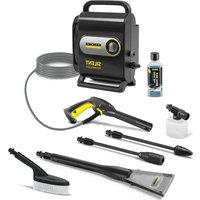
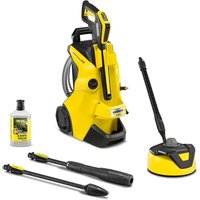
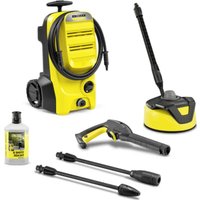
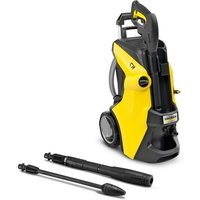
- GENERAL NOTES
- SAFETY DEVICES
- WARNING
- POWER SWITCH
- TRIGGER LOCKING BUTTON
- AUTO-STOP FUNCTION
- MOTOR CIRCUIT BREAKER
- SYMBOLS ON THE DEVICE
- ENVIRONMENTAL PROTECTION
- NOTES ON THE CONTENT MATERIALS (REACH)
- INTENDED USE
- ACCESSORIES AND SPARE PARTS
- SCOPE OF DELIVERY
- OVERVIEW OF THE DEVICE
- MOUNTING
- INSTALLING THE TELESCOPIC HANDLE
- MOUNTING THE SPRAY LANCE HOLDER
- INSTALLING THE HIGH-PRESSURE GUN HOLDER
- INSTALLING THE MAINS CABLE HOLDER
- ILLUSTRATION E
- INSTALLING THE WATER CONNECTION COUPLING
- ILLUSTRATION F
- INSTALLING THE FOAM NOZZLE ON THE DEVICE
- STARTUP
- ATTENTION
- RISK OF DAMAGE DURING OPERATION WITH WOUND-UP HIGH-PRESSURE HOSE
- ILLUSTRATION H
- ILLUSTRATION I
- CONNECTING THE WATER SUPPLY
- RISK OF DAMAGE THROUGH CONTAMINATED WATER
- NOTE
- CONNECTION TO THE WATER LINE
- RISK OF DAMAGE WHEN USING HOSE COUPLINGS MADE OF BRASS WITH AQUASTOP FUNCTION FROM THIRD-PARTY SUPPLIERS
- ILLUSTRATION J
- SUCTIONING WATER FROM THE CONTAINERS
- VENT THE DEVICE
- ILLUSTRATION K
- ILLUSTRATION L
- OPERATION
- CAUTION
- RISK OF INJURY FROM ESCAPING WATER UNDER HIGH PRESSURE
- SET SPRAY TYPE
- OPERATION WITH DETERGENT
- DANGER
- MIXING
- OPERATION WITHOUT DETERGENT
- INTERRUPTING OPERATION
- ENDING OPERATION
- TRANSPORT
- TRANSPORTING THE DEVICE
- STORAGE
- STORING THE DEVICE
- FROST PROTECTION
- CARE AND MAINTENANCE
- CLEAN THE SIEVE IN THE WATER CONNECTION
- ILLUSTRATION R
- TROUBLESHOOTING GUIDE
- △DANGER
- WARRANTY
- DECLARATION OF CONFORMITY
- EU DECLARATION OF CONFORMITY
- NAME AND ADDRESS
- DECLARATION OF CONFORMITY (UK)
- DIRECTIVES AND REGULATIONS
- COMMISSION REGULATION(S)
- DESIGNATED STANDARDS USED
- APPLIED CONFORMITY ASSESSMENT PROCEDURE
- SOUND POWER LEVEL DB(A)
- TECHNICAL DATA
- CONTENT
- TECHNICAL CHARACTERISTICS
- APPLICABLE REGULATION(S)
- REISER
- TRANSPORT OF APPARATUS
- WINNENDEN
- REGULATION(S) USED
- HARMONIZED STANDARDS APPLIED
- PROCEDURE APPLIED TO ASSESS CONFORMITY
- APPLIED REGULATIONS
- APPLIED HARMONIZED STANDARDS
- APPLIED PROVISION(S)
- APPLIED HARMONISED STANDARDS
- MOUNTING THE HIGH-PRESSURE LANCE HOLDER
- FIGURE D
- MOUNTING THE MAINS CABLE HOLDER
- FIGURE E
- INSTALLING THE WATER INLET CONNECTOR
- MOUNTING THE DETERGENT NOZZLE ON THE DEVICE
- FIGURE G
- COMMISSIONING
- FIGURE H
- RESTORING WATER SUPPLY
- CONNECTION TO THE WATER SUPPLY
- SUCTIONING WATER FROM RESERVOIRS
- AIR REMOVAL FROM THE DEVICE
- INJURIES
- ADJUSTING THE NOZZLE TYPE
- CLEANING THE MESH FILTER IN THE WATER SUPPLY PIPE
- DANGER OF DAMAGE DUE TO OMISSION OR DAMAGE OF THE MESH FILTER
- TROUBLESHOOTING
- DANGER TO LIFE
- THE DEVICE DOES NOT WORK
- THE DEVICE DOES NOT SUCK
- PRESSURE IS NOT BEING BUILT UP IN THE DEVICE
- PRESSURE DROPS
- DEVICE IS NOT TIGHT
- IMPRINT
- TECHNICAL SPECIFICATIONS
- GENERAL INSTRUCTIONS
- SAFETY DEVICE
- TRIGGER LOCK BUTTON
- MOHTAX
- INSTALLATION OF THE TELESCOPIC HANDLE
- INSTALLATION OF THE STRAIN RELIEF CLAMP
- INSTALLATION OF THE HIGH-PRESSURE PISTOL CLAMP
- INSTALLATION OF THE CABLE CLAMP
- INSTALLATION OF THE PRESSURE HOSE
- INSTALLATION OF THE SPRAY LANCE ON THE DEVICE
- WATER SUPPLY CONNECTION
- INSTRUCTIONS
- INSERT
- REMOVING THE DEVICE
- REMOVE THE PRESSURE HOSE
- FIGURE M
- FIGURE N
- TIPS
- USING CLEANING AGENTS
- OPERATION WITHOUT A WASHING DEVICE
- END OF WORK
- PULLING/PUSHING THE DEVICE
- FIGURE O
- CARRYING THE DEVICE
- STORAGE OF THE DEVICE
- DANGER OF INJURY IF THE PRESSURE IS APPLIED IN THE WRONG DIRECTION
- DANGER OF INJURY DURING FROST
- DANGEROUS! KEEP AWAY
- RISK OF DAMAGE DUE TO ABSENCE OR DAMAGE OF THE MESH FILTER
- PNNCPTIHNE NPAUOC
- MMHNN 3ACIO HE BCMOKTYECBCA
- Y NPNCPTPOI HE CTBOPOETBCA TNCK
- LARGE PRESSURE DIFFERENCE
- RISK OF LEAKS
- HARMONIZED STANDARDS
- APPLIED STANDARDS
- CONTENTS
- KARCHER AND ACCESSORIES
- SAFETY INSTRUCTIONS
- PROPER USE
- DANGER OF INJURY
- MAINTENANCE
- REPLACEMENT OF THE FUSE
- AUTOMATIC PIPE WELDING FUNCTION
- PROTECTIVE MAINTENANCE OF THE DEVICE
- PROTECTION AGAINST OVERHEATING
- REQUIRED AND OPTIONAL ACCESSORIES
- DEVICE DESCRIPTION
- INSTALLATION
- INSTALLING THE TELESCOPIC TUBE
- INSTALLING THE ADJUSTABLE FEET
- INSTALLING THE BURNER IGNITION DEVICE
- INSTALLATION OF THE STATIONARY DEVICE
- INSTALL THE ADAPTER FOR THE WATER SUPPLY
- INSTALL THE FILTER
- POWER SUPPLY
- PLACE THE DEVICE ON A FLAT, STABLE SURFACE
- CYKY6BIPBHAKOCBLNY
- HA3AP AYDAPBIHBI
- XACAIRAH UHAMYFMAIAPBIH NADANAHY KE3IHDEAI 3AKBIMDAHY KAYNI
- HYCAY
- CYPER J
- CONTAINER FOR DIRTY WATER
- FOR DRY VACUUMING
- DO NOT USE THE DEVICE
- INSTRUCTION
- HANDLING WITH CLEANING DEVICES
- SEPARATION
- DO NOT USE THE DEVICE IF IT IS DAMAGED
- DO NOT USE WATER OR CLEANING AGENTS
- DOCUMENT CONTENTS
- WARNINGS
- CLEANING
- KYPBIRFHBI TACBIMAIAY
- KYPBIINFBIHB TATPTY /NTEPY
- KYPBILFBIHKI KOWIPY
- ABTOMO6NIBMEH TACBIMAIAY
- CAKAY
- INSTALLING THE DEVICE
- ANTIFREEZE
- MAINTENANCE AND TECHNICAL SERVICE
- DANGER OF FIRE
- ELECTRICAL SAFETY FOR WATER HEATING
- ACCESSORIES
- DANGER! WARNING
- POWER TOOL SAFETY
- DRY THE DEVICE
- DO NOT USE THE DEVICE NEAR WATER
- CONFORMITY WITH THE FOLLOWING DIRECTIVES
- CONFORMITY WITH THE FOLLOWING STANDARDS
- CONFORMITY ASSESSMENT PROCEDURE
- MEASURED SOUND POWER LEVEL DB(A)
- MOUNTING THE HIGH-PRESSURE LANCE
- MOUNTING THE HOLDER FOR THE SPRAY LANCE
- MOUNTING THE WATER INLET HOSE
- MOUNTING THE DETERGENT DISPENSER DRAWER
- STARTING THE APPLIANCE
- CREATING WATER CONNECTION
- CONNECTING TO THE WATER SUPPLY
- FIGURE J
- REMOVE THE DEVICE FROM THE RESERVOIR
- DEAERATING THE DEVICE
- ADJUSTING THE SPRAY JET TYPE
- WORKING WITH CLEANING AGENTS
- USE THE NOZZLE FOR FOAM
- WORK WITHOUT PRESSURE, PREPARATION
- INTERRUPTING WORK
- ENDING WORK
- AFTER USE
- TRANSPORTING THE DEVICE IN A VEHICLE
- RISK OF INJURY DUE TO INCORRECT
- FIGURE Q
- PROTECTION AGAINST FREEZING
- CLEANING THE DEVICE IN THE WATER INLET
- HELP WITH DAMAGE
- DO NOT USE THE DEVICE WITHOUT CLEANING AGENT
- DO NOT OVER-TIGHTEN
- PULSATION OF THE PUMP
- THE DEVICE IS NOT SEALED
- APPLICABLE DIRECTIVES
- ADDRESS
- J
- AJLL 10 AJLAJL
- AD
- BIGTRIANGLEUP {LQ}
- JUSWLL ELG
- A
- OLAL ALOG, AOLAL LGL J
- JGLLLGCCJLLAGGSS
- AOLLWJZJG
- J4 = 21.CI
- REGISTER TO BENEFIT
Brand : Kärcher
Model : K 5 Comfort Premium
Category : Pressure washer