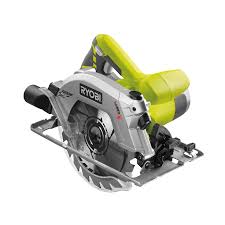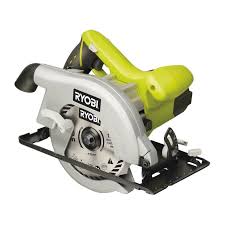
EWS1150RS - Circular saw RYOBI - Free user manual and instructions
Find the device manual for free EWS1150RS RYOBI in PDF.



User questions about EWS1150RS RYOBI
0 question about this device. Answer the ones you know or ask your own.
Ask a new question about this device
Download the instructions for your Circular saw in PDF format for free! Find your manual EWS1150RS - RYOBI and take your electronic device back in hand. On this page are published all the documents necessary for the use of your device. EWS1150RS by RYOBI.
USER MANUAL EWS1150RS RYOBI
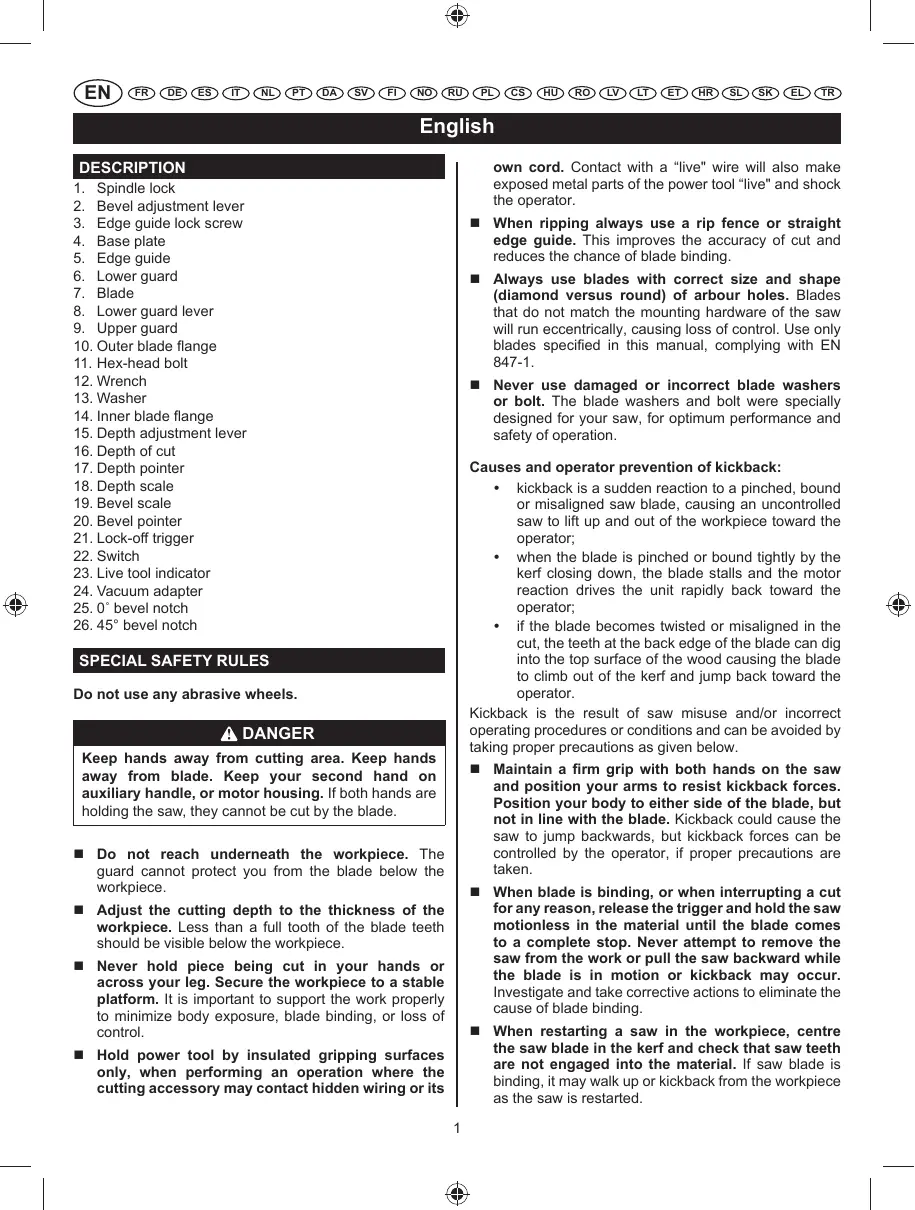
- Spindle lock
- Bevel adjustment lever
- Edge guide lock screw
- Base plate
- Edge guide
- Lower guard
- Blade
- Lower guard lever
- Upper guard
- Outer blade flange
- Hex-head bolt
- Wrench
13.Washer - Inner blade flange
- Depth adjustment lever
- Depth of cut
- Depth pointer
- Depth scale
- Bevel scale
- Bevel pointer
- Lock-off trigger
- Switch
- Live tool indicator
- Vacuum adapter
- 0^ bevel notch
- 45^ bevel notch
SPECIAL SAFETY RULES
Do not use any abrasive wheels.
DANGER
Keep hands away from cutting area. Keep hands away from blade. Keep your second hand on auxiliary handle, or motor housing. If both hands are holding the saw, they cannot be cut by the blade.
- Do not reach underneath the workpiece. The guard cannot protect you from the blade below the workpiece.
- Adjust the cutting depth to the thickness of the workpiece. Less than a full tooth of the blade teeth should be visible below the workpiece.
- Never hold piece being cut in your hands or across your leg. Secure the workpiece to a stable platform. It is important to support the work properly to minimize body exposure, blade binding, or loss of control.
Hold power tool by insulated gripping surfaces only, when performing an operation where the cutting accessory may contact hidden wiring or its
own cord. Contact with a "live" wire will also make exposed metal parts of the power tool "live" and shock the operator.
- When ripping always use a rip fence or straight edge guide. This improves the accuracy of cut and reduces the chance of blade binding.
Always use blades with correct size and shape (diamond versus round) of harbour holes. Blades that do not match the mounting hardware of the saw will run eccentrically, causing loss of control. Use only blades specified in this manual, complying with EN 847-1. - Never use damaged or incorrect blade washers or bolt. The blade washers and bolt were specially designed for your saw, for optimum performance and safety of operation.
Causes and operator prevention of kickback:
- kickback is a sudden reaction to a pinched, bound or misaligned saw blade, causing an uncontrolled saw to lift up and out of the workpiece toward the operator;
- when the blade is pinched or bound tightly by the kerf closing down, the blade stalls and the motor reaction drives the unit rapidly back toward the operator;
- if the blade becomes twisted or misaligned in the cut, the teeth at the back edge of the blade can dig into the top surface of the wood causing the blade to climb out of the kerf and jump back toward the operator.
Kickback is the result of saw misuse and/or incorrect operating procedures or conditions and can be avoided by taking proper precautions as given below.
- Maintain a firm grip with both hands on the saw and position your arms to resist kickback forces. Position your body to either side of the blade, but not in line with the blade. Kickback could cause the saw to jump backwards, but kickback forces can be controlled by the operator, if proper precautions are taken.
- When blade is binding, or when interrupting a cut for any reason, release the trigger and hold the saw motionless in the material until the blade comes to a complete stop. Never attempt to remove the saw from the work or pull the saw backward while the blade is in motion or kickback may occur. Investigate and take corrective actions to eliminate the cause of blade binding.
- When restarting a saw in the workpiece, centre the saw blade in the kerf and check that saw teeth are not engaged into the material. If saw blade is binding, it may walk up or kickback from the workpiece as the saw is restarted.
English
Support large panels to minimise the risk of blade pinching and kickback. Large panels tend to sag under their own weight. Supports must be placed under the panel on both sides, near the line of cut and near the edge of the panel.
- Do not use dull or damaged blades. Unsharpened or improperly set blades produce narrow kerf causing excessive friction, blade binding and kickback.
Blade depth and bevel adjusting locking levers must be tight and secure before making cut. If blade adjustment shifts while cutting, it may cause binding and kickback.
Use extra caution when making a "plunge cut" into existing walls or other blind areas. The protruding blade may cut objects that can cause kickback.
SAFETY INSTRUCTIONS FOR SAWS WITH LOWER GUARD
- Check lower guard for proper closing before each use. Do not operate the saw if lower guard does not move freely and close instantly. Never clamp or tie the lower guard into the open position. If saw is accidentally dropped, lower guard may be bent. Raise the lower guard with the retracting handle and make sure it moves freely and does not touch the blade or any other part, in all angles and depths of cut.
- Check the operation of the lower guard spring. If the guard and the spring are not operating properly, they must be serviced before use. Lower guard may operate sluggishly due to damaged parts, gummy deposits, or a build-up of debris.
Lower guard should be retracted manually only for special cuts such as "plunge cuts" and "compound cuts". Raise lower guard by retracting handle and as soon as blade enters the material, the lower guard must be released. For all other sawing, the lower guard should operate automatically.
Always observe that the lower guard is covering the blade before placing saw down on bench or floor. An unprotected, coasting blade will cause the saw to walk backwards, cutting whatever is in its path. Be aware of the time it takes for the blade to stop after switch is released.
SPECIFICATIONS
| Voltage | 230 V - 240 V ~ 50 Hz |
| Input | 1150 W |
| No-load speed | 5600 RPM |
| Bore size | 20 mm |
| Blade size | 170 mm |
Blade
Thickness 1.5 mm
Teeth 12T
Width of cut 2.2 mm
Cutting capacity
at 0^ 55 mm
at 45^ 38 mm
Bevel scale 0 - 45^
STANDARD ACCESSORIES
Sawblade
Parallel fence
Wrench
ASSEMBLY
Be sure to disconnect the tool from the power supply before attaching or removing the saw blade. Be sure that the teeth of the saw blade are pointing upward at the front of the tool
INTENDED USE
Sawing wood.
Don't use it for a purpose not intended.
OPERATION
ATTACHING THE BLADE
See Figure 2-4.
- Press and hold the spindle lock button.
- Turn the hex-head bolt with a wrench until the spindle locks.
- Loosen the hex-head bolt by turning the wrench anticlockwise.
- Remove the hex-head bolt and the outer blade washer.
- Retract the lower guard back with the lower guard lever as far as possible under the upper guard.
- Attach the saw blade against the inner blade washer on the spindle.
- Fit the outer blade washer and the hex-head bolt.
- Tighten the hex-head bolt by turning the wrench clockwise.
- After tightening the hex-head bolt, release the spindle lock button.
NOTE: When the blade has been installed, make sure the spindle lock has been released by spinning the blade freely.
English
REMOVING THE BLADE
- Press and hold the spindle lock button.
- Turn the hex-head bolt with a wrench until the spindle locks.
- Loosen the hex-head bolt by turning the wrench anticlockwise.
- Remove the hex-head bolt and the outer blade washer.
- Retract the lower guard back as far as possible under the upper guard.
- Remove the saw blade.
ADJUSTING THE DEPTH OF CUT
See Figure 5-9.
- Loosen the depth adjustment knob.
- Slide the base plate to the desired depth using the depth adjustment knob and then retighten securely.
NOTE: The depth of cut can be determined by the depth scale or by measuring the distance by which the blade protrudes from the base plate.
ADJUSTING THE ANGLE
See Figure 10-11.
- Set the cutting angle to any position between 0^ and 45^ .
- Loosen the bevel adjustment knob at the front of the tool and move the base plate to the desired angle using the bevel scale.
- Retighten the bevel adjustment knob.
SWITCH
See Figure 12.
This tool is started and stopped by squeezing and releasing the trigger switch. To prevent the tool from being started accidentally, the trigger can only be operated if the safety button is depressed first. The safety button can be depressed with the thumb leaving the other fingers free to squeeze the trigger switch. It is not necessary to maintain pressure on the safety button once the trigger switch has been depressed.
OPERATION
DANGER
Keep hands away from the cutting area when operating the tool. Keep the cord away from the cutting area and position it so that it will not get caught on the workpiece during the cutting operation.
When cutting, use steady and even pressure in order to obtain a uniform cut; do not force. Cut at a speed suited to the workpiece. Cut slowly if the workpiece is hard. Inspect the saw blade frequently and replace or sharpen it if dull,
to avoid overloading the motor.
CUTTING POSITION
See Figure 15-16.
When cutting a workpiece at 0^ , use point "A" of the base plate line guide and move the saw along the pencilled line you have drawn. When cutting at 45^ , use point "B". This line guide shows an approximate line of cut. Make a sample cut in scrap lumber to determine the actual line of cut.
CAUTION
When ripping, the rip fence should only touch the workpiece slightly. Do not force.
LIVE TOOL INDICATOR
This tool features a live tool indicator which illuminates as soon as the tool is connected to the supply. This warns the user that the tool is connected and will operate when the switch is pressed.
MAINTENANCE
After use, check the tool to make sure that it is in top condition.
It is recommended that you take this tool to a Ryobi Authorized Service Center for a thorough cleaning and lubrication at least once a year.
Do not make any adjustments while the motor is running.
Always disconnect the power cord from the socket before changing removable or expendable parts before lubricating or working on the unit. Keep handles dry, clean and free from oil and grease.
If the power supply cord is damaged, it must be replaced only by the manufacturer or by an authorized service center to avoid risk. Contact authorized service center.
A WARNING
For greater safety and reliability, all repairs should be performed by an authorised Ryobi Service Centre.
ENVIRONMENTAL PROTECTION

Recycle raw materials instead of disposing of as waste. The machine, accessories and packaging should be sorted for environmental-friendly recycling.
English
SYMBOLS

V
Safety Alert
Hz
Volts
Hertz
W
Alternating Current
No
Watts
1
No-load speed
in-1
Revolutions or reciprocations per minute

CE Conformity

GOST-R conformity

Class II, double insulated

Please read the instructions carefully before starting the machine.


Wear eye protection

Wear ear protection

Wood

Do not cut metals

Width of cut
0
Diameter
Waste electrical products should not be disposed of with household waste. Please recycle where facilities exist. Check with your local authority or retailer for recycling advice.
Français
DESCRIPTION
STANDAARD ACCESSORIES
Undlad at skarei metal

Fræsebrede

Diameter
OCOBsIE IPIPABINIA BE3ONACHOCTN
He nCnoJIb3yIte a6pa3nBHbIe Kpyr.
YKA3AHNIA NO BE3ONACHOCTNДЯ BCEX NII
ONACHO
He donyckaIte nonadaHn pyK b 6bnaCTb pe3Kn. He kacaiTeCb pexuJero dNcKa. Depknte pyK yHa BTOpyo dononHHTeBHyO pyKy nnn Kopnyca. Ecnn obe pyK depKAT yBndenn, OHn HE mOrT 6bItb cokpaueHb Ha ne3BVe.
He nbitaTebc DoctaTb NOd 3arotOBKn. OxpaHnK He moKeT 3aunTntb Bac OT ne3Bna NOd 3arotOBKn.
OtperynpyreIy6bHynpnHbCOOTBETCTBN CTOUINHO3a0rOBKn.MeHee nonHb 3y6 3y6beB Je3BnDOnKHe6blTbBnuHbHmKe DetAni.
■ Hnkorda He Depxnte Kycok Cokpaazhotc B Baushnx pykax nIu 3a Hory. 3akpenite n3dene Ha yctOnuHOB nIaTΦOpme. BaxHo, TTO6bl NopdepxNBAbTa paOby DOJXhBIM O6pa3OM CBCTNI K MmHmMMy BO3dEChTBne TeNa, JIe3BVe O6ra3aTeJIbHbIM, INI yTpAbl KOHTpOJa.
Держinte эльктуческе Инстументы 3a
изолноразовпьго nobерхонст Толък по
Выллпнениoneраци, Kordа ржун
Инстум Рожет Контювать
С capьтюпnpobodкови С coobctberньим
пpoвдом. Контс"paobotаншim" пpoвдом
сдале тадж ОткрьтBEmetТallnueckneЧаст
эльктуностуческе и вебет к опетатур.
30
Korda pa3pbIb BcERda NcONlb30BaTb PnAhnKn IIN npmO pykoBODCTBa Kpa. 3To ynyuHaet TOHOCb pe3kn N CHNkaeBepoTHocb Je3BVe O6BaTeJIbHbIM.
Bcerda nCnoIb3yIte ne3Bnna npaBnIbHoro pa3Mepa nOpMbI (no CpaBHeHIO c AnIma3Am payND. b6ecdKe dbIp. Je3Bn, KOtOpbIe He COOTBeTCTByUOT KpeNek nnbl, Bydet paOToTa 3KcEHTpUHNO, YTO npuBeDet K NOTEpe KOHTPONIA. HcNoIb3yIte TOnbKO peKyuIe DmCKn, Yka3AHHbIe B daHOM pyKOBODCTBE N yDObNETBOPHOJIo TpeBOBaHAM CTAndapra EN 847-1.
HnKorda He HcNoB3yIe NoBpeXeHHbIe HnHn HnPaBnBhIbe WsB6Ie NsBeNn 60NT. J5BeNt WaiBbl n 60ntbl 6blnn CneuaJIbHO pa3pa6oTaHbI dBaBaEro BNDJI, DnOCTKeHN OONMaHbHO npOn3BOJNTeBbHOCTn N 6e3OnaCHOCTn pa6Obl.
DAJIbHEINUE YKA3AHNIA NO BE3ONACHOCTI DJIY BCEX NII
PpUHHbI OpeaTOp npedOTbpaueHnO TdaHn:
OTDAaYBnEeTcBAH3AnHnaPeakzuaYuunnHyJCB8AHHbIX INI HKe KOAKCNalbHOE JN3BHe NINblBy3IBaH HeKOHTPoINpyeMoEO BUNen, YTO6bIONDHTbN 33aROTOBKn NO OTHOWeHNIONEpaTOpY;
KOrdaJe3BVe CKeMaeTcra NnI Tyro No npOniJOM 3aKbItnna,Je3BVe KNOCKOB IN DbrataeNBHO peAKCNINDCKOB YCtPOJCTBa 6bICTpo nO hAnpavJIeHIO K OnepatOyT;
- Ecnn ne3Bnne nepekpyuBaetc nHn HnepaBnIbHO Bpa3p3e, 3y6bl Ha 3aDHeN kPOMKn INaCTn MOrYT Bpe3aTbCBA BepXHIO NOBepXHOCT bpeBecnHb Bl3bIAeT ne3Bnne BbiOpaTcN i npOniHa npBiratNo HnapPaBNeHIO K OnpaTopy.
OTdaua YBJIaETcpe3yJbTaTOM 3noynotpe6bHeHnna BIneN / / nIIN HeNPabINbHOI OepatINbHbIX PpoaeDpynnu yCNoBn, N ee MOxHO u36ExKaTb Nytem PpHnTnHaNDnEkaUxh Mep npedocTopoXHoCTn, KOTOpbIe npINBOYCTA HNKe.
I Podepxahne Kpenko o6eHm pykamn Bnden n noLoXeHne pK, Tc0bI npOTNBOCTOBy OTdau nCn. N3uBaWero TeHa, Tc0bI bce cToPohBj Ie3BnHO He B COOTBcTbN CJe3BnEM.OTdaa MoKET npVBecTN BIDen, Tc0bI nepeytn Haazd, Ho
Pycckn
OTDAH CIN MOXHO UnpAIBTb C NOMOUsI ONEpATOpa, ECNI COOTBETCTBHyOuIe MEpbI ppeIOCTOPOXHCTN pInHrTB.
Korda ne3Bne,ЯBnErcsOba3aTeNbHbIM,Ии npn npepbIbAHm Bblpe3atb KAKoN-Ni6O npuynHe, OTnyCTte Kypok andeKtah HeNoD8nKHO yBnDen B MATEpHaJe, noka Ie3Bne He DoxOJNT do NOnHOB octanOBKn. HnkOrda He nbItaTecb ydAnlTB BnDen B pa6ote nIITraHyb Ha3ad BnDen, noka Je3BmHaxODNTcB DVBHXeHNn NNOTkAT MoKET npon30TN. PaccIeNoBaHne n npednpnHrtb KoppeKtnpyUoiNe DeYCTBnI dJIy UcTaPHeHNn npnuHHbl Je3BnO63aTeMbHbIM.
I Pocne nepe3arpy3kn yBnDcn B 3arotobke ceHTpa nIbI B npOnn I yBeDInTeCb, YTO yBnDcn 3y6bl He yUcTByOJ B MaTePnAn. EcnI ne3BnE nIbI, IaBnTcR O83aTeJbHbIM, OHO MOKeT NdTI BBePx nIi OTdaHm OT 3arotobKn, KaK yBnDeJ, He 6ydet nepe3anyuen.
I Podepkka 60bnx nanehen, TTo6bIMNHm3npoBaT pNCK 3aueMnEHHneB3Bn mOTdau. BoJhune naHEn, KaK npAbeNIO, npOrn6BaTcBcno ND cO6CTBeHbIM BecOM. PndepKnaBaeT dONKbI 6bIb NOCTABHeHbIO ND naneHn C o6Bx CTOpOH, B6n3n JInHn pa3peaN 6bn3KO KpaUo naneHn.
He nCnoB3yIe TynIbe NnN NOBpeXeHHbIe JIe3BnH. Hepe3kAa NII HEnpabINbHO YCTAHOBNEHHbIe Je3BnI POn3BOJrT y3Koi PpOIMOM Bbl3bBAET Upe3MepHoe TpeHme,Je3Bne Oba3aTeNbHbIM OOTdAn.
Blade rnybHy n KOHNuecknx KOPpeKTHpOBKn 3aMOK pbUaHn DOJNkhbl 6bITb JXeCTKOu N 6e3onachOn, npExde Yem Bblpe3aTb. Ecnn ne3Bne CdBraet Bpem pe3Kn 3TO MOKeT pNBeCTN K O6BaTeIbHbIM NTaDu.
Bydte octopoxhbl npn npnHttn "OkyHybca pa3pe3" B cyuectbyuoume cTeHb nIy Dpyrnx Cnenbix obnactyx. BbICTyaioune Ie3Bne MoKeT cokpaitb06BeKtbl, KOTOpbi MOrTy Bb3BaTb 6opatThb ynap.
YKA3AHN IIO BE3OPIACHOCTN IJI YIINbIC HIX-HErO 3AUINTHOKOKYXA
IpoBepntb HnKHeRo 3aunTHoro Koxyxa dna HndneXauero 3akpItnne nepeaKaXdbIM nCnoIb3oBaHem.He nCnoIb3yeTne NHy,ecnn HnKHHa3uINbTHKOxY He DBNkTeC BcO6dHO n He 3akpblBaetc HemeDneHNo. HnKOrda He 3aKePnIte n He npBra3bVaIe TnHXHN 3aunTHbIKoKyx BOTkpITOM pNOXeHN. EcnnyBvNDel CnCyauH Noynl, HnKHH 3aunTHbIKoKyx MOKet 6bItn30rHyT. NOHmInTe HnKHH 3aunTHbIKoKyx CpyKOr BTVARInAHy 6eDnTeCb, YTO OH DnBKeTcCBcO6OHDn Hne PnKacaiTeCk JLezBnIO
nIINIIO6OJIpyrOJCTOPOHbI,BOBCEx yrrax nIpyoHbI pe3aHn.
■ PpOBePnTb pa60Ty HnXhero 3aunTHoro Koxyxa BeCHOJ. EcNl OxpAHNHk N BeCHOJ He pa6oTaOT DoJXHBiM 6pa3OM, OHN DoJXHbI 6ObClyXNBaTBc9 nepeD nCOnBtOBaHNm. HnXHg OxpAHNHK MoKeT pa6oTaTb MeDnEHNO H3-3a NobpeXeDeHNbIX qAcTei, CMOnIcTbIX OTIOKeHni, INI HapaUINBaHne MyCopa.
HnKnO oxpAHnKdoJnxHb8bTOnpOBeprHytBToNbKO BpyHyHO HcneuHaBbIX COKpaueHm,TaKxKaK"OkyHTbcCOKpaueHn" n"CLOXhIeCOKpaueHn." NobbIeHne HnKHeB PbaCnIooBTHBaYHn pyKu N,Kak ToNbKOJe3BHe BOJdetMATEPnA, HnKn 3aunTHbIKoKyx DoJnxHb6bITocBO6OxJDen. IJIa BCEx OCTaJIbHbIX NIIeHn, HnKn 3aunTHbIKoKyx DoJnxHe JIeCTBOBaTbABTOMaTmHECKN.
Bcerda cneJeTte 3a TEm, YTO HxHKnH 3aunTHbI KOxuy NOKpbIbAeT JNe3BnO Do pazMeueHEny BynenBHN3 Ha cKaMeKe IIN HA NoJy. He3aunHeHHbI, DInkUyMmCPO NHeUPnIe JNe3BmU BByIOBET BnEN, YTObI PAnTbCp, pe3ka BCE, YTO Ha CBOem npTN. He 3a6bIaIte O bpeMeHn, KOTOpoe Tpe6yTeCdIg ne3BnY, YTObI OCTaHOBtB NocLe NepeKJIuOHTeNb OCBO60XDeHb.
TEXHUNECKNEXAPAKTEPNCIK
XHNTb INHdNkAToPOM INHcTpymeHT
DaHHbI INCTpyMeHT OCHaUeH INDkaTopOM NITaHIN, KOTOpB 3aRopaTaCPr npoNOKJIIOHeHN INCTpyMeTbK cETn NITaHIN. OH npEDynPExJaet, yTO INCTpyMeHT NOKJIIOueH IN6yDet pa6OtaTb pn HAKatmN BbIKIOuTeAEN.
TEXHNUCKOE OBCNJXUBAHNE
Iocne Icnpb3OBAHnA, npOBepntb HNCTpymEnT, YTO6bl y6eINTCB, TTO OHa HaxoINTCB B NDeaJIbHOM COCTOHN.
Mby pekomehnyem Bam npnHbT 3OT INHCTpymeT Ryobi ABtopn30BaHHb CepBnCHbI LcHtp, nyTeM OChcKm n Cma3Kn He pexe oNHoro pa3a B roD.
He BheCTn IIObIe NImMeHEnHa Noka MOTop paOtaE.
Ipei3aemHcBEmhIXTeTaleHINpacXOHybIXMaTePnaIOB, CMA3KoI INI INhIMN DeICTBnMn, IPOIN3BOIDMbIMN NaI yCTpoIcTBOM, BcERdaOTcoEINHnIeTIHypNTaHmIOTpO3ETKn.
Copejnte pyuB cyxom u NCTOM Bunde, OHuaite ux OT Macna n Cma3Kn.
EcnKn Ka6eBn NtAHHN NOBpeXeHEn, BO n36eXaHHe onaHcOte ero DOnkEn 3aMeHNb JINoC am PnO3bOuNTen, NIOBO cneuaJIstCT ABOTM3OBAHHO CepBNCHO CEHTpaTInTeCb B ABOTM3OBAHHb CepBNCHb CEHTp.
OCTOPOXHO
Дябьш� Беонахочи NaHadeXHOCTN,BCEpeMOHTbIe paObTb DoJNXHbI bItb BbINOpHEbI RyobiABTOPTOBAHBNc cepNCHbI CEHTp.
3AUNITA OKPYXAIOUI CPEbl

He bIbpaBaiTe cbIpBe.CdaBaiTe erO B npepeaboTky. MaunHa, akceccyapbl uynakOBkdoJxHb6bItbOTcnpoBaHbI.
CIMBON

BHMaHne
V
Bonby
Hz
Tepu
ПеременныйТOK
W
Batt
No
Ckopoctb Ha xoNocTOM xOdy
min-1
O6o0TOB
NIN
BO3BpATHO-
IOCTyNaTeIbHbIX DBrXeHnB MInHyT

COOTBETCTBNE TpeboBaHnM GOST-R

COOTBETCTBNE TpeboBaHnM CE

Klacc 3aunIb II, DBOHnA n3OJraN

Ipeep
NCIOJIb3OBAHnEM
πρηδopa
BHHMaTeJIbHO 03HaKOMbTecb HNCTpyKlnei.
C DaHHoI


PpIMMeHnTe cpeDCTBa 3aIITbI opraHOB 3peHn

PpIMMeHnTe cpeDCTBa 3aIITbI opraHOB cnyxa

Древесина

3anpeaetcpeaTbMeTannbl

LInpinaΦpe3epoBkn
0
Диаметр

Otpa6oTaHna 3nEeKtPoTeXnUeckaa npDyuknna DoJNkHa yHmTOKaTBcB WMeCe T c BbTOBbIMN OTXdAMN. YTNIm3npyuTe, ecn ImeETC CneuAInbHOe TexHnueckoe obOpdyoBaHne. IIO BOpocam yTInn3aunn pOkOHcyIbTuPyuTEcb C MeCTbIM oprAhom Bnactn INI npednpnrTne m03nHNO TOPOBn.
Polski
OPIS
W CELU WYKONYWANIA CIECIA
POSEBNA SIGURNOSNA PRAVILA
Nikad ne upotrebljavaje brusni disk.
VAENA SIGURNOSNA PRAVILA ZA SVE VRSTE PILA
OPASNOST
Drzite rucke podalje od područja rezanja. Drzite ruke dalje od reze ncle. Ruka kojom ne dræite glavnu ručku alata mora draati pomočnu ručku ili se nalaziti na karteru motora. Tako ruke ne izlaeete opasnosti da se naću u zoni rezanja, odnosno na putu oštrici.
Rukom ne prolazite ispod komada koji obradujete: Podesite dubinu rezanja ovisno o debljini komada koji obradujete.
Zupci ostrice ne smiju tijekom rezanja savim prolaziti komad koji obradjete. NIKAD komad koji obradjute ne pridraevajte rukom ili izmedu nogu.
Ucvristige na na stabilni nosac. Iznimno je vaeno ispravno ucvstiti komad koji obradujete kako bistie izbjugli opasnost od ozljeda i ne savijati ostrico kako ne bistie zgubili kontrolu nad alatom. Alat draiteismo za izolirane i protuklizne dijelove kad
radite na povrsini koja bi mogla sakkiti elektricne aice ili kad se zbog posla kabel za napajanje moaee naci na putanjil alata.
Držite uredaj po izoliranim ručkama povrsina samo pri obavljanju operaciye u kojoj rezanje skrivene ožičenja ili vlastiti kabel. Uvjek upotrebljavaje vodilicu paralelnotnog piljenja ili ravnu letvu dok obavljate parallelno rezanje.
Tako cete poboljatsi preciznost rezanja i izbeci cete savijanje ostrce. Uvjek upotrebljavite ostrice koje su vojom velicinom i oblikom prilagodene drvetu.
Ostrice koje nisu preragodene osovini na koju se postavljaju nece se ispravno okretati te moaee doci do gubitka kontrode nad alatom. Nikad ne upotrebljavajte vijke i podloane ploice koji su ostecni ili neprilagodeni. Koristite samo ostricu navedenu u ovim uputama koja je u skladu s EN 847-1.
Podloane ploce i viji osmisljeni su posebno za vas model pile kako bi se postigli optimalna sigurnost i ucinak. Dodatna sigurnosna pravila za sve vrste pila
UZROCI POSKAKIVANJA I PREVENCija:
Uzroci i operadora prevencije povratnog udara:
SIGURNOSNA PRAVILA VEZANA UZ ŠITNIK OŠTRICE
Prije svake uporabe provjerite da donji stitnik ispravno prekriva ostricu. Ne upotrebljavaje pilu ako se donji stitnik ostrice ne moe slobodn o pomicati i ako se ako se odmah ne poklipi na ostricu. Donji stitnik ostrice nikad ne učvršćujte i ne pričvršćujte kad je u otvorenom poloæaju. Kad bi pila slučajn pala, donji stitnik ostrice mogao bi se savinuti. Podignite donji stitnik ostrice pomoću ručice i provjerite moæe li se njime rukovati bez potěškoça te da ne dodiruju ni ostricu ni bilo koji drugi dio bez obzira na kut ili odabranu dubin rezanja.
Provjerite je li opruga donjeg štitnika ostrice u dobrom stanju i radi li spravno. Ako štitnik ostrice ili opruga ne rade spravno, dajte ih popraviti prije ponovne uporabe pile. Kretanje donjeg štitnika ostrice moze biti zakoceno oštecenim dijelovima, ostacima smole ili nakupinama piljevine.
- Šṭitnik oštrice se smije ručno postavljati na mesto samo za posebne vrste piljenja, poput ubodnog piljenja i dvostrukog piljenja. Podignite donji Šṭitnik oštrice pomoću rucice.Zatim, čim oštrica ude u komad koji obradujete, opustite donji Šṭitnik oštrice. Za sve ostale vrste piljenja, donji Šṭitnik oštrice automatski se postavlja na mesto.
Uvijek prije postavljanja pile na postolje ili na pod
All Ryobi products are guaranteed against manufacturing defects and defective parts for a period of twenty four (24) months from the date stated on the original invoice drawn up by the retailer and given to the end user.
Deterioration caused by normal wear and tear, unauthorised or improper use or maintenance, or overload are excluded from this guarantee as are accessories such as battery packs, light bulbs, blades, fittings, bags.
In the event of malfunction during the warranty period, please take the NON-DISMANTLED product, along with the proof of purchase, to your retailer or nearest Authorised Ryobi Service Centre.
This warranty in no way affects your legal rights concerning defective products.
AUTHORISED SERVICE CENTRE
To find an authorised service centre near you, visit ryobitools.eu.
FR GARANTIE - CONDITIONS
DA GARANTI-REKLAMATIONSRET
The vibration emission level given in this information sheet has been measured in accordance with a standardised test given in EN 60745 and may be used to compare one tool with another. It may be used for a preliminary assessment of exposure. The declared vibration emission level represents the main applications of the tool. However if the tool is used for different applications, with different accessories or poorly maintained, the vibration emission may differ. This may significantly increase the exposure level over the total working period.
An estimation of the level of exposure to vibration should also take into account the times when the tool is switched off or when it is running but not actually doing the job. This may significantly reduce the exposure level over the total working period. Identify additional safety measures to protect the operator from the effects of vibration such as: maintain the tool and the accessories, keep the hands warm, organisation of work patterns.
FR AVERTISSEMENT
DECLARATION OF CONFORMITY
We declare under our sole responsibility that this product is in conformity with the following standards or standardized documents: 2006/42/EC, 2004/108/EC, 2011/65/EU, EN55014-1:2006+A1:2009+A2:2011, EN55014-2:1997+A2:2008, EN61000-3-2:2006+A1:2009+A2:2009, EN61000-3-3:2008, EN60745-1:2009, EN60745-2-5:2007+A11:2009 Noise level [K = 3dB(A)] : Lp=95dB(A) Lw=106dB(A) Vibration level [K = 1.5s / m^ ] h=4.57m/s
FR
Déclaration de CONFORMITE
Techtronic Industries Co. Ltd.
24/F, CDW Building, 388 Castle Peak Road, Tsuen Wan, Hong Kong
Brian Ellis
Vice President - Engineering
Hong Kong, JuL 13, 2010
Authorised to compile the technical file:
James Dickinson
Techtronic Industries (UK) Limited
Medina House, Fieldhouse Lane, Marlow, Bucks, SL7 1TB, United Kingdom