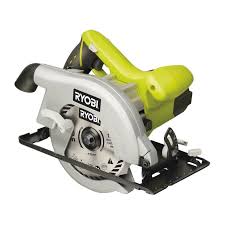
USER MANUAL RWS1400 RYOBI
Keep hands away from cutting area and the blade. Keep your second hand on auxiliary handle, or motor housing. If both hands are holding the saw, they cannot be cut by the blade.
Do not reach underneath the workpiece. The guard cannot protect you from the blade below the workpiece.
- Adjust the cutting depth to the thickness of the workpiece. Less than a full tooth of the blade teeth should be visible below the workpiece.
- Never hold piece being cut in your hands or across your leg. Secure the workpiece to a stable platform. It is important to support the work properly to minimize body exposure, blade binding, or loss of control.
Hold the power tool by insulated gripping surfaces only, when performing an operation where the cutting tool may contact hidden wiring or its own cord. Contact with a "live" wire will also make exposed metal parts of the power tool "live" and could give the operator an electric shock.
- When ripping, always use a rip fence or straight edge guide. This improves the accuracy of cut and reduces the chance of blade binding.
Always use blades with correct size and shape (diamond versus round) of arbour holes. Blades that do not match the mounting hardware of the saw will run eccentrically, causing loss of control. Use only blades specified in this manual, complying with EN 847-1.
- Never use damaged or incorrect blade washers or bolt. The blade washers and bolt were specially designed for your saw, for optimum performance and safety of operation.
- kickback is a sudden reaction to a pinched, bound or misaligned saw blade, causing an uncontrolled saw to lift up and out of the workpiece toward the operator;
- when the blade is pinched or bound tightly by the kerf closing down, the blade stalls and the motor reaction drives the unit rapidly back toward the operator;
if the blade becomes twisted or misaligned in the cut, the teeth at the back edge of the blade can dig into the top surface of the wood causing the blade to climb out of the kerf and jump back toward the operator.
Kickback is the result of saw misuse and/or incorrect operating procedures or conditions and can be avoided by taking proper precautions as given below.
- Maintain a firm grip with both hands on the saw
and position your arms to resist kickback forces. Position your body to either side of the blade, but not in line with the blade. Kickback could cause the saw to jump backwards, but kickback forces can be controlled by the operator, if proper precautions are taken.
- When blade is binding, or when interrupting a cut for any reason, release the trigger and hold the saw motionless in the material until the blade comes to a complete stop. Never attempt to remove the saw from the work or pull the saw backward while the blade is in motion or kickback may occur. Investigate and take corrective actions to eliminate the cause of blade binding.
- When restarting a saw in the workpiece, centre the saw blade in the kerf and check that saw teeth are not engaged into the material. If saw blade is binding, it may walk up or kickback from the workpiece as the saw is restarted.
Support large panels to minimise the risk of blade pinching and kickback. Large panels tend to sag under their own weight. Supports must be placed under the panel on both sides, near the line of cut and near the edge of the panel.
- Do not use dull or damaged blades. Unsharpened or improperly set blades produce narrow kerf causing excessive friction, blade binding and kickback.
- Blade depth and bevel adjusting locking levers must be tight and secure before making cut. If blade adjustment shifts while cutting, it may cause binding and kickback.
Use extra caution when sawing into existing walls or other blind areas. The protruding blade may cut objects that can cause kickback.
LOWER GUARD FUNCTION
- Check lower guard for proper closing before each use. Do not operate the saw if lower guard does not move freely and close instantly. Never clamp or tie the lower guard into the open position. If saw is accidentally dropped, lower guard may be bent. Raise the lower guard with the retracting handle and make sure it moves freely and does not touch the blade or any other part, in all angles and depths of cut.
- Check the operation of the lower guard spring. If the guard and the spring are not operating properly, they must be serviced before use. Lower guard may operate sluggishly due to damaged parts, gummy deposits, or a build-up of debris.
Lower guard may be retracted manually only for special cuts such as "plunge cuts" and "compound cuts". Raise lower guard by retracting handle and as soon as blade enters the material, the lower guard must be released. For all other sawing, the lower guard should operate automatically.
Always observe that the lower guard is covering the
blade before placing saw down on bench or floor. An unprotected, coasting blade will cause the saw to walk backwards, cutting whatever is in its path. Be aware of the time it takes for the blade to stop after switch is released.
WARNING
Wear eye and ear protection.
Wear dust mask.
Do not use any abrasive wheels.
- Avoid overheating the blade tips. Do not use dull or damaged blades. Do not force the tool.
Only use saw blades recommended.
- Do not use blades of larger or smaller diameter than recommended.
LASER SAFETY
Do not stare into beam during operation.
- Do not project the laser beam directly into the eyes of others. Serious eye injury could result.
- Do not place the laser in a position that may cause anyone to stare into the laser beam intentionally or unintentionally.
Do not use optical tools to view the laser beam.
- Do not operate the laser around children or allow children to operate the laser.
Do not attempt to repair the laser device by yourself.
- Do not attempt to change any parts of the laser device by yourself.
Any repairs must only be carried out by the laser manufacturer or authorized service agent.
Do not replace the laser with a different type.
INTENDED USE
Sawing and litre cutting all types of wood.
Do not use for cutting metal or masonry.
MAINTENANCE
WARNING
The product should never be connected to a power supply when you are assembling parts, making adjustments, cleaning, performing maintenance, or when the product is not in use. Disconnecting the product will prevent accidental starting that could cause serious injury.
- When servicing, use only identical Ryobi replacement
parts. Use of any other parts may create a hazard or cause product damage.
- Be sure to disconnect the tool from the power supply before attaching or removing the saw blade. Clean the tool and guarding system with clean cloths, or blow it clean with compressed air.
- Avoid using solvents when cleaning plastic parts. Most plastics are susceptible to various types of commercial solvents and may be damaged by their use. Use clean cloths to remove dirt, carbon dust, etc.
- Do not at any time let brake fluids, gasoline, petroleum-based products, penetrating oils, etc., come in contact with plastic parts. They contain chemicals that can damage, weaken or destroy plastic.
Always wear safety goggles or safety glasses with side shields during power tool operation or when blowing dust. If operation is dusty, also wear a dust mask.
If the power supply cord is damaged, it must be replaced only by the manufacturer or by an authorized service center to avoid risk. Contact authorized service center.
For greater safety and reliability, all repairs should be performed by an Authorised Ryobi Service Centre.
LUBRICATION
All of the bearings in the product are lubricated with a sufficient amount of high grade lubricant for the life span of the product under normal operating conditions. Therefore, no further lubrication is required.
ENVIRONMENTAL PROTECTION

Recycle raw materials instead of disposing of as waste. The machine, accessories and packaging should be sorted for environmental-friendly recycling.
SYMBOLS

Safety alert

Wood

Do not cut metals

Wear ear protection

Wear eye protection

Laser radiation.
Do not stare into beam.
Class 2 laser product
λ: 650nm; P≤1mW
EN 60825-1:2007


Danger! Sharp blade
Do not expose to rain
Width of cut
Blade teeth
Class II, double insulated
CE conformity
GOST-R conformity
Please read the instructions carefully before starting the machine.
Waste electrical products should not be disposed of with household waste. Please recycle where facilities exist. Check with your local authority or retailer for recycling advice.
RÉGLES PARTICULIERES DE SECURITÉ
PROCESSUS DE COUPE
DANGER
Undlad at skarei metal

Benyt horevem

Benyt ojenvaern

Laserstråling.
Se aldrig direkte ind i stralen.

m = 311
Kak cblpbe, a He
Kak Mycop. MaunHa,
yanaKOBka dOJXHbI bItb
UCIOBHBIE OBO3HAUHIN

BHMaHne
DpeBecnHa

3anpeaetcpeaTbMeaTnbl

Umpnha pa3pe3a

Yncno 3y6beB

KJacc 3auntbI II, DBOHnA H3OJIaUN

COOTBETCTBNE Tpe6oBaHnM CE

COOTBETCTBNE Tpe6oBaHnA M GOST-R

Ipeed nOIpb3oaaHnem np6opa BHIMATEJIbHO O3aHOMbTeCb C daHNo INCHPTyKUnei.
Otpa6oTaHnHa 3eKeTpoTeXnueCeKa npDyKUma DOnkHa yNHTOxAtbCBA MecTe C bIToBbIM NTxOdAmu. YtINn3npyTe, eCNImMeetc CneuaNbHoE TeXnueCeKoe oobpyoDaHBe. IIO BONpocAM yTNIn3aun npOKOHcybTnpyuTeCb C MeCTbIM OprAHOM BnACTn INI npedPnraTnem pO3nHNoTTOBnI.
SPECJALNE ZASADY BEZPIECZENSTWA
PROCEDURE CIECIA
NIEBEZPIECZENSTWO
Nu priviti direct in raza.
Proclus cu laser clasa 2
λ: 650nm; P≤1mW
EN 60825-1:2007
POSEBNA SIGURNOSNA PRAVILA
POSTUPCI ZA REZANJE
OPASNOST

m = 311 ;
All Ryobi products are guaranteed against manufacturing defects and defective parts for a period of twenty four (24) months from the date stated on the original invoice drawn up by the retailer and given to the end user.
Deterioration caused by normal wear and tear, unauthorised or improper use or maintenance, or overload are excluded from this guarantee as are accessories such as battery packs, light bulbs, blades, fittings, bags.
In the event of malfunction during the warranty period, please take the NON- DISMANTLED product, along with the proof of purchase, to your retailer or nearest Authorised Ryobi Service Centre.
This warranty in no way affects your legal rights concerning defective products.
AUTHORISED SERVICE CENTRE
To find an authorised service centre near you, visit rybitools.eu.
FR GARANTIE - CONDITIONS
DA GARANTI-REKLAMATIONSRET
The vibration emission level given in this information sheet has been measured in accordance with a standardised test given in EN 60745 and may be used to compare one tool with another. It may be used for a preliminary assessment of exposure. The declared vibration emission level represents the main applications of the tool. However if the tool is used for different applications, with different accessories or poorly maintained, the vibration emission may differ. This may significantly increase the exposure level over the total working period.
An estimation of the level of exposure to vibration should also take into account the times when the tool is switched off or when it is running but not actually doing the job. This may significantly reduce the exposure level over the total working period. Identify additional safety measures to protect the operator from the effects of vibration such as: maintain the tool and the accessories, keep the hands warm, organisation of work patterns.
FR AVERTISSEMENT
Techtronic Industries GmbH
Max-Eyth-Strasse 10, D-71364 Winnenden, Germany
Herewith we declare that the product
Circular Saw
RWS1250/RWS1400/RWS1600
RWS1250 S/N: 29800101000001 - 29800101999999
RWS1400 S/N: 28300101000001 - 2830010199999
RWS1600 S/N: 27500101000001 - 27500101999999
is in conformity with the following standards or standardized documents
2006/42/EC, 2004/108/EC, 2011/65/EU
EN55014-1:2006+A1:2009+A2:2011, EN55014-2:1997+A1:2001+A2:2008
EN61000-3-2:2006+A1:2009+A2:2009, EN61000-3-3:2008.
EN60745-1:2009+A11:2010,EN60745-2-5:2010.
Sound pressure level: Lp=96.5 dB(A) K=3 dB(A)
Sound power level: Lw=107.5 dB(A) K=3 dB(A)
Vibration ahv: ah=4.5 m/s² K =1,5 m/s²

Brian Ellis
Vice President of Engineering
Authorised to compile the technical file:
Rainer Kumpf
Techtronic Industries GmbH
Max-Eyth-Strasse 10, D-71364 Winnenden, Germany
C € 2012

Techtronic Industries GmbH
Max-Eyth-Strasse 10, D-71364 Winnenden, Germany
RWS1250/RWS1400/RWS1600
RWS1250 S/N: 29800101000001 - 29800101999999
RWS1400 S/N: 28300101000001 - 28300101999999
RWS1600 S/N: 27500101000001 - 2750010199999
Max-Eyth-Strasse 10, D-71364 Winnenden, Germany
C € 2012

Max-Eyth-Strasse 10, D-71364 Winnenden, Germany
RWS1250/RWS1400/RWS1600
RWS1250 S/N: 29800101000001 - 29800101999999
RWS1400 S/N: 28300101000001 - 28300101999999
RWS1600 S/N: 27500101000001 - 27500101999999
Vice President of Engineering
Max-Eyth-Strasse 10, D-71364 Winnenden, Germany

Max-Eyth-Strasse 10, D-71364 Winnenden, Germany
RWS1250/RWS1400/RWS1600
RWS1250 S/N: 29800101000001 - 29800101999999
RWS1400 S/N: 28300101000001 - 28300101999999
RWS1600 S/N: 27500101000001 - 27500101999999
es conforme a las作為 normas o documents normalizados
2006/42/EC, 2004/108/EC, 2011/65/EU
EN55014-1:2006+A1:2009+A2:2011, EN55014-2:1997+A1:2001+A2:2008
EN61000-3-2:2006+A1:2009+A2:2009, EN61000-3-3:2008
EN60745-1:2009+A11:2010, EN60745-2-5:2010.
Max-Eyth-Strasse 10, D-71364 Winnenden, Germany

E 2012
Max-Eyth-Strasse 10, D-71364 Winnenden, Germany
RWS1250/RWS1400/RWS1600
RWS1250 S/N: 29800101000001 - 29800101999999
RWS1400 S/N: 28300101000001 - 28300101999999
RWS1600 S/N: 27500101000001 - 27500101999999
Max-Eyth-Strasse 10, D-71364 Winnenden, Germany
C E 2012
Techtronic Industries GmbH
Max-Eyth-Strasse 10, D-71364 Winnenden, Germany
RWS1250/RWS1400/RWS1600
RWS1250 S/N: 29800101000001 - 29800101999999
RWS1400 S/N: 28300101000001 - 28300101999999
RWS1600 S/N: 27500101000001 - 2750010199999
Vice President Ontwerp
Max-Eyth-Strasse 10, D-71364 Winnenden, Germany
C € 2012
Techtronic Industries GmbH
Max-Eyth-Strasse 10, D-71364 Winnenden, Germany
Pelo presente declaramos que os produits
Serra Circular
RWS1250/RWS1400/RWS1600
RWS1250 S/N: 29800101000001 - 29800101999999
RWS1400 S/N: 28300101000001 - 28300101999999
RWS1600 S/N: 27500101000001 - 27500101999999
Max-Eyth-Strasse 10, D-71364 Winnenden, Germany
C E 2012
DA EC OVERENSSTEMMELSESERKLERING
Techronic Industries GmbH
Max-Eyth-Strasse 10, D-71364 Winnenden, Germany
Vi erklaerer hermed, atprodukte
Rundsay
RWS1250/RWS1400/RWS1600
RWS1250 S/N: 29800101000001 - 29800101999999
RWS1400 S/N: 28300101000001 - 28300101999999
RWS1600 S/N: 27500101000001 - 27500101999999
Max-Eyth-Strasse 10, D-71364 Winnenden, Germany
C E 2012

EC-DEKLARATION ANGÄENDE ÖVERENSSTÄMMIGHET
Techtronic Industries GmbH
Max-Eyth-Strasse 10, D-71364 Winnenden, Germany
RWS1250/RWS1400/RWS1600
RWS1250 S/N: 29800101000001 - 29800101999999
RWS1400 S/N: 28300101000001 - 28300101999999
RWS1600 S/N: 27500101000001 - 2750010199999
Vice president of engineering
Max-Eyth-Strasse 10, D-71364 Winnenden, Germany

EC-erklaring om Produktoverensstemmelse
Techtronic Industries GmbH
Max-Eyth-Strasse 10, D-71364 Winnenden, Germany
Herved erklarer vi at Produktet
Sirkelsag
RWS1250/RWS1400/RWS1600
RWS1250 S/N: 29800101000001 - 29800101999999
RWS1400 S/N: 28300101000001 - 28300101999999
RWS1600 S/N: 27500101000001 - 27500101999999
Max-Eyth-Strasse 10, D-71364 Winnenden, Germany

EC-SÄÄNNÖSTEN NOUDATTAMINEN
Techtronic Industries GmbH
Max-Eyth-Strasse 10, D-71364 Winnenden, Germany
RWS1250/RWS1400/RWS1600
RWS1250 S/N: 29800101000001 - 29800101999999
RWS1400 S/N: 28300101000001 - 28300101999999
RWS1600 S/N: 27500101000001 - 27500101999999
Max-Eyth-Strasse 10, D-71364 Winnenden, Germany

3AABJIEHNE O COOTBETCTBUN TPEBOAHNIM EC
Techronic Industries GmbH
Max-Eyth-Strasse 10, D-71364 Winnenden, Germany
Haemou mbl 3aeym,mo daHHbI npodykm
Unpkynpna nna
RWS1250/RWS1400/RWS1600
RWS1250 S/N: 29800101000001 - 29800101999999
RWS1400 S/N: 28300101000001 - 2830010199999
RWS1600 S/N: 27500101000001 - 27500101999999
coombemcmeyem cneoyouum HOpMaU ookymehmam
2006/42/EC, 2004/108/EC, 2011/65/EU
EN55014-1:2006+A1:2009+A2:2011, EN55014-2:1997+A1:2001+A2:2008
EN61000-3-2:2006+A1:2009+A2:2009, EN61000-3-3:2008
EN60745-1:2009+A11:2010, EN60745-2-5:2010.
YpOBeHb 3ByKOBO rAaBHeHr: Lp=96.5 dB(A) K= 3 dB(A)
YpOBeHb akyctnueckoMouhocTn: Lw=107.5 dB(A) K=3 dB(A)
Bùbāpànqí ahv: ah=4.5 m/s² K =1,5 m/s²

C E 2012
Brian Ellis
Bnue-npe3nEHT NO TexHnueckomy o6bOpyDobAHIO
Max-Eyth-Strasse 10, D-71364 Winnenden, Germany

DEKLARACJA ZGODNOSCI EC
Techtronic Industries GmbH
Max-Eyth-Strasse 10, D-71364 Winnenden, Germany
RWS1250/RWS1400/RWS1600
RWS1250 S/N: 29800101000001 - 29800101999999
RWS1400 S/N: 28300101000001 - 28300101999999
RWS1600 S/N: 27500101000001 - 27500101999999
Max-Eyth-Strasse 10, D-71364 Winnenden, Germany

EC IZJAVA O USKLADENOSTI
Techtronic Industries GmbH
Max-Eyth-Strasse 10, D-71364 Winnenden, Germany
RWS1250/RWS1400/RWS1600
RWS1250 S/N: 29800101000001 - 29800101999999
RWS1400 S/N: 28300101000001 - 28300101999999
RWS1600 S/N: 27500101000001 - 2750010199999
Max-Eyth-Strasse 10, D-71364 Winnenden, Germany


PROHLÁŠENI O SHODE EC
Techtronic Industries GmbH
Max-Eyth-Strasse 10, D-71364 Winnenden, Germany
RWS1250/RWS1400/RWS1600
RWS1250 S/N: 29800101000001 - 29800101999999
RWS1400 S/N: 28300101000001 - 28300101999999
RWS1600 S/N: 27500101000001 - 27500101999999
Max-Eyth-Strasse 10, D-71364 Winnenden, Germany

Techtronic Industries GmbH
Max-Eyth-Strasse 10, D-71364 Winnenden, Germany
RWS1250/RWS1400/RWS1600
RWS1250 S/N: 29800101000001 - 29800101999999
RWS1400 S/N: 28300101000001 - 28300101999999
RWS1600 S/N: 27500101000001 - 27500101999999
Vice president of Engineering
Max-Eyth-Strasse 10, D-71364 Winnenden, Germany

2012

EC ATBILSTIBAS PAZINOJUMS
Techtronic Industries GmbH
Max-Eyth-Strasse 10, D-71364 Winnenden, Germany
Ar so pazinojam, ka produkti
Ripzagis
RWS1250/RWS1400/RWS1600
RWS1250 S/N: 29800101000001 - 29800101999999
RWS1400 S/N: 28300101000001 - 28300101999999
RWS1600 S/N: 27500101000001 - 27500101999999
Max-Eyth-Strasse 10, D-71364 Winnenden, Germany
C € 2012

EC VASTAVUSDEKLARATSOION
Techtronic Industries GmbH
Max-Eyth-Strasse 10, D-71364 Winnenden, Germany
Kinnitame, et see toode
Ketassaag
RWS1250/RWS1400/RWS1600
RWS1250 S/N: 29800101000001 - 29800101999999
RWS1400 S/N: 28300101000001 - 28300101999999
RWS1600 S/N: 27500101000001 - 27500101999999
Max-Eyth-Strasse 10, D-71364 Winnenden, Germany
C E 2012


EC ATITIKTIES DEKLARACIJA
Techtronic Industries GmbH
Max-Eyth-Strasse 10, D-71364 Winnenden, Germany
RWS1250/RWS1400/RWS1600
RWS1250 S/N: 29800101000001 - 29800101999999
RWS1400 S/N: 28300101000001 - 28300101999999
RWS1600 S/N: 27500101000001 - 27500101999999
atitinka zemiau isvardintus standartus ar standarty dokumentus
2006/42/EC, 2004/108/EC, 2011/65/EU
EN55014-1:2006+A1:2009+A2:2011, EN55014-2:1997+A1:2001+A2:2008
EN61000-3-2:2006+A1:2009+A2:2009, EN61000-3-3:2008
EN60745-1:2009+A11:2010, EN60745-2-5:2010.
Garso slegio lygis:Lp=96.5 dB(A) K = 3 dB(A)
Garso galingumo lygis: Lw=107.5 dB(A) K= 3 dB(A)
Vibracija ahv: ah=4.5 m/s² K=1,5 m/s²

Brian Ellis
Vicepresidentas, Inzinerija
Max-Eyth-Strasse 10, D-71364 Winnenden, Germany
C € 2012

EC IZJAVA O USKLADENOSTI
Techtronic Industries GmbH
Max-Eyth-Strasse 10, D-71364 Winnenden, Germany
RWS1250/RWS1400/RWS1600
RWS1250 S/N: 29800101000001 - 29800101999999
RWS1400 S/N: 28300101000001 - 28300101999999
RWS1600 S/N: 27500101000001 - 27500101999999
u skladu sa sliedecim normama ili nomiranim dokumentima
2006/42/EC, 2004/108/EC, 2011/65/EU
EN55014-1:2006+A1:2009+A2:2011, EN55014-2:1997+A1:2001+A2:2008
EN61000-3-2:2006+A1:2009+A2:2009, EN61000-3-3:2008
EN60745-1:2009+A11:2010, EN60745-2-5:2010.
Max-Eyth-Strasse 10, D-71364 Winnenden, Germany
C E 2012

IZJAVA EC O SKLADNOSTI
Techtronic Industries GmbH
Max-Eyth-Strasse 10, D-71364 Winnenden, Germany
RWS1250/RWS1400/RWS1600
RWS1250 S/N: 29800101000001 - 29800101999999
RWS1400 S/N: 28300101000001 - 28300101999999
RWS1600 S/N: 27500101000001 - 27500101999999
skladen z zahevani siledecih standardov ali stanidarizanin dokumentov 2006/42/EC, 2004/108/EC, 2011/65/EU
EN55014-1:2006+A1:2009+A2:2011, EN55014-2:1997+A1:2001+A2:2008
EN61000-3-2:2006+A1:2009+A2:2009, EN61000-3-3:2008
EN60745-1:2009+A11:2010,EN60745-2-5:2010.
Raven zvočnega tlaka: Lp=96.5 dB(A) K= 3 dB(A)
Ravenjakostizvoka:Lw=107.5dB(A)K=3dB(A)
Vibracije ahv: ah=4.5 m/s² K =1,5 m/s²

Brian Ellis
Max-Eyth-Strasse 10, D-71364 Winnenden, Germany
C E 2012


PREHLÁSENIE O ZHODE EC
Techtronic Industries GmbH
Max-Eyth-Strasse 10, D-71364 Winnenden, Germany
RWS1250/RWS1400/RWS1600
RWS1250 S/N: 29800101000001 - 29800101999999
RWS1400 S/N: 28300101000001 - 28300101999999
RWS1600 S/N: 27500101000001 - 2750010199999
Max-Eyth-Strasse 10, D-71364 Winnenden, Germany
C € 2012

IZJAVA EC O SKLADNOSTI
Techtronic Industries GmbH
Max-Eyth-Strasse 10, D-71364 Winnenden, Germany
Aia tou npovto8nawoue o to poiov
Kukliko6 kontns
RWS1250/RWS1400/RWS1600
RWS1250 S/N: 29800101000001 - 29800101999999
RWS1400 S/N: 28300101000001 - 28300101999999
RWS1600 S/N: 27500101000001 - 27500101999999
oumuopooutai npoc ta akolouba npotua n tumnoiueva yypapa
2006/42/EC, 2004/108/EC, 2011/65/EU
EN55014-1:2006+A1:2009+A2:2011, EN55014-2:1997+A1:2001+A2:2008.
EN61000-3-2:2006+A1:2009+A2:2009, EN61000-3-3:2008
EN60745-1:2009+A11:2010, EN60745-2-5:2010.
Eπiεδo aikouotiknc πieonc: Lp=96.5 dB(A) K=3 dB(A)
Max-Eyth-Strasse 10, D-71364 Winnenden, Germany

EC DEKJIAPAUHA HA 3A CBOTBETCTBNE
Techtronic Industries GmbH
Max-Eyth-Strasse 10, D-71364 Winnenden, Germany
RWS1250/RWS1400/RWS1600
RWS1250 S/N: 29800101000001 - 2980010199999
RWS1400 S/N: 28300101000001 - 28300101999999
RWS1600 S/N: 27500101000001 - 27500101999999
Max-Eyth-Strasse 10, D-71364 Winnenden, Germany

€ 2012


RYOBI