
1930 AA - Laser pointer SKIL - Free user manual and instructions
Find the device manual for free 1930 AA SKIL in PDF.
| Product type | Laser pointer with distance measurement |
| Brand | Skil |
| Model | 1930 AA |
| Distance measurement range | 0.3 - 30 m |
| Distance measurement accuracy | ±3 mm |
| Smallest measurement unit | 0.001 m |
| Measurement time | 0.7 s |
| Angular measurement range | ±90° |
| Angular measurement accuracy | ±0.5° |
| Operating temperature | 0 °C to 40 °C |
| Storage temperature | -20 °C to +70 °C |
| Max. relative humidity | 90 % |
| Laser class | 2 |
| Laser type | 635 nm, <1 mW |
| Power supply | Li-polymer battery 3.7 V, 500 mAh |
| Usage duration | Up to 3000 measurements |
| Weight | 0.13 kg |
| Dimensions (L x W x H) | 128 x 58 x 25 mm |
| Automatic laser shutdown | After approx. 20 s of non-use |
| Automatic tool shutdown | After 3 min (6 min in leveling mode) |
| Measurement modes | Single distance, area, real-time, indirect, digital leveling |
| Reference function | Set an angle reference |
| Maintenance | Clean with a soft, damp cloth; do not use detergents |
| Repairability | Repair by Skil authorized service center only |
| Warranty | See www.skil.com |
Frequently Asked Questions - 1930 AA SKIL
User questions about 1930 AA SKIL
0 question about this device. Answer the ones you know or ask your own.
Ask a new question about this device
Download the instructions for your Laser pointer in PDF format for free! Find your manual 1930 AA - SKIL and take your electronic device back in hand. On this page are published all the documents necessary for the use of your device. 1930 AA by SKIL.
USER MANUAL 1930 AA SKIL
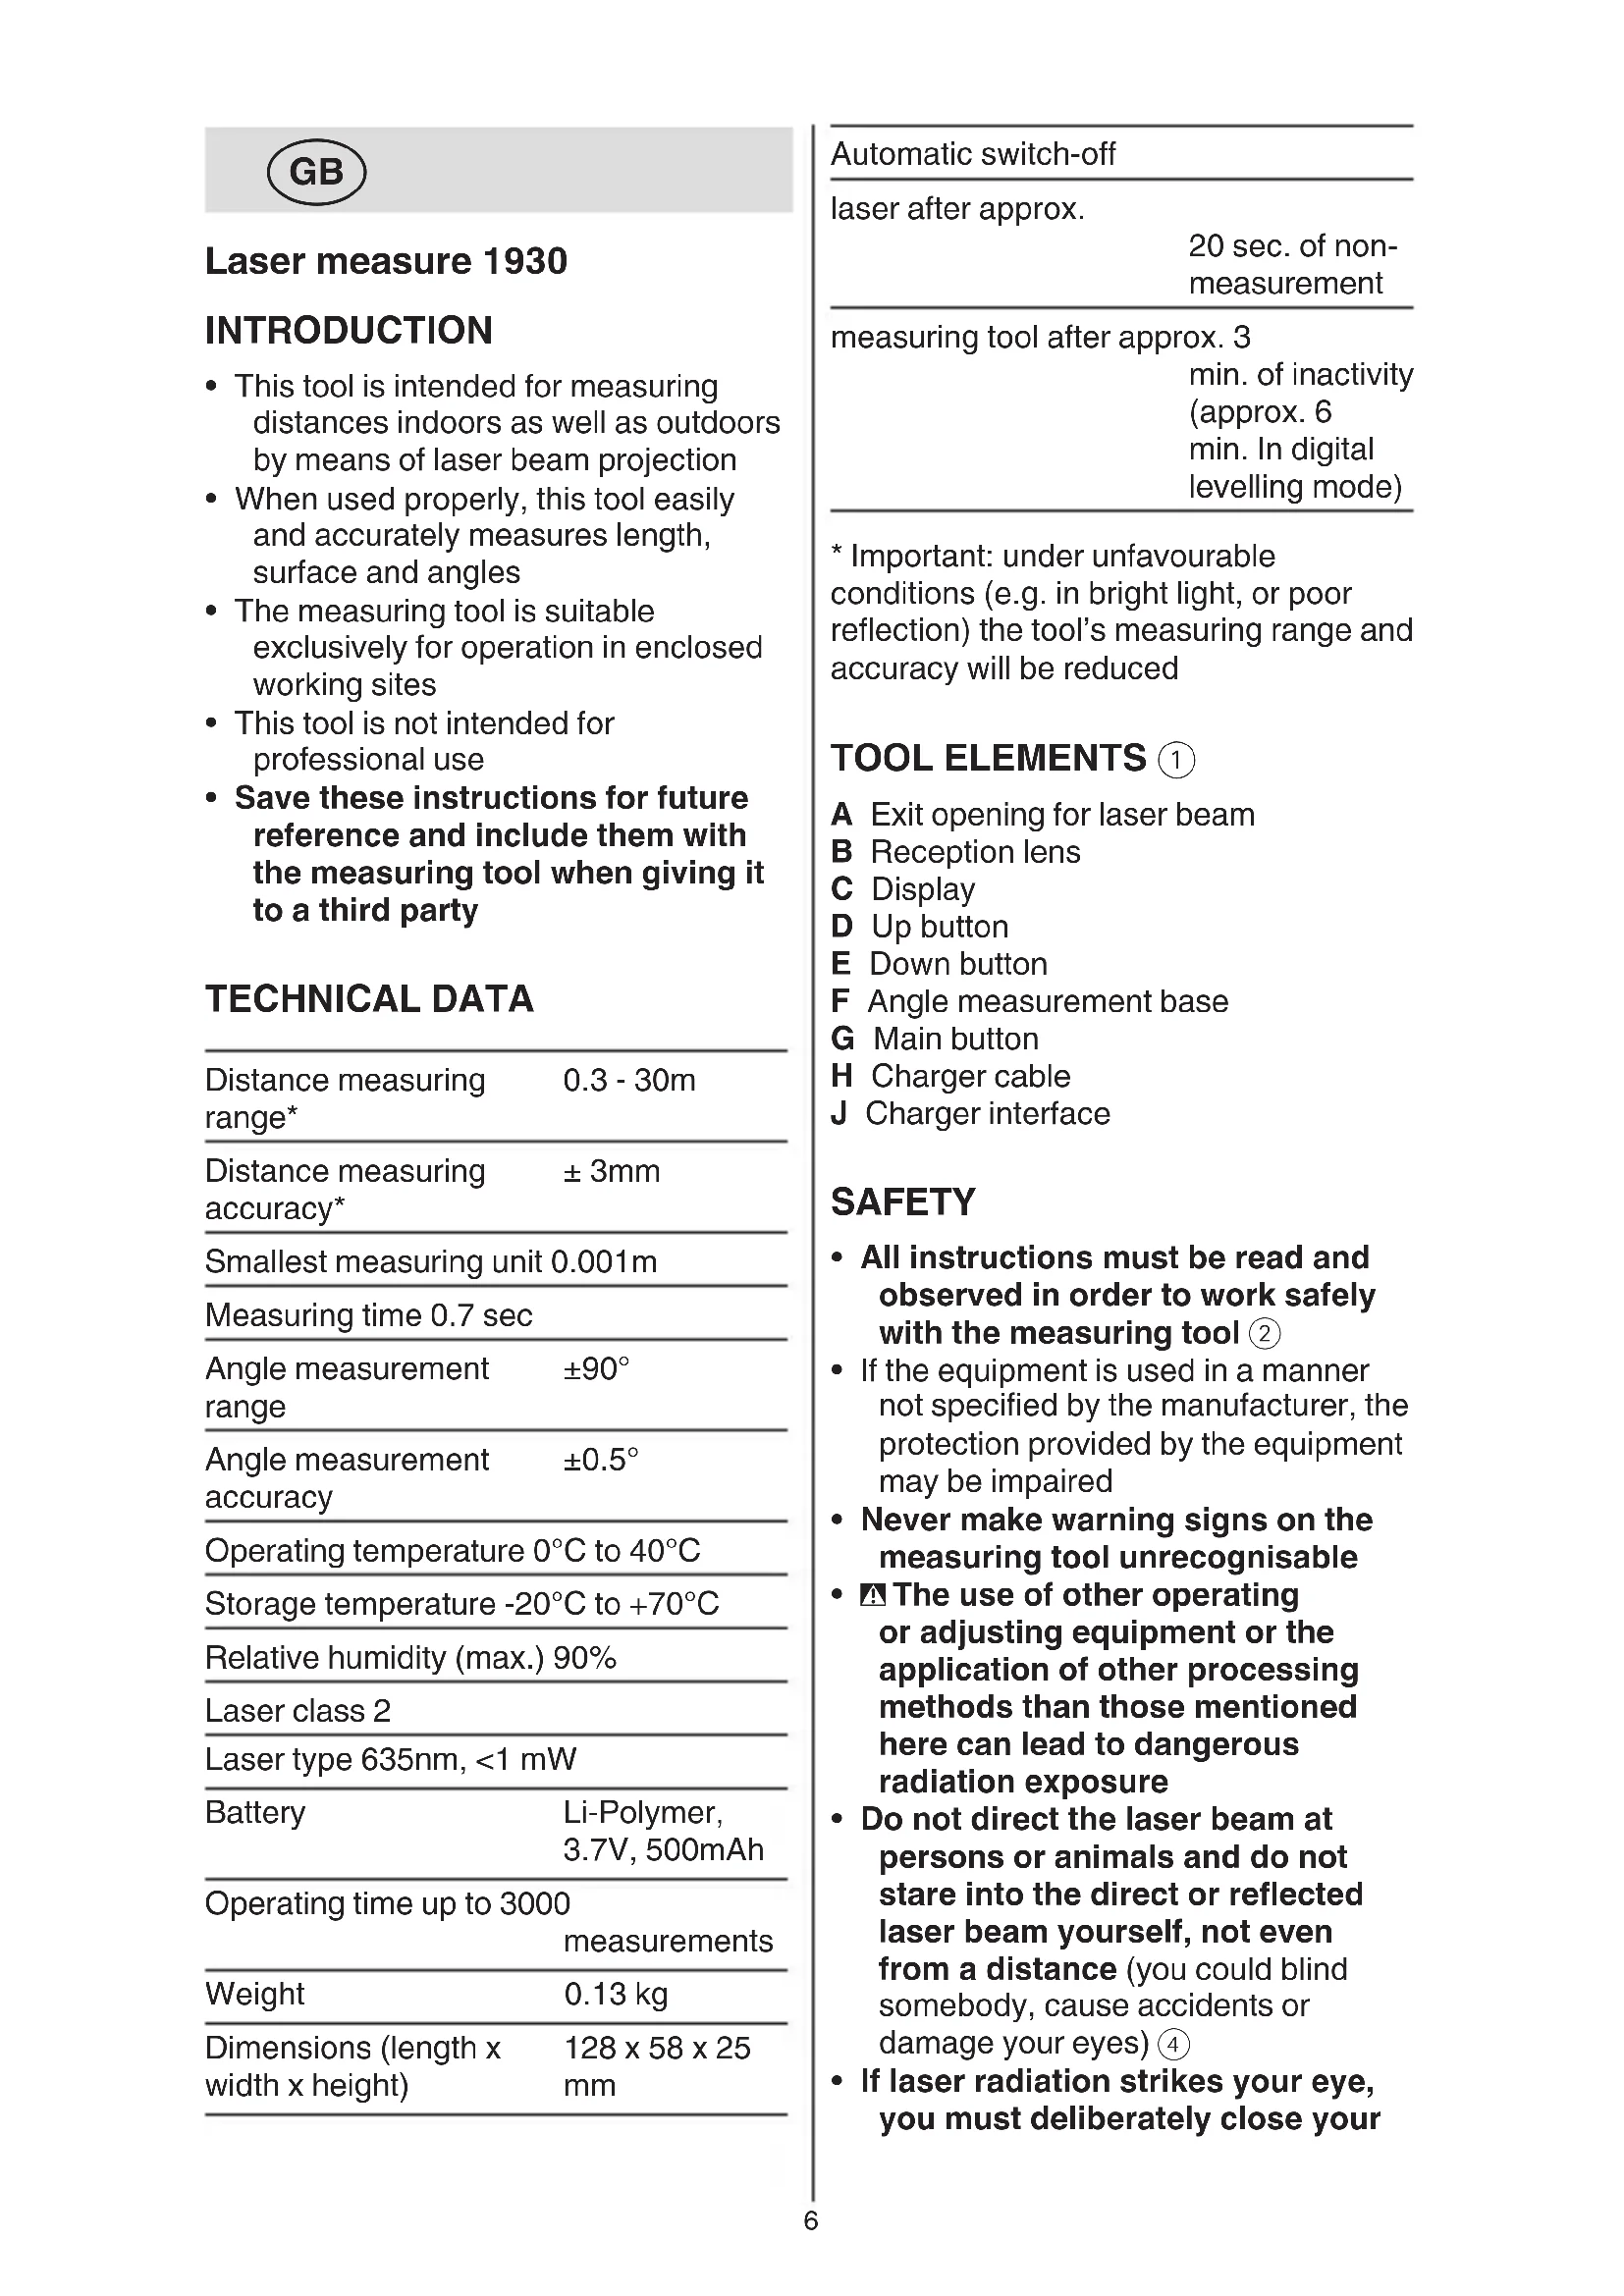
- This tool is intended for measuring distances indoors as well as outdoors by means of laser beam projection
- When used properly, this tool easily and accurately measures length, surface and angles
- The measuring tool is suitable exclusively for operation in enclosed working sites
This tool is not intended for professional use - Save these instructions for future reference and include them with the measuring tool when giving it to a third party
TECHNICAL DATA
| Distance measuring range* | 0.3 - 30m |
| Distance measuring accuracy* | ± 3mm |
| Smallest measuring unit 0.001m | |
| Measuring time 0.7 sec | |
| Angle measurement range | ±90° |
| Angle measurement accuracy | ±0.5° |
| Operating temperature 0°C to 40°C | |
| Storage temperature -20°C to +70°C | |
| Relative humidity (max.) 90% | |
| Laser class 2 | |
| Laser type 635nm, <1 mW | |
| Battery | Li-Polymer, 3.7V, 500mAh |
| Operating time up to 3000 measurements | |
| Weight | 0.13 kg |
| Dimensions (length x width x height) | 128 x 58 x 25 mm |
Automatic switch-off
laser after approx.
20 sec. of nonmeasurement
measuring tool after approx. 3
min. of inactivity (approx. 6 min. In digital levelling mode)
- Important: under unfavourable conditions (e.g. in bright light, or poor reflection) the tool's measuring range and accuracy will be reduced
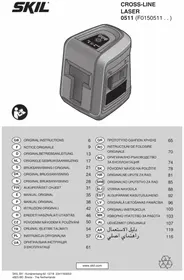
TOOLELEMENTS ①
A Exit opening for laser beam
B Reception lens
C Display
D Up button
E Down button
F Angle measurement base
G Main button
H Charger cable
J Charger interface
SAFETY
- All instructions must be read and observed in order to work safely with the measuring tool ②
- If the equipment is used in a manner not specified by the manufacturer, the protection provided by the equipment may be impaired
- Never make warning signs on the measuring tool unrecognisable
The use of other operating or adjusting equipment or the application of other processing methods than those mentioned here can lead to dangerous radiation exposure - Do not direct the laser beam at persons or animals and do not stare into the direct or reflected laser beam yourself, not even from a distance (you could blind somebody, cause accidents or damage your eyes) ④
- If laser radiation strikes your eye, you must deliberately close your
eyes and immediately turn your head away from the beam
- Do not make any modifications to the laser equipment
- Have the measuring tool repaired only through qualified specialists using original spare parts (this ensures that the safety of the measuring tool is maintained)
- Do not allow children to use the laser measuring tool without supervision (they could unintentionally blind other persons or themselves)
- Do not operate the measuring tool in explosive environments, such as in the presence of flammable liquids, gases or dusts (sparks can be created in the measuring tool which may ignite the dust or fumes)
EXPLANATION OF SYMBOLS ON TOOL
② Read the instruction manual before use
③ Do not dispose of electric tools and batteries together with household waste material
④ Laser radiation / Do not stare into beam / Class 2 laser product
USE
- Charging battery ⑤
! the battery supplied is partially charged (to ensure full capacity of the battery, completely charge the battery in the battery charger before using your power tool for the first time)
! read and follow the instruction delivered with the charger or power supply
-only use a charger or power supply which has an output voltage of 5V and output current of ≥ 0.5A
-connect charger cable H with both charger or power supply (not standard included) and charger interface J
-when connected, the tool will turn on and the battery level indicator 6 will start blinking
-charging is completed when the battery level indicator stops blinking and a full battery is indicated
-remove the charger cable H from the tool, or when it remains connected the tool will turn off after approx. half an hour
- Battery level indicator ⑥
-during use the battery level indicator on the display indicates the remaining battery capacity
On/off
-press main button G to turn on the tool
! the laser beam is automatically activated when the tool is turned on
-press and hold main button G for 1 second to turn off the tool
- Change units
! the default setting before first use is meters
1
-press and hold main button G to turn on the tool
-continue to press main button G for more than 2 seconds until the desired measurement unit (feet/inch or meter) is displayed
-release main button G to select the measurement unit
2
-press main button G to turn on the tool
-press and hold UP button D to select a different measurement unit
- Select measuring mode
-press UP D or DOWN button E to select the different measuring modes
- Single-distance measurement 8
-when you turn on the tool, the default measuring mode is single-distance measurement with the laser activated (see blinking laser indicator ⑦ a)
-if you select the distance mode by pressing UP D or DOWN button E the laser might not be activated automatically (see laser indicator ⑦ b), but only after pressing main button G
-with the laser beam activated, aim the laser at the target
-press the main button G to take a measurement (and automatically deactivate the laser)
! keep in mind that the tool measures from its rear (the tool length is included in the measuring result)
-press main button G to activate laser and press main button G again do take a consecutive measurement (up to 4 measurements can be displayed)
Area measurement ⑨
-press main button G to activate the laser
-aim at the first target (e.g. width) and press main button G to display the first dimension in the first row
-aim at the second target (e.g. length) and press main button G to display the second dimension in the second row
the laser is automatically deactivated and calculated area is displayed in the lowest row
-press main button G again to make a new measurement
Real-time measurement 10
this mode can be used to move the tool relative to the target and the continuously updated distance is displayed
-press main button G to activate the laser
-press main button G again to start measuring, the tool will start to beep
-press main button G again to deactivate the laser and end the measurement
- Indirect measurement ①
this mode can be used to calculate distances that cannot be measured because of an obstruction by an obstacle or the lack of a target surface
-press main button G to activate the laser
-position the tool at point A and aim at point B, the real-time angle is displayed
! if the display shows --.-° the tool is inclined to the left or right too much and the measurement cannot be made
-press main button G again and the measured distance AB and the angle are displayed and distances a and b are calculated
! the calculated length a is absolutely level and the angle between a and b is 90^ , which may differ from real situation
Digital levelling ②
-place the tool with the angle measurement base F on the surface to be measured
-the display shows the angle between the surface and absolute level
! if the display shows --.-- the tool is inclined to forward or backward too much and the measurement cannot be made ⑫ b
-to level or plumb the working surface, move the surface until the display shows 0^ or 90^
-if the deviation is within ± 10^ of 0^ and 90^ , fine-tuning arrows are shown which vary in direction and height relative to the target (12c
Instead of using absolute level, you can also set a reference by pressing and holding DOWN button E for 1 second; the display shows REF. and 0^ , the angle can now be measured relative to this reference
-press and hold DOWN button E for 1 second again to remove the reference and return to absolute level
-to hold a measurement, press main button G and the display shows HOLD and the measured angle
-press main button G again to release the hold
APPLICATION ADVICE
- When error messages occur in the display C, press any button to go back to the initial measurement display
- Faulty measurements cannot be excluded when measuring to different surfaces; the problematic surfaces are:
-transparent surfaces (e.g., glass, water)
-reflective surfaces (e.g., polished metal, glass)
-porous surface (e.g., insulation materials)
-structured surfaces (e.g., roughcast, natural stone)
If required, use piece of paper or a laser target plate (not included) on these surfaces
- Other possible causes for faulty measurement:
-the measurement took place outside the measuring range
-the angle between laser beam and target was too small
-the reception lens B or the laser beam opening A was misted up (e.g. due to a rapid temperature change)
Air layers with varying temperatures or indirectly received reflections can affect the measured value
MAINTENANCE / SERVICE
This tool is not intended for professional use
- Protect the measuring tool against moisture and direct sun light
- Do not subject the measuring tool to extreme temperatures or variations in temperature (the accuracy of the measuring tool can be impaired)
-as an example, do not leave it in vehicles for long time
-allow the measuring tool to adjust to the ambient temperature before putting it into operation
- Avoid heavy impact to or falling down of the measuring tool
-damage to the measuring tool can impair its accuracy
-after heavy impact or shock, compare the laser lines with a known horizontal or vertical reference line
- Keep the measuring tool clean at all times
- Do not immerse the measuring tool in water or other fluids
- Wipe off debris using a moist and soft cloth
- Do not use any cleaning agents or solvents
- Regularly clean the surfaces at the exit opening of the laser in particular, and pay attention to any fluff of fibres
- If the tool should fail despite the care taken in manufacturing and testing
procedures, repair should be carried out by an after-sales service centre for SKIL power tools
-send the tool undismantled together with proof of purchase to your dealer or the nearest SKIL service station (addresses as well as the service diagram of the tool are listed on www.skil.com)
- Be aware that damage due to overload or improper handling of the tool will be excluded from the warranty (for the SKIL warranty conditions see www.skil.com or ask your dealer)
ENVIRONMENT
- Do not dispose of electric tools, batteries, accessories and packaging together with household waste material (only for EU countries)
-in observance of European Directive 2012/19/EC on waste of electric and electronic equipment and its implementation in accordance with national law, electric tools that have reached the end of their life must be collected separately and returned to an environmentally compatible recycling facility
-symbol ④ will remind you of this when the need for disposing occurs
F
VEDLIKEHOLD / SERVICE
MANUTENÇÂO / SERVICO
PekomeHdyetcOuHCTnTb HnCTpyMeHT OT nbIIN NocLe KaJDoTO nCNoJIb3OBAHNA.
XpaHeHne
-Heo6xOJIMO XpaHnTb BCyXOM MeCTe
-Heo6xOJIMO XpaHHTb BdaJIH OT NCTOCHIKOB IOBblIeHHbIX TEMpepaTpy I BO3dEInCTBnA COJIHeuHbIX Lyuei
-πρι xρaηνιν ΘεοδxούνηmΟ Ιπεσεραθέρεκτον Κερεραία Ετεμηρατγρ
-xpahene6e3 ynaKOBn He donychaetc
-Notpo6HbIe Tpe6oBaHHaK YcIOBnM XpaHEnn CMOTpnte B FOCT 15150 (YcIOBne 1)
TpaHcnpTnpoBHa
-KaTeROpNueeCKH He DOnyUcHaETcnaDeHHe NJIObbIe MExaHnueeChNeBO3dEiCTBnHa yNaKOBky npITpaHCnOpTnPOBKe
-рп разгузke/норузke He
ДОПУСHAЕТСЯ ИСПОЛБ3OBAHNE
ЛЮБOrВИда ТЕХИКИ,
разотаюше NO приицiguу 3aЖИма
УпаКовки
-ПОДРОБНБЕТpeбованяК
УСЛОВИМТраHCПОТИРОВИ
СМOTРиTeВГОCT15150(YсЛOBиE
5)
BBEDEHNE
-ДаньиИнстументпрднЗнayehДЯИЗМереняpacctOнВПOMeшENIXHa yIuIe npN NOMOIInpoeцрOBAHЯla3epHOrO Lyua
- PnHaJleKaIeM npImeHnn 3Tm HnCTpyMeHTOM MOKHO IeKo N TOHO n3MepNTb dInHy, pIoUaIb N O6beM
-Измерптеловинстументприюен ИСКЛЮЧТельно ДлиэКСПлуаТAUHВЗАкрыТыХnomeшених
-ДаньиИНСТРУМЕNT He NOДXODIITДЯ ПOMБИЛЕHHORO ИСПОЛБ3OBAHIN
Xopoшо coxpanYe 3Tu HnCtpyKnIOn I nepeDaBaIte ee BmecTe c nepeDauei N3MepntbHOrO nHcTpymeHTa
TEXHnueCHe DAHHbIE
CTPAHA N3ΓΟTOBJEHHN
CdeIaHO B KITae
ToHocTb n3MepeHnA ± 3 MM paCCTOaHnA*
MnHmMaJIbHa eINHnIa 0,001 M n3MepeHnI
BpeMn3MepeHn0,7c
ABTOMaTnueckoe BblKJIHouEHHIe
na3ep nocne np6n.
20c6e3 npoBeDeHn n3MepeHn
ИЗМерпеловий ИНСТРУМЕТ ПОСLE РИБЛ.3MH 6e3dEiCTBnA (OKOLO6MH BpeKIMe UФрOBOro yPOBHЯ)
*BnMaHHe: npn He6laIarOpnpTbIX ycNoBnx (HaNP. npn npKOM CBTe)
pa6oynI dnaana3OH nTOHOCb HNCTpyMeHTa yMeHb7aOTc8
DETAJIHCHTPYMEHTA①
A OTBepCTne IJIaBbIXOda Ia3epHoro Lyya
B Pnpemha JnH3a
C DnncnneHa HnndKnx KpncTaIax
D Khonka BBEPX
E Khonka BHN3
F OchoBaHne Ira n3MepeHna yrIOB
G TlaBna KhoNka
H Ka6eIb 3aρaHOro yCTpOuCTBa
J INTEPfeic 3apHOro yctpoiCTBa
BE3OПАСHOCTb
ДЯобеспуньбзогин Наджног pa60тсИЗМерпелбим ИСТумЕТOMДOLЖНБI 6bITb ПОчNTAHы Nco6ЛЮаТбСВCE ИСТPyнцИ
- Исторынaya усторій Способом, He yka3aHHbIM
- Рождовпелем, может снзИтБуровень р dedлагаим 3auntbl
HnKOrda He n3MeHnTe Do Hey3HaBaEMoCTn npEdupeDnteBhIe Ta6JIuHn Ha n3MepHTeBHom HNCTpyMeHTe
HcnoJIb3OBAHHe pyrHx He ynOMaHyTbIX 3dEcB 3JeMeHTOB ynpaBLeHnI n perylnpoBaHnI nIy dpyrHX MeToIDOB 3KcnIyatauHn MoKeT noDBeprHyTb Bac onaCHomy Ira 3doPoBbI n3JyuHnIO
He HanaBnTe lyu Ia3epa Ha IIOeH JIN HNBOTbIX N Camn He CMOTPe Ha npMoH nn OtpaKaembl Lyu Ja3epa (3TOT Lyu MOKeT CJIeNTb IIOeH, CTaTB npuHNO HeCuaCTHO rclyua Hn IOBpeNTb rna3a) ④
Bcnyae nonaHaHna Ja3epHoro Lyya B rla3 rla3a HyHHo HamepeHNO 3aKpbITb N HeMeDJIeHNO OTBepHyTbcr OT Lyya
He MeHnTe HnUero B Ja3epHom yCTpOncTBe
- PemOH T Bawero n3MepntelbHoro
HHCTpymeHaTo npUaTe
TOJIbHO KBaIInΦnIpuBaHHomy
NepcoHaJy, HcNoJIb3yA TOJIbHO
OpHnHaJIbHbIe 3aNaChbIe YaactN
Hiyoro He minyTe B Ia3epHomy npncTpoi
BidaBaTe Cbi BmipOBAhni npHa Ha peMOHT Inwe KBaIiΦIKOBaHm φaxIBcAm Ta IInwe 3 BNKOpNCtAHNM opriHaBnX 3anactnH (TilbN 3a TaKnx yMoB BaW BmipOBAhni npHa i Hadani 6yde 3aIIuataNc8e3neuHM)
He do3Bolnyte iTMy KopnctyBaTncs 6e3 HaIydy Ia3epHm BmipOBAIbHm npnaDom (BOHN MOKytb HeHaBMNChe 3acJIINNTi INHXN IIOdei)
He npaioTe 3 BmipOBaIbHnmpnaDom y cepeoBnui, de icHycHe6e3neHa Bn6yx BhaCIIIOH npCyTHOCTi ropounx pINr, ra3IB a60 nny (y BmipOBaJIbHOMy npiaDi MOKyTB yTBOPOBaTnCra Ickpn, BiJ RnX MoKe 3aMmATnCra Nl a6o napu)
IORCHEHRAOYMOBHX I03HAOK HA IHCTPYMEHTI
②Перед ВИКОРИСТАннЯМ РОЧТайTe iHCTpyKцio i3 3aCTOCyBaHHa
③ He BnKnDaIte eJeKTpoIHCTpyMeHT Ta 6aTaapei pa3OM 3i 3BnuaHNM CMITTM
④ La3epHe BnnpomHOBaHH/ He nBItbcB npomHb / La3epHn npodykT 2 knacy
BnKOpHCTAHH
3apJxHnAkyMylTopa 5! AynMyIaTOp, kHn nocTaayctbCBA KOMJIeHTi, cYactHOBO
3apdHexn (noBhicto 3apTb aKymyIaTOP B 3apHOMy npncptoi nepei nepshm BVKnOpncTaHHaM CBoro eJeHTpoIHcTpymeHTy, 0o6 3a6e3neHTn NOBHy nOtJHHicTb aKymyIaTopa)
!BnBvItb Ta doTpmyTeScb noLoHeHb IHctpyKci, rKa nocTAbIeTbcra B KOMnJIeHTi i3 3apdHm npncTrooem a6o 6JIOHOM HnBLeHHa
-BHKOPNCOTByTe TIlbKn 3apAHNn
PnCTpii a6o 6Iok HnBLeHn
3 BnIXiDHO HAppyroIO 5 B Ta
BnIXiDHM CTrpymOM ≥0,5 A
-πiδKlHoyItb Ka6eIb 3apArdHOro npnctpoH Hdo 3apArdHOro npnctpoH a6o 6loky KINBLeHHa (CTaHdapTHO B KOMNJIeKT He BKJIuOHaETbcra) Ta iHTeppeiCy 3apArdHOro npnctpoJ
-при пдклочeni рплад BMнкаETбя, a iHДнКaTOp pIBн 3apЯу 6aTapei ⑥ noчнae 6lHMaTn
-3apJaKa 3aBepuYeTbcra, KOIN iHnKaTOp pIBHa 3apA dy 6aTapei nepeCTae 6JImaTu Ta noka3y e NOBnPiBeHb 3apA dy 6aTapei
-BiDKnUoyItb Ka6eIb 3apAHO rnpncTpoH BId npnilady, kkuo 3aJnWHTn IoroPiDKluOyeHM, npnilad BmKHeTbcrYepe3 nIBroHNH
- IIndiKaTOp pIBH3apAHy 6aTapei ⑥
-πiД yac BnKOpncTaHЯ iHdNkaToppBn3apAу 6aTapei Ha dncnpei noka3ye 3aIuWkoBn 3apA6aTapei
BMnKaHHBmNkaHH
-HaTnCHiTb TOnOBHy KHOHy G, 06 yBIMKHyTN npnilad
!npB BBIMKHeHHI npHlaD nouHaec aBTOMaTHUHO BnPOMiHOBaTH Ia3epHn Ipomihb
-HaTnCHiB Ta yTpmyIte roIOBHy KHOHky G npotrarom 1 cekyHn, UO6 BmKHyTu npnilad
3MiHa OINHnB BmipIOBaHHa
- OdnHnue HbMipIOBaHHa BiCTaHi 8
-прввимкннлрILAу3a 3amOByBaHHm ObaHn peKHM OINHnHOrO BmIpIOBaHHaBHaBbI 3 BKIOUeHnM Ia3epom (INB. 6lmaOuHn iHdNkAToP Ia3epa (7) a)
-RAHIO Bn BV6epeTe peKHM BiDcTaHI, HATNCHyBUN KHOHPY BGOPY D a60 BHN3 E, Ia3ep 6yde BMNKaTncr He aBTOMaTHUHO (INB. iHNKaTOP Ia3epa ⑦ b), a TIlbKn npn HAITNCaHHI rOIOBHOU KHOHN G
-при BBIMKHeHomy npomeni la3epa cnprMyTe la3ep Ha ziIb
-HaTnCHiB rOIOBHy KHOHky G DJI BNIKOHAHNBAIMIPIOBaHHA (Ta aBTOMaTHUHOro BUMKHeHHra Ia3epa)
! He 3a6yBaIte, 10 npncTpiBnMipIOe BiIDCTaHb BID CBOEi3aHbOi YacTHHN (IOBxHnHa npncTPOIO BXODHTb DOpe3yIbTaTy BnMipIOBaHHa)
-HaTNCiTb roIOBHy KHONky G, ⅢO6 BBIMKHyTN Ia3ep, Ta Ie pa3 HaTNCiTb roIOBHy KHOINy G dIy BnKOHaHHI NOcIIOBHNX BmipOBaHb (BiO6paJaCTbcrdo 4 Bmipib)
BmipioBaHHnIIOozi 9
-HaTnChiTb roIobHy KHOnHy G, 06 yBIMKHyTN Ia3ep
-cnpMyIte npomihb Ha nepuy ciNb (HaNP.. WnpiHy) Ta HATNCiB roIOBHy KHOHky G dny BIDo6paKeHHa nepwOro po3Mipy B
περψΟМу ряДку
-cnpmyte npomihb Ha dpyr
zilb (HaNP., DOBHNHy) Ta
HaTnCHiTb rOIOBHy KHOHky G dIy
BIDOBpaJKeHHa DpyrOTo pO3mipy B
dpyromy prk
-Ja3ep aBTOMaTHUHO BUMHKaETbCRA, aBcami HNHHi YacTHi BiO6paKaETbCra PO3paxOBaHa PLOsa
-HaTnCHiTb roIobHy KHOpKy G ue pa3 dIy HOBO Bmipy
BumipioBaHHBpeaIbHomy yaci 10
-uepeKIMMOHHa
BnKOpNCTOByBaTnДЯ
IepemiiueHn npnilady
BiHOCHOiI3 BiO6paJKeHHaM
6e3pepePBNO OHOBJIOBaHoI
BiDCTaHI
-HaTnCHiTb roIOBHy KHOHHy G, 06 yBIMKHyTN Ia3ep
-HaTNCIb rOIOBHy KHOHcy G ige pa3, 06 NOaTN BIMipIOBaHHn, npnaBnDaCTb 3ByKOBn CnHaJ
-HaTnCHiTb rOIOBHy KHOHky G ige pa3, 06 BmKHyTN Ia3ep Ta 3aBepuHTN BmMipIOBaHHJ
- HenpmaBnMip ①
-uepeHMMoHHa
BnKOpNCTOByBaTNdIpaO3paxHy
BiDcTaHei,kiHEMOxJIINBO
BmiprTnB3B'3Ky3HaABHicTIO
peeKoAn a6o HeoCTaTHbOIO
CilboBOIO NLOSeIO
-HaTnCHiTb roIobHy KhoNHy G, 06 yBIMKHyTn Ia3ep
-po3TaWyIe npnilad B Tocci A HabeiItb Ha Tocky B, 6yde BiO6paKaTnC8 Kyt B pealbHomy Yaci
!ЯкsoHaДиспл ei noka3aHo --, npHJa3aHaTTo CnIbHO HaxJIeHn BJIBO a6O BnpaBO Ta BHKoHaTHn BmIpIOBaHHa HEMOKJIIBO
-ue pa3 HaTNCiTB rOIOBHy KHOHky G, BiO6pa3nTbc Bmip BiDCTaHe AB Ta kyTa i 6yde BnHOHaHn po3paxyHok BiDCTaHe a Ta b !po3paxoBaHa DOHHa a BiNobiAc a6cOJIOTHO npMIM liHii, a Hyt MIX a Ta b cKnadae 90^g , 90, 90 MoXe BiDiPI3HrTncB iPealbHOi CHTyaui
LcnpoBeBnpiBHBIOBaHH ⑫
-po3TaWyIte npnlaO OCHOBOIO IJI Bmipy KytIB F Ha NOBepxHl Bmipy
-Ha DnCnJIe 3'ABNTbC KYT MIX NOBepxHeIO Ta a6COJIOTHm PiBHem
!ЯкsoHaДиСплeI NOka3aHo --.,npHla3aHaTcNoCnIbHO HaxJIeHnBpePea6oHa3aTa BHKOHATN BmIPIOBaHHAHEMOHINBO 12b
-ДЯ ropn30HTaIbHOro a6o BepTKaJIbHOrO BnpiBnHOBaHHra po6ooi nobepxHi nepemiiTaTe NOBepxHIO, nOKn Ha dinCpIeI He 3'ABNTbcr O° a6o 90°
-RAHIO BiXINHeHH 3HaXOHTbcB B MeKax ±10° BiD 0° Ta 90°, BiO6paKaIObCra CTrpIKn TOUHOrpeRyIIOBaHHra 3 Pi3HMn HAnpMaMn Ta BUCOTIO BiHOCHO ciJI ① c
-3amictb BnKOpncTaHHa6coJIOTHO pIBHra TaHoxMOnkHa 3aDaTn ONOpHe 3NaueHnHaTHNCHyBwTu yTpmyuOu HKnKyBHn3 E npotrrom 1 cekynHa dn;Ha dncPlei 3'ABNTbcra REF. Ta 0^ nicIyCboro BVmipIOBaHHa6yTyBnKOHyBaTcB iDHOcHo 2bOroONOPHO 3NaueHHa
-HaTnCHiTb Ta yTpmyIte KHONKy BHN3 E npotraom 1 cekyndn dny BndaJIeHHn OOnpHOro 3HaueHHn Ta NOBepHeHHn Do a6cOJIOTHOrO pIBHn
-Длфikcaii BmipobHnHaTncIb rOIOBHy KhoNky G,Ha dinCJIeI 3'ABNTbcra HOLD Ta3HaueHHBmipy
-ue pa3 haTnCHiTb roIOBHy KHOHky G, 06 cKacyBaTN fikcaio
IOPAINIO BHKOPNCAHIO
PnnoBHa dncnlei nobioomIeHb npo nOmNkC hATNCHTb 6yDb- kHy KHOhKy dIy NOBepHeHHa DO BHXiDHorO ekpaHy BmipiB
- Pn Bmipax pi3Hnx NOBepxOHb HEMOJIINBO BNKIOHTN NOMIHOBI BIMIPOBaHH; TpydHOi MOKyTb npedCTabTn TaKi NOBepxHi:
- npo3opi noBepxhi (HaNP., cHIO, BODa)
-BiD6nBHi NOBepxHi (Hanp., noIipOBaHm MeTaI, cKIo)
-NoticnIOBepxHi (HaNP., 30JiHi MaTepiAn)
-CTpykTpyoBaHi NOBepxHi (Ha np., STyKaTpyka, HaTypaJIbHn KAmIHb) Ppi Heo6XiDNoCTi Ha ci NoBepxHi C1i HaKlaCTn apKyuN panepy a60 Ia3epHy Bi3nHy MapHy (B KOMPJIeHT He BXODNTb)
- IHsi MoKJIbI npUHHn HeBipHX BmIPiB:
-BHmip npoBOIDBcra No3a MeXaMn BHMipy
-KyT MIX JIa3epHIM IpomeHem Ta BiMITKOIO cini 6yb 3aHaTO MaHIM
-риomhi liH3n B a6o oTbip nla3epHoro npomeHa 3anotiinn (Haapanlada, y 3B'ra3ky 3i Wbndko3MiHO TeMnepaTypu)
Ha 3haueHHB NIMipOBaHH MoKyTb BnINBaTN 7apN NOBITp3 pi3HMM TeMnepaTypam a6o Henpami BiO6paKeHH
OJIA/O6CnyROByAHH
- LcienHCTpymEnT He npndaTHn dI npOMNCIOBOrO BHKOpNCtAHN
3axuataTe BnMipIOBaJIbHn npIaB BiD BOJOrn i COHryHnx IpOMeHiB
He donyckaIte BnIbBy Ha BmipIOBaJIbHn IpnlaeKCTpeMaJIbHnx TempepaTyp Ta TempeaTyPhNX nepenadIB
(MOxyTb NORipSyBaTH TOUHicTb BnMIPIOBaJIbHOrO npHaIaIy)
-3OKpema, He 3aIuMaIte NOro Ha TpNbAIny Cac B MaunHi
-ηρψ HIX BMHKaTN NOrO, DaITe
HOMy Cta6iJI3yBaTN CBOIO
TemnepaTypy
- YHnKaIte CnIbHnx NOuTOBxIB Ta NaIHHa BnMIPIOBaJIbHOrO pNlaDy -B pe3yIbTaTI NOnKoJKeHN H BnMIPOBaJIbHOrO pNlaDy MoKe NOripuNTscry Ioro ToCHicTb -nicra CnIbHOrO NoSTOBxv a60 NaIHHa nepeBiPe Tna3epHy LiHiIO 3a DOnOMOrO BHe icHyUcOi Ropn3OHTaJIbHOI a6o BeptnKaJIbHOI KOHTpoJIbHOI liHII
3aBKnTpMaIte BnMipIOBaIbHn nplaB YnCTOTi
He 3aHypioTe BnMipIOBaIbHn npiaad y BODy a6o iHwi piINH
BntpaTe 3a6pydHeHHBaI0rOIO M'koI rHvipKOIO
He KopncTyIeCeMmHmM3ac06amIp03HHHKaM
3okpema, perylarpno npouuau Te NOBepxhi KOLO BHXiDHoro OTbopy Ia3epa i cndHynte pnCbomy 3a TtM, 06 He 3aIIHuaocBOPCNHOK
-Якuto He3BaJkaHOn Ha peTeIbHy TexHOIOrIO BnroTOBJIeHNHa I nepeBipKn iHCTpyMeHT BCE-TaKN BnIe 3 LaNy, NOro peMOHT Do3BOJIAETbcr BnKOHyBaTu NlUe B abTOpN3OBaHI cepBicHi MaICTepHi Dlan eJeKTpOpiJaIDiB SKIL
-
Naichi Tb Hcp03ipnni HCTpymeT pa30m 3doKa30m KynibI do BaWoro dInepa a6o Do Ha6nnKyOro ceHTpy 6cLyROByBaHHa SKIL (adpecn, a TaKoJ diarpaMa o6cLyROByBaHHa npictpo, noaOTbcHa caTi www.skil.com)
-
Bi3bmitb do BIDOMa, 10 yHKoJKeHHBhacIiDOK npeBaHTaKeHHa6o HeHaJIeKHO NOBOJKeHHa 3 IHCTpyMeHToM He 6ydyTb BKIOUeHi B rapaHTiO (ymOBn rapaHtii SKIL DnB. Ha caTI www.skil.com a6o DObiAaTEcB dInlepa y BaWomy perioHi)
OXOPOHA HABKOLINHbOICPEI
He BnKndaTe eIeKtpoiHCTpyMeHT,6atapei, npHaJaleJHKHO CT Ta yNaHOBY pa3OM 3I 3BnuAHHM CMITAM (TilbKn DnI KpaIH EC) -BIDNOBIDHO Do EBPonecboi DnpeKTHBN 2012/19/EC UOdo yTuJI3aui Ctapnx eJeKTPuHNX Ta eJeKTPoHHX npHlaDiB, B 3aJIeJHHOCTI 3 MICUEBHM 3aKOHODaBCTBOM, eJeKTPoIHCTpyMeHT, kHni nepe6yBaB B EKcNlyaTaui IOBHN H 6yTN yTuJI3OBaHNI OKpEmo, 6e3neuHm IJa HABKOJIuHbOTo CEpeDObNuHa ShJAXOM -MaIIOHOK 4 HaRaDae Bam npo ue
GR
Métpnση λειζερ 1930
EISAG
- Másurare in tamp real ⑩
OTHOCHTeHa BlaXHOCT 90% (MaKc.)
Klac na3ep 2
Tin la3ep 635 nm, < 1
mW
AkyMaTOpHa 6aTePnI Jntn- noJImepHa,3,7 V,500 mAh
BpemeHa pa6oTa 3000
ИзМерваня
Terno 0,13 kg
Pa3mepn(dblnnHa x 128x58x25
HnpOuHa X BncoUHa) mm
ABTomatuHO n3KIOUBAHe
na3ep cneI npn6JI.
20 cek ha hen3mepbahe
H3MepBaTeJIeH HNCTpymeHT
CneI npn6JI 3MnHa
HeaKTNBHOCT (npn6JI.6
MNH BpeKIM
Ha zHΦpOBO
HnBvIpaHe)
*BaXHo: npn He6laIarOpnpTn yCIOBn (Hanp. npn JrpKa CBeTlnHa nll looO OtpaKeHne) dnaNa30HbT n ToUHOCTTa Ha n3MepBaHe Ha nHcTpymeHTa ige 6bdaT HamaJIeHn
EJEMEHNAHCHPUMEHTA

A OTbOp 3a n3xoJaunna3epen IbH
B Pnpemaa Jeea
C Dnncnnei
D ByToH 3a Harope
E ByToH 3a HApOly
F Ochoba 3a n3MepeBaHe Ha bTbJI
G IaBEN 6yToH
H Ka6eI Ha 3apAHOTo yCTpOiCTBO
J INTEpΦeIc Ha 3apAДHOTO yCTpoIcTBO
BE30NACHOCT
3a da pa6oTHe 6e3OnacHo n cnrypHo c n3MepBaTeHnHa ypei, Tpa6Ba Da npOteTe H CnA3BaTe BCnUKN yKa3aHHN ②
AkoobopydBaHeTo ce n3noJ3Ba no NaunH, HeyKa3aOH OT npOn3BODHTeJI, 3auntata, OCHypeHa OT obopydBaHeTo, MoKe Da 6bJe HapuWeHa
Hnkora He octaBnTe npedynpenTeHNHe Ta6eHNn no n3mepBaTeHNy ype Da 6bDaT HeueTnBn
AHO 6bdaT n3noJ3BaHn pa3JIuHH OT npNBedeHnte TyK npNCnocO6JIeHn 3a o6cJyHBaHe nn HAcTpoBbAHe nn aKO ce n3IbJIHbAT dpyrN npoceDpyn, TOBa moKe da Bn n3IoJHn Ha onaCHO 06lbYBaHe
He haoBaIte Ia3epHnIbU KbM Xopa n HNBOTHN IN BHNMaBaIte Da He norJeDHeTe HEnOpeDCTBeHO Cpeu y Ia3epHnIbU NIn Cpeu y HerOBo OtpaJHeHne (Taka MOKeTe Da 3acJIeNITe Xopa, Da npuHHTe TpyoBn 3IOnOlyKn NnI Da npedn3BnKaTe yBpeJDaHe Ha OHTe) 4
- Ako Ia3epHnT nby nonaDHe B OuHTe, rN 3aTBOpTe Bb3MOxHo Hau-6bp30 n OTdpbHHe TlaBaTa Cn OT Ia3epHnI nbY
He n3BbPwBaIte n3MeHEnn no Ia3epHOTo 6OpyDbaHe
-Донусян TeиЗмepBaTeJHnIyypeДабБдe peMOHTnpaH caMoOT KBaINФИцран TExHnIu cAmO C n3NoJ3BaHe Ha
OpHnHaHn pe3epBn qactn (c TOBa ce rapaHTnpa 3ana3BaHeTo HaФункиnte,ocnIpyrau6e3OanacHOCTTaHaN3MePbTeJIHHypei)
He octabraye deca 6e3 npaHnHa3Op da pa6oTc n3MepBaTeHNy ypei (MoraT HeBOJHO Da 3acJeNr dpyrXopa)
He pa6oTeTe c n3MepBaTeJIHnyaypeB CpeDa C NOBnIeHaONaCHOCT OT eHCnIIO3nB KOrTo HMa JleCHO3aNaJIMNTeuHOCTn, Ra3OBe nn IpaXOBe(B N3MepBaTeJIHnyaypeD MoRaTda Bb3HNKHaT NcKpn, KOtO daBb3PnAmEHNr npaxa nn NapITE)OBRCHEHNE HA CNMBOLNTE IOHHCTPYMEHTA
② Прази унотpe6а поче tepeьководCTBOTOсуka3aHnA
③ He n3xBbpyIe eIeKtpoypeIte n 6aTeepn3aeDHO C 6ntOBN OTnaDbu
④Лазэрно Лбчени / He riledaiteв Льчa / Лазэрен порукт Клac 2
yNOTPE6A
3apeKdahe Ha aKymylaTopa 5!nDbaata B HOMnIeHa 6atepna e qactnH0 3apeDeHa (3a daOcnrypnte nBleH hanaunTe Ha6atepna, 3apeTe HnblHo6atepnaT B 3apndHOTO yCTPOcTBo 3a 6atepna, npEn Da n3noJ3BaTe Baunn EeKTPOHcTpymeHT 3a NbpBn nbT)!npoetete n cIeDaite HHCTpyKznte,doCTaBeHN CbC 3apndHOTO yCTPOcTBO nIn EeHTPO3axpaHBAHeTO -n3NoJ3BaIte cAmO 3apndHO yCTPOcTBO nIn EeKTPo3axpaHBAHe C n3XoJHO HanpeJKeHne OT V nN3XoJEN TO 口 ≥ 0 , 5 A-CBpKteKa6ela Ha 3apndHOTO yCTPOcTBO H n KbM 3apndHOTO yCTPOcTBO nIn eJeKTPo3axpaHBAHeTO (He e CTaNdAPTHO BVJIIOUeH), n KbM INHTepFeiCa Ha 3apndHOTO yCTPOcTBO J-KORATo e CBbp3aH, INCTpymeHTbT
Ie Ce BkIoUH N HdNkAToPbT 3a HnBOTO Ha 3apJd Ha 6aTepeyra ⑥ Ie 3aNoUHe Da Mna
-3apeKdaHeTo e 3aBbPshnlo, KOraTO INdNkAToptbT 3a HNBOTO Ha 3apJHa 6aTepeTt aCpe Da Mna n e yKa3aHa NbIHa 6aTepe
-3BaTe Ka6eHa Ha 3apJHOTO yCTpOHTBO H OT INHCTpymeHTa IIN, aKO OCTaHe CBbp3aH, INHCTpymeHTbT ige Ce N3KJIIOUcIeI np6JI. NOLOBn Yac
- INДИКаTOP 3a KaIauNTeTa Ha 6aTePnIrTa ⑥
-ПО ВЕME Ha yNtpe6a ИнднakTopbT 3a HNBOTo Ha Зарян Ha 6aTePnTa Ha ДиСпля Уka3Ba OCTaBaшь КацHTet Ha БaTePnTa
- BклioуbaHe/H3KlIOUBAHe -HaTnCHTe rIaBHH6yToH G, 3a da BkIIOHTe INHCTpyMeHTa ! La3epHnrt IbY Ce aKTNbHpa aBTOMaTHuHO, KOrato INHCTpyMeHTbTe BkIIOUeH
-HaTnCHeI 3aApbXTe rIaBnHn6byToH G 3a 1 cekyHda, 3a daN3KJIouHTe INHCTpyMeHTa
- CmHa Ha MepHnTe eHNnCi! HacrpoiKaTa no NpOpa3bnpaHe npEi nBpBaTa yNoTpe6a e MeTpN
1
-HaTnCHete 3aApbXTe rIaBHn86yToH G, 3a Da BkIIOuHTe INHCTpyMeHTa
-рдьнгete da haTnckate rnaBnH 6ytoH G 3a noBeue ot 2 cekyn, dokato ce nokaxe keJanaHaTa n3MepBaTeJHa eDHHuca (ФуТ/Инч nIIM MeTbp)
-OCBO6ODeTe rIaBnHna 6yToH G,3a Da n36epTe n3MePbAteHaTa eDHHua
2
-HaTnCHete rIaBnHna 6yToH G,3a da BkIIOUHTe INHCTpyMeHTa
-HaTnCHTe H3aDpBxTe 6yToHa 3a HAGOPE D, 3a da n36epete pa3nUHa n3MePbAteHa eINHua
-
H36epTe peKHM Ha H3MepBaHe -HaTnChTe 6yToHa 3a HAGOPE D nIi HAOJY E, 3a Da H36epTe pa3JIuHnTe peKHM Ha H3MepBaHe
-
Измерване на[eинчно pa3ctоянne ⑧
-KORATo BKJIIOUHTe INHCTpyMeHTa, peKIMbT Ha N3MepBaHe No NOpa36npaHe e N3MepBaHe Ha eINHHO pa3CToRnE c aKTINBpuHa Ia3ep (BIXTe MIRaunrNnHdNKaTOp Ha Ia3epa 7a)
-ako n36epepeKIma 3a pa3cTOnHHe Upe3 HaTnCKaHe Ha 6yToHa 3a HAGOPE D nIi HAIOJY E, Ia3epbT MoHe da He ce aHTnBnPa aBTOMaTHUHO (BVKe INHnKaTopa Ha Ia3epa ⑦b), a cAmO CJIeD HaTnCKaHe Ha rIabHHa 6yTOH G
-πpiaKTHBnpaH Ia3epen IbU CpeIeTe C Ia3epa B ueTAt
-HaTnCHTe TlaBnH 6yToH G, 3a Da HappaBnTe N3MepBaHe (N aBTOMaTHUHO Da DeakTNBnPaTe Ia3epa)
!Имайтпревид,ч Инструмент Мерг OT Задна сч act (Дьлжина На Иструмент e Вню既可以 В pe3ултata OT ИзМерваhtо)
-HaTnCHTe TlAbHn8 6yToH G,3a Da aKTHBnPaTe Ia3epa, H aTnCHTe TlAbHn8 6yToH G OTHOBO,3a Da HAnpaBHTe NocJeIOBaTeJHo n3MepBaHe (do 4 n3MepBaHH MOrat da 6bDaT noka3aH)
- I3mepBaHe Ha nlou ⑨
-HaTnchTe rIaBnHna 6yToH G,3a da aKTHBnPaTe Ia3epa
-ππηεηte ce B ΠbPbTa ζeI (Hanp. ⅢπρHa) H aTnchTe ΓλaBnH 6yToH G, 3a da ce nokαHe ΠbPbNt pa3Mep Ha ΠbPbNr peI
-ππeTeCe BvB BTOpaTa ceI (Ha np. Dblkna) n HaTnchete rAIBHn6byToH G, 3a da ce nokae BTOpNr pa3Mep Ha BTOpNpeD
-Ja3epbT Ce DeaakTNBnpa aBTOMaTHUHO N I3yHcJIeHaTa PLOUc Ce NOKa3Ba Ha NaJ-doJHnR peD -HaTINCHTe rIaBHnRA 6yTOH G OTHOBO, 3a Da HAnpabNTe HOBO n3MepBaHe
- N3mepBaHe B peaHbpeMe 10
-To3n peKIM MoKe Da Ce I3NoJ3Ba, 3a Da dBNKeIte IHCTpyMeHTa CnpRAMo ceJIta, N CE NOKa3Ba NOCToRHHo aKTyaIIIN3npaHOTO
pa3CTOHHne
-HaTnCHeTe rIaBnHna 6yToH G, 3a da aKTHBnPaTe Ia3epa
-HaTnCHeTe rIaBHH6yToH G OTHOBO, 3a Da 3aNoChTe Da H3MepBaTe, INHCTpyMeHTbT Ie 3aNoUHe Da NcCyKa
-HaTINCHETe TlaBnH 6yToH G OTHOBO,3a Da DeaKTHBnPaTe Ia3epa N da 3aBbPwHTe IN3MepBaHeTO
- HenpЯко n3MepBaHe ①
-To3n peHIM MOKe Da ce N3NoJ3Ba, 3a Da n3uNCJIbAte pa3CTOJHn, KOHTo He MoRat Da 6bDat N3MepeHn Iopadn IpEnrTCTBne Hnn JInca Ha ueBa NOBbpxHOCT
-HaTnCHeTe rIaBnHЯ 6yToH G, 3a da aKTHBnPaTe Ia3epa
-ПОЗИЦИОн_HИРаTe INHCTpyMeHTaВ TOUka A n ce npiueIeTe B TOUka B, pOKa3Ba ce bTbT B peaJIHO BpeMe
! aHO dncnpeT noka3Ba --, HNCTpyMeHTbTe hAnlOHeH npekaleHo Mhoro HaJIBO HnHaJrCHO N3MepBaHeTo He MoJHe Da 6bDe HnPaBeHo
-HaTnCHete rIaBnH6yToH G OTHOBO nIe Ce IoHaKaT N3MepeHOTO pa3ctoHHe AB n bIbIbT, a pa3ctoHnra Ta a n bIe ce n3YNCJIaT
!n3uNCleHaTaIbJHnHa a c a6cOJIOTHO HNBO N bT MeHdy a n b e 90°, Hoeto MoHe Da ce pa3nHuBa oT peaHaTa CNTyaun
ΦpOBO HnBéNlnpaHe ②
-IOCTaBeTe INHCTpyMeHTa C OCHOBaTa 3a N3MepBaHe Ha bTbI F Bbpxy NOBbpxHocTTa, KOrTo Ie ce N3MepBa
-ДиСплЕТ NOKa3Ba bГbIa MeJdY
ПОВьрхHOCCTTa n a6COJIOTHOTO HIBO
!аNO ДИСпLEТ NOKa3Ba --.,
ИнсTpymeHTbT e HaHIOHeH
HaNPeД nIi Ha3aD npeKaJIeHO
MHorO n N3МерВaHeto He MoKe
da 6БdE HAnpaBeHo ⑫b
-3a Da HnBelenpaTe NnN NOCTaBNTe BepTNKaJIHo pa6oTHaTa NOBbpxHOCT, DBNXKeTe NOBbpxHOCTTa, DOkATO DnCpIeT NOKaKe 0° nII 90°
-ako OTHIOHEHHeTo e BpaMHnTe Ha ± 10^ ot 0^ n 90^ ,ce noKa3BaT CTpeIkn 3a fInHO HAcTpOuBaHe, KOINTo ce pa3JIuHaBAt NO NocOHa IN BnCOUHa cnpMo ueI Ta ⑫ C
-BMecTO Da H3NOJ3BaTe a6COJIOTHO HNBO,MOKeTe CbUO Da 3aJaTepepehenu, KaTo HaTnCHete N 3aBpKHe 6yToHa 3a HADOLY E 3a1 cekynda;HcPJIeT nKa3Ba REF. n 0^ , cerabT MoKe da 6bJe n3Mepeh cnprMo Ta3n pepehenu
-HaTnCHTe N 3aApbXTe 6yToHa 3a HADOJY E 3a 1 cekyHda OTHOBO, 3a da npemaxHeTe pepepeHnraTa n da Ce BbpHeTe KbMa6COJIOTHO HNBO
-3a Da 3aBpKHe N3MepBaHe, HATNCHETe rIaBHn6yToH G n DnCnEeT noka3Ba HOLD n N3MepeHn bFbI
-HaTnCHeTe rIaBHHa 6yToH G OTHOBO,3a Da oCBO6oJHe 3aDpKaHeTo
YKA3AHN3A PABOTA
AkoHaDnCnIeCeNoBRT Cbo6ueHna3a rpeuKa C,HaTnCHTe HrKO 6yToH,3a Da ce BbPHeTe KbM PpBOHaJHnI DnCnIe 3a N3MepBaHe
- HeKopekTHN n3MepBaHnHa He MoRaT Da 6bDaT n3KJIIOyeHn, KOraTo Ce n3MepBaT pa3IINuHn NOBbPxHOCTn; npo6JIeMaTuHnTe NOBbPxHOCTn Ca:
-ПрОЗрачни NOВьрхноCTN (Hanp. CTbKIO, BODa)
-OTpa3raBaunIOBbpxHOCTN(HaNP. NOInpaH MeTaI, CTbKIO)
-Notob03Ha NOBbpxHocT (HaNP. 13OlaunOHn MaTePnaJIi)
-CTpykTyppaHn IOBbpxHOCTN (Ha np. KaMeHHa Ma3nIka, eCTeCTBeH KaMbK)
AHO CE N3NCKBa, N3PON3BaIte JINCT XapTnI NII IN PIACTnHa 3a IpruCeJIbAHe Ha Ia3epa (He e BkInOueHa) Bbpxy Te3n IOBbPxHOCTn
APKALPOŠANA / APKOPE
- Sis darbariks nav paredzets professionlai lietošanai
- Sargajiet merinstrumentu no mitruma un saules staru tiesas iedarbibas
- Nepaklaujiet instrumentu loti augstas vai loti zemas temperaturas iedarbibai un straujam temperaturas izmainam (var nelabveligi ietekmet ta precizitatei)
-piemeram,neatstajiet merinstrumentu uz ilgaku laiku automasina
-vispirms nogaidiet, lidz izlidzinas temperaturas starpiba, un tikai pec tam uzsqiet merinstrumenta lietoisanu
Nepielauijiet stipru triecenu iedarboansos uz merinstrumentu vaita kriisanu
-bojajumi merinstrumenta var nelabveligi ietekmet ta daribas precizitat
-ja merinstruments ir sanemis stipru triecenu vai kritis, parbaudiet t precizati, savietojot lazera stara veidoto linju ar limenisku vai statenisku atskaites linju
- Uzturiet mērinstrumentu tīru
- Neiegremdejiet merinstrumentu uten' vai citos skidrumos
- Apslaukiet izstradajumu ar mitru, mikstu lupatiu
- Nelietojiet apkopei kimiski aktivus tirišanas lidzeklus vai organiskos skidinatajus
- Regulari un ipaşi rupigi tiriet lazera stara izvadluku virsmas un sekojiet, lui uz tam neveidotos nosedumi
Ja, neraugoties uz augsto izgatavosanas kvalitati un rupigo pecrazoasanas pbaraudi, instruments tomer sabojajas, tas janogadaremontam firmas SKIL pilvarotaelektrinstrumentu remonta darbnica-nogadajiet instrumentuneizjaukta veida kopariegedes dokumentiem tuvakaja tirdzniecibas vieta vai firmas SKIL pilvarotapeciegades apkalposanas un remonta iestade (adreses un instrumenta apkalposanas shema ir sniegta interneta vietne www.skil.com) - leverojiet, ka garantija neietilpst
parslodzes vai nepareizas instrumenta
eksplaatacijas izraisitie bojajumi
(SKIL garantijas noteikumus skatiet
www.skil.com vai versietsies pie
izplatitaja)
APKÄRTEJAS VIDES AIZSARDZIBA
- Neizmetiet elektrioiekartas, baterijas, piederumus un iesainojuma materialus sadzives atkritumos (tikai ES valstim) -saskaara Eiropas Savienibas direktivu 2012/19/ES par nolietotajam elektriskajam un
elektroniskajam iekar tam un tas atspogulojumiem nacionalaja likumdoisana, nolietotas elektroiekartas ir jasavac, jaizjauc un janogadā otrreizejai pärstradei apkartejai videi nekaitigā veida -ipass symbols 4 atgadina par nepiecesamibu izstradajumus utilizes videi nekaitigā veida
LT
Matavimas lazeriu 1930
IVADAS
- Ppomeha Ha eHnHa MepkHa
!ctaHdapdHOTo nocTaByBaHe nped npBaTa ynoTpe6a e MeTpH
1
-πpHTnCHete nДржete ro TlaBHOTo KOnue G 3a Da ro BkIyUHTe aJatOT
- npoJolKeTe da ro dpHnTe npTncato rIaBHOTo konue G noBeke od 2 ceKyni ce doKeHa He ce nojabn caKaHaTa MEPHa eHNuca (cTaNka/HHn MeTap)
-OTnyTeteTo rIaBHOTO KOnYe G 3a Da ja n36epete MepHaTa eDHHuca
-ππTnCHeTe rIaBHOTo KOnYe G 3a Da rO BKnyuTe aJatOT
-πpHTnCHeTe nДрЖeTe ro KOnчeTo UP D 3a Да ИЗбepeTe dpyra Мерна edHnca
- INДирЕКTHO Мере He ①
-OBoJ peHIM MOHe Da ce KOpHCTn 3a npeCmetyBaHe paCToJaHnJa KOH He MoKaT Da Ce MepaT nopadN OnCTpyKuNiJa Co npeUHa HnH HeIOCTaTOK Ha ueHa NOBpHInHa
-причсichte Главно Кочe G 3a Да Г по вирате Лacepot
-NOCTaBeTe rO aJIaTOT BO TOUka A n HacOyTe KOH TOUka B, ce npKaKyBa aIOrIoT BO peaJIHo BpeMe
! aHO Ha ekpaHOT ce npHaHe --.,aIaTOT e npemHory HAnIOHET KOH JIeBO NII NdeCHO N MepeBeTo He MoKe Da ce HApabN
-NOBTOPOIPINTHcHTeTOrIaBHOTO KOJIe G n ce IpiKaKyBaat N3MpeHTo paCToJaHne AB N aROJOT n Ce IpecMeTyBaAT paCToJaHnJaTa a n b
! npecmetaHaTa DoJHKHa a e anCOJyTHo pamHa n aroJOT
nomerya n b e 90^ ,hoj mohe da ce pa3nkyBa od peaHaTa cnTyaunja
- HnHTaJIHO HnBEnIpaHBe ⑫
-NOCTABETe ro aIaTOT CO NOIOrata 3a Mepenbe arol F ha nobpunHaTa 1TO Tpe6a da ce MEPn
-Ha eKpaHOT ce npkaKyBa aroJOT NOMeIy NOBpUHaTa n anCOlyTHOTO HNBO
! aHO Ha eHpaHOT ce npHkaHe --.-,
aHaTOT e npeKymepHo haKloHET
HaHaPpei Hn HaHa3aI
MepeBeTo He MoKe da ce
HaPpABu ⑫b
-3a da ja HnBelenpaTe nInn3Mepnte pa6oTHaTa NOBpUnHa, NomeCTyBaJTe ja NOBpUnHaTa ODoKeHa eKpaHOT He ce npNkaKe 0° nIn 90°
-akoOTCTaNYBaHBeToeBOpaMKHTe Ha ± 10^ od 0^ n90°,ce npkaKyBaat CTpeIKN3aΦnHO NOdecyBaHe KOI ce pa3NIkyBaAT BO HAcOKaTa N BVCINHaTbO ODHOC HaZeI Ta
-HaMeCTO Da KOpNCTHTe aNCOJyTHO HnBO, nCTo TaKa MoKeTe da NoCTaBtE pepepeHca co npNTsckaBe n dpKHeBe Ha KOJIeTO DOWN E 1 cekynda; Ha ekpaHot ce npKaKyBa REF. n 0^ , aroIOT cera MOKe Da ce MEPn BO ODHoc Ha OBaa pepepeHca
- npntncheTe n dpKeTe ro konyeTo DOWNE 1 cekyHda noBTopHo 3a da ja oTcTaHnTe pepepeHcaTa I da ce BpaNTe Ha anCOnyTHOTO HNBO
-3a da 3aDpKHTe MepHe, npTnCHTe ro rIabHOTo KOnue G n Ha eKpaHOT Ke ce npKaKe HOLD n n3MepeHNot aOr
-πpHTnCHeTe rO rIaBHOTo kOnYe G NOBTOPO 3a Da rO ocNo6oNtTe 3aDpaHOTo MpeHe
COBETN3AПРIMEHA
Hora ce nojabybaaT npaHn 3a rpeuHa eKpaHOT C, npHTncHeTo Koe bHIO KOHue 3a da Ce BpaHTe Ha NOUeTHNt ekpaH 3a MepeHbe
-「peuHn MepeHa He MoKe Da ce NCKnyaT npn MepeHe Ha pa3InuHN NOBpUHH;npo6JIeMaTuHn NOBpuHH Ce:
-ПОВИДН NOВРШИΝ (Ha np. CTaKLO, BODa)
-peΦJIeKTHIpaUKN IOBpUHHN (Ha np. POnIpaH MeTaJ, CToKIo)
-nopo3Ha noBpHnHa (Ha np. n3OlaucnMaTepnjann)
-CTpykTypnpanHIOBpUHHN(Ha np. Tnnc, npnpoDen KaMeH)
Дokолку e notpe6Ho, KOpIcTeTe napye xaptnja nIn Iacepcha Ta6la (He ce BknyeHn) Ha OBne NOBpUHHN
- Дугни можни прични за поршно мереге:
-MepeHBeTO ce OdBnBaNo HaBOp OId MepHnot ONcer
-aroIOT nomery IacepcknoT 3paHn UeI Ta e npemHory MaI
-0jL j
J Lw J L L 1
#
J SgJ
J
J
J
J
J
| (###) | |
| g G G G G G G G G G G G G G G G G G G G G G G G G G G G G G G G G G G G G G G G G G G G G G G G G G G G G G G G G G G G G G G G G G G G G G G G G G G G G G G G G G G G G G G G G G G G G G G G G G G G G C | |
H
P
wgi as 0ai wsl aig s o1s j 51
wgi 0ai c boloo. woi igic oijLw
2j 1o 1 0s 1
ojai jzj ggo oaoaiae JcJy
JJLW iogdo
L 10115 p 12345678901123456789011234567890112345678901123456789011234567890112345678901123456789011234567890112345678901
g 100000000000000000000000000000000000000000
()
1 1 1 1 1 1 1 1 1 1 1 1 1 1 1 1 1 1 1 1 1 1 1 1 1 1 1 1 1 1 1 1 1


- TECHNICAL DATA
- TOOLELEMENTS ①
- SAFETY
- EXPLANATION OF SYMBOLS ON TOOL
- USE
- ! keep in mind that the tool measures from its rear (the tool length is included in the measuring result)
- ! if the display shows --.-° the tool is inclined to the left or right too much and the measurement cannot be made
- ! the calculated length a is absolutely level and the angle between a and b is 90° , which may differ from real situation
- ! if the display shows --.-- the tool is inclined to forward or backward too much and the measurement cannot be made ⑫ b
- APPLICATION ADVICE
- MAINTENANCE / SERVICE
- ENVIRONMENT
- F
- VEDLIKEHOLD / SERVICE
- MANUTENÇÂO / SERVICO
- XpaHeHne
- TpaHcnpTnpoBHa
- BBEDEHNE
- TEXHnueCHe DAHHbIE
- CTPAHA N3ΓΟTOBJEHHN
- DETAJIHCHTPYMEHTA①
- BE3OПАСHOCTb
- IORCHEHRAOYMOBHX I03HAOK HA IHCTPYMEHTI
- BnKOpHCTAHH
- IOPAINIO BHKOPNCAHIO
- OJIA/O6CnyROByAHH
- OXOPOHA HABKOLINHbOICPEI
- GR
- Métpnση λειζερ 1930
- EISAG
- EJEMEHNAHCHPUMEHTA
- BE30NACHOCT
- yNOTPE6A
- YKA3AHN3A PABOTA
- APKALPOŠANA / APKOPE
- APKÄRTEJAS VIDES AIZSARDZIBA
- LT
- Matavimas lazeriu 1930
- IVADAS
- COBETN3AПРIMEHA
Brand : SKIL
Model : 1930 AA
Category : Laser pointer