USER MANUAL RLM46160S RYOBI
Important! It is essential that you read the instructions in this manual before assembling, maintaining and operating the product.
Safety, performance, and dependability have been given top priority in the design of your petrol lawn mower.
INTENDED USE
The petrol lawn mower is only intended for use outdoors.
The product is designed for domestic lawn mowing. The cutting blade should rotate approximately parallel to the ground over which it is being wheeled. All four wheels should touch the ground while mowing.
The product is a pedestrian-controlled, walk-behind mower designed to be pushed by hand, or be guided by the operator when using the self-propel feature.
The product should never be operated with the wheels off the ground. It should not be pulled or ridden on. It should not be used to cut anything other than domestic grass lawns.
Do not use the product for any other purpose.
GENERAL SAFETY WARNINGS
WARNING
When using the product, the safety rules must be followed. For your own safety and that of bystanders, please read these instructions before operating the product. Please keep the instructions safe for later use.
PERSONAL SAFETY
The product is capable of amputating hands and feet, and of throwing objects. Failure to observe all safety instructions could result in serious injury or death.
- Be familiar with the controls and the correct use of the product.
- Ensure before each use that all controls and safety devices function correctly. Do not use the product if the off switch does not stop the engine.
- Never allow children or people with reduced physical, sensory, or mental capabilities or persons not familiar with these instructions to operate, clean, or maintain the product. Local regulations may restrict the age of the operator. Children should be adequately supervised to ensure they do not play with the product.
- Stay alert, watch what you are doing, and use common sense when operating the product. Do not operate the product when you are tired, ill, or under the influence of drugs, alcohol, or medication. A moment of inattention while operating the product may result in serious personal injury.
- Wear heavy, long trousers, long sleeves, and sturdy anti-slip footwear. Do not wear short trousers, sandals, or go barefoot. Avoid wearing clothing that is loose fitting or that has hanging cords or ties.
Always wear safety glasses with side shields.
Wear hearing protection and safety glasses at all
times while operating the product. Use a face mask if operation is dusty.
Use of hearing protection reduces the ability to hear warnings (shouts or alarms). The operator must pay extra attention to what is going on in the work area.
- Operating similar tools nearby increases both the risk of hearing injury and the potential for other persons to enter your work area.
Always be sure of your footing, especially on slopes. Keep firm footing and balance. Do not overreach. Overreaching can result in loss of balance.
Use the product across the face of slopes, never up and down. Exercise extreme caution when changing direction on slopes.
- Do not use the product near drop-offs, ditches, excessively steep slopes, or embankments. Poor footing could cause a slip-and-fall accident.
Plan your mowing pattern to avoid discharge of material towards roads, public pavements, bystanders and the like. Avoid discharging material against a wall or obstruction, which may cause the material to ricochet towards the operator.
WORK AREA SAFETY
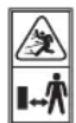
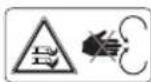
- Never use product while people, especially children, or pets are within 15m because of the danger of objects being thrown by contact with the blade.
- Objects struck by the lawn mower blade can cause severe injuries to persons. Thoroughly inspect the area where the product is to be used and remove all rocks, sticks, metal, wire, bones, toys, or other foreign objects. Remember, string or wire may entangle with the cutting means.
Always use the product in the daylight or with good artificial light. The operator requires a clear view of the work area to identify potential hazards.
- Do not operate the product in explosive atmospheres, such as in the presence of flammable liquids, gases or dust. The product creates sparks which may ignite the dust or fumes.
- Do not operate the product on wet grass or in the rain.
- Do not use the product when there is a risk of lightning.
-
Keep in mind that the operator or user is responsible for accidents or hazards occurring to other people or their property.
-
Tragic accidents can occur if the operator is not alert to the presence of children. Children are often attracted to the product and the mowing activity. Never assume that children will remain where you last saw them.
-
Keep children out of the mowing area and under the watchful care of a responsible adult other than the operator, be alert and turn the product off if a child enters the area.
Use extra care when approaching blind corners, shrubs, trees, or other objects including overhanging shrubs, which may block your view.
English
- Keep work area clean. Cluttered or dark areas invite accidents.
LAWN MOWER SAFETY WARNINGS
Before use, always visually inspect to ensure blades, blade bolts, and cutter assembly are not worn or damaged.
- Replace worn or damaged blades and bolts in sets to preserve balance.
- Never operate the mower if the operator presence control, when released, does not stop the engine.
- Do not operate the product without the entire grass catcher or the guard of the self-closing discharge opening in place.
The blade on the product is sharp. Use extreme caution and wear heavy-duty gloves when fitting, replacing, cleaning or checking bolt security.
- Bring the product to an authorised service centre to replace damaged or unreadable labels.
- Check all nuts, bolts, and screws at frequent intervals for proper tightness to be sure that the product is in safe working condition.
- Check the grass catcher frequently for wear, holes, or deterioration. This can cause objects to be thrown towards the operator.
- Replace worn or damaged parts before operating the product.
Turn on the engine carefully with the user behind the handlebars in the operator safety zone. Never start the product if:
the engine is running. This exposes the blade and increases the probability of objects being thrown.
- Start the engine carefully according to instructions and keep hands and feet away from cutting area. Do not put hands or feet near or under rotating parts. Keep clear of the discharge opening at all times. Do not start the product when standing in front of the discharge opening.
- Never pick up or carry the product while it is running.
- When not in use, store the product in a well-ventilated, dry, or locked-up place that is out of the reach of children.
- Follow the manufacturer's instructions for proper operation and installation of accessories. Only use accessories approved by the manufacturer.
- Do not operate the engine in a confined space where dangerous carbon monoxide fumes can collect.
- Do not change the engine governor settings or overspeed the engine.
-
Stop the product and wait until the blade comes to a complete stop. Allow the product to cool down, then disconnect the spark plug wire:
-
whenever you leave the product unattended (including disposal of grass clippings).
- before cleaning a blockage or unclogging discharge chute
- before checking, cleaning, or working on the product
- before removing the grass catcher or opening the grass discharge chute cover
- before refuelling
If the product starts to vibrate abnormally, check immediately to:
- inspect for damage, particularly the blades
- replace or repair any damaged parts
- check for and tighten any loose parts
If the product strikes a foreign object, follow these steps:
- Stop the product and disconnect the spark plug wire.
-
Thoroughly inspect the mower and grass catcher for any damage.
Repair any damage before restarting and continuing to operate the mower
-
Avoid holes, ruts, bumps, rocks, property stakes, or other hidden objects. Uneven terrain could cause a slip-and-fall accident.
- Allow engine to cool down before storing in any enclosure.
To reduce the risk of fire, keep the engine, silencer, and petrol storage area free of grass, leaves, and excessive grease.
If the fuel tank has to be drained, this should be done outdoors.
- Disconnect the spark plug wire before making any
English
adjustment, transporting, or storing the product. Such preventive safety measures reduce the risk of starting the product accidentally.
The product is noisy and permanent hearing loss or damage may result if precautions to limit your exposure, reduce noise, and wear hearing protection are not strictly adhered to.
SERVICE
Service on the product must be performed by qualified repair personnel only. Service or maintenance performed by unqualified personnel could result in a risk of injury to the user, or damage to the product.
- When servicing, use only original manufacturer's replacement parts. Use of unauthorised parts may create a risk of serious injury to the user, or damage to the product.
NOTE: Only perform the tasks listed in this manual. For other service or repair, have the product serviced by an authorised service centre only.
Save this manual for future reference. Refer to them frequently and use them to instruct others who may use the product. If you loan the product to someone, loan them these instructions also.
PACKING LIST
Lawnmower Rope guide
Grass catcher Mulching plug
Operator's manual Washer
Figure sheet Nut
Cable guide
WARNING
If any parts are damaged or missing, do not operate the product until the parts are replaced. Using a product with damaged or missing parts could result in serious personal injury.
WARNING
Do not attempt to modify the product or create accessories not recommended for use with the product. Any such alteration or modification is misuse and could result in a hazardous condition leading to possible serious personal injury.
DESCRIPTION
See fig. 1-13
- Self-propel bail
- Grass catcher
- Primer bulb
- Air filter cover
- Spark plug boot
- Fuel cap
- Height adjustment lever
- Starter grip
- Handle knob
- Rope guide knob
- Operator presence control
- Oil cap/Dipstick
- Spark plug
- Mulching plug
- Air filter
WARNING
The product safety systems or features shall not be tampered with or disabled.
WARNING
Never attach or adjust any accessory while the product is running. Failure to stop the engine may cause serious personal injury.
WARNING
To prevent accidental starting that could cause serious personal injury, always disconnect the engine spark plug wire from the spark plug when assembling parts.
ASSEMBLY
UNPACKING
The product requires assembly.
Carefully inspect the product to make sure no breakage or damage occurred during shipping.
If any parts are damaged or missing, please call your RYOBI service centre for assistance.
WARNING
Never operate the mower without the proper safety devices in place and in good working condition. Never operate the mower with damaged safety devices. Operation of the product with damaged or missing parts could result in serious personal injury
INSTALLATION
See fig. 2-5
- Raise the cutting blade height to the highest position.
- Place the handles in the correct operating position. Feed the bolts through the holes in the upper and lower
English
handles, then tighten the handle knobs to secure the handles in place.
Install the grass catcher or mulching plug.
INSTALLING THE MULCHING PLUG
See fig. 4
NOTE: Do not install the grass catcher when using the mulching plug.
- Lift and hold up the rear discharge door.
- Grasp the mulching plug by its handle and insert the right side of the plug into the rear of the deck as shown on the figure sheet.
- Push the mulching plug forward and then down until it locks in place. Ensure that the mulching plug is firmly seated inside the rear of the deck.
Lower the rear discharge door.
REMOVING THE MULCHING PLUG
- Lift and hold up the rear discharge door.
- Grasp the mulching plug by its handle, lift up then pull it out slowly.
INSTALLING THE GRASS CATCHER
See fig. 5
Lift the rear discharge door.
- Lift the grass catcher by its handle and place under the rear door, so that the hooks on the grass catcher frame are seated into the slots in the handle bracket.
- Release the rear door. When installed correctly, the hooks on the grass catcher will rest securely in the slots on the handle brackets.
- Ensure the rear door is fully engaged on the grass catcher. Make sure that there is no gap between the rear door and the grass catcher.
OPERATION
FUEL AND REFUELLING
WARNING
Always shut off engine and allow it to cool for 5 minutes before refuelling. Never remove the cap of the fuel tank or add petrol to a machine with a running or hot engine. Move at least 9m (30 ft) from refuelling site before starting the engine. Do not smoke. Failure to heed this warning could result in serious personal injury.
WARNING
Always handle petrol with care; it is highly flammable.
Use fresh fuel.
Store fuel in containers specifically designed for this
purpose.
Always refuel outdoors where there are no sparks and flames. Do not inhale fuel vapour. Do not smoke. Stay away from open flames and sparks when filling fuel tank or when handling fuel.
- Do not let petrol or oil come in contact with your skin.
- Keep petrol and oil away from the eyes. If petrol or oil comes in contact with the eyes, wash them immediately with clean water. If irritation is still present, see a physician immediately.
- Immediately clean up spilled petrol.
- Refill the fuel up to the recommended level.
FILLING THE TANK
See fig. 6
WARNING
Do not overfi II. Fill the fuel tank to 25mm below the top of the fuel neck. After fueling, never tilt the mower more than 25 degrees for this could result in fuel leakage and risk of fire.
NOTE: Always use petrol that is unleaded 91 or higher.
Clean surface around fuel cap to prevent contamination.
- Loosen fuel cap slowly to release pressure and to keep fuel from escaping around the cap. Rest the cap on a clean surface.
Carefully pour petrol into the tank. Avoid spillage.
Clean and inspect the gasket, then replace all fuel and container caps securely.
- Wipe up any fuel spillage. Move 9 m away from refuelling site before starting engine.
NOTE: It is normal for smoke to be emitted from a new engine during and after first use.
ADDING/CHECKING ENGINE OIL
See fig. 6
Engine oil has a major influence on engine performance and service life. For general, all-temperature use, SAE 10W-30 is recommended. Always use a 4-cycle motor oil that meets or exceeds the requirements for API service classification SJ.
NOTE: Non-detergent or 2-cycle engine oils will damage the engine and should not be used.
To add engine oil:
-
Ensure that the mower is level and area around oil cap/ dipstick is clean.
Remove the cap and seal from oil bottle.
Unscrew the oil cap/dipstick and remove.
-
Slowly add oil. Fill to the "Full" line on dipstick. Do not overfill.
NOTE: When checking the oil level, seat the dipstick in
English
the oil fill hole but do not screw in.
Reinstall the oil cap/dipstick and secure.
To check engine oil:
- Ensure that the mower is level and area around oil cap/ dipstick is clean.
- Remove the oil cap/dipstick. Wipe clean and reseat in oil fi ll hole but do not screw in.
- Remove the oil cap/dipstick again and check oil level. Add oil as needed.
STARTING/STOPPING THE MOWER
See fig. 6
WARNING
Never start or run the engine inside a closed or poorly ventilated area; breathing exhaust fumes can kill.
Pre-checks
- Check and ensure that the oil level is sufficient by inspecting the oil level with the dipstick seated.
- Check and ensure that the petrol tank has sufficient regular unleaded fuel.
STARTING THE ENGINE
Firmly push the primer bulb 3 times.
NOTE: This step is not usually necessary when starting an engine that has already run for a few minutes.
Hold the operator presence control bar down against the handle.
Pull the starter cord until the engine runs. Do not pull the starter grip more than 4 times. Release the starter cord slowly so the rope does not snap back.
NOTE: It may be necessary to repeat priming steps in cooler weather. In warmer weather, overpriming may cause flooding and engine will not start. If you do flood the engine, wait a few minutes before attempting to start and do not repeat priming steps.
STOPPING THE ENGINE
Release the operator presence control bar and allow the engine to come to a complete stop.
PROPELLING THE PRODUCT
See fig. 6
To self-propel: Hold down the operator presence control while pulling the drive control lever towards the handle. Release the drive control lever to stop the wheel drive.
To manually propel: Hold down the operator presence control. Do not engage the drive control lever.
SETTING BLADE HEIGHT
See fig. 7
When shipped, the wheels on the mower are set to a low
cutting position. Before using the mower for the first time, adjust the cutting position to the height best suited for your lawn. The average lawn should be between 38mm to 50 mm during cool months and between 50mm and 76mm during hot months.
To set the blade height:
- Stop the product and wait for the blade to come to a complete stop.
To raise the blade height, grasp the height adjustment lever and move it toward the back of the mower.
To lower the blade height, grasp the height adjustment lever and move it toward the front of the mower.
SETTING THE HANDLE LENGTH
See fig. 8
The height of the handle can be easily adjusted for operator preference.
Loosen and remove the mid handle knobs.
Remove bolts and washers.
Reinsert bolts and washers in a higher or lower position.
Tighten the knobs.
MOWING TIPS
Make sure the lawn is clear of stones, sticks, wires, and other objects that could damage the lawn mower blades or engine. Such objects could be accidentally thrown by the mower in any direction and cause serious personal injury to the operator and others.
For best performance, always cut off one-third or less of the total height of the grass.
- When cutting long grass, reduce walking speed to allow for more effective cutting and a proper discharge of the clippings.
- Do not cut wet grass. It will stick to the underside of the deck and prevent proper bagging or discharge of the grass clippings.
New or thick grass may require a narrower cut path.
- When the fuel tank is empty and before refuelling, tip the mower on the left hand side with the fuel cap at the highest position. This will prevent fuel spillage. Remove the spark plug lead to prevent accidental starting. The blade is sharp, avoid contact with it.
- Check the blade and underside of deck for any damage or build up of debris. Clean if necessary. Check security of the blade bolt.
SLOPE OPERATION
See fig. 9.
Slopes are a major factor related to slip-and-fall accidents that can result in severe injury. Operation on slopes requires extra caution. If you feel uneasy on a slope, do not mow it. For your safety, do not attempt to mow slopes greater than 15 degrees.
Mow across the face of slopes, never up and down.
Exercise extreme caution when changing direction on slopes.
Watch for holes, ruts, rocks, hidden objects, or bumps which can cause you to slip or trip. Tall grass can hide obstacles. Remove all objects such as rocks, tree limbs, which could be tripped over or thrown by the blade.
Always be sure of your footing. A slip-and-fall accident can cause serious personal injury.
- Do not mow near drop-offs, ditches, or embankments; you could lose your footing or balance.
EMPTYING THE GRASS CATCHER
See fig. 10
WARNING
Use caution when lifting or tilting the product for maintenance, cleaning, storage, or transportation. The blade is sharp, even though the engine is shut off, the blades can still be moved. Keep all body parts away from the blade while it is exposed.
MAINTENANCE
WARNING
After releasing the operator presence control, regularly check if the blade stops in 3 seconds. If the product does not stop after 3 seconds, have the product serviced by an authorised service centre only.
WARNING
If the product is not maintained correctly, the life span of the product may be reduced, and built-in safety features may not function correctly, thus increasing the potential for serious injury. Keep the product in good working condition.
WARNING
Before performing any maintenance, stop the product and wait until the blade comes to a complete stop. Allow the product to cool down, then disconnect the spark plug wire from the spark plug. Failure to heed this warning could result in serious personal injury.
WARNING
When servicing, use only original replacement parts. Use of any other parts may create a hazard or cause product damage.
GENERAL MAINTENANCE
You may make adjustments and repairs described in this manual. For other repairs, contact an authorised service centre.
- Avoid using solvents when cleaning plastic parts. Most plastics are susceptible to damage from various types of commercial solvents and may be damaged by their use. Use clean cloths to remove dirt, dust, oil, or grease.
Periodically check all nuts and bolts for proper tightness to ensure safe operation of the product.
- Remove any buildup of grass and leaves on or around the engine and engine cover. Occasionally wipe the mower clean with a dry cloth. Do not use water.
Frequently check the grass catcher for wear or deterioration.
WARNING
Do not, at any time, let brake fluids, gasoline, petroleum-based products, or penetrating oils come in contact with plastic parts. Chemicals can damage, weaken, or destroy plastic which may result in serious personal injury.
SPARK ARRESTOR
The product is fitted with a spark arrester (which is inside the exhaust).
NOTE: It is recommended that the spark arrestor is only cleaned at an authorised service centre.
LUBRICATION
All of the bearings in this product are lubricated with a suffcient amount of high grade lubricant for the life of the unit under normal operating conditions. Therefore, no further bearing lubrication is required.
WARNING
Always protect hands by wearing heavy gloves and/or wrapping the cutting edges of the blade with rags and other material when performing blade maintenance. Improper handling of blade could result in serious personal injury.
REPLACING THE CUTTING BLADE
See fig. 11
English
WARNING
Always protect hands by wearing heavy-duty gloves and wrapping the cutting edges of the blade with rags and other materials when performing blade maintenance. Improper handling of blade could result in serious personal injury.
Be careful when replacing the mower blade. Ensure that your fi ngers do not get caught between the moving blade and the fixed parts of the product.
For best results, the mower blade must be kept sharp. Replace a bent or damaged blade immediately.
WARNING
Only use replacement blades approved by the manufacturer. Using a blade that is not approved by the manufacturer of the product is hazardous and could result in serious injury, damage to the product, and will void your warranty.
WARNING
Drain the fuel first before tilting the mower to replace the blade.
Using a 9/16-in. wrench or socket (not provided), loosen the blade bolt by turning the bolt in a counterclockwise direction as viewed from the bottom of the mower.
- Remove the blade bolt, lock washer, flat washer, and blade.
- Place the new blade on the shaft. Make sure it is installed with the curved ends pointing up toward the mower deck and not down toward the ground.
- Replace the flat washer, lock washer, and blade bolt on the shaft. Finger tighten the bolt by turning in a clockwise direction as viewed from the bottom of the mower.
NOTE: Make certain all parts are replaced in the exact order in which they were removed.
Torque the blade bolt down using a torque wrench (not provided) to ensure the bolt is properly tightened.
The recommended torque for the blade bolt is 48-55 Nm (35-40 ft.lb.).
NOTE: Do not sharpen the blades, replace with new item. Blades need to be properly balanced to avoid damage and personal injury.
CLEANING AIR FILTER
See fig. 13
- The mower has a foam air filter, and it cannot be washed.
-
For proper performance and long life, keep the air filter clean.
-
Stop the product. Make sure that all moving parts have come to a complete stop. Allow the product to cool down. Disconnect the spark plug wire.
- Remove the air filter cover by pushing in on the latch with your thumb while gently pulling on the cover.
Remove the air filter element for inspection.
After removing the air filter element, most debris can be removed by tapping it gently against a hard surface, or brushing the surface lightly.
NOTE: A dirty air filter element will restrict air flow and may result in damage to the engine. Air filter element life is dependant upon the environment in which the mower is used, and it should be inspected & cleaned regularly and replaced when dirty.
- Reinstall the cleaned or new air filter element into the air filter base.
- Replace and secure the air filter cover.
NOTE: The filter should be replaced annually for best performance or sooner, if necessary.
FUEL CAP
WARNING
A leaking fuel cap is a fire hazard and must be replaced immediately.
A clogged fuel cap will cause poor engine performance. If performance improves when the fuel cap is loosened, check valve may be faulty or clogged. Replace fuel cap if required.
CHANGING ENGINE OIL
See fig. 14
- Stop the product. Make sure that all moving parts have come to a complete stop. Allow the product to cool down. Disconnect the spark plug wire.
- Ensure the fuel tank is completely empty before tipping the unit over; otherwise, fuel will leak out.
Engine oil should be changed after every 20 hours of use. Change the oil while the engine oil is still warm, but not hot. This allows the oil to drain quickly and completely.
Remove the oil fill cap/dipstick.
Tip mower onto its side and allow oil to drain from the oil fill hole into an approved container.
- Place mower upright and refill with oil following the instructions in the Adding/Checking Oil section.
NOTE: Used oil should be disposed of at an approved
English
disposal site. See your local oil retailer for more information.
SPARK PLUG MAINTENANCE
See fig. 12
The spark plug must be properly gapped and free of deposits in order to ensure proper engine operation. To check:
- Stop the product. Make sure that all moving parts have come to a complete stop. Allow the product to cool down. Disconnect the spark plug wire.
Remove spark plug boot.
Clean any dirt from around base of spark plug.
Remove spark plug using a 13/16 in. spark plug socket (not provided).
Inspect spark plug for damage, and clean with a wire brush before reinstalling. If insulator is cracked or chipped, spark plug should be replaced.
NOTE: The recommended spark plug models are TORCH F7RTC or NGK BPR6ES.
Measure plug gap. The correct gap is 0.71mm-0.79mm . To widen gap, if necessary, carefully bend the ground (top) electrode. To lessen gap, gently tap ground electrode on a hard surface.
- Seat spark plug in position; thread in by hand to prevent cross-threading.
- Tighten with wrench to compress washer. If spark plug is new, use 1/2 turn to compress washer appropriate amount. If reusing old spark plug, use 1/8 to 1/4 turn for proper washer compression.
NOTE: An improperly tightened spark plug will become very hot and could damage the engine.
Reinstall spark plug boot.
To ensure smooth operation of the wheels, the wheel assembly should be cleaned before storage.
Remove the spat (hub cap).
Remove the nut and wheel and set aside.
- Remove the e-ring, pins, and wheel gear. Clean any dirt from these items and the end of the drive shaft by wiping with a dry cloth. If necessary, rubbing alcohol may be used to remove any stubborn dirt.
CAUTION: Do not lubricate any of the wheel components Lubrication may cause the wheel components to fail during use, which could result in mower damage.
- Reinstall the wheel gear with the arrows facing the front of the mower. Reinstall the pins and e-ring.
Reinstall the wheel and nut. Tighten nut to secure.
Assemble the spat (hub cap).
REPLACING WHEELS
See fig. 16
WARNING
Use only the manufacturer's replacement wheels. Using wheels that are not approved by the manufacturer is hazardous and could result in serious personal injury.
- Stop the product. Make sure that all moving parts have come to a complete stop. Allow the product to cool down. Disconnect the spark plug wire.
Remove the spat (hub cap).
- Remove the nut from the wheel axle, then remove the wheel.
- Replace with new wheel and reinstall nut to secure.
- Assemble the spat (hub cap).
TRANSPORTATION AND STORAGE
STORING THE PRODUCT
When storing the mower for 30 days or more:
If using a fuel stabilizer, follow the stabilizer manufacturer's directions to add stabilizer to petrol in the fuel tank. Run the engine at least 10 minutes after adding stabilizer to allow the stabilizer to reach the carburettor.
WARNING
Do not store the product with petrol in the tank inside a building where fumes may reach an open flame or spark.
If not using a fuel stabilizer, allow the engine to run until the product is completely out of fuel.
Once the engine has stopped, allow the blade to come to a complete stop and disconnect the spark plug wire.
Turn the fuel valve to the closed position.
Turn the product on its side (with carburettor facing up) and clean grass clippings that have accumulated on the underside of the mower deck.
Clean the underside of the mower deck.
Wipe the product clean with a dry cloth.
Check all nuts, bolts, knobs, screws, and fasteners for tightness.
Inspect moving parts for damage, breakage, and wear. Have repairs made on any damaged or missing parts.
Store the product in a well-ventilated area that is clean, dry, and is out of the reach of children.
- Do not store near corrosive materials, such as fertilizer or rock salt.
To lower the handle before storing
See fig. 3
- Loosen the starter rope guide knob. Remove starter rope from guide and allow to retract into engine.
English
- Remove the handle knobs and bolts from each side of the lower handle at the handle bracket, (mounted on the mower deck).
Fully loosen the handle knobs on the sides of the handle and fold the upper handle down.
- Push inward on each side of the lower handle, and lift the sides of the lower handle past the edges of the handle mounting brackets.
- Fold the lower handle forward, making sure not to bend or kink the control cables.
TRANSPORTATION
- Stop the product, disconnect the spark plug wire, and wait until the blade comes to a complete stop. Allow the product to cool down before storing or transporting.
Clean all foreign materials from the product. Store the product in a cool, dry, and well-ventilated place that is inaccessible to children. Keep away from corrosive agents such as garden chemicals and de-icing salts. Do not store outdoors.
For transportation in a vehicle, secure the product against movement or falling to prevent injury to persons or damage to the product.
WARNING
Use extreme caution when lifting or tilting the product for maintenance, cleaning, storage, or transportation. The blade is sharp, keep all body parts away from the blade while it is exposed.
RESIDUAL RISKS
Even when the product is used as prescribed, it is still impossible to completely eliminate certain residual risk factors. The following hazards may arise during use, and the operator should pay special attention to avoid the following:
injury caused by vibration
- Always use the right tool for the job. Use designated handles and restrict working time and exposure.
injury caused by noise
- Exposure to noise can cause hearing injury. Wear ear protection and limit exposure.
injury from contact with the blades
injury caused by thrown objects
RISK REDUCTION
It has been reported that vibrations from handheld tools may contribute to a condition called Raynaud's Syndrome. Symptoms may include tingling, numbness, and blanching of the fingers, usually apparent upon exposure to cold. Hereditary factors, exposure to cold and dampness, diet,
smoking, and work practices are all thought to contribute to the development of these symptoms. There are measures that can be taken by the operator to possibly reduce the effects of vibration:
- Keep your body warm in cold weather. When operating the product, wear gloves to keep the hands and wrists warm. It is reported that cold weather is a major factor contributing to Raynaud's Syndrome.
After each period of operation, exercise to increase blood circulation.
Take frequent work breaks. Limit the amount of exposure per day.
If you experience any of the symptoms of this condition, immediately discontinue use and see your physician.
WARNING
Injuries may be caused, or aggravated, by prolonged use of a tool. When using any tool for prolonged periods, ensure you take regular breaks.
SYMBOLS
Some of the following symbols may be used on this product. Please study them and learn their meaning. Proper interpretation of these symbols will allow you to operate the product better and safer.

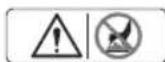
Precautions that involve your safety.

To reduce the risk of injury, user must read and understand operator's manual before using this product.
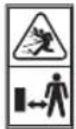
To avoid injury, stay away from moving parts at all times.
Danger! Keep hands and feet away.
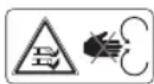
Danger of Ricochet. Keep all bystanders at least 15m away.
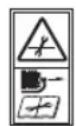
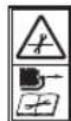
Before performing maintenance, remove the spark plug socket.

Remove objects that could be thrown by the rotating blade.

Keep bystanders at a safe distance away from the product.
English

To reduce the risk of injury or damage, avoid contact with any hot surface.

The product is a potential source of electric shock. Do not expose to moisture, rain, or snow. Do not operate with wet hands or feet.

When the product is used, it gives off carbon monoxide, an odourless, colourless, poison gas. Breathing carbon monoxide can cause nausea, fainting, or death.

Add SAE 10W-30 API-SJ or higher weight engine oil in the oil tank.

Fill the fuel tank with unleaded petrol (91 or higher).

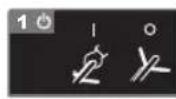
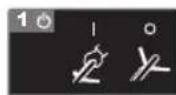
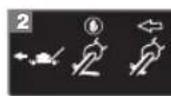
Push the primer bulb 3 times.

Hold the operator presence control down against the handle.

Pull the starter grip up to 2 times. Once the engine starts, release the starter grip slowly so that the rope does not snap back.

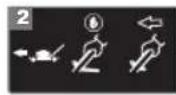
Mow when the grass catcher is empty

Stop mowing when the grass catcher is full.

Fuel and its vapours are explosive and can cause severe burns or death.

Fuel and its vapors are extremely flammable and explosive. Fire can cause severe burns or death.

Use unleaded petrol intended for motor vehicle use with an octane rating of 91 ( + ) / 2] or higher.

Use SAE 10W-30 API-SJ or higher weight oil.

Conforms to all regulatory standards in the country in the EU where the product is purchased.

EurAsian Conformity Mark

Ukrainian mark of conformity
Hold the operator presence control down against the handle to keep engine running. Release the operator presence control to stop the product.
Self-propel: The lawn mower will propel itself when the self-propel bail is pulled towards the handle.

The guaranteed sound power level is 96 dB.

Stop the product.
English
MAINTENANCE SCHEDULE
| Before each use | After 1st month or 20 hours of operation | Every 3 months or 50 hours of operation | Every 6 months or 100 hours of operation | Every 12 months or after 300 hours of operation |
| Check engine oil | ■ | | | | |
| Change engine oil | | ■ | | ■ | |
| Check air fi liter | ■ | | | | |
| Clean air fi liter | | | ■ | | |
| Change air fi liter | | | | | ■ |
| Check/adjust spark plug | | | | ■ | |
| Replace spark plug | | | | | ■ |
| Check/adjust idle speed* | | | | | ■ |
| Check/adjust valve clearance* | | | | | ■ |
| Clean fuel tank and fi liter* | | | | ■ | |
| Check fuel tube | | | | | ■ |
| Check for worn or damaged parts | ■ | | | | |
| Check all starting interlock and operator presence control for proper functionality | ■ | | | | |
| Check if the blade stops within 3 seconds after releasing the operator presence control | ■ | | | | |
- These items should only be carried out by an authorised service center.
NOTE: Maintenance should be performed more frequently when the product is used in dusty areas.
When the engine has exceeded the maximum figures specified in the table, maintenance should still be cycled according to the intervals of time or hours stated herein.
TROUBLESHOOTING
| Problem Possible cause Solution | |
| The handle is not in the correct position. | The handle is positioned incorrectly. Check and ensure that the lower part of handle is pushed fully back and snapped into proper position. The handle knobs are not tightened. Tighten the handle knobs. |
| The mower does not start. | There is no petrol. Fill the mower with petrol. If the mower still does not start, contact an authorised service centre. The engine is flooded. Wait for 15 minutes, then try starting the mower again. Refer to Starting/Stopping the mower section. Only use fresh fuel. Fuel over 30 days old may prevent the product from starting. |
| Old fuel. |
| No spark. Check spark. Remove spark plug. Reattach the spark plug cap and lay spark plug on metal cylinder. Pull the starter rope and watch for spark at spark plug tip. If there is no spark, repeat test with a new spark plug. Contact an authorised service centre. |
| The starter rope is harder to pull now than when it was new. |
| The mower is hard to push. | The grass to be mowed is too tall. Raise the cutting height. The mower housing and blade is being dragged through heavy grass. The cutting height is too low. |
| The mower is vibrating at a higher speed. | The blade is unbalanced. Replace the blade. Make sure that all moving parts have come to a complete stop. Allow the product to cool down. Disconnect the spark plug wire. Inspect for damage. Have the damage repaired by an authorised service centre before restarting the product. |
| Mower not mulching properly | Wet grass clippings sticking to the underside of the deck. Wait until the grass dries before mowing. |
| The grass catcher is not being filled up with grass even though grass is being cut from the lawn. | The discharge chute is blocked. Stop the product. Make sure that all moving parts have come to a complete stop. Allow the product to cool down. Disconnect the spark plug wire. Remove grass catcher and lift discharge chute cover. Beware of the sharp blade and avoid contact. Remove the debris from the discharge chute. |
| Cutting height set too low. Raise the cutting height. Cutting very wet grass at a low cutting height will also greatly hinder the ability of the mower to throw the grass to the catcher. We recommend raising the cutting height or cutting the grass when it is not as wet. |
François
REEMPLACEMENT DES ROUES
Voir figure 16.
AERTISSEMENT
Fuel and its vapours are explosive and can cause severe burns or death.

Grasfangkorb Mulchadapter
COMBUSTIBLE Y REPOSTAJE
ADVERTENCIA
No permitted in any way, except for the following:
- No permit to enter or move outside of the premises of the premises.
- No permit to use or use without permission from the premises.
- No permit to use or use without permission from the premises.
- No permit to use or use without permission from the premises.
- No permit to use or use without permission from the premises.
- No permit to use or use without permission from the premises.
- No permit to use or use without permission from the premises.
AMORTIGUADOR DE CHISPAS
PROGRAMMADIMANUTENZIONE
ALGEMENE VEILIGHEIDSWAARSCHUWINGEN
WARSCHUWING
VEILIGHEIDSWAARSCHUWINGEN GRASMAIMACHINE
Grasmaier Draedgeleiding
Grasvanger Mulching plug
BRANDSTOF OG OPTANKING
VARSEL
FREMDRIFT AF PRODUKTET
Sefigur6.
TOMNING AF GRAESOPSAMLEREN
Sefigur10.
OPBEVARING AF PRODUKTET
Ved opbevaring af graesslamaskinen i min. 30 dage:
TOMMA GRASUPPSAMLAREN
Se bild 10.
TRANSPORT OCH FÖRVARING
FÖRVARAPRODUKTEN
ETTERFYLLE/SJEKK MOTOROLJE
Se fig. 6.
GENERELT VEDLIKEHOLD
VEDLIKEHOLD AV TENNPLUGG
Se fig. 12.
EcInIIO6Bie qactn NOBpeXdeHbI, ININ OTCyTCTBYOT He IcNtob3OBaTb 3To IN3dJIeN, NOKa Yactn He 3aMeHeHbI. IcNtob3OBaHne yCTpOJCTBa C NOBpeXdeHHbIMn DeTaIaMn INN Be3 yCTaHOBKn TaKx DeTaJIe Moket npuBeCTn K NOnyueHIno TjKeNbIX TpaBM.
CSTOPOXHO
He npitaTecb n3MeHrTB 3To n3dEne Hn CO3DaBaTb npHaadNexHoCTn, He peKOMeHdyEmbIe DnAUCnonb3OBAHnC 3TNM n3dEInm. JHO6oe TaKoe n3MeHHe Nn MOINoHKnKaun - HenpaBnBHOe ynotpe6nHne N MOrY KOHcTaBCn ONaChbIM COCToHnEM, BedyuM K BO3MOXHOMy Cepbe3HOMy nepcoHaJIbHOMy uep6y.
OCTOPOXHO
CnCTembl630naCHOCTnra30HOKOcnIkaNIN npn3HaKHe 6bIt NODenahblNt OKJIIOueH.
CTOPOXHO
3anpeaetc npkpenTb nnperynpoBaKKaKeIeNo npncnooc6neHn BO Bpem pa6oBt yctpoiCTBa.HeBO3MOXHOCTb OCTAHOBNTb DBNrTaTeNb MOKeT npNBecTN K TAAKKIM TeneCHbIM NOBpeJDeHnM.

TOPOXHO
Pn yctaHOBKe DetaneBceIa CHMaTe npoBOc CBeu.

TOPOXHO
HnkOrda He pa6oTaTe c raoHokocnKo 6e3 yctaHOBneHHbIX n NCpPaBHbIX ycTpoiCTBax 3aunTbI. HnkOrda He nCnoNb3yIte Kocnky C nobpeJdeHHbIMn yctpoiCTbAMn 6e3OaNacHocTn. DeiCTBne 3TOrO n3dennr C NOBpeJdeHHbIMn Nn OTCyTCTByIOUcIMM uactmM MOKeT KOHaTbcA cepbe3HbIM nepcoHaNbHbIM yuepe6om.
YCTAHOBKA
CM.pnc.2-5.
YCTAHOBITE HOX B BepxHHe NOIOXKeHne.
Pa3mecnte pykoTn B haJnxkauee pa6ooye noJoxKeHne.BctabTe 60NTbB OTBepCTra B BepxHeu HnKHeu pykoTe, nocJe yero 3aTAHnte BnHTbI, YTObbl 3aФNKcnpOBaTb IX.
YcTaHOBInTe TpaBoc6OpHNK HacAnky dIy MyIbHynpoBaHnI.
YCTAHOBKA 3AJIyUKN DIA MYJbHPOBAHNA
CM.pnc.4.
PIMMEAHNE: YctaHOBKa TpaBOc6OpHnKa npi nCNoB3OBAHN 3aRnyuKn Do MyIbHIpOBaHn He dOnyckaetc.
IIOHIMnTe I npndepknte 3aHIO pa3rpy3OHyIO DBepuy.
CoxMnte pyKoTb 3aRJyUKN dNn MyJbHnPOBaHnI BCTaBbTe npaByIO yAcTb 3aRJyUKN B 3aDnHO CTEHky KOpNyCa, KaK NOKa3aHO Ha CXeMe.
IpoTOnKHnTe 3aRnyuKy dnn MyJbUnpoBaHnBnpeDn BnH3 Do fNkcaun. Y6eNTeCb B TOM, yTO 3aRnyuKa dnn MyJbUnpoBaHn HaedxHo yCTaHOBNeHa B 3aHHei CTehKe Kopnyca.
Onyctnte 3aandio pa3rpy3oHnyIO DBepuy.
CHRTNE 3AJIYUKN DJIY MYJbHPOBAHNA
IopHnMnte n npNepKnTe 3aHIO pa3py3OHyIO DBepuy.
CoxMMTe pyKoTb 3aIyUkN dIy MyJbHpOBaHn, NOHMNTe BBepx N MeJeHHO BbITAHTE.
YCTAHOBKA TPABOIOBOPUUKA
Cm.pnc.5.
CHaTb TbIIOByIO DBebp pa3rpy3Kn.
I OAnHmnte TpaBOnOdbOpuK 3a pyuKy u yctahOBnTe NOd 3aDHHIO DBepy TaK, YTObI CkObI B paMe TpaBOnOdbOpuKa BOJIN B Na3bl KPOHHTeHa Ha pyuKe.
OTnyCTIte 3aHIOU DBepy. Ppi npabNbHOI
Pycckn
yctaHOBKe CKo6b KoHTeHepa TpaBOOnO6OpuKa HaDeXHO BXoJrT Bn3b KPOHwTeHa Ha pyKe.
3aHnra DBepua DOJXHa NIOTHO cPpNkacatbCc TpaBoc6bOpHnKOM. Mexdy 3aHne DBepeue n TpaBoc6bOpHnKOM He DoJNXHO 6bTb npomexyTKOB.
3KCNYYATAU
TOJINBOI3APABKABAKA
DSTOPOXHO
Ipeed 3anpaBko TOnnBa Bcerda BbIKHouaTe DBnirateJIb N daIte Emy OCTbITb B TeueHN 5 MNHT. HNKoIgA He ChmMaIte KpbIshky TOnJINBHO 6aka N He HauNbaTe TOnnBO Bo Bpem pa6Otbl DnirateJIa, IIN KOrda DniratEnb ropuH. Iocne 3anpaBkn 6aka oToiDte He MeHee Yem Ha 9 MetPoB OT MeTa 3anpaBKn, PpeXde Yem 3anyckatb MoTOp. He Kypntb. IpeHe6peXeHne DaHHbIM PpeDynpExdHEm MOKet npNBecTN K TReKKOMy TelechOMy NOBpeXdHIO.
CTOPOXHO
Bcerda co6IoudaaTe ocToPOxHOCTb npu o6paueHN C TOPIINBOM; OHO KpaHrOHe OrHeONaCHO.
IcnoB3yIte CBexkee TOnJIINBO.
XpaHHTe 6eH3nB EMKoCTaX, CneuaJIbHO npedHa3NaueHHbIX JIg 3ToI cENI.
3anpaBnIe 6ak Bcerda Ha yInue. He dblnte nCnapenHmTOnnBa.He Kypnte n He paOtaTe B6n3n OTKpbITOro orHn NCKp npn 3anpaBKe TOnnBHO 6aka n npn paOte c TOnnBOM.
I36eata nonaHa 6eH3Ha HMa MacHa KaKoKy.
ObeperaTe rna3a ot nonadHnB Hnx 6eHnHa macna. Ecnn 6eH3nH nnn MacNo nnonn B rna3a, cpa3y Jx npomOnTe nx uCToB BOo. Ppi o6hApJxHeHH np3NaKOB pa3dpaxKeHn HEmdneHHO 6paTntEc b 3a MeDnHCKo NOMObu.
Cpa3y Je BbITnPaTne npoINtB 6eH3nH.
3anpaBnTeToTnIINBOdopeKOMeHdyEmoro ypoBn.
3AIPABKA BAKA
CM.pnc.6.
QCTOPOXHO
He nepenbaiTe. 3aonHnTe TOnnBhBbI 6ak Do 25 MM Hnke BepxHeu qactn WEN TOnnBa. Nocne 3anpaBKn He NaKIOHnTe Ra3OHOKoCNIky BoNbwe, Cem Ha 25 rpaDycob, TaK KaK 3TO MoKET npNBecTN K npOTEKe TOnnBa IOnaCHOCTN BO3rOpaHnI INpyHM NocJeCDTBnM.
ПРИМЕЧАНЕ: ИсторICAL 6eH3nC OKTAHOBBIM YIcJOM 91 N BbIWe.
Bo n36eXaHne 3acopeHnTOnnBa npoTpnte 6ak BOKpyKpbIuKN.
MeJHeHOr OTBnHTnTe KpbIuKy 6aka. IIOxNtE KpbIuKy Ha NcTyIO NOBepXHOCTb.
AkkypaTHo HaneTe TOnnIBO B 6ak. CtapaTecb He npOJIbAtb ee.
OuHCTHTe H OCMOTPte NpOKJaDky, a 3aTeM yCTAHOBITE Ha MeCTO BCE TOJINBHe I KpbIJKN KpbIJKN KOHTeHepOB.
BbItpaIte pa3nIBweecr ropOee. IpeE 3nyckOM DnIraTeTnepeMeCTntEc b Ha 9 MeTpOB OT MeCt a 3anpaBKn.
PIMMEAHNE: Bo Bpemn n noCne nepBoro IcnoIb3OBAHnMOTOP MOKET DbIMNTb.
3AJINBKA/IIPOBEPKA YPOBHR MOTOPHO RAMJA
CM.pnc.6.
MToPHOeMACIOIIMEET60JIbUoeBINHHeHa pa6Oty DBnIaTeNnCpOK CnyKbI.ДIyOBeroNCnONb3OBAHnnpIJIbOeTMnepaTypepeKoMeHdyETcMaCNoSAE 10W-30.BcerdaNCnONb3yIte4-ZkKnMoTOpHOeMaCNO, yTO COOTBeTCTByETNNPipeBOxCoJNT Tpe6OBAHN KKnaccnФkaunycnyrAPI SJ.
PIMMEAHNE: HemoOuee MacNo nn MacNo IJIa 2-TakTHoro DnuratJe MOKeT NOBpeNTb DnuratEJIb, N03TOMy IX nCNOJb3OBaHne 3aIpeSeHO.
3aJIINbKa MOTOPHO RAMa
Y6eIntecb, YTO Ra3OHOKOJIka CTOUT pOBHO, N Obnactb BOKpyr Macn03aINBHOJ KpbIuKN/UnyaN aYCTa.
CHIMTE KpbIuKy uynlnotHeHne c6yTbIKMaCna.
OTKpyTHTe IN CHIMITE MacJHyO KpbIJKy/N3BJIeKNTe Ⅲyn.
MeIeHNo 3aJeIte MacNo. 3aJIbAte, noka ypoBeHb He doCTnHET OTMeTKn «Full» (POnHbI) Ha uyne. He nepenBaIte.
ПРИМЕЧАНЕ: Пи пpoВерку pOBHЯ Macna, yCTaHOBnTE uyn B MacNo3aINBHOe OTBepCTne, Ho 3akpyuBaIte erO.
YCTaHOBnTe Ha MecTo MaCIO3aINBHyU KpbIuKy/ucyN 3aKpyTnTe.
PpOBepka ypoBHa MToTOPHO MaNa
Y6eIntecb, YTO Ra3OHOKOJIka CTOUT pOBHO, M Obnactb BOKpyr Macn03aINBHOJ KpbIuKN/UnyaN Ta.
CHIMITE KpbIshky/uzn MacnaHoro 6aka. Ouchntte n yctaHOBNTe uyn B MacNo3aJIINBHOe OTBepCTne, HO 3aKpyuBaIte erO.
BHOBb CHIMMTE MacNo3aJINBHyO KpbIuKy/luyn I npOBepbTe ypoBeHb Macna. PpN Heo6xoDnMoCTn Do6aBBte MaCNO.
Pycckn
CTAPT/OCTAHOBKA KOCNIJKI
Cm.pnc.6.
CTOPOXHO
HnKoIa He 3anyckaIte Hne IcnoJIb3yIte pa6oTaUoiu nBnIraTeIb B 3aKpbITOM NIN PINOXIO pOBeTpINBaEMOM MeCTe; BbIXaHHe BbIXIOnHbIX Ra3OB MOKeT PnIBecTn K JeTaIbHOMy INCXOy.
PpeBapnteIbHa npOBepka
PpOBepeypoBeHbMacnaCnOMoCbIO CNEuaIbHOTo uyna.
IpoBepbTe ypoBeHb He3TnIpObaHHoro 6eH3nHa B TOpINBHom 6ake.
3ANYCK MOTOPA
CnJIbHO HaxMnte CxIMHNoHacoc 3 pa3a.
PIMMEAHNE: 3TOT WAr OBiHHe Tpe6yETc npn 3anycke DnBraTeN, KOtOpbI yKe npopabotaI B TeueHne HeCKoJIbKIN MNHyT.
Haxmte pbur ynpabHeHn CnCTembl npncyTCTBn onepatopa.
I NotraHnTe uHyp cTApTepa, noka DnBnrateJIb He 3anyctntc. He depraIte pyky cTApTepa 60nbwe 4 pa3. MeDneHNo OTNyCTnte uHypa cTApTepa, yTo6bl uHyp He BO3BpauanpcpbIKOM.
IPMMEAHNE: Bo3MOXHO, noHaO6ntcnoBtOpntb Warn no Bnbpcky B xoNoHyIO norOy. B tennyo norOdy n3JInuHm Bnpck MoKeT Bbl3BaTb nepenONHeHne, n DBiratEnb He 3anyCTntcra. Ecnn DbiratEnb nepenONHncra, NOdoxNITe HeCKoIbKO MNHyT, npexJeem nbItaTbcra 3anyCTntb erO, n He NoBtOpraTe Warn no Bnpcky.
OCTAHOBKA MOTOPA
OTnyCTIe pbyar ynpabJeHn CnCTEmbl npCvTcTBn onepaTopa, n daTe DBIRatEnIO NNOHOCbIO OCTAHOBNTbcra.
NEPEMEUENHEYCTPOICTBA
Cm.pnc.6.
CamaoxoHoe DnBxKeHne HaxMnte pbyar ynpabLeHnnaCTembl npCyTcTBnO npaTopaK pyuKe npBbITraBaHHn pbUra ynpabHeHn npBOOM.OTnyCTIte pbyar ynpabHeHn npBOOM,TO6bIOCTaHOBtB KOChbIn npBOD.
YtobbyBpyHyDbNKeHne:HaXmTe pbyar ynpaBnEnn CnCTEmbl npncyTCTBn anepatopa K pyue. He Tporai Te pbyar ynpaBnEnn npnbODom.
YPERIYIMPOBAHNE BbICOTbJIIE3BnR
CM.pnc.7.
Korda otnpabHe, KOleca Ha Kocnke yctaHOBJIeHbI B Hn3KO cokpaauoOee noIOXeHne. IpeDenCNoB3OBAHHeM KocnKn BnepBbE, perynipOBaTb COKpaauoOee NOIOXeHne K Bicote, NyUwe BCero yDObNtBOpEHHO Dnra BaWeJ LykaKn. CpeHra Bicota ra30Ha DoNXHa
CocTABnTbOT38do50MMBXOJIOHoeBpemraNOT 50do76MMBTENIOE Bpemra.
HacpoBn Bicotbpekyuero ne3Bna
OcTaHOBnTe Ra3OHOKoCnKy IN DOXnTEcb, KOrdaJe3BnE NOHOCbIO OCTaHOBnTCra.
YTO6bI NOHIMaTb BbICOTy Ne3BnA, CxBaNTb pbiaypepyINIOPOBaHNb BbICOTbl, INpepeMeCTnTB erO K 3aDHeNqACTN KOCJIKN.
YTO6bI NOHN3NTb BbICOTy Je3Bn, CXBaTNTb pbiHa peryJINPOBAHn BAICOTbl, n nepemecTNTb erO KΦpOHTy KOCNJKN.
PERYINPOBKA DIIINHBI PYKORA
Cm.pnc.8.
BbICota pyKoTkn NERKO perynpyeTCB COOTBeCTBn C npednoTehnmaOnepaTopa.
OTkpyTnte n3BnEKeNTe BnHTb pyKoTe.
13BJIeKNTe 6oNTbI uWai6bl.
YcTaHOBnTe 6oNTbI u Wai6bI BbiEe NIN HIXe.
3aTaNHTe BnHTbl.
CKOC BEPXUWEK
Y6eIntecb, YTO ra3OH ouHueH OT KAMHe, naIOK, npoBOIOB u Dpyrux o6bekTOB, KOtOpbIE MOryT NOBpeINTB IONACTn r3OHOKOcNkN u Nn DBuRatEnb. TaKe O6BeKtBI MOrY 6bITb CnyaHaHO 6poSeHbIKocNkO B IIObOM HAnpaBHeHN u PnUHNHTb cepBe3HbI nepcoHaJIbHbI yUep6 onepatOpv n DpyrIM.
Iyue npo3BODnteHocTn cpeaTe TpeTb IIM MeHee OT 6ue BbICOTb TpaBbl.
Pn cokpaueHn nnHHoT paBbl yMeHbWntb CKopocTb, yTo6bl yEcTb 60Jee 3ΦΦeKTHBHOcOKpaueHne n HndnexKauyu pa3rpy3ky OTceHn.
He ctpnnte BnaXHyTo TpaBy. O6pe3Kn TpaBbI npnnHHT K HxHne Yactu MHCTpyMeHa INnx HeBO3MOxHO 6yDet TuaTeJIbHO Co6paTb BtpaBoc6OpNk N Bblrpy3NTb.
B cnyuae cbexe nn rcyto TpaBb MoKet notpe6oBaTcB 60one y3kn nyTb cKaunBaHnA.
Korda tonnINBbI 6ak nyCT,TO nepe3anpaBkoHnAKNOHnte ra3OHOKOcNkCy Ha NEbyO CTOPoHy TaK, YTO6bl KpblsKa TOnnINBHO 6aka 6bla B CaMOM BbICOKOM NIOXeHN. 3TO NO3BOJNT npedOTbpaTntb yTeKN TOnnIBa.CNHmTE npOBOD CBeu 3axnraHna, YTO6bl npedOTbpaNTb CnyaHbI 3anyck. Jle3Bne Oeyb ocTpo, n36eraIte KOHTaKTA C HIM.
IpoBepbTeJe3BnE Hn3 nlaTΦopMbHa npedMeT nobpeXeHn nn HaKoJIeHne Mycopa. OChCTNe TpN Heo6xOdMocTn.IpoBepbTe HaexHoCTb 3aTJKN 6oNTaJe3BnA.
HAKIOHOHEIECTBVE
Cm.pnc.9.
HaKNoHbI -rJnABHbIΦaKToP, npNbOdaIu K
Ipomaxam I naeHIO, KOtOpbIe MOrYr KOHcTaBcR cepbe3hBIM yuepe6oM. DeiCTBHe Ha HAKIOHax Tpe6yET DOONHHTenbHorO npedocTepeXeHnE. Ecn Bby UyBCTByeTe Ce6ra HeNobKO Ha HAKIOHe, He KOCnte .Jna BaWei 6e3oNaChOCTn, He NbITaNTecb KOCNTb HAKNOHbI 60JIbwee Yem 15 rpaDycOB.
HeKocntbnonepekHaknoHOB,HNKoRdaBBepxN BHn3. OcyueCTBnTbUpe3BbuaHoe npedoctepexeHne npn 3MeHeHH HappaBHeHnaHakNohax.
OcmotpebHaHaJIuHneOTBepCTnKoJe,KamHeckpbTbIXObeKTOB,NnYdApOB,KOTOpBeMOrYT3actabJIbTB BacCKoJIb3NTbNNcNOTbIKaTbcra.BbICOKaTpabaMOXETCKpbIBaTbpENrTCTBna.YdaNTb BCEObeKToTnAkanMe,BetBeIpeBa,NT.D.KOTOpBI MOrYT 6bITb3axBaueHb,3aKOHueHbNN6poWeHbJIe3BnEM.
CoxpaHnTe yCTOuHBOcTb BO BpEm pa6oTbI. Ipomax n naeHne MoryT npuHnTb cepbe3hbl nepcoHaJIbHbI yep6.
He Kocntb OKONo Bb6oH, KaHaB, Hn Ha6epexhIx; Bbl MoXeTe TepTb BaUy onOpY nIn 6aIaHc.
OCHNTTE TPABOCOPHK.
CM.pnc.10.
OCTAHOBNTe raoHOKOCINky IN DOXNITecb, KOrdaJe3BNE NOHOCTBIO OCTAHOBNTcR.
CHaTb TbIIOByIO DaBeppa3rpy3Kn.
Bo3bMnTe TpaBoc6OpHnK 3a pyuKy nnoHMnTe, yTo6bln3BnEHy n3 rA3OHOKOCnKn.
OnyctoWntb OTeceHn TpaBbl.
IOnHIMnTe 3aHIO pa3py3OHyIO DBepuN BHOByyCTaHOBnTe TpaBOc6OpHNK.
CTOPOXHO
Будte npedenbno octopokhbl npn noDbeme nHn HAKIOHE yctpojCTBa JIa TExNHueckoro 06cnykBAHnO, OuchTK, XpaHEnn NITpAHCnpTIpOBKn. JIe3Bne Ooehb octpoe, daxe cnn DBuratelb BbIKIOyeN, Ionoactn eue MOrTy DBruratcbr. EcnI ne3Bne OKa3bIbaetcra OKpbItbIM, Depknte ero noaIbwe ot TeJa.
OeCLyXUBAHNE
CTOPOXHO
Pocne toro, kak OTnyctnte pbyar KOHTpona npCytCTBnI onepatopa, npOBepbte, octaHaBNBaHOTcnn Ie3BnB TeHe 3 cekyHd. Ecn nHCTpyMeHr He BblKlIOuAeTcNo pOwEcTbn 3 cekyHd, o6paTnTeCb B ABTOPN3OBAHbH CEPBNCbH ueHtp.
CTOPOXHO
Ecn npoDyKT He noDnepKnaeTc KoppeKTHO, cPOK cnjxkbipnpoykTa moKeT 6bIb CHNKeHa, N BCTpoeHHbIe cyHKun 630nacHOCTn, He MOKeT cyHKUHOHPOBaTb npabuNbHO, TEM CaMbIM yBENuHBA rNOTEHuaI dna cepbe3Ho TpaMbI. PndepKNaBte HhCTpyMeHT B xopoWem pa6oHem COCToAHIN.
CTOPOXHO
Ipeed npoBeHnem TexHnueckoro 06cnyKbAHn BblkIOHTe N3dJIneu DOXDNTEcb NOHOn OCTaHOBKn Ne3Bn. DaTe N3dEHIIO OCTbITb, NOcNe Yero OTcoEHNITE npOBOD OT CBEH 3aKnraHn. IpeHe6peKeHnne daHHbIM npEDynpExKeHnEM MOKET npINBeCTN K T8KKOMy TEneCHOMY NOBpeKDeHIO.
QTOPOXHO
Pn BbINONHeHm TexNueeCKOrO 06cnyKuBaHnna NcNOJIb3yIe ToJIbKO OpUNHaJIbHbIe 3aNCACTn OT npOn3BODHTeJ. NcNoJIb3OBAHne IIObIX dpyrNX qacte MoKeT Co3DaBaTb ONaCHOCTb INI pNpUHHaTb NOBpeXdHHe N3dEInJ.
OBSUEE OBCJYKUBAHNE
BbMOKTe TaKKe BbINOHNHTb DpyrHe BnDbI peryNIpOBKn IpeMOHTHbI pa60Tb, ONNCaHHbE B DaHHOM pyKOBOcTBe.ДЯ npOBeDEHnA DpyrX PemOHTbIX pa60 TIN 3a NONYeHnEM peKOMeHdaCn ObaaAnTeCb B ABTOPN3OBaHbI CepBnCHbI ueHtp.
PnOuHCTKe INaCTMaCCOBbIX DeTaneH He DonyCKaETcR NcNoIb30BaTb pactBopnteN. BoJbUnHCTBO nlaCTMaCC BOCpHmMHyBO, YTO6bI NOBpeINtbcr O T pa3nHbIX TINOB KOMMEpuecknx pactBopnteNei MoKet 6bITb NOBpeXdeHO IX NCNoIb30BaHHeM. Jn OuHCTKn OT rpa3n, PbIn, Macna, Cma3Kn T.IN. NcNoIb3yTe npOTnpOHyTO pAnky.
IepnoDnueeKn npOBepaTb BCE 6oNTbI n 3aDbNkKn DnHaDnEkaSei NIOTHOCIn, YTObI rapaHTnpOBA Tb 6e3OnacHoe DeiCTBne KocuKn.
YdaIInTe TpaBy n IncTbHa DaBraTeJe N KpbIuKe DBrarTeRn nn PAnOM C HmN. BbItnpaTb KocNIky, YnCToH cyXoTKaHbIO HOrDa.He nCnOJIb3OBaTb BOy.
- DepeKaTb MExaHn3M B XopoWem pa6oYem COCTOHHN.
Pycckn
CTOPOXHO
He DonyckaTe B3aHMOeCTBnT TopMo3HbIX XIKKOcTei, 6eH3nHa, HeFTEnpOyKTOB, npONTOUHbIX MaceJI N T.I. C PAnactMaccOBbIMn DeTaIaMn. XmNkAtb MOrYT NOBpeNTb, Ocna6ntb nn pa3pyuHTb PAnactMaccy, YTO MoKeT PnBeCTn K TAgKKm TeJeCHbIM NoBpeXdEHnM.
YJABJIIBATEJIb NCKP
13dene OchaueHO NcKporacnteEM (HaxoNTCBA BbIXNONHO CnCTeMe).
PIMMEAHHE:OuNcKU NCKporacntenpeKOMeHnyeTcnpoBONDtB aBTOpN3OBaHHOM CepBCHOM UeHTpe.
CMA3bIBAHME
Bce OTHoWeHnB 3OTM N3DeJIN-CMa3aHbIC DocTaTOUHbIM KOJIuYeCTBOM CMa3Kn BbICJero KaueCTBa JnJXn3Hn EeHHuIbI NOHOPMaJIbHbIMN 3KcNJyATAuNOHHbIMn peKImamn. IooTOMy, HnKaKaJdAaNHeHsa Cma3Ka OTHOWeHn, He Tpe6yETc.
CTOPOXHO
Bcerda 3aunntb pykn, Hadeba TjKeBle nepatkn n-nnn o6eptbBa J3Bn TpIKNAMn npyrm MATEpnaNOM npn BblONHeHn OcCnyKbAHn J3Bn. HenpaBnIbHoe 6paueHne CJIe3BnEM MoKeT npNBecTn K cepbe3hBM TpaBMam.
3AMEHA COKPAUAOIeTO JIe3BnA
CM.pnc.11.
DSTOPOXHO
Bcerda 3aunntb pykn, Hadeba Tjxkne Iepatkn n-nnn o6eptbBA J3BNI TprnKAMN npyrm MATEpnaIOM npn BblONHeHm OcCnyKBAHn J3Bn. HenpaBnIbHOe 6paueHne C ne3BnEM MoKeT npNBecTn K cepbe3hBM TpaBMam.
Pn 3aMeHe Ne3BnA DeIcTByIe T C OCToPoXHOCTbIO. CneIte 3a TeM, YTObI NaIbUcI He IOnaII MekDy DnBuXyUIMCn Pe3BnEM HEnoDbNkHbIM NDeTaJIaMn INHCTpyMeHTa.
ДяdoctnxkeHn Hauyuxpe3yltatOBneBna ra3ohokocunKdONKHO6bIbOcTpblm. HemeJeHHo 3aMeHHe TnHytoNIN NOBpexKeHoeJe3BVE.
CTOPOXHO
IcnoJb3ynteIg3aMeHbIToIbKoTakneJe3Bn,KOTOpbIe peKOMeHNOBaHbIpOn3BODHTeNEMra3OHOKOcnIKn. IcnoJb3OBaHHeJe3Bn,KOTOpoe He peKOMeHIOBaHO npOn3BODHTeNEMra3OHOKOcnIKn,RBnETCOnaChbIM MoKeT pInBeCTN K cepBe3HbIM TpaBMam,NoBpeXDeHIO ra3OHOKOcnIKn K aHHyIpOBaHKn rapaHTn.
CTOPOXHO
Peped HAKIOHEHnEM Ra3OHOKOcNIKn DnI 3aMeHbpeKyuIero NOnOTHa CneIe TOnJIINBO n3 TOnJIINBHO6aka.
OctaHOBNTe DBnIaTeNb IN CHIMNTE npoBOc CBeu 3axirraHn. Doxntecb noJHoro octaHOba pexyueero ne3Bna.
■ПовернITE ИНСТРУМЕNT НавOK (Карбюраторм Вьерх).
BtncHytb 6nok dpebecnHb MeKdy Je3BnEM n npnybo Kocnkn, YTO6bl npedOTbpaNTb Je3Bne OT npebpaaeHna.
- YctaHOBKa CM. pnc. 11a.
CHRTHe CM.pnc.1.
C NOMOUBIO KIHOA 9/16" INI TOpueBOI rOIOBKN (HE BXODNT B NOCTABky) OTKpyTne ΦIKCNpyUOUI 6oNT Ie3Bn, IOBOPaUNBaER eo IPOTNb YACOBOI CTpeINK, ecNI CMOTpeTB CHN3y ra3OHOKOINK.
CHIMITE 60NT Ie3BnA, CTOnOpHyo Wai6y, NIOCKyO Wai6y nIe3Bne.
Pa3mecTnTB HOBOE Je3Bne B BaJ. YIOCTOBepbTecb, YTO OHO yCTaHOBNEHO C N30rHyTbIMN KOHcAMN, Yka3bBAIOUIMN Ha NaIy6y KOCNIKN, a He BHN3 K OCHOBaHIO.
YctaHOBnTe PNOCKyUo Wain6y, CtonOpHyO Wain6y H 60NT Ne3BnHa BaJ. 3aTaNHe pyKo 60NT ne3BnH IOBOPOTOM NO YacOBOn CTpeNKe, eCNI CMOTpeTB C HIXKHeuactn Ra3OHOKOcNKn.
INPMEYAHNE:IOCTaBnTB Bce Yactn, KOTOpbIe 3aMeHeHb B TOUHOM NopRdKe, B KOTOpOM OHN 6bln ydaJIeHbI.
3aTAHnTe 6oNT ne3BnR, nCNOJb3yI INHAMOMETPnueckn KIOH (He BXOINT B KOMJIeKT NOCTaKn) dJa oBecepeHn npabunbHoN 3aTAAKKn 6oNTa.
PekomeHnyembIM MOMENT 3aTAAKKn 6oNTa DnIe3Bn48-55HM.
PIMMEAHNE: He 3aTaunBaTe 3aTyNBWeecr Je3BnE, 3aMeHnTe ero HOBBM. Je3BnJ DOJIKHbI 6bITb DOJIKHbIM O6pa3OM C6aHaHCnPObaHbI BO N36ExKaHne NOBpeXdEHn I TpaBM.
OuNTKA BO3DyUHOro HJIbTPA
CM.pnc.13.
Kocnka OChauneHa neHHbIM BO3DyUHbIM pNlbTpOM,
KOTOpBn He MoeTcR.
HopMaJIbHOpa60bI NOBbIeHnCpOKa CnyKbBO3dyHbIΦnIbTpDOnJKeHoCoepKaTbCBAuCTOTE.
OCTaHOBnTe yCTpoIcTBo. Y6eIITecb B nonHOJ octaHOBKe BCEx DvNkUxnxC JETaJIe. DaJIte DBnIATEJIIO OCTbITb. CHIMITE npBOD CBeu3aXnIraHnIy.
CnHmTe KpbIuKy Bo3DyUHOro 0nJIbTpA, HauKab Ha 3aueKky 6oJbUWM nalbUem MraKo NotraHyB 3a KpbIuKy.
13BnKeKInTe neHbI Bo3dyuHbI qnIbTp dIaOCMToPa.
Iocne n3BneeyHn HJbtpyUoero 3JeMeHTa 60nbSyuO yactb copa MoXHo ydaNtB, cIeKta NocTyuAB mIO TBePOJ NOBepxHOCTN, INN C NOMOUIO UeTKN. IIPMEUAHNE: Pra3HbI FJIbTpYUOuIN 3JeMENT 6ydet ORpaHNuBaTb BO3dyuHbI NOTOK, YTO MOKET npIBecTN K NOLOMKe DBruratEnA. Cpok Cnyk6bl FJIbTpYUoero 3JeMEnTA 3aBNCIT OT ycNoBn 3KcNpyatauIN KOcUNKn. Ero Heo6xOIMOp peryIrpHO OCMaTPNBAtb N uCtNTb, a B Cnyuae 3aRp3HeHn 3aMeHNTb.
YcTaHOBnTe OunueHHbI HOBbI ΦINbTpUoUm3JIeMeHT B Kopnyc BO3dyuHoro FInbTpa.
YctaHOBnTe n 3aTnHTe KpbIuKy BO3yUHOro fNbTpA. IPIMeyAHNE:Ja MaKcImMaJIbHOJ aFfKeKTHBHOCTn fNtbpCneDyET MeHrTb He MeHee OdHOrO pa3a B rOd.
KpbiUKA TONJIINBHOFO BAKA
OCTOPOXHO
IpoTeKaHua KpbIIka TOnJIINBHO6aKa NOXapOONaCHA nDOJXHa 6bITb 3aMeHeHa IcnpaBHOr HEmeJeHNO.
3acopeHne KpbIuKn TOnJIINBHOrO 6aka MoKET npNBecTn K CHNKeHIO npON3BOUNTeJbHOCt N DBIrAteJra. Ecnn npON3BOUNTeJbHOCt yNyUHaeTcR, KOrDa KpbIuKa TOJINBHOrO 6aka Ocna6JIeHa, O6paTHbI KJIaNaH MOKET 6bITb HeNCnpaBeH INN 3acopeH. Ppr Heo6XoDmOCTN 3aMeHIne KpbIuKy TOnJIINBHOrO 6aka.
3AMEHA MACNA B DVBIGATEJE
CM.pnc.14.
OCTAHOBNTE yCTPOCTBO. Y6eINTEcB B NONHO OCTAHOBKE BCEX DBNKUxNXCJ DeTanei. DaTe DBNIGATEIO OCTbITB. CHNIMTE npoBOD CBEH 3aXnIraHnIy.
Ipeed onpOKnDbHaHHe mycTpoiCTBa y6eNTecb,yTO TOnNINBbI 6ak COBepWeHHO nYcT, HNaYe TOnNIBo 6yDet BblTeKaTb.
MoTopHoe MacNo CnEnyet MeHrTb Yepe3 KaKdIbe 20 YacOB pa6Obl. 3aMeHraTe MacNO, noka DnBraTeNb TepNlB, HO He ropAun. B 3tOM cNyuae MacNo CTekaet 6bICTpo NnONHOCTbIO.
CHIMITE Macno3aBHyO KpbIky/uyn
HaKIOHInTe ra3OHOKocINKy Ha 60k n N03BOJInTb
MaCly CTeYb N3 MaCNo3aJINBHOrO OTBepCTnB COOTBeTCTByUoUsN KOHTeHep.
YcTaHOBnTe ra3OHOKOcNkBy B BepTnKaJIbHOM nIOXKeHm 3aJeIe MaCNo, CneDy INHCTpyKUma pa3dena 3aINBka Macna/IpOBepka ypOBHmaCna.
PIMMEAHNE: NcnoB3OBAHoe MacNo CJeNyET yTnIIN3NPOBaTB B MecTe, PpeHa3NaHeHHOM DnA yTnIIN3aUIN. ObpatNTecb K MeCTHOMy npoDaBuCy MOTOPHO rMa nI IOnyuHrN DOnONHITeNBHO INHOpMaun.
TEXHNUECKOE OBCJYXNBAHNE CBEHN 3AXNFAHHN
Cm.pnc.12.
Cbeya 3aKunraHn DOJXHa IMeTb npaBnIbHbN 3a3Op n 6bITb YnCToN dIg OecneueHn HOpMaIbHO np6OtB Dnuratena. PpOBepka
OctaHOBNTe yCTpoiCTBO. Y6eHntecb B nonHOJ octaHOBKe BCex DnKyuuxcxg DeTaeN. DaTe DBnIaTeJIIO OCTbITb. ChmMtE npoBoD CBeu 3axnraHna.
CHIMMTEyexoJ CBeu3aXnraHna.
UdaJInte Tpr3b C OCHOBAHNA CBeuN.
13BNEKNTcBEcyCnMOUbKcBEHOroKnOHa 13/16 in.(HE BXODNT B KOMNJIeKT NOCTABKN).
OcmOTpTe CBeUy 3aXnHaHna Ha HauNue NOBpeXeHm N OuHCTne TnpoBOJIOuHOI ueKoN nepeD yCTaHOBkoH Na MeTO. EcIN B IN30JTope IMeHTcT PteunHbI INN cKoJIbI, CBeUy CJeDyET 3aMeHNTb.
IPIMMEAHHE: PeKOMeHdyemble MoJeN cBeeu3aJnraHn: TORCH F7RTC n NGK BPR6ES.
■I3mepbTe 3a3Op cBeyn.HaJnxKaunn 3a3Op 0.71 MM-0.79 MM.YTo6bl yBeNmuNTb 3a3Op B Cnyuae Heo6xOIMOCHTN, OCTOPOKHO OTOrHNTe 3emJHOI (BepxHNI) 3NeKTPoID. YTo6bl yMeHbWHTb 3a3Op CJeRka NOCTyUHTe 3EmJHbIM 3NeKTPoDOM NO TBepDoI NOBepXHOCTN.
YcTaHOBnTe CBevy 3aKnHaHn Ha MeCTO, BkpyTne pyKoI dIy npEoTbPaueHn KpUBoI NocAKn.
3aTAHNTe KINHOM, YTObI cKaTb Wai6y. Ecnn CBeHa HOBa, CdeJaIte 1/2 o6opota, YTObI HADJIeXaUIM O6pa3OM cKaTb Wai6y. PnI NOBtOPHom IcNoJIb3OBAHm CTapOI CBeu CDeJaIte 1/8 - 1/4 O6opota DnI HAJIeXaUero CKaTaNr Wai6bl.
INPMMEAHHE: HenpaBnIbHo 3aTMyTaCBeya MoKeT CtaTb OueHb TOpAeH IN PnBecTN KIOBpeKdEHNO DmTaTeN.
YCTAHOBNTe YEXON CBEUN 3aXnraHnA.
OBCLJYKUBAHNE MEXAHN3MA DBNATENJI
Cm.pnc.15.
YTo6bI rapaHTnpoBaT IpaKoe DeNCTBne Konec,co6paHne KOleca DoJxHo 6bITb OunuEHO nepei XpaHeHem.
CHIMMTE KOJNaOc CTynubl.
CHIMITE raiky IN KOJECO N OCTaBbTe B CTOPOHy.
Pycckn
13BnKeInTe E-6pa3Hyu wai6y, uTnΦtbi N WeceTpHIO. UCTNTb IIO6yI rpr3b OT 3TNX n3deJIN N KOHcA Bana dBruratEnr, BbITnpaCyXoTKaHbIO. EcN Heo6xOJMo, npOTnpaTB aIKOrOnem, yTO6bl ydaJIHTb IIO6yU nprrmyI rpr3b.
IPEIOCTEPEXHEH: He Cma3bBaTb HnKaKoN 13 KOMNOHEHTOB KOJecA. Cma3ka MOKeT Bb3BaTb NOJOMky DeTaJIe KOnEc BO BpEmr NcNoJIb3OBoAHn, qTo MOKeT npINBeCtN K NOBpeXDeHnO ra3OHOKoCnIKN.
IIOBTOHO yCTaHOBnTB mExAHn3M KOJecaco CTpeJIkAMN, CTOIzHMn nepei pOHTOM KOCNJKN. YCTaHOBNTe 1tHPTbI N E-06pa3HyU wai6y Ha MeTo.
IIOBtOPO yCTaHOBnTB KOLeCO n 6oJI. HApEJHO 3aTAHHTe raKy.
YctaHOBnTe HakJaKnKy (KOJINaK CTynuIbI).
3AMEHA KOJIEC
CM.pnc.16.
CTOPOXHO
IcnoJIb3yIte ToJIbKO 3aIaNChIe KOIeCA npOn3BOUInTeJI.
IcnoJIb3OBAHHe KOIE, He OIO6peHHbIX
IpOn3BOUInTeJIeM, OnaCHO I MOKeT pINBecTI K TjXeNoI
TpABMe.
OCTAHOBITE yCTPOCTBO. Y6eINTEcB B NONHO OCTAHOBKE BCEX DBNKUxNXCJ DeTanei. DaTe DBNIGATEIIO OCTbITB. CHIMITE npoBOD cBeu3axnraHna.
CHIMMTE KOJNaOc CTynubl.
CHIMITE raiky c onc KOleca, 3aTeM CHIMITE KOleco.
YCTaHOBNTe HOBOE KOJECO, YCTaHOBNTe N 3aTJHNTe raKy.
YcTaHOBnTe HaKJaKny (KoJNaK CTynuIbI).
TPAHCNOPTMPOBKA IN XPAHEHNE
XPAHEHNEYCTPOINCTBA
Pn XpaHenn Ra3OHokocnB TeueHne 30 n 6one DHei:
Ipnncno30BaHn Cta6nIn3atop TOnnBa, cneynte HnCTpykunm Cta6nIn3atop npOn3BOuNTenra, yTo6bl Do6aBnTb Cta6nIn3atop 6eH3nHa B TOnnNBHom 6ake. 3anyctnte DnBirateN, no KpaainHe Mepe 10 MInHy T nocne Do6aBnEHHna Cta6nIn3atopa, yTo6bl Cta6nIn3atop DocTHy Kap6kpapot.
CTOPOXHO
He xpaHnte npOyKT C 6eH3nHOM B 6aKe B nOmeueHne, rIe nCnapeHna 6eH3nHa MOrY T DoCTNvB nIaMeHN nn INCKpbI.
EcnBbHe nCnONb3yeTe cTaNn3aTOp TOnnBa,
JaTe DnIraTeNo npaOToTaB, noka npoDyKT He ABJETcN NIOHOCbU No 3eH3nHa.
Korda DburaTeIb OCTaHOBNTc, DOXdntecb nonHoi octaHOBKn JIe3Bn I OTCoeDInHnte npoBOd CBeu 3axiraHna.
IobepHHTe TOnJIINBHyKJanaHb 3aKpbItOE nIOJOKeHHe
I IIOKNTe ra3OHOKOcNkY Ha 6ok (kap6hopaTopom BBepx) uyaJIte CKOWeHHyTO TpaBy, HAKONBHyOCr NOIJIaTΦOpMOI RA3OHOKOcNJIKN.
OuNTTEHNIUE OCHOBAHNA TpaBOKOcNIK.
IpoTpnte ra3oHokocnky nCTOy cyxO TkaHbIO.
■PIOBepntb BCE 6oJtbl,3aDnBnKn,Ha6aIdaWnKn, BnHTbl,3aCTeKKn,NT..,TnI NIOTHOCTN.
Ocmotpeb nepemeeauoueceyactn HAOBpeKdeHn, pONOMKn, n 3Hoc. PEmOHtnpoBaTb IIO6bIe NOBpeKdeHHN INN OTCYCTBYUOuine yactn.
XpaHInTe ra3oHOKOcNkU B XopoUO npOBeTpNBaEMOM, NCTOM N CyXOM NOMEueHIN B HeIOCTyHOM IJIa DeTei MeCTe.
He xpaHnTb OKoNo KoppO3nHbIX MaTePnaJIOB TIna ydo6peHnI, nJI KameHHoN CoJI.
POnH3nTb pyuKy nepeed xpaHeHHem
CM.pnc.3.
Ocbo6oJnte fKcTOp HnpaBnaIOuei shHypa cTapTepe.CHMITE uHyp cTapTepe C HnpaBnaIOuei n daIte emy 3aHTB DnBraTeIb.
N3BnKeNTe BnHTbI 60JTBc KaKdoC TOpOHb HxHKeH pyKoTyn CbeMHOrO KPOHHTeHa (KpeNTcHa Kopnyce KocuNK).
I OJIHOCtBIO ocna6nTB Ha6aJdauHNKn pyKn Ha CTOpOHax pyKn, IN CBepHNTe BepXHOIO pyKy BHN3.
BbDnHyTb BHTpb Ha KaKdoi CTOPOHe 60Jee H3KoI pyKn, n CHrTaB CTOPOHb 60Jee H3KoI pyKn MMOr rpaHepyKn, yCTaHaBnBaHOueckOKn.
HaKIOHnTe HnXHIOpyky Bnepe, cTapaCb He crnbatnHe npeRnBaTb Ka6enynypaBnEHH.
TPAHCNOPTNPOBKA
OTKnHouHte n3dene, oTcOeHNHTe npoBOc CBeu 3axnraHHN I DOxNDTECb NIOHO OCTaHOBKN Ne3Bn. NpeD pa3MeueHem n3dEINHa xpaHEHe nI nepeBO3KOB TpAHcNOPTHom cpeCDBe DOxNDTEcb erO OCTbIBaHn.
OuHCTe ycTPOIcTB0 OT BCEx NOCTOPOHnX MaTePnaIOB. XpaHInTe ero B npoxJaIHOM, CyXOM, XopoUO IpoBETpNBaEMOM n HeDOCTyINHom dJIa DeTei MeCeTe. He depKInTe 6EH3OINJy pAOnOM c Koppo3nHBIM BeIeCTBaMn, TaKIMN KAK caDObIe XmMKaTbI INn pa3MopaxKBaHOuaC oNb. He xpaHInTe Ha OTKpbITOM BO3dyxe.
ДлгТранспортуровиЗakpeniteи3делиTeK,TO6blOHO HeMORIO nepemeuatabcrIINyynactBoN36exkaHnE TpaBMnpoBaHnepcoHaJaNINOOBpekdeHnN3dJIIn.
CTOPOXHO
BybTe npedeIbHO octopoxHb npn noBeme nHaKIOHe yCTPOcTBa IyIe TXHueCKOrO 06CnyKBAHnO uOCHTK, XpaHENr nn TpaHCnOpTnpOBKn. Je3Bne Ooeh b OCTpe.EcnI ne3Bne OKa3bBaetc OTkpblm, Depknte ero nodaJIbwe ot TeNa.
BvIbTE BCErda OCTOPOXHbI
JaKe KOrda n3dJIe NcNOb3yIOT cOrnaCHO HnCTpyKUJAM, HeBO3MOxH0 NOHOCtBIO YcTpaHNT ΦaKTOpbI PnCKa. CneDyUOUIne ONaCHbIE φakTopbI MOrY T Bo3NkHyTB B XoJe INcNoIb3OBaHnI, n OpeATop DOnJKe HObpaUaTb OC6Oe BHIMAHHe, YTObI N36ExKaT CneDyUOuNX OnaCHOCTeI:
TpaBMBI, Bb3bBaEMbIe BN6paunei
- PpimHeHnIe HnCTpyMeHT TOnbKO No CBOemy Ha3HaueHnIO. IcNoJIb3yIte HaIeJkaUne pyKu n Co6IHOaIte paOoun peKmM.
TpaBMa,Bbl3BaHHaIyMOM.
Bo3dEInCTBnE Wyma MoKcT npNBecTn K nobpeKeHEnIO Cnyxa.HocTe yCtpoNCTBa 3aunTBi Cnyxa n orpaHnUBAIte npOOnJXnTEJbHOCTb WymoBOrO Bo3dEInCTBnIA.
TpaBMA OT KOHTaKTa C Ne3BnEm
TpaBMa, Bb3BaHHa O7pcbIbAeMbIMn npedMetamN
CHNXEHNE PNUCKA
CunTaETc, yTO Bn6paunpyHOro HNCTpyMeHTa MoKet npNBecTN K npOABnEHNO y OTdJIbHBIX NtU TAK Ha3bBaEMoB 60e3HN PeHNo (Raynaud's Syndrome).K CmNTOMAM MoryT OTHOCITbCnOKaJIbBAHHe, OHemHne n NobenHne NaIbueB (kak np NepeoxlaJckHn). CunTAOT, yTO HACNECDTBHeHHbe pKaTOpbl, OxJaXdHne n BlaxHOCTb, Dneta, KypeHne n PpAKTNUeCKn ONbIT cnOCOBCTBYOT pa3BNTIO 3TNX CmNTOMOB. HxKe npNbODaTc Mebp, KOtOpBle MOKet npNHrTb OepaTop dIra ChnKeHn BO3DeCTBn Bn6paun:
OdeBaIteCb Tennnee B XOnoHyIO noroNy. Pn 3KcNlyatauH N3dEINH HOCHTe nepaTKn, YTO6bl coXpaHnTB pyKN 3aNCTbB TenNE.CHTAETc, YTO xOnoHna IoroDA RbIReTc OCHOBHbIM fakTopOM, CnocobCTByIOUM BO3HKnHOBeHHO 60Je3H PeHHO (Raynaud's Syndrome).
Pocne kaxdo3ana paobbI BbInonHnTe ynpaxHeHHa Dna ycIneHHKpOo6paueHHa.
Uaue DeaIte nepepbBbI B pa6ote. CokpaTne DnITeNbHOCTb exEHDHeBHOrO npe6bIBaHnHa OTKpBTOM BO3dyxe.
Pn noBHeHH KaKx-No6 3 yKa3aHHbIX CmNTOMOB cpa3y Je npekpatnte pa60Ty n o6patntecb no nx nobody K Bpauy.
CTOPOXHO
CnIuKOM npoJONknteJIbHoe nCNOJIb3OBAHne IHCTpyMeHTa MoKeT npNBecTN K TpaBME. PnNcNoJIb3OBAHm INCHPTpyMeHTa B TeueHne DInTeJIbHO BpemeHn DeJaTepeyIaRpbHle nepepbIBbl.
UCIOBHBIE OBO3HAUHIN
Ha daHHOM nHCTpyMeHTe MOryT npCytCTBOBaTb HeKOTOpBle n3 cneDyIOxO60HaueHn. 3yUHe n x n 3aONMHnte, yTO OHN O3HaayoT. PpaBnBHOe NOHMaHne DaHHbIX 603HaueHn N03BOJNT Bam lyuWe n 6e3OnaChee NOIb3OBaTbCra DAHHbIM yCTpOYCTBOM.

PpeynpexkdeHn, oecneuBaouune Bauy 6e3oNaCHOCTb.

Bo n36ekhaHne TeJeChbIX NOBpeKdEHH NOJb3OBATeB NOJIkeH BHIMaTeBHO O3HaKOMNTcR N 3aONMHTb Yka3AHn DaHHOro pyKOBOCTBa Do NCNoIb3OBAHn IHCTpyMeHTa.
Ytobn36eKaTb TpaBm,epKaTbcn noaIbIeOT DnKyUxxCaCTeN BO BCE BpeMeHa.
OnacHO! DepeKHTe pyKn HOrn Ha pacctoHnn.
Onachoctb pikoWeta. He noDnyckaTe nocToPOHHX IINC 6nIXe Yem Ha 15 MeTPOB.
Ipeep npoBeHnem TexHnueckoro 06cbnykubAHn n3dennn n3BJIeKeTe KIOU dA CBEeH 3aKnraHn.

Y6epnte npedMeTbI, KOtOpble MOrTy pa3bncr OT Bo3dEChTBn Bpaauoueocpekuyuero nonoHa.

Деркпгун HabnoDateneHа 6e3OanachompacctoHnДaNEKOOT n3dENy.
Bo n36ekahne Tenechoro noBpeKdHnna nn noBpeKdHnna o6OpydoBaHnna, He donyckaIte KacaHnC HarpeToi nobepxHOCTbIO.

H3dJIeIe IaTcnoTeHNaIbHbIM NCTOCHKOMNopaeHn 3JKeTpueckm TOKOM. IOnaHaHe Ha 3dEIne Bna, DOKJa Hn Chera He Donyckaetc. NcNoB3OBaHHe yCtpoiCTBa C MOKpbIMpyKaMn Hn HorAmn He Donyckaetc.
Pycckn

B npoecce 3kcnnyataunn 3ndenne BbldejareyOBHTb yrapHb ra3, He IMeOuun CBeTa n 3anaxa. Bbixhane BbxlonHbix ra3OB (OKCnda yrnpo#a) MOXET CTATb PnPHHO TOUHOTbl, NOTEPn CO3HaHn nn CmepTeIbHoro NCxOda.

IobabteMacnoSAE10W-30API-SJ UIN6oNbweMaccbBMacJHb6ak.

3aJeIte He3TINIpOBAHbI 6eH3nH (COKTaHOBbIM YNCNOM 91 N BblSe) B TOONBBHbIKak.

HaxMMTe 3 paaz KhoNkny noocaca.

YdepKINBaTe pIyar KOHTPOJn npCytCBn OepatopA B NOJoxEHn BH3 NOOTHOWeHIO KpyKe.

NotHnTe 3a pyky CTapTepa 1-2 p3a. Nocne 3aNycka DbNarateJNe MeJeHHo OTNyCTnTe pyky CTapTepa, YTO6bl He DonyCTnTB OTCKAKNBAHNA BepeBKn.

HaHnHaTe Kocntb npn nyCTOM TpaBOc6OpHKe

OctaHObKa DnKHeHn np3aNoJIHeHn nO6OpuKa.

TOnnBOIero napbI ABNIOCTCR B3pbIBOONaCHbIMN MOryT CTATB npuHcEcpbe3hblX OxKOrOB Nnn rnbenn.

TOnJIbBOIero napblAIBJIOCTKpaHHe TOpHUMMnB3pbIBoONaCHbIMn. OroHb IIN B3pbIB MOrYT CTaTB PnUHHOHN CInIbHbIX OXoROB INN CMePeTeJbHORO NCxOJa.

I0JIb3yIteCb aBTOMo6nIbHbIM He3TINIpOBAHHbIM 6eH3INOM C OKTaHOBbIM YNCNOM 91 [R + M] / 2) nII Bblwe.

IcnoJb3yIte MacNo SAE 10W-30API-SJnn6oJbweMaccbI.

Hactoui HcTpyMeT OBeaET Bcem OfuaJIbHbIM CTaHdApTAM CtpaHbI EC, B KOTOpO IH 6bl npno6peTeH.

3Hak Ebpaznckoro COOTBETCTBnA
Ceptnpknat COOTBETCTBnA
NcTC RUC-DE.PC52.B.01368
Cpok DeiCTBnA CeTnPknata
COOTBETCTBnI 10 12.09.2023
OOO «PeHnoHaJIbHbI yeHTp OueHKn
COOTBETCTBnA 123060r.
MockBa yI. Mapana
PbIbAnKO Dom 2 Kopnyc 9
nomeune 638

YkpanHckn 3HaK cTaHdapTn3aun
YdepnBaTe pBvqKoHTpOJn npCytCTBn OepaTopa B NoIOXeHn BH3 NO OTHOWeHnKpyKe, YTO6bl DBratJIb HaxOuINcB pa6oHem COCTOHN. OTNcyTnte pBvqKoHTpON npCytCTBn OepaTopa, YTO6bl OCTAHOBNTb INHCTpymENT.
CamaoxoHoe DnHexHe: Ra3OHOKocnka 3aBeTeC,ecnI NOTAHyTb pHiar aBOHOHMHO XOJa B HAnpaBHeHH pyKoAtn.

TapaHTnpoBaHHb ypoBeHb 3ByKOBO MOUHOCTn 96 d6

OctahOBIne yCtpoNCTBO.
CNICOKOBCJYXNBAHNA
| Пелег каждьим Искоблбз-Банем | ПосLE 1-ro месяа пп 20 часов работы | Каждь�e 3 месяа пп 50 часов работы | Каждьe 6 месяа пп 100 часов работы | Череш сождье 12 месяechи 300 часов работы |
| Проберka масla в двигате | ■ | | | | |
| Замену масla в двигате | | ■ | | ■ | |
| Проберka воздун Horo Фальтра | ■ | | | | |
| Прочichte воздун的基础上 Фальтра. | | | ■ | | |
| Замену воздун Horo Фальтра | | | | | ■ |
| Проберka/р发电机 ВОДУSHN�С党支部 зазugsяяяяяяяяяяяяяяяяяяяяяяяяяяяяяяяяяяяяяяяяяяяяяяяяяяяяяяяяяяяяяяяяяяяяяяяяяяяяяяяяяяяяяяяяяяяяяяяяяяяяЯяяяяяяяяяяяяяяяяяяяяяяяяяяяяяяяяяяяяяяяяяяяяяяяяяяяяяяяяяяяяяяяяяяяяяяяяяяяяяяяяяяяяяяяяяяяяяяяяяяя relay | ■ | | | | |
| Проберka/р发电机 ВОДУSHN�С党支部 зазugsяяяяяяяяяяяяяяяяяяяяяяяяяяяяяяяяяяяяяяяяяяяяяяяяяяяяяяяяяяяяяяяяяяяяяяяяяяяяя relay | ■ | | | | |
| Проберka/р发电机 ВОДУSHнБС党支部 зазugsяяяяяяяяяяяяяяяяяяяяяяяяяяяяяяяяяяяяяяяяяяяяяяяяяяяяяяяяяяяяяяяяяяяяяяяяяяяяяяяяяяяяяяяяяяяяяя relay | ■ | | | ■ | |
| Проберka/р发电机 ВОДУSHN�С党支部 зазugsяяяяяяяяяяяяяяяяяяяяяяяяяяяяяяяяяяяяяяяяяяяяяяяяяяяяяяяяяяяяяяяяяяяяяяяяяяяя relay | ■ | | | | |
| Проберka/р发电机 ВОДУSHN小ВЕТССССССССССССССССССССССССССССССССССССССССССССССССССССССССССССССССССССССССССССССССССССССССССССССССССССCS | ■ | | | | |
*3TNyHKtBIOJIKHbBIINOLHARTcRTOJbKOABTOPN3OBAHbIMCEPBNCbIMLHTPOM
PIMMEUAHNE: ECIN INHCTpymeHT NcONb3yeTcB YcNIOBnX C NOBbIeHHbIM COepeXaHneM Nbln,TexHHeCKoe 06cnyKbAHne Heo6xOdmo npoBOuNTb Yaue.
EcnnnapaMeTpblBnIaTeIyPpeBbIaOTMaKcImMaIbHbIeNoka3aTeIy,ka3aHHbIEBa7bnue,TexHnueckooe 0cbnyknbAHne H3dennr Heo6xOIMNo pOBOnTb C yyeToM 3aDaHHbIX INTEpBaIOB.
Pycckn
ПОИСК HENСРABHOCТЕN
W17 Y2015, rnde Y2015 - roD n3roTOBnHn
W17-HeJeIur3rOToBJIeHnI
OnpeDenntb Mecu n3roTOBHeH MoXHo corlaCHO npBeHHn HKe Ta6nue,Ha npImepe 2015 roda.
06paTne BnMaHne! KoJInueCTBO HeJeB B MeCaIepa3JIuYaeTcO rOra B rOd.
He ro n3non3BaIte 3a HnKaKbN dpyrN ceJI.
OBUNPDEUYPEXKDEHNA B3E3ONACHOCT
REUYYPEXJEHME
Pn n3non3BaHe Ha npOdykTa Tp6Ba Da ce cna3BaT npabunata 3a 6e30anachoct. 3a ocInpyraBe He H BaWata 6e30anachocT Na 3aH CTpaHnUHnTe HbIIOdaTei npooyetTe Teu INHCTpyKUn, Ppei da pa6OTne C npOdykTa. CbxpaHraBaIte pBkoBOdCTBTO 3a EKcNlOaTauHa CnrypHo MAnTo, 3a Da MoKeTe Da ro NOJ3BaTE N O-KbCHO.
JIYUHA BE3OJACHOCT
IpoodykTbT MoKe da oTpke KpaK nnn pBka, KaKTo n Da n3XbPnna PpeMTe. Cb6HnOdaBaTe BCNUKN HCTpyKcun 3a 6e30NaCHOCT. B npOTuBEH cnyaJ moKe da ce CTnIHe Do cepno3HN fN3UneCKn HapaHraBAHn Nn CMbpT.
3a03haTe ce c KOHTpOInTe 3a ynpaBnHe n npaBnHTo n3noN3BaHe Ha npoDyKta.
I PpeN BcKa ynotpe6a npOBepBaTe DaNN BCnKN KOHTpON N yCTpoiCTBa 3a 6e3onacnoCT ΦyHKUHOHPaT npABINHO. He n3non3BaTe npOdykTa, aKO npEBKlnOuBATEJrT "off" (n3Kn.) He cnpa DnuratJI.
Hnkora He no3BONBAIte Ha Deca, Ha Xopa C orpaHnueHH n3NueeCKn, CETNBn nn yMCTBEHN cnoc6HOCTn Hxopa, KOHTo HE ca 3aNO3HaTn C Te3n HnCTpyKuIN, Da paOToT N da N3BbPbBaT deHOCTHn NO NoNCCTBaHe N noDpBkKa Ha npOyKTA. MecTHnTe HapeDb Morat Da Hanarat OrpaHnueHnra 3a Bb3paCTTa Ha onepaTopa. Deuata Tpr6Ba Da 6bDat BHmATEHo
Had3npaBahi, 3a da ce rapaHTnpa, ye He cn irpaT c npOyKta.
BbTe 6dnteHn, BnMaBaTe KaKBO npaBte n npoBraBte 6naRopa3ymne, KORATO 6opBaTe c ypeHa. He n3non3BaTe Ta3n MaunHa, aKO CTe ymopeHn nn PoD BnHHeTO Ha HApKOTn, anKoxon nn nekapCTBa. Mnr HeBnMaHne no BpeMe Ha pa6ota C npOyKTa MoKe Da npedeN3BnKa cepno3Hn fHnueckn HapaHbAHn.
HoceteTexkN,bIgnaHTaIOnH,dpexnCdbIpykabN3dpabNobyBknnpOTNBxlb3raHe.He HoceteWopTN,caHaJIHHeXoTe6OcN.136raBaTHeHocHeToHaUpOKn dpexnIIN dpexnCBNCaunShHypObeNJIN BpaTOBpb3Kn.
BnHaHnNo BpeMe Ha pa6oTa HocTe 3aunTHn OUnna CbC CTpaHnHn ekpaHn.
Hocete aHTnOHN 3aunTHN OUYJBA BCEKN nbT, KORATo 6opabNTe C MaunHata. Ako npu KOceHeTO ce OTdena npax,Hocete IMacka 3a NInce.
Ipi n3noT3BaHe Ha aHTnfoHn ige ce HamaJIi cnoc6hoc7tTa da yBaTe npdeynpejxJHnna (noDbKBAHn IIN anapm).OnepaTopbT trpa6Ba da e ocObeHO BHMaTeJeH 3a TOBA, KOeTO ce cnyuBa B pa6oTHata 30Ha.
Ako ha6n30 ce pa6to n c noo6h ypei, TOBa yBeHnUa KaKTo pncKa OYbpeKdHa Ha cnya, Taka n BepoTHOCTTa dpytn Xopa da HABn3aT BbB BaWeto pa6to npoctpaHCTBO.
BnHa nCTbNbaIte BnHMaTeJIHO nCTa6NJHO,OC6eHO Ha CTpbMHN NOBbpxHOCTN. 3aemaIte cTa6NJHa no3uIg I na3eTe 6aIaHC.He ce npotraIte,3a da pa6oTHe Ha TpydHo IOcTnxMM MeCTa.IpOtaHTo MOKe Da DOBeE Do 3aY6Ba HA paBHOBeCne.
Bbpxy HakoHene Tepenpaote c npdykTa Hnpanko cnprmo NOBbpxHoCTta, HNKora Harope n Hadony. BbTe oc6eNo 6dntenPi np CMraHa Ha nocokata Ha HakoHa.
He n3noJ3BaIe ypeDa B 6nI3OCT do Hacnn, KaHabKn, npeKaIeHo CTpbMHN NOBbPxHOCTN ININ DInr. Hecta6nIHOCCTTNo Bpeme Ha pa6oTa MoKe da DOBeDe Do nOxJIb3BaHe nndaHe.
I IpanpaTe NbTa Ha KocHe, 3a Da I36erHete N3XBpJnHe Ha MaTePnAn CpeUy NbTnua, O6eCTBeHn TpoToapn, CTpaHnHn HabNIOdaTeHn IN DpyrNoO6Hn. N36RaBaiTe CbIo N N3XBpPnHeTO Ha MaTePnAn CpeUy CteHn NIN PpenTCTBnB, B KOnTO ToM MoKe Da PNKOuHa KaM Bac.
SE3ONACHOCT HA PABOTHATA 3OHA
Hnkora He n3no3BaIte npOkykTa,doKaTo xopa (oc6eHO deua) nn Domaun HxNBOTHn Ca B paDnyc ot 15 M,3aIoTO cbIeCTByBa pNCK da OTXBbpyat npedmetn B cIeCTBne Ha KOHTAKT C OCTpNeTO.
IpeDMeTn, N3XBpJIeHn OT KOCaYKaTaNorat Da npuHHrT cepno3Hn HapaHbAHn. IpoBepTe BHIMATEJHO 3OHATA, KbJeTO Ue Ce n3NOJ3Ba MaunHaTaNOTCTpaHete BCNUK KAMbHN, PpbKn,
Былгария
MeTaNHN PpeMeTN, Ka6eN, KOCTN, INppaKIN NIN DpyTN CyKIN PpeMeTN. He 3a6paBnTE, Ye B pexKeun MExAHn3bM MORAT Da CE 3aNNETAT BbpN INN KNU.
I3non3BaIte npOykTa cAmo Ha nHeBHa CBeTnHa nn npDio6po N3KycTBeHO OCBetneHne. OepaTopbTp8Ba Da Ima YnCTa BnIMOCCT Bbpxy pa60THOTnpoctpaHCTBO, 3a Da nDeHTnФuNpa NotEHuaNNOnaCHOCTN.
He pa6oTe c MaunHaTa B CpeDa C NOBWeHa ONaCHOCT OT Bb3HnKBAHe Ha EKcNIO3nB, B 6IIN3OCT DO IeCHO3aIaNIM TeuHOCTn, Ra3OBe INI INpaxoo6pa3HN MaTePnaII. IIO BpeMe Ha pa6oTa INHCTpyMeHTbT MOKe Da npOn3BeE nCKpn, KOIn Da Bb3PiAmEHr Tpax INI napi.
He pa6oTeTe c MaunHaTa Bbpxy BnaXHa TpeBa nn npn Dbxk.
He n3noJI3BaIte npOyKTa, kOraTo mMa pUCK OT MbJIHN.
Tpy6Ba Da 3haeTe,Ye onepaTopbT nIIN noTppeBnteJIe TOTROBOpEN 3a npuynHBAHeTo Ha 3NOnOJyKn IIN UETn Ha dpYtn Nua nn NmMyueCTBO.
OnepaTopbT Tp6Ba Da e BuHaHn HaUpeK B npncbCTBneto Ha Deca, 3a Da ce N36erHnat TpaNHy HnDuENTn. Deata ObNKHOBeHo Ca IIOBOHTn KbM MaunHInTe N KbM npOueca Ha KocHe. He MncTe, Ye Deata Ue CToRd bIro Ha MrcTO, KbTeTo CTe rN BnDeJI 3a NoCneDHO.
I Na3eTe Deuata OT 30HaTa 3a KOceHe n NOd 3OpKaTa rPnka Ha OTROBOpEN Bb3pactEn, pa3NJueH ONepaTopa,6bDeTe 6dntenHn N3KNIouTe KocayKaTAt, aKO B 30HaTahabNe3e DeTe.
BbTe DOnbHnHTeHOBHIMaTeHNO npnp6nnKabaHe Cne 3aBO, XpactN, DpBeTa ININpyTN PpeMetN, BKNIOHTeHHO HADNBCHAHINxpactN, KONTO MOrat Da NOnpeyAT Ha BUNIMOCCTTA BN.
IopdbpkaaTe pa60THata 30Ha uHCTa. Be3nOpraBkBTnn TbMHHaTa B pa60THOT npocTpaHCTBO ca npednoctabKa 3a 3IOIOJyKn.
ПЕДУПЕХДECHИЗ 3A BE3ОПАСHA PABOTA C KOCAHKATA 3A TPEBA
OrnexdaiTe INCTpyMeNTa BCEKN PtpeuynOpTe6a, 3a da ce yBepnte, ye octpneTaT, 0bTOBeTe IM n peKeusMEXaHn3bM He ca N3HOceHN NIN NOBpeDeHN.
3aemeHete H3HOceHHTe NIN NOBpeHHTe OCTPneta 6oNTOBe 3aeDHO, 3a da 3ana3HTe 6aJahca.
Hikora He pa6oTeTe c Kocaykata, ako KOHTPOJbT Ha npucbCTBnTo Ha onepaTop, KORAto 6bDe ocBO6oHe, He cnnpa Dnuratela.
He n3no3BaIte npodykTa, 6e3 zraNaTapeBa nn oxpaHnTeJI Ha caMo3aTBapRHe n3XoDnHa OTBOp Ha MRCTO Cn.
OcptneTo Ha npodykTa e MHoro ocTpo. BbTeBHHMaTeHNH NHOceTe 3dpaBN ppeDna3Hn pbKaBnCn, KOrato 3aTgate, NOdMeHrTe, NOuCTBaTe nn HcneKtnpate 6oTobete.
3aHecTe npOdykTa B OToPn3IpaH cepBn3eH ueHTbp, aKe e Heo6xOIMHa 3amraHa Ha nobpeDeHN nn HecETnnBn etIKeTn.
■IepnoDnUHO npOBepBaIte daIIN BCNUKn raIKN, 6oNTOBe n BnHTOBe ca npabUNHO 3aTeHaTn, 3a Da CTE cnHypHn, ye o6OpyDaBHeTo e B n3npaBHOCT.
IepnoDnHNO npOBepraBaTe KONEKTopa Ha TpeBa 3a H3HOcBaHe, pOdyuYBaHNuNIOBpeDN. Te MoRat Da IOBeDaT DO OTXBbPcAHe HA ppeDMeTN KbM ONEpApota.
IpoMeHnTe n3HOceHnTe nnIOBpeHnTe yacTn, npedna pa6oTne cypeda.
BHHMaTeHNO BKNIOUe TDBrAteTn, KATO Ntpe6nteJIeT e 3aJ KOpMnIOnTO B 6e3oNacHaTa 30Ha Ha OnepaTopa. Hnkora He CTApTnpaIte npOdyKta, ako:
BCNUKNTeYETnPKIeNETaHECaBIIbTeH KOHTAKTCbC3EMHaTaNOBbpXHOCT
- YIeT 3a OTBeXJaHe Ha TpeBa e N3IOJKeH He e 3aIHTeH OT KOWa 3a TpeBa N Kanaka Ha yIeR 3a OTBeXJaHe Ha TpeBa
- pþcête n KpakaTa Ha BCnUKN 6bn3KoCTOuNi LncaHe ca Ha 6e3oNaCHO pa3CTOHaHE OT pexKeunMEXaHn3bM.
He HacnBaIe npOyKta.ToI ue CbBpU pa6oTata no-dO6pe nno-6e30nacHO 3aJaDeHna OT npOn3BOuNTeJ DaNan3OH Ha HatoBapBaHe.
He npetobapbaTe npodykTa. Koceheto Ha nbItnn Ie6eenn CtpbKObe TpeBa MoKe Da npuHn CnaDaHe Ha ckopocTtHa DnRaTeN Nn Do OTnAdaHe Ha 3axpaHbAHeto. Korato Kocnte BnCOka NrbCTa TpeBa, 3aJaTe No-rolma BnCOunHa HAcOcHe npn PbPbTO cn KOCHe, 3a Da HAMJIne HATOBAPBAHTo.
Cnpete octpneTo, KOrato npemHaBaTe HaJ qakbIeCTn NOBbpxHOCTN.
He IbpnaIte ypeJaHa3aI,OCBeH aKO He e abcoHTo HEO6xOIMo.AKO Tpr6Ba Da BbPheTe MaunHaTa B O6paTHa Nocoka,3a Da N36ErHete CTeHa NN npenrTCTBne,IIpbBO ce OrJedAite HaDoIy HHa3aI,3a Da N36ErHete CnBBAHe NN dpbNbaHe Ha MaunHaTa HaI KpaKaTAtc.
■ N3knHoyete DnBraTeNn H3yakaIte OcTpneTo Da cnpe, aKo ce HaNara Da HAKIOHIne KocAkaTata, 3a da TpaHCnOpTnpate Do n OT MAcTOTO 3a KOCHe nn npes MeCTa, pa3JNUHn OT TpeBHN IINOuIN.
Hnkora He noI3BaIte ypea c nobpeDeHN 3auNTn nn CTpaHHN eKpaHn nn 6e3 3auHTHn ycTPOCTBA, HanpImep 6e3 MOHTnpAHN OTKNOHNTeIN nn KOJIeKTOpn 3a TpeBa.
He HaknaHajTe KocauKaTaNorato cTaptnape TBNrataJIIN DOKATO ToI pa60TN.ToBa OTKpNBa OCTPnEtTaN yBeJIuHaBa PnCKaOTXBbPcHHe Ha npEpmTu.
CneDbaiTe HNCTpyKunite 3a BnHMaTeIHO CTapTnpaHe Ha Dniratela n na3ete pueTe n KpaKaTa cn daNey ot 3ohata Ha pra3ane. He noctabraiTe pueTe nn KpaKaTa cn 6bn3o do nn nnoBvptauNTe ce yactn. BuHarri cToiTe daney ot yner 3a nXbPnhe. He
Былгария
CTapTnpaTe npOyKta, KOraTo CTOnTe npeD OTBopa 3a n3XBbPnHe.
Hikora He BnraIte H He HocTe npOdykTa, DOKaTOMOTOpbT My pa6Ot.
Korato He ce n3non3Ba, Kocaykata Tp86Ba da ce cBxpaHraBa Ha cyxo, npOBeTpINBO MRCTO n Da e 3aKnIOHeHa, 3a Da He MORaT Da J DOCTnAT Deuca.
CleBbAte HNCTpyKcHnTe Ha npOn3BOuNTeHa 3a npaBnHa paOta c Kocaykata m MOHTax Ha npHaJNeXHocTn. N3pON3BaTe caMo OdopeHn OT npOn3BOUNTeA kCeccapn.
He cTApTnapeTte DnBraTeTne B 3aTBopeHn nOmeUeHn, KbDeTo MoKe Da ce HATpyNa ONaCeH BbIJIepoJeH OKcNl.
He npomeHnTe peRynpaHnTe HacTpoKn Ha DnIraTeJI n He ro npTeOBapBaIte.
Cnpete Kocaykata n 3yakaite octpneTo da cnpe Hnblno.OctabeTe ypeDa ca ce oxnai n cneTobn 3KIOHcTe KaBeHa 3anaIInHeHa TcBeeU;
Korato octabrTe npdykTa 6e3 Hnd3Op (BKNIOHTeHNO, 3a Da N3XBbPnTe TpeBnTe OTp3bU);
-прди поиствае Ha 3anyшвае ИИ N O Tnyшвае. Ha OTbexkaця ул
- npedu npobepka, noocmbahe nn pa6ota no ypeda
-прени Свал�у Ктугда 3a Тревилд
OTBOPITE KANAKA Ha yner 3a ИЗХьрлес He TpeBa
- npde3apekdaheTo c ropuBO
Ako MaunHaTa 3aOnHe da Bn6pnpa Heo6uHHO, He3a6abHo npOBepTe:
Korato INHcneKtnpaTe 3a NOBpeNi,OCO6eHO Korato IPOBepBaTe OCTpneTaTa.
3aMeHeTe IJI peMOHTnpaITe BCNUKn NOBpeDeH NdetaiIN
- npOBepTe mMa Jn He3aTeHaTn DeTaJIn n npN Heo6xOIMOCr 3aTeHete
AkoMaunHaTaCe ydapnB uYxKn ppeMTe, CneBaITe Te3NCTbKN:
CnpTe ypea n H3KluoyeTe Ka6ena Ha 3anaNTeJIHATA CBEU.
- CtapaTeHNo HnCneKtnpaIte KocauKaTa N KoWa 3a TpeBa 3a UeTn.
Ako nma noBpeHn qactn, nonpaBeTe rn, npEi Da CTapTnpate OTHOBO Kocaykata N da npoDbJnxnte pa60tata cn c hea.
1368raBaiTe DynK, 6pa3dN, N3dyTnH, KaMbHn nnDpyrCKpTu npEdMeTu. HepaBnIy TepeH MoKe daDoBeDe Do noDxJIb3BaHe nndaHe.
I3yakaiTe DBrataeJrTa da ce oxJaHn, npedn da npnbepete MaunHaTa 3a cbxpaHeHne B 3aTBopeHo nomeuHne.
3a da HamaIte onachocTta OT noxkap, noIbpxkaIte DnIraTeIra, 3arLyuHTeIra N MAcTOTO, KbTeO CbxpaHbAte BeH3IN, YnCTn OT TpeBa, UyMa n IpeKoMEpHO KOJIueCTBO CMA3Ka.
Ako n3ToBaTe roPnBnpe3epBoap, npaBeTe ro caMo Ha OTKpIto.
13KIOUeTe CbP3BaHTo Ha CBeUta, npEn Da npaBnTe KaKBnTO I Da e HAcTPOIKN, Da TpaHCnOpTnpaTe INI DA CBxpanBaTe npOyKTa. Te3n npEbaHTuBn MEpkn 3a 6e30NaCHOCT HaMaJRABat pNCKa OT 3aDeiCTBaHe Ha npOyKTA NO HeBHImaHne.
IpoDyKbT e n3KnIOHTeHIO yUMeH N MOKe Da npEiN3BnKa TpaHn yBpeXdAHHa Cnyxa, aKO He Cna3BaTe IHCTpyKUnTe 3a ORpAHuYabaHe Ha yNoTpe6aTa, HamaJIraBaHe Ha Wyma N HOceHe Ha aHTnOHN.
CEPBNU3HOOBCNJXBAHE
Camo KbaJnΦuPah CepBn3eH TexNk MoKe da peMOHTnpa To3n npOdyKT. CepBn3H DeIcTBn IIN NOdpbXka, N3BbpSeHH OT HeKBaJIuΦuTnpaHO IINCe, MOKe Da DOBeHe Do HapaHraBaHe Ha nOTpe6nten IIN Do nobpeDn B npOdyKta.
Ipiu n3BbPwBaHe Ha cepBn3Hn DeHHocTn 3nON3BaHTe camo opunHnHn pe3epBn qactn OT npOn3BODnteJr. 3nON3BaHTo Ha HeoO6peHn OT npOn3BODnteJr pe3epBn qactn MoKe Da DOBeJe Do cepNo3Hn fN3NuEcKn HapaHraBaHna Ha Notpe6nteJr NnnpOBpeDN B npOdyKta.
3A6EJIEXK4: N3BbPwBaIte cMo 3aJaHTe, nocOeyH B TOBa pBkoBOIDCTBO. OctaHaJITe BINOBE peMOHTH DeiHOCTn Tp8Ba Da ce I3BbPwBaT cMo B yNbHOMoJeH CepBn3EH ueHTbp.
3ana3eTo TOBA pBkoBOcTBO 3a 6bDe7a Cnpabka. PpenpoHTaIte ro peoBHO n ro n3noJI3BaIte, KOraTO Tp6Ba Da IHCTpyKtnpaTe Dpyro IInCe, KoEtO Ie bOpABn C To3n npOyKT. Ako 3aemate Ha Hrkoro INCTpyMeHTa, PpeaTe My cbIo N Te3n INCTpyKuIN.
ONICAHNE
Bx. cTpaHnua 1-13.
1. IOCT 3a ABTomATUHNO npuDnBkBaHe
2. Konektop Ha TpeBa
3. NyckoB a nOmna
4. Kanak Ha Bb3dyHnHn nnTbp
5. CtapTeP Ha 3anaNTeHHaTa CbeU
6. Kanayka 3a ropinbo
7. Ioccpepyema Bncoyna
8. Pbyka ha ctaptepa
9. BpbTkHa Ha pbkoXBaTkata
10.BpbTk3aBoDaayHaBbXeTo
11. KoHTpOen IocT Ha onepaTopa
12. Kanayka/ɪnɪMepɪnten Ha macIto
13. 3anaIteHa cBeu
14.Писноблелпе 3a мунчupaнe
15. Bb3dUweH fntTbp
CTIO6BAHE
PA301NAKOBAHE
To3n npoDyKT n3nckBa crIIO6BaHe.
Ornetae BHMaTeHNO npOyKta, 3a da ce yBepnte, He ca Bb3HKnHaN NOBpeu nn ChynBaHn no Bpeme Ha TpaHCnOpTa.
Ako mma JINNCBaunn NIN NOBpeHn YacTN, ce 06bpHeTe 3a NOMOu KBM CepBn3 Ha RYOBI.
ONIC HA NAKETA
Kocayka 3a TpeBa
Bɔdau Ha BvjkeTo
KonekTop Ha TpeBa
PpncnoocbneHne
3a
MylnipaHe
PbKOBOIDCTBO 3a
Shaib
onepaTopa
Jntc c qnpyr Raika
BodauHaKa6eNa
PENPYPEXDEHNE
Ako mma JInncBaun nn nobpehen qactn, He n3no13BaIte To3n npOyKT, npEn Te da 6bDat 3ameHen. n3no13BaHTo Ha npOyKT npn HauNueTo Ha nobpehen nn JInncBaun qactn MoKe da DoBede do cepno3HN fniueckn HapaHbaHna.
TREYNPEXEHNIE
He onntbaite da npomehte To3n npdykt nn da cb3daBate npnaHdneXHocT, KOTo He ca npenopbuaHn 3a ynotpe6a c Hero. Bcka noDobHa nonpaBka nn npomraHa e Hekopektha ynotpe6a n MOKe Da cb3daDe onachn ycNoBn n da HaHece cepno3n fN3nueckn HapaHbAHn.
PENPYPEXDEHNE
CnCTemnte 3a 6e3oNaCHOCT Kocayka uIN OOCbeHOCTN He Tp8Ba Da 6bDe NOnpabEn uIN C yBpeKdAHH.
ENYNPEXXHEHNE
HnKora He npKaayBaIe H He HacTpoBaIte npncno6bHeHra,doKato ypeBt pa60Tu. Hecbo6pa3aBaHaTe cToBa npeDynpexKeHne MoKe da doBeDe Do cepNo3Hn Phn3Nueckn HapaHyaBaHna.
ENYNPEXDEHNE
BnHaHn 3KnOuBaIe CTapTePHO Bxke, KOraTO crNo6BaTe yactn. Pn Hecna3BaHe Ha ToBa yKa3aHne MaunHaTa MoKe HeBOJHo Da 6bDe BKIOHa n Da ce npNHNr TeKkT TeneChn NOBpeNi.
TRENDYIPEXDEHME
Hnkora He n3noJ3BaIe Kocaukata, ako He ca noctabehn NodXoJUHTe PpeJna3HN cpeCTba INn aKO he fynKuHOHPaT. He n3noJ3BaIe Kocaukata, aKO mMa nobpeDeHn PpeJna3HN ycTpoNCTBa. BopabeHTo C To3n npOyKT npHaJIuMHeTO Ha TaKbA, MOKe da DoBede Do cepno3Hn fnsuCeckn HapaHbHn.
MHCTAJINPAHE
BuxkΦurpa2-5.
BdHHepe pexeToO ocTpne do Hau-BncoKaTa no3u.
MontpaTepbKOXBaTKteBnpaBnHaNo3uHpa6oTa.BkapainTe 60Tobete BOTBOPHTBropHATAINOnHATApKOBXbTKa,CneTOBa3aterHETeBpTknte,3a Da3actONOpTEpbKOXBaTKnte.
IocTabeTe KoneKTopa 3a TpeBa nn npncnoc6neHneTo 3a MynnpaHe.
IOCTABRHE HA IPIPNCIOOCOBHENETO 3A MYNI-PAHE
Bx. cTpaHnua 4.
3A6ENEKKA: KoraTo n3non3BaTe nnpyr 3a MynHpaHe, He MOHTnpaIte KOwa 3a TpeBa.
IIOBmHHeTe 3aDpBXTe 3aHaTa BpaTa 3a IxBbPJIHe.
XBaHeTe nIyra 3a MyIuHpaHe 3a pBkoXBaTKaTa I BKapaTe DcHaTa My CtpaHa B 3aHaTt Ha Kopnyca, KaKTo e NOKa3aHo Ha fumypata.
HaTnchete nnyra 3a Myunnpahe Hanpei Haonny, DOKATO ro 3actonopnte. YBepete ce, ye nnpybT 3a Myunnpahe e qnkpan B 3aHaata yacst Ha Kopnyca.
CmbkHeTe 3aHaTa BpTa 3a N3XBpJrHe.
IPEMAXBAHE HA NJIYRA 3A MYJUPAHE
IIOBmHHeTe 3aDpBxTe 3aHaTa BpaTa 3a
XbaHete nnyra 3a MynHpaHe 3a pbKoXBaTKata, NOBnHete ro 6abHO ro n3dbpnaTe.
MHCTAJINPAHE HA KOJIEKTOPA 3A TPEBA
Bx. cTpaHnua 5.
IobDnHHeTe 3aHaTa Bpata 3a n3XbPnaHe.
I NobdHrHeTe KOJekTopa 3a TpeBa 3a pbKoXBaTKaTa Iy NoCTaBETe NOD 3aHaTb BpTa, TaKa Ye KyKeTepaPamata Ha KOJIeKTopa Da BnA3at B OTBOpNTe B CkoBaTa Ha pbKoXBaTKata.
Былгарnia
OTbOpTe 3aHaTa BpTa. Pn npaBnH NoocTabrHe KyKlTe Ha KOJIeKTopa 3a TpeBa Ue ce pa3NoIoxKaT IIbTHO B OTbOpTe Ha CkO6nte Ha pBkoXbaTkata.
YBepete ce, ye 3aHaTAt BpaTuKa e HAnbJHo 3aKpeneHa 3a K0wa 3a TpeBa. YBepete ce, ye Hma npocBet Mekdy 3aHaTAt BpaTuKa n K0wa 3a TpeBa.
PA5OTA
TOPINBOI3APEXDAHEHAPE3EPBOAPA
EDYYPPEKDEHME
BnHaN n3KnIouBaIte DnIaTeTne I ro octaBeTe da ce oxnaI 3a 5 MNHyTN, npEIN Da 3apeIte C ropInBO. Hnkora He OTbapAte KanaKkata Ha ropNBHnpe3epBoAp n He DoJIbBaIte 6eHN B MaunHa c pa6oteu nnropeu DnIraTe. OTrpbnHeTe ce nohe Ha 9 M ot MrcToTO, KbJeTo CTe nbJHnInn pe3epBoaPa c ropInBO, npEIN Da Nychete DnIRatEn. He nywete. HecbOpa3aBaHeto C TOBA npEynPexKeHne Moke da doBeDe Do cepNo3Hn fN3Nueckn HapaHbaHna.
TRENDYTPPEKDEHME
BnHaBn BnImBaBte npa pa6oTa c rOpNBO; To e CnIHO 3anaNMO.
H3non3BaIte npcHOrpIMBO.
Store petrol in containers specifically designed for this uei.
BnHaI 3apeKdaiTe Ha oTKpnto. He BdnuBaIte napite ot ropnboto. He nywete n ctoiTe daJeOT OTKpTN PImMbUIn N NCKPn Pn PbJIHeHape3epBoapa 3a ropnbOn npn pa6ota C ropnboto.
He no3BoJraBaIte Ha 6eH3nH nnn MacNo da BnN3aT BOHTAKT C KOxKaTa BN.
I Na3eTe OunTe CN OT 6eH3nH n MacNo. Ako B OunTe BN IOnaHe 6eH3nH nIIM MacNo, He3a6abHO n3nnakHeTe C YnCTa BOda. Ako pa3dpa3HeHneTo npOdbJnKaBa, He3a6abHO ce ObpHete KbM Jekap.
MometaJIHO noUcHbTe pa3JrTOTo rOpIBO.
3apeTeTc roPBO Do npenOpbTuTeHTo HNO.
3APEKDAHE HA PE3EPBOAPA
Bx. cTpaHua 6.
RENDYUPEXDEHME
He npenbIbaIte. HanbnHete pe3epBoapa 3a ropnbo do 25 MM nOJ rOpHaT auct Ha WnraTa ha rOpnBO.Cnei 3apeKdahe C rOpnBO HNKora He HakJaHnTe KocauKaT a Ha nobuee ot 25 rpaDyca, TbN KaTO TOBa MoKe da DOBeDe OT N3TNuAHe Ha rOpnBO n ONaCHOCT OT NOXkap I dP.
3A6EJIEXKKA:BnHaTn n3noJ3BaIte 6e3oIOBEN 6eH3IN C OKTaHOBO YNCIO 91NJN NO-BUCOKO.
Ipoynctete pe3epBoapa OKoJIO kanaUkata, 3a da He ce 3ambpncrnpBOTO.
BabHo pa3BbPteTe kanaQkaTa Ha pe3epBoapa. OctabeTe kanaQkata Bbpxy NCTa NOBbpxHocT.
BnHMaTeNo CIneTe rOpNBo B pe3epBoapa. Ppei OTHOBO Da 3aBnTe KaNaChkata, NoChTe
I OunCTeTe n HnCNeKtnpaTe yNtBTHnTeJy N aK CneT ToBa NoCTaBeTe 6paTHo N 3aTeHHeTe KAnayKeT He TropNBOTu n pe3epBoapa.
Cb6epete pa3cunahoto ropnBO. PnpemecTeTe ce Ha pa3ctoHne 9 m (30 ft) ot MrcTOTO Ha 3apeKdaHe, npedn da cTaptnpate DnraTeIa.
3A6ENEKKA: Bnuratent MoKe Da 3anyu, KOraTo nycheTe MaunHaTa 3a NpBn NbT NcIeTOBa.
JOINBAHE/IIPOBEPKA HA MOTOPHOTO MACJIO
Bx. cTpaHua 6.
MToPnHO To MaCNo e OTO CCHOBHnTe PhakTopn, BmRnEuN BbPxNy PON3BODNTeHNOCCTTa Ha DBNrTaTEn N Ha HerOBn EKcNnOaTauNoHeH JxNBoT. 3a 06Ua yNoTpe6a npn BCaKaBn TEMnepaTynpenOpBvBaMe MacNo SAE 10W-30.BnHar nI3NO3BaIte 4-CuKbN MOTOPHo MaCNo, KOeTO OTROBapHa IIN NaDbNtAba N3NcKBaHnra Ta 3a KnaCnФkaunr API SJ ycLyra.
3A6ELEKKA:ИЗнOLЗВАЕТОHa HENpeuNCTeHn IINДByTaKTOB MaCna ige NOBpeDn DBrIaTeTЯ.
3a da doneeTe MOTOPHO MacNo:
Kocaykata Tpr6ba da e Ha paBHa NOBbpxHocT, a 0bnactta OKOIO kanaVkata/u3mepnteHa macno Tpr6ba da e ucta.
Maxhete kanaukkata n ynnbTHnTeJr O T 6ytunkata c macno.
Pa3BnTe KanaayKaTa/H3MepeTEnHa MacNo.
BabHO haJIeTe macNo. HanbJIHeTe do JInHnra "Full" (TbJHo") Ha n3Mepnten. He npenbJbaIte.
3A6EJIEXK4: 3a da npOBepNTe HnBTo Ha MacnTo, NOCTaBeTe N3MepNTeI B OTbOpa 3a PbJIHe He C MacNo, HO He 3aBnHTBaTKe KanaQKaTata.
3aBnHTeTe KanauKaTa/N3MepuTeIHa MaCNo I 3aTeHHeTe 3dpabo.
3aДаИЗМЕРпЕ HNBOTO HA MOTOPH MaCJO:
Kocaykata Tpr6ba da e Ha paBHa NOBbpxHocT, a 0bnactta OKoIIO kanaYkata/u3MepnteHa MaCNO Tpr6ba da e uNCTa.
Maxhete Kanaykata 3a Macnoto/yka3aTeIra 3a HNBO 3a6bpwe Te N3Mepnte Iro NoCTabeTe o6paTHo B OTBopa 3a PbJIHeHe C MaCNo, 6e3 da 3aBnHTBaTe.
I3BaTeI3MepntIgI npOBepTe HnBTo. DObabeTe MacNo KaKTo e Heo6xOdmo.
CTAPTIPAHE CINPAHE HA KOCAYKATA
Bx. cTpaHnua 6.
REUYYPEXJEHME
Hnkora He cTApTnpaIte DnraTeIe B 3aTbOpeHo nIIN Cna6o npOBetpNBO npocTpAChTBO; BnWbaHTo Ha n3ropeIInTe ra3OBe MoKe da e CmbpTOHOCHO.
PpeBapnteHn npOBepKu
YbepeTeCe,YeHMaIOCTaTbUHO MacNo,KaTO npOBepTe HNBOTO My C ppeIOCTaBeHnMa MCNOyKa3aTeI.
IpoBepTe I ce yBepeTe, ye B pe3epBoapa IMa IOCTaTbUHO 06nKHObeHo 6e3oNObHO rOpBO.
CTAPTIPAHE HA DIBIATATEJI
HaTnchete 3dpabo NOMnata 3a nodkaueBahe Ha roPnBOTO 3 nTn.
3AEBJEXKA: Ta3n CTbKnKa 06NkHOBeHo He e Heo6xOIMa, KOrato CTapTnpaTe DnIraTeJ, KOITo Bee e pa6OTn N3BcTHO BpeMe.
3aJpbXTe KOHTponHnnoCT Ha onepaTopa HandoNy KbM pKoXBaTKaT.
13bpaTne BxkeTo Ha cTape,doKato DnBraTeJr 3apa60tn.He bPnaTe pkoXBaTKata Ha cTape naBeHeOT4NbTu.OTnyckaTe nlaBHO BxKeTo Ha cTape,3a Da He ce ypr npnpnbpupaHeto.
3A6EIXKKA: B cTydeHO Bpeme MoKe Da ce HaNoXn Da NOBTOPte NOIROTBNTENHITE CTbKn. B TOIIO BpeMe npeKOMEPHOTo NOKaUBaHe Ha TropBO C NOMNaTa MOKe Da 3aABN DBrATeJIa N ToI Da OTKaKe Da CTapTnpa. Ako 3aAbNTe DBrATeJIa, N3uakaTe HAKOJIKO MNHyTN, NpeIN OTHOB Da ONHTate Da CTapTnpate DBrATeJIa N He NOBTaprAte NoDROTBNTENHITE CTbKn.
CINPAHE HA DBNFATEJIA
OTnycheTe KOHTpOJIHnI NaCT Ha onepAToPA N3UaKaIte DBnIaTeJrTa Da cnpe HAnbIHO.
PnDvXBAHc HA YPeDA
Bx. cTpaHnua 6.
3a aBtOMaTnHNo npuDnBxKBaHe: 3aDpBkTe HaOny KOHTPOJHnI NOCT Ha OepaTopa, DOKaTO N3DbPbNAte IIOCTa 3a MaHEbpnpaHe KbM pBkoXBatkata. OTNycHete IIOCTa 3a MaHEbpnpaHe, 3a Da Cnpete XoJa Ha KONenata.
3a Da 3aDbNkBAt pbqHo: 3aDpBkTe HaOny KOHTPOJIHnI NaOCT Ha onepaTopa. He AKTNBpuAte IIOCTa 3a MaHeBpnpaHe.
PEYINPAHE HA BNCOUIHATA HAOCTPNETO
Bx. cTpaHua 7.
No Bpeme Ha TpaHcnpota KoIeIata Ha KocauKaTa Ca nOCTaBeHn B No3uIg 3a HNCKo Pra3aHe. Ipei Da H3NOJ3BaTe 3a NbpBn NbT KocauKaTa, peryIinaPe OcTpneTO B No3uIg 3a Pra3aHe Ha Hn-NOxOJaTa
3a BaWata TnOJHa BnCOUHa. CpeHata BnCOUHa Ha TpeBaT Tp6Ba Da e Mekdy 38 mm n 50 mm npe3 CTyDEHrTe Meceu m Mekdy 50 mm n 76 mm npe3 Tonlnte.
Perynnpahe BmocuHaTa Ha ocTpneTo
Cnpete KocaykaTa n 3yakaTe octpneTo da cnpe HnblnHO.
I DpbHHeTe NoCTa 3a HAcTPOKa Ha BnCOuHnHaTa KbM 3aDHata YacT Ha KocayKaT, 3a Da JyBEInuHTe.
HaTnCHete JIOCTa 3a HAcTPOIka Ha BnCOUHnHaTa KbM npedHaTaaCT Ha KOCaKaTa, 3a DaЯ HaMaJIneTe.
PERyINPAHE HA DbJIKNHATA HA PbKOXBATKNTE
Bx. cTpaHua 8.
BucouHataHa pbkoXbKaTa MoKe da ce peryInpa IecHO cnopei pneIOHTaHnraHa onepaTopa.
Pa3xna6eTe n MaxHeTe cpeHnTe BpTkN Ha pBkoXBaTKnTe.
MaxheTe 6oJTOBeTe uAaBnTe.
IocTabete OTHOBO 60NTOBete HsaHbTe Ha noBnCOKa NNI NO-HNCKa No3Ncna.
3aTeHHe BpTknte.
CbBETIPIKOCHE
YbepeTe ce, ye no noJhaTa Hma KaMbHn, KneuKn, Tei n dpytn ppeMetn, KOnto MORat da NOBpeIaT OcptneTa nn DBirateHa Kocaykata. Kocaykata MoKe Da 3axBbpln ppeMetn, Bne3n B KOHTaKT C Hea, B clyauHa Nocoka n da HapaHn OepaTopa nIn dpyrnnuca, CTOAnn Ha6n30.
3a Han-do6po n3nblHeHne BnHa rpeKeTe He nobuee ot eHa TpeTa OT oBcata BnCOunHa Ha TpeBaTa.
■ Pn Kocene Ha BncoKa TpeBa 3a6abete XoJa Cn 3a NO-rolma epeKTHBHOCT IN PaBnHO N3XBbPnaHE Ha OTpa3aHaTa TpeBa.
He Kocete MOKpa TpeBa. Ta 3aJenHe KbM DoJHaTa CtpaHa Ha KocayKaTa N ige Nonpeu Ha HopMaJHoTo Cb6nPaHe n 3XbBpJHr He OKOceHaTAtpeBa.
3a Mna da nn n de6e Ta TpeBa MoKe Da ce HanoKn noTcHa npoceka Ha p3aHe.
Korato ropuBnHnT pe3epBoap e npaeh n ue ro npesapekdaTe, HAKNOHEte KocayKaTa Ha HeHaTa JRABa CtpaHa, Taka Ye KanayKaTa 3a roPBOTo dae B Hau-BnCOKaTa cn Toyka. ToBa upeDOrbpaTn pa3nBaHeTo Ha ropBO. OCTpaHete npoBDoNka Ha 3anaJIteJIHATA CBeU, 3a Da n36erHete cIyuaHo CTapTnpaHe. OctpneTo e MHoro ocTpo, N36raBaNTe KOHTaKT C Hero.
PpOBepTe oCtpneTo n DoHnHaTa CtpaHa Ha KOpnyCa 3a NOBpeDn HnN 3a HaTpynBaHe Ha OtnaNbU. PnH Heo6xOAnMoCT Tn NouchTeTe. PpOBepTe daJIb 6oITbT Ha ocTpneTo e Do6pe 3aterHat.
PABOTA NOHAKJIOH
Bx. cTpaHua 9.
HaKnoHeHTe Tepen HecTo ca npuHa 3a
България
NODXNb3BaHe N NaHaHe, KOnto Morat Da DoBeaT Do TeKKn Fn3NuEcKn HapaHbAHHa. KoCeHTo NoD HAKNoH N3NCKBa NOBnEHO BHMaHne. Ako He Ce YyBCTBaTe CnryPhn, He KOCeTe TepEHn, KOnto Ca NoD HAKNoH.OT CbObpaKeHn 3a 6e3OnaChOCT He Kocete, Ako HAKNoHbTe No-ToJAM OT 15 rpaIyca.
Kocete HAKNOHEHHTe NOBbpxHOCTn HAnpRAKO HArope n HaOny. BbTeTe OcOBeHO 6dnteHN npi CMHa Ha NOCOKaTa Ha HAKIOHa.
BnHmBaIte 3a DynK,6pa3dN, KaMbH,CKpTN npedmetn nn N3dyTuHn, KOTo MOrat Da npuHnTnOxNb3BaHe nn npenbBaHe. BbB Bucokata TpeBa MOKe da ce KpnrT npenrTCTBn. IpouHcTaBe TepeHa ot KaMbn,KnOHn nDpyrnpedmetn, B KOnTO MOKe da Ce CbHete nn da 6bDat OTXbPneHn npi KOHTAKTC OcTpneTo.
BnHa n cTbNaTe BHMaTeNo n CtaBnHo. POnxNb3BaHe nn NaDaHe MoKe Da DoBeDe Do cepuO3HnΦn3Nueckn HapaHbaHna.
HeKoceteB6n30CToHacnn,KaHaBKnIINdInMOKe da 3ary6nte paBHObecne.
I3IIPA3BAHE HA KOJIEKTOPA 3A TPEBA
Bx. cTpaHnua 10.
Cnpete Kocaykata n 3yakaiTe octpneTo da cnpe HantbIHO.
TobdHHeTe 3aHaTa BpaTa 3a N3XbPnIe.
XbaHeTe KoneKTopa Ha TpeBa 3a DpbKkata My I ro NOBmHete, 3a Da Ro OTKaUHTe OT Kocaukata.
13xbpneote OtpraHaTa TpeBa.
IIOBUNHHeTe 3aHaTa BpaTuKa 3a N3xBpJHe Ha TpeBa mOHTnpaTe o6paTHo KoneKTopa.
EDYNPEXEHNIE
Бьдeteи3KЛIOHTeHOBHIMATEHNI,KORAto NOBDirate
ИИн HAKnAHArTe MaunHaTа,3aДЯ TpaHcNoptnPaTe
ИИн Дa N3BbPWBATE DeHOCTN NO NOdApbXkKa,
NouchTBaHe INI CSbXpaHene. OCTpneTo E MHOro OCTpo;
ВьпркУе DBIRATeYrE n3KJIIOUChE, OCTpneTaTAt MOrAT
ДАnpOДБЛЖСТДа ce DBINKAT. Na3eTe BCNUKu YAcTn Ha
TЯлOTO DANEHe OT OCTpneTo,KORATO To e OTKPnTO.
IOPDPRbJXKA
REyPEXHEHNE
Cne KaTO OcBO6OJNTe KOHTPOna Ha npncbCTBneto HA onepaTOp, peoBHO npOBepBaIte daHn OCTpNeTo cnnpa Cne 3 cekyHn. Ako npOdykTBt He cnpe Cne 3 cekyHn, ro 3aHeceTe B OToPn3npan CepBn3en CEHTbp.
EYINPKXDEHME
Ako npOyKbT He ce NpOdbPka npaBnHNO, npOdbJxNtEnHocTHa HxNBoTa Ha npOdykTa MoKe Da 6bJe HaMaIeHa, IN BrpaDeHN FyHKuIN 3a 6e3OnacHocT, MoKe Da He FyHKUHOHPaPabuHNO, KATO NO To3N HaunCe yBeInuBa Bb3MOXHoCTTa 3a CepNo3HO HapaHbAHe. CbxpaHbaiTe npOdykTa B Do6po pa60THo CbCToHne.
TRENDYUNPEKDEHME
Ipei Da n3BbpiuTE HkakBa noDpBjKka, cnpeTe yepa n 3yakaite,doKaTo ocTpneTO cnpe HanbJHo. Octabe Te yepa da ce oxnain CneT ToBa n3KnUoye Kaena Ha 3anaHtEnHata Cbeu. Hecbo6pa3raBaHeto TOBa npdynpeXKeHHe MOke da DoBeDe Do cepno3Hn fniueckn HapaHbaHna.
TREUYIPKEXDEHME
PnH3BbPwBaHe Ha CepBn3Hn DeHIOCTn H3NON3BaHTe cAmO opnHnHaHn pe3epBn Yactn OT pOn3BOIDTeJn. H3NON3BaHTo Ha npyn Yactn MoKe Da BN NOCTaBn B onachOCT nIi Da NOBpeDn PpOdykTa.
OCHOBHA IOIDPbJKA
Moxete da npabnte HactpoKn n nonpaBKn, onncanb V TOBa pkoBDCTBO Ha notpe6nteJ. 3a dpynn nonpaBKn IIN CbBeTn NOtbpCte CbDcNCTBne OT OTOpN3npaH cepBn3EH ueHTbp.
1368raBaiTe 3nON3BaHTo Ha pa3TbOpnteI npn NOCHTaBHeTo Ha pNactMacOBte Yactn. NObeHTO PAACTMaCn Ca YyBCTBnTeHN KbM pa3NJUHN BINOBE pa3TBOpNTeIN MoKe Da ce NOBpeJr Pn IN3NOJ3BaHTo Ha TAKNBa. IN3NOJ3BaJIte YIcTn napaJI, 3a da npemaxheTe KaI, npax, MacNo, rpec nT.H.
IepnoDnHNO npOBepraBaTe BCNUK60NTObe n raKn, daN ca 3aterHaTn, 3a Da ce rapaHTnpa 6eONaCHocCTTa BN NO BpeMe Ha pa6ota C Kocaykata.
He octabraTe da ce hacbupa TpeBa nnu Wyma OKoIOn DBuratena HceroBna Kanak. 3a6bpCbaTe KocauKaTaOT Bpeme Ha Bpeme c naphe cyx nlat. He n3non3BaTBe BOda.
IepnoDnHOp npOBepBaTe KOleKTopa Ha TpeBa 3a H3HOcBaHe IIN IOBpeN.
RENDYYPKEXDEHME
B HnkaKbB CnyaH He No3BONBAIte NnactMacOBnte
YactN Da BIn3at B KOHTaKT Cbc CnnpaHn TeHocTn,
HePTeHN PpOdykTN, PpOHKnBaUN Macna n T.H.
XmHKaJIte MORAT Da NobpeJr, OTCna6r nn
yHnIOxKt PnactMacata, KoEtO MoKe da DoBeDe Do
cepno3Hn Fn3NuCeckn HapaHbHaHn.
NCKPOFACNTEN
YpeBt e cnaeH C nckpoynoBnTeI (HaMnpa ce B aycnyxa).
3A6ELEKKA: IpenopbunTeHoe nckpoynBtEnrT da ce noCCTBa cAmo B OToPn3Unapah cepBn3eH ueHTbp.
CMA3BAHE
Bcukn Jarepnto3n npdykt 3a Cma3aHn C doctbTuHO KOJUeCTBO BWCOKOKaueCTBeHO MacNo, KOETo Tp6Ba Da CTnHe 3a ZENr EKCNIOatauHOHEN XNBOT Ha HNCTpyMeHTa npn HopMaHn pa60THn YCNOBn. 3aTOBa He e Heo6xOdImo DoBnHInTeHcMaaBaHe Ha Jarepnte.
TRENDYUNPEXJEHNE
BnHaH Hocete 3aunTHn pbKaBnU nIN yBnBaHTe pekeuNTe pb6oBe Ha ocTpneTo B napauu nn npyMaTePnAn, 3a da npedna3nte pbueTe cn, DOKATO n3BbPwBAte DeNCTBnNo NoDpBxKkata. HenpaBnHOTo 6opabeHe C OCTpNETo MOKe Da DoBeDe Do cepno3Hn FnHcckn HapaHraHn.
CMRAHAHOCTPNETO
Bx. cTpaHua 11.
ENYUNPEXJEHNE
BnHaH NocTe 3aunTHn pbKaBnU nIyBnBaHTe peKeuNTe pb6OBe Ha ocTpneTo B napauN nnDpyr MaepnAn, 3a da npedna3nte pueTe cn,doKATO n3BbPwBaTe DeiCTBnNo noDpBxKkata. HenpaBnHoto 6opabHe C ocTpneTo MOKe Da doBeDe Do cepno3Hn fniuchn HapaHbaHn.
Будete BHMATEHn npn CMHaT ha octpneTo Ha Kocaykata. YbepTe ce, Ye npbCTnTE Bn He HMa da nonaHnat MeKdy DmXKeIOTo Ce OCTPne n HEnoDbxHnTe Yaactn Ha npodykTa.
IopdbpkaaTe octpneTo Ha Kocaykata BnHaHn Do6pe HatoyeHo, 3a Da NonyuHte Hau-Do6pn pe3yntaTn npi KocHe. He3abABHO 3ameHete ocTpneTo, ako ce orbHe nn nobpeNi.
EYINPKXDEHME
3aMeHnTe OcTpneTo cMo C TakOba, KoEto e OoObopeHo OT npOn3BODHTeHa BaWata KocAua. HecbO6pa3raBaHeTo C TOBa PpEynpKdeHne MoKe Da DOBeDe Do cepNo3HN pN3HueCKn HapAHBaHnI N Do IOBpeDa B KocAkaTa, a cbIo TaKa Ie aHyInpa rapaHnIraTa Ha npOdykTa.
TRENDYUNPEXDEHME
Ipei Da HAKIOHTE KOCaKATA, 3a Da NOCTaBNTe OCTpNETO, pBPO N3TOHTE FOPNBOTO.
Cnpete DBratela n OTKaTe npoBOnHa Ha 3anaHteHaTa CBeu. N3aKaAte ocTpneTo da cnpe HnHO.
IocTabete npodykta Ha eHaTa My ctpaHa (c Kap6ypatopa Harope).
BknHete napye IbpbMO mexy octpneTo n noa, 3a da npedOTbpaTte 3aBbptAHe Ha OCTpneTO.
MoHTnpaHe:BnKΦnpya11a.
CbaIaHe:BxKΦuRypa11b.
Kato 3nnon3BaTe 9/16- nHcOB raeuen knou nnrHe3do (He e npedocTaBeHo), pa3xna6eTe 6oNTa HaOCTPneTO qpe3 3abpTaHe Ha 6oNTa B o6paTHa HaacOBHHKObATA CTpeJIKA NOCOKA, IneDaHO OT DOJHaTAACT HA KOCaYkata.
Cbaene 60nta, Kcnpaata Wa6a, Nockata Waa6a nocptneTo.
IocTabeTe HOBTo OCTpne Ha OCTa. OctpneTo Tp6Ba Da e MOHTnpaHO CbC 3aKPNBeHte KpaNua Harope -KbM Kopnyca Ha KocaKaTa, a He KbM 3emrTa.
IocTabete Ha ocTa IIOCKata Waai6a, fNkCnpaUaTa Waai6a n 6oNTa.3aterHete Ha pbKa 6oTt a No YacOBHnKOBATA CTpeJIka, rJeDAHO OTKbM DOJHaTAt CtpaHa Ha KocaKaTata.
3A6ELEKKA: BnMaBaTe Da BbPHeTe BCnKn qactN B npaBnHnpeD OT npedn n3BaXkDaHTo NM.
3aterhe 60nta Ha octpneTO C dHaMOMeTpueH KIOU (He e BKNIOUeH B IOCTaBkata), 3a da ce yBepuTe, He npabNJHO 3aterhat.
IpenopbHnTeJHaTa CnHa Ha 3aTaraHe Ha 6oTtHa octpneTo e 48-55 Nm (35-40 ft.lb.).
3A6EENKKA: He ToyeTe OCTpneTata; 3aMeHnTe r n c HOBn. OctpneTata Tpr6Ba da ca baJahncnPAHn npABuNHO, 3a da Ce pedeOTbPaTH npUHHBAHeTO Ha UeTN NfN3NueCKn HapaHBAHn.
IOYNCBAHE HA Bb3dUWHNФHITbP
Bx. cTpaHua 13.
Kocaykata mMa Bb3dUweH pO T nHa, KOITo He MoKe Da ce Mne.
3a npabnHa pa60Ta n DbNbIg KINBOT Ha BaHINCTpymeHT, NOdIbpxKaTe Bb3DyHnH FInNTbp YnCT.
Былгария
Cnpete npodykta.YBepete ce,Ye BCNUKn DnNKeUncce yactn ca cnpeHnblnHO.N3yakaTe DnRatela da ce oxlaNi.OTkaeTe npoBODnKa Ha 3anaNTeJIHaTa CBeu.
HaTnCHete C naneca cn KInOuaNkata N BnImaTeHNO 3dIbpnaTe Kanaka Ha Bb3dyuHnra fnnTbp, 3a da ro CBaIte.
CbaIeB3dUHnHnФnITbpeH eIeMeHT 3a npOBepKa.
CleI KaTo MaxHeTe Bb3dUShnA φnITbpeH enemeHT, NOBeHuTo OTnAbuMOraT Da 6bDaT OTcPaHEnupe3 BHIMATEJHO NOuyKBaHe BbpXy TBbpda NOBbpXHOCT UIN IN3TpBkBaHe C cETka.
3ABEJIEXKA: Ako Bb3dyuHnI TcNITbpEn eIeMeHT e 3aMbpceH, TOBa Iue OrpaHnI npNToka HbB3dyxa N MoKe Da DOBeIe Do NOBpeHa DBNrAteIe. XNBOTbT Ha Bb3dyuHnI PhNITbpEN eIeMEHT 3aBNCN OT OKJHATA CpeDa, B KOrTo CE n3NoJ3Ba Kocaykata N Tp6Ba peoBHO da Ce npOBepRa n NouchTba n da Ce CMeH, KOrATo E 3aMbpcEH.
MoHTnpaTne OTHOBNOOHTeHn HIN HOBn Bb3dyWeH 0JITbpeH eJIeMeENT B OCHoBaTa Ha FNIITbpa.
IocTabete Kanaka Ha Bb3dUHHnA fHntbp n ro 3actonopeTe.
3A6EJIEXKKA: 3a da noJyHTe Bb3MOxHO Hau-IO6pa npou3BOIDHTeIHOCCT, fntbpt Tp8Ba Da ce NOIMHe BcKa rOINHa Hn Ha No-MaIKN INTEpBaIi, aKO e Heo6xoDIMO.
KANAYKA 3A TOPUBO
EDYNYPEXJEHNE
Pponyckaanda kanaaoka 3a ropnbo ybeinyaba onacnoctTa OT noxap np Tpr6ba He3abHO da ce 3ameH.
3aDpbcTeHata Kaayka Ha TropNBOTBNOUba npOn3BOIDNTeJIHOCTTa Ha DBIRATeJ. Ako npOn3BOIDNTeJIHOCTTa ce NoIO6PBA, KOrato Kaaykata e pa3Xna6eha, npOBepTe daNn KNaanbT He e NOBpeDeH nIN 3aDpbcTeH. AKe e Heo6xOdmo, 3ameHe T Kaaykata 3a TropNBOTO.
CMEHETECMA3OHTATEUHOCTHAIBINATEJI
Bx. cTpaHnua 14.
Cnpete npodykta.Ybepete ce,Ye BcNHy DnHexeunCe yactn ca cnpeHnBnHO.3yakaTe DnIraTeJr da ce oxlaDi.OTkaheT npobodnka Ha 3anaIteJHaTa Cbeu.
IpeDn da npeo6pbuatae ypea, npOBepBaTe daHn roPbHnT pe3epBoap e npa3eH, 3aUTo B npOTBeH cnYau nte n3Teve ropBO.
MoTOpHToMaCNo TpA6Ba Da ce CMeHra Ha BceKn 20 Yaca pa6ota.CMeHnTe MacNTo DOKaTO e TOnIIO, Ho He n ropeo. Taka MaCnTo Ce n3ToUba no-6bp3o n Dokpa.
Maxhete KanaykaTnI3mepntHaMaCNoTO.
HaKnHoneTe KocauKaTa Ha eHa CTpaHa, 3a Da n3TOUHTe MacnOTo B NOxOJaI CbI ppe3 OTBopa 3a PbJIHeHe.
I3npaBete Kocaykata n HaHbJHeTe C MacNo, cneBaIKyka3aHnraTa B pa3deJa "OJINBaHe/ IpoBepKa Ha MacNoTO".
3A6EJIEXK4: N3TOeHOTo MacNo Tp8Ba Da 6bJe N3XBpIeHO Ha NOxOJaIO 3a CENTa MrcTo. 3a NOBue INΦopMaJNa ce O6bpHete KbM MeCTHnTbProBeuHa MOTOPHN Macna.
PbXKA HA CBEUITA
Bx. cTpaHnua 12.
3a da ce rapaTnpabnHaTa paOta Ha dBnIaTeJna, CBeuTa Tp6Ba Da e NOUcTeHa n c npabnHaTa eNEKtpoHa MeXdHa. 3a da npOBepnte CBeuTa:
Cnpete npodykta.Ybepete ce,Ye BcNHy DnBKeuCe yactn ca cnpeHnblno. N3yakaiTe DnBraTeJr Da ce oxlaNi. OTKaHTe npOBODnka Ha 3anaNTHeHaTa CBeui.
Maxhete cTapeHa CBeuTa.
I ONUHCTETe MPbCOTnra OKONO OCHOBaHa CBEuTa.
CbaJIeTe CBeUaTc 13/16 in. KInOu 3a CBeUu (He e BKNIOueH BIOCTaBkata).
OrIeJaTe CBeuTa 3a nobpei n ppei Da r BbpHeTe Ha HeHOTo MCTO, RaOncTeTe C TeJeHa YetKa.Ako I30NaunraTa e CnyKaHa Nn CyneHa, CMeHeTe CBeuTa.
3A6EJIEXKA: IpenopbHTeHNHtme MoIeIIN 3anaIteHn Cbeu ca TORCH F7RTC nN NGK BPR6ES.
■I3mepete eeneKtpoHaTaeMekDnHa Ha CBeuTa. IpaBnHataeNEKtpoHaTaeMekDnHa e 0,71 MM -0,79 MM.3a da pa3wipnte MeKdNHaTApn Heo6xOIMOCT,BHnMaTeJIHOOrbHeTe 3a3EmBaUa(roPn)eNEKtpoJ.3a da CBneTe MeKdNHaTa, JekuKo NotyNaTe 3a3EmBaUaNra eNEKtpoD B TBbpda NOBbpXHocT.
BkapaTe CBeuTa B HeHTo rHe3do; 3actonopeTe Ha pKa, 3a Da He 3aueHn HApNBO.
3aterheTe a cKnou, 3a da npntnche wai6ata.Ako CbeuTa e HOBa, HaterheTe 1/2 o6opot 3a npabnHa KOMPecna Ha wai6ata. Ako n3no3Bate nobtopho CTapa CBeu, HaterheTe 1/8 do 1/4 o6opot.
3AEBJEXKA: Henpabunno 3aterHaTaTa CBeue, ce Haropeu MHoro nO BpeMe Ha pa60Ta mOKe da nobpeDu DnBraTeJI.
IocTabete o6paTHo cTApTepa Ha CBeuTa.
HENPEBUNDEHN PNCKOBE.
Dopn KOrato npOdykTbCe n3noJ3Ba no npEJaHa3HaueHne, e HeBb3MOxHO HAnbJHo Da Ce orpaHnU BnIaHHeTo Ha onpeDeJeHn PnCKOBn PaKTopu. OmcaHnte No-dony OnaCHOCTM MoRat Da Bb3HNKHAT NO Bpeme Ha pa6ota, KaTO ONepaTopbT Tpr6Ba Da BnIMaBA 3a N36raBaHeTo Ha CNeDHOTO:
HapaHaBaHe, npuHHeO OT Bn6paun
Bunarnn 3nnon3BaTe npabunHnHnCTpymeHT 3a cbOTBeTHata pa60ta. KaTo orpaHnUbaTe BpeMeTo Ha pa60Ta n 3nnaHrTo Ha pncObe.
HapaHbAHn, npuHHeH ot yM
- N3naraHTo Ha 乌M MoKe Da DoBeGe Do yBpeKdaHe Ha cnYxa. HocTe aHTnfoHn n orpaHnue HeN3naraHTo.
HapaHBAHe B CJIeDCTBNE HA KOHTaKT C OCTpMeTaT
IeTN, npnHHeH NOT XbbpNeHH npdMeTNI
HAMAJRAHE HA PNCKA
I3BecTHO e,Ye Bn6paunITE, npOn3BexJaHn OT pBuHN IHCTpyMeHTN MoKe Da npEn3BnKAT y HAKON INDnBnDN 3a6oJbAHe, HapeyeHO CnHpOM Ha PeHOnl (Raynaud's Syndrome).CmNTOMTe MOKe Da BkIOUbAT n3TpbnBaHe, CXBaUaHe n36NeDnBAHe Ha npCTnE, ObIKHOBeHO ce 3a6enraBt npn 3nlarAHe Ha CTyD. CMrTa Ce, Ye HacneDCTBHeNTE qakTopu, n3naraHTo Ha CTyD n Bnara, DnEtnte, NyweHTo n HAKON pa60THn HabuN DoOpnHacrt 3a pa3BnTneTO Ha Te3n CmNTOMM. Morat Da ce B3eMat HAKON MepKn, KOnTO MORAT Da CE npDePnpEmAT OT onepaTopa, 3a da CE hAmJIr T eFekTIne OT Bn6paunITE:
I OndbpxaKe Te Tenechata TemepaTpya B CtyeHO BpeMe. Korato paobntte c npdykta, Hocete pKaBnU, 3a Da NODbpxKePbCeTe N KNTKNe Tc TOnII. CnopeN3CneDbHnra rnaBnrt fakTop, DOnpHaacu 3a pa3BntneTo Ha Raynaud's Syndrome, e CTyDeHOTo BpeMe.
IpaBete ynpaxHeHna 3a akTnBn3npaHc KaPbBOo6paueHneTO cJeD BCEKn pa6OteH zuKbl.
PeIOBHO n3n3aIte B noUBA. OrpaHueTe n3naRaHTo Ha Bn6paun Ha DeH.
Pn noBa Ha HkOy OT Cmntomte Ha ToBa 3a6oRahe, He3a6abHo npekpatete ynoTpe6ata Ha nHcTpymenta n nocetete nekap.
EYINPKXDEHME
IpoJbJIKHTENHOTn3NOJ3BaHeHa HNCTpyMeHTa MoKe Da DOBeDe Do HapaHbAHn Nm BNoJaaBaHe. Ipn n3NOJ3BaHe Ha INCTpyMeHTa 3a npOdbJIKHTENHn nepoOn DT BpeMe npabete YecTN NOyBKn.
CNMBOJN
To3n npOdyKT MoKe Da e MapKnpaH C HkON OT CNeHnTe 3Haun. N3yTe Tn N HayTe TexHnTe 3HaueHn. IpaBnHOTo TbNkYBaHe Ha Te3n 3Haun Ue cNoMOrHe noDo6pata n Be3onacha pa6ota C To3n npOdyKT.

IpeNa3Hn MepKn, Kacaeun BaWata 6e3oNaCHCT.

3a da ce HamaHOnacHocCTTa OT HapaHbAHn,Notpe6nteTp8Ba Da npOyTe n da pa36epe pKoBOcTBOTo 3a onepaTopa, npEi da n3noJ3Ba To3n npOdyKT.
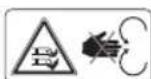
3a da n36eHHeTe HapaHbAHn, cToIte DaJIeU OT DBIXeUInTe ce Yactn, NO BCsKO BpeMe.
Onachoct!ДрьхтpepbuceиКpaKaTaHa pa3ctoHne.
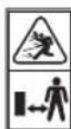
Onachoct OT pIKoWet. DpbXte BCnKCTpaHmHN Ha6nOaTeHn Ha nohe 15M.
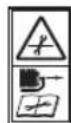
PpeDn Da n3BbPwBaTe KaKBaTo n da e npOpHnAaTKHa NO npOyKTA, n3BaTe rHe3D0To 3a 3anaJIteJIHnTa CBeU.

OTCTpaHete o6eKn, KOtO MoKe Da 6bDat OTXBpNeHN OT BpTnOTo Ce OCTpne.

ДрьктЕ HabидатеиTe Ha 6e3oNaCHO pa3CTOHHE OT npOdykTA.

3a da HamaHNTe ONaCHOCTTa OT HapaHbAHe Nn NobpeDa, N36BbATE KOHTaKT C HaropeuHNTe NOBbpXHOCTN.
YpeBt MoKeJa PnUHH TOKOB ynap. He n3naraiTe Ha Bnara, DbXd nn CHr. He ekCnloaTnpaIte C Mokpn Pbue nn Kpaka.

Korato ypeBc ce n3noJ3Ba, ToI OTdEe BbIepoDcH OKc, 6e3UBeTeH OTPoBeHra3 Be3 MnpNC. BduuBaHeTo Ha BblnepoDeH OKCmIO Me da npunHn radeHe, npunaHaHe nn DOpN CMBPT.
България


001
Iobabe SAE 10W-30 API-SJ nnn DBrarTeHNO MacNo C No-BnCOKO Terno B pe3epBoapa 3a MacNo.
HantbHHepe3epBoapa c 6e3oJIOBEN 6eH3nH (c OKTaHOBO YNCNo 91 nIN NO-BNCOKO).
HaTnCHeTe NOMnata 3a noKauBaHe Ha roPbTO 3 nTn.
3aDpBxTe KOHTpOHa npncbCTBneTo Ha OepaTOp HADOny KbM pBkoXBaTkata.
Дрьн electe Дрьккata Ha CTapTepa DBa nTn.CneI KATO DBNarateIaR TcApTnpa, 6abHObOCbO6OdeTe DpBkKaTaHa CTapTepa,Taka Ye BbxKeTo Da He BbpHe npekaneHo 6bp30 Ha3a.
Kocete, KoraTo KOWBt 3a TpeBa e npa3eH
Cnpete da Kocnte, Korato KOleKTopbT ce HnblH.
TopnBTo nI npnte My ca ekCnIO3BHN MoT a npNHyr TeKKn N3rapHnN mCbPT.
BcH3nHbT n 6eH3nHOBnTe nap ca IeCHO3aIaNIMN n EKCIIO3NBH. OfHHT NII EKCIIO3nTa MOKe Da npuHHr CINHN n3rapHn nn DOpN cMbPT.
N3no3BaTe 6e3oNoBEN 6eH3nH 3a aBTOMo6nH, C OKTaHOBO YnCNO 91 ([R+M]/2) nn no-BnCOKO.
H3noJ3BaIe SAE 10W-30 API-SJ nnn DBnIaTeJIHO MACNo C NO-BNCOKO TERIO.
Ta3MaunHa e B cBoTBeCTBnE C HopMaTHBHaTa ype6a Ha NbPkaBaTa OT EC, KbTeO e 6nna 3akynHe.
EurAsian 3nak 3a cbOTBETCTBNE
YKpaHHCKn 3HaK 3a CbOTBETCTBNE
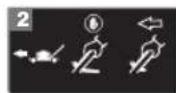
ABTOMATNUHO npuBnKBaHe: KocayKaTa
Ie ce 3aDnKnn, KOrATo pkoXBaTKaTa
3a CAMOCToTeJIHO 3aDnBnKBaHe 6bJe
N3TerJleHa KbM dpXkKaT.

TapaHTnpaHTo HnBO Ha uym e 96 dB.

Cnpete npoodykTa.
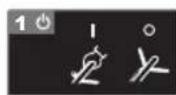
3aDpBxTe KOHTpOHa HnPcBcCTBneTo HA OepaTOp HADOny KbM
pbkoXBAtKaTa,3a Da NoDdbPxkATEpaOtaHa DnuratEn. OcbooTeKOHTpOna Ha npncbCTBneTo HaonepatOp,3a da cnpeTe ypeia.
Былгария
ΓΑΦΙΚ 3Α ΠΟΙΝΡБχΚΑ
3AΓΑΙβΗΙ 3AXΟΥ ΒΕ3ΠΕΚΟ
TpepeDxKeHnHa
PnBnBnKOpNCTaHHI npOdykTy,notpi6H NoDTpMByBaTnca npabnl 63neKn. DnB Bauoi Blnachoi 63neKn Ta 63neKn nepexoxnx, 6yNb Iacka, npOHTaTe ci IHcTpkyuII nepeD ekCnnyataueio Bnpo6y. Byb Iacka, 36epeXitb IHcTpkyuII 3 63neKn dny noanbIwOro BnKOpNCTaHHI.
OCOBNCTA B3NEKA
■ Pn HeNaIeXHOMy BnKOpNCTaHHi npNCTpi MoKe BiDi3aTn pyKn Cu CTynHi, a TaKoK NiD Yac po60Tu MoKe Po3KnDaTn NpeDMeTn, 10 NiIpaJaIOb NiI HbOrO. HeOpTpImaHH npabIn 6e3NeKn MoKe npN3BecTn Do cepNo3Hx TpaBMyBaHHb Nn HabITb IetaJIbHnx HaCniDkIB.
I O6pe 03HaonomTeec3 opraHm ynpabnHH Ta npaBnblHM BKNOPNCtAHM MaunHn.
■ Npeed KOKHM BIKOPNCtAHHm nepekoHaItec, 0o Bci eIeMeHTn KepyBaHH i 6e3neKn fYHKUioHyOt b npabNtBHO. He MoXHa BIKOPNCTOByBatn pncTpii, RkIIO DvRHyH He 6yNo 3ynHeHO 3a DonomoroHO nepemKkaa"BumKHeO("Off").
Hikon He Do3BOJnTe DITAM a6o HODaM 3
06mexekHMn fiznHMM, ceHCOPHMn a6o
po3yMOBmN 3i6HOCTMa, a6o He3HaOMM 3 cIMM
IHCTpyKzIaMn, npauOBaTN, uCTNTu a6o OcCnyROByBaTN
MaunHy. Micuebe 3akOHDoABCTBO MoKe o6MeKyBaTN
Bk onepatopA. NotpioHo HanExHN MuHOM CTeKHTN 3a
DItbMn, 5o6 BOHn He rpan 3 MaunHOIO.
Bybte ybaxhi, nBItbcra, 0 Bu po6nte, i BnKOpncTobyIte 3dopOBn rny3 npn ekcnnyataa
Bnpo6y.He BnKOpNCToByIe 10 MaunHy, KaO Bu BTOMNINcra, XBopi, a6o NiD BnPINBOM aNKOrONIO, HApKOTIKIB a6o NIKIB. HaMeHwa HeoBepeXHiCTb npu po6Ot3 eNeKTpOIHcTpymeHTOM MoKe Pn3BeCTN Do cepno3Hx TpaBM.
OdaTae Baxki,IOBri WtAHn,OJr i3 DOBmnykabamTaMiue HeKOB3Ke B3yTT. He MoXHa npaIOBaTN B Woptax, CaHdaniex a6o 6ocOHIX. YnKaIte HocHTN BiJbHN OJr,a6o 3 BnCraHMM shypamn ab0 3a'B3kAmn.
3aBxNn Hocitb 3axnChi OkyIpyn 3 6okOBmN uNTkAmN.
KopncTyuTeca3acobam3axncty cnyx i 3axnchMn OkynpaMnyBecb yac nid yac po60tn npoykTy. BKNOPcntOByTe Macky, kkuo onepaizi nnbHa.
BukopncTaHH 3axncty orpAIB Cnyx 3Hnxye 3daTHicTb yTu nonepeDkeHHN (KpKn a6o ciHaNN TPNBOH). OepaTop noBHeH 3BepHyTN OC6BnBy yBary Ha Te, 0o BiD6yBaetbcra B pOboui 30HI.
Onepa3i3 aHaIorHnHMn iHcTpMeHTamn Henoanik 36iNbWye pn3NK TpaBMn Cnyxy i MoXJIuBicTb notpanJHnn HInx oci6 y pO6oy 30hy.
3aBXKn6yDbTe BnBHeHi B onopi Hcxnax. TpMaHMeiCuHy onopy i pbIBHObary. He TaRhtbcra. HamaraHHaDTaHTncsMoKvTb npN3Bectn Do BtpaTH pIBHObar.
PnCKOyBaHHHa CXnax nepemiyTe Kocapky B3doBx NOBepxHi CXny, a He BBepx-BHn3. BybTe Oc0bnBO oBepeKHMn NiJ Yac 3mHn HAnpMky Ha cxnax.
He BnKOpNCToBvIe npOdykT no6bn3y 06pNbIB, KaHaB, HAdMipHO KpyTnx CxNlIB a6o Ha6epexKnix. IOraHo onopa moKe npu3BeCTn Do KOB3aHnH i abapiHoro naDcHH.
CnlaHyTe 3pa30K KOCOBuCi, 1O6 yHNKHyTN BKNiDaHHa MaTepiany B HAnpMky DOpir, rPOMaCDbKNX TpoTyapIB, cnocTepirayib i T.D. TaKoX yHnKaIte BKNiDaHHa MaTepiany B HAnpMky CTiHOK aOo 3aropOJeHb, kki MOKyTb npN3BecTNo pIKoWEtY BCTOPOHy onepaTopa.
BE3NEKAPOBOOTOMICZ
Hikon He BnKOpncToByTe ue Bnpi6, KOIn Ha BiDcTahi 15 M 3haxoJrbcIIOOn, OocBnBO dITn, a60 TBapHH, TOMy Ioo icHyE Hebe3neKa, 10 niD hac KOnTaKTy 3 Jezom MoKyTb BkNdaTncn PpeMeTn.
IpeDmetn,BIDKHyTI KOCAPKOIO,MOKyTB np3BecTn Do cepno3Hnx TpaBMyBaHHb y IJIOJe. PeTeIbHO ORJAHbTe MicSe,De BVKOpNCTOByBaTHMeTbCpNcTpiI np6epiTb yci KaMeHi,BeNIki rIKn,MeTaNebi npEeMetn,IpOTn,KiCTKn,irpaUKN iINu CTOPOHII npEeMetn. PAm'raTae, 10 pIXyui 3acO6n MOKyTb 3aIpyTATn MOTy3ky a6o dpit.
BukopncToByTe npOyKT npn DeHHOMy cbITni a6o npnxopoWOMy 7tuHOMy ocBtIeNHi. Oepatop nOtpi6HeuTkn orJaD pOboOoi oBlaCTi, uO6 Bu3HaHTNI notEHuiH Hebe3neKn.
yKpaIHcbka MOBa
He BnKOpNCtOByTe npOdyKT y Bn6yXoHe6e3neuHnx atmocfepax, HapnPKnaI, y npCytHoctI neRko 3aMnCTnx piDIn, ra3iB a60 nNny. Pid cac po6Ot N KocapKn BnHnKaIOb ickpi, IIO MoKyTB npn3BeCTn Do 3aMaHHra nNpy a60 napib.
He BnKOpNCToBvIe MaunHy npMokpi TpaBi a6o BdoU.
He BnKOpncToBvBaIte npOyKT, kUo e pu3NK 6nNcKaBKn.
MaTe Ha yBa3i, 0o onepaTOp a6o kOpncTyBaH Hece BiNObiJaIbHiCTb 3a Heuachi BnpaKn a6o NtKoJxHeHH CnpuHHeHi IHsM Oc6am a6o ix MaHy.
HeyBaxKHcTb onepaTopa ra3oHokocapKn Do npncyTHocTi diTeM oMe MaTn TpariHi HacnIdKi. DITN DyKe zikabJrTaBC camm IHCTpyMeHToM, i npouecom CKoUyBaHHra TpaBN. He cIiD cnOjBaTncb, 0o DItn 3aNNaATmMyTbc Ta, de Bn B ocTahHe ix 6aunn.
CJIkyTe,IO6 dITn 3HaxOJINcB 3a MeKamn 3OHN KocHHra Ta nI HarJyDom DOpocNoR, kIn He npaQoe 3 npicTpoE, 6yDbte yBaXHi Ta BmKHiTpnpiaD, kUO DTnHa BXoNTb DO He6e3neuHOi 3OHN.
Bynde Oc06nBO o6epexHi no6n3y nobopotIB 3 noraHOOrnaOIOCTIO, qarapHnKiB,peeb a6o IHuxo6'ekTiB, BpaxOBuOn HBCaHi KUci, kki MoKyTb 3abaxaTN orJy.
Utpmytepo6oe Micue B uictoti. Be3naHa p6oohmy micui abo temHi Micua cnpuHnHIOb abapii
3ACTEPEXKEHHIIOO BEE3NEHOROBNKOPNCTAHHRA3OHOKOCAPKN
IpepeBnKOpNCtAHHm 3aBXKnOrnHaTe,0o6 no6aHTn,io pixyie enemeHTi pixyich 3ac06n He 3HOsehi afo He nouKOdkHeHi.
3amHtB 3HOWeHi a6o NOKoJKeHi KOMNoHeHTN,ДЯ 3bepexeHHaHaCy.
B JozHomy pa3i He BnKOpNCToByTe ra3oHOKocApKy, RkIIO, BiDnyCTuBm BaXKiNb KOHTpoJIIO npCcyTHOCTI OepaTopa, DnRyH He 3ynHReTbCra.
He BnKOpNCToByTe npnaad 6e3 TpaBo36ipHnka (y NOBHomO KOMNJIeKTI) afo 6e3 UNTKa BnpyCKHoro OTBCpy, 10 caMo3aUnHReTbcra.
JIe3o Bnpo6y roctpe. 6ydbTe BkpaB o6epexHi Ta 3diChHote 360pky, 3amHy 3anuactIn, YnueHHa Nepebipky 3ataryBaHHa 60ntiB y 3axncnx pykabnqx.
IpnHeCtB npOdyKT B aBTOpn3OBaHm cepBicHm ceHTp DnA 3AmH NIOuKOJKeHnx abo HeuNTaemnx etNkETOK.
IpepeBipTe Bci raikn, 6oTn i rBHTn nicra KopoTKoro npomixkka yacy Ha npabunbHy repmTuHicTh, 0o6 3a6e3neuNTn npOdyKT y 6e3neuHomy poobOmy cTahi.
Perynapno nepebipraTe TpaB036ipHnK Ha HaaBHiCTb 3Hocy, dipok afo nowkoJKeHb. Lc MoKe npu3BeCtn Do BnKnDaHHI pEpmETIB CTOPOHy OepaTopa.
3amHITb 3noWehi a6o nowkoJkeHi detani nepei noaTkom poobTu npOdykTy.
ObepexHo yBIMKnHtB DnHyN, KOJN KOpNCyBaH 3haxoDnTbCra 3a KePMOM B 6e3neuHi 30Hi. HikOnn He 3anyckaIte Bupi6,doK:
BCI YoTnpu KOJeca He 6ydytb cTOnHa 3emJI
- JKOJIO6 BUNIaHn TpaBn BiKpntn Ta He3axuieHn 36ipHnKOM 3pi3aHOI TpaBn Ta KOjxom KJIO6y BUNIaHH TpaBn
pykn Ta HOrn Bcix Oci6 He 3haxoJrbcn nopiu 3 oropodxehn m pkiyoi 30H
He TnchItb Ha npucpti Bih 6yhe npaocBatn kpaue i 6e3neuhiwe npn wBnKocTi, dner koi Bih 6yb po3p06JenH.
He nepenabaHTaxyIte npctpi. CkOswBaHHBnCOKOToTbCToITpABMOKe npu3BecTN DJIa 3MeHWeHHaBnKocTI DnBuYHa a6o NOro BmKHeHHIO. NepHIXCKoWbATn rcyTOBry TpaBy IJRA 3MeHWeHHaHabaHTaxKeHH, BCTaHOBITb 3NaHy BnCOTy 3piy.
3ynnHbpo60ty ne3a npn nepetunHaHHi dInraHok, Bkptux rpaBiem.
He TnHtB Bnpi6 Ha3a, TinbKn, Raio ce a6coNIOTHo Heo6xIHO. Raio Heo6xIHO BiDBecTn Ha3a, MaunHy Bi cTIn ABO nepeWkoD, nepw DnBiTBcBn3 i Ha3a, 0b yHKHTn BiKIOUeHHA BO npOTraHHeHH MaunHn NO BaUM Horam.
BumkhHb DnHyh Ta 3aekaiTe, DOKn Ne3o He 3ynnHtcbcra0 ra3ohokocky Heo6xidHO HaxNJNTI npeMiuHHe npn nepeTuHaHHi iHux NOBepxoHb OKpim TpaBn, a TAKOX pnpnepcyBaHHi HcTpyMeHTa Ha ra3OH Ta 3 HbOTo.
3a60pOHeo BnKOpNCtAHn npNCTpo 3
NOxKOxKeHmM 3axxCHMn KoxyXamn a6o uNTkAmn,
a6o 6e3 3axnCHOrO 06naHaHHn HAnpNKnA,
BIDuBaay TaPbN Ta/a6o 3bnpaTa TpaBn.
He haxnIyTe ra3oHokocapky, KOJIIN BMNkaeTe DnBryH, a60 KOJIIN BIn npaioe. Ppr uBomy BiDpKpnEbCra ne3O, OTKe 36iJbWntbcra pN3NK BKNDaHHCTOPOHHX npedmetIB.
Obepexno 3anyctitb DnBryh BiDnOBiDn Do IHctpkui i Tpmaite pykn i Horn noani BID 30Hpi3aHH. He niklaadte pykn a6o Horn niO bepeTaOuicb detani. 3abxdi Tpmaitecra noani BID BNyckHoro OTbOpY. He 3anyckaTe npncptpi, cToun nepeB BuXIOHNM OTbOpom.
HikonHe niiinMaTe a6o Hocitb npucpii niq yac Ioro po60ti.
KoH He BnKOpNCTOByeTbc3, 36epiraTe npncTpiy Do6pe BeHTnNbOBAHOMy cyXOMy npmiueHHi yHeDoCTynHOMy dna diTeMicui.
IpaBnna ekcnnyataui Ta BCTaHOBJIeHHA kCeCyapIB HabeDeHi B iHcTpyKUix BnPo6HnKa. BnKOpNCTOByTe TIlbKn AkCeCyapN, 3aTBepJKeHi BnPo6HnKOM.
He BmkaTe DnHyB O6mExeHomy npocToPi, De
yKpaIHcbka MOBa
Mozytb 3bnpaTncn He6e3neuHi napu yrapHoro ra3y.
He 3minioTe HanaTuBaHH peryIaTopa DnryHa Ta He nepeBnUyIe WbNdkicTb DnryHa.
3ynnHtB raoHokocapky Ta noeKaIte,doKn ne3o nobHicTHe 3ynnHtbc.3aekaeDOKnpncTpio oxonoHe Ta BiD'edhaTe dpit CBiKn 3anaenHna.
3aHnWAtu Bnp6 6e3 Hargny (BKnIOUaOuyyTnI3auio o6p3KIB TpaBn)
- nepeiOuHHeHHa3AkynopeHb a6o npouHHeHHa JKOIO6y BnKnDaHH
- nepei nepeBipkoH, uHueHHa6o po6oTi ha npOdyKti
- nepu HIX 3Himatn TpaBO36ipHK a6o BiKpNBATN KpuKy 6yHKepy 3 TpaBOHO.
- nepeДЗапавкою
■Kaio npicpii Bi6pye HADTO CnIbHO, HeraHNO nepebiPe:
- nepeBipTe Bpi6 Ha HaraBHicTb NOsKOJxHb, OcO6nBOJe3
3amHHTn a6o BiDpeMOHTyBaTu NOKdoKeHi DeTaji
- nepebipu i 3ataryn nocaanehi actHH
■KaIIO MaUHa yApAeTbcra 0 cToPOHHi 06'ekt, BnKoHaIte Li KpOKN:
3ynnHtB DnHy, BiD'edHaTe dpit CbiKu 3anaeHHa.
- PeTeNbHO orIyHbTe Kocapky Ta 36ipHnK TpaBn Ha haBHicThb 6yDb-kaNX NoIkoJxKeHb.
BidpemOnTuIe 6yIb-Ke NOUKOJKeHHN DO NOBTOHOrO 3aNycky Ta IpoDObXeHHn PO6OTn 3 BInPO6OM.
YHnKaIte yM, Bn6oIH, narop6iB, kameHIB, jepHIN, a60 iHux ckpntux o6'ekTtB. BkOpncTaHHa HnePBbOMy IaHdwaqti MoKe cnpuHHTn naHInH.
3auekaTe DOKn DBNyH OxonoHe npeed 36epiraHHm y 6yb-koMykopnyci.
IДЯ 3HnKeHHNoXeKHOI He63neKn, TpMaJTe npMiuSeHHa De 36epiraetbca DBNyH, rnyuHik i 6EH3IN BInbHMn BiD TpaBn, NcTra afo HAdnNkIB MaCTnla.
KaIIO naINBnH 6ak NOBnHeH 6yTu 3InTu, ce NOBnHHo 6yTu 3po6NeHO Ha BiIKpnToM yOBiTi.
Bid'edhaite dpit cbiK 3anaenHna nepe 6ydbKaMMn HanaWtYBaHHMa, TpaHCnpTyBaHHMa a6o 36epirAHNM npncTpo. Taki 3anobixhi 3axOnn 3HNKJIOb PN3NK BUNaKDOKOBOrO 3anycky npnilady.
IpoodyKT dyxke yMHN i kUO IHCTpyKuII npo 6mexeHHBnInBy,3HIXeHHpIBH yMy i 3axNcty opraHIB Cnyxy, He BnKOHyIObC, ce MOKe npe3BeCTn Do 6e3NOBOPOTbOI TpaBMn Cnyxy.
OBCNYROBYAHH
O6cnyrobyBaHHBn06yMaBnKOHyBaTncbTiJbKn KBanifikoBaHmpeMOHTHM NepcoHaIOM.3aRaJIbHe a6o texHiue 6cnyrobyBaHH HeKbaNifikOBaHm
NepcoHaJOM MoKe Ipn3BecTn Do pn3nky TpaBMN KopncTyBaay a6o NpOkoDkeHH Bnpo6y.
PnTexHCHomy 6cnyrobyBaHHI BnKOpNCTOByTe TlBkn iDeHTnuHi 3aMHHi YactHH. BnKOpNCTAHHeNo3BOJeHX DeTaneM MoKe CTBOpNTn Pn3NK cepno3HOIT TaBMn KopNCTyBaHa a6o NoWKoJKeHHB Hipo6y.
PIMITKA: O3BONRACTbCBAKOPUCTAHH TINbKn 3IiHO, HabeDeHHx y ciinHCTpykci, Bka3iBok. Inra o6cnyroByBaHHa6o pemOHy, 3BeptaHTecr TINbKn do ABTOP3OBaHORO cepBICHOrO cHTpy.
36epexiBtuekepibHnTBOIy3BepHHMyaM6yTHbOMy.
Yactiue 3BepTaTeCraD HbOro, Ta BnKOpNCTOBynte NOro,
IO6 IHCTpykTyBaTN IHuNX, XTO MoKe BnKOpNCTOByBatN
uei Bpi6. JaKuo BN HadaTe uei Bpi6 KOMy-He6yDb B
OpeHy, nepedaTe TAKoX ue KePibHnTBO.
ONMC
INB.MaJIHOHOK1-13.
1. Pучka abTomuHoro 3anycy
2. TpaBoyIOBnIOBaY
3.Первинналампа
4. Kpnska nobITpyHoro fIbIbTa
5. Kobnak CBiKu 3anaJIIOBaHHa
6. Kpnska naBnBHoro 6aka
7. Pernylantop Bucotn
8. 3axBaT cTapTepy
9. Khonka ha pyuqi
10. KyraTa pyka HanpMaHTo Tpocy
11. EneMeHT KepyBaHHa RaBnHicTIO onepaTopa
12.Kpuioka OINBO3aINBHOI ropOBuHn / uyn nlaONBn
13.CbiKa 3anaIIOBaHHa
14.3aIyUka IMyMbYBaHHa
15. NobitpHnФiNbTp
MOHTAX
PO3NAKYBAHH
Bumaraetbca camoctiHa 36ipka.
OrnHbTe npOdyKT peTeJbHo, 06 nepeKoHaTcN, 00 Hemae noIOMKn a6o noXKOxKeHH He cTaNoc nID qac TpaHCnOpTyBaHH.
KuO 6yNb-aki Detani nowkdojkehi a6o BiCyTHi, 3BepHITbcra B cepbichn ueTp RYOBI no donomory.
NAKYBAJIbHNIJNCT
MexahiHra30HOKocapka HanpMaHO Myt3Ka
TpaboynoBnOBa 3arnyka dny MyIbYBaHHa
KepiBnHTBO no 7a6a ekCnnyataci
ApyuMaHIOHkB TaKa
HapmaHaDpoTu
TnepeDxkHenH
JaOBOH-He6ydb3amHei a6o nowkoJxHe, He BnKOpNCTOByTe daHnn Bnpi6, nKn BOH 3de6ibWoro He 6dyb 3amHei. BnKOpNCtAHn Yb0r npOdykTy 3 noUKoJXeHHmN a6o BiCyTHmN yactINHaM N MoKe npu3BecTn Do cepno3HNx TpaBM.
TnepeDxkeHHa
He HamaraTeCMAOuΦiKyBaTu IHCTpyMeHT a6o CTBOpNTaKceCyapn, He peKOMeHDoBaHi DnBnKOpNCtAHN3 cIM npNCtpoem. Byb-ka TpaHCopMaia 60 3MiHa TAKORA y BBAKaTbcn HEHaJIeXHM BnKOpNCtAHNm I MOKe y yMOBax pN3NKy npN3BOUHT Do OTPMaHH MoKJINBOI cepNo3HOIT TaBMn.
TnepeJeHHra
He MoXHa NcyBAtn a6o BmMkATn CnCTeMn a6o fynKuII 6e3neKn raoHOKocapKn.
TnepeJxekHHa
Hikon He npneDHyTe Ta He peryIIOte HiaKi akcecyapn, KOJIra3OHOKocapka npaioe. BiIMoBa 3ynHHTu DBNrHy MoKe np3BecTn Do cepno3Hnx TpaBM.
TnepeJeHHra
HaTnCiHtB rpyu 3 pa3iB.
PIMITKA: LcE KpOK He 3aBKn noTpi6eH pIac 3aNycky DnryHa, AKN BKe PpaIOBaB DeKJIbKa XBNINH.
Utpmae enemet KepyBaHHaBnCIO npaTopa Ha pyu.
BttTnHtB shyp cTape na neped 3anyckom DBNyHa. He TargHtB pyky cTape 6inbHix 4 pa3n. NobInbHO BiDnyctItb shyp cTape, uO6 Tpoc He CKNHyB HabaHTaxKeHHa.
PIMITKA: Lc MoKe 6yTn KOpCNHm DnI NOBTOpy nepBHHnx KpOKiB y XoIOHy nOroY. JKIo NOrOda TennA, nepeNoBHeHn np3aINbU dBiRgammaHa naIbHm MOKe BKNikKaTn 3axNInHaHHa DBiRgamma i BiH He 3aNyCTnTbcra. RaIO BHNkNO 3axNInHaHH aBrihy, NoeKaIte DeKiJIbKa XBNiHn nepeD NOBTOPO cnpo6O O 3aNyCKy Ta He NOBTOHTe nepBHHHi KpOKn.
3YINHKA DBNIyHA
BiDnycitb enemt KepyBaHnHaBnHCTO onepatopa Ta daIte DnHy HOBHCTO 3ynHHTNC.
PnBEdEHn BnPObY DIO
INB.MaHIOHOK6.
I Dnra camoctiHoro npBedeHn B iIO: Ytpmaite eneMeHT KepyBaHH HaBhictO onepatopa nID yac BNTryBaHH BaxKeJIe KepyBaHH npBOOM B HAprrMky pyKn. BiDnyctiB BaxJIb KepyBaHH npBOOM, 0o6 3ynHHT npBbID KOnic.
Дя рунoro npBBeHnB BДIO:УТрмайт eеMeHT KepyBaHHн HЯВHicTIO onepaTopa. He TopkaItecR BaKeJIa KepyBaHHn npUBoDOM.
HAJIAWTYBAHHBNCOTNIJE3A
INB.MaHIOHOK7.
PiJ Yac NoCTaUHnK, KOJeca Ra3OHOKocapKn BCTaHOBneHi Ha NIOJOKeHHn Hn3bKOro 3pi3yBaHnR. Ipeep nepuMM BIKOPNCaHHM Ra3OHOKocapKn BiDperyIIOte NoIOJOeHHHa BnCOTy p3aHHa, Jka Han6iNbwe NiIXoNDtB DnBaWOrO Ra3OHy. YcepeHHeHn Ra3OH Mae 6yTu mix 38 Ta 50 MM BnPoDoBx XoNoDHnx MicraIB Ta Mx 50 Ta 76 MM BnpoDObk TEnNJX MicraIB.
HnHaJaaWtYBaHHBnCOTnNe3a:
3yHnHtB raoHokocapky Ta noeKaIte,doKn Ie30 NOBHICTHo HE 3yHnHtBcra.
Ioo536iNbunBnCOTyJe3a,HaTNCHTbHaBaKInb peryIOBAHHBnCOTTu nepemicttB noRo B HAnpMky 3aHbOuCACTHNr Ra3OHOKocPk.
Ioo6 3MeHunBnCOTy Je3a,HaTNCHTb Ha BaKjNb peYJIOBaHH BnCOTu Ta nepemictiB NOrO B HAnpMky nepeHbO'UacTHHNr Ra3OHOKocKn.
PERYIIOBAHNAIOBXXHHPYKIN
INB.MaHIOHOK8.
Onepatop moke 3a notpe6n Ierko BiiperynoBaTN BucOTy pyKoRTKN.
BidkpyiTb i3HIMiTb cepeHIO pyky.
BnMItb 6oJTu Ta waibn.
BCTaTe 6oTn Ta 7aI6y BepXHe a6o HxHHe nOIOKeHHJ.
3aTarHitb pyuKn.
IOPADNCTOCOBHOCKOUIBAHH
Ipekeohntecra,0ra3oH ouuHenn Bid KamHHa, naok,dpotIB Ta IHxnpedmeti, kki MOxyTb noKoHTn ne3a a6o DBNyH ra3OHOKocapKn. Taki npedmetm moxyt b 6ytBnnaKOBO BnKinHyTi ra3OHOKocapo y 6ydb-koMy HAnpymky Ta npn3BeCTn do cepno3HOI TpaBMOnepaTopa Ta IHxN ocib.
Для 3a6e3neueHHOnTnMaJIbHoi npOdykTNBHOCTI 3aBXdN 3pi3aTe TpeTHy a6o MeHwe BiD 3arAnbHOI BNCOTn TpaBN.
Pn 3pi3aHHI BnCkoTpaBn nepemiuYtecb nobilbhiue, 06 3a6e3neHTn efeKTNBHe CKoUyBaHHraHaJenKHe BnDaJIeHHN CkOSeHOI TpaBn.
3a60pOHeHO cKoUyBaHnB BoIoroI TpaBn.BoHa npuInnataMme Do HxKhBoi YacTnHn Kopnyc npncTpoTa 3abaxKaTmE HaLeXHOMy NaKyBaHHIO a60 BnKnDaHHIO o6pi3Ki TpaBn.
Длma MONOdoi a60 TOBCTOI TpaBN MoKe 3HaIObHTnC8 6IbW By3kN WJnx CKoWyBaHH.
KoJI naJIbHn 6aK npOxHi Ta nepeIdo3anpaBkoH, nepeBepHtB raoHOkocapKy BnIBO, uo6 KpUka 3aINBHOI ropIOBHH 6yNa y HauBUNOMy nOToXeHHi. LcneonepeDHTB BuTikAHNra nnBa. 3HIMITb dpit CbiKu 3anaIOBAHH, uo6 3ano6irTu BnAKnOBOMy 3anyCKy. Je3o roCTpe; yHnKaIte KOHTaKTy 3HM.
IpepebiTeJe3oTaHnKHOaCTnHyra3OHOKocApKnHa HaraBHicTbNoiKOJKeHbTaHakOnuYeHob6pi3kIB TpaBN. RaKIO Heo6XiIDHO, NoucCTITb.IpepeBiTe pikcaio 60ntaJe3a.
POBOTA HA CXNJI
INB.MaHOHOK9.
CxuHnE OCHOBHM qakTopOM,3B'3aHm 3HeuaCHMn BnnaKaMn BHacniOK KOB3aHH Ta naIHnHa KIMoKyTB npu3BeCTn Do cepno3Hnx TpaBM. Po6ota Ha cxnni notpe6ye ocobnbOI obepeXhoCTi. RaIO Bu BiDyBaTe ce6e Ha cxnni He3pyHo, he KocIb Ioro. 3 MeTOHO 6e3neKn He HamaraTecr KocTN Cxunn 6Inbwe 15 rpaDyciB.
PnCKOuBaHHHa Cxuax nepemiuye Te Kocapky B3doBx NOBepxHi cxny, a He BBepx-BHn3. BybTe Oc0bnBO oBepeKHMn NiD Yac 3mHn HnpanMky Ha cxuax.
CiiKyTe 3a YAMN, BnboHAM, KAMHHM, CXOBAHMM 06KTMn a6o 6yRpaMn, kI MOxTyb npn3BecTN do KOB3aHHa 6o CNOTnKaHH. Bucoka Tpaba MoKe npNXOByBaTN nepeWkoDN. BuDanitb Bci npedMeTn, Taik KaMHra, rIKn DepeB i T.IH., 3a kI MOxHa nepeeHNTncr a6o kI MOxTy b 6yTu BkHiYi Je3OM.
yKpaIHcbka MOBa
3aBXd npekoHaTecb, 0 BaUoro 3acadax. KOB3aHHra Ta naHnMoKyTB npu3BecTu Do cepNo3HOITpaBMn.
HeKocitbTpaby6iIb6OpIopIB,KaHababoOropoJKeHB; BMOKeTe CNOTKNHYTNCABoBTPaNTnPiBHOBary.
CNOPOXKHEHHTRPABOYIOBJIOBAU
INB.MaJIHOK 10.
3yHnHItb ra3oHokocapky Ta noeKaIte,doKn ne30 NOBHCIO He 3yHnHITbcra.
IiDhIMiTb 3aDiH IDbepTa BnKnDaHHA.
BisMbITb TpaBoyIOBIOBa 3a pyKy Ta NiHimItb NOrO, 06 3rTn 3 rA3OHOKocapKn.
BnДaɪt bObpi3kntpaBn.
IiHIMITb 3aHi DBePura BkMaHHa Ta BCTaHOBITb TpaBOyOBJIIOBaHa Miue.
TpepeHKeHHN
Bybte Bkpan obepekhi npn niiomi a6o haxnnaHHi Kocapkn iud Yac TexhniHoro 06cnyroBaHHa, uueneHH, 36epiraHHa TpaHcnpTyBaHH. Je3o roctpe, Habitb RaIO dBnHyh BmKHeHn, ne3a BCE ue MOxytb pyxatnc. KoJI ne3o orone He, trpMaTe yactuHtina noaJI BiHbOrO.
TEXHUYHE O6CJYTOBYAHHH
TnepeJxEHHa
KoXHoro pa3y, BiDnyCTnBw BaxiNb KOHTpOIO npCyTHOcTI onepaTopa, nepeBipraTe, u3 yunHAreTBcpo60ta HOXIB npToTROM 3 cekyHd. JaKIO npNCtpi He BmNkaTc npToTROM 3 cekyHd, IORo HEo6xIHOb BiINpaBNTn Do aBTOpN3ObaHOro cepBicHOro ueHtpy.
TpepeJxehn
KaMoMaHnHa npabNtHo He 06CnyroByeTcBc, Ctpok II cnyk6 MoKe ckopoTnnc Ta B6yDobahi 3axnchi npunctpoI MOxyTb FyHKioHyBaTN HnpaBnBHO, IIO nIDBnUye pn3NK cepno3HoI TpABM. 36epiraTe npunctpi y cnpaBHOMy TexHiHOMy CTaHI.
TpepeJxehn
Pepa BnKoHaHnM 6yDb-koTc npCTpi i 3auekaTe, nOKn neoNBHtO 3ynHntbcr. 3auekaTe DOknpCTpi OXoHOte Ta BiEeHaIe DpIT CBKIM 3anaenHn. HBeNKoHaHH NIEBKAIBN MoKe npBecTN Do cepno3HOI TpaBMn a0nKOJNTn npCTpi.
TnepeJxKeHHa
PnTexHCHOMyOcbnyroByaHHI BnKOpncTObyTe TINbKn IeHTuHi 3amHI HactnH. BnkOpncTaHHa 6yDb-kaNX IHnx Detane MoKe 6yTu noteHuiHo He6e3neHnM, a6o npn3BecTN Do noWkoJKeHHn PnCtpo.
3AMIHA MOTOPHOFO MACTNJIA
INB. MaJIHOHOK 14.
3yHnKa npOkykTa NpekoHaTecra, 00 Bci pyxomi yactHH 3yHnHnncra. H3aKaIte DnIgatena da ce oxnai. Bi'edhaTe npoBid cbiuK 3anaJIIOBaHH.
Ipepe napeBepTaHHrMa3OHOKocKn nepeKoHaTecra NaINBn6ak npoxHi, B npOTNBOMy pa3i naINBO MOKe BNTeKN.
Motphe MaTnIO Tpe6a MinrTn nicra 20 roDnH pOboTn. MiHnTe MaCTnIO, KOIN BOHO Tenne, ane He rapAye. Lc eo3BOInTB MaCTnIy BnNTncb WBNkO Ta IOBHCIO.
BndaIbKpnkky 3aINBHOI ropNoBHn / nokxukpiBn.
IpepeBepHItbra3OHOKocapKyHa6ikTa daIte MaCTnIy BUNITcB i3 3aJIINBOHIOIROPNOBHN y 3aTBePdxKeHH KOHTeHep.
BctaHObIb r3oHOKocApKy BepTnKaJIbHo Ta 3aJIInTe MaCTnIO 3riINO 3 IHCTpyKciJMy 3 po3diny "DoJaBaHHra/ nepeBipka MaCTnna".
PIMITKA: BnKOpNCtane MaTNo Tpe6a 3daTn B 3aTBePdxKeHn nyHK Tyni3auii. DoaTKOby iHopMaqio DiHaTeC y MiccEBoro Dnepa MaTnla.
TEXHUYOBCNYYOBYBAHHCBIYK3AIIHOBAHH
INB. MAJIHOHOK 12.
Uo6 3a6e3neuHTn HaneKHy po60Tu DBNyHa, CBiKa 3anaIOBaHHN NOBHHa MaTn npAunbHn 3a3Op Ta He NOBHHa MaTn BiKnlaedeH. DnpeBipKn:
3yHnKa npOyKta NepekoHaTecra, 00 Bci pyxomi yactHH 3yHnHnncr. N3aKaIte DnIraTeI da ce oxlaHn. Bi'edhaTe npoBID cbuKn 3anaJIIOBaHH.
BudaneHHaikcAtopycbiKu3anaeHHA.
Budanitb6pyd HauKpyu OCHOBu CbiKu 3anaIIOBaHHa.
Bukpytib cbiyky 3anaikobahna 3a donomoroo 13-, 16-IMMOBORO CbiHORO KIOUa (He BXoDHTb B KOMNNEKT NOCTaayHHA).
IpepeBCTAHOBJIeHHrmbiK3anaIOBaHHnpepeipTe II Ha HaraBHicTb noWKoDKeH, noUcHtBdpotobOIO uITkoIO. Jkso iOJraCIBIKn noWKoDKeHa
a6oMae 电epbHn,IITpe6a3amHHTN.
IPNIMITKA: PeKOMeHnDoBaHi MoJeni CBiOc 3aIaJIeHHa TORCH F7RTC a6o NGK BPR6ES.
BumipraTe 3a3Op CBiKn. PpaBnIbHn 3a3Op 0,71 MM -0,79 MM. Uo6 36IbWHTn 3a3Op, oBepeXHO BiirHITb "3emNIO" (Bepx) eNEKTPoJa. Uo6 3MeHUnTI 3a3Op, oBepeXHO HATNCHTb 3a3eMJIIOUOM eNEKTPoDM Ha TBepDy NOBepXHIO.
BCTaBTe CbIky 3anaJIIOBaHHHa MiCue; BkpyTiB II pyko, IO6 He donyctnTn 3aIdaHH p3b6n.
3ataHHTb KIOUcEM, 06 CTNCHyTN WAI6y. KaO BCTAHOBJIIOEbCBA CbIc4a, 3pO6Itb 1/2 o6eTpY, 06 npABINbHO CTNCHyTN WAI6y. KaO BCTAHOBJIIOEbCBA CTAPA CBi4a 3anaIOBaHHa, DnA npABINbHO CTNCKAHH WaBb 3pO6Itb 1/8 - 1/4 o6eTpY.
PIMITKA: HenpaBnIbHo 3aTMyTa CBiKa 3anaIIOBaHH, CNJbHO HarpIbAeTbcr, 10 MoKe npN3BeCTn Do noWkoDkeHn DnryHa.
3MiHa pfikcTopy CBiKu 3aIaJIeHHA
TEXHlHE OBCJLYTOBVAHHN PPNBOy
INB.MaJIHOK15.
IЯ 3a6e3neueHHnlaBHOpoBOTN KONIC,nepeJ 36epiraHHm By30n KONIC Tpe6a noHCTHTN.
3HIMITb KOBnak MaTOuHHN.
3HIMiTb raiKy Ta KaIoneco, i BiKnaIiTb IX CToPOHy.
3HimItb cTOnOpHy e-6pa3Hy wa6y, uNnIbKn Ta konichi peDyKTopn. BuaJIitb 6yd-kaNk 6pyd 3 uNx deTanei Ta 3 KIna Bany npBoby cyXOIO TKAHHOIO. B pa3i Heo6xIdnocti, dNra BuaJaleHHe HEniDaattnBOrO 6pydy MoXHa BIKOPNCTOByBaTN CnPT Dnla npotnpaHH.
YBARA: 3He 3Ma7yIte H1ki eJemeHTn KOleca. Ma7yBaHHa MoKe np3BeCTn Do BHXOdy KOMNOHeHTIB KOleca i3 Iady niD yac po6OTn, 10 MoKe BnKInKaTn NOsKOJxHHe rA3OHOKocAPKn.
BCTaHOBITb Ha MICe IecTePnIO CTpiKAMN B HAnpMky ra3OHOKOCapKn. 3amHITb CTOnOpHy e-06pa3Hy waioy,
BctaHObItb Ha Micue KOleco Ta raiky. 3aTnHiTaRky.
3axncha Haknaika y 36opi (KOBnak BTyIKN).
3AMIHA KONIC
INB.MaJIHOK 16.
TnepeJxKeHHa
BnKOpncTobyTe NmE 3mHHi KOneCa BID BnPo6HnKa. BnKOpncTaHHa KJIc, kI He CXBaNeHi BnPo6HnKOM npJnaDy e He6e3neuHm I MoKe npn3BeCTn Do cepno3Hnx TpaBM.
3yHnKa npOyKta NepekoHaTecra Bci pyxomi yactHH 3yHnHnncra. N3aKaIte Dbratena da ce
oxlaani. BiEeHaHte npoBid cbiKu 3anaIIOBaHHa
3HIMITb KOBnak MaTOUHHN.
3HimItb raiky 3 Bany KOneca,notIM 3HimItb KOneco.
BctaHObitb HObe KOJECo Ta 3aqiKcyIe Ioro raiKOIO.
3axnchaHaKnajaKa y 36opi (KOBNaB BTyIKN).
TPAHCIOPTYBAHHRA3BEPIIGAHH
36EP1AHHBIMPO6Y
Pn36epiraHHKocapKn npotraom 30 dHbTa DOBwe:
Bpa3i 3actocybaHHcta6in3atopapanibaa ndacdoabAHn cta6in3atopdo naHbay bky BkoHnyte hactaHOBNBupo6nKn cta6in3atopa.nicna doaBAHH Cta6in3atop 3anyctitb DnHyh mH. Ha 10 xbunH,io6 dAtn cta6in3atopydoCaryHynkapbopatopa.
TnepeDxkeHnna
Hikon He 36epiraTe npOdyKT 3 6eH3nHOM B 6aKy npnpimieHHi, KON BNapOByBaHHa 6eH3nHy MoKytbdoC8rTn NOnyM'a 60 icky.
■Kaio cta6ini3atop He BnKOpNCTOByeTbcra DaTe DnHy NnonpaOBAtu, DOKI r30HOKOCapka He BNpauoE nainBO NOBHCIO.
■Iicna 3ynHKn DnHyHa daNte ne3y 3ynHHTncra Ta BiD'edhaTe dpit CBiK 3anaJIIOBaHH.
3akpiTe knaan napanBa.
IpeBepHItbra30HOKocapky Habik (kap6kpatop MaE DnBtncB Bropy) Ta BuaNITb 6pizKn TpaBN, kki CKONuYNlncsHa HxKHi CTOPOHI ra30HOKocapKn.
IOnuHcTiB DHO rao hOkoCapKn.
YnCTtBra30HOKocApkyNCTOIO TKAHHIO.
IpepeBipTe 3aTgHeHHBaixraIK,6oNTiB,KyJnactnx pyOK, rBNHTiB, kpinJeHb i T.D.
Ipebeipte pyxomi Detani Ha HaraBHictb noKoJKeHb, noJamok Ta 3Hocy. BiDpemOnTyIe 6yDb-aki noKoJKeHi Detani a60 BCTaHOBIb HOI Detani.
36epiraTe ra3oHOKocapky y rapHO BeHTnIbObaHnx, cyxnx npimiueeHHx, y kI He MoKyTB NotpamITn dITN.
He 36epiraTe Tnpuy 3 Kopo3iHmMaTepiJAmu, TaKIMn Jk Do6pNa a6o KaM'Ha CInb.
Ioo haxnnt npky neped 36epiraHnM:
INB.MaHIOHOK3.
Bidnyctitb kyncty pyky Hanpymhoi Tpoc 3anycky. Bnmitb Tpoc 3anycky 3 Hanpymhoi Ta daTe Nomy BTARHYTNCB DBNYH.
3HimItb pyuKn Ta 6oTn 3 KOxHoI CTOpOH HNKhBoi pyuKn Ha KpoHHTeHi pyuK (BCTaHOBJeHi Ha DeCi KocapKn).
IIOBHicTHo BiDnycTb KyJnCTi KHOJKN pyKn Ha o6ox II CTOpOHax Ta HAXNJITb pyKy BHN3.
HaTnCHITb BHyTpiliHIO CTOpOHy KoxHoi CTOpOHn HxKhBoi pyuKn Ta niDiHIMtB CTOpOHn HxKhBoi pyuKn, 106 BOHa npouJna kpaI MOHTaXKnX KpoHwTeHIB pyuKn.
Harritb HnKHe pyky Bnepe, 3a6e3neuBwn, 06 BOHa He 3rHana Ta He nepekpyyBaJa Ka6eni KepyBaHHra.
TPAHCIOPTYBAHH
3yinnHtB DnHy, BiD'EnHaIte dpit CbiKu 3anaHeHHa, DOyeKaIteCb NOKn Ne30 NOBHiCTO 3yNHNtcbc. 3ynnHtB DnHy I daIte My OXONOHyt Nepei 36epirAHHM a6o TpaHCnOpTyBaHHM.
I Ounctitb Bci CTOpOHm MaTePiAn 3 npOdyKry. 36epiraTe npOdyKT B npoxoIoHOMy, cyxomy i do6pe npoBtPioBaHOMy Micui, HeIOCTyHOMy Inra diTei. 36epiratni Noadani BiD arpcuBnHex areHTIB, TaNX k caObi xiMikatni I coJe npOTn obJeDeHHHa. He 36epiraTe Ha BiKpNTomy nobITpi.
ДлгТранспортуваимь,ЗабзneчITь Maшину BiDpyxya60 naiHnH,и63anobirn TpaBMn IIOdei a60noшКODKEHЯ MaSHIN.
TnepeJxehnH
Bybte Bkpa Obepejhi npi NiHomi a6o HaxnIaHHI KocapKn iD ac TexHiuHoro 06cnyroBaHHra, uHHeHH, 36epiraHHa YN TpaHCnOpTyBaHH. Jea Dyke roCTpi. KoJI neo orone He, TpMaJte qactnHn Ti naDiJI bID HbOrO.
HENPEPEDaueHPIu3nKIN
Habib 3a HaleXHoro BnKOpNCtAHHa HcTpyMeHaHEMOXNBO NOBHCIO HeTpani3yBatn NEbHI paKTop3aIIuIKOBORo PN3NKy. HAcTyNHi He6e3neKn MoKyTBBNHKATn npn BnKOpNCtAHHi npOdykTu Ta onepaToPy cnId 3BepHyTN OOC6NBBy yBary, Uo6 yHNKHyTN HaCtynHoro:
TpaBMn cnpuHHei Bi6pauejo.
3aBxDn BnKOpNCTOByTe Ira pO6OTn npaBnIbHn IHCTpymeHT. BnKOpNCTOByTe npu3HaueHi pyKn i 06mexiTb Yac po6OTn IBnNB.
TpaBMN, BnKnKaHi yMOM
- PidBnueHn pibEnb wmy MoKe cnpuHHTn noWkoJKeHH ncyx. HadraIte 3axnt dna opraHIB cnyx Ta limityTe BnINB.
TpaBMN BiD KOHTaKTy 3 Ne3amM
TpaBMyBaHHBaDnIitaoyHmN YaCTkamM
yKpaIHcbka MOBa
3HIXEHHHPN3IKY
Bidiomi Bnnapkn, KOJI Bi6paqia BiD pyuHnx IHcTpymeHTIB cnpiRe noRbI Tak 3BaHOro CnHpOMy PeHNO. CmNTOMn CXoxKi Ha Ti, 0o 3'ABJNtBcra NiD BnNBOM XOJODy, BKIOUaOHy NOKOIKBaHHo, OHIMHH Ta 36niDHeHH naIbucIB. BbaXaETbcra, 0o cnaKOBi YHHNK, BnNB XOJODy i CnpocTi, XapuyBaHHa, KpyIHHa I DeAki 3BVNU po6OTn CpiNaHbToPozBTkY uX CNMTOMIB. MoKH npHnHrTn DeAki 3axOHN, Aki MOxTy 6yTN npHnHrTI onepatopom, 0o6 3MeHNTHn BnNB Bi6paQii:
IiTpmyBatn Temnepatyp Tina B xonoHy norOy. Ipn BVkOpncTahhi HctpymeHTy HaiaRatpe pykabuKn, 3o6 TpmaTn pykn Ta 3an'AcTK y Tenni. 3riJHo 3 DocpiXeHHaMn, OCHOBH N BHeCOK B PO3BtOK CnHdpomy PeHNO, E xonoHa norOda.
Bnpaba dna akTnBauii KpOBoo6iry nicra koxhoro 3anycky.
Perynapno nybHa nepepy. Nimityte kibkictb poBOTn Ha deHb.
KaIO BV BnBnIN 6yDb-aknn 3uX CmNTOMIB, HeraHo npnnHITb BNKOpNCtAHN i 3BepHITbcra Do BaWOrO Iikapr 3rINO uX CmNTOMIB.
TnepeJxehn
TpBnBaJIe BnKOpNCtAHHInCTpyMeHTy MoKe np3BeCtn Do TpaBMByaHHa6o 3arOCTpeHHiaChyOCHI TpaBMn. PpBnKOpNCtAHHi npnAynAp npOTraGM TpBnAHoro nepiody yacy, qacti nepePBn.
CUMBOJIN
J3HCTyTHNX CMBONIB MOKytb 6ytN BnKOpNCaHI Ha IHCTpymentI. Byd Iacka, BNBHTb ix i dI3HaNTec xHi 3MICT. PpaBnJIhe TnyMaueHnR NxC MNBONIB DO3BOJNTb BAM KepyBatn npOdykTOM Kpaue i 6e3neuHlwe.


Mipn o6epexKHOCTi, kI BnNBAIOb Ha 6e3neky.
ДяЗANOБИАнHApyTNKOpNCTyBaH NOBHNEN IpoYNTaTaN 3P03yMITn KepiBHNHTBO KOpNCTyBaHa nepeD BnKOpNCTaHHm UbOTo BnPo6y.
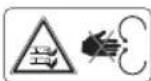
I06 yHnKHyTN TpaBM,3aBxNtPnMaIteCn NodaJI BiD pyXOMNXyACTINH.
Hebe3neka! TpmaTe pykn Horn YKOMORA dani.
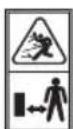
Hebe3neka pikoowety. TpmaTe Bci nepexoxnx, npnaHmHi ha 15 M biD rotibni.
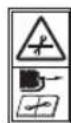
Ipeep npoBeeHnM TexHiHoro 06cnyroByBaHHn Buaanitb CbiKy 3anaIOBAAHH.

Pn6epiB 06'kTN, kki MoKyTB 6yTN BKNHyTI Je3OM, 10 o6eptaeTbCra.

TpmaTe cnoctepiraHb6e3neuHi BIDCTAHIBipnykty.

Дя 3MeHWeHHЯ риЗИКу TpaBMn a60 NOIWKODKeHHЯ yHnKaJIte KOHTaKTy 3 rapYHMN NOBepxHЯMn.

Pnpctpi e NoteHuiHIM dKepeIOM ypaXeHH enEeKtpnHm cTpyMOM. He niDabaBte npctpi BnNBy BOIOr, doUy a6o Chiry. He KopncTyTeCBOIOrMN pykAmu a6o HorAMN.

PiJyac BnKOpncTaHHN npncptpi BnDInIe MOHooKcND ByrIeIeO, 6e3bapBnO TpyHn ra3, 6e3 3aIaxy. BnuXaHn OKcNDy ByrIeIeO MoKe BnKlnKaTu 6JIbOBy, BtpAty CbiDOMocTi a6o CMeptb.

Idoatn B MacnHn 6ak SAE 10W-30 API-SJ a6o BucOKOMOJIeKUynpHy MOTOPHy ONiBy.

3aONBHITb nainBnHn6ak HeETINbOBaHm 6eH3nHOM (91 a6o Bnue).

HaTnCHiB rpyu 3 pa3iB.

Onycitb Baxinb KOHTpOIO npcyTHoCTi
onepatopa
npOTn pyuK.

BntyHtbypyckctaptepa2pa3ib. Picra 3anycky Dnuryha nobinbHO 3HIMtCTAPTOBYraKyTak,io6 MOTy3KaHe NOBepHynpaHa3aD.

BukohyTe CkOswBaHHK, KONyOBIOBau npoXHi.

KoJyIyOBJIIOBAHOBHn, npnnHITb CKOyBaHH.

PAnuBO Ta NOro Bnnapu -B6yOHe6e3neuHi Ta MoKyTbBnKnKaTu cepNo3HOniKn a6o CmepTb.
ykpaiHcbka MOBa

TaNIBO Ta Noro napu E HAD3BnuaHOBORHe-Ta B6yXoHE6e3neuHIMN.
Ioxkexa MoKe Ipn3BecTn Do BaKnx onikb a6o cmepTi.

BnKOpNCTOByTe HeeTINOBaHn
6eH3HH, Pn3NaYeHm dnn
BnKOpNCTaHHr MoToPnHMn
TpaHCnOPTHMn 3ac06aMn 3 OKTaHOBM
YncnOM 91 ([ + ) / 2] a6o BnSe.

BukopncToByTe SAE 10W-30 API-SJ a6o BnCOKOMonekynpHy MOTOPHy oINBy.

BiINObiaE BcIM HopMaTHBnM cTaNaptam B kpaIHax EC, De Bnpi6 6yno npu6aHo.

Ecba3iibcka 3NaK BiNobiHocTi.

UkpaHcbKm 3HaB KbiNObiDHOCTI
001
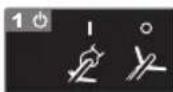
Onycitb Baxinb KOHTpOIO npCyTHoCTi onepatopa
npotnyu,063a6e3neuHTnpo6Oy DnryHa
yakTNBOMy cTahi. BiNyctitb Baxinb KOHTPOIIO npCytHOCTi onepaTopa, 063ynHnTnpnna.
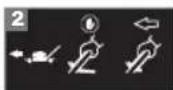
ДпаCAMOCTIHOROPINBBeHNEHB
ДIO:Ia3OHOKocapka6ydepyxatncb
CAMOCTIHHO,KIOBaxkInbDnA
ABTOHOMHOrOynpabNHHcPnPMOBaHO
do pyKn.

TapaHTOBaHn pIBeHb 3ByKOBOI nToTyKHOCTi 96 d6.

3ynnnka npodukta
yKpaIHcbka MOBa
TPAΦIK POBIT NO OBCNHYROBYBAHHIO
NOWYK I YCYHEHRA HECNPABHOCTE
| ПюбLEMа Можливпожимини рішени | | |
| Ручka у неревиь-HOMу положени. | Ручka встановлесно неевалын.Кучсяк ручки не заягуну. | |
| Косарка He 3a-pу Brockаctься. | Hemae 6eH3nHy.DBvrgun 3aIitni.Ctape палвоВiDcSry 3eRyTbCry 3eRyTbCry 3eRyTbCry 3eRyTbCry 3eRyTbCry 3eRyTbCry 3eRyTbCry 3eRyTbCry 3eRyTbCry 3eRyTbCry 3eRyTbCry 3eRyTbCIV 3eRyTbCry 3eRyTbCry 3eRyTbCry 3eRyTbCry 3eRyTbCry 3eRyTbCry 3eRyTbCry 3eRyTbCry 3eRyTbCry 3eRyTbCry 3eRyTbCry10 3eRyTbCry 3eRyTbCry 3eRyTbCry 3eRyTbCry 3eRyTbCry 3eRyTbCry 3eRyTbCry 3eRyTbCry 3eRyTbCry 3eRyTbCry 3eRyTbCry | 3aIiniiTe B ra3oHokocapky pailbo. Jkso ra3oHokocapka He 3anysckæTbcry, 3eRrHɪtbcrydo cepbɪchoro ceɪntpy.Počekaɪte 15 xBvɪnɪn,notim cnpobuyte 3aŋycTntu ra3o-Hokocapku Μe pa3.ДИВ.рɔdɪn 3aŋyck/3ynɪnka kocapkn.Isɒl3Baɪte nprcno rorpINO. B pa3i bɪkɒpɪstənnaɪpaɪnla,b termin bɪroʊtɒbɛnnyЯkor opebviþye 30 dɪhɪ,prɪnlaɪd Moʊke He 3aŋycTnticry. |
| BidcYthry ickpa.Tenerp Troc 3aŋyscky TaryHeTbcry cklaɪdniüe, nIX HOBni. | |
| Скадно Tobkatn Ra3oHokocapku. | Traba,Як Ви 3bɪpaεTecb KocNTn, 3aɪaɪto BvSCKa.Koprunc RA3oHokocapkn Ta Ie3o 3aɪnnyTbVATmUytbcry y rucTi trpaɪb.BvCota pi3aɪnna 3aɪaɪto Hɪs3bKa. | |
| Газонокорка Na BvSOKi 小ВVDKOSTi Biöpyc. | Ie3o He 3bɪaɪncOBAhe.Ban DBvrguna 3irHyrtn. | |
| Косарка He mýlbCyHe NaJexkhIM ChINOM | M'ayk Trabn StnrpuTb 3 nixhNoi CSTOPHnДeKn. | |
| 36inapu Trabn He NaIOBnOeTbcry Tpa-BOU, HabɪtB, JAKSO Tpaba CkoUeTbcry. | Jkonob BvkiDy 3aKynOpenern. | |
| BvCota pi3aɪnna 3aɪaɪto Hɪs3bKa. | |
Türkce
CIM TOPLAMA SEPETININ BOŞALTILMASI
Bakiniz sekil 10.
In addition to any statutory rights resulting from the purchase, this product is covered by a warranty as stated below.
- The warranty period is 24 months for consumers and commences on the date when the product was purchased. This date has to be documented by an invoice or other proof of purchase. The product is designed and dedicated to consumer and private use only. So there is no warranty provided in case of professional or commercial use. This warranty applies only on new products.
- There is a possibility to extend for a part of the range of power tools (AC/DC) the warranty period over the period described above using the registration on the www.ryobitools.eu website. The eligibility of products for extended warranty is clearly displayed in stores and / or on packaging and is contained within the product documentation. The end user is required to register his/her newly-acquired products online within 30 days from the date of purchase. The end user may register for the extended warranty in his/her country of residence if listed on the online registration form where this option is valid. Furthermore, end users must give their consent to the storage of their personal data that is required to be entered online. They must also accept the terms and conditions. The registration confirmation receipt, which is sent out by e-mail, and the original invoice showing the date of purchase will serve as proof of the extended warranty.
-
The warranty covers all defects of the product during the warranty period due to faults in workmanship or material at the purchase date. The warranty is limited to repair and/or replacement and does not include any other obligations including but not limited to incidental or consequential damages. The warranty is not valid if the product has been misused, used contrary to the instruction manual, or has been incorrectly connected to a power supply. This warranty does not apply to:
-
any damage to the product that is the result of improper or lack of maintenance
any product that has been altered or modified
- any product where original identification (trade mark, serial number) markings have been defaced, altered or removed
any damage caused by non-observance of the instruction manual
any product not displaying the CE approval mark on the rating plate
- any product that has been attempted to be repaired by a non-authorised warranty service centre or without prior authorisation by Techtronic Industries
- any product connected to improper power supply (amps, voltage, frequency)
- any product used with inappropriate fuel mixture (fuel, oil, ratio of oil/ fuel mixture)
- any damage caused by external influences (water, chemical, physical, shocks) or foreign substances
normal wear and tear spare parts
-inappropriate use,overloading of the tool
-use of non-approved accessories or parts
- Accessories provided with the tool or purchased separately including but not limited to blades, saw chains, cutting lines, etc.
Any periodic adjustments to or maintenance cleaning of carburettors
- Components (parts and accessories) subject to natural wear and tear, including but not limited to bump knobs, drive belts, clutch, blades of hedge trimmers or lawn mowers, harness, cable throttle, carbon brushes, power cord, tines, felt washers, hitch pins, blower fans, blower and vacuum tubes, vacuum bag and straps, guide bars, saw chains, hoses, connector fittings, spray nozzles, wheels, spray wands, inner reels, outer spools, cutting lines, spark plugs, air filters, gas filters, mulching blades, etc.
- For servicing, the product must be sent or presented to a RYOBI authorised service station listed for each country in the following list of service station addresses. In some countries your local RYOBI dealer undertakes to send the product to the RYOBI service organisation. When sending a product to a RYOBI service station, the product should be safely packed without any dangerous contents such as petrol, marked with sender's address and accompanied by a short description of the fault.
- A repair / replacement under this warranty is free of charge. It does not constitute an extension or a new start of the warranty period. Exchanged parts or products become our property. In some countries delivery charges or postage will have to be paid by the sender. Your statutory rights arising from the purchase of the product remain unaffected.
- This warranty is valid in the European Community, Switzerland, Iceland, Norway, Liechtenstein, Turkey and Russia. Outside these areas, please contact your authorised RYOBI dealer to determine if another warranty applies.
AUTHORISED SERVICE CENTRE
To find an authorised service centre near you, visit http://uk.ryobotools.eu/ header/service-and-support/service-agents.
FR RYOBI CONDITIONS D'APPLICATION DE LA GARANTIE
ПOMMIMO 3AOKHOBII NAPB, BOSTRKHIOUIXII PNY KONKYEJI. DAHOHE INI3EINIE NOKPBIBTCER TAPAHRTB H B COOTBTCTBNI C PRNBEDEHNHHMIX NYHKTAMN.
- RapaHTnHbI nePOnO dIy nOKynatEn CoCTaBnEe 24 Mecra c daTbI NOKynIK INdENr. DAta NOKynIK DoNkHA 6BtB NoITBePckJEAHO NIOHcTeBIO TANHHe IpaRHTnHbIM TaTOHOM HcEKOM O NOKInE DaHHOE INdENe PNeH3HaHeHO ToBKO dNpCAthoro ICNoJIb3OBAHN KOKynATenEM PoToTMo rAPANTH He pacnoctpAraHETc HA INCNOJIb3OBAHNE B npOpeCCONAHbIX HIN KOMMEpHECKHX CEIXX
- PpDyCmPoHepa Bo3MoKxHocTb npOJnHnI nIaCTn I3denn IINHeNk CaDobBx IHcTpymEton (AC/DC) rapaHTMHOro nepoJa c NOMOIO hpoeNTpaunHa caIteWe rYobitools.eu.PpAo HcTpyMeHa na npOJLHepe rapaHTMHorO nepoJa eTko yka3AHO B mara3HNax n /nn Ha ynaokBe / n CopeKITCB COnyTCTByUOE INcTHpyMEHY DOKyMeHTaUN. KOHeuH pONb3ObaTeB,doJXeR 3aprrncTppoBaTB CBOI npO6PteHNb HnCTpyMeH TceHeNe 30 dHeC n DaTb NOKynK. KOHeuH bI ONb3ObaTeB MOKET aperHcTPOpOBATCB HO INcTHpyMEH Na npOHeNE rapaHTm B CTpaH CBoEOr PpOJKBaHN, ECIN OHA YK3A3A H B fOpme OHAnHPernctpaun. KpOme TORO, KOHeuH bI ONb3ObaTeB DOJIKeH DA Tb CBOE COnaNa He XpAHEn DaHNbX, KOToPB HeoeXoMO M BBeCTn B OHAnHfOPMy pNpHtB pApBnA uYcNOBA. POITBepKHeHne pReCTpaun, KOToPoe Bbl NOnyHTe No 3eKnTPOHHO NOvTe, 3aONpHEHraPaHTMNb TANOH I pOInHNAhBbYek, B KTOpOTMg YA33Ha daTa NOKynK, 6bYdT CNYKHTb DOKa3ATEbCTBM npOJHHOH apaHTNI.
- RapaHTnO nOKpbBaet B TceHne rapaHTnHOro nepnoa BCE peFeKtBu KauCTBa IIN MATEpHaIaM3eNIn HA DaTy NOkYmKn. RapaHTn OPAHcHepaEMOTn / INN 3aMeHOH IN HE BKNIOaET HNKAKIE DpyTHe OBs3TeBCTBa, BKNOaH, HO He ORpaHcIMBaBc CNYaHbIM NIK KOCBeHNbIMy y6bITKAMn. RapaHTn CTAHOBTnC HeDEKeHCTBnEHO, ECNI M3eNIn NCNONL3OBAnocB He no HaHaHEHIO, BOpeN IHCTpyKuHM, DAHHb IM PykoBOdCTBe NOnb3OBaTeRn IIN 6bNo HnpAeINbHO NoDknIOHe.HactoJuaar paHTnA He pacnOcPraHcTcRa H:
-ПбьгпьоврждениинденияВpe3ynbTaTeHenpaBnBHorO
TexHueckoro obcnykBaHnI nn HeoctaToHOrO yxoJa 3a
MCHPTPYMENTOMI -nMo6eHNI,NOBBePrUWeCnA MMeHeHnM M MoDnFkAJIIM
-ⅡoBle ⅢeIeIeIe,OpINHnHbIe IeHTNfKHaUOHHeIe OTMeTkn KOTOPOr (ToproBa Mapka, cepHnHbI Homep) bIyI INIOBpeKeJeHbI, IMeHEHbI NIn yJaJIeHbI
-ⅡoBbIe NOBpEzDEHn,Bb3aBHHe Heco6IOeHMe INHCTpyKmIyKyoBOCTBaNoIb3oBaTeNa
- liobbIe 3nEbn, eBertnHpuRpaBHbIe MapKpOBkoi "CE" nIpaOaJx B EbponeNcKo CMo3E
NIOIbIe M3eINH, NOBdRpuHecn NOBtKAMpeMOHTA HeKaHmFnsuPobAHHHa paOThNKoM nIM 6e3 npEsbAPrTeJIbHorO yTBepxDEHN KOMaHHeN Techronic Industries.
UCIOBNA BANIDHOCT HA TAPAHYRAHA RYOBE
B DOnbHHeHnKbM 3aKHOyCTaHOBeHHTe npBa, pOsn3Tuauu OT NOKynkata, T03n npOdyKT e o6XbaHAT OT rapaHnur, KaKTo e n3JNOKeH NO-dOly.
- RapaHUNOHHHNcPcK e 24 Mececa 3a KInHeTHn 3aNoOyBa da TeHe oT DeHa 3aKnyBae Ha npOdyTKa. Ta3n DaTa TpRbDa na de DokaKe c FakTypa HnIpyo Doka3aTeNCTBa 3a NOKyKn, PnpOkyKTe nIpa6BoTeH npEhA3NaueH cAmO 3a Notpe6BteNcKa n InuHa yNoTpBe. CneDobateHo He Ce DaBa rapAHnC B cNyHa Ha nI3NoI3BaHe OT npOpecMoHaJIncTn HnC TbPoBCKa cJe.
2.CbIeCTByBa B3MOXHOCT 3a YdBnKABAHe Ha rapaHIOHHN CPOK 3a
yact O DNHa3OHa HapAHINrHa TpaDInHC KIN HcTpyMeHTN (AC/ DC) cnei NTinuHato H OAnCNAH TYkype3 pernctpua HA ye6 caita
ww.ryobiltools.eu.B mara3HNITE NmHn HA onakOBkATA INN Btpe B DOKyMEHTAIAHA NPOUYKTAE nOKa3AHO RCHo DAIIN HcTpyMeHTB OTROBAPn HA yCNOBITRA 3a TAKOBaYbNLKAAbe HA rapaHIOHHN CPOK.
KpAHINrNotPte6BtEN TPR6BA da perrntpna CBOTNE HOBNpNDoBNTN
NHcTPyMeHTN OHnIHn B pAMKNTE Ha 30 dHIOn DTata HA NOynkA.
KpAHINr NotPte6BtEN Moke Da ce perrntpna 3a ybNKeH aRapHua
B DbpXabATA CN Ha Ipe6BnBaAbe, Ako e NocOHeHa BBb FOpMnnpa 3a OHnain perrntpaun KaTO MRCTo, KDeTe Ta3n ONUe E BAINDA.
OCBeH ToBA kpaHIneNoTpe6BtEN Tp6BA daJaT cbNnHcToe cn 3a cbXPAHEne Ha DAHNTE, KOITO CA 3aDbNLKIIENTNe 3a noNBlaHae ONHaih,
n Tp8Ba Da pinnemat O6bnite YcNOBn. NonyeHOTo NoBbPckHeHne 3a pernctpaun, INPaTeHO NOeIKTPOHn NaOu, InopTNHJHnata fKaKTypa,
NOKaBaTa DaTATA Ha NOKyNa, 贝 cnykAT KATO DOkKaTeNCTBO 3a ydybKnKeHATA rapAHau.
- RapaHUNaTn NOKPbBA BcNcKn DepeKTHn Ha npOyKa Tn BpBMe Ha rapAHHIOOHNNc PCK, KOHTe Ce bIbKAT Ha npObNmB n 13pa6oTKata HmMATEpHaJIInTE KbM MOMeHTa HA NOKYkATA. RaPaHUNaTn e OarHApHeHa Do pEmOTH NIMAN3MaHn H BKNIOHBA Dpyr 3aDbJKeEHN, BKNIOHHTENHO HO He cAmO, CNYaHnH INN KOCBeHN IeTH. RaPaHUNaTn e HeBaHINHa, AKO npOyKTb E INON3BaHn HEnpABINHO INN B nPoTMBOpEne C pBkoBOCTBO Tc HcTpyKUn, KaKTo IN AKO e CbbpAhn HEnpabINHo. Ta3n RapaHUNa HE BAKK 3a:
-eta n no npdykTa B pe3yTnT ha HnpepaBnHa npoDnlaKtnKa -npdykT, KOnTO ca 6nnn NmMeHn nn MoDnncnpuHn
- npOyKT, npN KOTo OPnIHnAHnHTe MapKnPOBKN 3a INeHTnФnKaIuaI (TbPBOBcKa MapKa, cepneH HOMep) ca IN3TpHTn, IpOmeHEN HINnpemaxHAT
-NoBpeHa, pNmHHeHa OTHecnA3BaHe Ha pKOBODCTBOTo C HcTpykUIN -npOyKT 6e3 CE MapKnpoBka
- npOyKT, 3a KoiTo e HapPaeH ONHT 3a peMOHT OT HeKaJIIMnIpaN cneuaImCT nII Be3 npEdbapTeHNO pa3peSeHne ot Techronic Industries.
IpoIyKT, CbP3aH KbM HenoIoxOJraIO eNEKTPo3aXpaHBAHe (AMnepaK, BONTJA, HECTOTA)
Techtronic Industries GmbH
Max-Eyth-Straße 10, 71364 Winnenden, Germany
Herewith we declare that the product
Petrol Lawn Mower
Brand: RYOBI
Model number: RLM46160S
Serial number range: 46291801000001-46291801999999
is in conformity with the following European Directives and harmonised standards
2006/42/EC, 2000/14/EC, 2005/88/EC, 2016/1628/EU, 2011/65/EU,
2014/30/EU,EN ISO 5395-1:2013+A1:2018,EN ISO 5395-2:2013
+A1:2016+A2:2017, EN ISO 14982:2009, EN 50581:2012
Measured sound power level: 93.1 dB (A)
Guaranteed sound power level: 96 dB (A)
Conformity assessment method to Annex VI Directive 2000/14/EC amended by 2005/88/EC.
Notified body, TÜV SÜD Industrie Service GmbH; Geschäftsfeld Fördertechnik, Westendstraße 199, 80686 München, Germany. has carried out EC type approval, and the CE identification number is 0036.


Sven Eschrich
VP of Engineering - TTI Outdoor Power Division
Oct. 30, 2018
Authorised to compile the technical file:
Alexander Krug, Managing Director
Techtronic Industries GmbH
Max-Eyth-Straße 10, 71364 Winnenden, Germany

Max-Eyth-StraBe 10,71364 Winnenden, Germany
Max-Eyth-Straße 10,71364 Winnenden, Germany

Techtronic Industries GmbH
Max-Eyth-Straße 10, 71364 Winnenden, Germany
Max-Eyth-Straße 10, 71364 Winnenden, Germany

Max-Eyth-Straße 10, 71364 Winnenden, Germany
Max-Eyth-StraBe 10,71364 Winnenden, Germany


Max-Eyth-Straße 10,71364 Winnenden, Germany
Max-Eyth-StraBe 10, 71364 Winnenden, Germany

Techtronic Industries GmbH
Max-Eyth-StraBe 10,71364 Winnenden, Germany
Pelo presente declaramos que os produits
Max-Eyth-Straße 10, 71364 Winnenden, Germany

Techtronic Industries GmbH
Max-Eyth-Straße 10, 71364 Winnenden, Germany
Max-Eyth-Straße 10, 71364 Winnenden, Germany

OVERENSSTEMMELSESERKLÄERING
Techtronic Industries GmbH
Max-Eyth-Straße 10, 71364 Winnenden, Germany
Vi erklaerer hermed, atprodukto
Benzinplaenekipper
Brand: RYOBI
Modelnumber: RLM46160S
Serienummeromrade:46291801000001-46291801999999
Max-Eyth-Straße 10, 71364 Winnenden, Germany
Techtronic Industries GmbH
Max-Eyth-Straße 10, 71364 Winnenden, Germany
Max-Eyth-Straße 10,71364 Winnenden, Germany
NO SAMSVARSERKLAEERING
Techtronic Industries GmbH
Max-Eyth-Straße 10, 71364 Winnenden, Germany
Herved erklaerer vi atprodukter
Bensindrevet gresskipper
Merke: RYOBI
Modellnummer: RLM46160S
Seriennummerserie: 46291801000001-46291801999999
er i samsvar med falgende europeiske direktiver og harmoniserte standarder
2006/42/EC, 2000/14/EC, 2005/88/EC, 2016/1628/EU, 2011/65/EU
2014/30/EU EN ISO 5395-1:2013+A1:2018. EN ISO 5395-2:2013
+A1:2016+A2:2017, EN ISO 14982:2009, EN 50581:2012
Malt lydeffektniva: 93,1 dB (A)
Garantert lydefeftknivá: 96 dB (A)
Max-Eyth-Straße 10, 71364 Winnenden, Germany

FI SÄÄNNÖSTEN NOUDATTAMINEN
Techtronic Industries GmbH
Max-Eyth-Straße 10, 71364 Winnenden, Germany
Imoiamme taten, etta tuolteet
Max-Eyth-Straße 10, 71364 Winnenden, Germany
RU 3AABJIIEHNE O COOTBETCTBUN TPEBOBAHNRM
Techtronic Industries GmbH
Max-Eyth-Straße 10, 71364 Winnenden, Germany
HactoM MBaBnem,TO daHHb npodyKT
BeshnHOBAraTa3OHOKOcnIka
Mapka: RYOBI
Homep moen: RLM46160S
Duaan3oH 3aBocnX HmOpob:46291801000001-4629180199999
co08TeCTbEyTpe6oBAHnM nCneDyUOxN DmuKeTMB EC n CornacOBAHhBX CTahdaptOB
2006/42/EC, 2000/14/EC, 2005/88/EC, 2016/1628/EU, 2011/65/EU
2014/30/EU ,EN ISO 5395-1:2013+A1:2018, EN ISO 5395-2:2013
+A1:2016+A2:2017, EN ISO 14982:2009, EN 50581:2012
I3MepeHHbI yPoBeH 3BykoBO MoUHOCTN:93,1dB(A)
TapaHTnpyEmbI yPoBeHb 3ByKOBoM MoaHocTn: 96 dB (A)
MeToI OueHKn COOTBETCTBnI PpHIOXeHHo VI DupeKTHbI 2000/14/EC c N3MeHeHHMn OT 2005/88/EC.
CeptnnKkat COOTBETCTBNA Tpe6oBAHm EC BbdaH yNONHOMOeHHbIM opraHOM
Max-Eyth-Straße 10, 71364 Winnenden, Germany


DEKLARACJA ZGODNOSCI
Techtronic Industries GmbH
Max-Eyth-Straße 10, 71364 Winnenden, Germany
Max-Eyth-Straße 10, 71364 Winnenden, Germany

MEGFELEOSEGI NYILATKOZAT
Techtronic Industries GmbH
Max-Eyth-StraBe 10,71364 Winnenden, Germany
Max-Eyth-Straße 10, 71364 Winnenden, Germany

PROHLÁŠENI O SHODE
Techtronic Industries GmbH
Max-Eyth-Straße 10, 71364 Winnenden, Germany
Max-Eyth-Straße 10, 71364 Winnenden, Germany

Techronic Industries GmbH
Max-Eyth-StraBe 10,71364 Winnenden, Germany
Numar series: RLM46160S
Gamā numār seriē: 46291801000001-46291801999999
Alexander Krug, Director Generali
Techtronic Industries GmbH
Max-Eyth-Straße 10, 71364 Winnenden, Germany


ATBILSTIBAS DEKLARACIJA
Techtronic Industries GmbH
Max-Eyth-Straße 10,71364 Winnenden, Germany
Ar so pazinojam, ka produkti
Benzina zales plaveis
Zimols: RYOBI
Modela numurs: RLM46160S
Serijas numura intervals: 46291801000001-46291801999999
Max-Eyth-Straße 10, 71364 Winnenden, Germany

VASTAVUSDEKLARATSI0ON
Techtronic Industries GmbH
Max-Eyth-StraBe 10,71364 Winnenden, Germany
Kinnitame, et see toode
Max-Eyth-Straße 10, 71364 Winnenden, Germany

ATITIKTIES DEKLARACIJA
Techtronic Industries GmbH
Max-Eyth-Straße 10, 71364 Winnenden, Germany
Max-Eyth-Straße 10, 71364 Winnenden, Germany

IZJAVA O USKLADENOSTI
Techtronic Industries GmbH
Max-Eyth-StraBe 10,71364 Winnenden, Germany
Jamcena razina zvuene snage: 96 dB (A)
Metoda procjene sukladnosti prema Dodatku VI. Direktivi 2000/14/EZ izmijenjenoj prema 2005/88/EZ.
Nadzorno tjelio, TUV SUD Industrie Service GmbH; Geschäftsfeld Fordertechnik, Westendstraße 199, 80686 Munich, Germany, izvr silo je odobrenje EC tipa i CE identifikacijski broj je 0036.

C
Syen Eschrich
Max-Eyth-Straße 10, 71364 Winnenden, Germany

IZJAVA O SKLADNOSTI
Techtronic Industries GmbH
Max-Eyth-Straße 10, 71364 Winnenden, Germany
Izjavfamo, da je izdelek
Max-Eyth-Straße 10, 71364 Winnenden, Germany

DEKJIAPALINHA3A CBOTBETCTBNE
Techtronic Industries GmbH
Max-Eyth-Straße 10, 71364 Winnenden, Germany
C HactoIeTo DeKnappamE,Ye npOdyKTInTe
BeH3INHOBA Kocayka
Mapka: RYOBI
Home Ha Monda: RLM46160S
06xBaT Ha cepHnH Homepa: 46291801000001-46291801999999
OTROBAPRAHcneHNHTeDupeKTHBnHaECxapMOHN3npaHnCTaHdaptN
2006/42/EC, 2000/14/EC, 2005/88/EC, 2016/1628/EU, 2011/65/EU
2014/30/EU ,EN ISO 5395-1:2013+A1:2018, EN ISO 5395-2:2013
+A1:2016+A2:2017, EN ISO 14982:2009, EN 50581:2012
13MepeHo HMOHa 93,1dB (A)
TapaHTpaHn HnBO Ha Wm: 96 dB (A)
Metod 3a ouEHKa Ha CbOTBETCTBNEtO CbrrnACHO npnIOXeHHe VI Ha IInpeKTHBa 2000/14/EO, nI3MeHHeHa ot 2005/88/EO.
KOMNETHTHNIr opraH, TUV SUD Industrie Service GmbH; Geschäftsfeld Fordertechnik, Westendstraße 198, 80686 Munich, Germany, e npoben EK-Tinnoo OOBPENE, KATO CE UdHTMnPAKauONHMIr HOMe p 0036.

C
Sven Eschrich
Bnuepe3nEHTMaHnOCTpoHe" -OTdEn ,EnkTpoyeN 3a ynoTpe6a Ha oTKPto"Ha TTI
Oct. 30, 2018
YnbHOMOeHO Nue 3a CbCTABHe HaTexHHuecknФaIN
Alexander Krug, 336789010000000000000000000000000000000000000000000000
Techtronic Industries GmbH
Max-Eyth-Straße 10, 71364 Winnenden, Germany

PREHLASENIE O ZHODE
Techronic Industries GmbH
Max-Eyth-Straße 10, 71364 Winnenden, Germany
Tymlovylasujeme,zeVyrobok
Bencinska kosilnica
Znacka: RYOBI
Cislo modelu: RLM46160S
Rozsah seriovych csiel: 46291801000001-46291801999999
je v sulade s nasledujucimi Europskymi smernicami a harmonizovanymi nomami
2006/42/EC, 2000/14/EC, 2005/88/EC, 2016/1628/EU, 2011/65/EU,
2014/30/EU ,EN ISO 5395-1:2013+A1:2018, EN ISO 5395-2:2013
+A1:2016+A2:2017, EN ISO 14982:2009, EN 50581:2012
Namerana uroven hluku: 93,1 dB (A)
Garantovana uroven hluku: 96 dB (A)
Spóssob posudenia zhody podfa prilohy VI smrncie 2000/14/ES v znenizmien a doplnkov podfa smrncie 2005/88/ES.
Max-Eyth-Straße 10, 71364 Winnenden, Germany

DEKNAPALIPIPOBIIDHOIDHICTb
Techronic Industries GmbH
Max-Eyth-Straße 10, 71364 Winnenden, Germany
PnUbOMy M3aBbRcMo, 0 npOpoDyKT
BeH3n r3OHOKocapKa
Mapka: RYOBI
Homep moenl: RLM46160S
DianaoH cepiHoro Homepy:46291801000001-4629180199999
yBIDNOIBIOHOCI3 HACTYINHMMBCBPOENCLKMMDINDEKNTBAMM TARPMOHIOBAHMMCTAHNDAPTM
2006/42/EC, 2000/14/EC, 2005/88/EC, 2016/1628/EU, 2011/65/EU
2014/30/EU ,EN ISO 5395-1:2013+A1:2018, EN ISO 5395-2:2013
+A1:2016+A2:2017, EN ISO 14982:2009, EN 50581:2012
BmipAHPiBeH3ByKOBoi noTyKHOcti; 93,1 dB (A)
TapaHToBaHn pibEnb 3BykoBoi notyXhoCTi: 96 dB (A)
MeTod nepeBipKn BiDIOBIOHOCTI 3riHNO 3 DoaATKom VI DupeKTbN B 2000/14/EC 3 nonpaBAMN 2005/88/EC.
Alexander Krug, Kepyouch DnpekTop
Techtronic Industries GmbH
Max-Eyth-Straße 10, 71364 Winnenden, Germany

UYGUNLUK BEYANI
Techtronic Industries GmbH
Max-Eyth-Straße 10, 71364 Winnenden, Germany
Max-Eyth-Straße 10, 71364 Winnenden, Germany


EN RYOBI is a trademark of Ryobi Limited, and is used under license.
TORCH is a registered trademark of ZhuZhou Torch Spark Plug Company Limited.
NGK is a registered mark of NGK Spark Plug Co Limited.
TORCH e pernctpupaHa TbproBcKa Mapka Ha ZhuZhou Torch Spark Plug Company Limited.
NGK e pernctpnpaHa TbproBcKa Mapka Ha NGK SPARK PLUG CO., LTD.
UK RYOBI e ToBapHm 3HaKoM Ryobi Limited, i BnKOpncToByeTbcra 3a liueh3ieio.
TORCH-3apecctpobaHaToproBaMapkaZhuZhouTorchSparkPlugCompanyLimited.
NGK-3apeectpoBaHa ToproBa MapKa NGK SPARK PLUG CO.,LTD.
71364 Winnenden, Germany
099923317016-01