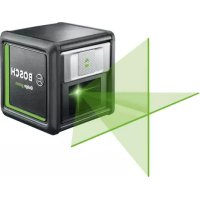
USER MANUAL Quigo Green BOSCH
www.bosch-pt.com/serviceaddresses
Disposal
All instructions must be read and observed in order for the measuring tool to function safely. The safeguards integrated into the measuring tool may be compromised if the measuring tool is not used in accordance with these instructions. Never make warning signs on the measuring tool unrecognisable. SAVE THESE INSTRUCTIONS FOR FUTURE REFERENCE AND INCLUDE THEM WITH THE MEASURING TOOL WHEN TRANSFERRING IT TO A THIRD PARTY.
SAVE THESE INSTRUCTIONS FOR FUTURE REFERENCE AND INCLUDE THEM WITH THE MEASURING TOOL WHEN TRANSFERRING IT TO A THIRD PARTY.
Warning! If operating or adjustment devices other than those specified here are used or other procedures are carried out, this can lead to dangerous exposure to radiation. The measuring tool is delivered with a laser warning sign (marked in the illustration of the measuring tool on the graphics page).
If the text of the laser warning label is not in your national language, stick the provided warning label in your national language over it before operating for the first time.

Do not direct the laser beam at persons or animals and do not stare into the direct or reflected laser beam yourself. You could blind somebody, cause accidents or damage your eyes.
If laser radiation hits your eye, you must close your eyes and immediately turn your head away from the beam. Do not make any modifications to the laser equipment. Do not use the laser goggles (accessory) as protective goggles. The laser goggles make the laser beam easier to see; they do not protect you against laser radiation. Do not use the laser goggles (accessory) as sunglasses or while driving. The laser goggles do not provide full UV protection and impair your ability to see colours. Have the measuring tool serviced only by a qualified specialist using only original replacement parts. This will ensure that the safety of the measuring tool is maintained. Do not let children use the laser measuring tool unsupervised. They could unintentionally blind themselves or other persons. Do not use the measuring tool in explosive atmospheres which contain flammable liquids, gases or dust. Sparks may be produced inside the measuring tool, which can ignite dust or fumes.

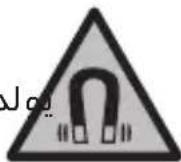
Keep the magnet away from implants and other medical devices, e.g. pacemakers or insulin pumps. The magnet generates a field that can impair the function of implants and medical devices.
- Keep the measuring tool away from magnetic storage media and magnetically-sensitive devices. The effect of the magnets can lead to irreversible data loss.
Product Description and Specifications
Please observe the illustrations at the beginning of this operating manual.
18 | English
Intended Use
The measuring tool is intended for determining and checking horizontal and vertical lines.
The measuring tool is suitable for indoor use.
Product features
The numbering of the product features shown refers to the illustration of the measuring tool on the graphic page.
(1) 1/4" mount of the adapter plate (2) Fine adjustment screw of the adapter plate (3) Adapter plate (4) On/off switch (5) Laser beam outlet aperture (6) Tripod a) (7) Laser viewing glasses a) (8) 1/4" tripod mount (9) Battery compartment cover (10) Laser warning label (11) Serial number (12) Battery compartment cover locking mechanism (13) 1/4" screw of the holder (14) Locking screw of the holder (15) Fastening screw of the holder (16) Holder
a) Accessories shown or described are not included with the product as standard. You can find the complete selection of accessories in our accessories range.
Technical data
| Cross line laser Quigo Green |
| Article number | 3 603 F63 C02 |
| Working range at leastA) | 12 m |
English | 19
Cross line laser Quigo Green
| Levelling accuracyB)C) | ±0.6 mm/m |
| Self-levelling range ±4° | |
| Levelling time ≤ 6 s | |
| Operating temperature -5 °C to +40 °C | |
| Storage temperature -20 °C to +70 °C | |
| Max. altitude 2000 m | |
| Relative air humidity max. 90 % | |
| Pollution degree according to IEC 61010-1 2 | D) |
| Laser class 2 | |
| Laser type 500-540 nm, < 5 mW | |
| C6 | 5 |
| Divergence 25 × 5 mrad (full angle) | |
| Tripod mount 1/4" | |
| Batteries 2 × 1.5 V LR3 (AAA) | |
| Operating time at leastB) | 3 h |
| Weight according to EPTA-Procedure 01:2014 | |
| - Cross line laser 0.27 kg | |
| - Holder 0.2 kg | |
| Dimensions (length × width × height) | 65 × 65 × 65 mm |
A) The working range may be reduced by unfavourable environmental conditions (e.g. direct sunlight). B) At 20-25°C C) The values stated presuppose normal to favourable environmental conditions (e.g. no vibration, no fog, no smoke, no direct sunlight). Extreme fluctuations in temperature can cause deviations in accuracy. D) Only non-conductive deposits occur, whereby occasional temporary conductivity caused by condensation is expected.
The serial number (11) on the type plate is used to clearly identify your measuring tool.
20 | English
Assembly
Inserting/changing the batteries
It is recommended that you use alkaline manganese batteries to operate the measuring tool.
Push the locking mechanism (12) in the direction of the arrow to open the battery compartment cover (9) and remove the battery compartment cover. Insert the batteries supplied.
When inserting the batteries, ensure that the polarity is correct according to the illustration on the inside of the battery compartment.
If the batteries become weak, the laser lines will flash quickly for a few seconds.
Always replace all the batteries at the same time. Only use batteries from the same manufacturer and which have the same capacity.
Take the batteries out of the measuring tool when you are not using it for a prolonged period of time. The batteries can corrode and self-discharge during prolonged storage in the measuring tool.
Operation
Starting Operation
Protect the measuring tool from moisture and direct sunlight. Do not expose the measuring tool to any extreme temperatures or variations in temperature. For example, do not leave it in a car for extended periods of time. In case of large variations in temperature, allow the measuring tool to adjust to the ambient temperature before putting it into operation. The precision of the measuring tool may be compromised if exposed to extreme temperatures or variations in temperature. Avoid substantial knocks to the measuring tool and avoid dropping it. Damaging the measuring tool can cause accuracy to be compromised. If the laser line is subjected to a substantial knock or is dropped, check it by comparing it to a known horizontal or vertical reference line. Switch the measuring tool off when transporting it. The pendulum unit is locked when the tool is switched off, as it can otherwise be damaged by big movements.
Switching on/off
To switch on the measuring tool, push the on/off switch (4) up. Immediately after switching on, the measuring tool sends two laser lines out of the outlet aperture (5).
To switch off the measuring tool, push the on/off switch (4) downward over the laser beam outlet aperture (5).
Never leave the measuring tool unattended when switched on, and ensure the measuring tool is switched off after use. Others may be blinded by the laser beam.
Automatic levelling
Position the measuring tool on a level, firm surface or attach it to the holder (16) or the tripod (6). To work with automatic levelling, the underside of the measuring tool needs to be horizontal and aligned with the tripod mount (8) facing down. After switching on, the automatic levelling function automatically compensates irregularities within the self-levelling range of ±4°. The levelling is finished as soon as the laser lines stop flashing.
If automatic levelling is not possible, e.g. because the underside of the measuring tool deviates by more than 4° from the horizontal plane or the measuring tool is held freely in the hand, the laser lines will continuously flash slowly and the measuring tool will work without automatic levelling. The laser lines remain switched on, but the two intersecting lines will no longer necessarily be perpendicular to each other. To make sure that the two laser lines are still perpendicular to one another, position the measuring tool at an angle of 90° to the wall.
In case of ground vibrations or position changes during operation, the measuring tool is automatically levelled again. Upon re-levelling, check the position of the horizontal or vertical laser line with regard to the reference points to avoid errors by moving the measuring tool.
Working Advice
Only the centre of the laser line must be used for marking. The width of the laser line changes depending on the distance.
Using the holder (16), you can attach the measuring tool to various objects up to 10 to 60 mm thick, e.g. to vertical or horizontal boards or pipes.
Loosen the fastening screw (15) of the holder, position the holder in the desired location and retighten the fastening screw.
Place the measuring tool with the tripod mount (8) on the 1/4" screw (13) of the holder and tighten it to secure it on the holder applying moderate force. Do not tighten the measuring tool firmly as this could cause damage.
Roughly align the holder before switching on the measuring tool. To do this, loosen the locking screw (14). Move the measuring tool into a horizontal position at the required height (with the tripod mount (8) facing down).
Retighten the locking screw.
You can also mount the measuring tool on the holder using the adapter plate (3).
Working with the Tripod (Accessory)
A tripod offers a stable, height-adjustable support surface for measuring.
Place the measuring tool with the 1/4 tripod mount (8) on the thread of the tripod (6) or a conventional camera tripod. Tighten the measuring tool using the locking screw of the tripod.
Roughly align the tripod before switching on the measuring tool.
You can also mount the measuring tool on the tripod using the adapter plate (3).
The adapter plate (3) makes it easier to accurately align the measuring tool with a reference point and enables you to quickly attach and detach the measuring tool.
The adapter plate (3) can be mounted on the holder (16) or tripod (6).
- Holder: Place the adapter plate with the 1/4'' mount (1) on the screw (13) of the holder and tighten it to secure it on the holder applying moderate force.
Note: Loosen the locking screw (14) of the holder if you want to change the position of the measuring tool. If the adapter plate is turned without loosening the locking screw, the adapter plate can become loose and the measuring tool can fall off.
- Tripod: Tighten the locking screw of the tripod in the 1/4" mount (1) of the adapter plate.
Press the measuring tool into the adapter plate (3) so that the locking mechanisms of the adapter plate engage in the holes on two sides of the measuring tool.
The adapter plate can be fastened to the bottom, back and top side of the measuring tool.
Check that the measuring tool is firmly secured.
When the adapter plate is mounted on the back, the height of the measuring tool can be aligned. When it is mounted on the top or bottom, the measuring tool can be aligned sideways. Turn the fine adjustment screw (2) of the adapter plate to align the laser line with a reference point.
Laser Goggles (Accessory)
The laser goggles filter out ambient light. This makes the light of the laser appear brighter to the eye.
Maintenance and Service
Maintenance and Cleaning
Keep the measuring tool clean at all times.
Never immerse the measuring tool in water or other liquids.
Wipe off any dirt using a damp, soft cloth. Do not use any detergents or solvents.
The areas around the outlet aperture of the laser in particular should be cleaned on a regular basis. Make sure to check for lint when doing this.
After-Sales Service and Application Service
Our after-sales service responds to your questions concerning maintenance and repair of your product as well as spare parts. You can find explosion drawings and information on spare parts at: www.bosch-pt.com
The Bosch product use advice team will be happy to help you with any questions about our products and their accessories.
In all correspondence and spare parts orders, please always include the 10-digit article number given on the nameplate of the product.
Great Britain
Robert Bosch Ltd. (B.S.C.)
P.O. Box 98
Broadwater Park
North Orbital Road
Denham Uxbridge
UB 9HJ
At www.bosch-pt.co.uk you can order spare parts or arrange the collection of a product in need of servicing or repair.
Tel. Service: (0344) 7360109
E-Mail: boschservicecentre@bosch.com
You can find further service addresses at:
www.bosch-pt.com/serviceaddresses
Disposal
Measuring tools, accessories and packaging should be recycled in an environmentally friendly manner.

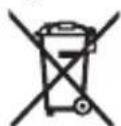
Do not dispose of measuring tools or batteries with household waste.
Only for EU countries:
According to Directive 2012/19/EU, measuring tools that are no longer usable, and according to Directive 2006/66/EC, defective or used battery packs/batteries, must be collected separately and disposed of in an environmentally correct manner.
French
www.bosch-pt.com/serviceaddresses
www.bosch-pt.com/serviceaddresses
Disposal
www.bosch-pt.com/serviceaddresses
Disposal
www.bosch-pt.com/serviceaddresses
Disposal
www.bosch-pt.com/serviceaddresses
Waste disposal
Bosch Service Center
Telegrafvej 3
2750 Ballerup
Spare parts can be ordered online at www.bosch-pt.dk, or a repair order can be created.
Tel. Service Center: 44898855
Fax: 44898755
E-Mail: vaerktoej@dk.bosch.com
www.bosch-pt.com/serviceaddresses
Disposal
Bosch Service Center
Telegrafvej 3
2750 Ballerup
Denmark
Tel.: (08) 7501820 (within Sweden)
Fax: (011) 187691
You can find more contact details for service here:
www.bosch-pt.com/serviceaddresses
Waste management
Disposal
Disposal
Disposal
Power tools, accessories and packaging should be recycled in an environmentally friendly manner.

Do not dispose of power tools and batteries in household waste!
For EU countries only:
Disposal
Robert Bosch Sp. z o.o.
Waste disposal
Bosch Service Center PT
K Vapence 1621/16
69201 Mikulov
On www.bosch-pt.cz you can order the repair of your machine or spare parts online.
www.bosch-pt.com/serviceaddresses
Disposal
www.bosch-pt.com/serviceaddresses
144 | Magyar
Disposal
www.bosch-pt.com/serviceaddresses
Waste treatment
For battery packs
Do not place the magnet near pacemakers and other medical devices, e.g., defibrillators or insulin pumps. The magnet creates a field that can affect the operation of pacemakers and medical devices.
Keep the measuring tool away from magnetic data carriers and devices sensitive to magnetic fields. The effect of magnets can lead to irreversible data loss.
Product description and services
Attention, observez les illustrations au début du manuel d'utilisation.
Niveau laser Quigo Green
Dimensions (longueur x largeur x hauteur) 65x65x65 mm
A) La plage de travail peut diminuer en raison de conditions environnementales défavorables (par exemple, lumière directe du soleil). B) à 20-25°C C) Pour les valeurs indiquées, les conditions environnementales doivent être dans la plage allant de normales à favorables (par exemple, absence de vibrations, absence de brouillard, absence de fumée, absence de lumière directe du soleil). Après de fortes variations de température, des écarts de précision sont possibles. D) Il y a généralement seulement une contamination non conductrice. Cependant, en règle générale, une conductivité temporaire survient, causée par la condensation.
L'identification univoque de l'instrument de mesure est possible par le numéro de série (11) sur la plaque signalétique.
Assemblage
Insertion/remplacement des piles
Dans l'instrument de mesure, il est recommandé d'utiliser des piles alcalines au manganèse.
Pour ouvrir le couvercle du compartiment à piles (9), appuyez sur le verrou (12) dans le sens de la flèche et retirez le couvercle du compartiment à piles. Insérez les piles fournies avec l'instrument.
Veillez à respecter la polarité correcte conformément à l'illustration à l'intérieur du compartiment à piles.
Si les piles sont faibles, elles clignotent rapidement pendant quelques secondes.
Remplacez toutes les piles en même temps. Utilisez uniquement des piles du même fabricant et de même capacité.
Retirez les piles de l'instrument de mesure si vous ne l'utilisez pas pendant une période prolongée. En cas de stockage prolongé dans l'instrument de mesure, une corrosion et une autodécharge des piles sont possibles.
Utilisation de l'instrument
Mise en marche de l'instrument
Protect the measuring instrument from moisture and direct sunlight. Do not expose the measuring instrument to extreme temperatures or temperature fluctuations. For example, do not leave it in a car for a long time. With significant temperature fluctuations or changes, allow the temperature of the measuring instrument to stabilize. Extreme temperatures or temperature fluctuations can adversely affect the accuracy of the measuring instrument. Avoid strong impacts or drops of the measuring instrument. Damage to the measuring instrument can affect its accuracy. After a strong impact or drop, check the laser line against a known horizontal or vertical reference line. When transporting, switch off the measuring instrument. When switched off, the pendulum mechanism is locked, which can be damaged during strong movements.
Switching On/Off
To switch on the electronic measuring instrument, slide the switch (4) upwards. Immediately after switching on, the measuring instrument emits two laser lines from the laser outlet opening (5). To switch off the measuring instrument, slide the switch (4) downwards so that it is over the laser outlet opening (5). Do not leave the measuring instrument unattended and switch off the measuring instrument after use. Other persons may be blinded by the laser beam.
Automatic Levelling
Place the measuring instrument on a firm horizontal surface or fix it on the holder (16) or on the tripod (6). For working with the automatic levelling system, the lower part of the measuring instrument must be horizontal, and the thread
of the tripod (8) must be directed downwards. After switching on, the automatic levelling function compensates for unevenness within the self-levelling range of ±4°. Levelling is complete as soon as the laser lines stop blinking.
If automatic levelling is not possible, for example because the lower side of the measuring instrument is tilted more than 4° from horizontal, or because the measuring instrument is held freely in the hand, the laser lines blink slowly and the measuring instrument works without the automatic levelling function. The laser lines blink slowly and the measuring instrument works without being switched on, but the two crossing lines do not necessarily have to be at right angles to each other. To check the perpendicularity of the two laser lines to each other, place the measuring instrument at a right angle to a wall.
During vibrations or changes in position during operation, the measuring instrument automatically self-levels. After repeated levelling, check the position of the horizontal or vertical laser line relative to reference points to prevent errors due to displacement of the measuring instrument.
Application Instructions
Always use only the center of the laser line for marking. The width of the laser line changes with distance.
Fixation using the mounting bracket (see Fig. A)
The holder (16) allows you to mount the measuring tool on objects with a thickness of 10 to 60 mm, for example, on vertical or horizontal boards or pipes.
Loosen the clamping screw (15) of the holder, place the holder in the desired position, and retighten the clamping screw.
Insert the measuring tool with the mounting hole (8) onto the 1/4" screw (13) of the holder and tighten it with moderate force. Do not overtighten the measuring tool, as you may damage it.
Roughly align the holder before switching on the measuring tool. To do this, loosen the adjustment screw (14) of the holder. Set the measuring tool to the required height in the vertical
162|Russian
horizontal position (thread of the mounting hole (8) facing down). Retighten the adjustment screw firmly.
www.bosch-pt.com/serviceaddresses
Disposal
Measuring tools, accessories, and packaging should be sorted for environmentally friendly recycling.

Do not dispose of measuring tools and batteries in household waste!
Only for EU countries:
According to the European Directive 2012/19/EU, measuring tools that are no longer usable, and according to the European Directive 2006/66/EC, defective or exhausted battery packs/batteries must be collected separately and disposed of in an environmentally correct manner.
Kazakh
Eurasian Economic Union (EAEU) conformity mark
This device is intended for use in the household and similar applications, such as in staff kitchens in shops, offices, and other working environments.
Do not use it outdoors.
The device must be connected to a power supply of the same voltage as indicated on the rating plate and in the manual.
The device must be connected to a power supply with the voltage indicated on the rating plate and in the manual.
The device must be connected to a power supply of the same voltage as indicated on the rating plate.
The device must be connected to the specified voltage.
The device must be used for 7 hours. After the specified period, starting from the date of manufacture (indicated on the rating plate), the device must be checked for safe operation.
The device must be used only for its intended purpose, as described in the manual.
If the device is dropped or damaged, do not use it. If the power cord is damaged, it must be replaced by the manufacturer, its service agent, or a similarly qualified person to avoid a hazard.
Important safety instructions
Do not immerse the device in water.
Intended use and restrictions
The device must be used only for its intended purpose.
Storage
Store in a dry place. Keep away from high temperatures and direct sunlight. Protect from temperature fluctuations.
Repair of the device must be carried out in accordance with the requirements of GOST 15150-69 (part 1) and the manufacturer's instructions.
Operation
- During operation, it is necessary to follow the rules for safe maintenance and repair of the device, as well as the instructions for packaging and transportation of the equipment.
- Operating conditions must comply with GOST 15150-69 (part 5).
Safety instructions

To ensure safe and correct operation, all instructions must be read and followed. Failure to follow the instructions in this manual may result in unsafe conditions.
Do not skip the instructions in this manual. Follow them strictly, as they are provided for your safety.
Be careful - if the instructions or adjustments given here are not followed, or if other work is performed, this may lead to dangerous situations. The instructions must be followed exactly as described in the manual. If the instructions are not clear, contact the manufacturer for clarification before use.

Do not point the laser at people or animals, and do not look directly into the laser beam. The laser can cause eye damage, and exposure to the beam can be harmful.
176|Kazakh
If the laser beam enters the eye, immediately look away from the beam. Do not look directly into the laser. Use protective goggles (if necessary) to protect your eyes. Protective goggles are used to protect against the laser beam, but they do not provide complete protection. Use protective goggles (if necessary) to protect your eyes from the beam or from reflected light.
Protective goggles should be used to protect the eyes from the laser beam and to reduce the risk of injury.
The device should only be used by trained personnel. The device is not safe for use by children. Do not allow children to use the device without supervision. They may accidentally injure themselves or others. Do not use the device in areas with flammable liquids, gases, or dust. The device may produce sparks, heat, or fire.
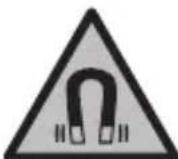
Magnetic implants, pacemakers, or other medical devices may be affected by the device.
Keep the device away from magnetic implants or medical devices that may be affected by the magnetic field.
The magnetic field can be used to detect the direction of the magnetic field lines and the magnetic field strength. The magnetic field can be used to detect the direction of the magnetic field lines and the magnetic field strength.
The magnetic field and current direction
The device is not suitable for use in the presence of flammable gases.
Do not use in the presence of flammable gases.
The device is intended for use in dry and wet conditions.
The device is not intended for use in the presence of flammable gases.
Bosch Power Tools, 7 kabat
Tel.: +7 (727) 331 3100
Fax: +7 (727) 2330787
E-Mail: ptka@bosch.com
Service and repair centers and pick-up points
You can find the service and repair centers and pick-up points at:
www.bosch-professional.kz
For more information on service centers and repair centers, please visit:
www.bosch-pt.com/serviceaddresses
Kedere Kapaty
OJIwe KypaBbH, OHbIH Jka6DbIKTapbI MeH KaNTaMaCbIH KopUaFaH opTaHbI KOpFaNtBbH Kdere Jkapaty OPhBaHa TaNCbipy KaKeT.
Kniwey KypanapbH He 6atapeaapdbI yKOKbcibaTaTamaHb3!
184 | Roman
Tek kaHa EO endepi ysiH:
Eypona 2012/19/EU epexeci 6oynbHwa kapaMcbI3 eJlwey KypaIapbl XHe Eypona 2006/66/EC epexeci 6oynbHwa 3aKbIMdaIFaH Hemece ecki aKKymyIaTOp/6atapeennap 6eNEK XHaIbIn Kdere JkapaTbIybl KaKeT.
Româna
Instruţiuni de siguranta

Service scule electrice
Strada Horia Macelariu Nr. 30-34, sector 1
013937 Bucuresti
www.bosch-pt.com/serviceaddresses
Eliminarea
Ia3epen HnBennp c Kpbctoo6pa3eH nbq Quigo Green
| OTHOCHTENHa BλαχNOCT MaKc. 90% | |
| Стени на замberсане сблесно
IEC 61010-1 | 2D) |
| Клас пазер 2 | |
| Тип пазер 500-540 nm, < 5 mW | |
| C6 | 5 |
| Ди�ергенья 25 × 5 mrad (плен bгел) | |
| Посравka за станВ 1/4" | |
| Бастени 2 × 1,5 V LR3 (AAA) | |
| Работна подьжителноct минимумВ | 3h |
| Маса сбласно EPTA-Procedure 01:2014 | |
| - Пазерен Нвелорс крвстообразен льч 0,27 kg | |
| - Стойа 0,2 kg | |
| Размери (дьлжина × Шерпina × Височina) 65 × 65 × 65 mm | |
A) Ipn He6naorponprrn yCIOBn (Hanp. HenocpeDCTBeHN CbHueBn Ibun) pa6oTHnIy dHaana3OH MOKe Ja e NO-MaJIbK. B) npn 20-25°C C) NocoueHnTe cToHocTH npeDnonarat HopMaHn Do 6naRopnTn ycNoBnHa OKoHnTa CpeDa (HaNP. 6e3 Bn6paun, 6e3 Mbra, 6e3 dM, 6e3 dIpeKTHO cnbHueBO nbueHne). Cnei CNHn TemnepaTyprn KOeBaHn MoKe Da ce CTnrHe DO OTKHOHEHn B TOUHOCTTA. D) Иma cAmO He npoBOJMo 3aMbpcBaHe, npi KoTo o6aue e Bb3MoKho da ce ouakBa BpeMeHHO npuHHeHa npoBOJMOCT nopadN KOHdeH3.
The device is calibrated at the factory. The serial number (11) is on the device label.
Mounting
Battery use/replacement
To protect the measuring device, the use of alkaline-manganese batteries is recommended.
To open the battery compartment cover (9), press the button (12) in the direction indicated by the arrow and pull the cover. Insert the batteries supplied in the kit.
Pay attention to the correct polarity, shown in the figure on the inside of the battery compartment.
If the batteries are exhausted, the laser line will flash quickly for a few seconds.
Replace all batteries at the same time. Use only batteries of the same type and from the same manufacturer, with the same capacity.
If the instrument is not used for a long time, remove the batteries from it. During prolonged storage, the batteries in the measuring instrument may corrode and discharge themselves.
Operation
Turning on/off
Protect the measuring tool from impacts and direct sunlight. Do not expose the measuring tool to extreme temperatures or sudden temperature changes. For example, do not leave it in a car for a long time. In case of large temperature differences, let the measuring tool adjust to the ambient temperature before switching it on. In case of extreme temperatures or large temperature differences, the accuracy of the measuring tool may be affected. Avoid strong impacts or drops of the measuring tool. Damage to the measuring tool may affect its accuracy. After strong impacts or drops, check the laser line against a known reference horizontal or vertical line. When transporting the tool, switch it off beforehand. When switching off, the pendulum unit locks, but it may be damaged during strong impacts.
Switching on/off
To switch on the measuring tool, press the on/off button (4) once. After switching on, the measuring tool emits a laser line through the opening (5). To switch off the measuring tool, press the on/off button (4) again towards the laser beam exit opening (5).
The octagonal type Bknoyeh 6e3 na3op; before turning on the device, read the safety instructions. The hands may be protected from the laser.
Automatic leveling
Place the measuring tool on a horizontal, even base, attach it to the stand (16) or the tripod (6). For working with the automatic leveling, the rear side of the measuring tool must be horizontal and aligned with the supply for the stand (8). After switching on, the automatic leveling compensates for unevenness in the self-leveling range of ±4° automatically. When the laser lines stop moving, the leveling process is finished.
If automatic leveling is not possible, e.g., because the measuring tool is tilted more than ±4° from the horizontal, press the button on the measuring tool, the laser lines will start to flash slowly. The measuring tool then works without automatic leveling. The laser lines remain switched on, but the two cross lines are not necessarily perpendicular to each other. To ensure that the two laser lines are perpendicular to each other, place the measuring tool perpendicular to the wall.
If the position changes during operation, the measuring tool levels itself again automatically. After repeated leveling, check the positions of the horizontal and vertical laser lines against the reference points to avoid errors due to displacement of the measuring tool.
Working instructions
Mark the center of the laser line. The width of the laser line changes with distance.
Fastening with the stand (see figure A)
With the stand (16), you can attach the measuring tool to various parts with a thickness of 10 to 60 mm, e.g., to vertical or horizontal pipes or tubes.
Loosen the locking screw (15) on the stand, place the stand in the desired position, and retighten the locking screw.
Place the measuring tool with the supply for the stand (8) onto the 1/4" screw (13) of the stand and tighten the clamping force on the stand. Do not
tighten the measuring tool too firmly, otherwise it may be damaged.
Before switching on the measuring tool, roughly align the stand. For now, loosen the fixing screw (14) on the stand. Move the measuring tool to the desired height horizontally (with the supply for the stand (8) as needed). Retighten the locking screw.
You can also attach the measuring tool to the adapter plate (3) on the stand.
Working with the tripod (accessory)
Place the base of the laser level on a stable, height-adjustable mounting. Install the laser level with the 1/4" mount (8) on the supplied screw on the base (6) or on a standard tripod. Tighten the laser level with the screw on the base.
Before turning on the laser level, roughly level the base.
You can mount the laser level on the base with the adapter plate (3).
Working with the adapter plate (see fig. B-C)
The adapter plate (3) enables precise leveling of the laser level using a reference point and allows quick setup and removal of the laser level.
The adapter plate (3) can be attached to the bracket (16) or the base (6).
- Stand: Place the adapter plate with the 1/4" mount (1) on the screw (13) of the stand and tighten it with moderate force.
Note: If you want to change the position of the laser level, loosen the screw (14) on the bracket. When tightening the adapter plate without loosening the screw, the plate may tilt and the laser level may fall.
- Base: Tighten the fixing screw of the base into the 1/4" mount (1) of the adapter plate.
Attach the laser level to the adapter plate (3) so that the tabs of the adapter plate fit with a click into the corresponding recesses on both sides of the laser level. The adapter plate
can be attached to the bottom, rear, or top side of the laser level.
Make sure the laser level is attached correctly.
When attaching the adapter plate to the rear side of the laser level, it can be adjusted in height; when attaching to the top or bottom side, it can be adjusted laterally. To align the laser line precisely with the reference point, use the fine adjustment screw (2) on the adapter plate.
Laser viewing glasses (accessory)
Observe the laser beam at the laser outlet. The laser outlet is marked with a warning label.
Maintenance and service
Maintenance and cleaning
Maintain the measuring tool and the measuring tool case.
Do not immerse the measuring tool in water or other liquids.
Dispose of the batteries with a cloth, if the casing is damaged. Do not use cleaning agents or solvents.
Clean the outlet of the laser regularly with a special surface to avoid leaving fingerprints.
Customer service and application consulting
The service department will answer your questions regarding repairs and maintenance of your purchased product, as well as regarding spare parts. You will find the component drawings and information for spare parts at:
The Bosch application consulting team will be happy to help you with any questions about our products and their accessories.
Please, for questions and when ordering spare parts, quote the 10-digit order number printed on the type plate of the tool.
Bulgaria
Robert Bosch SRL
Service power tools
Strada Horia Macelariu Nr. 30-34, sector 1
013937 Bucharest, Romania
Tel.: +359(0)700 13667 (Bulgarian)
Fax: +40 212 331 313
Email: BoschServiceCenterBG@ro.bosch.com
www.bosch-pt.com/bg/bg/
Other service centers can be found at:
www.bosch-pt.com/serviceaddresses
Disposal
Measuring tools, accessories, and packaging should be recycled in an environmentally friendly manner.
Do not dispose of measuring tools and batteries with household waste!
Only for EU countries:
According to European Directive 2012/19/EC, measuring tools that can no longer be used, and according to European Directive 2006/66/EC, defective or exhausted batteries must be collected separately and handed in for environmentally correct recycling.
Macedonian
Safety instructions

Read these instructions carefully and follow them so that you can work safely and without danger with the measuring device. If the measuring device is not used in accordance with the instructions, the protective functions may be impaired.
The mechanism in the measuring device. Do not ignore the warnings. Always follow these instructions and use them together with the measuring device.
Caution - if you use other accessories, such as tripods or stands, other than those listed here, this may lead to dangerous exposure to radiation. The measuring device is marked with a laser warning label (shown on the graphic page). If the text on the laser warning label is not in your language, stick the label in your language over it before first use.

Do not point the laser beam at people or animals, and do not look into the direct or reflected laser beam yourself. This can blind people, cause accidents, or damage their eyes.
If the laser beam hits your eyes, close them and turn your head away from the laser beam. Do not make any changes to the laser device. Do not use laser goggles (additional equipment) as protective goggles. Laser goggles are used for better detection of the laser beam; however, they do not protect against laser radiation. Do not use laser goggles (additional equipment) as sunglasses or in traffic. Laser goggles do not provide full UV protection and reduce color recognition. The measuring device may only be repaired by a qualified specialist and only with original spare parts. Only then will the safety of the measuring device be maintained. Do not leave children to use the laser measuring device without supervision. Without supervision, they could injure themselves or others. Do not work with the measuring device in environments where there is a risk of explosion, where there are flammable gases, or in damp or dusty conditions. The measuring device creates sparks that could ignite gases or dust.

Do not place the magnet near implants or other medical devices, e.g., pacemakers or insulin pumps. The magnet creates a field that could impair the function of implants or medical devices.
Keep the measuring device away from magnetic data carriers and magnetically sensitive devices. Due to the strong magnet, data may be irreversibly lost.
Laser with green line
Dimensions (length × width × height) 65 × 65 × 65 mm
A) The working field may be limited under unfavorable environmental conditions (e.g., direct sunlight). B) at 20-25°C C) The given values assume normal environmental conditions (e.g., no vibration, no dust, no moisture, no direct sunlight). At extreme temperatures, deviations in accuracy may occur. D) Non-conductive impurities may occur, but timely conductivity is expected due to condensation.
Check the product (11) against the specification and the service area to identify your measuring device.
Installation
Inserting/replacing the battery
For working with the measuring device, the use of alkaline batteries is recommended.
To open the battery compartment cover (9), press the locking mechanism (12) in the direction of the arrow and lift the cover of the battery compartment. Insert the batteries according to the polarity.
Insert the batteries according to the polarity shown on the inside of the battery compartment.
When the batteries are low, the laser lines blink quickly.
Always replace all batteries at once. Use only batteries from the same manufacturer and with the same capacity.
If you do not use the measuring device for a long time, remove the batteries. During prolonged storage in the measuring device, the batteries may corrode and discharge themselves.
Operation
Starting operation
Protect the measuring device from moisture and direct sunlight.
Do not expose the measuring device to extreme temperatures or temperature fluctuations. For example, do not leave it in a car for a long time. In case of large temperature fluctuations, allow the measuring device to acclimate before putting it into operation. In case of extreme temperatures or temperature fluctuations, the accuracy of the measuring device may be impaired. Avoid impacts and dropping of the measuring device. After strong impact on the measuring device, the accuracy may be impaired. Check the laser lines against the known horizontal or vertical reference line. Switch off the measuring device during transport. When switching off, the pendulum unit is locked, which would otherwise be damaged during intense movement.
Switching on/off
To switch on the measuring device, press the on/off switch (4) upwards. After switching on, the measuring device immediately emits laser lines from the laser outlet (5). To switch off the measuring device, press the on/off switch (4) downwards. Do not leave the measuring device switched on unattended and switch it off after use. Other persons may be blinded by the laser beam.
Place the measuring tool in a horizontal position on the floor or attach it to the holder (16) or the tripod (6). To work with the self-leveling function, the measuring tool must be placed horizontally and the tripod (8) must be aligned vertically. After switching on, the self-leveling function automatically compensates for irregularities within the self-leveling range of ±4°. Leveling is complete when the laser lines stop moving. If automatic leveling is not possible, e.g. because the floor on which the measuring tool is placed is more than 4° from horizontal, or the measuring tool is held freely in the hand, the laser lines will blink rapidly and the measuring tool will operate without the self-leveling function. The laser lines remain switched on, and the two vertical
lines must be at right angles to each other. To ensure that the two laser lines are at right angles to each other, align the measuring tool orthogonally to the wall.
When the working position is changed or the working time is changed, the measuring tool levels itself again automatically. After re-leveling, check the position of the horizontal laser line against the reference points to avoid errors in positioning the measuring tool.
Working Advice
For marking, always use the center of the laser line. The width of the laser line changes with the distance.
Attaching with the holder (see figure A)
With the holder (16), you can attach the measuring tool to various objects with a thickness of 10 to 60 mm, e.g. to vertical or horizontal pipes or tubes.
Loosen the attachment screws (15) of the holder, place the holder on the desired location, and then retighten the attachment screws.
Place the measuring tool with the tripod mount (8) on the 1/4" screw (13) of the holder and tighten it with moderate force on the holder. Do not overtighten the measuring tool, as it may be damaged.
Roughly center the holder before switching on the measuring tool. To do this, loosen the locking screw (14) of the holder. Move the measuring tool to the desired height in a horizontal position (with the tripod mount (8) facing down). Retighten the locking screw.
You can also attach the measuring tool to the holder with the adapter plate (3).
Working with the tripod (accessory)
The tripod provides a stable measuring surface that can be adjusted in height. Place the measuring tool with the 1/4" mount on the tripod (8) on the thread of the tripod (6) or on a commercially available tripod. Secure the measuring tool with the locking screw of the tripod.
Roughly center the tripod before switching on the measuring tool.
The adapter can be attached to the stand or to the tripod (3).
Working with the adapter (see figures B-C)
The adapter (3) enables precise alignment of the measuring tool and allows for quick positioning and adjustment of the measuring tool.
The adapter (3) can be attached to the holder (16) or to the tripod (6).
-Holder: Screw the adapter with the 1/4" thread (1) onto the locking screw (13) of the holder and tighten it with moderate force. Note: Loosen the locking screw (14) of the holder if you want to change the position of the measuring tool. When turning the adapter without loosening the locking screw, the adapter may loosen and the measuring tool may fall.
- Tripod: Tighten the locking screw for the tripod with the 1/4" thread (1) on the adapter.
Insert the measuring tool into the adapter (3) so that the locking mechanisms of the adapter engage in the openings on both sides of the measuring tool. The adapter can be attached to the bottom or the top side of the measuring tool.
Check that the measuring tool is stable.
When mounting the adapter on the top side, the measuring tool in height may be off-center when mounting on the top or bottom side. Turn the adjusting screw (2) on the adapter to center the laser line of the reference point.
Laser safety goggles (accessory)
Laser safety goggles filter out ambient light. In this light, the laser beam appears brighter to the eye.
Maintenance and service
Maintenance and cleaning
Always keep the measuring tool clean.
Do not immerse the measuring tool in water or other liquids.
Clean the device with a damp cloth. Do not use cleaning agents or solvents.
The ventilation slots should be cleaned regularly to ensure proper air circulation.
After-sales service and advice on use
Our after-sales service will answer your questions regarding maintenance and repair of your product as well as spare parts. You can find exploded views and information on spare parts at: www.bosch-pt.com
The Bosch advice team will be happy to help you if you have any questions about our products.
For all spare parts and accessories, you can refer to the 10-digit number on the product's specification plate.
North Macedonia
D.D. Eniktis
CabaKovayek 47b, no. 3
1000 Skopje
E-mail: dimce.dimcev@servis-bosch.mk
Internet: www.servis-bosch.mk
Tel./fax: 02/2467610
Mobile: 070 595 888
D.P.T.U. "RODKA"
1000 Skopje
E-mail: servisrojka@yahoo.com
Tel: +38923174-303
Mob: +389 70 388-520, -530
Additional service address can be found at:
www.bosch-pt.com/serviceaddresses
Disposal
Measuring tools, accessories and packaging should be sorted for environmental-friendly recycling.
210 | Serbian

Do not dispose of measuring tools and batteries in household waste!
Only for EU countries:
According to the European Directive 2012/19/EU, measuring tools that are no longer usable, and according to the Directive 2006/66/EC, defective or used batteries must be collected separately and recycled for reuse.
Serbian
www.bosch-pt.com/serviceaddresses
Removal of debris
Measuring tools, accessories, and packaging should be included in recycling that is appropriate for environmental protection.
www.bosch-pt.com/serviceaddresses
Disposal
Dispose of measuring tools, accessories, and packaging in an environmentally friendly recycling process.

www.bosch-pt.com/serviceaddresses
Disposal
Measuring tools, accessories, and packaging should be taken for environmentally acceptable recycling.
Do not dispose of measuring tools and batteries in household waste!
Only for EU countries:
According to the European Directive 2012/19/EU, measuring tools that are no longer usable, and according to the European Directive 2006/66/EC, defective or exhausted batteries must be collected separately and taken for environmentally acceptable recycling.
Estonian
Safety instructions

www.bosch-pt.com/serviceaddresses
Waste management
Laser safety glasses (accessory)
Laser safety glasses have the property of blocking ambient light, making the laser beam appear brighter to the eyes.
www.bosch-pt.com/serviceaddresses
Disposal of worn-out products
Worn-out measuring tools, their accessories, and packaging materials must be recycled in an environmentally friendly manner.
250 | Lithuanian

Do not dispose of the measuring tool and batteries in household waste!
Only for EU countries.
www.bosch-pt.com/serviceaddresses
Cooling

(a ρalgalllallol (6) .
(a _ j U a _ j g _ j o _ j j) (7)
ρlgglllllllllll 1 (8) dog
Ü _ j [U _ j amp; U _ j amp; U _ j amp; U _ j ] = U _ j 9
jj _ 1 µ_ 2 a a g × (1 0)
Ü _ ijkl lambdajslucjd 12
. . 15
ol _ Δ (1 6)
__SUPPIMER__

Robert Bosch Morocco SARL
www.bosch-pt.com/serviceaddresses
.
267
2012/19/EU and 2006/66/EC


www.bosch-pt.com
10.
www.bosch-pt.com/serviceaddresses