
GML 50 Professional - Radio BOSCH - Free user manual and instructions
Find the device manual for free GML 50 Professional BOSCH in PDF.
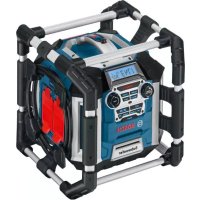


| Product type | Radio charger |
| Brand | Bosch |
| Model | GML 50 Professional |
| Power supply | Mains 230 V/110 V or Li-Ion battery 14.4–18 V |
| Amplifier power (on mains) | 50 W |
| Weight | 11.2 kg |
| Protection rating | IP54 (dust-proof and splash-proof) |
| Charging temperature | 0 to 45 °C |
| Operating temperature | 0 to 45 °C |
| Storage temperature | -20 to 50 °C |
| Radio bands | FM (87.5–108 MHz) and AM (531–1602 kHz) |
| Supported audio formats | MP3, WMA |
| Battery charging voltage | 14.4–18 V |
| Charging current | 0.9 A |
| Charging time (1.3 Ah battery) | Approx. 120 min |
| Charging time (4.0 Ah battery) | Approx. 400 min |
| Audio ports | AUX1 (3.5 mm external), AUX2 (3.5 mm internal), USB, SD/MMC, LINE OUT |
| 12 V output | Yes (max 1 A, fuse-protected) |
| Backup batteries (clock) | 2 × 1.5 V LR06/AA |
| Remote control | Yes, CR2032 battery, range 7 m |
| Equalizer | Presets JAZZ, ROCK, POP, CLASSICAL + manual bass/treble adjustment |
| Display | Screen with time, frequency, playback information |
Frequently Asked Questions - GML 50 Professional BOSCH
User questions about GML 50 Professional BOSCH
0 question about this device. Answer the ones you know or ask your own.
Ask a new question about this device
Download the instructions for your Radio in PDF format for free! Find your manual GML 50 Professional - BOSCH and take your electronic device back in hand. On this page are published all the documents necessary for the use of your device. GML 50 Professional by BOSCH.
USER MANUAL GML 50 Professional BOSCH
Robert Bosch Power Tools GmbH
70538 Stuttgart
GERMANY
www.bosch-pt.com
160992A2NF[2015.04]T/289
1609 92A 2NF
GML 50 Professional

BOSCH
WARNING Read all safety warnings and all instructions, including the information on the
bottom side of the radio charger. Failure to follow the warnings and instructions may result in electric shock, fire and/or serious injury.
Save all safety warnings and instructions for future reference.
The term "radio charger" used in the safety notes refers to mains-powered radio chargers (with mains cable) and to battery-operated radio chargers (without mains cable).

- Keep work area clean and well lit. Cluttered or dark areas invite accidents. The plug of the radio charger must match the outlet. Never modify the plug in any way. Do not use any adapter plugs with earthed (grounded) radio chargers. Unmodified plugs and matching outlets will reduce the risk of electric shock. Do not misuse the cord to carry the radio charger, hang it up, or for pulling the plug out of the outlet. Keep the cord away from heat, oil, sharp edges or moving parts. Damaged or entangled cords increase the risk of electric shock. When operating the radio charger outdoors, only use extension cords suitable for outdoor use. Use of a cord suitable for outdoor use reduces the risk of electric shock. When operating the radio charger in damp environments is unavoidable, use a residual current device (RCD). The use of a residual current device (RCD) reduces the risk of electric shock. Connect the radio charger to a mains supply that is properly connected to earth. Socket and extension cord must have an operative protective conductor.
- Completely unwind the mains cable when operating the radio charger via mains supply. Otherwise the mains cable can heat up. Take care that the mains plug can be pulled at any time. The mains plug is the only possibility to disconnect the radio charger from the mains supply. This radio charger is not intended for use by children and persons with physical, sensory or mental limitations or a lack of experience or knowledge. This radio charger can be used by children aged 8 or older and by persons who have physical, sensory or mental limitations or a lack of experience or knowledge if a person responsible for their safety supervises them or has instructed them in the safe operation of the radio charger and they understand the associated dangers. Otherwise, there is a danger of operating errors and injuries. Supervise children during use, cleaning and maintenance. This will ensure that children do not play with the radio charger. Charge only Bosch lithium-ion batteries with a capacity of 1.3 Ah or more (4 battery cells or more). The battery voltage must match the battery charging voltage of the radio charger. Do not charge any non-rechargeable batteries. Otherwise there is a danger of fire and explosion.

Protect the radio charger from rain and moisture. The penetration of water into the radio charger increases the risk of an electric shock.
- Charge only Bosch lithium-ion batteries. The battery voltage must match the battery charging voltage of the radio charger. Otherwise there is a danger of fire and explosion.
- Keep the radio charger clean. Contamination may result in danger of electric shock. Check the radio charger, cord and plug each time before using. Do not use the radio charger when defects are detected. Do not open the radio charger yourself and have it repaired only by qualified personnel using original spare parts. Damaged radio chargers, cords and plugs increase the risk of electric shock. Do not operate the radio charger on easily inflammable surfaces (e.g. paper, textiles, etc.) or in inflammable environments. Fire hazard due to occurring heat build-up of the radio charger during charging. Under abusive conditions, liquid may be ejected from the battery; avoid contact. If contact accidentally occurs, flush with water. If liquid contacts eyes, additionally seek medical help. Liquid ejected from the battery may cause irritations or burns. In case of damage and improper use of the battery, vapours may be emitted. Ventilate the area and seek medical help in case of complaints. The vapours can irritate the respiratory system. Do not open the battery. Danger of short-circuiting.

Protect the battery against heat, e.g., against continuous intense sunlight, fire, water, and moisture. Danger of explosion.
- When battery pack is not in use, keep it away from other metal objects like paper clips, coins, keys, nails, screws, or other small metal objects that can make a connection from one terminal to another. Shorting the battery terminals together may cause burns or a fire.
- Recharge only with the charger specified by the manufacturer. A charger that is suitable for one type of battery pack may create a risk of fire when used with another battery pack. Only use the battery in conjunction with your radio charger and/or a Bosch power tool. This is the only way to protect the battery against dangerous overload. The battery can be damaged by pointed objects such as nails or screwdrivers or by force applied externally. An internal short circuit can occur and the battery can burn, smoke, explode or overheat. Read and strictly observe the safety warnings and working instructions in the operating instructions of the tools that you connect to the radio charger. ▶ Products sold in GB only: Your product is fitted with a BS 1363/A approved electric plug with internal fuse (ASTA approved to BS 1362).
If the plug is not suitable for your socket outlets, it should be cut off and an appropriate plug fitted in its place by an authorised customer service agent. The replacement plug should have the same fuse rating as the original plug. The severed plug must be disposed of to avoid a possible shock hazard and should never be inserted into a mains socket elsewhere.
Product Description and Specifications


Read all safety warnings and all instructions. Failure to follow the warnings and instructions may result in electric shock, fire and/or serious injury.
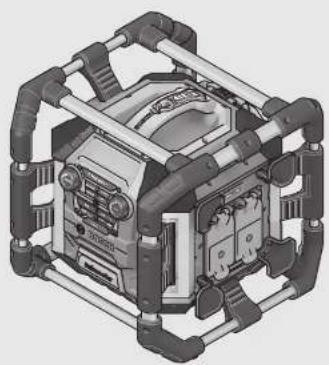
While reading the operating instructions, unfold the graphics page for the radio charger and leave it open.
Product Features
The numbering of the product features refers to the illustration of the radio charger on the graphics page.
1 Speaker 2 Remote control 3 Carrying handle 4 Control lamp for AC supply (not for article number 3601 D29660) 5 AC outlet cover (not for article number 3601D296 6 AC socket outlet (not for article number 3601D29660) 7 " | < < ” button on the remote control 8 Outlet opening for infra-red beam 9 Increase volume button 10 " > |" button on the remote control 11 Play/pause button on the remote control 12 Reduce volume button 13 On/Off button for audio operation on the remote control 14 "Source" button for audio source on the remote control 15 "Mute" button 16 Loop-clip button 17 Latch of back-up battery lid 18 Back-up battery lid 19 Locking latch of digital media bay flap 20 Digital media bay flap 21 Rod antenna 22 Charging compartment 23 Locking latch of battery lid 24 Battery lid 25 Battery pack* 26 "Equalizer" button 27“Memory”button 28 "Custom" button (for manual sound adjustment) 29 "Clock" button (for setting the time) 30 "Tune" adjustment knob (for tuning of stations)
31 Reception lens for remote control 32 Button for random playback/repeat 33 "Seek+/>>]" button 34 "Source" button (for selecting an audio source) 35 "I<</Seek" button 36 Play/pause button 37 Adjustment knob for volume level ("Volume") and sound ("Bass/Treb") 38 On/Off button for audio operation 39 Display 40 "AUX 1 IN" socket 41 12 V connection socket 42 "LINE OUT" socket 43 Fuse cap 44 Fuse for 12 V connection 45 USB port 46 SD/MMC slot 47 "AUX 2 IN" socket 48 Holder for external audio sources Accessories shown or described are not part of the standard delivery scope of the product. A complete overview of accessories can be found in our accessories program.
Display elements for audio operation
a Equalizer (sound-pre-set) indicator b Changing treble - indicator c Changing bass - indicator d Indicator for volume, memory location for radio station and title (depends on the selected audio source) e Station-memory reception indicator (for radio operation) f Random playback indicator (for SD/MMC card or USB audio source) g Repeat-current-track indicator for all tracks in the current folder/direction (for SD/MMC card or USB audio source) h Repeat-current-track indicator (for SD/MMC card or USB audio source) i Stereo indicator j Indicator of radio frequency/Play duration of current track (depends on the selected audio source) k Temperature warning I Battery inserted indicator m Battery charge indicator n Audio-source indicator o Time indication display
English | 17 Technical Data
| Radio Charger GML 50 | ||
| Article number | 3601 D29 6.. | |
| Back-up batteries | 2 x 1.5 V (LR06/AA) | |
| Weight according to EPTA-Procedure 01:2014 | kg 11.2 | |
| Protection class | #/I | |
| Degree of protection | IP 54 (dust and splash water protected) | |
| Permitted ambient temperature | ||
| - during charging | °C | 0...+45 |
| - during operation* | °C | 0...+45 |
| - during storage | °C | -20...+50 |
| Recommended batteries | GBA 14,4 V .../GBA 18 V ... | |
| Audio Operation/Radio | ||
| Operating voltage | ||
| - for mains operation | V | 230/110 |
| - for battery operation | V | 14.4-18 |
| Rated output of amplifier (for mains operation) | W | 50 |
| Reception angle of remote control | ° | 110 |
| Reception range | ||
| - FM | MHz | 87.5-108 |
| - AM | kHz | 531-1602 |
| Supported file formats1) | MP3, WMA | |
| Battery Charger | ||
| Battery charging voltage (automatic voltage detection) | V= | 14.4-18 |
| Charging current | A | 0.9 |
| Allowable charging temperature range | °C 0-45 | |
| Charging time for battery capacity, approx. | ||
| - 1.3 A h | min | 120 |
| - 4.0 A h | min | 400 |
| Number of battery cells | 4-10 | |
| Remote Control | ||
| Working range2) | m | 7 |
| Battery | 1 x 3 V (CR2032) | |
- Limited performance at temperatures <0 °C 1) (for SD/MMC card or USB audio source) 2) The working range can be decreased by unfavourable environmental conditions (e.g. direct sun irradiation).
Technical data determined with battery from delivery scope.
Assembly
Power Supply of the Radio Charger
The power supply of the radio charger can take place via the mains supply or via a lithium ion battery inserted in the charging compartment 22. When the battery is used for power supply, only the functions audio operation and power supply of external devices via the integrated USB connection, are available.
Observe the mains voltage! For power supply via mains, the voltage of the power source must correspond with the data on the type plate of the radio charger. Radio chargers marked with 230 V can also be operated with 220 V.
Battery Insertion/Removal (see figure A)
Note: Use of batteries not suitable for the radio charger can lead to malfunctions of or cause damage to the radio charger. Open locking latch 23 of the battery lid ("Charger/Battery Bay") and fold out battery lid 24.
Insert a battery into the charging compartment 22 in such a manner that the connections of the battery face against the connections in the charging compartment 22, and allow the battery to engage in the charging compartment.
As soon as a battery with sufficient voltage is inserted, the battery inserted indicator I appears on the display.
18|English
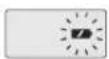

The battery inserted indicator I flashes when the battery is low.
To remove the battery 25, press the release button on the battery and pull it out of the charging compartment 22.
After inserting or removing the battery, close the battery lid 24. Lock the battery lid by engaging the locking latch 23 in the housing and then pressing down.
If required, wear protective gloves when removing the battery. The battery can heat up considerably when charging.
Inserting/Replacing the Back-up Battery (see figure A)
In order to store the time in the radio charger, back-up batteries have to be inserted. Using alkali-manganese batteries is recommended for this purpose.
Open locking latch 23 of the battery lid ("Charger/Battery Bay") and fold out battery lid 24.
Remove the battery 25, if required.
To open the back-up battery lid 18, press on the latch 17 and remove the back-up battery lid. Insert the back-up batteries. When inserting, pay attention to the correct polarity according to the representation on the inside of the back-up battery compartment.
Mount the back-up battery lid 18 again.
"REPLACE AA BATTERY WHEN UNIT NO LONGER KEEPS CORRECT TIME": Replace the back-up batteries when the radio charger no longer stores the time.
Always replace all batteries at the same time. Only use batteries from one brand and with the identical capacity.
- Remove the back-up batteries from the radio charger when not using it for longer periods. When storing for longer periods, the back-up batteries can corrode and discharge themselves.
Operation
Protect the radio charger against moisture and direct sunlight.
Audio Operation (see figures B and C)
Some audio operation functions can also be controlled via the remote control (see "Remote control", page 20).
Switching Audio Operation On/Off
To switch on audio operation (radio and external playback devices), press the On/Off button 38. The display 39 goes on and the last set audio source after switching off is activated. When the radio charger is in the energy saving mode (see "Energy Saving Mode", page 21), press the On/Off button 38 twice to switch on audio operation.
To switch off audio operation, press the On/Off button 38 again. The current audio source setting is stored.
To save energy, only switch the radio charger on when using it.
Adjusting the Volume
To increase the volume, turn the "Volume" 37 adjustment knob clockwise; to reduce the volume, turn the adjustment knob anticlockwise. The volume setting (value between 0 and 20) appears for a few seconds in indicator d on the display.
Before adjusting or changing a radio station, set the volume to a lower setting; before starting an external audio source, set the volume to medium.
Adjusting the Sound
An equalizer is integrated in the radio charger for optimal sound reproduction.
The treble and bass setting can be manually changed or sound pre-sets for various music styles can be used. The following pre-programmed settings are available: "JAZZ", "ROCK",
"POP" and "CLASSICAL" apart from the individually programmable setting "CUSTOM".
To select one of the stored sound pre-sets, press the "Equalizer" button 26 until the desired setting is indicated in indicator a on the display.
Changing the "CUSTOM" Setting:
- Press the "Custom" button 28 once. The "BAS" indicator c flashes on the display and the stored bass level flashes in indicator d.
- Set the desired bass level (value between 0 and 10). To increase the bass level, turn the "Bass/Treb" adjustment knob 37 clockwise; to reduce the bass level, turn the adjustment knob anticlockwise. To store the set bass level, press the "Custom" button 28 a second time. The "TRE" indicator b flashes in the display for the following treble adjustment, and the stored treble value flashes in indicator d.
- Set the desired treble level (value between 0 and 10). To increase the treble level, turn the "Bass/Treb" adjustment knob 37 clockwise; to reduce the treble level, turn the adjustment knob anticlockwise.
- To store the set treble level, press the "Custom" button 28 a third time.
Selecting an Audio Source
To select an audio source, press the "Source" button 34 until indicator n for the desired internal audio source (see "Setting/Storing Radio Stations", page 19) or external audio source (see "Connecting External Audio Sources", page 19) appears in the display:
- FM: FM radio, - AM: AM radio, - AUX 1: External audio source (e.g. CD player) via the 3.5 mm socket 40 on the side, - AUX 2: External audio source (e.g. MP3 player) via the 3.5 mm socket 47 in the digital media bay, - USB: External audio source (e.g. USB stick) via the USB port 45, - SD: External audio source (SD/MMC card) via the SD/MMC slot 46.
Setting the Rod Antenna
The radio charger is provided with a mounted rod antenna 21. For radio operation, point the rod antenna toward the direction that enables the best reception.
When the reception is insufficient, position the radio charger at a different location that enables better reception.
Note: When operating the radio charger in the direct vicinity of radio-communication equipment or radio transceivers, the radio reception can be subject to interference.
If the rod antenna 21 should become loose, tighten it directly at the housing by turning in clockwise direction.
Setting/Storing Radio Stations
Press the "Source" button 34 until "FM" is indicated for the ultra-short wave reception range or "AM" for the medium wave reception range in display element n.
To set a certain radio frequency, turn the "Tune" adjustment knob 30 clockwise to increase the frequency, and anticlockwise to decrease it. During setting, the frequency is indicated in display section o, then in j.
To scan for radio stations with a high signal strength,
press and briefly hold the "Seek" button 35 to scan down and the "Seek +" button 33 to scan up the frequency scale. The frequency of the found radio station is briefly indicated in display o and then in j.
When the reception of a suitable signal is sufficiently strong, the radio charger automatically switches to stereo reception. The indicator for stereo reception i appears on the display.
To store a set station, press the "Memory" button 27. The "PRESET" indicator e flashes in the display and the number of the last preset in d. To select a preset, press the "-Seek" button 35 to scan down and the "Seek+" button 33 to scan up, until the desired preset is displayed in indicator d. Press the memory button 27 again to store the set station as the selected preset. The indicators e and d no longer flash.
A total of 20 FM and 10 AM stations can be preset. Please note that an already occupied preset is overwritten when a new radio station is assigned to it.
For playback of a preset station, briefly press the "Seek" button 35 to scan down or the "Seek +" button 33 to scan up, until the desired preset is displayed in indicator d and "PRESET" is displayed in e.
Connecting External Audio Sources (see figure C)
Apart from the integrated radio, various external audio sources can be played.
AUX-In connection 1: The AUX-In connection 1 is particularly suitable for audio sources to be placed outside of the digital media bay (e.g. a CD player). Remove the protective cap of the "AUX 1 IN" socket 40 and insert the 3.5 mm plug of the provided or of another matching AUX cable into the socket. Connect the AUX cable to an appropriate audio source.
After removing the AUX cable, reattach the protective cap of the "AUX 1 IN" socket 40 to protect against dirt/debris.
For external audio sources via the following connections, open locking latch 19 and open lid 20 of the "Digital Media Bay".
- SD/MMC connection: Insert a SD or MMC card into the SD/MMC slot 46. The labelling of the card must face toward the fuse cap 43. Playback of the card can be started as soon as the track number as well as the number of available tracks on the card are displayed in indicator d. To remove the card, briefly press on the card, which is then ejected.
- USB connection: Insert a USB stick (or the USB plug of an appropriate audio source) into USB port 45. Playback of the USB stick can be started as soon as the track number as well as the number of available tracks on the stick are displayed in indicator d. To remove the USB stick, pull it out of the USB port.
- AUX-In connection 2: AUX-In connection 2 is particularly suitable for audio sources that can be placed inside of the digital media bay (e.g. a MP3 player). Insert the 3.5 mm plug of the provided AUX cable into the "AUX 2 IN" socket 47. Connect the AUX cable to an appropriate audio source.
When small enough, the connected external audio source can be fastened into the digital media bay using the Velcro strap of the holder 48.
After connecting the external audio source, close the Media/connections flap 20 if possible, to protect against damage and debris.
For playback of the connected audio source, press the
"Source" button 34 until the indicator n for the desired audio source appears on the display.
Controlling External Audio Sources
For audio sources connected via the SD/MMC slot 46 or the USB port 45, playback can be controlled via the radio charger. The number of the selected track is displayed at the left of indicator d and the number of available tracks on the right.
Play/Pause:
- To start playback, press the play/pause button 36. The playing time of the current track is displayed in indicator j.
- To interrupt or continue the playback, press the play/pause button 36 again. The current playing time flashes in indicator j.
Selecting Tracks:
To select a track, press the -Seek button 35 to scan down or the Seek + button 33 to scan up, until the number of the desired track is displayed on indicator d. - To start playback, press the play/pause button 36.
Random Playback/Repeat:
- For random playback of all tracks on the card or the USB stick, press the random playback/repeat button 32 once. The indicator f appears on the display.
- To repeat all tracks in the current folder/direction, press the random playback/repeat button 32 a second time. The indicator g appears on the display.
Note: Only in this function, the number of the current folder/direction on the card or USB stick will appear on the right-hand side of indicator d. To change the folder/direction, you have to return to the normal playback first and select a track from the desired folder/direction.
- To repeat only the current track, press the random playback/repeat button 32 a third time. The indicator h appears on the display.
- To return to normal playback mode, press the random playback/repeat button 32 a fourth time, so that none of the indicators f, g or h appear on the display.
- To start playback, press the play/pause button 36.
Connecting External Audio Playback (see figure C)
The current audio signal of the radio charger can also be transferred to other playback devices (e.g. amplifier and speakers).
Remove the protective cap of the "LINE OUT" socket 42 and insert the 3.5 mm plug of a matching AUX cable into the socket. Connect an appropriate playback device to the AUX cable. After removing the AUX cable, reattach the protective cap of the "LINE OUT" socket 42 to protect against dirt/debris.
Remote control
Have the remote control repaired only through a qualified repair person and only using identical replacement parts. This will ensure that the functionality of the remote control is maintained. Do not operate the remote control in explosive atmospheres, such as in the presence of flammable liquids, gases or dusts. Sparks can be created in the remote control which may ignite the dust or fumes.
Initial Operation
Protect the remote control against moisture and direct sunlight. Do not subject the remote control to extreme temperatures or variations in temperature. As an example, do not leave it in vehicles for longer periods. In case of large variations in temperature, allow the remote control to adjust to the ambient temperature before putting it into operation.
The remote control remains ready for operation as long as battery with sufficient voltage is inserted.
Position the radio charger in such a manner that the signals from outlet opening 8 of the remote control can directly reach reception lens 31 on the radio charger. When the remote control cannot be pointed directly against a reception lens, the working range is reduced. By reflecting the signal (e.g. against walls), the working range can be improved even for indirect signals.
The remote control 2 can be stored in carrying handle 3. When using the remote control, you can fasten it e.g., to a belt loop by opening loop-clip button 16 and attaching the remote control.
Functions
Independent of the audio source:
- To switch the audio operation on and off, press button 13 on the remote control.
- To switch the sound on and off, press the "Mute" button 15 on the remote control. To increase the volume, press button 9; to reduce the volume, press button 12. To change the audio source, press the "Source" button 14.
For radio operation:
To select a radio station with a lower frequency, press button 7 until the desired frequency is found.
To select a radio station with a higher frequency, press button 10 until the desired frequency is found. When controlling audio sources connected via the SD-/MMC slot 46 or the USB port 45: To start, interrupt, or continue the playback of a track, press the play/pause button 11. To select a track, press button 7 or 10.
Battery Replacement
To replace the battery, unscrew the screw of the battery compartment on the backside of the remote control and remove the battery lid.
When inserting the new battery, pay attention to the correct polarity. Screw on the battery lid again.
Replace the battery only with a new battery of the same type. Danger of explosion when inserting other battery types. Remove the battery from the remote control when not using it for longer periods. When storing for longer periods, the battery can corrode and discharge itself. Keep the battery away from children. Children could swallow the battery and cause a hazardous situation for their health.
Battery Charging (see figure A)
The charge procedure begins as soon as the mains plug of the radio charger is plugged into a socket outlet and a battery 25 is inserted into the charging compartment 22 (see "Battery Insertion/Removal", page 17).
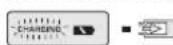
During the charging procedure, the "CHARGING" indicator m flashes on the display. The "CHARGING" indicator goes out when the battery is fully charged.
Due to the intelligent charging method, the charging condition of the battery is automatically detected and the battery is charged with the optimum charging current, depending on battery temperature and voltage.
This saves the battery and ensures that it is always fully charged when in the radio charger.
The charged battery 25 can be removed from the charging compartment 22 or (when inserted in the charging compartment) be used for power supply during audio operation.
If required, wear protective gloves when removing the battery. The battery can heat up considerably when charging.
Power Supply of External Devices
The power supply of external devices via the 12 V and the AC connection is possible only when the radio charger is connected to mains, and not via the inserted battery.
When the radio charger is connected to the mains supply, this is confirmed by the lit green control lamp 4.
USB Connection
With the USB connection, it is possible to operate and charge most devices whose power supply is possible via USB (e.g., various mobile phones).
Disengage locking latch 19 and open the digital media bay flap 20. Connect the USB plug of the external device to the USB port 45 of the radio charger. To start the charging procedure, the external device must possibly also be selected as the audio source on the radio charger.
12 V Connection (see figure C)
With the 12 V connection socket, you can operate an external electrical device with a 12 V plug and a max. current consumption of 1 A.
Remove the protective cap of the 12V connection socket 41. Insert the plug of the external electrical device into the 12V socket outlet.
The 12 V connection socket is protected by a fuse 44. When no voltage is given after connecting an external device, disengage locking latch 19 and open the digital media bay flap 20. Unscrew the fuse cap 43 and check if the inserted fuse 44 has blown. If the fuse has blown, insert a new fine-wire fuse (5 x 20 mm, 250 V max. voltage, 1 A rated current and quick-acting tripping characteristic). Screw on and tighten fuse cap 43 again.
Note: Use only 1 A fuses for a max. voltage of 250 V ("250V 1A FUSE FOR 12V OUTLET"). When using other fuses, the radio charger can become damaged.
The 12 V connection is also protected with an internal thermal fuse, which is blown/actuated when overheated. The fuse is automatically reset after the radio charger has cooled down.
After removing the external plug, reattach the protective cap of the 12 V socket outlet 41 to protect against dirt/debris.
AC Connection ("Power Outlets") (not for article number 3601 D29 660)
Further external electrical devices/tools can be operated via the AC outlets. The socket outlets can vary in consideration of country-specific standards.
The total maximum permitted current consumption of all connected electrical devices/tools must not exceed the value in the following table (also see the labeling on the housing under the outlet cover 5):
Article number Total max. current consumption (in A)
| 3601 D29 600 15 |
| 3601 D29 630 9 |
| 3601 D29 670 12 |
| 3601 D29 6W0 15 |
| 3601 D29 6X0 9 |
Open one of the AC outlet covers 5 and insert the plug of an external electrical device into a socket outlet 6 of the radio charger.
Time Indication
The radio charger is equipped with a time indication with separate power supply. When back-up batteries with sufficient capacity are inserted in the back-up battery compartment (see "Inserting/Replacing the Back-up Battery", page 18), the time can be stored even when the radio charger is disconnected from the AC power supply or the battery.
Setting the Time
- To set the time, press and hold the "Clock" button 29 until the hours indication flashes in the time indication display o.
- Press the "Seek +" button 33 or the "-Seek" button 35 until the correct hour setting is indicated.
- Press the "Clock" button again, so that the minutes indication flashes in the time indication display o.
- Press the "Seek +" button 33 or the "-Seek" button 35 until the correct minute setting is indicated.
- Press the "Clock" button a third time to store the time setting.
Energy Saving Mode
To save energy, you can switch the time indication in display 39 off.
For this, press and hold the On/Off button 38 when switching off audio operation (see "Switching Audio Operation On/Off", page 18), until there is no indication on the display.
To switch the time indication on again, press the On/Off button 38 once.
Working Advice
Temperature Monitoring for Battery Operation
When the radio charger is operated only via battery (no mains supply), the battery temperature is monitored.
- When the battery temperature is below -10°C or above 50°C, the temperature warning k flashes on the display.
- When the battery temperature is above 70°C, the radio charger automatically switches off to protect the battery. When the battery has cooled down, the radio charger can be put into operation again.
Recommendations for Optimal Handling of the Battery
Protect the battery against moisture and water.
Store the battery only within a temperature range between -20°C and 50°C. As an example, do not leave the battery in the car in summer.
A battery that is new or has not been used for a longer period does not develop its full capacity until after approx. 5 charging/discharging cycles.
A significantly reduced working period after charging indicates that the battery is used and must be replaced.
Observe the notes for disposal.
Troubleshooting - Causes and Corrective Measures
Cause Corrective Measure
| Radio charger inoperative | |
| No power supply Properly insert mains plug or battery (completely) | |
| Radio charger too warm or too cold | Wait until the radio charger has reached operating temperature |
22|English
Cause Corrective Measure
Radio charger inoperative on AC power supply
Mains socket faulty. Use another socket.
Mains plug or cord defective. Check mains plug and cable and have repaired as required.
Radio charger inoperative on DC power supply
| Battery contacts contaminated | Clean the battery contacts (e.g. by inserting and remov- ing the battery several times) or replace the battery |
Battery pack defective. Replace the battery.
Battery too warm or too cold. Wait until the battery has reached operating temperature (temperature warning LED flashing or radio charger switches off).
Battery charging or power supply to external devices inoperative
Mains plug not plugged in. Plug mains plug in (completely).
Battery not inserted. Have battery engage properly (correctly) for charging in charging compartment.
12 V power supply inoperative
No fuse 44 inserted. Insert fuse 44.
Fuse 44 blown. Replace fuse 44.
Internal thermal fuse blown/actuated. Remove external device and allow radio charger to cool down.
Radio charger suddenly inoperative
Mains plug or battery not properly or completely plugged in. Plug in mains plug or battery properly or completely.
Software error. To reset the software, pull the mains plug and remove the battery; wait 30 seconds, then insert mains plug and battery again.
Bad radio reception
| Interference from other devices or insufficient set-up location | Position radio charger at other location with better reception |
| Rod antenna not optimally directed | Turn/change position of rod antenna |
Time indication faulty
Back-up batteries of clock empty. Replace back-up batteries.
Back-up batteries incorrectly inserted (wrong polarity). Insert back-up batteries correctly.
Cause Corrective Measure
Remote control inoperative
| Battery of remote control empty | Replace battery of remote control |
| Battery of remote control incorrectly inserted (wrong polarity) | Insert battery of remote control correctly |
| Signal of remote control does not reach reception lens 31 | Turn radio charger so that re-ception lens 31 faces toward the remote control |
When the corrective measures do not eliminate an error, please contact an authorised service agent for Bosch power tools.
Maintenance and Service
Maintenance and Cleaning
The mains cable is provided with a special safety connection and may only be replaced by an authorised service agent for Bosch power tools.
For safe and proper working, always keep the radio charger and the remote control clean.
Do not immerse the remote control into water or other fluids. Wipe off debris using a moist and soft cloth. Do not use any cleaning agents or solvents.
After-sales Service and Application Service
Our after-sales service responds to your questions concerning maintenance and repair of your product as well as spare parts. Exploded views and information on spare parts can also be found under:
www.bosch-pt.com
Bosch's application service team will gladly answer questions concerning our products and their accessories.
In all correspondence and spare parts orders, please always include the 10-digit article number given on the type plate of the radio charger.
Great Britain
Robert Bosch Ltd. (B.S.C.)
P.O. Box 98
Broadwater Park
North Orbital Road
Denham
Uxbridge
UB9 5HJ
At www.bosch-pt.co.uk you can order spare parts or arrange the collection of a product in need of servicing or repair.
Tel. Service: (0344) 7360109
E-Mail: boschservicecentre@bosch.com
Francais | 23
Ireland
Origo Ltd.
Unit 23 Magna Drive
Magna Business Park
City West
Dublin 24
Tel. Service: (01) 4666700
Fax: (01) 4666888
Australia, New Zealand and Pacific Islands
Robert Bosch Australia Pty. Ltd.
Power Tools
Locked Bag 66
Clayton South VIC 3169
Customer Contact Center
Inside Australia:
Phone: (01300) 307044
Fax: (01300) 307045
Inside New Zealand:
Phone: (0800) 543353
Fax: (0800) 428570
Outside AU and NZ:
Phone: +61 3 95415555
www.bosch.com.au
Republic of South Africa
Customer service
Hotline: (011) 6519600
Gauteng - BSC Service Centre
35 Roper Street, New Centre
Johannesburg
Tel.: (011) 4939375
Fax: (011) 4930126
E-Mail: bsctools@icon.co.za
KZN - BSC Service Centre
Unit E, Almar Centre
143 Crompton Street
Pinetown
Tel.: (031) 7012120
Fax: (031) 7012446
E-Mail: bsc.dur@za.bosch.com
Western Cape - BSC Service Centre
Democracy Way, Prosperity Park
Milnerton
Tel.: (021) 5512577
Fax: (021) 5513223
E-Mail: bsc@zsd.co.za
Bosch Headquarters
Midrand, Gauteng
Tel.: (011) 6519600
Fax: (011) 6519880
E-Mail: rbsa-hq.pts@za.bosch.com
Transport
The contained lithium-ion batteries are subject to the Dangerous Goods Legislation requirements. The user can transport the batteries by road without further requirements.
When being transported by third parties (e.g.: air transport or forwarding agency), special requirements on packaging and labelling must be observed. For preparation of the item being shipped, consulting an expert for hazardous material is required.
labelling must be observed. For preparation of the item being shipped, consulting an expert for hazardous material is required.
Dispatch batteries only when the housing is undamaged. Tape or mask off open contacts and pack up the battery in such a manner that it cannot move around in the packaging. Please also observe possibly more detailed national regulations.
The radio charger, remote control, battery packs, accessories and packaging should be sorted for environmental-friendly recycling.

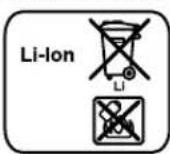
Do not dispose of the radio charger, remote control and battery pack/batteries into household waste!
Do not dispose of the radio charger, remote control and battery pack/batteries into household waste!
Only for EC countries:
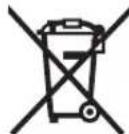
According to the European Guideline 2012/19/EU, power tools that are no longer usable, and according to the European Guideline 2006/66/EC, defective or used battery packs/batteries, must be collected separately and disposed of in an environmentally correct manner.
Batteries no longer suitable for use can be directly returned at:
Great Britain
Robert Bosch Ltd. (B.S.C.)
P.O.Box 98
Broadwater Park
North Orbital Road
Denham
Uxbridge
UB95HJ
At www.bosch-pt.co.uk you can order spare parts or arrange the collection of a product in need of servicing or repair.
Tel. Service: (0344) 7360109
E-Mail: boschservicecentre@bosch.com
Battery packs/batterie
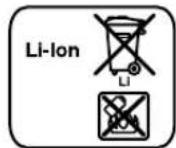
Li-ion:
Please observe the instructions in section "Transport", page 23.
Subject to change without notice.
Français
Connecting external audio sources (see figure C)
12 V connector (see figure C)
Robert Bosch (France) S.A.S.
Subject to change without notice.

Espanol
Bosch Service Center
Telegrafvei 3
2750 Ballerup
At www.bosch-pt.dk you can order spare parts online or create a repair order.
Tel. Service Center: 44898855
Fax: 44898755
E-Mail: vaerktoej@dk.bosch.com
Transport
38 Pa-Av-knapp for Ijud
39 Display
40 "AUX 1 IN"-kontaktdon 41 12 V-anslutningskontakt 42 "LINE OUT"-kontaktdon 43 Lock for sakring 44 Sakring for 12 V-anslutning 45 USB-kontaktdon 46 SD-/MMC-kortplats 47 "AUX 2 IN"-kontaktdon 48 Faste for externa ljudkallor
Bosch Service Center
Telegrafvej 3
2750 Ballerup
Danmark
Tel.: (08) 7501820 (inom Sverige)
Fax: (011) 187691
Transport
The lithium-ion batteries included are subject to the requirements for dangerous goods. The user can transport the batteries by road without further obligations.
The power tool is equipped with a safety device and must be replaced only by an authorized Bosch Service Center.
Keep the power tool and the ventilation slots clean to be able to work well.
Do not immerse the power tool in water or other liquids.
Clean the dust and debris with a dry cloth. Do not use harsh cleaners or solvents.
Service and customer support
The Service answers your questions regarding the repair and maintenance of your product as well as spare parts:
www.bosch-pt.com
The Bosch advisory team will gladly answer your questions regarding our products and their accessories.
Please keep the information and the spare parts. When ordering spare parts, always quote the 10-digit article number printed on the type plate of the product.
Greece
Robert Bosch A.E.
Erythreas 37
19400 Koropi-Athens
Tel.: 2105701258
Fax: 2105701283
www.bosch.com
www.bosch-pt.gr
ABZ Service A.E.
Tel: 2105701380
Fax: 2105701607
Translation
The translations and the original instructions are intended to be used together. The translations may be used only with the original instructions.
When the device is transported by a third party (e.g. by air freight or a transport company), the special requirements for packaging and labeling must be observed. In this case, the advice of a hazardous goods specialist must be sought when preparing the shipment.
Send the device for repair only when the interior is empty. Remove the batteries and adhesive tape and secure the device in the packaging so that it cannot move.
Please also observe your national regulations and any stricter local regulations.
Disposal

The device, accessories, packaging and batteries must be recycled in an environmentally friendly manner.
Do not dispose of the device and batteries in household waste!
Only for EU countries:
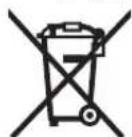
According to Directive 2012/19/EU, waste electrical equipment, and according to Directive 2006/66/EC, defective or used batteries must be collected separately and recycled in an environmentally friendly manner.
Maintenance and troubleshooting:
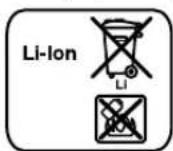
Li-Ion:
The device is supplied with a ceramic "Metaopora" cover, type 112.
Keep the device away from water.
Turkish
Safety Instructions

WARNING
40 "AUX 1 IN" socket
41 12 V connection socket
42 "LINE OUT" socket 43 Fuse cover 44 12-V connection fuse 45 USB socket 46 SD-/MMC card slot 47 "AUX 2 IN" socket 48 External audio source bracket
Playback/stop:
To start playback, press the play/pause button 36. The playing time of the current title appears on the display. - To pause or resume playback, press the play/pause button 36 again. The current playing time appears on the display.
Title selection:
Bosch San. ve Tic. A.S.
Ahi Evran Cad. No:1 Kat:22
Polaris Plaza
80670 Maslak/Istanbul
Bosch Expert Team +90 (0212) 367 18 88
Isiklar LTD. STI.
Kizilay Cad. No: 16/C Seyhan
Adana
Tel.: 0322 3599710
Tel.: 0322 3591379
Robert Bosch Sp. z o.o.
Bosch Service Center PT
K Vapence 1621/16
692 01 Mikulov
At www.bosch-pt.cz you can order the repair of your machine or spare parts online.
Tel.: 519305700
Fax:519305705
E-Mail: servis.naradi@cz.bosch.com
www.bosch.cz
Preprava
Press the tuning buttons. The frequency is displayed on the display after the tuning is completed.
To find a radio station with a strong signal, press the seek button down «- Seek» 35 or the seek button up «Seek +» 33 and hold it briefly. The found radio station frequency is briefly displayed on the display after this.
If the received signal is good enough, the corresponding device automatically switches to stereo reception. The stereo reception indicator is displayed on the display.
To save the tuned radio station, press the memory button «Memory» 27. The indicator «PRESET» e flashes, and the display d shows the number of the last tuned memory slot. To select a memory slot, press the seek button down «-Seek» 35 or the seek button up «Seek +» 33 until the desired memory slot is displayed on the display d. Press the memory button 27 again. To save the tuned radio station in the selected memory slot, the indicators e no longer flash.
You can save up to 20 radio stations in the memory. Note that when selecting an already occupied memory slot, the previously saved radio station is replaced by the new one.
To play a saved radio station from memory, briefly press the seek button down «-Seek» 35 or the seek button up «Seek+» 33 until the desired memory slot is displayed on the display d. The indicator e will show «PRESET».
Connecting external audio sources (see fig. C) In addition to the integrated radio, it is possible to play various external audio sources.
AUX In 1 socket: The AUX In 1 socket is particularly suitable for audio sources that are located outside the information compartment (e.g., CD player). Remove the protective cap from the AUX 1 socket 40 and insert the 3.5 mm jack of the cable supplied or another suitable AUX cable into the socket. Route the AUX cable to the suitable audio source.
After you have pulled out the AUX cable, close the AUX 1 socket 40 with the cap again to protect it from dirt.
For external audio sources that are connected via the sockets mentioned below, open the locking lever 19 and open the cover 20 of the compartment for the media player (Digital Media Bay').
- SD/MMC card slot: Insert the SD or MMC card into the SD/MMC card slot 46. The label on the card must point in the direction of the arrow. The protective cap 43 must be closed. Playback from the card can be started after the display d shows the number of tracks and the total number of tracks recorded on the card. To remove the card, briefly press on the card so that it pops out.
Insert the USB flash drive (or a USB stick that matches the audio source) into the USB port 45. Playback of the USB flash drive can be started after the display d shows the track number and the total number of tracks recorded on the flash drive. To remove the USB flash drive, pull it out of the USB port. The AUX IN 2 jack: The AUX IN 2 jack is especially suitable for audio sources that can be stored in the compartment for information carriers (e.g., MP3 player). Insert the 3.5 mm plug of the AUX cable (supplied) into the "AUX 2 IN" jack 47. Connect the AUX cable to a suitable audio source.
You can secure the external audio source with the retaining strap 48. Close the compartment for information carriers.
To avoid damage and scratches, close the cover of the compartment for information carriers 20 after you have connected the external audio source.
To play connected audio sources, press the audio source selection button "Source" 34 until the display d shows the corresponding audio source.
Controlling external audio sources
Playback of audio sources connected via the SD/MMC card slot 46 or the USB port 45 can be controlled via the remote control. The display d shows the current track on the left and the total number of tracks on the right.
Playback/Pause:
- To start playback, press the Play/Pause button 36. The playback duration of the current track is shown on the display j. - To pause playback, press the Play/Pause button 36 again. The current playback duration is shown on the display j.
Selecting a track:
To select a track, press the Previous track button "-Seek" 35 or the Next track button "Seek+" 33 until the display d shows the desired track. - To start playback, press the Play/Pause button 36.
Playback in random order/Repeat playback:
- To play all tracks from the card or USB flash drive in random order, press the Random/Repeat button 32 once. The display f appears. - To repeat all tracks in the current folder, press the Random/Repeat button 32 again. The display g appears.


Russian | 165
Note: Only in this function, the display d on the right shows the current track number on the card or USB flash drive. To change the folder, you must first return to normal playback mode and select tracks from the corresponding folder.
- To repeat only the current track, press the Random/Repeat button 32 a third time. The display h appears. - To return to normal playback mode, press the Random/Repeat button 32 a fourth time. The displays f, g, h disappear. - To start playback, press the Play/Pause button 36.
IopKnIOueHHe BHeuHnx yCTpOcTB BocnpOn3BeEHH 3Byka (cm.pnc.C)
BbMoKeTe nepeDaBaTb akTyalnbHb ayDnOcnHAn OT aPAn HOro yCToHCTBa CpaHIO TaKke H Na DpyrHe yCToHCTBa BOCnpOn3BeDEHn 3ByKa (HaNP, yCNHTeN n DnHAMKN).
CHHIMTE 3aunTHyIO KpbIkyrhe3Ja «LINE OUT» 42 H BCTaBBte 3,5 MM WTekep NOxOJaUeero Ka6enAUX B rHe-3do. PnDCoeHNHTe NOxOJaUee yctpoCTBO BOCpon3Be DENH 3Byka K Ka6enIO AUX. NocTe TOro, KAK Bb BYtAAuIN Ka6enB AUX,CHOBA BCTaBBte KpbIkydJra 3aunTbIOT 3arpa3- HeHH Ha rHe3Do «LINE OUT» 42.
IynbT dNCTaHcHOnHOro ynpabHeHHa
Pemont Baawero npbTa dnctahuHnHO ynpaBneHH NOJKe HnpoBOnTbC TONko KBaHnHnHpOBaHHbIMN CnueHaHnCTAMn HTONko C nCnOlb3OBAHHem OPHHnHaBbIX 3anYacte. TOnko Tak MOxHo rapaHTnpoBaTb COxpaHeHne FyHKnHOHaJIbHOCTn PylbTa nCTaHnOHHO YnpaBNeHHA. Hepa6oTaTe cnybTom dctahunHoro ynpabnenn BO B3pbIBOOanchoi Cpe, no6nH3OCTOn t rOpounx XIKoCTe,ra0B nblnn. B n3MePHTeNbHom HnCTpyMeHTe MOrT o6pa3OBaTcR hCKpbl,OT KOTOPBX MoKET BOCIIaMeHHTbCra NlblN nnapbl.
3Kcnnyataa
3aunuatae npbI dncTaHcHOnHHo ynpabHeHnO T BO3dEChBn Bnarn H pRmBix CoNHeuHbX Nyue. He noDBeprAte npbT hCTaHcHOnHOro ynpabNeHH BO3dEChTBHO 3KCTpeMaIbHbIX TemnepaTp H TemnepaThbIM nepenadaM. B VactHOCTn, He octaBnIte erO Ha dInTeJIbHoe BPem B MaIhne. Ppi 60JIbXIN nepena-dax TemnepaTpbi Chauana daTe npbTy nctaHcHOnHOro ynpabLeHry cStaHm3NpOBaTb TemnepaTppy, npExDe Yem NaHHaTb pa60tAb C HIM.
CMoMeHTaYcTaHOBKn6batapein CdoCTaTOUHbIM HapPraKeHNEMIyblTINCTaHUNHOYnpAbeHHrROKpaOte.
YCTAHOBITE 3aepHoe yctpoiCTBO cpaHIO tAKHM o6pa3oM, YTO6bI CnHaNbI N3 OTBepCTH BXOJA INHΦpakpachoro LyuA
8HaIyIbTe DnCTaHcHOnHO rYnpaBHeHrN nonaAIN npAHO HpHemHyIOHN3y 31apdHOrO yCToPcTbCa pAno. PnHEBO3MOxHOCTHn HApBaBt IyIbT DnCTaHcHOnHO rYnpaB
JIeHnHaHnpaMyHO HnPneMHyIOIHH3y DaJIbHOCTb PnEMa yMeHbShaETc. DaJIbHOCTb PnEma-BKIIIOuH N pNHePNOM CnHane-MoXHO YBeINHTb OTPaXeHNEM CNHana (Hanp.,OT CTeH).
IynbTINCTaHNOHHOrO ynpAbeHn2MOKHO xpaHnBpyKe IINpeHoc3. PnNcNoNb3oBaHH NylbTa INCTaHnONHOrO ynpABHeHn ERO MoXHo 3aKpeHnB, HAp., HaNETpeMHr:OTkpoTe IIN 3TOrO 3Amok 16 H BCTabTe pNtBT DCTAHIOHHOrO ynpAbeHn B nTnIO.
Функшн
He3aBnCmO 0t ayDnHOCTouHnKa:
-TO6bl BKNIOHTb H BbIKIOHTb ayHOpexHM,HaKMnTe KONky 13 Ha nyIbte IINCTaHIOHHOYnpaBHeHH. -уTO6bl BKNIOHTb H BbIKIOHTb 3ByK,HaXMITE KHOIky «Mute»15. - UTO6bI yBENHHTb rPOMKoCTb, HAKMNTe KHOKNy 9, YTO6bl y6aBHTb rPOMKOCTb-KHOKNY 12. -406b CMEHHTb aydnohctouHHK,HaXMMTe KhoNky «Source» 14.
To select a radio station:
- To select a radio station with a lower frequency, press the Previous Track button 7 until you find the desired frequency. - To select a radio station with a higher frequency, press the Next Track button 10 until you find the desired frequency.
For controlling audio devices connected via the AUX jack 46 or the USB port 45:
- To start, pause, or resume playback of a composition, press the Play/Pause button 11. To select a composition, press the Previous Track button 7 or the Next Track button 10.
Battery replacement
To replace the battery, unscrew the screw of the battery compartment from the back of the remote control and remove the battery compartment cover.
When inserting a new battery, observe the correct polarity. Screw the battery compartment cover back on firmly.
Replace the battery only with a battery of the same type. If you insert a battery of a different type, there is a risk of explosion. If you will not use the remote control for an extended period, remove the battery from it. During prolonged storage, corrosion of the battery contacts may occur. Do not give the battery to small children. Small children may swallow the battery and endanger their health.
Charging the battery (see Fig. A)
The charging process begins after the plug of the charging device with the radio is inserted into the socket, and the battery is in the 25-V charging jack 22 (see "Installing the battery", p. 162).
166]Russian
![BOSCH GML 50 Professional - 166]Russian - 1](/content/2026/02/368606/images/ee7d5355f169b138dbf7cd3541c08b27b0d9d9ba953b703fb5e9597cbb660719.jpg)
During charging, the battery charging indicator "CHARGING" lights up. The "CHARGING" indicator goes out when the battery is fully charged.
Thanks to the intelligent charging procedure, the charging device automatically detects the state of charge of the battery and performs charging with the optimal current depending on the temperature and voltage of the battery.
This protects the battery, and - when stored in the charging device with the radio - it is always fully charged.
The charged battery 25 can be removed from the charging jack 22 or left in the charging jack to be used as a power source during operation of the device in the audio system.
The battery can heat up during charging if necessary to protect the gloves. The battery may become very hot during charging.
Protect the battery from water.
Store the battery only in a temperature range from -20°C to 50°C. Do not leave the battery in a car.
A new battery that has not been used for a long time reaches its full capacity only after about 5 charge-discharge cycles.
A significant reduction in operating time after charging indicates that the battery is aging and indicates the need to replace it.
Follow the disposal instructions.
Malfunction - Causes and remedies
Cause Remedy
The device does not work
| He BCTaBbIe IpeDoxpaHIn-TeIb 44 | BCTaBbIe IpeDoxpaHInTeIb 44 |
| Cpabotan IpeDoxpaHInTeIb 44 | Поменiate IpeDoxpaHIn-TeIb 44 |
| Cpabotan BHyTpEnHnI npedoxpaHInTeIb c TeIIOBbIM peIe | ОсоeДиHInTe BHeUHmI 3IeK-Трорибop ИдАгte BaшЕму заюнOMу yctpoIcTBy c pa-ДИО OCTbIb |
The charging device suddenly stopped working
| HengląbNbHO iπi He noJHO cTbU BCTaBHe CTeBOI uTencβI iπi AKyMylrTop- hA 6atape. | ΠρaBbNbHO xOpoJIo BCTaBbTe CTeBOI ΜιTencβI iπi AKyMylrTopHyIO 6aTa- peI |
| OünbKa npOrpAMMHorO oBeCneueHη | ЧтбI nepezayctHb pro- rρaMMHoe oBeCneueHηe, БынtsI ΜιTencβI iπi AKy- mylrTopHyIO 6atapeI, ПоJO- жДITE 30с ИСНОВА BCTaBte uTencβI/akkymylrTopHyIO 6atapeI. |

Cause Remedy
Poor radio reception
Batteries:
Li-Ion:
Follow the instructions in the “Transportation” section, page 169.
Changes are possible.
Ukrainian
Safety instructions

Read all safety instructions and warnings.
Failure to follow the safety instructions and warnings may result in electric shock, fire, or serious injury.
Keep all safety instructions and warnings for future reference.
The term “charger” used in the safety instructions refers to both chargers for cordless tools (with a power cord) and chargers for battery packs (without a power cord).
Keep your work area clean and well lit. Cluttered or dark work areas can cause accidents. The charger plug must match the outlet. Do not modify the plug in any way. Do not use any adapter plugs with grounded chargers. Unmodified plugs and matching outlets reduce the risk of electric shock. Do not use the charger in wet or damp conditions or expose it to rain or moisture. Keep the cord away from heat, oil, sharp edges, or moving parts. Damaged or entangled cords increase the risk of electric shock. When using the charger outdoors, use an extension cord suitable for outdoor use. Using a cord suitable for outdoor use reduces the risk of electric shock. If operating the charger in a damp location is unavoidable, use a residual current device (RCD) protected supply. Use of an RCD reduces the risk of electric shock. Connect the charger to a properly grounded outlet. The plug of the extension cord must be properly grounded. When disconnecting the charger from the power supply, pull the plug, not the cord. The cord may become hot. Ensure that the cord can be unplugged from the outlet at any time. Strongly


170|Ukrainian
Possible injury from the charger when used with a power cord.
The radio is not intended for use by persons (including children) with reduced physical, sensory or mental capabilities, or lack of experience and knowledge, unless they have been given supervision or instruction concerning use of the appliance by a person responsible for their safety. Children should be supervised to ensure that they do not play with the radio. Charge the rechargeable batteries only with the charger specified for this purpose. The charging voltage must correspond to the charging voltage of the charging device. Do not charge batteries that are not designed for repeated recharging. In this case, there is a risk of fire and explosion.

Protect the charger from moisture and water. There is a risk of electric shock.
Charge the Bosch rechargeable batteries only. The battery voltage must correspond to the charging voltage of the charging device. In this case, there is a risk of fire and explosion. Keep the charging device clean. Contamination can lead to electric shock. Before each use, check the charging device, cable, and plug. Do not use the charging device if it is damaged. Do not open the charging device yourself; repairs should only be carried out by qualified personnel using original Bosch spare parts. Damaged charging devices, cables, or plugs increase the risk of electric shock. Do not use the charging device on a flammable surface (e.g., paper, textiles) or in a flammable environment. Heating of the charging device during charging can lead to fire. Proper use of the battery reduces the risk of injury. Avoid contact with it. In case of accidental contact, rinse the affected area with water. If fluid gets into the eyes,
seek medical attention. Battery fluid can cause skin irritation or burns.
In case of damage or improper use of the battery, vapor may escape. Ventilate the area and seek medical attention if symptoms occur. Vapor can irritate the respiratory tract. Do not open the battery. There is a risk of short circuit.

Protect the battery from heat, e.g., from continuous sunlight, fire, water, and moisture. There is a risk of explosion.
Do not expose the battery to rain, snow, or wet conditions. Do not use the battery in the presence of flammable gases or liquids. Do not store the battery in a place where it may be exposed to metal objects that could cause a short circuit. Short-circuiting the battery terminals may cause fire or damage. Charge the battery only with the charger recommended by the manufacturer. Using a charger not intended for this battery may cause damage. Use the battery only with the combination of your charger and/or power tool. Under these conditions, the battery will be protected from overloading. Do not expose the battery to sharp objects, such as nails or screws, or to external mechanical impact. Avoid short circuits, corrosion, or swelling of the battery. Read and strictly follow the safety instructions and operating instructions provided in the user manuals of the devices you connect to your charger.
The battery indicator lights up when the battery is low.
To remove the battery, press the battery release button and pull the battery out of the battery compartment.
Close the battery compartment cover after inserting/removing the battery. Lock the battery compartment cover by turning the locking knob on the housing and pressing it down until it clicks.
Always wear gloves when handling the battery. The battery may become very hot during charging.
Replacing the backup batteries (AAA)
To preserve the memory of the charging device, you need to install backup batteries. We recommend using alkaline batteries.
Turn the locking knob of the battery compartment (Charger/Battery Bay) and open the battery compartment cover.
Remove the battery if necessary.
To open the battery compartment cover, press the latch and lift the cover. Insert the backup batteries. Pay attention to the correct polarity as shown inside the battery compartment.
Close the battery compartment cover again.
"REPLACE AA BATTERY WHEN UNIT NO LONGER KEEPS CORRECT TIME": Replace the backup batteries if you can no longer set the time on the charging device.
Always use the same type of batteries. Use batteries of the same brand and capacity.
Remove the backup batteries from the charging device if you will not use it for a long time. During storage, the batteries may corrode and self-discharge.
Operation
Charging the device via the mains adapter and the solar panel.
Audio recorder (see fig. B)
The audio recorder can also be controlled from the remote control (see "Remote control", page 175).
Turning on the audio recorder
To turn on the audio recorder (radio and external programs), press button 38. After button 39 is pressed, the audio recorder that was last played is activated.
The charging of the device via the radio is in the energy-saving mode (see "Energy-saving mode", page 177). To turn on the audio recorder, press button 38 again.
To turn off the audio recorder, press button 38 again. The current audio track is saved. To save energy, the charging of the device via the radio is only activated when you are going to use it.
Setting the volume
To increase the volume, turn the knob "Volume" clockwise; to decrease it, turn it counterclockwise. The volume setting (value in dB) is displayed for a few seconds on the display.
Before the first use, set the volume to the lowest value, and before starting an external audio recorder, set it to the middle value.
Setting the tone
For optimal sound reproduction, the device is equipped with an equalizer.
You can manually change the setting of high and low frequencies or use the programmed tone settings for different musical styles. The following settings are available: "JAZZ", "ROCK", "POP" and "CLASSICAL", as well as the "CUSTOM" setting, which you can program yourself.
To select one of the saved tone settings, press the tone setting button "Equalizer" 26 until the desired setting appears on the display.
Connecting the antenna
Connect the antenna to the radio using the antenna jack. For best reception, extend the antenna fully.
If reception is poor, reposition the radio or use a better receiver.
Note: The flexible antenna is designed for direct connection to the radio's antenna socket. Do not connect it to an external antenna.
If the antenna jack is loose, tighten it securely to the radio body using a screwdriver.
Tuning/Storing Radio Stations in Memory
Press the Source button repeatedly until the FM or AM indicator appears on the display.
To tune to a desired radio frequency, turn the Tuning knob clockwise to increase frequency or counterclockwise to decrease frequency. The frequency is shown on the indicator during tuning and on the display after tuning is complete.
To search for radio stations with strong signals, press the Seek- button or the Seek+ button and hold briefly. The frequency of the found station will be shown on the indicator and then displayed on the display.
When a good signal is received, the radio automatically switches to stereo. The stereo indicator appears on the display.
To store a radio station, press the Memory button. The display shows the preset number, and the indicator shows the last stored station number. To select a memory preset, press the Seek- or Seek+ button until the desired preset number appears on the indicator. Press the Memory button again to store the current station in the selected preset. The indicators for preset and memory will turn off.
You can store up to 20 FM stations and 10 AM stations. Note that if you select an already occupied preset, the previously stored station will be overwritten.
To recall a stored station, briefly press the Seek- or Seek+ button until the desired preset number appears on the indicator and the preset indicator is displayed.
Connecting External Audio Devices (AUX)
For devices with a headphone jack, you can connect them to the radio's AUX input.
AUX In 1: AUX In 1 is a 3.5 mm stereo jack for connecting external audio devices such as CD players. Remove the protective cap from the AUX IN 1 jack and insert a 3.5 mm stereo cable or an adapter cable. Connect the other end of the cable to the audio output of the external device.
Insert the AUX cable into the AUX 1 IN jack, then close the protective cover to prevent dust and dirt.
For devices that do not have a corresponding jack, open the protective cover 19 and open the cover 20 of the Digital Media Bay section.
- SD/MMC card slot: Insert an SD or MMC card into the SD/MMC card slot 46. The label on the card should be facing the front panel 43. Playback from the card can be started after the indicator d shows the number and total number of compositions recorded on the card. To remove the card, briefly press the card so it pops out. - USB slot: Insert a USB flash drive (or a USB player of the appropriate audio format) into the USB slot 45. Playback from the USB flash drive can be started after the indicator d shows the number and total number of compositions recorded on the flash drive. To remove the USB flash drive, pull it out of the USB slot. - AUX In 2: The AUX In 2 jack is intended for connecting an audio source that can be stored in the Digital Media Bay section (e.g., MP3 player). Insert the 3.5 mm plug


Ukrainian 175
of the AUX cable into the AUX 2 IN jack 47.
Connect the AUX cable to any audio source.
If the size is appropriate, you can close the external audio source using the mounting bracket 48 in the Digital Media Bay section.
To protect against dust and dirt, close the cover of the Digital Media Bay section 20 after connecting the external audio source.
To start playback from the connected audio source, press the audio source selection button «Source» 34 until the indicator of the corresponding audio source appears on the display.
Controlling connected audio sources
Playback of audio sources connected via the SD/MMC card slot 46 or USB slot 45 can be controlled using the remote control. The left indicator d shows the number of the current composition, and the right indicator shows the total number of compositions.
Playback / Pause / Stop:
To start playback, press the Play/Pause button 36. The playback duration of the current composition is displayed on indicator j. - To pause or resume playback, press the Play/Pause button 36 again. The current playback duration is shown on indicator j.
Selecting a composition:
- To select a composition, press the previous track button «-Seek» 35 or the next track button «Seek+» 33 until the number of the corresponding composition appears on the indicator d. - To start playback, press the Play/Pause button 36.
Repeated playback buttons:
- To repeat one composition or a USB flash drive, press the REPEAT/REPEAT ALL button 32. The indicator will appear. - To repeat the entire composition from the current track, press the REPEAT/REPEAT ALL button again. The indicator will appear. Note: Only in the right column, the indicator d will appear for the current track. To change the track, you must first return to normal playback mode and select the composition from the corresponding track. To repeat the current composition, press the REPEAT/REPEAT ALL button 32. The indicator will appear. - To return to normal mode, press the REPEAT/REPEAT ALL button again; the indicators f, g, or h will disappear. - To start playback, press the PLAY/PAUSE button 36.
Connecting external audio playback devices (AUX, etc.)
You can connect an external audio device to the AUX input of this device using a cable with a 3.5 mm jack.
Remove the protective cap from the LINE OUT jack 42 and insert the 3.5 mm plug of the corresponding cable.
Connect the external audio device to the cable. After connecting the cable, put the protective cap back on the LINE OUT jack 42 to protect it from dust.
Remote control
The remote control should only be repaired by qualified personnel using original spare parts. This also ensures the functionality of the remote control. The remote control does not work with the device in environments where there is a risk of explosion due to the presence of flammable liquids, gases, or dust. In such environments, sparks may be generated, which could cause a fire or explosion.
Operating precautions
Protect the remote control from moisture and direct sunlight. Do not expose the remote control to extreme temperatures or temperature fluctuations. In particular, do not leave it in a car for a long time. If the remote control has been exposed to temperature changes, turn it off and let it stabilize to its own temperature.
The remote control is supplied with a battery. When the battery is low, the remote control may not function properly.
Install the battery with the correct polarity, so that the positive terminal (+) is facing up in the battery compartment 31. The remote control can be pointed directly at the device or at a reflective surface, such as a wall. The effective range can be increased by reflecting the signal.
The remote control can be stored in the holder 3. When using the remote control, you can attach it, for example, to a belt: open the clip 16
The remote control is supplied with a battery.
Functions
To enable or disable radio modes, press button 13 on the remote control. To enable or disable sound, press the "Mute" button 15.
176 | Ukrainian
- To change the volume, press button 9; to change the volume, press button 12.
- To change the source, press the "Source" button 14.
For radio:
- To select a radio station with a lower frequency, press the lower search button 7 repeatedly until the desired frequency is found.
- To select a radio station with a higher frequency, press the upper search button 10 repeatedly until the desired frequency is found.
Controlling sources connected via the card slot SD/MMC 46 or the USB port 45:
- To start, pause, or resume playback, press the Play/Pause button 11. - To select a track, press the lower search button 7 or the upper search button 10.
Battery replacement
To replace the battery, turn the device over, slide the battery cover on the back of the remote control, and remove the battery cover.
Insert the new battery following the correct polarity. Then slide the battery cover back into place.
Replace the battery only with a new battery of the same type. Improper battery replacement may cause an explosion hazard. Remove the battery if you do not intend to use the remote control for a long time. During storage, the battery may discharge itself. Do not let children near the battery. Children may swallow the battery and endanger their health.
Charging the built-in battery (see below)
Before charging, make sure that the charger is plugged into a power outlet, and the battery is charged via the charging port 22 (see "Charging the built-in battery", page 172).
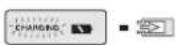
The charging indicator on the display shows the battery charging status. The CHARGING indicator lights up when the battery is fully charged.
Thanks to the intelligent charging system, the charging level of the battery is automatically detected and charging is carried out with an optimal current depending on the temperature and the battery voltage.
If you charge the battery while storing it in a cool place, it will be fully charged.
The battery can be charged either in the charging cradle 22 or by removing it from the cradle and using it in the device. When removing the battery, be careful to protect your hands. The battery may become very hot during charging.
Charging external devices
External devices can be charged via the 12 V outlet and the USB outlet only when the charging device is connected to the mains, not from the inserted battery.
When the charging device is connected to the mains, the green control lamp 4 lights up.
USB outlet
Via the USB outlet, it is possible to charge external devices that allow charging via USB (e.g., mobile phones).
Open the protective cap 19 and pull out the cover for the information section 20. Using a suitable USB cable, connect the USB outlet of the external device to the USB outlet 45 of the charging device. To start charging, the external device must be switched on.
12 V outlet (see Fig. C)
Via the 12 V outlet, you can connect external devices with a 12 V plug and a maximum current of 1 A.
Remove the protective cap from the 12 V outlet 41. Insert the plug of the external device into the 12 V outlet.
The 12 V outlet is protected by a fuse 44. If the external device does not receive voltage, open the locking cap 19 and pull out the cover for the information section 20. Unscrew the fuse cap 43 and check whether the built-in fuse 44 is working. If the fuse is working, insert a new fuse (5x20 mm, max. voltage 250 V, nominal current 1 A, slow-blow). Then screw the fuse cap 43 back on.
Note: Use only fuses rated for a current of 1 A and a maximum voltage of 250 V (250V 1A FUSE FOR 12V OUTLET). Using other fuses may damage the charging device.
Do not leave the device unattended while it is charging, or if there is a power outage. After the charging device has cooled down, the device should automatically return to its original position.
To protect against contamination, reinstall the protective cap for the charging socket as described in the external instructions.
AC power outlet (except model 3601D29660)
You can connect external electrical devices through the AC power outlet. The outlet may be damaged if
Ukrainian 177
depending on the specific standards of individual countries.
The maximum permissible total current for all connected electrical devices must not exceed the values specified in the table below (see also on the housing and on the cover 5):
Model number Total max. current (in A)
3601D29600 15 3601D29630 9 3601D29670 12 3601D296W0 15 3601D296X0 9
Open cover 5 near the AC power outlet and insert the plug of the external electrical device into the socket of the charging device.
Clock display
The charging device is equipped with a clock display with a separate power source. If the device is disconnected from the mains for a long time, the battery will discharge (see Replacing the batteries, page 173). You can set the clock again after reconnecting the device to the mains or after replacing the battery.
Setting the clock
To set the clock, press the clock button "Clock" 29 repeatedly until the clock display starts flashing. Press the upper button "Seek+" 33 or the lower button "- Seek" 35 repeatedly until the desired hour appears. -Press the clock button "Clock" again; the clock display will flash. -Press the upper button "Seek+" 33 or the lower button "- Seek" 35 repeatedly until the desired minute appears.
To save the time, press the "Clock" button again.
3. The energy saving mode can be activated by pressing the hour indicator on the display.
To save energy when activating the audio reminder (see "Turning the audio reminder on/off", page 173), hold the button 38 pressed until the indicator on the display goes out.
To turn on the hour indicator again, press button 38 once.
Operating instructions
Battery temperature control
If the charger is powered from the battery (not from the mains), the battery temperature is monitored.
- If the battery temperature is below -10°C or above 50°C, the display shows an indicator of going beyond the temperature range. - If the battery temperature exceeds 70°C, the charger switches off automatically to protect the battery. After the battery cools down, the charger can be switched on again.
Instructions for optimal use of the battery
Protect the battery from water and moisture.
Store the battery at temperatures between -20°C and 50°C. In particular, do not leave the battery in a car.
A new battery or one that has not been used for a long time requires several charge/discharge cycles to reach its full capacity.
If the operating time after charging becomes noticeably shorter, the battery is worn out and needs to be replaced.
The instructions for use are attached.
Troubleshooting - causes and remedies
The battery does not charge or does not charge properly when external devices are connected.
Not installed. Install the front panel.
The battery is not installed. Install the battery correctly so that it is properly seated.
Incorrect socket for 12 V.
Fuse not installed. Install the fuse.
Correct fuse. Replace the fuse.
Correct internal fuse. Replace the external fuse with a thermal fuse. Contact the charging device manufacturer.
Press the power button.
Incorrectly or not correctly installed. Install the battery or battery pack correctly.
Software error. Restart the software. Remove the battery or battery pack, wait 30 seconds, and reinstall the battery/battery pack.
Press the power button.
Interference from other devices. Move the charging device away from other devices or use a better radio antenna. Check the antenna orientation.
Not detected.
Backup battery for clock. Replace the backup battery.
Backup battery installed incorrectly. Install the backup battery with correct polarity.
Remote control battery
Insert the battery into the battery compartment of the remote control. Insert the battery into the battery compartment of the remote control, ensuring correct polarity.
If the remote control does not work properly, replace the battery.
If the device is not working properly, do not attempt to repair it yourself. Contact an authorized Bosch service center.
Maintenance and service
Maintenance and cleaning
The device is equipped with safety features. Do not attempt to repair it yourself. Contact an authorized Bosch service center.
Keep the remote control and the device away from moisture and direct sunlight.
Do not immerse the remote control in water or other liquids.
Wipe off dirt with a soft, damp cloth. Do not use cleaning agents or solvents.
Service and customer consultation on product use
The service center will answer your questions regarding repair and maintenance of your product. Spare parts and information can be obtained at:
www.bosch-pt.com
The Bosch team will be happy to answer any questions regarding the use of our products and accessories.
For questions and spare parts orders, please quote the 10-digit order number found on the product nameplate.
Repair and maintenance of power tools must be carried out in accordance with the requirements of the standards in force on the territory of Ukraine, either in specialized service centers or by authorized service centers of Robert Bosch.
WARNING! The use of counterfeit products is unsafe during operation and may have negative health consequences. The manufacture and distribution of counterfeit products is prosecuted by law in administrative and criminal proceedings.
Ukraine
LLC "Robert Bosch"
Service center for power tools
str. Kramskogo, 1, 02660, Kyiv-60
Ukraine
Tel.: (044) 490 24 07 (multi-channel)
E-Mail: pt-service.ua@bosch.com
Official website: www.bosch-powertools.com.ua
The addresses of regional warranty service workshops are indicated in the attached warranty card.
Kazakhstan | 179
Transportation
The built-in lithium-ion battery packs are subject to the requirements for the transportation of dangerous goods. Battery packs can be transported by the user by road without the need to comply with additional regulations.
When transported by third parties (e.g., by air freight or forwarding agent), special requirements for packaging and labeling must be observed. In this case, when preparing the shipment, consultation with a dangerous goods expert is required.
Charge the battery with the supplied charger. Before charging, open the contacts and connect the battery so that it does not come into contact with the housing.
Also, please note the possible additional instructions.
Disposal

Chargers, radio-controlled remote controls, batteries, and packaging must be disposed of at an ecological recycling facility.
Do not dispose of chargers, remote controls, and batteries in household waste!
For EU countries:
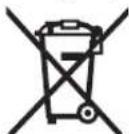
According to the European Directive 2012/19/EU and the European Directive 2006/66/EC, used power tools, damaged batteries, or batteries that have reached the end of their service life must be collected separately and disposed of in an environmentally friendly manner.
Batteries:
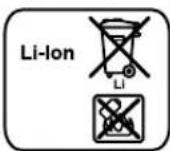
Lithium-ion:
Please refer to the instructions in the section "Transportation", page 179.
Possible.
Kazakhstan
This device is intended for use in Kazakhstan. The device must be connected to a power source with a voltage of 220-240 V and a frequency of 50 Hz. The device must be grounded. The device must be used in accordance with the instructions. The device must be kept away from water and moisture.
This device is intended for use in Kazakhstan.
The device must be connected to a power source with a voltage of 220-240 V and a frequency of 50 Hz. The device must be grounded. The device must be used in accordance with the instructions. The device must be kept away from water and moisture.
The housing of the gearbox, the oil filler plug, the oil drain plug, the oil level indicator (dipstick), the breather, the housing of the clutch release mechanism, the gear shift mechanism, and the clutch cable are located on the housing.
Gear shift mechanism
The gear shift mechanism and the clutch release mechanism
Gear shift type and characteristics
The device is designed for operation in a temperate climate.
Maintenance
Maintenance should be performed in accordance with the maintenance schedule. During maintenance, it is necessary to protect the device from temperature extremes, perform maintenance regularly, and avoid maintenance when the temperature is too high. The maintenance schedule is specified in GOST 15150 (Part 1).
Storage
During storage, the device must be protected from mechanical damage. Before storage, it is necessary to allow the device to cool down. The storage conditions must comply with GOST 15150 (Part 5).
180|Kazakh
Safety instructions
WARNING: Technical safety instructions and warnings must be observed. Technical safety instructions and warnings must be followed to prevent injury or damage to equipment.
Keep the safety instructions and warnings for future reference.
The safety instructions are based on the requirements of the technical regulations (including cables) and the accumulator (including cables) of the device.
Do not use the device if it is damaged or malfunctioning. If the device is not damaged, it is possible to bring it to a service center for repair. The radio transmitter must be connected to a power outlet. Grounding is required. When connecting the radio transmitter to the power supply, use an alternating current outlet. Use only grounded outlets and connect the device to the power supply with a three-prong plug. Do not touch the power cord with wet hands, do not pull it out of the outlet, and do not unplug it by pulling the cord. Protect the power cord from high temperatures, moisture, sharp objects, and contact with heating appliances. If the power cord is damaged or worn, replace it. If you are not using the radio transmitter for a long time, unplug it from the outlet. The plug of the radio transmitter must be connected to an outlet with a grounding contact. If the radio transmitter is connected to an outlet without grounding, use an adapter with a grounding wire. Do not connect the radio transmitter to an extension cord with multiple sockets. The outlet and plug must be easily accessible. Do not place the radio transmitter near water. If water gets inside, unplug it immediately. Do not use the radio transmitter with a damaged cord or plug. Only use the radio transmitter with the original power supply. This radio transmitter is not intended for use by children or persons with reduced physical, sensory, or mental capabilities, or lack of experience and knowledge, unless they have been given supervision or instruction concerning use of the appliance by a person responsible for their safety. Children should be supervised to ensure that they do not play with the radio transmitter.
Do not use the device if it is damaged or malfunctioning. If the device is not damaged, it is possible to bring it to a service center for repair. The radio transmitter must be connected to a power outlet. Grounding is required. When connecting the radio transmitter to the power supply, use an alternating current outlet. Use only grounded outlets and connect the device to the power supply with a three-prong plug. Do not touch the power cord with wet hands, do not pull it out of the outlet, and do not unplug it by pulling the cord. Protect the power cord from high temperatures, moisture, sharp objects, and contact with heating appliances. If the power cord is damaged or worn, replace it. If you are not using the radio transmitter for a long time, unplug it from the outlet. The plug of the radio transmitter must be connected to an outlet with a grounding contact. If the radio transmitter is connected to an outlet without grounding, use an adapter with a grounding wire. Do not connect the radio transmitter to an extension cord with multiple sockets. The outlet and plug must be easily accessible. Do not place the radio transmitter near water. If water gets inside, unplug it immediately. Do not use the radio transmitter with a damaged cord or plug. Only use the radio transmitter with the original power supply. This radio transmitter is not intended for use by children or persons with reduced physical, sensory, or mental capabilities, or lack of experience and knowledge, unless they have been given supervision or instruction concerning use of the appliance by a person responsible for their safety. Children should be supervised to ensure that they do not play with the radio transmitter.
Do not allow children to play with the device. Keep the radio transmitter out of reach of children. Only use the charger (4 batteries) Bosch type. The charger must be connected to the radio transmitter's charging socket. Do not charge non-rechargeable batteries. Do not use batteries that are damaged or leaking.
Do not disassemble or modify the radio transmitter. If water gets inside the radio transmitter, it may cause a short circuit and damage the device.
The battery is rechargeable. The battery compartment is designed for recharging; the batteries must be placed in the charging compartment. In case of danger, remove or insert the battery. Use only the rechargeable battery. Insert the battery according to the polarity markings. Do not use the rechargeable battery if it is damaged or leaking. Do not use the rechargeable battery with other batteries or power sources. Do not short-circuit the rechargeable battery. Do not expose the rechargeable battery to moisture or rain. If the battery is damaged or leaks, do not touch it. If liquid from the battery comes into contact with skin or eyes, rinse with water and seek medical help. Do not disassemble the battery. There is a risk of short circuit.

Do not use the battery if it is damaged, deformed, or has been dropped. There is a risk of injury. Store the battery away from paper clips, coins, keys, nails, screws, or other small metal objects that could cause bridging of the contacts. Keep the battery away from metal objects.


Short circuit may cause burns or fire.
Charge the battery only with the specified charger. Using a different charger may cause fire or damage. Use only the original rechargeable battery and Bosch charger. Do not charge the battery if it is damaged. Do not expose the battery to high temperatures or direct sunlight. Do not throw the battery into fire or water. Do not open or disassemble the battery. If the battery is damaged, contact a qualified service center.
Service and Maintenance


Remove the battery before any maintenance or cleaning.
Maintenance and cleaning should be performed only by qualified personnel.
Do not immerse the rechargeable battery in water or other liquids.
Disposal
The rechargeable battery must be disposed of according to local regulations. Do not dispose of it with household waste.
1. Control buttons 2. Back cover 3. Lock 4. Audio input socket (3601D29660 headphone jack) 5. Audio output socket (3601D29660 headphone jack) 6. Audio output socket (3601D29660 headphone jack) 7. Control button operation period 8. Test mode 9. Sound adjustment period 10. Control button operation period, |<< 11. Control button operation period 12. Sound adjustment period 13. Control button operation period for audio output
14. Control button operation period, Source audio selection period 15. Mute operation period 16. Knob 17. Battery compartment cover (buffer batteries) 18. Battery compartment cover (buffer batteries) 19. Disc player compartment cover lock 20. Disc player compartment cover 21. Antenna 22. Charging socket 23. Accumulator compartment cover lock 24. Accumulator compartment cover 25. Accumulator 26. Equalizer sound adjustment period 27. Memory card slot 28. Custom setting period 29. Clock setting period 30. Tune radio station adjustment period 31. Control button operation period 32. Socket on/off period 33. Track search, Seek+/>> period 34. Source audio selection period 35. Track search, |</<-Seek period 36. On/off 37. Volume sound adjustment with Bass/Treb sound adjustment period 38. Audio output period 39. Display 40. AUX1 IN jack 41. 12V output jack 42. LINE OUT jack 43. Antenna socket 44. 12V antenna socket 45. USB port 46. SD/MMC card slot 47. AUX2 IN jack 48. External audio inputs are designed to connect devices with standard connectors. The connectors may differ from those shown in the diagram.
Audio output elements
Sound adjustment control elements: volume control, bass control, treble control, sound adjustment, radio station selection control (connected to audio input), radio station selection control (radio)
182|Kazakh
f. Socket on/off control (SD/MMC card or USB audio input) g. Data card on/off control (SD/MMC card or USB audio input) h. Data indicator on/off control (SD/MMC card or USB audio input) i. Stereo cable control
j. Radio on/off or auto on/off
k. Narrow control
(connected to audio input)
l. Temperature sensor
1. Accumulator charging control
m. Accumulator charging indicator
n. Audio input control, socket control
Buffer batteries compartment cover is on the back side.
"REPLACE AA BATTERY WHEN UNIT NO LONGER KEEPS CORRECT TIME": Replace the buffer batteries when the unit no longer keeps correct time.
Batteries must be kept dry. Do not connect the battery terminals together.
If the device is not used for a long time, remove the batteries from the radio. If the batteries are left in the device for a long time, they may leak and cause damage.
Charging
Do not charge the radio with a non-recommended charger.
Audio jack (see table and figures)
The audio jack can be used to control some functions of the radio (see "Control" on page 185).
Connecting/disconnecting the audio jack
To connect the audio jack (for radio and external audio), see page 38. The audio jack is connected to the radio's accessory connector on page 39.
If the radio is in power-saving mode (see "Power saving mode" on page 187), press the connect/disconnect button twice to connect the audio jack.
To disconnect the audio jack, press the connect/disconnect button twice. The audio jack parameters are set to default.
To save battery power, connect the radio only when necessary.
Resetting
To reset the device, press and hold the "Volume" button (page 37) and the "Reset" button simultaneously. The reset parameters (between 0 and 20) are set to factory defaults.
To reset the radio to factory settings, press and hold the "Reset" button while turning on the radio, and then release it.
Reset
The device is designed for playback of audio files.
Select the equalizer preset that matches the music genre. For jazz, rock, pop, classical, and other genres, select the appropriate preset. For custom settings, use the CUSTOM parameter.


184 | Kazakh
To adjust the equalizer settings, use the "Equalizer" button to select the desired parameter and adjust it as needed.
Adjusting the CUSTOM parameter:
Press the "CUSTOM" button to select a preset. On the display, use the "BAS" control to adjust the bass level (0 to 10). To adjust the treble, use the "Bass/Treb" button to switch between bass and treble, then adjust the treble level. To reset the equalizer settings, press the "CUSTOM" button again.
Audio Input Selection
To select an audio input, press the "Source" button and choose from the available inputs (see Radio station setup on page 184) or external audio inputs (see External audio input connection on page 184):
FM: Radio tuner, AM: Radio tuner, "AUX1": External audio input (microphone, CD player) via 3.5 mm jack (40), "AUX2": External audio input (microphone, MP3 player) via 3.5 mm jack (47), "USB": External audio input (microphone, USB flash drive) via USB port (45), "SD": External audio input (SD/MMC card) via SD/MMC slot (46).
Antenna Connection
Connect the supplied antenna to the radio tuner. For better radio reception, extend the antenna fully.
Connect the cables to the corresponding jacks on the rear panel of the radio.
Note: The radio tuner may not work properly if the antenna is not connected or if the radio signal is weak.
If the antenna is not connected, the radio may not function properly.
Radio station setup
Auxiliary audio input, "Source" 34, FM tuner frequency selection button (TUNE) or AM tuner frequency selection button (TUNE) for manual tuning.
To select a preset radio station, press the TUNE 30 button to select the next preset station, or press the TUNE button to select the previous preset station. The selected preset station will be displayed on the display.
To manually tune to a radio station, press and hold the "Seek" 35 or "Seek +" 33 button until the desired frequency is found. The tuned radio station will be displayed on the display.
If the signal is weak, the radio tuner will automatically switch to stereo mode. The stereo indicator will be displayed on the display.
To set the clock and calendar, press and hold the "Memory" 27 button. Then, use the "PRESET" buttons to adjust the clock and calendar settings. To set the clock, press and hold the "Seek" 35 or "Seek +" 33 button until the clock display flashes. The clock setting will be displayed on the display. 27 The clock and calendar can be set using the buttons on the front panel.
The clock and calendar can be set using the buttons on the front panel. After setting the clock, the radio will display the time.
To set the clock and calendar, press and hold the "Seek" 35 or "Seek +" 33 button until the clock display flashes. The clock setting will be displayed on the display.
The auxiliary input jack (AUX IN) is located on the front panel.
The auxiliary input can be used to connect portable audio devices.
AUX-In jack 1: AUX-In jack 1 is for connecting audio devices (such as MP3 players, CD players) to the auxiliary input. The AUX IN jack is a 3.5 mm stereo jack. Connect the AUX cable to the AUX IN jack.
When the AUX cable is connected, the AUX IN indicator will light up.
For auxiliary input, use the supplied cable with a 3.5 mm stereo plug. Connect it to the "Digital Media Bay" 20 on the front panel.
-SD/MMC card slot: Insert an SD or MMC card into the SD/MMC card slot 46. The card should be inserted with the label facing up. To remove the card, press it in and release it.


Kazakh 185
The card can be removed by pressing it in and releasing it. To remove the card, press it in and release it.
-USB socket: USB flash drive (or USB cable) can be connected to the USB socket. The USB flash drive must be inserted into the socket with the connector facing the correct direction. To remove the USB flash drive, pull it out of the USB socket. -AUX-In socket: The AUX-In socket allows you to connect an external audio device (e.g., MP3 player) via a 3.5 mm AUX cable. Insert the AUX cable into the "AUX IN" socket. To remove the AUX cable, pull it out of the socket.
To set the external audio device, press the "Source" button (48) repeatedly until the external audio device is selected.
To protect the device from damage, do not insert the external audio device into the socket with excessive force.
To operate the connected audio device, select the audio device by pressing the "Source" button (34) repeatedly until the audio device is displayed on the screen.
External audio device control
The SD/MMC card slot (46) or USB socket (45) can be used to connect an external audio device. The device can be controlled via the buttons on the front panel. The display shows information about the currently playing track or file.
Play/Pause:
To start playback, press the Play/Pause button (36). The current track will be played. To pause or resume playback, press the Play/Pause button (36) again. The current track will be paused.
Track selection:
- To select a track, press the "Seek" button (35) or the "Seek" button (33) repeatedly until the desired track is displayed on the screen. To start playback, press the Play/Pause button (36).
Repeat/Shuffle:
To repeat all tracks from the card or USB flash drive, press the Repeat/Shuffle button (32) once. The indicator will light up. To repeat all tracks in random order, press the Repeat/Shuffle button (32) twice. The indicator will light up. Note: This function only works with tracks stored on the card or USB flash drive. To cancel repeat, press the Repeat/Shuffle button (32) again.
To shuffle all tracks, press the Repeat/Shuffle button (32) three times. The indicator will light up. To cancel shuffle, press the Repeat/Shuffle button (32) again. The indicator will turn off. To start playback, press the Play/Pause button (36).
External audio device connection (see figure)
When connecting an external audio device, ensure that the device is turned off before connecting it to the AUX input.
LINE OUT"YWbIFBHH42CaKtayKaIaNkuaCbHweiin CaikecAUX kaBenIH3,5MM WTeKePiYwblka caNbH3. CaikeoHaHTy KpyBnIFCbHBH AUX Ka6eIHe KOcbH3.AUX Ka6eINIH WTeKePi AnFaHda NaCTaHydAn CaTAYuH "LINE OUT "YAAHbIFbIHbIH 42 KOPfAflW KaIINaKlIacBH KaITa OPhATbIH3.
Backapy Kypbinfbcbi
Bacapky KypbInfbcih TEK 6inikti MaMaHaFkaHe apaynb6nweKeTepmeh XeHdeti3. Con apkbblb 6bacny KypbInfbcihHbHpybc icTeYih cKaTaibc3i KahatbH cyhblkTbIkap,ra3aap Hemece WaH XhbInfah Xapblhc Kayi6ap optada 6ackpy KypanbIfbcih naDanaH6aHb. Bacepky KypblfbcbyuWkbH WbIFapbln, WauHbJ KaHdbipBn,opt Tydbpyb MyMKH.
PaiDanaHyFa eHdipy
Bacapy KypbInfbcIn cb3aH XaHe Tikenei Kyh caynepein H caTah3. Backapy KypbInfbciba anpbikwa Temnepatypa Hemece Temnepatypa Tep6enepi acep etneyi Tnic. OHblmbicblabTOKeJIKeTe y3ak yaKbI KaIbIpMaHbI. YnKeH Temnepatypa Tep6enepi kafdaibHa aIbnMeH 6ackapy KypbInfbcblbH TLmnpaTpaCbH DpybcTan coH naDanaHbHbI3.
BaTapea JxTeepnik KepHey 6oNca BAcKApy KypblHbCbl XMybc icten typa.
Papno3aparTafbiTb6bacpy Kypblfbcihh Wbfbc TecirineH 8 bIfatbIH CnHanDap pAnokaBldaFbIbTH KabidayNnH3acbHa 31 TIKENe JxetetIn etin Koiblb. Erep bacapy Kypblfbcih Kabiday NnH3acbHa Tikenei 6aftlay MyMkih 60maca Kymbc aMamfa Kbickapabi. CnHan KaTapynapbl (Mbicbn, Kabipfada) apkblt Tikeen KeMeRer H CnHAnDap XaFaDbIa Da XETy KaIbIKTbfHJ KkaCapTy MmKiH.
Bacapy KypbIFbcIH 2 Tacy TykabIHda 3 cKaTay MYMKH. NaaHaNy yuH bacapy KypbIFbcIH Kyblntb16 aubin baccay KypbIFbcIH acbIn 6actbpMa da6ekTIy MYMKH.
Функунлар
TaHdAnFaH ayDnO Ke3Ie 6aHbHbCTbI eMec: -Ayno Xymcbin Kocy Xhe eipy yuih Kocy-epipy nephecin 13 kaeta bacnbiz. - Db6bictb Kocy Xehe eipy yuH ,Mute"15 nepheci 6acbl3.


186|Kazakka
- bbl6bc KaTbIbIbIbIH KETepy yiwih 9 nepheci, an Dbl6bc KaTbIbIbIH TEmeHdTeY wih 12 nepheci 6acblh3. -AyDnOKe3HAnMaCTbIpy yuIH,Source"14 nepHecih 6aCbHb3.
AynoXymbcbHda:
-TeMeHxNiiKTe paMo cTaHcAcbIH TaH 13dey7 nepheci HKepeTki xNikTa6bIfraHa7a6acbHbI3. Korapbji Kiniikpe padno cTahcscbi TaHday ywi Hxorapbida i3ey 10 nepheci Kepekti Kniik TabiFaHwa 6acbHia.
SD-/MMC cany opHb4 46 hemce USB yraBfbl 45 apkbnbl Kocbnfah ayno Ke3epin backapyda:
Do not touch the battery with wet hands, and do not short-circuit the terminals. If the terminals are short-circuited, a large current will flow and may cause burns or fire.
Battery operation
To operate the battery, press the battery release button on the battery pack, then pull the battery out. To insert the battery, slide it in until it clicks. Do not use force when inserting the battery. If the battery is not inserted properly, it may fall out.
The battery is a single unit. Do not disassemble the battery. If the battery is damaged, replace it with a new one. If the battery is not used for a long time, remove it from the device. Do not short-circuit the battery terminals. Keep the battery away from children. If the battery is swallowed, seek medical attention immediately.
Charging the battery (see figure A)
To charge the battery, plug the charger into a power outlet and connect the battery to the charger. The battery will charge in about 22 hours. (See figure B for battery charging.)

During charging, the charging indicator will light up. When the indicator goes out, the battery is fully charged.
The charging process is controlled by the battery's internal circuit, which monitors the battery temperature and voltage to ensure safe charging.
If the battery is new, it should be fully charged before first use.
A fully charged battery can be used for about 22 hours, or it can be used to power other devices via the USB port.
If the battery is not used for a long time, store it in a cool, dry place. Do not charge the battery in high temperatures.
Using the device with external power
The device can be powered by an external power source with a voltage of 12 V or higher.
If the external power source is not properly connected, the device may not operate correctly.
If the external power source is not connected, the device will operate on battery power.
USB socket: The USB socket can be used to connect or charge devices (such as phones) that have a USB connector.
This device's lifespan is 20 years. The USB socket's access cover must be opened to use the USB port. To charge, the cover must be opened and the audio device connected.
12 V socket (with cover)
The 12 V socket is an electrical outlet that must be supplied with 12 V DC and a maximum current of 1 A. The 12 V socket's cover must be closed when not in use. The electrical outlet's DC is connected to the 12 V socket. The 12 V socket is protected by a fuse. If the socket's cover is not closed, the device's lifespan may be reduced to 20 years. The fuse is rated at 4 A and must be replaced with a fuse of the same rating. If the fuse blows, replace it with a fuse of the same type (5x20 mm, 250 V max, 1 A breaking capacity). Do not use a fuse with a higher rating.
Warning: The fuse's maximum
250 V rating is for use with "250V 1A FUSE FOR 12V OUTLET". Do not use a fuse with a higher rating.
The 12 V socket is protected by a thermal fuse, which may blow if the socket is overloaded.
After using the radio, the fuse may be hot.
To prevent damage, do not connect the 12 V socket's cover to the electrical outlet when the cover is open.
Power outlets
(3601D29660 is not a spare part)
The power outlets must be connected to the electrical outlets. The sockets must comply with local standards.
Connect the electrical outlets to the maximum current specified in the table.


Fuse 187
Instructions for use (part 1 of the manual):
Setting the clock (A)
3601D2960015
3601D296309
3601D2967012
3601D296W015
3601D296X09
The clock can be set to the current time using the radio signal. The radio signal is received automatically.
Setting the clock manually
If the radio signal is not received, the clock can be set manually. If the batteries are inserted correctly (see "Inserting batteries"), the clock will attempt to receive the radio signal. If the signal is not received, the clock can be set manually.
Setting the clock manually
To set the clock manually, press the "Clock" button. The hour display will flash. Press the "+" button to increase the hour or the "-" button to decrease it. Then press the "Clock" button again. The minute display will flash. Press the "+" button to increase the minutes or the "-" button to decrease them. Press the "Clock" button to confirm.
Energy saving mode
To save energy, the display can be turned off.
To do this, press the "Light" button (see "Light on/off"). The display will turn off.
YaKbT KepcTeKiH KIta Kocy yuH Kocy-epiPy nepheciH 38 6ip pet 6acbHbI3.
Paindany HycaynapbI
Akkymyntopdbi naDanahydafti temnepaypa 6akblaybl
Erep padno3apraTafbIu Tek AkkyMnyTOpDah 3heprna anca (xenire KocblbcB3, OHda akkyMnyTOp TEMpepatpcb6akblnHaBbl.
-ErepakkymyIoptemnepaypacbI-10CtemeHemece 50Cxxorap6oNca,temnpaypaeckeptykDncnnneJde XblblkbTAtbl. -Erepakkymyntoptemnepatypacb70CJxofapb6oNca, padno3apndtaibakkymyntopdbKopray ywiH
ABTOMaTbIeJeI. AkkymyIaTOp cybIfaHHaH Co PAAnO3ApAraTbFbIHTb KaHaI icke KocCyFa 60nAbI.
AkkymyIaTOpblOuTaHbI naHdAnany Typanbl HcyKaynap AkkymyJIaTOpblCybIKbIKTapdaH XaHe bInFaHaKopFaHbI.
AkkymyIaTOpIbTeK-20C...50°C TempeIpya ayMbHnDa caKaTaHbI3. AkkymyIaTOpIb Ka3Da KeniIKe KaIbIPMaHbI3. KaHa Hemece y3aK yaKbIT BoNbI naJdaJaHbImarAH aKKyMnyTOp ToBk CbblMbIbIbFbHa 5 aPaTay 3apraTay TaCyblNy UKnblHaH KeiHKeTei. Painanany Meepiminai anTapbikTai KbiKapbya kkyMnyTopdbH eckipreHH Xahe aybictbpy Kepektiriin 6inipedi. KokltapdbkaHtahcHcyTpaIbHyckaynapdbOpbHdaHb3.
Akaynap-Ce6entepiXheweimdepi
Ce6e6i Wewimi
PaHno3apraTafbiI W KocbIMaDbI
| энерия кабдыктanyы кok Кени aiырbing He mece (Tолык) зapаялfacан akКуМУЛТорды calынbl3 |
| Радиоарядantaftыш ТыIM bICTык He mece ТыIM сык ЖЕТСЕОЕ KUTIH3 |
PaoaTbIiXeJIiKxMbictaicTeMeJxatbp
12B KockbiwICTeMeiKaTbip
| Сактындьрьш 44 орнасылмаян | Сактындьрьш 44 салынб3 |
| Сактындьрьш 44 icten кетti | Сактындьрьш 44 алмасырьнb3 |
| Iшki temператуа сактындьрьш icke Косындь | Сырткы Крьлгьны ольи, раDNозарДТаБИТы сыltынб3 |
| РадиоэарДТаБИЧЕДECHОКICTEMЕΚANДы | |
| Женийаырь иеме аKKуМУЛЯТOPТOLыБIMeH салынбаFAH | Женийаырь иеме аKKуМУЛЯТOPДы ДУрьс кжЕн ТOLынСаынб3 |
| БаГдагПамаьik касаКТаMa Кateliri | БаГдагПамаьik ЖасаКТаMны Калл�и Кentічі рушін кенийаырь ТаRTынɑKKуМУЛЯТOPДы аны Кочьнlb3, 30 секунd Кутіn, кенийаырьн hemece aKKуМУЛЯТOPДы Кайтɑ салынб3. |
PaHno Ka6bInayKaKcbIeMec
| Баcka Крьлгылар Немес Дурс ecм ecм opнату кайы apкылы akayныk | Радиозэрдтабихжakсы Каблдayы ушin оныбасka Жерр орнтынд3 |
| Кадayны anteHTHа OTTHMалды 6afblTalMaFAH | Кадayны anteHTHaHb Буразы3 |
| Yakbir Kepcetkiшi akayныfBi | |
| Саftын 6уфөрлін Баразылары 6oc | Буфөрлін 6batapeлары Алмacrынl3 |
| Буфөрлін 6batapeлар пОПОстары aybICын ketkeн | Буфөрлін 6batapeлары Дурьс поюстам Салынl3 |
Backapy Kypbnfbcbi cteMei katabp
Before commissioning, the product must be handed over to the authorized service organization for inspection.
Install the control and monitoring system for the device before use.
Do not immerse the control system in water or other liquids.
After cleaning, dry it with a soft cloth. Do not use aggressive cleaning agents.
Service and maintenance instructions
For service and maintenance, contact the service center. For questions about accessories and spare parts, contact the address below. A list of spare parts and information about accessories can be found at:
www.bosch-pt.com
For questions about accessories and spare parts, contact the Bosch service center.
If you have questions, please contact the spare parts service. If you are not sure, you can find the order numbers on the type plate of the device.
Only use original spare parts and accessories. Repairs and maintenance must be carried out by qualified personnel or authorized service centers.
WARNING: Improper use can lead to injury. Use the device only for its intended purpose and follow the safety instructions.
KAZAKHSTAN
Robert Bosch
State Utility Enterprise "Kypdalap" of Almaty city
Kazakhstan
050050
Raimbek avenue
Communal building 169/1
Tel.: +7 (727) 232 37 07
Fax: +7 (727) 2330787
E-Mail: info.powertools.ka@bosch.com
Website: www.bosch.kz; www.bosch-pt.kz
Romania | 189
Disposal
Power tools, accessories and packaging should be sorted for environmentally friendly recycling. Do not dispose of power tools into household waste!
Only for EU countries: According to the European Directive 2012/19/EU on Waste Electrical and Electronic Equipment and its implementation into national law, power tools that are no longer usable must be collected separately and disposed of in an environmentally correct manner.
Batteries must not be disposed of with household waste. Do not expose batteries to fire or high temperatures. There is a risk of explosion!
If the battery is defective, dispose of it according to the instructions.

Before operating the power tool, carefully read the operating instructions, and keep the battery pack, charger, and accessories in a safe place.
The power tool, operating instructions, and battery pack/batteries must not be disposed of with household waste.
Only for EU countries:
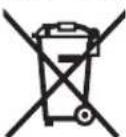
According to European Directive 2012/19/EU, power tools that are no longer usable must be collected separately and recycled in an environmentally friendly manner. According to European Directive 2006/66/EC, defective or exhausted battery packs/batteries must be collected separately and disposed of properly.
Battery packs/batteries:
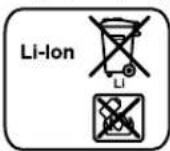
Li-ion:
Please note the instructions in section 1, paragraph 189 regarding transport.
Technical changes reserved.
Defective battery: Replace the battery.
Tel. service power tools: (021) 4057540
Fax: (021) 4057566
E-Mail: infoBSC@ro.bosch.com
Tel. customer consultation: (021) 4057500
Fax: (021) 2331313
E-Mail: infoBSC@ro.bosch.com
www.bosch-romania.ro
Transport
The integrated Li-Ion batteries comply with the requirements of the legislation regarding the transport of dangerous goods. The batteries can be transported by road without restrictions.
In the case of transport by third parties (e.g., air transport or by freight forwarder), special requirements regarding packaging and labeling must be observed. In this situation, an expert in the transport of dangerous goods must be consulted when preparing the shipment.
Indicators for battery charging
Charging indicator
Indicators for sound source selection
The remote control
Technical data
If necessary, replace the battery 25.
To remove the battery compartment cover 18, press the latch 17 and pull out the cover. Insert the batteries. Pay attention to the correct polarity, as shown on the inside of the battery compartment.
Insert the cover 18 onto the battery compartment until it clicks into place.
"REPLACE AA BATTERY WHEN UNIT NO LONGER KEEPS CORRECT TIME": Replace the batteries when the clock of the radio charging device no longer keeps the correct time.
Replace all batteries at the same time. Use only batteries of the same type and brand.
If you have enough time to use the radio charging device, remove the batteries
for charging. When not in use, the batteries for charging may be stored and self-discharge.
Working with the remote control
Point the radio charging device at the device to be charged.
Audio playback
Some functions of the radio charging device can be controlled via the remote control (see "Remote Control", page 204).
Turning the audio playback on/off
To turn on the radio charging device (radio or audio source), press button 38. Button 39 is activated and the audio source is turned on, set to the last used audio source.
If the radio charging device is in power saving mode (see "Power Saving Mode", page 206), to turn on the audio playback, press button 38 twice.
To turn off the audio playback, press button 38 again. The current state of the audio source is saved.
To save power, turn on the radio charging device only when you use it.
Adjusting the volume
To increase the volume, turn the Volume control 37 clockwise. To decrease the volume, turn it counterclockwise. The current volume level (a number between 0 and 20) is displayed for a few seconds on the display.
Adjusting the volume and muting the audio source: press the volume control to mute the audio source.
Setting the alarm
For optimal sound reproduction from the radio alarm clock, use the equalizer.
You can adjust the sound frequencies manually or select one of the preset equalizer settings for different music styles. The options are "JAZZ", "ROCK", "POP", and "CLASSICAL", as well as a "CUSTOM" setting that you can program yourself.
To select one of the preset equalizer settings, press the "Equalizer" button repeatedly until the desired setting appears on the display.
Changing the "CUSTOM" setting
- Press the "Custom" button once. The display will show "BAS" and in the field below the current value for the low frequencies.


Bulgarian | 203
- Set the desired level for the low frequencies (value between 0 and 10). To increase the low frequencies, turn the "Bass/Treb" knob clockwise; to decrease, turn it counterclockwise. - To set the level for the high frequencies, press the "Custom" button again. The display will show "TRE" and in the field below the current value for the high frequencies. Set the desired level for the high frequencies (value between 0 and 10). To increase the high frequencies, turn the "Bass/Treb" knob clockwise; to decrease, turn it counterclockwise. - To save the setting, press the "Custom" button a third time.
Selecting the sound source
To select the sound source, press the "Source" button repeatedly until the symbol of the desired sound source appears on the display (see "Setting/Storing radio stations", page 203), or the external sound source (see "Connecting an external sound source", page 203):
- - FM1: radio tuner, - FM2: radio tuner, - AUX1: external sound source (e.g., CD player) connected to the 3.5 mm jack 40, - AUX2: external sound source (e.g., MP3 player) connected to the 3.5 mm jack 47, - USB: external sound source (e.g., USB flash drive) connected to the USB port 45, - SD: external sound source (SD/MMC card) inserted into the SD/MMC slot 46.
Adjusting the antenna
The radio alarm clock is equipped with a built-in antenna. To improve reception, adjust the position of the antenna for best signal quality.
If it is not possible to achieve satisfactory reception, place the radio alarm clock in a location where the signal is stronger.
Note: When operating the radio alarm clock in close proximity to sources of interference, such as electrical devices, reception may be affected.
Turn the knob 21 clockwise, then the knob to the body, by turning it in the direction of the clock hand.
Setting/Storing radio stations
Press the button for selecting the sound source «Source» 34 several times until the symbol «FM» for reception in the FM range (UKW) or «AM» for reception in the medium wave range (MW) appears on the display.
To tune to a specific reception frequency, turn the tuning knob 30 in the direction of the clock hand if you want to increase the frequency, or against the clock hand if you want to decrease it. While tuning, the current frequency is shown in field O of the display, and then in field j.
For automatic search of radio stations with strong signal strength, do not turn the knob briefly for searching backwards «-Seek» 35, or the button for searching forwards «Seek+» 33. The frequency of the found radio station appears briefly on the display in field o, then in field J of the display.
The portable radio device is automatically set to stereo mode. The symbol for stereo mode I appears on the display.
To store a tuned radio station, press the button for storing «Memory» 27. The display will show the symbol «PRESET» e, and in field d - the number of the last stored memory slot. To select a memory slot, press the button for searching backwards «-Seek» 35, or the button for searching forwards «Seek +» 33, until the desired memory slot appears in field d. Press the button for storing 27 again to store the tuned radio station in the selected memory slot. The symbol e will disappear. You can store 20 UKW radio stations and 10 MW radio stations. Please note that if you store a new radio station in a slot where another was previously saved, the old one is overwritten.
To tune to a stored radio station, press the button for searching backwards «- Seek» 35, or the button for searching forwards «Seek +» 33, until the desired station appears in field d, and in field e - the symbol «PRESET»
Switching on external sound sources (see chapter C).
In addition to the built-in radio receiver, external sound sources can also be used.
Input AUX-In 1: The input AUX-In 1 is suitable for sound sources that are connected externally to the radio device (e.g., CD player). Remove the protective cap and insert the plug «AUX 1 IN» 40 and insert the jack
3.5mm into the socket on the device or on another suitable cable. Connect the audio cable to the suitable sound source.
To protect against dust, after removing the jack plug «AUX 1 IN» 40, put the cap back on.
For external sound sources connected to the described inputs, free the slot 19 and repeat the click 20 on the socket for external sound sources (Digital Media Bay).
Slot SD/MMC: Insert the SD or MMC card into the slot SD/MMC 46. The card must be oriented towards the protective cap 43. Playback from the card can start when the display field shows the title of the recording.



204|Bulgarian
The card is being recorded. To remove the card, first press the stop button - the card is ejected automatically.
- USB interface: Insert the USB flash drive (or USB cable from a power source) into the USB interface socket 45. Playback from the USB flash drive can start when the display field d shows the title and total number of tracks on the USB flash drive. To remove the USB flash drive, pull it out of the socket. - AUX IN 2: The AUX IN 2 input is suitable for audio sources that can be connected to the stereo system (e.g., MP3 players). Insert the 3.5 mm plug of the included audio cable into the socket «AUX 2 IN» 47. Connect the audio cable to the appropriate audio source.
If space permits, you can secure the external audio source with the self-adhesive tape and the bracket 48. To prevent damage, it is recommended to close the cover 20 after connecting the external audio source.
To play the connected audio source, press the «Source» button 34 several times until the symbol for the desired audio source appears in the display.
Controlling the external audio source
The audio source connected to the SD/MMC card slot 46 or USB interface 45 can be controlled via the radio remote control. The display d shows the track number and title of the current selection, as well as the total number of tracks.
Playback/pause of playback:
- To start playback, press the Play/Pause button 36. The progress of the current track is shown in field j. - To pause or resume playback, press the Play/Pause button 36 again. The current progress will be displayed in field j of the display.
Selecting a track:
- To select a track, press the «Seek-» button 35 or the «Seek+» button 33 repeatedly until the desired track number appears in the display field d. - To start playback, press the Play/Pause button 36.
Playback in random order/repeat playback:
- To play all tracks on the card or the connected USB flash drive in random order, press the Random/Repeat button 32 once. The symbol f appears on the display. - To repeat all tracks in the current folder, press the Random/Repeat button 32 again. The symbol g appears on the display.
Note: Only in this function, the display field d shows the number of the current track on the card or USB flash drive. To change the folder, you must first return to normal playback mode and select a track from the desired folder.
To stop playback, press the STOP button on the remote control. To resume playback, press the PLAY/PAUSE button again. To return to normal playback mode, press the PLAY/PAUSE button for the fourth time, so that none of the symbols f, g, or h is displayed on the display. To stop playback, press the PLAY/PAUSE button.
Connecting external playback devices (see Fig. C)
You can connect the audio signal of a radio-controlled device to the external playback device (e.g., an amplifier or sound system).
Connect the audio cable to the "LINE OUT" jack and insert the 3.5 mm plug into the corresponding cable. Connect the cable to the corresponding external playback device. For connection to an amplifier, place the cable back into the "LINE OUT" jack and then connect the other end of the audio cable.
Remote control
Only use the remote control with original spare parts. This ensures the functionality of the remote control. Do not use the remote control in environments with increased risk of explosion, where there are flammable gases, vapors, or dust. In the remote control, sparks may occur that could ignite dust or vapors.
Inserting batteries
Protect the remote control from moisture and heat. Do not expose the remote control to extreme temperatures or direct sunlight. For example, do not leave it in a car for a long time. In case of large temperature differences, let the remote control acclimate before using it.
When a battery is inserted, the remote control is ready for operation.
Position the radio-controlled device so that the signals emitted through the opening 8 of the remote control can reach the receiving sensor 31 of the radio-controlled device directly. If the remote control cannot be pointed directly at the receiving sensor, the operating range is reduced. All
Bulgarian | 205
Due to signal reflection (e.g., from walls), the operating range may be increased.
The remote control 2 can be stored in the holder for remote control 3. When using it, you can attach it, for example, to a wall bracket, by opening the locking mechanism 16 and placing it.
Functions
Independent sound source:
To turn the radio on/off, press button 13 on the remote control. To turn the sound on/off, press button 15. To increase the volume, press button 9; to decrease the volume, press button 12. To select the sound source, press button 14 labeled "Source".
To select a lower frequency station, press the button for searching backward 7 until the desired frequency is found. To select a higher frequency station, press the button for searching forward 10 until the desired frequency is found.
To adjust the sound, included in the SD/MMC card slot 46 and USB interface 45:
To turn on, press and hold the power button on the remote control, then press the play/pause button 11. To select a track, press the button for searching backward 7 or the button for searching forward 10.
CHANGING THE BATTERIES
To change the batteries, unscrew the screw of the battery compartment cover on the back of the remote control and open the cover.
When inserting new batteries, observe the correct polarity. Then close the cover and tighten the screw of the battery compartment.
Replace the batteries only with new batteries of the same type. Using other types of batteries may cause a risk of explosion. If you do not intend to use the remote control for a long time, remove the batteries from it. If the batteries are stored for a long time, they may leak or self-discharge. Keep the batteries out of reach of children. Children may swallow the batteries and endanger their health.
Charging the rechargeable battery (see Fig. A)
Rapid charging begins when the radio is connected to the mains and a rechargeable battery 22 is inserted into the battery compartment 25 (see Inserting/Removing the rechargeable battery, page 202).
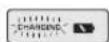

The charging indicator lights up while the battery is being charged.
Thanks to the intelligent charging process, the rechargeable battery is charged with the optimal current for the current temperature and voltage. This protects the rechargeable battery from overcharging and ensures safe storage when the radio is left connected to the mains. The rechargeable battery 25 can be removed from the charging compartment 2NN (if it is placed in the charging compartment) to be used for storage of the radio in standby mode.
The rechargeable battery must be removed before disposal.
No battery charging while the battery is being charged.
Charging of external devices
Charging of external devices via the 12 V socket and via the DC jack is possible only when the radio charging device is connected to the mains, not to the battery. When the radio charging device is connected to the charging mains, the green LED lights up.
USB interface
Via the USB interface, you can charge devices that are designed for this purpose (e.g., mobile phones and telephones).
Release the locking mechanism 19 and open the cover 20. Connect the USB cable of the external device to the USB interface 45 of the radio charging device. To start charging, it is necessary to connect it to the USB external device as a sound source.
12 V output (DC jack)
With the help of the 12 V output, you can supply an external device with an input voltage of 12 V, with a maximum total current of 1 A.
Open the protective cap of the 12 V output 41. Insert the plug of the external device into the socket of the 12 V output.
The 12 V output is protected by a fuse 44. If there is voltage when switching on the external device, release the locking mechanism 19 and open the cover 20. Remove the fuse holder 43 and check whether the fuse 44 is not blown. If the fuse is blown, insert a new one with the appropriate parameters (size 5 x 20 mm, max. voltage 250 V, nominal current 1 A). Then close the fuse holder 43 again.


206|Bulgarian
Attention: Use only a fuse with a maximum current of 1 A and a maximum voltage of 250 V (E250V 1A FUSE FOR 12V OUTLET). If a different fuse is used, the radio charging device may be damaged.
The 12 V output has built-in temperature protection, which is activated when it overheats. The protection switches off automatically when the radio charging device cools down.
To protect against short circuits, place the protective cap on the 12 V socket 41 again after disconnecting the cable from it.
DC jack (Power Outlets) (see spare parts list item 3601 D29 660)
The contacts for alternating current can be protected by other electrical devices. Depending on the country where the radio for construction sites is delivered, the change of the contacts may be different.
The total consumption of all devices connected to the radio for construction sites must not exceed the values given in the table below (see the labels on the housing and the channels):
Catalog number Total maximum consumption current (in A)
3601D2960015
3601D296309
3601D2967012
3601D296W015
3601D296X09
Select the channel from the 5 channels on the alternating current contacts and insert the plug of the electrical device into the contact 6 of the radio charging device.
Clock
The radio charging device is equipped with a built-in clock for automatic protection. When the battery is inserted into the slot (see battery insertion/replacement, page 202), the current time can be set. If the radio for construction sites is without a battery, it is without protection from the mains.
Setting the clock
- To set the clock, press the "Clock" button 29 several times until the hour number in the field 0 starts to flash. - Press the forward search button "Seek ^+ 33, resp. the backward search button -Seek 35, until the correct hour is displayed. Press the "Clock" button again, so that the minute number in the field 0 starts to flash. - Press the forward search button ^ 一 Seek+33, resp. the backward search button -Seek35, until the correct minutes are displayed. - Press the "Clock" button a third time to confirm the set time.
Economy mode
To save energy, you can switch off the display 39 of the clock.
Turning the radio on and off (switching the power on/off), page 202. Press the button for switching on/off to turn on the device. The display shows the current time.
To turn on the device again, press the button for switching on/off.
Operating instructions
Temperature control during charging of the battery
If the radio is charging the battery (there is a charging process), the battery temperature is monitored automatically.
- If the battery temperature is below -10°C or above 50°C, a warning symbol for temperature appears. - If the battery temperature is above 70°C, the radio is switched off automatically to protect it. The radio can be switched on again after the battery has cooled down.
Instructions for optimal operation with the battery
Protect the battery from moisture.
Store the battery only at temperatures between -20°C and 50°C. For example, do not leave the battery in a car in summer.
A new or long-unused battery reaches its full capacity only after about 5 charging and discharging cycles.
If the operating time after charging is significantly reduced, the battery is worn out and must be replaced.
Follow the disposal instructions.
Troubleshooting - causes and remedies
Cause Remedy
The radio does not work.
Controls on the components
The numbering of the figures with the components is given in the order of the graphic page.
1 Loudspeaker 2 Remote control 3 Order button 4 Control lamp for the connection for changing the device (not for article number 3 601 D29 660) 5 Connection socket for changing the device (not for article number 3 601 D29 660) 6 Connection cable for the connection for changing the device (not for article number 3 601 D29 660)
210|Macedonian
7 Button for rewinding back, |< 8 Opening for the mains plug 9 Button for switching on the volume 10 Button for rewinding forward, >>| 11 Button for playback/pause of the remote control 12 Button for muting 13 Button for switching on/off the audio mode of the remote control 14 Button for selecting the audio source "Source" of the remote control 15 Button for switching off the sound "Mute" 16 Socket with cover for the connection 17 Locking of the connection plug for the battery (battery for backup power supply) 18 Connection plug of the battery (battery for backup power supply) 19 Socket for the connection of the battery (battery for backup power supply) 20 Connection plug of the battery (battery for backup power supply) 21 Telescopic antenna 22 Socket for the battery 23 Socket for the connection of the battery (battery for backup power supply) 24 Connection plug of the battery (battery for backup power supply) 25 Battery 26 Button for selecting the equalizer for the sound color "Equalizer" 27 Button for saving "Memory" 28 Button for manual adjustment of the sound color Custom 29 Button for adjusting the time "Clock" 30 Rotary button for adjusting the radio station "Tune" 31 Display of the remote control 32 Button for special playback/repeat of playback 33 Button for rewinding forward, Seek+/>> 34 Button for selecting the audio source "Source" 35 Button for rewinding back, |</<-Seek 36 Button for playback/pause
37 Rotary button for adjusting the volume (Volume) or the sound color (Bass/Treb) 38 Button for switching on/off the audio mode 39 Screen 40 AUX1 IN socket 41 12-V connection socket 42 LINE OUT socket 43 Socket for the power supply 44 Power supply 12-V connection 45 USB connector 46 SD-/MMC-card slot 47 AUX2 IN socket 48 Holder for the remote control
*The scope of delivery may differ from the standard scope of delivery. You can find the complete scope of delivery in our program for the equipment.
Elementary display of the remote control
a) Command for adjusting the volume of the sound: command for selecting high tone or low tone; b) command for selecting bass; c) command for selecting treble, with memory for radio stations. d) Command for selecting the source (depending on the selected audio source) e) Command for receiving radio broadcasts (when listening to radio) f) Command for special reproduction (direct selection of SD/MMC card or USB) g) Command for repeating playback of all tracks in the current folder (for auto selection of SD/MMC card or USB) h) Command for repeating playback of the current track (for auto selection of SD/MMC card or USB) i) Command for stereo reception j) Command for radio frequency. k) Stop playback of the current track (depending on the selected audio source) l) Temperature warning m) Display of the battery icon n) Display of the battery charge level o) Display of the audio source p) Display of the time
Macedonian | 211
Technical specifications
"REPLACE AA BATTERY WHEN UNIT NO LONGER KEEPS CORRECT TIME": Replace the batteries when the radio clock can no longer keep time correctly.
Always use all batteries of the same type. Use only batteries of the same type and with the same capacity.
Remove the backup batteries from the radio clock when you do not use it for a long period. If they are stored for a long time, the backup batteries may corrode and become unusable.
Use
Protect the radio clock from moisture and direct sunlight.
Audio mode (see the figures in the appendix)
Some of the functions of the audio mode can be controlled via remote control (see "Remote control", page 214).
Switching on/off the audio mode
To switch on the audio mode (radio or external player for playback), press the on/off button 38. The display 39 will activate the selected audio source. After switching off the radio clock.
Since the radio clock is in energy-saving mode (see "Energy-saving mode", page 216), to switch on the audio mode, press the on/off button 38.
To switch off the audio mode, press the on/off button 38 again. The current setting of the audio source will be saved.
To save energy, switch on the radio clock only when you use it.
Noise level on the display
To adjust the volume, press the volume buttons on the remote control, and to mute, press the mute button on the remote control.
The volume adjustment (between 0 and 20) is shown briefly on the screen.
Before adjusting or changing the radio station, set the volume to the desired level, and before starting the search, select the desired source.
Adjusting the bass sound
For optimal reproduction of the sound in the radio mode, there is an internal adjustment.
The level of high and low tones can be adjusted or you can use the preset adjustments for different music styles. You can choose the preset programs: JAZZ, ROCK, POP, and CLASSICAL, as well as the self-programmed setting, CUSTOM.
To select the preset adjustments for the bass sound, press the button for selecting the preset adjustments for the bass sound, "Equalizer" 26, until the desired setting appears on the screen.
Battery care tips
Protect the battery from moisture and water.
Store the battery at temperatures between -20°C and 50°C and do not leave the battery in a car for a long time in summer.
A new battery or one that has not been used for a long time should be fully charged and discharged about 5 times.
Shortened operating time after charging indicates that the battery is worn out and needs to be replaced.
Pay attention to the disposal instructions.
Defect-typical help
Punna Tomo
Paper-nonwoven functions
| 3a ppe6e | Hovhovhovhovhovhovhovhovhovhovhovhovhovhovhovhovhovhovhovhovhovhovhovhovhovhovhovhovhovhovhovhovhovhovhovhovhovhovhovhovhovhovhovhovhovhovhovhovhovhovhov h |
| eheprnja | Ctabete ro mpexknhot prnknyok nHH HANONHTA 6ateprnja (cENOCHO) |
| OT | Papno-nonhaot e npemhory TOnon nHH npemhory nahen Povekajte,doNEka paDINO nonhaot He ja noCTHnE OnepaTHBnATa TemnepaTpya |
| ytnkaot e hecnpaben Koprctete dpyr ytnka |
| MpexHnot pmpKnyok nln kaben ce depeKTn |
Macedonian|217
Punna Nmou
Paper-nonwoven functions not operating in battery mode
Tel./fax: 02/2467610
Mob: 070595888
Transport
Lithium-ion batteries are subject to the regulations for hazardous materials. Batteries can be transported only by the user, without additional qualifications.
When transporting by the user (e.g., by air transport or by ship), it is necessary to
Bosch Power Tools 1609 92A 2NF (19.4.16)


218|Serbian
Pay attention to the special markings on the packaging and labels. In such cases, when preparing the shipment, an expert for hazardous substances must be consulted.
Transport the batteries only when the housing is undamaged. Tape off open contacts and pack the battery so that it cannot move in the packaging.
Please also observe any additional national regulations.

Radio-frequency remote control, remote control and programmer, must be disposed of in an environmentally friendly manner.
Do not dispose of radio-frequency remote controls, remote controls and programmers/batteries with household waste or waste containers!
Only for soil within the EU
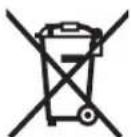
According to European Regulation 2012/19/EU, electrical appliances must not be used and must be disposed of separately. According to Regulation 2006/66/EC, batteries must be collected separately and recycled for reuse.
Battery:
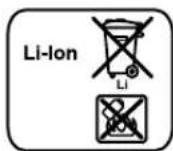
Lithium-ion:
Please pay attention to the notes in the "TRANSPORT" section, page 217.
We reserve the right to make changes.
Serbian
Safety instructions
WARNING
Read all safety warnings and instructions, including the information on the
bottom page of the RadioLader. Failure to follow the safety warnings and instructions may result in electric shock, fire and/or serious injury.
Keep all safety warnings and instructions for future reference.
The term used in the safety warnings "Radiolader" refers to a radio charger that operates on mains power (with a mains cable) and to a radio charger that operates on battery (without a mains cable).
"REPLACE AA BATTERY WHEN UNIT NO LONGER KEEPS
CORRECT TIME": Replace the buffer batteries when the clock on the radio charger no longer keeps the correct time.
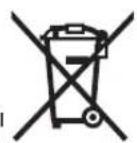
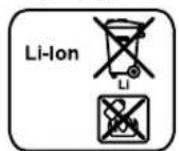
Bosch Power Tools 1609 92A 2NF(19.4.16)
| ### | ### | ### |
| ### | ### | ### |
| ### | ### | ### |
| ### | ### | ### |
| ### | ### | ### |
| ### | ### | ### |
| ### | ### | ### |
| ### | ### | ### |
| ### | ### | ### |
| ### | ### | ### |
| ### | ### | ### |
| ### | ### | ### |
| ### | ### | ### |
| ### | #### | ### |
| ### | ### | ### |
| ### | ### | ### |
| ### | ### | ### |
| ### | ### | ### |
| ### | ### | ### |
| ### | ### | ### |
| ### | ### | ### |
| ### | ### | ### |
| ### | ### | ### |
| ### | ### | ### |
| ### | ### | ### |
| ### | ### | ### |
160992A2NF|(19.4.16) Bosch Power Tools
33"Seek+" lglgai gai JJIgbc baoi 35" -Seek"Jawgai gaiJJ
aall lwl
"Clock" jll lcl sai ojo b
0gglgaggl
33"Seek+"
35"Seek"Jawg
.
"Clock" 1111111000
aBbI JgJ bao
39 aullll 1c gagallgagla b
a911j9g
gall 1j1lab1i1kai jaiuui
1276 1111111111111111111111
38 130
-20°C 100 g 100 g 100 g 100 g
1 250 20x5)
43
250V 1A FUSE FOR 12V OUTLET) 250
Jl 10
laa b a d a 100
140 41 12 J Uo go uao aLg uac
("Power Outlets")glaljllogo
aJoo jolal 1uJoo 50 60 aboo uuouo! 1 1sU21 oJg 1 g 1sU21 uOac Joo. EuaaJ Uauwai auii jla Jo auiu pSal 21 jge 1uoi JJJ . aLwai Ujac aso oJy oJy
acjyI Ubao kao/buo
35" -Seek" Jauu gai Cui jiu bao uj. aBua Uogao ujg33"Seek+ "Icui gai Lsue gao yagao Iquc gao Iyao Iy
Jg jyj Juiuui U 1s uu uua uauu 1uus puo ooo. aqls uuuu ooo cis 1
33"Seek+ (jai gai jgi 35 -Seek (Jaw) baol d wagal ic ggejai baoi i so jy j labao ai daaai baaai (jai o27 osi ai jj d ge u wagai (gai 0juiai oji siiiaai baoi i kai
10g 20 aao 20 aai elisao abgaalabaa gao ayi wjial. abwgio lago abaoa pui loic dy cbaas ySakc
Bosch Power Tools 1609 92A 2NF(19.4.16)
Jaiiaolao baiyogauai jaiLabi Jai jao 1jaiuagai jao kao pa38 saj oja labg jgi jao aasim laic baq jalai elaai Jai
37 "Volume" jg kj1 p0 g2s (g2o jai 0 g2o a2i jai oac a2o ai a2o ai c2o alj g2j j21 p0 g2o ai d20 g0 (20g0 aa) 20g2o ai ab .19g2o ai uai i Li g bao qaaiao ao 5c g2o ai g2o bao Jabwgo aag 5c abwog, aclz ai abo U li .
"Seek+/>>I" (JcJgj JJJ 33
"Source" 34
"<-Seek" 35
36
Volume 37
("Bass/Treb")
38
39
"AUX 1 IN" 40
41
"LINE OUT" 42
43
12 1000 44
USB 45
SD/MMC 46
"AUX 2 IN" 47
__SUPPIMER__
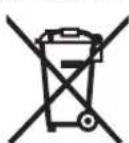
(Li-Ion)
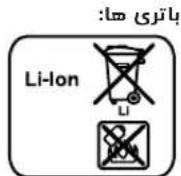
REPLACE AA BATTERY WHEN
UNIT NO LONGER KEEPS CORRECT TIME:
Bosch Power Tools 1609 92A 2NF(19.4.16)
286|LwJ

160992A2NF(19.4.16) Bosch Power Tools


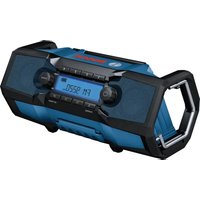
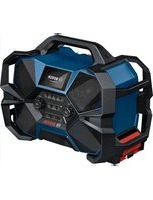
- GML 50 PROFESSIONAL
- BOSCH
- PRODUCT DESCRIPTION AND SPECIFICATIONS
- PRODUCT FEATURES
- DISPLAY ELEMENTS FOR AUDIO OPERATION
- ASSEMBLY
- POWER SUPPLY OF THE RADIO CHARGER
- BATTERY INSERTION/REMOVAL (SEE FIGURE A)
- ENGLISH
- INSERTING/REPLACING THE BACK-UP BATTERY (SEE FIGURE A)
- REPLACE AA BATTERY WHEN UNIT NO LONGER KEEPS CORRECT TIME": REPLACE THE BACK-UP BATTERIES WHEN THE RADIO CHARGER NO LONGER STORES THE TIME
- OPERATION
- AUDIO OPERATION (SEE FIGURES B AND C)
- SWITCHING AUDIO OPERATION ON/OFF
- ADJUSTING THE VOLUME
- ADJUSTING THE SOUND
- CHANGING THE "CUSTOM" SETTING
- SELECTING AN AUDIO SOURCE
- SETTING THE ROD ANTENNA
- SETTING/STORING RADIO STATIONS
- CONNECTING EXTERNAL AUDIO SOURCES (SEE FIGURE C)
- CONTROLLING EXTERNAL AUDIO SOURCES
- PLAY/PAUSE
- SELECTING TRACKS
- RANDOM PLAYBACK/REPEAT
- CONNECTING EXTERNAL AUDIO PLAYBACK (SEE FIGURE C)
- REMOTE CONTROL
- INITIAL OPERATION
- FUNCTIONS
- BATTERY REPLACEMENT
- BATTERY CHARGING (SEE FIGURE A)
- POWER SUPPLY OF EXTERNAL DEVICES
- USB CONNECTION
- V CONNECTION (SEE FIGURE C)
- AC CONNECTION ("POWER OUTLETS") (NOT FOR ARTICLE NUMBER 3601 D29 660)
- TIME INDICATION
- SETTING THE TIME
- ENERGY SAVING MODE
- WORKING ADVICE
- TEMPERATURE MONITORING FOR BATTERY OPERATION
- RECOMMENDATIONS FOR OPTIMAL HANDLING OF THE BATTERY
- TROUBLESHOOTING - CAUSES AND CORRECTIVE MEASURES
- CAUSE CORRECTIVE MEASURE
- RADIO CHARGER INOPERATIVE ON AC POWER SUPPLY
- RADIO CHARGER INOPERATIVE ON DC POWER SUPPLY
- BATTERY CHARGING OR POWER SUPPLY TO EXTERNAL DEVICES INOPERATIVE
- V POWER SUPPLY INOPERATIVE
- RADIO CHARGER SUDDENLY INOPERATIVE
- BAD RADIO RECEPTION
- TIME INDICATION FAULTY
- REMOTE CONTROL INOPERATIVE
- MAINTENANCE AND SERVICE
- MAINTENANCE AND CLEANING
- AFTER-SALES SERVICE AND APPLICATION SERVICE
- WWW.BOSCH-PT.COM
- GREAT BRITAIN
- FRANCAIS
- IRELAND
- AUSTRALIA, NEW ZEALAND AND PACIFIC ISLANDS
- REPUBLIC OF SOUTH AFRICA
- CUSTOMER SERVICE
- GAUTENG - BSC SERVICE CENTRE
- KZN - BSC SERVICE CENTRE
- WESTERN CAPE - BSC SERVICE CENTRE
- BOSCH HEADQUARTERS
- TRANSPORT
- THE RADIO CHARGER, REMOTE CONTROL, BATTERY PACKS, ACCESSORIES AND PACKAGING SHOULD BE SORTED FOR ENVIRONMENTAL-FRIENDLY RECYCLING
- ONLY FOR EC COUNTRIES
- BATTERY PACKS/BATTERIE
- LI-ION
- FRANÇAIS
- V CONNECTOR (SEE FIGURE C)
- ESPANOL
- SERVICE AND CUSTOMER SUPPORT
- GREECE
- TRANSLATION
- DISPOSAL
- ONLY FOR EU COUNTRIES
- MAINTENANCE AND TROUBLESHOOTING
- TURKISH
- SAFETY INSTRUCTIONS
- WARNING
- PLAYBACK/STOP
- TITLE SELECTION
- PREPRAVA
- PLAYBACK/PAUSE
- SELECTING A TRACK
- PLAYBACK IN RANDOM ORDER/REPEAT PLAYBACK
- RUSSIAN
- IOPKNIOUEHHE BHEUHNX YCTPOCTB BOCNPON3BEEHH 3BYKA (CM.PNC.C)
- IYNBT DNCTAHCHONHORO YNPABHEHHA
- KCNNYATAA
- ФУНКШН
- CHARGING THE BATTERY (SEE FIG. A)
- ]RUSSIAN
- MALFUNCTION - CAUSES AND REMEDIES
- CAUSE REMEDY
- POOR RADIO RECEPTION
- BATTERIES
- UKRAINIAN
- REPLACING THE BACKUP BATTERIES (AAA)
- AUDIO RECORDER (SEE FIG. B)
- TURNING ON THE AUDIO RECORDER
- SETTING THE VOLUME
- SETTING THE TONE
- CONNECTING THE ANTENNA
- TUNING/STORING RADIO STATIONS IN MEMORY
- CONNECTING EXTERNAL AUDIO DEVICES (AUX)
- CONTROLLING CONNECTED AUDIO SOURCES
- PLAYBACK / PAUSE / STOP
- SELECTING A COMPOSITION
- REPEATED PLAYBACK BUTTONS
- CONNECTING EXTERNAL AUDIO PLAYBACK DEVICES (AUX, ETC.)
- OPERATING PRECAUTIONS
- CHARGING THE BUILT-IN BATTERY (SEE BELOW)
- CHARGING EXTERNAL DEVICES
- USB OUTLET
- V OUTLET (SEE FIG. C)
- AC POWER OUTLET (EXCEPT MODEL 3601D29660)
- MODEL NUMBER TOTAL MAX. CURRENT (IN A)
- CLOCK DISPLAY
- SETTING THE CLOCK
- OPERATING INSTRUCTIONS
- BATTERY TEMPERATURE CONTROL
- INSTRUCTIONS FOR OPTIMAL USE OF THE BATTERY
- TROUBLESHOOTING - CAUSES AND REMEDIES
- THE BATTERY DOES NOT CHARGE OR DOES NOT CHARGE PROPERLY WHEN EXTERNAL DEVICES ARE CONNECTED
- INCORRECT SOCKET FOR 12 V
- PRESS THE POWER BUTTON
- NOT DETECTED
- REMOTE CONTROL BATTERY
- SERVICE AND CUSTOMER CONSULTATION ON PRODUCT USE
- UKRAINE
- TRANSPORTATION
- FOR EU COUNTRIES
- LITHIUM-ION
- KAZAKHSTAN
- THIS DEVICE IS INTENDED FOR USE IN KAZAKHSTAN
- GEAR SHIFT MECHANISM
- GEAR SHIFT TYPE AND CHARACTERISTICS
- MAINTENANCE
- STORAGE
- KAZAKH
- SERVICE AND MAINTENANCE
- AUDIO OUTPUT ELEMENTS
- CHARGING
- AUDIO JACK (SEE TABLE AND FIGURES)
- CONNECTING/DISCONNECTING THE AUDIO JACK
- RESETTING
- RESET
- ADJUSTING THE CUSTOM PARAMETER
- AUDIO INPUT SELECTION
- ANTENNA CONNECTION
- RADIO STATION SETUP
- THE AUXILIARY INPUT JACK (AUX IN) IS LOCATED ON THE FRONT PANEL
- EXTERNAL AUDIO DEVICE CONTROL
- TRACK SELECTION
- REPEAT/SHUFFLE
- EXTERNAL AUDIO DEVICE CONNECTION (SEE FIGURE)
- BACKAPY KYPBINFBCBI
- PAIDANAHYFA EHDIPY
- ФУНКУНЛАР
- KAZAKKA
- BATTERY OPERATION
- CHARGING THE BATTERY (SEE FIGURE A)
- USING THE DEVICE WITH EXTERNAL POWER
- V SOCKET (WITH COVER)
- POWER OUTLETS
- (3601D29660 IS NOT A SPARE PART)
- FUSE
- SETTING THE CLOCK (A)
- SETTING THE CLOCK MANUALLY
- PAINDANY HYCAYNAPBI
- AKKYMYNTOPDBI NADANAHYDAFTI TEMNEPAYPA 6AKBLAYBL
- AKKYMYIATOPBLOUTAHBI NAHDANANY TYPANBL HCYKAYNAP AKKYMYJIATOPBLCYBIKBIKTAPDAH XAHE BINFAHAKOPFAHBI
- AKAYNAP-CE6ENTEPIXHEWEIMDEPI
- CE6E6I WEWIMI
- PAHNO3APRATAFBII W KOCBIMADBI
- PAOATBIIXEJIIKXMBICTAICTEMEJXATBP
- SERVICE AND MAINTENANCE INSTRUCTIONS
- BATTERY PACKS/BATTERIES
- TECHNICAL DATA
- WORKING WITH THE REMOTE CONTROL
- AUDIO PLAYBACK
- TURNING THE AUDIO PLAYBACK ON/OFF
- SETTING THE ALARM
- BULGARIAN
- SELECTING THE SOUND SOURCE
- ADJUSTING THE ANTENNA
- SWITCHING ON EXTERNAL SOUND SOURCES (SEE CHAPTER C)
- CONTROLLING THE EXTERNAL AUDIO SOURCE
- PLAYBACK/PAUSE OF PLAYBACK
- CONNECTING EXTERNAL PLAYBACK DEVICES (SEE FIG. C)
- INSERTING BATTERIES
- CHANGING THE BATTERIES
- CHARGING THE RECHARGEABLE BATTERY (SEE FIG. A)
- CHARGING OF EXTERNAL DEVICES
- USB INTERFACE
- V OUTPUT (DC JACK)
- DC JACK (POWER OUTLETS) (SEE SPARE PARTS LIST ITEM 3601 D29 660)
- CATALOG NUMBER TOTAL MAXIMUM CONSUMPTION CURRENT (IN A)
- CLOCK
- ECONOMY MODE
- TEMPERATURE CONTROL DURING CHARGING OF THE BATTERY
- INSTRUCTIONS FOR OPTIMAL OPERATION WITH THE BATTERY
- CONTROLS ON THE COMPONENTS
- MACEDONIAN
- ELEMENTARY DISPLAY OF THE REMOTE CONTROL
- TECHNICAL SPECIFICATIONS
- USE
- AUDIO MODE (SEE THE FIGURES IN THE APPENDIX)
- SWITCHING ON/OFF THE AUDIO MODE
- NOISE LEVEL ON THE DISPLAY
- ADJUSTING THE BASS SOUND
- BATTERY CARE TIPS
- DEFECT-TYPICAL HELP
- PUNNA TOMO
- PAPER-NONWOVEN FUNCTIONS
- PUNNA NMOU
- SERBIAN
- ONLY FOR SOIL WITHIN THE EU
- BATTERY
- KEEP ALL SAFETY WARNINGS AND INSTRUCTIONS FOR FUTURE REFERENCE
- REPLACE AA BATTERY WHEN UNIT NO LONGER KEEPS
- ABBI JGJ BAO
- ("POWER OUTLETS")GLALJLLOGO
- ACJYI UBAO KAO/BUO
- ("BASS/TREB")
- (LI-ION)
- REPLACE AA BATTERY WHEN
- UNIT NO LONGER KEEPS CORRECT TIME
Brand : BOSCH
Model : GML 50 Professional
Category : Radio