
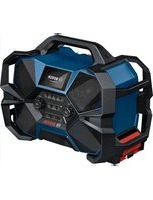
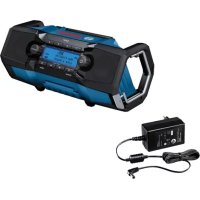
PRA MultiPower - Radio BOSCH - Free user manual and instructions
Find the device manual for free PRA MultiPower BOSCH in PDF.


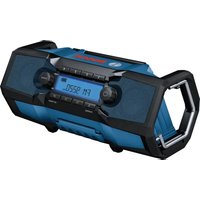
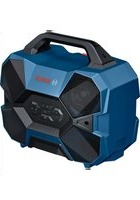
| Product type | Robust professional radio |
| Brand | Bosch |
| Model | PRA MultiPower |
| Dimensions (W x H x D) | 30 x 35 x 20 cm |
| Weight | Approx. 8 kg |
| Power supply | Mains (220-240 V) and rechargeable 18 V battery (compatible with Bosch Professional) |
| Power consumption | 40 W max |
| Audio output power | 30 W RMS |
| Speakers | 1 x 16 cm woofer + 1 x 3 cm tweeter |
| Radio receiver | DAB+ / DAB (Band III), FM (87.5-108 MHz) |
| Connectivity | Bluetooth 4.2, USB-A port (charging), 3.5 mm AUX input |
| Main functions | DAB+/FM radio, Bluetooth streaming, built-in charger for battery and smartphone, preset equalizer, IP54 protection (dust and water splash) |
| Battery life | Up to 12 hours (depending on volume and source) |
| Care and cleaning | Clean with a soft, dry cloth. Do not use solvents or abrasive products. |
| Safety instructions | Use on a stable surface. Do not expose to rain or excessive moisture. Disconnect before cleaning. |
| Spare parts and repairability | Spare parts available through Bosch after-sales service. Repair by authorized center. Modular design for easy component replacement. |
| General information | 2-year warranty. Made in China. Operating temperature: -10°C to 50°C. |
Frequently Asked Questions - PRA MultiPower BOSCH
User questions about PRA MultiPower BOSCH
0 question about this device. Answer the ones you know or ask your own.
Ask a new question about this device
Download the instructions for your Radio in PDF format for free! Find your manual PRA MultiPower - BOSCH and take your electronic device back in hand. On this page are published all the documents necessary for the use of your device. PRA MultiPower by BOSCH.
USER MANUAL PRA MultiPower BOSCH
OBJ BUCH-2386-001.book Page | Monday, February 9, 2015 11:54 AM
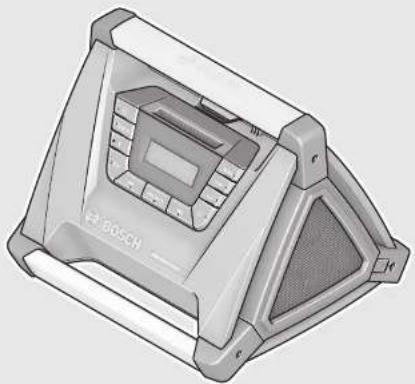
natural_image
3D rendering of a Bosch air purifier device with control panel and mesh chamber (no text or symbols visible)Robert Bosch GmbH
Power Tools Division
70764 Leinfelden-Echterdingen
GERMANY
www.bosch-pt.com
1609 92A 12F (2015.02) T / 199 EURO

PRA MultiPower

BOSCH
Executive Vice President Engineering
Head of Product Certification PT/ETM9

i.v. h=mc
Robert Bosch GmbH, Power Tools Division 70764 Leinfelden-Echterdingen, GERMANY Leinfelden, 12.01.2015
Montage
Read all safety warnings and all instructions. Failure to follow the warnings and
instructions may result in electric shock, fire and/or serious injury.
Save all warnings and instructions for future reference.
The term "radio" in the warnings refers to your mains-operated radio (with power-supply plug) or battery-operated radio (without power-supply plug).
- Keep work area clean and well lit. Cluttered or dark areas invite accidents.
The mains part of the power-supply plug must match the outlet. Never modify the plug in any way. Do not use any adapter plugs with radios. Unmodified plugs and matching outlets will reduce risk of electric shock.
▶ Do not abuse the cord of the power-supply plug. Never use the cord for carrying, pulling or unplugging the radio. Keep cord away from heat, oil, sharp edges and moving parts. Damaged or entangled cords increase the risk of electric shock.
▶ Completely unwind the cord of the power-supply plug when powering the radio from the mains. Otherwise the cord can heat up.
▶ Ensure that the mains plug can be pulled at any time. The mains plug is the only way to disconnect the radio from the mains.

Do not expose radio or power-supply plug to rain or wet conditions. The penetration of water into the radio or the power-supply plug increases the risk of electric shock.
▶ Keep the radio and the power-supply plug clean. Dirt poses a danger of electric shock.
▶ Check the radio, power-supply plug, cord and connector before each use. Stop using the radio if you discover damage to it. Do not open the radio or the power-supply plug yourself, and have them serviced only by a qualified repair person using only identical replacement parts. Damaged radios, power-supply plugs, cords and connectors increase the risk of electric shock.
This radio is not intended for use by children and persons with physical, sensory or mental limitations or a lack of experience or knowledge. This radio can be used by children aged 8 or older and by persons who have physical, sensory or mental limitations or a lack of experience or knowledge if a person responsible for their safety supervises them or has instructed them in the safe operation of the radio and they understand the associated dangers. Otherwise, there is a danger of operating errors and injuries.
▶ Supervise children during use, cleaning and maintenance. This will ensure that children do not play with the radio.
▶ Do not open the battery. Danger of short-circuiting.

Protect the battery against heat, e. g., against continuous intense sunlight, fire, water, and moisture. Danger of explosion.
When battery pack is not in use, keep it away from other metal objects like paper clips, coins, keys, nails, screws, or other small metal objects that can make a connection from one terminal to another. Shorting the battery terminals together may cause burns or a fire.
▶ Under abusive conditions, liquid may be ejected from the battery; avoid contact. If contact accidentally occurs, flush with water. If liquid contacts eyes, additionally seek medical help. Liquid ejected from the battery may cause irritations or burns.
In case of damage and improper use of the battery, vapours may be emitted. Ventilate the area and seek medical help in case of complaints. The vapours can irritate the respiratory system.
▶ Recharge only with the charger specified by the manufacturer. A charger that is suitable for one type of battery pack may create a risk of fire when used with another battery pack.
▶ Use the battery only together with your Bosch product. This is the only way to protect the battery against dangerous overload.
The battery can be damaged by pointed objects such as nails or screwdrivers or by force applied externally. An internal short circuit can occur and the battery can burn, smoke, explode or overheat.
Read and strictly observe the safety and work instructions in the operating instructions of the devices you connect to the radio.
▶ Caution! When using the radio with Bluetooth ^® , interference can occur with other devices and equipment, aircraft and medical devices (e.g. pacemakers, hearing aids). Also, damage to people and animals in the immediate vicinity cannot be completely excluded. Do not use the radio with Bluetooth ^® near medical devices, petrol stations, chemical plants, in areas where there is a danger of explosion and where blasting takes place. Do not use the radio with Bluetooth ^® in aircraft. Avoid using the product near your body for extended periods.
The Bluetooth® word mark and logos are registered trademarks owned by Bluetooth SIG, Inc. and any use of such marks by Robert Bosch GmbH is under license.
Product Description and Specifications

Read all safety warnings and all instructions. Failure to follow the warnings and instructions may result in electric shock, fire and/or serious injury.


14 | English
Product Features
The numbering of the product features refers to the illustration of the radio on the graphics page.
1 On/Off button
2 Display
3 Media compartment
4 Locking latch of the storage compartment
5 "Mute" button
6 Carrying handle
7 " V o l + " button for increasing the volume/treble/bass setting
8 "V o l - " button for reducing the volume/treble/bass setting
9 button (for setting the time)
10 Speaker
11 12 V connection socket
12 seek button
13 "Preset/ "preset/play button
14 steel button
15 "EQ" button for manual sound adjustment
16 Bluetooth® button *
17 Indicator for Bluetooth® connection
18 "Source" button (for selecting an audio source)
19 "AUX 2" socket
20 Latch of back-up battery lid
21 Back-up battery lid
22 Receptacle for power-supply plug
23 Rod antenna
24 Battery port (10.8 V)
25 Battery receptacle (14.4/18 V)
26 "AUX 1" socket
27 Lid of the storage compartment
28 Lid of media compartment
29 Latch of media compartment lid
30 Plug-in connector
31 Power-supply plug
32 AUX cable
33 Battery pack*
34 Battery unlocking button
*Accessories shown or described are not part of the standard delivery scope of the product. A complete overview of accessories can be found in our accessories program.
Display Elements
a Radio frequency indicator
b Battery charge-control indicator
c Stereo indicator
d Time format indicator (3 603 JA9 04. (AUS/NZ))
e Mute indicator
f Multi-function indicator
g Audio-source indicator
Technical Data
| Portable Radio PRA MultiPower | ||
| Article number | 3 603 JA9 0../3 603 JA9 04. | |
| Back-up batteries | 2 x 1.5 V (LR03/AAA) | |
| Battery | V 10.8/14.4/18 | |
| Bluetooth® | Bluetooth® 4.0 (Classic)1) | |
| Weight according to EPTA-Procedure 01/2003 kg | 2.9–3.1 | 2) |
| Permitted ambient temperature | ||
| – during charging | °C | 0...+45 |
| – during operation* | °C | -10...+40 |
| – during storage | °C | -20...+70 |
| Recommended batteries | PBA 10,8 V ...PBA 14,4 V ... V-/PBA 14,4 V ... W-.PBA 18 V ... V-/PBA 18 V ... W-. | |
| Recommended chargers | ||
| – PBA 10,8 V ... | AL 11.. CV | |
| – PBA 14,4 V ... V-/PBA 18 V ... V-. | AL 18.. CV/AL 22.. CV | |
| – PBA 14,4 V ... W-/PBA 18 V ... W-. | AL 18.. CV | |
| 1) Bluetooth® devices must support the A2DP profile. | ||
| 2) depending on the battery pack being used | ||
| * Limited performance at temperatures <0 °C | ||



English | 15
Portable Radio PRA MultiPower
Audio Operation/Radio
| Operating voltage | ||
| - for operation with power-supply plug | V | 12 |
| - for battery-pack operation | V | 10.8/14.4/18 |
| Rated output of amplifier (for operation with power-supply plug) | 2 x 3 . 5 W | |
| Reception range | ||
| - FM | MHz | 87.5-108 |
| - AM (3 603 JA9 0.. (EU)) | kHz | 531-1602 |
| - AM (3 603 JA9 04. (AUS/NZ)) | kHz | 522-1611 |
1) Bluetooth ^® devices must support the A2DP profile.
2) depending on the battery pack being used
* Limited performance at temperatures <0 °C
Power-supply plug
Article number 1 600 A00 0..
| Input voltage | V~ 100-240 | |
| Frequency | Hz 50/60 | |
| Input current | mA 500 | |
| Output voltage | V= | 12 |
| Output current | mA | 1500 |
| Weight according to EPTA-Procedure 01/2003 | kg | 0.2 |
| Protection class | ☐/II | |
Declaration of Conformity
CE
We declare under our sole responsibility that the product described under "Technical Data" complies with all applicable provisions of the directives 1999/5/EC, 2004/108/EC,
2006/95/EC, 2009/125/EC, Regulation (EC) No.
278/2009, 2011/65/EU including their amendments and is in conformity with the following standards:
EN 60065:2002-05 + A1:2006-05 + A2:2010-10 +
A11:2008-11 + A12:2011-02,
EN 300 328 V1.8.1:2012-06,
EN 301 489-1 V1.8.1:2008-04,
EN 301 489-1 V1.9.2:2011-09,
EN 301 489-17 V2.2.1:2012-09, EN 62479:2010-09,
EN 55013:2013-06, EN 55020:2007-01 + A11:2011-10,
EN 61000-3-2:2006-04 + A1:2009-07 + A2:2009-07,
EN 61000-3-3:2013-08.
Technical documents at:
Robert Bosch GmbH, PT/ETM9,
70764 Leinfelden-Echterdingen, GERMANY
CE 12
Henk Becker
Executive Vice President
Engineering
Helmut Heinzelmann
Head of Product Certification
PT/ETM9

Robert Bosch GmbH, Power Tools Division
70764 Leinfelden-Echterdingen, GERMANY
Leinfelden, 12.01.2015
Assembly
Opening/Closing the Storage Compartment
Fold the rod antenna 23 out of its holder. Then open the locking latch 4 of the storage compartment and fold open the lid 27.
Note: Close the lid of the storage compartment and lock it using the latch 4 when operating, transporting or storing the radio. Otherwise, the radio may become damaged.
Power Supply of Radio
The radio can be powered using the power-supply plug 31 or using a Li-Ion battery 33.
Operation with Battery Pack (see figures A-B)
Note: The use of batteries unsuitable for your radio can lead to malfunction or damage to the radio.
Note: The battery pack is supplied partially charged. To ensure full capacity of the battery pack, completely charge the battery pack in the battery charger before using for the first time.
▶ Use only the chargers listed in the technical data. Only these chargers are matched to the lithium-ion battery of your radio.
The lithium-ion battery can be charged at any time without reducing its service life. Interrupting the charging procedure does not damage the battery.
To insert a battery, open the lid 27 of the storage compartment.
- Operation with 10.8 V battery: Insert a 10.8 V battery into the battery port 24 so that the terminals of the battery rest on the terminals in the battery port 24. Allow the battery to engage in the battery port.
- Operation with 14.4/18 V battery: Place a 14.4 V battery or an 18 V battery on the battery receptacle 25 so that the terminals of the battery rest on the terminals of the battery receptacle 25. Slide the battery onto the battery receptacle until it engages.
The battery charge-control indicator b appears on the display as soon as a battery with sufficient voltage is inserted and the radio is not connected to the mains by the power-supply plug 31.




16 | English
The battery charge-control indicator b indicates the current battery pack status. When the battery charge-control indicator flashes, the battery pack must be charged.
Indication Capacity
| ≥ 2/3 | |
| ≥ 1/3 | |
| <1/3 | |
| Reserve | |
| Battery pack empty |
To remove a battery, open the lid 27 of the storage compartment.
- Operation with 10.8 V battery: Press the unlocking buttons 34 on the battery and pull it out of the battery port 24.
- Operation with 14.4/18 V battery: Press the unlocking button 34 on the battery and pull it off the battery receptacle 25.
Operation with Power-supply Plug
▶ Observe the mains voltage! The voltage of the power source for the power-supply plug must correspond with the data on the type plate of the power-supply plug.
Open the protective cap of the 12 V connection socket 11. Insert the plug-in connector 30 of the 12 V power-supply plug into the 12 V connection socket 11. Connect the power-supply plug to the mains supply.
▶ Use only the original Bosch power-supply plug intended for your radio. This measure alone enables trouble-free operation of the radio.
When you remove the plug-in connector, close the protective cap of the 12 V connection socket 11 again to protect against dirt.
The power-supply plug 31 can be stored in the storage compartment of the radio when it is not being used. To do so, open the lid 27 of the storage compartment. Place the power-supply plug with the mains connection in the receptacle 22.
Inserting/Replacing the Back-up Battery
Back-up batteries must be inserted to store the time and radio stations on the radio. Alkali-manganese batteries are recommended for this.
Open the lid 27 of the storage compartment. If necessary, remove the power-supply plug 31.
To open the battery lid 21, press the latch 20 and remove the battery lid. Insert the back-up batteries. When inserting, pay attention to the correct polarity according to the representation on the inside of the battery lid.
Mount the back-up battery lid 21 again.
Replace the back-up batteries if the time is no longer stored on the radio and the display dims.
Always replace all batteries at the same time. Only use batteries from one brand and with the identical capacity.
▶ Take the back-up batteries out of the radio when you are not using it for a prolonged period of time. The back-up batteries can corrode and self-discharge during prolonged storage.
Operation
▶ Protect the radio against moisture and direct sunlight. The radio is suitable only for use in dry indoor areas.
Audio Operation
Switching On and Off
To switch on the radio, press the On/Off button 1. The display 2 is activated and the audio source selected the last time the radio was switched off will be played.
Each time after pressing a button, the display 2 is illuminated for several seconds.
To switch off the radio, press the On/Off button 1 again. The currently selected audio source will be stored.
To save energy, only switch the radio on when you are using it.
Adjusting the Volume
A medium volume (value of 10) is always set when you switch on the radio.
To increase the volume, press the "Vol +" button 7; to reduce the volume, press the "Vol -" button 8. The volume setting "VL" is indicated with a value between 0 and 20 for a few seconds in indicator f on the display.
Before adjusting or changing a radio station, set the volume to a lower setting; before starting an external audio source, set the volume to medium.
The sound can be switched off by pressing the "Mute" button 5. To switch the sound on again, either press the "Mute" button 5 once more or either of the "Vol+" 7 or "Vol-" buttons 8.
Adjusting the Sound
An equalizer is integrated into the radio to ensure optimum sound reproduction.
To change the bass level manually, press the "EQ" button 15 once. The display will show "BA" and the stored bass level in indicator f. Press the "Equalizer" button 15 again for the treble. "TR" and the stored treble level will be shown in indicator f.
The bass and treble levels can be adjusted between -5 and +5. To increase the indicated value, press the "Vol +" button 7; to lower the value, press the "Vol -" button 8. The changed values are automatically stored when indicator f changes back to the time indication a few seconds after last pressing either of the buttons.
Selecting an Audio Source
To select an audio source, press the "Source" button 18 repeatedly until the required internal audio source (see "Setting/Storing Radio Stations", page 17) or external audio source (see "Connecting External Audio Sources", page 17) is shown on the display:
- "FM": FM radio,
- "AM": AM radio,
- “BT”: External audio source (e.g. smartphone) via the Bluetooth® connection,
- "AUX 1": External audio source (e.g. smartphone or CD player) via the "AUX 1" 3.5-mm socket 26 on the outside,




English | 17
- "AUX 2": External audio source (e.g. smartphone or MP3 player) via the "AUX 2" 3.5-mm socket 19 in the storage compartment.
The "FM", "AM", "AUX 1" and "AUX 2" audio sources appear continuously in the audio source indicator g. "BT" for the Bluetooth® connection appears briefly in the multi-function indicator f and is subsequently indicated by the Bluetooth® indicator 17 lighting up (see "Bluetooth® connection", page 17).
Setting the Rod Antenna
The radio is supplied with the rod antenna 23 mounted. When listening to the radio, swing the rod antenna in the direction that provides the best reception.
If it is not possible to achieve sufficient reception, place the radio in a location with better reception.
Note: Operating the radio in the immediate vicinity of radio units, wireless equipment or other electronic devices may impair the radio reception.
Setting/Storing Radio Stations
Press the "Source" button 18 until "FM" is indicated for the ultra-short wave reception range or "AM" for the medium wave reception range in display element g.
To set a certain radio frequency, press the ▶▶| seek button 12 to increase the frequency or the ◀◀ seek button 14 to decrease it. The current frequency is shown in indicator a on the display.
To scan for radio stations with a high signal strength,
press and briefly hold the ▶▶| seek button 12 or the |◀◀ seek button 14. The frequency of the found radio station is shown in indicator a on the display.
If a suitable signal has a sufficiently strong reception, the radio automatically switches to stereo reception. The stereo indicator c will appear on the display.
To store a set station, press the "Preset/▶" preset/play button 13 until the "PR" indicator and the number of the most recently set preset flash in indicator f. To select a preset, press the ▶ seek button 12 or the ◀ seek button 14 repeatedly until the required preset appears in indicator f. Press the
"Preset/▶" preset/play button 13 again to store the set station on the selected preset.
You can store 10 FM stations and 10 AM stations. Please note that if selected again, an occupied preset will be overwritten with the new radio station.
To play a stored station, briefly press the "Preset/▶" preset/play button 13 and then the▶▶| seek button 12 or the◀◀ seek button 14 repeatedly until "PR" and the required preset appear in indicator f.
Connecting External Audio Sources
Apart from the integrated radio, various external audio sources can be played.
Bluetooth® connection:
- To activate the Bluetooth® connection, you can either press the "Source" button 18 repeatedly until "BT" for the Bluetooth® connection appears in the multi-function indicator f, or press the Bluetooth® button 16. The Bluetooth® indicator 17 flashes slowly to indicate that a connection has not yet been established.
- To establish a connection to a suitable audio source, press the Bluetooth® button 16 for at least 2 s. During the search, the Bluetooth® indicator 17 will flash quickly.
- "PRA MultiPower" appears on the display of the audio source and has to be activated there. To do so, also observe the operating instructions of your audio source.
- The Bluetooth ^ indicator 17 lights up continuously as soon as the Bluetooth ^ connection has been established. If the Bluetooth ^ button 16 is pressed again for at least 2 s during a connection search or while there is an existing connection, a new connection will be established.
- Note: When initially connecting (pairing) the radio to an external audio source, you may be prompted to enter a PIN code for the radio. In this case, enter "1234".
"AUX 1" connection:
- The "AUX 1" connection is especially suitable for audio sources that are to be kept outside of the storage compartment (e.g. smartphone in the media compartment 3).
- Take off the protective cap of the "AUX 1" socket 26 and insert the 3.5-mm plug of the AUX cable provided or of another suitable AUX cable into the socket. Connect the AUX cable to a suitable audio source.
- To play the "AUX 1" audio source, press the "Source" button 18 repeatedly until "AUX 1" appears in indicator g.
- When you remove the plug of the AUX cable, attach the protective cap of the "AUX 1" socket 26 again to protect against dirt.
"AUX 2" connection:
- The "AUX 2" connection is especially suitable for audio sources that are to be kept in the media compartment (e.g. smartphone or MP3 player).
- Open the lid 27 of the storage compartment. Insert the 3.5 mm plug of the AUX cable provided or of another suitable AUX cable into the "AUX 2" socket 19. Connect the AUX cable to a suitable audio source.
- Press the latch 29 of the media compartment lid and fold open the media compartment lid 28. Place the audio source in the media compartment so that the AUX cable can be fed through the hole in the lid. Close the lid 28 of the media compartment and the lid 27 of the storage compartment.
- To play the "AUX 2" audio source, press the "Source" button 18 repeatedly until "AUX 2" appears in indicator g.
Controlling External Audio Sources
Playback of audio sources connected via Bluetooth® can be controlled using the radio.
Play/Pause: To start playback, press the "Preset/▶" preset/play button 13. To pause or resume playback, again press the "Preset/▶" preset/play button 13.
Fast forward/rewind: To fast forward or rewind within a track, hold down the seek button 12 or the seek outlet 14 until the required position in the track is reached.
Select track: To select a track, press the ▶ seek button 12 or the ▶ seek button 14 repeatedly until the required track is reached. To start playback, press the "Preset/▶" preset/play button 13.


18 | English
Time Indication
The radio has a time indication with separate power supply. If back-up batteries with sufficient capacity are inserted into the battery compartment (see "Inserting/Replacing the Backup Battery", page 16), the time can be stored even when the radio is disconnected from the power supply via battery or power-supply plug.
Setting the Time
- To set the time, press the ⏻ button 9 until the hours indication flashes in display element f.
- Press the ▶▶| seek button 12 or the◀◀ seek button 14 until the correct hour setting is indicated.
- Press the ⏻ button 9 again, so that the minutes indication flashes in display element f.
- Press the ▶▶| seek button 12 or the◀◀ seek button 14 until the correct minute setting is indicated.
- Press the ⏻ button 9 a third time to store the time setting.
If the >>| seek button 12 and the |◀| seek button 14 are not pressed for more than 5s during the setting procedure, the procedure will be aborted and the previous, unchanged time will be shown.
Working Advice
Storage in Media Compartment
If you use audio sources via Bluetooth® or the "AUX 1" connection, you can keep the corresponding devices (e.g. smartphone or MP3 player) in the media compartment 3.
Please note that the media compartment is intended only for storage and does not possess any data transfer or charging functions.
Note: Remove external devices from the media compartment 3 when transporting the radio. Otherwise the external device may fall out and be damaged.
Recommendations for Optimal Handling of the Battery
Protect the battery against moisture and water.
Store the battery only within a temperature range between -20°C and 50°C. As an example, do not leave the battery in the car in summer.
A battery that is new or has not been used for a longer period does not develop its full capacity until after approx. 5 charging/discharging cycles.
A significantly reduced working period after charging indicates that the battery is used and must be replaced.
Observe the notes for disposal.
Maintenance and Service
Maintenance and Cleaning
Keep the radio clean to ensure good, safe operation.
Wipe off debris using a moist and soft cloth. Do not use any cleaning agents or solvents.
After-sales Service and Application Service
Our after-sales service responds to your questions concerning maintenance and repair of your product as well as spare parts. Exploded views and information on spare parts can also be found under:
www.bosch-pt.com
Bosch's application service team will gladly answer questions concerning our products and their accessories.
In all correspondence and spare parts orders, please always include the 10-digit article number given on the type plate of the radio.
Great Britain
Robert Bosch Ltd. (B.S.C.)
P.O. Box 98
Broadwater Park
North Orbital Road
Denham
Uxbridge
UB 9 5HJ
At www.bosch-pt.co.uk you can order spare parts or arrange the collection of a product in need of servicing or repair.
Tel. Service: (0344) 7360109
E-Mail: boschservicecentre@bosch.com
Ireland
Origo Ltd.
Unit 23 Magna Drive
Magna Business Park
City West
Dublin 24
Tel. Service: (01) 4666700
Fax: (01) 4666888
Australia, New Zealand and Pacific Islands
Robert Bosch Australia Pty. Ltd.
Power Tools
Locked Bag 66
Clayton South VIC 3169
Customer Contact Center
Inside Australia:
Phone: (01300) 307044
Fax: (01300) 307045
Inside New Zealand
Phone: (0800) 543353
Fax: (0800) 428570
Outside AU and NZ:
Phone: +61 3 95415555
www.bosch.com.au
Supplier code ERAC000385
Republic of South Africa
Customer service
Hotline: (011) 6519600
Gauteng - BSC Service Centre
35 Roper Street, New Centre
Johannesburg
Tel.: (011) 4939375
Fax: (011) 4930126
E-Mail: bsctools@icon.co.za




Français | 19
KZN - BSC Service Centre
Unit E, Almar Centre
143 Crompton Street
Pinetown
Tel.: (031) 7012120
Fax: (031) 7012446
E-Mail: bsc.dur@za.bosch.com
Western Cape - BSC Service Centre
Democracy Way, Prosperity Park
Milnerton
Tel.: (021) 5512577
Fax: (021) 5513223
E-Mail: bsc@zsd.co.za
Bosch Headquarters
Midrand, Gauteng
Tel.: (011) 6519600
Fax: (011) 6519880
E-Mail: rbsa-hq.pts@za.bosch.com
Transport
The contained lithium-ion batteries are subject to the Dangerous Goods Legislation requirements. The user can transport the batteries by road without further requirements.
When being transported by third parties (e.g.: air transport or forwarding agency), special requirements on packaging and labelling must be observed. For preparation of the item being shipped, consulting an expert for hazardous material is required.
Dispatch batteries only when the housing is undamaged. Tape or mask off open contacts and pack up the battery in such a manner that it cannot move around in the packaging. Please also observe possibly more detailed national regulations.
Disposal

Radios, power-supply plugs, battery packs/batteries, accessories and packaging should be sorted for environmental-friendly recycling.
Do not dispose of radios, power-supply plugs and battery packs/batteries into household waste!
Only for EC countries:
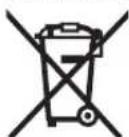
According to the European Guideline 2012/19/EU, electrical devices/tools that are no longer usable, and according to the European Guideline 2006/66/EC, defective or used battery packs/batteries, must be collected separately and disposed of in an environmentally correct manner.
Batteries no longer suitable for use can be directly returned at:
Great Britain
Robert Bosch Ltd. (B.S.C.)
P.O. Box 98
Broadwater Park
North Orbital Road
Denham
Uxbridge
UB 9 5HJ
At www.bosch-pt.co.uk you can order spare parts or arrange the collection of a product in need of servicing or repair.
Tel. Service: (0344) 7360109
E-Mail: boschservicecentre@bosch.com
Battery packs/batteries:

Li-ion:
Please observe the instructions in section "Transport", page 19.
Subject to change without notice.
Français
Henk Becker Executive Vice President Engineering Helmut Heinzelmann Head of Product Certification PT/ETM9

Robert Bosch GmbH, Power Tools Division 70764 Leinfelden-Echterdingen, GERMANY Leinfelden, 12.01.2015
Montage
Robert Bosch (France) S.A.S.
Executive Vice President
Engineering
Helmut Heinzelmann
Head of Product Certification
PT/ETM9

Robert Bosch GmbH, Power Tools Division
70764 Leinfelden-Echterdingen, GERMANY
Leinfelden, 12.01.2015
Montaje
Executive Vice President
Engineering
Helmut Heinzelmann
Head of Product Certification
PT/ETM9


i.v. h=mc
Robert Bosch GmbH, Power Tools Division
70764 Leinfelden-Echterdingen, GERMANY
Leinfelden, 12.01.2015
36 | Português
Montagem
Abrir/fechar o compartimento de armazenamento
Executive Vice President Engineering
Helmut Heinzelmann
Head of Product Certification PT/ETM9

Robert Bosch GmbH, Power Tools Division
70764 Leinfelden-Echterdingen, GERMANY
Leinfelden, 12.01.2015
Montaggio
Henk Becker Executive Vice President Engineering Helmut Heinzelmann Head of Product Certification PT/ETM9

Robert Bosch GmbH, Power Tools Division 70764 Leinfelden-Echterdingen, GERMANY Leinfelden, 12.01.2015
Montage
Opbergen in mediavak
Executive Vice President
Engineering
Helmut Heinzelmann
Head of Product Certification
PT/ETM9

Robert Bosch GmbH, Power Tools Division
70764 Leinfelden-Echterdingen, GERMANY
Leinfelden, 12.01.2015
Montering
Bosch Service Center
Telegrafvej 3
2750 Ballerup
På www.bosch-pt.dk kan der online bestilles reservedele eller oprettes en reparations ordre.
Tlf. Service Center: 44898855
Fax: 44898755
E-Mail: vaerktoej@dk.bosch.com
Transport
Executive Vice President
Engineering
Helmut Heinzelmann
Head of Product Certification
PT/ETM9


Robert Bosch GmbH, Power Tools Division
70764 Leinfelden-Echterdingen, GERMANY
Leinfelden, 12.01.2015
Montage
Bosch Service Center
Telegrafvej 3
2750 Ballerup
Danmark
Tel.: (08) 7501820 (inom Sverige)
Fax: (011) 187691
Transport
Executive Vice President
Engineering
Helmut Heinzelmann
Head of Product Certification
PT/ETM9


Robert Bosch GmbH, Power Tools Division
70764 Leinfelden-Echterdingen, GERMANY
Leinfelden, 12.01.2015
Montering
Åpne/lukke medierom
Executive Vice President
Head of Product Certification
Engineering
PT/ETM9

i.v. h=mc
Robert Bosch GmbH, Power Tools Division
70764 Leinfelden-Echterdingen, GERMANY
Leinfelden, 12.01.2015
Asennus
Executive Vice President
Engineering
Helmut Heinzelmann
Head of Product Certification
PT/ETM9


i.v. h=mc
Robert Bosch GmbH, Power Tools Division
70764 Leinfelden-Echterdingen, GERMANY
Leinfelden, 12.01.2015
80 | Ελληνικά
Συναρμολόγηση
Executive Vice President
Engineering
Helmut Heinzelmann
Head of Product Certification
PT/ETM9

Robert Bosch GmbH, Power Tools Division
70764 Leinfelden-Echterdingen, GERMANY
Leinfelden, 12.01.2015
Montaj
Bosch San. ve Tic. A.S.
Ahi Evran Cad. No:1 Kat:22
Polaris Plaza
80670 Maslak/Istanbul
Bosch Uzman Ekibi +90 (0212) 367 18 88
Işıklar LTD.ŞTİ
Kızılay Cad. No: 16/C Seyhan
Adana
Tel.: 0322 3599710
Tel.: 0322 3591379
Henk Becker Executive Vice President Engineering Helmut Heinzelmann Head of Product Certification PT/ETM9

Robert Bosch GmbH, Power Tools Division 70764 Leinfelden-Echterdingen, GERMANY Leinfelden, 12.01.2015
Montaż
Robert Bosch Sp. z o.o.
Executive Vice President
Engineering
Helmut Heinzelmann
Head of Product Certification
PT/ETM9

Robert Bosch GmbH, Power Tools Division
70764 Leinfelden-Echterdingen, GERMANY
Leinfelden, 12.01.2015
Montáž
Bosch Service Center PT
K Vápence 1621/16
692 01 Mikulov
Henk Becker Executive Vice President Engineering Helmut Heinzelmann Head of Product Certification PT/ETM9

Robert Bosch GmbH, Power Tools Division 70764 Leinfelden-Echterdingen, GERMANY Leinfelden, 12.01.2015
Montáž
Otváranie/zatváranie priehradky na odkladanie
Executive Vice President
Head of Product Certification
Engineering
PT/ETM9


i.V.
h = w
Robert Bosch GmbH, Power Tools Division 70764 Leinfelden-Echterdingen, GERMAN
Leinfelden, 12.01.2015
Összeszerelés
Executive Vice President
Engineering
Helmut Heinzelmann
Head of Product Certification
PT/ETM9

Robert Bosch GmbH, Power Tools Division
70764 Leinfelden-Echterdingen, GERMANY
Leinfelden, 12.01.2015
Сборка
Executive Vice President
Engineering
Helmut Heinzelmann
Head of Product Certification
PT/ETM9

i.v. h·w
Robert Bosch GmbH, Power Tools Division
70764 Leinfelden-Echterdingen, GERMANY
Leinfelden, 12.01.2015
128 | Українська
Монтаж
Executive Vice President
Engineering
Helmut Heinzelmann
Head of Product Certification
PT/ETM9


i.v. h=w
Robert Bosch GmbH, Power Tools Division
70764 Leinfelden-Echterdingen, GERMANY
Leinfelden, 12.01.2015
136|Қазақша
Жинау
24 Compartment accumulator (10,8 V)
25 Suport de prindere accumulator (14,4/18 V)
26 Intrare „AUX 1“
27 Capac compartiment depozitare
28 Capac compartment media
29 Dispozitiv de blocare capac compartiment media
30 Conector aparat
31 Alimentator
32 Cablu AUX
33 Acumulator*
Executive Vice President
Head of Product Certification
Engineering
PT/ETM9


Robert Bosch GmbH, Power Tools Division
70764 Leinfelden-Echterdingen, GERMANY
Leinfelden, 12.01.2015
Montare
Tel. service scule electrice: (021) 4057540
Fax: (021) 4057566
E-Mail: infoBSC@ro.bosch.com
Henk Becker Executive Vice President Engineering Helmut Heinzelmann Head of Product Certification PT/ETM9

Robert Bosch GmbH, Power Tools Division 70764 Leinfelden-Echterdingen, GERMANY Leinfelden, 12.01.2015
Монтиране
Executive Vice President Engineering
Helmut Heinzelmann
Head of Product Certification PT/ETM9

Robert Bosch GmbH, Power Tools Division
70764 Leinfelden-Echterdingen, GERMANY
Leinfelden, 12.01.2015
Монтажа
Executive Vice President
Engineering
Helmut Heinzelmann
Head of Product Certification
PT/ETM9


i.v. k=mc
Robert Bosch GmbH, Power Tools Division
70764 Leinfelden-Echterdingen, GERMANY
Leinfelden, 12.01.2015
Srpski|163
Montaža
Otvaranje/zatvaranje pretinca za čuvanje
Štapnu antenu 23 izvadite iz njenog držača. Onda otvorite polugu za blokadu 4 pretinca za čuvanje i otklopite poklopac 27.
Uputstvo: Zatvorite poklopac pretinca za čuvanje i blokirajte ga polugom 4, ako radio uređaj puštate u rad, transportujete ga ili skladištite. Inače radio uređaj može da se ošeti.
Henk Becker Executive Vice President Engineering Helmut Heinzelmann Head of Product Certification PT/ETM9

Robert Bosch GmbH, Power Tools Division 70764 Leinfelden-Echterdingen, GERMANY Leinfelden, 12.01.2015
Montaža
Executive Vice President
Engineering
Helmut Heinzelmann
Head of Product Certification
PT/ETM9

Robert Bosch GmbH, Power Tools Division
70764 Leinfelden-Echterdingen, GERMANY
Leinfelden, 12.01.2015
Montaža
Otvaranje/zatvaranje pretinca za spremanje
Executive Vice President Engineering
Helmut Heinzelmann
Head of Product Certification PT/ETM9

Liu Joo
i.v. h=mc
Robert Bosch GmbH, Power Tools Division 70764 Leinfelden-Echterdingen, GERMANY Leinfelden, 12.01.2015
Montaž
Hoidiku avamine/sulgemine
Executive Vice President
Engineering
Helmut Heinzelmann
Head of Product Certification
PT/ETM9


Robert Bosch GmbH, Power Tools Division
70764 Leinfelden-Echterdingen, GERMANY
Leinfelden, 12.01.2015
Montāža
| Henk Becker | Helmut Heinzelmann |
| Executive Vice President | Head of Product Certification |
| Engineering | PT/ETM9 |

Robert Bosch GmbH, Power Tools Division
70764 Leinfelden-Echterdingen, GERMANY
Leinfelden, 12.01.2015
Montavimas
OBJ BUCH-2386-001.book Page 198 Monday, February 9, 2015 11:37 AM


198 | Lietuviškai
Šalinimas


- PRA MultiPower
- BOSCH
- Montage
- Save all warnings and instructions for future reference.
- Product Description and Specifications
- | English
- Product Features
- Display Elements
- Technical Data
- Declaration of Conformity
- CE
- Assembly
- Opening/Closing the Storage Compartment
- Power Supply of Radio
- Operation with Battery Pack (see figures A-B)
- | English
- Operation with Power-supply Plug
- Inserting/Replacing the Back-up Battery
- Operation
- Audio Operation
- Switching On and Off
- Adjusting the Volume
- Adjusting the Sound
- Selecting an Audio Source
- English | 17
- Setting the Rod Antenna
- Setting/Storing Radio Stations
- To scan for radio stations with a high signal strength,
- Connecting External Audio Sources
- Bluetooth® connection:
- "AUX 1" connection:
- "AUX 2" connection:
- Controlling External Audio Sources
- | English
- Time Indication
- Setting the Time
- Working Advice
- Storage in Media Compartment
- Recommendations for Optimal Handling of the Battery
- Maintenance and Service
- Maintenance and Cleaning
- After-sales Service and Application Service
- www.bosch-pt.com
- Great Britain
- Ireland
- Australia, New Zealand and Pacific Islands
- Republic of South Africa
- Customer service
- Gauteng - BSC Service Centre
- Français | 19
- KZN - BSC Service Centre
- Western Cape - BSC Service Centre
- Bosch Headquarters
- Transport
- Disposal
- Only for EC countries:
- Battery packs/batteries:
- Li-ion:
- Français
- Montaje
- | Português
- Montagem
- Abrir/fechar o compartimento de armazenamento
- Montaggio
- Opbergen in mediavak
- Montering
- Åpne/lukke medierom
- Asennus
- | Ελληνικά
- Συναρμολόγηση
- Montaj
- Montaż
- Montáž
- Otváranie/zatváranie priehradky na odkladanie
- Összeszerelés
- Сборка
- | Українська
- Монтаж
- 136|Қазақша
- Жинау
- Montare
- Монтиране
- Монтажа
- Montaža
- Otvaranje/zatvaranje pretinca za čuvanje
- Otvaranje/zatvaranje pretinca za spremanje
- Montaž
- Hoidiku avamine/sulgemine
- Montāža
- Montavimas
- | Lietuviškai
- Šalinimas
Brand : BOSCH
Model : PRA MultiPower
Category : Radio