
AD 3084 - Waffle Maker ADLER - Free user manual and instructions
Find the device manual for free AD 3084 ADLER in PDF.

| Product type | Waffle maker |
| Brand | Adler |
| Model | AD 3084 |
| Power supply | 220-240 V ~ 50-60 Hz |
| Power | 1200 W (estimated) |
| Dimensions (approx.) | 30 x 20 x 10 cm |
| Weight (approx.) | 2.5 kg |
| Plate material | Non-stick coating |
| Number of programs | 5 (Belgian, Buttermilk, Classic, Chocolate, Custom) |
| Browning levels | 7 (from 1 light to 7 dark) |
| Texture modes | 2 (Fluffy, Crunchy) |
| Built-in timer | Yes, with beep |
| Display | Digital display with indicators |
| Lid lock | Yes, for storage only |
| Cord storage | Yes, built-in |
| Included accessories | Batter spoon |
| Cleaning | Wipe with a damp cloth, do not immerse |
| Safety | Automatic shut-off? (not specified, but strict safety advice) |
| Repairability | Repairs only by an authorized service center |
| Warranty | 2 years (standard, to be confirmed) |
| Use | Domestic use only |
Frequently Asked Questions - AD 3084 ADLER
User questions about AD 3084 ADLER
0 question about this device. Answer the ones you know or ask your own.
Ask a new question about this device
Download the instructions for your Waffle Maker in PDF format for free! Find your manual AD 3084 - ADLER and take your electronic device back in hand. On this page are published all the documents necessary for the use of your device. AD 3084 by ADLER.
USER MANUAL AD 3084 ADLER
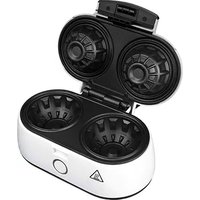
natural_image
Black and silver flatbread grater with two side knobs (no visible text or symbols)AD 3084
| EN | User Manual | 3 | PL | Instrukcja obsługi | 83 |
| DE | Bedienungsanleitung | 7 | IT | Manuale d'uso | 88 |
| FR | Mode d'emploi | 13 | SV | Bruksanvisning | 93 |
| ES | Manual de usuario | 18 | BG | Ръководство за употреба | 98 |
| PT | Manual de Instruções | 23 | DA | Brugsanvisning | 104 |
| LT | Naudojimo instrukcija | 28 | SK | Používatel'ská príručka | 108 |
| LV | Lietošanas instrukcija | 33 | BS | Korisnički priručnik | 113 |
| ET | Kasutusjuhend | 38 | MK | Упатство за употреба | 118 |
| HU | Használati útmutató | 43 | HR | Korisnički priručnik | 123 |
| RO | Manual de utilizare | 48 | UK | Керівництво користувача | 128 |
| CS | Návod k použití | 53 | SR | Упутство за употребу | 133 |
| RU | Руководство пользователя | 58 | AR | دليل المستخدم | 139 |
| EL | Еүхειρίδιο хрήσης | 63 | AZ | İstifadəçi təlimatı | 142 |
| NL | Gebruikershandleiding | 69 | SQ | Manuali i përdorimit | 146 |
| SL | Navodila za uporabo | 74 | KA | Общёمّجُجْنَد | 152 |
| FI | Käyttöohje | 78 |

natural_image
Black metal ladle with a smooth handle and rounded body (no text or symbols visible)10
User Manual (EN)
GENERAL SAFETY CONDITIONS IMPORTANT SAFETY INSTRUCTIONS FOR USE READ CAREFULLY AND KEEP FOR FUTURE REFERENCE
-
Before using the device, read the instruction manual and follow the instructions contained therein. The manufacturer is not responsible for damages caused by using the device contrary to its intended use or improper operation.
-
The device is for domestic use only. Do not use for other purposes incompatible with its intended use.
-
Connect the device only to a grounded outlet 220-240V \~50-60Hz. In order to increase the safety of use, do not connect multiple electrical appliances to a single circuit at the same time.
-
Be especially careful when using the device when children are around. Do not allow children to play with the appliance do not allow children or persons unfamiliar with the appliance to use it.
-
WARNING: This equipment may be used by children over 8 years of age and persons with limited physical, sensory or mental ability, or persons without experience or familiarity with the equipment, if this is done under the supervision of a person responsible for their safety or they have been given instructions on the safe use of the equipment and are aware of the dangers associated with its use. Children should not play with the equipment. Cleaning and maintenance of the equipment should not be performed by children unless they are over 8 years of age and these activities are performed under supervision.
-
Always remove the plug from the power outlet after use by holding the outlet with your hand. DO NOT pull on the power cord.
-
Do not immerse the cord, plug and the entire device in water or other liquid. Do not expose the unit to weather conditions (rain, sun, etc.) or use in high humidity conditions (bathrooms, damp camping houses).
-
Periodically check the condition of the power cord. If the power cord is damaged, it should be replaced by a specialized repair facility to avoid danger.
-
Do not use the device with a damaged power cord or if it has been dropped or damaged in any other way or malfunctions. Do not repair the device yourself, as there is a risk of electrocution. Return a damaged device to a competent service center for inspection or repair. Any repairs may be made
only by authorized service centers. Improper repair may cause serious danger to the user.
-
Place the appliance on a cool stable, level surface, away from hot kitchen appliances such as electric stove, gas burner, etc....
-
Do not use the device near flammable materials.
-
The power cord must not hang over the edge of the table or touch hot surfaces.
-
Do not leave the device or the power supply to the outlet unattended.
-
To provide additional protection, it is advisable to install in the electrical circuit, a residual current device (RCD) with a rated residual current of not more than 30 mA. In this regard, please consult an electrical specialist.
-
The temperature of the accessible surfaces of the operating device can be high. Do not touch the hot surfaces of the device.
-
Due to the high temperature, use extreme caution when removing prepared food, removing hot fat or other hot liquids. Hot steam may escape from the appliance.
-
The device has a heating function. The device should be used with care. Touch surfaces only intended for this purpose. Use protective clothing (oven gloves, etc...)
-
Wait until the device has cooled down before storing.
-
Do not place cardboard products, paper, plastics and other flammable and fusible items inside the device.
-
The unit is not designed to operate with external timers or a separate remote control system.
-
Do not put portions of the appliance that are too large or occupy the entire volume of the appliance, as this may cause fire and damage to the appliance.
-
The power cord must not be laid above the appliance, and should not touch or lie near hot surfaces. Do not place the appliance under an electrical outlet.
-
Do not move or relocate the device during operation. After operation, it can be moved only after it has cooled down.
-
Open the device only with the handle. Release the closing clip (4) beforehand.
-
Before and during use, make sure that the power cord is not stretched over an open flame or other heat source, and on sharp edges that may damage the cord insulation.
-
Before the first use, remove all packaging items. Note that in the case of a case with metal elements, a little visible protective film may be stretched over these elements, which should also be removed.
-
NEVER cover the device during operation or when it has not completely cooled down, remember that the heating elements of the device require time to cool down completely.
-
BE CAREFUL if you use the appliance on heat-sensitive surfaces. It is then recommended to use insulating pads
-
The device cannot be used with external timers or other separate remote control systems
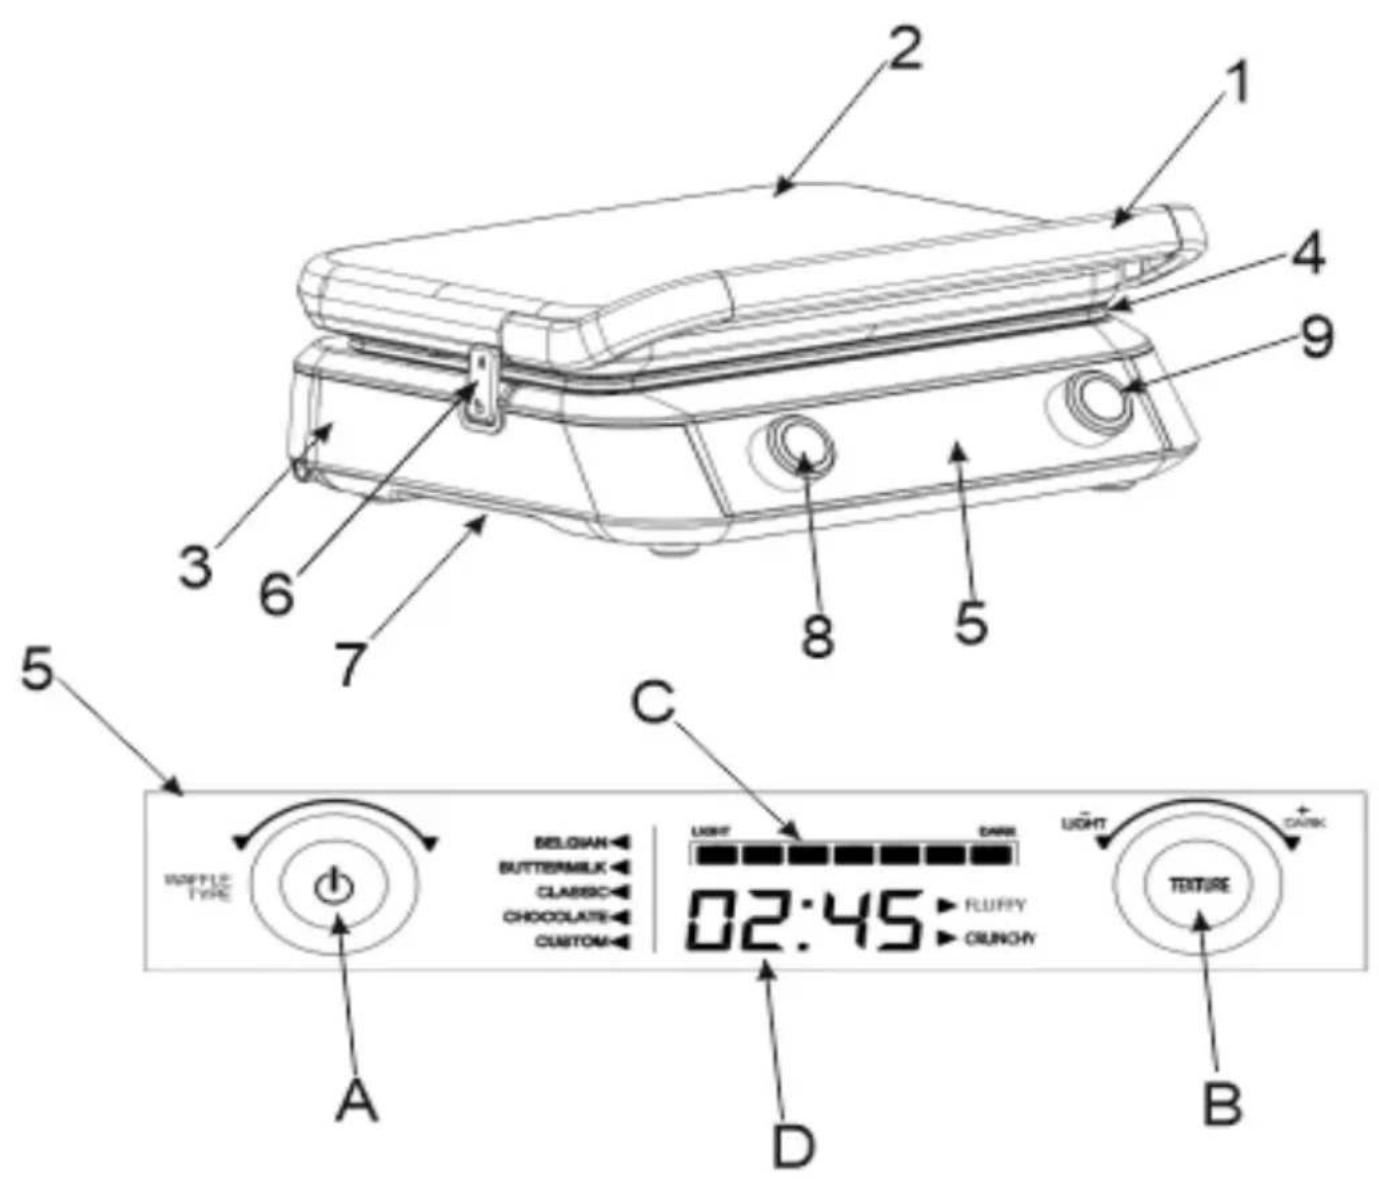
DEVICE DESCRIPTION:
-
Handle
-
Top housing
-
Bottom housing
-
Heating plates
-
Control panel
-
Lid lock (for storage only)
-
Power cord storage compartment
-
Program selection dial
-
Baking degree selection knob
-
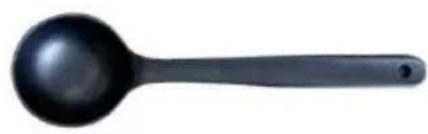
Spoon for pouring dough
A. On/off button
B. Baking selection button
C. Baking degree indicator / preheat indicator
D. Timer
BEFORE FIRST USE
- Remove the packaging and any stickers and accessories that are on the outside and inside the device (between the heating plates).
- Wipe the hotplates with a damp and then dry cloth.
- Lightly grease the heating plates with vegetable oil or other grease, close the unit and plug it into a grounded outlet, press the button (A) on the knob (8), the unit will turn on and the display will show the factory settings. The unit will begin to heat up, indicated by flashing icons (C) on the display.
- Leave the unit on for a few minutes to get rid of the factory odor. During this time, the device may emit a small amount of smoke. This is a normal phenomenon.
- Clean the device according to the "Cleaning" section.
USING THE DEVICE
Prepare a cake according to your favorite recipe.
- Plug the closed device into a grounded outlet.
Press the button (A) on the knob (8), the appliance will turn on and the display will show the factory settings.
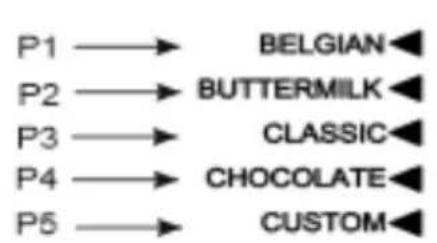
- Turn the knob (8) to select one of the 5 programs.
Program
Program description
P1 BELGIAN Program designed to prepare Belgian type waffles
P2 BUTTERMILK A program designed to prepare waffles with the addition of buttermilk
P3 CLASSIC Program for the preparation of traditional waffles
P4 CHOCOLATE Program designed to prepare chocolate waffles
P5 CUSTOM* The program allows you to individually set the time and degree of baking of waffles*
- After selecting the desired program, use the knob (9) to select the waffle baking degree according to your taste preference: from 1 to 7, where 1 (Light) is for light waffles and 7 (Dark) is for darker waffles. Then, by pressing the
button (B) on the knob (9), select how the waffle is baked
T1 - "FLUFFY" - Soft
T2 - " CRUNCHY" - Crunchy
-
Wait for about 5 minutes. After this time the device should reach the required temperature, the icons (C) on the display will stop flashing.
-
Fully open the appliance. Pour the previously prepared batter onto the lower heating plate.
-
Close the appliance. Do not close the upper housing (5) by force.
-
After the dough is poured in, the appliance will automatically start counting down the time (D) according to the selected program and browning level (see tables below). After the countdown, the unit will beep
NOTE: Hot steam may escape from the upper housing (5) of the device during operation, this is normal.
- Completely open the upper housing (5) and remove the baked waffle, using only a wooden or plastic spatula. Note: If you do not remove the waffles, they will continue to bake.
CAUTION: Do not use metal utensils or sharp kitchen utensils, as they may damage the special non-stick cooktops.
-
Before baking the next batch, close the top housing so that the hotplates warm up to the right temperature.
-
After baking is finished, unplug the appliance from the outlet and let it cool down.
T1 Soft / FLUFFY
| Baking degree | 1 | 2 | 3 | 4 | 5 | 6 | 7 |
| P1/ BELGIAN | 03:10 | 03:25 | 03:40 | 03:55 | 04:10 | 04:25 | 04:40 |
| P2/ BUTTERMILK | 03:35 | 03:50 | 04:05 | 04:20 | 04:35 | 04:50 | 05:05 |
| P3/ CLASSIC | 03:40 | 03:55 | 04:10 | 04:25 | 04:40 | 04:55 | 05:10 |
| P4/ CHOCOLATE | 03:00 | 03:15 | 03:30 | 03:45 | 04:00 | 04:15 | 04:30 |
T2 Crispy / CRUNCHY
| Baking degree | 1 | 2 | 3 | 4 | 5 | 6 | 7 |
| P1/ BELGIAN | 02:00 | 03:30 | 04:00 | 05:30 | 07:00 | 08:30 | 10:00 |
| P2/ BUTTERMILK | 02:15 | 04:30 | 04:40 | 06:30 | 08:10 | 09:50 | 11:10 |
| P3/ CLASSIC | 02:10 | 03:50 | 04:30 | 06:10 | 07:50 | 09:30 | 10:50 |
| P4/ CHOCOLATE | 03:30 | 04:30 | 05:30 | 06:30 | 07:30 | 08:30 | 09:30 |
*WARNING: there is no defined baking time in the "CUSTOM" program, so there is no beep to indicate that the waffles are ready.
TO CHANGE THE SETTINGS
Since the settings cannot be changed once baking has started, wait until the current cycle is complete or stop the machine by pressing button (A) on the knob (8) and turn it back on.
COVER BLOCK (6) Used only for storing the appliance. Leave the locking mechanism open during baking, if you close it, the waffle batter will not be able to spread evenly.
TIPS
*Do not open the top lid during baking before the recommended time has elapsed, this can result in a so-called "scone"
*Baked waffles should be put on the griddle, in order to evaporate the water from the waffle, this will make the waffles
will be crispier.
CLEANING DEVICE
- After use, remove the plug from the outlet and wait for the device to cool down before you start cleaning.
- Wipe the cooktops first wet and then dry with a cloth (you can also use a paper towel).
- Lubricate the most difficult to clean cake with oil and leave it. After a few minutes, gently remove the residue with a wooden spatula.
-
Do not use any metal or hard abrasive tools to wipe the inside/outside of the unit to avoid scratching the surface of the unit.
-
Do not immerse in water.
Sample recipes:
P3, Traditional Waffles
500g flour, 400ml Milk, 100g sugar, 250g melted butter, 5 eggs, 5g baking powder, 16g Vanilla Sugar.
Pour the flour into a bowl, add baking powder, sugar, vanilla sugar. Mix everything together. Add milk, eggs and melted butter. Mix until a smooth batter is obtained.
P1, Belgian Waffles
250g flour, 420ml milk, 50g sugar, 125g melted butter, 3 eggs, 13g instant yeast
Pour flour into a bowl, add yeast, sugar, Mix everything. Add milk, eggs and melted butter. Mix until smooth then set the dough aside to rise.
P2, Waffles on buttermilk
320g flour, 500ml buttermilk, 115g melted butter, 2 eggs, 35g brown sugar, 2g baking powder, 1g baking soda, 1g salt. Pour flour into a bowl, add baking powder, baking soda, salt and sugar,. Mix everything together. Add buttermilk, eggs and melted butter. Mix until a smooth batter is formed.
P4, Chocolate Waffles
175g flour, 450ml milk, 100g melted butter, 2 eggs, 150g sugar, 6.5g baking powder, 100g dark chocolate, 30g cocoa powder
Pour flour into a bowl, add baking powder, sugar, crumbled chocolate and cocoa All mix together. Add milk, eggs and melted butter. Mix until the mixture is smooth.
SPECIFICATIONS:
Power supply: 220-240V \~ 50-60Hz
Nominal power: 1600W
Maximum power: 2400W
Caution hot surface:
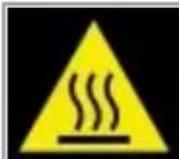
The temperature of the accessible surfaces of the running appliance may be high. Do not touch the hot surfaces of the appliance
For the sake of the environment. Dispose of cardboard packaging and polyethylene (PE) bags in the appropriate containers for separate collection of municipal waste according to their description. If there are batteries in the device, remove them and separately return them to the collection and storage facility. Return the used device to a suitable collection and storage facility, as the hazardous substances in it may pose a threat to health and the environment. The marking on the product indicates that the device should not be disposed of in the container with municipal waste. Waste electrical equipment, is waste that contains substances harmful to humans, animals and the environment. These substances can lead to contamination of the soil, water or air, and through this they can enter the human body and lead to numerous health ailments, such as vision, hearing, speech disorders, they can also damage the kidneys, liver and heart, and cause skin diseases. Harmful substances can also have adverse effects on the respiratory and reproductive systems and lead to cancerous changes. Consumption of plants growing on the complained of soils, and products made from them may risk the above-mentioned health effects. Do not dispose of the device in the municipal waste container!!!

Service If you wish to purchase spare parts or report any complaints, please contact directly with the seller who issued the receipt.
T1 - "FLUFFY - Suave
T2 - " CRUJIENTE" - Crujiente
T1 - "FLUFFY" - Suave
T2 - "CROCANTE" - Crocante
T1 - "FLUFFY" - Soft
T2 - " KRAUKŠKĪGAS" - Kraukškīgs
T1 - "FLUFFY" - Soft
T2 - "CRUNCHY" - Crunchy
BESCHRIJVING APPARAAT
T1 - "FLUFFY - Zacht
T2 - " KROKANT - Knapperig
T1 - "FLUFFY" - Mehki
T2 - "HRUSTLJAV" - Hrustljavo
T2 - " KRISPIG" - Crunchy
T1 - "FLUFFY" - Mekano
T2 - "CRUNCY" - Hrskavo
-
Sačekajte oko 5 minuta. Nakon ovog vremena, uređaj bi trebao dostići potrebnu temperaturu i ikone (C) na displeju će prestati da trepću.
-
Potpuno otvorite uređaj. Prethodno pripremljeno testo izlijte na donju grejnu ploču.
-
Isključite uređaj. Gornje kućište (5) ne zatvarajte silom.
-
Nakon sipanja testa, uređaj će automatski početi da odbrojava vreme (D) prema odabranom programu i stepenu prženja (pogledajte tabele ispod). Nakon odbrojavanja vremena, uređaj će emitovati zvučni signal
NAPOMENA: Vruća para može izaći iz gornjeg kućišta (5) uređaja tokom rada, to je normalno.
T1 - "FLUFFY" - Meko
T2 - "CRUNCHY" - Hrskavi
-
Pričekajte oko 5 minuta. Nakon tog vremena, uređaj bi trebao postići potrebnu temperaturu i ikone (C) na displeju će prestati treptati.
-
Potpuno otvorite uređaj. Prethodno pripremljeno tijesto izlijte na donju grijaću ploču.
-
Isključite uređaj. Nemojte silom zatvarati gornji dio kućišta (5).
-
Nakon izlijevanja tijesta uređaj će automatski početi odbrojavati vrijeme (D) prema odabranom programu i stupnju pečenja (vidi tablice u nastavku). Nakon odbrojavanja vremena, uređaj će emitirati zvučni signal
T2 - "CRUNCHY" - Crunchy
borough district (KA)
ghsghmthgjdn 6mgsqn 3nhmddjn glsghmthgjdn 3bnd3bghmmzbn ngbghghjdn
T2 - "CRUNCHY" - Crunchy

Brand : ADLER
Model : AD 3084
Category : Waffle Maker