GIC 12V-4-23 C Professional - Measuring equipment BOSCH - Free user manual and instructions
Find the device manual for free GIC 12V-4-23 C Professional BOSCH in PDF.
| Product type | Inspection camera |
| Brand | Bosch |
| Model | GIC 12V-4-23 C Professional |
| Screen size | 4.3 inches |
| Screen resolution | 800 × 480 px |
| Camera resolution | 1 280 × 720 px (JPG images) |
| Internal storage capacity | Up to 30 images |
| Field of view | 75° |
| Focus distance | 30 – 80 mm |
| Maximum light intensity (LED) | 200 lx (at 50 mm) |
| Camera head diameter | 8.3 mm |
| Flexible cable length | 1.5 m |
| Minimum cable bend radius | 25 mm |
| Power supply | Lithium-ion battery 12 V (GBA 12V...) or adapter for 4 AA batteries (LR6/NiMH) |
| Operating time (with 2.0 Ah battery) | Approx. 8 h |
| Operating time (with AA alkaline batteries) | Approx. 3 h |
| Weight | 0.37 kg |
| Dimensions (L × W × H) | 242 × 140 × 66 mm |
| Protection rating (housing) | IP54 |
| Protection rating (head and cable) | IP67 |
| Operating temperature | -10 °C to +50 °C |
| Storage temperature | -20 °C to +50 °C |
| Main functions | Visual inspection, image capture, digital zoom, adjustable LED lighting, high indicator |
| Maintenance and cleaning | Clean with a soft, damp cloth; do not use detergents or solvents |
| Safety | Do not look directly at the LED; avoid contact with water on the housing; observe safety instructions for batteries |
| Spare parts and repairability | Repair by a Bosch authorized service center; spare parts available at www.bosch-pt.com |
Frequently Asked Questions - GIC 12V-4-23 C Professional BOSCH
User questions about GIC 12V-4-23 C Professional BOSCH
0 question about this device. Answer the ones you know or ask your own.
Ask a new question about this device
Download the instructions for your Measuring equipment in PDF format for free! Find your manual GIC 12V-4-23 C Professional - BOSCH and take your electronic device back in hand. On this page are published all the documents necessary for the use of your device. GIC 12V-4-23 C Professional by BOSCH.
USER MANUAL GIC 12V-4-23 C Professional BOSCH
GIC 12V-4-23 C Professional
Robert Bosch Power Tools GmbH
70538 Stuttgart
GERMANY
www.bosch-pt.com
160992A9RK(2024.05)T/420

de Originalbetriebsanleitung
en Original instructions
fr Notice originale
es Manual original
pt Manual original
1.1.1.1.1
HI OORSpronkelenjke gebruksaanwijzing
da Original Brugsainsling on Dukhovianinian
S Bruksanishing 1 original shiftin
10Original callisthenius 1Alliteration,chanted
Aikpsersetj
eepnnoonnnnne
Onlinalieetanm
pl Instrukcja oryginalina
C Povodni Havos k podzvani 1. Povodni (p. 2)
SK Powcny hawod na pouzide
hu Eredei hasznalatiutasitas
ruOpHnHaHbHoepyKO5OaCTBO no 3KcnnyatauHa
ukOpriHbHaIhCTpyKu3eKcnnyataaui
kk Tnndanany HcyckaynbfbHbINrnnyckacB
ro Instruetioni originale
bgOpnHnHaHnHCTpyKlnHa
mkOpHHHnHOynaTBO3a pa6ota
sr Originalno upstvo za rad
slZvirna navodila
hr Originale upute za rad
et Alguparane kasutusjuhend
IV Instrukcijas originalvaloda
Original Instrukturjahr 2013
ar
fa Jol Slaioj aJg

2
Deutsch. 8
English 22
Francais .Page 35
Espanol. 49
Portugués. 63
Italiano . 76
Nederlands.. 90
Dansk . 103
Svensk Sidan 115
Norsk. Side 127
Suomi . 139
EAAyika 152
Türkce Sayfa 166
Polski. Strona 181
Čestina Stránka 194
Slovencina Stranka 207
Magyar Oldal 219
Pycckn CtpaHua 232
YkpaHcbka. 247
Ka3ak . 261
Romana.. 276
Былгарский.. 290
MaKeDoHcKn. 303
Srpski Strana 317
Slovenscina Stran 330
www.bosch-pt.com/serviceaddresses
Transport
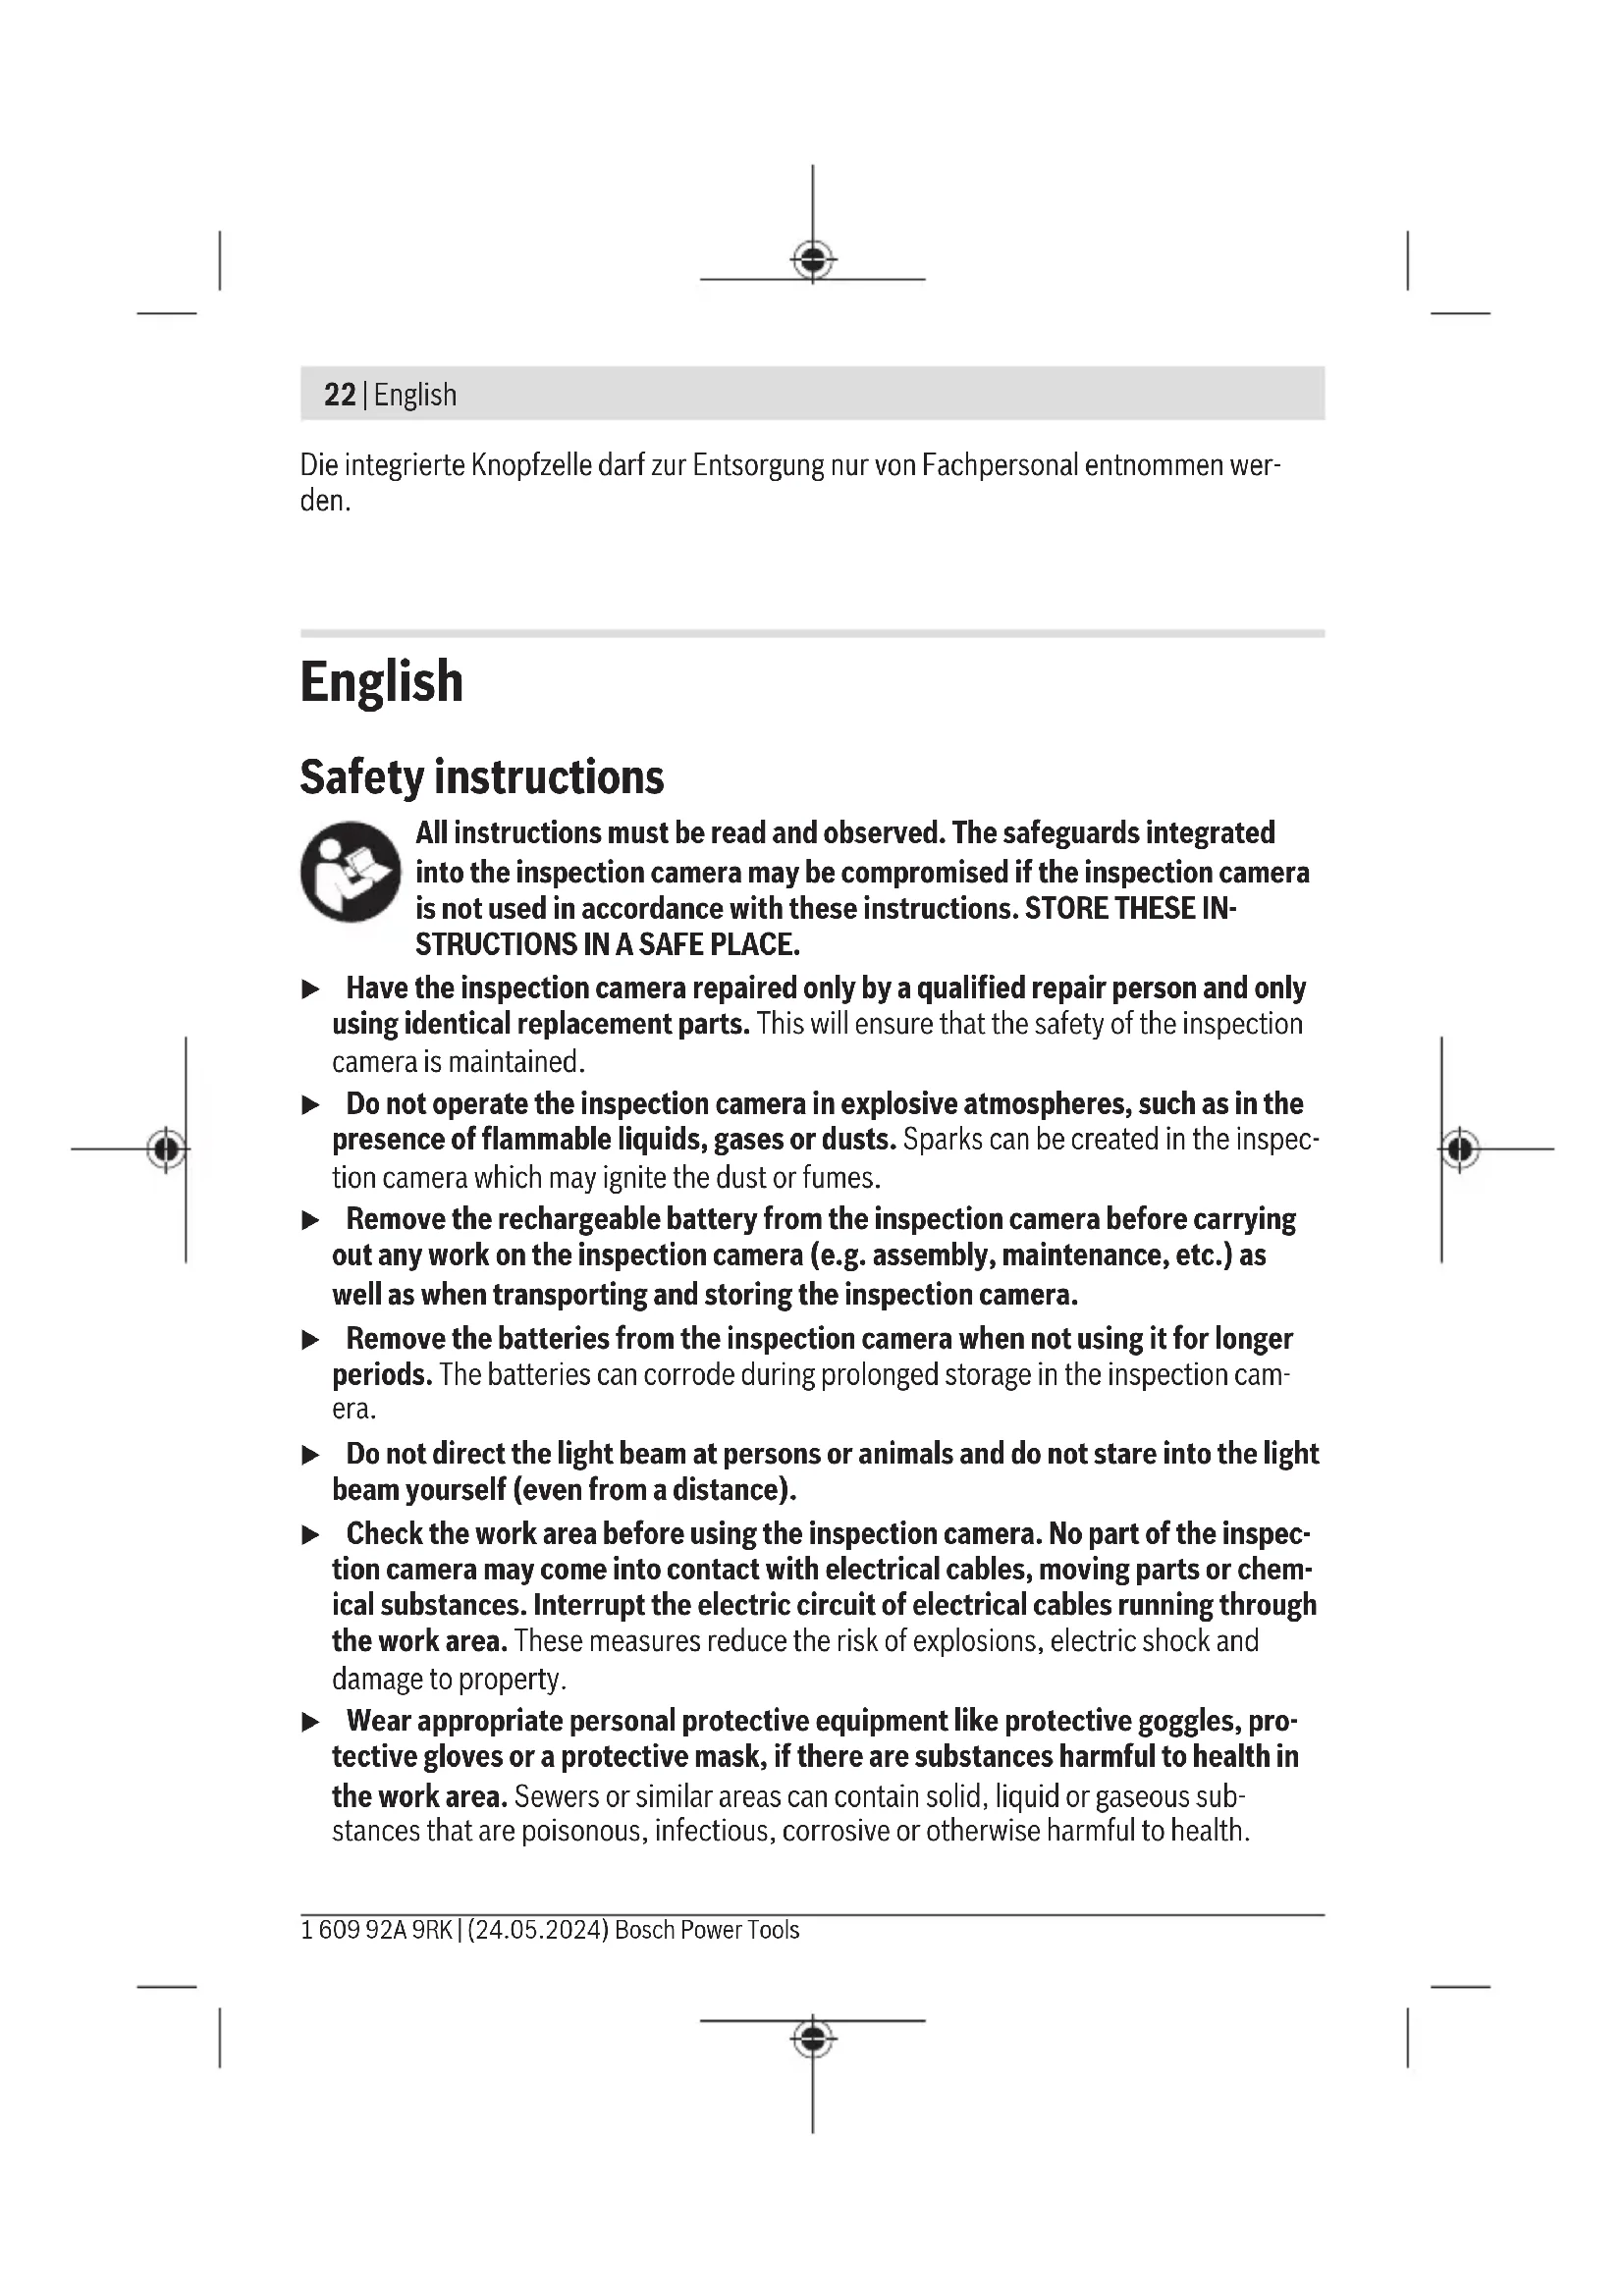
All instructions must be read and observed. The safeguards integrated into the inspection camera may be compromised if the inspection camera is not used in accordance with these instructions. STORE THESE INSTRUCTIONS IN A SAFE PLACE.
- Have the inspection camera repaired only by a qualified repair person and only using identical replacement parts. This will ensure that the safety of the inspection camera is maintained.
- Do not operate the inspection camera in explosive atmospheres, such as in the presence of flammable liquids, gases or dusts. Sparks can be created in the inspection camera which may ignite the dust or fumes.
Remove the rechargeable battery from the inspection camera before carrying out any work on the inspection camera (e.g. assembly, maintenance, etc.) as well as when transporting and storing the inspection camera. - Remove the batteries from the inspection camera when not using it for longer periods. The batteries can corrode during prolonged storage in the inspection camera.
Do not direct the light beam at persons or animals and do not stare into the light beam yourself (even from a distance). - Check the work area before using the inspection camera. No part of the inspection camera may come into contact with electrical cables, moving parts or chemical substances. Interrupt the electric circuit of electrical cables running through the work area. These measures reduce the risk of explosions, electric shock and damage to property.
Wear appropriate personal protective equipment like protective goggles, protective gloves or a protective mask, if there are substances harmful to health in the work area. Sewers or similar areas can contain solid, liquid or gaseous substances that are poisonous, infectious, corrosive or otherwise harmful to health.
Pay particular attention to cleanliness if you work in areas with substances harmful to health. Do not eat during work. Avoid contact with substances harmful to health, and clean hands and other body parts that could have come into contact with them with hot soapy water after work. This reduces the danger to health.
- Do not stand in water if you are using the inspection camera. Working in water poses a risk of electric shock.
Do not modify or open the battery. There is a risk of short-circuiting.
In case of damage and improper use of the battery, vapours may be emitted. The battery can set alight or explode. Ensure the area is well ventilated and seek medical attention should you experience any adverse effects. The vapours may irritate the respiratory system.
If used incorrectly or if the battery is damaged, flammable liquid may be ejected from the battery. Contact with this liquid should be avoided. If contact accidentally occurs, rinse off with water. If the liquid comes into contact with your eyes, seek additional medical attention. Liquid ejected from the battery may cause irritation or burns.
The battery can be damaged by pointed objects such as nails or screwdrivers or by force applied externally. An internal short circuit may occur, causing the battery to burn, smoke, explode or overheat.
- When the battery is not in use, keep it away from paper clips, coins, keys, nails, screws or other small metal objects that could make a connection from one terminal to another. A short circuit between the battery terminals may cause burns or a fire.
- Only use the battery with products from the manufacturer. This is the only way in which you can protect the battery against dangerous overload.
- Only charge the batteries using chargers recommended by the manufacturer. A charger that is suitable for one type of battery may pose a fire risk when used with a different battery.

Protect the battery against heat, e.g. against continuous intense sunlight, fire, dirt, water and moisture. There is a risk of explosion and short-circuiting.

WARNING
24 | English


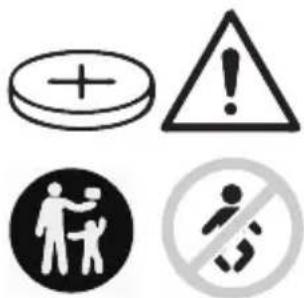
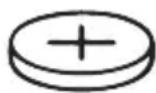
Ensure that the coin cell is kept out of the reach of children. Coin cells are dangerous.
- Coin cells must never be swallowed or inserted into any other part of the body. If you suspect that someone has swallowed a coin cell or that a coin cell has entered the body in another way, seek medical attention immediately. Swallowing coin cells can result in severe internal burns and death within 2 hours.
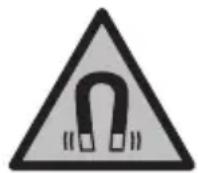
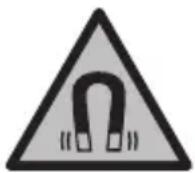
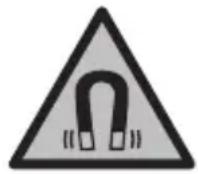
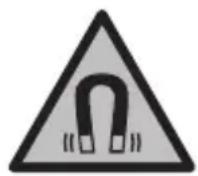
Keep the magnetic accessories away from implants and other medical devices, e.g. pacemakers or insulin pumps. The magnets in the accessories generate a field that can impair the function of implants and medical devices.
- Keep the magnetic accessories away from magnetic data storage media and magnetically-sensitive devices. The effect of the magnets in the accessories can lead to irreversible data loss.
Product Description and Specifications
Please observe the illustrations at the beginning of this operating manual.
Intended Use
The digital inspection camera is suitable for inspecting areas that are dark or difficult to access. It is also suitable for moving and removing small and light objects (e.g. small screws) after fitting the supplied accessories on the camera head.
The digital inspection camera must not be used for medical purposes. It is likewise not intended for removing pipe blockages or installing cables.
Product Features
The numbering of the product features refers to the representation of the inspection camera on the graphic pages.
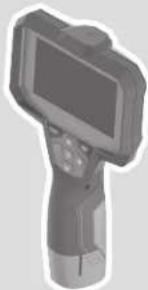
(1) Camera cable
(2) Camera head
(3) Illumination light in the camera head
(4) Camera lens
(5) Display
(6) On/off button
(7) Up button
(8) Left-hand button
(9) Centre button
(10) Down button
(11) Right-hand button
(12) Photo recording button
(13) Handheld device
(14) Rechargeable batterya
(15) AA1 battery adapter
(16) Top flap
(17) USB Type-C® portb)
(18) USB Type-C® cable
(19) Port
(20) Battery adapter cover
(21) Release button
(22) Battery adapter cap
(23) Camera connection
(24) Locking mechanism for camera cable
(25) Magnet
(26) Hook
(27) Mirror
a) This accessory is not part of the standard scope of delivery.
b) USB Type-C® and USB-C® are trademarks of USB Implementers Forum.
Display Elements
(a) Status indicator function Up Indication
(b) Direction indicator function Up Indication
(c) Battery charge indicator for rechargeable battery/non-rechargeable batteries
26 | English
Technical Data
| Digital inspection camera GIC 12V-4-23 C | ||
| Article number | 3601 B415.. | |
| Display size " 4.3 | ||
| Display resolution px 800 × 480 | ||
| Resolution of camera/image filesA)B) | px 1280 × 720 | |
| Screenshot format JPG | ||
| Max. number of photos in internal memory 30 | ||
| Field of viewA)C) | ° | 75 |
| Focus distanceA) | mm 30-80 | |
| Max. luminous intensity of the illumination light in the camera headA)D) | lx 200 | |
| Max. immersion time for camera head/cable in diesel, engine oil, ethyl alcohol, petrol, AdBlue® or salt water (26.5% salt content)A) | min 30 | |
| Power supply | ||
| - Rechargeable battery (Li-ion) 12 V | ||
| - Non-rechargeable batteries (alkaline manganese, with battery adapter) | 4 × 1.5 V LR6 (AA) | |
| - Rechargeable batteries (NiMH, with battery adapter) | 4 × 1.2 V HR6 (AA) | |
| Backup power supply for saving the time | ||
| - Coin cell CR2450 (3 V, lithium | battery) | |
| - Battery life approx. Years 3 | ||
| Operating time, approx.E) | ||
| - With rechargeable battery (Li-ion)F) | h | 8 |
| - With non-rechargeable batteries (alkaline manganese) | h | 3 |
| - With rechargeable batteries (NiMH, 1.2 V) | h 3.5 | |
| WeightG) | kg | 0.37 |
| Dimensions (length × width × height)F) | mm | 242 × 140 × 66 |
| 1609 92A 9RK | (24.05.2024) | Bosch Power Tools | |
Digital inspection camera GIC 12V-4-23 C
| Camera head diameterA) | mm 8.3 | |
| Length of camera cableA) | m 1.5 | |
| Smallest bend radius of camera cable mm 25 | ||
| Protection rating of handheld device (without re-chargeable battery/battery adapter) | IP54 | |
| Protection rating of camera head and camera cableA) | IP67 | |
| Recommended ambient temperature during charging | °C 0 to +35 | |
| Permitted ambient temperature during operation °C -10 to +50 | ||
| Permitted ambient temperature during storage °C -20 to +50 | ||
| Recommended rechargeable batteries GBA 12V... | ||
| Recommended chargers GAL 12... | ||
| GAX 18... | ||
A) With camera cable GIC 4/5 Imager 8.3mm / 1.5m
B) Resolution 800 × 480 , if the image is enlarged in the display or is displayed in black and white
C) Measured across the diagonal of the image
D) at 50~mm distance in a dark environment
E) with camera display, with Up Indication function, average display brightness, illumination light with 50% brightness
F) with GBA 12V 2.0Ah
G) Weight without rechargeable batteries/non-rechargeable batteries/battery adapter/camera cable
Assembly
Power supply
The inspection camera can be operated either with a Bosch lithium-ion rechargeable battery, with commercially available non-rechargeable batteries or with commercially available NiMH rechargeable batteries.
The battery charge indicator (c) will indicate the state of charge of the Li-ion battery, non-rechargeable batteries or NiMH batteries on the display.
28 | English
Operation with Battery Adapter (see figure A)
The non-rechargeable or NiMH rechargeable batteries are inserted into the battery adapter.
The battery adapter is intended only for use in designated Bosch inspection cameras and must not be used with power tools.
To insert the non-rechargeable/rechargeable batteries, slide the receptacle (20) of the battery adapter into the bay (19). Place the non-rechargeable/rechargeable batteries in the receptacle as shown in the picture on the cap (22). Slide the cap over the cover until you feel it click into place and it is flush with the handle of the inspection camera.
To remove the non-rechargeable/rechargeable batteries, press the release buttons (21) of the cap (22) and pull off the cap. Pull out the cover (20) from inside the port (19).
Always replace all the batteries at the same time. Only use batteries from the same manufacturer and which have the same capacity.
- Remove the non-rechargeable/rechargeable batteries from the inspection camera when not using it for longer periods. The non-rechargeable/rechargeable batteries can corrode during prolonged storage in the inspection camera.
Operation with Lithium-Ion Rechargeable Battery (see figure B)
Use only the chargers listed in the technical data. Only these battery chargers are matched to the lithium-ion batteries of your inspection camera.
Note: Lithium-ion rechargeable batteries are supplied partially charged according to international transport regulations. To ensure full rechargeable battery capacity, fully charge the rechargeable battery before using your tool for the first time.
To insert the charged rechargeable battery (14), slide it into the port (19) until you feel it click into place and it is flush with the handle of the inspection camera.
To remove the battery (14), press the release buttons (21) and pull it out of the port (19). Do not use force to do this.
Recommendations for Optimal Handling of the Battery
Protect the battery against moisture and water.
Only store the battery within a temperature range of -20 to 50^ . Do not leave the battery in your car in the summer, for example.
A significantly reduced operating time after charging indicates that the battery has deteriorated and must be replaced.
Follow the instructions on correct disposal.
Fitting the camera cable (see figure C)
For operation of the inspection camera, the camera cable (1) must be fitted on the hand-held device (13).
Push the connector of the camera cable (1) onto the camera connection (23) in the correct position until it clicks into place.
Removing the camera cable (see figure D)
To remove the camera cable (1), press the locking mechanism (24) and pull the connector out of the handheld device (13).
Fitting the mirror, magnet or hook (see figure E)
The mirror (27), the hook (26) or the magnet (25) can be fitted on the camera head (2) as accessories.
Push one of the three accessories, as shown in the figure, all the way onto the camera head (2).
Note: The magnet (25) and the hook (26) are only suitable for moving and removing loose, small and light objects. The inspection camera or the accessory can be damaged with too strong a pull.
Operation
- Protect the handheld device and the rechargeable battery or battery adapter from direct sunlight. Protect the rechargeable battery or battery adapter against moisture. The camera cable (1) and camera head (2) are watertight if assembled correctly; the handheld device (13) is splash-proof. However, the rechargeable battery (14) and the battery adapter are not protected against water. If they come into contact with water, there is a risk of electric shock or damage.
- Do not use the inspection camera if the lens on the camera head (2) has fogged up. Switch the inspection camera on only if the moisture has evaporated. The inspection camera may otherwise become damaged.
The switched-on light (3) can become hot during operation. To avoid burns, do not touch the light. - Do not subject the inspection camera to extreme temperatures or variations in temperature. For example, do not leave it in a car for extended periods of time. In case of large variations in temperature, allow the inspection camera to adjust to the ambient temperature before putting it into operation.
30 | English
Starting Operation
Switching On and Off
To switch on the inspection camera, press the ON/OFF button (6) or the centre button (9).
Note: If the camera cable is not fitted when switching on, the display will show an error message.
To switch off the inspection camera, press the ON/OFF button (6) until the display switches off.
If no button on the inspection camera is pressed for a certain time, then the inspection camera will automatically switch itself off to preserve battery life. You can set the switch-off time in the main menu.
Regulating the illumination light in the camera head
To regulate the light, press the left-hand button (8) or the right-hand button (11) until it reaches the required brightness or the illumination light has switched off.
Do not look directly into the light (3) and do not direct the light onto other people. The light can blind your eyes.
Zooming In/Out of the Image in the Display
To set the magnification level of the display view, press the up button (7) or the down button (10) until the required magnification level has been reached.
Main Menu
To access the
Navigating in the menu
- To scroll through a menu: Press the up (7) or down (10) buttons.
- To switch to a submenu: Press the centre button (9) or the right-hand button (11).
- To confirm a selected menu option: Press the centre button (9).
- To switch a function with a virtual switch on or off : Either press the centre button (9), the right-hand button (11) or the left-hand button (8). This will also save the setting.
- To return to the previous, higher-level menu: Briefly press the ON/OFF button (6).
- To exit the main menu and return to the camera display: Briefly press the ON/OFF button (6).
Menu options
: Switch the function on or off.
When the Up Indication function is switched on, the arrow of the direction indicator (b), shows where "up" is in the image (see figure F).
Note: The function is not possible with all camera cables. The function is limited if a mirror (27) is fitted and/or with a vertically aligned camera cable (1).
: This is where recorded photos can be accessed.
You can select the required file based on its date using the down (10) or up (7) buttons.
Press the right-hand button (11) or the centre button (9) to see a preview of the selected photo.
To open the selected file, press the centre button (9).: Set the required brightness for the display. : Switch between the colour view and black/white view of the display. -
-
: You can set the date and time for saving files and select the date and time format.
Note: If the date and time can no longer be saved, the built-in coin cell is drained. Contact an authorised Bosch-after-sales service centre if this happens.
: Select the language used in the display. -
: Choose the time interval after which the inspection camera will switch off automatically if no button is pressed. -
: Here you will find device information, such as the installed software version and legal information. : You can reset all of the menu options to factory settings. This also simultaneously, permanently delete all of the saved files.
Saving/Transferring the Recordings
Taking a Photo
Press the photo recording button (12) to take a photo of the current display view. The photos are stored in the internal memory of the inspection camera and can be transferred via USB Type-C®.
Data transfer via the USB Type-C® interface
Switch on the inspection camera to transfer data via the USB Type-C® interface. Open the flap for the USB Type-C® port (17). Connect the USB Type-C® port to your PC via the USB Type-C® cable (18).
32 | English
Open the file browser on your PC and select the Bosch_GIC drive. The saved files can be copied from the internal memory of the inspection camera, moved to your PC or deleted.
As soon as you have completed the required operation, disconnect the drive following the standard procedure.
Note: Always disconnect the drive from the operating system of the PC first (eject drive), as failure to do so may damage the internal memory of the inspection camera.
Remove the USB Type-C® cable (the inspection camera will switch off automatically).
Close the upper flap (16) to protect against dust or splashes.
Note: Only use the USB Type-C® interface to connect the inspection camera to a PC. The inspection camera may be damaged if connected to other devices.
Note: The USB Type-C® interface can only be used for data transfer. Rechargeable batteries or other devices cannot be charged by this interface.
Working Advice
Check the environment that you want to inspect, paying particular attention to obstacles or hazardous areas.
Bend the camera cable (1) so that the camera head can be easily introduced into the environment to be inspected. Carefully introduce the camera cable.
Adjust the brightness of the camera illumination light (3) so that the image is easily recognisable. When photographing highly reflective objects, for example, you can achieve better results in lower light or using black and white contrast setting.
If objects to be inspected look blurred, then reduce or increase the distance between camera head (2) and object.
Errors - causes and corrective measures
Error indicator Cause Corrective measures in the display

Internal memory al- Delete the files from the internal memory. most full
(yellow warning)

Internal memory full Delete the files from the internal memory.
(red warning)
Error in the internal Restart the inspection camera.
memory
If the problem persists, contact an authorised
Bosch after-sales service centre.
Maintenance and Service
Maintenance and Cleaning
Do not immerse the handheld device (13) in water or other liquids.
Always keep the inspection camera clean. Clean the inspection camera and all accessories particularly thoroughly after you have worked in areas with substances harmful to health.
Wipe off any dirt using a damp, soft cloth. Do not use any detergents or solvents.
Clean the camera lens (4) in particular regularly and make sure to check for any lint.
Replacing the Built-in Coin Cell
The coin cell replacement must be performed by Bosch or by an after-sales service centre authorised to work with Bosch power tools.
Caution: The coin cell must always be replaced with a coin cell of the same type. There is a risk of explosion.
Remove and dispose of drained coin cell correctly. Drained coin cell may leak and damage the product or cause personal injury.
After-Sales Service and Application Service
Our after-sales service responds to your questions concerning maintenance and repair of your product as well as spare parts. You can find explosion drawings and information on spare parts at: www.bosch-pt.com
The Bosch product use advice team will be happy to help you with any questions about our products and their accessories.
In all correspondence and spare parts orders, please always include the 10-digit article number given on the nameplate of the product.
Malaysia
Robert Bosch Sdn. Bhd.(220975-V) PT/SMY
No.8A,Jalan 13/6
46200 Petaling Jaya
Selangor
Tel.: (03) 79663194
Toll-Free: 1800 880188
Fax: (03) 79583838
E-Mail: kiathoe.chong@my.bosch.com
www.bosch-pt.com.my
34 | English
Great Britain
Robert Bosch Ltd. (B.S.C.)
P.O.Box 98
Broadwater Park
North Orbital Road
Denham Uxbridge
UB95HJ
At www.bosch-pt.co.uk you can order spare parts or arrange the collection of a product in need of servicing or repair.
Tel. Service: (0344) 7360109
E-Mail: boschservicecentre@bosch.com
You can find further service addresses at:
www.bosch-pt.com/serviceaddresses
Transport
The recommended lithium-ion batteries are subject to legislation on the transport of dangerous goods. The user can transport the batteries by road without further requirements.
When the batteries are shipped by third parties (e.g. air transport or forwarding agency), special requirements on packaging and labelling (e.g. ADR regulations) must be met. A dangerous goods expert must be consulted when preparing the items for shipping.
Dispatch battery packs only when the housing is undamaged. Tape or mask off open contacts and pack up the battery in such a manner that it cannot move around in the packaging. Please also observe the possibility of more detailed national regulations.
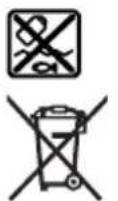
Disposal

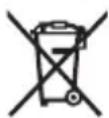
The inspection camera, batteries/rechargeable batteries, accessories and packaging should be sorted for environmentally friendly recycling.
Do not dispose of the inspection camera or batteries/rechargeable batteries with household waste.
Only for EU countries:
In accordance with Directive 2012/19/EU and Directive 2006/66/EC respectively, inspection cameras that are no longer usable and defective/drained batteries must be collected separately and recycled in an environmentally friendly manner.
If disposed incorrectly, waste electrical and electronic equipment may have harmful effects on the environment and human health, due to the potential presence of hazardous substances.
Only for United Kingdom:
According to The Waste Electrical and Electronic Equipment Regulations 2013 (SI 2013/3113) (as amended) and the Waste Batteries and Accumulators Regulations 2009 (SI 2009/890) (as amended), products that are no longer usable must be collected separately and disposed of in an environmentally friendly manner.
Battery packs/batteries:
Li-ion:
Please observe the notes in the section on transport (see "Transport", page 34). The integrated coin cell may only be removed for disposal by qualified personnel.
Français
Robert Bosch Morocco SARL
53, Rue Lieutenant Mahroud Mohamed
20300 Casablanca
Tel.: +212529314327
E-Mail: sav.outillage@ma.bosch.com
France
Robert Bosch (France) S.A.S.
www.bosch-pt.com/serviceaddresses
Transport
Calle Robert Bosch No. 405
Bosch Power Tools 1609 92A 9RK| (24.05.2024)
62 | Espanol
C.P. 50071 Zona Industrial, Toluca - Estado de Mexico
Tel.: (52) 55 528430-62
Tel.: 800 6271286
www.bosch-pt.com/serviceaddresses
Transporte
www.bosch-pt.com/serviceaddresses
Transporte
www.bosch-pt.com/serviceaddresses
Trasporto
Lamp in camerakop regelen
www.bosch-pt.com/serviceaddresses
Vervoer
Bosch Service Center
Telegrafvej 3
2750 Ballerup
På www.bosch-pt.dk kan der online bestilles reservedele eller oprettes en reparations ordre.
Tlf. Service Center: 44898855
Fax: 44898755
E-Mail: vaerktoej@dk.bosch.com
www.bosch-pt.com/serviceaddresses
Transport
Bosch Service Center
Telegrafvej 3
2750 Ballerup
Danmark
Tel.: (08) 7501820 (inom Sverige)
Fax: (011) 187691
Du hittar fler kontaktuppgifter till service har:
www.bosch-pt.com/serviceaddresses
Transport
De rekommenderade litiumjonbatterierna ar underkastade kraven for farligt gods.
www.bosch-pt.com/serviceaddresses
Transport
www.bosch-pt.com/serviceaddresses
Kuljetus
www.bosch-pt.com/serviceaddresses
Metaopà
Ouoviotwvec umatapiec ivtwv Aioiu unokevtai otic anaitnoeic twv enikivduuvw ayato. Oi natapiec mnpouv va metaepoov obikoc anotov xpntn xwpic aalouc opouc. 'Otav, omuoc, oi natapiec anoetllovtai anotptiouc (n.x. aeponopikowc n e taipia meta-ppow) npenei va tnpouvtai diapopec idiaitepec anaitnoei yia tn oukeuaia kai tn onmuvan. Edw npenei, katn npoeiuaia tou tepaiou anootoanc va ztnthei onomega noTe kai ngouBouh evoc edikou ia enukivduva aytheta.
AantoTeAte TIC mntapiec ovo otav to nepiBna eivai aKto. KoAte Tc ymuvc enapec 1e kAaTikn Taivia kalva ouokeuaZete Tnv mntapia katatoto pno, wote autv maov kouviEa 1oA otN oukeuaioia. Iapaakaoue va lauabave enionc unOoN oac kaluxov nio auotnpec cVikce diataEic.
Anospon

H kaepa eithepnoan, oI pataiec/entavaopptioevec matapiec, Ta Eapntmuata kai ooukeuaiec npenla avakukawovtal me tpo noi Aiko npoc to nepiabllov.

Mn pivete Tnv kaepa enithetaponc kai tic matapiec/enaavapoptiovee c matapiec ota oikiaka anoppipmuata!
Movi yia xwpec tnc EE:
www.bosch-pt.com/serviceaddresses
Bosch Power Tools 1 609 92A 9RK| (24.05.2024)
Nakliye
Robert Bosch Sp. z o.o.
www.bosch-pt.com/serviceaddresses
Transport
Bosch Service Center PT
KVapence 1621/16
692 01 Mikulov
Na www.bosch-pt.cz si si muzete objednat opravu Vaseho stroje nebo nahradni dily online.
www.bosch-pt.com/serviceaddresses
Přeprava
Doporucene lithium-iontove akumulatory podlehaji pozadavkum zakona o nebezpecnych nabladech. Tyto akumulatory mohou byt bez dalsich podminek prepravovany uživatelem po silnici.
www.bosch-pt.com/serviceaddresses
Transport
Odpurucane litiovo-ionove akumulatory podliehaju poziadavkam na transport nebezpečného nákladu. Akumulatory moze použivateł prepravoat po cestach bez dalsich opatrení.
www.bosch-pt.com/serviceaddresses
Szallitas
Cpok cnjx6b1 n3dJIHnA
Cpok cnjx6bI n3dennr coctabnreT 7 neT. He pekomehnyetcK kcnnyataun no ncteHnn 5 let xpaHHeN C daTbI n3roTOBneHn 6e3 npedBaHTelbHo npOBepKn (daty n3roTOBHeHn CM. Ha 3TNKeTke).
Ipeueheb KpHTnuecknx OTka3OB uOnh6ouHbIe DeiCTBna nepcohana nnnoB30BaTeTn
- He HcNoIb3OBAbT npn NOBHeHn NbIMa HeNocpeIcTBeHNO 3 KOpIyCa n3dEInA
-He HcNoIb3OBaTb Ha OTKpbITOM IpOCTpaHCTBe BO BpeM JaOxJa (B paCnblraEMoB Ode)
-He BKHIOuATb npn nonaHaHHN BOdBi B KOpnyC
Kpntepn npedeBbIX coctoHHN
- noBpeKdeH Kopnyc n3dennr
Tn n nepnoaHocb TexHHueckoro 6cnyKbaHna
PekomeHnyETcOuHCTHTb HNCTpyMeHT OT nbIN NocLe KaKdoRo HCNoB30BaHHa.
XpaHeHne
-Heo6xOIMO XpaHnTB BCyXOM MeCTe
- Heo6xOIMO xpaHnTb BdaIIN OT HCTOCHNKOB IOBblIeHHbIX TempeaTpN BO3JeCTBna COJIHeuHbIX Lyuei
- npxpaehnn Heo6xoJMo H36eRaTb pe3Koro nepenada TempepaTyp
-eCNHHTpyMeHT NOCTaBnAeTcB MRAKo CymKe IINI PnactIKOBOM KeIce peKOMeHN dyETcXpaHHTb HNCTpyMeHT B3ToI 3aunTHOyNAKOBe
- noipobhble tpe6oBaHnK yCIOBnM xpaHeHn CMOtpnte B FOCT 15150-69 (YcnoBne 1)
TpaHcnoptmpoBka
- KaTeOpHueCKn He IOnyckaTcra NaeHne N IIO6bIe MexaHnueCKHe BO3dEiCTBna Ha yNaKOBky npH TpaHCnOPTnPOBKe
- npn pa3rpy3ke/nprgy3ke He donyckaetcnaonb3OBaHne IIO6oRO Bnda texhkn, pa60taioe no npinunny 3axnma ynaKOBKn
- noJpObHbIe Tpe6oBaHnK yCNoBnM TpaHcNoptnPoBKn CMOtprTe B FOCT 15150-69 (YcNoBHe 5)
Yka3aHnnoTexHnke 6e30nacHOCTN

IpouHTaTe N BbInonHraTe BCE yKa3aHHa. HecobJIOJeHne HacToaUx yKa3aHH npn HCNoB30BaHHN HHcNeKzHOHHo KaMepbIMoXeT npHBecTH
234 | Pycckn
K NOBpeJdeEHIO 3aUHTbIX MExaHn3MOB, HHTeRpnpoBaHHbIX B HHCneKcNoHHyIO KaMepy. POXAJYNCTA, HADEXHO XPAHNT 3TN YKA3AHNIA.
PemOHnHcneKuHOHKnAmepbI pa3peWaeTcBbINOHNrTb TOnbKO KBaHnHPOBaHHOMy NepcoHany HToBko C HCNoJb3OBAHHeM OPHRHaJIbHbIX 3aNpacte. 3TNm oBeceueHbAeTc6be3OpacHOCTb HcneKUHOH KnAmepbI.
He pa6oTaIe c HnCneKuOHHO Kamepo BO B3pbIBOONaCHO Cpe, B6H3n roPioUHX XnKocTe, ra3OB H nbInn. B HnCneKuOHHO Kamepe MoryT o6pa3oBaTbcNCKpbI, OT KOTOpbIX MOKeT BOCnIaMeHNtBCr nbInh nn Napbl.
N3BneKaIte aKKymyIaTOp H3 HHCnEKeUHOHcKMepebl neped BblIOJIHeHHem IIO6bIX MaHmnyIaIcN c Hei (HaNPmep, MoHTaxHbIX pa60r, TexHueckoro 06CnyXHBaHnHn T.I.), a TaKke npu ee TpaHCnOpTpObKe H xpaHeHH.
I3BneKaIte 6aTapeKn H3 HHCNEKUHOHNoKamepbl,ecnnpoOJXHTeNbHoe BpMa He 6ydeTe pa60TaTb c Hei. Pn dInTeMbHom XpaHeHHN B HHCNEKUHOH No Kamepe Bo3MOxHa Kopp03n.
He hampabnIte lyu CBeta Ha IIOeHnn XHBOTbIX H He CMOTpTe camn B nyu CBeta, BKIOUaHc 6oNbWoro pacctOHH.
Ipeed nCnoB3OBAHnem HnCneKuOHnKamepbI npOBepbTe pa6oyu 30hy. Hn OndHa n3 qacte HnCneKUOHnKamepbI He dOnxHa cOpnKaCatbCc 3NeKTpNueCKHM npoBOaMH, NOBnXhBIMN 3JIeMeHTaMn HnXNMueCKHM BeueCTBaMn. Pa3OMKnHte 3NeKTpNUeCKHe cEN Ka6eJe, npoNoxeHHbIX uepe3 pa6oyu 30Hy. 3TN MEPbI CHNXaIOT pNCK B3PbIBa, NopaxeHnE 3NeKTpNUeCKHM TOKOM mATEpnaIbHoro yuepe6a.
POnb3yIcBnOxOaHmCpeDCTBaMn HndNBdyaHbHO 3aunTbI, BacCTHO CT, 3aHTbIMN OUKAMN, 3aHTbIMN nepaTKamN Hn peCNHpTopoM, cInn B pa6oey 30he npncytCTBYOT onachbIe BeueCTBa. KaHaIN3aunr nn aHaIOrnuHbIe 30Hbl MOrT COpEJaT bTBePdIe, XnKne Hn rA3oo6pa3HbIe BeueCTBa, xapaKTepn- 3YIOUeCA TOKCHNOCTbIO, INoekuOHHOCTbIO, arpeCCNBHOCTbIO Hn HhBMn ONaCHOCTAMn IJ3OpOBbI.
06paaTe ocO6e BnMaHne Ha rHrHeNy npn pa6oTe c BeuecTBamn, onaChbIM nIy 3dopOBb. He npHHMaTe NnSy BO BPem pa6oTbI. N36eAte KOHTaTa C BpeHbIM nIy 3dOpOBbBeuEcTBamn, nocne pa6oTbI ouHsauTe pyKn IpyrHe yaCTH TeLa, KOTOpBle MOrHn COpHKacatbcra C HmH, ropuee MbInbHOB Odoi. 3TO CHHaET PnCKn dIy 3dOpOBb.
He cToTe B BOte npH hCnObl30BaHH HHCneKUHOHHo KaMepb. Pa6oTa B BOte MOKeT pInBeCTN K IopaKeHHIO 3JeKTpHueCKHM TOKOM.
He BHOCTe KOHCTpyKTHBbIX N3MeHeHH B aKKyMnTOp H He OTKpbBaTe erO. Pn 3OM BO3HnKaet ONaCHOctb KOpOTKOTo 3aMbKaHH.
PnIOBpeJdeHnn HHeaIeXaIeM HCNoIb3ObaHHn AKKymIaTopa MoKeT Bbl-DeNtbcra3.AKKymIaTOp MOKeT Bo3rpaTbcA Hn B3pBaTbc.06ecneYbTe npHTOK CBExKeRo BO3dyxa I npn BO3HKnHOBeHHxKaIob 6paNTecb K BpaUy. Ra3bl MOryt BbI3BaTb pa3IpaKeHne DbIXaTeNbHbIX NpTei.
Pn HnpabHbHom hCnoB30BaHH n3 aKKymyIaTopa MoXeT NOTeY b XNDKOCTb. 36eraTe cOpNKoCHOBENc Hei. Pn CnyaHOM KOtAKTe IpomOte COOT BcTByIOue MeTO BOIo. Ecn 3Ta XNDKocTB nonaTe B rna3a, To DOONH TELbHO o6paHTecb 3a nomoubIO K BpaUy. BbTEKaIOUaA aKKymyIaTOPHa JxID-KOCtB MOXeT pNBeCTN K pa3dpaxKeHHo KOKN INN K OXOrAM.
OctpbIMN ppeMeTaMn, KaHnp., rBO3dEm HnH OTBepTKoJ, a TaKKe BHeUHM CnIOBBIM BO3deIcTBHeM MoXHO NOBpeHtB aKKymyIaTophyio 6aTapeIo. 3To moKxET PnIBecTH K BVHTpeHHem KOpOTKOMy 3aMbIkaHIO, BO3rOpAHIO C 3aDbIMIeHNEM, B3pblBy HnH neperpeBy aKKymyIaTophOH 6aTapei.
3aunuane HeHcnoB3yeMbI aKKyMylrTop OT KaHcEnerpCKHX cKpeNOK,MOHeT, KIOUeH, rBO3deH, BNTOB H dpyRnX MaIeHbKnx MTeAIIHueckNX pPeIMeTOB, KOToPbIe MOrY 3aKOpOThtb nonOca. KopOTkoe 3aMbIkaHne nONIOcoB aKKymyTAToPa MOKeT npNBecTH K OKOram NII NOkApy.
NcnoB3yIte aKKymnTOpHyIO 6aTapeIO TOnbKO B H3dennx H3rTOBHTeIN. TOnbKO TaK aKKymyIaTOp 3aunuEHN OT OnaCHO neperpy3KN.
3apjxai Te aKkymyIaTOHbIe 6aTapeu TOnbKO c NOMOu b3apJNbIX yctpoiCTB, peKomeHIOBaHHbIX H3rOToBHTeMe. 3apJHOe ycTPOiCTBO, npedy-CMOTpeHHe dIg ONpeJeHHO BnDa aKKMyIaTOpOB, MoKeT pNBeCTN K NOXapHoi ONaCHOCTn Pn INCNoJIb3OBAHnn erO C DpyrIMN aKKMyIaTOpAMn.

3aunuai Te aKKymyTOpHyo 6aTapeo OT BbICOKNX TemnepaTyp, HAp.,OT dHNTeNbHO HarpeBaHHa CoHHe,OT ORHa, rpa3N, BOBbl N Blarn. CyIecTByeT ONaCHOCTb B3pbIBa N KOPOTKOTo 3aMbikaHNJ.


PNEyPPEKDEHNE


XpaHHe MmHaTOpHbIe 3neMeHTbl NHTaHnB HeOCTynHOM dIeTe MeTe. MuHaTOpHbIe 3neMeHTbl NHTaHnHe6e3oNaChbl.
MHHnAtIOphbIe 3IeMeHbI NHTaHn HeNb3r rnoTaB HNN BBOuNTb B IIO6bIe pyTHe eCTeCTBeHHbIe OTBepCTn. PpH aHnnHn nOdo3peHn, YTO MHHnAtIOphbI
236 | Pycckn
3IeMeHT NHTAHN 6bIN npornoueH Hn 6bIN BBeH epe3 HHOe cTeCTBeHHoe OTBepTne, HeMeDJIeHNO o6paTntecb K BpaCy. IpOrNaTBaHHe MHNaTIOpHoro 3IeMeHTa HNTAHN MOXET B TeueHHe 2 YacOB pNBecTH K TRAKeJbIM BHyTpEHHM OXKOrAM N CMEPTN.
He yctahabnbaite MaHHTbIe npHaJIeXHOCTN B6H3n Hm- pHaHTOB n npOuHX MeHcHckx annapaTOB, HAp., KapnoCTMMyAToPob HHCyHIOBbIX HaCOCOB. HaxoJusceB n pInHaJIeXHOCTAX MaHHTbI CO3dAOT MaHHTHOe NOle, KOTOpoe MOKeT OKa3bIBaTb BnHnHe Ha pa6Oty HmPaHTaHTOB N MeHcHckx annapaTOB.
Depxnte MaHHTbIe npHaJnxHoCTn BdaH NT MaHHTbIX HocTeNe DaHHbIX NOT npH6OpOB, YyBCTbHTenbHbIX K MaHHTOMy NOIO. Bo3deNCTBne MaHHTOB npHaJnxKHOCTe MoXET npHBODITb K HeBOCNOHNMOI nOtepe daHHbIX.
Onncahne npodukta uycnyr
PoxaIyIcTa, co6IIOJaTe HIIIOCTpaunB Hauane pyKOBoIDCTBa IIO 3KcNpyaTauHn.
PpHMeHeHne no Ha3HaueHnIO
UHcneKIOHHa KaMepa NOxOHT dIg OCMOTpa TpyHOIOCTyHBIX INI TeMHbIX 30H. Kpme To, OHa NOxOHT dIg NepemeueHn I3BLeueHn He6oJIuNX nIerKHX PpeMeTOB (HaNPIMep, MaJIeHbKnx BnHTOB) NOCJe yCTaHOBKn BXOJuxxB KOMIIeKT HNCTpyMeHTOB Ha rOLOBky KaMepbl.
UHcneKuOHnKaMepa He MoKeT npMeHbCBA MeHcNcHcx cenx. KpO Me TOrO, OHa He PpeHa3HaueHa dIy UcTaPHeHH 3acOpOB B Tpy6ax IIN pOToRnBaHH KaBenei.
N3o6paXeHHbIe coCTaBHbIe yactH
HymepauncoCTabhix qacte BbIOnHeHa no 306paXeHNHO h CTpaHnue c HJIIOCTpa- zHJMN HHCNEKUOHHO KaMepbl.
(1) Ka6eNbKaMepeB
(2) KaMepa
(3) lamna B kamepe
(4)ПинзаКамерbl
(5)Dincnne
(6) BbiknHouaTeNb
(7) KhoNka BBepx
(8) KhoNka BneBO
(9) CpeHnKa KhoNka
(10) KhoNka Bn3
(11) KhoNka BnpaBO
(12) KhoNkaΦoTOcBEmKn
(13) Puyno np6op
(14) AKKymyIaTOp
(15) IepexoDnK dna 6aTaapeek AA1
(16)BepxHnKpbuHa
(17) THe3do USB Type-C®b)
(18) Ka6eIb USB Type-C
(19) OTeCek
(20)Koxkx npexoHnka nna 6aTaapeek
(21) KhoNka pa36IOKINPOBKN
(22) Kpbiuka nepexoHnka dna 6aTaapeek
(23) Pa3beM kamepbbl
(24)ФИКСАЦЯΚΑБЕΝΑΚΑМЕРБI
(25)MaHHT
(26) Kpouok
(27) 3epkaio
a) 3TH npHnHaIeXHoCTn HE BXoAIT BCTAHapTHbI KOMIIeKT NocTAbKN.
b) USB Type-C® n USB-C® YBJIaIOTcT TOPROBbIMN MapKaMn opraH3aun «USB Implementers Forum».
3nemEnbHnDnKaun
(a) ΦyHKUHnHKaCnCTaTyCaUp Indication
(b)ФункциИндикциНарвеленUp Indication
(c) INHdNkatop 3apRaeKeHHocTn aKKyMnyTopHO6aTapeu/6aTaapeek
TexHnueckne daHHbIe
UHPOBAA HNCNEKUNOHNA KAMEPA GIC 12V-4-23 C
TobapHbI HOMep
3601B415..
Bosch Power Tools 1609 92A 9RK| (24.05.2024)
238 | Pycckn
UHPOBAA HNCNEKUNOHNA KAMEPA GIC 12V-4-23C
CoxpaHeHne/pepeHoc CHIMKOB
ΦOTocbemKa
HaKMMTe Ha KhoNky fOToCbEmKn (12), UTO6bl CdeNaTb fOTorpaΦnIO TeKyUeHnDnKa- cnn DnCpIe. fOTorpaΦnH coXpaHraIOTc H BHyTpEHHn HaKoNITeJb HnCneKuONHO KaMepbl MOryt nepeDaBaTcBcyepe3 nHTeppeic USB Type-C
Ipepaa daHbix uepe3 nHTepceic USB Type-C
Для поедаши даньх черз USB Type-C® BKNIOHTe INHcneKUHOHHyO KaMepy. OTKpoI-Te KpbIshky rHe3da USB Type-C® (17). CoeINHte pa3bem USB Type-C® c nOmoIbIO Ka-6bIa USB Type-C® (18) co CBOHM KOMNbIOTepOM.
3aynctte Mehekep aaiIOB Ha CBOEM KOMIbIOTe N BbIepeTBEHnHm
HNC Bosch_GIC. CoXpaHeHHbIe paJIbI c BHyTpEHHero HaKoNITeJI HHCNEKUHOHoi Ka-Mepbl MOxHNO CKOINPOBaTb/NepeHecnHa CBOI KOMNbIOTep HnYdaIHTb.
Iocne toro, kak Bbl 3aBepnTe HeobxOIMbIe npouecbbI, OTKnIOHTe BHeHn DnCK CTanDapTHbIM o6pa30M.
Yka3aHHe: BcERda npOn3BODHe «6e30NaChoe OTKnIOueHne» BHeUHero DnCKa H3 KOMNbIOTepHO CNCTEmbl, B IpOTNBHom Cnyae BHYTeHHN HaKoNTeB NHCNEKUNOH HO KaMepb MoKeT 6bITb NOBpeJDeH.
OTcoeHNHtE KaebIb USB Type-C® (HNCNEKUHOHaKaMepa BbIKIOHTcAABTomaHTeCKN).3aKpOteBepxHIOKpbIuKy(16)Jn3aunTbO TblnN 6pbI3r BObl.
Yka3aHne: noKIOuAte HcNEKIOOHHyO KaMepy uepe3 HHTeppeC USB Type-C toIbKO KIK. PnnoKIOUeHHN KdpyHM np6opam HcNEKIOHHa KaMepa MoKeT 6bITb NOBpeJdeHa.
Yka3aHne: nHTeppeic USB Type-C® nCnOlb3yETcA NCKIIOHTeBHO dIy nepeaun daHNbIX, Upe3 Heo HEnb3a 3apKaTb aKKyMnyTOpbl IIN dpyrne np60pbI.
YkaaHnno npImeHeHnIO
IpoBepbTe cpeNy, KOtOpyIO Bbl XOTnTe OCMOTpeTb, ydienr ocO6oe BHMaHne IIO6bIM npenrTCTBnM HnONaChbIM MecTaM.
I30rHnTe KaBb KaMepb (1) TaKIM o6pa3OM, YTO6bI rOIOBky KaMepb MoXHO 6blno neRKO BCTaBtB B cpeNy, NOJnEkaUyO OcMOTpy. OcTopoXHO BBeInTe KaBeb KaMepb.
Hactpoite npKocTb lamn KaMepbl (3) TaKIM 06pa3OM, yTO6bl n3O6paXeHne xopoWOpacno3HaBaoCb. Hanpimep, IJI npEiMeTOB C BbICOKo OTpaKaIOUeI cNoCo6HoCTbIOI INoBbIeHn KaueCTBa H3O6paXeHn MOxHO HCNOJb3OBA Tb MeHbWe CBETA HIN YcTaHOBNt b cepHO-6bIy KOHTpact.
EcnHn HcCneIyEmbIe obBeKbI OTo6paKaIoTcpa3MbITbIMN, yMeHbIHTe nnYBEnuYbTe paCCTOHHe MeJdy rOIOBKO KaMepbI (2) n ObBeKTOM.
HencnpaBHOctb -PpHnHbI uYcTpaHeHne
Hdkaunn Pnunna Cnooc6 yctpaennn HncnpaBno- cTeHaDnC- nnee

BHytpenHn Hako- YdaNTe paaiNbIC BHytpenHero HakonnteJ. nHTeIb NoTH 3aONHeH
(keToe npedynpexdene)

BHytpeHHnHaKo- YdaHrTe paHbI C BHyTppeHHeRo HaKoHrTeJ. nHTeJI 3aONHeH
(Kpachoe npedynpeckd- Hne)
Oun6ka BHytpenHe- Ipe3anyctHte HhCneKuohHykoMepy.
To HacoiHnEi Ecn npo6IeMa coXpaHReTcR, o6paHTecb BaTOpH3OBAHHyIO cepBnCHyIO MaCTepCKyIO Bosch.
TexobnykBaHne n cepBnC
Texo6cnyxmbaHne n ouhctka
3anpeuaetcnaorpykaTb pyuHoe yctpoCTBO (13) B BOy nn npyrgne KndKocTN.
CopeKHTe HNCNEKUHOHHyIO KaMepy B YNCTOTE.Oc6eHHo TuaTeNbHO OUnuAte HNCNEKUHOHHyIO KaMepy N BCE BCnOmaTeNbHbIe npHCnOco6NeHnI NOcIe pa60TbIC ONaChbIMN BEUcCTBaMn.
BbItpaIte 3arpa3HeHn cyXo n MraKo TpAknO. He nCnoJIb3yIte KaKe-1n6o uNCTa-
Ie cpeCTBa nn paCTBOpHTen.
B yactHOCTn, peryIaRPhO ouHuaTe oBeKTHB KamepbI (4), ydaJIaB BOPCHKN.
3aMeHa BCTpoEHORO MHHaTIOPHORO 3neMeHTaHn
3aMeHa KHONoUHOro 3JIeMeHTa NHTaHnI DOJXHa IPOH3BOIDTbCra CneuAnCTOM KOMNaHHn Bosch nnn B aBtOpN3OBaHHom cepBnCHOM cEHTpe 3JeKTPoHNCTpyMeHTOB Bosch.
BHHMaHHe: Bcerda 3aMeHnTe 3IeMeHT nHTaHnHa 3IeMeHT nHTaHnTOrO Xe Tnna. CyueCTByET onachocTb B3pbIBa.
N3BneKaIte H yTHnH3npyTe pa3pJxHbIe MHHaTIOphbIe 3JIeMeHTbl NHTAHNB COOTBeCTBmC npeDncaHnMn. Pa3pJxHbIe MHHaTIOphbIe 3JIeMeHTbl NHTAHN MOyT yTpAITb TepMeTNUHOCTb H NOBpeNTb npOdyKT Hn HaHeCTN IIOJAM TpaBMbl.
246 | Pycckn
CepBnC n KOHcyIbTnpOBaHne no BOpocam npImeHnA
CepBnchbI OTdEN OTBeHT Ha BCE Baun BonpoCbI no pemOnTy n 6cnyKnbHIO BaWero npOdykTa, a TaKke IIO 3aIpaCTaM. N3o6paXeHHcN C npocTpaHCTBeHHbIM pa3deHHeM deIaTei INHΦopMaUIO NO 3aIpaCTaM MoKHO nOCMOtpeTb TaKke IIO aDpecy:
www.bosch-pt.com
KoIeKTHB COTpydHnKOB Bosch, npedocTbAIIuOuN KOHCyNbTaUH Ha npedMeT nCpONb-3OBaHn IPOdyKUn, cyIOBObCTBHeM OTBeHT Ha BCE BaUN BOpocbI OTHOCHTeHOrHaWe npodykUn H eepnHaJIeXHoTeH.
PoxaanyiCTa, BO Bcex 3anpocax n 3aka3ax 3anuacte o6ra3atebHo yka3bBaIte 10-3nauHbTOBAPHbH HOMep no 3aBOdCKo Ta6nue He3dEInr.
www.bosch-pt.com/serviceaddresses
TpaHcnpOpBovKa
Ha pekomeHdyemble nInn-HoHHbIe aKcymyIaTOPhIbe 6bapen pacnpocTpaHiaOTc Tpe60BaHnB B OTHoWeHN TpaHCnOpTnPOBKN OnaChbIX rpy3OB. AkcyMnyIaTOPhIE 6batape MOryt nepeBO3HTbcra Camm NOnb3OBeTeMe ABToMO6NbHbIM TpaHCnOpTOM 6e3 Heo6xoDnMoCTn Co6IoJeHn DOONHHTeNbHbIX HOpM.
PnpeB03e C npBleueHnem Tpebnx nuc (Ha npimep: Ha cmoIe HnTpaHCnpT HBIM 3KcpeIHTOPOM) Heo6xOIMO CO6IIOaTb OCO6bIe Tpe6oBAHnK yPaKOBKe I MapKnPOBKe. B 3TOM Cnyae PnPi NOIroTOBKe rpy3a K OTnpabKE Heo6xoImo PnpBLeu b 3Kc- nepTa no onachbIM rpy3am.
OtnpaBnIte aKymyIaTOpHyIO batapeIO TOnbKO C HeNOBpeXdeHHbIM Kopnycom. 3a- KneIe OTKpbITbIe KOHTaKTbI N yNaKyIte aKymyIaTOpHyIO batapeIO TaK, YTObI OHa He nepMeMaJacb BHyTpN yNaKOBKn. IoxaanyCTa, c6JIIOJaTe TaKke BO3MOxHbIe DononHHTenbHbIe HaCuHOHaNbHbIe npednncAHn.
Yttnn3aun

HNCneKcnoHHbIe KamepbI, aKKymyTOpbl/6aTapeKn, npHaJNeXHOCTN yNaKOBky CJeDyeT yTHIN3NpOBaTb B COOTBETCTBn C Tpe6oBaHNmOxpaHbI OKpykaIOSeI cpebl.

He ytnnn3npyTe HnCneKuOHhIe KamepbI n aKKymyIaTOpbl/6aTapeKn C 6bITOBbIM Mycopom!
Tolbko dIra cTpaH-ueHOB EC:
B COOTBETCTBHN CEBPONENCKO DNPEKTHBOI 2012/19/EU OTCNYKHBWNE CBOI cPOK INHCNEKUNHOHbIe KAMepbI N COOTBETCTBHN CEBPONENCKO DNPEKTHBOI 2006/66/EC NOBPExJEHHbIe IIN6O OTCLNYKBWNe CBOI cPOK AKKUMYJATOpbl/6aTapeNKn HxKHO Co6nPaTb OTdJIbHo I yTNIIIN3HPOBaTb EKOLOGNueCKI 6eONaChbIM o6pa3OM.
Pn HnnpabHbHou ytnnn3aun OtpaobTaHHbIe 3neKtpueckne n 3neKtpoHHbIe np60pbl MOryT OKa3aTb BpeDHOE BO3dEiCTBHe Ha OKpyKaIOUyO CpeDy N3doPoBBe YelOBekaH3-3a BO3MOxHOro PnncTyCTBnB HnX ONaChbIX BeIecTB.
AkkymyIaTOPbI/6aTapeH:
JIITHN-HOHHbIe:
IoxanyiSta, yuHtBaiTe yka3aHne B pa3dene TpaHcnpTnpoBka (cm. „TpaHcnpTnpOBKa“, CtpaHnua 246).
I3BneueHHe BCTpoeHHoro KHOOnOuHoro 3JeMeHa TnTaHn IyTuN3aun MoKet npOH3BOIDITbCra TONbKO KBaHΦnUPOBaHHbIM nepCOHaJOM.
ykpaIHcbka
Bka3iBkn 3 Texhikn 6e3nekn

IpoHTaTe Bci Bka3iBKN iDotpmyTecx ix. BnkOpHCTaHHBideoCKona 6e3 dOtpmAHnHa uHx IHcTpkykui MoKe npH3BeCTn Do noWkoJXeHHA
Bosch Power Tools 1609 92A 9RK| (24.05.2024)
248|yKpaIHcBka
iHTerpoBaHnx 3axhchnx MexaHi3MIB. HADIIMHO 3BEPIAGAITE LIG BKA3IBKN.
BidaBaTe BiEoCKon Ha peMOHT NHe KBAiΦiKOBaHm faxibzam Ta NHe 3 BHKOpHCTaHHM opHirHaIbHnX 3anuactnH. TInbKn 3a TaKnx yMOB BiEoCKon i Hadani 6yde 3aIIuWatncs 6e3neuHm.
He npaioTe 3 BiDeocKoON y cepeobnui, de icHyc He6e3neKa Bn6yxy BnacIIOK npcyTHOci TropouHx pIDH, ra3IB a60 nHny. Y BiDeocKoTI MoKyTb yTBOpIOBaTnC4 ICKn, BiJ kNkX MOKe 3aMmTaNc nnAbo BNapn.
BnmaTe akymyIaTOPn 3 BideoCKona nepei BHKOHaHHaM 6ydb-aknx MaHInyIaui 3 Hm (Hanp.,MOHTaxHHx po6it,po6it 3TexHIOro 06cnyroByBaHHaTOO), a TAKOX nepei Horo TpaHCnOpTyBaHHaM Ta 36epirAHHM.
BnMaIe 6aTapeKn 3 iHcneKciHoi Kamep, kUo TpNBaHn Yac He 6yTe KopNCTyBaTHc HEO. Y pa3i TpNBaIoro 36epirAHn y BiJeockOni 6aTapeKm MoKyTB KOpOyBaTN.
He npabnTe cBtIOBn npomInb Ha IIOe a60 TBapHH, i cami He nHBiTbcHa npomInb Na3epa, HabItb 3 BENKoi BiDCTahi.
Ipebeipte nepei BnKOpHCTaHHm BiDeoCKona po6oy o6naTb. KOnHa qactnHa BiDeoCKona He NOBHHa KOHTaKtYBaTH 3 eNeKTponpOBoAMn, pyxOMMn qactnHAMn a60 xIMiUHMn peuOBHAMn. IpeepNBaIe KOHTyp cTpymy eNeKTponpOBoKn, 10 npoxoINTb y po6oii 30HI. Li 3axoDi 3anobiraotb pn3Nky BV6xy, ypaJxHnI CTPyMOM Ta MaTePiaIbHnx 36NTkIB.
Hocitb biNobiDihi iHnBiDyanbHi 3ac06n 3axncty, k-OT 3axnchi OKnyapn, 3axnchi pykabuci a6o pecnipatop, kuo y po6oui o6nacti e wkidniBd n3doPob'peOBUHH. KaHAn CTiHnx BOa a6o noi6Hi dIJIHKM MoKytb MiCTHT bepdi, pki a6o ra3oONi6Hi peOBUHH, 0o c OTPyHMn, 3apa3HMn, Ppa3HKMn, a6o IHWM uHOM WKODTb 3doPob'IO.
Oco6nHBO CTe3a YHCTOToO, KIO npauoTe y 0bnaTc3i WkIDHBmN dIg 3doob'peoBnham. HeixTe Bnpoobx po6tN. HnKaIte KOHTaKTy 3 He6e3neuHmN dIg 3doob'peoBnham i MInTe nCnpo6To pky TaIHsi qactHH Tina, IIO MOrNI KOHTaKtyBaTH, rapyOIO BOIO 3 MNOM. TaKIM YHOM 3MeHJyETbcR He6e3neKa dIg 3doopOB'.
He ctiIte y BOdi, KOHN BHKOpHCTOByTe BiDeoCKOn. Pid uac poBOTn y BOdi icHyepn3NK ypaJxehnEneKTPocTpyMOM.
He BHOcBe KOHCTpyKTHBHNX 3mIH B aKymyIaTOpHy 6aTapeIO Ta He BiIDKpHBaIte II. IChye He6e3neKa KopoTKoro 3amHKaHHa.
Pn noxkoJxehhi a6o HenpaBnIbHI ekCnpyatauii akymyIaTOPHOi 6aTapei MoKe BHXoNDtN nap. AkymyIaTOPHa 6aTaper MoKe 3aMAtncb a6o Bn6yxatn.
BnycttbcbiKe nobitpy i-y pa3i ckapr-3BepHItbcn do nikapra. Nap moke npda3HOBaTu dnxalbHi 7naxn.
Pn HnpaBnHbHomy BkOpncTahHi 3 akymnyTophoi 6aTaapei MoKe noteKTH piHa. YnkaTe KOtakTy 3 Heo. Pn BnnaKOBomy KOtakTi npomHte BiNoBIDhe Micue BOIO. Kxpo piHa notpanHa B Oci,doaTKOBO 3BepHItcba do nikapA. AkmyrTopHa pDHa MoKe cnpuHHrN noDpa3HeHHa kipn a60 onIKn.
TocpHm npedMetamn, Hanp., rbi3dkamn a6o BHKpyTkamn, a6o npKnaadHnM 3OBHIshboi cnn MoxHa noWkoDHTn AkymyIaTOphy 6bataeIO. MoxJIVe BHyTpIiHc KOpOTke 3AMnKaHHa, 3aRopHHa, yTBOpEHnAIMy, Bb6yx a6o neperpiB akymyIaTOphOi 6bataeI.
He 36epiraIte akymnTOpHy 6atapeo, kkoBn came He KopnctyTeCb, npra i3 KaHcJIepcBKMn cKpInkamn, KJIouaMn, rBi3dkamn, rBNHTAMn Ta iHNHMn HEBeHHKMn MetaneBmN npeMeTAmn, kki MoKyTB cnpuHHn TnepeMHKaHH KOHTaKTIB. KopOTke 3amHKaHH mIX KOHTaKTAmn akymnTOpHOi 6atapei moKe cnpuHHrTo nOIKn a60 noKexky.
BukopncToByte akymyIaTOpHy 6aTapeIo Nmwe y Bnpo6ax Bnpo6Hnka. Nmwe 3a TaKnx yMOB aKymyIaTOp 6yde 3axueneHn BiD Hebe3neuHoro nepeBaHTaKeHHra.
3apJxAte akymyIaTOPHi 6atapei NWe B 3apJHnx npcTpoX, peKOMeHIOBaHHx BnPo6HnKoM. BnKOpNCTaHHa 3apJxByBaIbHOrO npcTpoI DnA akymyIaTOpHX 6atapei, dIra kNX BiH He nepeDbaueHn, MoKe npn3BOHTn Do nokexi.


3axuatae akymytaophy 6aatapeo BiTennla, 3okpema, Hnnp., BiD coHauHHx npomeHB, BORHIO, 6pydy, BOIN Ta BONOr. IcHyE He6e3neKa B6byx i KOPOTKOrO 3AMKAHHa.
NONEPEDXEHNA
TpmaTe MHaTOpHi eMeHTn XHBLeHHa Y HeOCTynHomy dna dite MiCi. MiHaTOpHi eMeHTn KINBHeHHa He6e3neuHi.
Mihiatuphi enemeHTn XNBneHHe moXHa KOBTaTH a6o BBOHTN B iHwi npnpdi OTbOpn tina. y pa3i niO3pn Ha npokOBtBuHHa miiaTIOphoro enemeHTa XNBneHn a60 noRo BBeDEHHa Kpi3b iHwi npnpdi OTbOpn heraHo
250|YkpaIHcbKa
3BepHItbcn do nikapn. IpokobTyBaHHa MiHaTOpHoro enemeHa KINBHeHHa MoKe npotrom 2 rOHN npn3BeCTn DO BaKnx BHyTpihx oniKIB i CmepTi.
He BCTaHOBIOIe MarHIThe npnlaDn no6nn3y imnnaHTaHTi i INHX MeINuHNx anapatIB, HAp., KapdiocTMyJrTopi B i IHCyNIHOBNX NOMN. MarHITn npnlaDn CTBOPIOJr NOJe, JKe MOKe HeRaTHBNO BnINBaTN Ha cyHKUOHaJIbHy 3daTHICTb IMnIaHTaHTi B i IHCyNIHOBNX NOMN.
TpmaTe marHITHe npnndHa BiDctani BId marHITHX HociiB daHnx i cyTnBnX Do marHITnX noniB npnnd. BnHB marHITiB npnndmoKe npn3BeCTn Do Heo6opOTHOI BtpaTH daHnx.
LHpOBn BiDeoCKoH He MoKHa BnKOpNCTOByBaTn y MeduHx cInx. BiH TaKoH He np3HaueHn dny ycHeHH 3acMieHH Tpy6 a6o BtaryBaHH KaBeiB.
3obpaxehi kOMnoHeHTN
Hymepaiz 306paKeHHX KOMnoHeHTiB NocnlaCTbcra Ha 306paKeHHa BideoCKona Ha CTopiHKax 3 MaIIOHKam.
(1) Ka6eNbKaMepeN
(2) OchoBHa yactHa kamepn
(3) IHHKATOPN BOCHBH N acTHNI KamepN
(4) IiHa Kaemepn
(5)Dincnne
(6) KhoNka BmKHeHHa
(7) KhoNka «Bropy»
(8) KhoIIka «BniIBO»
(9) LcHTpaIbHa KHOIIKa
(10) KhoIIka «BHH3»

(11) KhoNka «BnpaBo»
(12) KhoNka «ΦOTo3HIMOK»
(13)PyuHe 3HaPaIaIaI
(14) AkymyntopHa 6aTapea
(15) Aanrepe6aapei AA1
(16)BepxHkPnKka
(17) ΓΗΙδΟ USB Type-C ^(8)b)
(18) Ka6eBb USB Type-C
(19) Cekzia
(20)Koxyx nepexiHnka dna 6aTapeNoK
(21) KhoIIka po36IokyBaHHa
(22) KpnuKa nepexiDnka dna 6aTapeNoK
(23) Po3'Em kamepn
(24)ΦikcaTOpKa6eNkaMepeN
(25) MaHHT
(26) Γα
(27)Дзеркало
a) 电 npnnaH He BXoHb Do cTaHdapTHOrO KOMnIeKTy nocTaaHHa.
b) USB Type-C® i USB-C® ∈ ToprobHMn Mapkamn oprahi3aui «USB Implementers Forum».
Elenentn iHdkaui
HanautybaHHI INdkaTopiB B OCHOBHI qactnHi kamepn
Iio6 BiDperynIOBaTH CBItNo, HATnCKaIte KhoNky «BniBO» (8) aO KoHONky «BnpaBo» (11), DOKn He 6ynde IOcAryTa baxaHa JckpaBicTh aO CBITNO He BmKHeTbcr.
He nBtbcHa npame cBtno (3) i He cnpmaMoYte cBtNo Ha iHux IIOdei.
Cbitno lammMOKe NOwKOdHTN OUI.
36inbweHHa/3MeHWeHHa 3o6paXeHHHa dncnnei (MacuTa6yBaHH)
Дянадаштуваим рibня 36иьшени iHднkaцii dinрпя, habиckайт ha KhoNKу «Вcropу» (7) a60 конку «Виз» (10),doKn He 6уde doсагHyTo baxKaHH n cTyinb 36иьшewehн.
TOLOBHe MeHIO
LIO6 notpapanitn do
Habiraçı B MeHHO
-「TopTaHHaMeHIO:HaTnCHiB KhoNkY《Bropy》(7)a6o《Bn3》(10).
- Ipepxid y niDmeHIO: HATNCiThb ceHTpaIbHy KHOKNy (9) a6o KHOKNy «BnpaBO» (11).
-ПiTВерджения образиой опци мeню:HaTnСHITь ZeHtpaIbHy KhONky (9).
-YBIMKHeHHBIMKHeHHaYHKuII BiPTyaIbHnM nepemkaayem :HaAckaTe ceHTpaIbHy KhoNky (9), KhoNky «BnpaBo» (11) a6o KhoNky «BniBo» (8). HanaWtBuHHraTakOx 36epiraIoTbcra.
-Поверненяdo MeHIO ha pIBeHb BnIe: KOpOTko HaTnCHiTb KHONKy BMNKaHHa/ BmHKaHHa (6).
-BnXi3 rONOBHOro MeHIO i NOBepHeHHaO IHNkaaII KaMepn: KOpOTKO HaTNCiTb KHONKy BMNKaHHa/BMMKaHHa (6).
Onqu MeHIO
Pn yBIMKHeHnI cyHKiUp Indication cTpiKa noka3yE iHnKaCIO HnprMky (b), De y 306paKeHHi «Bepx» (DnB. MaI. F).
Bka3IBka: Ua cyHKciHa He doCTynHa dJa BCix KaBeiB Kamepn. Pn MOHTOBaHOMy d3epkani (27) Ta/a6o npn rOpH3OHTaJIbHOMy BnpiBHIOBaHHi KaBeIIo Kamepn (1) cyHKsiO6mExeHa.
<Γanepe>: Tyt MoxHa BnKlnKaTn 3po6neHi foToIpaqii. Khonkamn BnH3 (10) a6o Brropy (7) o6epiB 6axaHI paHn Ha ochObi cBOci DaTH. HatnciB kHOnKy «BnpaBO» (11) a6o ceHTpaIbHy KHOJky (9), 06 bNknKaTn nonepenHn neperrnI odopaHoro foTO. HatnciB ceHTpaIbHy KHOJky (9), 06 BiDkpITn obpaHn paHn.
-
-
<ДаТаУac>: BCTAHOBITb DaTy Ta Yac dIa 36epexeHHaIINIB Ta Bn6epiB
ФОмТдАнТаусy.
Вka3IBKa:ЯкpoДATAI YAC 6IbWe He 36epiraIOTBcR,БbyOBAHIMIHiATIOHNI
ЕlementЖИВLEHЯ рОЗрджeHH.у TAKOMY BnnaKу 3BepHITbcrdo
уnobHOBaKeHoI cepBicHOI cnyk6N Bosch.
-
<3abOcbKi HanaT.>MOKHa CKNHyTN OIJI MEHIO 3aBOcBKnX HaJauTyBaHb. Pn cboMy Bci 36epexeHi paaiu octaTOUHO BuaJAnHTbcra.
36epexeHH/nepeaay3anncib
3annc foto3himkib
HaTNCHTb KONKy (ΦOTo3HIMOK) (12), ζΟδ 3ροδιν ΦΟΤΟ NOTOΥΗΙ ΙΝΙΚΑΙΙ ΠΙΝΤΝΕΟ. ΦOTORpaΦΠI 36epiraHObCS y BHyTpιwHi nAm'Ati BiDeOCKOa, iIX MOXHa NpeHeCTN 3a dONOMOrIo USB Type-C®.
258|yKpaiHcbKa
Ipeepa aanx uepe3 iHTepceic USB Type-C
Yepe3 HbOro He MoXHa 3apJxKaTH aKymIaTOPn a60 iHsi npicTpoI.
Bka3iBkn ⅢoDo po60TN
IpeBipTe cepedobnue,aje 6aKaTe ornaHytn,iocobno cTeKTe 3a nepeWkoJaMa abo He6e3neHmN dJnHKamn.
3irHitb KaBb KaMepn (1) TaK, 06 OCHOBHy qactHy KaMepn MoKHa 6yIo Do6pe BBeCTN y DocniJxJyBaHe cepeOBoNt. O6epexHo BBeDiTb KaBb KaMepn.
HanaIyIte RaKpaIcTb lamn KamepN (3) TaK, 0o6 3O6paXeHH MoXHa 6yNo Do6pe po3ni3HaTn. HanpNKlaD, RaIO npEmdTeMaIOb BnCOky BiIDNBaIbHy 3DaTHICTb, DnIPOkpaUeHH RAocTi 3O6paXeHH MoXHa BnKOpNCTOBvBaTH MeHue CBItna a60 HanaIyBaHH YOpHO-6iNOrO KOHTpAcTy.
JaKIO DoCNIJxIyBaHn npEaMeT BiO6paKaεTbCn HeuITko, 3MeHtTe a6o 3bIbIte BIDCTaHb MIX OCHOBHOU qACTNHOIO KamepN (2) i npEaMeTOM.
Hecnpabhocti -PnpuHH i ycyhenHa
Indnkaia
NOMMOKHa
ducnne

PnunHa YcyHennr
BHytpiushnam'Yb
MaJxke 3aIOBHeHa
Bndaitb faaHn 3 BHytpiunHboi na'MrTi.
www.bosch-pt.com/serviceaddresses
TpaHcnprybaHHa
Ha pekomeHdoBaHJIiIEBO-IOHHIakymyIaTOpHI 6aTapei po3NOBCIOJxOHTbCBAHOMn IooTOpaHCnOpTyBaHHN He6e3neuHnx BaHTaxKiB. AkymyIaTOpHI 6aTapei MoKyt BpeBo3NTcK KopNCtBuayem ABTomO6iNbHM TpaHCnOpTOM 6e3 noTp6H IOTPMaHHI DoaTKOBHX HOpM.
Pn nepecnui TpemH Oo6aMn (Haep.: NOBITpHMM TpaHCNOpTOM a60 TpaHCNOpTHM ekCneIHTOPOM) nOtpi6Ho DoepKyBaTHcA Oo6bNBx BmOR 0do ynaKOBKn Ta MapkyBaHH. Ycbomy BnApkny y niDrTOBci NocnKN NobHEn 6paTH yuaCTb EKCNEPT3 He6e3neuHx BaHTaXIB.
Bicnnaite akymyntophy 6atapeo lihe 3 henookjkeHm Kopnycom. 3akneite Bidknti KOtaktn Ta 3anakyte akymyntophy 6atapeio Tak, 0b BOHa He coBaIacB ynaKobci. DToPmYntecra, 6yd naCka, TAKOX MOXINBHX DoaTkoBnx HaioHaJIbHnx npinnscB.
Ytulizia
Bideockon, 6atapei/akymyntopn, npnaan Ta nakybaHHr Tpe6a 3daBatn Ha ekonoriuHNo uHCTy NobTOpHy nepepo6ky.
He BnKndaTe Bideockon Ta akymyntopn/6aatapei B noobyTObe CmTTT!
Пишешдя краин EC:
BidnoiDn do Ebponecboi DnpeKTHBn 2012/19/EU BiJeockOn, 1o BnIaHn i3 BxNBaHH, Ta BiNoBIDn do Ebponecboi DnpeKTHBn 2006/66/EC noXkoJKeHi a6o BiNpaCbOBaHI akymyIaTOpHi 6aTaapei/6aTaapeKn NOBHHI 3daBaTncr OkpeMo i yTNl3yBaTHcR ekONOriHu YnCTHM CnOCobom.
Ipn HnnpabHbHi yTHni3aui BiDnpaBObaHi eNktpuHi Ta eNktpoHHi npnaDMOxyTb MaTH uKdINBn BnHB Ha HbKoNnHc cepeOBnue Ta 3doPob'AnIOHNUpee3 MoKnBy hAraBnictb He6e3neuHx peoBnH.
AkymyIaTOPn/6aTapeuKn:
JitieBO-ioHHi:
Будлackа,Звада Te Ha Bka3iBknВ po3diI TpaHcnpTyBaHHa (INB. "TpaHcnpTyBaHHa", CtopiHa 260).
IHTerpoBaHmMiHaTIOPHn eIeMeHT XNIBHeHHaO3BOJAEbCBAHMaTH IINiue cPaxiBcM i NIIe dIyTNi3aui.
Ka3aK
Eypa3n8 3KoHOMNKaNbIK OdaFbHa (KeJeH OdaFbHa) MySe MemIeKeTtepayMaFbIHDa KOnJaHbIaNabi
Kayinci3dk HycKaynapbl

BapnbHcKaynapdbOkbinOpbHday KepeK. Tekcepy KaMepacbI 6epinren HcKaynapra cai naDanaHbIMaca, 6yn Tekcepy KaMepacbHa KipikTipinreH Kayinci3dk WapanapbHa XaRbIMcb13 acep etyi Mymkn.OcbI HcCKAYAPdbI KAYINC13 TYPDE CAKTAHbl3.
Tekcepy KaMepacbH TeK 6iniKti MaMaHra XHe TynHycKa KocanKbl 6enweKeTpMeH XeHdeyre pyKcat eti3. Ocbia Taekepy KaMepacbHbH, Kayinci3diI caTanaDbI.
Tekcepy KaMepacbIH XaHfbIc cyMbIKtbIKTap, Ra3ap Hemece 6aH 60NaTbIH XapbIbIC Kayi 6ap opta naDanaan6aHbI. Tekcepy KaMepacbI yIbKbIH 6bIfapbl, 6aHbI HeMece 6ybl TyTaHdbIpbyI MymkH.
Tekcepy KaMepacbIHda Ke3 KeIReH KymblcTapdbI (MbIcaJIb, MOHTaXday, TexHHKaJIbIK KbI3MeT KOpCety KHe T.6.) 6actamai TypbIn, coHdai-aK TekcepY KaMepacbIH TacbIMaNay XHe caTay Ke3iHne OHbIH iWiHeh aKKyMyJrTopDbI WbIFapbIN aJIbIHbI3.
Tekcepy kamepacbH y3aK yaKbIT naDanaH6aTbIH xaFdaIda iwiHeh 6ataperaIapdbI mbifapbIn aBbHbI3. Tekcepy kamepacbHa da y3aK yaKbIT caKTayda KaTkaH 6ataperaIapdbI tot bacybl MyMKIN.
Kapbik caynecin anaamapra hemece xahyapnapra 6afttaMaHb3 Xhe tinti anbictan bocbih Kapbik caynecine 03ihi3 KapamaHb3.
Tekcepy KaMepacbIH KOndaHy anDbIHda Kymbic aMaMbIH TekcepHi3. TekcepY KaMepacbIHbH ew6ip 6eNirHe 3neKtp cbIMapbIH, XblXkbIMaIbI 6eNikTePdi Hemece XHMnJIbIK 3aTTApdbI TnI3yRe 6oImaIbI. KymbIC aMaMbIHda eTKi3inreH 3neKtp cbIMapbIHbH 3neKtp Ti36erIH y3iH3. MyHdawapanap JapbIBcTOK COFy XeHe Mynikke 3akBIM KeNTipy KayniH a3aITabI.
XyMbic aHMaFbIHda DeHcayNbIKKa 3nHaDbI 3aTKeTep 6oNfAHa, KopFaHbIi K0e3inDipik, KopFaHbIu KonFan Hemece pecnnpaTOp cHKTbI XeKe KopFaHbIC Xa6dbfbH KnIn XypiH3. Cy aftby KaHaIapbIHda Hemece YKCaC aMakTapDa ybl, XyKnalbl, aUbl Hemece DeHcayNbIKKa backa KonMeH 3nHa KeNTipeTIH KaTTbl, cybIK Hemece ra3dbl 3aTKeTep 6ap 6onybl MymKiH.
DeHcaynbikka 3nHaHdbi 3aTteKtep opHaIacKaan aMaKTapda Kymbic icterehne Ta3anbikka a npbikwa ha3ap aydapbHb13. Kymbic ke3iHde tamak iunneHi3.
DeHcaynbikKa 3nHaNbI 3aTTeKTepe TImMeH3 XHe Kymbic icTeReHHen KeiH KOblHbI3bl JxHe 3aTTeKTepeMeH KaHacBy MymKiH bAcKa DeHe MyWeJepIH bICTbIK cinti epitihdicimeH ta3anaHbI3. OcbnaMa deHcaynbikKa 3nH KeTIpy Kayni a3aAdbI.
Tekcepy KaempacbH naindaanHaH Ke3de cyda TypMaHbI3. Cyda kymblc ictereHne, TOK cFy Kayni TybHdAaDbI.
AkkymyIopDbl e3repTneHizKHeawnabHbI3.KbICKa TynbIKany kayni 6ap.
AkkymyIaTOp 3aKbIMdIaHaH HeMece dypbc NaIdaIaHbIMMaHaJ XaFdaIJa, OaH by 6y bIybl MyMKIn. AkkymyIaTOp XaHbIN HeMece Xapblbn Kanybl MyMKIn. Ta3a aya iIke TapTBIs3 XeHe WaBIMap 6oIca, dApirepdiN KEmeriHe KByrHiH3. By TBiHbC any KonlapaBH TITipKeHdipyI MyMKIn.
AkkymyIaTOp dypbIc naIdaIaNbIMmaHaH HeMece 3aKbIMdaIraH XaFdaIa, AKKymyIaTOpdAn cybIKtbIK aYbI MymKIn. OraH TImeH3. Ke3deCOK Tepire THReHne, cOn Jepdi cyMeH WaiBih3. CBybIKTBIK Ke3re TnCe, MeduINHaNbIK KOMek anbIHbI3. AkkymyIaTOpdaI cybIKtbIK TepiHi TiipKeHdpYi Hemece Kyndipyi MYMKIH.
Were Hemece 6ypaybIw cHAKTbI yWtbl 3aTTap Hemece cbipTKbl acep apKbINbI aKKymyIaTOp 3akbIMdaHybl MymKIn. Byn KbICKa TynbIKaTnyFa anBn Keiin, aKKymyIaTOp KaHybl, TyTIH WbIFapByl, XapbIybl Hemece KbIsbn Ketyi MyMKIn.
PnIaHaHbIMaTbIH aKKymyIaTOPdbI TyicnepePi TybIKaybl MyMKiH KbICTbIPfBHTapdaH, TbIHdapdaH, KInTTepDeH, WerenepeH, BnHTepeH XaHe 6acKa ycaK Temip 3aTAPdaH caTaHbI. AKKymyIaTOP tyicnepePiH apacbHaFbI KbICKa TybIKtany KyIKtepre Hemece optke aeKenyi MMyKHi.
Byn aKKymyIaTOpdbTeK KaHa OcbIeHdpywi eHIMdePiHe naJaIaNbIb3. CoapKblbl aKKymyIaTOpdbKayinti, apTbIK JyKteUdeH caKaTaIcbl3.
AkkymyIaTOpbIK 6aTapeHbI TeK eHdipuyi KepceTKeH 3apdTay KypblfbcimEn 3apAdTaHbI. 3apdTay KypblfbcIb 6eIrini bip aKKymyIaTOpnap TypiHe apHaHaH, OHbI 6acKa aKKymyIaTOpnapDbI 3apdTay ywiH naJaHaHy oPt KayPiH Tydbipadbl.


AkkymyTopdbI, KblnydaH, cohdai-aK, Mbicanbl, y3dkci3 KYN XapbIfbIHah, OTtaH, KipdeH, cydah XeHe bInfandan KopFaHbI3.
Xapblbc KAne KbICKa TybIKTany KayPi TybIHaNbl.

ECKEPTY


Tymeni 3nement 6anapdbin KOnbina Tycneyih KaMTamacbi3 etiH3. Tymeni 3nementTep Kayini.
TyMeni 3nementepdi ew kafdaJa KxTyFa Hemece Dehere 6acKa Konnapmen Kipri3yre 6oMaIdbI. TyMeni 3nement KxTbInFaH Hemece Dehere 6acKa KxOImen Kipin Ketken KaFdaJa, Depey apiirepre KOnbIfbIbIb3. TyMeni 3nemehTIiKxTbInybl2 cafat iwiHne iWtei KaTbIkyore XeHe OImRe AKeenyi MymkIH.
MarHHTIK KepeK-XapaKTapDbI HmPnHaTATapDbIH XHe
KapdnoCTHMyIaTOp Hemece HHCyHIn COPfbcI cHKeTbI 6acKa da
MeHcHAnbIK KypblfblApdbIH XaHbIH KaMHaB3.KepeK
XapaKTapDbIH MarHHTePi HmPnHaTAtapDbIH HeMece MeiUHaNbIK
KypblfblApdbIH KymbICbHa acep etetih epic TyDpaBl.
MarHHTI akceccyapbIMarHHTI depeK TacbImaaywbilap MeH MarHHTKe ce3imTan acnantapdAn anbc yctahb3. Akceccyapnap MarHHTepiHn acepi KaIIbHa KeNTipyre 60MaMThBn DepeKTep KofanybHa aBIn Kenyi MymkiH.
Ohim xhe kyaT cnaTamaCbl
Painanany HcyckaynbIbIHbIH anfbI 6eJIiriHcpeTepiH cekepiH3.
MaKcaTbI 6oBbHwa naJdaNaHy
CaHbIK TeKcepy Kamepacbl KOJ XeTki3y KnbIH 60nA TbIH HemeCe KapaHfbI aMakTapdbI TeKcepye apHaHaH. Ohbl, XeTki3iIm XnbIHtBfHdaFbI KEmekwi KypaIapdbI KaMepa 6actnerHe MOtaxJaFaHHaH KeiH, KiWi XeHe XeHIn 3aTAPdbI (MbicaJIb, KiWi 6ypaHaIapdbI) XblXbITy XHe anbl Tactay yWIn NaIdaIaNHyfa Da 60nAbI.
CaHdbIK TeKcepy KaMepacbIH MeHnUHaNbIK MaKcaTTapda naJaDaHaHyFa TblbIM caIbHaDbI. CoHbImeH KaTAP on 6iTeJIReH Ky6bIpApDbI Ta3aNay Hemece Ka6ebJePdI TaTpY yuIN HJkapamAdbI.
KopcetinreH komnoHeHTTep
KepcetinreH KOMnoHeHTepDIn Hemipnepi rpaqnkabIK 6eTTepderi TeKcepy KaMepacbHbH, CNaTtAmcbHa HerizdEnreH.
(1) KaMepa ka6eNi
(2) Kamepa bactneri
(3)Kamepa 6actneriHderi waM
(4)Kamepa obbeKTnBi
(5)Dincnne
(6) Kocy/ewipy tyuMeci
(7)KofapbI KblNkbity Tymecci
(8) Confα kblnkbity TyuMeci
(9) OptaHfblTyHMe
(10) TEmeH XbIJIbIbI TYuMeci
(11) OHFa KblNkbity TyIMeci
266|Ka3aK
(12) Cypetke Tycipy Tymeci
(13) Kon KypblnFbIcbl
(14) AKKymyIaTOp
(15) AA1 6atape aanTepi
(16)KoFapFblKaNTaMa
(17) USB Type-C® yacbpb
(18) USB Type-C® ka6eni
(19) Haya
(20) BaTapeAaAnTepeiH Kabbl
(21) Bocaty Tymeci
(22) BaTapeAaAnTepiHJKanKbIwbl
(23)KamepaKaIraIbIbI
(24)Kamepa ka6eniHb6ekitkiu
(25)MaHnT
(26) InreK
(27) AúHa
a) Byn kepek-kaapac,ctaHdaptbI kTeK3iimm KnbHbTbHbHa KipMei.
b) USB Type-C® Jxhe USB-C® - USB Implementers Forum yibimbihcayda 6eirinepi.
Hndkaaun 3nementTepi
(a)ФункциЯньИКУИ ИндИкaТоры Up Indication
(b)Функцяньи 6afbIT INHДИКaTOpbl Up Indication
(c) AkkymyTOpdbH/6aTapeIapdbH 3apdI DeHReHH INHINKaTopbI
Iwki JkaTOnbln Kaandepnik
Фаилардьiшкіжадтан коьннб3.
274|Ka3aK
Dnncnnnei deri kate HndkaTOpbl
Ce6e6i Ieewimi

(Kbl3bl TYCTI eckepty)
IwkiXaTOnbIN KaNDbI
Φaɪnɪdɑpɒbɪ iʊkɪː kʌŋTaɪn ːkɔŋbɪHbɪ3.
Iwki KaTafbi KaTe Tekcepy KamepaCbIH KaTAt iCKe KocbHb3.
Macele wewimce, eKineTBI Bosch Kbl3MeT KepeTy opTaIbIfbHa KOJIbIFbIHbI3.
TexHnKanblk Kytim XHe Kbl3MeT
KbI3MeT KepceTy XaHe Ta3aay
KoN Kypblfbcih (13) cyfa Hemece 6acka CynbIKbTApFa 6aTbIpMaHbI3.
Tekcepy KamepacbIH aPdaiBIM Ta3a yCTaHbI3. DeHCaylbIKKa 3nHdbI 3aTTapDbI KaMTHTbIH aMaKTapda KymbIC icTeReHHeH KeiH Tekcepy Kamepacbi MeH 6apblk KemeKwI Kypalndapbl MyKNT Ta3aJAN WbIFbIHbI3.
IactaHynapdbcynaHraH, KymcaK sybepeken cypriH3. Kyblu 3aTAPbI Hemece epitkiupepdi naDanaH6aHbI3.
Ocipece kamepa obbeKTbH (4) Kyyeni Typde Ta3aIan TypbHb3 XaHe KbIIuBkTapFa Ha3ap aydapbIHb3.
KipiktipinreH tymEni 3nemehtri anMaCTbipy
Tymei anementiy aybictbyy kmbicbH Bosch komnache mece Bosch 3eKtp Kypanapbl bohihwa ekinetti Kbi3MeT Kepcety opTaibfbl opbHdaybl KaKeT.
Ha3ap aydapbIbI3: Tymeni 3neMeHTTI apdaBIM 6ipdei typderi Tymeni 3neMeHTKe aybICTbIPbIbI3. KApblbc kayni 6ap.
3apnki KaMaFah K1wi 6atapeanapDbTticti peTte anbIn Tactan Keadere XapaTbIHb3.3apnki KaMaFah 6atapeanap TbIfb3 6onMaKanbIn eHIMdi 3aKbIMdaybl HeMece aadMapdbJkaPaKaTTaybl MyMKIN.
Tytbinybifa Kbl3MeT KOpcty XHe naDanaHy Kehectepi
Kb3MeT KepCety opTaIbIbIeHIMdi XHeDey XHe OFaH TexHnKaIbIK Kb3MeT KepCety, coHaJ-ak KocankbI 6eJeKTeP TypaIbI cypaKTapFa kayan bepedi. Kypamdac 6eJeKTeP 6oBihwa Keckin MeH KocankbI 6eJeKTeP TypaIbIMaJImeTTep TEmHderi MeKeHkaI 6oBihwa KonXeTImDi:
www.bosch-pt.com
Bosch kbl3meTik keHec 6epy to6bl 6i3in eHimdep JHe onapbHKepeK-kaPaKTapbl TypaBl cypaKTapblb1ra kayan bepei.
CypaTap KOJXHe KocanBb 6eIWeKTePre TaNcbipbc 6epy Ke3iHde MInDeTTI Tpype OHIMHIN PhpMaBbIK TaKaTaNacBHaBb 10 TaH6aBb EhIM HEmipin 6epiH3.
OHyiTaIaIaTapbMeH HopMaIapbIHbIH CaTanybIMe HJKeTp KypaIbIH XHey XHe KeiIiK bI3Met Kepcety 6apbIK MemkeETep ayMaftbHaTek "Po6ep Boi" HnpMaIbIK HeMece ABOpn3aunraHaH Kbl3Met Kepcety optaIbIKTapbIHda opbIHdanaIb. ECKEPTY!
3aHcbl 3KoJIInHe 3HIMepi NaIaHaKyaiTI, DeHCayIbIFbIHb3Fa 3nH KeTipyi MyMkiH. 3aHcbl 3Kacay XHe TaPaTy aKIMwiiK XHe KblMbICTbIK TApTIN 6ObIHwa 3aHMeN KydaHaDbI.
Ka3akctah
TyTBHyBbInapFaKeHec6epyXeHeWafBIMdApDka6bInayOpTaIbFlbI:
"Po6epT Bow" (Robert Bosch) KLIIC
AnMaTbIK
Ka3aKCTaH Pecny6nKacbi
050012
Mypar6aeB K., 180 yu
"TePmec" BO, 7 ka6aT
Ten.: +7 (727) 331 31 00
a c: + 7 (727) 2330787
E-Mail: ptka@bosch.com
CepBnCTIK Kbi3MeT KepeTy opTaIbIKTapbi MeH Ka6blday nyHKTepiHmKeHen-KaHbI
TypaIbI ToIbIK JxHe 3eKti aKnapaTbI Ci3: www.bosch-professional.kz pecmncaiTTAH
aIa aIaIbI3
KbI3Met Kepcety opTaNbIKTapbIHbIH 6acka da MeKeHkaJnapbIH MblHa XepeH KaPaHbI3:
www.bosch-pt.com/serviceaddresses
TacbImanay
YcbHbINFaH NHTN-HOHBK aKKyMnyTopnap Kayinti Tayapnapfa KOybINA tBt H TanaTapfa 6aFbHaDbI. PAnDanaHyBbI aKKyMnyTopnapdbI KeWeJe KocbIMwa KyKaTTapcbI3 TaCbIMaJa anaDbI.
YwHwi TapaTap (MbIcAlb, aye Hemece Kyt TaCbIMaIay KOMnHaNrcbl) opaybiKa XaHe TaHbAmafa KoBbIaNbIH apHaBI TanaTAPbI CaKtaybi KepeK. Xi6epinTeH Kyt I daBHdA Ke3IHde KayiTI Kytepdi TaCbIMaIay capanbInapbIMeH xaBapnacy KepeK.
AkkymyIaTOpdbi Kopnycbl 3akbIMdaIaNfah 60nca fanaXi6epiH3. AushkTyicnepepi XeimdeH3 XeHe aKkymyIaTOpdbI opamada Ko3FaMaHTbIHdAn opaHb3. KaKeT 60nca, KocbIMwa YNTbIK epeXeJIepdi caKaTaHb3.
276 Romana
Kədere kapaty

Tekcepy kamepacsbH, 6ataperaIapdb/aKKymyIaTOpIaPdbI, KepeKxapaKTapdbI xHe opaybiMATEpHaIaPbIH KOpwaFAn opta ywiN Kayinc3 konMeH KaDeE XapaTy opbIHpaBHa Tancbipy KepeK.
Tekcepy KaMepacbIH XaHe 6ataperaIapdb/aKKymyIaTopnapdbI TypMbictbIK KOkbicka TaCTaMaHbI3!
Tek KaHa EO enepi yuH:
2012/19/EU eyponaIbIK dIpeKTHBaCbI 6oBbIHwa icTeH sbIKKaH TeKcepy KaMepaIapbIH
JHe 2006/66/EC eyponaIbIK dIpeKTHBaCbI 6oBbIHwa aKayIbI HeMece ecKi
aKKyMyIaTOpnapdbI/6aTapeRanapdbI 6eNEk XnHay KHe KopwafH opTa yWIn Kayinci3
KOMHen KaTAt OHDey OPhbHa TaNCbIpY KaKeT.
Kate konmen Ke daere japaTbINFaH ecki 3neKTpNIK XaHE 3neKTPOHdbIK Kypblfbnap Kayinti 3aTTapDbIH 60Iy MymkiHdiRiHe 6aIIaHbICTbI KOpwaFAn optara XaHe aam DeHCayNbIfbHa 3nHDbI Ocep TnI3yi MymkIn.
AkkymyIaTOPnap/6aTapeeIap:
HNTM-HOHNbIK:
TacbImaay 6oimihderi HcyaynapdbOpbHdaHb3 (KapaHb3 ,TacbImaay", Bet 275). KipiktpinreH tymei 3neMeHTti Kaenee japaTyfa TeK 6iiikTi MaMaHapFa 1bifapyfa pykcat etinei.
Româna
Instruţiuni de siguranta

Service scule electrice
Strada Horia Macelariu Nr. 30-34, sector 1
013937 Bucuresti
www.bosch-pt.com/serviceaddresses
1609 92A 9RK| (24.05.2024) Bosch Power Tools
Transport
3a BkIIOUbaHe Ha HcneKcHOnHHata KaMepa HaTnCHeTe NyCKOBn IpeKbCBauch (6) Hnn CpeHn8 6yToH (9).
Yka3aHne: Ako npn BkIIOUBaHe Ka6eIbT 3a KaMepaTa He e MOHTnpaH, Ha DnCnpe rce noKa3Ba Cbo6uHne 3a rpeWka.
3a n3KnIOUbaHe Ha nHcneKuHOHHaTa KaMepa HaTnCHete NyCKOBn IpeKbCBay (6)doKaTo DnCnIeRr He yraChe.
Ako n3BeCTHO BpeMe He ce HaTnCKa 6yToH BbPxy HnCneKuOHHaTa KaMepa, 3a IpeIpa3BaHe Ha akymlyaTopHaTa 6aTePn, pecn. 6aTePnHTe KaMepaTa ce N3KIOUBA aBTOMaTHNo. BpeMeTo Ha n3KIOUbaHe MoKe da Ce 3aJaDe B rIaBHO To MeHIO .
Perynnpahe Ha lamnata B rnaBata Ha kamepata
3a da perynnpate lamnata, hattnckaiTe 6ytoHa BnaBO (8), pecn. 6ytoHa BdACHO (11) DOTORBa,doKATO JenaHATA npKOCT He ce DoCTnH INn lamnata He ce N3KnIOuN.
He rnepaIte dIpeKTHo B lamnata (3) n He hacoUbaIte lamnata KbM dpyrn xopa. CBeTINHATA OT lamnata MOKe Da 3acnen OuHTe.
YBeHnUaBaHe/HamJIaBaHe Ha n3o6paXKeHneTo Ha dncnnre (zoom)
3aДа HabcpoNTe CTeneHTa Ha yBENHuaBaHe Ha INHINKaunraHa DAHCnner, HATNCKaIte 6yToHa Harope (7), pecn. ByToHa HAnony (10) DoTOraBa, DOkato JKeNaHaTa CTeNeH Ha yBENuHauBaHe He ce DoCTnRHe.
TnabHO MeHIO
3aДа nonaHHeT B <Главно MeHIO>,HaTиСHTe CpeHnIyToH (9).
Habnnpahe B MeHTo
-Преминаване празз мени:Натисные бутона нагоре (7) Или надoly (10).
- CmHa B noMeHIO: HATncHeTe cpeHNn 6yToH (9) nnn 6yToHa cbc cTpeNka BDACHO (11).
- IOTBbpxkdaBaHe Ha n36paHa onuO r MeHIOTo: HATNCHTe cpeHNr 6yTOH (9).
-BKIOUBaHe/IN3KIOUBaHe Ha cyHcIcN C BnPTyaneH npeBKnIOUbaTe:HaIChete cpeHn86yToH (9), 6yToHa BdCHO (11) nn6yToHa BnBO (8). HAcTPOkata cbio ce 3anaMeTBA Taka.
-Bpbuane B cneBaaOTo MeHIO Harope:HaTnchTe 3a KpaTKO NyCKOBn npekbCBay (6).
- Hanyskahe Ha IaBHOTo MeHIO IN BpueHe Ha dncnpeHa KaMepaTa: HATsche 3a KpaTKO NysKOBnI pekbcbay (6).
OnuHa MeHTo
-
PnBkHoueHa yHKuur Up Indication CTekKaTa Ha HndKauyra 3a Nocoka (b) noKa3Ba Kbde Ha cHmKata e "rope"(Bk. F).
Yka3aHHe:ФyHKUraTa He e Bb3MOxHa C BCnKn Ka6eHa KaMepn.ПрmoHTnpaHO orIeJano (27) n/nn npn OTBeCHO pa3noLoXeHne Ha Ka6eHa KaMepaTa (1)ФyHKuTATA e OrpaHnueHa.
C6byToHnTe HaOny (10), pecn. Harope (7) n36epeTe XeHaHnTe faiNoBe Ha 6a3a daTata.
HaTnCHeTe 6yToHa BnACHO (11) nHn CpeHn8 6yToH (9), 3a Da n3BnKaTe npedBapnte- nen H3rIe Ha n3bpaHata CHIMka.
HaTnche CpeHn8 6yToH (9), 3a da OTBOpHe JKeJaan HpaHn.
-
-
-HactpoiKHa ypeda>
<ДаMuac>:HactpoIteIaTaNuc3aCbXpaHЯBaHeHaФaIIOBTeNn36epeTe FOpmAT HaIaTaNuc.
Yka3aHne: Ako daTata n yacbT Beue He ce 3anaMetraBAT, INTERpnpaHaTa 6byToHHa 6aTePn e n3toeHa. B To3n cnyaai ce o6bpHeTe KbM opoTnp3an KIneHTcKn cepBn3 Ha Bosch.
- <нзклочане сд...>: Изберетe Врemeьи nHTepBaJ, сд. КОТо nHcneKuOHHaTа KaMepa aBTOMATnHо DA ce ИЗклоча, aKO He ce HaTnCHe 6yToH.
-
-<Φa6p. NaCTpoKn>: MoXeTe Da HynpaTe BCnUKN OUnN OT MeHIO To Φa6pnuHN-Te NaCTpoKn. CbueBpeMeHHo BCnUKN 3aNaMeTeHN φaIIOBE ce N3TpNBaT OKOHaTeHNO.
300 |Былгарский
3anametrahe/npedabaheHa 3aHcN
PpaBHeHa cHmKa
HaTnchete 6byToHa 3a npabHe Ha cHmka (12), 3a da HappaBHTe cHmka Ha aKtyaHnnaHnncnne. ChmKHTe ce 3ana3BaT BbB BbTpEwHaTa NaMeT Ha HHCNEKcNoHHaTa KaMepa MOrat Da ce npedabat Upe3 USB Type-C®.
IpeaBaHe Ha daHnn npe3 USB Type-C® nHTepdfeic
3a npedabaheTo Ha daHHn no USB Type-C® BKIOUeTe HHcneKUNOHHaTa KaMepa. OTbopeTe KaNaka Ha USB Type-C® 6yKcata (17). CbbpKeTe USB Type-C® 6yKcata upe3 USB Type-C® kaBena (18) c Baunr KOMnIOTpBp.
OTBopeTe Bbpxy KOMNIObpa cn paaiIOBna 6pay3bp n36peTe dpaIB Bosch_GIC. 3a- nncAHnte paHIOBE MOrat da ce KOINpAT OT BbTpEshata NaMeT Ha HnCneKUHOHHata KaMepa, da ce npemecTBat Ha Baunra KOMNIObpr Hnn da ce n3TrPBat.
Korato npekpatnte keaannn npoec, pa3kaeTe cTaNapTHO npaBa.
Yka3aHHe: TbPBO BnHaN OTnncBaIe dpaIBa OT OnpaunOHHaTc HCTema Ha KOMIObTa (n3KapBaHe Ha dpaIBa), Tb KaTO B npOTuBEn CnyauB BbTpEwHaTaNamET Ha INHCNEKtUHOHHaTakamepa MoKe Da ce NOBpeiN.
I3BaTe USB Type-C Ka6ena (HNCneKcHOnHHaTa KaMepa npn TOBa ce n3KnIOyBa aBTOMaTHNo). 3aTbOpTe ropnKaNk (16) 3a 3aUnTa OT npax N npbCKN BODa.
Yka3aHne: Cbbp3BaIte HnCnEKnOHHaTa KaMepa npe3 USB Type-C® nHTepFeiCa cMoC KOMIObP. PnB BKNIOVAHe KbM dpyrHu yCTpoiCTBa HnCnEKnOHHaTa KaMepa MoKe da 6bDe NOBpeHa.
Yka3aHHe: USB Type-C® nHTeppeiCbT cnyKn n3KnUoyTeNHO 3a npedabaHe Ha daHHn, akymylaTopHN batePN Hn dpyrHypeN He MoRat Da ce 3apeJdT ppe3 Hero.
Yka3aHn3a pa60Ta
IpoBepaBaiTe cpeData, KOaTO JKeJaTe Da HNCNeKTHpate N CneJeTe NO-CneuaHNO 3a IpeuKN nn ONaChm MecTa.
OrbaiTe KaebaHa KaMepaTa (1) Taka, Ye IanaBata Ha KaMepaTa Da MoKe Da ce Bkapa Do6pe B IopIeKaaUaTHa H3CneIbAHe CpeDa. BHIMATEHNO BkapBaIte Ka6ena Ha KaMePata.
Hactpoite npkoctta Ha lamnata Ha Kahepata (3) Taka, ye KaptnaTa da e c do6bp KOHTpact. Pn cnlno Otpa3Baun npedmetn, Hanpnmep, Moxete da noCTnrHete No-d6pokaueCTBO Ha CHIMKAt a C NO-MALKO CBETNIHa C HactpoiKaTa 3a UepHO-6yI KOHTpact.
Ako npedmette, KOHTO CE n3CneBAt, CE npedctaBt HeCHO, HamaJIeTe nn yBENuTe pa3cTOrHHeTO MeKdy rnaBaTa Ha KaMepata (2) IN npedMeta.
IpeuKN -PnHnH 3a Bb3HKBaHe n HaunH 3a OTCpaHaBaHe
CbO6eHn3a PpNnHa NmOoU rpeWka Ha dnc- nne

BrgaHa namet 3tpnTe paaiNoB OT BbTpewHata naMeT. NOHTI bHa
(xbIto npeynpexdene)

BrpaeHa namet 3tpnTe paaiIOB OT BbTpewHata namet.
IbHa
(yepBHeNo ppeDynpexKdHne)
Ipeka BvB BbTpew- PecTApTaIe HHCNEKUNOHHaKaMepa.
HaTaNamet Ako npo6nembT npoDbNkH, o6bpHeTe ce KbM
OTOp3npan KIneHTcKn cepBN3 Ha Bosch.
Повдьржанecерви3
PoiDbpxKaHe n nouchTaBe
He notonraBte pchny ypei (13) BbB BOa Hn Dpyr TeuHoctn.
Iopdpkaite HnCneKunOHnata KaMepa BnHaHn YnCTa. IOnuHCTBaIte HnCneKunOHnata KaMepa HBCNU NOMOHN CpeDCTBA OcOBeHO BHIMATEHNO CNEI KATO CTpe paBOTNI B 30HN C ONACHN 3a 3dpaBETO BeueCTBa.
H36bpcBaTe 3aMbpCBAHHaTc MeKa,NeKO HAbnaXHeHa KbpNa.He H3noI3BaTe no- qHCTBaU npenapATn nIpa3TBOpHTeN.
IOnHCTBaHTe IIO-CneuaHNO JeuaTa Ha KaMePaTa (4) peoBHO IN BHMaBaHTe 3a BlaCnH
CmHa Ha HnterpnpaHata 6yToHnHa 6aTepeHn
CmHaTHa 6byToHHata 6atepna TpaBa da ce n3BbpHn OT Bosch nHn OT OTOHnPAH KIneHTCKn cepBn3 a eNeKTpoHnCTpyMeHTn Ha Bosch.
BHHMaHHe:BHHaH3aMeHnTe 6yToHHata 6aTePncaDpyra ot cbuHa Tn. CbuecTByBa ONaCHOCT OT EKcPi03nA.
3BaXdaIte H3XBpIaIte H3xa6eHH 6byToHH 6aTePHN CbrrnacHO npedncaHnTa. H3xa6eHH 6byToHH 6aTePHN MoRt Da npoteKAT N da yBpeJrT npodykTa Hn da npedn3BnKaT HapaHBAHn.
302 |Былгарский
KlnentcKa cnx6a n koncyntaun oTHocHo ynotpe6ata
CepBn3bT Ⅲe OTROBOpHa BbnpocHTe Bn OTHOCHO peMOHTn I NOdIpbJka Ha 3aKUpeHn O T Bac npOdyKT, KaKTo n OTHOCHO pe3epBHN qactn. POKOMnoHENTn Ueptexn INHOpMaun 3a pe3epBHNte qactn Ⅲe OTKpneTe n Ha:
www.bosch-pt.com
Ekntno koncuntaaou OTHOCHO ynotpe6ata Ha Bosch ue Bu nomorhe c ydoBocTBE npn BbnpoCn 3a HaunTe npOdykTN TexHnte akcecoapn.
MOnI, npN Bbnpocn n npN npOpbUbaHe Ha pe3epBn qactn BnHa ng nocOuaTe 10-ncppeHn KaTaoJKeH Homep, n3ncaH Ha Ta6eKata Ha ypeDa.
Быларна
Robert Bosch SRL
Service scule electrice
Strada Horia Macelariu Nr. 30-34, sector 1
013937 Bucuresti, Romania
TeN.: +359(0)700 13667 (Блгарский)
ΦaKc: +40 212 331 313
Email: BoschServiceCenterBG@ro.bosch.com
www.bosch-pt.com/bg/bg/
DpyrncepBn3Hn aDpeCh ue OTkphTe Ha:
www.bosch-pt.com/serviceaddresses
TpaHcnpTupahe
IpenopbunTeHNHe IHTHeBO-IOHHN aKymaTOpHn 6aTePN Tp6Ba Da n3NbHBA t H3NCKBAAHn 3a TpaHCnOpTnpaHne Ha OAnCH ToBapn. AkymaTOpHnTe 6aTePN Moar Da 6bDat TpaHCnOpTnpaHn OT Notpe6nteHa Ny6nnuH MeCTa 6e3 DoonblHteHNn pa3pe- uHTeHN.
Ipn TpaHcnpTnpe H O TpeHn (Hanp. npn Bb3dyweH TpaHCnopt nnn no3BaHe Ha Kypnepcn ycnyr) hMa CneuaHn N3NCKBaHn KbM ONaKOBaHTo n 06o3HaayBaHTo m. 3a ceta npn noTROBkata Ha NaKeTnpaHTo ce KOHCyNTnpaTe C eKcnept B cbOTBeTHATA oBnact.
I3npaaiTe akyMylatopHn 6atepnn cmo aKO KOpnycBt Hm He e NOBpehen. I3oHpaIe OTKpHTN KOHTaKTHN Klemn Clenyaun LeHTN IN ONAKOBAte akyMylatopHnTe 6atepnn Taka, ye da He MoT a Da ce N3MeCTBaT B ONAKOBkata cn. MoJr, cna3BaTe cbso n DonblHHTeHH HaunOHAnHn PpeDnHcaHH.
БракуВанe

C orneon3BaHe Ha OKnHaTcpeHa HnCneKuOHnHa KaMepa, 6aTeepHte/akymyIToPnTe 6aTeepn, npnaJnxHoCTnTe nOaNkOBKnTe Tp8Ba Da ce npedaBt 3a OOn3OTBopraBaHe Ha CbDpbXaUHTe Ce B TIX CypOBHN.
He n3xBbprnTe nHcneKuOHHaTa kamepa n 6atepnTe/aKymyNatopnTe 6atepn npn 6ntobte otnaBtu!
Camo 3a ctpaHn ot EC:
CbIaCHO Ebponeckata DnpeKTHBa 2012/19/EC Beue HEn3noJ3BaEMITE HHcneKUHOHN KaMepn, a cbIaCHO Ebponeckata DnpeKTHBa 2006/66/EO DepeKTHnte Hnn H3paXoDBAH akymyIaTOPHn 6aTePN/6aTePN Tp86Ba da ce cb6npaT pa3dEJIHO n da ce npedabat 3a ekOLOrHuO peuNKnipaHe.
Pn HnnpaBnHNO n3XbPJIHe cTapnte eNekTpueckn H eNekTpOHNu ypei NopaN Bb3MOxHOTo NaHnne Ha ONaCHN BeIeCTBa MoT a OKaKaT BpeHN BInraHn Bbpxy OKoJHaTa CpeDa N OBeWkoTo 3dpaVe.
AkymyaTopn HnH 6nKHOBeH 6aTeepn:
JIHTHeBO-IOHNN:
Mona, cna3BaIte yka3aHnra Tpa3dena TpaHcnpTnpaHe (Bx. "TpaHcnpTnpaHe", Ctpanuca 302).
HnterpnpaHa7a byToHHa 6aTepeH MaCe H3BaXda cAmO OT KBaHnΦnUpaHn TexHnC c eI N3XBbPnaHe.
MaKeDoHcKn
Be36eHocnHaNoMeH

CHTe yntCTBa Tpe6a Da ce npouHtaa H da CE BHMmAba Ha HNB. DOKONky KaMepata 3a npOBepKa He ce KOpHCTn COrnaCHO npHNOxKeHnte HHCTpyKUnn, MoXe Da ce HapUSh FyHKunJaTa Na BRpaDeHNTe 3aHTTHMexAHN3MBO KaMepata 3a npOBepKa. IOBPO UYBAJTE IIN OBNE
yNATCTBA.
KamepaTa 3a npOBepKa cMee Da ce nonpaba cMo od cTpaHa Ha KBaHnФnkyBaH cTpyeH nepcoHaI co opHnHaHn pe3epBn DeIOBn. CaMo Ha Toj HauHH Ke 6ndete cnHypn Bo 6e36eHocTa Ha KamepaTa 3a npOBepKa.
He pa6oTeTe co KaMepaTa 3a npOBepKa BO OKONHa KaDe NOCTOn ONaCHOCT O ekCnNo3Ha, KaDe HMa 3aapanBn TeuHcTn, rac Hn npaunHa. KaMepaTa 3a npOBepKa co3dAba NcKpn, KOn MoKe Ja ja 3analat npaBt Na napeata.
Ппед 6ино КаКВа ИНТерВeHиJa Ha KaMepaTa 3a npOBepKa (Ha np. MoNTaЖa, OДРЖУБа№ИТн.) КAKO И прп ТраHCnОрТ И СКладиРа№, ИЗВадеTe ja 6atePиJaTа OД KaMepaTa 3a npOBepKa.
Изваде тбастпгд Камерета 3а npоверка,дokону He ja корнтп поюлг Врeme. Пи поглг сklадираьe,бстпг bo Камерета 3a npоверкamожда Кордирот.
He ro hacouybajte 3paKOT CBETNIHa KOH Nnca HnN XNBOTnH He nOrneHybajTe dIpeKTHO BO Hero, Dypn HN OD rOleMa oDdaneueHoCT.
Ipea ja ynopte6nte kamepata 3a npobepka, npobepete ro pa6oTHOT noJe. Hnehen den od kamepata 3a npobepka He cMee da dojde BO KOHTaKT co eNEKtpuHn Ka6n, NOBHXHH DeIOBn Hnn XemNcK cynCTaHc. ENEKTPuHnTe Ka6n, wTO NOMHyBaAT BO pa6oTHOT oNe, NCKnyute rO od cTpyJHOTo KONO. ObHe MEPKN To HaMaIyBaat pH3HKOT Od EKCnIO3HN, eNEKTPuHcYdap Hn MaTepnjaHn WTeH.
Hocete cooDBeTHa IuHa 3awTHTHa onpeMa KaKO 3awTHTHn OUYHa, 3awTHTHpaKaBnU Hn 3awTHTHa MaCKa 3a DnIeHe, DokONky NocToJa T cynCTaHOn onacnNo 3dpabjeto Bo pa60THO none. KaHJIte 3a ODBOHyBaHe nn CInuHnte o6naCTn MoKe Da CoDPKAt UBPCTn, TeuHn Hn rAcOBnDn CyNCTaHn, KOI ce OTpOBn, INΦeKTbHN, Hmaat HaPn3yBaUKO JeJcTBO Hn Ce ONaChn No 3dpabjeTo Ha dpyr NaHH.
Oco6eHO BnMaBajTe Ha uHCTOTATA,doKoNkPy pa60ntte BO nonHba co cynctaun onacnno 3dpabjeTo. He jaTe 3a Bpeme Ha pa60tata. N36erHybajTe KOHTaKT CO cyntaHUn OnacnNo 3dpabjeto H no pa60taT a NCuHcTeTe rH dNaHKnte H dpyHrTe DeIOBn Od TenoTo Ito DoUHe BO KOHTaKT CO cyntaHUne Co TOnon pactBop od canyH. Co Toa ce HamaNyBa OnacchoTa nO 3dpabjeTo.
He ctojte BO BODa,doKoNky ja KopnCTHTE Kamepata 3a npOBepka. Pnp paBoTeHBe BO BODa IocToN pN3NK od eNeKTpnueh ydap.
He moHnHnHpajTe n OTHbopajTe ja 6atepnjata. NocToH onaHcOCT oKpaTOK cnoJ.
Pn owtetybahe n he nponncna ynoptpe6a ha 6atepnjata moxe da n3ne3e napea. Batepnjata moxe da ce 3anann nn da ekcnnpnida. BheceTe cbexk Bo3dyx
I NOKOKIky IMa IOBpeHn OndHeCeTe rHa IeKap. Iapeata MoKe da rHa Ia pa3Hn DNshHTe NaTuTa.
Pn norpeuho KopncTebe nn npn oWteHa 6aTepnja Moxe da ncteue 3anaHb TaueHoCT od 6aTepnjata. N36erHyBajTe KOtAaTc co Hea. DOKONky cnyajno dojTe BO KOHTaKT co TeUHOCTa, HcNpakHeTe co BODa. DOKONky TeuHocTa Dojde BO KOHTaKT co OUnTe, NobapajTe nekapca nomoi. NCTeueHata TeuHocT od 6aTepnjata Moxe da npedn3Bnka KoxHn npntauHnnn H3ropeHHn.
Batepnjata moxe da ce owtetn od octpnte npedmetn kaKo Ha np. KInHcN Hn ODBpyBaHn co HndBopeuho BnJaHne. Moxe da dojde do BHaTpeuhen KpaTOK cnoj n batepnjata moxe da ce 3anaHn, da nyustn yad, da ekcnlonpa nn da ce nperpee.
Heynotpe6eHata 6atepnja dpxkeJe ja noaaneky od KaHcEapnckn cnojyBaKn, KnyueBn, Jene3HH napn, KInHcu, 3aBpTKn Hnn dpyr nn MaH MeTAnn npedMeTH, ITO MoKe Da npedN3BnKaat npemocTyBaBe Ha KOHTaKTHTe. KpaToK cnoj Mery KOHTaKTHTe Ha 6atepnjata MoKe da npedN3BnKa n3ropeHnCn Hnn noJap.
KopncTee ja 6aTepnjata camo BO npOn3BOdn oN npOn3BDoNTenOT. Camo Ha Toj NaHn 6aTepnjata Ke ce 3aHTTN oN onaCHO npeontobapyBaHe.
Баатину спнгс co nonhaun wTo ce npenopauahn ncknyuho od npoanbodntenot.Дokolky noHaoy 3a KoJ ce hamehen odpehen BnD ha batepni, ce Kopnctn co dpyn batepni, noctOn onacnoct od noxap.

3austntete ja 6atepnjata od toonnHa,Ha np. od donrotpajHo H3noxyBaBe Ha coHueBn 3paun, oran, HeuNCTOTnH, Boda n Bnara.
IHaKy, nocToOn onaNCHoCT OJ EKcPnO3nJa J KpaTOK cNoJ.
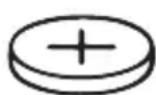


PPEyPENEYBAHe
Бидete снгурни, Дека Deца т He Doa'aat Bo Donnp co konuectata 6atepnja. Konuectte 6atepnce onacn.
Hnkoraaw nporontybajte rK konjcctnte 6atepnn Hne cTabajte rN dpyrno OTbOpn od TeIOTO. DOKONky nocToH comHeBaBe deKa konjcctata 6atepnja e nporontana HnE BMeTHaTBo dpyr den od TeIOTO, BeHaaw nobapajte MeduHHcKa NOMoW. IporontyBaBeTo Ha konjccta 6atepnja MoKe BO pok od 2 yaca da doBede Do cepno3HN BHaTpeHn H3ropeHn nn CMpt.

He ja npnhecybajte MarheThata onpema Bo 6n3nHa ha HmPnAHTn Hn dpyrn MeduHcN ypei, Ha np. nejcmejkepn Hn HncyHHcKa nymna. MaHETnte Ha onpemaTa co3daBaat nole Koe MOxe da ja hapuyn Ha fynKunjata Ha HmPnAHTne Hn Ha MeduHcKIne ypei.
MarheThata onpema dpxkete ja noaaleky od MarHeTcKn HocauH na noaTOuH ypeHn UyBCTBHTeHH Ha Marhet. Iopadn BnjuHaTeTo Ha MarHeTOT Ha onpemata MOKe da doje do HenoBpaTHo r6beHe Ha noaTOUte.
Onnc Ha npon3BODOT n nepopmaHcnte
BHHMaBaJTe Ha cIINKHe BO ppeHnO TdE Ha yNaTcBTo 3a KopncTeBe.
YnoTpe6a co cooDbetHa HameHa
Дигнтalthа Камера 3а поверка e norODha 3a npOBepka Ha Teшko DoCTaHn HIN TemHN MeCTa. ПО мontжата Ha ИспорачанOT NOMOshO CpeIcTBO Ha rIaBaTa OJ KaMepata, Taa e norODHa 3a nOmeCTyBaHbe I OTCTpaHyBaHbe Ha MaIIN IeCHN IIpeDMeTH (Ha np. cHTH 3aBPTKN).
Дигиталнata KaMepa 3a npOBePkHe cMee Da ce KOpNCTn 3a MeDnHcN zuEN. Taa nCTO Taka He e HameHeTa 3a NonpaBka Ha 3anyuSeHN ueBKn HIn BLeueBe Ha Ka6nn.
InyctpaunjaHaKOMnoHeHTN
HymepnpaheTo Ha cInKte Co KOMnoHeHTn Ce odHecyBa Ha npKa3OT Ha KaMepaTa 3a npOBepka Ha rpaΦnUkata CtpaHnua.
(1) Ka6eI 3a KaMepeTa
(2) ΣλaBaHaKaMepaTa
(3) CBeTna Ha rnaBaTa Ha KaMePaTa
(4) ΠεκαΗ καμεραΤa
(5) EkpaH
(6) Konque 3a BknyuBaHbe- ncknyuBaHbe
(7) Konque rope
(8) Konue nebo
(9) CpeiHo konue
(10) Konue dony
(11) Konque de cHo
(12) Konue 3a φοτorpαφρανe
(13) PaueH ypei
(14) BaTepeInja
(15) BaTePnckn aanTep AA1
(16) Topen noKJoneu
(17) USB Type-C®-nopTab
(18) USB Type-C®-ka6en
(19) O TBop
(20) 06BnBkaHa6atepncKnot aanTep
(21) Konque 3a oTKnyuBaHbe
(22) Kanaye 3a 3aTbOpaHe Ha 6aTePncKnot aanTep
(23)ПриклuyokзаКамерара
(24) MexaHn3am 3a 3aknyyBaHe Ha Ka6eIOT 3a KaMepaTa
(25) MarHeT
(26) Kukn
(27)Ornepano
a) Obne doataoH He ce BknyeHn BO cTaHapdHnot Oncer Ha Hcnpaka. b) USB Type-C® n USB-C® ce Tprobckn 03HaKn 3a USB Implementers Forum.
Enementn 3a npnka3
(a)Приказа Statус HaФункида Up Indication
(b)ПиказаHaHCoKaHaФyHKuJaUpIndication
(c)ПиказаHaHANOJIHeTOcTHaakymlyaTopckaTa6aTepeHja/6aTepeHnte
TexHnUKN noaToCuN
| Дигитална камера за поверka GIC 12V-4-23 C | |
| Б Proj на дол | 3 601 B41 5.. |
| Големина на ekpanот " 4,3 | |
| Рezолуцija на ekpanот px 800 × 480 | |
| Рezолуцija на датOTekи на камера/cliknakA/B) | px 1280 × 720 |
| Фор mat, слика od ekpanот.JPG | |
| Мас. 6proj на слики на Вnatршнata мемориja 30 | |
Bosch Power Tools 1609 92A 9RK| (24.05.2024)
308 | MaKeDoHcKn
Дигитална камера за поверка GIC 12V-4-23 C
| Видно пoleA)C) | ° | 75 |
| Фокус-разочаимеA) | mm 30-80 | |
| Мakc. сбетлесен Истенотet, сбетлеса, галва на камератaA(D) | Ix 200 | |
| Мakc. Враиме на потуваBE, галва/кавел на Камерата BO дзел, моторно масло, etnil ддковол, Бенин, AdBlue® и сална ВODA (codжина на сал 26,5%)A) | min 30 | |
| Надюльные сесяпaja | ||
| - Akumулatorский ватерни (литоим-JOнски) 12 V | ||
| - ватерни (алконо-mангански, co ватерски щадпөр) | 4 × 1,5 V LR6 (AA) | |
| - akumулatorский ватерни (NiMH, co ватерски щадпөр) | 4 × 1,2 V HR6 (AA) | |
| Backup-hаюльные сесяда за з acquьваяне на враимео | ||
| - Кочецха ватерни CR2450 (3 V, liлтоимска | батерни) | |
| - Рок на траеве на ватерлajata okoly Говни 3 | ||
| Враетмоге на работа okolyE) | ||
| - со akumулatorска ватерни (литоим-JOнска)F) | h | 8 |
| - со ватерни (алконо-mангански) h 3 | ||
| - со akumулatorскпь ватерни (NiMH, 1,2 V) h 3,5 | ||
| ТекинаG) | kg 0,37 | |
| Дименztи (дожина ×шируна × Висиha)F) | mm 242 × 140 × 66 | |
| Диаметар на галава на КамератaA) | mm 8,3 | |
| Должina на кавелOT за КамератaA) | m 1,5 | |
| нajмал радун SC на витkaBE на ватерлOT за Камератa mm 25 | ||
| Вид на заштпа, рaven урд (бez akumулatorскпь ватерни/батерскпь щадпөр) | IP54 | |
| Вид на заштпа, галва и вайен на КамераA) | IP67 | |
| преничona.okолна Temпенича рпн погоне °C 0 ... +35 |
Дигитална камера за поверка GIC 12V-4-23 C
O3B0eHa OKoHa TemnepaTpa npa6ota ^ C - 10 +50
I03B0eHa OKOJIHa TeMnepaTpAp npCklaHpaHe ^ C - 20 +50
npenopauhan akymylaTopckn 6aepnn GBA 12V...
npenopauhan noHaun GAL 12...
GAX 18...
A) co Ka6eN 3a KaMePaTa GIC 4/5 Imager 8.3mm/1.5m
B) Pe3onyuju 800 × 480, kora cInkata Ha ekpaHOT ce 3rolemyBa nIi ce npkaKyBa uPHO-6eHa
C)Измеренипөку диагоганала та снлкалa
D) Ha pactojaHne od 50 mm n TemHa cpeHnHa
E) Co npka3 Ha KaMepa, co yHKuJa Up Indication, cpeHa ocBeTneHocT Ha ekpaHOT, CBeTIO Ha KaMepa co 50% ocBtneHOC
F) Co GBA 12V 2.0Ah
G) TeKHa 6e3 akymyataopcKn 6aTeepn/6aTeepn/aanTep 3a 6aTeepn/Ka6en 3a KaMepa
Mоntаха
HanojyBaBe co eheprnja
Kamepata 3a npOBepka moKe da ce paKyBa nn co Bosch nHTnym-jOHcKa batepnja, obuHn batepnn nn co obuHn NiMH-akymyNatopckn batepnn.
Pnka303a cocto6ha ha hanoHETOC (c) Ha ekpaHot ja nokaKyBa cOCTo6bata Ha hanoHETOC Ha IHTyM-joHcKaT akyMylatopcka 6aTepnja, 6aTepnte oH. NiMHakymylaTOPCKnte 6aTepn.
Pa6oTeHe co aanTep 3a 6aTeHH (BnH cInka A)
BaTePnIte oH. NiMH-akymyIaTOPcKIne 6BaTePnCe cTaBaat Bo baTePnCKNt aanTep.
BatepncnT aanTep e HameHET ncknyuHb 3a npedBHeHaTa KaMepa 3a npoBepka Ha Bosch h He cMee da ce KopHcTH co eNeKtpnHn anATn.
3a BMeTHyBaBe Ha 6aTePnHTe OHN. AkymlyaTOPCKHte 6aTePN, CTaBeTe ja o6BnBkata (20) Ha 6aTePnCKHOT aHaTep BO OTBOPOT (19). CTaBeTe rN 6aTePnHTe OHN. akymlyaTOPCKHte 6aTePN cNopei cInkata, Ha KaNaayeto 3a 3aTBopAbe (22) Bo o6BnBkata. CTabete ro KaNaayeto 3a 3aTBopAbe HAD o6BnBkata, DoNeKa He Ce BKIoPi npaBnHIO H He IerHe paMHO co DpShkATA Ha KaMepaTA 3a NpOBepKa.
3a BaDeHe Ha 6aTePnHTe OHN. AkymyIaTOpCKHte 6aTePHN, PnTHcHETe Ha KOnuHbTa 3a OTKnyuBaHe (21) Ha KaNaYeTo 3a 3aTBopaHe (22) n NobLeueTe ro. N3BLeueTe ja CTABeHATA o6BnBka (20) od OTBOPOT (19).
310 MaKeDoHcKn
Cekora3aemenybajTe rncnte 6atepnn oedna. KopncTe cmo 6atepnn od een npOn3BODHTe n co nct KaanuTeT.
I3BaTe Tn 6aTePnHTe Ond. akymyIaTOPCKNte 6aTePNn oKamepaTa 3a npOBepKa,doKoIky He ja KopHCTNe nOOnrO BpeMe. Pn noDoIro cKnadpaHe, 6aTePnHTe T.e. akymyIaTOPCKNte 6aTePNn BO kamepata 3a npOBepKa MoKe da KopoDnpaat.
Pa6oTeHe co 6aTepeHja (BnDn CInKa B)
KopncTeTe rncamO nonHaunTe KOHTo ce HabeEnn BO TexHHckte noaTou. Camo obne ypeN 3a nonHeBe ce nroDn 3a nHTnM-jOHcKaTa 6aTepnJa 3a Baata KaMepa 3a npOBepka.
Hanomeha: Ntym-johckte 6atepnce ncnopayBaat denyMHO HanonHeTn npaHm MehyapodHnte npoNc3a TpaHCnpT. 3a da ce 3arapaHTnpa zenochata jaHHa Ha 6atepijata, nped npBata ynotpe6a zenocho HanonHete ja.
3a cTaBaIbe Ha HAnONHeTata akymyIaTOPcKa batepiJa (14) cTaBeTe ja BO OTBOPOT (19), IOneKa He Ce BKNIOII pRaBnHO H He IeHrpe paMHO co DpWKATA Ha KaMepata 3a npOBepka.
3a Baede He Ha 6atepnjata (14) npntnche Te Ha KOnuHbTa 3a OTKnyyBaHe (21) n 3Bneute ja akymylaTopcKa 6atepnja od OTBopOT (19). PnToa He ynotpe6yBajTe cnla.
HanomeHn 3a onTHMaHNo KOpHcTeHe Ha 6aTePnHrTe
3aunTe ja 6aTeepnjaTa OJ BnaRa N BOJa.
Cknapajte ja 6atepnjata BO once r Ha temnepaypa od -20 ^ C do 50^ . He ja octabajte 6atepnjata Ha np. BO aBtOMoBNOT BO neTo.
CkpateHTo BpeMe Ha pa6oTa no NOnHeBeto NOKaKByBa, DeKa 6aTePnJaTa e NOTpoWeHa Mopa Da ce 3aMeHN.
BHHMaBajTe Ha HAnOMeHnTe 3a OTCTpaHyBaHe.
MOnTnpaIbeHaKa6eI3aKamepata(BuIcnCnkaC)
3a kopncTeHbe Ha KaMepaTa 3a npOBepKa, Mopa Da ce MoHTnpa Ka6eIOT Ha KaMepaTa (1) Ha paHHoT ypei (13).
CTaBeTe ro npNKnyuOKOT Ha KaBEnOT 3a KaMepata (1) npabHnHO Ha KOHeKTopOT Ha KaMepata (23),doEka He ce BKnIOnn.
MOnTnpaIbe Ha orIeIaNo, MarHET nn KyKn (BnDn cInka E)
OrnepaTO (27), KyKeTe (26) nn MaHHeTOT (25) MoKe da ce MOHTnpaaT KaKO NOMOuHO cpeCTBO Ha rnaBata oN KamepaTa (2).
EiHO od TpHTe NOMOHN CpeDCTBa CTaBeTe FO DO KpaJ Ha INaBata Ha KaMepata (2), KaKO 170 e npKakKaHO Ha CNkata.
Hanomeha: MarHeTOT (25) И КУКИTe (26) ce nOroHn caMo 3a nOmeCTyBaIbe H OTcPaHyBaIbe Ha Ia6aBo nOCTaBeHn, MaII N IeCHN npeDMeTH. ПprJaKo BJIeueHb e MoKe Da ce OWTeTn KaMepaTa 3a nPoBepKa IIN NOMOISHOTO CpeICTBO.
Ynotpe6a
3aHTTeTo paHnOt ypeH n akymyNatopckata 6atepnja Hn 6atepncKnot aanTep od dneKTHa coHueBa CBettnHa. 3aHTTeTe ja akymyNatopckata 6atepnja Hn 6atepncKnOT aanTep od Bnara. KaBenoT ha KamepaTa (1) n rnaBaTa Ha KaMepata (2) ce OTnpHN Ha BOda DOKOJIky IpaBnIHO CE MOHTnpaaT, paHnOT ypeD (13) e OTnpEN Ha npckaHe BOda. Cenak, akymyNatopckata 6atepnja (14) n 6atepncKnOT aanTep He ce 3aHTTeHn OD BOda, KOHTaKTOT CO BOda MoKe da DoBeDe do eNeKtpuChe uap Hn OwTeTyBaHe.
He ja kopncTeTe kamepata 3a npOBepka,doKoNky leKaTa Ha rnaBaTa od kamepata (2) e 3amarneHa. Ncknyuete ja kamepata 3a npOBepka, dpyn OTkako BlarataKe Hcnapn. Hnaky, kamepata 3a npOBepka Moze da ce oTuTeH.
BknyeHte cBeTna (3) moKe da ce BxeuTat 3a BpeMe ha pa6oTata. He rH donnpajTe cBeTnata, 3a da n36erHete n3ropeHnci.
He ja n3noxybajte kamepata 3a npoBepka Ha ekCTpeMHN TeMnpaTyprn Hn ocunnauBo TemnepaTypata. Ha np. He rO octabajte dOJIro BpeMe BO aBTOMo6Hnot. Pn rOlenuOCunnauBO TEMpepaTpa, OCTabeTe ja kamepata 3a npoBepka HajnpBO da ce akImMaTHnHa, nped Ja caTabHTe BO ynotpe6a.
CTabaIbe Bo ynotpe6a
BknyyBaBe/ncknyyBaBe
3a BknyuBaBe Ha KaMepaTa 3a npOBepKa npTnCHeTe Ha KOnueTo 3a BknyuBaBeNCKnyuBaBe (6) HnCpeHOTo KOnue (9).
Hanomeha: IOKoIky Ka6eIOT 3a KaMepaTa He e MOHTnpaH npBkIyUyBaHbETo, ekpaHOT nOKaKyBa nopaka 3a rpeuKa.
3a ncknyyBaBe Ha KaMepaTa 3a npOBepKa, OndHO BnHTnCHTe rO konyeTo 3a BKnyyBaBe-ACKnyyBaBe (6)doEka He ce n3racn ekpaHOT.
312 MaKeDoHcKn
Ako HeKoe BpeMe He Ce npHTncHe KOnue Ha KaMepaTa 3a npOBepKa, Taa aBTOMaTCKn Ce nCKnyuBa 3a 3aUHTa Ha akymyNatopckata 6atepna. BpeMeTo Ha nCKnyuBaBe MoKe Da rO odPeIte BO rNaBHO To MeH.
Perynnpahe Ha cBeTnaTa Ha rnaBata Ha KaMepata
3a da ro peryunipate CBETNOTO, npHTNCHEte ro KOnyeTo JeBO (8) Ond. KOnyeTo Decho (11)doEka He ja noCTnHHeTe cKaHaTa OCBeTneHOCT Hn DoEka He ce NcKnyuCBETNOTO.
He norneHybajTe DnpeKTHo BO CBetNaTa (3) He n HacouyBajTe NCTHte KOH dpyr nnuca. CBeTnHaTa Ha CBetNaTao MoKe Da rN 3acNeHN OUYe.
3roneMyBaBe/HamanyBaBe Ha cNIkaTa Ha ekpaHot (Zoom)
3a da ro npnilarodnte HNBOTo Ha 3roJeMyBaHe Ha ekpaHOT, npTnckajTe ro KOnyeTo rope (7) Ond. KOneTo dony (10), DoNeKa He ce doCTnHc KaHOTo HNBO Ha 3roJeMyBaHe.
TnabHO MeHn
3a da cTnHHeTe IIO
Habirupahe BO MeHHTO
-Прелисуваье НИЗ MeHNTо: ПпТиСHTe Ha KОпЧeTo rOpe (7) ИИ KОпЧeTo dony (10).
-Мениваье BO поименito:причсichte Г средно Кочe (9) ИИ Кочeto Decho (11).
-ПOTВРДУВАБЕ на ИЗБРАнОПИДЯ ONМЕНTO:ПрИТСНЕ ГСРЕДНОТКОпUE (9).
-BknyuBaHe/ncKnyuBaHe Ha cyHKunja co BnptyeHnpeKnHyBauchepntchete HnHa CpeHTo KOnue (9), KOnueTo DeCHO (11) Hn KOnueTo neBO (8). Pntoa nocTabkata ce 3auyByBa.
- BpakaBe Ha cIeHTo NOBnCOKo MeH: KpaTKO pHTNCHeTe rO KOJIeTO 3a BKnyyBaBe/HCKnyyBaBe (6).
- Изеге te od Главно Meни в ВраTe ce Ha ппказOT ha KaMepaTa: КразКо ппсшete ro konueTo 3a ВклуУBaHbe/ИСКлуУВаHbe (6).
OnuHa MeHTo
-
Pn BknyeHa cyHKunja Up Indication cTePkata ro npKakyBa npKa3OT 3a Hacoka (b), KOJ HA cnKata e,rope" (BnuCnkaF).
HanomeHa: yHKunjaba He e MOxHa CO CHTe Ka6n 3a Kamepata. Pn moHTnpaHO orIepano (27) n/nnn pn BeptTKalHo n3paMHyBaBe Ha Ka6enot od Kamepata (1) cyHKnjuata e orpaHneHa.
-
IpnTnchete ro konueTo decho (11) nHn cpeHOTo KOUe (9), 3a da NobNKate npereed ha n36paHata foTOrpaFna.
PnTuscheTo ro cpeHTo KOnue (9), 3a da ja OTBOpHe n36paHaTa DaTOTeKa.
: nocTaBeTe ja caKaHaTa OCBetneHOCT Ha ekpahOT. -
: BknyeTe nnn ncknyeTe ro npka3ot 3a 6oja 3a ekpaHOT (ncknyeHo: npka3 BO uprho-6eno).
- -
<ДатуМ & Врeme>: NOCTaBeTe ГИ ДатуМOT И ВреMeTo 3a 3aUyByBaHbe Ha ДатоTeKи ИЗбepeTe ГОфрMaTOT Ha ДатуМ И Врeme.
Hanomeha: aKO daTymOT n BpeMeTo NOBeKe He ce 3auyByBaAT, BrpaDeHaTa Konuecta batepnja e npa3Ha. Bo OBOJ cnUyaj, KOHTaKTnpajTe co OBnacteHa Bosch cepBncha cnUk6a.
www.bosch-pt.com/serviceaddresses
TpaHcnpoT
Ipenopauahnte IHTnym-jOHcN 6atepnnoJnEkaT ha 6apaBaTa Ha 3aKOHOT 3a OnaChn MaTePnaH. Batepnte MoKe da ce TpaHCnOpTHpaat cAmo od CTpaHa Ha KOpNCHKOT, 6e3 Notpe6a Od dOONHtEnn KBaHnΦnKauzn.
При п repнoc на Истпе od CTpaHa Ha TpeTица (Ha np. Bo3dUweH TpaHCnopt HnH WneDnju) HeonxOJHO e da ce BHNMaBa Ha CneuJaHnTe HanomeHn Ha ambaJakata n O3NaKte. Bo takOB cIyuj, pri NOdrTOBkata Ha npaTKaTa Mopa da ce Nobka ekCnept 3a onacn cyncTaHUn.
TpaHcnpTpajTe rH 6aTePnHTe cAmOdoKoNky KyKnIeTe o HeoIeTeHO.3aJeTe rH OTbOpEnHe KOHTaKTn H cNaKyBajTe ja 6aTePnJaTa Ha ToJ HauHH ITo Hema Da ce DBrXKn BO aM6aJaxata. Be MoJIhme BHNMaBajTe Ha eBEHTyaJIHrte DoONlHrTeHN HaunOHAnH npOnncn.
OtctpaHyBaHe

Kamepata 3a npOBepka, 6atepHnTe/aKymyIaTOpCKnTe 6atepn, onpeMaTa n am6aJaxnTe Tpe6a Da ce OTCpaHaT Ha ekOJIoKn npaTnB NaHH.
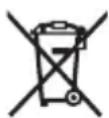
www.bosch-pt.com/serviceaddresses
Transport
Preporučeni litijum-jonski akumulatori podležu zahtevima propisa o opasnim materijama. Korisnik moze bez dodatnih uslova transportovati akumulatore na drumu. Kod slanja preko trecih lica (na primer vazdušnim transportom ili špedicijom) mora se obratiti pažnja na posebne zahteve u pogledu pakovanja i označavanja. Tada se kod priPRE makueta za slanje mora pozvati strucnjak za opasne materije.
Akumulatorske baterije šaljite samo akо kucište nije ostećeno. Odlepite otvorene kontakte i upakujte akumulatorsku bateriju tak, da se nePokrece u paketu. Molimo da obratite pažnju na eventualne dalje nationalne propise.
Uklanje dubreta

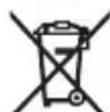
Kameru za inspekciju, baterije/akumulatore, pribor i pakovanja treba.
predati na reciklazu koja je u skladu sa zastitom zivotne sredine.
www.bosch-pt.com/serviceaddresses
Transport
www.bosch-pt.com/serviceaddresses
Transport
Preporučene litij-ionske aku-baterije podljiježu zakunj o transportu opasnih tvari. Korisnik bez ikakvih preduvjeta moze transportirati aku-baterije cestovnim transportom.
Ako transport obavlja treca strana (npr. transport zrakoplovom ili špedicija), treba se pridrzavati posebnih zahtjeva za ambalažu i označavanje. Kod pripreme ovakvih posiljki za transport prethodno se treba savjetovati sa strucnjakom za transport opasnih tvari.
Aku-bateriju šaljite nekim transportnim sredstvom samo ak je njezino kuciSTE neoštećeno. Oblijepite otvorene kontakte i zapakirajte áku-bateriju takdo se ne moze pomicati u ambalazi. Pridržavajte se i eventualnih dodatnih nacionalnih propisa.
Zbrinjavanje

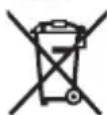
Inspekcijsku kameru, baterije/aku-baterije, pribor i ambalažu treba dovesti na ekoloski prihvatljivo recikliranje.
Inspekcijsku kameru i baterije/aku-baterije ne bacajte u kućni OTPad!
Samo za zemlje EU:
Sukladno europskoj Direktivi 2012/19/EU inspekcijske kamere koje više nisu uporabive i sukladno europskoj Direktivi 2006/66/EZ neispravne ili astrosene aku-baterije/baterije moraju se odvojeno sakumljati i dovesti na ekoloski prihvatljivo recikliranje.
U slučaju nepravilnog zbrinjavanja elektrichi i elektronicki stari uredaji mogu imati štete učinke na okolis i ljudsko zdravlje zbog moguce prisutnosti opasnih tvari.
www.bosch-pt.com/serviceaddresses
Transport
www.bosch-pt.com/serviceaddresses
Transportesana
leteicamajiem litija jonu akumulatoriem ir piemerojami Bistamo kravu aprites likuma noteikumi. Lietotajs var transportet akumulatorus ielu transporte plusma bez papildun nosacijumiem.
Parsutot tos ar treso personu starpniecibu (piemeram, ar gaisa transporte vai citu transporte agenturu starpniecibu), jiaevero ipaşi sutijuma iesainosanas un markesanas noteikumi. Tapec sutijumu sagatavoşanas laikā japieaicina bistamo kravu pärvadăşanas specialists.
380 | Lietuvič k.
Parsutiet akumulatoru tikai tad, ja ta korpuss nav bojats. Aizlimejiet valejos akumulatora kontaktus un iesainojiet akumulatoru ta, lai tas iesainojuma neparvietotos. Ludzam ieverot ari ar akumulatoru parsutisanu saistitos nacionalos noteikumus, ja tadi pastav.
www.bosch-pt.com/serviceaddresses
Transportavimas
Rekomenduojamu licio jonj akumulatoriugabenimui taikomos pavojingu kroviniu gabenimagrelamentuojanciu jstatymu nuostatos. Naudotojui gabenant akumulatorius kelais jokie papildomi reikalavimai netaikomi.
Jei siunçiant pasitelkiami tretieji asmenys (pvz., oro transports, ekspeditorius), butina atsižvelgtj pakuotei ir zenklinimui taikomus ypatingus reikalavimus. Butina, kad rengiant siunta dalyvautu pavojingu kroviniu gabenimo specialistas.
.1g 1g (a log aI I J I J I J I J I J I J I J J J J J J J J J J J J J J J J J J J J J J J J J J J J J J J J J J J J J J J J J J J J J J J J
()u
()
()
()
()
g g a j g k l s 1000000000000000000000000000000000000000000000000000000000000000000000000
aolg jlbu
g aal yol g o g g a l y f uu e li g aas jao g 1go 1gc g d qa l wll cag billg f rall 1g .Jau 1gbl ggl g gl g gl alw n g k jn k s a.ajlc gl alw gl alw .JLswl no Jkswy
4.aaJy oJao 1
aall oal algall aowlo .JaiI wI plabll gliu 8
oal lgal cwoL nn j d Jl Ieawy Jjag
oall jol jd g. JaoI bJw yjigulgplaaW
.duuysdo xoog sa jba liim
lll Jss
aUgS aIg g
4.aaJlo jε aαjε
山lalwU
Uo aBdAolI Lw
Iglll jg jn oJ. gJ Jn Jn Jn Jn Jn Jn Jn Jn Jn Jn Jn Jn Jn Jn Jn Jn Jn Jn Jn Jn Jn Jn Jn Jn Jn Jn Jn Jn Jn Jn Jn Jn Jn Jn Jn Jn Jn Jn Jn Jn Jn Jn Jn Jn Jn Jn Jn Jn Jn Jn J
UJbIgLgAaLoaLbc (22)
1uolKJ aUog (23)
UoLJI UcU Jg (24)
μu bli (25)
eluo (26)
oJoo (27)
(a. L LaI 1ggl
(b.USB Implementers
unuljolic
Up Indication aI I Jg (a)
Up Indication 11
UjUJI/0sJJI Jw uJuJugo (c)
aaiJUJIJI
UgI pS JnJnJnJnJnJnJnJnJnJnJnJnJnJnJnJnJnJnJnJnJnJnJnJnJnJnJnJnJnJnJnJnJnJnJnJnJnJnJnJnJnJnJnJnJnJnJn
.
(A oJgall jal) aJlblgI qoI sAiwI J
.
Bosch no
.ajgJl gdooljgjg
J (20) UU UU UU UU UU UU UU UU UU UU UU UU UU UU UU UU UU UU UU UU UU UU UU UU UU UU UU UU UU UU UU UU UU UU UU UU UU UU UU UU UU UU UU UU UU UU UU UU UU UU UUUUUUUUUUUUUUUUUUUUUUUUUUUUUUUUUUUUUUUUUUUUUUUUUUUUUUUUUUUUUUUUUUUUUUUUUUUUUUUUUUUUUUUUUUUUUUUUUUUUUUUUUUUUUUUUUUUUUUUUUUUUUUUUUUUUUUUUUUUUUUUUUUUUUUUUUUUUUUUUUUUUUUUUUUUuuuuuuuuuuuuuuuuuuuuuuuuuuuuuuuuuuuuuuuuuuuuuuuuuuuuuuuuuuuuuuuuuuuuuuuuuuuuuuuuuuuuuuuuuuuuuuuuuuuuuuuuuuuuuuuuuuuuuuuuuuuuuuuuuuuuuuuuuuuuuuuuuuuuuuuuuuuuuuuuuuuuuuuuuuuuuuuuuuuuuuuuuuuuuuuuuuuuuuuu uu u u u u u u u u u u u u u u u u u u u u u u u u u u u u u u u u u u u u u u u u u u u u u u u u u u u u u u u u u u u uu uu uu uu uu uu uu uu uu uu uu uu uu uu uu uu uu uu uu uu uu uu uu uu uu uu uu uu uu uu uu uu uu uu uu uu uu uu uu uu uu uu uu uu uu uu uu uu uu uu uu uu uu uu uu uu uu uu uu uu uu uu uu uu uu uu uu uu uu uu uu uu uu uu uu uu uu uu uu uu uu uu uu uu uu uu uu uu uu uu uu uu uu uu uu uu uu uu uu uu xu xu xu xu xu xu xu xu xu xu xu xu xu xu xu xu xu xu xu xu xu xu xu xu xu xu xu xu xu xu xu xu xu xu xu xu xu xu xu xu xu xu xu xu xu xu xu xu xu xu xu xu xu xu xu xu xu xu xu xu xu xu xu xu xu xu xu xu xu xu xu xu xu xu xu xu xu xu xu xu xu xu xu xu xu xu xu xu xu xu xu xu xu xu xu xu xu xu xu xu Xu Xu Xu Xu Xu Xu Xu Xu Xu Xu Xu Xu Xu Xu Xu Xu Xu Xu Xu Xu Xu Xu Xu Xu Xu Xu Xu Xu Xu Xu Xu Xu Xu Xu Xu Xu Xu Xu Xu Xu Xu Xu Xu Xu Xu Xu Xu Xu Xu Xu Xu Xu Xu Xu Xu Xu Xu Xu Xu Xu Xu Xu Xu Xu Xu Xu Xu Xu Xu Xu Xu Xu Xu Xu Xu Xu Xu Xu Xu Xu Xu Xu Xu Xu Xu Xu Xu Xu Xu Xu Xu Xu Xu Xu Xu Xu Xu Xu Xu Xu Du du du du du du du du du du du du du du du du du du du du du du du du du du du du du du du du du du du du du du du du du du du du du du du du du du du du du du du du du du du du du du du du du du du du du du du du du du du du du du du du du du du du du du du du du du du du du du du du du du du du du DuDuDuDuDuDuDuDuDuDuDuDuDuDuDuDuDuDuDuDu Du Du Du Du Du Du Du Du Du Du Du Du Du Du Du Du Du Du Du Du Du Du Du Du Du Du Du Du Du Du Du Du Du Du Du Du Du Du Du Du Du Du Du Du Du Du Du Du Du Du Du Du Du Du Du Du Du Du Du Du Du Du Du Du Du Du Du Du Du Du Du Du Du Du Du Du Du Du Du Du Du Du Du Du Du Du Du Du Du Du Du Du Du Du Du Du Du Du Du DuDuDuDuDuDuDuDuDuDuDuDuDuDuDuDuDuDuDuDuDuDuDuDuDuDuDuDuDuDuDuDuDuDuDuDuDuDuDuDuDuDuDuDuDuDuDuDuDuDuDuDuDuDuDuDuDuDuDuDuDuDuDuDuDuDuDuDuDuDuDuDuDuDuDuDuDuDuDuDuDuDuDuDuDuDuDuDuDuDuDu
pJ uI pSJIaJIgI UJIJIbLI JSLU .Luuu algb oJol qolssuWl Luuu algb oJol ssal Iuols
(BgJgJl) pSjll pIaewu
4o 1a
4.aaJUlaolga
gull Ugolgoaal Iu G Oo JnJyj
. 10000000000000000000000000000000000000000000000000000000000000000000000000000000000000000000000000000
aJoo aoe bpoSoll go Jolal ldo
Jgall gagll 1wng no dals
.aaai 2 (2) |jolSJI
oJUJI LwI JUWLO (26) UJg (25) uubollo
Iolks jooa aJc slljll aJLg .qulljlg auuall aoaJlg
Jllo 0oLwJl alw9 g Jaaol
山
10


4.(2)awJc
4
ggl aal ylae lgc jol .jwll maaa
2)1J0LSUJg(1)J0SUSL.
Ie JnJnJnJnJnJnJnJnJnJnJnJnJnJnJnJnJnJnJnJnJnJnJnJnJnJnJnJnJnJnJnJnJnJnJnJnJnJnJnJnJnJnJnJnJnJnJnJnJnJnJn
.
山
LbXg Jw
jjg(6) 1g jj lol
(9) 包 _ 9 山
g lbs aIw jj, jss sic Jog oJolSll 1s 1s 1s
.oo
JJJ Jc JpaWg bdo | 10k
.0jJgabuU (6)Labxlg
GobuIg, gll jol lksj j 1c bdo
IabIgSaaJ. UJIbIgI pSjaI aia Ic IlaaU logig
.aauul aolal
JolI Jg aalb
(11) (8)
aI aI I gI gIgIgIgIgIgIgI
.1111 1
(ρgj) ∫g ∫gJgJ/μ
jjllg(7)gllljjlll jckjssd gnnnns
. bb JSSI dJUgogll pU U (10) Lwll
aJll aJlJI
.(9) b g^ Icb
aJlJI U JaiI
aLac bdo 8)JwJ1 jll g(11) J0jllg(9)bwg
-.(10)
-.(11)
-.(9)1wJj1U
-jjllclo|bawl
jj l c b 1 p J 1s I sI logg I aolS
.ajglalloogolg
-aaJU U JU 1
-buO EugI UJ da
.1jabgosslllalallgss gaoaaiaggl
Uboll Jai/ba
oJgblaiJI
Jg 12) gblll jI c bol Ie Jg UJ. USB Type-C
USB Type-C® àaIgIgIgIgIgIgIgIgIgIgIgIgIgIgIgIgIgIgIgIgIgIgIgIgIgIgIgIgIgIg
IbCg .USB Type-C 已 cUulll J. USB Type-C (17) 0
Jc USB Type-C (18) L
Jg jL g Uusu uusu uusu uusu uusu uusu uusu uusu uusu uusu uusu uusu uusu uusu uusu uusu uusu uusu uusu uusu uusu uusu uusu uusu uusu uusu uusu uusu uusu uusu uusu uusu uusu uusu uUSU UUULUULUULUULUULUULUULUULUULUULUULUULUULUULUULUULUULUULUULUULUULUULUULUULUULUULUULUULUULUULUULUULUULUULUULUULUULUULUULUULUULUULUULUULUULUULUULUULUULUULU
404
USB auiuiaagalglgupnccnccnnl lajg yjg g:abgalo
10 o jy jy jy jy jy jy jy Type-C
. 11 11 11 11 11 11 11 11 11 11 11 11 11 11 11 11 11 11 11 11 11 11 11 11 11 11 11
JlI JdWJ
111 111 111 111 111 111 111 111 111 111 111 111 111 111 111 111 111 111 111 111 111 111 111 1
oJy p q aal l w 10 g jll oj g 2gog p dla .aag Jall g (2) IJolSJI wJ nn jI gai
ywwJ 1
.aaJlJoo Joo
aJdJ 0jSJJ Jaiaa

(jawj
.aaJlJoo Joo
aJdJl oJSL JdUoo

(paai)
1d 100000000000000000000000000000000000000000000000000000
.Bosch
aDg dJUJI
(13) 15g lglg 2
15g1 g 15k 15k a1b1 15k b1
o0o o0o o0o o0o o0o o00
g1 o0o o0o o0o
.40000000000000000000000000000000000000000000
aJl aJjJI JbJI j
a a a a a a a a a a a a a a a a a a a a a a a a a a a a
Jb 1000
4a yj b a 4g q g
aaoe aagaaaiil ae jg uylbll.iauill la9 g 10g agg aally jyolg g g g y w
pIddwI IJluiuWlg Jdo
Robert Bosch Morocco SARL
gjoo jJolI gJw.53
LJ1J20300
+212529314327:
sav.outillage@ma.bosch.com: 一 _ 9 ≤ 一 _ 1
:dddoDdI jglic Jo jolld
www.bosch-pt.com/serviceaddresses
JJI
. 11111111111111111111111111111111111111111
J 1 J 1 J 1 J 1 J 1 J 1 J 1 J 1 J 1 J 1 J 1 J 1 J 1 J 1 J 1 J 1 J 1 J 1 J 1 J 1 J 1 J 1 J 1 J 1 J 1 J 1 J 1 J 1 J 1 J 1 J 1 J 1 J 1 J 1 J
4g jj l jL,
.
Jg j 1 Jg j gj y
g u g w, uai
u 1g b do sl.
u g g uisj
A. .uS LwJy
J 1 J 1 J 1 J 1 J 1 J 1 J 1 J 1 J 1 J 1 J 1 J 1 J 1 J 1 J 1 J 1 J 1 J 1 J 1 J 1 J 1 J 1 J 1 J 1 J 1 J 1 J 1 J 1 J 1 J 1 J 1 J 1 J 1 J 1 J
ajl jls gag la
dagj cblj d
Gaaai Sswlo, GiaI uSisw, Siic siilo, GiaI aljag Jnssao yu w bua ly uolg l yu uls. dss oiaiwl jai I du oJgac, goc, Lw ds sWbLgLgLo, Caw slgo 5gla cwi .dsso ooiow
J 1 J 1 J 1 J 1 J 1 J 1 J 1 J 1 J 1 J 1 J 1 J 1 J 1 J 1 J 1 J 1 J 1 J 1 J 1 J 1 J 1 J 1 J 1 J 1 J 1 J 1 J 1 J 1 J 1 J 1 J 1 J 1 J 1 J 1 J
.
4JJSpLio
4.1Jgagog
a gj jgbpj
JU J J J J J J J J J J J J J J J J J J J J J J J J J J J J J J J J J J J J J J J J J J J J J J J J J J J J J J J J J J J J J J J J J J J J J J J J J J J J J
A
.
Lg jI gj 5J dSJJw jdJil .slowl siiS JgW Ooaw Jd SgJyJw Cg, cwi O w dJb j Jg W

J 1 aS s ju as g w Jiaabo sljba sda slo sji .s j jg JLSG S


1u
L 1 aS y bS dS dS aJg Jg Jy j g Jw o S w n s Jg Jg Jg Jy Jy Jy 2 Ugb JcWl N Ss Sj y Jy Jy Jy
g laiiia i jj d j 1 j j j j j j j j j j j j j j j j j j j j j j j j j j j j j j j j j j j j j j j j j j j j j j j j j j j j j j j j j j j j j j j j j j j j j j j j j j j j j j j j j j j j j j j j j j j
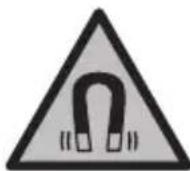
4sLgKwJgG
$$ \left. \right.\left. \right.\left.\left.\left.\left.\left.\left.\left.\left.\left.\left.\left.\left.\left.\left.\left.\left.\left.\left.\left.\left.\left.\left.\left.\left.\left.\left.\left.\left.\left.\left.\left.\left.\right.\right.\right.\right.\right.\right.\right.\right.\right.\right.\right.\right.\right.\right.\right.\right.\right.\right.\right.\right.\right.\right.\right.\right.\right.\right.\right.\right.\right.\right.\right.\right. $$
$$ (^ {b} \mathrm {U S B T y p e - C} ^ {\circledast} \cup S g w \tag {17} $$
$$ \text {U S B T y p e - C} ^ {\circledast} \cup \text {L S} \tag {18} $$
$$ d b \text {a} \tag {19} $$
$$ \left. \right.\left. \right.\left. \right.\left.\left.\left.\left.\left.\left.\left.\left.\left.\left.\left.\left.\left.\left.\left.\left.\left.\left.\left.\left.\left.\left.\left.\left.\left.\left.\left.\left.\left.\left.\left.\right.\right.\right.\right.\right.\right.\right.\right.\right.\right.\right.\right.\right.\right.\right.\right.\right.\right.\right.\right.\right.\right.\right.\right.\right.\right.\right.\right.\right.\right.\right. $$
$$ \cup \ddot {o} \circ \text {s i s} \text {s l j} \text {l} \text {d o s} \tag {21} $$
$$ \left. \right.\left. \right.\left.\left.\left.\left.\left.\left.\left.\left.\left.\left.\left.\left.\left.\left.\left.\left.\left.\left.\left.\left.\left.\left.\left.\left.\left.\left.\left.\left.\left.\left.\left.\left.\right.\right.\right.\right.\right.\right.\right.\right.\right.\right.\right.\right.\right.\right.\right.\right.\right.\right.\right.\right.\right.\right.\right.\right.\right.\right.\right.\right.\right.\right.\right.\right. $$
$$ \cup \cup \cup \cup \cup \tag {23} $$
$$ \dot {u} \cup \text {山} \cup \text {江} \tag {24} $$
$$ \mathrm {l} \mathrm {j} \mathrm {i} \omega \tilde {\mathrm {l}} (2 5) $$
$$ \wp \text {L} g \tag {26} $$
$$ \Delta \tilde {\omega} _ {1} ^ {i} (2 7) $$
(a.suiuui jugoi sji
(b.su USBImplement
LjIwJsl
Up Indication
Up Indication 品 _ 品 ^ 品
Ug/1jJwU Lg jJw GJlW (c)
ω|411
iG Uaia
| GIC 12V-4-23 C | d'or##s##s##s##s# | |
| 3601 B415.. | ### | |
| "4,3 | ### | |
| px800 × 480 | gog | |
| px1280 × 720 | gogB(A) | |
| JPG | ### | |
| 30 | ### | |
| 75 | ° | (C(A) |
| mm30-80 | A | |
| lx200 | (D(A) | |
| min30 | jou jou jou | |
| jou jou jou | ||
| % 26,5) sa g AdBlue® | ||
| (A) sa | ||
| ### | ||
| 12 V | -( | |
| 4 × 1,5 VLR6 (AA) | l (l) | |
| 4 × 1,2 VHR6 (AA) | ( | |
| ### | ||
| CR2450 (ρηηηηηηηηηηηηηηηηηηηηηηηηηηηηηηηηηηηηηηηηηηηηηηηηηηηηηηηηηηηηηηηηηηηηηηηηηηηηηηηηηηηηηηηηηηηηηηηηηηηη | ||
| JLW3 | E | |
| ### | ||
| 8 | h | (F(j) yj yj yj yj yj yj yj yj yj yj yj yj yj yj yj yj yj yj yj yj yj yj yj yj yj yj yj yj yj yj yj yj yj yj yj yj yj yj yj yj yj yj yj yj yj yj yj yj yj yj y |
| 3 | h | (j) yj yj yj yj yj yj yj yj yj yj yj yj yj yj yj yj yj yj yj yj yj yj yj yj yj yj yj yj yj yj yj yj yj yj yj yj yj yj yj yj yj yj yj yj yj yj yj yj y |
412|wJ
| GIC 12V-4-23 C | d' |
| mm8,3 | |
| 1,5 | m |
| 25 | mm |
| IP54 | |
| IP67 | |
| °C0...+35 | |
| °C-10...+50 | |
| °C-20...+50 | |
| GBA 12V... | |
| GAL 12... | |
| GAX 18... |
480×800
Lw9%50 Ljg
(AGIC 4/5 Imager 8.3)
(Bgog,gl0s
(Cjgaj o|j[
(DSJJb1g50mm
(Ei, uuiuuaa
(FGBA 12V 2.0Ah U
(Gjg jS/15j jg
wai
sjjl uolgio
Bosch jgogjw lJw yIyI yI yI yI yI yI yI yI yI yI yI yI yI yI yI yI yI yI yI yI yI yI yI yI yI yI yI yI yI yI yI yI yI yI yI yI yI yI yI yI yI yI yI yI yI yI yI yI yI yI yI
(A yu d u Lg) yu ly u Ly Lg o yu JyUyu NIMH jJw Uu yu yu yu yu .y
g jyjIjI I J IJ 1s i g sii ddd jd jw y
3JLSa
JwLgSGLyBlygSGLyBlyj (19)abssuLdsIyj yj (20)
(22) wg jgs Jg W g 1j jw l y gao 1 g b u s jg o ssi (5g j w g j.
Jg Jwjjj g dws j Lwds g saoa
J 15 J 15 J 15 J 15 J 15 J 15 J 15 J 15 J 15 J 15 J 15 J 15 J 15 J 15 J 15 J 15 J 15 J 15 J 15 J 15 J 15 J 15 J 15 J 15 J 15 J 15
.19)abdoo jI (20) 5d
. 15S u yg jy b l nojam I j jw sI yu / L yu d yu g a
.
4.1ggboo
j. 1 j l j j j j j j j j j j j j j j j
j j j j j j j j j j j j j j j j j j j j
.igw gJgJcWl Jsao .igw 5
(Bgaa a dSis gaj) jJw lLg yjU JLS oogai
<leu.sui\$ oJaiw
Jj j Jj Jj Jj Jj Jj Jj Jj Jj Jj Jj Jj
Jg g Jn jilg 1s y jy p g jjw lq s y jy d i S y jy 1s y jy .s y jw y o o y jjw da j c g o y Ll jy 1s y jy .j y jy k jy jy Jk Jy Jy Jy
(19) a d a j (14) w jw yjy jg .gwhlao wjjb jyjgs o kssu gddiy wggg jgb
(21) jdd oiiS slj llo doS (14) jjw lgl yjw
[5g] qil i, cwl o sh aJl Jsaw jd as gblaw Ij Sos adwg 3jl
.1s 2)
jI. jI. JI. JI. JI. JI. JI. JI. JI. JI. JI. JI. JI. JI. JI. JI. JI. JI. JI. JI. JI. JI. JI. JI. JI. JI. JI. JI. JI. JI. JI. JI. JI. JI. JI. JII
-juuogUgS1J(6)
-/[jugdaS:J J 6) wgol
gio 15w auij
(b) 150000000000000000000000000000000000000000000000000000000000000000000000000000000000000000000000
.
jw wJy jy Jy (7) yL y (10) uLy dS y .uLi
COW doS oW uLai yu Lai u Ly gJy
.duJ 9) bWg daS y (11) CwJ
.duJ 9) bWg doS oW uL aJy Jy
-..s<1g|j
.
.(ωlωolωjJaw:gola)
- pui jw laa -S uis w g 1 -<Device settings oJpui J L
. 1 J J J J J J J J J J J J J J J J J J J J J J J J J J J J J J J J J J J J J J J J J J J J J J J J J J J J J J J J J J J J J J J J J J J J J J J J J J J J JJ
. uS Uaui Julw J 1u jU w dS uS
jgb u wjjb jy jgs s gwh o sl jwgl dss a d jgwo .gwh o wgoia logil
-ajjjolpjdaw -laabdu jgio
.duuU 1gao UcIbI g o
.1gW 5u oW yI uJ Jolao Jolao .Jil dJdJL
UuSc UJl/1sS oagj
jS uSc oog
(12) jgS uSc daS, gJgJjLai daa Jilwjl nJgS uSc gl y 9 jy Jy wjjb jy dabla Jl uSsc .dJwJ. .siu USB Type-C@ qjbp jI wgi
USB Type-C® 15
. 1J JJJJU JUSB Type-C (17) Cg W .JIS J USB Type-C (18) JL BOSCH_GIC gJgOJgJgJgJgJgJgJgJgJgJgJgJgJgJgJgJgJgJgJgJgJgJgJgJgJgJgJgJgJgJgJgJgJgJgJgJgJgJgJgJgJgJgJgJgJgJgJgJgJgJgJ g JI JI JI JI JI JI JI JI JI JI JI JI JI JI JI JI JI JI JI JI JI JI JI JI JI JI JI JI JI JI JI JI JI JI JI JI JI JI JI JI JI JI JI JI JI JI JI JI JI JI J
Sisla Jw jyolks lal wjI sJl dawam I gJg:disj
JJn Dd aWl nKoo oJyol Jn JG (gJd Jz) .sii buiu uji
Jgb du ksiin nn JyJU (wjju (jyjgs) sis 1J USB Type-C@ Uls
JyJU JyJU JyJU JyJU JyJU JyJU JyJU JyJU JyJU JyJU JyJU JyJU
Sb USB Type-C 15000000000000000000000000000000000000000000000000000000000000000000000000000000000000
lac ulsi
SjbslaIgao gss 1JJJLggo b. dgs Jy Ss y s 1 (1) jrgd Lk .sJgblal I Jn Jn Jn Jn Jn Jn Jn Jn Jn Jn Jn Jn Jn Jn Jn Jn Jn Jn Jn Jn Jn Jn Jn Jn Jn Jn Jn Jn Jn Jn Jn Jn Jn Jn Jn Jn Jn Jn Jn Jn Jn Jn Jn Jn Jn Jn Jn Jn Jn Jn J n J n J n J n J n J n J n J n J n J n J n J n J n J n J n J n J n J n J n J n J n J n J n J n
418|
山oljgJx -Lb
山
daoo
JsuLoi
.
ai a ai 的最小值为 k .
wUj u

(jj|xw)

(jojgJsui)
.
JGLaI abgla
ωl
sjloljogdI gjjg
.
abla Jb
( k,l)
doljuiuowJsu ojuai
Bosch jjw joo loa
.
uugw9 1o
oLswJjS jao g jos,guJg
.uiSj jg abg c lo ylo ylw g uI JJ (13) JJl dws
150 bao j 0j g d a jilai. sjj d jia o jlgam l j wjju jy jgs
Uwglg g ujjj jy jg s jL GdoL w slu do 1go
Jus jao Cg d Jg SoS
jI jI .sis o laow ggbjo g ji Jlaaw s jI gdl jSg
.5g 5g g0g g0
(4)
.
www.bosch-pt.com/serviceaddresses
olswJoa
j jjw lgl s1s/1g wjjj g 1jssjla djj
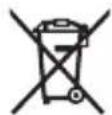
/
:gi gjog
dgg (419 a, "olss Jaa, d s 5g) u b Js d lab
a aai i jgi b w g i q i o d s aas i sl da s s l y u jy gdo .g w piai y