Drive 9000 - Car charger Telwin - Free user manual and instructions
Find the device manual for free Drive 9000 Telwin in PDF.
| Brand | Telwin |
| Model | Drive 9000 |
| Product type | Multifunction portable jump starter (cigarette lighter charger) |
| Rated voltage | 12 V |
| Internal battery capacity | 9000 mAh (lithium-polymer) |
| Starting current | 350 A (1200 A peak) |
| Output sockets | 2 x USB 5 V (1 A / 2.1 A), 1 x 12 V / 10 A, 1 x 19 V / 3.5 A |
| LED light | Continuous, flashing, emergency signal |
| Weight | 640 g |
| Charging power supply | 100-240 V AC (adapter included) or 12 V DC via cigarette lighter |
| Included accessories | Jump start clamps, 12V/19V cable, adapters, charger, USB cable |
| Maintenance | Charge before use, after each use, and every 3 months |
| Safety | Connect clamps in order (red to positive, black to ground); do not reverse polarity; do not short-circuit |
| Intended use | Emergency start of 12 V vehicles, charging electronic devices |
| Warranty | 12 months (excluding battery) |
Frequently Asked Questions - Drive 9000 Telwin
Important: Avoid any contact between the clamps.
Important: The device contains a lithium battery: do not open it or expose it to heat.
User questions about Drive 9000 Telwin
0 question about this device. Answer the ones you know or ask your own.
Ask a new question about this device
Download the instructions for your Car charger in PDF format for free! Find your manual Drive 9000 - Telwin and take your electronic device back in hand. On this page are published all the documents necessary for the use of your device. Drive 9000 by Telwin.
USER MANUAL Drive 9000 Telwin
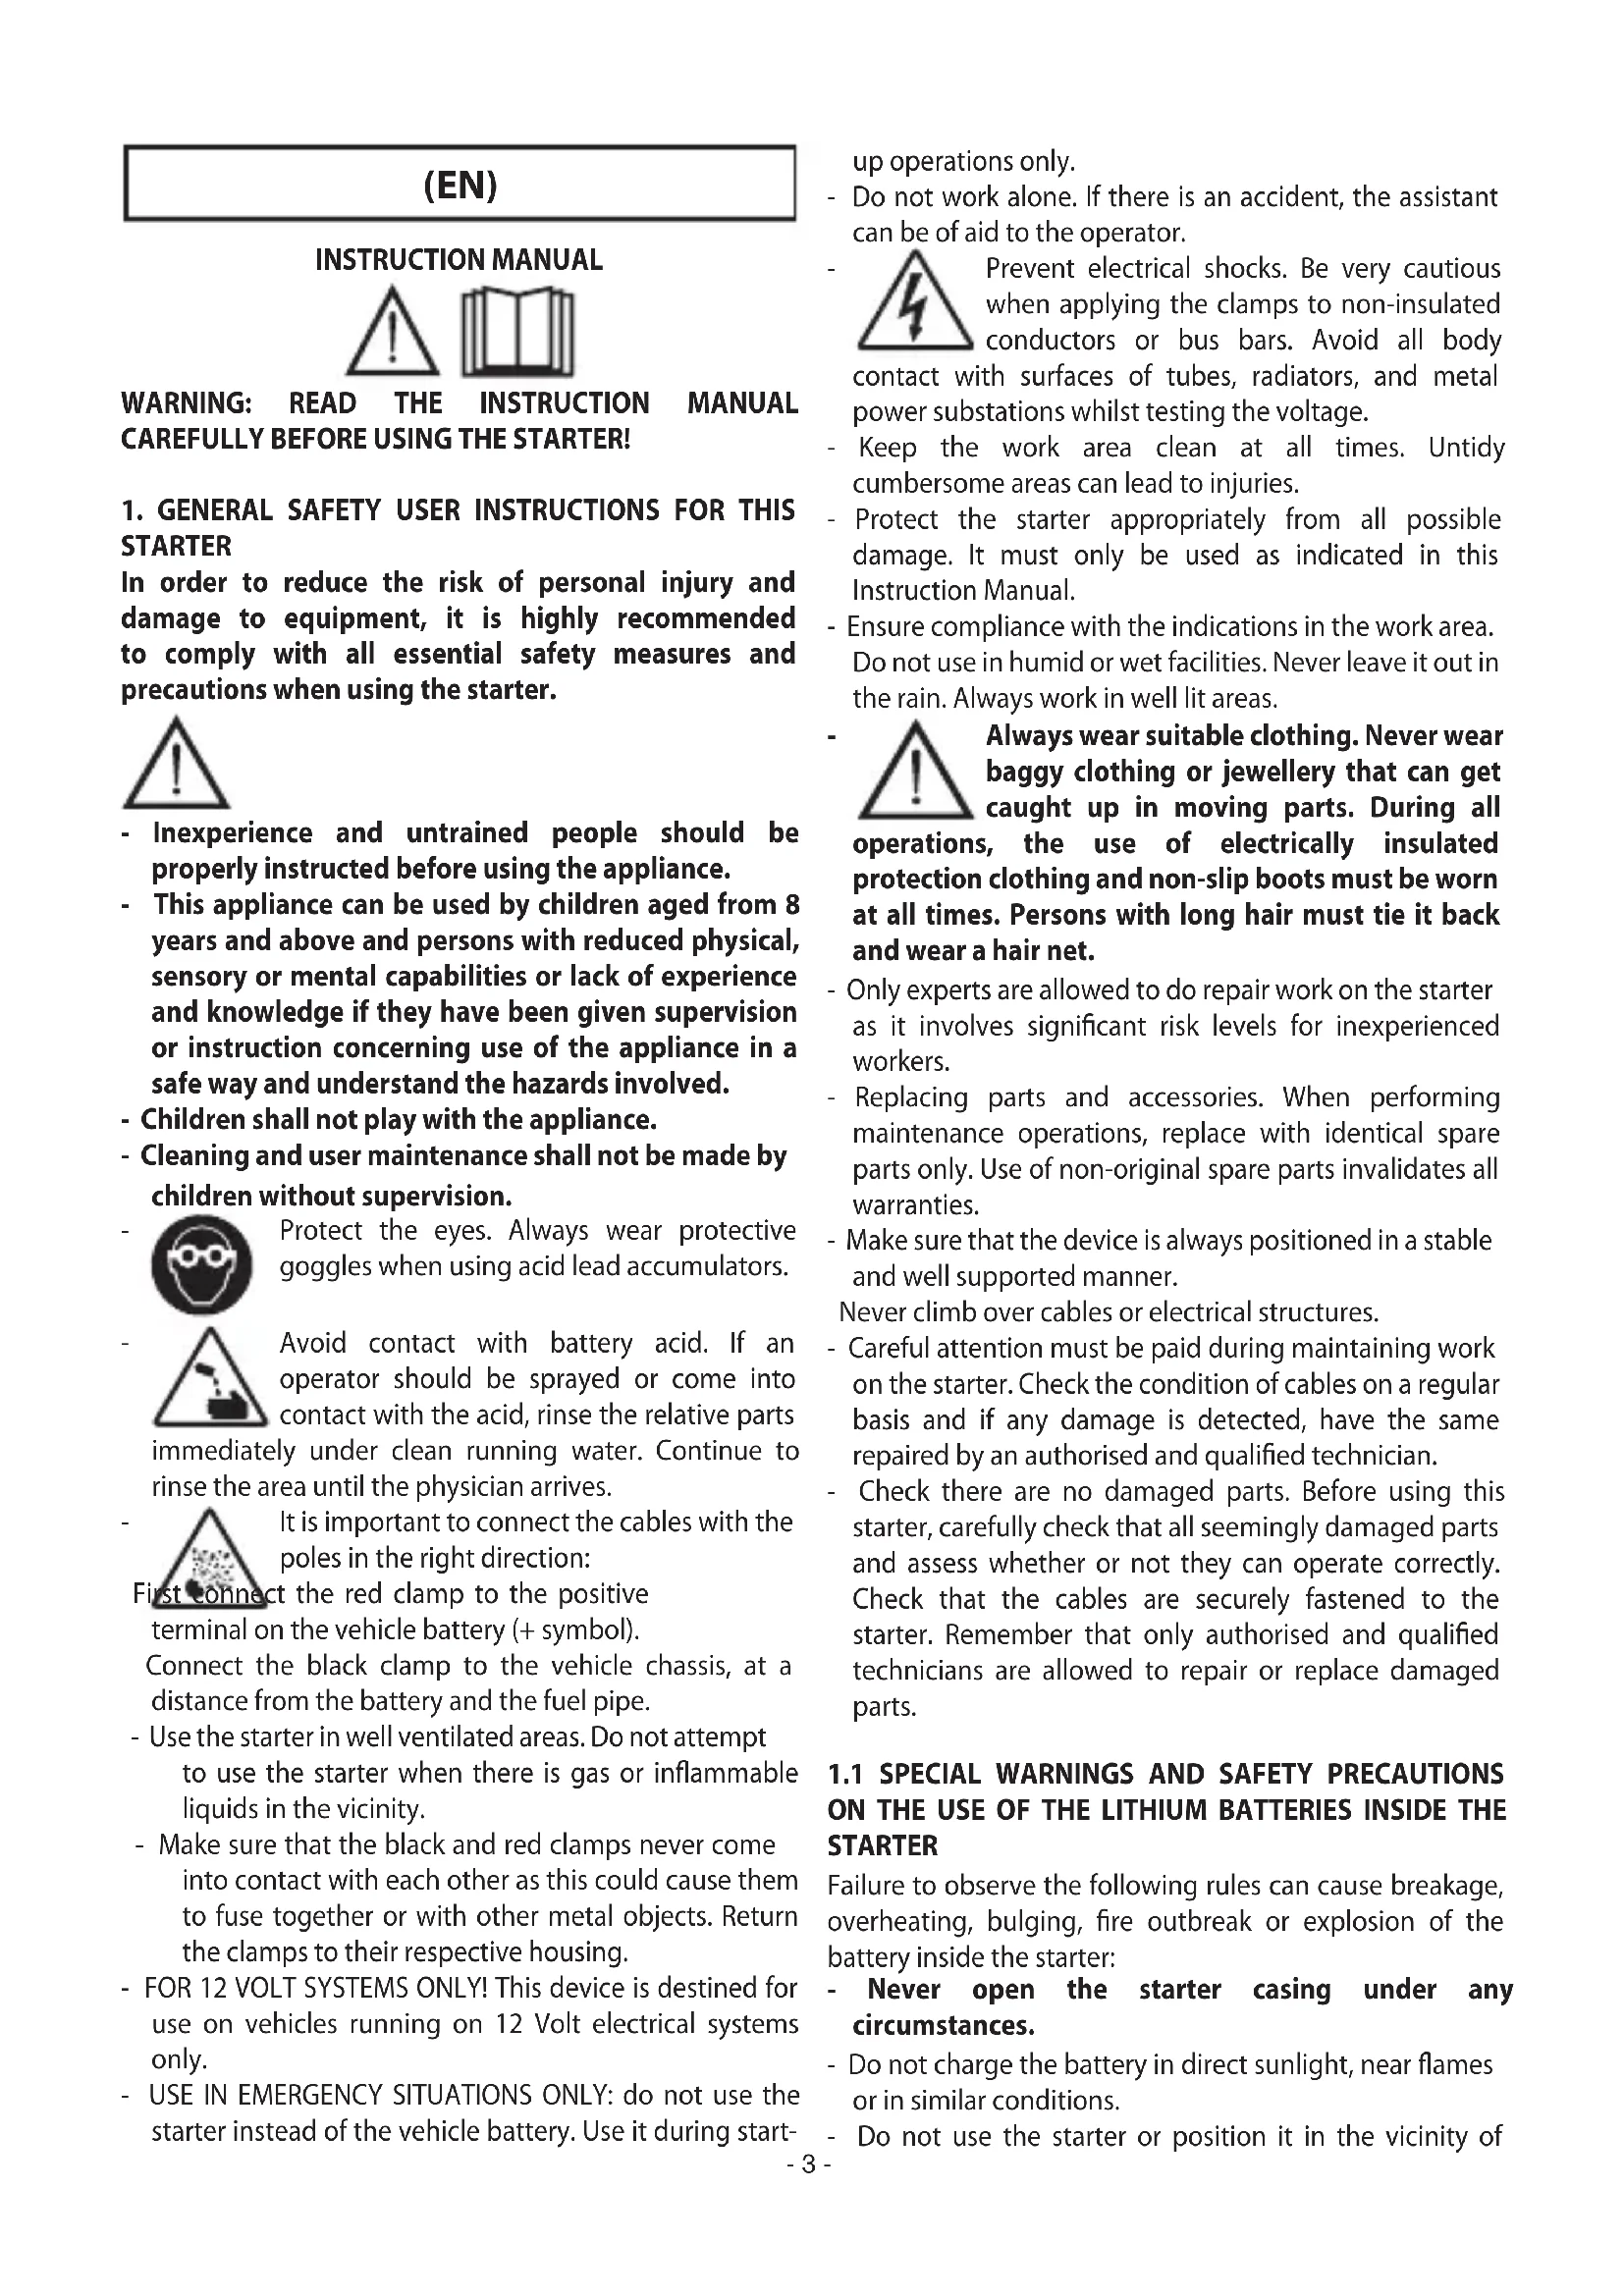
In order to reduce the risk of personal injury and damage to equipment, it is highly recommended to comply with all essential safety measures and precautions when using the starter.

- Inexperience and untrained people should be properly instructed before using the appliance.
- This appliance can be used by children aged from 8 years and above and persons with reduced physical, sensory or mental capabilities or lack of experience and knowledge if they have been given supervision or instruction concerning use of the appliance in a safe way and understand the hazards involved.
- Children shall not play with the appliance.
- Cleaning and user maintenance shall not be made by children without supervision.

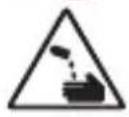
Protect the eyes. Always wear protective goggles when using acid lead accumulators.

Avoid contact with battery acid. If an operator should be sprayed or come into contact with the acid, rinse the relative parts
immediately under clean running water. Continue to rinse the area until the physician arrives.

It is important to connect the cables with the poles in the right direction:
First connect the red clamp to the positive terminal on the vehicle battery (+ symbol).
Connect the black clamp to the vehicle chassis, at a distance from the battery and the fuel pipe.
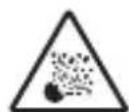
- Use the starter in well ventilated areas. Do not attempt to use the starter when there is gas or inflammable liquids in the vicinity.
- Make sure that the black and red clamps never come into contact with each other as this could cause them to fuse together or with other metal objects. Return the clamps to their respective housing.
FOR 12 VOLT SYSTEMS ONLY! This device is destined for use on vehicles running on 12 Volt electrical systems only. - USE IN EMERGENCY SITUATIONS ONLY: do not use the starter instead of the vehicle battery. Use it during start
up operations only.
- Do not work alone. If there is an accident, the assistant can be of aid to the operator.
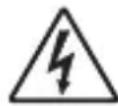
Prevent electrical shocks. Be very cautious when applying the clamps to non-insulated conductors or bus bars. Avoid all body contact with surfaces of tubes, radiators, and metal power substations whilst testing the voltage. - Keep the work area clean at all times. Untidy cumbersome areas can lead to injuries.
- Protect the starter appropriately from all possible damage. It must only be used as indicated in this Instruction Manual.
- Ensure compliance with the indications in the work area. Do not use in humid or wet facilities. Never leave it out in the rain. Always work in well lit areas.
Always wear suitable clothing. Never wear baggy clothing or jewellery that can get caught up in moving parts. During all operations, the use of electrically insulated protection clothing and non-slip boots must be worn at all times. Persons with long hair must tie it back and wear a hair net.
- Only experts are allowed to do repair work on the starter as it involves significant risk levels for inexperienced workers.
- Replacing parts and accessories. When performing maintenance operations, replace with identical spare parts only. Use of non-original spare parts invalidates all warranties.
- Make sure that the device is always positioned in a stable and well supported manner.
Never climb over cables or electrical structures. - Careful attention must be paid during maintaining work on the starter. Check the condition of cables on a regular basis and if any damage is detected, have the same repaired by an authorised and qualified technician.
- Check there are no damaged parts. Before using this starter, carefully check that all seemingly damaged parts and assess whether or not they can operate correctly. Check that the cables are securely fastened to the starter. Remember that only authorised and qualified technicians are allowed to repair or replace damaged parts.
1.1 SPECIAL WARNINGS AND SAFETY PRECAUTIONS ON THE USE OF THE LITHIUM BATTERIES INSIDE THE STARTER
Failure to observe the following rules can cause breakage, overheating, bulging, fire outbreak or explosion of the battery inside the starter:
- Never open the starter casing under any circumstances.
- Do not charge the battery in direct sunlight, near flames or in similar conditions.
- Do not use the starter or position it in the vicinity of
heaters, near flames or in other hot areas.
- Only use the charger supplied with the device to charge the starter.
- Do not throw the starter into a fire or heat it up.
- Do not invert the positive "+" and negative "-" connection polarities.
- Do not short-circuit the starter terminals.
- Do not perforate the starter casing with drill bits, do not hit it with a hammer or stand on it.
- Do not position the starter inside stoves, microwave ovens etc.
- Do not throw the starter or cause high impacts.
- Do not modify or tamper with the starter casing.
- Refrain from using the starter if it emits strange smells, heats up or deforms during use, charging or storage.
- If the starter emits strange smells or leaks acid, immediately move the device away from any heat sources or free burning flames.
- In case of contact of the starter battery acid on the skin or clothing, rinse with copious amounts of water.
- In case of contact of the starter battery acid with the eyes, rinse immediately with copious amounts of water and call a doctor.
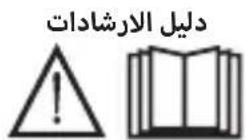
Keeping this manual.
The manual should be read, paying attention to all the warnings and safety precautions to be taken when using and maintaining the device, the list of components and all technical specifications.
Please keep this manual in a secure and dry place for future reference.
2. INTRODUCTION AND GENERAL DESCRIPTION Intended use
Multi-functional, portable, battery-powered starter. Ideal for anyone needing an emergency starter. Its applications include use on motorcycles, automobiles, boats and many more.
Fully compatible with any 12-volt starter system.
The starter uses LITHIUM BATTERIES; this makes the device extremely compact and easy to handle.
The multi-functional starter is also equipped with a powerful LED light and four outputs to power and/or charge 5V/12V/19V electronic devices.
Description (figure A):
A-1. Book type pack.
A-2. Multifunctional starter.
A-3. Starter clamps.
A-4. 12V/10A and 19V/3.5A output cable.
A-5. Charger cable with cigarette lighter type 12V jack plug.
A-6. Adaptor cable to connect the USB port on the device to various power and/or charge inputs on the main commercially available electronic devices.
A-7. Output adaptors for the A-4 cable.
A-8. Charging power unit.
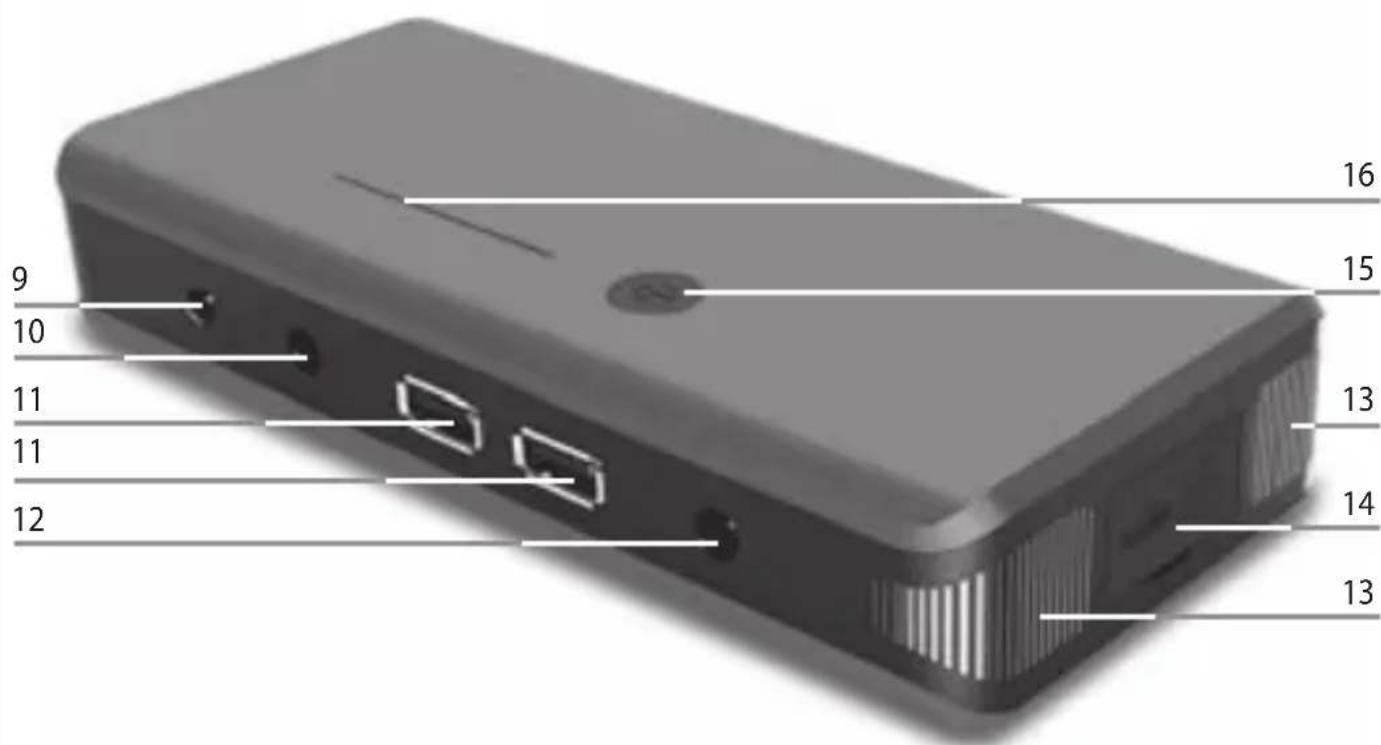
A-9. Starter charging input.
A-10. 12V/10A output.
A-11. 5V/1A and 5V/2.1A USB ports.
A-12. 19V/3.5A output.
A-13. LED lights.
A-14. Starter clamps outs (ref. A-3).
A-15. ON/OFF switch for the charge level, the output ports (ref. A-11 and 12) and the LED lights.
A-16. Internal battery charge status indicator LED.
3. INSTALLATION
POSITIONING THE STARTER
When using the starter, position it on a horizontal, flat and stable surface.
4.1 How to use the starter:

WARNING: instructions
follow these meticulously, and
always in the order given below!
Always prevent the black and red clamps from touching each other or a common cable!
- Make sure that the vehicle or boat to be started is switched off (switch or ignition key in the OFF position).
- Connect the red clamp POS. (+) to the battery terminal POS. (+), then connect the black clamp NEG. (-) to the vehicle chassis or the battery terminal NEG. (-).

WARNING: failure to follow these rules may compromise the operating life of the device:
- Turn the vehicle ignition to the start position for no more than 3 seconds.
- If the vehicle or boat does not start, wait at least 15 seconds before trying again.
- If the vehicle or boat still does not start, wait at least 2 minutes before trying again.
After a successful start, with the engine running, follow the sequence of instructions below with great care:
- Disconnect the black clamp (negative) from the vehicle.
- Disconnect the red clamp (positive) from the vehicle.
- Remove the starter cable connector from the starter
- Replace the cables and the starter in their seats inside the case.
It is highly recommended to recharge the starter as soon as possible.
4.2 Using the starter as a power and/or charging device:
- Select the output cable (fig. A-4 or fig. A-6) with the terminal suitable for the device to be powered (fig. A-7) according to the required voltage/current;
- Insert the cable terminal into the appropriate output port on the starter (fig. A-10, 11, 12);
- Press the ON button seen in figure A-15
- Insert the other cable terminal into the device to be
powered;
4.3 Using the LED lights
- Press and hold the ON button (fig. A-15) for a few seconds to enable the continuous LED light function.
The press the button in the following sequence:
- once to start the blinking light;
- twice to start the emergency signal;
- three times to switch the light OFF.
5. CHARGING
Important! To achieve maximum battery performance, always charge before use, then after every time it is used and, in any case, at least every 3 months.
The unit can be charged using a 230VAC power supply (using the power supply adapter supplied, fig. A-8) or using a 12V cable with a jack plug (fig. A-5).
Press the button seen in fig. A-15 to check whether the battery needs charging.
The LEDs seen in fig. A-16 indicate the charge status of the battery, which light up as the status increases:
-one LED only: low battery;
- all LEDs are on: fully charged battery.
5.1 Charging with 100Vac - 240Vac 50/60Hz power supply

WARNING: Use the supplied power supply adapter only!
- Insert the power supply adapter plug (Fig. A-8) into a 230Vac socket or other compatible with the network voltage.
- Now insert the relative output plug into the charger socket seen in fig. A-9.
- The LEDs seen in fig. A-16 light up in sequence when the unit is charging and remain on when the unit is fully charged.
- The starter is fitted with a control device to prevent overcharging the battery and power unit. Leave the system to charge for as long as necessary.
5.2 Charging onboard the vehicle using 12Vdc power supply:
- Insert the jack plug on the supplied cable (Fig. A-5) into the cigarette lighter socket in the car or onboard the boat.
- Insert the other terminal of the supplied cable into the starter charge socket (Fig. A-9).
6. DISPOSING OF THE BATTERY
When the starter battery is completely run down it should be sent to a re-cycling facility. In some countries this is mandatory. Contact the local special refuse authority for information on recycling.


WARNING:
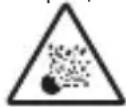
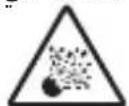
Do not burn the battery to dispose of it. This could cause an explosion. Before disposing of the battery, apply insulating tape to the bare terminals to prevent shorting. Do not expose the battery to intense heat or fire as this could cause an explosion.
SPECIFICATIONS:
DRIVE 9000
Type of battery:
- rechargeable factory-sealed lithium-polymer battery.
Battery capacity:
- 9000 mAh
Starter current (12 V):
-350A
- (1200 A peak)
Starter cables:
- polarised terminals
- copper
-diameter 5.3mm^2 (10AWG) - length 250 mm
- PVC insulated
Light:
-LED
Output sockets:
- two USB 5V - 1A/2.1A sockets
- 12V - 10A socket
- 19V-3.5A socket
Characteristics:
- ON/OFF switch
- automatic charging level reset switch
- charge level and fully charged indicator LEDs
- continuous, blinking and emergency LEDs
Weight:
-640g
Accessories included (fig. A):
Output power unit (fig. A-8) 100 V-240 V 50/60 Hz, 12 VDC/1000 mA
- charge cable with 12 V cigarette lighter jack plug
- Input/output connection cables (fig. A-4, A-6)
- Various terminals (fig. A-7)
DRIVE 13000
Type of battery:
- rechargeable factory-sealed lithium-polymer battery.
Battery capacity:
-12000mAh
Starter current (12 V):
-450A
- (1500 A peak)
Starter cables:
- polarised terminals
-
copper
-
diameter 5.3mm^2 (10AWG)
- length 250 mm
- PVC insulated
Light:
-LED
Output sockets:
- two USB 5 V - 1 A/2.1 A sockets
- 12 V - 10 A socket
- 19 V - 3.5 A socket
Characteristics:
- ON/OFF switch
- automatic charging level reset switch
- charge level and fully charged indicator LEDs
- continuous, blinking and emergency LEDs
Weight:
-700g
Accessories included (fig. A):
Output power unit (fig. A-8) 100 V-240 V 50/60 Hz, 12 VDC/1000 mA
- charge cable with 12 V cigarette lighter jack plug
- Input/output connection cables (fig. A-4, A-6)
- Various terminals (fig. A-7)
(IT)
MANUALE ISTRUZIONE

ATTENZIONE:
MANUEL D'INSTRUCTIONS

ATTENTION: AVANT D'UTILISER LE DEMARREUR, LIRE ATTENTIVEMENT LE MANUEL D'INSTRUCTION!
1. SECURITE GÉNÉRALE POUR L'UTILISATION DE CE DEMARREUR
- Icnoj3yTe nycKOoe yCTpoiCTBO B xopoio npoBeTpnaeMbix MeCTax. He nbTaTneTecb
OCyueCTBnTb Nyck, HaxoJaCb B6IIN3n rOpOuNX ra3OB nn KndKoCTe.
He donyckaai Te copnKocHOBeHna YepHbIX KpaChbIX 3aXIMOB, NCKOJIbKy 3TO MOxET PpNBecTN K PnabIeHNIO CAMIX 3aXIMOB NII NpyrNX MetaJIInuecknx qactei. NomeuAte 3axIMbl TOlbKO B CneuaJIbHbIe depKaTeN.
TOJIbKO JIJI CNTTEM C HAPRJXEHEM 12 BOJIbT! NcnoJIb3OBAtB TOJIbKO C TpaHCnOpTHbIMN CpeIcTBaMn, HApRJaHHe 3NeKtpuYeCKoN CNTEmbl KOToPbIX coCTabJIeT 12 BoJIbT.
- INCNOJb3OBATb TOJbKO B ABAPINHbIX CNYAAX: He INcnoJb3yIte NysCKOBoe yCTpoNCTBO BMeCTO aKKymJrTopa TpaHCnOpTHoro cpeDCTBa. INcnoJb3yIte TOJbKO dIra OcyueCTBHeHnry nyca.
- He pa6oTaIe B OndHouKy. B cnyuae HeCuaCTHOcIyuaBaw NOMOuHK MoKeT OKa3aTb NOMOuB.
I36eraTe 3JIeKTPnuecknx yIapOB. Co6IIOaIte Oco6yIO OCTOpOxHocTb npn KpeIIeHN 3axIMOB K npoBODnKam IIN paCnpedeNTeNbHbIM cTePKHM 6e3 n3OJcUN. Ppn npOBepKe HAnpJKeHn CneIte, YTO6bl qactN BaWero TeNa He KacannCb NOBepXHOCTe Tpy6, pAnaTOPOB IN MetaNNuecknx WkaΦOB.
- Copejnte pa6ooyemecToB uHCTOTE.3arpomoxdeHHbIe yactKN MOryT CTaTb npuHNO TpaBM.
- 136eraaTe nobpeXdHnry NyCKOBOrO yCTpoNCTBa.
NcnoIb3yIne ToIbKO corNaCHO yka3aHnM HAcToIeRpyKOBoDCTBa.
Co6nIouaIte yka3aHna, kacaUuuecra pa6oeryo Mecta. He nCnoIb3yIte BO BlaJXbIX NIN MOKpbix MeCTax. He noDBeprAte erO Bo3JeNCTBNUO doxJa. Pa6oaiTe BXopoIo OcBeUeHHbIX MeCTax.

OdeBaIteCb DoJIxHbIM 6pa30m. He HocHTe DInHHyO OJExkD yKpaSeHn, KOTOpblc MOrTy 3anyTaTbcra B
noBnKbix qactx. Bo BpeMpa60tbl peKomeHdyetc nCnOlb3OBaTb 3aunTHyU oEjky C 3neKtpnuecko n3OJauNe, a TaKxe 6byb c Heckonb3auen noDooBoB. B cnyuae ecnn y Bac dnnHHbIe BONoCbl, nCnOlb3yUte rOLOBHOY6Op, No3BOJIoUm co6paTb BONoCbl.
- PemOHr NysKOBOrO yCTpoNCTBa Heo6xOJIOBepaTb TOLbKO CneuJaINCTam, B IpOTNBOM CnyuaeIPOlb3OBaTeJIb MOKeT NOBepRHyTbcra cepbe3HOJOnaCHOCTn.
-3aMeHa qacteN n npHaJnHexHocte. Pnp npoBeHnI Texo6cnyxnbAHn IcNoIb3yIte TOnbKO NdeHTnUHbIe 3aUactn. IcNoIb3ObaHne IIO6bIX dpyrX 3aUacteN npNbOdnt K aHHyInpOBaHnIO rapaHTn. - Bce Bpemr coxpaHnTe yToHnBOe nOIOXeHne Ha cTa6nIbHbIX ToKax OOnOpbl. He nepemeuaTecb Na Ka6eJMaMn IIN 3JIeKTPnueCKmN KOHCTpyKcJMaMn.
Co6IoudaIte octopoxHoctb npBbINOJIHeHNu Texo6cnyxHBaHnnyCKOBORO yCTpoNCTBa.
IepnoDnueckn npOBepaTe ero Ka6eHn n B cnyuae 06hApUxKeHn NOBpeKdEHN NOpyHTe n KBaHnΦuNpOBAHHOMy yNoJHOMOeHHOMy cneuaJIInCTy BbINOJIHNTb peMOHT.
- y6eHNTecb B OTCyTCTBHN NOBpeXDeHHbIX qaCTe. Npeed nCIOJIb3OBAHnEM 3TOI rNcKOBOrO yCTpoINCTBa, BHIMATEJbHO npOBepbTe BCE qACTn, KOTOpblE KaJyTcN NOBpeXDeHHbIMN, QTO6bl ONpeDEnITb, pNIRoHNbl IN OHn IIN HOPMaJIbHO pa60tbl. Y6eHNTecb B TOM, 4TO npOBODa HAdExHNO pNkpeNlEhbl K NcKOBOMy yCTPOINCTBy. PEmONT INN 3AmEHy NOBpeXDeHHbIX qACTe peKOMeHdyem DOBepNTb KBaINΦuIPoBAHOMy IN yONJHOMOeHHOMy CneUaJIInCTy.
1.1 OCObIe IPEyIpeXDEHnI MEpBI IPEIOCTOPOXHOCTN, KACAOUNEcA NCIOJIb3OBAHnI JNTUEBbIX AKKUMJrTOPOB, CODEPKAUHXCB NYCKOBOM YCTPOICTBE
HecobnOeHne cIeNyUoX npabn MoKet npuBecTn K nOBpeXdEHHIO, nepeRpeBy, pa36yxaHIO, BocnlaMeHeHHIO IINB3pbIBy aKKymJrTopa BHyTpN NyCKOBORO yCTpoiCTBa:
-
Hn B Koem Cnyae He OTKpbIbaIe KOpNyc NyCKOBORO yCTpOJIcTBA.
-
He 3apjkaite nyckooe yctpoietbo Ha coHnce, B6n3n nnameHN nnB aHaIOnuHbIX ycIOBnX.
- He nCnoB3yIte nyckOBoe yCTpoiCTBO n He octaBnTe ero B6n3n neey, nIameHn nn npyrnx TeNbIX MeCT.
-ДяЗарядкп nycKOBOrO yctpoiCTBa nCNoIb3yIteTOJbKO BxOJaUmB KOMJIeKtauuO yctpoiCTBa 6JOKnITaHn. - He 6pocaiTe nyckoBoe yctpoiCTBO B OOrHb N He HarpeBaaiTe ero.
- He MeHnIte NOJrPHOCTb NIOJOXHTeJIbHOro "+""NOTpuCaTeJIbHOro"-KoHTaKTa.
- He coeHnHnTe HAKOPOTKO KOHTaKTbI NyCKOBORO yCTpOJCTBa.
- He cBepnnte OTBepCTnB KOpnyce NyCKOBORO yctpoiCTBa, He 6eIte ero MOJOTKOM n He CTAHOBTecb Ha Hero.
-He nomeaain Te npckOBoe yctpoNCTBO B neu, MKNPOBONHOBIE neu n dp. - He kndaaTe nyckoBoe yctpoiCTBO u n36eRaTe cunbHbIXo ydapOB.
- He BCKpbIbaiTe n He MoiΦuIpyuTe KOpNyc NyCKOBOrO yCTpoIcTBa.
- Ecni BO Bpemn nCnoB3OBAHn, 3apKn nnXpaHeHnnyCKOBOro yCTpoNCTBa n3 Hero NoCTynaeCTpaHHbI 3anax, OH HarpeBaETcNn DeOpMpyeTc, nCnoB3OBAHne yCTpoNCTBa Heo6xOIMNo PpeKpaTntb.
- Ecnn n3 NyckOBoro yctpOCTBa BbJIINBaETc KNCJOTA nn Noctynaet cTpaHbI 3anax, ero Heo6xOdmo HemeJeHNO nepemecNTb Ha 6e3onacHoe pacCTOHRHe OT NCTOCHKOB TENJa NN OTKpbITORO PnaMeHN.
- B cnyuae nonaadaHnKncIOTbI n3 aKKymyIaTopa NyCKOBOrO yCTpoiCtBa Ha Koxy nn Odekdy, HemeJeHHo 6nBHO npomoe BOoN.
B cnyuae nonaadaHnKNCOTbI n3 aKKymyJrTopa nyckoboro yctpoiCTBa B rna3a, HemeJeHHo 06uNbHO npomOte nx BOdo n O6paTITecb K BpaCy.
XpaHnte3To pyKOBoDCTBO.
PykoBODCTBO Heo6xOJIMO DJI O3HaKOMJeHnC npedynpejckdeHnMn mepaMn npedocTopoxHOCTN, KacaIoUcMMnc 6e3oNaCHOCtN, C npoceDypamn no EKcnNyatauN n Texo6CnyXNBAHIO, CO CNICKOM COCTABHbIX uacteN I TexHnueCKmN XapaKTepunctkAmn.
XpaHnte pyKOBOCTBO B HAdexHOM N cyxom MeCTe, yTO6bI erO moXHO 6bIIO nepeuHTaTb B 6yduem.
2.BBEDEHNEIOBUEEONINCAHNE
PpeymotpHHbI BnNCnoNb3ObaHna
MHorofoyHKUHOHaIbHoe nepeHoCHe NcKOBoe yCTPOICTBO C aKKymIaTOpOM. IdealbHO IOxOINT DnBCEX, KOMy Tpe6yeTcNyCKOBoe yCTPOIcTBO dN HePpeBvIeHHbIX clyuaEB. Ero MoKHO ICNoIb3ObAtb C aBTOMo6nJIaMn, IOnKaMn IpyrIMn TpaHCnOpTHbIMn CpeIcTBaMn. OHO NOHOCbIO COBMeCTmO Co BcEMN 12-BOJbTOBBIMn CNCTeMaMn PycKa.
B nyckobom yctpojCTBe nCnoJb3yIOTCa JNTNEBbIE AKKYMylATOPbl,TO 06ecneuBaet Upe3BbUaHHyo MaHeBpeHHOCTb N KOMNaKTHOCTb yCTPOJCTBa.
KpomeTORO,MHOrofoHKUHOHaJIbHOeNyCKOBoeyCTPOIcTB OCHaIeHO MOUHbIM CBToIONDbIM OCBeIeHNEM N YeTbIpBm BbIXoHDbIMN NOPaMn DnI NaTHnN/INN 3apAkn 3JeKtpOnHbIX yCTpoiCTB5B/12B/19B.
Onncahne (pucyhoK A):
A-1. YnakOBKa c OTkpBtHem Tnna "KNHXKa".
A-2. MHorofoyHKUHOHaJIbHoe NyCKOBoe yCTPOIcTBO.
A-3. NycKObIe 3aXIMbl.
A-4. BbIXoHNoKa6eJb 12B/10An 19B/3.5A.
A-5. 3apnHbI Ka6eIb 12 B co wTeIcEem Tm "PpKpyBaTeIb".
A-6. IepexoHn KabeJb MeJy USB-nop 06OpudOBaHn npa3IuHbIMn rHe3dAMn nITaHnN N/nn 3apJKn 3JIeKTPoHHbIX yCTpoiCTB, DOctYnHbIX B npOdaXe.
A-7. BbIXoHbIe nepexoDnKn Ia Ka6eJr no3.A-4.
A-8. 3apnHbI 6JOK nHTaHnJ.
A-9. BxodJn3apJKnnyckOBoro yctpoNCTBa.
A-10. BixoJ 12 B/10 A.
A-11. BbIXoHbIe USB-nOpTbI 5 B/1 A n 5 B/2.1 A.
A-12. BbIXOД 19B/3.5 A.
A-13. CBeToIIOHOe ocBeeHne.
A-14. BbIXoHoe rHe3do nIa NyCKOBbIX 3aXnMOB (no3. A-3).
A-15. KhoNka ON/OFF (BKJI/BbIKJI) dIypoBn3apJa, BbIXoHbIX npToB (no3. A-11 n 12) nCBeTOnIOHOrO OCBeueHn.
A-16. CBeToDnOdHbI nHdNkaTOp ypoBHa 3apJa BHyTppeHrero aKKyMylrTopa.
3. YCTAHOBKA
PACNOJOXEHNIYCKOBOYUCTBA
Bo Bpempa60tby yCTaHOBnTe NyCKOBE yCTPOINCTBO By cytOnuBOe NOJKeHne Ha rOpN3oHTaJIbHyIO n POBHyIO NOBepXHOCTb.
4.ПИИЦИДЕСТВИА
4.1 IcnoIb3ObaHne npckoBOr o yctpoiCTBa:

BHUMAHNE: cneyuTe yka3aHnMa, ctporo co6Iouda yka3aHHbI
Hnke nopjdoK!
Cneinte 3a Tem, TTo6bI YepHbIn N KpaChbIn 3axm He BXoDnB 6bIB KOHTaKT IN He npKacannCb 6bl K O6uemy npOBoHNky!
- Y6eINTecb, yTO TpaHCnOpTHoe CpeCDtBO nIN JIOKa, KOtOpYIO Heo6XoIMMO 3aNyCTNTb, BBIKIIOueHa (BbIKIIOuAteIb INN KInOu 3aKINrAHHa HAXODNTcB B noJIOKeHNN OFF).
- CnepBa nOdkNIOUHTe KpaCHbI 3aXIM POS. (+) K KneMMe POS. (+) aKKymJrAToPA, nocJe Yero nOdkNIOUHTe YepHbI 3aXIM NEG. (-) K waccn TpaHCnOpTHOro cpeDCTBa nn K KneMme NEG. (-) aKKymJrAToPA.

BHUMAHNE: heco6nloJeHne n3noXeHHbIX HmXe npaBn moXeT cH3ntb cPOK cnYX6bl
60bopydObaHn:
- YctaHOBNTe BblKIOHcATEb TpaHCnOpTHORO CpeCDBa B noJoxKeHne NcKa, Ho He 60Jee Yem Ha 3 cekyHdbI.
- Ecnn aBTOMO6nIb nIIN NOkCy He ydaetc3anyctntb, noDoxdTe, no KpaHHeMpe, 15 cekyHnepei NOBTOPOHNONbITKoI.
- Ecn n oocne nobtophoon nonbITKn DnuratEnb Bce eue He ydaetca 3anyctntb, nodoxKdTe, no KpaHne Mepe, 2 MInHytbI nepei nobtopHO nnbITkoN.
aIocne 3anycka n oka dBnraTeNb pa6oTaET, TuaTeNbHO CneDyIe IocJeIOBaTeNbHOCTN N3IOXeHHbIX HNXe
- OToeHNHte YepHbI 3aXIM (otpnuatelhbl)OT TpaHCnOpTHOrO cpeDCTBa.
- OToeHNHe KpaHbI 3axIM (noJxTeJIbHbI) OT TpaHCnOpTHOro cpeCTBa.
- OToCoeDInHnTe ot nyckOBoro yctpOcnBa 7tEnCeB nyckOBbIX ka6enei.
- TomecTe Ka6eNn N PysKOBoe yCTpoIcTBO B CneuaJIbHOe OTdElenHne B JxKe.
PekomeHnyetcKaK MOxHO cKopee 3apAHTb NyCKOBoe yCTPOIcTBO.
4.2 IcnoIb3OBAHHe nyckOBOrO yCTpoIcTBa B KaueCTBe yCTpOJIcTBA NITAHNn/nn 3apJKn:
-
Bb6epnte BbIXoHoi Ka6enb (pnc. A-4 nnn pnc. A-6) co 7TeTcEneM, COOTBeTCTByIOUIM yCTpoiCTby, nHTaHne KOTOPORO Heo6xOAnMo OecneuTb (pnc. A-7) B 3aBnCmOCTn OT Tpe6yEmoro HnpanKeHn/ToKa;
-
BCTaBbTe Wtencenb Ka6eB A COOTBcTByoUnn BbIXoHNo nOpT nycKOBOrO yctpoiCTBa (pnc. A-10, 11, 12);
- HaxmTe KhONky ON, n3o6paXeHHyIO Ha pncyHke A-15
- BCTaBbTe BTOPOI KOHeI Ka6eI B NITaEMoe yCTpoIcTBO;
4.3 IcnoIb3ObaHne CBeToMDIOHO OcBeueHnA
- YdepeKnBaIte HaxaToi KhoNky ON (pnc. A-15) B TeueHne HeCKoJIbKnx CeKyHd, UTO6bl BKIOUHTb CBeTOIOHOc OCBeUeHne B HenpepbIBHom peXmme.
Iocne yero nocneIOBaTeNbHO HaKMnTe KhoNky:
6. VERWERKING VAN DE ACCU ALS AFVAL
TONOETHOHOTYEKKINHTH
MANUAL DE INSTRUCTIUNI

ATENTIE: INAINTE DE FOLOSIREA DEMARORULUI CITITICU ATENTIE MANUALUL DE INSTRUCTIONSI!
1. SIGURANTA GENERALÁ PENTRU FOLOSIREA ACESTUI DEMAROR
Current depornire (12 V):
-350A
- (1200 A de varf)
Cabluri dePornire:
- borne polarizate
-cupru - sectiunea 5.3mm^2 (10AWG)
- lungime 250mm
- izolate in PVC
Lumina:
- LED
Prize de iesire:
- camo eHa INdikaTopHa lamna CBeTn: aKymyIaTopbTe n3TOUeH;
- BCnUKN INdNkAToPn JAmnn CBeTAY: aKymyNaToPbTe HAnbJIHO 3apeH.
5.1 3apekdahe cbc 3axpaHbahe ot 100Vac - 240Vac 50/60Hz

BHUMAHNE: ɪnənɪsɪbaiTe eɪnɪhCTBeHo npeɪdɑtæBéHOTo 3axpɑnBaɪʊ yctpɔɪcTBO!
- BkIouete ⅢeCena Ha 3axpaHbAto yCTpoiCTBO (ФИг. A-8)В KOHTaKT OT 230Vac nIN CbBMeCTUM C HAnpeKeHHeTO Ha 3axpaHbAto yCTpoiCTBO.
BkapaIe cIeTOBa CneuaHnHa IeCenHa n3XoJa B KOHTaKta 3a 3apeKdahe Ha fNrgpa A-9. - INHdkaTophnte JAMn Ha 16 CBeTBaT NocJeIOBaTeJIHO, KOrato eINHuaTa ce 3apeJda n CBETAT BCNUKe, KOrato 3apeJdaHeTo npNKluOuN.
-Пусковоу yctpoиCTBO e obopydBaHO c KOHTpOJIHO yctpoINCTBO, KoETO n03BOnJa Da ce npedOTbpaTn npeTOBapBaHTo Ha akymylaTopa И Na 3axpaHbUTo yctpoiCTBO. Octabete cnCTemata Da ce 3apeJda 3a BpeMeTo, KoETo e Heo6xOIMMo.
5.2 3apejdahe Ha 6opda Ha aBTOMo6nna cbc 3axpaHbHe 12Vdc:
BkapaTe hakpaHnka 3a 3anaKata B npedoctabeHna Ka6eI (Our. A-5) B cneuaHnKa KOHTaKT Ha 6opda Ha
abTOMo6nna nnHa loKaTa.
- BkapaIte npyrna HaupaHnK Ha npedocTaBeHnKa6en B KOHTaKta 3a 3apeXdaHe Ha NyCKOBOTO yCTpOInCTBO (ФИг.А-9).
6.YHINIOXKABAHE HA AKYMYLATOPA
N3TOUeHnT aKymyIaTOP Ha NyCKOBOTo yCTpOuCTBO Tp6Ba Da ce peuKInpa. B HApON DbpXkABu TOBa e 3aDbLnKInTeJIHO. CbPKeTe ce c MeCTHaTOpraHn3aCnA 3a peuKnInpaHe Na TBbpDn OTNaBcN, 3a Da NOnyuNTe INΦOpMaun, CBp3aHa CpeuKnInpaHeTo.


PNEdUnPExKDEHNE:
He yHnIooKabai Te aKymyIaTopa Upe3 n3rapAHe. Toba MoKe Da npuHH eKcPiO3NJa. Ppei Da yHnIooKHTe aKymyIaTopa, NOKpNIte OTKpNTe KpaNJa C nOxDxOJa uN3OJIpaUa JeHTa C cen Da ce ppeoTbPaTt Kbcu CbeDInHeHna. He n3JaraTe aKymyIaTopa Ha nHTeH3INBHa TOIIHa IIHa OrbH, Tb' KaTO ToBa MoKe Da npuHH eKcPiO3NJa.
CNEUΦUKALIA:
DRIVE 9000
Bud ha akymyamopa:
JIITnueB-NOJIMpeH akyMylaTOp, XepMeTnueckn, MoKe Da ce 3apeXka.
Kanaumem Ha akymyamopa:
- 9000 mAh
Nycko mok (12 V):
-350A
- (1200A npn nK)
Ka6enu 3a cmapmupahe:
HaKpaHnCn CNoJIocN
- mei
- ceuehe 5.3 mm² (10AWG)
-1bJxHa 250mm
- n3oJauPVC
Cemnua:
- CBETOДИОДHA (LED)
Kohmakmu Ha u3xoda:
-Два КонтаКТа USB 5V - 1A/2.1A
-KoHTaKT 12V-10A
-KoHTaKT 19V-3.5A
Xapakmepucmu:
- npekcbay ON/OFF
- aBTOMaTnueH npeKbCBAu 3a CTeneH Ha 3apeXdaHe
- INДИКaTOPHa JIaMn 3a CnHAnI3IpaHe Ha CTeIeHTa Ha 3apeJdaHe I KpaHa 3apeJdaHeTo
- CBeToIIOJHa CBeTINHa - HenpeKbChHa, MInaHa N aBapnHa.
Tezno:
-640g
J 1 J 1 J 1 J 1 J 1 J 1 J 1 J 1 J 1 J 1 J 1 J 1 J 1 J 1 J 1 J 1 J 1 J 1 J 1 J 1 J 1 J 1 J 1 J 1 J 1 J 1 J 1 J 1 J 1 J 1 J 1 J 1 J 1 J 1 J
J 1 J 1 J 1 J 1 J 1 J 1 J 1 J 1 J 1 J 1 J 1 J 1 J 1 J 1 J 1 J 1 J 1 J 1 J 1 J 1 J 1 J 1 J 1 J 1 J 1 J 1 J 1 J 1 J 1 J 1 J 1 J 1 J 1 J 1 J
Lgog Jaaa aBb bds ggo jglj 1 no sSt Lgll gl klyl ldey y Ls. Jauill sdy aluol uol alal oal y Ie Jy - 5n 0u bla cbl gslal aluol y dI 1o
1 1 1 1 1 1 1 1 1 1 1 1 1 1 1 1 1 1 1 1 1 1 1 1 1 1 1 1 1 1 1 1 1 1 1 1 1 1 1 1 1 1 1
1.1
J 1s J 1s J 1s J 1s J 1s J 1s J 1s J 1s J 1s J 1s J 1s J 1s J 1s J 1s J 1s J 1s J 1s J 1s J 1s J 1s J 1s J 1s J 1s J 1s J 1s J 1s
ailll aill l no brrll grlalall waiil 0g 4 arlln 1x y .diloo gbrggl
brrll gl cllss no brrll daaaggl jzawll sly pdsiwy - .s rj oJgbliaq g lll aiill no
Jusillisbln bajg jolll gdo gjoll nlaill oJ
. 4iisuuiyogai jllg Jusillgdsly y
."aJlalwgl +" aegall Jusillbgsy
. Jusill sdy jbjg 0jdsy y
gabolly gjbrg y, lalall y
. Jusill sdy abc y
1 1 1 1 1 1 1 1 1 1 1 1 1 1 1 1 1 1 1 1 1 1 1 1 1 1 1 1 1 1 1 1 1 1 1 1 1 1 1 1 1 1 1 1 1 1 1 1 1 1
ylll g oal l jaiil yla bby aolso Jg - 1all no g jdaaag

Jusu Jusu Jusu Jusu Jusu Jusu Jusu Jusu Jusu Jusu Jusu Jusu Jusu Jusu Jusu Jusu Jusu Jusu Jusu Jusu Jusu Jusu Jusu Jusu
sly gaa aall aoLLy aalall yssannll clas.1 Jjge agw yj jy jy J 1 1 1 1 1 1 1 1 1 1 1 1 1 1 1 1 1 1 1 1 1 1 1 1 1 1 1 1 1 1 1 1 1 1 1 1 1

J 8 JJIJIJIJIJIJIJIJIJIJIJIJIJIJIJIJIJIJIJIJIJIJIJIJIJIJIJIJIJIJIJIJIJIJIJIJIJIJIJIJIJIJIJIJIJIJIJIJIJIJIJIJIJIJIJIJIJIJIJIJIJIJIJIJIJIJIJIJIJIJIJIJIJIJIJIJIJIJIJIJIJIJIJIJIJIJIJIJIJIJIJIJIJIJIJIJIJIJIJIJIJ
iic aolg oJbji lojI .nssell aLoo .q

J 15 J. aalbll aaoa oooo 0000000000000000000000000000000000000000000000000000000000000000
(+jorll)oJuslll 1g jgall
no aol dLwJc oJusll JgDgwl Lwog g
.0gglb g yIaBn IyIeWg 1sdy
.0gJgJgJgJgJgJgJgJgJgJgJgJgJgJgJgJgJgJgJgJgJgJgJgJgJgJgJgJgJgJgJgJgJgJgJgJgJgJgJgJgJgJgJgJgJgJgJgJgJgJg
Joo
yds ydy bgs jgbl cyly g aaswyl .bgs jzssll cldc lgljgl jd. dysall yjbl 0o oolll jgddslggtg J
J
Ji jj j j j j j j j j j j j j j j j j j j j j j j j j j j j j j j j j j j j j j j j j j j j j j j j j j j j j j j j j j j j j j j j j j j j j j j j j j j j j j j

(1)
(+).) .aJbUPOS bUy (+) POS yJI JI JI JI JI JI JI JI JI JI JI JI JI JI JI JI JI JI JI JI JI JI JI JI JI JI JI JI JI JI JI JI JI JI JI JI JI JI JI JI JI JI JI JI JI JI JI JI JI JI JI
.(-).NEG
aI 100000000000000000000000000000000000000000000000000000

3 15 aJg Jg
Jg j 100000000000000000000000000000000000000000000
olil lalldll JdLg 1rall 1rg gog jzj
.ajyj jc (jll) 2gjjl j
.
Juswll sdy no Juswll sdy JyK Jogolj -
.àdljI JgolgoJgolglg
Joo 8g Jj 3 Jauu juxo oohdohy
aBbIyOgjj jlljgljlll jll
LED 2
jg jgJ (15-A Jk) (j) ON jjI jyaiyI gbo bfo
.1JraWyLED 2Laa aBgsai
juljuljulj jll
jolglgdl jodl oJgO
(iS|glbl |jIw| = uIj;SiO
.0eJyI (jz)OFFJ 2
J 1.5
JgJyLd JyIyJyJyJyJyJyJyJyJyJyJyJyJyJyJyJyJyJyJy
Jg3
230 aIb Jauo olwly oJgll Jx Jy 8-A Jkll Jgjll Jgll Jgoo
.(5-A Jswl) jaaa 2gjo Gg 12
iJbJI 15-A JkJl jI Jc bJ 1
16-A JI 116A JI 118 aogol LED oJwgo
;aaesia aajlal : bao >1g LED
.1oai ioguo auiu: iuaoLED ugo
240-3g 100 a1b jao aoaowj 1.5
50/60 50
jgl lclgulc1 jssll 1sall sly aoslo Jg - .blly jslg cll all no ggl jdd
JUULI 1
aLl 1 1 1 1 1 1 1 1 1 1 1 1 1 1 1 1 1 1 1 1 1 1 1 1 1 1 1 1 1 1 1 1 1 1 1 1 1 1 1 1
alglgglaaaJl.2
dagwoll
A、 = 1.
a 小小 d( b) = g.8 - A
J.2.2.15 J.2.2.20 9-A
.10/12 10-A
2.1/0g5g 1/0gU
.1g3.5/1g9 19 12-A
13-A
(3-A g>1) jduu 14-A
Jgssj()ON/OFF 15-A
.led 12911-A
.16-A
J1.3
j 5d
jaoogcbwocg jbwJc 4o, jswll gdy alswi
Jzullogso.4
:JusillisdyoluswlaS1.4
1olizjzogal jdy
laIg aui Iaiaoll oia gil:
g jssllagaae Jg yg dssll sssslaas
Jyoo JSL
j/ j11/ j11 11111111111111111111111111111111
(jzjll jzj/ jz) ON/OFF
jai jai jai gguo buo oslc jia
aI I jJg Jg Jg Jg LEDU
sJgblLEDjwogjawlyzolgLEDjwgo
:jgl
> 640 -
(A JsJll) aiaaoll
50/60Jg240-100(8-AJ)
J1000/2012
12 jgljwll aylg waaaag 290
(6-A 4-A JJUJI)CJUJ/JUJUdUg CUsL
(7-AJ)daLsa
DRIVE 13000
:ajlglgj
aaiy aiee aiee eae
:dd
aclw 3 rul llo 12000 -
:(Jg12)Jd
450
(505) 1500)
:J
a.boojbl
< v < 90^
(10AWG) 5.3
250 J( b + 1)
Jgzo(PVC)sLdy
= ( , - 1)
LEDgo
:211
2.1/2.1 1-USB5JL
10-12
3.5-1g 19u
:
(JU)ON/OFF
jlll jw w gwo b oos 0sclg c
aui jwulg wuLED
sglbLEDgogjawwledogLED
:jgl
700-
(A JsJJI) aiaaJI cJaiJI
50/60Jg240-100(8-AJ)
JU 1000/2000
12 jgljwll aJgJnssaas gjo JxJy
(6-A 4-A JKJ) CJSJ/JSJJ dUg cJsk
(7-A Jkui) aJus oJb1
!b@gjolldlllJuaaJgxaJusw:

aalalal aaii. jaii. jaii iaii jaii jaii jaii jaii jaii jaii jaii jaii jaii jaii jaii jaii jaii jaii jaii jaii jaii jaii jaii jaii jaii jaii jaii jaii jaii jaii jaii jaii jaii jaii jaii jaii jaii jali
gulldal aalal lloglall ae jol all


:
J. 100000000000000000000000000000000000000000
aagssall gll lgl 1yjlc yjlc yjw odswl aaybll jno yalsll
1 1
10j
:
DRIVE 9000
:jjg
aal y alg g aal 8 aol
:ddjll
aclwll 3yol lo 9000 -
:(1g 12)
yol350-
( g + 1) > g + 3 > 1200) -
:J
abooJb1
ω
(10AWG) 5.3
250^ lgbl +
Jgjso(PVC)u
:0=0y1
LEDggo
:
yol 2.1/xo1-0g USB5u
10-12
3.5-19
:ajaiasill
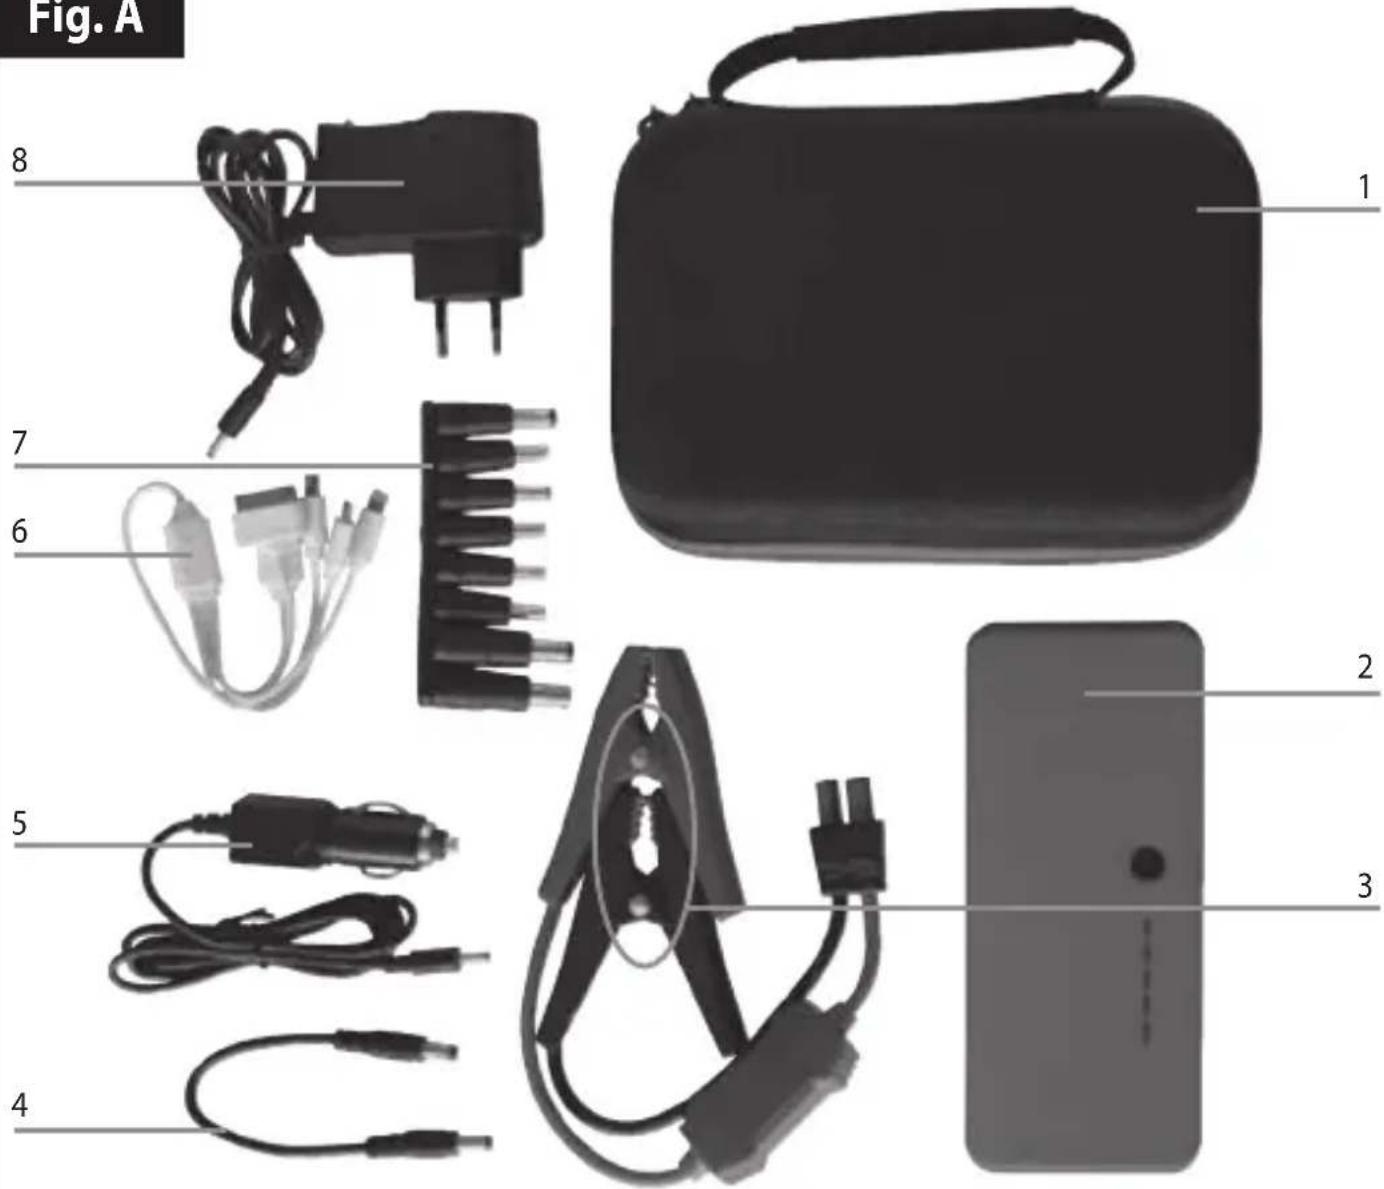
Fig. A
(EN) GUARANTEE
The manufacturer guarantees proper operation of the machines and undertakes to replace free of charge any parts should they be damaged due to poor quality of materials or manufacturing defects within 12 months of the date of commissioning of the machine, when proven by certification. Returned machines, also under guarantee, should be dispatched CARRIAGE PAID and will be returned CARRIAGE FORWARD. This with the exception of, as decreed, machines considered as consumer goods according to European directive 1999/44/EC, only when sold in member states of the EU. The guarantee certificate is only valid when accompanied by an official receipt or delivery note. Problems arising from improper use, tampering or negligence are excluded from the guarantee. Furthermore, the manufacturer declines any liability for all direct or indirect damages. To protect the battery and lengthen its working life, charge it before using it for the first time, then after every time it is used and, in any case, at least every 3 months. If these recommendations are not followed, the battery may undergo an irreversible chemical deterioration process. As the battery is a component subject to wear and tear and its level of performance and preservation over time depend on how well it is used and looked after, this element is not covered by any form of warranty.