
GAS 35 H AFC Professional - Vacuum Cleaner BOSCH - Free user manual and instructions
Find the device manual for free GAS 35 H AFC Professional BOSCH in PDF.
 FR
FR
 BG
BG
 CS
CS
 DA
DA
 DE
DE
 EL
EL
 EN
EN
 ES
ES
 ET
ET
 FI
FI
 HU
HU
 IT
IT
 KK
KK
 KO
KO
 LT
LT
 LV
LV
 MK
MK
 NL
NL
 NO
NO
 PL
PL
 PT
PT
 RO
RO
 RU
RU
 SK
SK
 SL
SL
 SV
SV
 TR
TR
 UK
UK
| Product Type | Wet and dry vacuum cleaner |
| Brand | Bosch |
| Model | GAS 35 H AFC Professional |
| Rated voltage | 220-240 V / 110 V (depending on version) |
| Frequency | 50-60 Hz |
| Rated input power | 1200 W (230 V) / 1000 W (110 V) |
| Max suction power | 1380 W (230 V) / 1150 W (110 V) |
| Gross container capacity | 35 L |
| Net capacity (solids) | 25 L |
| Net capacity (liquids) | 19 L |
| Dust bag volume | 19 L |
| Max vacuum pressure | 230 hPa (230 V) / 211 hPa (110 V) |
| Max flow rate | 36 L/s (129.6 m³/h) |
| Pleated filter surface area | 0.5 m² |
| Filter class | H (hazardous dusts) |
| Weight (according to EPTA) | 12.4 kg |
| Protection class | I (grounding) |
| Protection rating | IPX4 (vacuum cleaner), IP55 (Swiss plug) |
| Sound pressure level | 69 dB(A) (70 dB(A) for 110 V) |
| Sound power level | 83 dB(A) |
| Automatic filter cleaning | AFC (Automatic Filter Cleaning) - every 15 seconds |
| Delayed shut-off function | 15 seconds after the tool stops |
| Power tool socket | With earth contact (max 2200 W / 750 W depending on version) |
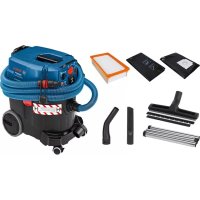
| Included accessories | Suction hose, floor nozzle, crevice nozzle, adapter, HEPA pleated filter, disposable bag, safety filter bag |
Frequently Asked Questions - GAS 35 H AFC Professional BOSCH
User questions about GAS 35 H AFC Professional BOSCH
0 question about this device. Answer the ones you know or ask your own.
Ask a new question about this device
Download the instructions for your Vacuum Cleaner in PDF format for free! Find your manual GAS 35 H AFC Professional - BOSCH and take your electronic device back in hand. On this page are published all the documents necessary for the use of your device. GAS 35 H AFC Professional by BOSCH.
USER MANUAL GAS 35 H AFC Professional BOSCH
www.bosch-pt.com/serviceaddresses
Disposal
Safety information for vacuum cleaners

Read all the safety information and instructions. Failure to observe the safety information and follow instructions may result in electric shock, fire and/or serious injury.
Save all warnings and instructions for future reference.
This vacuum cleaner is not intended for use by children or persons with physical, sensory or mental impairments. It should not be used by persons who have insufficient experience and knowledge. Otherwise, there is a risk of operating errors and injuries. Supervise children. This will ensure that children do not play with the vacuum cleaner. Comply with all safety provisions for the substances being extracted.
WARNING
Never vacuum material that contains asbestos. Asbestos is a carcinogenic substance.
WARNING
WARNING
Only use the vacuum cleaner if you have been adequately informed
about the use of the equipment, the substances to be vacuumed, and how to dispose of these safely. Thorough instruction on how to use the equipment prevents accidental misuse and injuries.
WARNING
The vacuum cleaner is suitable for vacuuming dry substances, and
can also be used to vacuum liquids when taking appropriate measures. The penetration of liquids increases the risk of an electric shock.
- Do not use the vacuum cleaner to vacuum combustible or explosive liquids, such as petrol, oil, alcohol, or solvents. Do not vacuum hot, burning, or explosive dust. Do not operate the vacuum cleaner in areas subject to explosion hazards. Dust, vapours, and liquids can ignite or explode.
WARNING
Only use the socket for the purpose stipulated in the operating
manual.
WARNING
If you notice a foam or water leak, switch off the vacuum cleaner im
mediately and empty the container. Otherwise, the vacuum cleaner can become damaged.
NOTE: The vacuum cleaner must only be stored indoors. NOTE: Clean the liquid fill level sensors regularly and check whether they are damaged. Otherwise, the equipment may not function properly. If operating the vacuum cleaner in a damp location is unavoidable, use a residual current device (RCD). Use of an RCD reduces the risk of electric shock. Always check the vacuum cleaner, cable, and plug before use. Do not use the vacuum cleaner if you discover any damage. Do not open the vacuum cleaner yourself. It should be repaired exclusively by a qualified professional using only genuine spare parts. Damaged vacuum cleaners, cables, and plugs increase the risk of electric shock. Do not crush the cable or run the device over it. Do not pull on the power cable to pull the plug out of the socket or to move the vacuum cleaner. Damaged cables increase the risk of an electric shock. Pull the plug out of the socket before cleaning or performing maintenance on the vacuum cleaner, making tool adjustments, changing accessories, or putting away the vacuum cleaner. This safety measure prevents the vacuum cleaner from being started accidentally. Ensure that the workplace is well ventilated. The vacuum cleaner should be repaired exclusively by a qualified professional using only genuine spare parts. This will ensure that the safety of the vacuum cleaner is maintained. If the dust extractor is being used in areas containing hazardous substances, then vacuum, wipe, or seal the outside of the dust extractor before taking it out of the hazardous area. All parts of the dust extractor are deemed contaminated and you must ensure appropriate measures are taken to prevent the hazardous substances from spreading.
WARNING
The dust extractor contains dust particles that pose a risk to health.
Emptying and maintenance procedures, including the disposal of dust containers, should only be carried out by professionals. Suitable protective equipment is required. Do not operate the vacuum cleaner unless the complete filter system is correctly inserted. Otherwise, you are putting your health at risk.
Before using the equipment for the first time, check that the vacuum hose is in perfect condition. Leave the vacuum hose fitted to the vacuum cleaner while doing this so that no dust escapes accidentally. Otherwise, you may end up inhaling dust particles. Do not sit on the vacuum cleaner. You can damage the vacuum cleaner this way. Take care when using the power cable and the vacuum hose. Improper use of these can put other people at risk.
Do not clean the vacuum cleaner by spraying a jet of water directly at it. Water entering the top of the vacuum cleaner will increase the risk of electric shock. Connect the dust extractor to a properly earthed power supply system. The plug socket and extension cable must have a fully functioning protective conductor.
Products sold in GB only:
Your product is fitted with a BS 1363/A approved electric plug with internal fuse (ASTA approved to BS 1362). If the plug is not suitable for your socket outlets, it should be cut off and an appropriate plug fitted in its place by an authorised customer service agent. The replacement plug should have the same fuse rating as the original plug. The severed plug must be disposed of to avoid a possible shock hazard and should never be inserted into a mains socket elsewhere.
Symbols
The following symbols may provide you with important information pertaining to the use of your dust extractor. Please take note of these symbols and their meaning. Knowing what these symbols mean will help you to use your extractor more effectively and more safely.
Symbols and their meaning


WARNING! Read all the safety and general instructions. Failure to observe the safety and general instructions may result in electric shock, fire and/or serious injury.
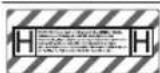
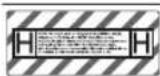
Dust extractor from dust class H in accordance with IEC/EN 60335-2-69 for the dry extraction of harmful dusts with an exposure limit of < 0.1 mg/m^3
If the text of the warning label is not in your national language, stick the provided warning label in your national language over it before operating for the first time.
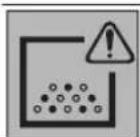
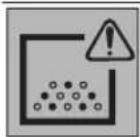
WARNING! The dust extractor contains dust particles that pose a risk to health. Emptying and maintenance procedures, including the disposal of dust containers, should only be carried out by professionals. Suitable protective equipment is required. Do not operate the dust extractor unless the complete filter system is correctly inserted. Otherwise, you are putting your health at risk.
Symbols and their meaning
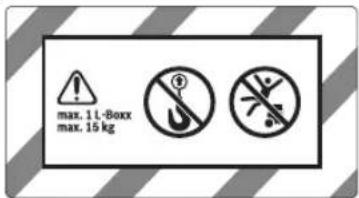

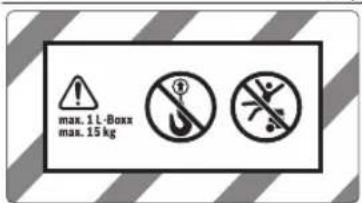
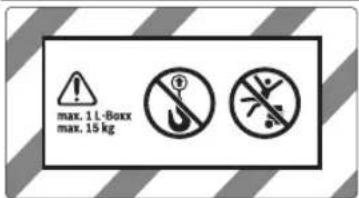
max. 1 L-Boxx, max. 15 kg
Only attach a maximum of one L-BOXX. The weight of the L-BOXX along with its contents must not exceed 15 kg.

Do not hang the dust extractor on a crane hook, e.g. in order to transport it. The dust extractor is not suitable for moving with a crane. There is a risk of injury and damage if you do this.

Do not sit or stand on the dust extractor. The dust extractor may tip over and become damaged if you do this. This poses a risk of injury.
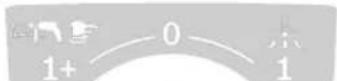

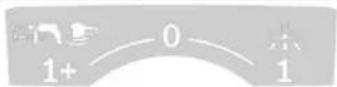
Automatic start/stop
Extracting dust that accumulates from working power tools. The dust extractor switches on automatically and off again with a time delay.

Switching Off

Extraction
Extracting dust deposits
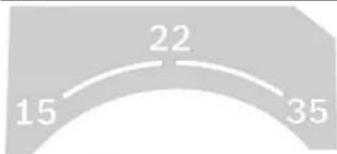

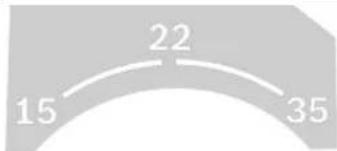
Volume flow monitoring for a hose diameter of 15 mm

Volume flow monitoring for a hose diameter of 22 mm

Volume flow monitoring for a hose diameter of 35 mm
Min/Max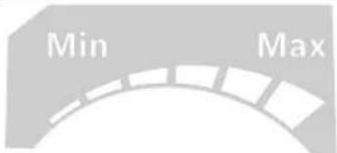
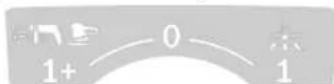
Continuous regulation of suction power:
Symbols and their meaning
Maximum suction power for applications with a high level of dust generation - Reduced suction power for applications with a low level of dust generation, and also to regulate the suction between the connected power tool and the surface of the workpiece, for example (e.g. when sanding)
max. 2200 W min. 100 W
Permitted connected load of the connected power tool (country-specific)
AFC
Automatic filter cleaning
Product Description and Specifications
Please observe the illustrations at the beginning of this operating manual.
Intended Use
The dust extractor is intended for collecting, vacuuming, conveying and separating non-flammable dry dusts, nonflammable liquids and a water-air mixture.
The dust extraction capability of the dust extractor has been tested and corresponds to dust class H for dry dusts according to IEC/EN 60335-2-69.
It is suitable for the increased demands in professional use, e.g. in trade, industry and workshops according to IEC/ EN 60335-2-69.
The plug socket must only be used in dry conditions during operation.
Product features
The numbering of the product features refers to the representation of the vacuum cleaner on the graphic pages.
(1) Container
(2) Sealing plug for extraction connection (3) Hose adapter (4) Holder for vacuum hose (5) Plug socket for power tool (6) Volume flow controller (7) Mode selector switch (8) Suction power regulator (9) AFC button (10) Carrying handle (11) L-BOXX holder (12) Top part of dust extractor (13) Catch for top part of dust extractor (14) Wheel (15) Castor brake (16) Castor (17) Cable holder (18) Closing flap for filter cover (19) Closing flap latch (20) Holder for suction tubes (21) Holder for crevice nozzle/curved nozzle (22) Holder for floor nozzle (23) Dust extraction adapter (24) Curved nozzle (25) Vacuum hose (26) Safety filter bag (27) Disposal bag (28) Class H flat-pleated filter (HEPA/PTFE) (29) Crevice nozzle (30) Rubber lip (31) Brush inserts (32) Floor nozzle (33) Suction tube (34) Adapter for vacuum hose holder (35) Snap fastener (36) False air intake (37) Control LED (38) Locking screws (39) Filter cover (40) Fill level sensors
Technical data
| Article number | 3601JC36..3601JC3660 |
| Rated voltage V 220-240 110 | |
| Rated power input W 1200 1000 | |
| Frequency Hz 50-60 50-60 |
1609 92A 98V| (22.01.2024) Bosch Power Tools
| Wet/dry dust extractor GAS 35 H AFC GAS 35 H AFC | |||
| Container volume (gross) | 35 35 | |||
| Container volume (net) | 25 25 | |||
| Net volume (liquid) | 19 19 | |||
| Dust bag volume | 19 19 | |||
| Max. vacuumA) | |||
| -Dust extractor hPa 230 211 | |||
| -Turbine hPa 254 242 | |||
| Max. flow rateA) | |||
| -Dust extractor l/s | 36 | 31 | |
| m3/h | 129.6 | 111.6 | |
| -Turbine l/s | 74 | 71 | |
| m3/h | 266.4 | 255.6 | |
| Max. suction power W 1380 1150 | |||
| Area of pleated filter m20.5 0.5 | |||
| Dust class | H | H | |
| Weight according to EPTA-Procedure 01:2014 | kg | 12.4 | 12.7 |
| Protection class | ±/l | ±/l | |
| Dust extractor protection rating | IPX4 | IPX4 | |
| Mains plug Switzerland protection rating | IP55 | - | |
A) Measured using a vacuum hose 3 m long and 35 mm in diameter. The specifications apply to a rated voltage [U] of 230 V. These specifications may vary at different voltages and in country-specific models. Values can vary depending on the product, scope of application and environmental conditions. To find out more, visit www.bosch-professional.com/wac.
Automatic start/stop
| Rated voltage | Maximum power | Minimum power |
| 230 V | 2200 W | 100 W |
| 110 V | 750 W | 100 W |
Permitted connected load of the connected power tool. These values can differ for other country-specific models. Please take note of the information on the socket of the dust extractor.
Noise/Vibration Information
Noise emission values determined according to EN 60335-2-69.
Typically the A-weighted sound pressure level of the dust extractor is 69 dB(A) (70 dB(A) for 110 V). Uncertainty K = 1 dB(A). The sound power level is 83 dB(A).
Wear hearing protection!
Total vibration values a_h (triax vector sum) and uncertainty K determined according to EN 60335-2-69: a_h < 2.5 m/s^2, K = 1.5 m/s^2.
Assembly
Pull the plug out of the socket before cleaning or performing maintenance on the vacuum cleaner, making tool adjustments, changing accessories or putting away the vacuum cleaner. This safety measure prevents the vacuum cleaner from being started accidentally.
Fitting the holder for the vacuum hose (see figure A)
- Slide the holder (4) for the vacuum hose firmly into the corresponding adapters (34) from above until they click into place.
Fitting the vacuum hose (see figure B)
Pull the sealing plug (2) out of the hose adapter (3).
Attach the vacuum hose (25) to the hose adapter (3) and turn it clockwise as far as it will go.
Always seal the extraction connection with the sealing plug whenever you remove the vacuum hose. This prevents dust from escaping.
Note: The friction generated by the dust in the vacuum hose and accessory during extraction causes an electrostatic charge that the user may experience as static discharge (depending on environmental factors and their physiological state).
Bosch generally recommends using an anti-static vacuum hose (accessory) to vacuum up fine dust and dry materials.
Fitting the vacuuming accessories (see figure C)
The vacuum hose (25) is equipped with a clip system which can be used to connect vacuuming accessories (dust extraction adapter (23), curved nozzle (24)).
Fitting the dust extraction adapter
- Push the dust extraction adapter (23) onto the vacuum hose (25) until you hear both snap fasteners (35) on the vacuum hose engage.
- To remove the adapter, press the snap fasteners (35) inwards and pull apart the components.
Fitting the nozzles and tubes
- Push the curved nozzle (24) onto the vacuum hose (25) until you hear both snap fasteners (35) on the vacuum hose engage.
- Then attach the required extraction accessory (floor nozzle, crevice nozzle, suction tube, etc.) firmly to the curved nozzle (24).
- To remove the accessory, press the snap fasteners (35) inwards and pull apart the components.
Inserting/removing the disposal bag or safety filter bag (dry extraction) (see figures D1-D3)
Either a disposal bag (27) or safety filter bag (26) must be used for the dry extraction of dust class H materials. Insofar as materials with or without an exposure limit of ≥1 mg/m³ (dust class L materials) are extracted, these can be sucked straight into the container.
WARNING
The dust extractor contains dust particles that pose a risk to health.
Emptying and maintenance procedures, including the disposal of dust containers, should only be carried out by professionals. Suitable protective equipment is required. Do not operate the vacuum cleaner unless the complete filter system is correctly inserted. Otherwise, you are putting your health at risk.
Inserting the disposal bag
- Open the catches (13) and remove the top part of the vacuum cleaner (12).
- Insert the disposal bag (27) into the container (1) with the inlet facing forwards.
- Pull the inlet over the connection flange and all the way into the recess of the connection flange.
- Make sure that the disposal bag (27) touches all the inside walls of the container (1).
- Fold the rest of the disposal bag (27) over the edge of the container (1). Put the top part of the vacuum cleaner (12) on and close the catches (13).
Removing and sealing the disposal bag
- Seal the container (1) using the sealing plug for extraction connection (2).
- Open the catches (13) and remove the top part of the vacuum cleaner (12).
- Pull the full disposal bag (27) backwards out of the connection flange.
- Seal the disposal bag (27) tightly below the extraction connection opening and the ventilation hole using the cable tie provided.
- Carefully take the disposal bag (27) out of the container (1) without damaging it. When doing so, make sure that the disposal bag does not scrape against the connection flange or other sharp objects.
- Wipe the container (1) from time to time using a non-abrasive off-the-shelf cleaning product and leave it to dry.
Inserting the safety filter bag
- Open the catches (13) and remove the top part of the vacuum cleaner (12).
- Insert the safety filter bag (26) into the container (1) with the inlet facing forwards.
- Pull the inlet over the connection flange and all the way into the recess of the connection flange.
- Make sure that the black plastic bag of the safety filter bag (26) touches all the inside walls of the container (1).
- Make sure that the vacuum compensation hole is in the container.
- Fold the rest of the black plastic bag over the edge of the container (1). Put the top part of the vacuum cleaner (12) on and close the catches (13).
Removing and sealing the safety filter bag
- Seal the container (1) using the sealing plug for extraction connection (2).
- Open the catches (13) and remove the top part of the vacuum cleaner (12).
- Pull the full safety filter bag (26) backwards out of the connection flange.
- Seal the opening of the safety filter bag by pushing the closing flap over the opening.
- Seal the black plastic bag tightly with the cable ties provided.
- Remove the adhesive label next to the vacuum compensation hole and use it to seal the hole.
- Carefully take the sealed safety filter bag out of the container (1) without damaging it. When doing so, make sure that the safety filter bag does not scrape against the connection flange or other sharp objects.
- Wipe the container (1) from time to time using a non-abrasive off-the-shelf cleaning product and leave it to dry.
Fitting the rubber lip (wet extraction) (see figure E)
Note: The requirements for the degree of penetration (dust class H) have only been verified for dry extraction.
- Use a suitable tool to lift the brush inserts (31) out of the floor nozzle (32).
- Place the rubber lips (30) in the floor nozzle (32).
Note: The textured side of the rubber lips must be facing outwards.
Attaching the L-Boxx (see figure F)
You can attach an L-Boxx to the top part of the dust extractor for transporting the extractor and to provide space-saving storage for extractor accessories and/or the power tool.
- Click the L-Boxx onto the adapters (11).
Do not carry the dust extractor by the carrying handle of the attached L-Boxx. The dust extractor is too heavy for the carrying handle of the L-Boxx. There is a risk of injury and damage if you do this.
Operation
Pull the plug out of the socket before cleaning or performing maintenance on the vacuum cleaner, making tool adjustments, changing accessories or putting away the vacuum cleaner. This safety measure prevents the vacuum cleaner from being started accidentally.
When operating the dust extractor, ensure that the lockable castors on the dust extractor are blocked to prevent the dust extractor from rolling away unintentionally. Test the correct functioning of the castors on the relevant surface before operation.
Start-up
▶ Products that are only sold in AUS and NZ: Use a residual current device (RCD) with a nominal residual current of 30 mA or less. Pay attention to the mains voltage. The voltage of the power source must correspond with the data on the type plate of the vacuum cleaner. Make sure you inform yourself about the applicable regulations/laws on how to handle harmful types of dust in your country.
The dust extractor may be used for vacuuming and extracting the following materials:
Dusts with an exposure limit of < 0.1 mg/m³
The dust extractor must categorically not be used in potentially explosive areas.
To ensure optimum suction power, you must always fully unwind the vacuum hose (25) from the top part of the dust extractor (12).
Dry vacuuming
Vacuuming up dust deposits
- Adjust the volume flow controller (6) to suit the hose diameter used.
- To switch on the dust extractor, set the mode selector switch (7) to the "extraction" symbol.

- To switch off the dust extractor, set the mode selector switch (7) to the "switch off" symbol.
The dust extractor is fitted with airflow monitoring. In the "extraction" operating mode, the volume flow monitoring is fixed to a value of 20 m/s, irrespective of the setting of the volume flow controller (6).
If the value falls below this, e.g. due to accumulated dirt in the vacuum hose, a full safety filter bag or a clogged flat-pleated filter, an audible alarm signal will sound. In this case, switch off the dust extractor and check it as described in the "Rectifying faults" section.
Extracting dust that accumulates from working power tools (see figure G)
There must be a sufficient air exchange rate in the room when the exhaust air comes back into the room. Be aware of the corresponding national regulations.
The dust extractor has a plug socket with a protective earth contact (5) that can be used to connect an external power tool. Observe the maximum permitted connected load of the connected power tool.
In order for sufficient dust transport to be ensured at the extraction point, the volume flow must not fall below the minimum specified for the connected power tool.
Hose diameter Volume flow setting
| 35 mm 57.9 m | 3/h |
| 22 mm 41.2 m | 3/h |
| 15 mm 12.7 m | 3/h |
- Adjust the volume flow controller (6) to suit the hose diameter used. - Fit the dust extraction adapter (23).
- Insert the dust extraction adapter (23) into the extraction outlet of the power tool.
Note: When working with power tools that have a low air feed into the vacuum hose (e.g. jigsaws, sanders, etc.), the false air intake (36) of the dust extraction adapter (23) must be opened. This will ensure that the automatic filter cleaning function works correctly.
To do this, turn the ring above the false air intake (36) until the opening is at its maximum size.
- To activate the automatic start/stop
function of the dust extractor, set the mode selector switch (7) to the "automatic start/stop" symbol.
In this operating mode, the volume flow is electronically monitored according to the setting of the volume flow controller (6). Having the correct setting selected ensures sufficient dust transport.
- To start the dust extractor, switch on the power tool connected to the plug socket (5). The dust extractor will start automatically.
- To stop dust extraction, switch the power tool off. The automatic start/stop run-on function will run for up
1+
24|English
to 15 seconds longer in order to extract the remaining dust from the vacuum hose.
-To switch off the dust extractor, set the mode selector switch (7) to the "switch off" symbol.
①
If the acoustic warning signal sounds, the dust extractor must be checked as described in the "Rectifying faults" section.
Wet vacuuming
Do not use the vacuum cleaner to vacuum combustible or explosive liquids, such as petrol, oil, alcohol or solvents. Do not vacuum hot, burning or explosive dust. Do not operate the vacuum cleaner in areas subject to explosion hazards. Dust, vapours and liquids can ignite or explode. The vacuum cleaner must not be used as a water pump. The vacuum cleaner is designed for vacuuming air and vacuuming water mixtures.
Note: The requirements for the degree of penetration (dust class H) have only been verified for dry extraction.
Steps to Take before Wet Vacuuming
- Remove the disposal bag (27) or the safety filter bag (26) if necessary.
Note: Use a wet filter bag (accessory), which separates liquid from solids, to make disposal easier when vacuuming water-solid mixtures.
- Place the rubber lip (30) into the floor nozzle (32).
- Switch off the automatic filter cleaning (AFC).
Vacuuming up liquids
To switch on the dust extractor, set the mode selector switch (7) to the "extraction" symbol.
The dust extractor is equipped with fill level sensors (40). The dust extractor shuts down if the maximum fill level has been reached. Set the mode selector switch (7) to the "switch off" symbol.
Note: When extracting non-conductive liquids (e.g. drilling emulsion, oils and fats), the dust extractor will not switch off when the container is full. The fill level must be constantly monitored and the container emptied in good time. If the acoustic warning signal sounds during wet extraction, the operating reliability of the dust extractor is not affected. No measures to rectify the fault are necessary.
- To switch off the dust extractor, set the mode selector switch (7) to the "switch off" symbol.
- To transport the dust extractor, screw the sealing plug (2) onto the hose adapter (3). Empty the container (1). To prevent mould growth after wet extraction:
- Remove the flat-pleated filter (28) and leave this to dry thoroughly.
- Remove the top part of the dust extractor (12), open the filter cover (39) and leave both elements to dry thoroughly.
Automatic filter cleaning (see figure H)
When automatic filter cleaning (AFC) is active, the flat-pleated filter (28) is cleaned every 15 seconds using blasts of air (pulsating noise).
The filter cleaning function should be activated at the very latest when the suction power is no longer sufficient.
Regular use of the filter cleaning function will increase the service life of the filter.
In order to achieve an optimum filter service life, deactivate the automatic filter cleaning function only in exceptional cases, e.g. when vacuuming pure liquids or using a safety filter bag.
A flat-pleated filter with surface dirt is still fully functional. It is not necessary to clean the flat-pleated filter manually by shaking or blowing it out; this may even damage the filter.
Note: The automatic filter cleaning function is switched on by default when the dust extractor leaves the factory.
It is only possible to switch the automatic filter function on or off when the tool is switched on.
- Deactivating AFC
Press the AFC button (9).
The control LED (37) will go out.
Activating AFC
Press the AFC button (9).
The control LED (37) will light up green.
Maintenance and Service
Maintenance and Cleaning
Pull the plug out of the socket before cleaning or performing maintenance on the vacuum cleaner, making tool adjustments, changing accessories or putting away the vacuum cleaner. This safety measure prevents the vacuum cleaner from being started accidentally. To ensure safe and efficient operation, always keep the dust extractor and the ventilation slots clean.
In order to avoid safety hazards, if the power supply cord needs to be replaced, this must be done by Bosch or by an after-sales service centre that is authorised to repair Bosch power tools.
Wear a protective mask of protection class FFP2 or higher and disposable protective suit according to the relevant provisions when carrying out maintenance and cleaning of the dust extractor. Maintenance and cleaning may only be carried out by persons with proof of expertise.
The housing of the dust extractor must be thoroughly vacuumed and wiped clean with a damp cloth, or treated with sealant, before the dust extractor can be removed from the hazardous area. All dust extractor parts must be considered to be contaminated when taken from the hazardous area, appropriate precautions must be taken. All parts not sufficiently cleaned during maintenance/repair must be disposed of (in impermeable bags).
For the user to carry out maintenance, the dust extractor needs to be disassembled, cleaned and maintained as far as this is possible without endangering maintenance personnel or other persons. Before disassembly, the dust extractor should be cleaned to prevent any potential hazards. The processes described in the Assembly chapter form part of the maintenance routine. The room/enclosure in which the dust extractor is disassembled should be well ventilated. Wear personal protective equipment while carrying out maintenance.
After completing maintenance, the maintenance area should be cleaned.
A technical inspection must be carried out at least once a year by the manufacturer or someone who has been trained, e.g. to check for filter damage and to check that the dust extractor is tight and that the control unit is functioning correctly.
In addition to this, the effectiveness of the filter must be inspected at least annually in accordance with EN 60335-2-69, 22.AA.201.2.
National requirements may also necessitate more frequent inspection.
If the filter is no longer deemed effective, it must be replaced and the test must be repeated.
Removing/changing the flat-pleated filter (see figures 11-12)
The suction power is dependent on the condition of the filter. Therefore, the filter should be cleaned regularly.
If the flat-pleated filter (28) becomes damaged, replace it immediately.
- Loosen the two locking screws (38) and push the closing (19) flap latch downwards.
- Pull on the closing flap (18) and open the filter cover (39).
- Hold the flat-pleated filter (28) by the supports and take it out from above.
- Use a damp cloth to remove any dust and dirt that accrues around the closing edge of the filter cover (39) when removing the flat-pleated filter (28).
- Insert the cleaned (or a new) flat-pleated filter (28), ensuring that it is positioned correctly and securely.
- Close the filter cover (39) (you should hear it click into place).
- Push the closing (19) flap latch up again and tighten both locking screws (38).
Cleaning the container
Wipe the container (1) from time to time using a non-abrasive off-the-shelf cleaning product and leave it to dry.
Cleaning the fill level sensors (see figure J)
Make sure that the fill level sensors are cleaned (40) occasionally.
- Open the catches (13) and remove the top part of the vacuum cleaner (12). Clean the fill level sensors (40) using a soft cloth. Put the top part of the vacuum cleaner (12) on and close the catches (13).
Storage and transport (see figure K)
Before transporting the dust extractor, remove any full disposal bags or safety filter bags and empty any liquids that have been absorbed, in order to prevent back injuries. - Wrap the power cable around the cable holder (17). - Insert the accessories into the holders provided for them: Suction tubes (33) into the holders (20), crevice nozzle (29) into the holder (21), floor nozzle (32) into the holder (22). - Open the elastic bands of the vacuum hose holder (4) and wrap the vacuum hose (25) around the top part of the dust extractor in the holder (4). Hook the elastic bands back in. -Only ever carry the dust extractor by the carrying handle (10). - Store the dust extractor in a dry room and secure it so that it cannot be used by unauthorised persons. Put the castor brake (15) down to hold the castors (16) in place.
Rectifying faults
If a fault (e.g. a filter damage) occurs, the vacuum cleaner must be switched off immediately. The fault must be repaired before resuming operation.
Warning! The dust extractor contains dust particles that pose a risk to health. Observe all the safety warnings in these instructions.
Problem Corrective measures
| Suction turbine will not switch on. | - Check the mains cable, mains plug, fuse, socket and fill level sensors (40). |
| The mode selector switch (7) is set to "automatic start/stop". | |
| - Set the mode selector switch (7) to the "vacuuming" symbol or switch on the power tool plugged into the plug socket (5). | |
| The suction turbine switches off. | - Empty the container (1). |
| Problem Corrective measures | |
| The suction turbine will not switch on again after the container has been emptied. | - Switch the dust extractor off and wait five seconds before switching it back on. |
| - Clean the fill level sensors (40) and the space between the fill level sensors (40) using a brush. | |
| The suction power is decreasing. | - Remove any blockages from the vacuum nozzle, suction tube (33), vacuum hose (25) or flat-pleated filter (28). |
| - Change the disposal bag (27) or safety filter bag (26). | |
| - Make sure the filter cover (39) is engaged correctly. | |
| - Place the top part of the dust extractor (12) on correctly and close the catches (13). | |
| - Change the flat-pleated filter (28). | |
| Dust is escaping during extraction | - Check that the flat-pleated filter (28) has been fitted correctly. |
| - Change the flat-pleated filter (28). | |
| Automatic switch-off (wet extraction) is not working. | - Clean the fill level sensors (40) and the space between the fill level sensors (40) using a brush. |
| Automatic switch-off will not work in the presence of non-conductive liquids or foaming. | |
| - Check the fill level regularly. | |
| Acoustic warning signal sounds. Suction power setting too low. | |
| - Set the suction power regulator (8) to a higher setting. | |
| Hose diameter setting is wrong. | |
| - Set the volume flow controller (6) to the correct vacuum hose diameter. | |
| Vacuum hose (25) is blocked or twisted. | |
| - Remove blockage or untwist hose. | |
| Disposal bag/safety filter bag full. | |
| - Change the disposal bag (27) or safety filter bag (26). | |
| Flat-pleated filter (28) is dirty. | |
| - Clean or change the flat-pleated filter if required. | |
| The airflow supplied by the connected power tool is insufficient. | |
| - Open the false air intake (36) on the dust extraction adapter (23): Turn the ring on the dust extraction adapter until the false air intake is fully open. | |
| - Open the false air intake on the power tool if there is one. | |
| Malfunction of the monitoring electronics. | |
| - Contact an authorised Bosch after-sales service centre. | |
| The automatic filter cleaning function is not working. | - Activate the automatic filter cleaning function (press the AFC button (9)). |
| - Connect the vacuum hose (25). | |
| The automatic filter cleaning function will not switch off. | - Contact an authorised Bosch after-sales service centre. |
| The automatic filter cleaning function will not switch on. | - Contact an authorised Bosch after-sales service centre. |
Accessories
| Accessory number | |
| Safety filter bag 2 607 432 050 | |
| Disposal bag (PE) (dry/wet) 2 607 432 051 | |
| PTFE/Hepa flat-pleated filter, dust class H | 2 607 432 052 |
After-Sales Service and Application Service
Our after-sales service responds to your questions concerning maintenance and repair of your product as well as spare parts. You can find explosion drawings and information on spare parts at: www.bosch-pt.com
The Bosch product use advice team will be happy to help you with any questions about our products and their accessories.
In all correspondence and spare parts orders, please always include the 10-digit article number given on the nameplate of the product.
Great Britain
Robert Bosch Ltd. (B.S.C.)
P.O.Box 98
Broadwater Park
North Orbital Road
Denham Uxbridge
UB95HJ
At www.bosch-pt.co.uk you can order spare parts or arrange
the collection of a product in need of servicing or repair.
Tel. Service: (0344) 7360109
E-Mail: boschservicecentre@bosch.com
You can find further service addresses at:
www.bosch-pt.com/serviceaddresses
Disposal
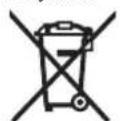
The vacuum cleaner, its accessories and packaging should be recycled in an environmentally friendly manner.
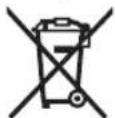
Do not dispose of the vacuum cleaner along with household waste.
Only for EU countries:
According to the European Directive 2012/19/EU on Waste Electrical and Electronic Equipment and its implementation into national law, vacuum cleaners that are no longer usable must be collected separately and disposed of in an environmentally friendly manner.
If disposed incorrectly, waste electrical and electronic equipment may have harmful effects on the environment and human health, due to the potential presence of hazardous substances.
Only for United Kingdom:
According to The Waste Electrical and Electronic Equipment Regulations 2013 (SI 2013/3113) (as amended), products that are no longer usable must be collected separately and disposed of in an environmentally friendly manner.
Français
Robert Bosch (France) S.A.S.
www.bosch-pt.com/serviceaddresses
Calle Robert Bosch No. 405
C.P. 50071 Zona Industrial, Toluca - Estado de Mexico
Tel.: (52) 55 528430-62
Tel.: 800 6271286
www.bosch-pt.com/serviceaddresses
Disposal
Automatic Filter Cleaning
AFC
Automatic filter cleaning (AFC =
Automatic Filter Cleaning)
Automatic Filter Cleaning
AFC
www.bosch-pt.com/serviceaddresses
Waste disposal
Bosch Service Center
Telegrafvej 3
2750 Ballerup
Spare parts can be ordered online at www.bosch-pt.dk
Service Center Phone: 44898855
Fax: 44898755
E-mail: vaerktoej@dk.bosch.com
www.bosch-pt.com/serviceaddresses
Disposal
Bosch Service Center
Telegrafvej 3
2750 Ballerup
Denmark
Tel.: (08) 7501820 (within Sweden)
Fax: (011) 187691
You can find more service contact details here:
www.bosch-pt.com/serviceaddresses
Waste management
| AFC | Automaticisk filterrensing (AFC = Automatic Filter Cleaning) |
www.bosch-pt.com/serviceaddresses
Disposal
www.bosch-pt.com/serviceaddresses
Safety
Automatic Filter Cleaning
AFC Automatic Filter Cleaning (AFC = Automatic Filter Cleaning)
Description of the appliance
Please refer to the figures at the beginning of the operating instructions.
Intended use
The vacuum cleaner is intended for vacuuming, suction, extraction and collection of dry, non-flammable dusts, as well as for vacuuming liquids and a mixture of air and water.
The vacuum cleaner has been tested in accordance with the state of the art and complies with the requirements of the H class for dust according to IEC/EN 60335-2-69.
It is suitable for continuous operation in commercial use, e.g. in industry, trade and workshops according to IEC/EN 60335-2-69.
112|English
During operation, the hose may only be used in dry areas.
Disposal of the appliance
The operating instructions for the device are presented on the following pages.
Table of contents and safety instructions
Place the main body (24) on the filter housing (25), with the two lugs (35) of the filter housing engaging with the corresponding slots. Install the filter element (e.g., filter cartridge, oil filter, air filter, etc.) onto the main body (24). To secure, turn the lugs (35) towards the slots and tighten the elements.
Installation/removal of the collection container or safety filter container (see figures D1-D3)
The device can be operated with either a collection container (27) or a safety filter container (26).
If the concentration of hazardous substances is at least 1 mg/m³ (corresponding to protection class L), the device can be used directly in the workplace.
SAFETY INSTRUCTIONS
The device contains substances hazardous to health. Before starting work,
maintenance, repair, and disposal of the device, only trained personnel should handle it. A suitable protective mask is essential. Do not operate the device without the correctly installed filter system. Otherwise, your health may be at risk.
Installing the collection container
-Open the clamps (13) and remove the upper part of the device (12). Place the collection container (27) with the opening facing upwards into the device (1). Turn the opening downwards to the connection. -Ensure that the collection container (27) is fully seated in the device (1). -Check the collection container (27) for damage. -Install the upper part of the device (12) and close the clamps (13).
Removing and closing the collection container
-Close the device (1) with the pressure relief valve (2). -Open the clamps (13) and remove the upper part of the device (12). Remove the full collection container (27) from the connection downwards. -Close the collection container (27) with the supplied cap and store it in a safe place. Dispose of the collection container (27) properly, without damaging it. Do not place the collection container on the connection or on other sharp objects. -Clean the device (1) occasionally with a non-abrasive commercial cleaner and dry it.
Installing the safety filter container
-Open the clamps (13) and remove the upper part of the device (12). -Place the safety filter container (26) with the opening facing upwards into the device (1). Turn the opening downwards to the connection.
-Place the pressure relief valve (26) on the internal fittings of the vessel (1). -Make sure the valve is correctly positioned on the vessel. -Remove the remaining pressure relief valve from the vessel's rim (1). Place the cap (12) and close the clamps (13).
Removal and closure of the pressure relief valve
-Close the vessel (1) with the quick-release clamp for the connection (2). -Open the clamps (13) and remove the cap (12). -Remove the full pressure relief valve (26) from the connection flange towards the bottom. -Close the opening of the pressure relief valve, turning the key over the opening. -Close the valve by turning it clockwise. Remove the automatic vent valve from the valve's vent and close it again. Remove the pressure relief valve carefully, without letting it fall into the vessel (1). Check that the pressure relief valve is correctly seated or properly aligned. -Rinse the vessel (1) thoroughly with the cleaning agent and let it dry.
Installation of the pressure relief valve (low pressure) (see figure E)
Note: The connections to the base (category of use) are only for the low pressure. Remove the protective caps (31) with a suitable tool if the base is not used (32). Install the pressure relief valve (30) on the base (32).
Note: The flat side of the pressure relief valve must face outward.
Installation of the L-BOXX (see figure F)
For the transport of the pressure relief valve and for the storage of the accessories of the pressure relief valve and/or the electric tool, you can install an L-BOXX on the top of the pressure relief valve.
-Place the L-BOXX on the supports (11).
Transport the pressure relief valve with the installed L-BOXX. The pressure relief valve is suitable for the transport of the L-BOXX. There is a risk of tipping and injury.
Operation
Pull the plug before performing maintenance on the pressure relief valve, before making adjustments
to the device, or before changing accessories on the pressure relief valve. These safety measures reduce the risk of accidental starting of the pressure relief valve.
During the operation of the pressure relief valve, ensure that the valves present on the pressure relief valve are closed, for the protection of the pressure relief valve and the system. Check the functionality of the valves before operation with the respective base.
Operating position
Please read the operating instructions carefully before using the device and keep them for future reference. Please observe the safety instructions/warnings applicable in your country regarding the safe handling of the device.
The device is intended for vacuuming small particles:
www.bosch-pt.com/serviceaddresses
Disposal
The device, accessories, and packaging should be recycled in an environmentally friendly manner.

Do not dispose of the device with household waste!
Only for EU countries:
According to the European Directive 2012/19/EU on waste electrical and electronic equipment and its transposition into national law, used devices must be collected separately and recycled in an environmentally friendly manner.
- For applications with low dust generation, e.g., sanding, adjust the suction power between the accessory and the surface. Low suction performance
Automatic Filter Cleaning
AFC
Automatic filter cleaning (AFC = Automatic Filter Cleaning)
Product and performance description
www.bosch-pt.com/serviceaddresses
Disposal
Robert Bosch Sp. z o.o.
www.bosch-pt.com/serviceaddresses
Waste disposal
Suction power regulation:
Maximum suction power for work with high dust generation - Reduced suction power for work with less dust generation and e.g. for regulating the suction between the connected power tool and the workpiece surface (e.g. when sanding)
max. 2200 W min. 100 W
Automatic Filter Cleaning
AFC
Automatic filter cleaning (AFC = Automatic Filter Cleaning)
Bosch Service Center PT
K Vapence 1621/16
692 01 Mikulov
On www.bosch-pt.cz you can order the repair of your
www.bosch-pt.com/serviceaddresses
Disposal
Hand over the vacuum cleaner, accessories, and packaging for ecological recycling.
www.bosch-pt.com/serviceaddresses
Disposal
www.bosch-pt.com/serviceaddresses
Disposal
The manufacturing date is indicated on the product housing.
Contact information regarding the importer is provided on the packaging.
Service life
The service life of the product is 7 years. It is not recommended to operate the product after 5 years from the manufacturing date without prior inspection (see the manufacturing date on the label).
List of critical failures and erroneous actions of personnel or users
-Do not use a damaged tool or damaged protective housing -Do not use if smoke appears directly from the product housing -Do not use with a frayed or damaged electrical cable -Do not use outdoors during rain (splashing water) -Do not turn on if water gets into the housing -Do not use with strong sparking -Do not use with a rotating brush
Criteria for limit states
- Breakage of the electrical cable
- Damage to the product housing
Type and frequency of technical maintenance
Recommended tool for cleaning dust from surfaces.
Storage
- Store in a dry place - Keep away from sources of high temperatures and direct sunlight - Avoid sudden temperature changes during storage - Storage without packaging is not allowed - For detailed storage requirements, see GOST 15150-69 (Condition 1)
Transportation
Categorically do not allow any mechanical impact on the packaging during transportation - During unloading/loading, do not use any type of equipment that operates by clamping the packaging - For detailed transportation requirements, see GOST 15150-69 (Condition 5)
Safety Instructions for Vacuum Cleaners

Read all safety instructions and instructions. Failure to follow safety instructions and instructions may result in electric
shock, fire, and/or serious injury.
Save these instructions and instructions for future use.
This vacuum cleaner is not intended for use by persons (including children) with reduced physical, sensory, or mental capabilities, or lack of experience and knowledge, unless they have been given supervision or instruction concerning use of the appliance by a person responsible for their safety. Children should be supervised to ensure that they do not play with the vacuum cleaner. Follow all safety rules when working with substances that are sucked up by the vacuum cleaner.
WARNING
HOM.
Never vacuum up materials that contain asbestos. Asbestos is a carcinogen.
WARNING
Use the vacuum cleaner only if you have received sufficient information about the vacuum
Always store and handle these substances safely. The instructions reduce the risk of incorrect use and injury.
WARNING
The vacuum cleaner is intended for collecting dry substances, and with appropriate accessories -
also for collecting liquids. Vacuuming up water increases the risk of electric shock.
Do not vacuum up flammable or explosive liquids, such as gasoline, oil, alcohol, or solvents. Do not vacuum up hot, burning, or explosive dust. Do not use the vacuum cleaner in rooms with high explosion hazard. Dust, vapors, or liquids may ignite or explode.
WARNING
Use the socket only for purposes specified in the operating instructions.
WARNING
When the vacuum cleaner is full, turn it off immediately and empty the container.
Otherwise, the vacuum cleaner may be damaged.
CAUTION! Store the vacuum cleaner only indoors. CAUTION! Regularly check the liquid level sensor for damage.
It may adversely affect functionality.
If it is impossible to avoid using the vacuum cleaner in a damp room, connect the power tool through a residual current device (RCD). The use of an RCD reduces the risk of electric shock. Before each use, check the vacuum cleaner, power cord, and plug. Do not use the vacuum cleaner if damage is detected. Do not open the vacuum cleaner yourself; repairs should only be performed by qualified personnel and only with original spare parts. Damaged vacuum cleaners, cords, and plugs increase the risk of electric shock. Do not run over or strain the cord. Do not pull the cord to unplug it from the socket or to move the vacuum cleaner. A damaged cord increases the risk of electric shock. Before maintenance, cleaning, adjusting, replacing accessories, or storing, unplug the vacuum cleaner. This precaution prevents accidental starting. Ensure good ventilation at the workplace! Repair of the vacuum cleaner should only be performed by qualified personnel and only with original spare parts. This ensures the safety of the vacuum cleaner. If the vacuum cleaner was used in areas with hazardous substances, before removing it from the hazardous area, clean, wipe, or seal the external surface of the vacuum cleaner. All components of the vacuum cleaner are considered contaminated, and appropriate measures must be taken to prevent the spread of hazardous substances.
WARNING
The vacuum cleaner contains substances harmful to health. During emptying and maintenance,
Cleaning the dust container is only permitted by specialists. Appropriate protective equipment is required. Do not operate the vacuum cleaner without a properly and correctly installed filter system. Otherwise, you will endanger your health.
Before commissioning, check the inside of the vacuum cleaner. Leave the vacuum cleaner switched off during this check so that dust does not escape. Otherwise, you may inhale it. Do not sit on the vacuum cleaner. You could damage it.
Handle the mains cable and the vacuum cleaner carefully. Otherwise, you could endanger other people. Do not vacuum up water with a direct jet. Water penetrating the vacuum cleaner's cover increases the risk of electric shock. Connect the vacuum cleaner to a properly earthed socket. The plug must be fitted with a protective conductor.
Symbols
The following symbols may be important when operating your vacuum cleaner. Please remember these symbols and their meaning. Correct understanding of the symbols will help you use the vacuum cleaner better and more safely.
Symbols and their meaning


WARNING! Read all safety instructions. Failure to follow the safety instructions and instructions can result in electric shock, fire, and/or serious injury.
Vacuum cleaner class H in accordance with IEC/EN 60335-2-69 for the extraction of dust with an exposure limit value of <0.1 mg/m³.
If the text of the warning label is not in your native language, before first use, stick the label in your native language that is included in the delivery.
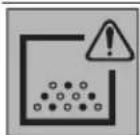
WARNING! The vacuum cleaner is intended for the extraction of hazardous dust. Emptying and maintenance procedures, including the removal of the dust container, are only permitted by specialists. Appropriate protective equipment is required. Do not operate the vacuum cleaner without a properly and correctly installed filter system. Otherwise, you will endanger your health.
Symbols and their meaning

max. 1 L-BOXX, max. 15 kg
Do not stack more than one L-BOXX case.
The mass of the L-BOXX case together with its contents must not exceed 15 kg.

Do not hang the vacuum cleaner on a crane hook, e.g., for transport.
Do not use the vacuum cleaner without a filter. This is fraught with damage and injury.

Do not sit or stand on the vacuum cleaner, and do not use it as a step ladder. The vacuum cleaner may tip over or be damaged. There is a risk of injury.
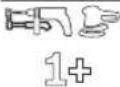
Automatic on/off
When vacuuming dust from working power tools, the vacuum cleaner switches on automatically; switching off occurs with a delay.

Switching off

Vacuuming mode
Collection of dust deposits
Indication of the maximum permissible connected load of the connected power tool (depending on the country)


Automatic Filter Cleaning
AFC
Automatic filter cleaning (AFC = Automatic Filter Cleaning)
Product description and services
Please observe the illustrations at the beginning of the operating instructions.
Intended use
The vacuum cleaner is intended for collecting, vacuuming, and separating dry, non-flammable dust, as well as water-air mixtures.
The device is suitable for vacuuming dry dust in accordance with IEC/EN 60335-2-69.
It is designed for increased loads during continuous industrial use, e.g., for professional work, in industry and workshops in accordance with IEC/EN 60335-2-69.
During operation, the socket may only be used in dry conditions.
Illustrated components
The numbering of the components corresponds to the illustration on the page with figures.
(1) Container (2) Plug for suction hose
(3) Hose for vacuuming (4) Holder for suction hose (5) Socket for power tool (6) Air flow regulator (7) Mode switch (8) Suction power regulator (9) AFC button (10) Handle for carrying (11) Fastening for L-BOXX (12) Vacuum cleaner lid (13) Lid lock (14) Wheel (15) Brake for steering roller (16) Steering roller (17) Cable holder (18) Lock for filter cover (19) Filter lock (20) Suction hose holder (21) Holder for crevice nozzle / bent nozzle (22) Holder for floor nozzle (23) Adapter for accessories (24) Bent nozzle (25) Suction hose (26) Safety filter bag (27) Disposal bag (28) Flat pleated filter class H (HEPA/PTFE) (29) Crevice nozzle (30) Rubber lip (31) Brush insert (32) Floor nozzle (33) Suction tube (34) Fastening for suction hose holder (35) Push button (36) Air inlet with plug (37) Control LED (38) Locking screws (39) Filter cover (40) Sensor.
Technical data
Vacuum cleaner for wet/dry cleaning GAS 35 H AFC
Before maintenance and cleaning of the vacuum cleaner, before adjusting it, before replacing accessories, or before storing it, pull the plug out of the socket.
This precaution prevents unintentional starting of the vacuum cleaner.
Mounting the suction hose holder (see figure A)
Press the suction hose holder (4) onto the fastening (34) provided for this purpose until it engages.
Mounting the suction hose (see figure B)
Pull the plug (2) out of the hose connection (3).
Attach the suction hose (25) to the suction tube (3) and turn it clockwise until it stops.
Always close the shut-off valve before removing the suction hose. This prevents dirt from entering.
Note: Due to friction when suctioning, a charge can build up on the suction hose and accessories.
Static charge can build up, and as a result, the user may experience a static discharge (depending on the ambient conditions and the sensitivity of the body).
Bosch generally recommends using an antistatic suction hose (accessory) when vacuuming fine dust and dry materials.
Mounting the accessories for suctioning (see Fig. C)
The suction hose (25) is equipped with a locking system that allows you to connect accessories to the hose (dust bag adapter (23), curved nozzle (24)).
Installing the dust bag adapter
Slide the dust bag adapter (23) onto the suction hose (25) so that the two locking buttons (35) on the hose engage in the recesses. - To release, press the locking buttons (35) inward and pull the elements apart.
Mounting the nozzles and tubes
Slide the curved nozzle (24) onto the dust bag adapter (25) so that the two locking buttons (35) on the adapter engage in the recesses. - Then fully attach the required accessory (floor nozzle, crevice nozzle, suction tube, etc.) onto the curved nozzle (24). - To release, press the locking buttons (35) inward and pull the elements apart.
Installing/removing the dust bag or disposable filter bag (dry suction) (see Fig. D1-D3)
For dry removal of materials corresponding to dust class L, you must insert the dust bag (27) or the disposable filter bag (26).
Materials with an exposure limit value of ≥ 1 mg/m³ (according to dust class L) can be collected directly into the container.
WARNING
The device is designed and manufactured in accordance with the requirements of the technical regulations.
Connection to the container is permitted only by specialists. Appropriate protective clothing is required. Do not operate the vacuum cleaner without a properly installed filter system. Otherwise, you will endanger your health.
Installing the dust bag
- Open the locks (13) and remove the vacuum cleaner lid (12). - Insert the dust bag (27) into the container (1) with the opening facing forward.
- Push the intake opening onto the connection flange until it stops at the connection flange. - Make sure that the dust bag (27) is fully attached to the inner walls of the container (1). - Fold the remaining part of the dust bag (27) over the edge of the container (1). - Put the vacuum cleaner lid (12) back on and close the locks (13).
Removing and closing the dust bag
- Close the container (1) with the plug for the suction hose connection (2). - Open the locks (13) and remove the vacuum cleaner lid (12). - Remove the dust bag (27) from the connection flange by pulling it back. - Seal the dust bag (27) tightly with the supplied clip, pulling the bag over the suction tube opening and the ventilation opening. - Carefully remove the dust bag (27) from the container (1) so that it is not damaged. Make sure that the dust bag does not come into contact with the connection flange or other sharp objects. - From time to time, clean the container (1) with a damp, non-abrasive cloth and let it dry.
Installing the safety filter bag
- Open the locks (13) and remove the vacuum cleaner lid (12). - Insert the safety filter bag (26) into the container (1) with the opening facing forward. - Push the intake opening onto the connection flange until it stops at the connection flange. - Make sure that the black plastic part of the safety filter bag (26) is fully attached to the inner walls of the container (1). - Make sure that the opening for equalizing the reduced pressure is in the container. - Fold the remaining part of the black plastic bag over the edge of the container (1). - Put the vacuum cleaner lid (12) back on and close the locks (13).
Removing and closing the safety filter bag
- Close the container (1) with the plug for the suction hose connection (2). - Open the locks (13) and remove the vacuum cleaner lid (12). - Remove the safety filter bag (26) from the connection flange by pulling it back. - Close the opening of the safety filter bag by sliding the zipper over the opening.
172|Russian
- Seal the black plastic bag tightly with the supplied clips. - Fold the label over the opening for equalizing the reduced pressure and seal the opening. - Carefully remove the closed safety filter bag from the container (1) in such a way that it is not damaged. Make sure that the safety filter bag does not come into contact with the connection flange or other sharp objects. - From time to time, clean the container (1) with a damp, non-abrasive cloth and let it dry.
Installing the rubber grommets (for liquid suction) (see Fig. E)
Note: The requirement for the degree of protection (dust class H) has been confirmed only for dry dust extraction.
Insert the insert tools (31) using a suitable tool or the filling hose (32). Insert the rubber lips (30) into the filling hose (32).
Note: The structured side of the rubber lips must face the marking.
Installing the L-BOXX (see Fig. F)
To transport the vacuum cleaner and to save space, the L-BOXX can be installed on the vacuum cleaner for storing accessories.
- Install the L-BOXX on the fasteners (11).
Do not carry the vacuum cleaner by the handle of the installed L-BOXX. The vacuum cleaner is too heavy for the handle of the L-BOXX. This could cause damage or injury.
Working with the tool
Before any work on the vacuum cleaner, such as maintenance, cleaning, adjustment, or replacement of accessories, or before storing it, unplug the power cord from the outlet. This precaution prevents unintentional starting of the vacuum cleaner.
Risk of operation: Ensure that the guide rollers of the vacuum cleaner are locked to prevent unintentional rolling. Before operation, check the rollers on the corresponding surface.
Switching on the electric tool
Pay attention to the mains voltage! The voltage of the power source must match the data on the rating plate of the vacuum cleaner.
Familiarize yourself with the applicable regulations/legal requirements in your country regarding handling of hazardous dust.
The vacuum cleaner can be used for vacuuming the following materials:
- Dust with an exposure limit value of < 0.1 mg/m³
Do not use the vacuum cleaner in potentially explosive atmospheres. To ensure optimal suction power, the hose (25) must always be fully unwound from the hose reel (12).
Dry vacuuming
Collecting dust deposits
- Set the air volume regulator (6) to the hose diameter being used. To switch on the vacuum cleaner, set the mode selector switch (7) to the symbol "Vacuuming". To switch off the vacuum cleaner, set the mode selector switch (7) to the symbol "Off".

The vacuum cleaner is equipped with an air flow monitor. The air flow monitor is set at the factory to the "Vacuum cleaner brush" setting at 20 m/s, independent of the position of the air volume regulator (6).
If the actual value is lower, e.g., if the suction hose is blocked, is clogged, or the filter is damaged or the filter bag is full, an audible warning signal sounds. In this case, switch off the vacuum cleaner and check it as described in the section "Troubleshooting".
Vacuuming dust from power tools (see Fig. G)
If the exhaust air is discharged into a room, sufficient air exchange must be ensured in the room. Observe the applicable regulations in your country.
The vacuum cleaner has a socket with a protective contact (5). An external power tool can be connected to it. Note the maximum permissible power consumption of the connected power tool.
To ensure sufficient transport of dust at the extraction point, the minimum air flow with a connected power tool must be at least the prescribed value.
Do not vacuum up flammable or explosive liquids, e.g., gasoline, oil, alcohol, or solvents. Do not vacuum up hot, burning, or explosive dust. Do not use the vacuum cleaner in rooms with a high explosion hazard. Dust, dirt, or liquids may ignite or explode. It is not recommended to use the vacuum cleaner as a water pump. The vacuum cleaner is intended for vacuuming a mixture of air and water.
Note: The requirement for the degree of filtration (dust class H) is confirmed only for dry vacuuming.
Operation with wet vacuuming
Before cleaning, maintenance, replacing accessories, or before removing the plug from the socket, switch off the vacuum cleaner.
This precaution prevents unintentional starting of the vacuum cleaner.
For long, safe and trouble-free operation, keep the vacuum cleaner and ventilation slots clean.
If the hose needs to be replaced, to avoid danger, contact Bosch customer service or an authorized Bosch power tool service center.
When servicing and cleaning the vacuum cleaner, wear a protective mask of class FFP2 or higher, or disposable protective clothing in accordance with applicable regulations. Technical servicing and cleaning may only be performed by persons with a corresponding qualification certificate.
When carrying the vacuum cleaner out of a hazardous area, carefully wipe the outside of the vacuum cleaner and filter housing and seal it with a sticker. All parts that become contaminated when being carried out of the hazardous area must be treated as contaminated; appropriate precautions must be taken. All parts that have not been properly cleaned during servicing/repair must be disposed of (in sealed bags).
When servicing the vacuum cleaner, the user must disassemble, clean, and perform servicing work without endangering the servicing personnel or others. Before disassembly, the vacuum cleaner must be cleaned to prevent possible hazards. Technical servicing includes the procedures described in chapter [M]o[nt]. The room in which the vacuum cleaner is disassembled must be well ventilated. When performing servicing work, wear personal protective equipment.
After performing servicing work, the area where servicing was carried out must be cleaned.
At least once a year, the manufacturer or a qualified specialist must perform a technical inspection of the power tool, for example, checking for damage to the filter, the tightness of the vacuum cleaner, and the proper functioning of the control device.
In addition, the effectiveness of the filter must be checked at least once a year in accordance with EN 60335-2-69, 22.AA.201.2.
Regulations applicable in the respective country may require more frequent checks.
Removal/Replacement of the flat pleated filter (see Fig. 11-12)
The suction power depends on the condition of the filter. Therefore, clean the filter regularly.
The flat pleated filter (28) must be replaced immediately if damaged.
- Loosen both locking screws (38) and slide the latch (19) downwards. - Lift the catch (18) and open the filter cover (39). - Grasp the flat pleated filter (28) by the recesses and pull it out upwards. - Remove any dust and dirt that has fallen out when removing the flat pleated filter (28) from the edge of the filter cover (39). Insert a new or cleaned flat pleated filter (28) and ensure it sits flat and correctly. - Close the filter cover (39) (it should engage with a click). - Slide the latch (19) upwards again and tighten both locking screws (38).
Cleaning the container
From time to time, wipe the container (1) with a damp, soft cloth and let it dry.
Cleaning the liquid level sensors (see Fig. J)
From time to time, clean the level sensors (40).
- Open the locks (13) and remove the lid of the vacuum cleaner (12). - Clean the level sensors (40) with a soft cloth. - Replace the lid of the vacuum cleaner (12) and close the locks (13).
Storage and transport (see Fig. K)
Remove the dirt container or the bagless filter container and empty the collected liquid before transporting the vacuum cleaner to avoid spilling.
- Wind the power cord around the cable holder (17). Insert the accessories into the provided holders: suction hose (33) into holder (20), crevice nozzle (29) into holder (21), floor nozzle (32) into holder (22). - Open the elastic holders of the suction hose and attach the suction hose (25) to
the circumference of the vacuum cleaner lid in the holder (4). Put the elastic bands back in place.
- Carry the vacuum cleaner only by the handle (10). - Store the vacuum cleaner in a dry place and protect it from unauthorized use. - For the guide roller (16), lower the brake of the guide roller (15) downwards.
Troubleshooting
In case of malfunction (e.g., motor failure), the vacuum cleaner must be switched off immediately. Before switching it on again, the fault must be rectified.
CAUTION! The vacuum cleaner contains harmful substances for health. Observe all safety rules described in this manual.
www.bosch-pt.com/serviceaddresses
Disposal
When the vacuum cleaner, accessories, and packaging have reached the end of their service life, they should be handed over to an environmentally friendly recycling facility.
He bIbpaBaIte nbIeNcOC B 6bITOBMyCOP!
Tolbko dIa cTpaH-ueNoB EC:
In accordance with European Directive 2012/19/EU on waste electrical and electronic equipment and its transposition into national law, unusable devices must be collected separately and sent for environmentally friendly recycling.
Improper disposal of waste electrical and electronic equipment can have harmful effects on the environment and human health due to the potential presence of hazardous substances.
Ukrainian
Safety instructions for use

Read all safety instructions and instructions. Failure to follow safety instructions and instructions may result in electric shock, fire, and/or serious injury.
Keep all safety instructions and instructions for future reference.
Store the instructions in a safe place and keep them for future reference.
This appliance is not intended for use by persons (including children) with reduced physical, sensory or mental capabilities, or lack of experience and knowledge, unless they have been given supervision or instruction concerning use of the appliance by a person responsible for their safety. Children should be supervised to ensure that they do not play with the appliance. Follow all safety instructions when using the appliance.
WARNINGS
WARNINGS
Never collect materials containing asbestos. Asbestos is considered hazardous.
Use the appliance only after receiving sufficient information about its use.
Use of the appliance, materials to be collected, and safe handling. The detailed instructions reduce the risk of incorrect use of the tool and the risk of injury.
WARNING: To reduce the risk of fire, electric shock, or injury, follow these precautions.
Use only as described in this manual. Use only manufacturer's recommended attachments.
Do not use outdoors or on wet surfaces. Do not use in the presence of explosive atmospheres, such as in the presence of flammable liquids, gases, or dust. Do not vacuum flammable or combustible liquids, such as gasoline, or use in areas where they may be present. Do not vacuum anything that is burning or smoking, such as cigarettes, matches, or hot ashes. Do not use the vacuum in an area where there is a risk of explosion. Dust, fumes, or liquids may ignite or explode.
Use the outlet only as specified in the operating instructions.
Unplug the vacuum immediately if it is not working properly or if it has been dropped or damaged. Otherwise,
the vacuum may cause injury.
WARNING! The vacuum can be used only in dry indoor locations. WARNING! Regularly check the dust bag and filters and replace them if they are damaged. They may adversely affect the functionality. To avoid the use of the vacuum in a wet environment, use a device with a protective switch. Using a device with a protective switch reduces the risk of electric shock. Before each use, check the vacuum, cable, and plug. Do not use the vacuum if it is damaged. Do not open the vacuum yourself; its repair should be carried out only by qualified personnel using original spare parts. Damaged vacuum, cord, or plug increases the risk of electric shock. Do not run over the cord or pinch it. Do not pull the cord to unplug the plug from the outlet or to move the vacuum. A damaged power cord increases the risk of electric shock. Unplug the plug from the outlet before performing maintenance or cleaning, before adjusting the vacuum, before changing accessories, or before storing the vacuum. These preventive safety measures reduce the risk of accidental starting of the vacuum. Ensure good ventilation at the workplace. Repair of the vacuum should be carried out only by qualified personnel and only with original spare parts. This ensures the preservation of the vacuum's safety properties. If the vacuum has been used in a hazardous area, before using it again in a safe area, clean, wash, or decontaminate the outer surface of the vacuum. All components of the vacuum are considered contaminated, and you must take appropriate measures to prevent the spread of hazardous substances.
The vacuum contains hazardous substances. The procedure for maintenance,
including disposal of the contents,
178|Ukrainian
may only be performed by qualified personnel. Appropriate safety measures are required. Do not operate the vacuum without the filter system properly and securely installed. Otherwise, you may endanger your health.
Before use, check the device for visible damage. Do not use the device if it is damaged, to avoid danger. Otherwise, you may get an electric shock. Do not place it on a flat surface. If you can, place it on a flat surface. Be careful with the power cord and the device. Otherwise, you may endanger people. Do not immerse the device in water or other liquids. The risk of electric shock is greater if the device is wet. Place the device on a stable, dry surface. The plug and socket must be properly grounded.
SYMBOLS
The following symbols may be used with the device. Be careful and remember these symbols and their meanings. Following these symbols will help you use the device safely.
SYMBOLS AND THEIR MEANINGS


WARNING! Read all safety instructions and
instructions. Failure to follow safety instructions and instructions may result in electric shock, fire, and/or serious injury.
The device complies with IEC/EN 60335-2-69 for dry
use in commercial establishments with a limited value of electromagnetic radiation <0.1 mT/m
If the text of the warning plate is not written in your language, before first use, stick the plate included in the delivery set onto the device in your language.
WARNING! The device is intended for cleaning. Emptying and maintenance, including removing the dust bag, may cause dust emissions. Appropriate protective measures are required. Do not
Symbols and their meanings
operate the device without a properly and securely installed filter system. Otherwise, you endanger your health.
max. 1 L-Boxx max. 15 kg
Do not install more than one L-Boxx.
The weight of the L-Boxx together with its contents must not exceed 15 kg.

Handle the device carefully, avoid dropping it.
When using the device, follow the instructions for safe operation.

Do not place the device on unstable surfaces; use it properly.
Correct use. The device may tip over and fall. There is a risk of injury.
Automatic start and stop
Use of the device with other power tools
The device automatically turns on when the trigger is pressed and turns off when released.

Switching on/off

Operating modes
Using the device with accessories
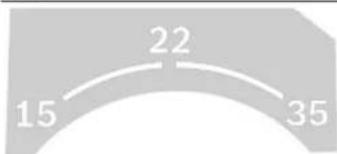
15
Control of air flow for a nozzle with a diameter of 15 mm
22
Control of air flow for a nozzle with a diameter of 22 mm
35
Control hole for a 35 mm diameter gauge
Symbol meanings

Min/Max
Adjusting the suction power during operation:
- Maximum suction power for use in conditions of high dustiness - Reduced suction power for use in conditions of low dustiness, e.g., when adjusting the suction power between the electric tool and the workpiece surface (e.g., during sanding)
max. 2200 W min. 100 W
Data on the maximum permissible total power consumption of the connected electric tool (depending on the country)
AFC

Automatic Filter Cleaning
AFC
Automatic filter cleaning (AFC = Automatic Filter Cleaning)
Installing the protective filter bag
- Open the locks (13) and remove the container lid (12). - If necessary, insert the protective filter bag (26) into the container (1) with the opening facing forward. - Press the protective filter bag firmly against the front of the container. - Make sure that the protective filter bag (26) fits completely against the inner walls of the container (1). - Check that the opening for air extraction is present in the container. - Fold the edge of the container (1) over the opening of the plastic bag.
- Put the container lid (12) back on and close the locks (13).
Removing and closing the protective filter bag
Remove the container (1) with the sealing plug (2) from the suction pipe. - Open the locks (13) and remove the cover of the flat filter (12). - Pull out the filter element (26) with the suction hose. - Close the opening of the suction hose by sliding the flat filter cover over the opening. - Carefully close the plastic cover using the accessory kit supplied. - Switch off the vacuum cleaner and unplug it from the mains before cleaning. - Carefully remove the sealing plug (1) without damaging it. When doing so, make sure that the sealing plug does not catch on the suction opening or other sharp objects. - Clean the container (1) with a mild, non-abrasive cleaning agent and allow it to dry.
Installing the spray nozzle (for suctioning) (see Fig. E)
Note: The degree of filtration (filter class H) is approved for dry suctioning.
- Using a suitable tool, unscrew the nozzle (31) from the spray head (32). - Install the spray nozzle (30) into the spray head (32).
Note: The structured spray head must be aligned correctly.
Installing the L-Boxx case (see Fig. F)
For transporting the vacuum cleaner and for economical use of space, the vacuum cleaner and/or power tool can be stored on the vacuum cleaner lid using the L-Boxx case. - Install the L-Boxx case on the mounting (11). Do not carry the vacuum cleaner with the L-Boxx case installed. The handles of the L-Boxx case are not designed for carrying the vacuum cleaner. There is a risk of injury and damage.
Operation
Before performing maintenance or cleaning, unplug the device from the mains. This also applies when replacing accessories or before storing the device. These safety precautions reduce the risk of accidental starting.
Before using the vacuum cleaner, ensure that the direction of the air outlet is blocked to prevent unintentional operation of the vacuum cleaner. Before use, check the air outlet for proper function.
Starting operation
Pay attention to the mains voltage! The voltage of the power source must match the data on the rating plate of the vacuum cleaner. Observe the regulations and laws regarding the handling of electrical appliances in your country.
The vacuum cleaner is suitable for vacuuming and suctioning dry materials:
- For materials with an exposure limit of <0.1 mg/m³, do not use the vacuum cleaner in areas where there is a risk of explosion.
To ensure maximum suction power, the filter (25) must be cleaned regularly with the flat filter (12).
Cyxe BiDcMoKTyBaHHA
BicmoktyBaHHnny, noo noociaab
BctaHObitperyIATOPnotOKy nobitpa(6)Ha BHKOpHCTOByBaHHdAmEtPJnaHa. IIO6yBIMKHTNINOCMOK,nepeBeiTb nepeMnkauePekHMIBpo60TH7HaCmBOI «PekmBCMOKTyBaHHA -Ⅲo6BHHKHYTHHINOCMOK,nepeBeIDtB nepeMkauch pexHMIBpo60TH(7)HaCMBON «BHHKAHHA」. ПлLOOC OCHaUeHn KOHTpOEn MNotOKy NOBtPn. KoHTpObNtOKy NOBtPn BCTaHOBHeHn BpeKmI BiDcMOKTyBaHHa JOKcTko Ha 20 m/c He3aJIeXHo BiD nIoXeHHa peryNaTopa NOTOKY NOBtPn (6). Akuo hacnpabdi ze 3aueHHHnXue, Hanp. kuo BIDCMOKyBaIbHH mHaH nNococy 3a6hBCr CMITTAM 3axCNHm fynbtpyBaIbHH mIXOk nepenOBHeHH a60 nnackn cKnadactn fInbTp noKoDIBcR, To Nyhae nonepaKyBaIbHH cnHan. B Takomy BNpaKy BmKhHtB nNococ i nepeBiTe Horo, kOnncHo y po3dini «YcyHeHH HeCnpabHocTe".
BicmoktybaHHnny BID npauoounx enktpoinctpymentIB (nB. man. G)
Y npnmiuHNI NOBHHa 6yTH 3a6e3neueHa DocTaH KpaTHiCt b NOBITPOoMHy, AkiO cnpauBoaHe nobITpBIbODHTCB y npnmiuHHa. 3BaXaIte Ha BIDNOBIDNI npnncn, OIOJTOy BaWi KpaHi.
YINOCOCIHTERPOBaHa PO3eTKa I33axnCHIM KOHTAKTOM (5). YHeMOXHAYBIMKHYTHO3BNIWHIENEKTPOIHCTPYMENT. 3BaKaHte HaMaKcHmAbHODoNYCTHMcyCNOxHBaHy notyHKHtBnIDcHAnHO eNEKTPOIHCTPYMENTa.
Ia36e3neueHHIOCTaTHbO rTaHCnOpTyBaHH Nny 3 MICaB iDcMOK TyBaHH 3HaueHHN NOTOKY NOBITPra IIN eHHO eEKeTPOiHCTpyMeHTa He NOBHHo 6yTN MeHIMM 3a MiHimaJIbHe.
| Даметшанга Налаштоани зашиени notokу nobitprn | |
| 35 MM 57,9 M | 3/rogen |
| 22 MM 41,2 M | 3/rogen |
| 15 MM 12,7 M | 3/rogen |
BctaHObitpeyIATOPnotOky nobitpr6Ha BKNKOpNCTOBYBaHNI diametpwnahra. - BctaHOBITb nepexiHnK IO nHnococa (23). BcTpOMiTb nepexiHnKdo nHnOocca (23) y BntaKnn naTpy6ok eNEkTpoiHCTpyMeHTa.
BkaibKa: niiac po6oTH 3 eNEKtpoHCTpyMeHTAM 3 MAIOIO NOaueIO NObITpy BIDCMOKTyBaIbHN WnAHI (HaIP, No3IKN, WNIIFyBaIbHi MAINHH ToIO) HeO6xIDHO BiIKPbATN OTBIP dNIA NOBITPI 3 aRnyuKOIO (36) Ha nepexiHky IO NINOOCa (23).IIWSe 3a TaKnx yMOB aBTOMaTHUHe OUYIeHHa FInbTp aMKe IpaIOBOaTH HOpMaJIbHO.
IyBcfo NOBepaTe KInbue Ha OTBopi IINOBITpa 3aRnykoIO (36), NOKN OTBip He CTAHe MAKCMmaHbHM.
-3a4nTH ABOMATNHE BMHKAHHBMHKAHN INOCOCA, BCTaHOBtB nepeMHKaay peKHMIB po60TN (7) Ha CMBON «ABTomATHka NcCKy Ta 3yNHKNB. B bomy peKmipo60TN notik nobITPA KOHTPOIOCTBCA eNEKTOPHIKOY BIDNOIBHOCTi DO HAcTPOHN HA perynrTOPI NOTOKY NOBITRA (6).Ipi npabINbHO BVbpaHOMy HanaWtBuHHi 3a6e3neuyTcBOCTaTHC TpahcnpTyBaHHN INy.
-Ⅱo6yBIMKHyTHnINOCOC,yBIMKHITbNIDKNIOueHmNOpo3eTKI(5)eNEKTPOIHCTpyMeHT.IINIOOCA BTOMATNUHO NOHNHaepauOBAHT. -BHMKHITb eNEKtpoHCTpymeHT, u6B BiDCMOKTyBaHH npnnnHnoCb. ΦyHKiIABTOMaTHUHO rnycky/3yynHKn nicra po60tn npdoBxky IpaQOBaTH Do 15 cekyHd nicra BmKHeHH, u6 BCMOKTAth 3aNNuKN pNny 3 BiDCMOKTyBaHOro shaHa. -Ⅲo6BnMkHHTnHnococ,nepeBeiTb nepeMnKaaypeKmibpo6ToN(7)Ha CnMBON《BNMnKaHHA
Akua 3bkyobn nonepybaHn ciHa, nnooc nopti6no nepeBipntn, k onncAo H po3dini «YcyHeHH HecnpabHocteN.
Bonore BiDCMOKtyBaHHa
He BCMOKTyIe NINOCMOKOM rOpOci a6o BN6yXoHE6e3neHi piDHH, HApnPKnAd, 6EH3HH, ONHBy, cNHPt, po3HHNKn. He BCMOKTyTe rapuHn PNN, nnn, 10 roPHTb, Ta B6yXoHE6e3neHn nn. He
WARNING: Do not use the device if it is damaged or leaking. If, during use, it may catch fire or explode.
Do not allow children to use the device as a toy. The device is intended for drying wet laundry.
Note: For step or degree of filtration (class H), check before drying.
Operation of the drying device
- If necessary, remove the bag for the condensate (27) or the condensate filter (26). Note: To remove the condensate from solid materials, use the water filter (accessory) to protect the pump from solid materials. - Insert the drain hose (30) into the drain outlet (32). - Activate the automatic filter cleaning (AFC).
Cleaning the device
To switch off the device, turn the mode selector to the symbol "DRYING". When drying, the maximum fill level (40) is reached. The drying process stops automatically. Turn the mode selector to the symbol "OFF".
Note: When drying delicate fabrics (e.g., drill emulsion, oils and pastes), the drying process stops at full capacity. It is necessary to check the fill level and empty the contents manually.
If during water drying the pump needs to be primed, this does not indicate a reduction in drying performance. No measures to improve the pump's functionality are necessary.
- To switch off the device, turn the mode selector (7) to the symbol "OFF". - To transport the device, wind the cable (2) around the holder (3). - Empty the container (1). After the drying process, the condensate tank should be emptied: - Remove the condensate filter (28) and let it dry well. - Remove the drying rack (12), cover the filter (39) and let both parts dry well.
Automatic filter cleaning (see fig. H)
During automatic filter cleaning (AFC = Automatic Filter Cleaning), the condensate filter (28) is cleaned every 15 seconds with a pulsating air flow. The filter cleaning function should be activated at the latest when the drying performance is no longer sufficient. With regular use of the filter cleaning, the filter's service life is extended.
If the condensate filter is heavily soiled, it remains fully functional. Cleaning the condensate filter by rinsing or blowing is not only unnecessary, but can also damage the filter.
Note: The automatic filter cleaning is activated when the device is switched on.
BMKAHHBIMKHeHHABTOMaTHHOrO OuHcHnHΦIbTp aMOXJIbe HnWe npN yBIMKHeHomy IHCTpyMeHTI.
-BUMKHeHHAFC
HaHCHihtb Ha KhoNky AFC (9). KoTHpObln cBtioJIOd (37) rache.
-BMHKAHHAFC
HaTnCHiB Ha KhoNky AFC (9). KOHTpOJIbHn CBIIOJIOI (37) CBIITbcr 3eNEHM KOIbOpOM.
Texhuihe 06cnyroByBaHHaicepBic
Texhihe 06cnyrobyBaHHa Ta ouHueHH
BHTHHTb WtTencB 3 pOzETK, nepu HIX BHKOHyBaTH po60TH 3 texHicHoro 06cnyROByBaHH a60 ouHueHH, HanaTOBYBaTH NINOcmOK, MInATn PnHaADn A6o nepu HIX BiKnactn NINOcmOK. Li nonepeJxYBaHbHi 3axoHN 3 texHIK 6e3neKN 3MeHuyOTb PN3NK BnnaKOBOrO 3anyCKy NINOcmOKa. Дляякioi 6e3neuhoipo60THTPMaIte BIDCMOKTyBauiBENTHnauiHiOTBOPBUCHTOI.
Akyo Tpe6a NOMIHnPiEeHbHm Ka6enb, ce Tpe6a pO6HTHa fipmi Bosch a60 B cepBicHi MaIcTePHi dJeNEKtPOINCTpyMeHITB Bosch, 06yHNKHyTN He6e3NeK. PnO6cnyROyBaHHI Ta OHuHHeHHI HNococy HaJraTte 3axHCNY Macky KInacy 3axHcy FFP2 a6o Bnue Ta NOBHN 3axHCNH Ondopa3OBn OJr BiNoBIHO Do YHHNX npABIN. TexHnue 06cnyROyBaHHI Ta OHuHHeHHaMOxTyb npBOdHTN nHne Oco6n, kAI MaOTb CbIOU TBO npo KBanifikaio.
IpepeBnDaeHnHm nnoococ 3 Hebe3neHoI 30Hn Heo6xIOHO peteBho npOnnOocOHT Ta npoteptn Kopnyc nnoococ BONOrIO TKaHHoAO abo 3arepmTHyBaTH Noro repMeTKOM.Ipn BHXoJi 3 Hebe3neHoi 30Hn yci BCMOKTyBaJIbHI cactHHN NOBHHi BBKaTncra 3abpydHeHMn I no BiHDNoeHHIO DO HNX NOBHHi 6yTH BxNTi BiINOBiDi 3anobixhi xaxoJn.Yci Detani, ouHceHi He HaneXHM uHOM niJ cacTexHInHorO oClyroByBaHH/peMOHTy, NOBHHi 6yTH yTNiIOBAHI (y repMeTHuHNx MiKkax).
PnTexHCHOMyOcbnyroByBaHHKOpNCTyBaemnnococ He06xIDHO demoHTyBaTH,OnCTHTa BnKOHaTHMOKNBI pOBoTH3TexHCHORo 0cbnyroByBaHH,He HapaxaOHn npn coby HA He6e3Neky OcbnyroByouH nepcoHAn Ta IHUNX oci6.IpeedemohTaXeMnnOCoc Tpe6a npouctHTn,IO6
3ano6iHTMOKINBHM He6e3neKaM.TexHicHe 06cnyROByBaHH MICTHTb onepaui,ONHCahi y po3di CknaDHaHH. PnIMiueHH, BAKOMY DEMOHyETbCa HNOOC, NOBHNOd6pe npOBiTpOBaTHc. Nid qacTexHIOHO 06cnyROByBaHH BraIte Oo6hCTe 3axHcHe CnpAKeHH.
IicraTexHIOHO6cnyROyBaHHa Tpe6a npnbpatn Mlue, de3iINCHOBANOCaTexHHeO6cNYROyBaHHa OohaimeHne OIN Ha pik Heo6xijHo, 06 Bnpo6nK a6o Hauheha oc6a npobodmN TexHIny nepeBipky npnaJy, Hanp., nowkOjKeHHa fInbtpy, iInbHicTB nNoococa Ta cnpabHnicb KOHTpObnHO rPncTPOK.
KpIM TORO, efeKTHBHICTb fInbTpna NOBHHa nepeBiprTcHepiDwe Ondoro pa3y Ha pIK BiINOBIDHO EN 60335-2-69,22.AA.201.2.
Kpim toro,naiohahbi BmormoMoxytb 3ymobnIOBaTH Heo6xHnicb 6bnu cactoro nepernyd. RaiophiinbpBtpNBeepKTHNHCb, noro Heo6xHHO 3amHHTa NOBtOHTBnPiPo6yBaHH.
BHHMaHa/3aimaHnackoroCKnaqactoroΦinbtpa (mB.mal.11-12)
NotyHKtB BIDCMOKTyBaHH 3aIeKHTb BID CTAHy fInbTpA. Tomy cni peYnphO OuNHyBAtn fInbTp.
HeraHno 3amHIOTe NOsKOJKeHN PnACKn CknaJauctn fInbTp (28).
-10ncna6teIbAphiKcyuOiUHTn(38)iNocyHbTe3axnCT 6nOKyBaIbHoIraNka(19)BHN3. -NotarHtB3a6nokyBaIbHHnraHouK(18)iBikpInTe Kpnkkyfipnbtpa(39). -Bi3bMitB nIaCKn CKlaqactH pInbTp (28) 3a nepemHcKn IBuMItb Horo,NotarHYBUnyropy. -Bonororo raHuyipko npnbepitb nni i 6pyd, uo cnaHn 3 nnackoro cknaqactoro fInbtra (28) niJ vac noro BnMaHHa, 3 KpaHO KpnKuKn fInbtra (39). BCTaBTe HOBn a6o npouHueHn pIaCKn CKlaJauctHn fInbTp (28), npu cboMy cnIdkyte 3a HadiHo i npabNbHOIO nocdKOHO. -3akpiTe KpkiKky fipbTpa (39) (BOHa NOBHHa BiDyTHO yBiIN B 3aueenneHna). -10ocyhbe 3axnct 6bokybaibho r3uka (19) Bropy ta MIHcO 3aBHTiB o6nBaΦikcyoui wTnФTn (38).
OuueenHcMHOCTi
YacBIDnacy npOHpAte EMHICTb(1)3BnuaHMM, Hea6pa3HBHM MIOUOM 3aco6oM i DaBaTe I BHCoxHyTH.
OuunueHHaDatunKIBPbH3anOBHOBAHHa(HB.MaJ) Uac BiudacyouunyTe DaTUnKPiBH3anOBHeHHa(40).
-BiKpnHe 3aMKn (13) i3HIMtB KPNsKy NINOCMOka (12). -Протпьдатчн piBЯЗANOBEHЯ(40)M'якю raHuipkoio. -HaIiHbTe KPNKy NINOCMOKa (12) i3aKpNTe 3aMKn (13).
36epirahHH i TpaHcnpTyBaHHa (nB. Man. K)
- Ipeep TpaHcnpOpTyBaHHM BnIMtB NOBHH 3axnCHNfynbTpYBaBHHMIOWKuNnakeT DnCmTTA60 BnHnTe3i6paHy pIDHy 3nnlOcoCa, uo6 He HaidipBatn CnHy.
- HaKpyiTb wHyp ha KpnneHHn dHa hHpya (17). BCTaBTe npHnAaDy npH3HaueHi DnI cybO rTO pTmAmu: BCMOKTyBaJIbHi Tpy6N (33) B TpMAmu (20),uiINHHy HacaKy (29) B TpMAmu (21),PiIOrOBy HacaKy (32) B TpMAmu (22).
-BiKpnIe enactnHi cTpiKu TpImaHa BIDCMOKTyBaJIbHO 7nAHa (4) i npoklaIb BIDCMOKTyBaJIbHm 7nAHT (25) HABKOIO KPNIK NINOOCa y TpIMaU (4). BCTPOMITb enactnHi cTpiKHa Micue. - IpeheNoTe nnnooc nnne 3a pyky (10). -Пибраiteплосocдя 3берiraHHу cyxe npIMiueHHI 3axuiaTe Ioro BiJ HecaHKioHOBaHOro BKNOPICHaHH. -Длгдсунннннннннннннннннннннннннннннннннннннннннннннннннннннннннн raJbMo HnPmHOro pOlnka (15)doHn3y.
YcyeHHHa HecnpaBHOcte
Ypa3i HecnpabHocti (Hanp., nepenomneneHH phinbtpa) Nnocmok Tpe6a HeraHOBHMKHyTN. PepeNOBTOPHMM BMKAHHM Tpe6a ycyHyTH HeCnpabHictb.
YB4A! Pnnooc Mictb ukiinBn dnn 3doopob' nnn. DToPmUyTecb ycix iHCTpykui 3 Texhikn 6e3neKn zuoro noci6nka.
| ПюблemaУсунения | |
| Вidмokуba ha TpybHa He Заньа TCB. | - Перевп Te chypжвlenha, Stencel, azanobixnK, po3etky i daTchNK pIBHЯ Заловиьня (40). |
| Перевпak ржимь робOTN (7) BCTANOBLEHЯ на сИМВОЛ «АВТOMATиka pySCY ta ЗуNHКИ. | |
| - Встановып лоревпak ржимь робOTN (7) на сИМВОЛ «РжIM BCMOKtyBaHЯ» | |
| abo yBIMKHITb piKIIuOeHЯ do po3etKN (5) eIeKTPoiHCTPpMent. | |
| Вidмokуba ha TpybHa ВIMNKaCTbC. | - Спорожніт b кontелер (1). |
| Пися спорожніня Контейнера ВidmoktuBaHa TpybHa He ВIMNKaCTbC. | - ВIMKNTb плосoc 3auekaite 5 cekynd, uepez 5 cekynd 3HOB yBIMKHITb Ioro. |
| - OuchITb ДатчNKPIBЯ 3aONOBHOBAHЯ (40), a takoxng pOcTip mIX daTCHKAMH PIBЯ 3aONOBHOBAHЯ (40) за дОПOMOrOToU SltTK. | |
| Зменшевский Notykhich ВCMOKTuBaHЯ. | - ВдалITb 3aCmUeHЯ 3i BCMOKtyBaJbHOI Hacadkn, BCMOKtyBaJbHOI Trpy6n (33), ВIDmOKTuBaJbHOI shaHra (25)aboПлackTORO cKlnductoTO φINbTpA (28). - 3amHITb nakET dny CmITry (27)aboZaxHCSHФyInbTrpyBaJbHЯ MlloK (26). - Правиьно BCTANOBITb KpIshKу φINbTpA (39). - Правиьно BCTANOBITb KpIshKу плосoca (12) iЗakriHte 3aMKn (13). - 3amHITb плackск scklaudactm φINbTp (28). |
| Пд час ВIDмokTuBaHЯ 3 плосoca розлita TCB. | - Перевпгte пrabиьпICTb BCTANOBHLENHЯ пLACKTORO cKlnductoTO φINbTpA (28). - 3amHITb плackск scklaudactm φINbTp (28). |
| АВТOMATичne ВIMKHeHЯ (ВОлore ВIDmOKTuBaHЯ) He cnpaцьовe. | - OuchITb ДатчNKPIBЯ 3aONOBHOBAHЯ (40), a takoxng pOcTip mIX daTCHKAMH PIBЯ 3aONOBHOBAHЯ (40) за дОПOMOrOToU SltTK. у рazi рДIN, уо He npROBЯТь eIeKTPRKy,abo pri n yTbOpeHnI pIHи ABTomatNiue ВIMNKaHЯ He npaц�e. - Постий Н� реревпayte рibeHь 3aONOBHENH. |
| Пунас поразедуBaJbHЯ сгнал. | ВСТановида ЗанадTo мana NotykhICTb BCMOKtyBaHЯ. - BCTANOBHLEHЯ рerglyaTOPNotyKHOCtI BCMOKtyBaHЯ (8) Na 6ilbwe 3naueHЯ. ВСТановида НЕравиьня DiAMETr ShaHra. - BCTANOBITb рerglyaTOPnoty nobITray (6) Na npavinbHЯ DiAMETr ShaHra. ВIDmOKTuBaJbHЯ shaHr (25)ЗБНТу abo nepERHyTN. - UcyhTe zacmivcheny abo nepERHN. Паket dlya smITry/ЗхИСнY phyIbTrpyBaJbHЯ MlloK nobHN. |
For spare parts and repairs, please provide the 10-digit order number that is on the product nameplate.
Warranty service and repair of power tools are carried out in accordance with the manufacturer's terms in the countries of the EU, in direct or authorized service centers of Robert Bosch GmbH. WARNING! Using counterfeit products is unsafe and may have negative consequences for your health. The manufacturer and distributor of counterfeit products will be prosecuted under administrative and criminal law.
Ukraine
Bosch Service Center for Power Tools
Kraing St.
02660 Kyiv 60
Tel.: +380 44 490 2407
Fax: +380445120591
E-Mail: pt-service@ua.bosch.com
www.bosch-professional.com/ua/uk
The addresses of regional warranty service workshops are indicated in the national warranty certificate.
The addresses of other service centers are listed below:
www.bosch-pt.com/serviceaddresses
Disposal
After use, the device and its packaging must be disposed of in an environmentally friendly way for recycling.
Do not throw it in the household waste!
Disposal:
In accordance with European Directive 2012/19/EU on waste electrical and electronic equipment and its transposition into national legislation, used electrical and electronic equipment must be collected separately for environmentally sound recycling.
Proper disposal of used electrical and electronic equipment helps to avoid potential negative effects on the environment and human health due to the presence of hazardous substances.
Kazakh
Eurasian Economic Union (EAEU) Conformity Mark
This product has been certified for compliance with the technical regulations of the Customs Union. The EAC mark indicates that the product meets the requirements of the relevant technical regulations of the Customs Union. The mark is applied to the product, its packaging, or the accompanying documentation.
Service life
Service life: 3 years from the date of manufacture (indicated on the product label). After this period, the product must be taken out of service.
Service and maintenance instructions
If the device housing is damaged, do not use it. If the power cord is damaged, do not use it. If the device has been dropped or damaged, do not use it. If water or other liquids have entered the housing, do not use it. If the device emits smoke or a burning smell, unplug it immediately.
Cleaning and care
- Do not immerse the device in water. - Do not immerse the power cord in water.
Service type and scope
Before starting maintenance, it is necessary to disconnect the device from the power supply. It is necessary to protect against accidental switching on. If it is impossible to disconnect, refer to the additional instructions for maintenance parts according to GOST 15150-69 (part 1).
Maintenance
During maintenance, it is necessary to check the fastening of parts and, if necessary, make mechanical adjustments.
- It is not allowed to operate machines with a broken cable. - Read the maintenance instructions according to GOST 15150-69 (part 5).
Safety precautions for operation
Read the safety instructions and warnings. Follow the technical safety instructions and warnings when operating.
And/or use protective equipment when working.
Keep safety instructions and warnings for future use.
Do not allow children or persons with limited physical, sensory or mental abilities, or with insufficient experience and knowledge, to operate the device. Such persons should be supervised and instructed. Keep children away from the device.
Do not allow children to play with the device.
Follow all safety regulations during operation.
WARNING
Do not inhale asbestos dust.
Acbct kahepeorehdi 60bn
Ta6binaDb.
ECKEPTY
WanCopfbIbI naIaIaNHy, copatbIH 3aTKeTp MeH OIapDbI
DpybcKIO Tpyanbl KaKETTI aknapaTbI anFaHHAN CoHa WaHcOpBtbl naDanaHbHb3.HyckaynbKTapdbI dOpbHday opbHCbI naDanaHy MeN kaKaTTaHypapDbI a3aTadbl.
ECKEPTY
Wancnpfbi KpyKa 3aTeKTePdi XHe Tnicti Wapanap apkbln
cynbiktbikapda copyafaphanfah.Cyblktbikaptnoi TOK COFY KAYIN APTTbipabli.
WAnCOPFbIuHEn6eHNH,MaH, CnHPT,epitkiuTep CnKbI XaHbI HEmecx XapblNFBI CybIKbIKTapdbI copyFA 60MaJDbI. bIcTBiX KaHbIN TyPhAHemecx XapblNFII WAnDbI copyA 60MaJDbI. WAnCOPFbIuHbIX XapblNy Kayni 6ap XaHapda naHdAnahyFA 60MaJDbI. WaH,by Hemece CybIKbIKTap TYaHybl HEmecx XapblNy MyMKIH.
ECKEPTY
Po3eKaHbI TEK naHanaHy hcyckaynbifbHda 6enrineHren
MaKaTtApda naaDanaHbHbI3.
ECKEPTY
Ko6ik Hemece cy wblkca wahcopfbwbtb 6ipden owi pin,
KoTeHepin Ta3anaHb13.KeipKaFdaJaWaHcopfbiu 3aKbIMDaHyblyMymKiH.
WARNING! The washing machine must be disconnected from the power supply before any maintenance. WARNING! Do not touch the power cord with wet hands. If the power cord is damaged, it must be replaced by the manufacturer, its service agent, or similarly qualified persons to avoid a hazard. Do not use the washing machine if the power cord or plug is damaged. If the power cord is damaged, it must be replaced by the manufacturer, its service agent, or similarly qualified persons. Do not pull the power cord to disconnect the plug from the socket. Do not place the washing machine on a carpet that blocks the ventilation openings. Do not use the washing machine without the filter and drain hose properly installed. The washing machine must be connected to the water supply using the new hoses supplied with the appliance. Old hoses should not be reused. If the supply cord is damaged, it must be replaced by the manufacturer, its service agent, or similarly qualified persons in order to avoid a hazard.
CAUTION
This appliance is intended for household use only.
For safety and proper operation, the appliance must be installed and serviced by a qualified technician. The manufacturer is not responsible for any damage caused by improper installation or use. The appliance must be connected to the water supply using the new hoses supplied with the appliance. Old hoses should not be reused.
Do not install the appliance in a place where it may be exposed to water or moisture.
Before cleaning or maintenance, disconnect the appliance from the power supply. Do not use the appliance if the power cord or plug is damaged. Do not pull the power cord to disconnect the plug from the socket. Do not place the appliance on a carpet that blocks the ventilation openings. The appliance must be connected to the water supply using the new hoses supplied with the appliance. Old hoses should not be reused. If the supply cord is damaged, it must be replaced by the manufacturer, its service agent, or similarly qualified persons in order to avoid a hazard.
WARNING
The appliance must be disconnected from the power supply before any maintenance. Do not touch the power cord with wet hands. If the power cord is damaged, it must be replaced by the manufacturer, its service agent, or similarly qualified persons to avoid a hazard.
WARNING

CAUTION: All safety instructions must be followed and only qualified technicians should perform repairs.
Safety instructions must be followed and only qualified technicians should perform repairs. Do not use the appliance if the power cord or plug is damaged.
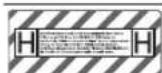
This appliance is intended for household use only and is designed to be used in accordance with IEC/EN 60335-2-69. The noise level is less than 0.1 mW/m³.
Expert: The technical data in this manual is based on the results of tests conducted in accordance with the standards in force at the time of manufacture.
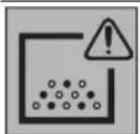
EXPERT! The filter is a consumable item. To ensure the machine operates correctly, the filter must be replaced when it is dirty or when the container is full. The filter should be cleaned or replaced by qualified personnel only.
Replacement parts
Only use original accessories and spare parts.
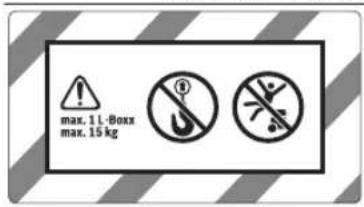

max. 1 L-BOXX, max. 15 kg
Place only one L-BOXX on the device.
The L-BOXX and its contents must not weigh more than 15 kg.

Do not use the device without a filter, dust bag, or paper bag. Do not use the device without a filter. There is a risk of damage and injury.

Do not open the filter, do not start or operate the device without it. Only use the filter when it is properly installed. There is a risk of damage.
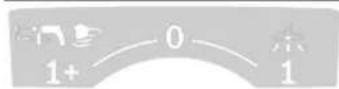

Automatic filter cleaning (AFC = Automatic Filter Cleaning)
Power and battery specifications
Please read the safety instructions carefully before use.
Storage and transport
Store the device in a dry place, away from rain and moisture. Keep it out of reach of children and unauthorized persons.
The device must be used in accordance with the IEC/EN 60335-2-69 standard and is intended for commercial use, such as in hotels, schools, hospitals, factories, and offices.
On IEC/EN 60335-2-69, the stages of cleaning, washing, drying, and extraction are carried out in accordance with the instructions.
The socket must only be connected to a properly installed socket.
Control panel
The control panel contains the switches and indicators for the various functions.
(1) Container (2) Filter bag (3) Indicator lamp (4) Suction hose (5) Socket for electrical tools
190|Kazakh
(6) Exhaust filter (7) Accessory holder (8) Suction hose (9) AFC button (10) Carrying handle (11) L-BOXX holders (12) Suction bag (13) Suction bag holder (14) Power cord (15) Control dial (16) Control dial (17) Cable clip (18) Suction hose connection (19) Hose connection (20) Suction hose connection (21) Connection for dust extraction (22) Connection for dust extraction
(23) Suction hose (24) Dust bag (25) Suction hose (26) Protective hose (27) Hose (28) HEPA filter (29) Dust extraction (30) Rubber nozzle (31) Crevice nozzle (32) Dust bag (33) Suction hose (34) Indicator lamp (35) Battery (36) Charger (37) Vacuum cleaner (38) Filter (39) Suction hose (40) Control dial
Technical specifications
| bɪnfənʌbɪ/кургak тазалayfa aphanfahншан copfblg GAS 35 H AFC GAS 35 H AFC | ||
| Θиm hæmipi | 3601 JC3 6.. 3601 JC3 660 | |
| HominahdBi Kepehy B 220-240 110 | ||
| HominahdBi TytbHbIaMbH Kyat Bt 1200 1000 | ||
| Жилік Г 50-60 50-60 | ||
| Котейнер кeелimi (бpyтTO) п 35 35 | ||
| Котейнер кeелimi (таза) п 25 25 | ||
| Таза кeелimi (счыктуk) п 19 19 | ||
| Шан жинafыsh кeелimi п 19 19 | ||
| Мамс. ВakyymA) | ||
| - Шанcopfbls | rПа 230 211 | |
| - Турбиha | rПа 254 242 | |
| Мамс. оTKiЗу кeелermA) | ||
| - Шанcopfbls | n/c | 36 |
| M³/car | 129,6 | |
| - Турбиha | n/c | 74 |
| M³/car | 266,4 | |
| Мамс. copy куаты | Вт 1380 1150 | |
| Катnapысу[a]aydaы | M² | 0,5 |
| Шан класы | H | |
| Салмагы EPTA-Procedure 01:2014 Кужаты саï | КГ | 12,4 |
| Корганыс класы | ⊕/I | |
| Шанcopfbltsin корганыс дэражесi | IPX4 | |
For dry/wet extraction: 35 L and AFC 35 L AFC
Protection class IP55
A) 35 mm and 3 m suction hose
Specifications [U] 230 V for alternating current. For direct current and other voltages, see the specifications.
The device can be used for other purposes, but it may be used for the intended purpose and in accordance with the instructions. For more information, visit: www.bosch-professional.com/wac.
-Connect the container (1) with the filter bag (2). -Remove the suction bag (13) and the suction bag holder (12). -Pull the protective hose (26) out of the holder.
The device must be used only for its intended purpose. -Do not use the device with damaged or cracked parts. -Before cleaning, disconnect the device from the power supply and allow it to cool down. Do not immerse the device in water or other liquids. If the device is damaged, do not use it and contact the service center (1). Do not use the device near flammable or explosive materials. -Clean the container (1) with a standard abrasive cleaner and a soft cloth.
Replacing the filter (see figure E)
Attention: Before replacing the filter, turn off the device and unplug it. -Remove the filter cover (31) by turning it counterclockwise (32). -Remove the old filter (30) and insert a new one.
Attention: The filter must be replaced regularly to ensure proper operation.
L-BOXX insert (see figure F)
The device can be stored in the L-BOXX insert without the battery inserted. Make sure the device is switched off before storing it in the L-BOXX.
- Open the L-BOXX (11). Place the device in the L-BOXX. Close the L-BOXX. The device is now protected from dust and dirt.
Maintenance
Before cleaning or servicing the device, switch it off and remove the battery. This prevents accidental starting.
When cleaning the device, do not use water or other liquids. Use a dry cloth to wipe the device clean.
Cleaning
Pay attention to the safety instructions! The device must be stored in a dry place, away from heat sources. Do not expose the device to rain or moisture.
The following materials can be recycled:
-Plastic parts are marked with <0.1MR/M for recycling.
Do not dispose of the device in household waste.
The copy of the original document must be made on white paper (25) with black ink (12) only.
Copy of the original
Copy of the original document
- To adjust the copy density (6), press the density adjustment button. - To make a copy, press the "Copy" button (7) on the control panel. - To make a copy, press the "Copy" button (7) on the control panel.
The copy density is set automatically. If the copy density is not correct, adjust it using the density adjustment button (6). If the original is dirty, torn, or has creases, the copy may be unclear. If the original is not suitable, the copy may be unclear. If the original is not suitable, the copy may be unclear.
Copy of the original document with the original document placed on the glass (see figure G)
This button is used to select the paper size. Make sure the paper size is correct. Pay attention to the paper size.
Open the document cover (5). Place the original face down on the glass. Close the document cover. Make sure the original is placed correctly.
The copy of the original document must be made on white paper (25) with black ink (12) only.
Paper size adjustment button
| 35 MM 57,9 M | 3/caF |
| 22 MM 41,2 M | 3/caF |
| 15 MM 12,7 M | 3/caF |
- To adjust the copy density (6), press the density adjustment button. - Copy settings (23) are set. Copy settings (23) are set for the copy paper size.
Note: If the original is not suitable for copying, the copy may be unclear. The copy settings (23) may not be correct. The copy may be unclear.
The automatic document feeder function is not available.
If the original is not suitable, the copy may be unclear.
- To make a copy, press the "Copy" button (7) on the control panel. The copy density is set automatically. If the copy density is not correct, adjust it using the density adjustment button (6). The copy will be made on white paper (25) with black ink (12) only.
- Wash the filter (5) after disconnecting the electric pump. The filter must be cleaned. - Disconnect the electric pump, then drain the water. To clean the filter, press and hold the filter cleaning button for 15 seconds. - To turn on the filter, adjust the mode switch (7) to the "Wash" position.
Before cleaning, disconnect the filter from the power supply via the "Filter Off" button.
Filter cleaning
The filter is designed for filtering water, not for filtering other liquids such as gasoline, alcohol, or solvents. Do not filter flammable or hazardous liquids. Do not use the filter in any other way. Do not filter liquids that are hazardous to health or the environment. The filter is intended for water purification only.
Note: When using the filter for the first time (or after a long period of inactivity), the filter may produce a small amount of water.
Filter cleaning procedure
If necessary, remove the filter cover (27) or the filter cartridge (26).
Note: If the filter becomes clogged during use, the filter cartridge (if applicable) should be replaced or cleaned.
- Replace the filter element (30) with a new one (32). - The filter's automatic cleaning function (AFC) is now activated.
Draining water from the filter
To drain water from the filter, adjust the mode switch (7) to the "Drain" position.
194|Kazakh
The filter is equipped with a pressure sensor (40). If the maximum pressure is reached, the filter will shut off. Adjust the mode switch (7) to the "Wash" position.
Note: When draining water from the filter (e.g., before storage or transport), the filter container should be emptied. The pressure sensor should be checked and the container cleaned if necessary.
During filter cleaning, if a warning signal is given, the filter and the pump are turned off. To reset, press the reset button.
The device is equipped with a water filter (7) "Owipy" that enriches the water. The filter must be replaced (2) once a year (3) or when it is clogged. - The container (1) is empty.
To install the filter, follow these steps:
Remove the filter cover (28), then take it out. - Remove the filter's locking ring (12), take out the filter cartridge (39), and then remove it as well.
Automatic filter cleaning (see figure)
During automatic filter cleaning (AFC = Automatic Filter Cleaning), the filter cover (28) is opened for 15 seconds and the filter is cleaned by water flow (pulse mode).
If the water pressure is too low, the cleaning function may not work properly.
The cleaning interval can be adjusted by changing the cleaning frequency.
To adjust the cleaning frequency to the desired level, use the automatic cleaning function only when the filter is clogged or the water flow is reduced.
Do not use the filter cover to clean the filter. The filter cover must be removed or replaced if it is damaged, and it is possible to clean the filter with a soft brush.
Note: The automatic filter cleaning function is always active.
The automatic filter cleaning function is only available for models with a large filter housing.
- Activating the AFC function
Press the AFC button (9).
The indicator light (37) will turn on.
- Deactivating the AFC function
AFC TYMecin(9)6acbHb3.
BaKbIayJapbIKdHOdB(37)JacblTcneHkaHbI.
Technical service and maintenance
Technical service instructions and maintenance
Before performing any maintenance or repair work, disconnect the appliance from the power supply. This safety measure must not be bypassed. Only qualified personnel should perform maintenance and repair work.
If the appliance is used improperly, to avoid danger, contact Bosch or Bosch Electric Tools service centers for repair and maintenance.
For technical service and maintenance, wear protective gloves and a respirator mask of class FFP2 or higher. Technical service and maintenance work should only be carried out by trained personnel.
Before cleaning, remove the filter and clean it with a brush or rinse it under running water. All filters should be cleaned after each use. During technical service/maintenance, all cleaned filters should be inspected (including for damage).
For technical service, the filter must be cleaned and, if necessary, replaced. Only use original spare parts and other accessories. To avoid damage, clean the filter before storage. During technical service, follow the "MoTaxkDay" procedure. The filter should be replaced if it is damaged. During technical service, wear protective gloves.
Technical service must be performed after technical service instructions.
If any liquid or moisture gets into the appliance, the appliance must be checked by technical service personnel.
If any liquid gets into the appliance, it must be checked according to EN 60335-2-69, 22.AA.201.2. It may be necessary to check it more often.
If the liquid is not detected, it must be cleaned and checked.
The cover must be closed when the appliance is not in use (see I1-I2).
The appliance must be stored in a dry place. The appliance must be cleaned before storage.
3aKbIMdaJfahKaJnnaKKaTnpblcY3rHi (28) pepy aNMaCTbIpbHbI3.
-Eki6ekitkiu 6ypaHdaHbI (38) 6ocatBn, nactHaHbH CaKaTaHdbipfblhB19 TEmEH KblKbITbHbI3. -ΠnactHaHbI (18) TaptbI, cy3riKaKaNaFbIH (39) aUbHbI3. -KaIlnak KaTnapnbCy3riH (28) KanKacbHaH yctan, OHbl KofapbI Kapai bIfapbHbI3. -KaIlnak KaInpnb cy3rhi (28) WbIrapy Ke3iHneTycetih WaH MeH Kipdi bInFaIbI wSybepeKeHN Cy3ri KaKNaFbIHbH (39) KneriHeH KetipiHj3. -KaHa Hemece Ta3anaHFaH KaIaNak KATnapb cy3riH (28) OPHaTbIn, OHbH 6epiK XeHe dypbc OpHaTbINFaHbHa Ke3 XeTKi3iH3. -Cy3iKaKnFaBih (39) KaybIn KOHyBnB3 (JeepTy Dbl6bCmEH Tipenyi Tnic). -Пл actHaHbIcKaTaNbIpbfblbH (19) KaTaNaH Kofapbl XblXblTbn, eki 6ekitkiw bpaHaHbI (38) 6ypan 6ekitih3.
KoTheHepDi Ta3aHaBbI3
KoHTeHepdi (1) cTaHdpTbI bckAnaH6aNtBn Ta3anay KypalBMEN Ta3an Kan KentipiH3.
Tontbipy dengreninH datunktepin ta3anay (J cypetin karaib3)
TOnbipy DeHReHH DaTuKTePi (40) KaKeTIHe Ta3aHaB13.
KynbInapBbI3aBbIn, aHcOpfbWtBnHXOFapFb6enirH (12) anbInTactaHb3. -Tonbpy DeHeRinH DaunKTepeiH (40) KymcaK WSybepeKeHn Ta3anaHb3. -ⅢaHcOpFbIHTbIKoFapbl6eJIIR (12) opHaTbIN KyIbIITapDbI (13) xa6bIbI3.
CaKtay KxHe TaCbImaIay (K cypetIH kapaHb3)
-CopfbltbTacbimndaydah6ypbih6en japaKaTTaHybHbIH anDbIH any yWIn TOnb KoKbIC Ka6bIH HEmece TOnb KopFaHbI Cy3rIKabHbIFapbHbI3 HEmece WbIFapbIHFaH cyBtkbTApIbI afB13bIbI3. Jeninik ka6ebnbdi Ka6ebnb YcTaBbIbHa (17) opaHb3. Kepek-KapaKaTApDbE3HHapHaBbYCTaFbIITapbHa caBbH3:copyKbIbpNpAbH (33) YCTaFbIITapbHa (20), TecIK KOHbIPMaHb (29) YCTaFbIbHa (21), eHdiK canTaMaHb (32) YCTaFbIbHa (22). -Copfblw nahr yctfaibihbH (4) ninimdi tacnacbih aubin, copfblw nahrihi (25) wanc0pfbw xofapfb 6eniriHH anHaNaCbHn YCTaftbka (4) cabHb3. Ninimdi tacnanapda kaitihi3. -ⅢaHcOpfbIHTbTeK TyTKacbHaH (10) ycTan TaCbIMaJaHaB3. -Copfbltby Kpyfak 6emere KObHb3 KHe pyKcTcb3 naDanahydaH Kopfahb3. - Backapy DeHrenekepi (16) 6eKity yuih Backapy DnHrenekepiHH TeKeriiuH (15) TMeH bacbIb3.
AkaynbikTapdbjKoIO
Erepakaynbk naida60nca, (mbicabblc y3ri 6y3bnfah 60nca) wancopfbtiDepeyewipy kepek
60anaJI. KaIa IcKe KocyaH anIbIH akaynbIKtbl KOIO KepeK.
Ha3ap aydpabHb1! CopfbIe hCaynbKka 3nH KeTiptetin WaHdbi Kytadbl. Ocb HcKaynbIKTaftaBl Kayinc3dk TexHHKaCbHbH 6apblk HcyckaynapblOpblHaB13.
Macene Wewimi
| Copy typ6bHacbl Jxmbic icteme Typ. - Xenilik Ka6bI, Jxenilik a7aHbI, cKaTaHbIPbHbITb, po3eTkaHb JxHe toTbipy deHreHin dAtuHKTePIH (40) TekcepHiz3. | |
| JXmbic pexHMepiH aybICTbIPbIN-KOCKbHI (7) "ICke KOCY/TOKATy aBTOMaTHKacbl" peXmIHne Typ. - Xmbic pexHMepiH aybICTbIPbIN-KOCKbIHTb (7) "Copy" bENriciH opHaTbHbI3 Hemece po3eTKaF (5) XaJIraHFaH əJIeKTP KypaJIbH iCke KocbIHbI3. | |
| Copy typ6bHacbl Oseedi. | - KonTeHepdi (1) bocatbHbI3. |
| Copy typ6bHacbl KOnTeHep bocatbIFaHHaH KeiH De Jxmbic icteme Typ. | - ΜaHcOpfblHTb eWipin, 5 cekHyd KytIIn3, 5 cekHyd etKeHHeH KeiH KaIITa KocbIHbI3. |
| - ToTbpy DeHreHin dAtuHKTePIH (40) XeHe daTuHKTePdH (40) boc opHbH KblIaKpHe Ta3aJIaHbI3. | |
| Copy KyaTb TEmeHdeI. | - Copy canTamacbiH, copy KybIPbH (33), copfbl WlnAHriH (25) Hemece XaJIpaK KaTnpbl cy3rH (28) XinaHbN KaIraH KipDeH ta3aPTbHbI3. |
| - Kokbc Ka6bH (27) Hemece KopFaHbIe cy3r I Ka6bH (26) aImactbIPbHbI3. | |
| - Cy3r KaKNaFbH (39) duByc bekiriHiz3. | |
196|Ka3aKa
| -Шацорфыштbingжогаргыбөлгин (12) дүрс opнатын, күлларын (13) хабинiz. | |
| - Каллak катnapны сүгін (28) онлайнырьнiz. | |
| Шан copy keziende shan shibin kastip | - Каллak катnapны сүгін (28) онлайнырс opнатынларынTekсерінiz. |
| - Каллak катnapны сүгін (28) онлайнырьнiz. | |
| Өширу ветоматнасы (ынfasды copying) | - Товлару дүнгийндатчктетрін (40) кэндатчктетрін (40) boc opнын кылшakпен тазаланьз. |
| Сүйскытлар tak оTKi3бeийн бүлсаме(hemce көбік пайда-bүлса,өширу аветоматнасы жунbic ictemeідiz. | |
| - Товлару дүнгийн(kунeni turtde baskilanaiz. | |
| Дыбістік eckер'tу сигhalы беріп'di | Тыm Temen copy куаты opнатылган. |
| - Copy куатын рettingішт (8) когарырak манг opнатынiz. | |
| Дурьс emec shanr dinametpi opнатылган. | |
| - Aya afынын рettingішт (6) copy shanrhih dyrbs dinametpihe сэйес opнатынiz. | |
| Сорфыш shanr (25) biterren hemce bkytel'ren. | |
| - bitericnti hemce bkyteludik ketipiiz. | |
| Кokьс кабы/когарыш сүгін kabы түллрketti. | |
| - Кokьс кабы (27) hemce kogarыш сүгін (26) онлайнырьнiz. | |
| Жаллak katnapны сүгі (28) лactaHaH. | |
| - Каллak katnapны сүгін тазаланьз hemce кжет bүлса, онлайнырьнiz. | |
| Жаллafнан олктр куралы apkынлжеткіkti aya afынlbetпeпeн каыр. | |
| - Косьмша aya cahtbaybin (36) copy adantepiride (23) aushbiv: copy adantepiridei calina haы kocbimша aya cahtbayl toltfblmeн aushbifahma 6ypan Tpybiviz. | |
| - Бар bonca: олктр куралынн kocbimша aya cahtbaylin aushbiv. | |
| Бakbilay олктpoн��akshi kate jymbic icten typ. | |
| - ЭкiletтВ Bosch кьзmet керсety optanlbfihа xabaplacibiz. | |
| Сүгіні avtomattы тугді тazalay Функцяrsы жунbic ictemeі typ. | - Сүгіт тazalay phunckцяшсв iccke kocbihz (AFC tvymecin (9) baskibiz). |
| - Copfbyшшалгін (25) калгahiz. | |
| Сүгіні avtomattы тугді тazalay Функцяrsы ewi py Mymkin emec. | - ЭкiletтВ Bosch кьзmet керсety optanlbfihа xabaplacibiz. |
| Сүгіні avtomattы тугді тazalay Функцяrsы кosity Mymkin emec. | - ЭкiletтВ Bosch кьзmet керсety optanlbfihа xabaplacibiz. |
| Корганы сузг Кабы 2607432050 | |
| Коргс Кабы (ПЗ) (Кррак/ bilfалды) | 2607432051 |
| ПТФЕ/HEPAЖалпak Катарны cyarici, Нknacbl | 2607432052 |
Service customer service and after-sales service for products
Service and technical service, as well as related accessories, must be provided in accordance with the regulations. For repairs and accessories, please contact:
For information about our products and accessories:
www.bosch-pt.com
Bosch service center will provide advice on questions regarding our products and their accessories.
If you have any questions, please contact the service center. When contacting, please provide the product's type plate number.
Only "Robert Bosch" branded or authorized service centers may perform repairs on power tools and their accessories. WARNING! If the product is used without registration, the warranty may be void. Registering the product and
using it in accordance with the instructions for use and safety regulations.
Kazakhstan
Contact address for service:
"Robert Bosch" LLC
Almaty.
Republic of Kazakhstan
050012
Mypat6aEBK.180y
"TepeMec"BO,7Ka6aT
Tel.: +7 (727) 331 31 00
Fax: +7 (727) 233 07 87
E-Mail: ptka@bosch.com
For information about the service centers and collection points, please visit: www.bosch-professional.kz
For other service centers and collection points, see:
www.bosch-pt.com/serviceaddresses
Disposal
The product, its accessories, and packaging must be disposed of in an environmentally friendly manner. Do not dispose of the product with household waste.
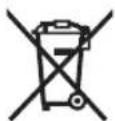
Only for EU countries:
According to the European Directive 2012/19/EU on Waste Electrical and Electronic Equipment and its implementation in national law, used electrical and electronic equipment must be collected separately and recycled in an environmentally compatible manner.
Please return your used electrical and electronic equipment to the collection points provided for this purpose.
For more information on recycling, please contact your local authorities or the retailer where you purchased the product.
Romanian
Indication of the maximum connected power allowed for the connected power tool.
These values may differ in the case of other models specific to the country of use. Please observe the specifications regarding the socket relevant to the vacuum cleaner.
Information on noise/vibration
Power tool service
Strada Horia Macelariu Nr. 30-34, sector 1
013937 Bucharest
www.bosch-pt.com/serviceaddresses
Disposal
The vacuum cleaner, accessories, and packaging must be handed over to a recycling center.
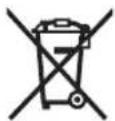
Do not vacuum up liquids. Penetration of liquids increases the risk of electric shock.
Do not vacuum up flammable or explosive liquids, e.g., petrol, oil, alcohol, solvents. Do not vacuum up burning, smoldering, or explosive dust. Do not work with the vacuum cleaner in rooms with increased risk of explosion. Dust, vapors, or liquids may ignite or explode.
WARNING: Use the contact for the operating instructions.
If the device is not working or water is present, immediately switch off the vacuum cleaner and disconnect it.
The vacuum cleaner may be damaged.
WARNING! The vacuum cleaner must be switched off before cleaning. WARNING! Check the sensors for the level of dust regularly, to ensure they are not damaged. Otherwise, the function may be impaired. If the vacuum cleaner is used in a damp environment, use a designated residual current device. Using a designated residual current device reduces the risk of electric shock. Before use, check the vacuum cleaner, the power cord and the plug. Do not use the vacuum cleaner if you notice damage. Do not attempt to repair the vacuum cleaner yourself. Repairs must be carried out by qualified personnel using original spare parts. Damage to the vacuum-
cleaner, the power cord and the plug increases the risk of electric shock.
Do not pull or press on the power cord. Do not pull the cord to remove the plug from the socket or to move the vacuum cleaner. A damaged power cord increases the risk of electric shock. Before carrying out technical maintenance or cleaning the vacuum cleaner, before adjusting settings, changing accessories or storing the vacuum cleaner, remove the plug from the socket. This precaution prevents accidental switching on of the vacuum cleaner. Ensure proper inspection of the work. Repairs of the vacuum cleaner must be carried out by qualified personnel using original spare parts. This guarantees the safety of the appliance. If the vacuum cleaner has been used in an area with hazardous substances, clean, empty and wipe the outside parts of the vacuum cleaner before leaving the hazardous area. All parts of the vacuum cleaner are considered contaminated; you must take appropriate measures to ensure that hazardous substances do not spread.
CAUTION - The vacuum cleaner is intended for dry vacuuming. Follow the instructions for use.
Dust, plug. Emptying the dust container should only be done by specialists. Protective equipment is required. Do not use the vacuum cleaner without a complete and properly installed filter system. Otherwise, your health may be affected.
Before switching on, make sure the voltage matches the power supply. Before cleaning the vacuum cleaner, unplug it to avoid inhaling dust. Otherwise, there is a risk of inhaling dust. Do not step on the vacuum cleaner. You could damage it. Be careful when using the power cord. You could create a dangerous situation for others through carelessness. Do not clean the vacuum cleaner with a direct water jet. Water entering the upper part of the vacuum cleaner increases the risk of electric shock. Connect the vacuum cleaner only to a properly earthed socket. The contacts must be properly connected. The power cord must have a properly connected protective conductor.
SYMBOLS
The symbols and their meanings are given for the correct and safe operation of the vacuum cleaner. Follow the symbols and their meanings. The correct interpretation of the symbols will help you use the vacuum cleaner better and more safely.
SYMBOLS AND THEIR MEANINGS

WARNING! Read all safety instructions and instructions for use. Failure to follow the safety instructions and operating instructions may result in electric shock, fire and/or serious injury.
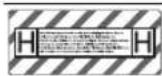
The vacuum cleaner is a vacuum cleaner of class H according to IEC/EN 60335-2-69 for dry vacuuming of health-endangering dusts with a limit value for exposure <0.1 mg/m³
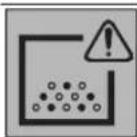
If the text of the warning label is not in your language, cover it with the label supplied with your language.
WARNING! The vacuum cleaner is suitable for vacuuming dust that is hazardous to health. Have maintenance and repairs, including emptying the dust container, carried out only by specialists. Appropriate protective equipment is required. Do not use the vacuum cleaner without a complete and correctly installed filter system. Otherwise, your health will be endangered.
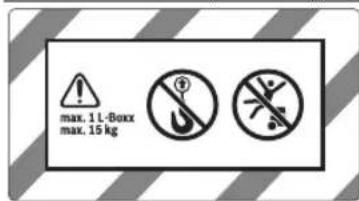

max.1L-Boxx max.15kg
Place only the maximum load on the L-BOXX.
The L-BOXX with the vacuum cleaner must not exceed 15 kg.

Do not use the vacuum cleaner with a crane hook, e.g. for transport. The vacuum cleaner cannot be carried by a crane. There is a risk of injury and damage.
SYMBOLS AND THEIR MEANINGS

Do not throw or drop the vacuum cleaner. The vacuum cleaner may tip over and be damaged. There is a risk of injury.
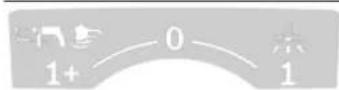

Start/Stop automatic
Vacuuming of dusts from working power tools. The vacuum cleaner switches on and off automatically with a time delay.

Switching off

Adjusting the extraction
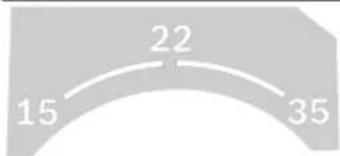
15
Volume flow setting for nozzle diameter 15 mm
22
Volume flow setting for nozzle diameter 22 mm
35
Volume flow setting for nozzle diameter 35 mm
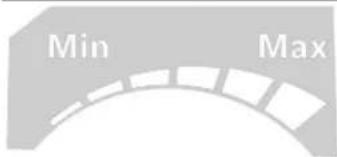
Min/Max
Adjusting the extraction power without regulation:
- Maximum suction power for applications with low dust generation. Minimum suction power for applications with high dust generation. For adjusting the suction force between the connected power tool and the workpiece surface (e.g.,
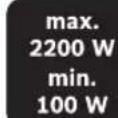
Data on the permissible connection power for the power tool (specific to the individual tools)
Symbols and their meaning
AFC
Automatic filter cleaning (AFC = Automatic Filter Cleaning)
Product name and designation
Please read the safety instructions in the operating instructions before using the product.
Intended use of the vacuum cleaner
The vacuum cleaner is intended for collecting, vacuuming, transporting and extracting non-flammable dusts, non-flammable liquids and water-air mixtures.
The vacuum cleaner has been technically tested and approved for dust class M in accordance with IEC/EN 60335-2-69.
The same requirements apply for professional use, e.g. in industry, as per IEC/EN 60335-2-69.
The contact may only be used when working in a dry environment.
Illustrated components
The numbering of the illustrated components refers to the illustrations on the graphics pages.
(1) Container (2) Inlet air hose opening cap (3) Hose for suction (4) Holder for suction hose (5) Contact for power tool (6) Volume flow regulator (7) Operating mode switch (8) Suction power regulator (9) AFC button (10) Handle for carrying (11) L-BOXX attachment (12) Vacuum cleaner cap (13) Clamp for vacuum cleaner hose (14) Water elbow (15) Spiral suction hose (16) Suction hose (17) Power cord holder (18) Closing cap of the filter bag (19) Base for closing cap (20) Holder for filter bag
210|Bulgarian
(21) Holder for crevice nozzle (22) Nozzle holder (23) Dust filter (24) Nozzle (25) Vacuum cleaner hose (26) Bag with pre-filter (27) Cloth for exhaust air (28) Flat pleated filter (HEPA/PTFE) (29) Nozzle (30) Rubber seal
(31) Brush (32) Nozzle (33) Suction tube (34) Release for vacuum cleaner hose (35) Pressing cap (36) Exhaust air opening (37) Control light (38) Pre-filter (39) Filter cap (40) Sensors for fill level
Technical data
| ПрахOSCукачka за мokро/cухо смуне GAS 35 H AFC GAS 35 H AFC | ||
| Каталожен Home | 3601JC36..3601JC3660 | |
| Номинално наразжени V 220-240 110 | ||
| Номинално консуmpлaria мошост W 1200 1000 | ||
| Чеб耗费 Hz 50-60 50-60 | ||
| ОБем на kon'tейнера (бруто) | 35 35 | ||
| ОБем на kon'teinера (нeto) | 25 25 | ||
| Нетен обем (точост) | 19 19 | ||
| ОБем на прахоювітелінatabletopba | 19 19 | ||
| Мамс. Ваду'm' | ||
| - ПрахOSCукaчka | hPa 230 211 | |
| - Турбina | hPa 254 242 | |
| Мамс. К olчесъно на потуане' | ||
| - ПрахOSCукaчka | l/s | 36 |
| m³/h | 129,6 | |
| - Турбina | l/s | 74 |
| m³/h | 266,4 | |
| Мамс. Смухаелна мошост W 1380 1150 | ||
| Плочи на有很大ьатя Филь�р | m² | 0,5 |
| Прахов Клас | H | |
| Маса съласно EPTA-Procedure 01:2014 | kg | 12,4 |
| Клас на зацпта | ±/I | |
| Вид на зацпта прахOSCукaчka | IPX4 | |
| Вид на зацпта有很大батяшевцарnia | IP55 | |
A) Measured with vacuum cleaner hose 35 mm and 3 m length. Values may vary depending on the nominal voltage [U] of 230 V. When using different voltages, the values may vary depending on the specific conditions. Values may vary depending on the product and depend on the conditions of use and the environment. More information at www.bosch-professional.com/wac.
| АвtomатICALS CTAP/cnupahe | ||
| HommaHанho HanpexeHne | мakcmaHаMoшноCT | mHHMaHаMoшноCT |
| 230 V | 2200 W | 100 W |
Rated voltage: maximum power, minimum power
110V 750W 100W
Analysis of the permissible connection power for power tools.
The values for noise and vibration may deviate. However, the data above the numbers of the vacuum cleaner apply.
The standard values have been selected
The values for the vacuum cleaner are established according to EN 60335-2-69.
The A-weighted sound pressure level of the vacuum cleaner is typically 69 dB(A) (70 dB(A) for 110V). Uncertainty K = 1 dB(A). The sound power level is 83 dB(A).
Work with ear protection!
The typical vibration values (vector sum for three directions) and the uncertainty K are determined according to EN 60335-2-69: ah < 2.5m / s2, K = 1.5m / s2
Assembly
Before performing technical maintenance or cleaning the vacuum cleaner, before making adjustments, changing accessories, or storing the vacuum cleaner, pull the plug out of the socket. This prevents accidental starting of the vacuum cleaner.
Mounting the floor nozzle for the vacuum cleaner (see Fig. A)
Push the floor nozzle (4) onto the vacuum cleaner until it clicks into place.
Mounting the hose for the vacuum cleaner (see Fig. B)
Replace the sealing plug (2) from the filter (3).
Place the vacuum cleaner hose (25) on the filter (3) and turn it clockwise until it stops.
The sealing plug prevents the vacuum cleaner from being blocked when the hose is not connected. This prevents the possibility of overpressure.
Note: Due to the suction of air through the hose, electrostatic charges may build up during operation, which can discharge depending on the working conditions and the sensitivity of the environment.
Bosch recommends using an antistatic hose (accessory) when vacuuming fine dust and dry materials.
Mounting accessories for vacuuming (see figure)
The vacuum cleaner (25) is equipped with a clip system, to which accessories (dust bag (23), wet/dry nozzle (24)) can be connected.
Mounting the dust bag
- Insert the dust bag (23) into the holder (25) until the collar (35) engages with a click. - To remove, press the buttons (35) inward and pull out the bag from the other components.
Mounting the nozzle and tubes
- Insert the wet/dry nozzle (24) into the holder (25) until the collar (35) engages with a click. - Then insert the desired accessory (nozzle for wet, nozzle for dry, etc.) onto the wet/dry nozzle (24). - To remove, press the buttons (35) inward and pull out the accessory from the other components.
Inserting/removing the fabric bag for dry vacuuming or the bag with pre-filter (dry vacuuming) (see figures D1-D3)
For dry vacuuming of substances according to dust class L, the fabric bag for dry vacuuming (27) or the bag with pre-filter (26) must be used.
If substances with a limit value of ≥ 1 mg/m³ (according to dust class L) are vacuumed, they can be vacuumed directly into the container.
CAUTION: The vacuum cleaner is suitable for vacuuming dust. Observe the regulations for disposal and cleaning.
Warning! The dust collection container is intended for use by specialists only. Appropriate protective equipment is required. Do not use the vacuum cleaner without a properly installed filter system. Otherwise, your health may be endangered.
Installing the fabric bag for dry vacuuming
- Open the clips (13) and remove the upper part of the vacuum cleaner (12). - Place the fabric bag for dry vacuuming (27) into the container (1) with the opening facing forward. - Pull the bag over the suction connection until it fits snugly. - Make sure the fabric bag for dry vacuuming (27) is well attached to the inner walls of the container (1).
212|Bulgarian
- Fold the remaining part of the fabric bag for dry vacuuming (27) over the container (1). - Place the upper part of the vacuum cleaner (12) back on and close the clips (13).
Removing and attaching the fabric bag for dry vacuuming
- Close the container (1) with the cap for the suction port (2). - Open the clips (13) and remove the upper part of the vacuum cleaner (12). - Pull the fabric bag for dry vacuuming (27) backwards off the suction connection. - Attach the fabric bag for dry vacuuming (27) tightly with the included cable tie over the opening of the suction port and the dehumidifying function. - Remove the fabric bag for dry vacuuming (27) from the container (1) being careful not to damage it. When doing so, make sure the fabric bag for dry vacuuming does not come into contact with the suction connection or other sharp objects. - Clean the container (1) with a damp cloth, if necessary, and let it dry completely.
Installing the bag with pre-filter
- Open the clips (13) and remove the upper part of the vacuum cleaner (12). - Place the bag with pre-filter (26) over the suction opening in the container (1). - Pull the bag over the suction connection until it fits snugly. - Make sure the spring ring of the bag with pre-filter (26) is well attached to the inner walls of the container (1). - Make sure the vacuum adjustment opening is in the container. - Fold the remaining part of the spring ring over the edge of the container (1). - Place the upper part of the vacuum cleaner (12) back on and close the clips (13).
Removing and attaching the bag with pre-filter
- Close the container (1) with the cap for the suction port (2). - Open the clips (13) and remove the upper part of the vacuum cleaner (12). - Pull the bag with pre-filter (26) backwards off the suction connection. - Close the opening of the bag with pre-filter by pulling the drawstring tight. - Attach the spring ring tightly with the included cable tie. - Pull the vacuum adjustment opening closed and close the corresponding opening.
- Remove the closed bag with pre-filter from the container (1) being careful not to damage it. When doing so, make sure the bag with pre-filter does not come into contact with the suction connection or other sharp objects. - Clean the container (1) with a damp cloth, if necessary, and let it dry completely.
Installing the wet vacuuming attachment (wet vacuuming) (see fig. E)
Instruction: To vacuum the system, switch on the vacuum cleaner (class H) and vacuum dry dust only.
- Connect the suction hose (31) to the appropriate inlet (32). - Insert the filter bag (30) into the inlet (32).
Instruction: The structure of the device is shown on the filter bag (30) and the vacuum cleaner.
Open the L-BOXX (see fig. F).
For transport and vacuuming, and for storage of the accessories and the power tool, you can order the top part of the vacuum cleaner L-BOXX.
- Place the L-BOXX on the mounting (11). Do not carry the vacuum cleaner by the handle of the L-BOXX. The vacuum cleaner is too heavy for the handle of the L-BOXX. There is a risk of injury and damage.
Working with the power tool
Before any work on the vacuum cleaner, before cleaning or servicing the vacuum cleaner, before changing accessories or storing the vacuum cleaner, pull the mains plug out of the socket. This measure prevents accidental starting of the vacuum cleaner.
Be careful when using the vacuum cleaner: check that the filter bag is correctly inserted and not blocked, to prevent the vacuum cleaner from overheating. Check the function of the filter bag before each use.
Starting operation
Pay attention to the mains voltage! The voltage of the power source must match the data given on the rating plate of the vacuum cleaner. Inform yourself about the applicable regulations/laws regarding work with hazardous dust in your country.
The vacuum cleaner is suitable for vacuuming the following materials:
- Dust exposure limit value < 0.1 mg/m³
Do not use the vacuum cleaner in areas with increased risk of explosion.
To ensure optimal suction performance, always fully extend the hose (25) from the upper part of the vacuum cleaner (12).
Switching on the dust extractor
-Set the volume flow regulator (6) to the used diameter of the hose. -To switch on the dust extractor, turn the operating mode switch (7) to the symbol "On". -To switch off the dust extractor, turn the operating mode switch (7) to the symbol "Off".
The dust extractor is equipped with a sensor for the air flow speed. In "On" mode, the volume flow is set firmly to a speed of 20 m/s regardless of the position of the air flow regulator (6).
If this speed is exceeded, e.g. due to the hose being clogged or the turbine being blocked by the filter, an audible warning signal is triggered. In such a case, check the electric tool as described in the section "Troubleshooting".
Dust extraction from power tools (e.g. circular saw)
When the exhaust air is returned to the room, sufficient fresh air exchange must be ensured. Observe the relevant national regulations.
The dust extractor has a socket with a protective contact (5). You can connect an electric power tool to it. Observe the maximum power rating for the connected electric tool.
To ensure sufficient and intensive extraction of fine dust, the air flow rate must not be lower than the minimum permissible for the respective electric tool.
| Диаметбр ha Шанга Стойост ha Habсторka ha obemня NOTOK | |
| 35 mm 57,9 m | 3/h |
| 22 mm 41,2 m | 3/h |
| 15 mm 12,7 m | 3/h |
- Set the volume flow regulator (6) to the used diameter of the hose. Mount the extraction adapter (23). Insert the adapter for dust extraction (23) into the exhaust port of the electric tool.
Note: When working with electric tools where the air flow rate of the hose is low (e.g. orbital sanders, routers, etc.), the opening (36) on the adapter (23) must be opened. Only then can the automatic filter cleaning work without interruption.
For now, close the opening (36) until the opening is fully closed.
-To start the automatic on/off mode of the dust extractor, turn the operating mode switch (7) to the symbol "Automatic on/off". In this mode, the air flow must be at the position of the regulator (6). The factory setting ensures sufficient intensive transport of dust.
-To switch on the dust extractor, press the switch (5) on the electric tool. The dust extractor switches on automatically. -Switch off the electric tool to stop the extraction.
The start/stop automatic function continues for up to 15 seconds to extract the remaining dust from the dust extractor hose.
Turn off the vacuum cleaner and switch the operating mode switch (7) to the symbol "OFF".
If the warning lamp lights up and an audible signal sounds, the vacuum cleaner must be checked according to the procedure described in the "Troubleshooting" section.
Wet vacuuming
Do not vacuum up flammable or explosive liquids such as petrol, oil, alcohol, or solvents. Do not vacuum up glowing or burning objects. Do not work with the vacuum cleaner in rooms with a risk of explosion. Dust, vapors, or liquids may ignite or explode. Do not use the vacuum cleaner as a water pump. The vacuum cleaner is intended for vacuuming up air mixtures.
Note: The specified degree of filtration (dust class) applies only to dry vacuuming.
Working steps before wet vacuuming
- If necessary, remove the filter bag (27) or the filter bag adapter (26). Note: For better removal of the filter bag when vacuuming up a mixture of water and solid particles, use the wet filter bag (accessory), which collects the solid particles from the liquid. - Insert the foam filter (30) into the filter holder (32).
- Activate the automatic filter cleaning (AFC).
Vacuuming up liquids
To switch on the vacuum cleaner, turn the operating mode switch (7) to the symbol "Vacuuming". The vacuum cleaner has a sensor for the fill level (40). When the maximum fill level is reached, the vacuum cleaner switches off. Set the operating mode switch (7) to the symbol "OFF".
Note: When vacuuming up non-conductive liquids (e.g. emulsions, oils, and greases), the vacuum cleaner does not switch off when the container is full. The fill level must be checked constantly and the container must be emptied in time.
If an audible warning signal sounds during wet vacuuming, the functional safety of the vacuum cleaner is not guaranteed. Do not take any measures to remedy the damage.
- To switch off the vacuum cleaner, turn the operating mode switch (7) to the symbol "OFF". - For transporting the vacuum cleaner, wind the power cord (2) around the cord hooks (3). - Empty the container (1). To prevent the formation of mold after wet vacuuming: - Remove the filter (28) and let it dry well. - Remove the upper part of the vacuum cleaner (12), open the filter cover (39), and let it dry well.
Automatic filter cleaning (AFC)
With automatic filter cleaning (AFC = Automatic Filter Cleaning), the filter (28) is cleaned every 15 seconds by means of air pulses (pulsation).
If the locking force is insufficient, the filter must be checked electromagnetically.
Frequent use of the filter cleaning system increases the filter's service life.
To achieve the maximum filter service life, deactivate the automatic filter cleaning system when necessary, e.g., when locking the same thickness or when using the bag with the pre-filter.
Surface contamination of the filters is normal. Regular cleaning of the flat filters is not necessary; the filters may be damaged if cleaned.
Note: The automatic filter cleaning system is factory-enabled.
Enabling/disabling the automatic filter cleaning system is possible only when the device is turned on.
- Deactivate AFC
Press the AFC button (9).
The control light (37) goes out.
- Activate AFC
Press the AFC button (9).
The control light (37) lights up green.
Maintenance and service
Maintenance and cleaning
Before performing technical maintenance or cleaning the vacuum cleaner, before adjusting the suction power, replacing accessories, or storing the vacuum cleaner, unplug the power cord from the outlet. This prevents accidental activation of the vacuum cleaner and potential injury. For efficient and safe operation, keep the vacuum cleaner and the ventilation openings clean.
For safe and proper replacement of the protective cable, it must be carried out by Bosch's authorized customer service for power tools, in order to preserve the safety of the Bosch power tool.
Cleaning and maintenance of the vacuum cleaner must be carried out by the user. The user must not carry out maintenance and repair work on the vacuum cleaner. Cleaning and maintenance must be carried out only by trained specialists.
The housings of the vacuum cleaner must be cleaned and wiped with a damp cloth or treated with suitable cleaning agents before the vacuum cleaner is removed from the hazardous area. All parts of the vacuum cleaner must be regarded as contaminated if they come from the hazardous area; appropriate precautions must be taken. Any parts that are not cleaned sufficiently must be disposed of (in non-permeable bags).
Technical maintenance by the user: The vacuum cleaner must be dismantled, cleaned, and serviced as far as possible without endangering the service personnel. Before dismantling, the vacuum cleaner must be cleaned to prevent any danger. The procedures described in the chapter are part of the maintenance. The room in which the vacuum cleaner is dismantled must be well ventilated. Wear personal protective equipment during maintenance.
All technical maintenance work must be carried out cleanly.
At least once a year, a technical inspection must be carried out by the manufacturer or by a trained person, e.g., for filter damage, the vacuum cleaner's leak-tightness, and the proper functioning of the control mechanism.
For filters with a higher dust class, the filter efficiency must be checked according to EN 60335-2-69, 22.AA.201.2.
National requirements may require more frequent checks.
If the filter efficiency is no longer guaranteed, the filter must be replaced and the check must be repeated.
The suction power depends on the condition of the filter (see Fig. II1-I2). Therefore, clean the filter regularly.
Replace a damaged flat filter (28) immediately.
- Loosen the two safety screws (38) and remove the lock (19) from the container lid. - Lift the container lid (18) and remove the filter basket (39). - Grasp the flat filter (28) by the tabs and pull it out upwards. - Remove dirt and moisture that may have accumulated when removing the flat filter (28), wipe the sealing lip of the filter basket (39). - Insert the new flat filter (28), making sure it fits correctly into the recess. - Close the filter basket (39) (must click audibly into place). - Remove the lock (19) from the container lid, turn it upwards, and tighten the two safety screws (38).
Service sculelectric
Strada Horia Macelariu Nr. 30-34, sector 1
013937 Bucuresti, Romania
Tel.: +359(0)700 13667 (Bulgarian)
Fax: +40 212 331 313
Email: BoschServiceCenterBG@ro.bosch.com
www.bosch-pt.com/bg/bg/
For other service addresses, open at:
www.bosch-pt.com/serviceaddresses
Disposal
The packaging, accessories, and packaging must be handed over for environmentally friendly recycling.
Do not dispose of the packaging with household waste!
Only for EU countries:
According to European Directive 2012/19/EC on waste electrical and electronic equipment, products that can no longer be used must be collected separately and handed over for environmentally friendly recycling.
Disposal of old electrical and electronic devices, if possible, may have harmful effects on the environment and human health due to the presence of hazardous substances.
Macedonian
Safety instructions for operation

Read all safety instructions and warnings. Failure to follow the safety instructions and warnings may result in electric shock, fire, and/or serious injury.
Improper use, fire and/or injury.
Remove the safety instructions for the core and for the water.
Before use, it is not intended for use by persons with
reduced physical, sensory or mental capabilities, or lack of
experience and knowledge, unless they have been given supervision or instruction concerning use of the appliance by a person responsible for their safety.
Do not leave the device unattended. Also ensure that children do not play with the device. Read all safety instructions for the materials to be used.
Never use materials containing asbestos. Asbestos is carcinogenic.
Users should only use the device for its intended purpose and have sufficient information about the
materials to be used and the safe handling. The instructions must be followed to avoid danger from improper use and injury.
The device is intended for use with dry materials, and with appropriate
measures for use with liquids. The use of liquids poses a risk of electric shock.
With the device, use only non-flammable liquids, e.g., gasoline, oil, alcohol, solvents. Do not use flammable, explosive or corrosive liquids. Do not use the device in areas where there is a risk of explosion. Dust, vapors or liquids may ignite or explode.
The device is only to be used with the accessories specified in the operating instructions.
The device must be disconnected from the power supply before cleaning or maintenance.
Repair the container. Never use the device if it is damaged.
WARNING! This appliance can be used only indoors. WARNING! Before use, check the device for damage and proper operation. Never use a damaged device. If the device is used in a damp environment, it cannot be avoided, use a protective switch for differential current. The use of a protective switch with differential current reduces the risk of electric shock.
Before use, check the device, cable, and plug. Do not use the device until you have ensured it is functioning properly. Do not open the device yourself and leave it for repair to qualified personnel, using only original spare parts.
A damaged device, cable, or plug increases the risk of electric shock.
Do not bend or crush the cable. Do not pull the plug out of the connector by the cable.
A damaged cable increases the risk of electric shock.
Remove the plug from the connector before cleaning or maintaining the device, before adjusting the device settings, replacing parts, or moving the device. These precautions prevent unintentional starting of the device. Ensure good ventilation of the work area. The device may only be repaired by qualified personnel using original spare parts. Only in this way will you be safe in the operation of the device. If the device is used in areas with hazardous materials, clean it, empty it, or seal the outer side of the device before removing it from the hazardous area. All parts of the device are considered contaminated and must be handled with appropriate precautions to ensure that hazardous substances do not pose a health risk.
SAFETY WARNINGS
The device contains dust that is hazardous to health. Emptying, servicing, and
disposal of the container must be done only by trained personnel. Appropriate protective equipment is required. Do not use the device without the complete filter system. Never endanger your health.
Before use, check that the hose for vacuuming is in perfect condition. When mounting the hose on the device, check that dust does not escape. Never vacuum up dust. Do not use the device as a ladder. You may damage the device. Carefully use the suction hose and the vacuuming hose. Be careful not to injure other people. Do not clean the device with direct water jet. Water entering the upper part of the device increases the risk of electric shock.
Connect the device to a properly grounded outlet. The plug and the extension cable must have a functional protective conductor.
Symbols
The following symbols are of great importance for the use of your device. Remember and understand the meaning of the symbols. The correct interpretation of the symbols will help you to use the device better and more safely.
Symbols and their meaning

DANGER! Risk of injury from the vacuum cleaner. Read the instructions carefully to understand what result can be expected from the vacuum cleaner and to avoid electric shock, fire, or serious injury.
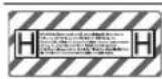
The device is classified as class II and complies with IEC/EN 60335-2-69 for vacuuming dry materials with a maximum emission of <0.1 mg/m³.
Since the warning text is not in your language, please attach the warning label in your language before first use.
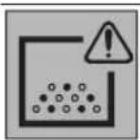
WARNING! The vacuum cleaner contains dust that is hazardous to health. Emptying, cleaning, and disposing of the dust container must only be done by trained personnel. Appropriate protective equipment is required. Do not use the vacuum cleaner without the filter system. Never endanger your health.
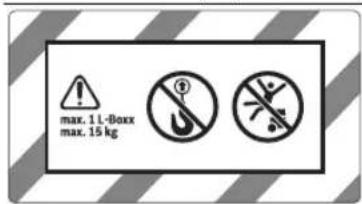

max. 1L-Boxx max. 15kg
Calculation of the maximum weight of one L-BOXX.
The L-BOXX together with its contents must not weigh more than 15 kg.
Symbols and their meanings

Do not lift the vacuum cleaner, e.g., during transport, by the handle. The vacuum cleaner is not suitable for transport by crane. There is a risk of injury from falling.

Do not use the vacuum cleaner as a ladder or step. Do not pull on the cable. The vacuum cleaner may tip over. There is a risk of injury.
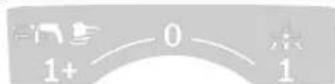
Start/Stop automatic
Vacuuming of the attached tool from an electrical power tool: the vacuum cleaner switches on automatically and switches off after a delay.

Switching off

Switching on
Vacuuming of the attached tool
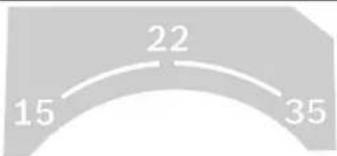
15 Control of the volume flow for a hose diameter of 15 mm 22 Control of the volume flow for a hose diameter of 22 mm 35 Control of the volume flow for a hose diameter of 35 mm
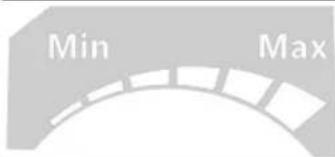
Min/Max
Insert the hose length control:
- Maximum hose length. When working, a large amount of correct hose length is created. When working, a large amount of correct hose length is created. To adjust the hose length, place the electric tool on the surfaces of the part being processed (e.g., when brushing)
Indications and meaning
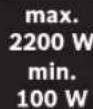
The maximum permissible connection length of the connected electric tool (depending on the country)
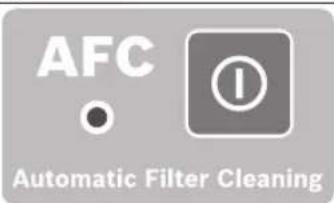
AFC
Automatic filter cleaning (AFC = Automatic Filter Cleaning)
Description of the manufacturer's performance
Pay attention to the pictures during the operating instructions.
Use with appropriate attachment
The attachment is used for collecting, vacuuming, transporting, and disposing of non-flammable dusts, non-flammable liquids, and mixtures of water and air. The attachment is technically tested for dust and complies with the dust class according to IEC/EN 60335-2-69.
This device is also suitable for commercial use, e.g., in workshops, industry, and service companies, according to IEC/EN 60335-2-69.
The device must only be used in a dry environment during work.
Illustration of components
The components marked on the drawing are described in the order of the drawing page.
(1) Hose (2) Conditions for suction (3) Filter for the hose (4) Hose holder (5) Power cord connector (6) Air flow regulator (7) Mode selector switch (8) Suction capacity regulator (9) AFC cap (10) Carrying handle (11) L-BOXX adapter (12) Top part of the suction device (13) Cover for the top part of the suction device (14) Rotor
220|Macedonian
(15) Blower for blowing (16) Blower for changing direction (17) Holder (18) Filter cover lock (19) Protective cover for locking (20) Hose holder (21) Small parts holder for filters/accessories (22) Holder for accessories (23) Suction hose (24) Accessory bag (25) Suction tube (26) Safety filter (27) Clamp for hose
(28) Flat pleated filter (HEPA/PTFE) (29) Foam filter (30) Rubber gasket (31) Brush (32) Base plate (33) Suction hose (34) Filter for the suction tube holder (35) Pressure cap (36) Exhaust air outlet (37) LED control light (38) Safety screws (39) Filter cover (40) Fill level sensors
Technical data
| Всисваця за влajхно/суво BCисвацье GAS 35 H AFC GAS 35 H AFC | ||
| Бpoj на дeн | 3601JC36..3601JC3660 | |
| Номинален наочи V 220-240 110 | ||
| Номинална щачина W 1200 1000 | ||
| Фразковциja Hz 50-60 50-60 | ||
| Волymен на садот (бруто) | 35 35 | ||
| ВOLYМEN на садот (псeto) | 25 25 | ||
| Нeto ВOLYМEN (тechост) | 19 19 | ||
| ВOLYМEN на кесата за прав | 19 19 | ||
| Марс. пошисток(A) | ||
| - BCисвац | hPa 230 211 | |
| - Турбаna | hPa 254 242 | |
| Марс. Клични на пotok(A) | ||
| - BCисвац | l/s | 36 |
| m³/h | 129,6 | |
| - Турбаna | l/s | 74 |
| m³/h | 266,4 | |
| Марс. Кличitel на BCисваде | W 1380 1150 | |
| Повшина на habранnot Фильер | m² | 0,5 |
| Класа на пав | H | |
| Текина согласно EPTA-Procedure 01:2014 | kg | 12,4 |
| Класа на заштоа | ±/I | |
| Вид на заштоа на BCисвач | IPX4 | |
| Вид на заштоа на зашAJцарскпструени prinkлuyок | IP55 | |
Measured with a suction hose 35 mm and 3 m. The rated voltage [U] is 230 V. The actual voltage may vary depending on the power supply in the respective country. Values may vary depending on the product and the environmental conditions. More information can be found at www.bosch-professional.com/wac.
Start/Stop automatic
Rated voltage Maximum power Minimum power
230V2200W100W
110V750W100W
The device is suitable for the rated power and connection to the connected electrical supply.
According to the model specifications, these values may vary. Pay attention to the data on the rating plate of the suction device.
Information on noise emission
The noise emission values are determined according to EN 60335-2-69.
Noise level at the suction connection, measured according to EN 60335-2-69, is 69 dB(A) (70 dB(A) for 110 V). Uncertainty K = 1 dB(A). Noise level at the operator's ear is 83 dB(A).
Wear hearing protection!
Vibration emission value a_h (vector sum of three axes) and uncertainty K are given in accordance with EN 60335-2-69: a_h < 2.5 m/s², K = 1.5 m/s²
Assembly
Remove the plug from the connector before cleaning or maintaining the vacuum cleaner, before adjusting the device settings, replacing parts, or performing repairs. These precautions prevent unintentional starting of the vacuum cleaner.
Mounting the hose holder for the suction hose (see figure A)
Insert the hose holder (4) for the suction hose into the designated openings (34) on the top, until it clicks into place.
Mounting the suction hose (see figure B)
Remove the hose (2) from the suction hose (3).
Place the suction hose (25) onto the hose connector (3) and turn it in the direction of the clock hands to the stop.
Secure the plug for blowing with the cap when you remove the suction hose. This prevents incorrect operation.
Note: During vacuuming, the friction of the air in the suction hose generates electrostatic charge, which the user feels in the form of static discharge (depending on the humidity of the surrounding air). In principle, we recommend an antistatic suction hose (accessory) for vacuuming fine dust and dry materials.
Mounting the accessories for suction (see figure C)
The suction hose (25) is equipped with a clip system, with which the accessories for suction (suction adapter (23), crevice nozzle (24)) can be attached.
Mounting the suction adapter
- Press the test button (23) on the test hose (25) until both ends of the pressure switch (35) do not activate the test hose. - For disassembly, press both ends of the pressure switch (35) and pull out the filter elements.
Replacing the filter cartridges
- Place the new filter cartridge (24) on the test hose (25) until both ends of the pressure switch (35) click into place on the test hose. - Then attach the appropriate filter set (e.g., filter cartridge, dust filter, test hose, etc.) to the installed filter cartridge (24). - For disassembly, press both ends of the pressure switch (35) and pull out the filter elements.
Inserting/removing the dust bag or safety filter bag (for vacuuming dry materials) (see figures D1-D3)
For vacuuming dry materials in accordance with dust class L, you must insert a dust bag (27) or a safety filter bag (26).
As long as materials with a limit value of occupational exposure ≥ 1mg/m3 are vacuumed (in accordance with dust class L), they can be vacuumed directly into the container.
WARNING
Vacuuming dust can be hazardous to health. Removing and disposing of the dust, as well as
The container for collecting dust may only be emptied by trained personnel. Appropriate protective equipment is required. Do not use the vacuum cleaner without the filter system. It may endanger your health.
Inserting the dust bag
- Open the latches (13) and remove the top part of the vacuum cleaner (12). - Insert the dust bag (27) with the filling opening facing forward into the container (1). - Fold the filling opening over the edge of the suction connection. - Turn the dust bag (27) so that it fits snugly against the inner walls of the container (1). - Place the remaining part of the dust bag (27) on the surface of the container (1). - Put the top part of the vacuum cleaner (12) back on and close the latches (13).
Removing the dust bag and closing
- Close the container (1) with the suction connection cover (2). - Open the latches (13) and remove the top part of the vacuum cleaner (12). - Pull the full dust bag (27) out of the suction connection backwards. - Firmly close the dust bag (27) with the cable tie provided below the opening of the suction connection and the ventilation opening. - Carefully remove the dust bag (27) from the container (1) without tearing it. Make sure that the dust bag does not catch on the suction connection or other sharp objects. - Clean the container (1) with a damp, lint-free cloth and let it dry.
Inserting the safety filter bag
- Remove the top cover (13) from the vacuum cleaner (12). - Place the dust bag (26) with the opening for filling onto the nozzle (1). - Push the opening for filling onto the intake connection until it stops. - Check whether the dust bag is correctly seated on the inner nozzle (1). - Check that the opening for the negative pressure connection is inside the nozzle. - Place the rest of the bag part onto the surface of the nozzle. - Insert the top cover (12) and close the locks (13).
Remove the dust bag and close
- Close the nozzle (1) with the accessory for suction (2). - Open the locks (13) and remove the top cover (12).
- Pull the dust bag (26) out of the intake connection downwards. - Close the opening of the dust bag by pressing the closure onto the opening. - Close the bag part with the correct cable guide. Remove the filter from the opening for the negative pressure connection and close the opening with it. - CAREFULLY REMOVE THE CLOSED DUST BAG FROM THE NOZZLE, WITHOUT DAMAGING IT (1). MAKE SURE THAT THE DUST BAG DOES NOT TOUCH THE INTAKE CONNECTION OR OTHER SHARP OBJECTS. - CLEAN THE NOZZLE (1) FROM TIME TO TIME WITH A DAMP, NON-ABRASIVE CLEANING AGENT AND LET IT DRY.
Inserting the rubber band (suction of moist materials) (see figure E)
Note: The dust bag for wet vacuuming (protection class IP X4) is only intended for vacuuming moist materials.
- Insert the nozzles (31) into the corresponding openings on the floor nozzle (32). - Place the rubber band (30) into the floor nozzle (32).
Note: The structured side of the rubber band must point upwards.
Connecting the L-BOXX (see figure F)
For transporting the vacuum cleaner, remove the accessory from the accessory compartment and, if necessary, attach the L-BOXX to the top of the vacuum cleaner.
- Attach the L-BOXX to the holder (11). Do not carry the vacuum cleaner by the handle for the L-BOXX. The vacuum cleaner is not intended for carrying the L-BOXX. There is a risk of injury and damage.
Use
Remove the accessory connector before emptying or cleaning the vacuum cleaner, before adjusting the settings, replacing parts or performing maintenance. These measures prevent unintentional starting of the vacuum cleaner.
When working with the vacuum cleaner, check that the safety switch is in the correct position to prevent unintentional starting.
Test the switch before working with the appropriate tool.
Pay attention to the electric shock hazard! The hose nozzle must correspond to the one indicated on the vacuum cleaner specification plate. Inform yourself about the important regulations/laws in your country regarding the disposal of electronic waste for health reasons.
The vacuum cleaner can be used for vacuuming dry materials:
- Dust with a hazardous value of < 0.1 mg/m³ in the base, the vacuum cleaner must not be used in rooms where there is a risk of explosion.
To ensure optimal performance, the vacuum cleaner must always be checked, and the filter (25) should be cleaned from the motor protection filter (12).
Vacuuming materials
Vacuuming with the supplied hose
- Set the air volume regulator (6) on the hose diameter. - To turn on the vacuum cleaner, set the mode selector switch (7) to the "Vacuuming" position. - To turn off the vacuum cleaner, set the mode selector switch (7) to the "Off" position.
The vacuum cleaner is equipped with air volume control. The air volume control is factory set to the "Vacuuming" position at a speed of 20 m/s, regardless of the position of the air volume regulator (6).
If this value is exceeded, e.g., due to coarse dirt in the vacuum hose, a full dust bag or a clogged filter, an acoustic warning signal sounds. In that case, turn off the vacuum cleaner and check it as described in the chapter "Removing blockages".
Vacuuming dust created during work with electric tools (see figure G)
There must be a sufficient air flow in the room, otherwise the extracted air is returned to the room. Observe the relevant regulations in your country.
The vacuum cleaner has a built-in socket (5). You can connect an external electric tool to it. Observe the maximum permissible power of the connected electric tool.
To enable proper transport of dust to the vacuum location, the minimum air flow for the connected electric tool must not be exceeded.
| Диемета на цевото Ростава в рedingоста Волуmerскпротok | |
| 35 mm 57,9 m | 3/h |
| 22 mm 41,2 m | 3/h |
The diameter of the hose must be suitable for the air flow.
15mm12,7m 3/h
- Connect the regulator to the intake hose (6) on the vacuum cleaner. -Mount the hose to the suction opening (23). Insert the hose into the suction opening (23) until it clicks into place.
Note: When working with electrical appliances, if the air flow through the first suction opening is low (e.g., in toilets, brushes, etc.), the opening for secondary air (36) on the suction hose (23) must be opened. Only in this way will the appliance not overheat and will work without problems. Turn the ring over the opening for secondary air (36) until the maximum opening is achieved.
-To start the start/stop automatic function of the vacuum cleaner, set the switch for selecting the operating mode (7) to the "Start/Stop Automatic" position. In this operating mode, the intake air flow is electronically controlled according to the position of the regulator (6). If the setting is correctly selected, the appliance will operate properly.
-To put the vacuum cleaner into operation, connect the electrical plug to the socket (5). The vacuum cleaner will start working automatically. Switch off the electrical appliance to finish. The start/stop automatic function will continue to work for another 15 seconds to suck up the remaining dust from the suction hose. -To switch off the vacuum cleaner, set the switch for selecting the operating mode (7) to the "Off" position.
If you hear a warning signal, you must check the vacuum cleaner as described in the section "Troubleshooting".
Vacuuming damp materials
Do not vacuum flammable or explosive substances with the vacuum cleaner, e.g., petrol, oil, alcohol, solvents. Do not vacuum liquids, flammable or explosive dust. Do not use the vacuum cleaner in rooms where there is a risk of explosion. Dust, vapors or liquids may ignite or explode. The vacuum cleaner must not be used as a water pump. The vacuum cleaner is intended for vacuuming dry dust and water.
Note: The drum for dust class (dust class H) is approved for vacuuming dry materials.
Working with the vacuum cleaner on damp materials
-If necessary, remove the filter bag (27) and the safety filter (26).
Note: For easier removal, when vacuuming water and wet materials, use the wet filter (optional), which will separate the water from the wet materials.
-Insert the hose end (30) into the holder (32). -Switch off the automatic filter cleaning (AFC).
Vacuuming liquids
To switch on the vacuum cleaner, set the switch for selecting the operating mode (7) to the "Vacuuming" position.
Before each use, check the fill level (40). If the maximum fill level is exceeded, the device must be switched off. To select the operating mode (7), set the switch to "Off".
Note: When vacuuming non-flammable materials (e.g., dust, dry dirt, oils, and grease), the device must not be switched off at the container. The fill level must be checked regularly and the container emptied in time.
If, during vacuuming of wet materials, an acoustic signal for emptying is emitted, the function of the vacuum is not impaired. There is no need for measures to remove the liquid.
- To switch off the vacuum, set the switch for selecting the operating mode (7) to "Off". - To empty the vacuum, open the clamps (2) on the container (3). - Remove the top (1).
To avoid the formation of foam when vacuuming wet materials:
- Remove the filter (28) and let it dry well. - Place it on the upper part of the vacuum (12), open it according to the filter (39), and let it dry well.
Automatic filter cleaning (Option H)
If the automatic filter cleaning (AFC = Automatic Filter Cleaning) is activated, the filter (28) will be cleaned every 15 seconds with an air pulse (clicking sound).
Shortly after the start of vacuuming, the cleaning must be activated and the filter.
Regular cleaning of the filter increases the service life of the filter.
To achieve the ideal filter usage, activate the automatic filter cleaning only in exceptional cases, e.g., when vacuuming clean liquids or when using the safety filter.
If the filter is clogged, the surface is damaged, but it is still functional. Cleaning the filter with water or blowing it out is not necessary and can damage the filter.
Note: The automatic filter cleaning is activated by default.
The activation/deactivation of the automatic filter cleaning is possible only when the device is switched on.
- AFC activated
Connect the hose to the connector (9).
Check the LED indicator (37) is lit.
Activate
Connect the hose to the connector (9).
Check the LED indicator (37) is lit.
Maintenance and service
Maintenance and cleaning
Remove the plug from the socket before maintenance or cleaning of the vacuum cleaner, before adjusting the supply of the device, replacing the spare parts or removing the device. These measures prevent unintentional starting of the vacuum cleaner. Clean and keep the ventilation openings of the vacuum cleaner clean to ensure good and safe operation.
If you need to use an extension cable, obtain it from Bosch or a specialist Bosch electrician dealer to avoid safety hazards. When servicing and cleaning the vacuum cleaner, wear a protective mask of class FFP2 or higher and protective gloves for single use in accordance with the relevant regulations. Servicing and cleaning may only be carried out by persons with proven competence.
The vacuum cleaner may only be cleaned and wiped with a damp cloth or sealed with a cleaning agent when the vacuum cleaner is removed from the hazardous area. The parts of the vacuum cleaner must be checked for contamination if they come from a hazardous area and must be handled with appropriate precautions. Parts that have not been properly cleaned during servicing/repair must be disposed of (in a sealed bag).
For maintenance by the user, the vacuum cleaner must be dismantled, cleaned, and maintained as far as possible without posing a risk to the person performing the maintenance or other persons.
Before dismantling, the vacuum cleaner must be cleaned to avoid potential hazards. Servicing and repair work must be carried out in accordance with the installation instructions. The room in which the vacuum cleaner is dismantled must be well ventilated. Wear personal protective equipment during maintenance.
Cleaning and maintenance of the vacuum cleaner should be carried out by the user.
At least once a year, a technical inspection must be carried out by the manufacturer or an authorized service technician, e.g., to check the filter, the vacuum cleaner's suction power, and the function of the control device.
Additionally, the effectiveness of the filter must be checked at least once a year in accordance with EN 60335-2-69, 22.AA.201.2.
Remove the filter and perform a control check.
If the filter class is changed, the filter must be replaced and checked again.
Removal/Replacement of the intake filter (see steps I1-I2)
The suction capacity depends on the condition of the filter. Therefore, check the filter regularly.
Remove the dirty intake filter (28).
- Unlock the two safety locks (38) and press the release button (19) until it is fully depressed. - Pull out the filter cover (18) and open the filter holder (39). - Take out the dirty filter (28) by holding it and pulling it out. - Remove any dirt that has fallen out when removing the intake filter (28) with a damp cloth from the filter holder (39). - Insert the new clean intake filter (28) and make sure it is properly seated. - Close the filter holder (39) (it should click into place).
Troubleshooting
If a defect occurs (e.g., a clogged filter), the suction power must be checked.
Warning! The suction unit is dangerous if used incorrectly. Read all safety instructions in this section.
Problem solving
The suction turbine does not work. - Check the power cord, the plug, the socket, the switch, and the overload sensor (40).
The mode selector switch (7) is set to "Start/Stop automatic".
- Set the mode selector switch (7) to the "Suction" position. Plug the power cord into the socket (5).
Problem solving
| Турбината за BCSCYBAÎble ce нсклочь. | - Искпашистую садот (1). |
| Турбината за BCSCYBAÎble посторно He paşOTи и по паздөгөтэн садот. | - Исклочьею BCSCYBAчOT и пошемытмс equivalently, по 5 сенид посторно Всклочье. - Сениportгета за НИВОТ на habален'tоct (40) по ИNVHINOT мениmpocstop (40) Искпстete Г co уетка. |
| Се ryби силatingа на BCSCYBAÎe. - Остраши差别я бл_OKада тд олmaэницatura за BCSCYBAÎe, сөвкátа за BCSCYBAÎe (33), цевою за BCSCYBAÎe (25) по habранnot менинр (28). - Заменею ворstавею роглесуot за менинр (39). - Рарынлho поставею рогнnot дд на BCSCYBAчot (12) и заховету Калачь�а (13). - Заменею habранnot менинр (28). | |
| Изегува пав при BCSCYBAÎeTo | - Праверете ддл habранnot менинр (28) по habилho мontиран. - Заменею habранnot менинр (28). |
| АстоматICALа на Исклочьи (BSCYBAÎe на Влжни мaterи) He pearigira. | - Сениportгета за НИВОТ на habален'toc (40) по ИNVHINOT менинр (40) Искпстete Г co уетка. Kaj полho кенин поставею рогнnot дд на BCSCYBAчot (12) и заховету Калачььа (13). - Пост乔аны кенинрajte на состоьбata на habален'toc. |
| Се слыша зч乘车 синhalл зд празупедуваьe. | КалачнтETО на BCSCYBAÎe e поставен на habлсал. - Perugлаторот на калачнтETО на BCSCYBAÎe (8) поставею Г на NOBICOKA В体现在�. Поставен e пошени ддаметар на рсев. - Поставею рсvelatорот на ВOLUMENCHК ПOTOK (6) на павилен ддаметар на црево. ЦревоTO за BCSCYBAÎe (25) e заиматою поCBNTKahO. - Oстраши差别я поалдату по CBNTKajte Г. Вrelчкatinga за рогд/бизденснatable менинр - Заменею ворstавею рогнnot дд на BCSCYBAчate mенинр Вrelчкua (26). Набранnot менинр (28) по CBALKAN. - Искпстete Г по eb. Заменею Г habранnot менинр. Hema doBoLOн пожок на ВОДух на пожклч乘车netею менинр - OTbopeteю OTbOPOT за ддолнителен ВОДух (36) на ддanelport за ВSCYBAÎe (23): BpTeTeю постechOT на ддanelport за BCSCYBAчate ддека цeloscho не се OTbOPOT за ддолнителен ВОДух. - ДдOLКУ ИМA: OTbOpeteю OTbOPOT за ддanelport за ВОДух на ддanelport YA Hapyшena phuNKUJЯ на КOLTРONHATAЕ менинр. - Контайрajte ja oblaastehata cepвисна сухьа на Bosch. |
| АстоматICALу чисе hy philteрOT He paBOTи. | - Астинрajteю philteрOT hy philteрOT (aktnibipajteю AFC-Konчeto (9)). |
| - Постпслочьею рсvelOT за BCSCYBAÎe (25). | |
| АстоматICALу чисе hy philteрOT He можеда се Исклочь. АстоматICALу чисе hy philteрOT He можеда се Влжун. - Астинрajteю philteрOT - Астинрajteю philteрOT - Астинрajteю philteрOT - Астинрajteю philteрOT - Астинрajteю philteрOT - Астинрajteю philteрOT - Астинрajteю philteрOT - Астинрajteю philteрOT - 白ншьчын. - 白ншьчын. - 白ншьчын. - 白ншьчын. - 白ншьчын. - 白ншьчын. - 白ншьчын. - 白ншьчын. - 白ншьчын. - 白ншьчын. - 白ншьчын. |
Device
www.bosch-pt.com/serviceaddresses
Battery, operation and maintenance. Requirements must be observed for environmentally friendly disposal.
Do not dispose of the battery in household waste or in the trash!
Only for EU countries:
According to the European Directive 2012/19/EU on waste electrical and electronic equipment, used batteries must be collected separately and recycled in an environmentally friendly manner.
If disposed of improperly, electrical and electronic equipment may have harmful effects on the environment and human health due to potentially hazardous substances.
The environment and human health are protected by proper disposal and recycling of this product.
Serbian
Safety instructions for vacuum cleaner

Read all warnings and instructions. Failure to follow the safety notes and instructions may result in electric shock, fire, or serious injury.
Keep all warnings and instructions for future reference.
This vacuum cleaner is not intended for use by children or persons with reduced physical, sensory, or mental capabilities, or lack of experience and knowledge. Otherwise, there is a risk of incorrect handling and injury.
Supervise children. This will ensure that children do not play with the vacuum cleaner.
www.bosch-pt.com/serviceaddresses
Removing dust
The vacuum cleaner, accessories, and packaging should be recycled in an environmentally acceptable manner.
Do not dispose of the vacuum cleaner in household waste!
Only for EU countries:
Automatic Filter Cleaning
AFC
Automatic filter cleaning (AFC = Automatic Filter Cleaning)
www.bosch-pt.com/serviceaddresses
Disposal
The vacuum cleaner, accessories, and packaging should be taken for environmentally friendly recycling.
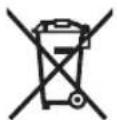
Do not dispose of the vacuum cleaner in household waste!
Only for EU countries:
In accordance with the European Directive 2012/19/EU on waste electrical and electronic equipment and its implementation in national law, unusable vacuum cleaners must be collected separately and taken for environmentally friendly recycling.
In the case of improper disposal, electrical and electronic waste equipment can have harmful effects on the environment and human health due to the possible presence of hazardous substances.
Estonian
www.bosch-pt.com/serviceaddresses
Automatic Filter Cleaning
AFC
Automatic filter cleaning (AFC = Automatic Filter Cleaning)
www.bosch-pt.com/serviceaddresses
Automatic Filter Cleaning
AFC
Automatic filter cleaning device (AFC = "Automatic Filter Cleaning")
Automatic Filter Cleaning
AFC automatic print list completeness (AFC = Automatic Filter Cleaning)
www.bosch-pt.com/serviceaddresses
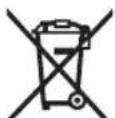

max. 1 L-Boxx, max. 15 kg


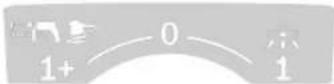
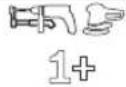

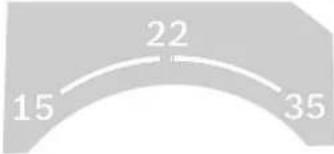
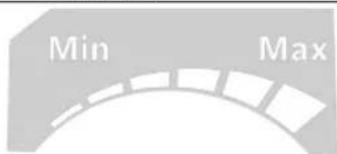
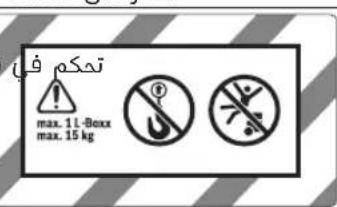
Min/Max: 12345678901


(4) = | | = | | = 1 .
Automatic Filter Cleaning
(AFC = Automatic Filter
Cleaning)
.IEC/EN60335-2-69
(35) yblai jll lcbai clll jol -
uUgUgJU
IaII pgbjg (24) aiaiaaiabai j
(35) 1j1j1j1j1 (25)
Egawu Ggay bawl pgbj
U
aJgUgUgUgUgUgUgUgUgUgUgUgUgUgUgUgUgUgUgUgUgUgUgUgUgUgUgUgUgUgUgUgUgUgUgUgUgUgUgUgUgUgUgUgUgUgUgUgUgUgUgUg
20 9 aablaA1 1y1 0aaw. lal abw saaol u
jbl) bawll ggbj jolu u
(A 0 j gα J
joo baiuogb jyolai (4) Jolai Jd - 3w uJ (34) aaoaall oalgall
(BjgJJI Jbl) bawll ggbu uSji
(3)pgbJJI J0 (2)gJJI sW
(3)ggbjll jolac (25) bawl ggbjgs aqill jia acllw yla dja oai jog
295
(12)
(24) aiaioll aboill lc pssoo Jsw (a)
-(1)Lg(26)JLo
-aa g)gjolb
-35)
pOaI aiao Jai
JU 1000000000000000000000000000000000000000000000000
(D1-D3 jgAlljbll)
(26) (D1-D3)
- (27) (26)
- a9 Log iagaaeggaiy jnuuuiuulldiojipu Llu
(1) LgJ (L J aai Iaog) 3 p/00 1 ≤ d a
- (12) abwU 5
.(13) Jg
aall lgc ojgbia jia
g 1
- algo apolopolololololololololololololololololololololololololololololololololololololololololololololololololololololol
100
aagglg 100
y
aui jai jil jolil jiall
(12)
(1)
∴ ( x,y) = ( ab + c,5/2a + b + c)
298
Robert Bosch Morocco SARL
JUJI JUJU 20300
+212529314327:
sav.outillage@ma.bosch.com:JgjSJdJU
www.bosch-pt.com/serviceaddresses
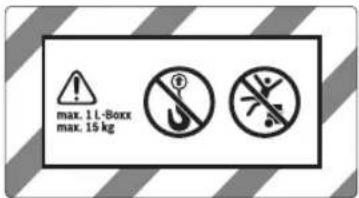
L-BOXX 1LgU UgO L-BOXX jgU


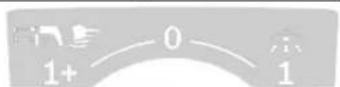
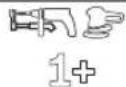

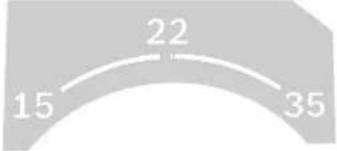
15 mm
22 mm
35 mm Silw
A
Jus Jus
4uSo Silu g 0
gj 15y Cuaa d j gai
4.uiSj jai jui
aS
J 1
#
law gjgl olaai w jw w w koo jy plic l jgl golg n llab. sinu comega jla law ay plic n l cws jy yjw sbla d go sS gjgl jji ng jq olaai w
sis
gj gao g y
g jai kj gao!jss sac. jilgsj I J Jgws Jgws g jai kj Cua g jgi yu cya wJ Saa I gsw syw lalj y/g iiaqw

HJL 160335-2-69 IEC/EN 60584 Gg JdilwI L 0,1 mg/m³>
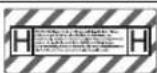
j j j j j j j j j j j j j j j j j j j j j j j j j j j j j j j j j j j j j j j j j j j j j j j j j j j j j j j j j j j j j j j j j
sglgagjgljIsw Golw gJpaJucg gugwUdLac.duyLo abao gdsuiaomgauai baq Juc gSgSgI Gs aIusg jundiaio bugi cuio joi jua .gwi guyu gga Cunoljll puiu w gJols juu Jg uilg aa Sgau
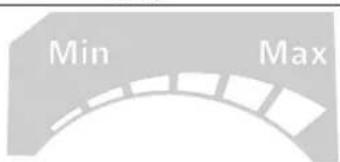
Min/Max: uSo Ug dUg pabu
(1)
gaj gao g ylc
(2)uLoJwJ
-1jSgJUuSo UgJUs
(3)Sulw sijds
-9 15 15 15 15
(4)
(5)
(3)
(6)
(7)SLSACgIgIgIgIgIgIgIgIgIgIgIgIgIgIgIgIgIgIgIgIgIgIg
(8)uSo uIguaaiaIgauaiaJbgo Uau
(9)AFC uu()o w juaio yjul jao
(10)
(11) L-BOXX
(12)
(13) L-BOXX
(14)
L-BOXX
100
L-BOXX
L-BOXX
L-BOXX
L-BOXX
L-BOXX
L-BOXX
L-BOXX
L-BOXX
L-BOXX
(HEPA/PTFE) H wLs 1
L
Lb L
(14)
(15)
(16)
(17)
(18)
(19)
(20)
(21)
(22)
(23)
(24)
(25)
(26)
(27)
(28)
(29)
(30)
(31)
(33)
(34)
(34) (35)
(5) a → 0 a doSS
g 1g
(37)UμS LED

Automatic Filter Cleaning
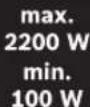
Cleaning)
CwIEC/EN60335-2-69U
__SUPPIMER__
IEC/EN 60335-2-69
| GAS 35 H AFCGAS 35 H AFC | الجعْلُّة/الجعْلُّة | ||
| 3601 JC3 660 | 3601 JC3 6.. | شَبْعْلِ | |
| 240-220110 | V | الجعْلِ | |
| 1000 | 1200 | W | الجعْلِ |
| 60-50 | 60-50 | Hz | الجعْلِ |
| GAS 35 H AFCGAS 35 H AFC | ### | |
| I3535 | (###) ab### ### | |
| I2525 | (###) ab### ### | |
| I1919 | (###) ## | |
| I1919 | ### | |
| ### | ||
| hPa230211 | -### | |
| hPa254242 | -### | |
| ### | ||
| 31 | 36 | I/s |
| 111,6 | 129,6 | m3/h |
| 71 | 74 | I/s |
| 255,6 | 266,4 | m3/h |
| W13801150 | ||
| m20,50,5 | ||
| H | H | ### |
| kg12,412,7 EPTA-Procedure 01:2014 ### | ||
| I/### | I/### | |
| IPX4IPX4 | ### | |
| IP55- | ### | |
(3) SILW OJSLgJ (25) SsO SILW Cclw gJUAC CSJg JIg gJLg JIg JIg JIg JIg JIg JIg JIg JIg JIg JIg JIg JIg JIg JIg JIg JIg JIg JIg JIg JIg JIg JIg JIg JIg JIg JIg JIg JIg JIg JIg JIg JIg JIg JIqJGJQJQJQJQJQJQJQJQJQJQJQJQJQJQJQJQJQJQJQJQJQJQJQJQJQJQJQJQJQJQJQJQJQJQJQJQJQJQJQJQJQJQJQJQJQJQJQJQJQJQJ0Sbch GsW Lgb 0sO cgs (c) Sylw gj0slaw Bosch sW gj0s0
jul jusu (AFC = Automatic Filter Cleaning) 1528
sJgUgL JUsuS uJgi gJisla UoJ jul oui joi oiai Ujoo
The device is intended for use in accordance with the instructions provided in this manual. 10. If the device is used in a manner not specified by the manufacturer, the protection provided by the device may be impaired.
The device should be inspected before each use. If the device is damaged, do not use it. The device should be cleaned and disinfected after each use. The device should be stored in a clean, dry place.
The device is not intended for use by persons (including children) with reduced physical, sensory or mental capabilities, or lack of experience and knowledge, unless they have been given supervision or instruction concerning use of the device by a person responsible for their safety.
WARNING: Do not use the device in the presence of flammable anesthetics.
WARNING: Do not use the device in the presence of flammable anesthetics.
CAUTION
Federal law restricts this device to sale by or on the order of a physician.
The device is intended for single use only. Do not reuse. Reuse may cause malfunction or injury. Dispose of the device properly after use.
Do not
If the device is used in a manner not specified by the manufacturer, the protection provided by the device may be impaired. (See instructions for use) Bosch
FFP2
The device is intended for use in accordance with the instructions provided in this manual. If the device is used in a manner not specified by the manufacturer, the protection provided by the device may be impaired. (See instructions for use)
The device should be inspected before each use. If the device is damaged, do not use it. The device should be cleaned and disinfected after each use. The device should be stored in a clean, dry place.
CAUTION
www.bosch-pt.com/serviceaddresses
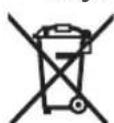
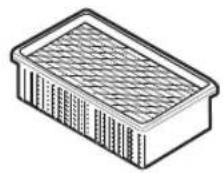
2607432052 (PTFE)
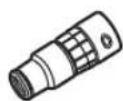
2608000585
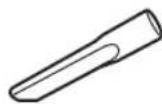
2607000165

2607000166

2607000170
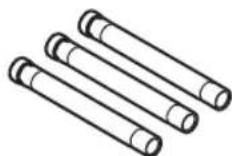
2608000575
1609201229
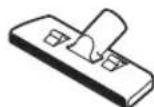
1609201230
1609390481

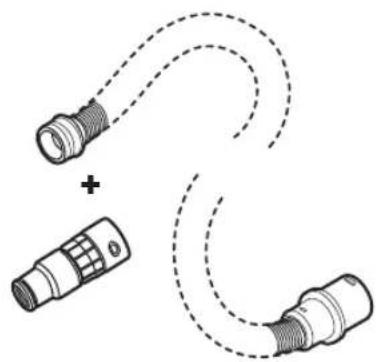

5m

35mm

1
2608000565
5m
.
26
08000566
5m
2608000567
5m
2608000568
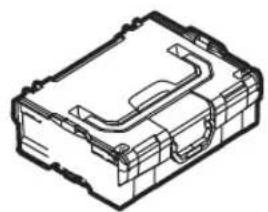
1600A003R926084386
1
| de | EU-Konformitäserklarung | ||
| Nass-/Trockensauger | Sachnummer | ||
| en | EU Declaration of Conformity | ||
| Wet/dry dust extractor | Article number | ||
| fr | Déclaration de conformité UE | ||
| Aspirateur eau et poussière | N° d'article | ||
| es | Déclaración de conformidad UE | ||
| Aspirador en húmedo/seco | No de articulo | ||
| pt | Declaração de Conformidade UE | ||
| Aspirador universal | N.° do produits | ||
| it | Dichiarazione di conformità UE | ||
| Aspiratore a umido/a secco | Codice prodotto | ||
| nl | EU-conformiteitsverklaring | ||
| Alleszuiger | Productnumber | ||
| da | EU-overensstammelseserklaring | ||
| Våd-/tørstøv-suger | Typenummer | ||
| sv | EU-konformitetsförklaring | ||
| Våt-/torrdamm-sugare | Produktnumber | ||
| no | EU-samsvarserklæring | ||
| Våt-/tørsager | Produktnumber | ||
| fi | EU-vaatimustemnukaisuusvakuutus | ||
| Märkäuivaimuri | Tuotenumero | ||
| el | Δηλωση πιστότητας EE | ||
| Δορροφηπήρας Αριθμός ευρετηρίουνης αυροφησης | Δηλωνουμε με απολεισική μας εύθυνη, ὄτι τα αναφερόμενα προίντα ανιστογχούν. σέλες, σεχικές, διατάξεις τὸν πότων αναφερόμενων σόθημώ και κανονισύμώ και ταυτίσουται με τα ακόλουθα πρότια. | ||
| tr | AB Uygunluk Beyani | ||
| Islak/kuru | Ürún kodu | ||
| II | |||
| pl | Deklaracja zgodnosci UE | Oswiadczamy z pełną odpowiedzialnoscia, ze niniejsze produkty odpwiatȩ wyszystkim wymaganiom poniżej wyszczególniych dyrektyw i roźporzędź, oraz ze są zgodne z następućymi normami. Dokumentacja techniczna:* | |
| Odkuracz do Numer katalogowy pracny sucho i mokro | |||
| cs | EU prohląsieni o shodé | Prohląsujeme na vyhradní zodpovednost, ze uvedený vyrobek splůje vsechna príslůné ustanověni nizě uvedených směrnic anarádení ale yasouladu snásledujćím normami: Technické podklady u:* | |
| Vysavač pro ObjednaciCIDSO | Vyhlasujeme na vyhradní zodpovednost, ze uvedený vyrobok splůna všětky prisólne ustanověni nizě uvedených směrnic anarádení ale yasulade snásledujćím normami: Technické podklady má spolocnost:* | ||
| sk | EU vyhląsenie o zhode | Egyedūlile felēsóggel kijelentjuk, hagy a megnevezett termék megfelelnek az alábbiakban felsorolársa kerülo irányelvek és rendeleket valamennyi ideváző elöirásainak és megfelelnek a kõvetkežo szabványoknak. Mûszaki dokumentumok megörzési pontja:* | |
| Vysávač na vysá- vanie namokro/ nasucho | |||
| hu | EU konformitási nyilatkozat | Egyedūlile felēsóggel kijelentjuk, hagy a megnevezett termék megfelelnek az alábbiakban felsorolársa kerülo irányelvek és rendeleket valamennyi ideváző elöirásainak és megfelelnek a kõvetkežo szabványoknak. Mûszaki dokUMENTUMOK megörzési pontja:* | |
| Nedves/száraz porszívó | Mlb 3aBbIeM NO na Hauy édHOnlHyU OTBETCTBHeHcTb,чTo Na3BaHbHbIe IpoJyKtBi COOTBETCTBYOT BcEM DeIcTBYUcIM IpreДпсаHЯМ NIXKeyUa3AHbX DINOPEKTHB IN PACNORJEN, a TAKKE NIXKeyUa3AHbX HOPM. TexNHueckaydoKUMENTAQU XPAHNTCAY:* | ||
| ru | Завленье о cootbetrSTBn EC | Mlb 3aBbIeM NO na Hauy édHOnlHyU OTBETCTBHeHcTb,чTo Na3BaHbHbIe IpoJyKtBi COOTBETCTBYOT BcEM DeIcTBYUcIM IpreДпсаHЯМ NIXKeyUa3AHbX DINOPEKTHB IN PACNORJIEN, a TAKKE NIXKeyUa3AHbX HOPM. TexNHueckaydoKUMENTAQU XPAHNTCAY:* | |
| Пыесocду вожног/cuxоу bopку | Mlb 3aBbIeM NO TOBAPNHI NO CIVINHIM ПОLOJENHIM NIXteO3HauHx DINOPEKTHB IN POCNORJIEN, a TAKKE NIXteO3HauHx DINOPEKTHB IN POCNORJIEN, a TAKKE NIXteO3HauHx DINOPEKTHB IN POCNORJIEN, a TAKKE NIXteO3HauHx DINOPEKTHB IN POCNORJIEN, a TAKKE NIXteO3HauHx DINOPEKTHB IN POCnORJIEN, a TAKKE NIXteO3HauHx DINOPEKTHB IN POCNORJIEN, a TAKKE NIXteO3HauHx DINOPEKTHB IN POCNORJIEN, a TAKKE NIXteO3HauHx DINOPEKTHB IN POCNORJIEN, a TAKKE NIXteO3HauHx DNOPEKTHB IN POCNORJIEN, a TAKKE NIXteO3HauHx DINOPEKTHB IN POCNORJIEN, a TAKKE NIXteO3HauHx DINOPEKTHB IN POCNORJIEN, a TAKKE NIXteO3HauHx DINOPEKTHB IN POCNORJIEN, a TAKKE NIXdeO3HauHx DINOPEKTHB IN POCNORJIEN, a TAKKE NIXdeO3HauHx DINOPEKTHB IN POCNORJIEN, a TAKKE NIXdeO3HauHx DINOPEKTHB IN POCNORJIEN, a TAKKE NIXdeO3HauHx DINOPEKTHB IN POCNORJIen, a TAKKE NIXdeO3HauHx DINOPEKTHB IN POCNORJIEN, a TAKKE NIXdeO3HauHx DINOPEKTHB IN POCNORJIEN, a TAKKE NIXdeO3HauHx DINOPEKTHB IN POCNORJIEN, a TAKKE NIXdeO3HauHx DINOPEK THB | Mlb 3aBbIeM NO na Hauy édHOnlHyU OTBETCTBHeHcTb,чTo Na3BaHbHbIe IpoJyKtBi COOTBETCTBYOT BcEM DeIcTBYUcIM IpreДпсаHЯМ NIXteKUa3AHbX DINOPEKTHB IN PACNORJIEN, a TAKKE NIXteKUa3AHbX HOPM. TexNHueckaydoKUMENTAQU XPAHNTCAY:* | |
| uk | Завленье о cootbetrSTBn EC | Mlb 3aBbIeM NO πi Na Hauy odHooocobov BviNoBvIaNBcTb,ю Na3BaHbHbIe BIPoBbIe BvIOBvIaOToYcIM YUHNHIM ПОLOJENHIM NIXteO3HauHx DINOPEKTHB IN POCNORJIEN, a TAKJONHIM NIXteO3HauHx DINOPEKTHB IN POCNORJIEN, a TAKJONHIM NIXteO3HauHx DINOPEKTHB IN POCNORJIEN, a TAKJONHIM NIXteO3HauHx DINOPEKTHB IN POCNORJIEN, a TAKJONHIM NIXteO3Hau HOpM. TexNHueckaydoKUcTBAZ | |
| Пиносoc вожlorо та cyхоу рпбрань | Фзягалды/kурахгдыэл МИн НИМ ДИКИТМ ИПОLOJENHIM NIXteO3HauHx DINOPEKTHB IN POCNORJIEN, a TAKJONHIM NIXteO3HauHx DINOPEKTHB IN POCNORJIEN, a TAKJONHIM NIXteO3HauHx DINOPEKTHB IN POCNORJIEN, a TAKJONHIM NIXte OTO-DOLOY N COTBETCTBA Na CLENDHTE STANDPAT. | ||
| kk | EO сөнөстik мafлүдамбы | Сөнөstларларларларлары БИнм Həmİр | Mlb 3aBbIeM NO πi Na Hauy odHooocobov BviNoBvIaNBcTb,чTo Na3BaHbHbIe IpoJyKtBi OTHeJIDep TЕмэн ZeЖынФаH NIXteO3HauHx DINOPEKTHB IN POCNORJIEN, a TAKJONHIM NIXteO3HauHx DINOPEKTHB IN POCNORJIEN, a TAKJONHIM NIXteO3HauHx DINOPEKTHB IN POCNORJIEN, a TAKJONHIM NIXteO3HauHx |
| ынгды/кургak ТаЗалayra apналганшацр | ТаЗалayra KATALOJOH HOMER | IpoJyKtBi ARIIaHbIe Na CIVINHIM YUHNHIM NIXteO3HauHx DINOPEKTHB IN POCNORJIEN, a TAKJONHIM NIXteO3HauHx DINOPEKTHB IN POCNORJIEN, a TAKJONHIM NIXteO3HauHx DINOPEKTHB IN POCNORJIEN, a TAKJONHIM NIXteO3HauHaTBA | |
| ro | Declarataie de conformitate UE | Declarám pe proprie raspundená că produselementionate corespendutur dispoziilior relevante ale directivelor ŞI reglementárlor enumerate in celece ce urmează ŞI suntince conformitate cu urmátoarele standarde. Documentaţie tehnica la:* | |
| Aspirator universal | Numār de identificare universal | Cпьліа OTROBOPHOCT №п DEКларпаме, ч КпОчелені特有的у рожуті NIXte ODEКларпаме, ч КпОчелені特有的у рожуті NIXte ODEKларпаме, ч КпОчелені特有的у рожуті NIXte ODEKларпаме, ч КпОчелені特有的у рожуті NIXte ODEKларпаме, ч КпОчелені特有的у рожуті NIXte ODEKларпаме, ч КпОчелені特有的у рож�уті NIXte ODEKларпаме, ч КпОчелені特有的у рожуті NIXte ODEKларпаме, ч КпОчелені特有的у рожуті NIXte ODEKларпаме, ч KIFLDAHIT | |
| bg | EC DeKnapaци за сьвотоветспe | Спьліа OTROBOPHOCT №п DEКларпаме, ч КпОчелені特有的у рожуті特有的у рожуті特有的у рожуті特有的у特有的у特有的у特有的у特有的у特有的у特有的у特有的у特有的у特有的у特有的у特有的у特有的у特有的у特有的у特有的у特有的у特有的у特有的у特有的у特有的у特有的у特有的у特有的у特有的у特有的у特有的у特有的у特有的у特有的у特有的у特有的у特有的у特有的у特有的у特有的у特有的у特有的у特有的у特有的у特有的у特有的у特有的у特有的у特有的у特有的у特有的у特有的у特有的у特有的у特有的y | |
| Прахосмукачka KaTalOжeн Homep | ТаЗалayra KATALOJOH HOMER | IpoJyKtBi ARIIaHbIe Na CIVINHIM NIXteO3HauHx DINOPEKTHB IN POCNORJIEN, a TAKJONHIM NIXteO3HauHx DINOPEKTHB IN POCNORJIEN, a TAKJONHIM NIXteO3HauHx DINOPEKTHB IN POCNORJIEN, a TAKJONHIM NIXteO3HauHo DINOPEKTHB IN POCNORJIEN, a TAKJONHIM NIXteO3HauHo DINOPEKTHB IN POCNORJIEN, a TAKJONHIM NIXteO3HauHo DINOPEKTHB IN POCNORJIEN, a TAKJONHIM NIXteO3HauHo DINOPEKTHB IN POCNORJIen, a TAKJONHIM NIXteO3HauHo DINOPEKTHB IN POCNORJIEN, a TAKJONHIM NIXteO3HauHo DINOPEKTHB IN POCNORJIEN, a TAKJONHIM NIXteO3HauHo DINOPEKTHB IN POCNORJIEN, a TAKJONHIM NIXteO2HauHo DINOPEKTHB IN POCNORJIEN, a TAKJONHIM NIXteO2HauHo DINOPEKTHB IN POCNORJIEN, a TAKJONHIM NIXteO2HauHo DINOPEKTHB IN POCNORJIEN, a TAKJONHIM NIXteO2HauHo DINOPEKTHB IN POCnORJIEN, a TAKJONHIM NIXteO2HauHo DINOPEKTHB IN POCNORJIEN, a TAKJONHIM NIXteO2HauHo DINOPEKTHB IN POCNORJIEN, a TAKJONHIM NIXteO2HauHo DINOPEKTHB IN POCNORJIEN, a TAKJONHIM NixO3HauHo DINOPEKTHB IN POCNORJIEN, a TAKJONHIM NIXteO2HauHo DINOPEKTHB IN POCNORJIEN, a TAKJONHIM NIXteO2HauHo DINOPEKTHB IN POCNORJIEN, a TAKJONHIM NIXteO2HauHo DINOPEKTHB INPOM. | |
| mk | EU-N3jabа за coobpa3noct | Coцелоча оdgOBOPHOCT ИЗавУВаме,.Deca Ke onишанITE поживо ВОБODIBAчп. | Izjavlajmo pod izključno odgovornost jozivljujemo, da navedeni proizvodi odgovaraju svid dotovičim odredbama naknadno navenedih smernica u uredaba i da su skladu sa sledecim standardima. |
| Всисвача за Stevilka artikla | Браз no на дуллу | Technicka dokumentacijs kod: * | |
| Влaxнho/cybo | Всисвача/cybo | Teknicna dokumentacijs kod: * | |
| Всисвача/cybo | Всисвача/cybo | Teknicna dokumentacijs Kod: * | |
| sr | Eu-izjava o usaglašenosti | Sisivača za mokroBro | Sisivača za mokroBro |
| i suvo usisavanje | i suvo usisavanje | i suvo usisavanje | |
| HR | EU izjava o sukladnosti | Pod punom odgovornošću izjavljujemo da navedeni proizvodi odgovaraju svim relevantnim odredbama direktiva i propisima navenedenima u nastavku i da su sukladni sa slijećim normama. Tehnička dokumentacija se može dobiti kod: * | |
| Usisavač za Kataloški br. | |||
| mokro/suho | |||
| usisavanje | |||
| et | EL-vastavusdeklaratsion | Kinnitame ainuvastutajatena, et nimetatud tooted vastavad järgnevalt loetletud direktiviide ja määruste kõikidele asjaomastele nõuetele ja on kooskõlas järgmiste normidega. Tehnilised dokumendid saadaval: * | |
| Mãrg-/ Tootenumber | |||
| kuivtolmuimeja | |||
| lv | Deklarăcija par atbilstibu | Mës ar pilnu atbildibu pazinojam, ka šeit aplūkotie izstrădăjumi atbilst visiem tälak minētajăs direktivās un rikojumos ietvertajām saistošajām nostănēm, kã arī sekojosiem standartiem. | |
| ES standartiem | |||
| Vakuumsqüejs Izstrădăjuma numurs | kã arī sekojosiem standartiem. Tehniskã dokumentăcija no: * | ||
| mitrai un sausai | |||
| uzsūkşanai | |||
| lt | ES atitikties deklaracija | Atsakingai pareiškiamie, kad išvardtyi gaminiai atitinka visus privalomus žemiau nurodytu direktvyu ir replamentu reikalavimus ir siuos standartus. Techniné dokumentacija saugoma: * | |
| Skysciu ir sausq Gaminio numeris | |||
| dulkiu siurblys | |||
| GAS 35 H AFC 3 601JC3 600 | 2006/42/EC EN 60335-1:2012+A11:2014+ 2014/30/EU A13:2017+A1:2019+A2:2019+ 2011/65/EU A14:2019+A15:2021 | ||
| 3 601JC3 630 | |||
| 3 601JC3 6W0 | |||
| 3 601JC3 660 | |||
| 3 601JC3 670 | |||
| *Robert Bosch Power Tools GmbH (PT/ECS) 70538 Stuttgart GERMANY | |||
| Thomas Donato Chairman of the Management Board Helmut Heinzelmann Head of Product Certification | |||
| Robert Bosch Power Tools GmbH, 70538 Stuttgart, GERMANY Stuttgart, 25.09.2023 | |||
IV
C
Declaration of Conformity
Wet/dry dust extractor Article number
GAS 35 H AFC 3 601 JC3 660
3601JC3670
We declare under our sole responsibility that the stated products comply with all applicable provisions of the regulations listed below and are in conformity with the following standards.
Technical file at: Robert Bosch Ltd. (PT/SOP-GB), Broadwater Park, North Orbital Road, Uxbridge UB9 5HJ, United Kingdom
The Supply of Machinery (Safety) Regulations 2008
The Electromagnetic Compatibility Regulations 2016
The Restriction of the Use of Certain Hazardous Substances in
Electrical and Electronic Equipment Regulations 2012
EN60335-1:2012+A11:2014+A13:2017+
A1:2019+A2:2019+A14:2019+A15:2021
EN 60335-2-69:2012
EN 55014-1:2017+A11:2020
EN 55014-2:2015
EN IEC 61000-3-2:2019
EN 61000-3-3:2013+A1:2019
EN IEC 63000:2018

BOSCH
Vonjy Rajakoba
Managing Director - Bosch UK
Robert Bosch Power Tools GmbH, 70538 Stuttgart, Germany represented (in terms of the above regulations) by
Robert Bosch Limited, Broadwater Park, North Orbital Road,
Uxbridge UB9 5HJ, United Kingdom
Martin Sibley
Head of Sales Operations and Aftersales
Robert Bosch Ltd. Broadwater Park, North Orbital Road, Uxbridge UB9 5HJ, United Kingdom, as authorised representative acting on behalf of Robert Bosch Power Tools GmbH, 70538 Stuttgart, Germany
Place of issue: Uxbridge Date of issue: 14/10/2023
- DISPOSAL
- SAFETY INFORMATION FOR VACUUM CLEANERS
- WARNING
- PRODUCTS SOLD IN GB ONLY
- SYMBOLS
- SYMBOLS AND THEIR MEANING
- AUTOMATIC START/STOP
- SWITCHING OFF
- EXTRACTION
- PRODUCT DESCRIPTION AND SPECIFICATIONS
- INTENDED USE
- PRODUCT FEATURES
- TECHNICAL DATA
- NOISE/VIBRATION INFORMATION
- WEAR HEARING PROTECTION
- ASSEMBLY
- FITTING THE HOLDER FOR THE VACUUM HOSE (SEE FIGURE A)
- FITTING THE VACUUM HOSE (SEE FIGURE B)
- FITTING THE VACUUMING ACCESSORIES (SEE FIGURE C)
- FITTING THE DUST EXTRACTION ADAPTER
- FITTING THE NOZZLES AND TUBES
- INSERTING/REMOVING THE DISPOSAL BAG OR SAFETY FILTER BAG (DRY EXTRACTION) (SEE FIGURES D1-D3)
- INSERTING THE DISPOSAL BAG
- REMOVING AND SEALING THE DISPOSAL BAG
- INSERTING THE SAFETY FILTER BAG
- REMOVING AND SEALING THE SAFETY FILTER BAG
- FITTING THE RUBBER LIP (WET EXTRACTION) (SEE FIGURE E)
- ATTACHING THE L-BOXX (SEE FIGURE F)
- OPERATION
- START-UP
- DRY VACUUMING
- VACUUMING UP DUST DEPOSITS
- EXTRACTING DUST THAT ACCUMULATES FROM WORKING POWER TOOLS (SEE FIGURE G)
- ENGLISH
- WET VACUUMING
- STEPS TO TAKE BEFORE WET VACUUMING
- VACUUMING UP LIQUIDS
- AUTOMATIC FILTER CLEANING (SEE FIGURE H)
- MAINTENANCE AND SERVICE
- MAINTENANCE AND CLEANING
- REMOVING/CHANGING THE FLAT-PLEATED FILTER (SEE FIGURES 11-12)
- CLEANING THE CONTAINER
- CLEANING THE FILL LEVEL SENSORS (SEE FIGURE J)
- STORAGE AND TRANSPORT (SEE FIGURE K)
- RECTIFYING FAULTS
- ACCESSORIES
- AFTER-SALES SERVICE AND APPLICATION SERVICE
- GREAT BRITAIN
- YOU CAN FIND FURTHER SERVICE ADDRESSES AT
- ONLY FOR EU COUNTRIES
- ONLY FOR UNITED KINGDOM
- FRANÇAIS
- AUTOMATIC FILTER CLEANING
- WASTE DISPOSAL
- YOU CAN FIND MORE SERVICE CONTACT DETAILS HERE
- WASTE MANAGEMENT
- SAFETY
- DESCRIPTION OF THE APPLIANCE
- DISPOSAL OF THE APPLIANCE
- TABLE OF CONTENTS AND SAFETY INSTRUCTIONS
- INSTALLATION/REMOVAL OF THE COLLECTION CONTAINER OR SAFETY FILTER CONTAINER (SEE FIGURES D1-D3)
- SAFETY INSTRUCTIONS
- INSTALLING THE COLLECTION CONTAINER
- REMOVING AND CLOSING THE COLLECTION CONTAINER
- INSTALLING THE SAFETY FILTER CONTAINER
- REMOVAL AND CLOSURE OF THE PRESSURE RELIEF VALVE
- INSTALLATION OF THE PRESSURE RELIEF VALVE (LOW PRESSURE) (SEE FIGURE E)
- INSTALLATION OF THE L-BOXX (SEE FIGURE F)
- OPERATING POSITION
- PRODUCT AND PERFORMANCE DESCRIPTION
- SERVICE LIFE
- LIST OF CRITICAL FAILURES AND ERRONEOUS ACTIONS OF PERSONNEL OR USERS
- CRITERIA FOR LIMIT STATES
- TYPE AND FREQUENCY OF TECHNICAL MAINTENANCE
- STORAGE
- TRANSPORTATION
- SAFETY INSTRUCTIONS FOR VACUUM CLEANERS
- VACUUMING MODE
- PRODUCT DESCRIPTION AND SERVICES
- ILLUSTRATED COMPONENTS
- MOUNTING THE SUCTION HOSE HOLDER (SEE FIGURE A)
- MOUNTING THE SUCTION HOSE (SEE FIGURE B)
- MOUNTING THE ACCESSORIES FOR SUCTIONING (SEE FIG. C)
- INSTALLING THE DUST BAG ADAPTER
- MOUNTING THE NOZZLES AND TUBES
- INSTALLING/REMOVING THE DUST BAG OR DISPOSABLE FILTER BAG (DRY SUCTION) (SEE FIG. D1-D3)
- INSTALLING THE DUST BAG
- REMOVING AND CLOSING THE DUST BAG
- INSTALLING THE SAFETY FILTER BAG
- REMOVING AND CLOSING THE SAFETY FILTER BAG
- RUSSIAN
- INSTALLING THE RUBBER GROMMETS (FOR LIQUID SUCTION) (SEE FIG. E)
- INSTALLING THE L-BOXX (SEE FIG. F)
- WORKING WITH THE TOOL
- SWITCHING ON THE ELECTRIC TOOL
- COLLECTING DUST DEPOSITS
- VACUUMING DUST FROM POWER TOOLS (SEE FIG. G)
- OPERATION WITH WET VACUUMING
- REMOVAL/REPLACEMENT OF THE FLAT PLEATED FILTER (SEE FIG. 11-12)
- CLEANING THE LIQUID LEVEL SENSORS (SEE FIG. J)
- STORAGE AND TRANSPORT (SEE FIG. K)
- TROUBLESHOOTING
- TOLBKO DIA CTPAH-UENOB EC
- UKRAINIAN
- SAFETY INSTRUCTIONS FOR USE
- WARNINGS
- SYMBOLS AND THEIR MEANINGS
- SWITCHING ON/OFF
- SYMBOL MEANINGS
- MIN/MAX
- INSTALLING THE PROTECTIVE FILTER BAG
- REMOVING AND CLOSING THE PROTECTIVE FILTER BAG
- INSTALLING THE SPRAY NOZZLE (FOR SUCTIONING) (SEE FIG. E)
- INSTALLING THE L-BOXX CASE (SEE FIG. F)
- STARTING OPERATION
- CYXE BIDCMOKTYBAHHA
- BICMOKTYBAHHNNY, NOO NOOCIAAB
- BICMOKTYBAHHNNY BID NPAUOOUNX ENKTPOINCTPYMENTIB (NB. MAN. G)
- BONORE BIDCMOKTYBAHHA
- OPERATION OF THE DRYING DEVICE
- CLEANING THE DEVICE
- AUTOMATIC FILTER CLEANING (SEE FIG. H)
- TEXHUIHE 06CNYROBYBAHHAICEPBIC
- TEXHIHE 06CNYROBYBAHHA TA OUHUEHH
- BHHMAHA/3AIMAHNACKOROCKNAQACTOROΦINBTPA (MB.MAL.11-12)
- OUUEENHCMHOCTI
- EPIRAHHH I TPAHCNPTYBAHHA (NB. MAN. K)
- YCYEHHHA HECNPABHOCTE
- UKRAINE
- THE ADDRESSES OF OTHER SERVICE CENTERS ARE LISTED BELOW
- KAZAKH
- EURASIAN ECONOMIC UNION (EAEU) CONFORMITY MARK
- SERVICE AND MAINTENANCE INSTRUCTIONS
- CLEANING AND CARE
- SERVICE TYPE AND SCOPE
- MAINTENANCE
- SAFETY PRECAUTIONS FOR OPERATION
- ECKEPTY
- CAUTION
- REPLACEMENT PARTS
- POWER AND BATTERY SPECIFICATIONS
- STORAGE AND TRANSPORT
- CONTROL PANEL
- TECHNICAL SPECIFICATIONS
- FOR DRY/WET EXTRACTION: 35 L AND AFC 35 L AFC
- REPLACING THE FILTER (SEE FIGURE E)
- L-BOXX INSERT (SEE FIGURE F)
- CLEANING
- COPY OF THE ORIGINAL
- COPY OF THE ORIGINAL DOCUMENT
- COPY OF THE ORIGINAL DOCUMENT WITH THE ORIGINAL DOCUMENT PLACED ON THE GLASS (SEE FIGURE G)
- FILTER CLEANING
- FILTER CLEANING PROCEDURE
- DRAINING WATER FROM THE FILTER
- AUTOMATIC FILTER CLEANING (SEE FIGURE)
- TECHNICAL SERVICE AND MAINTENANCE
- TECHNICAL SERVICE INSTRUCTIONS AND MAINTENANCE
- THE COVER MUST BE CLOSED WHEN THE APPLIANCE IS NOT IN USE (SEE I1-I2)
- KOTHEHEPDI TA3AHABBI
- TONTBIPY DENGRENINH DATUNKTEPIN TA3ANAY (J CYPETIN KARAIB3)
- CAKTAY KXHE TACBIMAIAY (K CYPETIH KAPAHB3)
- AKAYNBIKTAPDBJKOIO
- EREPAKAYNBK NAIDA60NCA, (MBICABBLC Y3RI 6Y3BNFAH 60NCA) WANCOPFBTIDEPEYEWIPY KEPEK
- SERVICE CUSTOMER SERVICE AND AFTER-SALES SERVICE FOR PRODUCTS
- WWW.BOSCH-PT.COM
- KAZAKHSTAN
- FOR OTHER SERVICE CENTERS AND COLLECTION POINTS, SEE
- ACCORDING TO THE EUROPEAN DIRECTIVE 2012/19/EU ON WASTE ELECTRICAL AND ELECTRONIC EQUIPMENT AND ITS IMPLEMENTATION IN NATIONAL LAW, USED ELECTRICAL AND ELECTRONIC EQUIPMENT MUST BE COLLECTED SEPARATELY AND RECYCLED IN AN ENVIRONMENTALLY COMPATIBLE MANNER
- ROMANIAN
- INFORMATION ON NOISE/VIBRATION
- WARNING: USE THE CONTACT FOR THE OPERATING INSTRUCTIONS
- IF THE DEVICE IS NOT WORKING OR WATER IS PRESENT, IMMEDIATELY SWITCH OFF THE VACUUM CLEANER AND DISCONNECT IT
- CAUTION - THE VACUUM CLEANER IS INTENDED FOR DRY VACUUMING. FOLLOW THE INSTRUCTIONS FOR USE
- START/STOP AUTOMATIC
- PRODUCT NAME AND DESIGNATION
- INTENDED USE OF THE VACUUM CLEANER
- BULGARIAN
- RATED VOLTAGE: MAXIMUM POWER, MINIMUM POWER
- THE STANDARD VALUES HAVE BEEN SELECTED
- WORK WITH EAR PROTECTION
- MOUNTING THE FLOOR NOZZLE FOR THE VACUUM CLEANER (SEE FIG. A)
- MOUNTING THE HOSE FOR THE VACUUM CLEANER (SEE FIG. B)
- MOUNTING ACCESSORIES FOR VACUUMING (SEE FIGURE)
- MOUNTING THE DUST BAG
- MOUNTING THE NOZZLE AND TUBES
- INSERTING/REMOVING THE FABRIC BAG FOR DRY VACUUMING OR THE BAG WITH PRE-FILTER (DRY VACUUMING) (SEE FIGURES D1-D3)
- CAUTION: THE VACUUM CLEANER IS SUITABLE FOR VACUUMING DUST. OBSERVE THE REGULATIONS FOR DISPOSAL AND CLEANING
- INSTALLING THE FABRIC BAG FOR DRY VACUUMING
- REMOVING AND ATTACHING THE FABRIC BAG FOR DRY VACUUMING
- INSTALLING THE BAG WITH PRE-FILTER
- REMOVING AND ATTACHING THE BAG WITH PRE-FILTER
- INSTALLING THE WET VACUUMING ATTACHMENT (WET VACUUMING) (SEE FIG. E)
- OPEN THE L-BOXX (SEE FIG. F)
- WORKING WITH THE POWER TOOL
- SWITCHING ON THE DUST EXTRACTOR
- DUST EXTRACTION FROM POWER TOOLS (E.G. CIRCULAR SAW)
- WORKING STEPS BEFORE WET VACUUMING
- AUTOMATIC FILTER CLEANING (AFC)
- DEACTIVATE AFC
- ACTIVATE AFC
- MACEDONIAN
- SAFETY INSTRUCTIONS FOR OPERATION
- SAFETY WARNINGS
- SWITCHING ON
- INDICATIONS AND MEANING
- DESCRIPTION OF THE MANUFACTURER'S PERFORMANCE
- USE WITH APPROPRIATE ATTACHMENT
- ILLUSTRATION OF COMPONENTS
- RATED VOLTAGE MAXIMUM POWER MINIMUM POWER
- INFORMATION ON NOISE EMISSION
- MOUNTING THE HOSE HOLDER FOR THE SUCTION HOSE (SEE FIGURE A)
- MOUNTING THE ACCESSORIES FOR SUCTION (SEE FIGURE C)
- MOUNTING THE SUCTION ADAPTER
- REPLACING THE FILTER CARTRIDGES
- INSERTING/REMOVING THE DUST BAG OR SAFETY FILTER BAG (FOR VACUUMING DRY MATERIALS) (SEE FIGURES D1-D3)
- INSERTING THE DUST BAG
- REMOVING THE DUST BAG AND CLOSING
- REMOVE THE DUST BAG AND CLOSE
- INSERTING THE RUBBER BAND (SUCTION OF MOIST MATERIALS) (SEE FIGURE E)
- CONNECTING THE L-BOXX (SEE FIGURE F)
- USE
- VACUUMING MATERIALS
- VACUUMING WITH THE SUPPLIED HOSE
- VACUUMING DUST CREATED DURING WORK WITH ELECTRIC TOOLS (SEE FIGURE G)
- THE DIAMETER OF THE HOSE MUST BE SUITABLE FOR THE AIR FLOW
- VACUUMING DAMP MATERIALS
- WORKING WITH THE VACUUM CLEANER ON DAMP MATERIALS
- VACUUMING LIQUIDS
- AUTOMATIC FILTER CLEANING (OPTION H)
- AFC ACTIVATED
- ACTIVATE
- REMOVAL/REPLACEMENT OF THE INTAKE FILTER (SEE STEPS I1-I2)
- PROBLEM SOLVING
- SERBIAN
- SAFETY INSTRUCTIONS FOR VACUUM CLEANER
- REMOVING DUST
- ESTONIAN
- AFC
- UUGUGJU
- U
- JBL) BAWLL GGBJ JOLU U
- (A 0 J GΑ J
- (BJGJJI JBL) BAWLL GGBU USJI
- GJ GAO G Y
- (1)
- GAJ GAO G YLC
- FEDERAL LAW RESTRICTS THIS DEVICE TO SALE BY OR ON THE ORDER OF A PHYSICIAN
- DO NOT
- DECLARATION OF CONFORMITY
- BOSCH
Brand : BOSCH
Model : GAS 35 H AFC Professional
Category : Vacuum Cleaner