
ComfortCut 2318V P4A - Grass trimmer GARDENA - Free user manual and instructions
Find the device manual for free ComfortCut 2318V P4A GARDENA in PDF.
| Product type | Battery-powered grass trimmer (edge trimmer) |
| Brand | Gardena |
| Model | ComfortCut 2318V P4A (ref. 14700 / 14701) |
| Cutting width | 23 cm |
| Rotational speed | 9500 rpm |
| Nominal voltage | 18 V (DC) |
| Nominal current | 2.3 A |
| Weight (without battery) | 2.0 kg (ref. 14700) / 2.1 kg (ref. 14701) |
| Sound pressure level (LpA) | 74 dB(A) (uncertainty 2.5 dB) |
| Measured/guaranteed sound power level (LWA) | 83 / 85 dB(A) (ref. 14700) ; 86 / 88 dB(A) (ref. 14701) |
| Hand-arm vibration (ahw) | < 2.5 m/s² (uncertainty 1.5 m/s²) |
| Compatible battery | POWER FOR ALL System PBA 18V (Li-Ion, 5 cells), e.g. 2.0 Ah or 2.5 Ah |
| Compatible charger | POWER FOR ALL System AL 18..CV (e.g. AL 1810 CV P4A) |
| Permissible charging temperature | 0 °C to +45 °C |
| Charging time (80% / 100%) for 2.0 Ah battery | 96 min / 124 min |
| Charging time (80% / 100%) for 2.5 Ah battery | 120 min / 154 min |
| Working positions | 3 positions (ref. 14701) : standard, tilted under obstacles, and head at 90° for edges |
| Shaft length adjustment | Yes, via clamping sleeve |
| Adjustable auxiliary handle | Yes, variable tilt |
| Blade | Rotary plastic blade (RotorCut), replaceable |
| Plant protection | Adjustable plant protection hoop |
| Safety stop | Double switch (start lever + lock-off button) |
| Battery charge indicator | 3-level LED display on the product |
| Maintenance | Clean without water ; replace plastic blade when worn |
| Warranty | 2 years (manufacturer, private use) |
Frequently Asked Questions - ComfortCut 2318V P4A GARDENA
User questions about ComfortCut 2318V P4A GARDENA
0 question about this device. Answer the ones you know or ask your own.
Ask a new question about this device
Download the instructions for your Grass trimmer in PDF format for free! Find your manual ComfortCut 2318V P4A - GARDENA and take your electronic device back in hand. On this page are published all the documents necessary for the use of your device. ComfortCut 2318V P4A by GARDENA.
USER MANUAL ComfortCut 2318V P4A GARDENA
RU INHctpyKuNo 3KcnIyaTaun
AkkymyIaTOpHbI TpIMMep
Translation of the original instructions.
This product may be used under supervision, or if instruction regarding the safe use of the product has been provided and the resulting dangers have been understood, by children aged 8 and above, as well as by persons with physical, sensory or mental disabilities or a lack of experience and knowledge. Children must not be allowed to play with the product. Cleaning and user maintenance must not be performed by children without supervision. The use of this product by young people under the age of 16 is not recommended.
Intended use:
The GARDENA Trimmer is intended to trim and to cut lawn and areas of grass in private domestic gardens and allotments.
The product is not intended for long term use.

DANGER! Risk of injury!
Do not use the product to cut hedges, to chop up material or to make compost.
1. SAFETY
IMPORTANT!
Read the operator's manual carefully before use and keep for future reference.
Symbols on the product:


ays wear approved hearing protection.
ays wear approved eye protection.


Remove the Battery before cleaning or maintenance.

expose to rain.

DANGER! Risk of injury to other people! Keep other people out of the area where you are working.

For the charger: Remove plug from the mains immediately if the cable is damaged or cut.
General safety warnings
Electrical safety

DANGER! Electric shock!
Risk of injury due to electric shock.
The product must be supplied through a residual current device (RCD) having a rated residual operating current not exceeding 30mA .
Do not overreach and keep the balance at all times. Always be sure of the footing on slopes. Walk, never run.
Do not touch moving hazardous parts before the machine is disconnected from the mains and the moving hazardous parts have come to a complete stop.
Always wear substantial footwear and long trousers while operating the machine.
Safe operating practices
1 Training
a) Read the instructions carefully. Be familiar with the controls and the correct use of the machine.
b) Never allow children or people unfamiliar with these instructions to use the machine. Local regulations can restrict the age of the operator.
c) Keep in mind that the operator or user is responsible for accidents or hazards occurring to other people or their property.
2 Preparation
a) Before use check the supply and extension cord for signs of damage or aging. If the cord becomes damaged during use, disconnect the cord from the supply immediately. DO NOT TOUCH THE CORD BEFORE DISCONNECTING THE SUPPLY. Do not use the machine if the cord is damaged or worn.
b) Before use, always visually inspect the machine for damaged, missing or misplaced guards or shields.
c) Never operate the machine while people, especially children, or pets are nearby.
3 Operation
a) Keep supply and extension cords away from cutting means.
b) Wear eye protection and stout shoes at all times while operating the machine.
c) Avoid using the machine in bad weather conditions especially when there is a risk of lightning.
d) Use the machine only in daylight or good artificial light.
e) Never operate the machine with damaged guards or shields or without guards or shields in place.
f) Switch on the motor only when the hands and feet are away from the cutting means.
g) Always disconnect the machine from the power supply (i.e. remove the plug from the mains, remove the disabling device or removable battery)
1) whenever the machine is left unattended;
2) before clearing a blockage;
3) before checking, cleaning or working on the machine;
4) after striking a foreign object;
5) whenever the machine starts vibrating abnormally.
h) Take care against injury to feet and hands from the cutting means.
Always ensure that the ventilation openings are kept clear of debris.
4 Maintenance and storage
a) Disconnect the machine from the power supply (i.e. remove the plug from the mains, remove the disabling device or removable battery) before carrying out maintenance or cleaning work.
b) Use only the manufacturer's recommended replacement parts and accessories.
c) Inspect and maintain the machine regularly. Have the machine repaired only by an authorized repairer.
d) When not in use, store the machine out of the reach of children.
Additional safety warnings
Battery safety

the safety and general instructions.
Failure to observe the safety and general instructions may result in electric shock, fire and/or serious injury.
Store these instructions in a safe place. Only use the charger if you can fully evaluate all functions and carry them out without restrictions, or if you have received corresponding instructions.
Supervise children during use, cleaning and maintenance. This will ensure that children do not play with the charger.
Charge only lithium-ion batteries of the POWER FOR ALL system type PBA 18V with a capacity of 1.5 Ah or more (5 battery cells or more). The battery voltage must match the battery charging voltage of the charger. Do not charge any nonrechargeable batteries. Otherwise there is a risk of fire and explosion.
Do not expose the charger to rain or wet conditions. Water entering a power tool will increase the risk of electric shock.
Keep the charger clean. Dirt poses a risk of electric shock.
Always check the charger, cable and plug before use. Stop using the charger if you discover any damage. Do not open the charger yourself, and have it repaired only by a qualified specialist using only original replacement parts.
Damaged chargers, cables and plugs increase the risk of electric shock.
Do not operate the charger on an easily ignited surface (e. g. paper, textiles, etc.) or in a flammable environment. There is a risk of fire due to the charger heating up during operation.
In order to avoid safety hazards, if the power supply cord needs to be replaced, this must be done by GARDENA or by a customer service centre that is authorised to repair GARDENA power tools.
Do not operate the product while it is charging.
Products sold in GB only: Your product is fitted with an BS 1363/A approved electric plug with internal fuse (ASTA approved to BS 1362). If the plug is not suitable for your socket outlets, it should be cut off and an appropriate plug fitted in its place by an authorised customer service agent. The replacement plug should have the same fuse rating as the original plug. The severed plug must be disposed of to avoid a possible shock hazard and should never be inserted into a mains socket elsewhere.
These safety warnings apply only for lithium-ion batteries of the POWER FOR ALL system PBA 18V.
Only use the battery with products of the POWER FOR ALL system manufacturers. This is the only way in which you can protect the battery against dangerous overload.
Recharge only with the charger specified by the manufacturer. A charger that is suitable for one type of battery pack may create a risk of fire when used with another battery pack.
The battery is supplied partially charged. To ensure full battery capacity, fully charge the battery in the charger before using your power tool for the first time
Keep battery packs out of the reach of children.
Do not open the battery. There is a risk of short-circuiting.
In case of damage and improper use of the battery, vapours may be emitted. The battery can set alight or explode. Ensure the area is well ventilated and seek medical attention should you experience any adverse effects. The vapours may irritate the respiratory system.
If used incorrectly or if the battery is damaged, flammable liquid may be ejected from the battery. Contact with this liquid should be avoided. If contact accidentally occurs, rinse off with water. If the liquid comes into contact with your eyes, seek additional medical attention. Liquid ejected from the battery may cause irritation or burns.
If the battery is damaged liquid can be ejected and cover nearby surfaces. Check affected parts. Clean these parts or change them if necessary.
Do not short-circuit the battery pack. When the battery pack is not in use, keep it away from other metal objects, like paper clips, coins, keys, nails, screws or other small metal objects, that can make a connection from one terminal to another. Shorting the battery terminals together may cause burns or a fire.
The battery can be damaged by pointed objects such as nails or screwdrivers or by force applied externally. An internal short circuit may occur, causing the battery to burn, smoke, explode or overheat.
Never service damaged battery packs. Service of battery packs should only be performed by the manufacturer or authorized service providers.
Protect the battery against heat, e. g. against continuous intense sunlight, fire, dirt, water and moisture. There is a risk of explosion and short-circuiting.
Only operate and store the battery at an ambient temperature between -20^ and +50^ . Do not leave the battery in your car in the summer, for example. At temperatures of < 0^ some devices may experience a loss of power.
Only charge the battery at an ambient temperature which is between 0^ and +45^ . Charging outside of this temperature range can increase the risk of damage to the battery and pose a fire hazard.
Electrical safety

DANGER! Cardiac arrest!
This product makes an electromagnetic field while it operates. This field may under some conditions interfere with active or passive medical implants. To decrease the risk of conditions that can possibly injure or kill, we recommend persons with medical implants to speak with their physician and the medical implant manufacturer before you operate the product.
Only use the battery product between 0^ to 40^ .
Disconnect the battery in case of emergency.
Do not use the product nearby a water, or for pond care.
Protect the battery contacts from moisture.
Personal safety

DANGER! Risk of suffocation!
Small parts can be easily swallowed. There is also a risk that the polybag can suffocate toddlers. Keep toddlers away when you assemble the product.
If the trimmer vibrates heavily, replace the blade and check the blade holder for damage.
Check the wear rib if ok before usage.
Use the front handle to transport the trimmer.
Use personal protective equipment.
Wear gloves for cleaning the cutting device.
Always wear eye protection.
Protective equipment such as gloves, non-skid safety shoes, or hearing protection used for appropriate conditions will reduce personal injuries.
Be careful during adjustment of the product to prevent entrapment of the fingers between moving and fixed parts of the machine, or while assembling the protective cover.
Don't use water, or chemical substances for cleaning the guard or other parts of the trimmer.
Keep all nuts, bolts and screws tight to be sure the product is in a safe working condition.
Do not disassemble the product further than the delivery status.
Warning! When wearing hearing protection, and due to the noise produced by the product, the operator may not notice persons approaching.
While operation and transport pay special attention to the hazard for other people.
Stay alert, watch what you are doing and use common sense when operating a power tool.
Do not use a power tool while you are tired or under the influence of drugs, alcohol or medication.
A moment of inattention while operating power tools may result in serious personalinjury.
2. ASSEMBLY

GER! Risk of injury!
injury when the product starts accidentally.
Wait for the plastic blades to stop and remove the battery before you assemble the product.
To assemble the protective cover and the plant guard [Fig.A1/A2]:

GEBI
The product may only be used when the protective cover is assembled.
- Slide the front part of the protective cover ③ onto the trimmer head ① until it engages.
- Slide the rear part of the protective cover ② onto the trimmer head ① until it stops.
- Tighten the both screws ④ carefully.
- Slide the plant guard ⑤ onto the trimmer head ① until it engages.
To attach the plastic blade to handle [Fig. A3]:
The scope of delivery includes 5 plastic blades. There are 4 spare plastic blades in the openings (9) on the handle.
For the assembly of the plastic blade into the blade holder, see 6. TROUBLESHOOTING To replace the plastic blade.
3. OPERATION

GER! Risk of injury!
injury when the product starts accidentally.
Wait for the plastic blade to stop and remove the battery before you adjust or transport the product.
To charge the battery [Fig. 01/02/03]:
![GARDENA ComfortCut 2318V P4A - To charge the battery [Fig. 01/02/03]: - 1](/content/2026/03/529095/images/bd3707273c657fe1b02faf5f0d044243ab11119fa651f67ea6bed7b1716697b0.jpg)
Note the mains voltage! The voltage of the power source must match the voltage specified on the rating plate of the charger.
For the GARDENA Battery Trimmer Art. 14700-55 / 14701-55 there is no battery and no charger in the scope of delivery.
Thanks to the intelligent charging process, the charge condition of the battery is automatically detected and then charged up with the optimal charge current depending on battery temperature and voltage.
In this way, the battery is treated with care and remains permanently fully charged when it is stored in the charger.
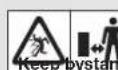
- Push the locking button A and remove the battery B from the battery holder D.
- Connect the battery charger into a mains socket.
- Slide the battery charger ①.onto the battery ⑧.
When the battery charge indicator at the charger flashes green the battery is being charged.
When the battery charge indicator at the charger illuminates permanently green the battery is completely charged
(Charging time, see 7. TECHNICAL DATA).
- Examine the charge status regularly while you charge.
- When the battery 8 is completely charged, you can disconnect the battery 8 from the charger 6.
Meaning of the Indication Elements:
Indication on the charger [Fig. O3]:
Flashing of the Battery Charge Indicator
The charging procedure is indicated by flashing of the battery charge indicator.
![GARDENA ComfortCut 2318V P4A - Indication on the charger [Fig. O3]: - 1](/content/2026/03/529095/images/2d4a28c754fa57052d5443d5116079b1c90110deffcd5ccc8d037a9177ae3aaf.jpg)
Note: The charging procedure is only possible when the battery temperature is within the allowable charging temperature range, sec 7. TECHNICAL DATA.
Continuous Lighting of the Battery Charge Indicator
![GARDENA ComfortCut 2318V P4A - Indication on the charger [Fig. O3]: - 2](/content/2026/03/529095/images/94bfdd7ee02cb6e643eb20532e2b40580ac34674cd84446caa74a09bf3d7a926.jpg)
Continuous lighting of the battery charge indicator indicates that the battery is fully charged or that the temperature of the battery is not within the allowable charging temperature range and can therefore not be charged.
When the battery is not inserted, continuous lighting of the battery charge indicator indicates that the mains plug is inserted in the socket outlet and that the battery charger is ready for operation.
Battery charge status indication on the product [Fig. O4/O14]: After starting the product, the battery charge status indication is displayed for 5 seconds.
Battery charge status Battery charge status indication
| 67 - 100 % charged | ①, ② and ③ illuminate green |
| 34 - 66 % charged | ① and ② illuminate green |
| 11 - 33 % charged | ① illuminates green |
| 0 - 10 % charged | ① flashes green |
If the LED ⑤ flashes green, the battery must be charged.
If the error LED is illuminated or flashing, see 6. TROUBLESHOOTING.
To set the working position:
Working position 1 [Fig.05]:
For standard trimming.
Working position 2 [Fig. O6/O7]:
Trimming beneath obstacles
The tube can be lowered from standard position 1 to two lowered positions 2 or 3 for trimming beneath obstacles.
- Put the trimmer on the floor.
- Hold the trimmer by the tube with both hands so that you can push the unlock button with one finger.
- Push the unlock button ⑩ and lower the tube ⑦ to the required position.
- Release the unlock button and let the tube engage again.
Working position 3 (only for Art. 14701) [Fig. O8/O9]:
Cutting at lawn edges.
CAUTION! The trimmer may only be used when the trimmer head is locked at 0^ or 90^ .
To rotate the trimmer head ① to 90^ ,the tube must be in standard position 1.
- Hold the trimmer by the tube ⑦ with both hands so that you can push the unlock button ⑩ with one finger.
- Push the unlock button ① and rotate the trimmer head ① from 0^ to 90^ until it engages.
- Release the unlock button (1) and let the tube (7) engage again.
To adjust the tube length [Fig. 010]:
![GARDENA ComfortCut 2318V P4A - To adjust the tube length [Fig. 010]: - 1](/content/2026/03/529095/images/f50c6af593edee7f3331f85a17ba73758ae346414a0c7277e5dc1ffb192b5fa7.jpg)
DANGER!
The product must not be used when the tube is completely inserted (transport position).
- Loosen the clamping sleeve ⑥.
- Pull out the tube ⑦ to the required length.
- Tighten the clamping sleeve again (6).
To adjust the position of the additional handle [Fig. O11]:
The position of the additional handle can be adjusted to your body height.
1.Pull the lever 12
2. Tilt the additional handle to the desired position.
3. Release the lever again.
If the trimmer is correctly set to the body height, the posture is upright and the trimmer head in working position 1 is tilted forwards slightly.
Hold the trimmer by the main handle and additional handle in such a manner that the trimmer head is tilted forwards slightly.
To adjust the plant guard:
- Work position [Fig. O12]
Park position [Fig. O13]
Pull off the plant guard and put it on into the required position until it engages.
To start the trimmer [Fig. 01/014]:
![GARDENA ComfortCut 2318V P4A - To start the trimmer [Fig. 01/014]: - 1](/content/2026/03/529095/images/04ac61c3cf4ac2cf74fb401d0eb59338e120349e7bb414e3a16818a904e216a1.jpg)
ER! Risk of injury!
of injury if the product does not stop when you release the start lever.
Do not bypass the safety devices or switches. For example do not attach the start lever to the handle.
The product is provided with a two-switch safety device (start lever with starting lockout) to prevent the product from being turned on by accident.
To start:
- Put the battery ⑧ into the battery holder ⑩ until it audibly engages.
- Hold the additional handle with one hand.
- Hold the main handle with the other hand, slide the starting lockout forward and pull the start lever. The trimmer starts and the battery charge status indication is displayed for 5 seconds.
- Release the starting lockout 15 again.
CAUTION! Avoid contact of the plastic blade and the blade carrier with hard objects (walls, stones fences etc.) to prevent the plastic blade and the blade carrier from wearing or breaking.
To stop:
- Release the start lever 6. The trimmer stops.
- Push the locking button A and remove the battery B from the battery holder D.
4. MAINTENANCE

GER! Risk of injury!
injury when the product starts accidentally.
Wait for the plastic blade to stop and remove the battery before you maintain the product.
To clean the trimmer [Fig. M1]:
![GARDENA ComfortCut 2318V P4A - To clean the trimmer [Fig. M1]: - 1](/content/2026/03/529095/images/f8c498b114c53a96b01d495a48bb6a95c99aae76b89454067e38ddcf6221ec15.jpg)
GER! Risk of injury!
of injury and risk of damage to the product.
Do not clean the product with water or with a water jet (in particular high-pressure water jet).
Do not clean with chemicals including petrol or solvents. Some can destroy critical plastic parts.
The airflow slots must always be clean.
- Clean the airflow slots with a soft brush (do not use a screwdriver).
- Clean all movable parts after each operation. Especially remove any grass and dirt from the protective cover ②.
To clean the battery and the battery charger:
Make sure that the surface and the contacts of the battery and the battery charger always are clean and dry before you connect the battery charger.
Do not use running water.
Battery charger: Clean the contacts and the plastic parts with a soft and dry cloth.
Battery: Occasionally clean the ventilation slots and the terminals on the battery using a soft brush that is clean and dry.
5. STORAGE
To put into storage:
The product must be stored away from children.
- Remove the battery.
- Charge the battery.
- Clean the trimmer, the battery and the battery charger (see 4. MAINTENANCE).
- Store the trimmer, the battery and the battery charger in a dry, enclosed and frost-free place.
Disposal:
(in accordance with RL2012/19/EC)

The product must not be disposed of to normal household waste. It must be disposed of in line with local environmental regulations.
IMPORTANT!
Dispose of the product through or via your municipal recycling collectioncentre.
Disposal of the battery:

The GARDENA battery contains lithium-ion cells that should not be disposed of with normal household waste at the end of its life.
LI-ion
IMPORTANT!
Dispose of the batteries through or via your municipal recycling collectioncentre.
- Discharge the lithium-ion cells completely (contact the GARDENA Service).
- Protect the contacts on the lithium-ion cells against short circuits.
- Dispose of the lithium-ion cells properly.
6. TROUBLESHOOTING
DANGER! Risk of injury!
injury when the product starts accidentally.
Wait for the plastic blade to stop and remove the battery before you troubleshoot the product.
To replace the plastic blade [Fig. T1/T2]:

DANGER! Risk of cutting injuries!
Do not use metal cutting elements or spare parts and accessories not intended for use by GARDENA.
If the wear rib is no longer visible, the blade carrier must be replaced. Contact the GARDENA Service.
The plastic blades may only become worn to half the original length at most. Only use original GARDENA Spare Blades
RotorCut. Spare plastic blades are available from your GARDENA dealer or directly from GARDENA Service.
GARDENA Spare Blades RotorCut for Turbotrimmer Art. 5368
To remove the plastic blade:
- Tum the trimmer over.
- Push the end of the plastic blade down slightly (A), slide the plastic blade inside through the blade carrier (B) and pull out.
To insert the plastic blade:
Slide the new plastic blade 8 from inside through the slot in metal of the blade carrier 8 until it audibly engages (click). When the new plastic blade is correctly inserted, it can be moved more easily.
Problem Possible Cause Remedy
| Trimmer is not cutting cleanly or not cutting at all | Plastic blade is worn or too short. | → Replace the plastic blade. |
| Plastic blade is broken off. → | Replace the plastic blade. | |
| Trimmer vibrates severely | Plastic blade is excessively worn and creates an unbalance. | → Replace the plastic blade. |
| Blade carrier is worn. | → Replace the blade carrier. | |
| Trimmer can no longer be stopped | Start lever is stuck. | → Remove the battery and loosen the start lever |
| Trimmer does not start or stops. LED ① is flashing green [Fig. 04] | Battery is empty. | → Charge the battery. |
| Trimmer does not start or stops. Error-LED ⑧ is illuminated red [Fig. 04] | Battery temperature is outside the permissible temperature range. | → Wait until the battery temperature is between 0 °C – +45 °C again. |
| There are drops of water or moisture between the battery contacts on the trimmer. | → Remove the water drops/ moisture with a dry cloth. | |
| Engine is blocked. | → Remove the obstacle. Start again. | |
| Trimmer does not start or stops. Error-LED ⑨ is flashing red [Fig. 04] | Product is defective. | → Contact the GARDENA Service. |
| Trimmer does not start or stops. Error-LED ⑩ is not Illuminated [Fig. 04] | Battery is not put completely into the battery holder. | → Put the battery completely into the battery holder until it audibly engages. |
| Battery is defective. | → Replace the battery. | |
| Product is defective. | → Contact the GARDENA Service. | |
| Charging is not possible. Battery charge indicator ⑫ Is continuously illuminated [Fig. 03] | The battery is not connected (correctly). | → Connect the battery to chargercorrectly. |
| Battery contacts are dirty. | → Clean the battery contacts (e.g. by connecting and disconnecting the battery several times. Replace the battery if necessary. | |
| Battery temperature is outside the permissible charging temperaturerange. | → Wait until the battery temperature is between 0 °C – +45 °C again. | |
| Battery is defective. | → Replace the battery. | |
| Battery charge indicator ⑬ Is not illuminated [Fig. 03] | Mains plug of the charger is not (correctly) plugged in. | → Insert the mains plug into the mains socket (completely). |
| Socket outlet, mains cable or charger is defective. | → Check the mains voltage. Let the charger be checked if necessary by an authorised specialist dealer or the GARDENAService. |

NOTE: For any other malfunctions please contact the GARDENA service department. Repairs must only be done by GARDENA service departments or specialist dealers approved by GARDENA.
- TECHNICAL DATA
| Battery Trimmer | Unit | Value (Art. 14700) | Value (Art. 14701) |
| Rated current | A | 2.3 | 2.3 |
| Rated voltage | V (DC) | 18 18 | |
| Cutting width | cm | 23 23 | |
| Battery Trimmer | Unit Value (Art. 14700) Value (Art. 14701) | ||
| Rpm of blade carrier R/min. 9500 9500 | |||
| Weight (without Battery) kg 2.0 2.1 | |||
| Sound pressure level \( L_{pA}^{1)} \)Uncertainty\( k_{pA} \) | dB (A) | 742.5 | 742.5 |
| Sound power level \( L_{WA}^{2)} \): measured/guaranteed Uncertainty \( k_{WA} \) | dB (A) | 83 / 851.6 | 86 / 881.8 |
| Hand/arm vibration \( a_{vwh}^{1)} \)Uncertainty \( k_{vwh} \) | \( m/s^2 \) | < 2.51.5 | < 2.51.5 |
| Measuring process complying with: \( ^{1}EN 50636-2-91 \)\( ^{2}RL 2000/14/EC \) | |||
| NOTE: The stated vibration emission value has been measured according to a standardized test procedure and can be used for comparison of one electric power tool with another. It can also be used for preliminary evaluation of exposure. The vibration emission value can vary during actual use of the electric power tool. |
| System Battery | Unit Value (Art. 14902)PBA 18V 2.0Ah W-B | Value (Art. 14903)PBA 18V 2.5Ah W-B | |
| Battery voltage V (DC) 18 18 | |||
| Battery capacity Ah 2.0 2.5 | |||
| Number of cells (Li-Ion) 5 5 | |||
| Appropriate POWER FOR ALL system Battery Chargers: AL 18..CV. | |||
| Battery ChargerAL 1810 CV P4A | Unit Value (Art. 14900) | ||
| Mains voltage | V (AC) | 220 - 240 | |
| Mains frequency | Hz 50 - 60 | ||
| Rated power | W | 26 | |
| Battery charging voltage | V (DC) 18 | ||
| Max. Battery-charging current | mA | 1000 | |
| Battery charging time 80% /97 - 100% (approx.) | |||
| PBA 18V 2.0Ah W-B | min. | 96 / 124 | |
| PBA 18V 2.5Ah W-B | min. | 120 / 154 | |
| PBA 18V 4.0Ah W-C | min. | 192 / 244 | |
| Permitted charging temperature range | °C 0 - 45 | ||
| Weight according to EPTA-Procedure 01:2014 | kg 0.17 | ||
| Protection class | ☐/ ☐ | ||
Appropriate POWER FOR ALL system Batteries: PBA 18V.
8. ACCESSORIES
| GARDENA Spare Blades RotorCut for Turbotrimmer | As replacement for consumed plastic blades. | Art. 5368 |
| GARDENA Replacement blade carrier | Available via the GARDENA Service. | |
| GARDENA Wheel set for trimmer (only for Art. 14701) | For easy cutting of lawn edges. Art. 9880 | |
| GARDENA System Battery PBA 18V/45 P4A PBA 18V/72 P4A | Battery for additional duration or for replacement. | Art. 14903 Art. 14905 |
| GARDENA Battery Quick Charger AL 1830 CV P4A | Charger for fast charging the POWER FOR ALL System Batteries PBA 18V...W... | Art. 14901 |
9. SERVICE/WARRANTY
Service:
Please contact the address on the back page.
Warranty statement:
In the event of a warranty claim, no charge is levied to you for the services provided.
GARDENA Manufacturing GmbH grants a warranty for all original GARDENA new products for two years from the date of original purchase from the retailer, provided that the devices have been for private use only. This manufacturer's warranty does not apply to products acquired second hand. This warranty includes all significant defects of the product
that can be proved to be material or manufacturing faults. This warranty is fulfilled by supplying a fully functional replacement product or by repairing the faulty product sent to us free of charge; we reserve the right to choose between these options. This service is subject to the following provisions:
The product has been used for its intended purpose as per the recommendations in the operating instructions.
- Neither the purchaser nor a third party has attempted to open or repair the product.
- Only Original GARDENA replacement parts and wear parts have been used for operation.
- Presentation of the receipt.
Normal wear and tear of parts and components (such as blades, blade fixing parts, turbines, light bulbs, V-belts/toothed belts, impellers, air filters, spark plugs), visual changes, wear parts and consumables are excluded from the warranty.
This manufacturer's warranty is limited to replacement and repair of products in accordance with the abovementioned conditions. The manufacturer's warranty does not constitute an entitlement to lodge other claims against us as a manufacturer, such as for damages. This manufacturer's warranty does not, of course, affect statutory and contractual warranty claims against the dealer/retailer.
The manufacturer's warranty is governed by the law of the Federal Republic of Germany.
In case of a warranty claim, please return the faulty product, together with a copy of the receipt and a description of the fault, with postage paid to the service address.
Consumables:
The plastic blade and the blade carrier are consumables and are not included in the warranty.
For standardtrimming,
Arbetsposition 2 [ bild O6/O7]:
Trimma kring hinder.
Satta in plastkniven:
Hold faststildstand.
Trimming under forhindringer.
FARE! Fare for kvelning!
Mindre deler kan lett svelges. Plastposer utgjor fare for kvelning for smabarn.Hold smabarn pa avstand under monteringen.
Hvis trimmeren vibrerer kraftig, ma du skifte ut kniven og kontrollere knivholderen for skader.
Kontroller at slitekanten er i orden for bruk.
Transporter trimmeren etter det fremre handtaket.
For standard-trimming.
Trimme under hinder.
IT Trimmer a battery
1.SICUREZZA 41
2.MONTAGGIO. 43
3.UTILIZZO 43
4.MANUTENZIONE 44
5. CONSERVAZIONE 44
6. ELIMINAZIONE DEI GUASTI 44
7. DATI TECNICI. 45
8 ACCESSORI. 45
9.SERVIZIO/GARANZIA 45
| Wartoc (14,1903) |
| PBA 18/2.5Ah W- |
Naplecle akumulatora V (DC) 18 18
NaΦopate nVAt npOoTaBunKa yuaia
PpOoTATEUKEc diATeEic, dntu yovia, aVIOIAHNTiKa UTOBHTaA cApaAEL ac npOATEUKEc AOKHO NCUXPPOIANTOUVTA vAOTIOXc OvHTKec peVouWTOCT PauaTAtojuoc.
Na elote npooaekktko kata npuuian tou npoiovtoc yia n aopuyn Evakauou Tou kaotukauw taivkntu kw taoeepewpawou Tou uangnuacatoc kata n ouapauayouuou Tou npoateuteukoi Kaauuucatoc.
Mn xnpaonpoiebe vepo h xnyukic oouiec yia tv kaoapioo Tou npootateu TIKOU n aaw Tmuotw Tou Kouputko.
Aatnpse 6a Ta naiia, ta mouovia kai tic bidec apyve yepa yia va diaopaaei ot n ouakeun Bpoketoi ae aapahk katataan yia epyaia. Mny anouauapkoayeTe Tpoioiv npoooteo and tvn katataan npaoocanc.
PoeiEoiOnai! Otav o xphntc spopae iipooataeutikka akohic kai Adyw Tou BapouBau mappayetai ato Tpoiov o xphntc umopsia va npapaBaejei atouuTnAnaCouv.
Kata Tn diapkeia Tng aeitoupyiac npooeETE idaitepa tov kivuvo yia aMa atopua.
No siete de evyponan, va npatopneite Ti kavete Koi va xonaiionoeite Tny kovai avokni katn xhpan evoc nakiptkou epyaekai.
Mn xnpaonoiie Kavva naekpkiop syaneio ewo eote koupaoevoi n to Tny entpeia vapkwiKw,ovotnuuuparoc npapukw.
Mia oniyun anpooeElaac kata in xpon nAektpikov epyaieov unpoi va oBnynoei ae aobapouc Tpaupuaouc.
2. SYNAPMOΛΟΓΗΣΗ
KJNYNO! Ppokknan OwmaTiknc BaaBnc! Kuvoc Ppokknan TpaumatwV Konnc e Tepintwn Tuaiae Ekkvnon Tou npoiovtoc
→πeipéveTe éxpi va αkivntooinθei to πλασικό μαχαρi Kaia αφαipεoTe nμatapia προτou ouvαρολoyoεTe to npoiov.
Suvapoloynon Tou npoataeutikou kaiumuatoc kai Tou npoataeutikou eaauatoC pUw [Ek.A1/A2]:
![GARDENA ComfortCut 2318V P4A - Suvapoloynon Tou npoataeutikou kaiumuatoc kai Tou npoataeutikou eaauatoC pUw [Ek.A1/A2]: - 1](/content/2026/03/529095/images/14ce7c415576d193162b5c7c389262a652c9f62a23941855f16a03039b5e7590.jpg)
To npoiov emipentetai va xnpoioeitai movo otav eivauvaopaoynepvo pootateutiko kaumu.
KINADNO!TpauatipocaoTnAeia
→MynxpnaiipoiieiTe maaikα aotoixia kntn c n vtaaλaktiKa napekoeva nou eivayekepievα nto tvn etapieGARDENA.
O'Atav 6ev iai neov opat n pheipoevn paBswon 8, npTei va atkataaet ein bao ton uaxapoiou 18, Aneuuvtheta OTO Szepic TcGARDENA.
Ta naaotikα paxaiipia einnptetai va exouv oephei to nau Ewc to nauou tou nkouc. Etnpertai va xpoaiotoeite anokkEti kyaavtaaakktia paxaiipia RotorCut tnc GARDENA. Ta avtalakntia nataoikia paxaiipia diatievtai ano tv atinpoawto GARDENA tnc npioxhc ane aneueeicac ano to nmu Aepic tnc eatapeiac GARDENA.
AvTAAkTikαμαipiaRotorCutGARDENA yα Koupεutiko Kδ.5368
Apaipoeon Tou naoTko uaxapiou:
He noDnyckaIte npynx IIOeN K Mecty, rIe Bbl pa6o
Taete.

AapraHoro yctpoCTBa:
EcnnKa6enb6bn nobpeckn nn npbaH, cneyet
HEmeIeHHO BbHyTb BNkKy n3 p03eTKn.
06yue yka3aHnno no texhne 6e3onachoctn
3nEeKtpueckKa 6e3onachocTb

ONACHO! NopaxeHne 3JektpoTOKOM!
Yrpo3a TpaBmnpoBaHn H3-3a npaKeHHn 3neKtpoTOKOM.
→ΠιΤΑΝΗΝ ΜΙΑΝΕΝΗ ΦΟΥ ΠΟΥ ΑΟΥ ΒΟΥ ΑΤΥ ΒΥ Χερεγεγεγεγεγεγεγεγεγεγεγεγεγεγεγεγεγεγεγεγεγεγεγεγεγεγεγεγεγεγεγεγεγεγεγεγεγεγεγεγεγεγεγεγεγεγεγεγεγεγε
H36e8aIte H9oOpMaIbHOrO NOnOxKHeNrTe NaBcTa yDepeJnBaIte paBHOBeCe, YTObbl BIOObE BpEMn COxaHrTb yCTOnuHOBe NOnOxKHeNr Ha CKIoHe. XOJIaTe, He 6eRaIte.
He npKacaiTBC k DBKyUMMCR OaChbIM qACTRM, NOKA Bn HE oTCOeDHHATE MAHNY OT 3NkEKTPOCCENI N DBKyUMMCR OaCHBIM qACTH He OGCTAHOBATCR IOHOCTbIO.
BoBpMa pa6oTb MaHnHb Heo6xOdmo BcERda Hocntb npCHyIO 06yBn nnHHIe 6pICKN.
Be30nacnoctb 3Kcnpyataa
1 06yueHne
a) BHNIMATEBHO pINOHTA HNCTPYKLUIO.OsHaKoMBTeCbOprAHAMI YPAPABHINH ANDADIKBHAMIN PNOHTYHOMMAMHHI.
b) HINKORDA He NsOBcHnTe NOns3oBaTbc MaunHIOI DEM H NlUAM, He I3yHbIMM DAHHY INCHpykuiu. MecThBe npeDncaHmoryrOrpaHnHtB BOSPACT NOHsOBAteHENCHPTyMeHTa
c)CJyETNOMHHTB,TOI NOILSOBATENBcAMHECETOTBECTEHHOCTb3a803MOKHe HeCACTHBe CNYanA,takKe 3aYrpo3yDpyTNXmNHXMMyuOCTBa.
2NoTobKa
a) NpepnpnmeHmE Heo6xOIMO npOBepntb CoeHNHTbHn uynH HNTbHk KaEBn Ha np3HAKn NOBpeKDeHn INMnHOCA.Bcnyae NOBpeKdHn KaEBN BO aPMA pAOBtBu HO6xOIMO HMeMDnHOOTcoE HETb er0 ot cEtN. HE PIMKACAITECB K KABELIO, NOKA OH HE BYET OTCOEINHEH OT CETN. He nIbSyTECB MaHHo, KaEBb KOtOpONOBpeKDeHn INMnHOuH.
b)PepenpaToHOBxOJIMnB3yAaBHO npoBepntbMaunHy HaNopeKdEHNHe,OTcTCTByIOUe HIN HenpauNtBuO yctaHoJIeHNHeIeNHeIeNpdoXpAHHTenBHeue yctpoCTBAKNKOKQXYn
c)HKoRGaHEHauHHepeA0bToCMAuHIOH,eCNiPraDHOxADOTCAIHOJI,B0O6BHHOCHTaTeH,IIOHO DAOMIHHEXKOBTHNE.
3 3Kcnnyataa
CoaDHHHbHbN yDHHHbHbKabEeepKteBaAOn pExyUero yCTPOBCTBA.
b) C. CrtDbTBAaHTHnIgAINpOCHyIOOByB Hoo6xoIMMOHOcHTb B ToHNOHEBCero BPemEHNIOJI0BAHMBAUHInb.
c)CnDyETIaERatPIMMHeHNA MauHHb BY PINOxIH NOOdbHX YCOOBHX, B OOOBHNCTNpyrTOPEr303H.
d)KCNPIYTHPOBATMaHINCYNOETOJbKO pN DHEBOHM COTBE INXOPOJEMNCKYCCTBHHOMC0EBHUM
e)HKoRaJa He 3KcNpyIte MaunHy CIOBpeKdBbHbM KOxyOM ININ PnpOxaHnTeBbHM yCTpoICTBOM,IM6 Bo3 KOxyaIN ININ npOxaHnTEBbHX YCTPOINCTB.
B JnOaHTe MTOPT ToIbKO rpo yCLOBHN,OTy pKYN HONHAXoARTCA BHe 30hJ dyctBTHPOPOKUOyEYOYTOPOCTBA.
g) Bcerda otKIOHauTe MaunHy OT anektonnHa (t.e. bHHMaTe BNky H3 nEeKpocen, CHMaTe 3aicphoe yctponCTBO nn CbemHyio 6atapeo)
1) Bcerda, KOrda MaunHa ocTaetcB 63 npncMOTpa;
2) neped cHTnEM 6noknpOBKn;
3) npoeepko, uctkoi nno o6pa0tKo MaunHb;
4) Nocne KOHTaKaTc C NoCTOpOHmN TeHaMn;
5) BCerda npn Hauane Heo6bHbX B6paun MaunHb.
h) OcteperaTecb TpaBmnpoBaHn HOr n pyk peKyUcYcTpoCTBOM.
i) NOCTOHHPOBOPAEIE, He 3a6bTbIy BENTHILIOHOHBEOTBEPCTA NOCTOPHOHMIMpeDMETAM.
4 CoepKaHHe B HcnpaBHOCTn XpaHeHne
a) MaHINH HeOxOIMo OTcoEHNHTbOT NcTOCHNKA aNKeTPOmTAHH (T.e.BHNYBnIKMn3neKTPropo3eTKN,CHNTb BNOKNpyIOoe yCPTPOCTBO NH CEBMHyO batape),PpKdHcMe Hm MoKHO bdyTe NpeHIn K pabotAM NO TEXHHECKOMY O6C/yykBAHMO NnHtCTKe.
b) 06xOIMO cONIOBtOBaT bONKO pOKOMHOBOAHIbHe I3OTOBHTAE M 3anaCHbCTnI PnHnAeNKeXHcToH.
c) MaunHtpepyetpeyraepHoN PPOsepKn H TeXHHeCKoR OcbNyKbAHn. HOHT MaunHt CNOyETOCyUOCTBnT BTOBkoB rapaHTmHOH MactopCKoI.
d)KoJaMauHaHe He cNoIbByeTc,ee ChEyET XpaHITb B MecTe,HeEOCTynI HOM nnAeT.
DononHntenbHbe yka3aHH no texnke 6e3oNaCHocTn
BézopacHoe 6bpaueHHe cakKymyIaTOpOM

PpoHTaTe Bce yKa3aHnNo TexHKe 6e3oNaCHOCTN
HnHCTpyKuHH
He6peKHOCTb B COJIKODEHIN YKASAHIN TEHXHN KEG3ONaCHOCTN IN HCTPYKUMMOKETPnPOBcT N IOPAKeHNO 31NKTpyHECKM TOKOM, NOkApY N/IMTNTRKEBMbT PABMaM.
Bepexho xpaHnTe 3n Hhctpykun. TOnb3yIteCb3aapRdHM yCTPOCTBOM TOJbKO pnp YcNOBm, YTO BbMOXeTE PONHOCTBO OJIeHNTHB BCE cyHKUN N BbINHHTb N603 OrpAHnHBM INN NIOyHIN COOTBTCTBYIOUHE HhCTpykun.
→PnNpIb3OBaHH,HCTKnTExHHuecKOMO6cnykBaHHKOHTpONpyteTeet.3HIMB06eCHHTE,TODEHHe6yDITnPAHc3apHdHBM YCPTPOCTBOM.
→3aJaHaeTolbKOJTHNHOHHBleAkkMyIATOpbCnCTeMBoPOWER FORALL TUNaPBA18VEMKcTOHeMeHee54U(560oneAkkMyIATOpbHXJemeHOTo. HanpRHeHneAkkMyIATOpa DOJIHXOoCTBETOBaHTanpaHKeHNo3apRKnAkkMyIATOpa,BbIabeAOMy 3apRbIMyCTpOCTBOM.He3apKaHeNehepe3apKaHaMeBeAkkMyIATOpB.BpNOTIHOBmCnyAeuyCtEETOrAnCHOctbNOKapaINB3pBa.
06eperaIte 3apnHoe yctpoCTBO OTdoJIHNc bIpocTH. IopadaHHe BDoBbEETKpeOe yctpoCTBO NOBIIaET pCKN oPakHEH NIAEETKpUeCEKIM TOKOM.
→NoDnepKnBaHrTe uHcToTy 3apAHO rO yCTpoNCTBa.
B Cnyue 3aepnoohin cyoectbyot onaoctb npapkeHHJNkEKPHeCKHM TOKOM.
→PepaKaKbIMHCNOB3OBaHEmnpoBepRte3apnHOeycTpoCTBO, KaebN uTeep. He noB3yIteB 3apnHBmYcTPOCTBO, eCn HAnDeHbNoBpeZdHnE. He npO3BIOJme CAMOCTeBHoe BCKpbl The 3apnHOro yCtPOCTBA n npO3BOJne ERO pEMONT ToLbKO CINAMKbANuHmnpoBaHHO rpeCOHana C nCNOB3OBaHemOprHnHbHBx 3anachbXuactei.
PnckopaeHne 3eKtPNeCKHM TOK.
→HeKcnnyatpyteapnHoeyctpoCTBOHaNERKOBocTnAmEHo-uxnxnoepxHOCTx(hanHPMep,bymara,TeKTTHBnT.n)nnBropoye cpde.13a-harpBaapnHoro yctpoCTBA Bnpocce 3apnDCuueCTByET OAnCHOCBBo3OPaHN.
→ ECIN Tpe6yETCAmeHa CoeHNHtBbHO KabeI, TO BO 36EkaHHe CHENH yPOB HnAeKHOCTCNEYET BnIOANHHT 3Ty OepaHn CnA MNI CIIaHNTCB GARDENA N B ATOPTIOBAAHOM CEPBCHON LHTPe, 0cOyNBAIOUEM AEKTPoAHCTPOMEHTBI GARDENA.
→He noIb3yItecb H3dennHem BO BpeMa erO 3apAKn.
→3NYKAGAHHYTEXHMIKBE63OAnCHOCTOnOTOHOCTARTONBKO KIMTNHOHNBHIM AKKYMTRITOPAMCINCTMPOWER FORALLPBA18V.
→PIMHEHREtAKKYMHTOPToNkoBnEDENHXNROTOBNTeRNCCTeMb POWER FORALL.ToNkoTAKMcOpa3OMMOKHOaUNITbAkkMyJITOPOTONACHOnpeRpy3Kn.
→3apjkaTe akkymyIopbToBko BpeKoMeHObaBHbXn3rOToBHe- nem aapJbHbX yCToPcbax. OaepdnoYo cTpoCTBa, npEHaHa- HHOHOIOIOPeJIeHO HTO na AKKMyIaTOpB, XCOOITOnAChOCTb BO3TOPAHNI pN ERO IcNOIbOBAHH C DpyfMn AKKMyIaTOpaAM.
→AKKMYNATOP NOCTABNRETCB YACTMHO 3APRJXEHOM COCTOHNN. UTObI NoBmTBA KMAICMAMJIHON 3AOFEKTMBHOCTHM AKKYMNITOPa,NEpe NEPBbIM IIOJIb3OBAHNEM NNOHCtBO 3APrIe AeKKyMnTOp B 3APrHOM yCTPOICTBE.
→XpaHHTe aKKyMyIITOpbI B HeNoCTynHbIX IINr DeTeMecTaX.
→He BCKpbBaIe aKKMynTOp.
CyllectByeTOnaHcOCTbKOpOTKO3ambiKaHH
→PnNOBpeKdeHmHHeHaJneKaueemHCNoIb3OBAHHaKKyMnTPOB H3HnxMOTy BblJeJIbTcH napbl. AKKyMnTOp MOKe T3arOpetbcn HmB3OPBaTCB.
06ceenebte doctyn cbexero 08daxya n C syaah Hehmoeranna Bpatntreck b spahy. Pnbp Moryt paaqpaakdu bdxaeleBhie npTn.
→PNHENPABNNBHOHNPMHEHHNINNOBPEKDEHHN3AKKYMNYTAPaMOKETBbITEbROPOJAHKJDKOCTb.N36eJIteKOHTAKTaCHeI. PNCHyAHNOHOKTAKePNOMeTOPOAPKEHHOeMeTOBOHO.EcN KIOCTbNONANA BnAa,06pntTeCB3aONONHTeBOHBopeAEH HOMOsb. BtKeUaUNA KKKYMNITOPaKJDKOCTbMOKETBb3BABTpaDpAekHNeKoKNIINXIMHECKNEOKOrn
→ ECNI AKKYMNATOP NOBpeKJHEn, H3 Hero MoTe BblTeCh JNkOcTb HAMoHTb COeCHeHne pIeMeTb. IPOBoPbTe npaKeHhBe qAchTn OCHNTte IX NIN 3aENHETBE CByHae Heo6XIOHNCTOn.
→HeDonyckaTe KopoTko 3ambKaHH aKKyMnTOpa. DepKHT HeHCNoIb3yeMbIK kKMyNtOp BdAnOT cKpenOK,MOHET,KNIOeH, RBO3eB, BNHTOB dpyRnx MEkKnX MeTaIIINcKcnx INpeDMeTOB, KOPTOb MOrY T bB3BaTb 3ambKaHH KOHTaKO.
KopoTKe 3aMkaHHe MEkDy KOHTaKtAMn AKKymIITopa MOKe TnpBcTeN KOKOram KN KBOrOPAHNIO.
→AKKymyTnTOPMOXeT6bITNOBpeHJENOCTpbIMNpEeDMTaMH, HAnPnMep, TBO3DEMHNOTBepTKo, NHO BO3DeHCTBHeM BHEWHeH Harpy3K.
3TO MOKET PnBECTN K BHYPeHHEMY KOPOTKOMY 3aMbKaHIO u AKKyMyIANTOP 3aGOpNTCH, 3aDUMTCH, B3OpBTCH NIN NpePpTeCTCH.
→HnkOrda He peMOHTpyuTe NOBpeKdEHHbIe AKKyMnyTOpbl.
IIO6eTexHECKoe 06CJyKBAHBeAekyMyHTopoB DOJIHKHOPOINBODITbCRTOJbKO I3rOToBENM NnYtONHOOMeHHBMIM CTaHLMRMTEXHcNECKo 06CJyKBAHBeA.

3aunuaiTe aKKyMnyrTOp OT KApbl, HanPIMep,OT DNITeBHorO HAXOJdHnHa COJNHe,OTKpbIToR OPiAmEni, rpr3n, BOdbn BnAar.
CyueCTByET OAnCHOCTb B3pbBa N KOpOTKOrO 3AmbKaHnA.
→3Kcnnpyntpyne HxpaHnTe AKKyMnTOp TOnbko npn TemnepaTpyax -0-20°C Do +50°C. He octabnIte AKKyMnTOp B ABOtomOuIne, HApnpimep, nomet. PnTmPeTpatypax <0°C yOTdJIbHbIX TINOB YCTPOJCTB BO3MOKHO CHNKeHne IPOIN3BODHTJIbHOCTN.
→3aŋjkaaiteakyymnyTOpToBko npnOkyjkaooXTeMnepatypax BnHnAzoHeOT 0^ do +45^
3aRJaKa BHe 3TOgIgAnHbA TmEpoatyp MoKOTpINBcTn KIOpeKENHO AKKyMylTOPA IIN NOBICHTb PNCK80FOPAHN.
3neKtpnuecka6e0nachoctb

ONACHO!OctanOBka cepda!
3To H3dene Co3daet BO Bpempa60bI 3eKtpomarHTHoe None.
B onpeDeneHHbIX o6ctotEnbCTBX 0TO NOLE MOKeT NOBnHTb HA yHKnIOHOHPoBAHNE AKTHBHX IIN NACCBOHBIX MEniHNCKHX MMnAHTaTOB.
Bo I36eKaHMe OAnOCHOT Bo3HNKOBHeHNI CUYaUH, KOtOpBE MOrY TnpBeCTN K TBrKeJIbIM INI CmEpTeNbHbIM TpaBMAM, INuA, NOJb3yOUnEeCER MEHNHCNMIMMnAHTATAMN, NEpE INCNOL3OBAHHE 3TOrO H3dene
DOJXHbI PpOKOHcYbIbTPOBaTcR CO CBOHM BpaOM H3rTOBOTeEM MMnAHTATA.
NcIbIyIe ankymyIaTOpHoe IN3dJIe ITOIbKO pI INTMnepaTyPax Mekdy 0^ n 40^
B cnyhae abapnn CHMNTe aKKMyIaTOp.
He nCnoB3yIte H3dene He 6bHn3 B0dbI nn Dn yXoDa 3a npdyamn.
3auiuaiTe KOHTaKbI aKKyMyIaTopa oT bIaI.
JINUHAR 6e0nacHOCTb

ONACHO!OnacHOCTb3aDOxHyTbcR!
Mennke Taeann Moryt 6bTb NERK nporHoueHb. H3-3a NoHN3nHHeBOrO rKaeta dnn MaNEhBkHX DeTe Cyue sycheBTy eOnAChOTb 3aDOxHytCBr. Bo Bpema MoTHaXe HaNoPnyckAaTbe 6nN3Ko MaNEhBkX DetEe.
EcnI TpMMpeCnIbHIOBpNDyET, ZAMeHHTe HOK IN pOBepeBtTe DEpKaTeBtHOKA HAnuNNIE NOPEKdENH.
Ipeep npumehenem npoepebe, B npaekne n3hococytoMnBoe pe6po.
NepemuaTepmmep3a npeDIOKpykOATKy.
Ponb3yIeTCbHINBnBnDyaJIbHBIMCpeIDCTBaMn 3aunTb.
HaeneBaIte npaTkn nAeNCTKn peKyuero yctpOHTBA.
Bcerda Hocnte cpeCTBa 3aunTb rna3.
CpeCTBA 3aHTHn, HApnMep, NpapATKn, HcckOJIb3aIIaA a3aIITNAR o6yBb INI cpeCTBA 3aHTHcNxA, IcNOJIb3eYMeIbe B cIpedeIeHHbX yCIOBIAIX, CCHIKAO TOnAChOCTb TpABMIPOBBAHN.
BbIte octopokHn npHaTcPOKe I3JenH, YTO6bI npEoTbPaHTb 3aueEM HINn pAnLbOe MEXyIO NIOBnKbIMn HNOOBNKBHMn qACTRM MaUNHb IN nPc0ke 3aUITHOTRO KOKxHa.
He IcNIOIb3yIte BODy INI XIMMUECKMe peaKTbI DII YIcTKn 3auiTbI INI dyPrxH xacte TnmpMe.
CnIeIa 3a Tm,TOb6e BcraHk, BoJIbIy INBHTbBbIy TFO 3aTARHYbIY,TOI rapAHcyET NAdEkehOpBaOoe CoCToHNeIaN.
He pa3bpaIte H3dene 60JIbe, cem OH pa3o6paH B COCTOHNIOCTaBKN. PpynpeJHcHEnI! PnNcNtbn3OBAHmC pECTb 3aunTb CNYXn H3-3a. UyMa, co3daBaEMOr I3dJeHMe, nONb3OaTeB MoKET He 3aMeNTb PpNbIMKaHOUxCNr JIOeI.
BoBpempaobTuItpaHcnpOtpOBKnOcbpaauTeocOcOoeBHIMAHMeHa yPPO3yDnDpyTnxIIOe.
CoPahnHe 6DInTeBHoCTb, CnTeTte 3a Tem, TTO Bn DnaTe n pyKOBcCTByHtce bApaBm CMbCfOM B POnCeB paOBoTc B cAnEeKPOHHTCPyMeHOTM. He paoTaTe C aNkETponHCTpyMeHOTM, EdyuB H cCOTAHN yCTaONCTaTAKoND BnINHMOH HApKOITOKOB, AIKKOROI IN MmDkAMHOBT.
OHO HHOBHeHHeBBHIMATEbHOCHTn Ppnpa6oTe C3NkTPoHCTpyMeHTAMM MoKETIINBECTIKTRKeJIbIMIOCNECTBAH.
2. MOHTAK

CHO!Onachoctb nonyuhenr TpaMbbl
CHOCTb Iope3OB npHnHepeHaMepeHHOM 3anycke H3dennr.
→Дохдnteь NOHOOCTAHOBKN PnactMaCCOBORO HOXa HCHMNTe AKKyMnyTOp,пржde Yem Bbl HaHTHeMoTAX MdENn.
MOnTAX 3aunTHoro Koxyxa n cKo6bl dnn 3auNTbI paCTeHn [Pnc.A1/A2]:
![GARDENA ComfortCut 2318V P4A - MOnTAX 3aunTHoro Koxyxa n cKo6bl dnn 3auNTbI paCTeHn [Pnc.A1/A2]: - 1](/content/2026/03/529095/images/b2eb701c3edb135861e982b3d74df1a9f1fc0bd14ccf173e38d9a1c48d9abf45.jpg)
CHO!
→N3dene pa3pewaaetc HcnoIb30BaTb TOIbKO npu yctaHOB- neHHOM 3aunTHbIM KOxyXOM.
- HauBnHbTe nepaHIO uactb 3aunTHoro kOxya ③ Ha roIobky Tpmmpepa ① do qnkcau.
- HAdBnHbTe 3aHNO Yoactb 3auuTHoro Koxyxa ② ynpa B rOIOBky TpMMMepa ①
3.OctopOKHO 3aTAHHTe 06a BnHTa ④
4.HaBnHbTe cKoby dna 3aunbpaacteHn Ha roNOBky Tpmmepa ① do qnkcaun.
3akpenenne nactmaccoBOHOHa hypkoHTke [Pnc.A3]:
B KOMITNEKT NOCTABKIN BXOJAT 5 IINACTMaCCOBBXH OHXE8.
IV3 HIX 4 3aNACbI INPAACTMaCCOBHX HOKA HAXOJATCR B BbEMKAX ③
HA pyKoNTKE.
YCTAHOKA nactMaccOBORO HOKA B HOKEdepKATEb OINCAHA B6.YCTPAHEHIE HEICPABHOCTEaMeHa nactMaccOBORO HOKA.
3. 3KcIyATAUN

CHO! Onachoctb nonyuhen TpaBmbl!
NCHOCtB Nope3OB npHnHepeHaMepeHHOM 3aIyCKe H3dJIINr.
TOJXIMTECbOCTAHOBKNIJAeTMAccBOORHOJoxnCHMmTe AKKyMnyTop,npKeJeHemBbHaHaeHHeHAcTpOkyNJtn TpaHCNOPtIPOBKymdEINN.
3apnka akkymyntopa [Pnc.01/02/O3]:
![GARDENA ComfortCut 2318V P4A - 3apnka akkymyntopa [Pnc.01/02/O3]: - 1](/content/2026/03/529095/images/bdd705e3bd39dd29b729743220b790c3725dd9ae7cc32614dc62fd58fe7e9c74.jpg)
MAHNE!
→Yunbinae ceteboe HanpexHHe! HanpexHe NCTOHHKA ToaJIOKooCTBOBAt DaHHBM Ha QnPMEHHO Ta6NHKe 3apHOro yCtpoCTBa.
B Coctab NoctabKN GARDENA aKKyMnyTOpHbIX TpMHMePOb apt. 14700-55 / 14701-55 aKKyMnyTOp n 3apAHOe yCTpoIcTBO he BxOJrT.
BnaorapnpoDyMaHHoN pOoueDype 3apRKn ABTOMATueckn OnpeBennETc npObeHb 3apRNaAKKMyIITopoN B 3aBMCIMocT NOTemepatpybN HAPKReHNEA KkYMyIITopo3 aPpRKa PPOV3BO-DNTCR C ONTMAmblHoH HaAHHH MoMeHT CINOn TOKA.
3a cHT 3T0R aKKyMnTOp COxpaHnETcN H, OCTaBneHHb B 3apADHom yCTPOINCTBE, BCERda 3APAAeTCH DO MAKCMMaIbHO rPOBHR.
- HAKMITE KONIKY pa36IOKPOBKIN A IN BbIHbTe aKKMyIHTOP 8 N3 aKKyMnIaTOpHORO pa3bema 0
- PoiKJIouHTe 3apJHoe yCTpoiCTBO aKKyMyIaTopa C B ceTeByo po3ETky.
- HAdBnHbTe 3apAHHoe yctPoNCTBO CHa aKKMyIANTop B
Korda HndkaTOp 3apAaKKymyTOpa Ha 3apAHO mEHTeMraT 3eJIeHbIM UBTOM, aKKymyTOp 3apJkAETCR.
Korda HnHnKaTOp 3apRKn aKKyMnyTopa Ha 3apRnHOM TpoCTBeHeNpBbHO CBETnC 3eHbIM UeBTOM, AKKMy- nTOp NIOHcTbO 3apRKeH
(Bpem3ap4knc,cm.7.TEXHUNECKNE DAHHBIE).
4.BoBpMa3apAnKpyrnpn npoBeepNte ypoBeHb 3apAnK.
5. KordaaakkymyIITop 8 NOHOCTBIO 3apAUNC, BBI MOXTe OTCOENHHb akkyMylrTOp 8 OT 3apAHO rO yCTpoCTBa 0
3HaueHHe 3JeMeHTOB HnDnKaHn:
HnkaTOp Ha 3apAnHom ycTpoCtBe [Pnc. O3]:
MiraaonuCBET MHHdkatopazapdKn AKyMnIyTopa (C)
O npoece 3eapnK CHnHAn3HpyET MHAnHe HnDnKAtopa 3apKn AkynMnytopa.
![GARDENA ComfortCut 2318V P4A - HnkaTOp Ha 3apAnHom ycTpoCtBe [Pnc. O3]: - 1](/content/2026/03/529095/images/d94728b519078438ce041e4a9d7be17dd9245418655be4836ff5f124d69ef1ab.jpg)
Ykaahane: PpoJIeCCr 34pIKJDNBIOMOEN HIMbI pRi NcIOBmK, TTO TemNepatypa AkkyMUTOpA HAXMDITB BOnyCTHMOM DnAHA3OHe TemNepatry aapkDnK mC.7.TEXHIAECKHE DAHBIe.
HenpepbMbHoe cBeeHu HmDnKATOPA 3apdKnAkkMyJNtOPA
![GARDENA ComfortCut 2318V P4A - HnkaTOp Ha 3apAnHom ycTpoCtBe [Pnc. O3]: - 2](/content/2026/03/529095/images/9cb91a620c25c388112a4edbeca498d61868883426ae234f8949579517e58a25.jpg)
HenpebHoe CbeueHne HnHKATOPA 3apRkNn AKKyMHTOPA CnHnHMnRytB O TOM, YTO AKKyMHTOT NPOHCTBOA 3apRkHN KIN QTO TEmepatypa AKKyMHTOPA HAOKTHC3A 3npedEeNQDFTMOHm DnAHA3OHa TEmepatyp a3apRkn HIOSTOMY OH MEOKET BbTb 3apRkHN KaTolBo TEmepatypa OKAKETcB DoNYCTMMOM DnAHA3OHe TEmepatyp, AKKyMHTOT 3apRkNAeTc.
5BcBtAeHnHO AKKMyNtOpa HEnpepbbHoe C8eHHeMHJDKaTOpa 3apRdKn AKKMyNtOpa CrrHnMnHpyET O mTO CEBeBA BmKA BCTAeHbNA BPO3EKN K aPdHOb YECPoRrTO BTOPO K pAoTe.
HnKaTOp ypoBHa 3apAkn AKKyMylTopa PHa HnAeenn [Pnc.O4/O14]:
Iocne 3anycka n3dennn HndkaTOp ypOBH 3apRKn AKKymyrtopa aKTHBnpyetcHa5cekyHd.
YpOBeHb 3apAaKn HnHkaTOp ypoBna 3apAkn aKKyMnyIaTopaaKKyMnyIaTopa
| 3apRjKeHo Ha 67 - 100 % | ①, ② n ③ CBETATC 3eJIeHbIM LCBETOM |
| 3apRjKeHo Ha 34 - 66 % | ① n ② CBETATC 3eJIeHbIM LCBETOM |
| 3apRjKeHo Ha 11 - 33 % | ① CBETATC 3eJIeHbIM LCBETOM |
| 3apRjKeHo Ha 0 - 10 % | ① MIRAE T 3eJIeHbIM LCBETOM |
EcnnCBETOIOHO Mmraet3eneHbIM CBETOM,Heo6xOIMO 3apnntbakkymyantop.
Ecn CBeToIOnO Oun6Ka CBETNCTH NIN MURAeT, CM.6.YCTPAHEHIE HENCPPABHOCTEN.
Yctanobka pa6oery noJoxeHn:
Pa60aHa nO3nua 1 [Pnc. O5]:
nraCTaHapTHORO KOWENr TpaBbl.
Paboua no3nua 2 [Pnc.06/O7]:
Kowene TpaBbI IOID npenrTCTBMAH.
IINKOWEHNI NOI INPEIATCTBNAIM WTAHRA MOKET ONYCKATBCN I3 CTAHdAPTHORO NONOJEHN1 BDBA HIKHNX NONOJEHN2 NIN3.
1.YCTAHOBITE TpMMMep Ha rpyHT.
2.YdepKnBaTe TpMMeP DByMpyKaMn 3a WtAHryTak, YTO6bMOXHO bIHO HAdaBNTb NaBcE M HA KONKy pa3bKnPOBKN (0)
3. HaxMMTE Ha KONky pa36nOKnPOBKN 0n ONyCTnTe WtAHry ⑦ B Tpe6yEMOE NOJOKHeHne.
4.OTnyctnte KhoNky pa36nokpO8Kn u CHOBA 3aФNKcpyIte WtAHy①.
P6oay no3nua 3 (Tolko dna apt. 14701) [Pnc. O8/O9]:
KoWeHne y KpOMOK ra30HOB.
BHIMAHHE! TpHMMep MOxHO HcNoBtob TbToNko npu ycNOBnФKcaunrTOLOBKn BnoJoxeHHN 0^ nnn 90°.
IINrTO,HTO6bIMoKHO6bIIO NOBEPHyb TOnOBky TPMMepa① Ha90°,WtAHRA DONXHAAHXOINTCB CCTAHdAPTHOINo3n1.
1.YdepnBaeTpMMepDyMpykAM3aTuHry⑦Tak,YTO6b MoKHO6bIHOHaabNTbPaJIbCEm HA KONKy pa3bIOKIPOBKN ⑩
2. Haxmnte Ha KhoNky pa36nokpOBKn 1n noBepHnTe rnoBky TpMMepa 1n noJoxeHnA O' B noJoxeHne 90'do IeIyKa fikcatorpa.
3. OTNYCTIe KONky pa36nOKpOBKN 1u CHOBa 3aHKnCpyNe WtAHry⑦.
HactpoKa nnHHb Wtahn [Pnc.010]:
![GARDENA ComfortCut 2318V P4A - HactpoKa nnHHb Wtahn [Pnc.010]: - 1](/content/2026/03/529095/images/8eaf31b43be8c2138c12573f583a04059b95ad3a3546ca6a50019f3983562fbb.jpg)
ONACHO!
HEnb3nNoIb3ObAtb6rH3dennem, KOrdaWtaHra nonHOctb0 3aDbHyTa (TpaHCnpTHoe nOnKeHne).
1.0cna6bte3aXMMHHyIO rmb3y⑥
2.BbTaHHTe WtAHry ⑦do HxKHOINHbI.
3. CHOBA 3aTARHHTE 3aKIMMHYIO TINb3y (6)
Hacpoika nonoxhenn dononHntelbHO pykortkn [Pnc.011]:
Ponokhene dononHnTeBHOpyKoNTKMOKeT 6bIb HacTpOeHa Ha Baw poCT.
- Notaryte pbyar (2).
- HaknoHnte DOnonHnteBHyo pyKoAry ⑧ B Tpe6yEmoe NonoKeHne.
- OTncyntte pbHar
Ecnn TpMmep npaBnHbHO HAcTpoeh Ha poCT,TO TENo HaxoDITcN BnpaBnHOM NOJOKeHH NToJIOBA KTPMmepBa p6OcH No3uHn1 HAKNOHEHa HEMHOro BnepeD.
→YdePiknBaIte TpMMep 3a OCHOBHyIO pyKoTky ④ NdoONHnTeBHyIO pyKoTKy ③ TAK, YTO6blrOJIOBkA TpMMepa 6bla CnERKaHaKnHOHeA BpePe.
Hactpoika ckobdna 3auntbpaacthen:
- Pa6ooye noJoxeHne [Pnc. O12]
- Napkoobouhoe noIoxeHne [Pnc. O13]
→BbITAHHTeCKO6yIIN3AaNTbIpaCTEHN⑤NcDBHBTe ee B Tpe6yEmoe IIOJKeHHeNoJeUHKaΦKcaTopa.
3anyck TpHMMepa [Pnc. O1/O14]:
![GARDENA ComfortCut 2318V P4A - 3anyck TpHMMepa [Pnc. O1/O14]: - 1](/content/2026/03/529095/images/3b368f2258aa5b886ba1a27400dbe3a8d16a6075189e28e16ecaa124cbccc9f0.jpg)
CHO!Onachoctb noJyueHHaTpaBmbI! CTBYET ONACHOCt b TpaBMnPOBaHH,ecnn H3dJIe He octahabJIbnaeTc npn OTnyckaHm NyckOBOro pbuara.
→ He obxoande npdooxpahnte hbe yctpoctba nnn nepeKIOUaTeHnpanmep, He 3akpennne TnyckOBOn pbuar Ha pykortke.
M3dennne OCHaSeHNO ppeOxpaHHTenbHbIM yCTpOoiCTBOM C DBymR BkIIOUATEJIIMn (NcKOB0B PbUar C b6KOINpOBKo BKIOUHeHH) KOTOpoe ppeOtBPAaet CnyuAHOe BKIOUHeHH M3dennr.
3anyck:
1.Bctabte akkymyIaTOp 8B OTBETHyo Yactb aKKymyIaTopa 0do ueNka fikcataopa.
2.YdepKnBaIte pykoI donoHnTeIbHyIO pyKOHTky 18.
3.YdePknBa rnaBHy pkyoatky Hpyroyn pyko, cAnhHe 6nokpoBky BkIOHNEH (5) Bnepe, n NotHnTE 3a NcKOBn pbHar (6).Tmmpe 3aNcyKaetc n HndNkATop yObaB 3apRKn AKKMyIraTopa P aKTNBPyETc Ha 5 cekyHd.
4. CHOBA OTNHYCTNE KONKY 6JOKNPOBKN BKNIOHENH 15
BHIMAHNE!BoH36eKahne H3HocA nnNnIIOOMKn nIaCTMaccOBOrO HOKAnnHOKeepKATERnH36eTaire KOHTAKTa NnactMaccOBORO HOKA nnHOKeEepKaTeRn C TBePbIMn O6bEKtAMn (CTeHb, KAMHN, 3abOpBnT.D).
OctahOBka:
- OTnycTne NyCKOBoB pbHar ⑥. TpMMep octaHaBnBaeTcR.
- HaxMMTE KONky pa36NOKPOBKN (A) IN BBHbTe aKKMyJrTOp (B) IN3 aKKMyJrTOpHO rO pa3BeMa (D).
4. TEXHnueCKOE OBCJyXNBAHNE

CHO! Onachoctb nonyeHn TpaBmbl! NCHOCb Iope3OB npn HnppeHnAmepeHHOM 3aynckE, H3dennr.
→DOKJINTECbOCTAHOBKNIIACTMACCOBORAHOHXaN BbHbTe A KXYMJTTOP, PEXKeDEeM PnHcTyNTbK TEXHueCKOMy 06cnyXBAHUNI3dENn.
UcNtKa Tpmmpea [Puc.M1]:
![GARDENA ComfortCut 2318V P4A - UcNtKa Tpmmpea [Puc.M1]: - 1](/content/2026/03/529095/images/66203aef171d8bace04992863cae84cd40514032ab2b4c5c71fc9da4dae0d54e.jpg)
CHO!OnachocbI nonyuHn TpaBMbl! CHOCbTtpaBMnpoBaHN n pCK NOBpeXdeHNn m3denn.
→He pa3pewaetc ouetaatb n3dennne B BOe HnnoCTpye BoBbl (BOco6eHHOCTN C NOMOsbIO MOE K bICOKoT daBneHN).
→ He npoH3BOJNTe YNCTKy C NMOUbO XHMKAToB, B ToM YNCne 6eHNHa NNpACTBOpTeHHe. HeKOTOpBe BceCTBa MOryt p43pyuNb BaxHbIe PnactMaccObble DeTaN.
BeHTnHIOHHbIe JENDONKHBi 6bITb NOCTORHHO YNCTbIMN.
- OuHCTNTe BEHTINLAIOHOHHbIe ⅢEHN MARKoN IETKOI (He NCNOJb3yIte OTBepTKy).
- Noche KaKdOrO INcNoJIb3OBAHnIry OYHCTNTE BCE NOBnIKHbIe YaCTIn. B Oc06eHHoCTn YdJIaTIe OCTaTK TpABbl I rpa3b N3-NOJ, 3aUHTHO KOKyXa ②.
Ynctka aKKymyIaTopa n 3aprHoro yCTpoNcTa b aKKymyIaTopa:
IpeepnoKIOUHcHMe3aprHOyCTpoCTBaAkkymyTnTopa y6eHTncB,HTO NOBEXPOCTN KOHTAKbI aKKymyTnTopa n 3aprHO rHOyCTpoCTBA AKKymyTnTopa NcTbcIe N cyXie.
He nolb3yItecb npoToouHoi BOdoi.
→3apnHoe yctpoiCTBO aKKyMylTOpa:OuMaTe KOHTaKtBnPiactMaCCOBbie Detanm MrgKoC cyxO canfetKoN.
→ Akkymyntop: Bpemr OTrBpeMeHn OChuAte MAnKoN, NcToTOn n cyxOHNBeHTnIaHNOHHbE IeJI N NOBDoAkkymyntopa.
5. XPAHEHNE
BbBOJn3KcnnyataaH:
Hae Heo6xmo XpaHnTB HEOCTyHOM DnTeMeTe.
- CHINMTE aKKMyIHTOp.
2.3apndnteakkymyHTOP - OuCTHTe TpHMMep, AkkymnTOp n 3apAnHoe yctpoNCTBO aKKMyrTopa (CM.4.TEXHNUECKOE OBCJUYKINBAHNE)
- XpHaHTe TpIMMep, AKKMyIANTOp N 3aapHoe yctpoiCTBO AKKMyIANTop B cyXOM, 3aKpbTOM N 3aUuHcEHHom OTPnIaTeIbHbIX TemNbpatyp NOMueHHm.
YTHN3aunr:
(cornaocn Dnpoktwu 2012/19/EC)

HeDonyckaETCBbIpaBbIbTn3dEIneC06bHbIMbIbTObIM MycPOM.ErO Heo6xOnmO yTMn3INPOBaT B COOTBTCTBM CDeNCTByIOmmMeTHbIMn PpeDNCAHMRN NO 3aunTe OKpykauoe cpeB.
BAKHO!
→YTHINH3pyntn3dennnepee3 MeCTbI PyHKT nPnEMKNTOPCBpB.
YTNH3aunna aKKyMnyrTopa:

GARDENA AKKMMyNtOP npdctabnetae c60bI nIITNIHOHHyo 6aTaapeIO, KOTOPA IO nCTeHEnIO CpOKa OlyKbI DOnJIHa yTNi3NPOBaTcBOrO tODeNbHO O6bHORO bSbTOBORO MyCopa.
Li-ion
BAKHO!
→YTHINHAPyTe aKKyMyIATOpbI Yepe3 MeCTHbI NyHKT npHEmKNBTOPCbIpbR.
- NonHocTbIO pa3paIte IINTH NOHHBe 6aTapeN (O6paTnTeCbB GARDENA cepBnCHbI cHTp).
2.3aunuate KOHTaKbI JNTn-HoHHbx 6aTapei OT KopoTKoro 3aMbKaHnR. - Hanaekaaum 6pa3om yTINH3npyte NTIN-HoHHbIe 6aTaepi.
6. YCTPAHEHNE HENCPABHOCTEIN

CHO! Onachoctb nonyuene TpaBmb!
CHOCb Iope3OB npH HepeHaMepeHOM 3anycke H3dennr.
→ДОЖДNTeB NOHoi OCTaHOBKn INaCTMACCBOrO HOxA n BbIbTe aKKyMnTOp, npEeJde Yem ycTpHaHTb HEnCnpaB-HOCTN N3dENIA.
3aMeHa nactMaccoboro Hoxa [Pnc. T1/T2]:
![GARDENA ComfortCut 2318V P4A - 3aMeHa nactMaccoboro Hoxa [Pnc. T1/T2]: - 1](/content/2026/03/529095/images/62f6ef09e865a5b80c9343feb0ddc8df11a73a9b67d3dbc226a46738ecdfdbe2.jpg)
7. TEXHnueCKNE DAHHbIE
AkkymyntopbHbTtphmmep Edn3.3aueHHe (apt. 14700) 3aueHHe (apt. 14701)
HOMHaJIbHbI TK A 2,3,2,3
HomHaJIbHOe HapPaxHeHn B (noct.) 18 18
UHnHa pe3Km 23 23
YncnoobopotOB 06/MH95009500
dpekatae Hoka
Bec (6es akymyntopara) kr 2,0,2,1
YpOeHb 38yKOBOro
DabEnHnAL 74 74
IorpeHnOcHb A5(A) 2,5 2,5
ypoBb 38kyoB MOIOHcN L2: HmepeHHn/ 83/ 86/ npaHTnpOBaHHb I5(A) 85 88 POrpueHocTb K1A 1,6 1,8
BbpaHn HpykoTke a1 2,5
NorpeuHoctb K 1,5 1,5
Metodn3mepenna cornacho: EN50636-2-91 RL 2000/14/EC
YKA3AHHE: NpHBeHeHHe 3aHaeHMe 6bP0oMnCCm 6bIIO 3MpeHo B COOTETCBMM C0 CTANAPHTHM MEOTOOM HcblTAHN N MOKET HCNOLB3OBATCbPNI pBNCBAHEMN 3JIeKTPOHNCTPMyEMTN Dpy T cDPYR. 370 HAeHMe KOTAKE
NCIOIb3OBATCBNJI PNEBDAIPNTBEHON OIEHNNOIBEPKEHOCTO 803JE6CTBNO.3HAeH NHE B6P03MCCCHMOKET HMEHATCBN BO BPEMApeJIbHOr HCNOJb3OBAHN3EKNKTPOHH- CTPTMNA.
CnCTeMHbI aKKyMylTOp
EdnM.3NaueHne (apt.14902)
PBA 18V 2.0Ah W-B
3HaueHHe (apt.14903)
PBA 18V 2,5Ah W-B
HannpaeKHeAekymyIaTOpA B (noci.) 18 18
| EMKOCbAkkymyIaTopa | 2,0,2,5 | |
| KoIIneCTBaIeEeK (Li-Ion) | 5 | 5 |
Pooxduaune 3apdHbte yctpoCTBa aKKyMnTOpOB cNtEmbPOWER FOR ALL: AL 18..CV.
3apnnoyycptno 1AL 1810 CVP4A
EdnM.3NaueHne (apr.14900)
| Hannpääkehe | B (nep.) | 220 - 240 |
| Частota сети | Гц | 50 - 60 |
| Номнailing мошноctь | В 26 | |
| Hannpääkehe zaporдkn aakkymäniltopа | В (noct.) 18 | |
| Мамс. tok zaporдkn aakkymäniltopа | MA | 1000 |
| Вреши зaporдkn aakkymänil- topа 80%/97 - 100% (nримерho) | ||
| PBA 18V 2,0Ah W-B | MHH | 96/124 |
| PBA 18V 2,5Ah W-B | MHH | 120/154 |
| PBA 18V 4,0Ah W-C | MHH | 192/244 |
| Дулстмьд дулазон temпераурдkn | °C | 0 - 45 |
| Вес в сооветүстин с рpo- цадурө酮 EPTA 01:2014 | Кг 0,17 | |
| Клasc заuntы | [ ] / [ ] |
Pdoxoadnne akkMyntopb cnCTeMn POWER FOR ALL: PBA 18V.
8. ПИHAДПЕХHOCTN
yctpoCTBO DnBbCTPOI POWER FOR ALL PBA 18V..W...
3apdKn aKKyMnyToppa
AL 1830 CV P4A
9. CEPBNC/ΓAPAHTN
CepBnC:
IpoKaiynta, o6paTneCb no aepcy, npBBeHHomy Ha o6paTHoN cToPOHe.
TapaHTnHbIe 06aTeNbCTBa:
B clyae rapaHmHoi peKaMaun C Bac He BImaetn nata 3a npdoctabennbIyyn.
GARDENA Manufacturing GmbH rapaHTpyET haNekkauyo pa60ty BCEX HObIX opRnHbXu3dENI GARDENA B TeHHe 2 net DaTb npBcO NOKyIKU y dIepa npy ycIOBHN cNOJIb3OBAHN u3de HNCKNUHTeHBO JINN HNbIX UeJe. FapAHTN H3OTOBNTBHe He pacnpoCTpaHrTeHa Ha 3dEJIn, npNo6peTeHbYe BA TOpNHOM BpHK. DaHNAIR pAPACnTBAcPpAHTeCn HA BCE cyueCTBeHbHe HeOCTaK IN3dEIN, KOtOpBE DOkA3eTbHO CB3aHb C Ow6KAMB MATEPAANAX INN pO43BOCTBe. FapAHTN NOpDA3yMeBaT nPeOCTaBHeNE NOHcTBQ dyHKUHOHpyKooJero 3dEIN Ha ZAMEHY INP POMHT HNCpABHOrO 3dEIN, OTPNBENHORo HAM BocnHtHO; Mb OCTaBEm 3a Co60 npABo BBupatb OOnn 13DByx BApNAHTOB NO CBOEMY yCMOTpeHHIO DAHN YcNYra npeOCTabHrTe cPi co5IODeHHn CNeDyOuX yCIOBn
V3nneHcnoh3oBaoocbNoHa3HaehmBCooTBeCTBmCpeKoHdAaMIMBpyKOBODCTBE NO 3KcNjyatauM.
Hn nokynateB, Hn TpeBe He nIbTaIINCb BCKpbBaT bnn peMOHTnpoBaTbN3dEne.
- Pnp 3KcNpyataunncnOJb30BaHNCb TOnbKO opuHaHbHBe 3aIacBHe n H3HaUNBaEMbe DetanGARDENA.
-Ппсдостаьнговарноука.
I3 rapaHTMN NCKIIIOHeHb HOpMaJIbHbN 13HOC Detanei NKOMNOHEHTOB (HaNPIMe, HOKei, Detanei KpENNEHn HOKei, TypBuH, OCBETeHbHbX pIN6oPoB, KInHObBix N 3y6aTbx pEmHei, paBOHx KOnc, CBeuei 3aHHraH, 13MeHEHn BHeuHero BnDa, a TAKKE IN3HaUNBaEMble n pacxoDnble detann.
DaHHa rapaHTn n3rTOBtENr ORpaHmNBAeTc 3aMeHoN i pemOH TOM HEKoHNIOHO TO BOpA HA yKa3AHbX BbIwe ycIOBnX. RaapHTn N3rTOBtENr He MoKet 6bTB OCHOBaHm Dn AaBbNKeHn INbIX npTeH3N, HApMImE, Ha BO3MeUHe Hyeep6a. DaHHa rapaHTn N3rTOBtENr, ECTCBeHHO, He 3aTpAraHbEt zAKOHbHe I DOBOBHphe rapaTHnHbte Tpe6oBaHm BOTHOeHHn DInpep aBa.
TapaHTINI HrTOBNTENI perynpyeTc npaBOM FeepaTHBOH PeCybIKN TepMaHN.
B rapaHTHmHOM cnyae, noXanyCTa, onnATITE Heo6xOIMMbIe noTOBcBbC60pbl BblWNTNE dEeKTHOE H3dENIE BMeCTe C KONHE ToBAPHOrO YekA nOnncAHem HeNcnpabHocTe No aDpeCy cepBnCHOH cnykbGARDENA.
Haahwbaemble Detann:
PiactmaccoBbHOKNHOKEeepkATEbHBNAOTcM3aHnBaemmIetaaHmHa Hxhe paocpoctpaHReTcra papaTHra.
Hnctpyknn npon3oBntenI nn PoocnckoEepaun
H3roToBntenb:GARDENA Germany AB
PO Box 7454, S-103 92 Stockholm, Sweden
CtpaHa n3rToBnEHH yKa3aHa Ha ToBape.
OΦnHbHmNtPepHa TeppnTopnO
Pocnn:
OOXyckBaPHa
141400,MockOBckan oBnaTb,r,XmKn
yn.JIeHHrpaickaB,BlaeHne 39
CTPOeHne6
nomeeneNoOB02_04
CepinHbH Homep:A2043
PocneHnE DBe Unpb roDa BbnycKa 2020 (TpeTn u Tbeptb3hak).
SL Akumulatorski obrezovalnik
- VARNOST 86
2.MONTAZA 87 - UPORABA 87
4.VZDRZEVENJE 88 - SHRANJEVANJE 89
- ODPRAVLJANJE NAPAK 89
- TEHNICNI PODATKI 89
8.PRIBOR 90
9.SERVISNA SLUZBA/GARANCIJA 90
Prevod izvirinih navodil.
UK AkymyIaTOPHn-TPmep
- B3NEKA 100
2.MOHtAK 101
3.ObCJyTOBByBAHH 101 - IOIJI 102
5.36EPIFAHH 103
6.YCYHEHHHHECINPABHOCTE 103 - TEXHIYHI XAPAKTEPNUCTIKN 104
8.KOMJIENKTYIOU 104
9.CEPBICHEOBCJYTOBYBAHHRAPAHTI 104
He nidaabaBn BnNBy dooy.

HE6E3NEKA! He6e3neKa TpaMbyaHnHaIn HnX oc6! He donyckaTte Inx oc6 y po6oy 30hy.

IaIapAnHOro npIcTpoI: HeraiHO BmIMb BnIKy poTeKny BnAaKy, kIo Ka6eB nOkoJokheni abo nepeziAhN.
3araIbHI BkazIBKu 3 texHikn 6e3neKu
EneKtpo6e3neka

→XHbENHHBnpo6Mae3iChHObATHCpe3uepe3 npCTpi 3axCHOrO BiJdKnIOHeH (T3B), HOMiHaBm 3aIIuKoBm CTpyM cnpalbOyBaBHNRKOHO He NOBHeH NepeBnBuYATN 30 Ma.
YHKNTHeHnpabnBHXIOJokEnbTinaI3aBxNdyTPMMyTePiHBaY,06 Bny bdy-aknn yac 3mOrtn CTmKo cToTHn Ha cxnAix. XoJIb, he Giraute, He TopkaTeCn KdoNHnx pyoxomHx Hebe3neuHx qactInH do TORO, Rk MaunHa he Byde BIDKnIOeHa Bid eNeKTpuHOI MepeKi, I Hebe3neHi pyoxomi qactHHte 3yINHTCB NOBICTO.
Pipacekcnyatajimamnnna3aiknHaiaBaaTe Mluee BaaTTa doBri 6pokn.
3aBxdu BnKOpncTobyTe 3ac06nIHDbIyalaHoro 3axncty.
BdraTe pykabu, 06 ouhcttn pkynn npncpti.
3aBxHn HaidiBaIte 3ac06n 3axncty ouei.
Taki 3axiNCI 3acc6n, RK pykabuui, HEKOBHe 3axiNCHE B3yTTa 6o 3axiNCI HabyuHK, RIK BYKOPCTOBYOTbCH yBIDIOBIDHNYMBOX, 3HNKcytB PN3NK TPABMYBAHH.
BbDy6o8e9KHI NcHac HauaHTyBaHH BnpoSy, YNkAte 3atNCKaHH NaIbUBM KpYOMMM HepyXOMMM qactINAMMaUNHN a60 Ni dac 3bn- PAHH 3axiHoH OKOxyx.
BHeKoPcOToBByJnAaHueHHa3xHcHmPnIpcTOCsyBaHb a60 hUHXX qactHn Tpimopar body a60 xmiHni pOboVHnn.
BCa raiKn, RbHITI rBHN MAnOHT 8SyTdo6pe 3aTnHyTI, 106 BnIbI 6yB y6eBnHOMY pOBoHOMY CTAI.
He po36npaTe Bpi6 Ha 6iNbSy KInbKicTB qacTHN, qm npn noCTaHaHHi.
3actepekeHHI PnBukopctaHHi IHydABybHix 3ac06B 3axnCTy oprAHIB cyxy IBhAcIIOK WMy, RkN BnPo6JIe BnIP6, KopcYBaH MKeH NOMITNI HbNKeHHIOEi.
IIu uac kcnnyataui jTaHNOPTybaHNr OocbMnBO cTeXte 3a TM, oOb He BUNHKa HBeNzepAa JnI hUINX NIOJe.
Bdyute ybaHHi, chdiyakte a TMM, 100 Bn po6nte i kopyTech aDopOBIM ny3dcm pnn o60tai e enkTporpinnaammi.
He KoprctyTeCe ENeKToHCTPMyEMTOYM ToYtac, RKIO BuTOMnTH a6o nepeSyBaTe PeI BnBmOB APAKOTIKbA, bIaKOrNo Ibo AoiNpckkXh 3aco6B.
OHa MHTb HeyBaXHOCTI pN BnKOpHCTAHHI eJIeKtPOIHCTpyMHTIB MOKe np3BecTH Do cepno3HN TpaBM.
2. MOHTAK
H6E3NEKA! He6e3neKa OtpMaHHr TpaBMn!
He3neKa OTPMaHnH Noi3y npn BnnaKOBomy 3anyCky Bnpo6y.
→3aueKaTe,doKNPiactMacobn pixyni npnctpi He 3ynnnbrcB, BNTARHb akymnytropHy 6atapeo, nepu HIX 3MOHTYbAt BNpIb.
BCTAHOBJIeHHa3xHCHOrO KOxyXaI O6MeKByBaA dIa 3axNcty pocHH [306p.A1/A2]:

3NEKA!
→Bnpi6 MoKHa BnKOpNCTOByBaTH TINbKn ToDi, NKIO BCTaHOBneHn 3anachn KoxyX.
- HuaHHTIb nepeHIO yactHy 3axnCHoro kOkyxa ③ Ha ronibky Tpumepa ①,doKBOHa He 3aueHneTbcN.
- HaaHnHtB 3aHIO yactHy 3axnCHOrO KOxyxa ② do ynopy Ha rojIKy TpIMepa①.
- 06epexxho 3aTnHtB 06uDba rBnHTN ①
- HndarHITb obmekyBaI y 3axnCTy poCINH (5) Ha ronibky Tpimepa①,doK BIn He 3aueHETbC
ΦIcYBaHHH nactMacoboro pikyOro npncptpoHa pyuqi [306p.A3]:
IIO KOMNNEK TY NOCTABKN BXODAIB 5 NnACTMACOBHX pIKyHIN
pnpCTPOB ⑥ 43MIHHI NnACTMACOBI pIKyHIN npnCTPOI po3TaWBOAHi
B na3ax ③ Ha pyHu.
Дя установки пл actmacoboro pikyhyoro npinctpoB TPMaHpyiKyoro npicntpoIO INB. 6.YCYEHHH HECIPABHOCTEN3amHa nactmacoboro pikyhyoro npinctpoK.
3. OBCNYROBYAHH
H6E3NEKA! He6e3neKa OtpmaHH TpaBMn!
e3neKa OTpImaHHI npi3y npn BnnaKOBomy 3anycky Bnpo6y.
3auekaT,doKIInACTMocOBm pixyunipri He 3ynHHbC, BHTARHtB akymyTOpHy batapeo, nepw HIX hanaaTOBYbTu a60 TpaHCnOPTbYbTu BNpI6.
3apnntn akymytntopny 6atapeo [306p. 01/02/03]:

YBAGA!
Bpoxayre Mepexey Hanpyry! Hanpyra Dkepebaene eektpoKbBHeHHa NOBHnHa BiNDiAtn DaHm Ha dipMOBI TaJbNcU3apHrHO pncTPO.
До кOMЛЕКТу NOCTaHнг akyMЛrTOpHnx TpHmEpIB GARDENA, Hoomepn apt.14700-55/14701-55,akyMЛrTOp Ta 3apAŋdHn pnpCTpr He BxOJrTb.
3aBnI INTeKtybHni 3apRdHI ciCTeMI 3apRd AKMyIaTOpHO 6aTapei ABOMATUHO PO3NI3HaE7cB, N AkyMylrTOpHA 6atapera 3apRdaKaETbCA ONTMAbHMM 3apRdHM CTpyMOM 3aJeKHO BID II TEMNepaTyPi Ta HApYFN.
Lc3axnueakymnyatopny6batapeko n03BONNEiTpmyBaNT nobHN 3apnd nid yac 36epirAHnB 3aprHOMy npncptoi.
- HATNCHTb KHONky fikcataopa A Ta BNTARHITb akymyIaTOpHy 6atapeoB3 KpInnneHHA kymyNtropHOi 6atapei ⑥
2.Плкочьзардн npucstpiakymnatopa 0do enektpomepeki. - HAdHrHtB 3apAHHn pnpCTpi kymyIaTPOHOi 6aTapei CHa akymyIaTOpHy 6aTapeio B.
Kkuo iHdkaTOp 3apy akyMynTopHO6atapei Ha zapdHomy npctpoi 6bMa3 e9eHmC bItnom, To akyMynTopHa 6ataper 3apyaKaTeBc.
Akuio iHdkatop 3aprydy akymyrtropHO6atapei Ha zapdHomy npctpoI roptnoCTHm 3eNEHM CBTNOM, TO akymyrtophy 6atapeIO NOBHcTIO 3apdXeHO
(Tpmbanictb 3apAdkn, nB.7. TEXHIYHXAPAKTEPNCIKN).
4.B npoueci 3apAdkn nepeBipraIte yepe3 piHOMiPi npomixkN qacy CTynH 3apAdkn.
5.Пил noBHOI aapAnknyakmyNAtOPHoi batapei(B) Bn MoKTe BiEaHn akMyNAtOPHy batapeio (B) BiD zapAnHoro npncptpoIO

3haueHH enemeHTB iHnKaayi:
IHHKaTOp Ha 3apaHOMy npncTpoi [3o6p.03]:
БИМANHA ИДКАТОРа 萨ару akymyntophoi 6bapei
Ipo npuec 3apnKm CmHAniye6bnMaHH HikKatopaaepny ayMynTnTophoBtapei
Bka3iBa: 3apdKJHMAOJKMBINIK, KJIOI TEMNEPATyAkyMYIaIITPOHO Batapei BIDNOIBaD oOcyTHMOY TMNEPATyHOMI dian3aOH 3apdKJHAA, DNB.7, TEXHHI XAPAKTEPNCYTKN.
IocTHe cBtTo IndKATOp3a3p4y akymyTnTropHb 6bataPe
![GARDENA ComfortCut 2318V P4A - IHHKaTOp Ha 3apaHOMy npncTpoi [3o6p.03]: - 1](/content/2026/03/529095/images/6d79276bcb8f003dbbd85ac61c6e088685a78be7601a21e7537c923a3d4a3fa7.jpg)
NoctHne cbTno IndKatoparaJyakmyNtropHObatapei ⑥ CnHnauoIe npo NoBHy aapJyak MyNtropHO batapei a0 npo Te, zo TEmepatya AkyMynTropHO batapei BHXOaHTBa3 MeKei DcNtymTOMR TEmepatpyHoro diaJana3OHy zapRdkaHHa, To TYM zapRdkaHHa 6 HEMOK-NHM. AkmyNtropHO batapei noue 3apRkATHCs, zuOH BO dyocrHyoDOnycTMMN TMepatypHnI diaJana3OH.
RkuO akMyNtropHO bataepe He CTABHeNO,To noctHne cbTno IndKatoparaZapJyak MyNtropHO batapeiCnHnauoIe npo Te, uO MEpeJebn WIEkep CTABNeHO Do POeTKn, MzapHnI pInCTpi IrotBoJdo EcnjnuAai.
IHNKAtop 3apAkyakymyTopHOi 6aTapei 已 Ha Bnpo6i [306p.04/O14]:
Iicra 3anycky Bnp6y iHnKATOp 3apny AkymynTOpHoi 6atapei 已 biO6paKaactbC npOTAROM5ceyHa.
3apnakymnatopnoI INnKATOP 3apny akymnatopho 6atapei 6atapei
| ЗарджевICTь на 67 - 100 % | ①, ② ta ③ ropгь ть селелим CBITLOM |
| ЗарджевICTь на 34 - 66 % | ① Ta ② ropгь ть селелим CBITLOM |
| ЗарджевICTь на 11 - 33 % | ① ropгь ть селелим CBITLOM |
3apKHeHicb Ha 0 - 10 % 6nMaE 3eJIeHm CBITnOM
Kkuo cbitnoio 6nmae 3eneHm Cbitnom,To akymyntopny 6atapeo notpi6no 3apnntn.
Hkoropbabo6bnmae cBtiojioHN iHnkaTOp NOMNKn, nB.6.YCYHEHH HECNPABHOCTEI.
BctahOBnHn TpHmepa Bpo6oNeNoJXeHH: Po6oNeNoJXeHH 1 [306p.05]:
CtAndapTha o6pi3ka.
P6ooye noJoxKeHHn 2 [306p.06/O7]:
06pi3ka nid nepeukkoio.
nni ndpuraHHH nI nepeWkoDAMPyKoTky MoXHa onyCTNTN 3 noNoXeHHH 3a 3aMOBvBaHHM 1 y Da HNNHn NOXeHHH 2 a603.
1.BctahOBiBtpmepHa3emJIO.
2. TpmaTe TpImep 06oma pykAm 3a pyKoRTky ⑦ TaKIM YHOM, IO6 Bn MOrJn HaTCHyTN NaBcEM Ha qikcatop ⑩
3. HATNCHTb Ha φikcatop ⑩ リOnycITb pyKoRTky ⑦ B δaKaHe nOJKeHH.
4. BiDnyctiB fikcatop 10, nicra yoro pykoarka 7 Mae 3HOBy 3aqiKcyBaTnCn.
Po6oey noJoxeHH3 (tinbKn apT. 14701) [3o6p. O8/O9]:
IiDcTpnaHn no KpaXra3OHy.
YBAFA! TpIMeM pMOxHa BnKOpNCToByaTH TinbKn B TOMy BnnaKy, Ako pixyua roNoBka TpIMepa 3aΦikcoBaHO Ha 0^ a6o 90^
IIOEpa 90pykortynotpi6HO3HOBY BCTAHOBHTN y NOXKeHHa 3aMOByBaHHM 1.
- TpmaTe Tpmepeoboma pykAm 3a pykonTy TaKm YHOM, 06B MOrJIn HATNCHyTN NaIbUeM Ha qikcatop
- HatncHtB Ha fikcatop (i NobepHiTb ronibky TpImepa 130°Ha 90^ ,doKn BOHa He 3aueHHeTbcn.
- BiDnyctiB pikcatop ⑩, nicra yoro pykoartka ⑦ Mae 3HOby zaphikcybATnCn.
PeykoBHaHn BnCOTn pyKoRTKn [306p.010]:
![GARDENA ComfortCut 2318V P4A - PeykoBHaHn BnCOTn pyKoRTKn [306p.010]: - 1](/content/2026/03/529095/images/3d413e88efc1cd22b920cf513c80427df9124fde863c8a6e11e026789bd91da9.jpg)
HEBE3NEKA!
Bpi6 He moKHa BnKOpncToByaTH, KOJI pyKoRtKa NOBHiCTO cKlaedeHa (noLoKeHHI TpaHcnpTyBaHH).
1.Ocna6te 3aTnckHy Btynky ⑥
2. BntarHITb pykortky ① Ha notpi6Hy doBxiny.
3. 3HOby 3aTARHITb 3aTNCKHy BTyIky ⑥
PerynobHH noJooKHeHH daatkooi pyuKn [306p. 011]:
IonoJHn IOnaTkoBoi pyKMOKe 6yTN BiNperynbOBAHe BIDNOBIOHO BoBaWoro3pocTy.
- NotarHirb 3a Baxinb ②
- HaxinntbdoatkoBypykuyBHeo6xidne noLoKeHHN.
- 3HOBy BiDnyctTb Baxkijb 12
KIIIO TpIMeB iDpEryIbOBAHO 3a 3PCTOM npABINbHO, TO nONo-KeHHaTI bye BepTnKaHbHM, a rONOBa TpIMepa B pOboCHMy nONoXeHHI TPOX HAXUNHeA BnepeD.
→ TpmaIte TpImep 3a ochOBHy pyKy (Ta daJOnaTkOBy pyKy TaKIM YHOM, ΜΦδ ΜριBKA TpImepa Bγla 3πεrKa HaxInHeha BpeJ.
PerynIOBaHHo6MExyBaHaJn 3axncry poCnnH:
- Po6oey noIoxKeHHa [306p.012]
-Полхенгьзберхенгь [306p.013]
→BldTnHb 06MekyBaH DnA3xNCTy pocnH 5 Ta BCTaHOBtB NoR ONotp6He NOIOKehHH TaKIM YHOM, Uo6 BiH 3aqiKCyBABCr.
3anycktpnmepa[3o6p.01/014]:
![GARDENA ComfortCut 2318V P4A - 3anycktpnmepa[3o6p.01/014]: - 1](/content/2026/03/529095/images/8fb5ecf31cfc40082be0c8a11c07ce26ab44f117589a681c06fcc5ad48214db6.jpg)
3NEKA! He6e3neKa OTPMaHnHa TpaBMn! IChye 3arpo3a OTPMaHHra TpaBMn, Akuo Bnpi6 He 3ynHnTbCnIcNrTOR, Rk 6yB BldnyuHn NcKOBn BaxInb.
→He 06xOdbTe 3axNCHI npHCTocyBaHHa 6o BmHKa. Hanpknad, He 3akpinKoiTe nyckOBn BaxiIb 3a pyky.
Bnpi6OcHauEHHIOBDIiHM 3aXHCNH pNCTPOcM (nyckobn Baxjib 360kyBaHHBM KJIIOUeHH), AKN 3axHuae Bnpi6 BiD BNpaKOBORo BMUKAHHa.
3anyck:
- BCTABTE akymyIANTOPHy 6batapeIO B 3aJIM akymyIANTOPHOI 6batapeiO, NOKN BOHa He KnaUHe, CTABUN HA MICUE.
- TpmaTe DoaTkoBpyKy OndHieO pykoIO.
- TpmaTe npyroIO pykoHO 3a OCHOBHy pyKoRTky 4, nepeCyHBTe 6nOKyBAHHA BKIOUeHHRA BnepeTa NotARHTb 3a NyCKOBIN BaKiB 16. TpmeR 3anyCKAeTBc, n IHmKATop 3apany AkymyTAPTOHoi 6barapei P bio6paKaactcbn pOITROM 5 ckyHd.
4.BiDnyctitb6IOkyBaHHBkIIOeHHH 15
YB4A! YHnKaIe KOHTaKtTy PnactMacoBOro pikyHoro npCTpOTo Ta TpIMaay pikyHoro npCTPOO 3 TBePdIMm npEdMTAMN (kAm'Ha CTHa, KameHi, oropoxi i take inhe), o6 3anobirn 3hocv a60 nonomui nactMacoBOro pikyHoro npCTpOo abpTpIMaay pikyHoro npCTpOIO.
3yHHKa:
- Bianyctitb CTapTOBn BaKJIb ⑥. TpIMep 3yHNNHTbCRA.
- HATCHITb KHONky fikcataopa A Ta BNTARHITb akymyIaTOpHy 6atapeiB 3 KpInnHeHHA kymyIaTOpHOI 6atapeiO
4.Доглад

E3NEKA! He6e3neKa OTPMaHH TpaBMn!
e3neKa OTPMaHH Nopi3y npH BnnaKOBOMy 3anycky Bnpo6y.
→3aekaipe,doKnPactMacoBni pixyyn npncptri He 3ynnnbcr, BNTARHhtb AkymnytropHy bataepu, nepw HIX 3dIChIOBAtn Texo6CnyroByBAHHBnPO6y.
UHueHHrTpHMepa[306p.M1]:
![GARDENA ComfortCut 2318V P4A - UHueHHrTpHMepa[306p.M1]: - 1](/content/2026/03/529095/images/6f3a3d8c4da889e688cefc37dd031da4d7c03e1ec013a938b65e8b24a02847c8.jpg)
3NEKA! He6e3neKa OTPMaHHa TpaBMn! 3arpo3a OTPMaHHa TpaBMn i pH3NK NOWKOJXeHHa Bnp6y.
→He ouuuyte Bpi6 BOIOO a6o niC tpymehem BOIN (ocobnBO nBnBCOKM TnCKOM).
→ He ouuuyte ximikatam, BKIOUOCH 6eH3HH, a6o po3HHNkAMn. DeKi 3 Hx MoKyTb NooKOHTB BAKNMBI nactNKOBi detani.
BENTINHJIHIOTBOPMAOTb6yTN3ABKINCHNTMN.
- OuHCTIb BEHTINRAJHI OTBOPN M'RAKO UITKIO (HE BHKOPNCTOBYTE BUKpyTKY).
2.ПиськхогиВИКОРИСТHAHЯОИМДАЕBCIpyXOMIACTHINH.BdanaTbOco6nBIO3aIIuNkTNpaBnIbpydy3aaxnchoroKoKxya②
UcTka akymyIaTOPa i 3apAHHoro npHcTPOHO akymyIaTOPa:
Peped TMMIKIiKJIIOUHTN3aapdHnI pNCTpII akymyIaTopa,nepeKoHaIETeCA,IO NOBepxHr I KOHTAKTN akymyIaTopa Ta Ioro 3apRdHOPO npiCTPOU NCTI cYci.
He BnKOpHcTObyIe npToOHy BDOy.
→3apdHn npncptiakymyAToPtoH6batae:OCHtTB KOHTAKTN nIaTOKOBi YACTHH 3a DOnOMTOIO M'KO, CYX0TKaHHN.
→ AkymyIaTOpHa 6aTaper: Y pasi HeoXiHocTi OHCTITb BEHTnIaLJI Hi OTbOp H BvBOJn aKymyIaTOpHOI 6aTapeIM'RAKOIO, NcTOHO Ta CxyIO KNTIO.
5.36EPIAHH
BnBeJenn3 excnnyataui:
Bupi6 noBHHen 36epiratncB HeoctynHomy dIteMicui.
- BuTARHITb akymyTOpHy 6aTapeio.
2.3apriitbakymyntopHy6atapeio - Ouchitb TpIMep, akymyIANTOPHy 6aTapeio i 3apAHH npHCTpiakymyIANTopa (nB.4.D0rJI).
- 36epiraTe TpHMeR, akymyIaTOpHy 6bataeO i 3apdHn npctpiakymyIaTOpHO 6bataeB cyxomy, 3akpntomy i 3axnueHOMy BiMDopo3y MiCJI.
Ytunisaui:
Bnnoe no Dpckm 2012/19/CC)

Bupi6 He moxha ytni3ybaTn 3i 3bHauHHMM nobyTOBMn BIXdoAMn. BiH nobHHeN 6yn tyn tyn13OBAHm BIDNOBIDHO mICueBnx YHHNX cTaHdpTb 3 OxopoHN HABKONHbORO cepeDOBuHa.
BAJKJINBO!
→Ytni3yIteBnip6y a603aDOnOMoIO MICueBOrO CneuaI3OBaHO r3bipHO rnykTyr 3ytNi3aui.
YtniiaqianakymnTOpHoi batapei:

AkymyrTopHa 6aTaper GARDENA mictnb tiin-ioHHI akymyraTOPHI enemehn, kri nicra 3akhiHHe TepmiHy ix cnkykHe MOxHa yTuNisByaTn K3BmuaHe NobyToBe CMITTR.
Li-ion
BAXJINBOI
→YTnni3yTe akyMnyTApHb 6aTaapei y a6o 3a donomorO MicueBoro cneuiianiaoharo 36ipHOrno nyKry 3 Tynl3auii.
1. NoaHicTIO po3pndIb nii-nio-hiakymyAtoptHi enemEnn (3BepHtbcn do cepbicHO ceHTpy GARDENA).
2.3axtITb KOtAKTN IITIN-iOHHX akMyIaTOpHIX enEMeHTIB iD KOPOTKORO 3AMnKAHH
3.Ytni3yIte nii-iOHHi akMynTOpHi enemeHTn HaneKHM HINOM.
6. YCYHEHHH HECNPABHOCTE

E3NEKA! He6e3neka OTPMaHH TpaBMn!
e3neka OTPMaHH npi3y npn BnnaKOBOMy 3anycky.
Bnpo6y.
→3aHeKaIte, DOKn INaCTMacoBni pKyU npHcTpi H 3ynHbCBy, BNTBnHt bAkyMnTpybAtapeIO, nepu HIX yCyBAtn HeCnpBaHOTi BpOBy.
3aMina nnaactmacoboro pikyuro npnctpo [306p. T1 / T2]:

HE6E3NEKA! He6e3neka nopisiy!
→ He binkopncObyTe MeTaneBipixyui enemeHTn a60 amHHi qactHn Ta KOMnEeKTyouci, aKi He nepeDbaehi fipMOGARDENA.
Kkuo WbMko3HouBaHoro pe6pa ⑥ Sinbue He BmHOb, To TpMaui pkyoO npctpoIO ⑧ niJaRae 3aMiHi. 3BepHtCBdo CepBICHO eHTpy GARDENA.
IInactmacobi pixyipnncptoi moxyb 6tyn 3nooehi MaKcmmabho HA noIOBHy cOeI DOBXHH, Do3BOJREBC BHKOpNCTOBYbTH IInne opirihhbi GARDENA 3minhi pixyipnncptoi RotorCut. 3mHni nactmacobi pixyipnncptoi MOxHa npnDbaB mRa3HH, eo peTaeTajne fipmy GARDENA, a6o 6eNocepeHb o Cepsic Hnx ceHTpax GARDENA.
GARDENA 3minnpixynn npncptpi RotorCut dIpy60tpmepa apt.5368
BHTTN pIactmacOBn pIKyu npCTpi:
- NpeBepHiTb TpMep.
- PnDabitb KHeue bnaCTmacOBor pkiyHOr npncTpOIO 3nerKa Bn3 (A), BnDaBtB nlaCTmacOBn pkiyHn npncTpI (B) Yepe3 TpIMaH pkiyHOr npncTpOIO (B) Ta BnTARHITb Noro.
BCTABHTnIpaTMacOBni pIKyu npncpti:
BCTABTE pIACMACOBPiKyuHPiNpIcTpiB MetanIHn npop3 TpIMaHaPiKyOHOPiNCTpPO Do Kiccali 3EHNHH 3YTHoO fikcalie (KnaaAH).
HkoHOBNIIINACMBOINpkyNINPnCTPIINpaBnHO BCTABNEH, BIH MAc HeBeNkN NqoT.
Ipo6nema MoKmBa npMmHa Cnoci yCyHeHHa
| Тример не ріke abo pixe norano | Пл actмасовий рікучий піnstгтг 3ншенин abo занад'tо короть. | → 3amHtB Пл actmасovий pixучийпіnstгтг. |
| Пл actmасovий рікучий піnsttgtr 3namabca. | → 3amHtB Пл actmасovий pixучийпіnstrgtr. | |
| Тример сильно вібруе Пл actmасovий рікучий піnsttgtr pydxe сильно 3ншенин, I ce BHKJIHKaCа He360anAHCOBAHICTb. | → 3amHtB Пл actmасovий рікучий pіnstgtrpydxe cIshen. | → 3amHtB Пл actmасovий pixучийпіnstrgtr. |
| Тримчхpічугго ріnstgtrpoio 3ншенин. | → 3amHtB Trpmaay pIXyUroPnpxtro. | |
| Тример не зуинягься | Здддддддддддддддддддддддддддддддддддддддддддддддддддддддддддддддддддддддддддддддддддддддддддддддддддд徳 | → BHTAHTb akymynlntophny 6batapeio 1z8iBhlbT nyckobni Baskilb. |
| Тример не зуражсakьая озо zуражсakьая озо zуражсakьая озо zуражсakьая озо zуражсakьая озо zуражсakьая озо zуражсakьая озо zуражсakьая озо zуражсakьая озо zуражсakьая озо zr | Актулгога batapeя розяджета. | → 3apHITb akymynlntophny 6batapeio. |
| Тример не зуражсakьая озо zуражсakьая озо zуражсakьая озо zуражсakьая озо zуражсakьая oзо zуражсakьая oзо zуражсakьая oзо zуражсakьая oзо zуражсakьая oзо zуражсakьая oзо zуражсakьая oзо zуражсakьая oзо zуражсakьая oзо zуражсakьая ozt | Temperatypya akymynlntophgo batapei bIXOДИТБ 3a МбДОуNTMOrOДIAnAOZHy. | → 3aueKaiTe,doKoi Tempepa-typa akymynlntophgo batapei 3hOBy He 3aXaOДIAnOMTcBcB MexkaxdiIaONOHy bD O Cdo +45 °C. |
| Мык кontaktmп Akymynlntop- hoi batapei Trpmaee aIHHO-KaHIO KpAIIb WOII BDOI ABOI. | → BIVaIb TpKpIb BOIDI/BOLO-уу заюмогоу cyxoI Tka-HNHN. | |
| Motop azbokokobao. | → BIVaIb TpepekoQdy. | |
| 3anyctitbHOby. | ||
| Тример не зуражсakьая озо zуражсakьая озо zуражсakьая озо zуражсakьая озо zуражсakьая озо zуражсakьая oзо zуражсakьая oзо zуражсakьая oзо zуражсakьая oзо zуражсakьая oзо zr | Виpl6 HencnpabHni. | → 3BepHITbdo copceBCHOROцentpy GARDENA. |
| Тример не зуражсakьая озо zуражсakьая озо zуражсakьая озо zуражсakьая oзо zуражсakьая oзо zуражсakьая oзо zуражсakьая oзо zr | Akymynlntogha batapeia He nobHCTO bCTABLNeHa y trpmaay akymynlntophgo batapei. | → NobHCTO bCTABTE akymynl- tophy batapeco y trpmaay akymynlntophgo batapei, zuob BOHA ZaIeHINHuaNae 3 xapak-TePHIM KlauzHNM. |
| Akymynlntogha batapeia HencnpabHni. | → 3amHtB Akymynlntophny 6batapeio. | |
| Виpl6 HencnpabHni. | → 3BepHITbdo copceBCHOROцentpy GARDENA. | |
| Зуражанna E HEMOKLINHIM. | Akymynlntoghy batapeio He (HeNPaBILH) BCTABLNeHo. | → PpRabHIO NaIaRTHIb Akymy- nIantophy batapeio Ha zapal- nI NHI prnctprii. |
| Indikatop szarady akumy- litotropno batapei L | Kohtaktna akymynlntophgo batapei 3abpudneho. | → OuchTb KOhtaktna Akymy- nIantophgo batapei (HapriKlnd, shaXOM bataratpAOBOI bCTABKn BHTAYBaHNNa Akymynlntophgo batapei, zuob BOHA ZaIeHINHuaNae 3xapik Y pa3i HeOBxIHooHOTi ZAMHITb Akymynlntophny batapeio). |
| Temperatypya akymynlntophgo batapei BIXOДIbTH 3a МбДОуNTMOrOteMfmpaTeaTPHOrO dIaIaONO Hy zapdIXaHNN. | → 3aueKaiTe,doKoi Tempepa-typa akymynlntophgo batapei 3hOBy He 3aXaOДIAnOMTcBcB MexkaxdiIaONOHy bD O Cdo +45 °C. | |
| Akymynlntogha batapeia HeNCiprabHni. | → 3amHtB Akymynlntophny 6batapeio. | |
| Indikatop szarady akumy- litotropno batapei L | Мерекевий StIteKer zapdIXaHNO O pRcIPOU He (HeNPaBILH) BCTABLNeHo. | → (PobHCTNo) BCTABTe Mepexe- bIM wtekep do po3etkn. |

PpO6JIeMa MoKJIMBa npMmHa Cnoci6 ycHeHHa
Indukatop 3aepykyummy
Ntropho 6atapei ©
He roptp [306p.03]
PoTeTka,Ka6enbXmbnHnHa abo zapdni npripti HneepaIIH
IpebeIpe MepeBeye Hanyry. IpebeIpe B pasi Heo6xJHNOCTI aepdHNpNcptnB Abotp3OBAHOrO dnpera afo B cepbICHOmy UENTPI GARDENA.

BKA3IBKA: B pasi iHmX HeCnptpABHOCTe 3BepHtbc, 6yIb nacKa, do cepBicHoro CEHTpy GARDENA. PemOHTHI PO6OTNI NOBHNI BHKOHyBATNC TINbK cEPBCIHMM CEHTpAMGARDENA,a TAKOX CNEUJIaIISOBAHMM fIpMaMn,IKI cETMfIKoBAHI KOMNAHIO GARDENA.
- TEXHIYI XAPAKTEPNCTIKN
YBnAky BOKOHHRApaHTiINHX BIMOR i3 Bac He CTARYBaTMETbCnIATA 3a HadaHI NOcIyI.
GARDENA Manufacturing GmbH Haanae dna BCix GARDENA opurihann HIX HOBIX BIP06IB rapaHTIO TepMIHOM Ha 2 pOKn 3 MOMeHTy, KOIN BOHN 6yNI BNEpue npni6aHI y DInnepa, KIOO BIPo6n 6yNI BIKOPrCTAHI BKNIOHO Y npRbATNIX uJnx. Ha BIPo6n, npNJ6aHI Ha BTOPHNHOM PNYK, U rapAHTI BIPo6NHa HE NoiuproctCBs. HA daHapraHTIN nouPioCTbcra Ha BCI iCTOTHi HeNoTNI BIPo6y, Aki Ha NiCTabi Ooka318 NORCHIOIOCTcDEEKETAmMATEPIany a60 BIPo6HHIM 6paKOM. L4 rapAHTI NEpeD6aVae 6e3KeouTOBy 3amiHy HeCnpABHORO BIPo6y Ha cnpabHNI, A60 X pEMOH HeCnpABHORO BIPo6y, HAdicnHoro HAM KOpNCYBaHEM M36epiraMo 3a CobO npAbO BV6opy ODHORO 3 cHX BApaiHtB. L4 noCnyra Haadaetcb 3a TaKNO yMOB:
Bup6 BnKOpNCTOByBaBC3a npn3HaueHHAM i3rIOHO 3 peKOMeH DaJIIMM, HABeDEHMN B IHCTpykuiX i3 EKCnIyatau.
Ahi nokyuene, ahi tpei oco6n He HamaaranC BdkpnTn abo BiDpemOHHTyBAtn Bpi5.
B npoceci ekcnnyatai 6ynn BnKOpntaHi TInbKn opnirHaJI GARDENA 3anaChi Ta WbNko3HOwByaHiaCTHH.
-Ппeд'яВИТиКоиIOуЕкa.
PapaHTI He nouHIOEbCn Ha 3BmAHn H3HcTeTaNen i KOMNOHEITI (HaNPKnAD, Ha pOyNHx npCTpONx, DetANX KPIINENHn PkOHx nPiCToB, TybIHax, dKepeNax cBtNA, KNIHOBNHnx i 3y6actnx peMeHnx, KpINbHaTuJi, NOBtPNHx fIIbTpAx, CbiHKx zanAEHNH), B3YaNbHI 3MiHn, a TAKOK WnDkO3HOwBaHi ChACTHn i BNTPaTHi MatepiA.
Lra pahTir Bnpo6nka, BiIOBIOHO Bnue Bka3aHnx yMOB, 6mExky- tbcNocTayHnM 3 MeTO 3AMHnI pEmOHOM. IHIpi npTeH3i Do HAC Rk Bnpo6nka, TAK Ri BIIuKOyBaHHA 3bNTKY, He oRpyHTOBYKtbcra papaTieo Bnpo6nka. 3BuayHo, nra papaTir Bnpo6nka, He CTOCyETBCIHcyOHX, BCTAHOBENHX 3aOKOHOM I DorobipHX rpaTHiHnx 30608'3aHb Dunepa/npdaBua.
IapaHTi Bnpo6Hnka nIDnrae npaBOBm NOIOKeHHAM PH.
Y rapaHTHOM BYNANKy HADNIb, 6yNb NACKa, HecpaaHn Bnip6 pa30m i3 konioeky npo noKynk y onom HcnpabHocti, cnpaTUB mBapTb nepecnkn, na anpcy GARDENA cepbicoro LHTpy.
Ubnko3HouybaHietani:
INaCTMACOBINpKyymnpNCTPIIaTpIMAHpiKyyOrOpnHCTPOIO CWBHQKOHOUYBaHHMIDTeA/IMM,TAKIMHOM,rapaHTHa HIX HE PO3NBOCIOOkyETCB.
RO Trimmer cu accumulator
- SIGURANTA. 105
2.MONTAJUL 106 - OPERAREA 106
- INTRETINEREA 107
- DEPOZITAREA. 108
- REMEDIERA DEFECTIUNILOR. 108
7.DATE TEHNICE 108
8.ACCESORII 109 - SERVICE/GARANTIE 109
procedureI EPTA 01:2014
1. TEXHnKA HA BE3ONACHOCT
BAKHO!
IpocheTete BHMMATEJHO HNCTPYKUIMRA 3a ekCnloatauH N 3ana3eTe 3a 6bEdu CnpBABK.
CIMBOJIN Bbpx npodykta:

ctpykunrta 3a ekcnnoatauna.
STANUM

Hocete BnHaHc cepTHmUpaHO 3aunTHO yctpoCTBO 3a cnya. Hocete BnHaHc cepTHmUpaHO 3aunTHO yctpoCTBO 3a 3peHHeTO.

I3BaIeTe 5atePnTa npEIN NouHCTBaHe IIN TexHuecko 06cIyXBAHe.

HraTe Ha bXd.
ONACHOCT! ONACHOT ONapaHRABaHe Ha npyMaI mua! DpbkTe apyrn Iuca danech OT 3OHATA B KORTO pa60THe.

3a 3apnHOTO yctpoNCTBO: He3abNO hNkIOUeTe uencela O NT KOHTaK, aKO Ka6bET e noBpeDe HIN npeKcbchat.
O6uynyka3aHnno TeXnKaHa 6e3onachocr
Bezonacnoct Ha eNeKtpnuecknte ypeu

ONACHOCT! TokoB yap!
OnachoctOT HapaHbAhe OT KOKOB yap.
→PnoIyKbTprB6Ba da bIbe 3aXpaHene H cIeNkTpuecTB np3 aBTOMaTHeu npeKbCBAU,JeICTbau npn NOBpeJa nnHmATMuHaHe HA TO (RCD) C HOMNHAHJEN TO HAKJIIOVAOBE O NTAKCMYM 30 mA.
H36RbAte Heo6vmaHa n0a Ha TnOto HbHarn naTepe paHOBOcne, 3a da IMATE HeIpeKbCHato 3dpaba Onopa HA cKnIOHOBeTe. XoTe, He TnAHte. He DOKocBaTe DeNkceEe Ce anachy TaChn Ha MaunHata, IpeDn MaunHata da bde NkLQeHcEOT eKeTpUncKaTa MPeKa u BnKHeuTE ce Ocnac Uacnt Da cnpat DNeKHeHTo Cn HanBNo.
Hocete BnHAr nO bEme Ha pAbotc MaunHata 3dpaBn OByBKn NbTnnaTahJOn
No-6e3onacha pa6ota
1 06yueHne
a)PcOHTETe BHMHATEHNO HCTKpyUHTA,3An03HaJIte c KOHTpONHTE en6MHTn IN PABBNIHOTO INNIO3BAHe HA MauHHATA.
5)HeNo3oBnBaIte Ha Nua,KoTTo He ca 3a03HaTc Ta3m HcHcTpkyuMnHn Da HnOIOBAIbTa3n MaHnU。HcTcBaWtOeMCTHn npAByHmNnHnHApE9MoRat Da orpaHauHbAt Bb3pactHa HnotpeMeTeN.
B)Tpa6Ba Da Cn HMa PnpEeBn,He NTpEeBnTeHr EOTROBOpEH3aHHuDeHTN MOnaHcOCT 3aDpyr NmuaMmMyUcETBOTo IM
2 Nodrotobka
a) PnepyIyntpe6a Tp8Ba Da 6bDat npOBepHn 3a npHaun 3a npBepa
mN INHcOBAHe 3axPAHuaIN YbJbKaauu Ka6en. Ako No Bpeme Ha
YIOTpe6a 6Dy NpOBepEn 3axPAHuaIN Ka6en, CbUIN Tp8Ba Da 6Bde
HkIOueH He3a6aBHO OT en. Mpeka.
HE JOKOCBAIte KA5EInA, PPEIN DA CT E TO N3KIOUHUNIOT
MPEKA. Ho nIOn3BaTe MaunHata, aKOxpaHbaHHT Ka6en e
NOBpeHn IIN 3a#nTne.
6)PnepaynippebaMaunHataTpa6baDa bdeBm3yauHo npoBepeha 3a TpOpepeHa, HnncBaunuHn HnpaBauHNo nocTaBeHN npEpaNaH yctpoi CTBA nn Kanaan.
H KINORA HE BKNIOVAIte MAIINHATA, AKO B NIO3OCT CE HAMIPAT XOPA, 0006HO Deua, JNJIKIOBTHN.
3 Eknoataa
a)ДрькгсхаразинудьнжавинкбелдаленOTрркшataKOPda.
6) IIO Bpeme Ha CEINI NEPNOH HA 3N0n3BaHe HA MaunHata TPOBA Da Ce HOCAT 3aunTHN OUNA H 3dpabn 06yKn.
B) Da cie 63648Ba VnON3BaHcTe H aMaHINbA T B NOn M TeOpOTrCNHNY CUCIOHN, OCC6HOI INI OTHACHOCT OT MUNHN.
r)NINONBAIeMaHInHatacMoHaNHeBbCAEBTINHnINPiNDo6pO NIKCYCTBEHOOCBETNEHE.
II)HeIIOI3BIAeMaIINHATAcN CIOEPEBENKANIKINBAIINTHOPINCNO6BNEHMe IIN63 BAKANIKINSAUHTNHPNICPOC6BNEHn.
e) BkIOHOte eKIOIOBnATeIa, Ako pLcTe I KpKaTc a H3bH 06XbTaA h PeKcTO cYToPcBO.
YnTope6a no npedHa3NaueHHe:
K) BHAHAR MOKIHOVAIte MauiHATA OT ENEKTPO3AXpaHBAHETO (T, p. 13KIOUBAHc Hb IeONcEaT O EJ.MpOxA,CBAIRHO Ha 6NOKIPOBKa TIN HA CBAIIHuaTa Ce 8ateepn
1) BUNaH, KOraTo MaunHaTa Ce octaB 8e3 Ha30p;
2) nped otctpaHbAhe Ha npo6nem c 6IoKpana MaunHa;
3) npednpobepka, noocmbane nn o6pa80ka Ha MaunHata;
4) CnEe KOHTaKT C yHKnTeNa,
5) BnHaH, KOraTo MaunHaTa 3aOnHHe Da Bn6pnpa HeoBuHaHo.
BHNMAIe 3a HapaHbAe No KpaKaTa n pLJeTe opeKeJTo npCno- c6oJIHe.
n) BinaHrCe yBekdabaiTe, ye OTbOpTe 3a BeHTnuaiaCe noDlbpxat HCTN CTyKdTena.
4NoDbPkaHeBn3npaBHocTc6xpaHHeHne
a) MaunHATA Tpa6Ba Daa 5bde N3KIOUeHa OT eEkeTpo3axpHaBAHeTO (T.p.13KIOUcBAHe Ha UeCnela OTe I.PMeXa, CBAIIHe Ha 5koKIOBkata ININ HA CBAIuata Ce BatePn), PpeDn 3BBpUIBaHETo Ha pa6Otn No NO.DpBkata ININ NOCHCTBAHETo.
5)JaceIIOJI3BATcMOpe3eepHHaCTnAikcecoapnipenOpbAHINOTPPOIN3OBDITNEH.
B) MaunHATA Tp6Ba Da 6bDe npOBepBaHa H NOIbPkaHa peoBHO. MaunHATA Da 6bDe pemOHmPaHa cAmO B OTOpMnpaH cepN3.
r) Ako MaunHaTa He ce mnoJn3Ba, Tn Tp6Ba Da bDe cbXpaHbHa Ha MRCTO HeoctbHNo 3a deca.
DOnbHnTeHNyKa3aHaNo TeXnKa Ha 6e3oNaCHOCT
Be30nacHa pa6oTa c 6aTeepm

Ppojete BcNkU kka3aHnno TeXnHa Ka 6e3oNachoCTu HNtcykLm.
Ako He 6bDat cnaeHn ykaaHnraTNo TeXnHa Ha 6beonacHOCT IN HcTpyKuNTte, CbIeCTBaOnaCHOCT ON KOBo yAp, NoKap WmN OTe KKn HapaHaBAHN.
CbxpaaHbAe rpnKnB0 Tea HNCTpykMn. V3no13BaIte 3ap4nHOTo yctpoCTBO CAMO, Ako HantbHIO OCHBNR BcHKNH NCHPTyKm IN MOKTe da Rn mTbNHtBe 3E cprAueHHN nI CTe NOUYHn CbOTBETNHr Ykaz3AHn
→Ha5nOdaBaeTeaataNoBpeMeHaynOpTe6a,NoNCTBaHeNTEXHneckoObcnyBaHe.TakaIeCTeCInpyH,YeDeuTaHeHITPantCbzapdnoTOyctpoCTbe.
→3apejddaTc cAmO JnTHeBO-OhHnAkyMynatopNb6atepnOT cnCTemataPOWORALLTNPBATG 18V.ckanauTetOT15Ahno-BnCOK(OT5ayMynatopNbKTknNNoNBoeJ).HanpejexHeToHa ayMynatopNb7aBepnTRpaBaDaCbOTBeCTBaHa HanpejexHeTe 3aapejdaHa6atePnHa 3apRnHOyctpoCTBo.He 3apejdaHeakymynatopNb6atepn.
B npTnBEH cnuya cnbuctByBa onaCHOCT OT noXkap n EKcnno3n.
→ 3apHHTO yCTPOCTBO He Tp8Ba da ce H3nara Ha bKd HnBnara.Boa, Bn3na B ENEKTPOHECKN ypeD NOBnaba PNCKa OT TOKOByap.
→IOIaBpKaHteAapHHoTcYpOTHOBuHTCIO. 3aMbpBaHToEcb3aDaBaPICKOTKOKUdAp.
→PpOBeRbAte 3apHnOTo yCTpoNCTBO,Ka6ena N eencena npeDn BCKa yNoTpeBa. He npo3BaTe 3apHnOTo yCTpoNCTBO, Ako a6eBekHe HkAKBn NobpeDn. He OTBaPrHe camn 3apHnOTo yCTpoNCTBO,CbIoTO da 6bJe peMOHTnpaHO camo OT KBAHNFuPAHm CneuHINCTn Camo C opTNHJHn Pe3epBN qACTn. NobpeHn 3apHnYCTPOINCTBa,Ka6ena N eencena NobMWBabat PNCKa OT TOKOB dyap.
→HeH3nON3BaIte 3apJHOTO yCTPOCTBO Bbpyx neCHO 3anaHMa NOBbpxHOCT (HaP, XAPTNA, TEKCTNI IN Dp.) NIN B CpeJa, KOrTO MOKe DA Ce B3nnAmeHH. CbuecTBBya PnCK OT noKAp npadn HarpBaHe Ha 3apJHOTo yCTPOCTBO NO BpeMe HA 3apeKaDaHE.
→ Ako e Heo5xOIMma cMHa Ha cBbP3BaAua Ka6en, ToBa Tp6Ba da 5bDe HapabeHOOT GARDENA nn OTp43nPAH cepBm3eH DeHtp 3a enKTPOHNCTpymHTH GARDENA, 3a da Ce n36erHt PnKOBETe 3a Be30nAc-HOCCTTA.
→He n3no13BaIe npOdyKta,doKaTo ce 3apeXka.
TeNy kA3aHnNo TExHnKa Ha 6eOanchoCT BaKAT cAmo aa IInTHE BO-IOHN AnkyMylatOpHn 6atePOn OT cNCTemATA POWER FOR ALL PBO 18V.
→N3nON3BaIteakymyIaTOPHATA6aTePnBcMoBnpOyKTHHa npOn3-BOJITENHa cICTemATA POWER FOR ALL.
CaMo Taka MoKeTe Da 3aunTne BaTepyTa OT onaCHO npetoBapBaHe.
→3apejdaTe akyMnatopnnte 6aTeepn CAmO cbc 3apnHy uctpoCTBa, KOToCe npenOpbHAT OT npnoBDOHTeR. OTe pAnO yctpOCTBO, KoTo e npdeHa3HaHeHO 3a cnpedeH BnAkyMnatopN 6aTeepn, CbIeCTByBA onaHcOT OE noXap, KOrTo CE nIINONBaCdpyn AkyMnatopn 6aTeepn.
→ Akymnatopnata 6aTeepna Ce doctabu qactuho 3apeheha. 3a oocrypnte PbHNA MOUHOCT Ha akymnatopnata 6aTeepna, 3apepe Tpepi NpBpa yNtpeba akymnatopnata 6aTeepna B 3aprHOTO yCtpoi-CTBO HnblHo.
→CbXpaHBAaTe aKymyNaTOpHN 6aTePN, N3BbN 3OHa Ha DoCTbN OT Deua.
→He oTbapnTe akymyntophata 6aTepeia.
CbueCTByBa pNCK OT Kbco CbeHHeHne.
→Pn nobpeHn HenpabHHa ynoTpe6ha Ha akymnatopHata 6ateprn morat da ce o6pa3ybat napn. AkymnatopHata 6ateprn moke da ce anaan nn da h36yhe.OcHyperte NCTB3dyA, npin onnaKbHn noIbpcete nekap.Papnte morat da pa3da3hrt JdxATEnhnte Pbntua.
→Pn HnnpabHHnHn3nON3BaHe Hn NOBpeHnA kymyNatopHa 6aTepeHn MoKe OT kymyNatopHnA 6bTepeHnJa nPoTee TeHocT. KORo MOKe da Ce b3nAmEHn. N36RbMaTe KOtAKTa C He. Pn CNyaueh KOtAKrN 3nnakHe C BOa. Ako TeHocT Ta nonaHBe O OHTe, NOBpCeTe DOnbHNHTeHa NEkapcKa NOMou.
TeHuOCTa N3TEKbNA O t AkyMnyatopHata BatePey MoKe J da,doBeJe do Da3pHeNe I KOKATA mInI 3rA3RnHn.
→ Akoakymnatopnata6atepnae nopeheta,TeHocTtaMoKe da Hteue H daHAMokpn c6ceHN ppeMeTH. Ipobepete 3acerHaHTe detaHnn. TIOcHETe rHn nn rCmHETe, aKo eHOooXOdmo.
→He Cbpb3BaIte Ha KaIcO akymnatopHata 6atepHn. DpbXte Hen3-Non3BHaTAtaKymNatopHs 6atepN daJeU OT KnaMepn, MoHETn, KIOHOBe, RBO3eN, HBNTOE INN DPyrn MAnKn MeTaIN NpeDMtN, KOTo 6xHa MorJn DaOKCBKT KOHTAKNTNe.
Kbco cbeJHHeNE MEXU KOHTA KITE HA kymyIaTOPHATA 8atePmIO MOKe da doBeDe Do IaRapHHN ININ NOxap.
→ Akymnatopnata 6aTepeRn MoKe Da 6bJe NobpeHena OT octpn npedmetn Kato HAp. NpOH NIN OTBepTKA NIN OT npinarHe Ha BbHHa cnla. MoKe Da Bb3HnKHe B7PteuHO KcO CbEInHEnne n AkymnatopHata 6aTepeN da ce 3anAn, 3anyu, EcknoHnpa nn da nperee.
→Hikora he pemOHnpaIte NoBpeHn akymnatOpH 6aTePMn. BcKO texHueCKO o6ClyKbAHe Ha akymnatOpH 6atePmN trp6Ba da CE hBbpB1BA cAmO OT pOnHbOJTeTEn IIN OTOpH3npan cepB3eH eHTbO.
→ Πa3eTe akymytaTOPHaTa 6aTePnO tOnnnHa, HApN. cBIO O TnpoDbIbKTeHNO HAarHe NaCbHyEe CBETnHa,OrbH, 3AmBCBaHE, BOda N BJrA.
CbueCTBya cNaCHcT OT EKcNIO3n IN KbCO CbeHHeHne.
→Nan3aBaeN CbXpaHbAaBe AkyMnATOpHata BatePna Camo
pnTneMtnepatya H aoknHata cpeMa Mny-20Cn+50°C. He octabnIte AkyMnATOpHata BatePna Ipes IANTOTOB konota.
PiN TneMtnepatya <O°C mka De cTnHrDe O cTeuHmHnHa 3a ypeDa
OrpauHvHnB NPOON3bOHTeNoCTta.
→3aepxJaTeAkyMnTOpHata6aTepeRn cMo npri TeMnpePaTypaHa OKoNHTaPeCpeA meKdy 0^ n +45^
3aZepKaHbTeI 3bHn TmempeyHn DnAa3oH MoKe Da NOBpey AkyMnAtopHata BatePn INn Da yBvHnN PnCKA OT NOKap.
Be3oNaChocHT ha enektpnuecknte ypeu

ONACHOCT! Cbpdeuen apect!
To3n npOdyKT obpa3aBye enekTpOMarHHTHO noe NO BpeMe Ha pa6oTa. To8a nonE moKe ne pnpOnepEnHeNbOcToTeNCTBa Da OKae BnHHne BbPxy NaHHa NA FyHNKIOHnPaHE Na AKTHBNH NIN NAPCNBHN MmHNHCKn HmNPAHTN. 3a da CE h3KNIOHn PNCkBT OT CNTyaHn, KOHTO 6NxA MoTIN da BODEdA DO TEKKN INN CMbPTOHOCHN HAPAHRBAHN, INUATA C MeINHcKn HmNPAHT TpRbBA npEIn yIOTpeBa HA To3n npOdyKT da ce KCHyTNPKATCb CBOE Nekap IN PNO3BODTENHa HmNNaHTA.
H3noI3BaIte akyMnyaTOpHnI npOdyKT cMo oT 0°C do 40°C.
H3aTe aKymnatoPnata 6aTepeB B CnyuHa Ha abapna.
He n3n3baIte npOyKta B 6n3oCT Do bOa N a 3n oPbXka Ha rpaunckn eepua.
Na3eTe KOHTaKTHe Ha akyMyaTOpHaTa Batey OToBna.
JnUHa6e3oNaCHOCT

ONACHOCT! OnachocT or 3aynwabahe!
Dpe6hNTe DteaHn MORatNEcHO Da bDat noBfHnTn. NOnHtneHoBbata TOp6a PpeCTabNBA OAnochOT 3aayuabahe 3a MaKNTe dea. DpXteMaNKHTe Dea Daney No BpMe HA MONTaKa.
Ako TpIMepbT BnBpnpa CnHIO, GmHETe HOXn H npOBepTe DpbKHa Ha HOXA 3a Nopei.
Ppoepe npedynynoTpe6a,dannnHocbaoTo ce pe6po e H3npabHOCT.
PpeHacnTe TpMepa 3a npedHaTa dpbKa.
HocTeIuHHnpEpa3Hn cpeCTBa.
HocTe pBkABUN 3a NOUcTBAHe Ha ycTPOcTBOTo 3a Pn3aHe.
Hocete BnHa n 3aunTHn Oyna.
3auiHTHnTe PnCnO6eHnA KATO pKaunu, HxKbRaau C ne PnpNaSHN 0bYknn 3aunta 3cJyxa, KOIT CO e NIOI8Bt B OrpeJeH yCNOBn HAAMBAATPNCXoT KOHYIm.
BbDte BBNMATAHNO BpEMHa HAcTPOKATA Ha pOykTA,3a Da 136E- HETe PnKNeuBaHETo HA pPCTNMe Mekdy DnBeKeUHTe Ce nCTaMOHAPHTe TaChn HA MaUNHATAI INP NPHoMTAka HaaSHTNHAR KANAK.
He n3n3baTe BOJla nnHXMmUeCKn PpeapATn 3a noVCHBaHe Ha 3auTata nn DpyrTe TaChn HApTimpE.
DJIbKTe BCIMKRAIKIN,BOHTOE BINHTOE 3aBHTEHN,3A CTe CHTYPHN, 40 NPOUYKTbE 603ONACHO BAOTHO CBCTOHNA.
He pa3rno68baIte npOdykTA cneI doCTaBkata.
PnpynpecknneH! Pnp HocHe Ha 3aunta 3a cyxa n npadn uyma, koto n3b4Ba npdykTA, cnpatopbMoke da He 3abeneKn pnp6nKabaa Cnna.
No Bpeme Ha paObaTn TpaHCnOpTpHaHe Oco6eHO BHMMaBaiTe 3a npynte Xopa,
BbTeKoHcHTpPAnH, TnDaTteTOBa, KToE npaBnIe n pa3cbkdaabaTpe3sO npn pa6oTa C eIEKTPOINCTpyMeH.
He nnonbaIte enektpoHnCTpyMeHT,doKATO CTe H3MOpeHmNnCTe noD BnHRHO To Ha HApKOTU, ANKOXON NIN MEdNKAMHTM.
MmOHHT HeBHMHMAHHe npaPbOaTc eNEKTPoHCTpyMeHT MoKe Da DObede Do TEKKN KOHTy3n.
2. MOHTAK

CHOCT! KoHTy3m!
PnCK OT Nop3BaHe, aKo npOyKTbT CE KKnIOu HEBONHO.
→N34aKaIte DOkATO NactMacoBHT HOK CNpe H3BaTeAkyMaTOpHATA 6atePn, ppe Da crNoBtne npOyKta.
MOnrKaHa 3aunTHnKanak n 3auHTHata cko6a 3paCTeHH [fnr.A1/A2]:

CHOCT!
→PpOdyKTbT MoKe Da 6bDe H3nOlaBcH CaMo aKO e MOHTnpaH 3aunTHnT Kanak.
3NaueHHe Ha eneMeHTHe Ha HnHaKaHATA:
HndkaunHa3apndHOyctpoCTBO[03]:
Muraa CetTnHa Na PooceBt Ha 3apeKdaHe cC mHaHmHa pycs3 MrrHe Ha HmHkaunrTa HnHKaunrta 3a 3apeKdaHe HA akymyatopnHata batePM
3apeKdane Ha akymyY Kyaahne: PiojeCt Ha zepaHae B 53MOeKcAMo, Ako TEmpe- parypara Ha akymyaropata batepna E bOnyHMMn HAnanoh HA temepyata Ha zapeKdane, BUK7. TEXMHNECKI DAHH.
NoctoHHa CBETHnHa NoctoHHa CBTHTnHa Ha HmDkAHTTA 3a 3apcKdaHe h AkyMNAI-
Ha MHDAHHTA 3a
3apeKDhA h AkyMNAI
HATPATA BHTO INH, CunHbNPA, ye AkyMNATOPHATA BATEPHA E 3ape
DEHAN HATBHOINH, YE TMENPCTAPYATA H AkyMNATOPHATA BATEPHA
e HbBn DOnyCTMMN DAHNAOH HA TMeNPATyPA H AzepeKaHae H 3atOBa
HE MOKE JIA B6Be ZAPeHNDA. BeHARa CNEIaONAH AOnyCTMMN
TEMHPATyPA DNANAOH, AkyMNATOPHATA BATEPHA ce 3apeJda.
5E3 BKIOHcHAAkyMNATOPHAA BATEPHA NOCTOHHA CTBNTHa
HaMHDAHHTA 3a 3apeKDAH h AkyMNATOPHATA BATEPHA CMTHAM
3HPa, HE IENCtBb TB BkIOHcB H B6KTPHECKHA KOHTAK N 3apdHOTO
ycptoeTBO e rotobao 3a yonTOpeBA.
HnKaa3a CbCToHHeTo Ha 3apeXdaHe Ha 6atepnaTa Bbpxy npdykta [qnr.04/O14]:
CneB KKnOuBaHTo Ha npOyKTA 3a 5 cekyHn ce noka3Ba HnDnKaunrTa 3a cbctoHHe To Ha 3apeXkDahe Ha 6atePnraT
CbctoHnHe Ha 3apeKdahe NHHkaun 3a cbctoHnTo Ha ha 6atepna 3apeXdahe Ha 6atepnaTa
BHIMAHHE! TpHMeBt MOxE Ja 6bJe H3NoJ3BaH, CaMO KOraTo rnaBata Ha TpHMepe a PnKcnpaHa Ha 0^ nH 90^ .
3a da moke rnaabaHa Tprnmepe ① da 6bde 3abbpTaHa Ha 90°, HauIbKNaHATA npBkKa TpR6Ba Da ce HAMpa B cTaNapTha noMa11.1
- DpbkTe C dBe pBte TpMepa 3a HaJIbXHata dpbKka Taka, Hc c eMHnRT npCT na MOKeTe da HATNCHEe OCBOOxDabau HAyTOH (1)
- HatncheTc ocbo6oxdaaba 6ytoh n3abbpTe Tnabata Ha Tpimepa ① OT 0^ HA 90^ ,doKato cbua tce fnknpca c 3uapKaBaHe.
- PycheTe OCB60KDaBaaHb 6yToH 10 OCTaBeTe HAdIbXHaT aDpXkKaOTHOBO Da ce fNcnpa Cn3uPakBaHe.
HactpoKa Ha aBnKHHaHa Ha aNbKHHata pBkKa [Φnr. 010]:

ONACHOCT!
PpOyKtBHe TpR6Ba Da 6bDe n3NoI3BaH, aKo HaIbXKaTa npBkKa e N3BaJe H3uJIo (no3nUa 3a npEhaCHe).
1.PaBnTe CTraaata Btynka ⑤
2.ИЗдбponаiteHaДьБЖнATERdБЖka①HaJKeNaHATAДБЛЖиHA.
3. 3aterHETe OTHOBO CTARauata Btynka ⑥
Hacpoika Ha no3nquraHa dOnbHLHTeHHata pkoXBaTka [phi.011]:
POniHa Ha DOnbHHTenHaTa pKoXBaTKa MoKe Da 6De HAcTpoEHa 3a BaunpaCT.
1.ИЗрпаит рьчкета ⑩
2. HakoHete donbHNHTenHaTa pKoXBaTKa 1Bpxy JeaHaTa NO3nH.
3. Puchete OTHOBO pbkata ②
KOrato TpMepBt E hactpoen InpabuHnO cnpmo BncounHata Ha TaIOTO, CTOKaTa HA TReTO E uNpbaEha HrnaBaTa HA TpMepa Ba paoTHa No3mua 1 e JekO HAKJNOHEHa Happei.
→ДьктЕТрмера3aOCHOBHATApbKoxBaTka ⑧иДоьнHITENHATA pKoxBtKa ③taKa, YeIЯBaTaHa TpMepa da 6bdeNeko HAKIO-HeHa HanpeJ.
Hactpoika Ha 3aunthata cko6a 3a pactehn:
-Pa6oHa no3nua[fnr.O12]
-ⅢxOHa no3nua[ΦnR.013]
→V3bpnaTe 3aunTHata cko6a 3pa pacteHn 5 n noCTabete BKeJahata no3uNpyoKato ce nnKnpca CnupKaBaHe.
BknHouBaHe Ha TpHMepe [Φn. 01/014]:
OACHOT!KoHTy3nn! OCHOT OT HapaHRB
CnCHOCT HApAHRABe, AOKIpoDyKTBt HE cnpe pni NYCKAte HaPbKATA 3a BkLIOUBAe.
→He n36bTaBte npEa3nHTe pncno6beHnHnnpKcbCbaTe. He 3akpenBaTe pbKaTAta BkNIOVAhehnapmep KbM dpKkata.
PpOyKbTe oBOpyBaC dBykNIOUOBO-3aunTHO ycTPOHCTBO (pbKh 3a BKNIOUBAe C 6nOKuPOBKa cpeu BKNIOUBAHe), KOET nped0BPATRBA HEBONHOTo BKNIOUBAHe HA pNOyKTa.
BknIOUbaHe:
- Noctabete akymyataopnata 6atepna B rhe3doTo 3a 6atepnaTaDOKATO Tc ce qknpca n3paKaBaHe.
2.ДрькTe ДпьнITEлгATApbkoXBaTka ③ c eнда рьka.
3.ДрькTe cdpyraTpa pbKa OCHOBHATA pBkoXBaTKa ④,пьзHTe6blOKIpOBkata cpeuY BknIOUHaBe ⑤ Hanpei n3IbPnaite pe bka3a BKnIOUBaHe ⑥.TpMHepr cTApnpia nNnDnKaJnTa 3a CbCTOHNeto Ha aapeKdaHaHa bATEprra P Ce nokA3Ba 3a 5 ckydN.
4.ПуснeteоTHOBO6LOKINPOBkATAcpeuBy BKIOHOBaHe 15
BHMHAHNE!N36BBAIe KOHTaKaHa NnactMacOBHn HOHn HaNbpaKaHa HoHa C TTBpDn PnpMeTn (3nOBe, KAMbHn, ORpaMn np.) 3a Da N36EerHeTe H3HocBaHe nN ChyPbHe Ha NnactMacOBn HOHn Ha NbpaKaHa HOHa.
Cnmpane:
- Nuchete pukkata 3a BknioyBaHe 16. TpmepbT cnpa.
- HatncheOcbo60kDaBaun 5yToH AIN3BaTeAkyMnTaOpHaTa 6aTePnB (OT HHe3DoTo 3a 6aTePnTaD.
4. TEXHnuecko O6CJyXBAHE
OACHOCT!KoHTy3nn! PnCK OT nopra3BaH
→ 3aKaHTe DOKATO PnactMacoBnT HOK CNpe N H3BaTeTe akymIaTOpHATA bATEPn, ppei Da HapBaNTe TEXHmUeCKo 06cnykaHe Ha npOyTKa.
Nouctbahe Ha tprnmepa [pnt.M1]:
OACHOCT! KoHTy3nn!
OcHOCOT HT HapaHbHe n pCK OT NOBpeHa Ha npOdykTa.
→He nouHCTBaIe npOdykTA C BODa HnN BOHa CTpyr (oco6eHO BODHa CtpyraND HaJIraHe).
→He nouchTaBae C XMMKAnH, BKNIOHTeNHO 6eH3HH Nn pa3TBOpH. HAKON OT TxA MOrAT Da NOBpeIaRBaKHN INaCTMACOBN DETaHIN.
BENTINALIOHHTNEOTBOPN Tp86Ba BnHaHn Da 6bDat YnCTN.
- NocHTeTe OTBOpTE 3a BEHTnlaLcN C MeKa YeTKa (He n3nON3BaIte OTeBPtKA).
2.CnEdBCKa ynoTpeBa noHcCTBaIe BCNCHN NOBnHNuACTH. Han-BeHe OTCpAHBAte OTe TaTBuO NTpeBa N 3aMbpcBAhe OT 3auNTHnAkanK②
NoctBaHe Ha 6atepHnTa Hn Ha 3apHnTo yCtpoCTBO:
YBepete ce, 4e NOBbpxHOCCTTn KaHTaKTNHe Ha BaTePnIa n Ha 3apAHOHO YCtPoIECTBO Ca BHaHn NCTN C CyXn, PpeDn Da BKIOHOTe 3apAHOHO YCtPoIECTBO KbM ENEKTPNHECKATA MPexKa.
He n3no3BaIte Teuaa Boga.
→3apAnHOyCTPOINCTBO:IOuHCTe KOHTAKTITe INIaCTMaCOBNTe DeTaIMN C MEKa N Cyxa Kbpna.
→ Akymnatopha batepina: IIOHCTBAHTe NOHKArOBEHTNALMOHHTe OTBOPIN KOHTAHTe HA akyMylaTOPHaTa 6aTePN C MEKa, MCTa N Cyxa YetKa.
5.CbXPAHEHNE
Cbaane oEeknoataa:
IpoodykTB Tp86Ba Da 6bde CbXpaHraBn Ha HeoctbNHO 3a deca MRCTO.
- 13BaTeAkyMylatopHata6aTePNH
2.3apeTe akyMylatopHata 6aTePnA - Nochte Tpmepa, akymylatopHata 6aTePnN 3apdHOTO yctpoCTBO (Bx4. TEXHNUECKO OBCJYKBAHE).
4.CbxaHaaBte TpMepa, Akymylatopnata 6aTepeuN 3apAHOYcTpoiCTBO HA cyxo, 3aTBOpEHO N 3aUHTeHO O T aMpTaBAHe MACTO.
N3XBbPnHe:
(cBnacho DnpektnBa 2012/19/EC)

PpOdyKbT He Tpr6Ba Da 6bDe n3XbBpHn 3aEHN C O bNHO BHeHte BtOBu OTnabTu. ToT pr6Ba Da 6bDe n3XBpNE CbFACHO DeCTBaUHTe MeCTHn pa3nopeDn 3a ona3BaHa HoKoIHATA cpeA.
BAKHO!
→V3xBbPnTe npOyKta Ha Hnn Ype3 Baunm MecTeH cb6npaTeH nyHKT 3a peuNKnPahe.
HxBpIHa 6aTeepnra:

Li-ion
GARDENA akymylatopnata 6atepna CbDpaKa IINTneBOOHMH KNEKNI, KOITO TPA6Ba CneI KpaH Na EKCNPoataIOHHNIM XHBOT Da ce NxBbpIAT OTDeHNO OT OboaHHTe ButoTOn OTNaBtu.
BAKHO!
→N3XbPnTe akyMnyaTOpHnTe 6aTePNHa HnIype3 Baunm MecTe cnBupateneH nyHKT 3a peuKlnpahe.
- Octabete IINTHEBO-IOHHNTE KNTKIN HAHbHNO da CE n3TOaT (O6bphETe Ce KbM cepBn3EH cHTbP Ha GARDENA).
- 06e3cnacete KOHTaKTITE Ha JNTnEBO-NOHHITE KNETKN Cpeuy CBp3BaHe HA Kbco.
- IVXbPnTe NITnEBO-IOHHTe KNeTKn Cnope npabnata.
6. OTCTPAHRABAHE HA IOBPEI
OACHOCT!KoHTy3HH! PnCKOTnnpa3BaH
→ N3aKaIe TdoKATO INaCTMaOBHr HOX CNpe H3BaJeTe AkyMauTOpHATA 6aTePNr PpeN da OcTpaHnTe NOpeJa no npOyKTa.

ONACHOCT! HapaHbAbe oT nop3Bahe!
→He n3non3BaIte MeTaN HpeKeu eIeMeHTn nn pe3epBn 占actn akcecoapn, KOUTo He ca npdeBnDennOT GARDENA.
Korato MAnocBaUTo ce pe6po 18 Beue He ce BnKda, TpBbA da 6Be de CMeHeN bPkaHa HoKa 18. O6bpHeTe ce KbM cepBN3 Ha GARDENA.
Ilnactmacobnte HOXOBe MOrat Da Ce H3NON3BAt MaKCHMym Do IIOJONBHnata O TbIXHnata Nm. Tpr6Ba Da 6bDat H3NON3BAHN cAmO opRTHAHnHpe3EBHn HOXOBe RotorCut Ha GARDENA. Pe3EBHnTe IInactmacOBH HOXOBe MOrat Da 6bDat 3akynenr ot Bawnn TbproBeu Ha npodyKTnte Ha GARDENA nnn dnpektho OT cepBNHATA CNyK6a HA GARDENA.
GARDENA Pe3epBEN Hox RotorCut 3a Typ60tpmep Apr.5368
CbaHHe Ha nlaCTMaOBnHOX:
1.3abbpTeTe pImepa.
2. HATICHTE NNTMACOBN KpH HA HOXA NEKHOADONY(A), npINBIXKETe NACTMOCOBN HOK 8 HABbTpne ppe 1bPkcaHa HOXA (B) IN TO I3BaDEte.
Noctabhe Ha nactMacOBH HOK:
→BkapaIte HOBII pIacMACOB HOK ⑧ npe3 MeTaNHIO T8Op Ha dbPckHa HA HOKa ⑥, DOKATO YyeTe N3UpaKBAHe OCBp3BAHeTO (n3UpaKaBAHe).
Ako HOBnT NactMacOB HOK e NOCTaBeH npaBnHO,TOI NO3BOJBA JekO Da Ce HAKNaHa.
Pp6nem Bb3MOXHa npMHHa OTCTpaHBAhe
| Тримергт He коси Или Коси пошо | Пл act Macomb HOX e I3HOCEN Или Тьрд e Кс. | → 3amehete Пл act Macomb HOK. |
| Пл act Macomb HOX e Chyten. → 3amehete Пл act Macomb HOK. | ||
| Тримергт Вибра синно | Пл act Macomb HOX e Tьрд СИНNO I3HOCEN IпpeДЗВИКВ ДeБАЛанс. | → 3amehete Пл act Macomb HOK. |
| Дыржачь Na HOX e I3HOCEN. → 3amehete Дыржача Na HOX. | ||
| Тримергт He може за bide сп reasonably | Ручкatinga 3a BKVIOUBAHe e zanla. | → Cbalete akymylatopnata Бateprna u ocbo6odete pykkaTа 3a BKVIOUBAHe. |
| Тримергт He ce BKVIOUBA Или сп reasonably | Akymylatopnata 6ateprna e pasredena. | → 3apejde akymylatopnata Бateprna. |
| Светоможд ST Mнra Зелего [Фиг. 04] | ||
| Тримергт He ce BKVIOUBA Или сп reasonably | Темпсатураза на akym- IATOPNATA 6ateprna e ИзБн dOучETIMMUNDAHAZOH. | → Ичakaite dokato temnepa- typata Na akymylatopnata Бateprna OTHOB e Меку 0 °C- + 45 °C. |
| Мени КOTAKITTE Na Akym- IATOPNATA 6ateprna Na Trimeperma mua KANK NBOI MII Bnfa. | → OTeprhete KaKNTe BODA/ Bllarata cbc Syx KaBpna. | |
| Ен ektrpondу ratelart e bokkupal. | → OTeprhete npenlntCTBneto. Bknckute OTHO. | |
| Тримергт He ce BKVIOUBA Или сп reasonably | Проб yourself e nobrechen. → | Оьberselfe ce KMm cspBn3 Ha GARDENA. |
| Светоможд ST a �obpeda @MMra Черевно [Фиг. 04] | ||
| Тримергт He ce BKVIOUBA Или сп reasonably | Akymylatopnata 6ateprna He e noctabeha I3uIINO B rHezdoTo Na bateprna. | → Пocstabete akymylatopnata Бateprna muzilno B rHezdoTo Na bateprna, Dokato tr ce ФИKKCIPA c KsIqpakBaHe. |
| Светоможд ST a nobpeda @ �obpedu @MMra Чerевно [Фиг. 04] | ||
| Akymylatopnata 6ateprna e nobreDEHa. | → 3amehete akymylatopnata Бateprna. | |
| Проб yourself e nobrechen. → | Оьberselfe ce KMm cspBn3 Ha GARDENA. | |
| Порочьт ha zarpejdane He e b3MOKeH. Иддциитя за zarpejdane ha akymylatopnata Бateprna @CBETN prOdbI- KUTeJHo [Фиг. 03] | Akymylatopnata 6ateprna He e noctabeha (парВИн). | → Пocstabete akymylatopnata Бateprna ралвину Bbyx Зapадно YcTPOCTBO. |
| Кон'takHTe Na Akymylatopnata Бateprna ca zambpchen. | → Пocstbete KonlakTite Na akymylatopnata Bateprna (Hanp.чрзMHOROKPATH Nocstabine MIBBAXDAHe Na akymylatopnata Bateprna. iPrn HeobxOIMMOCT ZAMHETe akymylatopnata Bateprna. |
PpO6JIeM Bb3MOXHa npMHn OToCTpaHBAHe
| Пю畴сът ha zarpeждане неба ветможен. Инд за зарочдане наб захочдане батерь ( с Bretи порл- хително [фг. 03] | Темпегатураза ha akymuna- торнatable батерь e Истьн Долуctимma Д��лaitон ha Темпегатура ha zarpeждане. Акшунатогрета batepers e nobpedeна. | → Иstонakайда докато төрени- тураза ha akшунатогрета Батерь оливо мөхдү 0 °C - + 45 °C. |
| Пю畴сът ha zarрдно устрийстwoе he e Величeur (правлино). | → Заменete akшунатогрета Батерь. | |
| Инд за зарочдане затерь ( с He с Bretи [фг. 03] | Товрева в полесски Контакт, засяанbaшиа кабел ини зарддото устрийстwo. | → Пю畴ерete нар体现在ето ha мрекatinga. Octabete рпн Hyнда зарддото устрийстwo да SFDE рю畴евенио от сэр- виз Ha GARDENA МIM р佩 otopiskimpanы tbровец. |

YKA3AHME: Pnnpnyn nopei ce o6pbuaiTe KbMaHc cepB3eH cHTbp HA GARDENA. PeMOHTTE rPb8Ba da 6bDat mHtIbHBAHn CaMo OT cEBM3HrTc cHTbp Ha GARDENA, KaKTo N ot CneuaHaN3pHaHn TbProBu, KOnTo ca OtopmpannOT GARDENA.
7. TEXHnueCKn DAHHN
| Akku-Tpimep | Марka CTойнocт (Apt. 14700) | Стойнocт (Apt. 14701) |
| Homнален тok A 2,3 | 2,3 | |
| Homнално habржени V (DC) | 18 | 18 |
| Шимпа на косе | cm 23 | 23 |
| Овороти на дьркача на Ножа | об/Мин | 9500 |
| Терло (бeз bateрь) | Кг | 2,0 |
| Нимо на палаганeto нашиma Lpa1) | dB (A) | 74 2,5 |
| Погршноct kPd | dB (A) | 83 / 85 1,6 |
| Нимо на зауковatable мошноct Lp; | m/s2 | < 2,5 |
| Из每一个人а рыцete aθωt) | 1,5 | 1,5 |
| Погршноct kPd |
MetoHa HmepBaHcBcRnacHO: EN50636-2-91 RL 2000/14/EC

YKA3AHHE: Nocouheta CTOHCT Ha BnbpauhoHHHTe EMHCN C8 M3mepBa cYbIACHO STaHAPNTMMAETPOA 3aMnTHBA HMOE daBbeMaN3oJI3BaHa 3aCpABHBAHHe HA eKTDPOHCTDVMHTH NOMEKNIM.TAH CTOHOT MOE
daIbIeN3IOJIaBAHa 3a npEbpAHPteHNa OeHKa Ha ECKTOINHHTA. CToIHOCCTHa BnBpOaONHHTe EMcHm MoKe Da BApnpa No BpeMe Ha DeIECTBHTeHATA yIOTpeBaHa eNEKTOHNCTPymeHA.
Uldised ohutusjuhised
Elektriohutus

Susidevincios dalys:
ROBERTO C. RUMBO S.R.L.
Predio Norlog
Lote 7
Benavidez. ZC:1621
Buenos Aires
Husqvama Australia Pty. Ltd
Locked Bag 5
Central Coast BC
NSW 2252
Phone: (+61) (0) 243527400
customer.service@
husqvama.com.au
Austria/Österreich
Husgyama Austria GmbH
Industriezeile 36
4010 Linz
Tel: (+43) 732 77 01 01-485
service.garden@
husqvamagroup.com
Azerbaijan
Firm Progress
a. Aliyev Str. 26A
1052 Baku
Belarus
Private Enterprise
"Master Garden"
Minsk
Sharangovich str., 7a
Phone: (+375) 17 257-00-33
Mob.: (+375) 29 676-16-09
mg@mastergarden.by
Belgium
Husqvama Belgium nv
Gardena Division
Leuvensesteenweg 542
Planet II E
1930 Zaventem
Belgi
Bosnia / Herzegovina
SILK TRADE d.o.o.
Industrijska zona Bukva bb 74260 Teşanj
Brazil
Brampton, Ontario L6T 4X3
Phone: (+1) 905 792 93 30
info@gardenacadana.com
Chile
REPRESENTACIONES
JCE S.A.
No207, Song Hong Rd.,
Chang Ning District,
Shanghai
PRC.200335
上海市长宁区淞虹路207号明
基广场B座3楼邮编:200335
Colombia
Husqvarna Colombia S.A.
Calle 18 No.68 D-31, zona
Industrial de Montevideo
Bogotá, Cundinamarca
Tel. 571 2922700 ext. 105
jairosalazar@
husqvarna.com.co
Costa Rica
Compania Exim
Euroiberoamericana S.A.
8/57 Beliashvili street
0159 Tbilisi, Georgia
Phone: (+995) 322 14 71 71
Great Britain
Husqvarna UK Ltd.
Preston Road
Aycliffe Industrial Park
Newton Aycliffe
County Durham
DL56UP
info.gardena@
husqvarna.co.uk
Greece
II.NANA△ONOYAOA EBE
AεωΦ.Aθηνωv92
Aeiv
T.K.104 42
Eλλδα
Tnλ. (+30) 210 5193100
info@papadopoulos.com.gr
Hungary
Husqvarna Magyarorszag Kft.
Ezred u. 1-3
1044 Budapest
Telefon: (+36) 1 251-4161
Aycliffe Industrial Park
Newton Aycliffe
County Durham
DL5 6UP
info.gardena@
husqvarna.co.uk
Italy
Husqvarna Italia S.p.A.
Via Santa Vecchia 15
23868 VALADRERA (LC)
Phone: (+39) 0341.203.111
assistenza.italia@
it.husqvama.com
Japan
Husqvarna Zenoah Co., Ltd.
1-9 Minamidai
Kawagoe
350-1165 Saitama
gardena-jp@
husqvarnagroup.com
Kazakhstan
LAMED Ltd.
155/1, Tazhibayevoi Str.
050060 Almaty
IP Schmidt
Abayavenue 3B
110 005 Kostanay
Korea
Kyung Jin Trading CO.,LTD.
107-4, SunDuk Bld.,
YangJae-dong,
Seocho-gu,
Seoul, (zipcode: 137-891)
Phone: (+82) (0)2 574-6300
Kyrgyzstan
Alye Maki
av. Moladayana Guardir J 3
720014
Bishkek
Latvia
Husqvarna Latvija SIA
Ulbrokas 19A
LV-1021 Riga
info@gardena.lv
Lithuania
UAB Husqvarma Lietuva
Ateities pl. 77C
LT-52104 Kaunas
info@gardena.nl
Luxembourg
Magasins Jules Neuberg
Husqvarna New Zealand Ltd.
PO Box 76-437
Manukau City 2241
Phone: (+64) (0) 9 9202410
support.nz@husqvarna.co.nz
Norway
Husqvarna Norge AS
Gardena Division
Troskenveien 36
1708 Sarpsborg
info@gardena.no
Peru
Husqvarma Peru S.A.
Jr. Ramón Cárcamo 710
Lima 1
Tel: (+51) 13320400
ext. 416
juan.remuzgo@
husqvarna.com
Poland
Husqvarna
Poland Spóka
ul. Wysockiego 15 b
03-371 Warszawa
Phone: (+48) 22 330 96 00
gardena@husqvarna.com.pl
Portugal
Husqvarna Portugal, SA
Lagoa - Albarraque
02-08 Tat Ann Building
Singapore 577185
Phone: (+65) 6253 2277
shiying@hyray.com.sg
Slovak Republic
Husqvarna Cesko s.r.o.
Turkova 2319/5b
149 00 Praha 4 - Chodov
Bezplatná infolinka: 800 154 044
servis@sk.husqvarna.com
Slovenia
Husqvarna Austria GmbH
Industriezeile 36
4010 Linz
Tel.: (+43) 732 77 01 01-485
service.gardena @
husqvarnagroup.com
South Africa
Husgvarna South Africa (Pty) Ltd
Postnet Suite 250
Private Bag X6
Cascades, 3202, South Africa
Phone: (+27) 33 846 9700
info@gardena.co.za
Spain
Husqvarna Espana S.A.
Calle de Rivas
28052 Madrid
Phone: (+34) 91 708 05 00