
PowerCut Plus 650/30 - String Trimmer GARDENA - Free user manual and instructions
Find the device manual for free PowerCut Plus 650/30 GARDENA in PDF.
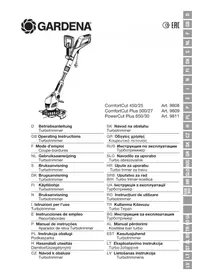


| Product Type | Grass Trimmer |
| Brand | GARDENA |
| Model | PowerCut Plus 650/30 |
| Power Rating | 650 W |
| Power Source | Electric (corded) |
| Cutting Width | 30 cm (12 in) |
| Line Diameter | 1.2 mm |
| Line Feed | Semi-automatic (Tap & Go) |
| Handle Type | Adjustable telescopic handle |
| Cutting Angle Adjustment | Yes, adjustable cutting head |
| Weight | 2.5 kg (approx) |
| Noise Level | 85 dB(A) |
| Vibration Level | 2.5 m/s² |
| Safety Features | Safety switch, protective guard |
| Maintenance | Clean after use, replace spool as needed |
| Spare Parts Availability | Replacement spools, line, guards available |
| Dimensions (L x W x H) | Approx. 100 x 20 x 30 cm (assembled) |
Frequently Asked Questions - PowerCut Plus 650/30 GARDENA
User questions about PowerCut Plus 650/30 GARDENA
0 question about this device. Answer the ones you know or ask your own.
Ask a new question about this device
Download the instructions for your String Trimmer in PDF format for free! Find your manual PowerCut Plus 650/30 - GARDENA and take your electronic device back in hand. On this page are published all the documents necessary for the use of your device. PowerCut Plus 650/30 by GARDENA.
USER MANUAL PowerCut Plus 650/30 GARDENA
Translation of the original German operating instructions.
Please read the operating instructions carefully and observe the notes given. Use these operating instructions to familiarise yourself with the product, the proper use and the safety instructions.

For safety reasons, children and young people under the age of 16, as well as people not familiar with these operating instructions, may not use this product. Persons with reduced physical or mental abilities may use the product only if they are supervised or instructed by a responsible person. Children must be supervised to ensure that they do not play with the product. Never operate the product when you are tired, ill or under the influence of alcohol, drugs or medicine.
→ Keep these operating instructions in a safe place.
Contents:
- Area of application of your GARDENA Turbotrimmer .....12
- Safety Instructions....12
- Assembly 14
- Operation....15
- Putting into Storage....17
- Maintenance 17
- Troubleshooting....19
- Technical Data....20
- Service/Warranty....20
1. Area of application of your GARDENA Turbotrimmer
Purpose: The GARDENA Turbotrimmer is designed for trimming and cutting areas of grass and lawns in private house and hobby gardens. The Turbotrimmer must not be used in public facilities, parks, sports grounds, next to roads or in agriculture or forestry.
Please note:

For safety reasons, the GARDENA Turbotrimmer must not be used for hedge trimming or for shredding for composting.
2. Safety Instructions
→ Please read the notes on safety on the Trimmer.

CAUTION!
Please read the operating instructions before using this tool.

Risk of electric shock!
Keep your Turbotrimmer away from water and rain!

Risk of injury to other people! • Keep people out

of the area where you are working.

Eye and ear injuries! Wear eye and hearing protection!
→ If the cable of the unit is

damaged, the unit must be unplugged from the mains immediately.
Check your Trimmer before each use
→ Always visually inspect your Trimmer before each use. → Check that the ventilation slots are not obstructed in any way.
Do not use the trimmer if it is damaged or if its safety devices (pressure switch, safety cover) and / or the filament cassette are damaged or worn.
→ Never bypass the safety devices. → Inspect the area to be cut before you begin work. Remove any foreign objects and look out for foreign objects (such as stones, pieces of wood, strings and wires) while you are working. → If you should come across an obstacle while cutting, turn off the Trimmer and unplug the mains plug. Remove the obstacle; inspect the trimmer for potential damage and arrange for it to be repaired if necessary. → Should the trimmer begin to vibrate abnormally, please take it out of operation and pull the mains plug. Inspect the trimmer for potential damage and arrange for it to be repaired, if necessary.
Use / responsibility

Tool does not stop immediately when turned off!
→ Keep hands away from the work area until the cutting filament is stationary!
The Trimmer can cause serious injuries.
→ Use the Trimmer only for the purpose specified in these operating instructions.
You are responsible for safety in the work area (2 metre radius).
→ Ensure that no other people (especially children) and animals are in close proximity to the danger area (15 metre radius).
In order to prevent injuries due to an accidental start-up of the device as a result of a damaged start button, third parties must stay clear of the device upon plugging it in.
Unplug the mains plug after use and regularly inspect the trimmer, especially the filament cassette, for damage and arrange appropriate repair if necessary.
→ Always wear an eye shield or safety goggles! → Wear sturdy shoes and long trousers to protect your legs. Keep your fingers and feet away from the cutting filament – above all when starting work. → Always ensure that you have a secure foot-hold whilst working. → Keep the extension cable away from the area you are cutting.
Take extra care when walking backwards. You may stumble!
Only work in the daylight or when visibility is good.
Interrupting work
→ Never leave the Trimmer unattended where you are working. → If you stop work, unplug the mains plug and store your Trimmer in a safe place. → If you stop work in order to move to another work area, the trimmer must be switched off, wait until the work tool is stationary and then unplug the mains plug. Always carry the trimmer at the additional handle.
Familiarise yourself with the surroundings
→ Familiarise yourself with the surroundings and look out for possible dangers which you may not hear due to machine noise. → Never use the Trimmer when there is a risk of thunderstorms, when it is raining or in damp, wet areas.
Never operate your Trimmer directly next to swimming pools or garden ponds.
Electrical safety
Check the power cord regularly for damage and signs of wear and tear.
Do not use your Trimmer if the power cord is damaged.
→ If the mains cord or extension cable is damaged while you are working, unplug the mains plug immediately. Do not touch the cable until the mains plug is switched off.
Supply lines must be lighter than:
- common rubber lines (H 05 RNF), if rubber-insulated;
- common PVC-coated lines (H 05 WF), if insulated with PVC.
Only connect the device to a mains circuit which is equipped with a residual current device (RCD) with a maximum release current of 30 mA.
In Switzerland the use of a residual-current device is obligatory.
Warning! This machine produces an electro-magnetical field during operation. This field may under some circumstances interfere with active or passive medical implants. To reduce the risk of serious or fatal injury, we recommend persons with medical implants to consult their physician and the medical implant manufacturer before operating this machine. Do not use the product when a thunderstorm is approaching.
3. Assembly
Assembling the trimmer:


TION!
The trimmer may only be operated provided that the protective cover ⑩ is assembled.
- Pull the lock ① belonging to the additional handle ②, push in both of the snap-fits ③ belonging to the additional handle ② and, with the grooves ® pointing forwards, snap them into the holder ④.
- Place both halves of the impeller ⑤ around the lower groove ⑥ of the trimmer head ⑦ and close until they audibly engage.
- From the front, push the plant guard ⑧ into the upper groove ⑨ of the trimmer head ⑦. In doing so, ensure that the installed bow can rotate freely (i.e. insert the bow with the kink pointing upwards).
- Place the protective cover ⑩ on top of the trimmer head ⑦.
- Turn the protective cover ⑩ until it can be pushed over the trimmer head entirely (the two arrows A1, A2 are directly across from each other).
- Rotate the protective cover ⑩ anticlockwise until it audibly engages.

DANGER! Risk of injury if the Turbotrimmer does not switch off when you release the start button.

→ Never bypass the safety devices or switches (e.g. by tying the start button to the handle).
Risk of injury!
→ Unplug the mains plug of the Turbotrimmer prior to each adjustment of the working position, to the shaft length, additional handle or plant guard!
Connecting the trimmer:
- Insert the loop of the extension cable ⑪ into the cable strain relief ⑬ from below through the handle ⑫ and pull tight.
- Plug the plug 14 of the trimmer into the socket 15 of the extension cable 11.
- Plug the extension cable into a 230 V mains power supply.
Setting the working position:
Working position 1: Standard trimming

Working position 2: Trimming beneath obstacles

Working position 3: Vertical trimming of overhanging lawn edges

Working position 1:
For standard trimming.
Working position 2:
- Press the foot pedal 16 and lower the shaft downwards into the desired working position.
- Release the foot pedal 16 and allow the shaft to engage.
CAUTION! Avoid contact between the ground and the trimmer head in working positions 1 and 2.

Setting the trimmer to body height:
Adjusting the plant guard:
Working position 3:
The upright must be in the uppermost position in working position 3.
- Turn the plant guard through 90° into the parking position until it engages.
- Press the foot pedal 16 and move the upright into the uppermost position.
- Press the button 17 and rotate the trimmer head from 0° to 90° until it engages.
- With the impeller, move the trimmer along the lawn edge.
CAUTION! The trimmer may only be used provided that the trimmer head is engaged at an angle of 0° or 90°.
Setting the shaft length:
Loosen the clamping sleeve 18, extend the handle 12 to the desired shaft length, and re-tighten the threaded collar 18.
The clamping sleeve 18 must be fastened firmly enough to prevent the shaft from being moved.
Setting the additional handle:
Pull the lock ① belonging to the additional handle ②, set the additional handle ② to the desired incline and release the lock ①.
If the trimmer is correctly set to the body height, the posture is upright and the trimmer head in working position 1 is tilted forwards slightly.
Hold the trimmer by the handle ⑫ and additional handle ② in such a manner that the trimmer head is tilted forwards slightly.

Working position Parking position
Turn plant guard ⑧ through 90° into the required position until it locks into place.
Starting the trimmer:

Filament feed (Tip mechanism):
Switching the trimmer on:
Press the start button ⑲ on the handle.
For Art. 9811 only: If high performance is required, the speed is increased automatically.
Switching the trimmer off:
Release the start button ⑲ on the handle.
The tip mechanism works when the motor is running. A clean cut is only achieved with the maximum filament length. During first operation, it may be necessary to extend the cutting filament several times.
- Start the trimmer.
- Hold the trimmer head ⑦ parallel to the ground and briefly touch the trimmer head ⑦ onto a solid surface (avoid constant pressure over extended periods of time).

The cutting filament ⑳ is automatically lengthened with an audible switching process and adjusted to the correct length with the filament limiter ⑳. If necessary, tap several times one after the other.
5. Putting into Storage
Storage: Store out of the reach of children.
→ Store your Turbotrimmer in a dry place where it is protected from frost.
Recommendation:
The trimmer can be suspended by the handle. The trimmer head is not placed upon any unnecessary strain if stored in a suspended manner.
Disposal: (in accordance with RL 2012/19/EU)

The product must not be added to normal household waste. It must be disposed of in line with local environmental regulations.
→ Important: Make sure that the unit is disposed of via your municipal recycling collection centre.
6. Maintenance
DANGER!

There is a risk of injury from the cutting filament!
→ Always unplug the mains plug of the Turbotrimmer before carrying out maintenance work!
Risk of injury and risk of damage to property!
→ Never clean the trimmer with water or with a water jet (in particular a high-pressure water jet).
Cleaning the trimmer:

Replacing the filament cassette:


The ventilation slots must always be free of dirt.
→ Clean all moving parts after each use, and especially remove any grass and dirt from the cover ⑩ and ventilation slots ⑳.
Risk of injury!
Never use metallic cutting elements or replacement parts and accessories not provided by GARDENA.
Only use original GARDENA Filament Cassettes. You can order Replacement Filament Cassettes from your GARDENA dealer or directly from the GARDENA Customer Service.
• for Art. 9808 / 9809: GARDENA Filament Cassette for Turbotrimmers Art. 5307 • for Art. 9811: GARDENA Filament Cassette for Turbotrimmers Art. 5309
- Press in cassette cover 23 on the two catches 24 at the same time and remove.
- Remove the filament cassette 25 .
- Remove any dirt.
- Pull approximately 15 cm of the cutting filament 20 out of the new filament cassette 25 through the hole in the plastic ring 26 .
- First thread the cutting filament 20 through the metal sleeve 27 .
- For Art. 9808 / 9809 only: Thread the cutting filament around the guide pin ②8.
- Insert the filament cassette 25 into the filament cassette holder 29.
- Fit the cassette cover 23 on the filament cassette holder 29 so that you hear both locking clips 24 click into place.
For Art. 9808 / 9809 only: When fitting the cassette cover 23, the cutting filament 20 must be placed around the guide pin 28 and must not be trapped.
→ If the cassette cover 23 cannot be touched down, turn the filament cassette 25 to and fro, until the filament cassette 25 is completely in the filament cassette holder 29.
7. Troubleshooting
DANGER!

Risk of injury from the cutting filament!
→ Always unplug the mains plug of the Turbotrimmer before troubleshooting.
Pulling the filament out of the filament cassette:

If a filament is drawn into the filament cassette you can pull it out again as described below.
- Remove the filament cassette 25 as described under
- Maintenance "Replacing the filament cassette".
- Press together the plastic ring 26 on the filament cassette 25 between your thumb and forefinger.
- Draw the plastic ring 26 over the side part of the filament cassette (use a screwdriver if necessary). You can now access the filament that was drawn into the filament cassette.
- Unwind the cutting filament 20 by approx. 15 cm and thread it through the eye of the plastic ring 26. If necessary, loosen the welded filament beforehand using a screwdriver, and unwind and rewind completely.
- Pull the plastic ring ②6 back over the filament cassette ②5.
- Reinstall the filament cassette 25 as described under
- Maintenance "Replacing the filament cassette".
Problem Possible Cause Remedy
| The trimmer no longer cuts Filament worn or too short. | → Lengthen the filament (see 4. Operation “Filament feed – Tip mechanism”). | |
| Filament cassette empty. → Replace the filament cas sette (see 6. Maintenance “Replacing the filament cassette”). | ||
| Filament drawn into the cassette or stuck together. → Pull the filament out of the filament cassette (see above). | ||
| Filament cannot be extended or filament is consumed rapidly | The filament became too dry and brittle (e. g. over the winter). | → Place the filament in water for approx. 10 hours. |
| Frequent contact between the filament and hard objects. | → Avoid contact between the filament and hard objects. | |

For any other malfunctions please contact the GARDENA service department. Repairs must only be carried out by GARDENA service departments or specialist dealers authorized by GARDENA.
8. Technical Data
| Turbotrimmer | ComfortCut 450/25 (Art. No. 9808) | ComfortCut Plus 500/27 (Art. No. 9809) | PowertCut Plus 650/30 (Art. No. 9811) |
| Motor power consumption 450 W 500 W 650 W | |||
| Mains voltage/mains frequency | 230 V / 50 – 60 Hz | 230 V / 50 – 60 Hz | 230 V / 50 – 60 Hz |
| Filament thickness 1.6 mm 1.6 mm 2.0 mm | |||
| Cutting width 250 mm 270 mm 300 mm | |||
| Filament supply 6 m 6 m 4 m | |||
| Filament feed Tip mechanism Tip mechanism Tip mechanism | |||
| Rpm of filament cassette approx. 12,800 rpm approx. 12,200 rpm approx. 10,500 rpm (Idle speed approx. 9,500 rpm) | |||
| Weight | approx. 3.3 kg | approx. 3.3 kg | approx. 3.6 kg |
| Telescopic adjustment of the turn handle | approx. 24 cm | approx. 24 cm | approx. 24 cm |
| Workplace-related emission values Lpa1) | 84 dB (A) | 83 dB (A) | 83 dB (A) |
| Uncertainty kpa | 3 dB (A) | 3 dB (A) | 3 dB (A) |
| Noise level LWA2) | measured 93 dB (A) / guaranteed 94 dB (A) | measured 94 dB (A) / guaranteed 96 dB (A) | measured 93 dB (A) / guaranteed 96 dB (A) |
| Uncertainty kWA | 1 dB (A) | 2 dB (A) | 3 dB (A) |
| Hand/arm vibration avhw3) | < 2.5 m/s 2 | < 2.5 m/s 2 | < 2.5 m/s 2 |
| Uncertainty ka | 1.5 m/s 2 | 1.5 m/s 2 | 1.5 m/s 2 |
Measuring process complying with 1) DIN EN 60335-2-91 2) RL2000/14/EG 3) DIN EN 786. The stated vibration emission value has been measured according to a standardized test procedure and can be used for comparison of one electric power tool with another. It can also be used for preliminary evaluation of exposure. The vibration emission value can vary during actual use of the electric power tool.
9. Service/Warranty
Warranty:
GARDENA guarantees this product for 2 years (from date of purchase). This guarantee covers all serious defects of the unit that can be proved to be material or manufacturing faults.
Under warranty we will either replace the unit or repair it free of charge if the following conditions apply:
- The unit must have been handled properly and in keeping with the requirements of the operating instructions.
- Neither the purchaser or a non-authorized third party have attempted to repair the unit.
The filament cassette and cassette cover are consumables and are not covered by the guarantee.
This manufacturer's guarantee does not affect the user's existing warranty claims against the dealer/seller.
If you have any problems with this product, please contact our Service or return the defective unit together with a short description of the problem – in case of guarantee, with a copy of the receipt – postage paid to one of the GARDENA Service Centres listed on the back of this leaflet.
| D ProdukthaftungWir weisen ausdrücklich darauf hin, dass wir nach dem Produkthaftungsgesetz nicht für durch unsere Geräte hervorgerufene Schäden einzustehen haben, sofern diese durch unsachgemäße Reparatur verursacht oder bei einem Teileaustausch nicht unsere originale GARDENA Teile oder von uns freigegebene Teile verwendet wurden und die Reparatur nicht vom GARDENA Service oder dem autorisierten Fachmann durchgeführt wird. Entsprechendes gilt für Ergänzungsteile und Zubehör. |
| GB Product LiabilityWe expressly point out that, in accordance with the product liability law, we are not liable for any damage caused by our units if it is due to improper repair or if parts exchanged are not original GARDENA parts or parts approved by us, and, if the repairs were not carried out by a GARDENA Service Centre or an authorised specialist. The same applies to spare parts and accessories. |
| F ResponsabilitéNous vous signalons expressément que GARDENA n'est pas responsable des dommages causés par ses appareils, dans la mesure où ces dommages seraient causés suite à une réparation non conforme, dans la mesure où, lors d'un échange de pièces, les pièces d'origine GARDENA n'auraient pas été utilisées, ou si la réparation n'a pas été effectuée par le Service Après-Vente GARDENA ou l'un des Centres SAV agréés GARDENA. Ceci est également valable pour tout ajout de pièces et d'accessoires autres que ceux préconisés par GARDENA. |
| NL ProductaansprakelijkheidWij wijzen er nadrukkelijk op, dat wij op grond van de wet aansprakelijkheid voor producten niet aansprakelijk zijn voor schade ontstaan door onze apparaten, indien deze door onvakkundige reparatie veroorzaakt zijn, of er bij het uitwisselen van onderdelen geen gebruik gemaakt werd van onze originele GARDENA onderdelen of door ons vrijgegeven onderdelen en de reparatie niet door de GARDENA technische dienst of de bevoegde vakman uitgevoerd werd. Ditzelfde geldt voor extra-onderdelen en accessoires. |
| S ProduktansvarTillverkaren är inte ansvarig för skada som orsakats av produkten om skadan beror på att produkten har reparerats felaktigt eller om, vid reparation eller utbyte, andra än Original GARDENA reservdelar har använts. Samma sak gäller för kompletteringsdelar och tillbehör. |
| DK ProduktansvarVi gör udtrykkeligt opmærksom på, at vi i henhold til produktansvarsloven ikke er ansvarlige for skader forårsaget af vores udstyr, såfremt det sker på grund af uautoriserede reparationer eller hvis dele er skiftet ud og der ikke er anvendt originale GARDENA dele eller dele godkendt af os, eller hvis reparationerne ikke er udført af GARDENA-service eller en autoriseret fagmand. Det samme gælder for ekstra udstyr og tilbehør. |
| FI TuotevastuuKorostamme nimenomaan, että tuotevastuulain nojalla emme ole vastuussa laitteistamme johtuneista vahingoista, mikäli nämä ovat aiheutuneet epäasianmukaisesta korjauksesta tai osia vaihdettaessa ei ole käytetty alkuperäisiä GARDENA-varaosia tai hyväksymiämme osia ja korjauksen on suorittanut muu kuin GARDENA-huoltokeskus tai valtuuttamamme ammattihenkilö. Tämä pätee myös lisäosiin ja lisävarusteisiin. |
| I Responsabilità del prodottoSi rende espressamente noto che, conformemente alla legislazione sulla responsabilità del prodotto, non si risponde di danni causati da nostri articoli se originati da riparazioni eseguite non correttamente o da sostituzioni di parti effettuate con materiale non originale GARDENA o comunque da noi non approvato e, in ogni caso, qualora l'intervento non venga eseguito da un centro assistenza GARDENA o da personale specializzato autorizzato. Lo stesso vale per le parti complementari e gli accessori. |
| E Responsabilidad de productosAdvertimos que conforme a la ley de responsabilidad de productos no nos responsabilizamos de daños causados por nuestros aparatos, siempre y cuando dichos daños hayan sido originados por arreglos o reparaciones indebidas, por recambios con piezas que no sean piezas originales GARDENA o bien piezas no autorizadas por nosotros, así como en aquellos casos en que la reparación no haya sido efectuada por un Servicio Técnico GARDENA o por un técnico autorizado. Lo mismo es aplicable para las piezas complementarias y accesorios. |
| P Responsabilidade sobre o produtoQueremos salientar que segundo a lei da responsabilidade do fabricante, nós não nos responsabilizaremos por danos causados pelo nosso equipamento, quando estes ocorram em decorrência de reparações inadequadas ou da substituição de peças por peças não originais da GARDENA, ou peças não autorizadas.A responsabilidade tornar-se-à nula também depois de reparações realizadas por oficinas não autorizadas pela GARDENA. Esta restrição valerá também para peças adicionais e acessórios. |
| PL Odpowiedzialność za produktZwracamy Państwa uwagę, że nie ponosimy odpowiedzialności za uszkodzenia naszych maszyn, bądź szkody spowodowane ich wadliwym funkcjonowaniem, powstałe na skutek nieprawidłowo przeprowadzonych napraw lub użycia nieoryginalnych części zamiennych. Naprawy winny być przeprowadzane tylko przez punkty serwisowe Husqvarna lub autoryzowane serwisy. Dotyczy to również części uzupełniających i oprzyrządowania.H TermékszavatosságNyomatékosan utalunk arra a tényre, hogy a természavatossági törvény szerint nem kell jótállást vállalnunk azokra a károkra, amelyeket nem a mi készülékeink okoztak, ha ezeket szakszerűtlen javítás okozta vagy egy alkatrész kicserélésénél nem a mi eredeti GARDENA alkatrészeinket vagy általunk engedélyezett alkatrészeket használtak fel és a javítást nem a GARDENA szerviz vagy egy erre felhatalmazott szakember végezte.Hasonlóképpen érvényes ez a kiegészítő alkatrészekre és tartozékokra is. |
| CZ Odpovědnost za výrobekVýslovně upozorňujeme na to, že podle zákona o odpovědnosti za výrobek neneseme odpovědnost za škody způsobené našimi přístroji, pokud byly způsobené neodbornou opravou nebo použitím jiných než našich originálních náhradních dílů GARDENA nebo námi schválených dílů a neprovedením opravy servisem GARDENA nebo autorizovaným odborníkem. Odpovídající platí i pro doplňkové díly a příslušenství. |
| SK Predmet zárukyUpozorňujeme dôrazne na to, že podľa zákona o poskytovaní záruk nezodpovedáme za škody spôsobené našimi vyrobkami, v pripade, že boli boli vyvolané neodbornými opravami, výmenou dielcov, ktoré nepatria k originálnym dielom GARDENA alebo neboli nami schválené arovnako boli spôsobené servisnými zásahmi, ktoré neboli vykonané servisom GARDENA alebo autorizovaným odborníkom. Rovnako to platí pre doplňky a príslušenstvo. |
| GR Euθύνη για το προϊόνΣας υπενθυμίζουμε ρητά, óτι σúμφωνα με το νόμο περί ευθύνης για τα προϊόντα δεν ευθυνόμαστε για ενδεχόμενες βλάβες που προκαλούνται από της συσκευές μας, εφόσον οφείλονται σε μία ακατάλληλη επισκευή ή σε μια αντικατάσταση τμημάτων για την οποία δεν έχουν χρησιμοποιηθεί τα πρωτότυπα ανταλλακτικά της GARDENA ή τα από μας εγκεκριμένα ανταλλακτικά και σε περίπτωση που δεν εκτελείται η επισκευή από το Τμήμα Εξυπηρέτησης Πελατών της GARDENA ή από έναν εξουσιοδοτημένο εξειδικευμένο τεχνίτη. Το ίδιο ισχύει για εξαρτήματα και συμπληρωματικά τμήματα. |
| SLO Jamstvo za izdelekPismeno poudarjamo, da po zakonu jamstva za izdelek nismo odgovorni za škodo, ki bi nastala zaradi uporabe našega izdelka, prav tako tudi ne za škodo ki bi nastala zaradi nepravilnega popravila izdelka ali pri napačni zamenjavi delov, ki niso originalni deli GARDENA ali pri uporabi z naše strani potrjenih delov, ki pa niso bili vgrajeni v servisu GARDENA ali v naši pooblaščeni servisni službi. Enako velja tudi za nadomestne dele in opremo. |
| HR Odgovornost za proizvodIzričito napominjemo da u skladu sa Zakonom o odgovornosti za proizvode nismo odgovorni za štete uzrokovane našim uređajima ako su one izazvane nestručnim popravkom ili u slučaju zamjene dijelova nisu korišteni originalni GARDENA dijelovi ili dijelovi koje smo odobrilí i popravak nije izvršio GARDENA servis ili ovlašteni stručnjak. Isto vrijedi i za dodatne dijelove i pribor. |
| RO Responsabilitatea legala a produsuluiMentionam in mod expres ca, in concordanta cu responsabilitatea legala a produsului, nu suntem răspunzători de nici un accident provocat de produsele noastre daca se datorează reparării necorespunzătoare sau daca piesele de schimb nu sunt originale GARDENA sau aprobate de GARDENA, sau daca reparațiile nu au fost efectuate de un Centru de Sevice GARDENA sau un specialist autorizat. Aceleași prevederi se aplica si pieselor de schimb si accesoriiilor. |
| BG Отговорност за качествоИзрично подчертаваме, че съгласно закона за отговорност за качество, ние не носим отговорност за вредите причинени от нашите уреди, ако същите са причинени от неправилен ремонт или при подмяната на части не са използвани оригинални части на GARDENA или части одобрени от нас и ремонта не е извършен от сервис на GARDENA или оторизиран специалист.Същото важи за допълнителните части и принадлежности. |
| EST TootevastutusJuhime teie tähelepanu sellele, et tootevastutusseaduse kohaselt ei vastuta me meie seadmete poolt põhjustatud kahjude eest, kui need on tekkinud asjatundmatu parandise tagajärjel või kui detaili vahetamisel ei kasutatud GARDENA originaalvaruosi ega meie poolt kasutada lubatud varuosi ja kui parandustöid ei ole teinud GARDENA klienditeenindusspetsisticalid ega meie volitatud spetsialistid. Sama kehtib lisadetailide ja tarvikute kohta. |
| LT Atsakomybė už produkcijąNurodome, kad remdamiesi Atsakomybės už produkciją jstatymu, neatsakome už nuostolius, sukeltus mūsu prietaisų, jei jie atsirado dėl netinkamo remonto, arba, jei keičiant dalis, buvo naudojamos neoriginalios GARDENA dalys arba dalys, kurių mes neleidome naudoti, o remontaą atliko ne GARDENA servisas arba nejgaliotasis specialistas. Tas pats galioja papildomoms dalims ir priedams. |
| LV Produkta atbildībaMēs skaidri norādām uz to, ka saskaņā ar Produktu atbildības likumu, mēs neatbildam par mūsu iekārtu radītiem zaudējumiem, ciktāl tos ir izraisijis neatbilstošš remonts vai daļu nomaiņa ar neoriģinālām GARDENA daļām vai ne ar mūsu norādītajām detaļām un remontu nav veicis GARDENA serviss vai pilnvarots speciālists. Tas pats attiecas uz papildinošajām daļām un piederumiem. |
| D EG-KonformitätserklärungDer Unterzeichnete Husqvarna AB, 561 82 Huskvarna, Sweden bestätigt,dass die nachfolgend bezeichneten Geräte in der von uns in Verkehrgebrachten Ausführung die Anforderungen der harmonisierten EU-Richtlinien,EU-Sicherheitsstandards und produktspezifischen Standards erfüllen.Bei einer nicht mit uns abgestimmten Änderung der Geräte verliert diesesErklärung ihre Gültigkeit. | H EU-Megfelelőségi nyilatkozatAlulirott, a Husqvarna AB, 561 82 Huskvarna, Sweden igazolja azt, hogy alalábbiakban megnevezett készülékek, az átalunk forgalomba hozott kivitelbenteljesítik a harmonizációs EU-irányelvek, az EU biztonsági szabványok ésa termékre jellemző szabványok követelményeit. Ha a készülékeken a mibeleegyezésünk nélkül változtatást végeznek, akkor ez a nyilatkozat érvényétveszti. |
| GB EU Declaration of ConformityThe undersignedn Husqvarna AB, 561 82 Huskvarna, Sweden hereby certifies that,when leaving our factory, the units indicated below are in accordance with theharmonised EU guidelines, EU standards of safety and product specific standards.This certificate becomes void if the units are modified without our approval. | CZ Prohlásení o shodě EUPodepsaný Husqvarna AB, 561 82 Huskvarna, Sweden potvrzuje, že dále uvedenépřistroje v námí do provozu uvedeném provedení splňují požadavky harmonizo-vaných směrnic EU, bezpečnostních norem EU a norem specifických pro výrobek.Při námí neschválené změně přístrojů ztrácí toto prohlásení platnost. |
| F Certificat de conformité aux directives européennesLe constructeur, soussigné :Husqvarna AB, 561 82 Huskvarna, Sweden déclare qu'à la sortie de ses usines lematériel neuf désigné ci-dessous était conforme aux prescriptions des directiveseuropéennes énoncées ci-après et conforme aux règles de sécurité et autresrègles qui lui sont appli cables dans le cadre de l'Union européenne.Toute modification portée sur ce produit sans l'accord express de GARDENAsupprime la validité de ce certificat. | SK EU-Vyhlásenie o zhodeNižšie uvedená firma Husqvarna AB, 561 82 Huskvarna, Sweden vyhlasuje,že uvedené zariadenia, ktoré sme uviedli na trh v ich vyhotovení splňajúpožiadavky harmonizo vaných predpisov EU, bezpečnostných štandardov EUa výrobno-špecifických štandardov.Při zmene zariadenia, ktorá nebola odsúhlasená výrobcom stráca totovyhlásenie platnost. |
| NL EU-overeenstemmingsverklaringOndergetekende Husqvarna AB, 561 82 Huskvarna, Sweden bevestigt, dat devolgende genoemde apparaten in de door ons in de handel gebrachte uitvoeringvoldoen aan de eis van, en in over een stemming zijn met de EU-richtlijnen,de EU-veiligheids standaard en de voor het product specifieke standaard.Bij een niet met ons afgestemde verandering aan de apparaten verliest dezeverklaring haar geldigheid. | GR Δήλωση Συμμόρφωσης προς τις Οδηγίες της ΕΕΗ υπογράφουσα Husqvarna AB, 561 82 Huskvarna, Sweden δηλώνει, ότι ταεξής αναφερόμενα εκδιδόμενα από την εταιρία μας προϊόντα ανταποκρίνονταίσε όλες τις εναρμονισμένες προδιαγραφές της ΕΕ, στα πρότυπα ασφάλειαςτης ΕΕ και στα ειδικά για το προϊόν πρότυπα.Σε μία μη συμφανημένη με την εταιρία μας τροποποίηση των συσκειών αυτήη δήλωση χάνει την ισχύ της. |
| S EU TillverkarintygUndertecknad firma Husqvarna AB, 561 82 Huskvarna, Sweden intygar härmedatt nedan nämnda produkter överensstämmer med EU:s direktiv,EU:s säkerhets standard och produktspecifikation. Detta intyg upphör att gällaom produkten ändras utan vårt tillständ. | SLO EV-izjava o skladnostiPodpisani proizvajalec «Husqvarna AB, 561 82 Huskvarna, Sweden« s podpisompotrjuje, da sledeče opisana naprava, ki smo jo poslali na tržišče izpolnjujezahteve harmoniziranih standardov ES-smernic, ES-varnostnih standardov inizdelku specifičnih standardov. V primeru spremembe na napravi brez našegapisnega dovoljenja ta izjava izgubi svoj pomen in veljavnost. |
| DK EU Overensstemmelse certificatUndertegnede Husqvarna AB, 561 82 Huskvarna, Sweden bekræfter hermed,at enheder listet herunder, ved afsendelse fra fabrikken, er i overensstemmelsemed harmoniserede EU retningslinier, EU sikkerheds standarder og produktspecifikations standarder. Dette certifikat træder ud af kraft hvis enhederne erændret uden vor godkendelse. | HR Izjava o sukladnosti EU-aDolje potpisana tvrtka Husqvarna AB, 561 82 Huskvarna, Sweden ovimepotvrđuje da dolje navedeni uredaji u izvedbi plasiranoj na tržište ispunjavajuzahtjeve harmoniziranih EU smjernica, EU sigurnosnih normi i normi zaodređene proizvode. Ova izjava postaje ništavna u slučaju izmjene uređaja kojenismoodobrili. |
| FI EY-vaatimustenmukaisuusvakuutusAllekirjoittanut Husqvarna AB, 561 82 Huskvarna, Sweden vakuuttaa, ettäallamainitut laitteet täyttävät tehtaaltamme lähtiessään yhdenmukaistettujenEY-direktiivien,EY-turvallisuusstandardienjatuotekohtaisten standardienvaatimukset. Laitteisiin tehdyt muutokset, joista ei ole sovittu kanssamme,johtavat tämän vakuutuksen raukeamiseen. | RO UE-Certificat de conformitatePrin prezenta Husqvarna AB, 561 82 Huskvarna, Sweden, certifica faptul ca,in momentul in care produsele mențio nate mai jos ies din fabrica sunt inconcordanta cu directivele UE, standardele de siguranța UE si standardelespecifice ale produsului UE.Acest certificat device vine nul in cazul modificării aparatului fără aprobarea noastră. |
| I Dichiarazione di conformità alle norme UELa sottoscritta Husqvarna AB, 561 82 Huskvarna, Sweden certifica che il prodottoqui di seguito indicato, nei modelli da noi commercializzati, è conforme alledirettive armonizzate UE nonché agli standard di sicurezza e agli standardspecifici di prodotto. Qualunque modifica apportata al prodotto senza nostraspecifica autorizzazione invalida la presente dichiarazione. | BG EC-Декларация за съответствиеПодписаната фирма Husqvarna AB, 561 82 Huskvarna, Sweden декларира, чеописаните по-долу уреди, пуснати в продажба съгласно нашата спецификация,изпливяват изискванията на хармонизираните EC-директиви, EC-стандарти забезопасност и специфичните производствени стандарти. При промяна на уреда,която не е съгласувана с нас, тази декларация губи своята валидност. |
| E Declaración de conformidad de la UEEl que subscribe Husqvarna AB, 561 82 Huskvarna, Sweden declara que lapresente mercancia, objeto de la presente declaración, cumple con todas lasnormas de la UE, en lo que a normas técnicas, de homo logació y de seguridadse refiere. En caso de realizar cualquier modificación en la presente mercancíasin nuestra previa autori zació, esta declaración pierde su validez. | EST ELi vastavusdeklaratsioonAllakirjutanu Husqvarna AB, 561 82 Huskvarna, Sweden kinnitab,et kirjeldatud seade vastab meite poolt ringlusse viidud kujul ELi harmoniseerituddirektiividele, ELi ohutusstandarditele ja tootega seotud standarditele.Meiega kooskõlastamata muudatuse tegemise korral seadmel kaotab seedeklaratsioonkehtivuse. |
| P Certificado de conformidade da UEOs abaixo mencionados Husqvarna AB, 561 82 Huskvarna, Sweden, por estemeio certificam que ao sair da fábrica osaparelhos abaixo mencionados estãode acordo com as directrizes harmonizadas da UE, padrões de segurançae de produtos específicos. Este certificado ficará nulo se as unidades foremmodificadas sem a nossa aprovação. | LT ES Atitikties deklarmcijaPasirašanti firma Husqvarna AB, 561 82 Huskvarna, Sweden patvirtina, kadżemiau nurodyti prietaisai ir jų modeliai, kuriuos paleidome j apyvartą, patenkinaharmonizuotas ES direktyvas, ES saugumo standardus ir specifinius gaminiostandartus. Atlikus bet kokį prietaiso pakeitimą, kuris néra suderintas su mumis,ši deklaracija praranda galiojimą. |
| PL Deklaracja zgodności Unii EuropejskiejHusqvarna AB, 561 82 Huskvarna, Sweden potwierdza, że poniżej określoneurządzenia w worsji oferowanej przez nas do sprzedaży spełniają wymaganiazharm onizowanych dyrektyw Unii Europejskiej, standardu bezpieczeństwaUnii Europejskiej i standardu specyficznego dla tego typu produktów.W przypadku zmiany urządzenia, która nie została z nami uzgodniona,niniejsza deklaracja traci moc obowiązywania. | LV ES-atbilstības deklaracijaParakstijusies Husqvarna AB, 561 82 Huskvarna, Sweden, Vácija apstiprina,ka sekojosi apzimētas iekārtas, kuras mēs izplatăm, savą izpildijumā atbilstharmonizētajam ES direktivam, ES drošības standartiem un produktaspecifiskajiemstandartiem.Ar mūsu neapstiprinātām izmainām iekārtā ši deklarācija zaudēsavu derigumu. |
| Bezeichnung der Geräte: | Turbotrimmer |
| Description of the units: | Turbotrimmer |
| Désignation du matériel : | Coupe-bordures |
| Omschrijving van de apparaten: | Turbotrimmer |
| Produktbeskrivning: | Turbotrimmer |
| Beskrivelse af produktet: | Turbotrimmer |
| Laitteiden nimitys: | Turbotrimmeri |
| Descrizione dei prodotti: | Turbotrimmer |
| Descripción de la mercancía: | Recortabordes |
| Descrição dos aparelhos: | Aparador de relva |
| Turbotrimmer | |
| Nazwa urządzenia: | Podkaszarka |
| A készülékek megnevezése: | Damilos füszegélynyíró |
| Označení přístrojů: | Turbotrimmer |
| Označenie zariadenia: | Turbotrimmer |
| Ovojaσία της συσκευής: | Kouρευτικό πετονιάς |
| Opis naprave: | Turbo obrezovalnik |
| Oznaka uređaja: | Turbo trimer za travu |
| Descrierea articolelor: | Turbotrimmer |
| Обозначение на уредите: | Tурботример |
| Seadmete nimetus: | Turbotrimmer |
| Prietaisų pavadinimas: | Turbo žoliapjovė |
| lekārtu apzīmējums: | Turbotrimmeris |
| Typen: | Típusok: |
| Types: | Typy: |
| Types : | Typ: |
| Type: | Túpot: |
| Typ: | Tipi: |
| Typer: | Tipovi: |
| Tyypit: | Tipuri: |
| Tipi: | Tíпове: |
| Tipos: | Tüübid: |
| Tipos: | Tipal: |
| Typy: | Tipi: |
| Art.-Nr.: | Cikkszám: |
| Art. No.: | Číslo artiklu: |
| Référence : | Art.: |
| Art.nr.: | Aριθ. είδους: |
| Art.nr.: | Art št.: |
| Art. nr.: | br. art. |
| Tuoten:o | Nr art.: |
| Art.: | Apt. номер: |
| Art. No: | Toote nr : |
| Art. no: | Gaminio nr.: |
| Nr artykułu: | Izstr.: |
| ComfortCut 450/25 | Art. 9808 |
| ComfortCut Plus 500/27 | Art. 9809 |
| PowerCut Plus 650/30 | Art. 9811 |
| EU-Richtlinien: | Ošnýles tns EE: |
| EU directives: | ES-smernice: |
| Directives européennes : | EU smjernice: |
| EU-richtlijnen: | Directive UE: |
| EU directiv: | EC-директиви: |
| EU Retningslinier: | ELi direktiivid: |
| EY-direktiivit: | ES direktyvos: |
| Direttive UE: | ES-direktivas: |
| Normativa UE: | 2006/42/EG |
| Directrizes da UE: | 2004/108/EC |
| Dyrektywy Unii Europejskiej: | |
| EU-irányelvek: | 2000/14/EC |
| Směrnice EU: | 2011/65/EC |
Reinhard Pompe Vice President
(C1428ARP) Buenos Aires
Phone: (+54) 11 5194 5000
info.gardena@
ar.husqvarna.com
Armenia
Garden Land Ltd.
61 Tigran Mets
0005 Yerevan
Australia
Husqvarna Australia Pty. Ltd.
Locked Bag 5
Central Coast BC
NSW 2252
Phone: (+61) (0) 2 4352 7400
customer.service@
husqvarna.com.au
GARDENA Belgium NV/SA
Brampton, Ontario L6T 4X3
Phone: (+1) 905 79293 30
info@gardenacanada.com
Chile
Maquinarias Agroforestales
Ltda. (Maga Ltda.)
Santiago, Chile
Avda. Chesterton
# 8355 comuna Las Condes
Phone: (+56) 2 202 4417
Dalton@maga.cl
Zipcode: 7560330
Temuco, Chile
Avda. Valparaíso # 01466
Phone: (+56) 45 222 126
Zipcode: 4780441
China
Husqvarna (China) Machinery
Manufacturing Co., Ltd.
No. 1355, Jia Xin Rd.
Ma Lu Zhen, Jia Ding Dist.,
Shanghai
201801
Phone: (+86) 21 59159629
Domestic Sales
www.gardena.com.cn
Colombia
Husqvarna Colombia S.A.
Calle 18 No. 68 D-31, zona
Industrial de Montevideo
Bogotá, Cundinamarca
Tel. 571 2922700 ext. 105
jairo.salazar@
husqvarna.com.co
Costa Rica
Compania Exim
Euroiberoamericana S.A.
Los Colegios, Moravia,
Consumer Outdoor Products
Santiago, Dominican Republic
Phone: (+809) 736-0333
Consumer Outdoor Products
Consumer Outdoor Products
Lautatarhankatu 8 B / P.O. Box 3
00581 HELSINKI
info@gardena.fi
France
GARDENA France
Immeuble Exposial
Aycliffe Industrial Park
Newton Aycliffe
County Durham
DL5 6UP
info.gardena@
husqvarna.co.uk
Greece
P. PAPADOPOULOS S.A.
92 Athens Avenue
Athens
P.C. 104 42
Greece
Tel. (+30) 210 5193100
info@papadopoulos.com.gr
Hungary
Aycliffe Industrial Park
Newton Aycliffe
County Durham
DL5 6UP
info.gardena@
husqvarna.co.uk
Italy
Husqvarna Italia S.p.A.
Via Como 72
23868 VALMADRERA (LC)
Phone: (+39) 0341.203.111
info@gardenaitalia.it
Japan
KAKUICHI Co. Ltd.
Sumitomo Realty &
Development Kojimachi
BLDG., 8F
5 - 1 Nibanncyo
Chiyoda-ku
Tokyo 102-0084
Phone: (+81) 33 264 4721
m_ishihara@kaku-ichi.co.jp
Kazakhstan
LAMED Ltd.
155/1, Tazhibayevoi Str.
050060 Almaty
IP Schmidt
Abayavenue 3B
110 005 Kostanay
Korea
Kyung Jin Trading CO.,LTD.
107-4, SunDuk Bld.,
YangJae-dong,
Seocho-gu,
Seoul, (zipcode: 137-891)
Phone: (+82) (0)2 574-6300
Kyrgyzstan
Alye Maki
av. Moladaya Guardir J 3
720014
Bishkek
Latvia
Husqvarna Latvija
Consumer Outdoor Products
Bākūžu iela 6
LV-1024 Rīga
info@husqvarna.lv
Lithuania
UAB Husqvarna Lietuva
Consumer Outdoor Products
Ateities pl. 77C
LT -52104 Kaunas
centras@husqvarna.lt
Luxembourg
Magasins Jules Neuberg
Husqvarna New Zealand Ltd.
PO Box 76-437
Manukau City 2241
Phone: (+64) (0) 9 9202410
support.nz@husqvarna.co.nz
Norway
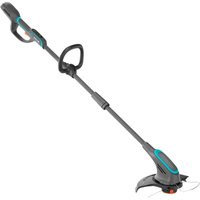
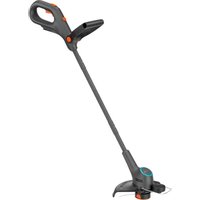


- TRANSLATION OF THE ORIGINAL GERMAN OPERATING INSTRUCTIONS
- CONTENTS
- AREA OF APPLICATION OF YOUR GARDENA TURBOTRIMMER
- PLEASE NOTE
- SAFETY INSTRUCTIONS
- CAUTION
- EYE AND EAR INJURIES! WEAR EYE AND HEARING PROTECTION
- CHECK YOUR TRIMMER BEFORE EACH USE
- USE / RESPONSIBILITY
- TOOL DOES NOT STOP IMMEDIATELY WHEN TURNED OFF
- ONLY WORK IN THE DAYLIGHT OR WHEN VISIBILITY IS GOOD
- INTERRUPTING WORK
- FAMILIARISE YOURSELF WITH THE SURROUNDINGS
- ELECTRICAL SAFETY
- CHECK THE POWER CORD REGULARLY FOR DAMAGE AND SIGNS OF WEAR AND TEAR
- ASSEMBLY
- TION
- WORKING POSITION
- THE UPRIGHT MUST BE IN THE UPPERMOST POSITION IN WORKING POSITION
- SETTING THE SHAFT LENGTH
- SETTING THE ADDITIONAL HANDLE
- STARTING THE TRIMMER
- SWITCHING THE TRIMMER ON
- SWITCHING THE TRIMMER OFF
- PUTTING INTO STORAGE
- RECOMMENDATION
- MAINTENANCE
- CLEANING THE TRIMMER
- THE VENTILATION SLOTS MUST ALWAYS BE FREE OF DIRT
- RISK OF INJURY
- TROUBLESHOOTING
- DANGER
- RISK OF INJURY FROM THE CUTTING FILAMENT
- TECHNICAL DATA
- SERVICE/WARRANTY
- WARRANTY
- ARMENIA
- AUSTRALIA
- CHILE
- CHINA
- COLOMBIA
- COSTA RICA
- FRANCE
- GREECE
- HUNGARY
- ITALY
- JAPAN
- KAZAKHSTAN
- KOREA
- KYRGYZSTAN
- LATVIA
- LITHUANIA
- LUXEMBOURG
- NORWAY
Brand : GARDENA
Model : PowerCut Plus 650/30
Category : String Trimmer