iTraver - Car seat Joie - Free user manual and instructions
Find the device manual for free iTraver Joie in PDF.
User questions about iTraver Joie
0 question about this device. Answer the ones you know or ask your own.
Ask a new question about this device
Download the instructions for your Car seat in PDF format for free! Find your manual iTraver - Joie and take your electronic device back in hand. On this page are published all the documents necessary for the use of your device. iTraver by Joie.
USER MANUAL iTraver Joie
Congratulations on becoming part of the Joie family! We are so excited to be part of your journey with your little one. While traveling with the i-Traver™ series high back booster you are using a high quality, fully certified safety enhanced child restraint. Please carefully read this manual and follow each step to ensure a comfortable ride and best protection for your child.
To use this Joie booster with the ISOFIX connections according to ECE R129/03, your child must meet the following requirements. Child height 100cm-150cm (Reference age 3.5-12 years).
Booster
Please read all the instructions in this manual before installing and using the product.
1 IMPORTANT: KEEP FOR FUTURE REFERENCE, PLEASE READ CAREFULLY.
Please keep the instruction manual in the storage compartment at the bottom of the booster as right figure.
For warranty information, please visit our website at joiebaby.com

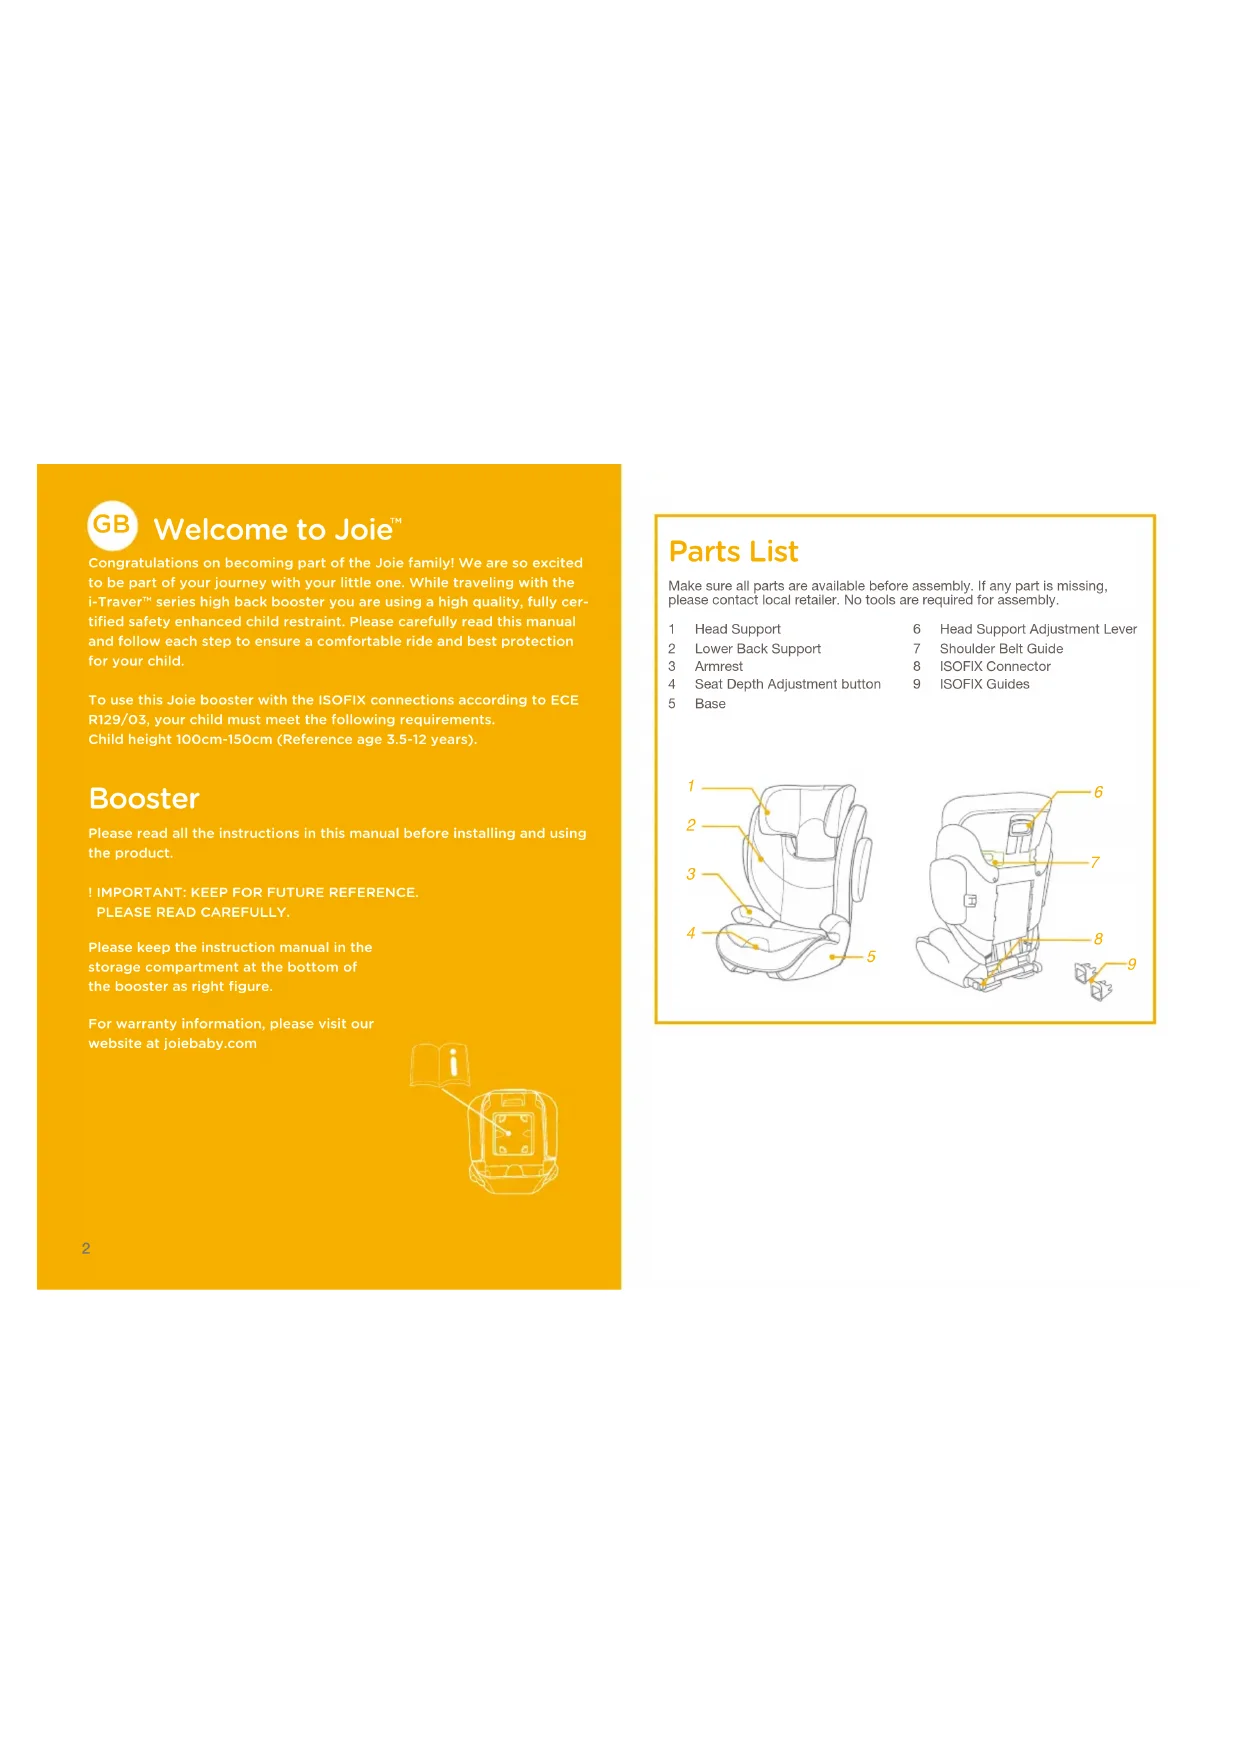
Parts List
Make sure all parts are available before assembly. If any part is missing, please contact local retailer. No tools are required for assembly.
1 Head Support
6 Head Support Adjustment Lever
2 Lower Back Support
7 Shoulder Belt Guide
3 Armrest
8 ISOFIX Connector
4 Seat Depth Adjustment button
9 ISOFIX Guides
5 Base


WARNING
! NO booster can guarantee full protection from injury in an accident. However, proper use of this booster will reduce the risk of serious injury or death to your child.
! Always take care to follow the installation instructions correctly, this will ensure the booster performs at an optimum safety level.
! Do take care so that the rigid items and plastic parts of an booster shall be so located and installed that they are not liable to become trapped by a moveable seat or in a door of the vehicle.
! To use this booster seat according to the ECE R129/03, your child must meet the following requirements.
Child height 100cm-150cm (reference age: 3.5-12 years). Forward facing only (in vehicle travel direction)
! The booster may not fit to all vehicles for the usage from 135cm-150cm.
! Any straps holding the booster to the vehicle should be tight and the straps should not be twisted.
! The booster seat should be replaced if it has been subjected to heavy loads in the event of an accident or if it has been dropped.
! This booster seat is only intended to be used in the car.
WARNING
! Do not make any alterations or additions to the booster seat without approval from the type approval authority. DO NOT remove any of the white EPP/EPS foams. Failure to do so may result in serious safety issues.
! DO NOT use the seat if the surfaces are too hot from sunlight.
! Never leave the child unattended in the booster seat or vehicle, not even for a few minutes.
! Any luggage or other objects liable to cause injuries in the event of a collision shall be properly secured.
! The booster shall not be used without the soft goods.
! The booster soft goods should not be replaced with any other than the one recommended by the manufacturer, because the soft goods constitutes an integral part of the restraint performance.
! Always secure child in booster, even on short trips, as this is when most accidents occur.
! DO NOT leave this booster, or other items unbelted or unsecured in your vehicle. Remove the booster seat from the car if not regular used and store in a dry, sun-protected surrounding.
WARNING
It's recommended not to use a second-hand booster seat whose history is not known. It may have invisible structural damages or defects due to incorrect usage/storage.
! DO NOT use any load bearing contact points other than those described in the instructions and marked on the booster.
! DO NOT install this booster under the following conditions:
- Vehicle seats facing sideways or rearward with respect to the vehicle's direction of travel.
- Vehicle seats movable during installation.
! Consult the retailer for issues concerning maintenance, repair and part replacement.
Emergency
In case of emergency or accidents, it is most important to have your child taken care of with first aid and medical treatment immediately.
Product Information
- This is an Enhanced Child Restraint System, intended to use as a Non-integral Universal Enhanced Child Restraint System (i-Size booster seat) from 100-150cm.
- It is approved to the latest UN Regulation R129/03.
Product Booster seat
Materials Plastics, Metals, Fabrics
Patent No. Patents pending
Suitable for Child height 100cm-150cm
(Reference age 3.5-12 years).
Installation forward facing (in vehicle travel direction)
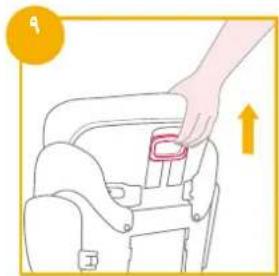
Booster Assembly
see images 1-7
- Squeeze the head support adjustment latch first and then slide in lower back support under the fabric cover to connect them together.
CHECK to make sure two pieces are securely snapped together by pulling on them. - To attach the lower back support to the base, hook the lower back support over the seat bar hinge on the base.
- Rotate the lower back support up while holding the booster seat until it clicks into an upright position.


- Align the side impact shield with the slot of lower back support plastics mounts, and then insert to lock.
Please choose whether to install the side impact shield according to the size of the car. - Remove side impact protection. Please refer to


Adjust the seat
see images 6
There are 3 positions for seat and adjust the seat as

Height Adjustment - for Head Support
see images
Squeeze the head support adjustment lever while pulling up or down on the head support until it snaps into one of the 10 positions.

Concerns on Installation
see images 10-18


13

Check provided car fitting list if used as 135-150 cm
Installation using ISOFIX System and 3-point belt or using 3-point belt only
(Forward Facing Mode/ for Child between 100cm-150cm / 3.5-12 years old)
see images 14-28
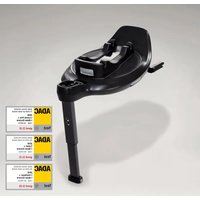
If vehicle is equipped with ISOFIX, the vehicle lower anchor points may be visible at the vehicle seat crease. See your vehicle owner's manual for exact locations, anchor identification, and requirements for use.
- Fit the ISOFIX guides with the ISOFIX anchor points. The ISOFIX guides can protect the surface of the vehicle seat from being torn. They can also guide the ISOFIX connectors.

- Press the ISOFIX adjusting button to pull out the ISOFIX connectors. 15
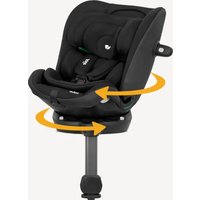
Rotate the ISOFIX connectors 180 degrees until they are pointing in the direction of the ISOFIX guides.


- Line up the ISOFIX connectors with the ISOFIX anchor points, and then click both ISOFIX connectors into the ISOFIX guides.
Make sure that both ISOFIX connectors are securely attached to their ISOFIX guides. The colors of the indicators on the both ISOFIX connectors should be completely green.
! Check to make sure the booster is securely installed by pulling on the both ISOFIX connectors.
- To remove the booster:
a. Press the secondary lock button 1-1 first and then the button -2 on the ISOFIX connectors before removing the booster from the vehicle seat.
b. Rotate the ISOFIX connectors by 180 degrees, then press the ISOFIX adjusting button to fold the ISOFIX connectors.


Pull the vehicle safety belt and pass through the belt path, and then buckle it up. -3

! Could also be installed by using 3-point belt only. (see images
Position shoulder belt through the shoulder belt guide shown in -1
DO NOT position vehicle belt over top of the armrests. It must pass underneath the armrests. 2-2
The booster can not be used if the vehicle safety belt buckle (female buckle end) is too long to anchor the booster securely.
! After your child is placed in this booster, the safety belt must be used correctly, and ensure that any lap strap is worn low down, so that the pelvis is firmly engaged.
To ensure the correct head support height is obtained, the bottom of the headrest MUST be even with the top of child's shoulders as shown in 2 and the shoulder belt must be positioned in the green zone as shown in 24
! Place a booster firmly against the back of a forward-facing vehicle seat equipped with a lap/shoulder belt.


Make sure, that the shoulder belt portion of the vehicle belt goes straight through the shoulder belt guide as shown in
Tighten the vehicle belt by pulling the shoulder strap until all belt slack is removed.
I f the belt lays across child neck, head or face, readjust head support height.
! Any straps holding the booster to the vehicle should be tight and the straps should not be twisted.


Detach Soft Goods
see images 2 - 3


To refit the seat pad simply reverse the steps above.


Care and Maintenance
Please wash the soft goods and inner padding with cold water under 30^ .
Do not iron the soft goods.
Do not bleach or dry clean the soft goods.
Do not use undiluted neutral detergent, gasoline or other organic solvent to wash the booster. It may cause damage to the booster.
! Do not twist the soft goods and inner padding to dry with great force. It may leave the soft goods and inner padding with wrinkles.
Please hang dry the soft goods and inner padding in the shade.
Please remove the booster from the vehicle seat if not in use for a long period of time. Put the booster in a cool, dry place and somewhere your child cannot access it.


Materialy Plasty, kovy, textil
Angaende installation
se Bilder 10-18


13


Kontrollera den medfoljande listan om bilmontering 135-150 cm
(Framatvant lage/fornarnellan 100 cm- 150cm/3,5-12 ar)
sebilder14-26
Upe3BbIyauHbIe cHTyaucn
B cnyuae ue3buiHoro npoCwecTBnI nnabapnHOI cnTyauu nclnyeT He3aMeDInTeNbHO Oka3aTb pe6eHKy nepByIO nOMOuB N o6paNTbcra K BpaHy.
ChyTne TkaHeBbIX DeTaNei
CM.pucyHKN 29-39


YTO6bI yCTaHOBNTb NOKlaNkCy CnDEHb, BInONHnTE yKa3aHHbIE WaBNOBpaTHOMnopAKe.


Yxod 3a n3dennem
CTnpaTte TkaHeBbIe DeTaIIN BHyTpEHIO O6NBky BXoNoHOBOe npTe TMepaType He Bblue 30^
3anpeaetcraadntbTKaHeBBBteTaN.
3anpeaaetcraO6eINBaTbN noDBepraTb TkaHeBbIe deTaNN XmMnCTKe.
3anpeaaetcnaonb30aBtHepa36abJeHHbHe HeItpaBbHbE MOoUne CpeCTBa,6eHNn Ipyrme oprAHueckne pactBopntEnI nIyNCTKn detCKoro ydepKNaBOuero yctpoiCTBa-6yctepa.3TO MoKeT npBeCTn K NOBpeJdeHIO detCKoro ydepKNaBOuero yctpoiCTBa-6yctepa.
He ckpyuBaIe TkaHeBbIe DeTaN IN BHyTpEHHIO O6NBky npn cyUke.OT 3TOrHa TkaHeBbIX DeTaN IN BHyTpEHHeO6NBKe MOrY TNOBUTcRc CKNaDKN.
BbIeunBaTe TkaHeBbIe DeTaJI N BHyTpEHHIO O6NBky IJI npocuIKN B TEHN.
EcnIeTcKoe ydepxnBaIOoee yctpoNCTBO-6yctep He IcNoIb3yeTcB TeueHne IInTeIbHO BpeMeHN, INBNeKaIte erO n3 ABtOMoBnI. IomecNTe DeTcKoe ydepxnBaIOoee yctpoNCTBO-6yctep B npoxnaHOe cyxoe MeTo, HeNOCTynHOe dIaDeTei.

1
jia jia 1o jia iiall jai jia jia jia jia jia jia jia jia jia jia jia jia jia jia jia jia jia jia jia jia jia jia jia jia jia jia jia jia jia jia jia jia jia jia jia jia jia jia
a|la|laalclai
Clll lcll g aal alal alal glal lal pks! 1e
aal aalaae e gag aaii
jia jia jia jia jia jia jia jia jia jia jia jia jia jia jia jia jia jia jia jia jia jia jia jia jia jia jia jia jia jia jia jia jia jia jia jia jia jia jia jia jia jia jia jia jia jia jia jia
pist#i pi l i o jull 1o pclll sall g jai o jull aal y
a aaa 1
#
e 1
( 5 - 3) ^2 = 21
aal 129/03 aaii
jiall 1
jiai jiai jiu jiu jiu jiu jiu jiu jiu jiu jiu jiu jiu jiu jiu jiu jiu jiu jiu jiu jiu jiu jiu jiu jiu jiu jiu jiu jiu jiu jiu jiu jiu jiu jiu jiu jiu jiu jiu jiu jiu jiu jiu jiu jiu jiu jiu jiu jiu jiu jiu jiu jyu jiuyu jiuyu jiuyu jiuyu jiuyu jiuyu jiuyu jiuyu jiuyu jiuyu jiuyu jiuyu jiuyu jiuyu jiuyu jiuyu jiuyu jiuyu jiuyu jiuyu jiuyu jiuyu jiuyu jiuyu jiuyu jiuyu jiuyu jiuyu jiuyu jiuyu jiuyu jiuyu jiuyu jiuyu
Ejial 1y juaa Jiaai jai Ejiaai
-
-
-
-
- 15.
-
-
-
(a)(y)y,0
(3) ( a + b) ( a^2 - ab + b^2) = a^3 + b^3
#
J 1
j 1
1

8.2.10.11.12.13.14.15.16.17.18.19.20.21.22.23.24.25.26.27.28.29.30.31.32.33.34.35.36.37.38.39.40.41.42.43.44.45.46.47.48.49.50.51.52.53.54.55.56.57.58.59.60.61.62.63.64.65.66.67.68.69.70.71.72.73.74.75.76.77.78.79.80.81.82.83.84.85.86.87.88.89.90.91.92.93.94.95.96.97.98.99.


aaiiie
aai jll iina biae e jg c 8ybaiai

ISOFIX 1200 jie lai
ISOFIX
ISOFIX
.1OSOFIX 111
ISOFIX pI 11111111111111111111111
10 1 1 1 1 1 1 1 1 1 1 1 1 1
( x,y) = 1,0
l2 = ± j2, l1 l_2
1
1
1
a a a a a a a a a a a a a a a
oalolalalalalalalalalalalalalalalalal
JbIgJgJgJgJgJgJgJgJgJgJgJgJgJgJgJgJgJgJgJgJgJgJgJgJgJgJgJgJgJgJgJgJgJgJgJgJgJgJgJgJgJgJgJgJgJgJgJgJgJgJg


gaa aie la Js aaiol sioa jsi oiae
Aaall 1

Witamy w Joie
Materialie Plastic, metal, textile
Nr. brevet Brevet in asteptare
I VIKTIG: BEHOLD FOR FREMTIDIG OPPSLAG. LES N°YE.
Allison Baby UK Ltd,
Venture Point, Towers Business Park
Rugeley, Staffordshire, WS15 1UZ
NUNA International B.V.
Van der Valk Bourmanweg 178 C, 2352 JD Leiderdorp, The Netherlands