
UniversalDetect - Detector BOSCH - Free user manual and instructions
Find the device manual for free UniversalDetect BOSCH in PDF.


User questions about UniversalDetect BOSCH
0 question about this device. Answer the ones you know or ask your own.
Ask a new question about this device
Download the instructions for your Detector in PDF format for free! Find your manual UniversalDetect - BOSCH and take your electronic device back in hand. On this page are published all the documents necessary for the use of your device. UniversalDetect by BOSCH.
USER MANUAL UniversalDetect BOSCH
www.bosch-pt.com/serviceaddresses
Disposal
All instructions must be read and observed. The safeguards integrated into the measuring tool may be compromised if the measuring tool is not used in accordance with these instructions. STORE THESE INSTRUCTIONS IN A SAFE PLACE.
Have the measuring tool serviced only by a qualified specialist using only original replacement parts. This will ensure that the safety of the measuring tool is maintained. Do not use the measuring tool in explosive atmospheres which contain flammable liquids, gases or dust. Sparks may be produced inside the measuring tool, which can ignite dust or fumes. The measuring tool may not be 100% accurate for technological reasons. To eliminate hazards, familiarise yourself with further sources of information, such as building plans and photographs taken during construction, etc. before carrying out any drilling, sawing or routing work on walls, ceilings or floors. Environmental influences, such as humidity, or proximity to devices that generate strong electric, magnetic or electromagnetic fields, moisture, metallic building materials, foil-laminated insulation materials or conductive wallpaper or tiles may impair the accuracy of the measuring tool. The number, type, size and position of the objects may distort the measuring results. If there are gas pipes in the building, check to ensure that none of them have been damaged after completing any work on walls, ceilings or floors. - When attaching objects to dry walls, and in particular when attaching them to the substructure, check to ensure that both the wall and the fastening materials have a sufficient load-bearing capacity.
Product Description and Specifications
Please observe the illustrations at the beginning of this operating manual.
Intended Use
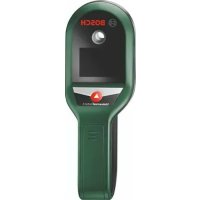
The measuring tool is intended for the detection of metal (ferrous and non-ferrous metals, e.g. reinforcing steel) and live wires in walls, ceilings and floors, and to detect wooden beams in dry walls.
The measuring tool is suitable for indoor use.
Product features
The numbering of the product features shown refers to the illustration of the measuring tool on the graphic page.
(1) Battery compartment cover (2) On/off button/measuring button (3) Display (touchscreen) (4) Light-up ring (5) Marking hole (6) Sensor area (7) Serial number (8) Wall sensor (9) Gripping surface
Display elements
(a) Navigation area (b) Information area (c) Status bar (d) Number of pages symbol (only with multi-page menus) (e) Audio signal indicator (f) Battery indicator
Technical data
| Digital detector UniversalDetect | |
| Article number | 3603F813.. |
| Max. detection depthA) | |
| - Metals 100 mm | |
| - Single-phase live cables (110-240 V, 50-60 Hz, with voltage applied) B) | 50 mm |
| - Wooden substructures in dry walls 25 mm | C) |
| Operating temperature -5 °C to +40 °C | |
| Storage temperature -20 °C to +70 °C | |
Digital detector UniversalDetect
| Operating frequency range 48-52 kHz | |
| Max. magnetic field strength (at 0.1 m) 106 dBμA/m | |
| Max. altitude 2000 m | |
| Relative air humidity | |
| - <Metal> and <Wood> operating mode | 30-80 % |
| - <Current> operating mode | < 50 % |
| Pollution degree according to IEC 61010-1 2 | D) |
| Batteries 4 × 1.5 V LR03 (AAA) | |
| Approx. operating time 4 h | |
| Weight according to EPTA-Procedure 01:2014 0.34 kg | |
| Dimensions (length × width × height) 255 × 90 × 56 mm | |
A) Depends on operating mode, material and size of the objects, as well as material and condition of the base material. B) Lower detection depth with non-live wires. C) Equal to two plasterboard panels. D) Only non-conductive deposits occur, whereby occasional temporary conductivity caused by condensation is expected.
The serial number (7) on the type plate is used to clearly identify your measuring tool.
The accuracy and detection depth of the measuring result may be negatively affected if the condition of the substrate is unfavorable.
Assembly
Inserting/changing the Batteries
It is recommended that you use alkaline manganese batteries to operate the measuring tool.
Do not use disposable batteries that have a rated voltage of greater than 1.5 V.
To open the battery compartment cover (1), push it away from the battery compartment in the direction of the arrow. Insert the batteries.
When inserting the batteries, ensure that the polarity is correct according to the illustration on the inside of the battery compartment.
The battery symbol (f) in the display status bar shows the current state of charge of the batteries.
If the symbol opposite appears in the display status bar, the measuring tool can continue to be used for up to another 15 minutes. Change the batteries.
Always replace all the batteries at the same time. Only use batteries from the same manufacturer and which have the same capacity.
Remove the batteries from the measuring tool if you will not be using it for an extended period. The batteries may corrode and discharge during prolonged storage in the tool.
Operation
Protect the measuring tool from moisture and direct sunlight. Do not expose the measuring tool to extreme temperatures or temperature fluctuations. If there are large temperature variations, allow the measuring tool to adjust to the ambient temperature before switching it on. The accuracy of the measuring tool and the functionality of the display may be compromised if exposed to extreme temperatures or temperature variations. Avoid hard knocks or dropping the measuring tool. After severe external influences or if you notice any abnormalities in functionality, have the measuring tool checked by an authorized Bosch after-sales service agent. Hold the measuring tool only by the intended gripping surface (9) to avoid influencing the measurement. Do not attach any stickers or labels to the sensor area (6) on the rear of the measuring tool. Metal labels in particular will affect measuring results.

Do not wear gloves when taking measurements and ensure that you are properly grounded. If you are not properly grounded, the identification of live wires may be impaired.
When taking measurements, avoid getting close to devices that emit strong electric, magnetic, or electromagnetic fields, such as mobile phones, laptops, or tablets. If possible, deactivate all tools whose radiation could interfere with the measurement and switch off the corresponding func
tions or tools.
Using the touchscreen
- Do not use the measuring tool if the touchscreen is visibly damaged (e.g., cracks in the surface, etc.).
The display is divided into a status bar (c) and a touchscreen with an information area (b) and a navigation area (a).
The status bar (c) shows the current sound setting (e), the battery's state of charge (f), and the number of pages (d) (in multi-page menus).
The measuring tool can be controlled by touching the buttons on the touchscreen display.
Use only your fingers to operate the touchscreen. Do not bring the touchscreen into contact with other electrical devices or water. To clean the touchscreen, switch the measuring tool off. Wipe off any dirt, e.g., using a microfibre cloth.
Navigating in the menu
To control the measuring tool via the touchscreen, the following general buttons (in addition to buttons in the specific language) will appear:
| Button Action | |
| Go back to the previous page | |
| Go forward to the next page | |
| Go one menu level back/up | |
| Open the <Settings> menu | |
| ? | Open the <Help menu> menu |
Starting Operation
Switching on/off
Before switching on the measuring tool, ensure that the sensor area (6) is dry. If necessary, use a cloth to dry the measuring tool. If the measuring tool has been exposed to a significant change in temperature, leave it to adjust to the ambient temperature before switching it on.
To switch on the measuring tool, press the on/off button (2). Follow the tips on using the measuring tool. You can choose to disable the function that shows these detailed instructions every time the tool is switched on in the submenu.
To switch off the measuring tool, press and hold the on/off button (2).
If no measurement takes place and no button is pressed on the measuring tool for approx. 5 minutes, the measuring tool will switch off automatically to save the batteries.
How it works (see figure A)
The measuring tool checks the substrate of the sensor area (6) in the measurement direction z up to the maximum detection depth.
Select the operating mode you require.
Always move the measuring tool over the substrate in a straight line along the x-axis, applying light pressure, without lifting it off or changing the pressure. The wall sensor (8) must be in uniform contact with the substrate in order for the measurement to be correct.
Hold the measuring tool by the gripping surface (9) with an even grip and do not touch the sensor area (6) while taking measurements.
If the measuring tool receives a signal, this will be shown in the information area (b) and the light-up ring (4) will light up yellow. Follow the additional instructions in the information area. Note that moving over the substrate multiple times will detect objects more precisely. If an object has been detected, this will be shown in the information area. The light-up ring (4) will light up red and the tool will emit a sound.
The type of object found (depending on the operating mode) will be shown on the display:
- Power cable. Metal object. Substructure.
If no objects are found, the light-up ring (4) will remain green and nothing will be shown on the display.
Operating Modes
When detecting, you can choose between three operating modes and can activate two modes simultaneously.
operating mode (see figure B)
operating mode is designed for finding wooden beams in dry walls.
When the measuring tool is placed on the wall, the light-up ring (4) lights up yellow until the signal can be clearly assigned by moving the measuring tool around.
Please note that when selecting this operating mode, all objects located in dry walls will be displayed. You can only rule out the presence of a metal object or electricity cable by combining this operating mode with the other two operating modes.
This operating mode will also find plastic pipes, especially those that are filled with water. Before drilling, sawing or milling, check to ensure that the object found is actually a wooden beam and not a plastic pipe.
Only use <Wood> operating mode on dry walls.
operating mode (see figure C)
operating mode is designed solely for finding objects made of metal (e.g. copper pipes or reinforcing steel), regardless of the nature of the wall.
In this operating mode, live cables are not displayed as power cables. In order to find power cables, you can also select the and operating modes at the same time.
operating mode (see figure D)
operating mode is designed solely for finding single-phase live cables (110-240 V, 50-60 Hz).
Preparing to take measurements and features of the measuring process:
- The cable must be live. You should therefore connect electricity consumers (e.g. lights, appliances) to the electricity cable you are trying to find. Switch on the electricity consumers to ensure that the electricity cable is live.
- The 50-60 Hz signal from the electricity cable must be able to reach the measuring tool. If the cable is in damp walls (e.g. >50% humidity), behind metallic foil (e.g. thermal insulation) or in an empty metal pipe, the signal will not reach the measuring tool and you will not be able to find the cable.
- The measuring tool must be sufficiently earthed. To do this, hold it firmly (without gloves) by the gripping surface (9). Make sure that you are in good contact with the floor. Insulating shoes, ladders or platforms may compromise your contact with the floor. The floor must also be earthed in order for live cables to be detected.
- The 50-60 Hz signal from the electricity cable must be stronger along the cable than in its immediate vicinity. If the wall is very dry or poorly earthed, the signal will be the same strength throughout the wall. This will result in the measuring tool indicating that it has found a signal over a large area, but it will not be able to detect the exact location of the cable. In this instance, it may be helpful to place your free hand on the wall 20-30 cm from the measuring tool in order to conduct the signal away from the wall.
- Switch off power consumers and make sure that live cables are de-energised before drilling, sawing or milling into walls, ceilings or floors. After performing any kind of work, check to ensure that objects placed on the substrate are not live.
If you are unable to detect the cable in operating mode, then you may be able to search for it as a metal object in operating mode. Please be aware that the maximum detection depth is low (approximately 2-3 cm). While solid-wire cables can be detected in operating mode, stranded-wire cables cannot.
Multi-phase (known as three-phase current or heavy current) electricity cables cannot be detected in operating mode because the signals from the different phases cancel each other out. You can, however, detect multi-phase electricity cables as metal objects in operating mode. The maximum detection depth is somewhat higher than that for single-phase electricity cables.
menu

To open the menu, lift the measuring tool off the substrate and press the button with the symbol shown opposite.
The sound and language settings will remain the same unless changed (i.e. they do not need to be set every time you switch on the tool).
Submenu:
You can switch the sound indicating that an object has been found on and off. The selected setting appears with the symbol (e) in the status bar.
Submenu:
Select the language of the menu navigation.
Submenu:
Here you can recalibrate the measuring tool manually. It is advisable to recalibrate the measuring tool if it starts to continuously detect a metal object without there actually being one nearby.
Follow the instructions in the information area on the touchscreen when recalibrating.
Only carry out the recalibration at room temperature.
menu

To open the menu, lift the measuring tool off the substrate and press the button with the symbol shown opposite.
Submenu :
Here you will find information about your measuring tool.
Submenu :
You can choose whether you want the instructions on using your measuring tool to be shown every time you switch it on. In this submenu, you can also choose to view the tips directly.
Submenu :
Here you will find information about the most common measuring errors.
Submenu :
A website address is given here where you will find further information about your measuring tool.
Working Advice
Marking objects
If required, detected objects can be marked. Perform a measurement as usual.
Once you have found an object, mark its position through the marking hole (5).
The symbol shown on the measuring tool may change while you are making this mark as the marking hole is directly in the sensor area (6) and the pen you use may disturb the sensors.
Always start a new measurement after marking a position. You can do this by lifting the measuring tool off the wall and then putting it down again. This will ensure that the marking process does not affect the measuring results that follow.
Errors - Causes and Corrective Measures
| Cause Corrective measures | |
| Measuring process does not start. | |
| Wall sensor (8) has not detected contact with the wall. | Briefly press the on/off button (2) to start the measuring process manually. |
| Measuring results inaccurate/implausible | |
| Interfering objects are within the sensor range (6) | Remove all interfering objects (e.g. watches, bracelets, rings, etc.) from within range of the sensor (6). Do not hold the measuring tool close to the sensor. |
| Ambient temperature too high/too low | Only use the measuring tool in the operating temperature range. |
| Strong temperature variation Allow the measuring tool to reach the correct temperature. | |
| The measuring tool monitors correct operation in every measurement. If a defect is detected, the display will indicate only the symbol shown opposite. In this case, or if you are unable to rectify an error using the other corrective measures mentioned, send the measuring tool to an authorised Bosch after-sales service centre. | |
Error during measurement using operating mode
| Cause Corrective measures |
| Light-up ring lights up red even though there are no wooden beams in the wall. |
| Water-filled plastic pipe Water-filled plastic pipes in dry walls are also displayed in <Wood> operating mode. |
Cause Corrective measures
| Wall is not a dry wall | <Wood> operating mode is only designed for dry walls. |
| Inhomogeneous dry wall Dry walls made from coarse chipboard can be highly in-homogeneous and cause incorrect measurements. For this reason, start the measurement at a different place on the wall and measure at a different height. If this does not help, hold an additional plasterboard panel on the wall and perform the measurement on this. | |
| Measuring tool placed onto the wall very slowly | Place the measuring tool onto the wall quickly. |
| Uneven contact with the wall When taking measurements, always hold the measuring tool so that contact with the wall is as even as possible and do not tilt the measuring tool. | |
| No wooden beams are found. | |
| Measured section too short Start the measurement at a different place on the wall and move the measuring tool over a larger section. | |
| Wooden beam too deep The detection depth depends on the building material and may be less than the maximum detection depth. | |
| Shielding building material or humidity too high | Detection will not be accurate in the presence of metallic building materials or building materials that are too damp (e.g. if the humidity is too high). |
Error during measurement using operating mode
| Cause Corrective measures | |
| Light-up ring lights up yellow or red even though there is no metal nearby. | |
| Auto-calibration not successful | Start a recalibration via the <Reset> submenu. |
| Light-up ring lights up yellow or red over a large measuring range on the wall. | |
| Many metal objects spaced closely together | Metal objects spaced too closely together cannot be detected separately. |
| Building materials containing metal or reinforcing steel in concrete | In the presence of metallic building materials (e.g. foil-laminated insulation materials, heat conduction plates), reliable detection is not possible. |
| Solid metal objects on the back of the wall | In the presence of solid metal objects (e.g. radiators), reliable detection is not possible. |
Cause Corrective measures
Auto-calibration not successful. Start a recalibration via the submenu.
Metal object not found.
Metal object is too deep or too small. The detection depth depends on the building material and on the object and may be less than the maximum detection depth.
Error during measurement using operating mode
Cause Corrective measures
Light-up ring lights up red over a large measuring range on the wall.
Insufficient earthing of the wall Touch the wall with your free hand at a distance of 20-30 cm from the measuring tool in order to earth the wall.
Live cable not found.
No/unusual voltage in the cable Apply voltage to the cable, e.g. by turning on the corresponding light switches. It is not possible to reliably detect multi-phase electricity cables and cables with voltages outside the 110 - 240V and 50 - 60Hz range.
Cable is too deep. The detection depth depends on the building material and may be less than the maximum detection depth.
Cable runs in an earthed metal pipe. Select the operating mode to detect metal pipes.
Measuring tool not earthed Grip the measuring tool firmly without gloves. Do not stand on insulating ladders or scaffolds. Do not wear insulating footwear.
Shielding building material or humidity too low/too high Detection will not be reliable in the presence of metallic building materials or building materials that are too dry or too damp (e.g. if the humidity is too low or too high).
Maintenance and Service
Maintenance and Cleaning
Check the measuring tool before each use. If the measuring tool is visibly damaged or parts have become loose inside the measuring tool, safe function can no longer be ensured.
Always keep the measuring tool clean and dry to ensure optimum, safe operation.
Never immerse the measuring tool in water or other liquids.
Wipe off any dirt using a dry, soft cloth. Do not use any detergents or solvents.
After-Sales Service and Application Service
Our after-sales service responds to your questions concerning maintenance and repair of your product as well as spare parts. You can find explosion drawings and information on spare parts at: www.bosch-pt.com
The Bosch product use advice team will be happy to help you with any questions about our products and their accessories.
In all correspondence and spare parts orders, please always include the 10-digit article number given on the nameplate of the product.
Great Britain
Robert Bosch Ltd. (B.S.C.)
P.O.Box 98
Broadwater Park
North Orbital Road
Denham Uxbridge
UB 95HJ
At www.bosch-pt.co.uk you can order spare parts or arrange the collection of a product in need of servicing or repair.
Tel. Service: (0344) 7360109
E-Mail: boschservicecentre@bosch.com
You can find further service addresses at:
www.bosch-pt.com/serviceaddresses
Disposal
Measuring tools, accessories and packaging should be recycled in an environmentally friendly manner.
Do not dispose of measuring tools or batteries with household waste.
Only for EU countries:
According to the Directive 2012/19/EU on waste electrical and electronic equipment and its transposition into national law, measuring tools that are no longer usable, and, according to the Directive 2006/66/EC, defective or drained batteries must be collected separately and disposed of in an environmentally correct manner.
If disposed incorrectly, waste electrical and electronic equipment may have harmful effects on the environment and human health, due to the potential presence of hazardous substances.
Only for United Kingdom:
According to The Waste Electrical and Electronic Equipment Regulations 2013 (SI 2013/3113) (as amended) and the Waste Batteries and Accumulators Regulations 2009 (SI 2009/890) (as amended), products that are no longer usable must be collected separately and disposed of in an environmentally friendly manner.
www.bosch-pt.com/serviceaddresses
Disposal
www.bosch-pt.com/serviceaddresses
Disposal
Bosch Service Center
Telegrafvej 3
2750 Ballerup
www.bosch-pt.com/serviceaddresses
Disposal
Bosch Service Center
Telegrafvej 3
2750 Ballerup
Denmark
Tel.: (08) 7501820 (within Sweden)
Fax: (011) 187691
You can find more contact details for service here:
www.bosch-pt.com/serviceaddresses
Waste disposal
Only for EU countries:
www.bosch-pt.com/serviceaddresses
Disposal
www.bosch-pt.com/serviceaddresses
Disposal
www.bosch-pt.com/serviceaddresses
Disposal
Bosch Service Center PT
K Vápence 1621/16
692 01 Mikulov
At www.bosch-pt.cz you can order a repair of your machine or spare parts online.
www.bosch-pt.com/serviceaddresses
Disposal
www.bosch-pt.com/serviceaddresses
Waste handling
- Avoid water entering the housing
Criteria for limit states
Damage to the product housing
Maintenance and service life of technical customer service
It is recommended to clean the tool from dust after each use.
Storage
Use the working modes only on constructions made of plasterboard.
Working mode (see figure C)
The working mode is intended exclusively for locating metal objects (e.g., metal pipes or reinforcing steel) regardless of wall parameters.
In this mode, live wires are not displayed as electrical cables. To locate electrical cables, you can simultaneously use the <3π. wire> working mode.
Working mode <3π. wire> (see figure D)
The <3π. wire> working mode is intended only for locating single-phase live wires (110-240 V, 50-60 Hz).
Instructions for measuring and measurement features:
- The wiring must be under voltage. Therefore, connect a power source (e.g., light bulbs or other devices) to the wire being sought. Turn on the power source to ensure that the wire is under voltage. -The signal from 50 to 60 Hz from the electrical cable should reach the measuring instrument. If the electrical cable is laid in damp walls (e.g., humidity > 50%), behind metallized screens (e.g., thermal insulation) or in a metal conduit, the signal will not reach the measuring instrument and the cable cannot be found. -The measuring instrument must be properly grounded. For this, firmly hold it by the handle surface (9) (without gloves). Make sure you have contact with the ground. Wearing electrical safety shoes, standing on a ladder or platform does not allow for the necessary contact. The surface you are standing on must also be grounded, otherwise the wire cannot be found. The signal from 50 to 60 Hz from the wire should be stronger above the location of the wire than in the immediate vicinity. If the wall is very dry or poorly grounded, the signal will be reflected equally across the entire wall. Then the measuring instrument indicates that a signal has been detected over a large area, but it is not possible to precisely determine the location of the wire. In this case, to obtain a signal from the wall, it may help to move your free hand along the wall at a distance of 20-30 cm from the measuring instrument. Disconnect the current consumer or the voltage-carrying conductors before drilling, sawing, or milling in walls, ceilings, or floors. After all work, check that all objects located in the base have been de-energized.
If the cable cannot be found in the <Wire> operating mode, perform a cable search in the mode as for a metal object. Remember that the maximum detection depth is small (about 2-3 cm). Unlike single-core cables, multi-core cables cannot be found even in this mode.
Multi-phase electrical cables (three-phase or with neutral current) cannot be found in the <Wire> mode, since the signals of the individual phases cancel each other out. However, multi-phase electrical cables can be detected in
234|Russian
the mode as for metal objects. The maximum detection depth is slightly greater, see the figure for single-core electrical cables.
Menu

Here you will find information about your measuring instrument.
Submenu <Hints>:
Here you can set whether the operating instructions for your measuring instrument should be displayed at each start. If necessary, you can also call up hints in this menu for direct viewing.
Submenu:
Here you will find information about the most common measurement errors.
Submenu <Support>:
Here you will find the internet address where you can get additional information about the measuring instrument.
Application instructions
Placement of objects
If necessary, objects can be placed. Perform the measurement in the same way.
After locating the object, mark the placement location through the marker opening. (5).
During marking, the reading of the measuring instrument may change, because the marker opening is located directly in the sensor zone (6), and the handle used for marking may affect the sensors.
After marking, always start a new measurement. To do this, remove the measuring instrument from the wall and install it back. This guarantees that the marking process does not affect subsequent measurement results.
Troubleshooting - Causes and remedies
Cause Remedy
The measurement process does not start.
The sensor (8) is not touching the wall. Briefly press the switch (2) to start the measurement process.
Inaccurate/unreliable measurement results
Foreign objects: Remove all foreign objects (e.g., watches, bracelets, rings, etc.) from the sensor zone (6). Do not touch the measuring instrument near the sensor.
Temperature too high/low: Use the measuring instrument only within the specified operating temperature range. Allow the device to stabilize its temperature.
Strong temperature fluctuations: Allow the measuring instrument to stabilize its temperature.

The measuring instrument ensures the correctness of each measurement. If the display shows a symbol, only the indicated methods can remedy the issue. If other indicated methods do not allow you to fix the problem, send the measuring instrument to an authorized service center.
Measuring instrument to an authorized service center.
236 | Russian
Error during measurement mode
Elimination method
The light ring glows red, even though there is no transfer tank in the wall.
| Започны воров пл actи- ковая trува | Започны воров пл actи- ковая trува |
| Стоа не яваETСА кONDТУК- цени ИЗ ГИСОКAPTOHA | Реким рабOTы <Древеснha> prirodenToькдя КONDТУКURSITAN КONDТУКURSITAN |
| Heodopodnagоня кONDТУКURSITAN ИЗ ГИСОКAPTOHA | КONDТУКURSITAN КРУПнOPAЗМернБИХ ДЕВESCHO-СТPy- Жechны ПЛТ MOГТ 6БТВ OЧЕНБ HeODHOPOДнIMИ Вbl- 3bIBATь LOЖHBE Cpa6aTBiBAHIN. ПОТOMY NaCHITE ИЗME- PEHNE CДPYTORO MeCTA HA STENE ИЗМЕРБTE HA DPyRÖN ВыICOTE.ЕСПЗ ATо HОМОRAET,ПрожMITE K STENE Do- ПОЛNTЕЛБHД ПИСТ ГИСОКAPTOHA И ВblONHITENEGHME- PEHNE NO HEMY. |
| Пробожпные ИЗМеритELьнIHСТРУМЕТК STЕОчEH MedlenHNO. | БыICTPO UCTAHOBITE ИЗМERITELьнIHСТРУМЕHT Ha STEVY. |
| HerabHOMeRрньй кONTAKT co STehО | Во Вremя ИЗМERENIA obecnebyte МAKCIMально ров- hoe paclnoLOXGEHNE ИЗМERITELBAGO INHCTPUMEHTA Ha STEHNE I He NaKIOHЯITE erO. |
| Дерveьнога БALKA He NaDEHa. | |
| Слишkom корOTКИ ИЗМерits- TeMbHД yUACTOK | Начнite ИЗМERENIE cДPyROI TOUKN STENEИпЕмe- СТITE ИЗМERITELHД ИНСТРУМЕHT Ha 6OJIbIJee pacCTO- ЯHNE. |
| Дерveьнога BALKA PACNoLo- Жehа сLIMSKOM TlYбOKO | ГлбиHA obHapUJSEHIN 3aBcSIT OT STPOnTeHBOrMaTe- риANA I MochET 6bITb MeHbSe MaKCSImaJIbHOr TlYbHNbI obHapUJSEHIN. |
| Зранирюши CTponTeB- Ны МATERПАИ NII CNLShKOM ВыICOKА BIAJXHOCb BO3dUxH | В сLYuae MeTAlIIuYeCKIN ИПсСКOM BIAJXHbIX CTpon- TeMbHbIX MATERPAnIOB (HaNPIMeR, pri CNIshKOM BbICO- КOH BIAJXHOCtN) DoCTOBepHoe obHapUJSEHINE HeBOZ- MOJHO. |
Error during measurement mode
Elimination method
The light ring glows yellow or red, even though there is no metal nearby.
Automatic calibration failed. Start a new calibration through the menu.
The light ring glows yellow or red over a large measurement range on the wall.
| MHORO MeTALINUeCKHx PpeH-METOB, PACNOLOJKeHHbIX 6N3KO dpyr K dpyru | MeTALINUeCKHne PpeDMetbl, pacNOLOJKeHHbIe CNIshKOM 6N3KO dpyr K dpyru, He MOryt 6bItb pacNo3HaHbI IO OTdJIbHOCTn. |
| STPOHTEHLBHe MATEPnaJIbI C CODepXaHNHeM MeTALNa IINI apMaTyPhA CTaJIb B 6eToHe | При pa6ote co STPOHTeHLbIMN MATEPnaJIaMn C COdep-JXaHNHeM MeTALNa (HaPrIMeR, CIONCTbIMN aIIOMHNHeBbl-МN H3OJIaCIOHHbIMN MATEPnaJIaMn, TeIIIOJPOBOJbIMN IInCTaMI) TOUHOe OpipeJIoJIeHne MeCTOLOJIOJeHry He-BO3MOJHO. |
| 6OJIbShne MeTALINUeCKHne 6ObEKTbI 3a CTeHoi | TOUHOe OpipeJIoJIeHne MeCTOLOJIOJeHry Пriп NaIIuHIn 6OJIbShnX MeTALINUeCKHx ObBeKToB (HaPrIMeR, paIIa-TopOB) HeBO3MOJHO. |
| АВТOMATИeCKa KaIIb6PoVBka 6NeYdAlaCb | ЗаустITE NOВТOPHyIо KaIIb6PoVBky chepe3 ПОДмeHIO <C6poc>. |
Metal objects not detected.
Metal objects. Detection depth depends on the building material. For plaster or too small objects, the depth may be less than the maximum detection depth.
Error during measurement in <3n. wire> mode
Elimination method
The light ring glows red over a large measurement range on the wall
Insufficient grounding. Touch the wall with your free hand at a distance of 20-30 cm from the measuring instrument to ground the wall.
The device is not detected without voltage.
238 | Russian
Service address
www.bosch-pt.com/serviceaddresses
Disposal
Used measuring tools, accessories and packaging should be disposed of in an environmentally friendly way for recycling.
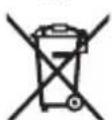
Do not throw measuring tools and batteries into household waste!
Only for EU member states:
In accordance with the European Directive 2012/19/EU on waste electrical and electronic equipment and its implementation in national legislation,
Bosch Power Tools 1609 92A 85B| (17.03.2023)
240 | Ukrainian
Measuring tools that are no longer usable must be collected separately and disposed of in an environmentally friendly manner in accordance with the European Directive 2006/66/EC. Defective or used battery packs/batteries must be collected separately and handed in for environmentally friendly recycling.
If disposed of incorrectly, waste electrical and electronic equipment may have harmful effects on the environment and human health due to the possible presence of hazardous substances.
Ukrainian
Safety instructions

IMPORTANT SAFETY INSTRUCTIONS. Using a power tool without following these instructions may cause damage to the protected mechanisms. PLEASE PAY ATTENTION TO THE INSTRUCTIONS.
Hand over the power tool for repair only to qualified specialists and only with the use of original spare parts. Only under such conditions will your power tool remain safe. Do not work with the power tool in environments where there is a risk of explosion due to the presence of flammable liquids, gases, or dust. Sparks may be generated in the power tool, which can ignite dust or vapors. For technical reasons, the power tool does not provide a 100% safety guarantee. To avoid hazards, before drilling, sawing, or milling into walls, ceilings, or floors, check for hidden electrical wires, gas pipes, or water pipes from other sources, such as building plans, construction drawings, or photographs taken during construction. Be especially careful when working near or close to electrical devices, as they may create strong electrical, magnetic, or electromagnetic fields, water, building materials, metal structures, aluminum-containing materials, as well as conductive fibers or fabrics, which can negatively affect the accuracy of the measuring equipment. The quantity, type, size, and location of objects can affect the measurement results.
If the building has a gas pipeline, after all work on walls, ceilings, and floors, make sure that the gas pipeline is not damaged. When attaching objects to plasterboard walls, check the sufficient strength of the wall or mounting materials, especially when attaching to a frame structure.
Do not use batteries with a nominal voltage higher than 1.5 V.
To open the battery compartment cover (1), slide it in the direction of the arrow on the battery compartment. Insert the batteries.
Pay attention to the correct polarity, as shown inside the battery compartment.
The battery charge indicator (f) in the display shows the current charge state of the battery.
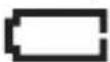
If the charge indicator is displayed in the display, the power tool can operate for a maximum of 15 minutes.
Replace the batteries.
Remove all batteries. Use only batteries of the same brand and with the same capacity.
Remove the batteries from the power tool if you will not be using it for an extended period. In case of prolonged storage in the power tool, batteries may corrode and self-discharge.
Work
Take the measuring instrument away from moisture and solar radiation. Do not expose the measuring instrument to extreme temperatures or temperature changes. If the measuring instrument has been exposed to temperature changes, before turning it on, let it stabilize its temperature. Extreme temperatures and temperature changes can damage the measuring instrument and affect the quality of the image on the display. Avoid impacts and falls of the measuring instrument. After strong external impacts and in case of any malfunction in the operation of the measuring instrument, it must be sent for verification to an authorized service workshop. Hold the measuring instrument only by the designated handle surface (9), so as not to affect the measurement.
Do not insert into the sensor zone (6) from the back side of the measuring instrument any sharp objects or tablets. Especially metal tablets can affect the measurement results.

Do not use the instrument during measurement and make sure there is reliable grounding. If grounding is insufficient, the influence of wires and interference can be increased.
During measurement, try to stay at a distance from devices that emit strong electric, magnetic or electromagnetic fields, such as mobile phones, laptops or radios. If possible, turn off the corresponding functions of all devices whose operation may
affect the measurement results, or turn off such devices.
Using the sensor screen
Do not use the measuring instrument if there are visible damages to the sensor screen (for example, cracks on its surface).
To turn on the measuring instrument, briefly press the power button (2).
If within about 5 minutes no measurement is performed and no key or button on the measuring instrument is pressed, the instrument, to save the battery, turns off automatically.
Measurement (see fig. A)
With the help of the measuring instrument, the resistance is checked by the sensor zone (6) from the minimum to the maximum depth of immersion.
Select the appropriate operating mode.
Move the measuring instrument along the line in the direction of the X axis with uniform pressure, without lifting or changing the pressing force. For correct measurement of the sensor part (8) must have full contact with the ground.
Hold the measuring instrument evenly over the surface of the handle (9) and do not touch it during measurement of the sensor zone (6).
The hidden object is displayed in the information zone (b), and the light ring (4) lights up yellow. Follow the further instructions of the information zone. Note that the accuracy of detection depends on several passes over the ground. The object is detected and indicated in the information zone; the light ring (4) lights up red, accompanied by a sound signal.
The display shows the type of detected object (depending on the operating mode): - cable lines,
246|Ukrainian
- metal objects, - frame structures.
If no object is detected, the light ring (4) lights up green, and the display shows no indicator.
Operating modes
You can choose between three operating modes for detection and activate the desired mode at any time.
Operating mode (see fig. B)
Operating mode for locating wooden beams in drywall. When the measuring tool is placed on the wall, the light ring (4) lights up yellow until the signal can be clearly recognized, moving the measuring tool.
Note that when selecting this operating mode, all objects in the drywall are displayed. To distinguish between different objects, you can switch to metal object or electrical wire detection.
Plastic pipes are also detected in this operating mode, especially if they are filled with water. Before drilling, sawing, or milling, make sure it is a wooden beam, not a plastic pipe.
Use the front operating mode with drywall.
Operating mode (see fig. C)
Operating mode for locating metal objects (e.g., metal pipes or steel reinforcement), regardless of their properties.
In this mode, the wire is displayed as a cable line. To identify the cable line, you can select the operating mode and activate it.
Pexn m po60THCtpym>(dHb. man.D)
Pexmpo60n nixoHtB nnwe dIy nIKIOueHHaOHHOI npOBOK (110-240 B, 50-60r).
IiIOROBaKa Do BnMIPIOBaHHa Ta Oco6bNBOcTi BnpOcei BmIPIOBaHHa:
-Пювода мас 6ут niД Hanpyroю. Тому пдклочь снжвачi eheprii (hanpknla, lixtapi, npnctpoi)do Mepeki eNeKtpoЖВння, kky BN wykaTe.yBIMKHITb cNoxNBAci eNeKtpoeHeprii, uOb nepekoHaTncsA, lo nHiaeNEKTPoXNBHeHHa pauioe. - CnHnB 50do60TcBID eNekTpponpoBOKn NOBHeH DoCraTaH BmipOBAhoro iHCTpyMeHa. RaKIO npOBdKa 3HaXoDHTbcy BOIOnx CTiHex
(hanpknad, BONorictb > 50%), 3a metaneboo fonbroo (hanpknad, BiD teIIOI3OJIaII) a60 B metaneBIn Tpy6i, cnHAn He HauXoJNb Do BVIMipOBaIbHOI IHCTpyMeHTA, i npOBoKy HEMOXINBO 3HaHTN.
BmipobbHn IHctpymeH NOBHe H 6Tu Do6pe 3a3emneHn. nIy BoTO MIOHO TpMaTe HOrO 3a NOBepxHIO 3axONHeHH (9) (6e3 pyKaBHyOK). NepeKoHaHTecr, 00 BN Cami MaTe HaJINH N KOHTAKT 3PiDIORO. I3OIOUye B3yTT, CXOn a6o PnAtOpMn MoKyTb nepeWKOJaTH KOHTaTKy.Cama NiDnora TaKoK NOBHHa 6Tu 3a3eMeHa, iHaKWe pOBODky He BDaCTbC3HaHTN. -CnHbI BID 50do60TcBID nihieneKtpoxNBHeHH NOBHeH 6yTH CNbHiHM HAD npoBokO, hIX y 6e3nocepHni 6nn3bkocti. RaKuo CTHa DyKe cyxa a6o noraHO 3a3emHeA, CnHbI OndaKOBO CnIbHO npoxOntB NO Bci CTHI. NotIM BnMIPOBaIbHn IHCTpyMeHT Ha BeNkI pIoOJI BIO6paXaE, IIO CnHbI 3HaJeHn, aIe He MoKe TOUHO 3HaIITN npoBOKy.Y cBOMy pa3I MOKe dONOMOTn Takn cnOci6: npocTaN BILbHy pyKy Do CTInn Ha BIDCTaHI 20-30 cm BiD BmIPOBaIbHoIhCTpyMeHTA, IO6 OTPMaTH CNrHb IBD CTIN. Nepu hix cBepdntn, po3nnHOBaTH a6o fpe3epyBaTH b CTiHX, cTei a60 nidno3i, BmKHiTb CnoXHBaui eNeKTpOxHBneHHra Ta 3HeCTpyMTe Ka6eni nI d Hanpyroю. Picna BCix pObit nepekoHaTecra, uO po3TaWobani ha po6oui nobepxhi o6'ekTH 3HeCTpyMneHI.
KIO npOBky HMOXnBO BN3HaHTBpeKMI pO60TN 3HaNITb II B peKMI pO60TN AK METaNEBn 06'KT. 3BepHt bYBaIy, 10 MaKcMaJIbHa rN6Ha BnABHeHH HeBeLNa (np6n3HO 2-3 cm).Ha BiIMHy BID npOBoKn i3 cyiNbHO rMATEPIAY, KpyeHn DpIT He MOKe BnBnTNCbpeKMI pO60TN Baratoa3na eEeKTPoPobODka (BiOMa NK TpHa3Ha a60 CTPym BnCOKOi Hanpyr) He MOKe 6TyBnBnEHa B peKMI pO60TN , Ocklbk NcHAn 3 pi3HNx pa3 nepePBnObO OHn OHNO. Ondak BN MoKTe BN3HaHTN 6araTOpa3Hy eEeKTPoPobOdky B peKMI po60TN AK MetaneBI o6'KT.N.MakcMaJIbHa rN6Ha BnABHeHH TPOXn 6Inb7a, HIX DnA ONDHOa3HOi eEeKTPoPobOKn.
MeHIO

Iio6 nepeeTn do MeHIO , iDHiMiB BmIpOBAhN IHCpymeHT 3 NobepxHi, a NOTIM HaTNCiTB KONKy NiBOpuy.
HanaityBaHHa 3Byky Ta MOBn 36epiraotbca npu BIMKHeHHi Ta yBIMKHeHHI BIMpiOBaHoro IHCTpyMeHa.
Пидмен <3BykoBи снгн>:
BIMOKeTe BMnKaTH Ta BmNkATn 3ByKOBn CnHaJI, KIN Bka3ye Ha 3HaJdeHI O6'ekTI. Bn6paHe HanaHTyBaHHa BiO6paKaεTbcra y pRdky cTaHy Ha IHnKaui 3ByKOBOrO CnHany (e).
Bosch Power Tools 1609 92A 85B| (17.03.2023)
248|YkpaHcbka
ПиДмени :
Bn6epiMbOy Habiraqui No MeHIO.
PiMeHIO :
TyB MOnKeTe BiKaiIbpyBaTH BmIpIOBaIbHn IHCTpMeHT BpyHy. NOBTOpe KAIIBPbBAHH peKOMeHdyEcBcA, kUO BmIPIOBaIbHn IHCTpMeHT NOCTIHBOBnRE MeTaeBn 06'kT, HabIT bKaIIO TaKOrO 06'kTa no6n3y HemaE.
Дя NOВTOPHOrO kani6pyBaHHЯ DoTpIMyITeCb IHCTpyKciB 30HI iHΦopMaciCEHCOPHOrO ekpaHa. BnKOHyIe kani6pyBaHHЯ LIIse 3a KIMHaTHoi TeMnepepatyn.
MeHIO
IoopeTn do MeHIO ,PiHimItb BmipioBaHn IHCpymeHT 3 NOBepxHi, a NotIM HaTNCiTB KHONky NIBOPy.
Pí3ka 3MiHa Tempepatyri DaIte BIMipIOBaIbHOMy iHCTpyMeHTy cTa6iI3yBaTH CBOI Toempepaty.

BmipobanbHn IHCTpymeHT BiDcTeKyE npaBnblHicTb po60tn pnp KOxHOMBy BmipobahHi. Pn BnBnEHHI HeonlaKn Ha DnCnIeB iDObpaXaetbcra Nnwe CnMBOI, IIO cToITb npuy.Y cbomy pa3i, a6o kIo 1Hwi Bkazahi 3axOn 3 yCyHeHHr He MoKyt b ycHyTN NOMILky, HadiuNlB BMipobanbHn
IHCtpymeHT BaTOpH3OBaHH CepBicHH ueHtp Bosch.
Pomnka npn BmipioBaHHI BpeKmipo6oTH
PnunHa ycyHeHHa
CbitnoBe kInbue cbHtbcra cepBOHm, XOa B ctiHi Hemae DepeB'hoI6aKn.
3aIOBHeHa BOIOIO 3aIOBHeHi BOIO IO pIaCTIKOBI Tpy6n B rIncOKapTOHi IIaCTIKOBA Tpy6a TaKoX BiIO6paXaOTbcR B peXmI po60TN
BiCyTHiCtB rIncoKapToHy PeKIMpo60TN nIXOjNTb IINHe dIa rIncoKapToHy.
HeoHopiHn rincoKapToH fIncokapToH 3 DC moxe 6yTu HeoHopiHm i CnpuHHn He npaBnBHe BnBLeHHr. Tomy noHiB BmipOBaHH B IHsI ToCti CTHN I BmipIOte Ha IHsI BnCoTI. AkiO ce He DOnOMOrNo, pncTaBTe DoaTkoBn I nCT rIncokapToH y Do CTHN I BmipraTe Ha HbOMy.
Punna Ysuchenn
Measuring instrument for wall thickness. The measuring instrument must be held firmly against the wall.
Uneven contact during measurement. During measurement, hold the measuring instrument firmly so that it touches the wall, and do not press the measuring instrument.
The wooden beam is not detected.
Set the measurement distance. Start measuring from its place on the wall and briefly move the measuring instrument to a greater distance.
The wooden beam is too deep. The detection depth depends on the building material and may be less than the maximum detection depth.
If the building material is metal or contains a lot of moisture, or if the material is damp (for example, wood that has absorbed moisture), detection is impossible.
Tips for working in operating mode
Pryhna Ysuchenn
Signal ring lights up yellow or red, even when there is no metal nearby.
It is not possible to start a new calibration using automatic calibration.
Signal ring lights up yellow or red over a wide range of measurements on the wall.
Too close. Metal objects that are too close to each other cannot be detected separately.
Metal building structures or building materials (for example, laminated aluminum or similar materials, thermal insulation panels) make detection impossible.
Detection of metal objects is impossible with metal objects on the back side of the wall (e.g., radiators).
Removal
If it is impossible to perform a new automatic calibration, press the "Automatic calibration" button.
Metal object not detected.
The metal object detection depth depends on the wall material and the object, and may be less than the maximum detection depth.
www.bosch-pt.com/serviceaddresses
Disposal
Power tools, accessories, and packaging should be sorted for environmentally friendly recycling.
Do not dispose of power tools and batteries in household waste!
Only for EU countries:
According to the European Directive 2012/19/EU on waste electrical and electronic equipment and its implementation in national law, power tools that are no longer usable must be collected separately and disposed of in an environmentally friendly manner. According to the European Directive 2006/66/EC, defective or exhausted batteries must also be collected separately and disposed of in an environmentally friendly manner.
If disposed of improperly, waste electrical and electronic equipment may have harmful effects on the environment and human health due to the potential presence of hazardous substances.
Kazakhstan
For the Eurasian Economic Union (EEU) member states
The conformity assessment is carried out in accordance with the technical regulations of the Customs Union and the requirements of the EEU.
The device must be balanced and adjusted.
254|Kazakh
Product service life
Service life is 7 years. After the expiration of the service life (counting from the date of manufacture indicated on the product), within 5 years, the product must be checked for operability (technical inspection).
List of components and parts supplied with the product
- The product must be stored in a dry place, protected from precipitation and moisture, away from heating devices. - The product must be stored indoors with ventilation.
Operating instructions
- The product must be grounded.
Operating instructions and safety
Before starting work, read the instructions.
Storage
When storing, the following must be observed: - Avoid exposure to high temperatures and direct sunlight. - During storage, protect from sudden temperature changes. - If the product is made of soft rubber or plastic, it must be stored in its original packaging. - For storage, use the product in accordance with GOST 15150-69 (Part 1).
Transportation
- During transportation, the product must be protected from mechanical damage and impacts. - When loading/unloading, do not allow the product to be dropped.
- Transportation conditions must comply with GOST 15150-69 (Part 5).

Before using the tool, read and follow all safety instructions. Failure to follow the safety instructions and safety rules can result in electric shock, fire and/or serious injury. Keep all safety instructions and safety rules for future reference.
1609 92A 85B|(17.03.2023) Bosch Power Tools
Do not use the tool in explosive atmospheres, such as in the presence of flammable liquids, gases or dust. Sparks created while operating the tool may ignite dust or fumes. The power tool plug must match the outlet. Never modify the plug in any way. Do not use any adapter plugs with earthed (grounded) power tools. Unmodified plugs and matching outlets will reduce risk of electric shock. Avoid body contact with earthed or grounded surfaces, such as pipes, radiators, ranges and refrigerators. There is an increased risk of electric shock if your body is earthed or grounded. Do not expose power tools to rain or wet conditions. Water entering a power tool will increase the risk of electric shock. Do not abuse the cord. Never use the cord for carrying, pulling or unplugging the power tool. Keep cord away from heat, oil, sharp edges or moving parts. Damaged or entangled cords increase the risk of electric shock. When operating a power tool outdoors, use an extension cord suitable for outdoor use. Use of a cord suitable for outdoor use reduces the risk of electric shock. If operating a power tool in a damp location is unavoidable, use a residual current device (RCD) protected supply. Use of an RCD reduces the risk of electric shock.
Power tool safety
Read all safety warnings and all instructions.
Save all warnings and instructions for future reference.
The term "power tool" in the warnings refers to your mains-operated (corded) power tool or battery-operated (cordless) power tool.
Work area safety
Electrical safety
The power tool is intended for the following applications as described in the operating instructions.
(1) Battery pack
256|Kazakh
(2) Charger/ Power supply (3) Display (touch screen) (4) Safety lock (5) On/Off switch (6) Sensor (7) Serial number (8) Cable sensor (9) Handle
Indications
(a) Pressure gauges (b) Valves (c) Fittings (d) Wind direction indicators (anemometer) (e) Dust indicators (f) Battery indicators
Temperature of flue gases / flue gas temperature
The flue gas temperature sensor is installed on the flue gas duct.

If the flue gas temperature exceeds the set value, the alarm is activated. If it is detected, the burner is shut off. If this happens,
contact the service organization to adjust the boiler and burner settings.
Boiler water temperature in operating mode
Self-diagnosis
If the pressure in the boiler exceeds the set value, the safety valve opens and the red lamp lights up.
| сумен толърbingлган пл actнк куьр | Ги升降 capтон кабырfasларды сунен толърbingлган пл actнк кабырлар <Араш> куmbic рекимide д. осьлай керсетile di. |
| Ги升降 capтон кабырfas emec | <Араш> куmbic рекимideTek Ги升降 capтонлгама урhalлган. |
| эр tekti Ги升降 capтон кабырfasьагдаллган коча тастддан касаллган Ги升降 capтон кабырfasлар оte ор tekti бolyы жэne opbl anыклар кателерин тydьруbl MUMKIN. Сондыклар олшey ар eketин кабырfasы baskа лордб acstahыз кэн бака等相关дддддддддддддддддддддддддддддддддддддддддддддддддддддддддддддддддддддддддддддддддддддддддддддддддддд Кабырfasлар олшени.Булшар кемпеспес, Кабырfasда Ги升降 capтоннан касаллган Ксвмша тасты устл турьл,Оньн устин олшени. | |
| Флшу куралы кабырfas Тым вая орналады | Флшу куралы кабырfas кулдам opнathыл. Тым вая орналады. |
| Кабырfasmen ядану bірkenki emec | Флшу куралы олшey bірбінда ордан Кабырfasа bірьнда bірkenki ядану cуstan Турьлдджэн олшey куралы Төнkeрmeni3. |
| Араш Берененер таьлmaйды. | |
| Флшу олiri тым Кьіся Куралы олшey орекетин кабырfasлары baskа лордб acstahыd Жэн олшey куралы узвьрak bэлік устин Жылжытынl3. | |
| Араш Берене тым Терен Аль'tay Терендігі куралысыліК matesрналга тауellen Жэн мaksималды aнытay Терендігін кем олуы МUMКIN. | |
| Мaterиал оklрандалган Hemece aya bілfaлдылfы Тым олры | Куралы мaterиалдырьmetалдан касаллган Hemece Тыm bілfaлды (MbICalbl, Тыm ол�ары оу bілfaлдылфында) bollyca, cehimdi typde opbl anыклay МUMKIN 60лmaйды. |
Boiler water temperature in operating mode
Self-diagnosis
If the pressure in the boiler drops below the set value, the safety valve opens and the yellow or red lamp lights up.
AUTOMATIC MODE: The burner is switched on and off automatically by the control system.
The safety valve opens when the pressure in the boiler exceeds the set value, and the yellow or red lamp lights up.
| ТыМ Тар орhalackан кел metалл HBICAH | ТыМ Тар орhalackанmetалл HBICAHapdBiH,орьIH б龄ек anbiktay MymKIN emec. |
| Бetoнда metaTall Курblbic maTeрнадары hemece apMaTypanbik Temip 6ap | MetaTall Курblbic MaTeрнадarbyHbIH (MbICalbl, anIOMHNMeH lamHaTTaIIFaH OkShaylaBbIM MaTePnA1, Жыlny etKizriW ta6ak metaTAll) opNbIH ceHIMdi Typde anbiktay MymKIN emec. |
| КабырfaHbIH apTkblжafblHda келемdi metaTall HBICAH 6ap | Кelemdi metaTall nbicaHapdbIH (MbICaIb, paIHaTopnap) opNbIH ceHIMdi Typde anbiktay MymKIN emec. |
| АвTomaTbI Tpyde kalibpney cAtci3 aYkTaNbl | <Ка'ta JyKtey> iшк мэзipi apKblbl KocbIMwa kalibpney npoecin icke kocbInbI3. |
| Metall HBICAH Ta6bImadbl. | |
| MetaTall HBICAH TbIM TepeH, opHaIacKaH hemece TbIM kiwi. | Anbiktay TepeHdiRi Курblbic MaTePnAblHaЖеHe hbICaHfRa baiNaHbICTbl BoIaDbIЖeHe MaKcIMaJIbl ahbiktay TepeHdiRiHeH Kem BoIybl MymKIN. |
<Electric> Boiler water temperature in operating mode
Self-diagnosis
The lubricant reservoir must be filled with oil before first use.
When inserting the lubricant reservoir, use a free hand to push it in until there is a gap of 20-30 cm from the guide bar.
Check the oil level indicator.
Check the oil level indicator. If the oil level is low, add oil through the oil filler opening. The oil level should be between the MIN and MAX marks on the indicator, and the oil should be suitable for the ambient temperature range of 110-240 V and 50-60 Hz.
Self-help
| Кабел升降升降升降升降升降升降升降升降升降升降升降升降升降升降升降升降升降升降升降升降升降升降升降升降升降升降升降升降升降升降升降升降升降升降升降升降升降升降升降升降升降升降升降升降升降升降升降升降升降升降升降升降升降升降升降升降升降升降升降升降升降升降升降升降升降升降升降升降升降升降升降升降升降升降升降升降升降升降升降升降升降升降升降升降升降升降升降升降升降升降升降升降升降升降升降升降升降升降升降升降下降升降升降升降升降升降升降升降升降升降升降升降升降升降升降升降升降升降升降升降升降升降升降升降升降升降升降升降升降升降升降升降升降升降升降升降升降升降升降升降升降升降升降升降升降升降升降升降升降升降升降升降升降升降升降升降升降升降升降升降升降升降升降升降升降升降升降升降升降升降升降升降升降升降升降升降升降升降升降升降升降升降升降升降升降升降升降升降升降升降升降升降升降升降升降升降升降升降升降升降降升降升降升降升降升降升降升降升降升降升降升降升降升降升降升降升降升降升降升降升降升降升降升降升降升降升降升降升降升降升降升降升降升降升降升降升降升降升降升降升降升降升降升降升降升降升降升降升降升降升降升降升降升降升降升降升降升降升降升降升降升降升降升降升降升降升降升降升降升降升降升降升降升降升降升降升降升降升降升降升降升降升降升降升降升降升降升降升降升降升降升降升降升降升降升降升降升降升降升降降落升降升降升降升降升降升降升降升降升降升降升降升降升降升降升降升降升降升降升降升降升降升降升降升降升降升降升降升降升降升降升降升降升降升降升降升降升降升降升降升降升降升降升降升降升降升降升降升降升降升降升降升降升降升降升降升降升降升降升降升降升降升降升降升降升降升降升降升降升降升降升降升降升降升降升降升降升降升降升降升降升降升降升降升降升降升降升降升降升降升降升降升降升降升降升降升降升降升降升降投降升降升降升降升降升降升降升降升降升降升降升降升降升降升降升降升降升降升降升降升降升降升降升降升降升降升降升降升降升降升降升降升降升降升降升降升降升降升降升降升降升降升降升降升降升降升降升降升降升降升降升降升降升降升降升降升降升降升降升降升降升降升降升降升降升降升降升降升降升降升降升降升降升降升降升降升降升降升降升降升降升降升降升降升降升降升降升降升降升降升降升降升降升降升降升降升降升降升降升降升升降升降升降升降升降升降升降升降升降升降升降升降升降升降升降升降升降升降升降升降升降升降升降升降升降升降升降升降升降升降升降升降升降升降升降升降升降升降升降升降升降升降升降升降升降升降升降升降升降升降升降升降升降升降升降升降升降升降升降升降升降升降升降升降升降升降升降升降升降升降升降升降升降升降升降升降升降升降升降升降升降升降升降升降升降升降升降升降升降升降升降升降升降升降升降升降升降升降升降 升降升降升降升降升降升降升降升降升降升降升降升降升降升降升降升降升降升降升降升降升降升降升降升降升降升降升降升降升降升降升降升降升降升降升降升降升降升降升降升降升降升降升降升降升降升降升降升降升降升降升降升降升降升降升降升降升降升降升降升降升降升降升降升降升降升降升降升降升降升降升降升降升降升降升降升降升降升降升降升降升降升降升降升降升降升降升降升降升降升降升降升降升降升降升降升降升降升降升降 卡赫尼赫尼赫尼赫尼赫尼赫尼赫尼赫尼赫尼赫尼赫尼赫尼赫尼赫尼赫尼赫尼赫尼赫尼赫尼赫尼赫尼赫尼赫尼赫尼赫尼赫尼赫尼赫尼赫尼赫尼赫尼赫尼赫尼赫尼赫尼赫尼赫尼赫尼赫尼赫尼赫尼赫尼赫尼赫尼赫尼赫尼赫尼赫尼赫尼赫尼赫 |
Technical data and service
Service and maintenance
Before any work on the machine, pull the plug out of the socket. If the plug is damaged or the cord is torn, it must be replaced by the manufacturer.
To ensure a long service life, keep the machine clean and lubricate it regularly. Do not immerse the machine in water or other liquids.
Clean the ventilation slots with a soft brush. Do not use aggressive cleaning agents.
Maintenance and service recommendations
The service center will provide technical support and advice, as well as answer questions about spare parts and accessories. For spare parts and accessories, please contact the service center:
www.bosch-pt.com
Bosch Kbi3MeTKeHec 6epy to6bI bi3diH eHimdep XaHe oIapdbH KepeK-XapaKTapbl typaBl cypaKTapblb3ra xayan 6epei.
CypakapkoJxHeKocankb6eIWeKeTepre TaNcbipbc bepy KeiHneMiHdTeTI Tpye EHIMHIhPmabIK TaKaTaNacBHaFb1 10 TaH6anbl EHM Hemipin BepiH3.
OHypiwi TaanTapb MeH HOpMaIapBihBcakTanybIme 3neKtp KpaBih XeHdey XHe KeinDi Kbi3MeT KepCteTy 6apbIK MemLeKeTTep aMyaFbIHda TeK "Pobep T Boi" dHpMaBik HeMece ABTopn3aunnaHaH Kbi3MeT KepCteTy opTaBikTapbIHda opbIHdaIb. ECKEPTY! 3aHcbiz KOJImEH eKeiHReH eHIMdepi naJaIaNHy Kayinti, DeHCaylbIFbIHb3Fa 3nH KeTIpyi MyMKIn. OHIMdepi 3aHcbiz JAcay XHe Tapaty AkIMsiNik XHe KbIMbICTbIK TepTIN BoBHWA 3aHMeH KyDaIaNAbI.
Ka3akctah
TybHybInapFaKeHec6epyXHeIaFbIMdApdbI Ka6blnay opTaIbIfb: "Po6ept Bow" (Robert Bosch) KLIJC
AnMaTbIK
Ka3aKCTaH Pecny6nKacbI 050012
Mypat6aeB K., 180 y
"RepMec" BO, 7 ka6aT
Ten.: +7 (727) 331 31 00
ΦaKc: +7 (727) 2330787
E-Mail: ptka@bosch.com
CepBnCTIK Kbl3MeT KepcTeY opTaIbIKTapbl MeH Ka6blNay nyHKTePiH MeKeH-KaBl TypaIbI TOnblK XHe 03eKti aKnapaTb Ci3: www.bosch-professional.kz pecMn caTTaH ana aIacbl3
KbI3Met Kepcety optaibikTapbIH 6acka da MekehkaJnapbIH MbHa XepdeH KapaHbI3:
www.bosch-pt.com/serviceaddresses
The device may only be handed over to a specialist workshop for repair.
Do not expose the device to rain or moisture!
For Turkey:
Old electrical and electronic devices, in accordance with the European Directive 2012/19/EU and its implementation in national law, must be collected separately and recycled.
Bosch Power Tools 1609 92A 85B| (17.03.2023)
Used batteries/accumulators that are no longer usable must be disposed of separately and in an environmentally friendly manner.
Old electrical and electronic devices may contain hazardous substances, and improper disposal can harm the environment and human health.
Romanian
Safety Instructions

All instructions must be read and observed. If the measuring tool is not used in accordance with these instructions, the protective devices integrated in it may be impaired. KEEP THESE INSTRUCTIONS IN A SAFE PLACE.
Electric tool service
Strada Horia Macelariu Nr. 30-34, sector 1
013937 Bucharest
www.bosch-pt.com/serviceaddresses
Disposal
Replacing the battery
To protect the measuring device, it is recommended to use alkaline manganese batteries.
Do not use batteries with a nominal voltage higher than 1.5 V.
To remove the battery compartment cover (1), slide it in the direction indicated by the arrow. Insert the batteries.
Pay attention to the correct polarity, shown on the inside of the battery compartment.
The battery indicator (f) on the display shows the current battery status.
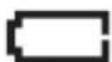
If the battery indicator on the display shows an empty symbol, the measuring device may still work for about 15 min. Replace the batteries.
Replace the batteries.
Replace all batteries at the same time. Use batteries of the same type and from the same manufacturer with the same capacity.
If you do not use the instrument for a long time, remove the batteries from it. If the batteries are stored in the measuring instrument for a long time, they may corrode and discharge themselves.
Operation
Protect the measuring instrument from moisture and direct sunlight. Do not expose the measuring device to extreme temperatures or sudden temperature changes. In case of large temperature differences, allow the device to acclimate before switching it on. In case of extreme temperatures or sudden temperature changes, the accuracy of the measuring device or the display may be affected. Avoid strong impacts or dropping the measuring device. In case of visible damage or malfunction, send the measuring device for inspection to the original Bosch service for electrical power tools. Hold the measuring device only by the intended gripping surfaces (9) to avoid affecting the measurement. Do not place stickers or labels in the sensor area (6) on the back of the measuring device. Metal labels affect the measurement result.

Before measuring, make sure there is sufficient grounding. With insufficient grounding, the detection of live cables may be affected.
Avoid proximity to devices that emit strong electric, magnetic, or electromagnetic fields, such as mobile phones, laptops, or tablets. If possible, switch off devices that could affect the measurement, or deactivate their relevant functions.
Sensor screen operation
Do not allow the measuring device to be used if the sensor screen shows defects (e.g., scratches on the surface, etc.).
The display is divided into a status area (c), as well as a sensor screen with an information area (b) and a control area (a).
The status area (c) shows the active audio signal setting (e), the battery indicator (f), and the page number (d) (when navigating through multiple pages).
Using the sensor screen, the measuring device can be controlled by touching the buttons on the screen.
For operation with the sensor screen, use only your fingers.
286 | Bulgarian
Do not touch other electrical devices to the sensor screen, do not wet it with water. To clean the sensor screen, turn off the measuring device. Remove any dirt with a microfiber cloth.
Navigation in the menu
To control the measuring device, the sensor screen is operated with the following gestures: tap and swipe.
To turn off the measuring instrument, press and hold the start button (2).
If no measurement is performed within 5 minutes and no button on the measuring device is pressed, the measuring device turns off automatically to save the batteries.
Operating modes (see Fig. A)
With the measuring device, the base is checked in the sensor area (6) in the direction of measurement up to the maximum opening depth.
Select the desired operating mode.
The measuring device should be held perpendicular to the base, without lifting it or changing the pressure. For correct measurement, the wall sensor (8) must have constant contact with the base.
Hold the measuring device against the surface for gripping (9) with constant force and do not tilt it during the measurement. The sensor zone (6) must be in contact.
If the measuring device detects an object, this is shown in the information field (b) and the LED (4) lights up with a red light. Follow the further instructions in the information field. Note that when scanning a defined area of the base, the accuracy of localization increases. When an object is localized, this is indicated in the information field; the LED (4) lights up with a green light and an audible signal sounds.
The type of detected object (depending on the operating mode) is shown on the display: - Electrical conductor, - Metal, - Wooden construction.
If no object is detected, the LED (4) remains green and no indication is displayed.
Operating modes
For detecting objects, you can choose between three operating modes and activate two of them simultaneously.
Operating mode (Fig. B)
This mode is suitable for detecting wooden beams in dry construction.
When placing the measuring device against the wall, the LED (4) lights up with a red light until the measuring device is calibrated.
Note that when selecting this mode, all objects in the drywall are detected. Only by combining with the other two operating modes can metal objects or electrical conductors be excluded.
In this mode, plastic pipes are also detected, especially if they are filled with water. Before drilling, cutting, or sawing, make sure that it is a wooden beam and not a plastic pipe.
Use this operating mode only for drywall.
Operating mode (Fig. C)
The tool is designed exclusively for opening objects made of metal (e.g., copper pipes or steel fittings), regardless of the wall structure.
In live mode, work is carried out under voltage. Do not attempt to locate electrical cables. To be able to locate electrical cables, you can switch the operating mode and .
Operating mode (Fig. D)
The tool is suitable for locating live wires under voltage (110-240 V, 50-60 Hz).
Preparation for measurement and measurement features:
-Live wire detection. Therefore, connect consumers (e.g., lamps, devices) to the wire being tested. Turn on the consumer to ensure that the wire is actually live. -The signal of 50 to 60 Hz from the electrical wire must reach the measuring device. If the wires are in damp walls (e.g., humidity >50%), in a metal conduit (e.g., under plaster) or in a metal pipe, the signal does not reach the measuring device and the wire cannot be located. -The measuring device must be properly grounded. To do this, hold it (without gloves) firmly on the surface and for gripping (9). Make sure you have good contact with the ground. Insulating shoes, mats, or ladders can affect contact. The ground itself must be grounded; otherwise, the wire cannot be located. The 50-60 Hz signal must be stronger than the wire, unless there is direct proximity. If the wall is hard, dry, or grounded, the signal through the wall is weak. Then the measuring device will show in a large area that a live wire is detected, but it cannot precisely locate the wire. In such a case, you can help by placing your free hand at a distance of 20-30 cm from the measuring device to divert the signal from the wall.
Before drilling, cutting, or sawing into walls, always disconnect the consumer from the power and the pre-checked voltage. After all activities, ensure that the fixtures to the base of the object are not under voltage.
If the wire in live mode cannot be located, trace the wire in live mode as a metal object. Note that the maximum detection depth is shallow (approx. 2-3 cm). For a difference from the
Cables, multiple cables cannot be located in live mode.
Conductors of multi-phase current (known as three-phase or five-wire) cannot be located in live mode, because the signals from the different phases cancel each other out. You can, however, locate multi-phase current conductors in live mode as a metal object. The maximum detection depth is slightly greater than that for single-phase current.
Menu

To set the menu, press the measuring device against the base and follow the instructions on the display.
When switching the measuring device on and off, the sound and display settings are saved.
Settings:
You can turn on and off the acoustic signal that indicates detected objects. The selected setting is shown in the status indicator for the acoustic signal (e).
Submenu <Language>:
Select the language for the user interface.
Submenu:
Here you can calibrate the measuring probe again. Re-calibration is recommended if the measuring probe is constantly exposed to metal objects, or if it is used in close proximity to them.
Follow the instructions in the information area of the sensor display during re-calibration. Perform re-calibration only at stable temperature.
Menu <Help menu>

To access the menu, select the measuring probe from the main menu and press the button shown on the side.
Submenu:
Here you will find information about your measuring probe.
Submenu:
You can select the first start-up instructions to be displayed for working with your measuring probe. If necessary, you can select the display of these instructions directly from this submenu.
Submenu:
Here you will find the norms for the most common errors in measurement.
290|Bulgarian
Submenu:
The device is intended for measuring purposes and must be used in accordance with the instructions.
Operation
Marking objects
If necessary, you can mark open objects. Perform the measurement as usual.
If you have opened an object, mark the desired location through the marking opening (5). During marking, the image on the display may change, as the marking opening is directly in the sensor area (6) and the marking process may affect the sensors.
After marking, the device automatically starts a new measurement. For this, separate the measuring tool from the wall. This ensures that the marking process does not affect the results of the subsequent measurement.
Troubleshooting - Causes and remedies
Service scule electric
Strada Horia Macelariu Nr. 30-34, sector 1
013937 Bucuresti, Romania
www.bosch-pt.com/bg/bg/
Further service addresses can be found at:
www.bosch-pt.com/serviceaddresses
Disposal
The measuring tool, accessories, and packaging must be disposed of in an environmentally friendly manner for recycling of the materials they contain.
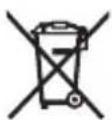
The measuring tool and the batteries must be disposed of separately!
Only for European Union countries:
According to the European Directive 2012/19/EU on waste electrical and electronic equipment and its transposition into national law, measuring tools that can no longer be used must be collected separately and handed in for environmentally correct recycling. According to the European Directive 2006/66/EC, defective or exhausted batteries must also be collected separately and handed in for environmentally correct recycling.
If electrical and electronic devices are disposed of incorrectly, hazardous substances may have harmful effects on the environment and on human health.
Macedonian
Safety Notes

All instructions must be read and followed. If the measuring tool is not used in accordance with the enclosed instructions, the protective mechanisms in the measuring tool may be impaired. Keep all instructions in a safe place.
The measuring tool may only be repaired by qualified specialists using original spare parts. This ensures that the safety of the measuring tool is maintained.
1609 92A 85B| (17.03.2023) Bosch Power Tools
Do not operate the measuring tool in explosive atmospheres, such as in the presence of flammable liquids, gases, or dust. The measuring tool creates sparks, which may ignite the dust or fumes.
Under adverse conditions, the measuring tool cannot guarantee reliable detection. To avoid hazards, before each use, drilling, sawing, or grinding in walls, ceilings, or floors, obtain other sources of information such as building plans, photos from the construction phase, etc. The influence of the environment, such as humidity or the proximity of other electrical devices that generate strong electrical, magnetic, or electromagnetic fields, humidity, building materials containing metal, insulation materials laminated with aluminum, or conductive wallpaper, may affect the accuracy of the measuring tool. The number, type, size, and position of objects may affect the measurement result. ▶ If there is gas in the building, then after every work in walls, ceilings, or floors, check that no gas has escaped. When attaching objects to surfaces, check the load-bearing capacity of the floor. For fastening materials, especially when fastening to drywall.
Description of performance features
Pay attention to the figures at the beginning of the operating instructions.
Intended use
The measuring tool is intended for detecting metals (ferrous and non-ferrous, e.g., reinforcing steel) and live cables in walls, ceilings, and floors, as well as wooden beams in dry walls.
Instruction for use in the interior space.
Illustration of components
The numbering of the components in the figure corresponds to the numbering in the graphic page.
(1) Battery release button (2) On/off switch (3) Display (4) Indicator light (5) Ventilation opening
Bosch Power Tools 1 609 92A 85B| (17.03.2023)
296 | Macedonian
(6) Field sensor (7) Serrated edge (8) Depth sensor (9) Surface of the tool
Control elements
(a) Navigation button (b) Information button (c) Status bar (d) Page number display (only for devices with multiple pages) (e) Signal tone button (f) Battery indicator
Technical data
| Дигитален deteKtop UniversalDetect | |
| Бров на дол | 3 603 F81 3.. |
| макс. дваочина на ретистриральеA) | |
| - Метал 100 mm | |
| -_edнофальский ск的乐趣а (110-240 V, 50-60 Hz, predecessor наимон)B) | 50 mm |
| - Осюва od драво bo суба 25 mm | C) |
| Оператина temпература -5°C ... +40°C | |
| Temпература при скадиралье -20°C ... +70°C | |
| Оncер на оператина Фразковецima 48-52 кHz | |
| макс. jaшина на магнetedно поle (при 0,1 m) 106 dBμA/m | |
| макс. оператина висна пеку розерентна висна 2000 m | |
| релатина влажно на воздунот | |
| - Ржим на pбotinga <Метал> и <Дрво> | 30-80% |
| - Начин на pбotinga <Стура> | <50% |
| Стосян на Изballканост соред IEC 61010-1 2 | D) |
| Баэрп 4 × 1,5 VLRO3 (AAA) | |
| В��еметаенье на pбotingа okoly. 4 h | |
1 609 92A 85B|(17.03.2023) Bosch Power Tools
UniversalDetect wall detector
Technical data according to EPTA-Procedure 01:2014 0.34 kg
Dimensions (length × width × height) 255 × 90 × 56 mm
A) Depending on the working method, the material, and the size of the object, as well as the material and composition of the substrate B) Auxiliary handle for registration on non-conductive cables C) Response of the two-pole circuit tester D) Occurrence of wireless interference, but timely detection is expected due to condensation.
Please refer to the specifications label for clear identification of your measuring device.
The measurement result may be affected by the accuracy and registration of the device's properties, depending on the conditions.
Installation
Inserting/Replacing the Batteries
For operation with the measuring device, it is recommended to use alkaline-manganese batteries.
Do not use batteries with a nominal voltage higher than 1.5V.
To open the battery compartment (1), press in the direction of the arrow on the battery cover. Insert the batteries.
Pay attention to the polarity as shown on the inside of the battery cover.
The battery indicator (f) in the display of the device shows the current battery status.
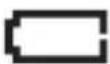
As soon as the battery indicator appears in the display of the device, the measuring device can operate for a maximum of 15 minutes. Replace the
batteries.
Always replace all batteries at the same time. Use batteries of the same type from the same manufacturer.
If you do not use the measuring device for a long time, remove the batteries.
When fully discharging in the measuring device, batteries may leak and become damaged.
Use
Protect the measuring device from direct sunlight and extreme temperatures. Do not expose it to extreme temperatures or temperature fluctuations. In case of temperature fluctuations, leave the measuring device to acclimatize before switching it on. In case of extreme temperatures or temperature fluctuations, the accuracy of the measuring device may be impaired. Avoid impacts and tipping over of the measuring device. After strong external influences and before commissioning, the measuring device must be checked at an authorized Bosch service center. Hold the measuring device only on the designated holding surfaces (9) so that it does not fall. Do not place stickers or signs on the sensor area (6) on the rear side of the measuring device. Especially note metallic objects in the vicinity of the measuring results.

Do not wear gloves during measurement and ensure proper grounding. Improper grounding may impair the detection of live cables.

During measurement, avoid being in the vicinity of devices that emit strong electrical, magnetic, or electromagnetic fields, such as mobile phones, laptops, or tablets. If possible, deactivate them or keep them away from the measuring device.
The display may be impaired by direct sunlight or extreme temperatures.
Using the display
Do not use the measuring device if it is visibly damaged (e.g., cracks on the surface, etc.).
The display is divided into a status bar (c) as well as a display with an information field (b) and a navigation field (a).
The status bar (c) shows the current audio signal status (e), the battery indicator (f), and the page number (d) (for multi-page displays).
The measuring device can be operated via the display using the buttons on the display.
To work on the display, use only your fingers.
Do not bring the display into contact with other electrical devices or water. To clean the display, switch off the measuring device. Remove dirt with, e.g., a microfiber cloth.
Navigation in the menu
To operate the measuring device via the display, the following basic operations are used (depending on the respective language):
The measurement process does not start.
Do not briefly press the sensor (8) with the tip for switching on/off or for contact detection with the switching on (2), in order to start the measurement process prematurely.
HeToUHn/HeBepoJTHm MepHn pe3yIaTn
Meahe Ha npedmetn BO OTeTpaHete r n CHTe npedmetn ITO ce Meaaat (Ha np. noneto Ha ceh30pot (6) YacOBHN, HapaKBuca, IpCTe HTH.) OD noneto Ha ceH30pot (6). He paKaJTe ro MepHnot ypeD Bo 6n3nHa Ha ceh30pot.
OkoHaTa TemnepaTypa e KopncTeTe ro mepHnot ypeI cMo BO oncER Ha npebuCoka/npenHcKa pa6oTHaTa TemnepaTypa.
CINHa IpOmeHa Ha OctaBeTe ro MepHnOT ypeI da ce Temnepnpa. TemnepaTypaTa

Mepnnot ypej ja KOHTpOInpa ToHata cyHKunja npn cekoe mepehe. JOKoKcy ce yTbpnn depeKT, ekpaHot ja npkKaKyBa camo 03HaKaTa BO 6n3nHa. Bo OBOJ cnuyaj nIIN DOKONky CO dpyrTe CnomeHaTH MEPKN 3a NOMOW He MoXe da ce OTCTpAnH ppeykata, npedaTe ro BaUnOT Mepeh ypeJ ha OBnacteHa Bosch
cepBncha cnyX6a.
304 MaKeDoHcKn
TpeuKa npn MepeHe co pexKm Ha pa6oTa
PnpuHa Tomo
CBeTneKnot npcten CBtH CpBeHo, nako BO sIdoT Hema dpBeHa rpeja.
| Пл actина цевka полна co вota | Пл actина за цевka полна co вota bo cyва гральба исто takesе посякува вов рекимот на pавoting |
| Нема суба гральba | Рекимот на павoting e наимет само за суба гральba. |
| нхомогена суба гральба Сymbа тгральba od граьшпеглоча може за bиende MHORY HEXOMOREHA Ида поедизвка гравшиноцрая. Затoa, започete Г меребето на друто место на садот и мерete на друту висна. Доколку то на помоген, тогаш дожete допоннелни пioча од Гпс Картон на садот и мерete наhea. | |
| Бавно поставete Г мернот уreed на садot | Бразно поставete Г мернот уreed на садOT. |
| Нерамноремерен контакт с сандот | СекORAШ дожete Г мернот уreed за в徕ке на мереньeto co Што e можно поамноремерен Контакт с сандот и не Г на habалува对接 мернот уreed. |
He npohajdeha dpBeha rpea.
| Мерно подане симогу Кратуко | Започete Г мerteшито на дуров место на сидот и придвожete Г мернот уreed на полесло pactозанne. | |
| Дрваната граведа e праздаю коставна | Длобочины на Perinctrupаные за виси od гаджниot матер joл и може за вомал од мakсимална длобочины на Perinctrupа. 3аштintен гаджени матер joл и пемногу Виска влажноct на ВOSTДУХОТ | Кajmetални поlemногу влажни гаджни матер joл (на有很大).При пемногу виска влажноct на ВOSTДУХОТ) не e можнх сигуруно лоцраль. |
TpeuKa npn MepeHe co pexHm Ha pa6oTa
PnunHa Tomo
CBeTneKnot npCTeH CBTeH XoITo HnN CpBeHo, hako Bo 6n3nHa Hema MeTaI.
ABTOMATCKOTO kaHbnpaBe 3anoyheTe dOnonHnTeIHO kaHbnpaBe npeky He e ycneuho NOdMeHTo .
The light beam is directed at a large field of view.
Length of measurement
| MHORY TECHO NOCTABENI METALHIN PPREDMETN | Преемногу TECHO NOCTABENI MEТALHIN П_PREdmETN може да не се лоцираат оделно. |
| гразжни материалышTO соржатmetалллчелоча apMaTypa BO 6eToH | Кajmetалн Гразжни материалы (на п. алушиимьскп ламинирани ИЗОЛациски материал, лимовс сToTПИнСКа сproвODПИВОСТ) He e можно лоцираны. |
| macHBHmmetaHn PpredmETn Ha 3aДнATER CTpaHa Ha SHIDOT | Kaj macHBHmmetaHn PpredmETn (нa п. гpejни тela) He e можно Точно лоцираны. |
| АВТOMATСКOTO калбрраны He e успшно | Започete дОпOLНITELO калбрраны пеку посmethу <Pecetnpaj>. |
| He e hajdenmetanen mpredmet. | |
| MetalHnOТ PpredmET e празлобokO NOCTABENI п PremHory Man. | ДлабочинATER Na Perinctprapaые 3ависн od ГразжниOT мaterиал и od пrecIMETOT И може за e помала od мakсималATER Длабочина Na Perinctprapaны. |
Measurement error during operation mode
Length of measurement
The light beam is directed at a large field of view.
| небовлино 3a3eмjyBa№Ha | Дорпete ro smIDOT co BaшаТа снобонha paKa Ha |
| SINДОТ | pacTojaHne od 20-30 cm od Мернот урeding, за ду ro 3a3eмjnte smIDOT. |
Do not use damaged cable.
| Hema/HeTHnHueH HAnOH Ha KaIeIot | CnpOBeTe He HAnOH Ha KaIeIOT, Ha np. co BkIyUbaIe Ha cooDBeTHNt IpeKInHyBaU 3a CBeTIO. IooIpaJIeTo Ha nobEkeΦa3Hn CTpyJHn KaIeI, KaKoi Na KabIe Co NOBKe He HApOH HauBOP od oncEROT od 110-240 V n 50-60 Hz He e cnIpyHNo MOxHNo. |
| KaIeIOT e IprdIIa6Oko IocTaBEN. | ДлбочIHATA Ha PerIcTpriPahIe 3aBnCS Ond rpaIeJHnOT MaTeRJaI N MoJce Ja e IomAJa Ond MaKcHMaJIHaTa Ila6OuHnHa Ha PerIcTpriPahIe. |
| KaIeIOT e Bo 3a3emJeHa MTeJIHa ΚeBka. | УлOTpe6Te ro pexIMOT Ha pa6Ota <MeTAN> 3a Да habde MeTAlHa ΚeBka. |
306 | Macedonian
Length of measurement
The measuring device is not protected against direct sunlight. Do not expose the measuring device to rain or moisture. Do not wear insulating gloves.
Protective clothing and metal, especially conductive materials or conductive materials (e.g., conductive or high humidity air) cannot be accurately measured.
Maintenance and service
Maintenance system
Check the measuring device before each use. If damage or wear is visible inside the measuring device, safe operation is no longer guaranteed.
Maintain cleanliness of the measuring device to ensure good and safe operation. Do not immerse the measuring device in water or other liquids.
Clean the device with a dry, soft cloth. Do not use cleaning agents or solvents.
Service and application advice
The service and application advice will clarify your rights during the correction and repair of your product as well as the spare parts business. Information on spare parts can also be found at: www.bosch-pt.com The Bosch application advice team will help you with any questions regarding your products and accessories.
For all rights and spare parts claims, you can refer to the spare parts list in the product's specification sheet.
North Macedonia
D.D. Eлектрос.
Sаbakоvа 47H, брoj 3
1000 Skopje
E-mail: dimce.dimcv@servis-bosch.mk
www.bosch-pt.com/serviceaddresses
Disposal
Measuring tools, accessories, and packaging should be disposed of in an environmentally friendly manner.
Do not dispose of measuring tools and batteries in household waste!
Only for EU countries:
According to the European Directive 2012/19/EU on waste electrical and electronic equipment and its implementation in national law, measuring tools that are no longer usable must be collected separately and recycled for reuse. Defective or used batteries must be disposed of separately according to Directive 2006/66/EC. If disposed of improperly, electrical and electronic equipment may have harmful effects on the environment and human health due to potentially hazardous substances.
Srpski
Removing debris
Disposal
Dispose of measuring tools, accessories, and packaging in an environmentally friendly way for recycling.
Do not dispose of measuring tools and batteries in household waste!
Disposal
Measuring tools, accessories, and packaging should be brought for environmentally friendly recycling.
Do not throw measuring tools and batteries into household waste!
Only for EU countries:
In accordance with the European Directive 2012/19/EU on waste electrical and electronic equipment and its implementation in national law, unusable measuring tools, and in accordance with the European Directive 2006/66/EC, defective or exhausted rechargeable batteries/batteries must be collected separately and brought for environmentally friendly recycling.
In the case of improper disposal, waste electrical and electronic equipment can have harmful effects on the environment and human health due to the possible presence of hazardous substances.
Estonian
Safety instructions

Waste disposal
Cleaning

| .العربية الحرفية الحرفية الحرفية الحرفية الحرفية الحرفية الحرفية الحرفية الحرفية الحرفية الحرفية الحرفية الحرفية الحرفية الحرفية الحرفية الحرفية الحرفية الحرفية الحرفية الحرفية الحرفية الحرفية الحرفية الحرفية الحرفية الحرفية الحرفية الح註冊 .العربية الح註冊 الح註冊 الح註冊 .العربية الح註冊 الح註冊 .العربية الح註冊 الح註冊 .العربية الح註冊 الح註冊 .العربية الح註冊 الح註冊 .العربية الح註冊 الح註冊 .العربية الح註冊 الح註冊 .العربية الح註冊 الح註冊 .العربية الح註冊 الح註冊 .العربية الح註冊 الح註冊 .العربية الح註冊 الح註冊 .العربية الح註冊 .العربية الح註冊 .العربية الح註冊 .العربية الح註冊 .العربية الح註冊 .العربية الح註冊 .العربية الح註冊 .العربية الح註冊 .العربية الح註冊 .العربية الح註冊 .العربية الح註冊 .العربية الح註冊 .العربية الح註冊 .العربية الح註冊 .العربية الحarters .العربية الحarters .العربية الحarters .العربية الحarters .العربية الحarters .العربية الحarters .العربية الحarters .العربية الحarters .العربية الحarters .العربية الحarters .العربية الحarters .العربية الحarters .العربية الحarters .العربية الحarters .العربية الحarters . .العربية الحarters . .العربية الحarters . .العربية الحarters . .العربية الحarters . .العربية الحarters . .العربية الحarters . .العربية الحarters . .العربية الحarters . .العربية الحarters . .العربية الحarters . .العربية الحarters . .العربية الحarters . .الع-ieل . .الع-ieل . .الع-ieل . .الع-ieل . .الع-ieل . .الع-ieل . .الع-ieل . .الع-ieل . .الع-ieل . .الع-ieل . .الع-ieل . .الع-ieل . .الع-ieل . .الع-ieل . .الع-ieل .الع-ieل . .الع-ieل . .الع-ieل . .الع-ieل . .الع-ieل . .الع-ieل . .الع-ieل . .الع-ieل . .الع-ieل . .الع-ieل . .الع-ieل . .الع-ieل . .الع-ieل . .الع-ieل . .. . . . . . . . . . . . . . . . . . . . . . . . . . . . . . . . . . . . . . . . . . . . . . . . . . . . . . . . . . . . . . . . . . . . . . . . . . . . . . . . . . . . . . . . . . . . . . . . . . . . ? . . . . . . . . . . . . . . . . . . . . . . . . . . . . . . . . . . . . . . . . . . . . . . . . . . . . . . . . . . . . . . . . . . . . . . . . . . . . . . . . . . . . . . . . . . . . . . . . . . . - . . . . . . . . . . . . . . . . . . . . . . . . . . . . . . . . . . . . . . . . . . . . . . . . . . . . . . . . . . . . . . . . . . . . . . . . . . . . . . . . . . . . . . . . . . . . . . . . . . . ; . . . . . . . . . . . . . . . . . . . . . . . . . . . . . . . . . . . . . . . . . . . . . . . . . . . . . . . . . . . . . . . . . . . . . . . . . . . . . . . . . . . . . . . . . . . . . . . . . . . \. . . . . . . . . . . . . . . . . . . . . . . . . . . . . . . . . . . . . . . . . . . . . . . . . . . . . . . . . . . . . . . . . . . . . . . . . . . . . . . . . . . . . . . . . . . . . . . . . . . 25 25 25 25 25 25 25 25 25 25 25 25 25 25 25 25 25 25 25 25 25 25 25 25 25 25 25 25 25 25 25 25 25 25 10 10 10 10 10 10 10 10 10 10 10 10 10 10 10 10 10 10 10 10 10 10 10 10 10 10 10 10 10 10 10 10 10 10 |
The original text appears to be garbled OCR output and not in English. It is unusable.
The original text appears to be garbled OCR output and not in English. It is unusable.
The original text appears to be garbled OCR output and not in English. It is unusable.
www.bosch-pt.com
The original text appears to be a repetitive pattern of characters, likely a page header or footer. It is unusable.
The original text appears to be garbled OCR output and not in English. It is unusable.
392
J
Robert Bosch Morocco SARL
The original text appears to be garbled OCR output and not in English. It is unusable.
20300
+212529314327
sav.outillage@ma.bosch.com
The original text appears to be garbled OCR output and not in English. It is unusable.
www.bosch-pt.com/serviceaddresses

LJW oJaw (7)
jgJw (8)
oJsws (9)
5gU (a)
Ucbl (b)
g jgi (c)
(AjLj j0g sso (BjLgLgLo (Caiw jg g (D)
.8gjulaii jssu 1yla, ggo jgb d piw s9g
JLJ0sJySg (7) 8oJawjI JyJolJzJlJwJ
aJg g jI 0jdl d
. Cws 6gj
wai
yjU/
o dogj g jnJl sIgjl jI oJl jI JI JI
.
www.bosch-pt.com/serviceaddresses
Copyright © 2009-2020 ARM LIMITED
All rights reserved.
Redistribution and use in source and binary forms, with or without modification, are permitted provided that the following conditions are met:
- Redistributions of source code must retain the above copyright notice, this list of conditions and the following disclaimer.
- Redistributions in binary form must reproduce the above copyright notice, this list of conditions and the following disclaimer in the documentation and/or other materials provided with the distribution.
- Neither the name of ARM nor the names of its contributors may be used to endorse or promote products derived from this software without specific prior written permission.
THIS SOFTWARE IS PROVIDED BY THE COPYRIGHT HOLDERS AND CONTRIBUTORS "AS IS" AND ANY EXPRESS OR IMPLIED WARRANTY, INCLUDING, BUT NOT LIMITED TO, THE IMPLIED WARRANTY OF MERCHANTABILITY AND FITNESS FOR A PARTICULAR PURPOSE ARE DISCLAIMED. IN NO EVENT SHALL THE COPYRIGHT OWNER OR CONTRIBUTORS BE LIABLE FOR ANY DIRECT, INDIRECT, INCIDENTAL, SPECIAL, EXEMPLARY, OR CONSEQUENTIAL DAMAGES (INCLUDING, BUT NOT LIMITED TO, PROCUREMENT OF SUBSTITUTE GOODS OR SERVICES; LOSS OF USE, DATA, OR PROFITS; OR BUSINESS INTERRUPTION) HOWEVER CAUSED AND ON ANY THEORY OF LIABILITY, WHETHER IN CONTRACT, STRICT LIABILITY, OR TORT (INCLUDING NEGLIGENCE OR OTHERWISE) ARISING IN ANY WAY OUT OF THE USE OF THIS SOFTWARE, EVEN IF ADVISED OF THE POSSIBILITY OF SUCH DAMAGE.
| de | Hiermit erklärt Robert Bosch Power Tools GmbH, dass der Funkanlageotyp UniversalDetect der Richtlinie 2014/53/EU entspricht. Der vollständige Text der EU-Konformitätserklärung ist unter der folgenden Internetadresse verfügbar: |
| en | Hereby, Robert Bosch Power Tools GmbH declares that the radio equipment type UniversalDetect is in compliance with Directive 2014/53/EU. The full text of the EU declaration of conformity is available at the following internet address: |
| fr | Le soussigné, Robert Bosch Power Tools GmbH, déclare que l'équipment radioélectrique du type UniversalDetect est conforme à la directive 2014/53/EU. Le texte complet de la déclaration UE de conformité est disponible à l'adresse internet suivante: |
| es | Por la presente, Robert Bosch Power Tools GmbH declares que el tipo de equipo radioélectrico UniversalDetect es conforme con la Diretiva 2014/53/EU. El texto complete de la déclaration é conformidad está disponible en la dirección Internetística: |
| pt | A abaixo assinada Robert Bosch Power Tools GmbH declares que o presente tipo de equipo equipamento de radio UniversalDetect está em conformidade com a Diretiva 2014/53/EU. O texto integral da déclaration de conformidade está disponible no seguente endereço de Internet: |
| it | Il fabbricante, Robert Bosch Power Tools GmbH, dichiara che il tipo di apparec chiatura radio UniversalDetect é conforme alla direttiva 2014/53/EU. Il testo completeness della dichiarazione di conformità à le disbursement al seguente indirizzo Internet: |
| nl | Hierbij verkaar ik, Robert Bosch Power Tools GmbH, dat het type radioappara-tuur UniversalDetect conform is met Richtlijn 2014/53/EU. De volledige tekst van de EU-conformiteitsverklaring kan worden geraadpleegd op het volgende internetadres: |
| da Hermed erkräer Robert Bosch Power Tools GmbH, at radioudystyrstypen UniversalDetect er i overensstemmelse med direktiv 2014/53/EU. EU-overens-stemmelmiseserklassingens fulde tekst kan findes på følgende internetadresse: | |
| sv | Härmed försakrar Robert Bosch Power Tools GmbH attenna typ av radiou-trustning UniversalDetect überensstämmer med direktiv 2014/53/EU. Den full-ständiga,texten till EU-försakran om überensstammelse finns på följande webb-adress: |
| no Robert Bosch Power Tools GmbH erkräer herved at radioutstyrstypen UniversalDetect er i overensstemmelse med direktivet 2014/53/EU. Den fulls- | |
| II | |
| tendige teksten i EU-samsvarserklæringen er tilgengelig på følgende nettadresse: | |
| fi | Robert Bosch Power Tools GmbH vakuuttaa, etta radiolaitetyppiUniversalDetect on direktivin 2014/53/EU mukainen. EU-vaatimustemmukaisu-usvakuutuksen tãysimittainen teksti on saatavilla seuraavassa internetosoittees-sa: |
| el | Mé tnv napouo o/η Robert Bosch Power Tools GmbH, δηλωνe i OTo oρδioεξολμούς UniversalDetect πλροι tnv obnyia 2014/53/EE. To πληρεçκεμεvo tnc δηλωούς συμμόρφωούς EE διατιθεται στnv ακόλουθη ΠΟτοελίδa ΟTO διαδiktuo: |
| tr | Robert Bosch Power Tools GmbH, UniversalDetect radyo ekipmani tipinin Di-rektif 2014/53/EU ile uyumlu oldugunu borian eder. AB uygunluk borianin tam metnine aşagidaki internet adresinden ulaşabilirsiniz: |
| pl | Robert Bosch Power Tools GmbH niniejszym oswiadcza, ze typ urzadzenia ra-diowego UniversalDetect jest zgodny z dyrektywja 2014/53/UE. Peñy tekst de-klaracji zgodnosci UE jest dostepny pod nastepujacym adresem internetowym: |
| cs | Tínto Robert Bosch Power Tools GmbH prohlăsuje, ze typ rádioveho zařizeníUniversalDetect je v souladu se směrnici 2014/53/EU. Uplné zněni EU prohlăseni o shodě je k dispozici na tétoto internetové adrese: |
| sk | Robert Bosch Power Tools GmbH týmtó vyhlasuje, ze rádiove zariadenie typuUniversalDetect je v súlade so smernicou 2014/53/EU. Uplné EU vyhlásenie o zhode je k dispozicii na tejto internetovej adrese: |
| hu | Robert Bosch Power Tools GmbH igazolja, hogy a UniversalDetect típusú rá-dióberendezés megfelela 2014/53/EU irányelvnek. Az EU-megfeleloségi nyilat-kozat teljes szövege elérhető a kõvetkežő internetes cimen: |
| ru | CIM Robert Bosch Power Tools GmbH 3aABnIeT, uto padnoobopudobanie TINa UniversalDetect COOTBETCTByeTДиpeKTbE 2014/53/EU. C noHbIM TEKCTOM DeKalapauni o COOTBETCTBnE EU moJHo O3NaKOMITbCS no CleduyUOeMy INTEPHT-ÄDPEcy: |
| uk | LIM Robert Bosch Power Tools GmbH 3aABnIe, zu padioobpadnahanhy TINy UniversalDetect BIDNobidaeДиpeKTbI 2014/53/EU. 3 nobHm TEKCTOM DeKalapauni BIDNobIDNocTI EU moJHaOImMTTcS 3a TakoU INTEPHT-ÄDPEcOJO: |
| kk | ÖsblMeR Robert Bosch Power Tools GmbH KOMnAHnrcbI UniversalDetect TpyiDeeri padno JxabkTarpdbI 2014/53/EU dInpeKTbBaCbHa caJIbIFbIH MaflymdaIdbI. EO cəŋKeCTiK MaflymdaMaMbI TaMeHdEr i INTEPHeT MekeHkaBbIa Da KaJXeTImDi: |
| € | |
| ro | Prin prezenta, Robert Bosch Power Tools GmbH declares à tipul de echipainen te radio UniversalDetect este în conformitate cu Direcva 2014/53/UE. Textul integral al declarações UE de conformitate este disponible la următoarea adresă in-ternet: |
| bg C hactoioRobert Bosch Power Tools GmbH Deelapnpa, Que tosni Tnp radnocepbjxeHne UniversalDetect e B sbotbctBnve c DinepeKTHBa 2014/53/EC. LioCTNHTekCT Ha EC DeelapauTnTa 3a sbotbctCTBHe Moche da se hameprHa cnednna INTEpNET aDPEC: | |
| mk | Co oba, Robert Bosch Power Tools GmbH NOTBpduBa Deka Tnnot Ha paio no onpema UniversalDetect e Bo corlaacNoCT co DinepeKTHBaTa 2014/53/EU. LioocnToTekCT Ha N3jabTa 3a coobpa3NoCT Ha EU Moche da ro npouHtate Na cnednba INTEpNET CTpaHnca: |
| sr | Ovim Robert Bosch Power Tools GmbH izavljue da je radio-oprema tipa UniversalDetect u skladu sa direktivom 2014/53/EU. Kompletan tekst EC izjave o usaglašenosti je dostupan na sledecoj veb-adresi: |
| sl | Robert Bosch Power Tools GmbH potrjuje, da je tip radijske opreme UniversalDetect skladen z Direktivo 2014/53/EU. Celotno besedilo izjave EU o skladnosti je na voljo na naslednjem spltnem naslovu: |
| hr Robert Bosch Power Tools GmbH ovime izjavljue da je radijska oprema tipa UniversalDetect u skladu s Direktivom 2014/53/EU. Cjeloviti tekst EU izjave o skladnosti dostupan je na sljedećoj internetskoj adresi: | |
| et | Käesolevaga deklareerib Robert Bosch Power Tools GmbH, et käesolev raio-seadme tüup UniversalDetect vastab direktiivi 2014/53/EL nõuetele. ELi vasta-vusdeklaratsioni täielik tekst on kättesaadav järgmisel internetaadressil: |
| lv Ar so Robert Bosch Power Tools GmbH deklare, ka radioiekārtaUniversalDetect atbilst Direktivai 2014/53/ES. Pilns ES atbilstības deklarācijas teksts ir pieejams šādā interneta vietne: | |
| lt | Aš, Robert Bosch Power Tools GmbH, patvirtinu, kad radijo jrenginiú tipsa UniversalDetect atitinka Direktyva 2014/53/ES. Visas ES atitikties deklaracijos tekstas prieinamas šiuo interneto adresu: |
| -> http://eu-doc.bosch.com/ | |


Declaration of Conformity
Hereby, Robert Bosch Limited as authorised representative acting on behalf of Robert Bosch Power Tools GmbH declares that the radio equipment type UniversalDetect is in compliance with the Radio Equipment Regulations 2017. The full text of the declaration of conformity is available at the following internet address:
- https://gb-doc.bosch.com



- DISPOSAL
- PRODUCT DESCRIPTION AND SPECIFICATIONS
- INTENDED USE
- PRODUCT FEATURES
- DISPLAY ELEMENTS
- TECHNICAL DATA
- DIGITAL DETECTOR UNIVERSALDETECT
- ASSEMBLY
- INSERTING/CHANGING THE BATTERIES
- OPERATION
- USING THE TOUCHSCREEN
- NAVIGATING IN THE MENU
- STARTING OPERATION
- SWITCHING ON/OFF
- HOW IT WORKS (SEE FIGURE A)
- OPERATING MODES
- OPERATING MODE (SEE FIGURE B)
- OPERATING MODE (SEE FIGURE C)
- OPERATING MODE (SEE FIGURE D)
- MENU
- SUBMENU
- WORKING ADVICE
- MARKING OBJECTS
- ERRORS - CAUSES AND CORRECTIVE MEASURES
- ERROR DURING MEASUREMENT USING OPERATING MODE
- CAUSE CORRECTIVE MEASURES
- METAL OBJECT NOT FOUND
- LIGHT-UP RING LIGHTS UP RED OVER A LARGE MEASURING RANGE ON THE WALL
- LIVE CABLE NOT FOUND
- MAINTENANCE AND SERVICE
- MAINTENANCE AND CLEANING
- AFTER-SALES SERVICE AND APPLICATION SERVICE
- GREAT BRITAIN
- YOU CAN FIND FURTHER SERVICE ADDRESSES AT
- ONLY FOR EU COUNTRIES
- ONLY FOR UNITED KINGDOM
- YOU CAN FIND MORE CONTACT DETAILS FOR SERVICE HERE
- WASTE DISPOSAL
- WASTE HANDLING
- CRITERIA FOR LIMIT STATES
- MAINTENANCE AND SERVICE LIFE OF TECHNICAL CUSTOMER SERVICE
- STORAGE
- WORKING MODE (SEE FIGURE C)
- WORKING MODE (SEE FIGURE D)
- RUSSIAN
- APPLICATION INSTRUCTIONS
- PLACEMENT OF OBJECTS
- TROUBLESHOOTING - CAUSES AND REMEDIES
- CAUSE REMEDY
- THE MEASUREMENT PROCESS DOES NOT START
- INACCURATE/UNRELIABLE MEASUREMENT RESULTS
- ERROR DURING MEASUREMENT MODE
- ELIMINATION METHOD
- THE LIGHT RING GLOWS RED, EVEN THOUGH THERE IS NO TRANSFER TANK IN THE WALL
- THE LIGHT RING GLOWS YELLOW OR RED, EVEN THOUGH THERE IS NO METAL NEARBY
- THE LIGHT RING GLOWS YELLOW OR RED OVER A LARGE MEASUREMENT RANGE ON THE WALL
- METAL OBJECTS NOT DETECTED
- ERROR DURING MEASUREMENT IN MODE
- THE LIGHT RING GLOWS RED OVER A LARGE MEASUREMENT RANGE ON THE WALL
- SERVICE ADDRESS
- ONLY FOR EU MEMBER STATES
- UKRAINIAN
- SAFETY INSTRUCTIONS
- WORK
- USING THE SENSOR SCREEN
- MEASUREMENT (SEE FIG. A)
- OPERATING MODE (SEE FIG. B)
- OPERATING MODE (SEE FIG. C)
- PEXN M PO60THCTPYM>(DHB. MAN.D)
- MEHIO
- ПИДМЕН
- YKPAHCBKA
- ПИДМЕНИ
- PIMEHIO
- POMNKA NPN BMIPIOBAHHI BPEKMIPO6OTH
- PNUNHA YCYHEHHA
- CBITNOBE KINBUE CBHTBCRA CEPBOHM, XOA B CTIHI HEMAE DEPEB'HOI6AKN
- PUNNA YSUCHENN
- THE WOODEN BEAM IS NOT DETECTED
- TIPS FOR WORKING IN OPERATING MODE
- PRYHNA YSUCHENN
- REMOVAL
- METAL OBJECT NOT DETECTED
- KAZAKHSTAN
- FOR THE EURASIAN ECONOMIC UNION (EEU) MEMBER STATES
- KAZAKH
- PRODUCT SERVICE LIFE
- LIST OF COMPONENTS AND PARTS SUPPLIED WITH THE PRODUCT
- OPERATING INSTRUCTIONS
- OPERATING INSTRUCTIONS AND SAFETY
- TRANSPORTATION
- POWER TOOL SAFETY
- SAVE ALL WARNINGS AND INSTRUCTIONS FOR FUTURE REFERENCE
- ELECTRICAL SAFETY
- INDICATIONS
- BOILER WATER TEMPERATURE IN OPERATING MODE
- SELF-DIAGNOSIS
- IF THE PRESSURE IN THE BOILER EXCEEDS THE SET VALUE, THE SAFETY VALVE OPENS AND THE RED LAMP LIGHTS UP
- IF THE PRESSURE IN THE BOILER DROPS BELOW THE SET VALUE, THE SAFETY VALVE OPENS AND THE YELLOW OR RED LAMP LIGHTS UP
- THE SAFETY VALVE OPENS WHEN THE PRESSURE IN THE BOILER EXCEEDS THE SET VALUE, AND THE YELLOW OR RED LAMP LIGHTS UP
- THE LUBRICANT RESERVOIR MUST BE FILLED WITH OIL BEFORE FIRST USE
- CHECK THE OIL LEVEL INDICATOR
- TECHNICAL DATA AND SERVICE
- SERVICE AND MAINTENANCE
- MAINTENANCE AND SERVICE RECOMMENDATIONS
- WWW.BOSCH-PT.COM
- KA3AKCTAH
- FOR TURKEY
- ROMANIAN
- REPLACING THE BATTERY
- SENSOR SCREEN OPERATION
- BULGARIAN
- NAVIGATION IN THE MENU
- OPERATING MODES (SEE FIG. A)
- OPERATING MODE (FIG. B)
- OPERATING MODE (FIG. C)
- OPERATING MODE (FIG. D)
- BEFORE DRILLING, CUTTING, OR SAWING INTO WALLS, ALWAYS DISCONNECT THE CONSUMER FROM THE POWER AND THE PRE-CHECKED VOLTAGE. AFTER ALL ACTIVITIES, ENSURE THAT THE FIXTURES TO THE BASE OF THE OBJECT ARE NOT UNDER VOLTAGE
- SETTINGS
- ONLY FOR EUROPEAN UNION COUNTRIES
- MACEDONIAN
- SAFETY NOTES
- DESCRIPTION OF PERFORMANCE FEATURES
- ILLUSTRATION OF COMPONENTS
- CONTROL ELEMENTS
- UNIVERSALDETECT WALL DETECTOR
- INSTALLATION
- INSERTING/REPLACING THE BATTERIES
- USE
- USING THE DISPLAY
- HETOUHN/HEBEPOJTHM MEPHN PE3YIATN
- MAKEDOHCKN
- TPEUKA NPN MEPEHE CO PEXKM HA PA6OTA
- PNPUHA TOMO
- CBETNEKNOT NPCTEN CBTH CPBEHO, NAKO BO SIDOT HEMA DPBEHA RPEJA
- HE NPOHAJDEHA DPBEHA RPEA
- TPEUKA NPN MEPEHE CO PEXHM HA PA6OTA
- PNUNHA TOMO
- CBETNEKNOT NPCTEH CBTEH XOITO HNN CPBEHO, HAKO BO 6N3NHA HEMA METAI
- LENGTH OF MEASUREMENT
- MEASUREMENT ERROR DURING OPERATION MODE
- THE LIGHT BEAM IS DIRECTED AT A LARGE FIELD OF VIEW
- DO NOT USE DAMAGED CABLE
- MAINTENANCE SYSTEM
- SERVICE AND APPLICATION ADVICE
- NORTH MACEDONIA
- SRPSKI
- REMOVING DEBRIS
- ESTONIAN
- CLEANING
- THE ORIGINAL TEXT APPEARS TO BE GARBLED OCR OUTPUT AND NOT IN ENGLISH. IT IS UNUSABLE
- COPYRIGHT © 2009-2020 ARM LIMITED
- DECLARATION OF CONFORMITY
Brand : BOSCH
Model : UniversalDetect
Category : Detector