
EasyVac 3 - Vacuum Cleaner BOSCH - Free user manual and instructions
Find the device manual for free EasyVac 3 BOSCH in PDF.
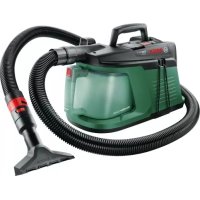



| Product type | Vacuum cleaner for dry materials |
| Brand | Bosch |
| Model | EasyVac 3 |
| Rated voltage | 220-240 V |
| Frequency | 50/60 Hz |
| Rated input power | 700 W |
| Reservoir capacity (gross) | 2.1 L |
| Max. depression (turbine) | 240 mbar |
| Max. flow rate (turbine) | 35 L/s |
| Weight according to EPTA 01:2014 | 4.3 kg |
| Sound pressure level | 73 dB(A) (uncertainty K=3 dB) |
| Vibration | < 2.5 m/s² (uncertainty K=1.5 m/s²) |
| Filter type | Cloth filter, pleated flat filter, permanent filter |
| Dust bag | Optional accessory |
| Automatic start/stop | Yes (for power tools) |
| Power tool socket | Yes, with grounding |
| Main functions | Suction of deposited dust and dust from power tools |
| Intended use | Private, non-professional |
| Maintenance | Regular cleaning of filters and dust container |
| Included accessories | Suction hose, floor nozzle, crevice nozzle, suction adapter |
| Safety | Use with residual current device (RCD) in damp environments |
Frequently Asked Questions - EasyVac 3 BOSCH
User questions about EasyVac 3 BOSCH
0 question about this device. Answer the ones you know or ask your own.
Ask a new question about this device
Download the instructions for your Vacuum Cleaner in PDF format for free! Find your manual EasyVac 3 - BOSCH and take your electronic device back in hand. On this page are published all the documents necessary for the use of your device. EasyVac 3 by BOSCH.
USER MANUAL EasyVac 3 BOSCH
Robert Bosch Power Tools GmbH
70538 Stuttgart
GERMANY
www.bosch-pt.com
160992A3FG(2016.12)PS/119

EasyVac 3
Ukrainian. Page 75
Kazakh. Page 79
Romanian. Page 83
Bulgarian. Page 87
Macedonian. Page 91
Serbian. Page 95
Slovenian. Page 98
Read all safety warnings and all instructions. Failure to follow the warnings and instructions may result in electric shock, fire and/or serious injury.
Save these instructions.
This vacuum cleaner is not intended for use by children and persons with reduced physical, sensory or mental capabilities, or lack of experience and knowledge. Otherwise, there is a danger of operating errors and injuries. Supervise children. This will ensure that children do not play with the vacuum cleaner.
WARNING Do not vacuum materials that are harmful to one's health, e.g. dust from beech or oak wood, masonry dust, asbestos. These materials are considered carcinogenic.
Inform yourself about the valid regulations/laws for your country concerning the handling of materials that are hazardous to one's health.
WARNING Use the vacuum cleaner only when you fully understand and can perform all functions without limitation, or have received appropriate instructions. A thorough introduction reduces operating errors and injuries.
WARNING The vacuum cleaner is suitable only for vacuuming dry materials. The penetration of liquids increases the risk of an electric shock.
WARNING Use the socket only for the purposes specified in the operating instructions. IMPORTANT The vacuum cleaner may only be used and stored indoors. The pene
tration of rain or moisture into the vacuum cleaner lid increases the risk of an electric shock.
- When operating the vacuum cleaner in damp environments, use a residual current device (RCD). Using a residual current device (RCD) reduces the risk of an electric shock. Connect the vacuum cleaner to a properly earthed mains supply. The socket outlet and the extension cable must have an operative protective conductor. Before each use, check the vacuum cleaner, cable and plug. Do not use the vacuum cleaner when defects are detected. Do not open the vacuum cleaner yourself and have it repaired only by qualified personnel using original spare parts. Damaged vacuum cleaner, cables and plugs increase the risk of an electric shock. Before maintaining or cleaning the vacuum cleaner, making any adjustments, changing accessories or placing the vacuum cleaner aside, remove the plug from the socket outlet. This safety measure prevents accidental starting of the vacuum cleaner. Provide for good ventilation at the working place. Have the vacuum cleaner repaired only through qualified specialists and only using original spare parts. This ensures that the safety of your vacuum cleaner is maintained.
Before restarting, check the proper condition of the vacuum hose. When doing this, leave the vacuum hose mounted to the vacuum cleaner to prevent dust from coming out. Otherwise, you could possibly inhale dust. Do not clean the vacuum cleaner with a water jet pointed directly at it. The penetration of water into the vacuum cleaner lid increases the risk of an electric shock. - Products sold in GB only: Your product is fitted with a BS 1363/A approved electric plug with internal fuse (ASTA approved to BS 1362). If the plug is not suitable for your socket outlets, it should be cut off and an appropriate plug fitted in its place by an authorized customer service agent. The replacement plug should have the same fuse rating as the original plug. The severed plug must be disposed of to avoid a possible shock hazard and should never be inserted into a mains socket elsewhere.
Products sold in AUS and NZ only: Use a residual current device (RCD) with a rated residual current of 30 mA or less.
Symbols
The following symbols could have a meaning for the use of your vacuum cleaner. Please take note of the symbols and their meaning. The correct interpretation of the symbols will help you to use the vacuum cleaner in a better and safer manner.
Symbols and their meaning

1+
Automatic Start/Stop feature
Extraction of dust resulting from running power tools
The vacuum cleaner automatically switches on and off with a time delay


1
Switching Off
Vacuuming
Vacuuming of deposited dust
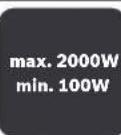
Specification of the allowable load of the connected power tool (country-specific)
Product Description and Specifications
Intended Use
The vacuum cleaner is intended for vacuuming dry materials that are not harmful to one's health, and it is especially suitable for vacuuming dust and chips on power tools.
The vacuum cleaner is intended only for private use and not for professional use.
Use the vacuum cleaner only when you fully understand and can perform all functions without limitation, or have received appropriate instructions.
Product Features
The numbering of the product features refers to the illustration of the vacuum cleaner on the graphics page.
1 Vacuum-hose holder 2 Mode selector switch 3 Cable holder 4 Socket for power tool 5 Carrying handle 6 Holder for crevice nozzle/floor nozzle 7 Hose connection piece 8 Release button for dust cup 9 Dust cup 10 Vacuum hose 11 Curved nozzle* 12 Extraction adapter 13 Crevice nozzle 14 Floor nozzle 15 Snap-fastener 16 Connection flange 17 Lid of the dust cup 18 Dust bag 19 Dust bag holder 20 Air diffuser 21 Fabric filter 22 Flat-pleated filter 23 Exhaust air cover 24 Permanent filter
*Accessories shown or described are not part of the standard delivery scope of the product. A complete overview of accessories can be found in our accessories program.
Technical Data
| Dry vacuum cleaner EasyVac 3 | |
| Article number | 0 603 3D1 0.. |
| Rated voltage | V 220-240 |
| Rated power input | W 700 |
| Frequency | Hz 50/60 |
| Container volume (gross) | I 2.1 |
| Vacuum (turbine), max. | mbar 240 |
| Airflow (turbine), max. | I/s 35 |
| Weight according to EPTA-Procedure 01:2014 | kg 4.3 |
| Protection class | # /I |
The values given are valid for nominal voltages [U] of 230 V. For lower voltage and models for specific countries, these values can vary.
| Automatic Start/Stop feature* | |||
| Rated voltage | max. power output | min. power output | |
| EU/AUS | 220–240 V | 2000 W | 100 W |
| UK | 220–240 V | 1800 W | 100 W |
| * Specification of the allowable load of the connected power tool (country-specific) | |||
Noise/Vibration Information
Sound emission values determined according to EN 60335-2-69.
Typically the A-weighted sound pressure level of the vacuum cleaner is 73 dB(A). Uncertainty K = 3 dB. The noise level when working can exceed 80 dB(A).
Wear hearing protection!
Vibration total values ah (triax vector sum) and uncertainty K determined according to EN 60335-2-69: ah < 2.5m / s2 K = 1.5m / s2
Assembly
Before any work on the vacuum cleaner itself, pull the mains plug.
Mounting the Vacuum Hose (see figure A)
- Insert the vacuum hose 10 into the hose connection piece 7 and turn it all the way in clockwise direction.
Mounting VAC Accessories
The vacuum hose 10 is equipped with a clip system, with which the VAC accessories (extraction adapter 12, curved nozzle 11) can be connected.
Fitting the extraction adapter or curved nozzle (see figure B)
- Fit the extraction adapter 12 or the curved nozzle 11 to the vacuum hose 10 until the two snap fasteners 15 of the vacuum hose click into place.
- To disassemble, press both snap-fasteners 15 inward and pull the components apart.
Mounting the suction nozzles
- Then attach the required vacuuming accessory (zle, crevice nozzle, etc.) firmly to the curved nozzle 11 or the extraction adapter 12.
Replacing/Inserting the Dust Bag (see figures C1-C4)
For vacuuming fine dust, which is generated when working with sanders, drills or fine saw blades, you should use a dust bag (accessory). This makes the dust easier to dispose of. Chips, which are generated when working with larger saws, or coarser dirt can be vacuumed without using a dust bag. When doing so, you should clean the fabric filter 21 occasionally (see "Cleaning the Filter Assembly", page 13).
Replacing/Inserting the Dust Bag (Accessory)
- Press the release button 8 and pull the dust cup 9 out of the vacuum cleaner. Grip the lid 17 at the connection flange 16 and remove the lid from the dust cup.
- Turn the lid 17 over. Put the dust bag 18 over the connection flange 16 of the vacuum cleaner and turn the cardboard flaps under the dust bag holder 19.
- Press the lid 17 back onto the dust cup 9 and then slide the dust cup back into the vacuum cleaner until it clicks into place.
- To remove a full dust bag 18, twist it off the connection flange 16 in a downward direction - without turning the lid 17 over.
Operation
Before any work on the vacuum cleaner itself, pull the mains plug.
Starting Operation
Observe correct mains voltage! The voltage of the power source must agree with the voltage specified on the nameplate of the vacuum cleaner. Equipment marked with 230V can also be operated with 220V . Only use an undamaged filter (no cracks, small holes, etc.). Replace a damaged filter immediately.
To save energy, only switch the vacuum cleaner on when using it.
To ensure optimal vacuuming performance, always completely unwind the vacuum hose 10 from the vacuum cleaner lid.
Vacuuming of deposited dust
- To switch on the vacuum cleaner, set the mode selector switch 2 to the "Vacuuming" symbol.

1
- To switch off the vacuum cleaner, set the mode selector switch 2 to the "Off" symbol.
0
Extraction of dust resulting from running power tools (see figure D)
A socket outlet with earthing contact 4 is integrated in the vacuum cleaner. An external power tool can be connected there. Observe the maximal allowable load of the connected power tool.
- Fit the extraction adapter 12 (see "Fitting the extraction adapter or curved nozzle", page 12).
- Insert the extraction adapter 12 into the dust extraction outlet for the power tool.
Note: When working with power tools that have a low air feed into the vacuum hose (e.g. jigsaws, sanders, etc.), the air diffuser 20 of the vacuum hose 10 must be opened. This will improve the total output of the vacuum cleaner and the power tool.
To do so, turn the ring above the air diffuser 20 until the maximum opening is produced.
- To activate the automatic

1+
start/stop of the vacuum cleaner, set the mode selector switch 2 to the "Automatic Start/Stop" symbol.
To start the operation of the vac, switch on the power tool connected to the socket 4. The vacuum cleaner starts automatically. - Switch the power tool off to end the vacuuming. The delayed action shutdown of the Automatic Start/Stop continues to run for up to 6 seconds in order to extract residual dust from the vacuum hose. - To switch off the vacuum cleaner, set the mode selector switch 2 to the "Off" symbol.
Maintenance and Service
Maintenance and Cleaning
Before any work on the vacuum cleaner itself, pull the mains plug. For safe and proper working, always keep the vacuum cleaner and ventilation slots clean.
If the replacement of the supply cord is necessary, this has to be done by Bosch or an authorized Bosch service agent in order to avoid a safety hazard.
Cleaning the Filter Assembly (see figures E1-E3)
- Press the release button 8 and pull the dust cup 9 out of the vacuum cleaner.
- Remove the fabric filter 21 along with its filter basket and brush down the fabric filter with a soft brush.
- Grasp the flat-fold filter 22 by the bars and remove it together with its filter basket. Brush down the flat-fold filter using a soft brush or rinse it out under running water and leave it to dry thoroughly.
- Re-insert the cleaned filters, ensuring that they are seated correctly and securely.
Cleaning the Dust Cup
- Wipe the dust cup 9 from time to time using conventional, non-abrasive detergent and then leave it to dry thoroughly.
Cleaning the permanent filter (see figure F)
Clean the permanent filter 24 from time to time in order to ensure that the vacuum cleaner continues to perform optimally.
- Open the exhaust air cover 23 and remove the permanent filter 24. Rinse out the permanent filter 24 under running water and then leave it to dry thoroughly.
- Re-insert the cleaned filter, ensuring that it is seated correctly and securely. Close the exhaust air cover again.
Malfunctions
In the case of insufficient vacuuming performance, check the following:
- Is the hose system clogged?
- Are the filters clogged with dust?
- Is the dust cup 9 full?
- Is the dust bag 18 full?
The vacuum cleaner switches off on overheating. Proceed as follows:
- Leave the vacuum cleaner to cool down for 60 minutes.
- Briefly remove the mains plug from the socket and then re-insert it. Make sure that the container 9 and dust bag 18 are empty and that the vacuum hose 10, filter 21/22 and permanent filter 24 are not blocked.
Emptying at regular intervals ensures optimum vacuuming performance.
If the vacuuming performance is not achieved thereafter, take the vacuum cleaner to customer service.
Storage (see figure G)
- Open the elastic bands of the vacuum-hose holder 1 and wrap the vacuum hose 10 around the vacuum cleaner. Hook the elastic bands back in. Put the vacuuming accessories in the bracket 6 provided for this purpose on the vacuum cleaner.
- Wind the mains cable around the cable holder 3.
- Carry the vacuum cleaner only by the carrying handle 5.
After-sales Service and Application Service
Our after-sales service responds to your questions concerning maintenance and repair of your product as well as spare parts. Exploded views and information on spare parts can also be found under:
www.bosch-pt.com
Bosch's application service team will gladly answer questions concerning our products and their accessories.
In all correspondence and spare parts orders, please always include the 10-digit article number given on the nameplate of the product.
Great Britain
Robert Bosch Ltd. (B.S.C.)
P.O.Box 98
Broadwater Park
North Orbital Road
Denham
Uxbridge
UB95HJ
At www.bosch-pt.co.uk you can order spare parts or arrange the collection of a product in need of servicing or repair.
Tel. Service: (0344) 7360109
E-Mail: boschservicecentre@bosch.com
Ireland
Origo Ltd.
Unit 23 Magna Drive
Magna Business Park
City West
Dublin 24
Tel. Service: (01) 4666700
Fax: (01) 4666888
Australia, New Zealand and Pacific Islands
Robert Bosch Australia Pty. Ltd.
Power Tools
Locked Bag 66
Clayton South VIC 3169
Customer Contact Center
Inside Australia:
Phone: (01300) 307044
Fax: (01300) 307045
Inside New Zealand:
Phone: (0800) 543353
Fax: (0800) 428570
Outside AU and NZ:
Phone: +61 3 95415555
www.bosch.com.au
Republic of South Africa
Customer service
Hotline: (011) 6519600
Gauteng - BSC Service Centre
35 Roper Street, New Centre
Johannesburg
Tel.: (011) 4939375
Fax: (011) 4930126
E-Mail: bsctools@icon.co.za
KZN - BSC Service Centre
Unit E, Almar Centre:
143 Crompton Street
Pinetown
Tel.: (031) 7012120
Fax: (031) 7012446
E-Mail: bsc.dur@za.bosch.com
Western Cape - BSC Service Centre
Democracy Way, Prosperity Park
Milnerton
Tel.: (021) 5512577
Fax: (021) 5513223
E-Mail: bsc@zsd.co.za
Bosch Headquarters
Midrand, Gauteng
Tel.: (011) 6519600
Fax: (011) 6519880
E-Mail: rbsa-hq.pts@za.bosch.com
Disposal
The vacuum cleaner, accessories and packaging should be sorted for environmental-friendly recycling.
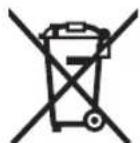
Do not dispose of the vacuum cleaner into household waste!
Only for EC countries:
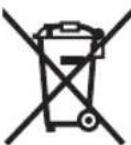
According to the European Directive 2012/19/EU on Waste Electrical and Electronic Equipment and its implementation into national law, vacuum cleaners that are no longer usable must be collected separately and disposed of in an environmentally friendly manner.
Subject to change without notice.
Français
Robert Bosch (France) S.A.S.
Bosch Service Center
Telegrafvej 3
2750 Ballerup
On www.bosch-pt.dk you can order spare parts online and create a repair order.
Service Center: 44898855
Fax: 44898755
E-Mail: vaerktoej@dk.bosch.com
Disposal
12 Extraction adapter
13 Nozzle for crevices
14 Floor nozzle
15 Push button
16 Connection flange
17 Lid for dust container
18 Dust bag
19 Dust bag holder
Bosch Service Center
Telegrafvej 3
2750 Ballerup
Denmark
Tel.: (08) 7501820 (within Sweden)
Fax: (011) 187691
Waste disposal
19 Dust bag holder
20 False air inlet
21 Textile filter
22 Flat folded filter
23 Cover for exhaust air

42|Norwegian
24 Permanent filter
Illustrated or described accessories are not included in the standard delivery. The complete accessory range can be found in our accessory program.
Technical data
| Tørrsuger EasyVac 3 | |
| Produktnummer | 0 603 3D1 0.. |
| Nominell spenning | V 220-240 |
| Opptatt effekt | W 700 |
| Frekvens | Hz 50/60 |
| Beholdervolum (brutto) | I 2,1 |
| maks. undertrykk (turbin) | mbar 240 |
| maks. gjennomstrømnings-mengde (turbin) | I/s 35 |
| Vekt tilsvarende EPTA-Procedure 01:2014 kg | 4,3 |
Protection class
This appliance complies with EN60335-2-69.
The noise emission value is below the limit specified in the standard. The A-weighted sound pressure level is 73 dB(A). Uncertainty K = 3 dB.
The sound power level must not exceed 80 dB(A).
Operate safely!
Use the three handles (air inlet, vacuum hose, and filter) for lifting. The vibration emission value is in accordance with EN 60335-2-69: a_h < 2.5 m/s², K = 1.5 m/s².
Sigma
Do not use the device if it is damaged before carrying out any work on it.
Calculating the total hose length (see figure A)
Place the flexible hose 10 onto the hose connector 7 and turn it towards the arrow on the connector until it locks.
Installing the accessories
The flexible hose 10 is equipped with a locking mechanism, with which the accessories (suction nozzle 12, curved nozzle 11) can be connected.
Installing the suction nozzle or the curved nozzle (see figure B)
- Insert the suction nozzle 12 or the curved nozzle 11 into the flexible hose 10 until the two buttons 15 on the flexible hose click into place with a characteristic sound.
- For removal, press the two buttons 15 towards the inside and then pull out the accessories.
Removing the protective cap
Place the corresponding fitting (elbow, threaded fitting, etc.) on the main thread 11 or on the threaded fitting 12.
Replacing/Positioning the housing cover (see figures C1-C4)
The protective cover, which is created during maintenance, must be replaced with a cover (fitting). The removal procedure is described below.
The fittings, which are produced with the fitting tool or the fitting pliers, can be replaced with the same type of cover. In this case, you must carefully remove the existing label 21 (see "Label removal", page 50).
Replacing the housing cover (special fitting)
Remove the protective cap 8 and pull the cover 9 out of the fitting. Turn the screw 17 on the connection 16 and remove the screw from the cover. - Turn the screw 17 back in. Press the cover 18 back onto the connection 16 of the fitting and tighten the screws until they are flush with the cover 19. Turn the screw 17 back onto the cover 9 and check that the cover is properly seated on the fitting, so that it does not come off with the characteristic sound. - To remove a cover 18, turn the screw 17 counterclockwise - from the connection 16 towards the cap.
Operation
Work the piece from three sides before carrying out any work on the fitting itself.
Start-up
Be careful with the voltage! The voltage of the power supply must match exactly the voltage indicated on the nameplate of the fitting. Electrical equipment with a rated voltage of 230 V also operates at 220 V. Use a suitable socket (with protective earth, with neutral, etc.). Replace a defective plug immediately.
Switch off the fitting when it is not in use. This saves energy.
Check the protective cap 10 at the top of the fitting. It is removed before the fitting is used.
Removing the installed cover
The appliance is intended for use in household and similar applications such as staff kitchen areas in shops, offices and other working environments, farm houses, by clients in hotels, motels and other residential type environments, bed and breakfast type environments.
1 0
50 Eλnviδ
The appliance is intended for use in household and similar applications such as staff kitchen areas in shops, offices and other working environments, farm houses, by clients in hotels, motels and other residential type environments, bed and breakfast type environments.
The appliance has been fitted with a plug and a protective earth. You can connect this plug to an external electrical appliance. Make sure the protective earth is connected to the electrical appliance.
Service and maintenance
Maintenance and cleaning
Pull the plug out of the socket before carrying out any work on the appliance. Keep the appliance and its accessories in good condition to ensure safe and reliable operation.
Any necessary replacement of the power cord must be carried out by Bosch or an authorized Bosch Service Center to avoid any safety hazards.
Changing the filter (see figures E1-E3)
- Pull the plug out of the socket and remove the dust container 9 from the appliance. Remove the filter 21, empty the dust container, and clean the filter with a soft brush.
Insert the new filter 22 into the guides and remove the filter. Clean the filter with a soft brush or rinse it under running water and let it dry completely. Then reinsert the filter and continue.
Cleaning the dust container
- Empty the dust container 9 after each use with a soft brush and let it dry completely.
Cleaning the filter (see figure F)
Open the air outlet flap 24 and remove the filter 24. Rinse the filter 24 under running water and then let it dry well. Place the filter back in its position and prepare for use. Close the air outlet flap.
Open the air outlet flap 23 and remove the filter 24. Rinse the filter 24 under running water and then let it dry well. Place the filter back in its position and prepare for use. Close the air outlet flap.
Baaβεc
When filter cleaning is necessary, carry out the following check:
Is the system clogged? - Are the filters dirty? - Is the filter housing damaged? - Is the filter housing seal intact?
Robert Bosch Sp. z o.o.
Bosch Service Center PT
K Vapence 1621/16
692 01 Mikulov
At www.bosch-pt.cz you can order the repair of your
Harmful substances for health, for example, beech or oak wood dust, stone dust, asbestos. These substances are considered carcinogens.
Inform yourself about the applicable regulations/legal requirements in your country regarding the handling of harmful substances.
WARNING
Use the vacuum cleaner only in the case that
Use the vacuum cleaner only in the case that
We have familiarized you with its unique features in the state of using it without any restrictions or limitations in the corresponding instructions.
The detailed instructions provide guidance on the correct operation of the device.
WARNING
The device is intended only for household use.
The presence of liquid in the vacuum cleaner increases the risk of electric shock.
WARNING
Use only the socket outlets specified in the manual.
Operating instructions.
CAUTION
Use and store the vacuum cleaner only indoors. Do not
expose it to rain or moisture. The presence of liquid in the vacuum cleaner increases the risk of electric shock.
If it is impossible to use the vacuum cleaner in a damp room, use a residual current device (RCD). Using an RCD reduces the risk of electric shock.
Russian | 71
Connect the vacuum cleaner to a grounded outlet according to electrical regulations. The extension cord and the socket must have a working protective conductor. Before each use, check the vacuum cleaner, the cord, and the plug. Do not use the vacuum cleaner if you notice any damage. Do not open the vacuum cleaner yourself; its repair should be performed only by qualified personnel and only with original spare parts. Damaged cords, plugs, and sockets increase the risk of electric shock. Unplug the appliance before performing maintenance, cleaning, or adjusting the vacuum cleaner, as well as before replacing accessories or storing the vacuum cleaner. This precaution prevents accidental activation. Ensure good ventilation at the workplace! Have your vacuum cleaner repaired only by qualified specialists using only original spare parts. This ensures the safety of the vacuum cleaner. Before use, check the condition of the dust bag. Leave the dust bag attached to the vacuum cleaner to prevent accidental spillage. Otherwise, you might inhale dust. Do not vacuum up water or liquids. The ingress of water into the vacuum cleaner's housing increases the risk of electric shock.
SYMBOLS
The symbols used may be important when operating your vacuum cleaner. Please remember the symbols and their meanings. Correct understanding of the symbols will help you use the vacuum cleaner more reliably.
Symbols and their meanings

1+
Automatic on/off
When sucking up debris from power tools, the vacuum cleaner automatically turns on after a certain period of time and then turns off again.
0
1
Off
Vacuum cleaner collection Vacuum cleaner collection of dust deposits
max.2000W min.100W
Indication of the maximum permissible connected load of the connected power tool (depending on the country)
Product description and services
ah < 2,5M / c2,K = 1,5M / c2
Assembly
Before starting maintenance or adjustment work on the vacuum cleaner, disconnect the mains plug from the socket.
TodknloeHne Iunahra BCacbHaHHa (cm.pnc.A)
BcTaBbTe BcAbBaIOUmI WnAHR 10 B nATpy6ok dIaI WnAHa ra7 nOBepHnTe no yacBOO CTpeNKe do ynpa.
MOHTAX npHnHaIeNKeHcTe nI BcscbBaHH
山naHr OTOcoca 10OCHAueH CnCTeMoH 3aXHMa, pnp nOmoU KOTOPoM MoKHO pNcoEINHHTb PpHaADJeKHOCTn DnA OTCaCbIBAHNA (aadTep OTCacbIBAHNA 12, H3OrHyTuIyHacAdKy 11).
MOnTAX aanTepa oTcabBaHn Hn H3OrHyToH hAcadKn (cm.pnc.B)
Haenehe Taanep OTCabIBaHn 12 Hn H30rHyTu HaCaKy 11 Ha nHaTg OTcoca 10 TaK, YTo6bI o6e HxHMhIE KHOKN 15 Ha nHaTRe OTcoca OTyETNBO BOJIN B 3aue-
0 0
MOnTak hacaDok
3aTeMnloTHoHaedeHbTeKeenaemble npHHaJIeKHOCTnIINOTcAcbBAHnHAonlHyIO HacaIKy,IeNEByIO HacaIKy IN.1)HaH3OrHHTyIO HacaIKy 11nn HA aanTep OTCacbBAHn12.
YcTaHOBka/cmHa MeuKa dIa IbII (cm.pnc.C1-C4)
ДлсбораMeNKoIbIIN,OBpa3yUOeIcR npi pa60tax co HINΦOBaJIbHbIMMaUNHaMn,CBepaMn HIN TOHKHMn HINb- HbIMN DNCaMn,HEo6xODNMO BCTaBHTb MeWOK IINbIIN (PpHAnDNeKHOctb).3To 06nEruHT ydaIeHne bIIN.
OnnnK, 6pa3yUoNecr npa paoTe 60nbHmMnnaamn Hnn Kpynhmycop MoXHO Co6HpTa, He BCTaBnA MeWOK nIbIIIN. PnTOM Heo6xOIMMo Bpemr OT BpeMeHH OuHtAcbTkAHeBOH PhnBtp 21 (cm. «OuHcTKaФnNbTpα», ctp.74).
YcTaHOBka/cmEHaMeIkaJnIbIIN(npHHaJIeXHOCTN)
HaxMMTe KhoNky pa36NoKnpOBKn 8 n H3BnKeKNe nbineByo KaMepy 9 n3 nbinecoca. - YXBaTIte KpbIiKy 173a coeHNITbHbI ΦnHeu 16 n CHMHTe KpbIiKy KOHTeHepa dIy nbIiN. -NepeBepHnTe KpbIshky 17. HaedeHbTe MeWOK nIa NbIIN 18 Ha coeHNHTeNbHbI HnAHeu 16 nbJIeCOca n3aBepHIne KapTOHHie Ra3bUKN POnd DePKaTeMbMeKAnIbIN 19. -CHOBA NIOTHO HAeHbTe KpBlUkY 17 Ha KOHTeHep dIa NblN 9 H BCTaBbTe erO Ha MeCTo B nbIeCoc TaK, UTO6bl OHOTETINBO BOWEN B3aenneHne. UTo6bI CHaTb NOnHbM MeWOkJnIbIIN18, NOBepHInTe eO -He NoBopauHbAa KpbIuKy 17- HCHIMTEeRO BHN3 C coeHNHTeBHOro fnaHua 16.
Pa60Ta c HcHctpymeHTOM
Before performing maintenance or adjustment work on the vacuum cleaner, disconnect the power cord from the mains socket.
Switching on the power tool
The mains voltage and the power source must correspond to the data on the type plate of the vacuum cleaner. Vacuum cleaners rated at 230 V operate at 220 V. Use only filters that are not damaged (cracks, small holes, etc.). If damaged, replace the filter immediately.
To save energy, switch on the vacuum cleaner only when actually using it.
To ensure optimal suction power, it is always necessary to fully extend the suction hose of the vacuum cleaner.
Collecting dust deposits
To switch on the vacuum cleaner, set the mode switch 2 to the symbol “Suction mode”.

To switch off the vacuum cleaner, set the mode switch 2 to the symbol “Blowing mode”.
Suction of dust from working power tools (see fig. D)
The vacuum cleaner has a socket with a protective contact 4. An external power tool can be connected to it. Pay attention to the maximum permissible total connected load of the connected power tool.
Mount the extraction adapter 12 (see “Mounting the extraction adapter” or “Curved hose”, page 73). Insert the extraction adapter 12 into the suction hose of the power tool.
Note: When working with power tools that blow air into the suction hose (e.g., electric planers, circular saws, etc.), it is absolutely necessary to open the air opening with the cap 20 on the suction hose 10. This will increase the total power of the vacuum cleaner and the power tool.
For the vacuum cleaner to operate at maximum power, turn the wheel until the opening reaches the maximum size.
To enable automatic on/off of the vacuum cleaner, set the mode switch 2 to the symbol "Automatic on/off".

Switch on the power tool. The vacuum cleaner starts automatically. Switch off the power tool. The suction stops. The automatic on/off function ensures a delay of approx. 0.5 seconds before switching off, so that the remaining dust is sucked up. To switch off the vacuum cleaner, set the mode switch 2 to the symbol "Blowing mode".
Maintenance and service
Maintenance and cleaning
Before any work on the vacuum cleaner, disconnect the power cord from the socket. To ensure safe operation, keep the vacuum cleaner and ventilation slots clean.
If the cord needs to be replaced, contact Bosch or an authorized Bosch service center for power tools.
Cleaning the filter (see Fig. E1–E3)
Press the release button 8 and remove the dust container 9 from the vacuum cleaner. Remove the pleated filter 21 together with the filter element. Clean the pleated filter with a soft brush. Insert the filter 22 behind the glass. Insert it together with the filter element.
Clean the filter with a soft brush or rinse it under running water and let it dry thoroughly.
Insert the cleaned filter into place and ensure it is inserted securely and correctly.
Cleaning the dust container
From time to time, wipe the dust container with a dry, non-abrasive cleaning agent, then let it dry thoroughly.
Cleaning the permanent filter (see Fig. F)
From time to time, clean the permanent filter 24 to ensure optimal performance of the vacuum cleaner.
Open the cover of the exhaust air opening. Remove the permanent filter 24. Rinse the permanent filter 24 under running water and let it dry. Insert the cleaned filter into place and make sure it is seated securely and correctly. Close the cover of the exhaust air opening.
Troubleshooting
If the suction power is insufficient, check:
- Is the suction hose clogged?
Are the filters clogged with dust? Is the dust bag full? Is the dust bag compartment full?
In case of overheating, the vacuum cleaner switches off. Perform the following actions:
Let the vacuum cleaner cool down for about 60 minutes. Remove the plug from the socket and insert it again. Make sure that the container 9 and the dust bag 18 are empty, and that the suction hose 10, the filters 21/22 and the permanent filter 24 are not clogged.
Regular emptying ensures optimal suction power.
If the suction power does not increase after this, the vacuum cleaner should be taken to a service center.
Storage (see fig. G)
- Open the elastic retaining straps of the suction hose 1 and wrap the suction hose around the vacuum cleaner. Put the elastic straps back in place. Insert the suction accessories into the holders provided on the vacuum cleaner.



74 | Russian
- Wrap the power cord around the cable hooks 3. Carry the vacuum cleaner only by the handle 5.
Service and consultation on product use
The service center will answer all your questions regarding repair and maintenance of your product and spare parts. Exploded views and spare parts information can also be found at:
www.bosch-pt.com
For any questions about our products, please contact the Bosch customer service team for professional advice on the use of our products. We will answer all your questions regarding our products.
Please be sure to indicate the 10-digit product number from the product nameplate in all inquiries and spare parts orders.
For Russia, Belarus, Kazakhstan, Ukraine
Warranty service and repair of power tools, in compliance with the requirements and standards of the manufacturer, are carried out in all countries only at authorized service centers of Robert Bosch.
WARNING! Use of counterfeit products is dangerous and can lead to electric shock, which may cause serious harm to health. The production and distribution of counterfeit products is prosecuted by law in administrative and criminal proceedings.
Russia
Authorized manufacturer's organization:
LLC "Robert Bosch"
Vasilievskoe Highway, 24
141400, Khimki, Moscow Region
Russia
Tel.: 8 800 100 8007 (toll-free within Russia)
E-Mail: info.powertools@ru.bosch.com
You can obtain complete current information about the location of service centers and authorized service points at:
Official website: www.bosch-pt.ru
- Hotline for reference and service Bosch: 8 800 100 8007 (free call within Russia)
Belarus
LLC Robert Bosch
Service center for power tools
ul. Timiryazeva, 65A-020
220035, Minsk
Belarus
Tel.: +375 (17) 254 78 71
Tel.: +375 (17) 254 79 16
Fax: +375 (17) 254 78 75
E-Mail: pt-service.by@bosch.com
Official website: www.bosch-pt.by
Kazakhstan
Consulting center for receiving claims
TOO «Po6ept Bωu» (Robert Bosch)
G. Amatly,
Republic of Kazakhstan
050012
st. Muratbaeva, 1.180
BLC «Termes», 7th floor
Tel.: +7 (727) 331 3100
Fax: +7 (727) 233 0787
E-Mail: ptka@bosch.com
You can get full information about the location of service centers and reception points on the official website:
www.bosch-professional.kz
Disposal
Separate collection. Products and packaging should be handed over for environmentally friendly recycling of waste.
Do not dispose of with household waste!
Only for EU countries:
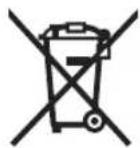
Waste electrical and electronic equipment (WEEE) Directive 2012/19/EU and its transposition into national law: Waste electrical and electronic equipment must not be disposed of with household waste; it must be collected separately and sent for environmentally sound recycling.
Changes may occur.
Ukrainian
Ukrainian
Safety instructions

Read all safety warnings and instructions. Failure to follow the warnings and instructions may result in electric shock, fire and/or serious injury.
Save all warnings and instructions for future reference.
This appliance is not intended for use by persons (including children) with reduced physical, sensory or mental capabilities, or lack of experience and knowledge, unless they have been given supervision or instruction concerning use of the appliance by a person responsible for their safety. Children should be supervised to ensure that they do not play with the appliance.
Use only with the supplied power adapter.
WARNING
Do not use near hazardous materials.
e.g., beech or oak wood, pine, or asbestos. These materials are considered carcinogenic.
Follow local regulations regarding disposal of waste electrical and electronic equipment in your country.
WARNING
Use only the supplied adapter.
Warning: all functions of this power tool are fully operational, and you are not limited in their use or in obtaining the corresponding instructions.
These instructions reduce the risk of incorrect use of the tool and the risk of injury.
WARNING
Switch off the device
Restarts

Operation

1
Disposal
Collect the dust, do not throw it away
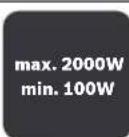
Data on the maximum permissible total power consumption of the connected electric tool (depending on the country)
76|Ukrainian
Safety instructions

Safety instructions for the safety instructions. Technical safety instructions
The safety instructions must be followed to avoid danger to persons.
These safety instructions are important.
Children, this instruction manual contains important information for your safety and the safety of others. Read and understand all instructions before using the device. Keep this manual for future reference.
Do not allow children to play with the device.

Do not use the device in environments with explosive or flammable atmospheres, or
near water, or with wet hands, or asbestos. These materials may cause fire.
Consult your local authorities regarding disposal of the device in accordance with environmental regulations.

Do not use the device if it has a damaged power cord or plug,
or if it has been dropped or damaged, or if it has been exposed to water. Contact qualified personnel for inspection and repair.

WARNING:

Do not use the device for purposes other than those intended.
Use the device only as described in this manual.

CAUTION: Use only the power cord provided with the device.
If the power cord is damaged, it must be replaced by the manufacturer, its service agent, or similarly qualified persons in order to avoid a hazard.
If the device is not working properly, unplug it and contact qualified service personnel. Do not attempt to repair it yourself. Do not immerse the device in water or any other liquid. Keep the plug and socket dry.
80|Kazakh
Before cleaning, unplug the device. Do not clean with wet hands. Do not use the device if the plug or cord is damaged. If the device is not working properly, unplug it and contact qualified service personnel. Do not use the device near water. Keep the device away from heat sources. Do not use the device with a damaged cord or plug. If the cord is damaged, have it replaced by a qualified person. Do not let the cord hang over the edge of a table or counter. Do not touch the plug with wet hands. Do not use the device in a bathroom or near water. If the device falls into water, unplug it immediately and do not reach into the water.
The device is designed for use in domestic and similar applications. The device is intended for household use. The device is intended for use in household and similar applications.
Device parts and accessories

1+
Start/Stop automatic
The device is equipped with a thermal switch that automatically turns off the device when it overheats, preventing damage to the motor.
0 off
1 on
Overheat protection
max. 2000W min. 100W
The device is intended for cutting meat, and the cutting blade is suitable for cutting meat (including bones).
Its characteristics and specifications
Do not immerse in water
The device is intended for cutting meat and for cutting bones, and is designed for use in household and similar applications.
The device is not intended for use in commercial or industrial applications.
Hot water and cold water supply pipes, electric heater, ventilation system, and water filter are connected to the water supply.
Control panel buttons
The control panel buttons are used to operate the machine functions.
1 Water inlet hose 2 Drain hose 3 Power cord 4 Electrical outlet 5 Button 6 Hot/cold water selector 7 Display 8 Door for washing machine 9 Door 10 Water inlet valve 11 Cold water inlet* 12 Water drain hose 13 Hot water inlet 14 Detergent drawer 15 Start/Pause button 16 Drain pump filter 17 Door hinge 18 Door lock 19 Door lock switch 20 Drain pump filter cover 21 Water level 22 Filter cover 23 Drain pump filter 24 Drain hose
*The cold water inlet must be connected to the cold water supply. The hot water inlet must be connected to the hot water supply.
Technical specifications
Connecting the water inlet hose (see figures C1-C4)
Connect the water inlet hose (hot and cold) to the water supply according to the color coding. Tighten the connections by hand.
If the water pressure is too high or too low, the water inlet hose may not work properly. See the water level section (21) for details.
Connecting the water inlet hose (if applicable)
Remove the drain hose from the packaging and connect it to the drain pipe. Install the drain hose as shown in figure 16. - Connect the drain hose to the drain pipe. - Insert the drain hose into the drain pipe and secure it with the clamp. - Make sure the drain hose is not kinked or blocked.
Drain pump
Remove the drain pump filter and clean it under running water.
Drain pump filter
Warning! Unplug the appliance before cleaning. The drain pump filter may contain foreign objects. Do not operate the appliance without the filter properly installed. Clean the filter regularly.
3Heprn KyatbH YHeMey YUinh UaHCopFbIuTbI TEK naDanaHaPda KocBhl3.
OnTImaIbIcOp kyAbyH kAmTaMaCb3eTy yuHIn cOp yHaHriH 10 wHaCOPfBw KofapFb6enirHeH TOnbKabHb3.
XnbinraHwaandapdbicopbihbi3
-CopfbltB kocyuyiH,naDanaHy TypnepiniH peTeyiuiH 2"Copy"6enricine XblXbTB1h3. - WAnCopFbIHTbEwipy yuH naJaHaNy TpynepiHH petreyiuiH 2 "Owipy"Genricine OPhaTbIH3.

1
0
Icten TpyraH 3neKtp KypandaPbIHAn WbIKKaH WaHapdbi copy (D cypetIH KapaHbI3)
UHaCOPbIHTaXepreKocBInFaHpo3Ka4OpHaTbInFaH.0n Xepde CbPTkbl3NeKtP KypalNB KOCy MymKIN. KocBlnFAH 3JNEKTP KypalNBH MaKCMMaJIbI pyKcat EtINReH KocBlnA TbH KaTbHa HaazapaydApbHb3.
Copy aanterpi12 opHaty ("Copfbiw aanterepdi Hemece Kcainfah KOHbipMaHbI opHaty" 81 6etinde kapaH3). Copy aanteripin 12 nektp kpaibihh copy utyepine CaIbHbI3.
Eckptne:3NeKtp Kypalmen JyMbic icterene ha copy 1aHaHbCbHda aya Xetkinikc36epince (mbicanl,kbn apanap, terictey MaunHanapbl kane T.6.), KypandbHkAnfay MyftacbHbH 10 cbiptkbl aya tecirin 20 auy Kepek. Ocbnaa 1aHcOpFbIHTbl HkHe 3NeKtp KypalbHbH KAnbl Kyatbl KaKcapabbl.
82 | Ka3aKa7a
Byy yin cbpKb aya Tecirih 20 YcTIN deri cKaHaHbI TECIK 6apbHwa aBnraHwa 6paHb3.
-ⅢaHcOpFbIHTbH 6actay/ToKtay ABTomAtHKacBn icKe Kocy yin naindany TpynepiHH peTteriH 2 "Bactay/ToKtayABTomAtHKacbl" 6enricHe opHaTbH3.

1+
- WAnCopFbIITb naiDanaHyra 6epy yuHIn po3EtKacBHa4 KocynIeKtp KypaIbH KocbIbI. WAnCopFbIABTOMaTTb pette kymbic iTeydi bactaIbI. -3NeKtp KypalbH eWipin copybl TOKtaBhlb3. Bactay/TOktay ABOMaTKacbHbIK KocbIMua iCTeyi 6 c wein bona, on copy wnaHInDeH KaFAn WaHapdb copbl any ywHKepek.
- User manual for the dishwasher "Optima" - Important safety instructions.
Technical safety
Use the device only as intended.
Connect the appliance to a properly installed socket with a ground connection. If the supply cord is damaged, it must be replaced by the manufacturer, its service agent, or similarly qualified persons in order to avoid a hazard.
If the appliance is not working properly, unplug it and contact the manufacturer or an authorized service center for repair. Do not attempt to repair it yourself.
Water connection (see figures E1-E3)
Remove the cap from the water inlet hose and the container. Connect the hose to the water supply with a 3/4 inch thread. Tighten the hose connection by hand, then tighten it with pliers. For the drain hose, connect it to the drain pipe or place it over the sink edge. Ensure the drain hose is not kinked and is properly secured.
Drain hose connection
Connect the drain hose to the standard siphon or drain pipe, and secure it properly.
Drain hose connection (see figure F)
Connect the drain hose to the drain pipe, ensuring it is not kinked.
Remove the cap from the drain hose and connect it to the drain pipe. Place the drain hose over the sink edge and secure it. Ensure the drain hose is not kinked and is properly secured. Replace the cap on the drain hose.
Electrical connection
If the supply cord is damaged, it must be replaced by the manufacturer, its service agent, or similarly qualified persons in order to avoid a hazard.
- Check the following: - Is the water tap turned on? - Is the water inlet hose connected properly? - Is the drain hose blocked? - Is the door closed properly?
Kb3bn Ketye wahcnpbiw ewei. TemeHderineepi opbHaDaHb3:
- 1uHaHcOpFbIbITb60MNCHcyblHbI3. -KeiayibpHpo3eKaadHWBIFapBn,OhKaIaIan po3eTKaFaCaHbIbI3. -9 KOHTeHepi MeH 18 WAn Ka6bI 6oc 6OlybH XHe copy WAnHbI 10, cy3ri 21/22 XHe TypaKbI cy3ri 24 6iTeNMeYiHe Ke3 XeTki3iH3.
KyuEnik Tpyderi bocaty onTmAnbI copy KyatbH KaMaTaMaCbI eTeJI.
Erep copy KyaTbX XeTIImMece WAnHcOpFbIITbKb3MeT KepeCy We6epxHaacbHa anapyKepek.
CaKay (G cypetin KapaHb3)
Copy wnaHbI yCTaftbIbIH nIMiTacnacB1 aWbIn, copy wnaHbI 10 WaHCOPfItbIH Kofapfb6enirih aiHaHaCbIHAnyCTaftbIbHa caJIbHb3. NImeni TACnanaPdKaTa acBbH3. Copy Kepek-KapaKaTapbIH Tnicti YctaFbIbHa 6 WaH CopFbIHTa CanbHb3. -KeinikKaBenIHKaenbYcTaBbHHaH opaH3. - UHaHcOpFbIITbTeK TaCbIMaNay TyTKacBHaH 5 YCTaHB3.
TytbHybIfa Kbl3Met Kepcety XHe naDanaHy Kehectepi
Kb3MeT KepcTeI ue6epxHaacbl eHIMdi JxHey XaHe KYTy, coHdaN-ak Kocanbl 6eIweKtep TypaIb cypaKTapra Jxayan bepei. KaKeTTI cbl36anap MeH Kocanbl 6eIweKtep TypaIb aKnapaTTbMbHa MeKeHxaJaTabac3:
www.bosch-pt.com
KeHec 6epyui Bosch Kbl3MeTkepnei eHimni naaIaNayxHe onapdbn Kocankbb6nweKtepi Typanb cypaTapbHb3ra TnaHaKtbj kayan 6epei.
CypakapkoXHeKocankb6eWKeTepreTancbPbc6epy Ke3HMeMHTeTI TpyeEHIMIN3aybITbIK TaKaTHaCbHdaFbl 10-caHbIeHIM HEMIPiHKa3bHb3.
EHdipyti TanaTapMeH HopMaIapBihH CaKtanybIme 3NeKtp KypalbH XeHDey XHe KeiNi D Kbi3Met KepCey 6apblk MemKeTepayMaftbHa Da TK "Poept Boi"
pmaIbIK HeMece ABTOPi3aunHaHaH KbI3MeT KepCey
opTaJIbKTapBHaD opBHaJaAbl.
ECKEPT! 3aHcb3 xKoIeM eKeiHRe HcHMepePi naIanaHy Kayinti, DeHcaybIbHbI3Fa 3nH KeTIpyi MymKIn. OHImepDi 3aHcb3 Xacay XHe TaPaTy EKIMuINIK XHe KblMbICTbIK Taptin 60bHHa 3aHMeKydaHaHaDbI.
Romania 83
Kazakhstan
Tүpнұсқа құжаттардың көшірмелерін беру орталығы:
"Robert Bosch" LLC
Almaty,
Republic of Kazakhstan, 050012
Muratbayev St., 180
"Termes" 50, 7 Kabat
Tel.: +7 (727) 331 31 00
Fax: +7 (727) 233 07 87
E-Mail: ptka@bosch.com
For more information about service centers and delivery points, please visit our website: www.bosch-professional.kz
Cable routing
When routing the cable, make sure it is not pinched or damaged by sharp edges. Route the cable to the designated cable routing point.
Do not kink the cable!
Only for EU countries:
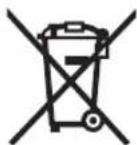
Do not dispose of power tools together with household waste material. In accordance with the European Directive 2012/19/EU on Waste Electrical and Electronic Equipment and its implementation in national law, power tools that have reached the end of their life must be collected separately and returned to an environmentally compatible recycling facility.
Subject to change without notice.
Româna
Tel. service scule electrice: (021) 4057540
Fax: (021) 4057566
E-Mail: infoBSC@ro.bosch.com
Tel. consultanta clienti: (021) 4057500
Fax: (021) 2331313
E-Mail: infoBSC@ro.bosch.com
www.bosch-romania.ro

Български | 87
Eliminare
Aspiratorul, accesoriile si ambalajele trebuie directionate catre o statie de revalorificare ecologica.
Nu aruncati aspiratorul in gunoiul menajer!
Do not vacuum up substances hazardous to health, e.g. dust from beech or
oak wood dust, asbestos. These are considered carcinogenic.
Inform yourself about the applicable normative documents/laws regarding work with hazardous dust in your country.
WARNING
Use the vacuum cleaner only if you are familiar with all its
functions and know how to use them, or if you have received appropriate instructions. Operating the vacuum cleaner with its functions without proper use may lead to accidents.
WARNING
The vacuum cleaner is suitable for vacuuming only dry materials
and liquids. Penetration of liquids into the motor increases the risk of electric shock.
WARNING
Use only the contacts described in this manual for connecting
the charger.
WARNING
The vacuum cleaner may be operated and stored only in closed
rooms. Penetration of rain or moisture into the upper part of the vacuum cleaner increases the risk of electric shock.
To reduce the risk of fire, use the recommended dust bag. Using the recommended dust bag reduces the risk of electric shock. Connect the vacuum cleaner to a properly grounded outlet. The contact and, if used, the extension cord must have a proper protective conductor. Before use, check the vacuum cleaner, the power cord, and the plug. Do not use the vacuum cleaner if you find damage. Do not attempt to open the vacuum cleaner yourself; have repairs carried out only by qualified technicians using original or spare parts. Damage to the vacuum cleaner, the power cord, and the plug increases the risk of electric shock. Before performing technical maintenance or cleaning, adjusting power tools, or replacing accessories, or when leaving the vacuum cleaner, disconnect the plug from the outlet. This precaution prevents accidental starting of the vacuum cleaner. Ensure proper inspection of the work; do not allow the vacuum cleaner to be repaired by unqualified personnel using original or spare parts. This ensures the functionality and safety of the power tool. Before switching on, make sure the device is in good condition. Do not point the vacuum cleaner at people or animals to avoid sucking them in. Otherwise, there is a risk of injury. Do not use the vacuum cleaner directly on water. Water entering the top part of the vacuum cleaner increases the risk of electric shock.
Symbols
The symbols below may be important for the correct operation of your vacuum cleaner. Familiarize yourself with the symbols and their meanings. Correct interpretation of the symbols will help you use the vacuum cleaner better and more safely.
88|Bulgarian
Symbol and its meaning


Automatic on/off module
When vacuuming dust from power tools, the vacuum cleaner automatically turns on and off with a delay.


Off
On
Vacuuming fine dust
max. 2000W min. 100W
Value of the permissible power of the connected power tool (depending on the connection for the corresponding socket)
Product description and its features
Intended use of the power tool
The vacuum cleaner is intended for vacuuming dry, non-hazardous materials and is specially designed for vacuuming dust and shavings from power tools.
The vacuum cleaner is intended for household use only. It is not designed for professional use.
Use the vacuum cleaner only as described in this manual. You may use it without restrictions and all functions only if you have received the corresponding instructions for this.
Illustrated elements
The numbering of the illustrated components refers to the groups of the vacuum cleaner on the graphic page.
1 Handle for carrying 2 Switch for operating mode 3 Dust container release button 4 Contact for electronic tool 5 Handle for accessories 6 Clamp for holding the hose for tight spaces / for the floor nozzle 7 Hose for the floor nozzle 8 Release button for the vacuum cleaner camera 9 Vacuum cleaner camera
10 Floor nozzle of the vacuum cleaner
11 Suction hose 12 Filter for vacuuming 13 Hose for tight spaces 14 Hose for the floor nozzle 15 Button 16 Release button for the handle 17 Hook for the cable for winding
18 Vacuum cleaner tube 19 Clamp for holding the vacuum cleaner tube 20 Auxiliary air vent 21 Filter for the dust bag material 22 Fine dust filter 23 Air outlet grille 24 Permanent filter
The illustrations of the accessories and the descriptions of the additional accessories are not included in the standard scope of delivery. The complete list of additional accessories can be found in the corresponding catalog for additional accessories.
Technical data
Vacuum cleaner for dry vacuuming EasyVac 3
| Каталожен Homep | 0 603 3D1 0.. |
| Hominahno HanpejceHne | V 220-240 |
| HomnHaHa KOncymupaHa MOUHOCT | W 700 |
| YeCTOTA | Hz 50/60 |
| Осевно Коша (бруто) | I 2,1 |
| макс. поданугане (тypбиha) | mbar 240 |
| макс. дeбИт (тypбиha) | I/s 35 |
| Мас сыласno EPTA-Procedure 01:2014 | kg 4,3 |
Classification
The device is connected to the power supply according to the rating plate: [U] 230 V. The power supply, as well as the specific national regulations, may differ.
Automatic switch-on and switch-off
| Homnahanho HanseplexeHHne | Makc. MOUHOCT | MHN. MOUHOCT | |
| EU/AUS | 220-240 V 2000 W 100 W | ||
| UK | 220-240 V 1800 W 100 W |
The power consumption of the connected electrical tool (depending on the tool's power) is indicated on the rating plate.
The noise values for the vacuum cleaner are determined according to EN 60335-2-69.
The equivalent A-weighted sound pressure level at the workplace, generated by the vacuum cleaner, is usually 73 dB(A). The uncertainty K = 3 dB.
During operation, the equivalent sound pressure level may exceed 80 dB(A).
Work with hearing protection!
The vibration emission value (vector sum along three directions) and the uncertainty K are determined according to EN 60335-2-69: ah < 2.5 m/s2, K = 1.5 m/s2

Assembly
Before carrying out any work and before cleaning the vacuum cleaner, disconnect the plug from the socket.
Mounting the hose (see Fig. A)
Insert the hose through the opening and turn it clockwise until it locks into place.
Mounting accessories
The accessory set includes a suction system that allows the connection of a hose (suction hose 12, nozzle 11).
Mounting the suction hose or nozzle (see Fig. B)
Insert the suction hose 12 or nozzle 11 into the hose 10 until the locking button 15 on the hose engages with a click. - For disassembly, press the button 15 and pull the two parts apart in opposite directions.
Mounting the nozzle
Insert the dust bag (dust bag for dry vacuuming, dust bag for wet vacuuming, etc.) over the suction opening 11 and over the air outlet 12.
Installing the dust bag (see figures C1-C4)
To attach the dust bag, which is removed during sanding, drilling, or grinding with the sanding plate, you must use the dust bag (not included in the standard delivery). This ensures the protection of the motor.
The dust that is produced when working with coarse sanding plates and the side outlet can also be extracted without the dust bag. In such cases, it is necessary to clean the filter regularly (see "Cleaning the filter", page 90).
Installing the dust bag (optional accessory)
Press the release button 8 and pull the hose 9 out of the dust extractor. -Grasp the catch 17 of the flap 16 and pull it out. -Turn the catch 17. Insert the dust bag 18 onto the flange 16 of the dust extractor and fold the cardboard edge under the clamp for the dust bag 19. -Replace the catch 17 on the hose 9 and then insert the hose into the dust extractor until it engages. -To remove the dust bag 18, pull it out without turning the catch 17 -just pull it off the flange 16.
Working with electric tools
Before carrying out any work on the dust extractor, disconnect the plug from the mains.
Starting operation
Pay attention to the mains voltage! The voltage of the power source must correspond to the data given on the rating plate of the electric tool. Electric tools marked with 230 V can also be operated with 220 V. Use only original accessories (safe, open, etc.). Immediately replace damaged
To save energy, switch off the dust extractor when it is not in use.
To ensure optimal suction power, unwind the hose 10 of the dust extractor completely from the upper part.
Suction with the dust bag
-To switch on the dust extractor, turn the rotary switch for the operating mode 2 to the symbol "Suction". -To switch off the dust extractor, turn the rotary switch for the operating mode 2 to the symbol "Off".


Suction with an electric tool connected directly (see fig. D)
The vacuum cleaner socket is built into the appliance. You can plug in a power tool into it. Contact the socket's maximum power for the connected power tool.
-Mount the dust bag 12 (see "Mounting the dust bag" or "Removing the bag", page 89). Insert the dust bag 12 into the power tool socket.
Note: When working with power tools, the air flow in the hose may be low (e.g., drills and routers, sanding machines, etc.). The auxiliary air intake opening 20 on the hose 10 must be opened. This ensures the combined operation of the vacuum cleaner and the power tool.
Turn the ring of the opening 20 until it opens the auxiliary air intake.
-To start the automatic mode
To turn the vacuum cleaner on and off automatically, press the switch 2 until the symbol for automatic on/off appears.


-To turn on the vacuum cleaner, press the switch 4 on the power tool. The vacuum cleaner turns on automatically. -Turn off the power tool to stop the vacuuming.
The automatic start/stop module keeps the vacuum cleaner running for up to 6 seconds after the power tool is turned off, to vacuum up the remaining dust.
-To turn off the vacuum cleaner, press the operating mode switch 2 until the symbol "off" appears.
Maintenance and service
Maintenance and cleaning
Before any maintenance or cleaning of the vacuum cleaner, unplug it from the socket. To work efficiently and safely, keep the vacuum cleaner and the ventilation openings clean.
If the power cord needs to be replaced, it must be done by an authorized service center for power tools to ensure the safety of the power tool.
Touch the filter (exit the filter E1-E3)
Press the release button and pull the filter out of the vacuum cleaner. Remove the filter from the holder by turning it counterclockwise. Grasp the flat filter 22 by the spare part and pull it out together with the filter mesh. Clean the flat filter with a soft brush or rinse it under running water and let it dry completely. Reinstall the cleaned filter, making sure it is properly seated and secured.
Cleaning the vacuum cleaner chamber
Periodically remove the dust container and clean it with a non-abrasive cleaner.
Cleaning the permanent filter (see fig. F)
To ensure optimal performance of the vacuum cleaner, clean the permanent filter 24 regularly.
Open the exhaust air outlet cover 23 and remove the permanent filter 24. Rinse the permanent filter 24 under running water and let it dry completely. Reinstall the cleaned filter, making sure it is properly seated and secured. Close the exhaust air outlet cover.
Troubleshooting
Check the suction power:
- Is the appliance switched on? - Are the filters clogged? - Is the dust chamber 9 full? - Is the dust bag 18 full?
If the vacuum cleaner is interrupted, it switches off. Follow the instructions:
- Let the vacuum cleaner cool down for 60 minutes.
- Remove the plug from the socket and then switch it on again.
- Make sure that the dust container and the dust bag 18 are correctly inserted, the filter 21/22 and the permanent filter 24 are not clogged.
Regular maintenance ensures optimal suction power.
If the suction power is not sufficient, the dust extractor must be sent for repair to the Bosch Service Center for power tools.
Storage (see figure G)
- Open the retaining clips of the dust extractor lid for the hose 1 and remove the hose 10 from the dust extractor. Then close the retaining clips. -Insert the accessories into the holders for the dust extractor.
- Place the dust extractor on the floor.
- When carrying, hold the dust extractor only by the handle 5.
Service and Technical Advice
For questions about the product, you can contact our service department. You can find the drawings and information about spare parts at the address:
www.bosch-pt.com
The technical advice team will be happy to answer your questions regarding our products and their accessories.
Please, when ordering spare parts, always quote the 10-digit article number printed on the type plate of the product.
Robert Bosch EOOD - Bulgaria
Bosch Service Center
Warranty and warranty repairs
6yn. YepHN Bpbx 51-B
FPI Bn3Hec ueHTbp 1407
1907 Codner
Tel.: (02) 9601061
Tel.: (02) 9601079
Fax (02) 9625302
www.bosch.bg
Recycling
The appliance, accessories and packaging must be recycled in an environmentally friendly manner.
Do not dispose of the appliance with household waste!
Only for EU countries:
According to European Directive 2012/19/EC on waste electrical and electronic equipment and its implementation in national law, appliances that can no longer be used must be collected separately and recycled in an environmentally friendly manner.
Separately collected and recycled.
Subject to change.
Macedonian|91
Safety instructions

Read all safety instructions and warnings. Failure to follow the safety instructions and warnings may result in electric shock, fire, and/or serious injury.
Keep all warnings for future reference.
This appliance is not intended for use by persons (including children) with reduced physical, sensory, or mental capabilities, or lack of experience and knowledge, unless they have been given supervision or instruction concerning use of the appliance by a person responsible for their safety.
Do not leave the device unattended. This will ensure that children do not play with the device.
SAFETY WARNINGS
Do not vacuum materials hazardous to health, e.g.
asbestos, stone dust, etc. These materials are carcinogenic.
Inform yourself about the relevant regulations/laws regarding handling hazardous materials in your country.
SAFETY WARNINGS
Using the vacuum cleaner
The appliance is intended for dry vacuuming only. It can be used without limitations or with the appropriate attachments. The detailed instructions will warn against misuse and damage.
SAFETY WARNINGS
The vacuum cleaner is intended only for vacuuming
Material. The connection to the mains supply poses a risk of electric shock.
A WARNING
The connector is intended for use only in dry indoor areas.
A WARNING
The vacuum cleaner is designed for household use only.
Indoor use only. Connection to the mains supply in a damp environment poses a risk of electric shock.
If the vacuum cleaner is used in a damp environment and cannot be avoided, use a residual current device (RCD). The use of an RCD reduces the risk of electric shock. The plug of the vacuum cleaner must be connected to a socket with a protective earth conductor. Before each use, check the vacuum cleaner, the cable, and the plug. Do not use the vacuum cleaner if it is damaged. Do not repair the vacuum cleaner yourself; take it to a qualified service person who will use original spare parts. The damaged vacuum cleaner, cable, or plug poses a risk of electric shock. Remove the plug from the socket before cleaning or maintaining the vacuum cleaner, before adjusting the settings, replacing parts, or storing the appliance. These measures prevent unintentional starting of the vacuum cleaner. Ensure the work area is well lit. The vacuum cleaner should only be repaired by qualified service personnel using original spare parts. Only then can the safety of the electrical appliance be guaranteed. Before each use, check that the vacuum cleaner is in perfect condition. When installing the plug of the vacuum cleaner, check that it is not damaged. Never use a damaged plug. Do not clean the vacuum cleaner with a direct water jet. Connection to the mains supply in the upper part of the vacuum cleaner poses a risk of electric shock.
Symbols
The following symbols are of great importance for the user of the vacuum cleaner. You can find the symbols and their meaning below. The correct interpretation of the symbols will help you use the vacuum cleaner safely.
Symbols and their meaning

1+
Start/Stop automatic
The vacuum cleaner switches on automatically when the electrical appliances connected to the socket are turned on, and switches off again after a certain time.

Switch off

1

92 | Macedonian
Signs and their meaning
max. 2000W min. 100W
Device for switching on and off the electrical appliance (depending on the country)
Description of the product power
Use with appropriate replacement
The replacement parts are removed and replaced, and the materials are not hazardous to health and are specially designed for the removal of dust and dirt from electrical appliances.
The removal is intended for private, not commercial use.
Use the device only as described in the instructions, without any restrictions or as needed.
Component illustration
The numbering of the figures with components is described and shown on the electrical appliances on the graphic page.
1 Handle for the device for removal 2 Switch for selecting the operating mode 3 Holder 4 Collector for the electrical appliance 5 Carrying handle 6 Holder for the hose for the function hose 7 Plug for the device 8 Connection for disconnecting the hose for dust 9 Hose for dust 10 Device for removal 11 Spare hose* 12 Filter for removal 13 Hose for function 14 Function hose 15 Connection for pressing 16 Accessory for the device 17 Cap for the dust container 18 Brush for dust 19 Holder for the dust container 20 Opening for used air 21 Filter for the device 22 Filter cover 23 Cap for the used air 24 Filter for the device The illustrated equipment is not part of the standard scope of delivery. The complete equipment can be found in our program for equipment.
Technical data
| Всисува за субовсисувае | EasyVac 3 |
| Бpoj на дeн/.apтник | 0 603 3D1 0.. |
| Homинален haben | V 220-240 |
| Homинална щашина | W 700 |
| Фразковцима | Hz 50/60 |
| Волуmen на kontejmерот (бруто) | | 2,1 |
| мakc.notприлесок (typбина) | mbar 240 |
| мakc. колчнина на пожотok (typбина) n/c 35 | |
| Текина согласно EPTA- Procedure 01:2014 кr | 4,3 |
| Клaca на заштета | # /I |
| Побатоите варата на homинален habenon [U] 230 V.Ове поадоци mootа отстancyваат ррн НСКИ НАПОП, BO зависочд od ИЗVEDБату BO одноанота земJA. | |
| Стат/Стол abTomatika* | |||
| Hominaelchen | Makc. | MHN. | |
| нанов | КалачтET | КалачтET | |
| EU/ИСКПУЕНО | 220-240 V | 2000 W | 100 W |
| UK | 220-240 V | 1800 W | 100 W |
The appliance is intended for professional use by trained personnel.
Information on noise/vibration
The noise emission values are in accordance with EN 60335-2-69.
The noise pressure level at the workplace can reach 73 dB(A). Measurement uncertainty K=3 dB.
The noise pressure level during operation may exceed 80 dB(A).
Wear hearing protection!
The vibration emission value (vector sum of three directions) and uncertainty are determined according to EN 60335-2-69:
an < 2.5 m/s2, K = 1.5 m/s2.
INSTALLATION
Before installing the vacuum cleaner, remove it from the packaging.
Installing the hose for vacuuming (see figure A)
Insert the hose into the suction opening and turn it clockwise to the stop.
Installing the accessories for vacuuming
The suction hose is equipped with a locking system, with which the suction accessory (suction nozzle 12, floor nozzle 11) can be attached.
Macedonian language
The appliance is intended for household use only (see figure B).
Insert the appliance plug 12 into the socket of the appliance 11 until the two locking buttons 15 on the appliance plug click into place. To detach, press the two locking buttons 15 and pull the appliance plug out of the appliance.
Mounting the appliance plug
Insert the appliance plug 12 into the socket of the appliance 11 or into the appliance plug (e.g., for another appliance).
Replacing/inserting the brush for the right (see figures C1-C4)
To use the appliance for cleaning with brushes, nozzles, or other accessories, you need to insert the brush (accessory). This ensures the removal of dirt.
The brushes that are used with the appliance can be cleaned without removing the brush. To do this, you should regularly clean the filter for the dust container (see "Cleaning the dust container, page 94").
Replacing/inserting the brush (accessory)
- Press the release button 8 and pull the brush 9 out of the appliance. Slide the brush 17 onto the accessory holder 16 and pull it out of the brush holder.
- Slide the brush 17.
Place the brush 18 over the accessory holder 16 of the appliance and slide the brush holder 19 over the brush. Repeat the process for the brush 9 and then insert the brush holder into the appliance until it clicks into place. - To remove the brush 18, turn it and pull it out - without turning the brush holder 17 - the accessory holder 16.
Use
For any type of intervention on the appliance, pull out the mains plug.
Switching on/off
Pay attention to the electrical voltage! The voltage of the power source must match the voltage indicated on the rating plate of the appliance. Electrical devices marked with 230 V can also be used with 220 V. Use only the original filter (without a bag, etc.). If you replace the filter, use only the original filter.
To enable the device, insert the plug into the socket only after use.
To enable optimal operation of the extractor, it is necessary to connect it to the mains 10 minutes before extraction and then extract.
Extractor operation
- To turn on the extractor, set the switch for operating mode selection 2 to the "On" position. - To turn off the extractor, set the switch for operating mode selection 2 to the "Off" position.

1
0
The extractor operation is created by the electrical appliances (see figure D).
The extractor has a built-in motor with a fan. You can connect an external electrical appliance. Pay attention to the maximum permissible connection power of the electrical appliance being connected.
- Installation of the exhaust adapter 12 (see Installation of the exhaust adapter in the provided socket, page 93). Insert the exhaust adapter 12 into the exhaust sockets of the electrical appliance.
Note: When working with an electrical appliance, if the air flow through the exhaust is low (e.g., due to clogged filters or ducts), the additional air opening 20 of the exhaust must be opened. This improves the overall performance of the extractor and the electrical appliance.
Turn the knob of the additional air opening 20 until it opens to the maximum.
-Start/Stop
To start the extractor, set the switch for operating mode selection 2 to the "Start/Stop Automatic" position.
-To stop the extractor, disconnect it from the connector of the electrical appliance. The extractor will stop automatically after a while. Disconnect the electrical appliance to finish the extraction.
Function for the Start/Stop timer The automatic timer continues to work for 6 more seconds to extract the remaining air from the extractor.
They are switched on, then they are switched off for the set of the working hours 2 with the mark "Switch off".

1+
94 | Macedonian
Maintenance and service
Maintenance and cleaning
Before cleaning the inside of the device, unplug it from the power outlet. Clean the inside of the device with a vacuum cleaner through the ventilation openings, so that it can work well and safely.
If you need to use an extension cord, use only an original or a specialized dealer for Bosch electrical appliances, to avoid endangering safety.
Cleaning the filter unit (see figures E1-E3)
- Press the release button 8 and pull it out straight to the right 9 from the appliance.
- Take out the pleated filter 21 together with the filter frame and clean the pleated filter with a soft brush. - Place the pleated filter 22 back in the correct position and take it out together with the filter frame. Clean the pleated filter with a soft brush or rinse it under running water and let it dry well. Then insert the cleaned filter and make sure it is properly seated.
Cleaning the dust container
Open the release button 9 on the dust container, empty it, and let it dry well.
Cleaning the exhaust filter (see figure F)
From time to time, clean the exhaust filter 24 to maintain optimal performance of the appliance.
Open the cover for the exhaust air 23 and take out the exhaust filter 24. Rinse the exhaust filter 24 under running water and then dry it well. - Then insert the cleaned filter and make sure it is properly seated. Then close the cover for the exhaust air.
Check the vacuuming data:
- Is the device switched on? - Is the filter inserted correctly? Is the container for dust 9 full? Is the container for dust 18 full?
When checking, only the following are used. According to the device:
- Leave the device running for 60 minutes to cool down. Remove the plug from the socket and plug it back in.
- Check the filter, dust container 9 and dust container 18 for proper installation, and that the hose for vacuuming 10, filter 21/22 and exhaust filter 24 are not clogged.
Regular cleaning ensures optimal vacuuming performance.
If the vacuuming performance cannot be achieved, take the device to the customer service.
Storage (see figure B)
Open the latches and place the hose for vacuuming 1 and the hose for vacuuming 10 on the device. Close the latches again. Place the device for vacuuming in the holder for vacuuming. Check the cable and the holder for cable 3. Carry the device only by the handle for carrying 5.
Customer service and advice
The customer service is responsible for your questions during repairs and maintenance of your product as well as spare parts. Exploded views and information on spare parts can be found at:
www.bosch-pt.com
The Bosch advice team will help you with any questions you have about our products.
For all spare parts orders, please quote the 10-digit product number on the type plate.
__SUPPIMER__
CabaKovayek 47, broj 3
1000 Skopje
E-mail: dimce.dimcev@servis-bosch.mk
Internet: www.servis-bosch.mk
Tel./fax: 02/2467610
Mob.: 070595888
Disposal
Disposal of the appliance, packaging and accessories must be carried out in an environmentally friendly manner.
Do not dispose of the appliance in household waste!
Only for EU countries
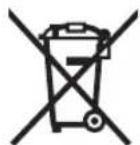
According to the European Directive 2012/19/EU on waste electrical and electronic equipment (WEEE), used appliances must be collected separately and recycled in an environmentally friendly manner.
The right to change is reserved.
Srpski|95
Serbian
Safety instructions

Urologist clipper
- EASYVAC
- SYMBOLS
- SYMBOLS AND THEIR MEANING
- PRODUCT DESCRIPTION AND SPECIFICATIONS
- INTENDED USE
- PRODUCT FEATURES
- TECHNICAL DATA
- NOISE/VIBRATION INFORMATION
- WEAR HEARING PROTECTION
- ASSEMBLY
- MOUNTING THE VACUUM HOSE (SEE FIGURE A)
- MOUNTING VAC ACCESSORIES
- FITTING THE EXTRACTION ADAPTER OR CURVED NOZZLE (SEE FIGURE B)
- MOUNTING THE SUCTION NOZZLES
- REPLACING/INSERTING THE DUST BAG (SEE FIGURES C1-C4)
- REPLACING/INSERTING THE DUST BAG (ACCESSORY)
- OPERATION
- STARTING OPERATION
- VACUUMING OF DEPOSITED DUST
- EXTRACTION OF DUST RESULTING FROM RUNNING POWER TOOLS (SEE FIGURE D)
- TO ACTIVATE THE AUTOMATIC
- MAINTENANCE AND SERVICE
- MAINTENANCE AND CLEANING
- CLEANING THE FILTER ASSEMBLY (SEE FIGURES E1-E3)
- CLEANING THE DUST CUP
- CLEANING THE PERMANENT FILTER (SEE FIGURE F)
- MALFUNCTIONS
- STORAGE (SEE FIGURE G)
- AFTER-SALES SERVICE AND APPLICATION SERVICE
- WWW.BOSCH-PT.COM
- GREAT BRITAIN
- IRELAND
- AUSTRALIA, NEW ZEALAND AND PACIFIC ISLANDS
- REPUBLIC OF SOUTH AFRICA
- CUSTOMER SERVICE
- GAUTENG - BSC SERVICE CENTRE
- KZN - BSC SERVICE CENTRE
- WESTERN CAPE - BSC SERVICE CENTRE
- BOSCH HEADQUARTERS
- DISPOSAL
- ONLY FOR EC COUNTRIES
- FRANÇAIS
- WASTE DISPOSAL
- NORWEGIAN
- PERMANENT FILTER
- OPERATE SAFELY
- SIGMA
- CALCULATING THE TOTAL HOSE LENGTH (SEE FIGURE A)
- INSTALLING THE ACCESSORIES
- INSTALLING THE SUCTION NOZZLE OR THE CURVED NOZZLE (SEE FIGURE B)
- REMOVING THE PROTECTIVE CAP
- REPLACING/POSITIONING THE HOUSING COVER (SEE FIGURES C1-C4)
- REPLACING THE HOUSING COVER (SPECIAL FITTING)
- START-UP
- REMOVING THE INSTALLED COVER
- EΛNVIΔ
- THE APPLIANCE IS INTENDED FOR USE IN HOUSEHOLD AND SIMILAR APPLICATIONS SUCH AS STAFF KITCHEN AREAS IN SHOPS, OFFICES AND OTHER WORKING ENVIRONMENTS, FARM HOUSES, BY CLIENTS IN HOTELS, MOTELS AND OTHER RESIDENTIAL TYPE ENVIRONMENTS, BED AND BREAKFAST TYPE ENVIRONMENTS
- SERVICE AND MAINTENANCE
- CHANGING THE FILTER (SEE FIGURES E1-E3)
- CLEANING THE DUST CONTAINER
- CLEANING THE FILTER (SEE FIGURE F)
- BAAΒΕC
- USE THE VACUUM CLEANER ONLY IN THE CASE THAT
- WARNING
- CAUTION
- SYMBOLS AND THEIR MEANINGS
- AUTOMATIC ON/OFF
- OFF
- VACUUM CLEANER COLLECTION VACUUM CLEANER COLLECTION OF DUST DEPOSITS
- PRODUCT DESCRIPTION AND SERVICES
- TODKNLOEHNE IUNAHRA BCACBHAHHA (CM.PNC.A)
- MOHTAX NPHNHAIENKEHCTE NI BCSCBBAHH
- MONTAX AANTEPA OTCABBAHN HN H3ORHYTOH HACADKN (CM.PNC.B)
- MONTAK HACADOK
- YCTAHOBKA/CMHA MEUKA DIA IBII (CM.PNC.C1-C4)
- YCTAHOBKA/CMEHAMEIKAJNIBIIN(NPHHAJIEXHOCTN)
- PA60TA C HCHCTPYMEHTOM
- SWITCHING ON THE POWER TOOL
- COLLECTING DUST DEPOSITS
- SUCTION OF DUST FROM WORKING POWER TOOLS (SEE FIG. D)
- CLEANING THE FILTER (SEE FIG. E1–E3)
- CLEANING THE PERMANENT FILTER (SEE FIG. F)
- TROUBLESHOOTING
- STORAGE (SEE FIG. G)
- RUSSIAN
- SERVICE AND CONSULTATION ON PRODUCT USE
- FOR RUSSIA, BELARUS, KAZAKHSTAN, UKRAINE
- RUSSIA
- BELARUS
- KAZAKHSTAN
- ONLY FOR EU COUNTRIES
- UKRAINIAN
- SAFETY INSTRUCTIONS
- KAZAKH
- DEVICE PARTS AND ACCESSORIES
- START/STOP AUTOMATIC
- ON
- ITS CHARACTERISTICS AND SPECIFICATIONS
- DO NOT IMMERSE IN WATER
- CONTROL PANEL BUTTONS
- TECHNICAL SPECIFICATIONS
- CONNECTING THE WATER INLET HOSE (SEE FIGURES C1-C4)
- CONNECTING THE WATER INLET HOSE (IF APPLICABLE)
- DRAIN PUMP
- DRAIN PUMP FILTER
- XNBINRAHWAANDAPDBICOPBIHBI
- ICTEN TPYRAH 3NEKTP KYPANDAPBIHAN WBIKKAH WAHAPDBI COPY (D CYPETIH KAPAHBI3)
- KA3AKA7A
- TECHNICAL SAFETY
- USE THE DEVICE ONLY AS INTENDED
- WATER CONNECTION (SEE FIGURES E1-E3)
- DRAIN HOSE CONNECTION
- DRAIN HOSE CONNECTION (SEE FIGURE F)
- ELECTRICAL CONNECTION
- CAKAY (G CYPETIN KAPAHB3)
- TYTBHYBIFA KBL3MET KEPCETY XHE NADANAHY KEHECTEPI
- PMAIBIK HEMECE ABTOPI3AUNHAHAH KBI3MET KEPCEY
- CABLE ROUTING
- ROMÂNA
- ELIMINARE
- SYMBOL AND ITS MEANING
- AUTOMATIC ON/OFF MODULE
- PRODUCT DESCRIPTION AND ITS FEATURES
- INTENDED USE OF THE POWER TOOL
- ILLUSTRATED ELEMENTS
- WORK WITH HEARING PROTECTION
- MOUNTING THE HOSE (SEE FIG. A)
- MOUNTING ACCESSORIES
- MOUNTING THE SUCTION HOSE OR NOZZLE (SEE FIG. B)
- MOUNTING THE NOZZLE
- INSTALLING THE DUST BAG (SEE FIGURES C1-C4)
- INSTALLING THE DUST BAG (OPTIONAL ACCESSORY)
- WORKING WITH ELECTRIC TOOLS
- SUCTION WITH THE DUST BAG
- SUCTION WITH AN ELECTRIC TOOL CONNECTED DIRECTLY (SEE FIG. D)
- TOUCH THE FILTER (EXIT THE FILTER E1-E3)
- CLEANING THE VACUUM CLEANER CHAMBER
- SERVICE AND TECHNICAL ADVICE
- ROBERT BOSCH EOOD - BULGARIA
- RECYCLING
- MACEDONIAN
- SIGNS AND THEIR MEANING
- DESCRIPTION OF THE PRODUCT POWER
- USE WITH APPROPRIATE REPLACEMENT
- COMPONENT ILLUSTRATION
- INFORMATION ON NOISE/VIBRATION
- INSTALLATION
- INSTALLING THE HOSE FOR VACUUMING (SEE FIGURE A)
- INSTALLING THE ACCESSORIES FOR VACUUMING
- THE APPLIANCE IS INTENDED FOR HOUSEHOLD USE ONLY (SEE FIGURE B)
- MOUNTING THE APPLIANCE PLUG
- REPLACING/INSERTING THE BRUSH FOR THE RIGHT (SEE FIGURES C1-C4)
- REPLACING/INSERTING THE BRUSH (ACCESSORY)
- USE
- SWITCHING ON/OFF
- EXTRACTOR OPERATION
- THE EXTRACTOR OPERATION IS CREATED BY THE ELECTRICAL APPLIANCES (SEE FIGURE D)
- START/STOP
- CLEANING THE FILTER UNIT (SEE FIGURES E1-E3)
- CLEANING THE EXHAUST FILTER (SEE FIGURE F)
- STORAGE (SEE FIGURE B)
- CUSTOMER SERVICE AND ADVICE
- SRPSKI
- SERBIAN
Brand : BOSCH
Model : EasyVac 3
Category : Vacuum Cleaner