P60PHT - Hedge trimmers Powerworks - Free user manual and instructions
Find the device manual for free P60PHT Powerworks in PDF.
| Technical Features | Electric hedge trimmer, 600 W power, 60 cm blade length, 28 mm tooth spacing. |
|---|---|
| Usage | Ideal for trimming hedges, shrubs, and small trees, suitable for domestic use. |
| Maintenance and Repair | Regular sharpening of blades recommended, cleaning after each use, checking electrical cables. |
| Safety | Equipped with an overload protection system, use of gloves and safety glasses recommended. |
| General Information | Lightweight for increased maneuverability, 2-year warranty, compliance with European safety standards. |
Frequently Asked Questions - P60PHT Powerworks
User questions about P60PHT Powerworks
0 question about this device. Answer the ones you know or ask your own.
Ask a new question about this device
Download the instructions for your Hedge trimmers in PDF format for free! Find your manual P60PHT - Powerworks and take your electronic device back in hand. On this page are published all the documents necessary for the use of your device. P60PHT by Powerworks.
USER MANUAL P60PHT Powerworks
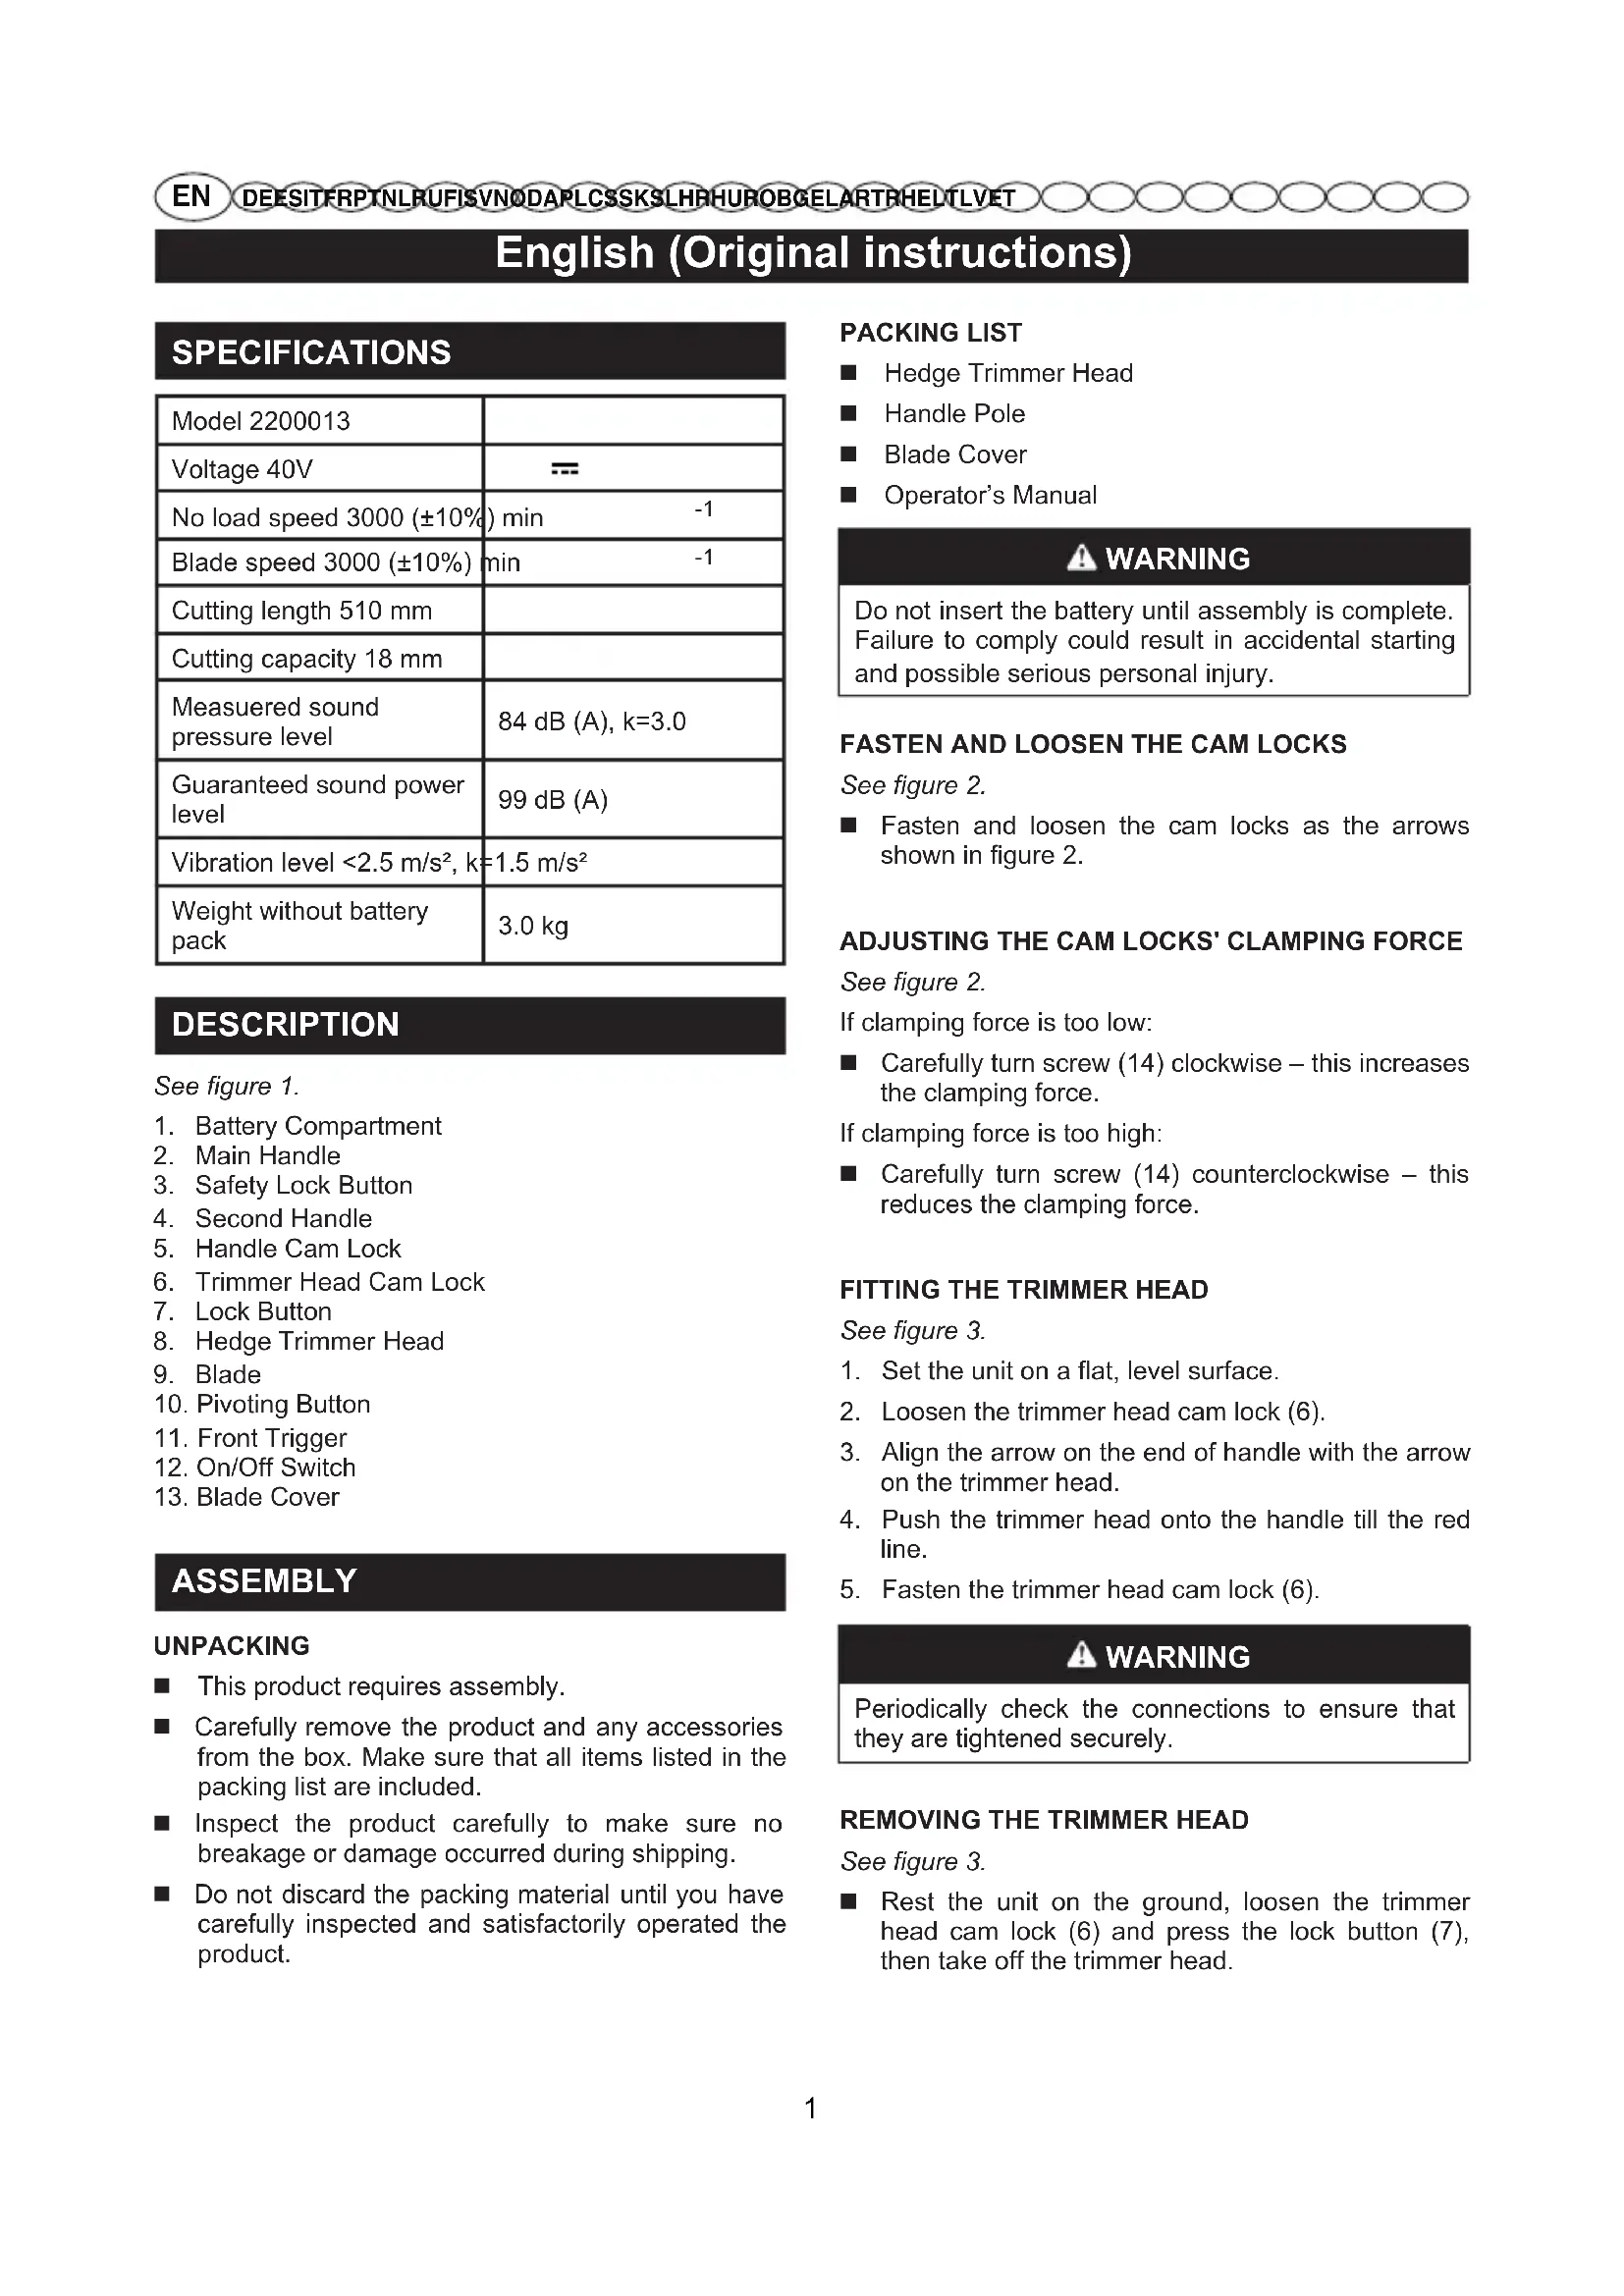
English (Original instructions)
SPECIFICATIONS
| Model 2200013 | |
| Voltage 40V | = |
| No load speed 3000 (±10%) min | -1 |
| Blade speed 3000 (±10%) min | -1 |
| Cutting length 510 mm | |
| Cutting capacity 18 mm | |
| Measuered sound pressure level | 84 dB (A), k=3.0 |
| Guaranteed sound power level | 99 dB (A) |
| Vibration level <2.5 m/s², k=1.5 m/s² | |
| Weight without battery pack | 3.0 kg |
DESCRIPTION
See figure 1.
- Battery Compartment
- Main Handle
- Safety Lock Button
- Second Handle
- Handle Cam Lock
- Trimmer Head Cam Lock
- Lock Button
- Hedge Trimmer Head
- Blade
- Pivoting Button
- Front Trigger
- On/Off Switch
- Blade Cover
ASSEMBLY
UNPACKING
This product requires assembly.
- Carefully remove the product and any accessories from the box. Make sure that all items listed in the packing list are included.
Inspect the product carefully to make sure no breakage or damage occurred during shipping.
- Do not discard the packing material until you have carefully inspected and satisfactorily operated the product.
PACKING LIST
Hedge Trimmer Head
■ Handle Pole
Blade Cover
Operator's Manual
WARNING
Do not insert the battery until assembly is complete. Failure to comply could result in accidental starting and possible serious personal injury.
FASTEN AND LOOSEN THE CAM LOCKS
See figure 2.
Fasten and loosen the cam locks as the arrows shown in figure 2.
ADJUSTING THE CAM LOCKS' CLAMPING FORCE
See figure 2.
If clamping force is too low:
Carefully turn screw (14) clockwise - this increases the clamping force.
If clamping force is too high:
Carefully turn screw (14) counterclockwise - this reduces the clamping force.
FITTING THE TRIMMER HEAD
See figure 3.
- Set the unit on a flat, level surface.
- Loosen the trimmer head cam lock (6).
- Align the arrow on the end of handle with the arrow on the trimmer head.
- Push the trimmer head onto the handle till the red line.
- Fasten the trimmer head cam lock (6).
WARNING
Periodically check the connections to ensure that they are tightened securely.
REMOVING THE TRIMMER HEAD
See figure 3.
- Rest the unit on the ground, loosen the trimmer head cam lock (6) and press the lock button (7), then take off the trimmer head.
English (Original instructions)
OPERATION
WARNING
Do not allow familiarity with this product to make you careless. Remember that a careless fraction of a second is sufficient to inflict serious injury.
WARNING
Always wear safety goggles or safety glasses with side shields when operating power tools. Failure to do so could result in objects being thrown into your eyes, resulting in possible serious injury.
WARNING
Do not use any attachments or accessories not recommended by the manufacturer of this product. The use of attachments or accessories not recommended can result in serious personal injury.
INSERTING AND REMOVING THE BATTERY
See figure 4.
- To insert the battery (15), line it up with the battery compartment (1) on the tool. Slide the battery into the battery compartment and push until the battery snaps into place.
- To remove the battery, push the release button (16). This will cause the battery to raise out of the tool. Pull the battery out of the battery compartment.
TURNING THE TOOL ON AND OFF
WARNING
Let the tool work at its own pace. Do not overload.
Switching on
See figure 5.
- Squeeze the front trigger (11).
- Pull the safety lock button (3) backward using your thumb and at the same time squeeze the on/off switch (12).
- Release the safety lock button (3). Continue to squeeze the on/off switch for extended operation.
Switching off
See figure 6.
- Release the front trigger (11) and the on/off switch (12).
- Upon release of the on/off switch (12), the safety lock button (3) will be automatically reset to the lock position.
The trimmer head pivots 135^ and can be locked into 7 positions within that range.
- Squeeze the pivot button (10).
- While squeezing the pivot button, move the head forward or backward.
- Release the pivot button once the trimmer head is in the desired position.
- The trimmer head should lock securely in place.
ADJUSTING POLE LENGTH
See figure 8.
- Rest the handle on the ground.
- Loosen the handle cam lock (5) and adjust the handle shaft to a comfortable length.
- Fasten the handle cam lock (5).
TIPS FOR OPTIMUM USE
See figure 9-10.
Start by trimming the top of the hedge. Slightly tilt the tool (up to 15^ relative to the line of cut) so that the blade tips point slightly towards the hedge (FIG.9). This will cause the blades to cut more effectively. Hold the tool at the desired angle and move it steadily along the line of cut. The doubled-sided blade allows you to cut in either direction.
In order to obtain a very straight cut, stretch a piece of string along the length of the hedge at the desired height. Use the string as a guideline, cutting just above it.
In order to obtain flat sides, cut upwards with the growth. Younger stems move outwards when the blade cuts downwards, causing shallow patches in the hedge. (FIG.10)
Take care to avoid any foreign objects. Especially avoid hard objects such as metal wire and railings, as these could damage the blades.
Regularly oil the blades.
AWARNING
Keep hands away from blade. Contact with blade will result in serious personal injury.
English (Original instructions)
MAINTENANCE
CLEANING THE MACHINE
After every work session, clean the machine thoroughly to remove all dust and debris.
To reduce fire hazards, keep the machine and, in particular, the motor free of leaves, branches or excessive grease.
Always clean the machine after use with a damp cloth dipped in neutral detergent.
Remove all traces of humidity using a soft damp cloth. Humidity can generate risks of electric shocks.
- Do not use aggressive detergents or solvents to clean the plastic parts or handgrips.
- Do not spray water onto the motor and electrical components and prevent them from getting wet.
To avoid overheating and damage to the motor or the battery, always keep the cooling air vents clean and free of debris.
CLEANING AND LUBRICATION OF THE CUTTING MEANS
WARNING
Do not touch the cutting means until the battery has been removed and the cutting means is completely stationary.
To increase the efficiency and working life of the blades, clean and lubricate them carefully after each work session:
Place the machine in a stable horizontal position on the ground.
Use a soft cloth to clean the blades, along with a brush to remove more difficult dirt and debris.
Lubricate the blades by applying a light layer of specific oil, preferably the non-pollutant type, along the upper edge of the blade.
NUTS AND BOLTS
- Keep all nuts, bolts and screws tight to be sure the equipment is in safe working condition.
Check regularly that the handles are fixed firmly.
STORING
STORING THE MACHINE
When the machine is to be stored away:
- Remove the battery from its housing and recharge it;
- Mount the blade cover.
- Wait until the motor is sufficiently cold;
- Clean.
- Check there are no loose or damaged components. If necessary, replace the damaged components and tighten any screws and loose bolts or contact the authorised service centre.
- Store the machine:
-in a dry place
- protected from inclement weather
- in a place where children cannot get to it
- making sure that keys or tools used for maintenance are removed.
STORING THE BATTERY
The battery must be kept in a cool, shaded place without humidity.
NOTE: If unused for any length of time, recharge the battery every two months to prolong its working life.
English (Original instructions)
TROUBLESHOOTING
| PROBLEM | POSSIBLE CAUSE | SOLUTION |
| The motor shuts down whilst working. | Battery is not inserted or is inserted incorrectly. | Make sure that the battery is inserted correctly. |
| The machine is damaged. | Do not use the machine Remove the battery and contact a Service Centre. | |
| With the safety lock button and trigger on, the cutting means does not turn. | The machine is damaged. | Do not use the machine. Immediately turn off the machine remove the battery and Contact a Service Centre. |
| The cutting means overheats whilst working. | Insufficient blade lubrication. | Turn off the machine, wait until the cutting means is stationary, remove the battery and lubricate the blades. |
| Excessive noise and/or vibration is experienced whilst working. | Loose or damaged parts. | Turn off the machine, remove the battery and: - inspect for damage; - check for and tighten any loose parts; - have any damaged parts replaced or repaired with parts having equivalent specifications. |
| The machine gives off smoke whilst working. | The machine is damaged. | Do not use the machine. Immediately turn off the machine remove the battery and Contact a Authorised Service Centre. |
He npnkaaTecb K pexyuemy npncnoc6neHIO, noka He 6ydt N3BHeHa 6atape, I do Tex nop, noka pexyuie npncnoc6neHne nonHOCTbO He octaHOBTc.
BcAkn pa3 nocne pa60tby peKOMeHyetyTc qNCTnTB n Cma3bIbAtb Hoxn, YTO6bIyBeHInuHTb Nx 3oΦeKTNBHOCTb I npOJNTb cPOK cnYk6bl:
IocTaBbTe MaunHy B rOpH3OHTaJIbHoe noJIOKeHne HTO6bl OHa npOuH0 ONpApJacb Ha 3eMNI.
Bbtpte Hox cyxon TprkO, npnnnuyo rpa3b MOXHO ydaNTb 1eTko.
CmaxbTe HOXn, Hanea ToHKn CNO nCneuaNbHoro Macna, NO BO3MOxHOCTN 3KOJIOrHuHoro, BDOJIb BepxHero Kpaar HOka.
KPEENEXHbIe IaIKN IN BnHTbI
CneHnte 3a TeM, yTo6bl raiKn N BnHTbl 6blnn 3aTaryTbI, dJa yBepeHHoCTN B TOM, yTO MaunHa BCerda 6e3onacha npn pa6ote.
IpeuOnuYeckn npOBepaTe npOuHocTb 3akpenJIeHn pyKoTOK.
XPAHEHNE
XPAHEHME MAUINHbI
PpeKdyeM y6paTb MaunHy Ha xpaHHe:
- ɪəBnɛknte 6aTapeɪŋ u3 cooTbeTCTbYIOUeI rHe3da n 3apAŋTe ee;
- YcTaHOBnTe 3aunTy Ha HOXK.
- Ndoxnte, noka DnurTaenb octbHET;
- PpOBeDnTe OChNcTky.
-
PpOBepbTe, YTO Het ocna6JeHHbIX nIN NOBpeKDeHHbIX KOMNOHeHToB. EcIn Heo6xOaMIO, 3aMeHnTe NOBpeKDeHHbIe KOMNoHEHtbl, a TaKKe 3aTAHnTe OCn6JeHHbIe BnHTbl N 60Jrbl nIN 6bpATNTecB BAETOpN3OBAHHbI cepBnCHbI ueHTp.
-
XpaHnTe MaunHy:
B CYXOM NOMEUHNN
-3aUHOMOTNORHOBO3dEICTBNA
-BHE DOcraMoCTN DeTeH.
-yoctOBepbTecb,TO Bbl y6paNN KNoHn HnCTpyMeHT, nCNoJIb3OBAuBWeeca DnA 06cnyKuBaHna.
Pycckn (IpebeO d opnHaJIbHbIX nHcTpyKcn)
XPAHEHNE BATAPEN
БатaperДолжнхахpaHITbCЯВTeHи,ВпpoxnaIHOM MecTeиВПОмeшeHH,ГdeOTcyTCTByETBnaxKHOCTb.
PIMMEUHNE: B cnyuae dnte horo npocTo 3apxkaTe 6atapeo pa3 B Da Mecaa, T06bl npoDnTb cpoK ee cnxkb.
BbIBJEHNE HENOJAOK
TUOTTEEN TEKNISET TIEDOT
Haekkekipperhoved
Stanghandtag
■ Klingeafskaermning
Brugsanvising
ADVARSEL
ZAPNUTIE A VYPNUTIE NARADIA
AUPOZORNENIE
FIXACNÉ SKRUTKY A MATICE
Zachovajte stav skrutiek a matic dotiahnuty, aby stehohli byt' stale isti bezpecnou cinnostou stroja.
Pravidelne kontrlujte riadne upevnenie rukovatii.
SKLADOVANIE
USKLADNENIE STROJA
Ked sa chystaste stroj uskladnit:
-
Odopnite akumulátor z jeho uloženia a nechajte ho nabit'.
-
Nasadte ochranny kryt NOZA.
- Pockajte na dostatočné ochladenie motora.
- Vycistite ho
- Skontrlujte, ci ziadne sučasti nie su uvolnene alebo poskodené. V pripe de potreby vyměnte poskodené komponenty a dotiahnite povolné skrutky a svorníky alebo sa obratte na autorizovánek servisné stredisko.
- Stroj skladujte:
A V A R T I S M E N T
alal alal alal alal alal alal alal alal alal
3
Jaaal aag a jol yjgl jg jie 4
whill sby
.8
.
(5)(5).2
5 (5) 15 1
jai 1
.10-9
a 51
y 9
a 1
.
g 1000000000000000000000000000000000000000000000000000000000
a 1
(10)
aall plaa jolks k y iaye plalg f y
y j 1
1
A
1 1
ybsy
#
A. (1)(2)
aallll lllllllllllllllllllllllllllllll
aal lal y, jall Jg 1e g aal jil al jol
aaii
a aae aee aee
ytaa aiaaa 8
J 1
#
A
jaiu gao jia jia jia jia jia jia jia jia jia jia jia jia jia jia jia jia jia jia jia jia jia jia jia jia jia jia jia jia jia jia jia jia jia jia jia jia jia jia jia jia jia jia jia jia jia jia jia jia jia jia j
1
1.6( 2,6)
2j
a
"OFF" "ON"
A
Jll Jll jll jll lal aulll s yjy jll g
山
5.5
1.(11)
2.2a
3.1
2) 1j
Jusll Jusll
6.6.1.11
1.(12)
aDulj jbyi (12) 1
(3)
()
yj
y 1
aiee eae aee
a
i 1
a12 12 a1
aai jlll g aal lglgall gaaagaa
l_g = ( r_1 + r_2) ( r_3 - r_1)
KAM KILI T L E R I N I N SIKI S T I R M A GUCUNU AYAR LAMA
Sekil 2'e bakin.
Eger sikistirma gucu cok duusukse:
nXn nnn nn nnnn nn nnnn nn nnnn nn.2
.3
.4
1
87
ywnnynnn nn .1
in nn pili (5) nnn nyn nn nn .2.2
.
.5) nnnn nn npn .3
mouinuiy
10-9
non non nnn nn nn nn nn nn nn
yyn nynnyn (nnn 17 on 15oyn)yn
n nnnn nn nnnnnnn
nannnnnnnnnnnnnnnnnnnnnnnnnnnn
y
.
ynnn nn nnnn nn nnnn nn nnnn nn
n nn nnnnnnnnnnnnnnnnnnn
110 1
y 1
y
(10)
yynn7 1970.
n nn nnnnnnnnnnnnnnn
.
.1TO 1N Dn Nn
#
n nn nnnn nn nn nn nn nn nn nn nn nn nn nn nn nn nn nn nn nn nn nn nn nn nn nn nn nn nn nn nn nn nn nn nn nn nn nn nn nn nn nn nn nn nn nn nn nn nn nn nn nn nn nn nn nn nn nn nn nn nn nn nn nn nn nn nn nn nn nn nn nn nn nn nn nn nn nn nn nn nn nn nn nn nn nn nn nn nn nn nn nn nn nn nn nn
npiinn
177
nnn nn nnnnnnnnnnnnnnnnnnnnnnnnnnnnnnnnnnnnnnnnnnnnnnnnnnnnnnnnnnnnnnnnnnnnnnnnnnn
777777
nwwy y ty 90n, noyn nno nn nnnn
TINN
nnn nnny uynnn nn nn n
7777777777
nyon
#
n nnnn nn nnnn nn nnnn nn nnnn
nyy nnnn nnwn noin y nyn ppon
.
#
n nn nnnnnnnnnnnnn
n7 777777777777777777777777777777777
nnnnnnnnnnnnnnnnnnnnnnnnnnnnnnnnnnnnnnnnnnnnnnnnnnnnnnnnnnnnnnnnnnnnnnnnnnnnnnnnnnnnnnnnnnnnnnnnnnnnnnn
#
y
y 1
.
nion w nni no
4
nix qintihion nn nih thion nx phnn.
nni nnnn nn
1(1)
nion nqint.7on nnnnn nnnnn
nHnnyn
y
#
n nn nn nn nn nn nn nn nn nn nn nn nn nn nn nn nn nn nn nn nn nn nn nn nn nn nn nn nn nn nn nn nn nn nn nn nn nn nn nn nn nn nn nn nn nn nn nn nn nn nn nn nn nn nn nn nn nn nn nn nn nn nn nn nn nn nn nn nn nn nn nn nn nn nn nn nn nn nn nn nn nn nn nn nn nn nn nn nn nn nn nn nn nn nn nn nn nn nn nn nn
yinn
.5
1.(11) nT
.2nn7(3
.(12) 7n7nn nn y n7 n7nn nn
nnnnn nn yin nn nnn
12
.6
.1.(12)
y (12) 2
n nn nnnn (3) nnnn
(nnnn)
nnonion
n nnnnnnnnnnnnnnnnnnnnnnnnnnnnnnnnnnnnnnnnnnnnnnnnnnnnnnnnnnnnnnnnnnnnnnnnnnnnnnnnnnnnnnnnnnnnnnnnnnnnnnnnnnnnnnnnnnnnnnnnnnnnnnnnnnnnnnnnn
nly1nn9
All new Powerworks Tools machinery is supplied with a 2 year parts and labour warranty from original date of purchase. A 30 day warranty is available for machines used professionally as Powerworks Tools are designed primarily to be used by DIY consumers. This warranty is non-transferable.
LIMITATIONS
This warranty applies only to defective parts/components and does not cover repairs due to:
- Normal wear and tear.
- Routine tune up or adjustment
- Damage caused by improper handling/abuse/misuse or neglect.
- Overheating due to lack of maintenance.
- Damage due to fittings/fasteners becoming loose/detached through lack of maintenance.
- Damage caused by cleaning with water
- Machines serviced or repaired by non-authorised Powerworks Tools service centres.
- Machines incorrectly assembled or adjusted.
- Damage caused by improper use of the machine.
- Damage caused by improper winterisation (pressure washers)
- Items considered as consumable parts are not normally covered by the warranty, including but not limited to:
Batteries
Electric cables
- Blade and blade assemblies
Belts
- Filters
- Chucks and tool holders
- Certain products may contain components such as engines, transmissions from an alternative manufacturer, these items will be subject to the appropriate manufacturer's warranty policy except where Greenworks Tools Europe GmbH agrees to underwrite any claims outside the said manufacturer's warranty period.
- Second hand goods are not covered under this warranty policy.
- The fitting of spares, replacements or extra components which are not supplied or approved by Greenworks Tools Europe GmbH.
Warranty
To claim a warranty on any product under this policy a proof of original purchase is required. Credit card statement do not qualify as sufficient proof of purchase. In the first instance of a warranty event occurring the consumer should return the product to the original place of purchase with their proof of purchase. The machine will be sent to our central service facility and an inspection made. If the machine be found to be at fault it will be repaired and sent back to the address of the consumer free of charge. Machines that retail for less than €100 euros including sales taxes will generally be replaced.
If the central service facility finds that machine is not found to be at fault then the consumer will be advised they will need to pay for the cost of the repair.
This warranty policy is subject to change from time to time to accommodate the needs of new products. A copy of the latest warranty policy will be available at www.greenworkstools.eu.

TapaHOnHH npaBnHa Ha Powerworks Tools 3a camoDeHN MaunH
NEPHOD HA TAPAHUNRA
Bcunm Maunn Ha Powerworks Tools ce npedocTabr c 2-rounha rapaunna 3a cepbnHa deHooCT n peepBNu qactn, cnTahO OT daTata Ha zakynbahe Ha npdykTa. PpeocTabra Ce camo 30-dnebHa rapaunna 3a npocceNoHaHO n3no13BaHnTe Maunn, 3aTO npodykTnte Ha Powerworks Tools ca npdHa3NaYeHn npedmHO 3a KInHeNTn, paboteu csc CamoJeHHMaunn. Hactoata rapaunna He Moke da Ce npexBpny.
OTPAHnueHHN
HaCToIaTa rapaHua e BaIIuHa cAmO 3a DepeKTHn YacTN/ KOMHOHTN IN He NOKPbBa pMoHTN, NopoDeHN OT:
- HopmaHNO 3HOCBaHe n amOpTn3aIy.
- PyTHHHH HAcTpoKn IIN DeHocTN no peryInpaHe.
3.Пов体育场причненOTНиравино6ораве/3noynotpe6a/ rpeшноИЗПОЛЗВАЕИПОЯВаHa HeбржноCT.
4.прерраин поади подрьжka.
5.Поведи поади рахларен/pa3kaуен chakн ИИСКрелТЕНЕLEMEHTN B CNEДCTBNE Ha loWa nOДРbXka. - NOBpeN, npuHHeH B CJIeCTBHe Ha noUcTbaHe c BOa.
- MaunHH, 06cnyKbAHn Hnn peMOHTnpaHn OT cepBn3Hn CEHTPOBE, KOHTO He ca otOpN3npaHn OT Powerworks Tools.
8.MaunHn, konTo ca crno6eHN nn npaHn HnpabuHNO. - Поведи, подени OT Ненин祛боравенс машина.T.
- NOBpeH, npoDHeH OTH HnPaBUNHO 3aImMaBaHe (BOOcTpyKn)
-
EInemEnT, KOnTo ce CHTaT 3a KOHcyMaTbN, HO O6nKHOBeHo He Ce NOKpNBaT OT rapaHcIyTa, BKNIOHTeINHO (HO He CaMO):
-
Batepim
EneKtpueecknKa6en -
OctpneTa N KOMJIeKtN OCTpneTa
Pembun
ΦHnTPn -
Haryon npodykTN MoRaT Da cbdbpKaT KOMNoHeHTN (HaNPIMep DVBATeIN, TpaHCMnCNI) OT dpyr npon3BODnteIN - 3a Te3n eJeMeHTn Ca B Cnna rapaHUnOHNHTe YcNOBnHa CbOTBeTHN npOn3BODNTeONCB H CnayNTe, Korato Greenworks Tools Europe GmbH ce cbflacn da noKpne ueTne, KOtTo He ce noKpNBat OT rapaHUnOHnepnoD Ha To3n npOn3BODNTeJ.
- CTOKI BTOPA ynoTpe6a He ce nokpmbat OT HAcToAaTa rapaHnia.
- MoHTnIpaHTo Ha pe3epBn YacTn, 3aMeCTBaUu NIN JOnbJIHITeJIH N KOMNoHErN, KOTo He ca npEoCTaBeH NIN ODo6peH NOr Greenworks Tools Europe GmbH.
Tapaun
3a npedraBaHe Ha rapaHIOHO HcK 3a daDeH npOyKT Tp6Ba Da ce npoocTabn DOKa3aTeNCTBO 3a NpBPOHaayHNO My 3aKyNyBaHe.
N3BneueHHraTo AT KpeHTnH KapTHe npEcdTbAIBat BaNDHO
DOKa3aTeNCTBO 3a 3akyNyBaHe. Pn NpBTO B3HNbKaHa Y cYbONBE,
No3OBNaBto pnpEBAHe Ha rapaHIOHO HcK, KIneHTb Tpr6Ba Da
3aHece npOyKTA Ha MRCTO HA HerOBO To NpBHOHaANHO 3aKyNYBaHe,
KbTeTo Tp6Ba Da npEocTabn DOKa3aTeNCTBO 3a 3aKyNyBaHeTo.
MaunHata ige 6bde n3npateHa Do hauinr rnaBeH cepBn3eH cteHTbp,
KbTeTo ige 6bde m3BbpHena HNCNEkua. Ako ce yctAHOBn pa6pnueH
dePekr No MaunHata, Ta ige 6bde 6e3nPaTHo pEmOHtnpaHa n
m3npaTeHa o6patHo Ha aDpeca Ha KIneHTa. MaunHnte Ha na3apHa
ctOHCT NO 100 eBPO (BKn. dAnbK npOdaXba) O6NKHO He 6bDat
noDMehn C HOBN.
Ako hainrT rnaBcH cepB3eH ueHTbp He yctahOBn fappnHn depeKtn no MaHHata, KIneHTbT ue 6bDe yBeDomeh, Ye Toi uetpBa da 3annat paxOdnte No peMOHTa Ha npodykTa.
HactoIHTe rapaHIOHN npaBnla MoT a 6bTaT IpomHeHH nepnoDnHO, 3a Da 6bDaT akTyAINHO aadTnpaH N KbM HOITE npOyKTN. Konne Ha Na-AkTuAnHITe rapaHIOHN npaBnla e HAnuHO Ha aDpec www.greenworkstools.eu.

NolirkiyunogoukeuwvpaotepaTOg Powerworks Tools
NEPIOAOEETHYHHE
Ola ta vea unxavnata tnc Powerworks Tools ouvodevovtai ano evynon 2 etw yia ta eapntnata kai ta epyatika touc, ano nny apxikn npepounvia ayopac. Eyyunon 30 npewv napexetai yia unxavnata tou xpnoiopoioivutr etayveaatka, kaow ta troiovta tnc Powerworks Tools ateuebuvotai kupiw os paaitexvesk katavaawte cpiovtwu maotepaotc. H eyyunon eivai netaaiaiun.
IIEPIOIPMOI
H TAPOUSA EYYUNON IOXUEI MOVIO IA EALTUMATKA EGAPNTMA/EVOTNEC KAI DEV KAUTTEI ETIAKEUEG TPO OPEIAOVTAI OE:
1.ΦuioIoyikrφθopá.
2. Zuvθεις επιοκεύς ἡ προσαρύους.
3. Znueis Tou npokalouvtaaovapooTo xeipioKataxpon/ eoqaaevn xpnon n qeia.
4. YIePtepauon Aoyw EAAeiug ouvtipnong
5. Znmuia loyw xalapwong/antoosanc εaaptnpatuv/ouvdeepwv εeartias eaiuwns ouvtipnns.
6. Znmu TPO TpOKAnEgK e aTkoaepiapu ovepo
7. Mxavnata Tou ntoBaalovtai oepic n tiokeues e μη εouioootneva kvtpa oepic ts Powerworks Tools.
8. Eaαμενη συναρολόγση ἡ προσαρογή μχανηματων.
9. Znuiic 念 ayw akataaannns xponns tou nxaavnatoc.
10. Znuies loyw eoepauevns ykataotaons vi to xeiuwa (poeles
11. Tioxieia troeewpoovtai avalwuaia, 6ev kaluttnovtaouvnoa ato nV eyyunon, ouuTepiaaabavovuv EvdeiktiKaTwv Ens: Mntatapie
Hεκτρία καλωδία
AeioEgKai diataeis Aeniodow
- IuavTc
-ΦiAtpa
- Suovetnpes kai nkec epyaaleiwv
-
Opiéva TPOIóVTA Evéxetai Va TEPiExouv Evotntec OTWCS, KIBWTIA Taxutuuv AtTO diaopopetikko katakeuaatn K.AT Ta EIOAuta UTOKEIVaTOn AVTIATOxN TIOIITIK EYUNON TOKATAKEUaTOn ToukETCOW TPEITIWcewovtou nGreenworks ToEs 100eGMBauwveia aavalaeeiattneic EKTOS nT PPOBETOevcn TEPiδou EvyunonTu KATAOKEUAOTN
-
Ta petaxipiaeva ayabaev kalutovtaatotnv tnapouo a troalikn Eyyunong.
- H ToToBéTnən avTaAakTikWv, EiWiav AvTKaTaTaon n TpOaTeTow vToiXeiWuou NapexovTai nykivovTai aTO tvgNevs Tools Europe GmbH.
Eyyunon
Ia tvk dikn oyyunc yio tioobntote tpoov kauuTTetai at a
TAAIOA Tn trapouac ToAIKNG, attateiat aoidein nC apxikns
ayopac. OI loyapiaooi Tiwtkw Kaptov dev toteAoov etrapkn
atodieyn ayopac. 2tv npwn Eupavion Tepiatatko eyyunoc, o
TEALATG OPEAEVA ETIPATEEYTOPOXO ATOAPXO aneio AyopaC
paiz ME tv antodeiyn ayopac tou. To uxAvna Ta otalei otic
KEPTIKES EYkataotaeic OEPBt Nc taipieiac mac kalta untoBnTei OE
EeVxo.Av to uxAvna KpBe ElattWmuKO, Ta EtnkeuaTei Ka th
ETIATPapei ot Dieuovon Tou katavaWTHxpiewan.
Mnxavnatau Tou diatbevtai ot liavki nyopay ia Tooa xaunAOTepa
twv 100 Eupw, aupeiaaabavovou Tou popou TwAnoeuw, Yevika
theta Avtkaotavai.
Av n Kevpiikn Eykataaotaon aepBic kpiie oTTO mynavna dev Tapouiae ataleia, tote o katavaawntc th eynepwtheta ot th pETTE va kaUwei To KoToC ts ETIOKEUNs.
H Tappouoa troalikn Eyyunong Evdoexaia v tpoittoieita kata diaatna, kauittovtac tic avykec veuv tipoiovtw. Avtypapo ts nT eaeutaiac troalikn Eyyunong 0eivai diaheigo otn dieuuvan www.greenworkstools.eu.

(DIY) duiy iuii Cn ie Powerworks Tools
J 1000000000000000000000000000000000000000000000000000000000000000000000000000000
1
n nn nnnn nn nnnn nn nnnn nn nnnn nnnn nnnn nnnn nnnn nnnn nnnn nnnn nnnn nnnn nnnn nnnn nnnn nnnn nnnn nnnn nnnn nnnn nnnn nnnn nnnn nnnn nnnn nnnn nnnn nnnn nnnn nnnn nnnn nnnn nnnn nnnn nnnn nnnn
Greenworksxynn
nnonnnn nnnn nn nnnn Tools Europe GmbH
JINXHINNN
111111111111111111111111111111
n 14
Greenworks Tools Europe GmbH
#
y 111111111111111111111111111111111111111111
197n nyn 77D
y 1
1.17n n 17y 07y
n 1
www.greenworkstools.eu nnnn nn pnnn nn

EN EC DECLARATION OF CONFORMITY
Manufacturer: Changzhou Globe Co., Ltd.
Address: No. 65 Xinggang Rd., Zhonglou Zone, Changzhou, Jiangsu, China
Name and address of the person authorised to compile the technical file:
Name: Peter Söderström
Adress: Hjortronvagen 3,555 93 Jönköping,Sweden
Herewith we declare that the product
Category LONG REACH HEDGE TRIMMER
Model 2200013
Serial Number. See product rating label
Year of Construction See product rating label
■ is in conformity with the relevant provisions of the Machinery Directive (2006/42/EC)
■ is in conformity with the provisions of the following other EC-Directives EMC Directive (2014/30/EU),
Noise Emission Directive (2000/14/EC amended by 2005/88/EC)
And furthermore, we declare that
The following (parts/clauses of) European harmonised standards have been used EN 60745-1; EN 60745-2-15; EN ISO 3744; ISO 11094; EN 55014-1; EN 55014-2; EN ISO 10517
Measured sound power level 96.4 dB(A)
Guaranteed sound power level 99 dB(A)
Conformity assessment method to Annex V / Directive 2000/14/EC
Place, date: Changzhou, 04/20/2016
Quality Director
Signature: Ted Qu Haichao
Ted qu
Adresse: No. 65 Xinggang Rd., Zhonglou Zone, Changzhou, Jiangsu, China
Indirizzo: No. 65 Xinggang Rd., Zhonglou Zone, Changzhou, Jiangsu, China
Adresse: No. 65 Xinggang Rd., Zhonglou Zone, Changzhou, Jiangsu, China
Endereço: No. 65 Xinggang Rd., Zhonglou Zone, Changzhou, Jiangsu, China
Local, data: Changzhou, 04/20/2016
Assinatura: Ted Qu Haichao
Adres: No. 65 Xinggang Rd., Zhonglou Zone, Changzhou, Jiangsu, China
Ampes: No. 65 Xinggang Rd., Zhonglou Zone, Changzhou, Jiangsu, China
IIMn aDpec IINuca, OTBeTCTBENHO 3a NOIROTOBky TexHnueckoJOKyMeHTaUIN:
Osoite: No. 65 Xinggang Rd., Zhonglou Zone, Changzhou, Jiangsu, China
Adress: No. 65 Xinggang Rd., Zhonglou Zone, Changzhou, Jiangsu, China
Adress: Hjortronvagen 3,555 93 Jonkoping,Sweden
Adresse: No. 65 Xinggang Rd., Zhonglou Zone, Changzhou, Jiangsu, China
Adresse: No. 65 Xinggang Rd., Zhonglou Zone, Changzhou, Jiangsu, China
Adres: No. 65 Xinggang Rd., Zhonglou Zone, Changzhou, Jiangsu, China
Adresa: No. 65 Xinggang Rd., Zhonglou Zone, Changzhou, Jiangsu, China
Adresa: No. 65 Xinggang Rd., Zhonglou Zone, Changzhou, Jiangsu, China
Naslov: No. 65 Xinggang Rd., Zhonglou Zone, Changzhou, Jiangsu, China
Ime in naslov osebe, ki je pooblascena za sestavljanje tehnicne dokumentacije:
Ime: Peter Soderström
Naslov: Hjortronvagen 3,555 93 Jonkoping,Sweden
Adresa: No. 65 Xinggang Rd., Zhonglou Zone, Changzhou, Jiangsu, China
Ime i prezime, i adresa osobe ovlaštene da sastavi tehničku datoteku:
Ime i prezime: Peter Soderstrom
Adresa: Hjortronvagen 3,555 93 Jönköping,Sweden
Cim: No. 65 Xinggang Rd., Zhonglou Zone, Changzhou, Jiangsu, China
Adresa: No. 65 Xinggang Rd., Zhonglou Zone, Changzhou, Jiangsu, China
Ampes: No. 65 Xinggang Rd., Zhonglou Zone, Changzhou, Jiangsu, China
Ime n aDpec Ha IInceTo, yNbHHomOuSeHO da cbCTaBn TexHnueckn qaui:
Ume: Peter Soderström
Ampes: Hjortronvagen 3,555 93 Jonkoping,Sweden
C HacToaTeTo DeKnapnpaMe, Ye npOdyKTbT
Changzhou, 04/20/2016:
()
Ted qu
Uretici: Changzhou Globe Co., Ltd.
Adres: No. 65 Xinggang Rd., Zhonglou Zone, Changzhou, Jiangsu, China
Yer, tarih: Changzhou, 04/20/2016
Kalite Mūdurü
Imza: Ted Qu Haichao
Ted.
Changzhou Globe Co., Ltd.
No. 65 Xinggang Rd., Zhonglou Zone, Changzhou, Jiangsu, China :
y
Peter Soderstrom:nu
Hjortronvagen 3,555 93 Jonkoping,Sweden
X
wn by nnnnnt
2200013
T
y
(2006)
EMC (2014/30/EU) n"nn
(2000/14/EC n-2005/88/EC) ynnn
:0nX,
Adresas: No. 65 Xinggang Rd., Zhonglou Zone, Changzhou, Jiangsu, China
Adrese: No. 65 Xinggang Rd., Zhonglou Zone, Changzhou, Jiangsu, China
Personas, kas atbildigs par tehniska faila apkopošanu, vards un adrese:
Vards: Ted Qu Haichao (kvalitates direktors)
Adrese: Hjortronvagen 3,555 93 Jonkoping,Sweden
Aadress: No. 65 Xinggang Rd., Zhonglou Zone, Changzhou, Jiangsu, China