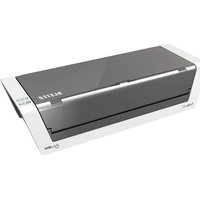
ILAM Touch A4 Turbo - Laminating machine LEITZ - Free user manual and instructions
Find the device manual for free ILAM Touch A4 Turbo LEITZ in PDF.
| Product type | Laminating machine |
| Brand | Leitz |
| Model | ILAM Touch A4 Turbo |
| Max. working width | 230 mm (A4 format) |
| Laminating speed | Up to 700 mm/min, automatic depending on thickness |
| Recommended film thickness | 80 µm to 250 µm |
| Max. material thickness | 1 mm |
| Rollers | 4 rollers (2 heated) |
| Preheating time | Approx. 5 minutes |
| Auto-off | After 30 minutes of inactivity |
| Power supply | 230 V AC |
| Power consumption | 300 W |
| Housing material | ABS |
| Manufacturer's warranty | 3 years |
| Main functions | Thickness detection, auto-reverse, manual reverse button, auto-off |
| Roller maintenance | Cleaning with the provided cleaning card |
| Housing maintenance | Soft, damp cloth with a little dish soap |
| Safety | Indoor use only, do not leave unattended, unplug before maintenance |
| Repairability | Repair exclusively by authorized after-sales service |
| Intended use | Laminating paper, photographs, laser/inkjet prints |
Frequently Asked Questions - ILAM Touch A4 Turbo LEITZ
User questions about ILAM Touch A4 Turbo LEITZ
0 question about this device. Answer the ones you know or ask your own.
Ask a new question about this device
Download the instructions for your Laminating machine in PDF format for free! Find your manual ILAM Touch A4 Turbo - LEITZ and take your electronic device back in hand. On this page are published all the documents necessary for the use of your device. ILAM Touch A4 Turbo by LEITZ.
USER MANUAL ILAM Touch A4 Turbo LEITZ
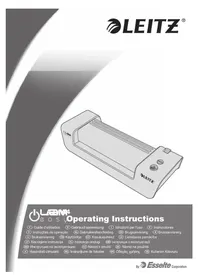
LABMA4 TURBO touchOperating Instructions
Guide d'utilisation
Gebrauchsanweisung
Recommended materials 4
For your safety 5
Tips for good results 5
Laminating, simple as that! 7
Troubleshooting 8
Maintenance and care 8
Specifications 9
3 year guarantee 9
Disposal of old equipment 9
Dear customer
Thank you for choosing a quality laminator by Leitz. Please read these operating instructions carefully in order to understand how to use the device safely. Keep these operating instructions with the device at all times as they are part of the product.
Recommended materials
-
Your Leitz laminator is suitable for lamination of most printed papers, copier, laser and ink jet papers with laminating pouches of 75 m (mic.) to 250 m up to a maximum thickness of 1mm .
-
The thickness of the material to be laminated is recognized by a sensor which automatically adjusts the laminating speed. Thus, in addition to thinner materials also photographs as well as coated inkjet and laser prints are always laminated with the best possible setting.
-
To ensure high-quality results, use Leitz brand pouches only. This also helps to prolong the lifetime of the device.
For your safety
Intended use
This device has been developed for laminating paper or similar materials. Use it exclusively for this purpose, as described in these operating instructions.
Precautions for setup
- The device is for indoor use only. Do not use outdoors.
- Prior to connection make sure your local mains voltage matches the rating indicated on the device.
- Set the device up close to a readily accessible mains socket. Make sure the device can be disconnected from mains at all times.
- Protect the mains cord from being strained, pinched or buckled and place it in a way to prevent people from tripping over the cord. Particularly ensure that damage is avoided at the plug and the point where the cord exits from the device.
- Do not expose the device to direct sunlight and do not place it on heat-sensitive surfaces, near heaters, air conditioners or flammable substances.
- Do not drop or hit the device.
Precautions for operation
- Never leave the device unattended when switched on.
- Keep the device away from children (risk of injury!).
- Ensure good aeration while laminating (e.g. open a window).
- Protect the device from moisture and do not operate it when mains cord or plug are defective.
- Always grasp the plug, not the cord itself. Never touch a mains plug with wet hands.
- Unplug the device when not in use.
- Do not place anything on top of the device and do not insert anything into the venting slots.
Precautions for cleaning, transport and storage
- Unplug and let the device cool down before cleaning, moving or storing it. When carrying the laminator, always hold it by the recessed grips on both sides.
- Use a soft, damp cloth and a dishwashing detergent for cleaning. Do not use cleaning tissues or chemical substances which might damage the surface.
- Do not open the housing and do not attempt to repair the device yourself. Contact your dealer for any required repairs. Read guarantee declaration for further information.
Tips for good results
To ensure the best possible lamination and to avoid any damage to the laminator, please take the following precautions:
- Laminating pouches are made of two sides linked to each other. Never laminate with only one side of a laminating pouch.
Always insert laminating pouches into the unit with the folded side first. Do not insert a laminating pouch until the previous laminated document has been removed. - Insert small objects like business cards always in the middle (below the READY indicator).
- Never laminate empty pouches. Always insert a document into the pouch when laminating.
- Do not cut the pouch prior to lamination. Trim the pouch to size after lamination.
- Do not laminate heat-sensitive, wet, wavy or crinkly materials.
- Do not laminate materials thicker than specified in this manual.
- Do not laminate metal objects.
- The lamination process is irreversible. Please keep this in mind when laminating unique pieces.
- Do not pull or push the pouch and do not switch off the laminator during normal lamination.
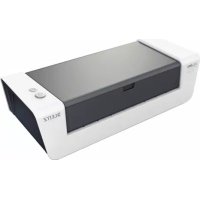
Overview of your laminator
Open out the front cover page where you will find a diagram that you can keep for reference while reading these operating instructions.
Input tray - Here you insert the pouch with the document to be laminated centrally. This tray can be folded in for space-saving storage.
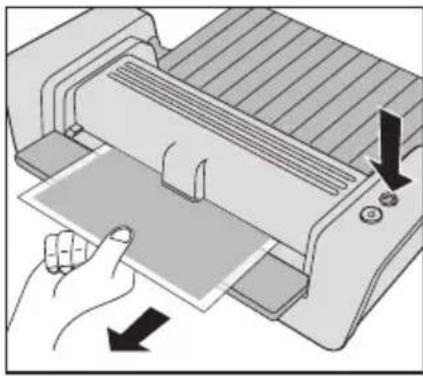
Output tray - This is where the laminated document exits. This tray can be folded in for space-saving storage. You can also laminate without folding out the tray when there is not enough room at the place of action. In this case you must lead out the laminated document diagonally upwards with your hand so that it is not blocked.
Mains cord/plug - Connect this with a suitable mains outlet. Read the safety precautions in this manual.
Reverse button - This activates the manual reverse function. Use this, for instance, to prevent a document that has not been inserted correctly from being laminated further. Assist the reverse motion by carefully pulling at the pouch. The READY indicator blinks red while reverse motion is in progress. The reverse motion ends as soon as you stop pressing the button. Important: If the pouch has almost entirely left the laminator through the output tray, the transport moves on while pressing the button and no reverse motion is performed.
On/Off button Use this to switch the laminator on (button lights) and off (button does not light). If no lamination is carried out, the laminator switches off after 30 minutes (energy saving function).
Anti-jam recognition with automatic reverse Your Leitz laminator is equipped with sensors to assist you in removing a pouch from the laminator in case of an impending or actual pouch jam. The following table shows how the laminator reacts in certain situations.
Situation Reaction
During lamination the pouch gets stuck in the front part of the laminator.
Automatic reverse is activated and the pouch is driven out through the input tray. Assist the process by carefully pulling at the pouch. As soon as the pouch has left the front sensor area, the laminator switches off automatically to prevent the pouch from being pulled in again. To laminate another item, switch the device on again.
During lamination the user switches off the device or the mains power fails or the device is otherwise disconnected from mains.
After re-starting the laminator, automatic reverse is activated for 30 seconds to drive out the pouch through the input tray. As soon as the READY indicator lights green, you can laminate again as usual.
Important: Clean the rollers after any pouch jam as described in section "Maintenance and care".
Thickness sensor with speed adjustment - Your Leitz laminator is provided with a sensor which recognizes the thickness of the material to be laminated and adjusts the laminating speed accordingly. By this, all approved materials from normal copying paper to photographs, coated inkjet and laser papers are always laminated as good as possible.
Four-stage READY indicator - Three red lights and one green light have the following meaning:
| 3 red lights | Heating up (approx. 5 min.) |
| 2 red lights | Heating up (approx. 3 min.) |
| 1 red light | Heating up (approx. 1 min.) |
| Green light | Ready for laminating |
| 3 red lights, blinking | Automatic or manual reverse |
A red light coming up during the lamination process means that the laminating temperature has dropped too far or the sensors are being calibrated automatically. This is normal behaviour. Just wait with the next pouch until the green light comes up again.
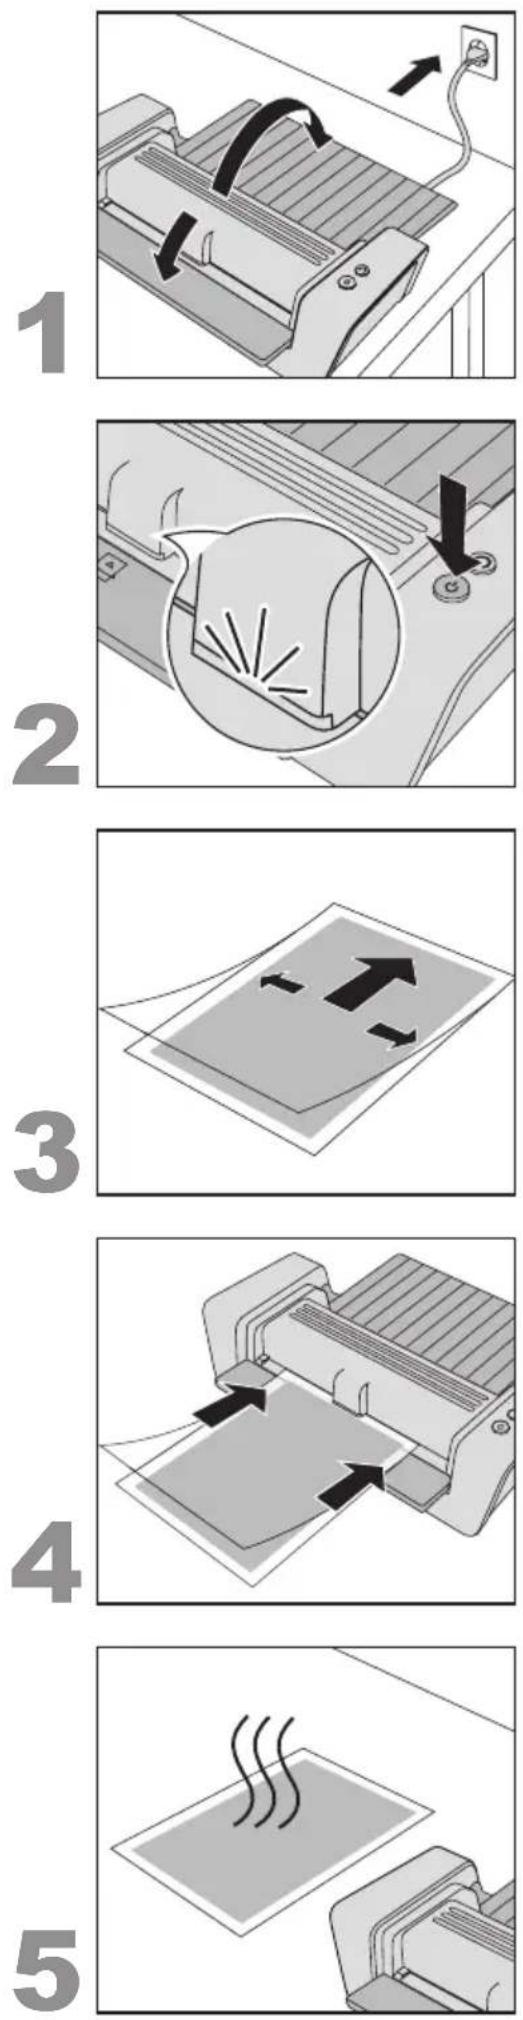
Laminating, simple as that!
1. Setting up and connecting the laminator
- Set the laminator up on a stable surface (e.g. table) close to a mains outlet. Ensure there is sufficient space behind the laminator so the laminated document is not blocked and can easily be removed.
- Fold out the input and output trays.
- Connect mains cord with mains socket.
2. Switching on
- Press the On/Off button (so that it lights.
The READY indicator lights up red and the laminator heats up.
As soon as all red lights are out and the green light is on, the working temperature has been reached and the laminator is ready for use.
3. Inserting the document into the pouch
- Insert the document into the laminating pouch. Align it to the pouch's folded side as close as possible and ensure even margins on the left and right.
Pouches that are too large can be trimmed to size after lamination.
4. Laminating
Important: Lamination is permanent. Before laminating unique pieces, test the process with a similar item. Always insert smaller objects in the middle of the input tray so that they are recognized by the thickness sensor.
- When the READY indicator lights green, insert the pouch with the folded side first straightly into the input tray until it gets pulled in.
The laminated document is automatically driven out at the output tray.
5. Letting the laminated document cool down
-
Remove the laminated document and leave it on a flat surface for one minute to cool down.
-
If you do not wish to laminate further documents, switch off the laminator.
Troubleshooting
Retrieve a pouch that has not been inserted correctly
- Press and hold the Reverse button.
The pouch is driven out again at the input tray.
- Assist the reverse motion by carefully pulling at the pouch.
The reverse motion ends as soon as you stop pressing the button.
Problem Cause Remedy
When pressing the Reverse button, the pouch is not being reversed but transported further.
Normal behaviour because the None. pouch has already left the front part of the laminator.
The laminator always runs at the same speed regardless of the thickness of the material.
Thickness sensor defective. Please let the laminator be inspected by customer service.


Maintenance and care
In order to remove superfluous adhesive from inside the device, clean the rollers regularly as described here:
- Switch on the laminator (Wait until the READY indicator lights green.
- Fold a sheet of unused copying paper once in the middle. Insert the supplied Laminator Cleaning Sheet into the folded paper (see figure A).
- Insert the paper with the folded side first into the input tray 3-5 times (see figure B).
To clean the housing:
- Pull out mains plug and wait for the device to cool down.
- Wipe the exterior with a soft, damp cloth and a dishwashing detergent.
3 year guarantee
To be returned with the device if defective.
LEITZ devices are sold with a 3 year guarantee.
The conditions of the guarantee period of 3 years are as follows:
- Each device is guaranteed against all defects in material and/or workmanship for a period of 3 years from the date of purchase.
- No device will be accepted without written notification from the customer giving details of the problem that has occurred, and proof of the date of purchase.
- All devices for repair are to be returned to Esselte with adequate packaging. No liability will be accepted by Esselte for goods damaged in transit from the customer, due to inadequate attention to packaging.
- The supplier will be responsible for all parts and labour charges as necessary to the device. The 3 year guarantee is subject to the following conditions:
a) That the device has been used strictly in accordance with the operating instructions supplied with the device.
b) That if the benefit of this guarantee is sought, the device must be returned, carriage paid to Esselte. Esselte does not accept responsibility for loss or damage in transit.
c) That the guarantee is invalid if the defects are found to be caused by accident, misuse, alteration or neglect.
d) That no liability of Esselte is to be implied here for damage, loss or expense of any kind resulting from, consequence upon, or in any way due to any fault whatsoever in the instrument or its accessories.
e) That this guarantee does not affect you statutory rights as a consumer.
In order to allow fast and smooth processing in case of a guarantee claim, please register at: http://www.leitz.com/lamination

Date of Purchase:
Model No. Serial No.:
Company Name:
Contact person:
Address:
Telephone/Fax No:
ESSELTE UK Ltd. Esselté Ireland Limited
Waterside House, Cowley Business Park, Westlink Industrial Estate,
Uxbridge, Middlesex, Kylemore Road,
UB8 2HP Dublin 10
UNITED KINGDOM IRELAND
Tel.:08709090609 Tel:+353-1-6268438
Fax:01895 878901 Fax:+353-1-6269798
www.esselte.ie
Disposal of old equipment
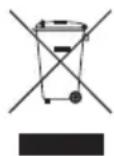
This symbol of a crossed out waste bin on a product, its packaging and/or accompanying documents means that the product is subject to the European directive 2002/96/EC as well as national law for implementation of the directive.
Directive and law prescribe that electrical and electronic products must not be disposed of with household waste. The customer must dispose of the product by delivering it to a designated station for collection, treatment and recycling of waste electrical and electronic equipment.
The correct disposal of your old appliance is free of charge and will help prevent potential negative consequences for the environment and human health.
For more information about disposing your old appliance, contact your city office, waste disposal service, or the shop where you purchased the product.
Specifications
Working mode/Heating system 4-roller, 2 of them heated, carrierless
Laminating speed Automatic by thickness sensor (max. 700 mm/min)
Pre-heat time about 5 min
Automatic switch-off after 30 min
Recommended pouch thickness 80(75) - 250 m Max. thickness of laminated item 1 mm
Maximum working width,
i-Lam touch A4 TURBO 230 mm i-Lam touch A3 320 mm
Power supply 230 V AC
Power consumption, i-Lam touch A4 TURBO 300 W
i-Lam touch A3 460 W
Net weight, i-Lam touch A4 TURBO 3.9 kg i-Lam touch A3 5.1 kg
Dimensions (W x D x H), i-Lam touch A4 TURBO 414 x 217 x 143 mm i-Lam touch A3 524 x 217 x 144 mm Enclosure material ABS
Subject to technical changes without prior notice.

Sommaire
Chere cliente, cher client,
i-Lam touch A3 460 W
Poids net,
i-Lam touch A4 TURBO 3,9 kg
i-Lam touch A3 5,1 kg
i-Lam touch A3 460 W
Peso liquido,
i-Lam touch A4 TURBO 3,9 kg
i-Lam touch A3 5,1 kg
Dimensoes (L× P× A)
i-Lam touch A4 TURBO 414 x 217 x 143 mm
i-Lam touch A3 524× 217× 144mm
i-Lam touch A3 460 W
Nettogewicht,
i-Lam touch A4 TURBO 3,9 kg
i-Lam touch A3 5,1 kg
Material behaviorizing ABS
i-Lam touch A3 460 W
Netokaal,
i-Lam touch A4 TURBO 3,9 kg
i-Lam touch A3 5,1 kg
i-Lam touch A3 460 W
Svars neto,
i-Lam touch A4 TURBO 3,9 kg
i-Lam touch A3 5,1 kg
i-Lam touch A3 460 W
Waga netto,
i-Lam touch A4 TURBO 3,9 kg
i-Lam touch A3 5,1 kg
Texhiu hi napameptn 99
3 pOKn rapaHTii 99
Ytuiiaqira BUKOpuctaHx npuaib 99
ShaHOBHN KJIeHTe!
3an06ixhi 3axoynpnpBCTaHOBneHHI
-Дани npnana npn3haeHo nЯ BnKOpncTaHHB npmiiueHni. He BnKOpncTOByuTe Noro Ha BiDkPntomy nobitpi.
- IpeepiiknHHeM nepekoHaTeC8, 10 Hapyra MicceBoI MepeKbiDnObiae DaHm Ha npnaDi.
CTaBTe npnna6bn3bKo nEkoocTynHoi po3eTKn. IpeekohaiTeC, 0 npnna MoXHa B 6yNb-akn Yac BiD'ehatn BiEneKtpomepeki.
- IpekeohaiTecb, 0o MepekeBn shyp HataRhytn, He 3aTncHyTn, He 3irHyTn, po3TaWynte noTO Takm YHOM, oJ, He cniTKHyTcra 6 shyp. IpekePnaTeCra, 1o MepekeBn shyp He HataRhyTn, He 3aTncHyTn a6o 3irHyTn, po3TaWoynte noTo tak, 0o6 hixTo He MIR cniTKHyTcra 6 shhyp.
3axnctitb npnaB BiD npmao nonaHaHH coHyaHnx npomehIB Ta He po3miuye Ioro Ha yTuNbHX Do Harpby NOBepxHx, no6n3y onaIIOBaIbHnx npnaIb, KOHNziohepiabO zoNko 3anaIbHnx peOboHn.
He daIte npuJaCy Bnactn, He niDbepHITb Noro ydapam.
3anobixhi 3axoyniudacekcnnyatauii
- Hikonn He 3aunuatae BkIoueHn npua6e3 Haarny.
He donyckaia Te ditee do npnla dy -ce he6e3neuHO!
3a6e3neuTe npoBITpOBAHHn iD yac lamHyBaHHn (HaepnKnaI, BiKpnTe BIKHO).
3axnctitb npnnaBid notpannnHn BONr, He BMnkaite Noro, kUo MepeKHi UHyp a6o BNkA nouKOJKeHi.
3aBxDn 6epItbcra 3a BInky, He TargHtB 3a Whyp. Hikonn He TopKaTecra MepexKHOI BUNKn BOJorMn pykAmn.
BHTB BUNky CNOyHoro shhpy 3 po3eKn, kKIO npnlaD BNkOpNCTOByEtcra.
He cTabTe KODHn X npMeTIB Ha npnaI, He npocobYnte yKopiDnX npEdMetTIB DO BENTJIAuHn XJIINH.
3anobixhhi 3axoyniudac yncntkn,tpaHcnopTyBaHHy,yknaeHH
Bunmitb Bunky 3 po3ekn nn daTe npnady oxonoHytn do toro, k no rnepemiatu, nctntu a6o 36epiratn. KoJn Hocnte lamHaTOp, 3aBXn TpMaTe nofo 3a 6okobi 3arIn6JeHHra.
-ДяоушенивикорпостаитEmяу raHvipky mnochni 3acio nobyTOBOrO npn3haeHH. He BnKOpNCTOBuTe Ondopa3Obi cepBetKn a6o ximiupeoBHN,60 BOHMOxKyTb NOWKODHTN NOBepxHIO.
He BiikpmbaTe Kopnyc i He npo6yute camoctiHo pemOHtBybATn npnaAd. Kaio nOtpi6eH pEmoHT, 3BepHiTbcrdoCBoroDinepa.DoataKOBi Bka3iBKn Bu 3Ha-ndete y rapaHTiHni DeKnapaui.
Bka3iBkn dIra rapHnx pe3yIbTaTIB
-Дянкраих pe3ynbtaTIB lamHybaHHЯ ДяпЗАбiraHЯ yшКODKEHB lamHaTOpY, npITpMaI-TeCЯ HAcTyNHx 3anO6iKHNx 3axoDiB:
-Пиibkn-nakeTe cknadaHb8c3ДBox6okIB,IO NOB'3aHI mixco6oI. HikoJI He naMHyTe TiNbKn ODHIM 6OKOM nakeTy.
- 3aBxJn 3anpaBJIyIe nakET 3aKpNTUM (CKlaJaHIM) 6OKOM ynepeI y npuaIad. 3anpaBJIyTe nakET tInbKn nicnToro, IIO BnHnn NaMioHOBAHIN DOKymENT.
- ManeHbki o6'ekTu kR Bi3nTibKn 3a npabTne 3aBxNn no ceHTpy (iD iHnKATOPOM rTOBHOCTi).
HikonHe lamHyTe npcti nibKn-nakeTn.3abKn 3anpaBnTe DOkymeHTo nibKn-nakeTy, KOIN Bn lamHyTe.
He 6p3aIte nnibky-naket neped lamHyBaHHm. P1pi3aIte nnibky-naket nicra lamHyBaHHdo nidxoJyoro po3mipy.
He laminyte yTnBi do Harpby, Mokpi, Xbnjacti a6o 3aBnti MaTepiaJN.
He laminyte MaTeiaTTOBunH, 0o BVxOHTb 3a Bka3aHn Bui INCTpykui MAKCmym.
He laminyte metaebi npedmetn.
- Ppoec laminybaHHra - HeoobopOTn. BpaxyTe ce, KOJI naHcyTe yHikaiJbHi DOKyMeHTn.
Bxodi HopMaJIbHOro lamiHyBaHHHe TargHiTcU WTOBXHITb naket Ta He BmMkaTe lamHaTOP.
3araIbHnOrJaBdBaUoroJamHaTOpy
Bn Moxete BiDKNHyTn nepeHIO o6KnadNHky. TaM Bn 3HaJTe iIIOCTpaIIO, KOtpy BN Moxete OrJHyTN, POKN YITaTMeTe IIO IHCTpyKciIO.
A IOTOK NOdaHn - TyT Bn BBODnte NIIIBky-NaKET 3 DOKyMeHTOM NO CEHTpy.ДЯ ekOHOMI Micu npN 36epirAHnI NiDCTabKy cboRo JOTKy MoXHa CKJaDaTn.
B IOTOK npnMaHHr-TyT BnDaeTbCra NaMIOBaHn DOKymeH.ДЯ ekOHOMiMi MicZr npu 36epirAHHi cKnaJaTe NiDCTaBky.ЯКUO B nyHKTI 3actocyBaHH 6paKyec MlCiR, Bu HABiTb MoKeTe NaMHyBaTN, He BiKnDaIOnu NiDCTaBky. B TAKOMy BnPaIDKY BnBeDiTb NaMIOBaHn DOKymeHT pyKOHO HabCKic B ropy, uo6 NOrO He 3a6NkOyBaNo.
MepexeBn Ka6eJb/MepexeBa BnIka - BCTaBTe B nIXoJaSy po3eTky. 3BepHITb yBary Ha Bka3iBkn 0do 6e3neKn B ciN IHcTpyKcii.
KnaBiawa "peBepc" - zuHou KnaBiueo BV aKTHByeTe pyuHn peBepc. 3a ii donomoroBV, HApnKnaI, MoKeTe yHnKHyTu nOdaJIbWoTo IamInyBaHHaHBCK BTAryHToRO DOkUMeHTy. IiTpmaIte 3BOpOTHi xID oBepeXHM BNTaRyBaHHaM NlIBKn-NakTe. IIqac peBepcy iHnKaicra roTOBHOCTi 6nMaEc YepBOHM KOJbOpOM. PeBepc 3aKiHuYetbcra, KOni BV BiPyckaeTe KnaBIw. BaxNBo: JaKuo nnBka-nakET MaJke NOBHCIO BBmua 3 lamHaTopuy epe3 loTOK npuMaHHa, ii Bye TpaHCnoptoBaHO daI npHaTNCHeHHi KnaBIwi, peBepCy He 6yde.
E Knabiwa BKN/BNKJ Heo BN BMnKaeTe (Knabiwa cBITNbC) a6o BmNKaTe (Knabiwa He cBITNbC) lamHaTOp. Kaio He 3diinCHIOETbcra lamHyBaHHra lamHaTOp uepe3 30 XBnHn HBMnKaETbca (fYHKia eKOHOMi eNeKTpoeHepri).
F Oni3HaHHa 3aTOpy nIIBKn 3 aBToMaTHnHm peBepcom - BaW IamHaTOp "Leitz" ochaueHn ceHCopam, KOTpi Bam dOnOMOxyTB BnIyauTu nIiBky-naket 3 npnaDy Ha BnIaDOK MOxJNBOrO abo fakTNuHoro 3aTOpy nIiBkn. HAcTynHa Ta6nua pokaxe Bam peakui I amHaTOpy B pi3HX cnTyauix.
Cityaia Peakui namiHaTopy
He3anexHo BiTobuHn MaTepiany, lamHaTop npaioe BeCb Yac 3 OndaKoBOIO WbNdkictIO.
CeHcOp TOBUnn 3incoBaHn. TaTe cepBicHi cnYk6i nepeBi-pTu n lamHaTOp .

Texhivhe o6cnyroByBaHHa Ta dOrgn
Uo6BnDAnr3aBnKne3 npnay,peynpH0 ouuatae BaN 3a HAcTyNHOIO hCTpyKciEIO:
BkHIOUHTb JAMIHATOp (OIOueKaIteCra, NOKi INNKAtOP rOTOBHOCTI 3aCBiTbCRA 3eJIeHIM KONbOpOM.
- CknaiItb apkyu konioBaIbHoro panepy no cepeHi. NoknadiTb NOCTaBHeHn KapToH dIra OUnSeHHr Do CknaDeHOro panepy (INB. 306paXeHHA).
Bboitb nanip 3akpntm 6okom ynepei 3-5 pa3iB no ueHTpy do Notka nOaHHa (INB. 306paXeHHA B).
PekomeHdoBaHa TOBUnHa 80(75)-250MKM nnIBKn
Makc. Tovuzha MaTepiany, 10
PiJaRaE lamHbAHnIO 1 MM
Makc. po6oHa shuPina
i-Lam touch A4 TURBO 230 MM
i-Lam touch A3 320 MM
eJIeKToPoxKINBJIeHnHa 230 B~
NOXUBaHaNOTyXHicTb
i-Lam touch A4 TURBO 300BT
i-Lam touch A3 460BT
Bara Hertto,
i-Lam touch A4 TURBO 3,9 K
i-Lam touch A3 5,1 K
Ta6apunu (UxΓxB),
i-Lam touch A4 TURBO 414 x 217 x 143 MM
i-Lam touch A3 524× 217× 144MM
Ybaxaembi nokynatelb!
Cnacn6o 3a To, yTo BbI npHnI npWeHne npn- oBpeTn KaueCTBeHHbI IamHaTop MapKn Leitz. Ipoc6Ba BHIMateJIbHO npOHTaTb 3TO pyKOBoDCTBO nO 3KcNpyatauH, YTObl O3HaKOMITbcra HAdExHbIM n6e3OpachbIM nCNoJb3OBAHem ycTpoiCTBa.CoxpaHnIte NHCtpykUIO NO 3KcNpyatauH IN TeueHne BCero cPoka NoJb3OBAHn IpOdyKTom.
PekomeHdyembIe MaTepnaJIbI
Baunm lamHaTopom MapKb Leitz Bby MoKeTe lamHnpoBaTb 60nbHnHCTBO 3aneaataHHbIX BuO8 bymar, fotoKoHn, paCneYatoK JIa3epHbIX IN CTPyHbIX pInHTePOB pIN NOMOu INJeHOHyX KOHBepTOB DnA lamHnpoBAHn TOIuHOn OT 75 MKM (MkPoH) Do 250 MKM, YTO6bI NOJyHTb KOHeHbN IpOdyKT C MaKcMaJIbHOI TOUHHOI Do 1 MM.
ToIunHa lamHnpemyo MATEpna ana 3amepeTc DaTCHKOM, KOtOpbA BtOMaTHueCKn COrNaCobBbAeT cKOpocTb lamHHPOBaHn. TaK Hapany C6Oone ToHKmM MaTePnaanamn BCerda Ocy- UeCTBJIaRcTc IaMHNHOpaBHe TAKKe C ONTMaJIbHoH NaCTpoiKOI FOtorpaFm n ChabkeHHbIX NOKpbITNeM paCneYaTOK CTpyHbIX n Na3epHbIX npInHTepOB.
-ДяdoTkeHnBbICOKKaueCTBeHHbIXpe3yNbTaTOBNCNOb3yTe NCKHouHTeNoIneHoHbIe KOHBPbMapKlLeitz.KpOmeToro, 6naorapr3tomynpoJNaBaetc pOcCnyKbIyctpoiCTBa.

ДяВаши6e3oNaChocTn
NcNoJIb3OBAHHe B COOTBETCTBnC Ha3HaueHHeM
Данhoe yctpoctBO 6blno pa3pa6oTANO ДЯлamHnObaHnB 6ymaRn n anAHLORNHybIX 6yMaRE mATEpnaNoB. IcNoJIb3yIte erO NCKIQUHTeJIbHO B 3TNX CEJIAX, COrJIaCHO OINCAHIO DAHHO INHCTpyKUIN NO 3KcPJIyatauIN.
Mepblnpedoctopoxhoctn npa3meuen
JaHHoe yctpoCTBO npedHa3HaeHo NckHouHTeJIbHO nI INcNoJIb3OBAHnB 3aKpbITbIX NOMeUHeHX. He nCnoJIb3yIte ero IIOd OTKpbITbIM He6OM.
IpeD NOKJIUOHeHMe OBeCneHTb, YTO6bI HAnpJKeHne B MeCTHO CETN COOTBcTcBOBaIO npaAMTpAm, yKa3aHHbIM Ha yCTpoICTBe.
Pa3mctte yctpoiCTBO 6bni3n NERKIO DocTyHNO po3eTKn. Y6eHTecb, YTO yCTpoiCTBO MOXHO BIO6oe BPem NOHOCbO OTcoeHNHTb OT CETN.
- Iponoxntb ceTeBOI uHyp TaK, yTO6bl OH He 6bln pactHyT, 3axkatnnnNtOMJIeH n Tak, YTO6bl HIKTO He MOR CNOTKNyTbCn OuHyp. BOCO6eHHoCTn CNEJNTe 3a OTCYCTBnEM NOBpeXJeHn Ha BnInke N B MeCe Tbe XOda CeTeBOI uHypa n3 ycToPocTBA.
3aunuane yctpoeCTBOOTnpmORo nonadHncoHehBix nyueH He pa3meaJeeroHa YyBCTBntbHbIX KHarpeBy NOBepxHOCTX, B6JIN3N OTONTeBbIX np6OpOB ININ KOHNIOHEPOB INI NERKO BOCIIaMeHJOUUXc MaTePnaNoB.
He noDBepraTe naDeHnry ycTpoiCTBa n He noDBepraTe eroydapam.
Mepbl npedoctopoxknoT npn 3Kcnnyataun
Ctporo 3aippeaaetcraocTabIyctpoicTBO6e3Ha30pa, noka OHO BKNIOUOHeO.
-Дерхи te yctpoCTBO BdaIIN OT deteN (onachocb nonyuHnra TpaBmbl!).
B Ipouece JAMHHOpBaHnO6ecneHTb XopoUyHO BeHTnIaHnO (Hanp.,OTKpbITb OKHO).
3aunuane yctpoinCTBOOT nonadnna BlaH,He BKIOauTeero,Korda cetebo WHyp NINBnIka NOBpeKdEhl.
Bcerda6epntecb pyko3a BNky,a He 3a cam uHyp.HKoHa KacaTeCb cTeBOu BNIKMOKpbIMn pykAMN.
- EcπuycTpoiCtBO He nCnOJIb3yETcR, BbIHbTe BnIKy n3 ceTeBOI p03eTKI.
He ctaBnTb JIN KJtAcTb Ha yCtpoiCTBO npeMeTb I He BBOInTb BBeHTnJIaIOHHbIe IeJI NocToPOHHne npeMeTbI.
Mepbl npeioctopoxhoCTn npu OunCTke, TpaHcnpTupOBKe n XpaHeHH
- Ipeed TpaHcnpOpTnOBKo, OChcTKo NIn XpaHeHem BbItaunTb n3 po3eKn CeTeBOI WTeNCeJI DaTb yCTpOcTBy OCTbTb. IpeHocra lamHaHTop, BceIgA depKaTaB erO 3a 60kOBBe BblEMKN, npedHa3NaYeHHbe dIra 3axBaTa.
- ONUCTKINONBJ3OBATcBMAKOKBNAKHOTPRAIKOHN HeoJIbWIMKOJNUeCTBMOUJceroCpeDCTBa.HeNCIOJIb3yIte CaΦeTKIN ONUCTKININXUMNueCKNEBeueCTBa,T.K.OH MOrTy NOBpeNTb NOBepxHOCTb.
He OTKpbIbAaTe KOpNc Hne IbTaTecb CamocToTeJIbHO YHINITb yctpoiCTBO.ObpaTntEcB BaWy ToproByO opraHn3aUIO,ecn HEO6xoIMNO pOn3Becn peMOHT.ДЯ NOnyeHn6 BoOEe NOpO6Ho INHOPMaUN O3HaKOMbTeCb C rapaHTnHbIM NcMbOM.
Pone3HbIe COBeTbI DJIa DOCTNXeHHa XopoUHX pe3yJbTaTOB
Yto6bl oecneuNb ONTnMaIbHbI pe3ynbTaI IaMnHPOBaHnI npdeynpeDntb NOBpexDeHnHa IaMnHaTope, npoc6ba co6IkaTa b cJeNyUOune MebpI npedocTOPOXHOCTN:
- PIIeHouHbIe KOHBePTb IMeHOT DBe CTOpOHbI, COeINHeHHbIe Dpyr C dpyrom. Ctporo 3anpeaetc JAMnHIpOBaT b PIIeHOuHbI KOHBePT TOnbKO C OdHOJ CTOpOHbI.
BBOHtB pHeOHHbE KOHBeptb By cTPOcTBO BcERda TOLko 3aKpbIToN (CIOXeHHo) CTOpHOH BnpeD. BBOHT PHeOHHbIE KOHBeptb ToLbKO nocne TORO, KaD O TOrO 6bl BbHyT NaMHIpOBAHHbI DOKyMeHT.
BBoNTb He6oIbWne npEmdTb, HAp., Bn3HTbIe KapTOck, Bcerda nocepeDInHe (noi nHdkaTopom paOoe roTOBHOCTN).
Ctporo 3anpeaaetcnaMHHPOBaT nyctbIe NHeOHHbIE KOHBeptb. B npoucece naMHHPOBaHnBCTabTb BCerda OdnDOKyMeHT B NHeOHHbIKOHBePT.
He ope3aTb nIeHouHbI KOHBeP T nepeI naMHINPOBaHnEM. Iocne IaMHNPOBaHnI OpeKbTe nIeHOUHbI KOHBeP Do noDxOJauxX pa3MePoB.
He lamHHopOBaTb YyBCTBNTeHbHle K HArpeBy, MOKpbie, BONHcTbe INM MOpUHNcTbe MaTepnaJIbI.
He lamnHnpoBaT MaTePnaIbI, KOtOpBle TOnIe yKa3aHHbIX B daHHOM pyKOBODCTBe NO 3KnIpyatauIN.
He lamnHnpoBaT MeTanIuYeckne npEmdTebl. - Piocecc JAMHHPOBAAH Heo6paTm. Ipocb6a yueCTb 3TO o6ctOerTeJIbCTBO, ecN Bbl JAMHHpyeTe yHnKaIbHbIe DOkyMeHTbl.
BoBpemrCTaHapTHORIJaMHHPOBaHnRE TaHyTb HHe TOnKaTb IJIeHOHybIKOBepT, aTaKKe HE OTKIIIOHaTb JaMHHaTOp.
KpaTkni 063op BaJero IaMnHaTo- pa
OTKpoTe BHyTpEnHIO CTOpOHy nepaHneOBloXKn (3a orIaBnEHHem).Tam Bby HauDeTe n3o6paKeHne, KOtOpoe Bbl MoKeTe npocMaTPnbTaB INpocece CyTeHnHaCToJUero pyKOBoDCTBa no 3KcNpyatauIN.
AOTCEK DnBBOda-cOda BbI BBODInTe NO CEHTpy PIIeHOHyBI KOHBepT C IaMHNHyPEmbIM DOkymeHToM. YTO6bl XpaHtB yCTpOINCTBO, 3KOHOMMeTO, BO3MOXHO BBecTN BHyTpB NOCDaBky DnIg ONOpbl DOkymeHToB, BXODaUYIO B COCTab 3TOTO.
OTCEKДЯ BbIaun-3deCbBbIaTeTcЯ nAMnHropoBaHHbI DOKyMeHT. YTo6bl XpaHNTb yCTpoIcTBO,3KOHOmR MeCTo,BBeINTe BBecTN BHytpNoCTABKy dJIOnOpblDOKyMeHTOB.Pnp CTecHeHHbIX ycNoBnX Ha MeCe pa60tBl BMOKeTe TAKKe JAMnHropoBaTb, He OTKnDbIBaH hapyKy NoCTABKy dJIOnOpblDOKyMeHTOB. B TaKOM Cnyuae BbI DOJxHbI BBIOdntb JAMnHropoBaHHbI DOKyMeHT HapyKy NOd HAKnIOHOM KBepy, YTo6bl OH He 3aCTpI.
Cetebon Ka6eB/WTencenb - noCoeHnTe eroknoxOJaEpo3eTke. Pocb6a co6IIOdaTb yka-3aHne nToTexHnke 6e3oNaChOCTn, npuBeDeHHbIe B daHHom pyKOBOdCTBe nO 3KcNlyaTaunn.
KhoNka peBepca -3Toi KhoNkoB Bbl BkHouaeTe pyuHoi peBepc. Tem cambIM Bbl MoKeTe, Hanpimep, npedynpeDntb daIbHeJWee lamHHpoBaHne KpIBO 3aTAYTO DOkyMeHTa. POMOrnTe OcyUeCTBnTB peBepc, OCTOpOXHO NOTrNBaI pHeNoHyBIO KOHBep. Bo BpEma peBepca HndNKatOp pa6oey roTOBHOCTM Miraet KpaChbIM CBETOM. PeBepc 3aBepwaeTcay, KaTOnbKO Bbl OTNyCTnTe 3Ty KhoNky. BaxHo: KOrDa pJeHoyHBI KOHBep TNOTH NONHOCTbIO BblJeN I3 lamHaTopa YpeE3 OTCEK dIy Bbl Daun, pRn HaxKaTN N KhoNk OCyUeCTBnAeTcA daJIbHeJWaa TpaHCnOpTnpOBKa DOkyMeHTa n peBepc He DeIeCTByeT.
E KhoNka BKn. /BbIKn. OHa BKIOUaET NaMnHaTOP (KHOJa 3aropaetc) n OTKIOUaET erO (KHOJa He ropnt). Ecnn NaMnHropoBaHne He npOBODITc, NaMnHaTOp OTKIOUaeTc Ype3 30 MNHyT (Функия kOHOMm 3NeKtpnueCTba).
FФункця paCno3HaBaHnA 3aTopa nHeKn c ABTomatNueckm peBepcom-BaW naMHaTOp mapKLeitz o6opyOBOAH daTUnKaMn, KOToPbIe B cnUyae rpo3aJero nIN HAcTyuNBwero 3aTopa noMoraIoT ydaJIITb PNeHOChbIK KOHBeP T3 ycTpOiCTBa:Ha CneDyUoSe TaBnCe NOcHReTcK, KaK naMHaTOp pearnpuyET B ONpeDeJeHHbIX CNTyaun-ax.
CnTyauqnaPeakunJaamHaTopa
He3aBNCIMO OT TOIuINbI MaTePnana JAMHaTOp BCerda pa6oTaET Ha OndHaKOBo CKOPOCTN.
HeicnpaBeH daTnK ToJIuINbI. Ipoc6Ba npuyntb cepBnCHoI cnjx6e npOBepntb IaMnHaTop.


Texnueckoe obcnykBaHne uyOd
IyanaHn3nnKOB Kner n3 yctpoiCTBa peryraPHO OunuataB Bannk TaK, KaONcaHo Hxke:
BknIOUHTe JAMnHaTOp (PNOJOKNITE, NOKa INDnKaTOp pa6OueH rTOBOHOCTHNe 3aROPNTc 3eJIeHBIM CBETOM.
CIOXHTB NOCEPeDInHe JnCT HEnCNoJIb3OBAHHo KOnIpOBaJIbHOI 6ymar. NIOXHTe NoCTaBnEHHb BMeCTe C yCTpoiCTBOM ictaun KapTOH B CNOxehHyO 6yMaIg (CM.Pnc.A).
BBeInTe 6yMaIy 3aKpbItOn CTopoHOu BnpeD 3-5 pa3 B OTCek Dnra BBOda (cM.Pnc.B).
Дя Oчистк Корпуca:
- BbTaunTe n3 po3eTKn ceTeBOI wTeNCeJIb I NOdoXdnte, Noka yCTpoiCTBO He OCTbIHET.
- IpoTpnte HapxHbIe NOBepxHOCTM MrgKo, BnaXHo TpAIOKc He6OJbWIM KOnuYeCTBOM MOUoero CpeDCTBa.
TapaHTnA cPOKom Ha 3 roDa
B cnyae nonomkn OTnpabTb BmecTe c annapatom.
Bce annapatbLeitz IMeIOT rapaHTIO 3 rOda npn co6JIoDeHn cnEduoX ycNoBn:
- TapaHTn3 rOda c DaTbI NOKyKn pacnpocpaHAreTc HBa BCE deFeKTbI MaTePnAna n/nnn Ha 6paK 3aBODCKo Bbipa60TKn annapata.
2.Bcnyae npedbBnHn npTeHm:Mbnpocm BAc onncatb 6paK B nCbMeHOM BnDE.
3.Bcnyae BO3HKnHOBeHnIpeTeH3n,Heo6xOIMO O6paTntbcra K npOabuy TObapa, pEdbYBnB rapaHTnHbI TaON.H B cnyae 06CHOBaHHOCTHnpTEH3n,PpOdaue HnPaBNT 6pakOBaHHbI annapat BOO.3ccenbTe."Ppi ATOM,OOO.3ccenbTe" He Hecet OTBeTCTBeHHocTH 3a DeΦeKtbl,BO3HKnUne Pn TpaHCnOpTnpOBKe B pe3yblTaTe NcNoJIb3OBAHnHnepnroDHOynakOBKn.
4.B COOTBecTBnC daHHoR rapaHTneMbI 683yEmc3aMeHrTb 6paKOBaHHbIe DeTaNNu BblONHrTb COOTBeCTByIOUne peMOHThBipepaToB.1. RaapHTnJeCTBnteBHa npBblOnHeHHn CNe dyHOx yCNOBn:
a) rapaHTnHoe CbneTeJIbCTBO 3aONJIHeO npoJaBcOM (daTa npoJaXn I cnpMeHHa neaTb),
6)CMOMeHTa NOKyKN AnnapaT NcNoB3OBaNc B COOTBeCTBm C pyKOBoIDCTBOM NO 06cnyKuBaHIO,
B) annapat,Дя KOTOPORO npebЯнeha npeTeH3nHa rapaHTIO, 6ydet OTnpaBnen Ha qmy OOO "3ccenbTe" c onnaTOn KIneHTOM cToIMocTn nepecbIKN, npuem OOO "3ccenbTe" He HecET OTBeTCTBeHHOCt 3a noTePio nIN nobpeKdHn npi TpaHCnOpTIpOBKe,
r) yctahOBHeHbIe DeEeKtI He Bo3HNKnBpe3yntaTe abapn, HnpabunbHorO noNb3oBaHna, nepeDeJkn nnXe HeKBaINuPupBaHHO nCNoB3oBaHna,
)OOO"3ccelbTe",6e3yuepe6aIINB03MOXhBXI npTeH3n B COOTBETCTBmC 3aKOHOMOBTBETCTBEHHOCHT3aKaHeCTBO BbIpyCKaEMOIPOdykUnnHEcETOTBETCTBEHHOCNT3a KaKeI-Ni6oDepeKtbl,yuepeNlPacxOdbI,pOn3oWeDnne B pe3yIbTaTe DepeKtaannapaTaNnXe KOMJIeKTyUOux HetaneBbI3BaHHBe BCNECTBnE 3TORINJN Xe CBB3AHHbIE C HIM.
Дяо onepatиBHOHи 6eCnepe6oHoi npop6OKNr rapaHTmHOrO cnuya Mbl npocMn Bac 3apeMCTpnpoBaTbc B INHTepHeTe no aDpccy: http://www.leitz.com/lamination

Data nokynkn:
N2 moDen / TIN moDen:
HaMeHOBaHHeΦnMb/HaMeHOBaHHe/OTdE:
Ampc/Ten:
Matern Kopyca ABC CoxpaHreTc npaBO Ha BHeceHne TexHuecknx n3MeHeHn.
Obsah
Doporucené materialy 106
Provaibi bezpechnost 107
i-Lam touch A3 460 W
Hmotnost netto
i-Lam touch A4 TURBO 3,9 kg
i-Lam touch A3 5,1 kg
Rozmery (× H× V)
i-Lam touch A4 TURBO 414 x 217 x 143 mm
i-Lam touch A3 524× 217× 144mm
Material krytu ABS
i-Lam touch A3 460 W
Greutatea neta,
i-Lam touch A4 TURBO 3,9 kg
i-Lam touch A3 5,1 kg
Dimensiuni (1× a× 1)
i-Lam touch A4 TURBO 414× 217× 143mm
i-Lam touch A3 524× 217× 144mm
Materialul carcasei ABS
Subrezerva unor modificari tehnice.

Mtpa Tpoquaagns kata tv tooetnon
H ouakeun exei oxediaothei yia tn xpnon o Kaeiooucsxpwous. xpnoipotoiitai e Ewepikoucsxpwous.
- Pivouvfoettnouakeunoioupeuteite,otn taon tou TOTIKOU DIKTUO OUPWVEIe Ta dodoeva ETTAVOWOn Ouakeun.
ToTIOeTnTe Tn OuaKeun PAnoiu MiaC PpiCaM EukoAn PPOaBaaN. Sioupeuteite ot n OuaKeun mItopei va aTouuv- 8eTe I npwC ato tv pIca ava naoa otiym.
Bεβaiωθeite oTI KOλωδIO δEV EIVAI TEVTωμEVO n KOUaOPIaσμevo kAI TOnTOEHTnATE OEA σαφαLc ΣημEIO, OTou δEV Θa OKoVTáVEI KAVEIC OTO KAλδIO. Ioiaitepa βεβaiωθeITE oTI KOλωδIO kAI N UToDoxn TnC TTpiçac δEV Exov UTTOTei KATIOIA Σŋua.
Ipoataeute Tn oukeun ato Tny aueon naiakn aktivoBoia kai mny tny tototheite eTavw oE cepuikc euaiohtes Etnipaveies, PAnoiov ouokeuwv Eepavocn kaipatioou n Etnaw Oe upekcta ulika.
Mny aqivete va tneoi katw ngoukeun kai nvt xutrate.
Meo a Tpoquuaegs kaTn diapkeia Tns aeitoupyiac
Mny aipnevTe Tne Tn ouokun apukaktn evw piketai e λεitoupyia.
KpatnoTe Ta TnaiDi paKpi aTTO n OuaKEun (kivouoc Tpau- patioou!).
- Otav yivetai Taaotiktooinan oovtiEe va utapxekalos aepiooC (T.x. aoixTo npa@uipo).
Pooataeoute Tn ouakeun ato tvuypaia kai mnu tvxnpoiottoinoe otav to kaawio n npia evai elattwpatikn.
Mny TpaBATE To kaiwio TnTo aTo nTv uTo0oxn TnC npicac. Mny ayyizTe TnTo nTv picae peyeva xepia.
- Atroouvdeote nunxavn atto nlektipko peuvaotav dev eivai oE leitoupyia.
Mny tottotheite n apnveTe kaveva avtkeiuevo eTavw otn ouakeun kai mny EIayete kaveva Eevo owa ma eo a otc thupioec egaeipouou.
Mtpa Tpoostaoia cKa ta th diapkeia Tou ka aip oou, eTAPOPaC kai atrothkeuon
Piiv t n metapop, tov kaopioo kai tv aTOnkeuon apaieite to pic kai aqvette tn ouokun va kpuwoi. Tia tn metapopa tiavete naVToTnAotIKOTInn anTO TIC TIAeupikec eoXec oukpatnans ts.
TAtov kaBapioo xpnoiopoToieEva paakoc, uyp Tavicai liyo uypo TTaw. Mny xpnoiopoToieKaBapiotka avtIakia n xnmuKes ouies Tou mTtopouv bAauov Tnv Etnipaveica.
Mny aoieTe Tn oukeun kai mny TPOOTaHaeTe va ETIOKEU aote Tn ouokeun mooi oac. Eaate OE ttaqne Tov emuToPo oas yia oioeOnTne atapaitntec EIOKEues. AiaBaote Tn dwn enyUnnc yia npiopoepe nnpoepie.
i-Lam touch A3 460 W
Kaθαρο βαρος,
i-Lam touch A4 TURBO 3,9 Kla
i-Lam touch A3 5,1 Kla
( × M× Y),
i-Lam touch A4 TURBO 414 x 217 x 143 x1
i-Lam touch A3 524× 217× 144 .
YAIKO TEPiβAμaTOs ABS
ETIQUAAOaOte OXETIKa ME TEXVIKcAaayEc.

Içindekiler
Onerilen malzemeler 136
Sizin guvenliginiz icin 137