ILAM Easy A3 - Laminating machine LEITZ - Free user manual and instructions
Find the device manual for free ILAM Easy A3 LEITZ in PDF.
| Product type | Laminating machine |
| Brand | Leitz |
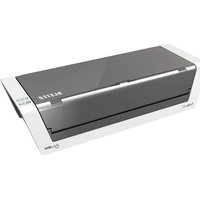
| Model | ILAM Easy A3 |
| Dimensions (W x D x H) | 487 x 146 x 99 mm |
| Net weight | 2.6 kg |
| Power supply | 230 V AC, 50 Hz |
| Power consumption | 435 W |
| Laminating speed | 414 mm/min |
| Warm-up time | Approx. 6 minutes |
| Recommended film thickness | 80 (75) - 125 μm |
| Max. material thickness | 0.6 mm |
| Max. working width | 320 mm (A3 size) |
| Heating system | 2 heated rollers, without document protector |
| PHOTO setting | Yes, for thick materials (photo paper, coated) |
| Jam release lever | Yes, to remove the pouch in case of jam |
| Maintenance and cleaning | Clean rollers with cleaning card; housing with soft damp cloth |
| Safety | Automatic shutdown after use, heating indicator, do not leave unattended |
| Warranty | 3 years |
| Housing material | ABS |
Frequently Asked Questions - ILAM Easy A3 LEITZ
User questions about ILAM Easy A3 LEITZ
0 question about this device. Answer the ones you know or ask your own.
Ask a new question about this device
Download the instructions for your Laminating machine in PDF format for free! Find your manual ILAM Easy A3 - LEITZ and take your electronic device back in hand. On this page are published all the documents necessary for the use of your device. ILAM Easy A3 by LEITZ.
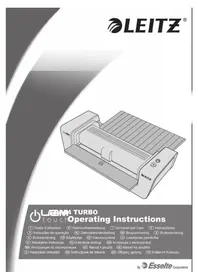
USER MANUAL ILAM Easy A3 LEITZ
e a s yOperating Instructions
Guide d'utilisation
Gebrauchsanweisung
Tips for good results 5
Recommended materials 5
Laminating, simple as that! 6
Clearing a jammed pouch 7
Other problems 7
Maintenance and care 7
3 year guarantee 8
Specifications 8
Disposal of old equipment 8
Dear customer
Thank you for choosing a quality laminator by Leitz. Please read these operating instructions carefully in order to understand how to use the device safely. Keep these operating instructions with the device at all times as they are part of the product.
Overview of your laminator
Open out the front cover page where you will find a diagram that you can keep for reference while reading these operating instructions.
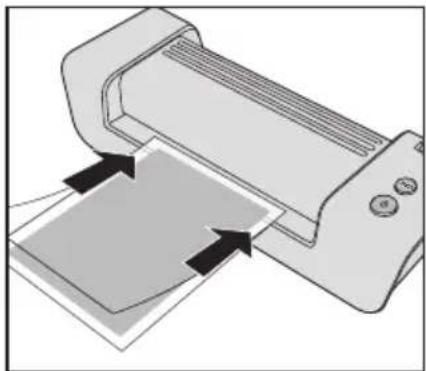
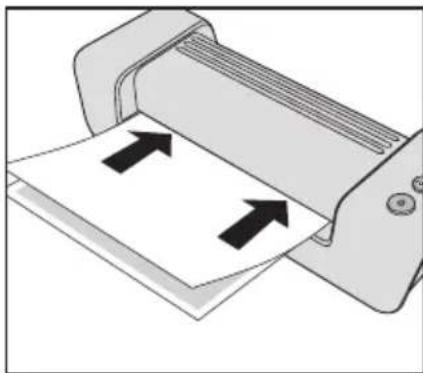
Input tray - Here you insert the pouch with the document to be laminated centrally.
Output tray - This is where the laminated document exists.
Release lever-In case of a pouch jam you can pull out the pouch while pressing this lever down.
⑥ Mains cord/plug - Connect this with a suitable mains outlet. Read the safety precautions in this manual.
E PHOTO button - Use this to switch the PHOTO setting on (button lights) and off (button does not light). The PHOTO setting provides a slightly higher laminating temperature to improve the results using thicker materials like photographs, coated inkjet and laser papers.
F On/Off button with READY indicator - Use this to switch the laminator on and off. After switching on, the button initially lights red (laminator heats up). When the working temperature has been reached, the button lights green. The red light may come up again during the lamination process or after activating the PHOTO setting. This is normal behaviour. Just wait with the next pouch until the button lights green again.
For your safety
Intended use
This device has been developed for laminating paper or similar materials. Use it exclusively for this purpose, as described in these operating instructions.
Precautions for setup
- The device is for indoor use only. Do not use outdoors.
- Prior to connection make sure your local mains voltage matches the rating indicated on the device.
- Set the device up close to a readily accessible mains socket. Make sure the device can be disconnected from mains at all times.
- Protect the mains cord from being strained, pinched or buckled and place it in a way to prevent people from tripping over the cord. Particularly ensure that damage is avoided at the plug and the point where the cord exits from the device.
- Do not expose the device to direct sunlight and do not place it on heat-sensitive surfaces, near heaters, air conditioners or flammable substances.
- Do not drop or hit the device.
Precautions for operation
- Never leave the device unattended when switched on.
- Keep the device away from children (risk of injury!).
- Ensure good aeration while laminating (e.g. open a window).
- Protect the device from moisture and do not operate it when mains cord or plug are defective.
- Always grasp the plug, not the cord itself. Never touch a mains plug with wet hands.
- Unplug the device when not in use.
- Do not place anything on top of the device and do not insert anything into the venting slots.
Precautions for cleaning, transport and storage
- Unplug and let the device cool down before cleaning, moving or storing it. When carrying the laminator, always hold it by the recessed grips on both sides.
- Use a soft, damp cloth and a dishwashing detergent for cleaning. Do not use cleaning tissues or chemical substances which might damage the surface.
- Do not open the housing and do not attempt to repair the device yourself. Contact your dealer for any required repairs. Read guarantee declaration for further information.
Tips for good results
To ensure the best possible lamination and to avoid any damage to the laminator, please take the following precautions:
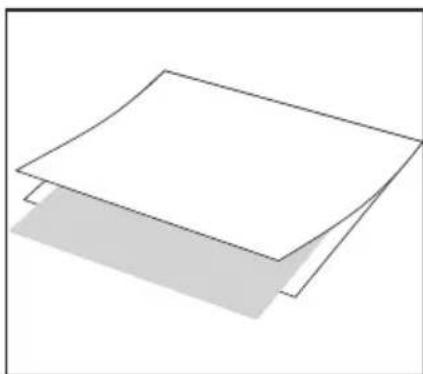
- Laminating pouches are made of two sides linked to each other. Never laminate with only one side of a laminating pouch.
Always insert laminating pouches into the unit with the folded side first. Do not insert a laminating pouch until the previous laminated document has been removed. - Never laminate empty pouches. Always insert a document into the pouch when laminating.
- Do not cut the pouch prior to lamination. Trim the pouch to size after lamination.
- Do not laminate heat-sensitive, wet, wavy or crinkly materials.
- Do not laminate materials thicker than specified in this manual.
- Do not laminate metal objects.
- The lamination process is irreversible. Please keep this in mind when laminating unique pieces.
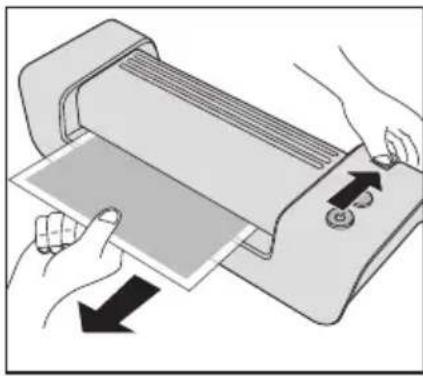
- Ensure there is sufficient space behind the laminator so the laminated item is not blocked. By slightly supporting the pouch with one hand from the bottom side, deformation of the still warm document can be avoided.
- Do not pull or push the pouch and do not switch off the laminator during normal lamination.
Recommended materials
- Your Leitz laminator is suitable for lamination of most printed papers, copier, laser and ink jet papers with laminating pouches of 75 m (mic.) to 125 m up to a maximum thickness of 0.6mm .
- To improve the results using thicker materials like photographs, coated inkjet and laser papers, the laminator offers a PHOTO setting.
- To ensure high-quality results, use Leitz brand pouches only. This also helps to prolong the lifetime of the device.
1
2
3
4
5
Laminating, simple as that!
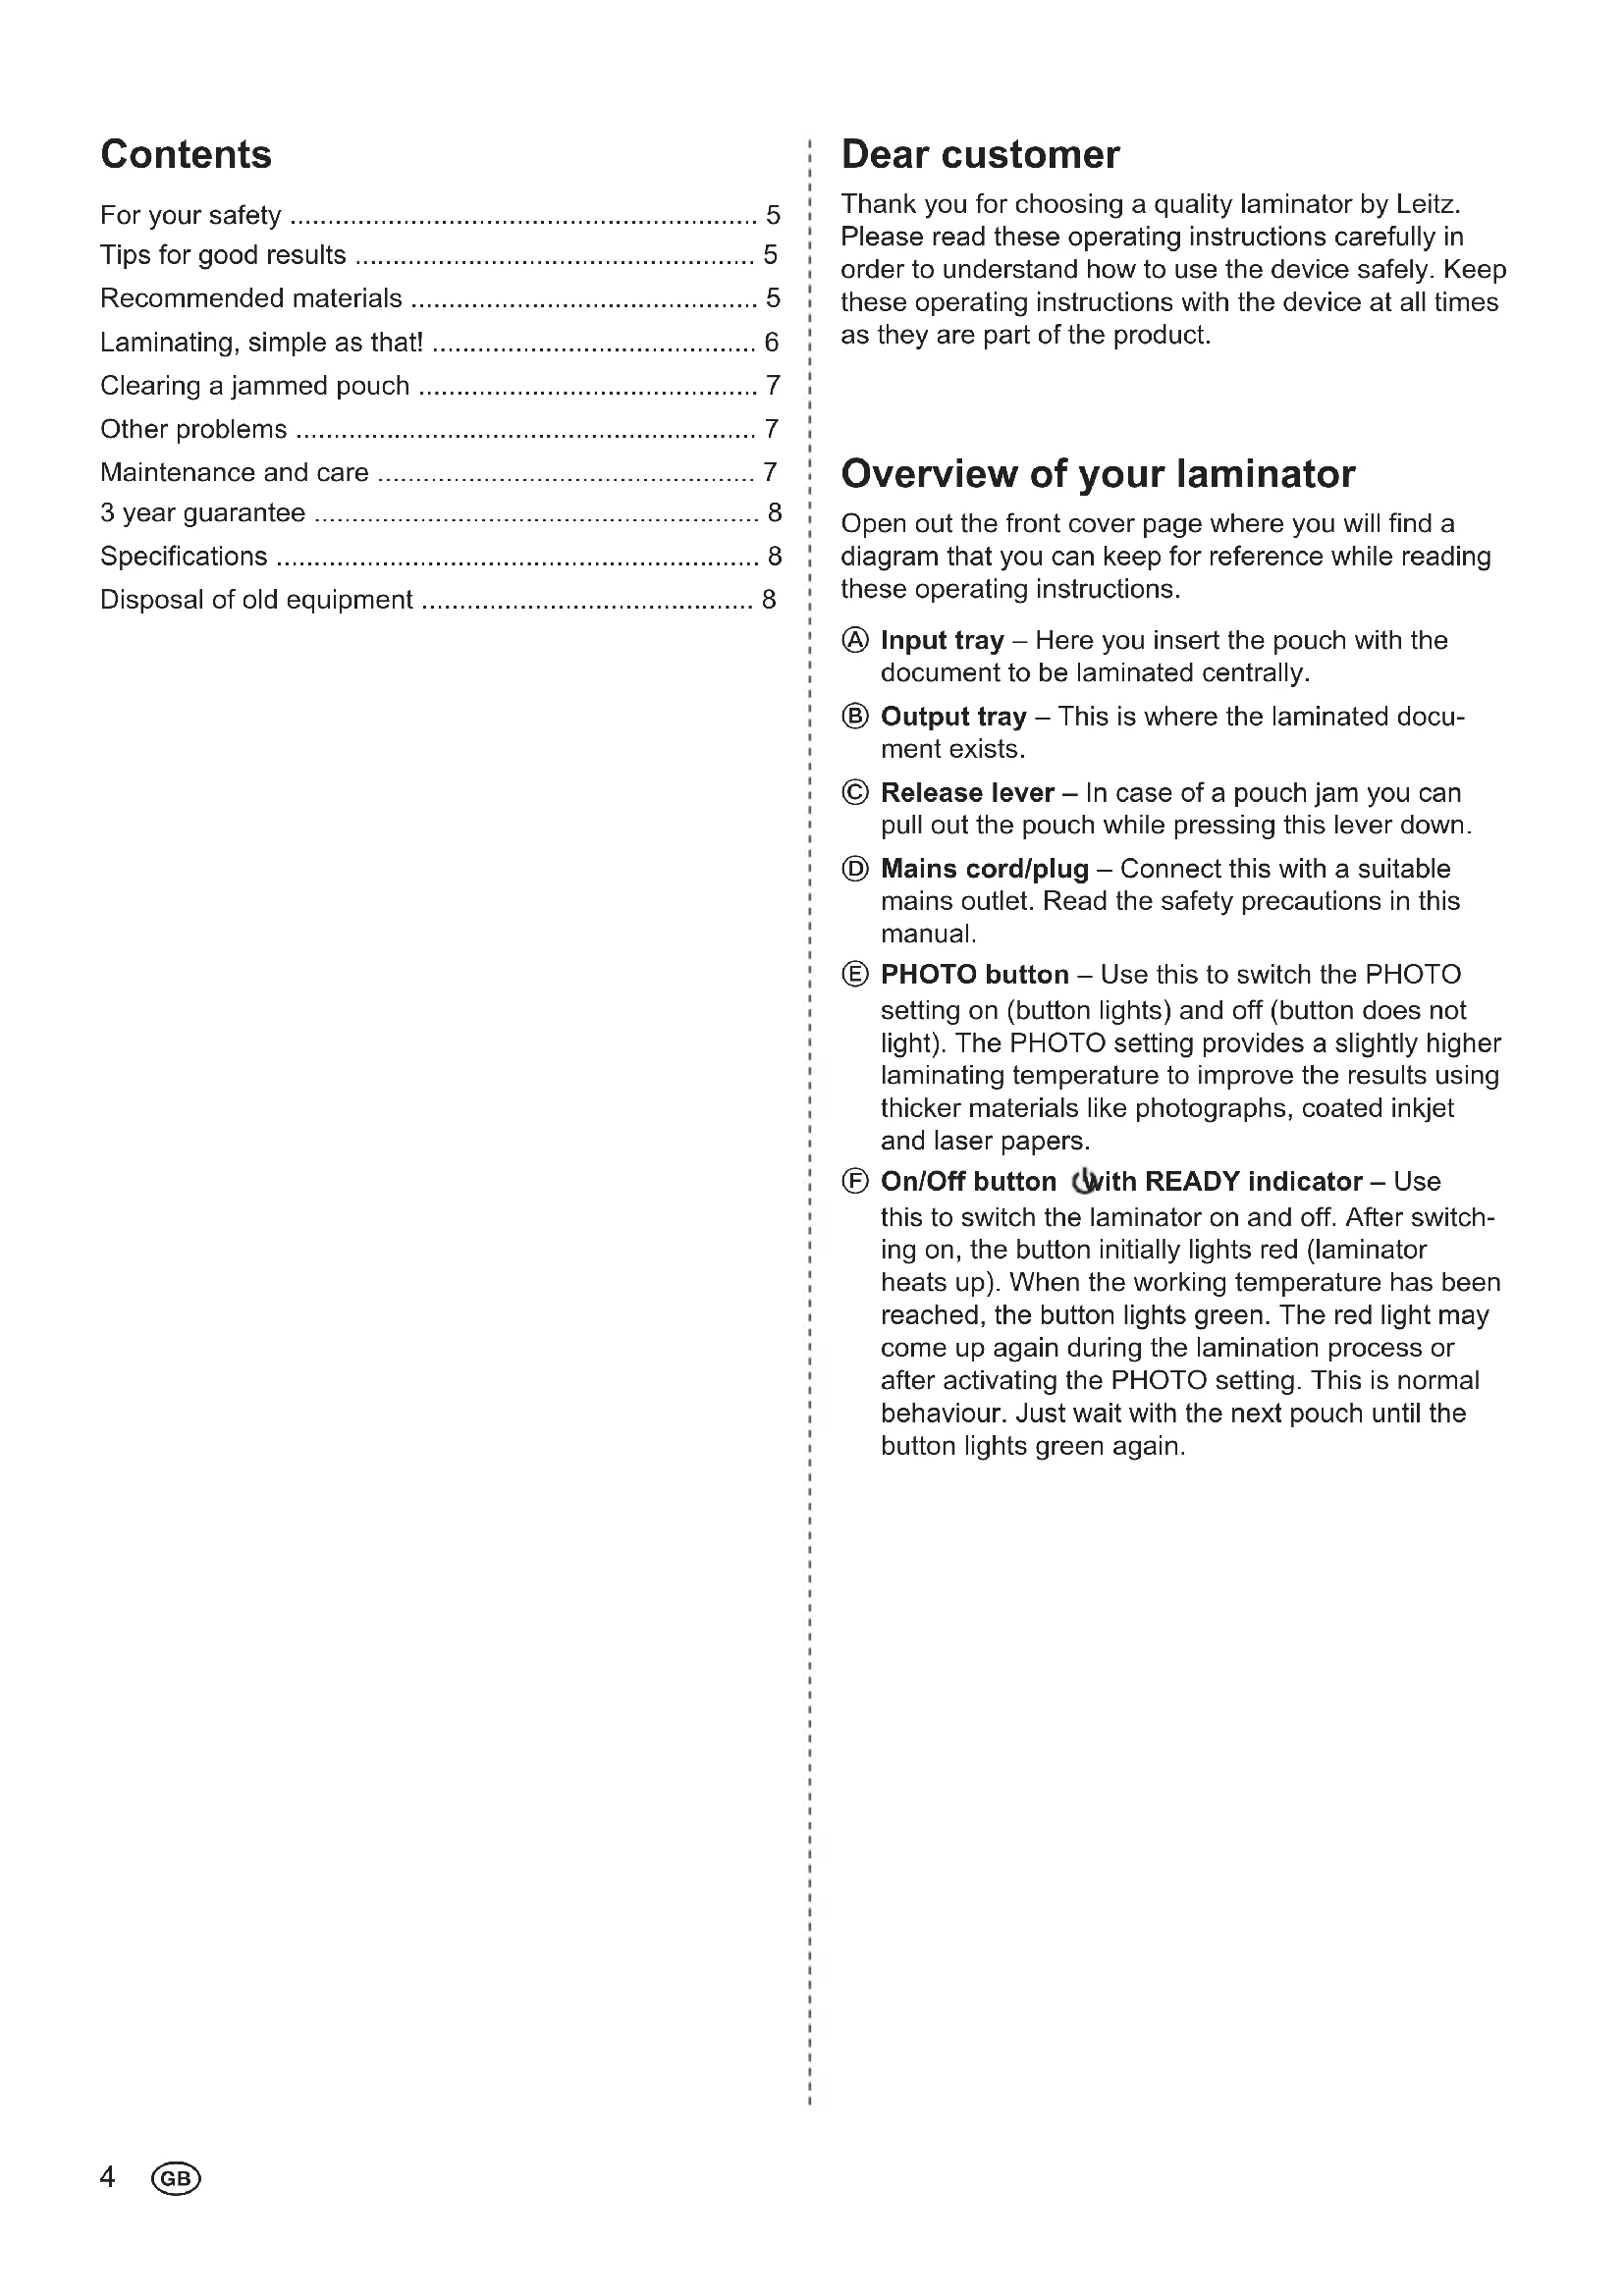
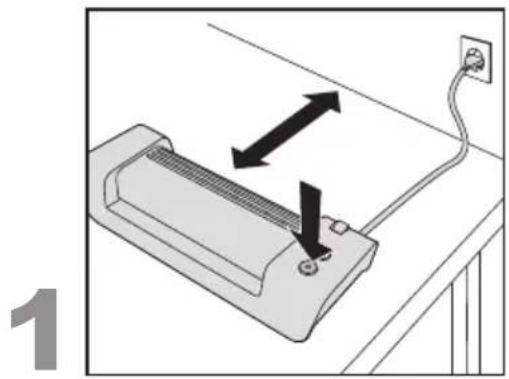
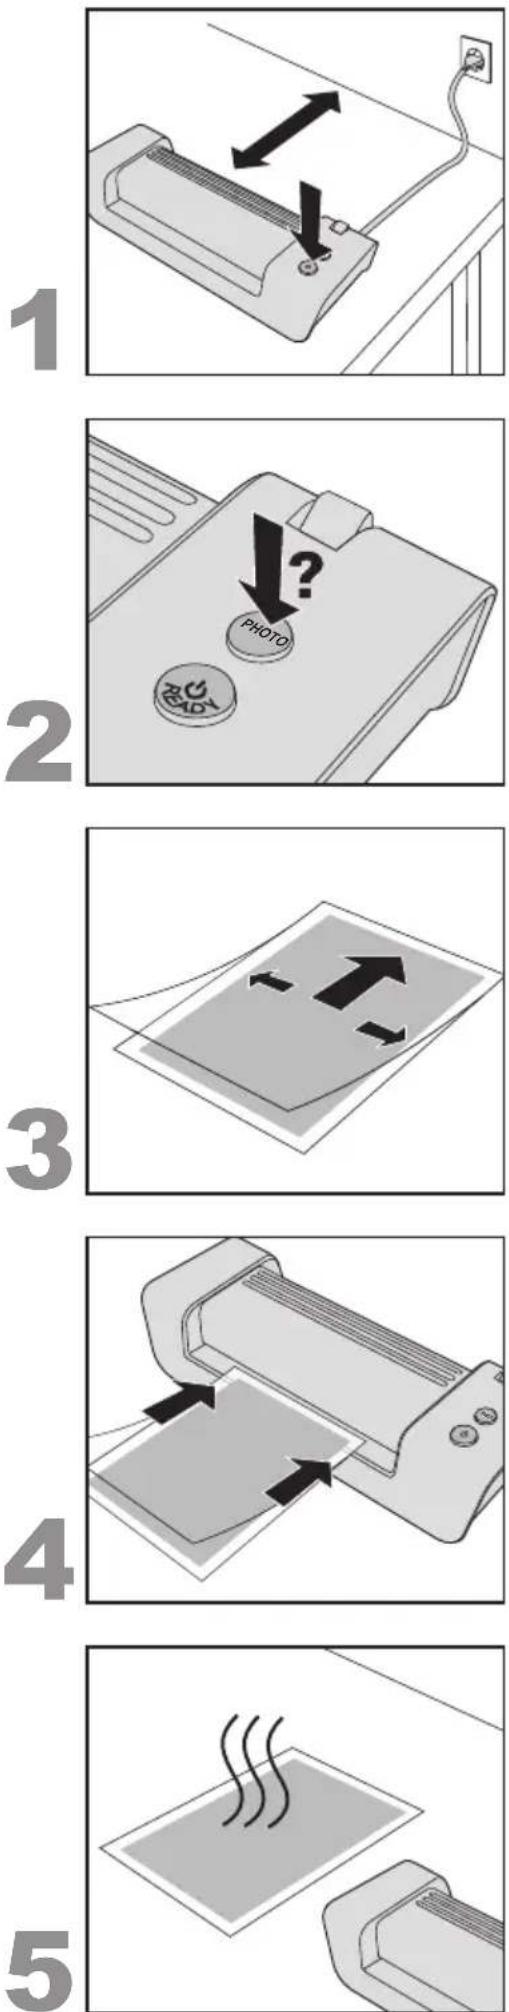
1. Setting up and switching on the laminator
- Set the laminator up on a stable surface (e.g. table) close to a mains outlet. Ensure there is sufficient space behind the unit so the laminated item is not blocked and can easily be removed.
- Connect mains cord with mains socket.
- Press the On/Off button (
The On/Off button lights up red and the laminator heats up. When the working temperature has been reached, the button lights green (READY).
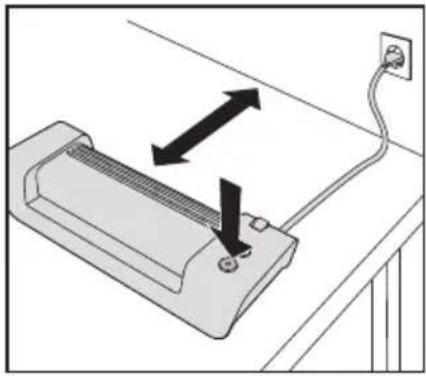
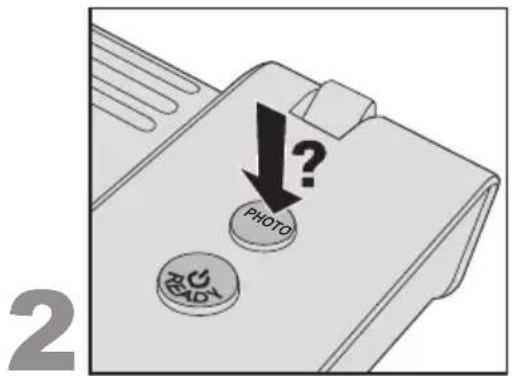
2. Choose PHOTO setting if necessary
- If you want to laminate thicker materials like photographs, coated inkjet and laser papers press the PHOTO button (E), so that it lights.
When laminating thinner materials (e.g. writing paper) the button should not light.
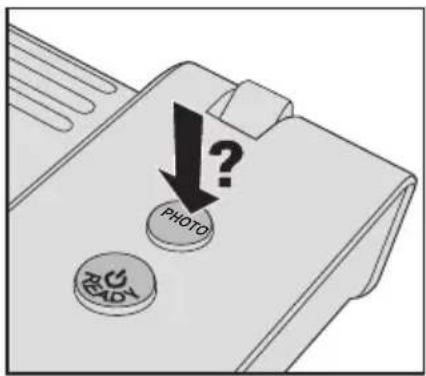
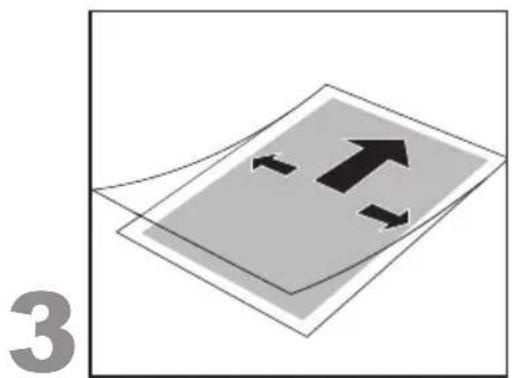
3. Inserting the document into the pouch
- Insert the document into the laminating pouch. Align it to the upper side as much as possible and maintain even margins on both sides.
Pouches that are too large can be trimmed to size after lamination.
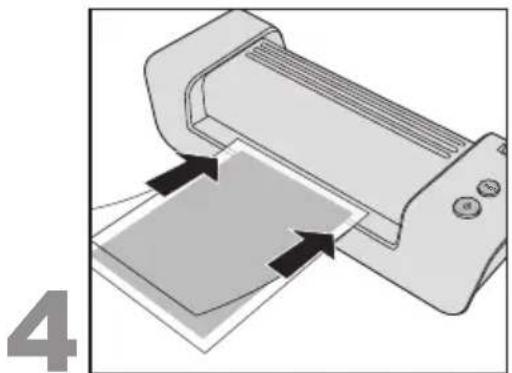
4. Laminating
Important: Lamination is permanent. Before laminating unique pieces, test the process with a similar item.
- When the On/Off button ( lights green, insert the pouch with the sealed side first and centrally into the input tray until it gets pulled in.
The laminated document automatically exits at the output tray. You can improve the result by holding the document at the same time straight and level with one hand.
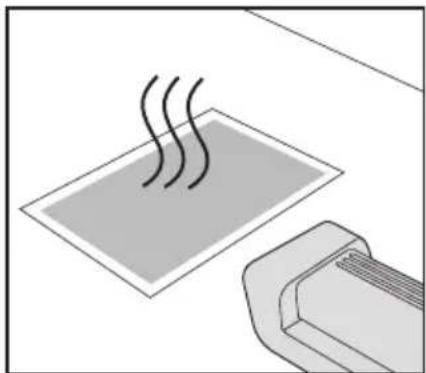
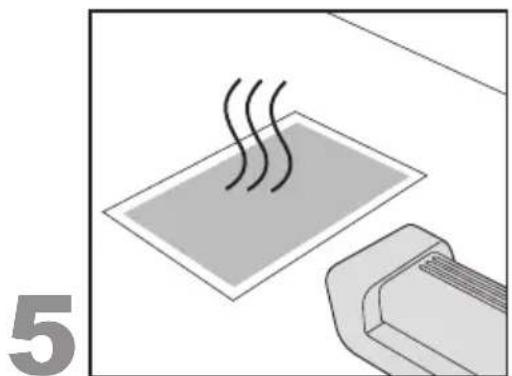
5. Letting the laminated document cool down
- Remove the laminated document and leave it on a flat surface for one minute to cool down.
- When you have no further documents to laminate, switch off the laminator.
Clearing a jammed pouch
Jamming can occur when laminating unsuitable materials or using pouches not recommended by Leitz.
CAUTION: To prevent any damages to the laminator, the pouch must be removed before switching off the unit. To accomplish this, proceed as follows:
- Press the Release lever down and pull out the pouch immediately (see figure on the left).
Clean the rollers after any pouch jam as described in section "Maintenance and care".
Other problems
- Blisters or wrinkles on the print:Blisters or wrinkles on the print:
Too much heat. If the PHOTO button lights, press it to disable the PHOTO setting.
- White or cloudy patches:
Pouch and/or laminated item too thick. Check whether suitable pouches/materials have been used (see specifications).
-
Patches in margin:
-
Document too thick to be laminated.
-
Pouch too thick. Check whether correct pouch thickness has been used (see specifications).


Maintenance and care
In order to remove superfluous adhesive from inside the device, clean the rollers regularly as described here:
- Switch on the laminator (Wait until the button lights green.
- Press the PHOTO button so that it lights.
- Fold a sheet of unused copying paper once in the middle. Insert the supplied Laminator Cleaning Sheet into the folded paper (see figure A).
- Insert the paper with the folded side first into the input tray 3-5 times (see figure B).
To clean the housing:
Pull out mains plug and wait for the device to cool down.
- Wipe the exterior with a soft, damp cloth and a dishwashing detergent.
3 year guarantee
To be returned with the device if defective.
LEITZ devices are sold with a 3 year guarantee.
The conditions of the guarantee period of 3 years are as follows:
- Each device is guaranteed against all defects in material and/or workmanship for a period of 3 years from the date of purchase.
- No device will be accepted without written notification from the customer giving details of the problem that has occurred, and proof of the date of purchase.
- All devices for repair are to be returned to Esselte with adequate packaging. No liability will be accepted by Esselte for goods damaged in transit from the customer, due to inadequate attention to packaging.
- The supplier will be responsible for all parts and labour charges as necessary to the device. The 3 year guarantee is subject to the following conditions:
a) That the device has been used strictly in accordance with the operating instructions supplied with the device.
b) That if the benefit of this guarantee is sought, the device must be returned, carriage paid to Esselte. Esselte does not accept responsibility for loss or damage in transit.
c) That the guarantee is invalid if the defects are found to be caused by accident, misuse, alteration or neglect.
d) That no liability of Esselte is to be implied here for damage, loss or expense of any kind resulting from, consequence upon, or in any way due to any fault whatsoever in the instrument or its accessories.
e) That this guarantee does not affect you statutory rights as a consumer.
In order to allow fast and smooth processing in case of a guarantee claim, please register at: http://www.leitz.com/lamination

Date of Purchase:
Model No. Serial No.:
Company Name:
Contact person:
Address:
Telephone/Fax No:
ESSELTE UK Ltd. Esselté Ireland Limited
Waterside House, Cowley Business Park, Westlink Industrial Estate,
Uxbridge, Middlesex, Kylemore Road,
UB8 2HP Dublin 10
UNITED KINGDOM IRELAND
Tel.:08709090609 Tel: +353-1-6268438
Fax:01895878901Fax:+353-1-6269798
www.esselte.ie
Disposal of old equipment
This symbol of a crossed out waste bin on a product, its packaging and/or accompanying documents means that the product is subject to the European directive 2002/96/EC as well as national law for implementation of the directive.
Directive and law prescribe that electrical and electronic products must not be disposed of with household waste. The customer must dispose of the product by delivering it to a designated station for collection, treatment and recycling of waste electrical and electronic equipment.
The correct disposal of your old appliance is free of charge and will help prevent potential negative consequences for the environment and human health.
For more information about disposing your old appliance, contact your city office, waste disposal service, or the shop where you purchased the product.
Specifications
| Working mode/Heating system 2-roller, carrierless | |
| Laminating speed 414 mm/min | |
| Pre-heat time about 6 min | |
| Recommended pouch thickness 80(75)-125 μm | |
| Max. thickness of laminated item | 0.6 mm |
| Maximum working width, i-Lam easy A4 / i-Lam easy A3 | 230 / 320 mm |
| Power supply | 230 V AC |
| Power consumption, i-Lam easy A4 / i-Lam easy A3 | 285 / 435 W |
| Net weight, i-Lam easy A4 / i-Lam easy A3 | 2.1 / 2.6 kg |
| Dimensions (W x D x H), i-Lam easy A4 | 397 x 146 x 99 mm |
| i-Lam easy A3 | 487 x 146 x 99 mm |
| Enclosure material | ABS |
Subject to technical changes without prior notice.

Sommaire
Chere cliente, cher client,
Eliminar outweighs problems
PekomeHdoBaHi MaTepiA.. 95
JamiHyBaHHa - ue npocTo! 96
YcyBaTu 3aTOp nJIBKn 97
YcyBaTn iHsi npo6nemn 97
Texhiue 6cbnyrobybaHHra Ta dorgn 97
3 pOKn rapaHTii 98
TexhiHn npametpn 98
Ytuiiaqira BkOpuctaHn npuaib 98
ShaohBnKJIeHTe!
3an06ixhi 3axoynpnpBCTaHOBneHHI
-Дани npnnaI npn3haeHo IЯ BnKOpncTaHHB npmiiEHHi. He BnKOpncTOByuTe NOro Ha BiDkPntomy nobitpi.
- IpeepiiknHHeM nepekoHaTeC8, 10 Hapyra MicceBoI MepeKbiDnOBiAe DaHm Ha npnaDi.
CTaBTe npnna6bn3bKo nEkoocTynHoi po3eTkn. IpeekohaiTecra, 0npnnaMoxHa B 6yNb-akn Yac BiD'ehatn BiEneKtpomepeki.
- IpekeohaiTecb, 0o MepekeBn shyp HataRhytn, He 3aTncHyTn, He 3irHyTn, po3TaWynte noTO Takm YHOM, oJ, He cniTKHyTcra 6 shyp. IpekePnaTeCra, 1o MepekeBn shyp He HataRhyTn, He 3aTncHyTn a6o 3irHyTn, po3TaWoynte noTo tak, 0o6 hixTo He MIR cniTKHyTcra 6 shhyp.
3axnctitb npnaB BiD npmaoronoanaaHncohnynx npomeHB Ta He po3miuyeIte Noro Ha yTuNbHX Do Harpby nobepxHx, no6n3y onaIIOBaIbHnx npnaib,KOHnuciohepiab60 Ierko 3anaIbHnx peOboHn.
He daIte npuJaCy Bnactn, He niDbepHITb Noro ydapam.
3anobixhi 3axoDi nId yac ekcnnyatauii
- Hikonn He 3aunuatae BkIoueHn npuaad 6e3 Harny.
He donyckaiaTe ditee do npuna -ue He63neuHO!
3a6e3neuTe npoBITpOBAHHn iD yac lamHyBaHHn (HaepnKnaI, BiKpnIte BIKHO).
3axnctitb npnnaBid notpannnHn BONr, He BMnkaite Noro, kUo MepeKHi UHyp a6o BNkA nouKOJKeHi.
3aBxDn 6epItbcra 3a BInky, He TargHtB 3a Whyp. Hikonn He TopKaTecra MepexKHOI BUNKn BOJorMn pykAmn.
BHTB BUNky CNOyHoro shhpy 3 po3eKn, kKIO npnlaD BNkOpNCTOByEtcra.
He cTabTe KODHn X npMeTIB Ha npnaI, He npocobYnte yKopiDnX npEdMetTIB DO BENTUaIHHx UJIINH.
3anobixhhi 3axoyniudac yncntkn,tpaHcnopTyBaHHy,yknaeHH
Bunmitb Bunky 3 po3ekn nn daTe npnady oxonoHytn do toro, k no rnepemiatu, nctntu a6o 36epiratn. KOnn Hocnte lamHaTOp, 3aBXn TpMaTe Noro 3a 6okobi 3arIn6JeHHra.
-ДяоушенивикорпостаитEmяу raHvipky mNIOUH3ac6I NObYTOBOrO npn3HaueHH. He BnKOpNCTOByTe OJHopa3Obi cepBetKn a6o xIMiHi peOBOHN, 60 BOHN MOKyTb NOWKOdUTN NOBepxHIO.
He BiikpmbaTe Kopnyc i He npo6yute camoctiHo pemOHtBybATn npnaAd. Kaio nOtpi6eH pEmoHT, 3BepHiTbcrdoCBoro dinepa. DOnatKOBi Bka3iBKn Bu 3Ha-ndete y rapaHTiHni DeKnapaui.
Bka3iBkn dIra rapHnx pe3yIbTaTIB
-Дянайкрашиpeультatabиамініваньідялллллллллллллллллллллллллллллллллллллллллллллллллллллллллллллллллллллллллллллллллллллллллллллллллллл
3an06iraHHywkoJKeHb namiHaTOpy, npntpmaI-
TecaHactynHnx 3an06iKHNx 3axOjib:
-ПиIBKn-NakeTe cKnadaHOb8c3ДBox60kIB,IO NOB'3aHI mIX CO6O. HikoJI He NaMInyTe TiNbKu ODNHM 6OKOM nakeTy.
- 3aBxJn 3anpaBjIyTe nakET 3aKpntum (cklaadHm) 6okom ynepey npua. 3anpaBnyTe nakET tInbkn niCnToro, IO BnHnn NaMioHOBAHn DOkymeHT.
HikonHe lamHyTe npcti nibKn-nakeTn.3abKn 3anpaBnTe DOkymeHTo nibKn-nakeTy, KOIN Bn lamHyTe.
He 6p3aIte nnibky-naket neped lamHyBaHHm. Pnpi3aIte nnibky-naket nicra lamHyBaHHdo nixoJxoro po3mipy.
He laminyte yTnBi do Harpby, Mokpi, Xbnjacti a6o 3aBnti maTepiaJn.
- He laminyte MaTeiaJIN TOBunH, 10 BNXOHTb 3a Bka3aHn Bui INCTpykui MAKCIMyM.
He laminyte metanebi npedmetn.
-ПюпеслamihybaHЯ - Heo6opOTnB.ВpaxyTe ue, KOJI NaMHyTe YHikaiJbHi DOKyMeHTN.
3BepHItb yBary Ha Te, 063a lamHaTOpom 6yIIO DOCTaTHbO Micu IINr TORo, 06 lamIHOBAHNI DOKymeHT MoKe BnXODNTN 6e3 npo5nem. JERKHO NiITpIMKOIO ONDHO pyKOIO 3HN3y MOxHa 3MeHUnTI NdeopmauiO ue TENlORO DOKymeHTy.
B xodi HopmaJIbHoro JamiHyBaHHHe TgHiTb UTOBXHITb NaKet Ta He BmUKaIe JamiHaTOP.
PekomeHdoBahi maTepiJi
Baum lamihatopm «Leitz» Bn mokeTe lamihybaTn 6iibicb HndpykoBAHx BNiB nanepy, foToKoNi, Ia3epHnx Ta ctpymHHnx dpykIB 3a donomoroIaMihyBaIbHnx pIbOK-naketIB Bi75 Mkm (MIkpOH) Do 125 MKM DO MAKcmaIbHOI TOBUnHn0,6 MM.
-Дяп полшени pe3yntaTIB 3бьш TOBCTMIM MaTePianamnЯкфOTorpaФiI a6o na3epHi n CTpyMuHHI dpykn 3 noKpOBom lamHaTOP oCHaUeHn HacTpOuKOHO PHOTO.
3apaBn BncoKoRicHnx pe3ynbTaTIB BnKOpNCTaTe BnKnIOuHO nIiBKN-nakTeN φipMn «Leitz».ДоDAtKOBO ue npOdoBxye cTpOK cnYk6n npnnaNy.
YcyBaTn 3aTop nJIbKn
JaKIO Bn laminyTe HeniJXoJiMi MatepiAn a6o BNkOpNCTaTe HepekomEnIobani fipMoTO «Leitz» NIIIBKN-NakETN, ue MoKe npuBecTn do 3atopy nnibkn.
06epexHo:Дялзлбоггнгпошкджьлamihatopy Tpeba ydaTn nIbky-naket nepeB BnKIOUeHHm npuady. NocTynaTe TaKIM YHOM:
-HaTnCHiB BiDnyckHn BaxKinb yHn3 Ta HeraHOB BNTaRHiTB nnibky-naket (INB. 3o6paKeHHa NIBopyu).
- Picna Koxhoro 3atopy nibcn cnid ouuatau Baikn, kc ce oncaHO B po3dini "TexHicHe obcnyroByaHHa Ta dorgn.
YcyBaTn iHsi npo6IeMn
- PnyxnpuKn a6o cknaKn Ha nJIbci-naketi:
3aHaTo Bucoka TemnepaTypa. JaKIo CbIIT6cKnaBiHa PHOTO, HATNCHTb Ha Hei, 0o6 BuKnIOuTaN HAcTpoNky PHOTO.
- Bini a6o moJOnHn nJaMa:
Плівka-naket Ta/a60 MaTePIaI, 50 nAmiHyE7bCra, 3aHaTTo TOBCTI.
ПпeБВьрЯнTe, uN BnKOpNCtAeTe Bn nIxDxOJaUci nakETn/MaTePiaIu (dNv.TexHicHi napametpn).
- Пляма На Краю:
-Дokум ent 3aHaTO TOBCTn ДЯ NaMiHyBaHHra.
-ПиИка-nakETЗанДTOTOBCTN.IpeBipRnTe,чВиВИКОпСТaTe BnNiIXOДЯICI nakETN (ДИВ.TexHicHi napametpn).


Texhivhe o6cnyroByBaHHa Ta dOrgn
Uo6 BndaJrtn 3aBn Kne 3 npnay,peyraepno ouucaTe BaHn 3a HactynHOIO INCTpyKueIO:
Bknoyitb lamHaTop (OoueKaItecra, nokn KnaBiwa 3acBITbc3eHm KOJbOpom.
- Hatnchtb knaibiy PHOTO tak, 06 BOHa 3acBtiJnacr.
- CknaidiTb apkyw konioBaIbHoro panepy no cepeDnHi. NoknaiTb NOCTabJIeHn KapToH dIy OUYueHHa DO CknaJeHOro panepy (INB. 306paXeHHA).
BbOitb nanip 3akpntm 6okom ynepei 3-5 paizib no ueHTpy do Notka noaHHa (nVB. 3o6paXeHHA B).
PekomeHdyemblc MaTepnaJIbI
BaWIM JAMHATOPOM MapKl Leitz Bb moKeTe JAMHINPOBaTb 60nbHnHCTBO 3aneaTaHHbIX BnO8 Gymn, fTOKOHN, pacNeayatoK Na3epHBix N CtpyHbIX PnINTeOB PnP NOMOU INIeHOHyBx KOHEpTOB DnJ JAMHINPOBaHry TOUINHOOT75 MKM (MkPOH) Do 125 MKM, YTObI NOnyHTb KOHeHbN pOdyKT c MaKcMaJIbHOr TOnIHHOJ Do 0,6 MM.
-Дя уншеня рezиьтata lamHHupOBaHn6Oone nIIOTHbIX MaTePnaIOB, HAnp.,ФOTOrpaФи N Cha6KeHbIX nOKpbITnEM pacNeuATOK CTpyHbIX n Ia3epHbIX npINHTepOB, lamMHaTOp nMeetФyHKUHO PHOTO.
ДяdoTIXeHnBbICOKaueCTBeHHbIXpe3yNbTaTOB nOJIb3yIte NCKIOHTeNbHOIIeHOHcHbIE KOHBepTbIMapKl Leitz.KpOmeToro,6naorap3tOMy npOJIeBaetc cpoK cnXkbIycTpOCTBa.
1. Pa3MeCTIte IN BKJIIOUHTb JAmHaTop
- YctaHOBNTe JAMHATOp Ha yCTOuHBOM, POBHOM OCHOBAHN (HaNP., Ha CTone) HeNoDAneky OT 3JNEKTPnueCKoP03ETKn. CNeIte 3a HAnuHem DoCTaTOUHorO MeCTa No3aDn JAMHATopa, YTObblamHHpOBaHHbI DOKUMeHT He 3JIeKTPnueCKoN MOr 6ecnPenrTCTBeHHO BbIHMaTbcra.
BCTaBnTb ceTeBOu WTeKepe Bpo3eTKy. - HaxaTb KhONky BkN./BbIKn ( ) Khonka BkN./BbIKN. 3azopaemc kpaCHbIM ceemOM, u lamuhamop pa3oapeBaemc. Ka monbko pa6oay memepamypa docmuHyma, konka ceemumc 3eHebIM ueemom.
2. BbI6paTbФyHKcHIO PHOTO
- Ecnn Bby xotnte pa6oTaTb c 60one nIOTbIMn MaTePnaIaMn, HApN., FOToRpaΦnA Mm NII Cha6KeHHbIMN NOKpbITneM pacNe- yATKAMN CTpyHbIX N Ja3epHbIX npInHTepOB, HAXMNTe KHOKNy PHOTO E, YTO6bl OHa 3arOpenacB.
Ipu lamunupoahuu 6onee moHKux Mamepuanoe (Hapn. noymoou 6ymau) 3ma KHonka He doJxHa cemumbcra.
3. BCTaBntb DOkymeHT B nIeHOHyB KOHBeP.T.
BCTaBBTe DOKUMENT B NJIeHOUHbI KOHBepT. PpN 3OM BbInpaBnTe erO KaK MoXHO 6NIJKe K CNOXKeHHo CTOpOHe NJIeHOUHOrO KOHBepTa I ObecneYbTe OINHaKOBBie pacCTOHHa CNEBa n Cnpaba.
Iocne lamuHupoeaHa Bbi MoKeme nodpe3amb cnuukom 6oBwue nneHOchBie KOHeepmbi.
4. Ламнирobане
Baxho: lamuhupoeaHue - Heo6pammbi npouecc. Ipexde yem lamuhupoeamb omdehble npedMembl, onpo6yme emy onepauio Ha ananosuHOM obekme.
Korda Khonka BkN./BbIK. CBeHTc3eJIeHbIM UBeTOM, BCTaBBTe PJIeHOHyB KOHBepT CO CNOKeHHoI CTpaHnCeI BnepeI NO CEHTpy I npRAO BOTCEK dIЯ BBODa TAK, YTObI OHa 3aTAYlacB HHTpb.
IamunupoeaHbI doKymehm aemomamueecku ebidaemcyepe3 omcek dner ebdaquu. Bbl moxeme ynywumb kayecmeo peymbama, npmo ydepkua npu 3om doKymehm pykoi.
5. DAtb OCTbITb lamHHnpOBaHHOMy DokymeHTy.
BbHbTe JAMHHPOBaHHbI DOKyMeHT N OCTaBBTe erO OCTbIBaTb Ha POBHOI NOBepXHOCTN B TeueHne npn6n. OJHOIMHyTbl.
- Ecnn Bbl He xOTnTe JAMHnPoBaTb Dpyrne DOkymeHTbl, OTKIOUHTe yCTpoiCTBO.

YcTpaHnTb 3aTop nJIeHKn
Ecnn Bbl lamHHpyeTe HnnpHroHbI MaTePnaJIb IIN nCNoB3yeTe IIHeHOUHbI KOHBepTb, He peKomeHDoBaHHbIe fOpMoI Leitz, MoXeT BO3HNKHyTb 3aTOp IIneHKn.
OCTOPOXHO:Bo n36exKaHne NOBpeJdeHn lamHaTopa BbI DOJKNbI ydaJIITb PHeHouHbI KOHBepT, npExJe Yem OTKJIIOuATb yctpoiCTBO. Ipn 3tOM NocTyNaIte CneDyUoIm O6pa30m:
-
HaxmTe pbyar De6IOKnPOBKN KHN3y u cpa3y Je BbITaunTe PHeHouhbl KOHBeP (cM. pnc. cneBa).
-
nocne KaKdOrO 3aTopa PJIeHKn OUYIaIe TaBnIKn TaK, KaK ONcaHO B pa3deJe ,TexHnueckoe o6cnykmbAHne n yxoD".
YcTpaHHeI npOuX npo6JIeM
- Np3bipbKn nJn cKnaKn Ha nJeHouHOM KOHBepTe:
cniuKOM BbICOKa TemnepaTypa. Ecn 3arOpntc KhoNk aPHOTO, HaxMnte ee, yTo6bl OTKnIOUHTb cyHKnIO PHOTO.
BeIbIe nn MoNoHbIe nTHa:
CJNWKOM NIOHTbI NIIeHOHyB KOHBepT N/INI JAMNHpyEmbIMaTePnA.I POBepbTe,NCIOJIb3yEtE NBI NOxOJaUne NIIeHOHcyIbe KOHBepTb/MaTePnAJIbI (CM.TexHueckne daHHble).
- Пятано Кразм:
-OKyMeHT CnIuKOM NIOTHbI DnI NaMnHPOBaHn.
TapaHTnA cPOKOM Ha 3 roDa
B cnyae noJomKoTnpaBnTb BmecTe c annapaTom.
Bce annapatbLeitz HMeIOT rapaHTnIO 3 rOa npN co6JIoDeHn nCleDyUOx yCNoBn:
- TapaHTn3 rOda c DaTbI NOKyKN pacnpocpaHAreTcHa Bce DepeKtbl MaTePnAna H/INn Ha 6paK 3aBODCKo BBipA6OTKn annapata.
- B cnyuae npedbAeHnepTeH3n:MbI npocm Bac onncatb 6paB NcBMeHHOM Bnde.
3.Bcnyae BO3HKnHOBeHHnpeTeHN,Heo6XoIMo 6paTntbcra K npOabTu TObapa, npEJbYBnR rapaHTnHbI TaON. B cnyae 06OCHOBAHNOCTn npTeHN, npOdaue HnPaBNT 6pakOBaHbI annapat B OOO ,3ccenbTe".Pn 3ToM,OOO ,3ccJIbTe" He Hecet OTBETCTBEHOCHTn 3a DeΦeKtbl, BO3HKnUne Pn TpaHCnOpTnpOBKe B pe3yIbTaTe IcNlNb3OBaHHn HnpiuOrHOy nakOBKn.
4.B COOTBECTBnC DaHHo rapaHTne MbI 6OaKOBaHHbIe DeTAn N BbINONHrTb COOTBETCTBYIOUne peMOHThIE pa60tI. RaapHTra DeIcTBNTeBHa npu BbINONHeHN CJeDyUOux ycIOBn:
a) rapaHTnHoe CbneTeJIbCTBO 3aONJIHeNo npOdaBcOM (DaTa npOdaJxN cnpMEnHaNeYaTb),
6)CMOMeHTa NOKyKNAnnapaTcNcNoB3OBaCraB CooTBeCTBmC pyKoBOdCTBOM NO 06cIyKuBaHIO,
B) annapat,ДЯ KOTOPORO npebryneHa npeTeH3nHa rapaHTIO, 6ydet OTnpaBNeH haФmMy OOO "3ccelte" c onnatoi KIneHTOM cTOnMOCTn nepecblnK, npuHem OOO "3ccelte" He HecET OTBeTcTBHeHOCTn 3a notePio Nn nobpeXdHn npn TpaHCnOpTIpOBKe,
r) yctahOBHeHbIe DeEeKtI He Bo3HNKnBpe3yIbTaTe abapn, HnpaBnHOrO nolb3oBaHna, nepeJeKn nnJx HeKBaNnPhiuPoBaHOrO nCNoB3oBaHna,
i)OOO"3ccenbTe"6e3yuepe6aIINB03MOKbIX npTeH3n B COOTBETCTBmC 3aKOHOM 6OB TBETCTBEHHOCHT 3a KaeeCTBO BbIpyckaemOI pOdykUnn,He HecET OTBETCTBEHHOCHT 3a KaKe-Im6o DeEkeTbI,yuepeNpIpaXoDbI,pOnI3oWeuine B pe3yblTaTe DeEkeTA aannapata NnJx KOMJIeKTyUoxN DeTanei,BbI3BaHHBe BCNeDCTBne 3TOR,NNJx C8raAHbIe C HIM.
Дяо onepatNBHOnи 6eCnepe6oHoi npop6OTKn rapaHTnHOrO cnUyA Mbl npocMn Bac 3apeMCTpnpoBaTbc B INHTepHeTe no aDpecy: http://www.leitz.com/lamination

Data nokykn:
No moJeN/THn moJeN:
HaMHMeHOBaHHeΦnPmB/HaMHMeHOBaHHe/OTdEJI:
Ampc/Ten:
PpOdaBeu (HnPmEnHa netaB):
NeTeJeepoH/TeJeepaKc:
000《3ccenbTe》
Pocn, r.MockBa, 125040
3- ynua Rmckoro non, d.18
Ten.: (495) 933 27 63
ΦaKc:(495)9332762
YdaJIeHne cTapbIX yCTpOJcTB B KaueCTBe OTXODOB
EcnHa npOyKTe, ynaKOBKe n/nn Ha npINOxKeHHbIX DOkymeHTax pINBOuNTc8 3TOT CmBOJ nepeepKHyTORo MycOpHOro KOHTeHepa, To Ha 3TOT npOdyKT paCnpocCTpaHrOTcnoLOXeHnI DInpeKTtBbl EBpo
co3a 2002/96/EC, a TaKKe HaunOHaJIbHbIX 3aKOHO O peaIIN3aUNN 3ToN DInpeKTNBbI Na npaKTnKe.
Дирекива ИЗАКОн ПпсдИСьIBAIOT 3aПeT O HApab-лeHи CTapbIX 3ЛeKTPnueckIN X 3ЛeKTPoHHbIX YcTpOiCTB B 6bITOBОМycOp (OcTaTOUHbI MYCOP). ДЯ obecneчЕня IX KBaIIФицЮВаHOrO yda-лeHи B KaueCTBe OTxOIOB,пepepa6OTKN I NOВТорHOrO nCNoJIb3OBAHnR Bbl OБЯЗнblу UdaJIaTb cTapbIe YcTpOiCTBa B KaueCTBe OTXODOB Upe3pyHKtbl PrnEma,прEDyCMOTpeHHbIe DnI ATOrO rocydap-CTBOM.
YdaJra cTapBie yCTpOncBa HaJIeXaIIM o6pa3OM, Bbl npEynpeKdaTe yUep6 dna OKpykaIOuSei CpeBbI nOnacHocTb dna CO6CTBeHHoro 3dOpOBb. YdaJeHne OTxoob ocUeCTBnAreTcra dna Bac 6ecnnatHO.
IOnOHHTeJIbHyIO INHΦOpMaζIIO 6 ydaJIeHN cTapbx YcTpoIcTB KauEcTBe OTXoOB Bbl NOnyUInTe B BaIeI rOPOdCKoAaMnHnCTpaCnB, B BeOMCTBe I0 ydaJIeHNIO OTXoOB NII N TOM Maar3nHe, B KOTOpOM Bbl npNo6peNn npOdyKT.
TexHnueckne daHHbIe
CkopoocbIJIaMHHIpOBaHn4 414 MM/MNH.
Bpema noDorpeBa OK.6 MmN
PekomEnyemai TOniunHa nnEHNK 80(75)-125 μm
MaKc. TOnuHa lamHpyemoro MaTePnAna 0,6 MM
MaKc. pa6o7a 7uPnHa, i-Lam easy A4 / i-Lam easy A3 230/320 MM
3NeKtpoNTaHne 230B nepem. Toka
Iotpe6nemmaMoUHocTb,
i-Lam easy A4 / i-Lam easy A3 285/550BT
Bec Hetto, i-Lam easy A4 / i-Lam easy A3 2,1/2,6 k
Pa3mepbl (UxΓxB), i-Lam easy A4 397 x 146 x 99 MM i-Lam easy A3 487 x 146 x 99 MM
MATEPNAI KOPNYCA ABC
CoxpaHaeTcI npaBO Ha BHeceHne TeXHHuecknX n3MeHeHn.

Obsah
Mtpa Tpoquaagns kata tv tooetnon
Hauakeun exei oxediaothei yia tn xphon o kaiotouc xwpouc. xpanoiotoeitai eegwteipokucxwpouc.
Ipiuovdeote n oukeun iyoupeuteite, ot n taon tou totiko diktou ouupwvei e Ta deojeva eravw onuokun.
ToTOnoTeHnOuKeunnnnoiou miaocpiacmeukoan pOa aon.1iyoupeuteite ot n oukeunmuTopei va atouuvde0e i npwca an to nTv trica ava naa oTiyu.
Bébaiωeite oT to kαλδio dev eivai TeVTwévo n Kouloupiασevo kai totoθetnate to oε aφaβε σημεio, otnou δe vα Κοντáuei kaveic oTo kαλδio. liaitepa βεbaiωeite oT to kαλδio kai n utdoxñ nC πipacg δev exouv utootei kαntoiαζμia.
Piooataeute tn oukeun ato tv aueon naiakn aktivobolia kai mnu tv tototheite et avw oepmuka euaiaotncs emapaviec, TAnoiov ouokeuw vepuavoc n klaipatiaou n entaw os e uphiekta uikca.
Mny apyve ta tceoi katn oukeun kai nyn thXTUTATE.
Meo a Tpoquuaegs kaTn diapkeia tns aeitoupyias
Mny apnvte TOTe Tn ouokun aqulaktn Evw bpioketai e Aetoupyia.
KpatnoTe Ta TaiDiA paKiia aTTO Tn OuaKeun (kivduvoC TpaMaTIOPOU!).
- Otav yivetai paaotikotoinon qpvovtcte va utapxekaloc aepi- (π.x.avoixto napaθupo).
- Ppoataeote tn ouakeun anio tvv ypaia kai uny tvn xpoiotoiHOte otav to kalwio n npia eivai Eaattwnatikn.
Mny Tpaabe To kaawio troe ano tvu utdooxn Tns Tpiicac. Mny ayyiciTe nroTnv Tpicae Ebpveyeva xepia.
- Atouuvdeote n mnxavn atto nAektpko peupa otav dev evai eAeitoupyia.
Mny toTIOtheTeIe n aHvETe kaveva avtikeuvo eTavw otn oukeun kai mnu EIOAYTE Kaveva Eevo oWua uOa otic bupidec eoepioou.
Mtpa Tpoostaoia cKa ta th iapkeia Tou ka aipi- oou, mtaopac kai atothekeuong
Piiv Tn metapop, To kai aipioo kai nV atoNkeuon apapeite To qic kai apnvete Tn oukeun va Kpuwoei. Ia Tn metapop a Tlavete Tn avta To V TlaotIKOTIOINTn atTO TIC TLEUPKEc EooxEs Ouykpatnong ts.
TAtov kaBapiox npoiotoe eva laakouypo Tavi kai liyo uypo triawv. Mny xnpoiotoeite KaBapiotkaavtilakia n XnmuKc ouie tsou mtopouv bauov tnv etiaveia.
Mny aoieTe n oukeun kai mnu TPOoTAAOaTe va etIOKEua- oTe TN Ooukeun mvoi oac. EATE OE tApn me Tov eItoPo aG yia OTIOEaONTOE ATTAPAITNEc ETIOKEueCs. AiaBaote tn dNlaWan EyyunonS yia TEPIOAOTEpeC IAnpOpopieC.