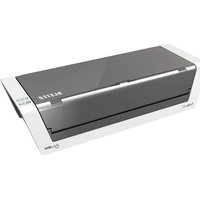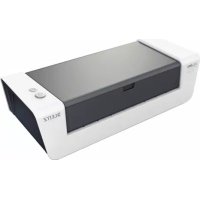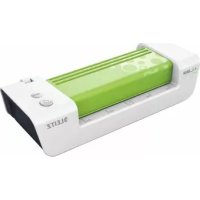
ILAM Easy A4 - Laminating machine LEITZ - Free user manual and instructions
Find the device manual for free ILAM Easy A4 LEITZ in PDF.



Frequently Asked Questions - ILAM Easy A4 LEITZ
User questions about ILAM Easy A4 LEITZ
0 question about this device. Answer the ones you know or ask your own.
Ask a new question about this device
Download the instructions for your Laminating machine in PDF format for free! Find your manual ILAM Easy A4 - LEITZ and take your electronic device back in hand. On this page are published all the documents necessary for the use of your device. ILAM Easy A4 by LEITZ.
USER MANUAL ILAM Easy A4 LEITZ
natural_image
Line drawing of a LiAM eLe1V device with labeled buttons (PHOTO and RADIO) and 'ALEITZ' branding (no text beyond labels)ILABN4easy
Tips for good results 5
Recommended materials 5
Laminating, simple as that! 6
Clearing a jammed pouch 7
Other problems 7
Maintenance and care 7
3 year guarantee 8
Specifications 8
Disposal of old equipment 8
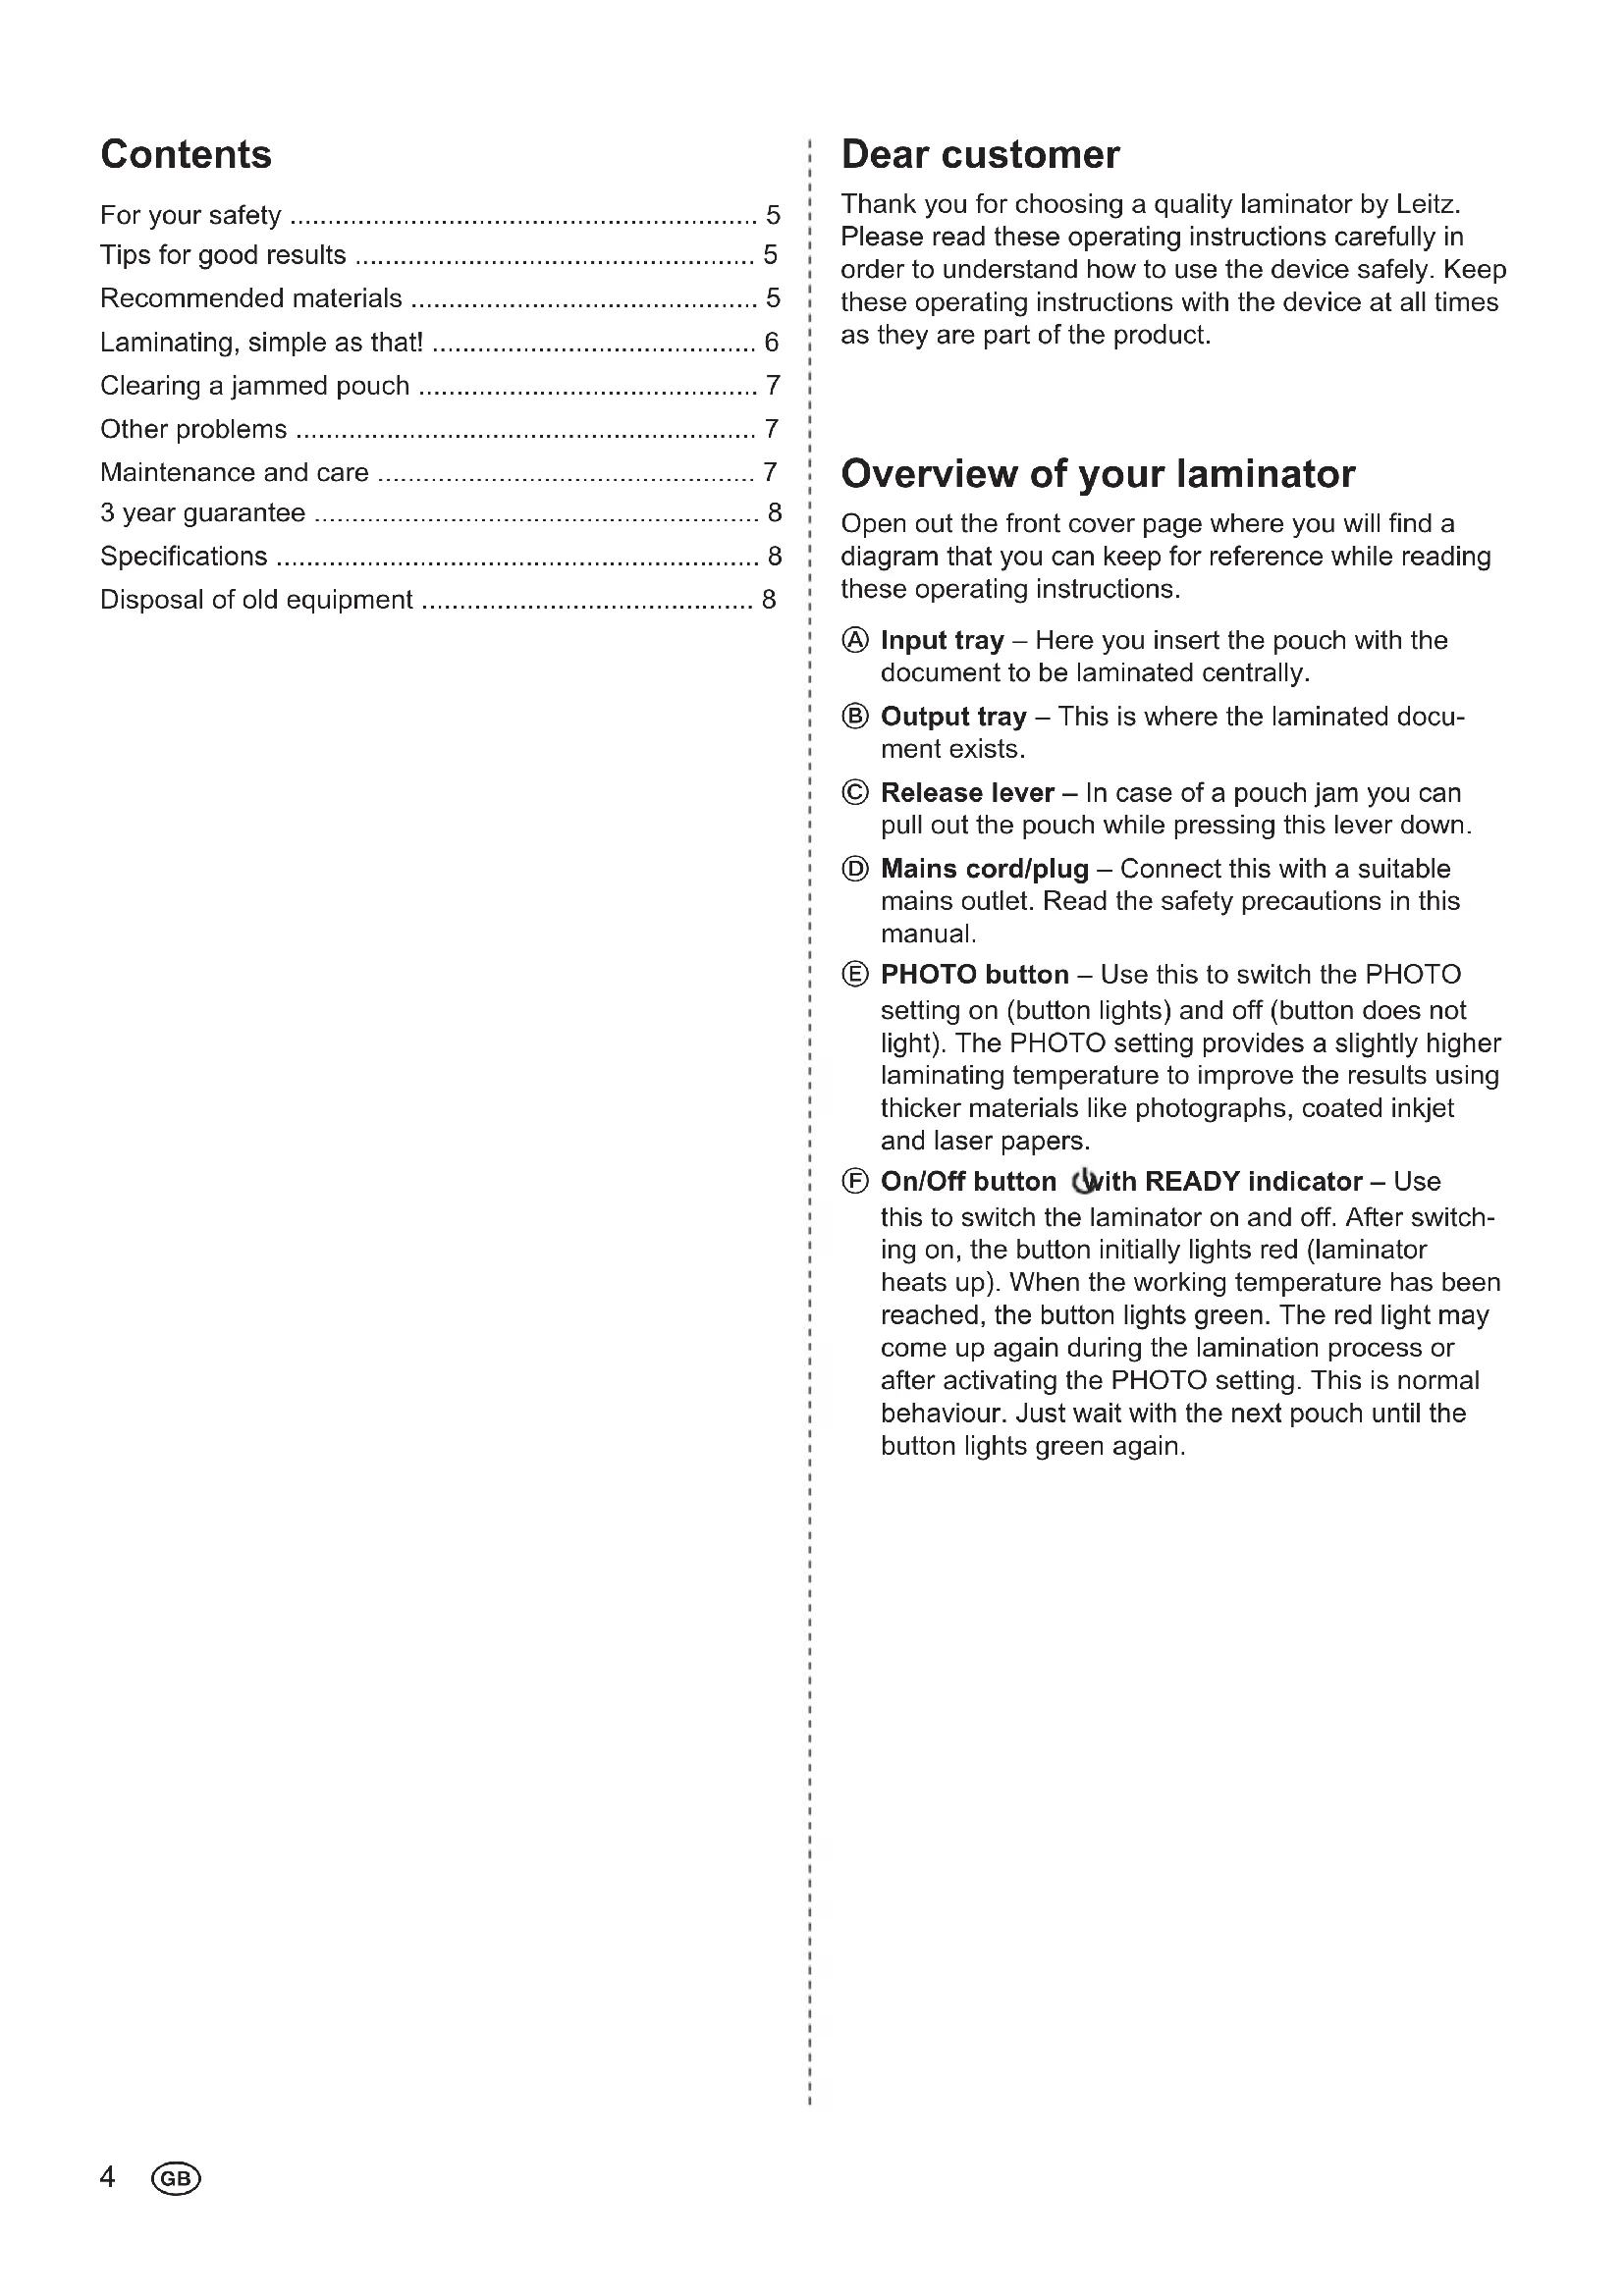
Dear customer
Thank you for choosing a quality laminator by Leitz. Please read these operating instructions carefully in order to understand how to use the device safely. Keep these operating instructions with the device at all times as they are part of the product.
Overview of your laminator
Open out the front cover page where you will find a diagram that you can keep for reference while reading these operating instructions.
Ⓐ Input tray – Here you insert the pouch with the document to be laminated centrally.
⑧ Output tray – This is where the laminated document exists.
© Release lever – In case of a pouch jam you can pull out the pouch while pressing this lever down.
① Mains cord/plug – Connect this with a suitable mains outlet. Read the safety precautions in this manual.
⑤ PHOTO button – Use this to switch the PHOTO setting on (button lights) and off (button does not light). The PHOTO setting provides a slightly higher laminating temperature to improve the results using thicker materials like photographs, coated inkjet and laser papers.
⑤ On/Off button with READY indicator – Use this to switch the laminator on and off. After switching on, the button initially lights red (laminator heats up). When the working temperature has been reached, the button lights green. The red light may come up again during the lamination process or after activating the PHOTO setting. This is normal behaviour. Just wait with the next pouch until the button lights green again.
⚠️For your safety
Intended use
This device has been developed for laminating paper or similar materials. Use it exclusively for this purpose, as described in these operating instructions.
Precautions for setup
- The device is for indoor use only. Do not use outdoors.
- Prior to connection make sure your local mains voltage matches the rating indicated on the device.
- Set the device up close to a readily accessible mains socket. Make sure the device can be disconnected from mains at all times.
- Protect the mains cord from being strained, pinched or buckled and place it in a way to prevent people from tripping over the cord. Particularly ensure that damage is avoided at the plug and the point where the cord exits from the device.
- Do not expose the device to direct sunlight and do not place it on heat-sensitive surfaces, near heaters, air conditioners or flammable substances.
- Do not drop or hit the device.
Precautions for operation
- Never leave the device unattended when switched on.
- Keep the device away from children (risk of injury!).
- Ensure good aeration while laminating (e. g. open a window).
- Protect the device from moisture and do not operate it when mains cord or plug are defective.
- Always grasp the plug, not the cord itself. Never touch a mains plug with wet hands.
- Unplug the device when not in use.
- Do not place anything on top of the device and do not insert anything into the venting slots.
Precautions for cleaning, transport and storage
- Unplug and let the device cool down before cleaning, moving or storing it. When carrying the laminator, always hold it by the recessed grips on both sides.
- Use a soft, damp cloth and a dishwashing detergent for cleaning. Do not use cleaning tissues or chemical substances which might damage the surface.
- Do not open the housing and do not attempt to repair the device yourself. Contact your dealer for any required repairs. Read guarantee declaration for further information.
Tips for good results
To ensure the best possible lamination and to avoid any damage to the laminator, please take the following precautions:
- Laminating pouches are made of two sides linked to each other. Never laminate with only one side of a laminating pouch.
- Always insert laminating pouches into the unit with the folded side first. Do not insert a laminating pouch until the previous laminated document has been removed.
- Never laminate empty pouches. Always insert a document into the pouch when laminating.
- Do not cut the pouch prior to lamination. Trim the pouch to size after lamination.
- Do not laminate heat-sensitive, wet, wavy or crinkly materials.
- Do not laminate materials thicker than specified in this manual.
- Do not laminate metal objects.
- The lamination process is irreversible. Please keep this in mind when laminating unique pieces.
- Ensure there is sufficient space behind the laminator so the laminated item is not blocked. By slightly supporting the pouch with one hand from the bottom side, deformation of the still warm document can be avoided.
- Do not pull or push the pouch and do not switch off the laminator during normal lamination.
Recommended materials
- Your Leitz laminator is suitable for lamination of most printed papers, copier, laser and ink jet papers with laminating pouches of 75 µm (mic.) to 125 µm up to a maximum thickness of 0.6 mm.
- To improve the results using thicker materials like photographs, coated inkjet and laser papers, the laminator offers a PHOTO setting.
- To ensure high-quality results, use Leitz brand pouches only. This also helps to prolong the lifetime of the device.
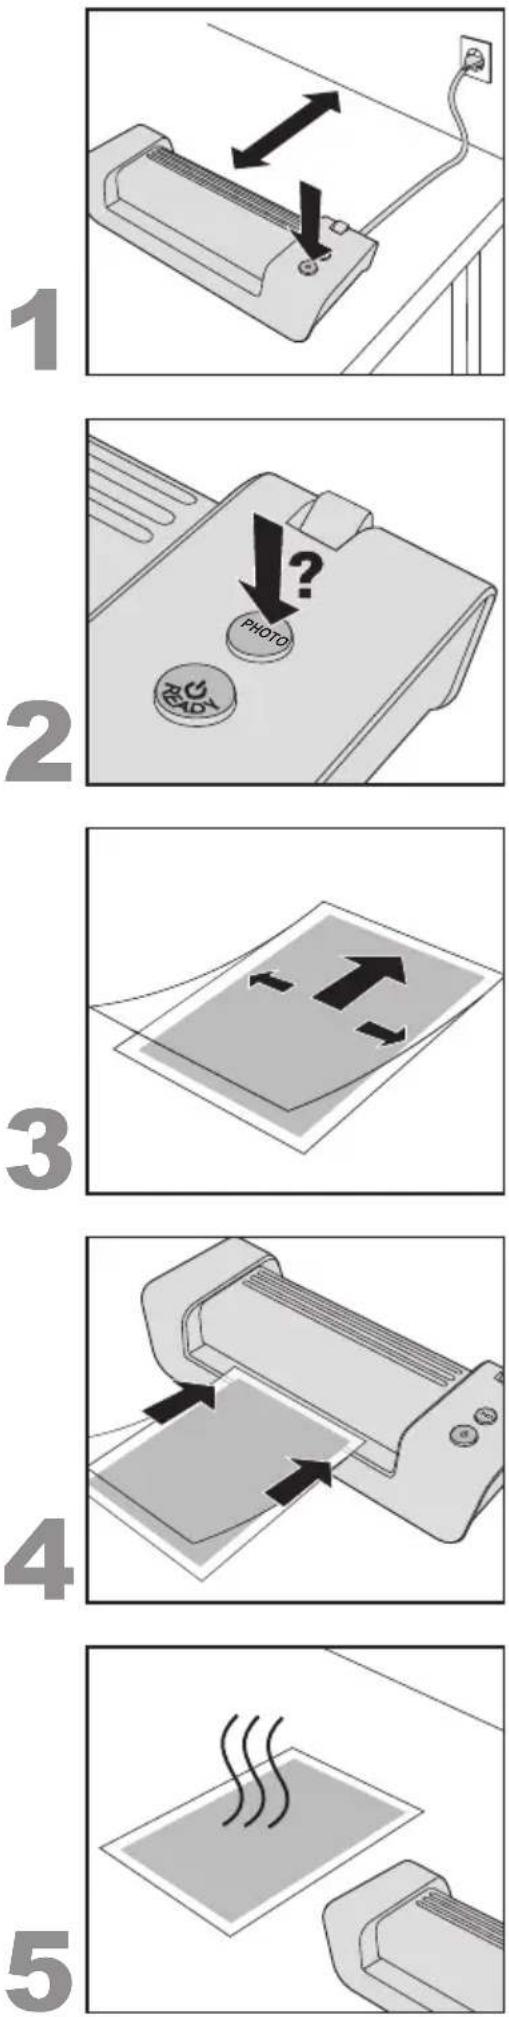
Laminating, simple as that!
1. Setting up and switching on the laminator
- Set the laminator up on a stable surface (e.g. table) close to a mains outlet. Ensure there is sufficient space behind the unit so the laminated item is not blocked and can easily be removed.
- Connect mains cord with mains socket.
- Press the On/Off button (
The On/Off button lights up red and the laminator heats up. When the working temperature has been reached, the button lights green (READY).
2. Choose PHOTO setting if necessary
- If you want to laminate thicker materials like photographs, coated inkjet and laser papers press the PHOTO button Ⓔ, so that it lights.
When laminating thinner materials (e. g. writing paper) the button should not light.
3. Inserting the document into the pouch
- Insert the document into the laminating pouch. Align it to the upper side as much as possible and maintain even margins on both sides.
Pouches that are too large can be trimmed to size after lamination.
4. Laminating
Important: Lamination is permanent. Before laminating unique pieces, test the process with a similar item.
- When the On/Off button ( lights green, insert the pouch with the sealed side first and centrally into the input tray until it gets pulled in.
The laminated document automatically exits at the output tray. You can improve the result by holding the document at the same time straight and level with one hand.
5. Letting the laminated document cool down
- Remove the laminated document and leave it on a flat surface for one minute to cool down.
- When you have no further documents to laminate, switch off the laminator.
natural_image
Illustration of hands using a roll-up scanner to press or adjust a flat sheet (no text or symbols visible)Clearing a jammed pouch
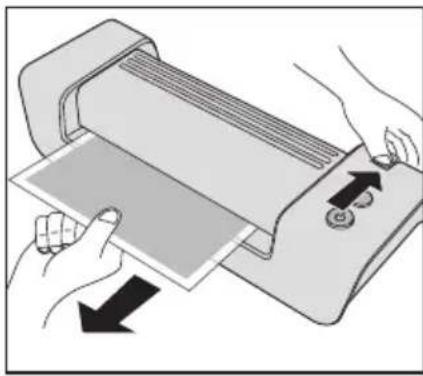
Jamming can occur when laminating unsuitable materials or using pouches not recommended by Leitz.
CAUTION: To prevent any damages to the laminator, the pouch must be removed before switching off the unit. To accomplish this, proceed as follows:
- Press the Release lever down and pull out the pouch immediately (see figure on the left).
– Clean the rollers after any pouch jam as described in section "Maintenance and care".
Other problems
- Blisters or wrinkles on the print: Blisters or wrinkles on the print: Too much heat. If the PHOTO button lights, press it to disable the PHOTO setting.
- White or cloudy patches: Pouch and/or laminated item too thick. Check whether suitable pouches/materials have been used (see specifications).
- Patches in margin: - Document too thick to be laminated. - Pouch too thick. Check whether correct pouch thickness has been used (see specifications).
natural_image
Two-step diagram showing a document being folded and then being placed on a paper sheet, labeled A and B (no text or symbols on the diagrams themselves)Maintenance and care
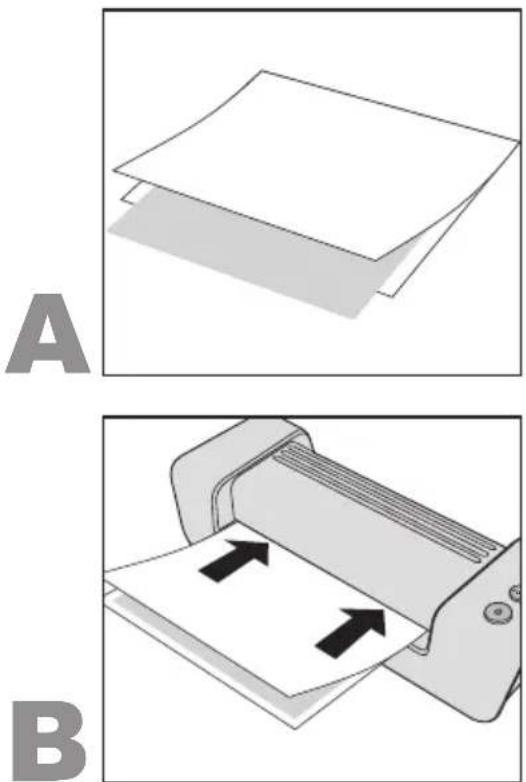
In order to remove superfluous adhesive from inside the device, clean the rollers regularly as described here:
- Switch on the laminator ( Wait until the button lights green.
- Press the PHOTO button so that it lights.
- Fold a sheet of unused copying paper once in the middle. Insert the supplied Laminator Cleaning Sheet into the folded paper (see figure A).
- Insert the paper with the folded side first into the input tray 3–5 times (see figure B).
To clean the housing:
- Pull out mains plug and wait for the device to cool down.
- Wipe the exterior with a soft, damp cloth and a dishwashing detergent.

3 year guarantee
To be returned with the device if defective.
LEITZ devices are sold with a 3 year guarantee.
The conditions of the guarantee period of 3 years are as follows:
- Each device is guaranteed against all defects in material and/or workmanship for a period of 3 years from the date of purchase.
- No device will be accepted without written notification from the customer giving details of the problem that has occurred, and proof of the date of purchase.
- All devices for repair are to be returned to Esselte with adequate packaging. No liability will be accepted by Esselte for goods damaged in transit from the customer, due to inadequate attention to packaging.
- The supplier will be responsible for all parts and labour charges as necessary to the device. The 3 year guarantee is subject to the following conditions:
a) That the device has been used strictly in accordance with the operating instructions supplied with the device.
b) That if the benefit of this guarantee is sought, the device must be returned, carriage paid to Esselte. Esselte does not accept responsibility for loss or damage in transit.
c) That the guarantee is invalid if the defects are found to be caused by accident, misuse, alteration or neglect.
d) That no liability of Esselte is to be implied here for damage, loss or expense of any kind resulting from, consequence upon, or in any way due to any fault whatsoever in the instrument or its accessories.
e) That this guarantee does not affect you statutory rights as a consumer.
In order to allow fast and smooth processing in case of a guarantee claim, please register at: http://www.leitz.com/lamination

Date of Purchase:
Model No. Serial No.:
Company Name:
Contact person:
Address:
Telephone/Fax No:
ESSELTE UK Ltd. Esselte Ireland Limited
Waterside House, Cowley Business Park, Westlink Industrial Estate,
Uxbridge, Middlesex, Kylemore Road,
UB8 2HP Dublin 10
UNITED KINGDOM IRELAND
Tel.: 0870 9090609 Tel: +353-1-6268438
Fax: 01895 878901 Fax: +353-1-6269798
www.esselte.ie
Disposal of old equipment
This symbol of a crossed out waste bin on a product, its packaging and/or accompanying documents means that the product is subject to the European directive 2002/96/EC as well as national law for implementation of the directive.
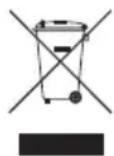
Directive and law prescribe that electrical and electronic products must not be disposed of with household waste. The customer must dispose of the product by delivering it to a designated station for collection, treatment and recycling of waste electrical and electronic equipment.
The correct disposal of your old appliance is free of charge and will help prevent potential negative consequences for the environment and human health.
For more information about disposing your old appliance, contact your city office, waste disposal service, or the shop where you purchased the product.
Specifications
| Working mode/Heating system 2-roller, carrierless | |
| Laminating speed 414 mm/min | |
| Pre-heat time about 6 min | |
| Recommended pouch thickness 80(75)-125 μm | |
| Max. thickness of laminated item | 0.6 mm |
| Maximum working width,i-Lam easy A4 / i-Lam easy A3 | 230 / 320 mm |
| Power supply | 230 V AC |
| Power consumption,i-Lam easy A4 / i-Lam easy A3 | 285 / 435 W |
| Net weight,i-Lam easy A4 / i-Lam easy A3 | 2.1 / 2.6 kg |
| Dimensions (W x D x H),i-Lam easy A4 | 397 x 146 x 99 mm |
| i-Lam easy A3 | 487 x 146 x 99 mm |
| Enclosure material | ABS |
Subject to technical changes without prior notice.

Sommaire
natural_image
Illustration of hands using a roll-up scanner to press or adjust a sheet of paper (no text or symbols visible)natural_image
Two-step diagram showing a document being folded and then being placed on a paper sheet, labeled A and B (no text or symbols on the diagrams themselves)natural_image
Illustration of hands using a roll-up scanner to press or adjust a sheet of paper (no text or symbols visible)natural_image
Two-step diagram showing a stack of papers being folded into a printer, labeled A and B (no text or symbols on the diagrams themselves)Wartung und Pflege
natural_image
Illustration of hands using a roll-up scanner to press or adjust a sheet of paper (no text or symbols visible)natural_image
Two-step diagram showing a document being folded and then being placed on a paper sheet, labeled A and B (no text or symbols on the diagrams themselves)Manutenzione e cura
natural_image
Illustration of hands using a roll-up scanner to press or adjust a flat sheet (no text or symbols visible)Solución de atascos
natural_image
Simple line drawing of a folded paper or sheet with a shadow, labeled 'A' on the left (no text or symbols on the diagram itself)Mantenimiento
natural_image
Diagram of a printer printing paper with two arrows indicating direction (no text or symbols present)3 años de garantía
natural_image
Illustration of hands using a roll-up scanner to press or adjust a sheet of paper (no text or symbols visible)natural_image
Two-step diagram showing a document being folded and being placed into a printer (no text or symbols present)natural_image
Illustration of hands using a roll-up scanner to press or adjust a sheet of paper (no text or symbols visible)Lamineerhoesblokkade verhelpen
natural_image
Two-step diagram showing a stack of papers being folded and then being placed on a paper sheet, labeled A and B (no text or symbols on the diagrams themselves)natural_image
Illustration of hands using a roll-up scanner to press or adjust a sheet of paper (no text or symbols visible)natural_image
Two-step diagram showing a stack of papers being folded and then being placed on a paper sheet, labeled A and B (no text or symbols on the diagrams themselves)natural_image
Illustration of hands using a roll-up scanner to press or adjust a sheet of paper (no text or symbols visible)Fjerne foliestopp
natural_image
Two-step diagram showing a document being folded and being placed into a printer (no text or symbols present)natural_image
Illustration of hands using a roll-up scanner to press or adjust a flat sheet (no text or symbols visible)natural_image
Two-step diagram showing a document being folded and then being inserted into a paper holder, labeled A and B (no text or symbols on the diagrams themselves)natural_image
Diagram of a printer or printer with two arrows indicating paper movement (no text or symbols present)3 års garanti
natural_image
Illustration of hands using a roll-up scanner to press or adjust a sheet of paper (no text or symbols visible)natural_image
Simple line drawing of a folded paper or sheet with a shadow, labeled 'A' on the left (no text or symbols on the diagram itself)Huolto ja hoito
natural_image
Diagram of a printer printing paper with two arrows indicating direction (no text or symbols present)3 vuoden takuu
natural_image
Illustration of hands using a roll-up scanner to press or adjust a flat sheet (no text or symbols visible)natural_image
Illustration of hands using a roll-up scanner to press or adjust a flat sheet (no text or symbols visible)natural_image
Two-step diagram showing a document being folded and being placed into a printer (no text or symbols present)natural_image
Illustration of hands using a roll-up scanner to press or adjust a flat sheet (no text or symbols visible)natural_image
Illustration of hands using a roll-up scanner to press or adjust a flat sheet (no text or symbols visible)natural_image
Simple line drawing of a folded paper or sheet with a shadow, labeled 'A' on the left (no text or symbols on the diagram itself)natural_image
Diagram of a printer printing paper with two arrows indicating direction (no text or symbols present)natural_image
Illustration of hands using a roll-up scanner to press or adjust a sheet of paper (no text or symbols visible)natural_image
Simple line drawing of a folded paper or sheet with a shadow, labeled 'A' on the left (no text or symbols on the diagram itself)natural_image
Diagram of a printer printing paper with two arrows indicating direction (no text or symbols present)natural_image
Illustration of hands using a roll-up scanner to press or adjust a flat sheet (no text or symbols visible)natural_image
Two-step diagram showing a document being folded into a printer, labeled A and B (no text or symbols on the diagrams themselves)natural_image
Illustration of hands using a roll-up scanner to press or adjust a sheet of paper (no text or symbols visible)natural_image
Two-step diagram showing a document being folded and being placed into a paper holder, labeled A and B (no text or symbols on the diagrams themselves)Údržba a ošetřování
natural_image
Illustration of hands using a roll-up scanner to press or adjust a flat sheet (no text or symbols visible)natural_image
Two-step diagram showing a document being folded and then being placed on a paper sheet, labeled A and B (no text or symbols on the diagrams themselves)natural_image
Illustration of hands using a roll-up scanner to press or adjust a sheet of paper (no text or symbols visible)natural_image
Two-step diagram showing a document being folded and then being placed on a paper sheet, labeled A and B (no text or symbols on the diagrams themselves)natural_image
Illustration of hands using a roll-up scanner to press or adjust a flat sheet (no text or symbols visible)natural_image
Two-step diagram showing a stack of papers being folded and then being placed on a paper sheet, labeled A and B (no text or symbols on the diagrams themselves)natural_image
Diagram of a printer printing paper with two arrows indicating orientation (no text or symbols present)3 ani garanție
natural_image
Illustration of hands using a roll-up scanner to press or adjust a flat sheet (no text or symbols visible)natural_image
Simple line drawing of a folded paper or sheet with a shadow, labeled 'A' on the left (no text or symbols on the diagram itself)natural_image
Diagram of a printer printing paper with two arrows indicating direction (no text or symbols present)