GOP 12V28 Professional - Slicer BOSCH - Free user manual and instructions
Find the device manual for free GOP 12V28 Professional BOSCH in PDF.
User questions about GOP 12V28 Professional BOSCH
0 question about this device. Answer the ones you know or ask your own.
Ask a new question about this device
Download the instructions for your Slicer in PDF format for free! Find your manual GOP 12V28 Professional - BOSCH and take your electronic device back in hand. On this page are published all the documents necessary for the use of your device. GOP 12V28 Professional by BOSCH.
USER MANUAL GOP 12V28 Professional BOSCH
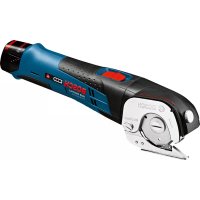
GOP 12V-28 Professional
Robert Bosch Power Tools GmbH
YkpaHcbKa ..CtoPiKa 169
Kaak. 179
MaKeDoHcN.. CtpaHua 208
Srpski Strana 217
Slovensca. Stran 226
General Power Tool SafetyWarnings
WARNING
Read all safety warnings, instructions, illustrations and specifica
tions provided with this power tool. Failure to follow all instructions listed below may result in electric shock, fire and/ or serious injury.
Save all warnings and instructions for future reference.
The term "power tool" in the warnings refers to your mains-operated (corded) power tool or battery-operated (cordless) power tool.
Work area safety
- Keep work area clean and well lit. Cluttered or dark areas invite accidents.
Do not operate power tools in explosive atmospheres, such as in the presence of flammable liquids, gases or dust. Power tools create sparks which may ignite the dust or fumes. - Keep children and bystanders away while operating a power tool. Distractions can cause you to lose control.
Electrical safety
Power tool plugs must match the outlet. Never modify the plug in any way. Do not use any adapter plugs with earthed (grounded) power tools. Unmodified plugs and matching outlets will reduce risk of electric shock.
- Avoid body contact with earthed or grounded surfaces, such as pipes, radiators, ranges and refrigerators. There is an increased risk of electric shock if your body is earthed or grounded.
Do not expose power tools to rain or wet conditions. Water entering a power tool will increase the risk of electric shock.
Do not abuse the cord. Never use the cord for carrying, pulling or unplugging the power tool. Keep cord away from heat, oil, sharp edges or moving parts. Damaged or entangled cords increase the risk of electric shock.
When operating a power tool outdoors, use an extension cord suitable for outdoor use. Use of a cord suitable for outdoor use reduces the risk of electric shock.
If operating a power tool in a damp location is unavoidable, use a residual current device (RCD) protected supply. Use of an RCD reduces the risk of electric shock.
Personal safety
Stay alert, watch what you are doing and use common sense when operating a power tool. Do not use a power tool while you are tired or under the influence of drugs, alcohol or medication. A moment of inattention while operating power tools may result in serious personal injury.
Use personal protective equipment. Always wear eye protection. Protective equipment such as a dust mask, non-skid safety shoes, hard hat or hearing protection used for appropriate conditions will reduce personal injuries.
Prevent unintentional starting. Ensure the switch is in the off-position before connecting to power source and/or battery pack, picking up or carrying the tool. Carrying power tools with your finger on the switch or energising power tools that have the switch on invites accidents.
Remove any adjusting key or wrench before turning the power tool on. A wrench or a key left attached to a rotating part of the power tool may result in personal injury.
Do not overreach. Keep proper footing and balance at all times. This enables better control of the power tool in unexpected situations.
Dress properly. Do not wear loose clothing or jewellery. Keep your hair and clothing away from moving parts. Loose clothes, jewellery or long hair can be caught in moving parts.
If devices are provided for the connection of dust extraction and collection facilities, ensure these are connected and properly used. Use of dust collection can reduce dust-related hazards.
Do not let familiarity gained from frequent use of tools allow you to become complacent and ignore tool safety principles. A careless action can cause severe injury within a fraction of a second.
Power tool use and care
Do not force the power tool. Use the correct power tool for your application. The correct power tool will do
the job better and safer at the rate for which it was designed.
Do not use the power tool if the switch does not turn it on and off. Any power tool that cannot be controlled with the switch is dangerous and must be repaired.
- Disconnect the plug from the power source and/or remove the battery pack, if detachable, from the power tool before making any adjustments, changing accessories, or storing power tools. Such preventive safety measures reduce the risk of starting the power tool accidentally.
- Store idle power tools out of the reach of children and do not allow persons unfamiliar with the power tool or these instructions to operate the power tool. Power tools are dangerous in the hands of untrained users.
- Maintain power tools and accessories. Check for misalignment or binding of moving parts, breakage of parts and any other condition that may affect the power tool's operation. If damaged, have the power tool repaired before use. Many accidents are caused by poorly maintained power tools.
- Keep cutting tools sharp and clean. Properly maintained cutting tools with sharp cutting edges are less likely to bind and are easier to control.
Use the power tool, accessories and tool bits etc. in accordance with these instructions, taking into account the working conditions and the work to be performed. Use of the power tool for operations different from those intended could result in a hazardous situation.
- Keep handles and grasping surfaces dry, clean and free from oil and grease. Slippery handles and grasping surfaces do not allow for safe handling and control of the tool in unexpected situations.
Battery tool use and care
- Recharge only with the charger specified by the manufacturer. A charger that is suitable for one type of battery pack may create a risk of fire when used with another battery pack.
Use power tools only with specifically designated battery packs. Use of any other battery packs may create a risk of injury and fire.
When battery pack is not in use, keep it away from other metal objects, like paper clips, coins, keys, nails, screws or other small metal objects, that can make a connection from one terminal to another. Shorting the battery terminals together may cause burns or a fire.
Under abusive conditions, liquid may be ejected from the battery; avoid contact. If contact accidentally occurs, flush with water. If liquid contacts eyes, additionally seek medical help. Liquid ejected from the battery may cause irritation or burns.
Do not use a battery pack or tool that is damaged or modified. Damaged or modified batteries may exhibit unpredictable behaviour resulting in fire, explosion or risk of injury.
Do not expose a battery pack or tool to fire or excessive temperature. Exposure to fire or temperature above 130^ may cause explosion.
Follow all charging instructions and do not charge the battery pack or tool outside the temperature range specified in the instructions. Charging improperly or at temperatures outside the specified range may damage the battery and increase the risk of fire.
Service
Have your power tool serviced by a qualified repair person using only identical replacement parts. This will ensure that the safety of the power tool is maintained.
- Never service damaged battery packs. Service of battery packs should only be performed by the manufacturer or authorized service providers.
Safety information for multi-cutters
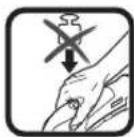
Hold power tool by insulated gripping surfaces, when performing an operation where the cutting accessory may contact hidden wiring. Cutting accessory contacting a "live" wire may make exposed metal parts of the power tool "live" and could give the operator an electric shock.
Only use the power tool for dry sanding. Water entering a power tool will increase the risk of electric shock.
Warning: Danger of fire! Avoid overheating the workpiece and the sander. Always empty the dust collector before taking a break from work. Sanding dust in the dust bag, microfilter, paper bag (or in the filter bag or vacuum cleaner filter) can spontaneously combust under certain conditions, for example if flying sparks are created when sanding metals. This risk is increased if the sanding dust is mixed with paint or polyurethane residue or with other chemical substances and if the workpiece is hot as a result of prolonged work.
- Keep hands away from the sawing area. Do not reach under the workpiece. Contact with the saw blade can lead to injuries.
Clean the air vents on your power tool regularly. The motor's fan will draw the dust inside the housing and excessive accumulation of powdered metal may cause electrical hazards.
Use suitable detectors to determine if there are hidden supply lines or contact the local utility company for assistance. Contact with electric cables can cause fire and electric shock. Damaging gas lines can lead to explosion. Breaking water pipes causes property damage.
Hold the power tool firmly with both hands and make sure you have a stable footing. The power tool can be more securely guided with both hands.
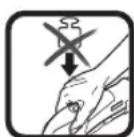
When changing the application tool, wear protective gloves. Application tools can become hot when used for prolonged periods of time.
Do not scrape any dampened materials (e.g. wallpaper) or on damp surfaces. Water entering a power tool increases the risk of electric shock.
16 | English
Do not treat the surface you will be working on with any fluids that contain solvents. Poisonous vapours may develop due to the materials heating up when being scraped.
Take particular care when handling scrapers and blades. The application tools are very sharp. Danger of injury.
- Secure the workpiece. A workpiece clamped with clamping devices or in a vice is held more secure than by hand.
In case of damage and improper use of the battery, vapours may be emitted. Ensure the area is well-ventilated and seek medical attention should you experience any adverse effects. The vapours may irritate the respiratory system.
Do not open the battery. There is a risk of short-circuiting.
The battery can be damaged by pointed objects such as nails or screwdrivers or by force applied externally. An internal short circuit may occur, causing the battery to burn, smoke, explode or overheat.
Only use the battery with products from the manufacturer. This is the only way in which you can protect the battery against dangerous overload.

Protect the battery against heat, e.g. against continuous intense sunlight, fire, water, and moisture. There is a risk of explosion.
Product description and specifications

Read all the safety and general instructions. Failure to observe the safety and general instructions may result in electric shock, fire and/or serious injury.
Please observe the illustrations at the beginning of this operating manual.
Intended use
The power tool is intended for sawing and cutting wood-based materials, plastic, plasterboard, non-ferrous metals and mounting elements (e.g. non-hardened nails, clamps). It is also suitable for working on soft wall tiles and for dry sand-ing and scraping of small areas. It is ideal for working close to edges and flush with surfaces. The power tool must only be operated using Bosch accessories.
Product features
The numbering of the product features refers to the diagram of the power tool on the graphics page.
(1) On/off switch
(2) Battery release button
(3) Battery
(4) Ventilation slots
(5) Orbital stroke rate preselection thumbwheel
(6) Battery charge indicator
(7) Tool holder
(8) Clamping lever of the depth stop
(9) Depth stop
(10) Plunge cut saw blade
(11) Clamping bolt
(12) Hex key
(13) Handle (insulated gripping surface)
(14) Dust extraction system
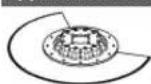
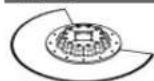
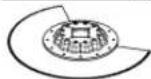
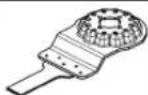
(15) Sanding plate1)
(16) Sanding sheet
(17) Clamping lever for dust extraction system
(18) Dust extraction outlet
(19) Dust extraction adapter
(20) Dust extraction hose^A1
A) Accessories shown or described are not included with the product as standard. You can find the complete selection of accessories in our accessories range.
Technical data
| Cordless multi-cutter GOP 12V-28 | ||
| Article number | 3601 HB5 0.. | |
| Rated voltage V= 12 | ||
| No-load speed n0 | rpm | 5000-20000 |
| Oscillation angle on left/right ° 1.4 | ||
| Weight according to EPTA Procedure 01:2014 | kg | 0.97-1.2 A) |
| Permitted ambient temperature | ||
| - during charging °C 0 to +45 | ||
| - during operation b) and dur-ing storage | °C | -20 to +50 |
| Recommended batteries GBA 10,8V... | GBA 12V... | |
| GBA 12V...W | ||
| Recommended chargers GAL 11... CV | GAL 12... CV | |
| GAL 18...W | ||
A)Depends on battery in use
B) Limited performance at temperatures < 0^
Technical data determined using the battery that comes with the product.
Noise/vibration information
Noise emission values determined according to EN 62841-2-4.
Typically, the A-weighted sound pressure level of the power tool is 79 dB(A). Uncertainty K = 3 dB. The noise level when working can exceed 80 dB(A).
Wear hearing protection!
Total vibration values a_r (triax vector sum) and uncertainty K determined according to EN 62841-2-4:
Sanding: a_h = 3m / s^2 = 1.5m / s^2
sawing with plunge cut saw blade: a_h = 9m / s^2 K = 1.5m / s^2 sawing with segment saw blade: a_h = 2.5m / s^2 K = 1.5m / s^2 scraping: a_h = 8.5m / s^2 K = 1.5m / s^2
The vibration level and noise emission value given in these instructions have been measured in accordance with a standardised measuring procedure detailed in EN 62841 and may be used to compare power tools. They may also be used for a preliminary estimation of vibration and noise emissions.
The given vibration level and noise emission value represent the main applications of the power tool. However, if the power tool is used for other applications, with different application tools or is poorly maintained, the vibration level and noise emission value may differ. This may significantly increase the vibration and noise emissions over the total working period.
To estimate vibration and noise emissions accurately, the times when the tool is switched off or when it is running but not actually being used should also be taken into account. This may significantly reduce vibration and noise emissions over the total working period.
Implement additional safety measures to protect the operator from the effects of vibration, such as servicing the power tool and application tools, keeping the hands warm, and organising workflows correctly.
Fitting
- Remove the battery from the power tool before carrying out work on the power tool (e.g. maintenance, changing tool, etc.). The battery should also be removed for transport and storage. There is risk of injury from unintentionally pressing the on/off switch.
Charging the battery
Use only the chargers listed in the technical data. Only these chargers are matched to the lithium-ion battery of your power tool.
Note: The battery is supplied partially charged. To ensure full battery capacity, fully charge the battery in the charger before using your power tool for the first time.
The following table shows examples of application tools. You can find additional application tools in Bosch's extensive range of accessories.
The lithium-ion battery can be charged at any time without reducing its service life. Interrupting the charging process does not damage the battery.
The lithium-ion battery is protected against deep discharge by the "Electronic Cell Protection (ECP)". When the battery is discharged, the power tool is switched off by means of a protective circuit: The application tool no longer rotates.
To remove the battery (3), press the release buttons (2) and pull the battery back and out of the power tool. Do not use force to do this.
Follow the instructions on correct disposal.
Battery charge indicator
The three green LEDs on the battery charge indicator (6) indicate the state of charge of the battery (3). The battery charge indicator only lights up for five seconds after startup.
LED Capacity
Continuous lighting 3 × green ≥ 2 / 3
Continuous lighting 2 × green ≥ 1 / 3
Continuous lighting 1 x green < 1/3
Flashing light 1 x green Reserve
Flashing light 3 x green Empty
If no LED lights up after switching the power tool on, then the battery is defective and must be replaced.
Changing the tool
Wear protective gloves when changing tools. There is a risk of injury when touching the application tools.
Selecting an application tool
Please observe the application tools intended for your power tool.
Application tool GOP 12V-28


Application tool Material Application
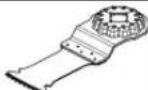
Bi-metal segment saw blade
Wood-based materials, plastic, non-ferrous metals
Separating cuts and plunge saw cuts; including sawing close to edges, in corners and in difficult-to-reach areas; example: Shortening skirting boards that are already installed or door frames, plunge cuts when adapting floor panels
18 | English
Application tool Material Application
| Sanding plate for Delta series 93 mm sanding sheets | Depends on the sanding sheet | Sanding surfaces at edges, in corners or in difficult-to-reach areas; depending on the sanding sheet, e.g. for sanding wood, paint, varnish, stone; fleeces for cleaning and for texturing wood, removing rust from metal and for keying varnish, polishing felt for pre-polishing | |
| Profile sander Wood, pipes/profiles, paint, varnish, filler, metal | Convenient and efficient sanding of profiles up to a diameter of 55 mm; red sanding sheets for sanding wood, pipes/profiles, varnish, filler and metal | ||
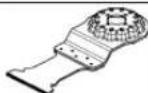
| Bi-metal plunge cut saw blade for wood and metal | Softwood, soft plastics, plasterboard, thin-walled aluminium profiles and non-ferrous metal profiles, thin sheet metal, non-hardened nails and screws | Small separating cuts and plunge cuts; example: Cutting a recess for sockets, cutting a copper pipe so that it is flush with a surface, making plunge cuts in plasterboard Delicate adaptation work in wood; example: Sawing recesses for locks and fittings | |
| HCS plunge cut saw blade for wood | Wood-based materials, soft plastics | Separating cuts and plunge saw cuts; including sawing close to edges, in corners and in difficult-to-reach areas; example: Thin plunge cut in solid wood for installing a ventilation grille | |
| Bi-metal plunge cut saw blade for hard-wood | Hardwood, laminated boards | Plunge cuts in laminated boards or hardwood; example: Installation of skylights | |
| TC plunge cut saw blade, metal | Metal, extremely abrasive materials, fiberglass, plasterboard, cement-bonded fibreboard | Plunge cuts in extremely abrasive materials or metal; example: Cutting kitchen front covers, easy cutting through hardened screws, nails and stainless steel | |
| Bi-metal plunge cut saw blade for wood and metal | Softwood, hardwood, veneered boards, plastic-coated boards, non-hardened nails and screws | Plunge cuts in laminated boards or hardwood; example: Shortening door frames, recesses for a shelf | |
| TC-Riff segment saw blade | Cement joints, soft wall tiles, fiberglass-reinforced plastics, porous concrete | Making cuts near edges, in corners or in difficult-to-reach areas; example: Removing joints between wall tiles for improvement work, cutting recesses in tiles, plasterboard or plastics | |
| Diamond-Riff segment saw blade | Cement joints, soft wall tiles, epoxy resin, fibre-glass-reinforced plastics | Precise routing and cutting of tile/joint material, epoxy resin and fiberglass-reinforced plastics; example: Producing small cut-outs in soft wall tiles and routing recesses in fiberglass-reinforced plastic | |
| TC-Riff Delta plate | Mortar, concrete residue, wood, abrasive materials | Rasping and sanding on a hard surface; example: Removing mortar or tile adhesive (e.g. when replacing damaged tiles), removing carpet adhesive residue | |
| TC-Riff grout and mortar remover | Mortar, joints, epoxy resin, fiberglass-reinforced plastics, abrasive materials | Routing and cutting of joint material and tile material, as well as rasping and sanding on a hard surface; example: Removing tile adhesive and joint mortar | |
Application tool Material Application
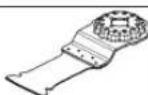
|  | HCS multi blade Roofing felt, carpets, arti- ficial turf, cardboard, PVC flooring | Fast and precise cutting of soft material and flexible abras- ive materials; example: Cutting carpets, cardboard, PVC flooring, roof- ing felt, etc. |
|  | Scraper, fixed Carpets, mortar, con- crete, tile adhesive | Scraping on a hard surface; example: Removing mortar, tile adhesive, concrete residue and carpet adhesive residue |
|  | Scraper, flexible Carpet adhesive, paint residue, silicone | Flexible scraping on a soft surface; example: Removing silicone joints, carpet adhesive residue and paint residue |
|  | Bi-metal segment serrated blade | Insulation material, insula- tion boards, floor panels, impact sound insulation boards, cardboard, car- pets, rubber, leather |
|  | TC-Riff sanding fin- ger | Wood, paint Sanding of wood or paint in hard-to-reach areas without sanding paper; example: Sanding off paint between window shutter slats, sanding wooden flooring in corners |
|  | TC-Riff plunge cut saw blade | Fibreglass, mortar, wood Plunge cuts in extremely abrasive materials; example: Routing of thin mosaic tiles |
|  | HCS universal joint cutter | Expansion joints, window putty, insulation materials (rock wool)Cutting soft materials; example: Cutting silicone expansion joints or window putty |
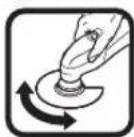
Fitting/changing the application tool
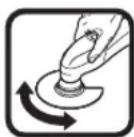
Remove the application tool if one has already been fitted. To remove the application tool, use the hex key (12) to loosen the clamping bolt (11) and remove the tool. Position the required application tool (e.g. plunge cut saw blade (10)) on the tool holder (7) so that the depressed centre is facing downwards (see figure on the graphics page, text on the application tool should be legible from above). Turn the application tool to a position which is convenient for the job at hand and allow it to lock into place in the cam
of the tool holder (7).Twelve positions offset by 30^ are possible for this.
Secure the application tool using the bolt (11). Tighten the bolt using the hex key (12) until the rounded head of the bolt is lying flat against the application tool.
Check that the application tool is seated securely. Application tools that are attached incorrectly or are not securely fixed in place may come loose during operation, thereby putting you at risk.
Selecting a sanding sheet
Different sanding sheets are available, depending on the material you are working with and the required surface removal rate:
| Sanding sheet Material Application Grit | |||
| - All wood and wood-based materials (e.g. hardwood, softwood, chipboard, construction boards) - Metal materials | For pre-sanding, e.g. of rough and uneven beams and boards | Coarse 40 | 60 |
| For surface sanding and levelling of slight irregularities Medium 80 | 100 | ||
| 120 | |||
| For finish-sanding and fine sanding of wood Fine | 180 | ||
| 240 | |||
| 320 | |||
| 400 | |||
20 | English
Sanding sheet Material Application Grit
| - Paint - Varnish | For sanding down paint Coarse 40 | 60 |
| - Filler - Bodyfiller | For sanding undercoats (e.g. removing brushstrokes, paint drips and paint runs) | Medium 80 100 120 |
| For final sanding of primers prior to painting Fine 180 | ||
| 240 | ||
| 320 | ||
| 400 |
Attaching/changing the sanding sheet on the sanding plate
The sanding plate (15) is fitted with a hook-and-loop fastening, allowing sanding sheets with a hook-and-loop backing to be secured quickly and easily.
Tap the hook-and-loop fastening of the sanding plate (15) before fitting the sanding sheet (16) to facilitate maximum adhesion.
Position the sanding sheet (16) so that it is flush with one side of the sanding plate (15), then place the sanding sheet on the sanding plate and press it on firmly.
To ensure optimum dust extraction, make sure that the punched holes in the sanding sheet are aligned with the drilled holes in the sanding plate.
To remove the sanding sheet (16), take hold of it by a corner and pull it away from the sanding plate (15).
You can use all sanding sheets, polishing and cleaning fleeces from the Delta 93 mm series in Bosch's range of accessories.
Sanding accessories such as fleece/polishing felt are attached to the sanding plate in the same way.
Dust/chip extraction
The dust from materials such as lead paint, some types of wood, minerals and metal can be harmful to human health. Touching or breathing in this dust can trigger allergic reactions and/or cause respiratory illnesses in the user or in people in the near vicinity.
Certain dusts, such as oak or beech dust, are classified as carcinogenic, especially in conjunction with wood treatment additives (chromate, wood preservative). Materials containing asbestos may only be machined by specialists.
-
Use a dust extraction system that is suitable for the material wherever possible.
-
Provide good ventilation at the workplace.
-
It is advisable to wear a P2 filter class breathing mask.
The regulations on the material being machined that apply in the country of use must be observed.
Avoid dust accumulation at the workplace. Dust can easily ignite.
Connecting the dust extraction system (see figure A)
The dust extraction system (14) is only designed for use with the sanding plate (15); it serves no purpose when used together with other application tools.
Always connect a dust extraction system for sanding. Remove the application tool for fitting the dust extrac system (14) (accessory).
Slide the dust extraction system (14) as far as it will go over the tool holder (7) onto the collar of the power tool. Turn the dust extraction system to the required position (not directly under the power tool). Push the clamping lever (17) shut to fix the dust extraction system in position.
Attach the dust extraction adapter (19) of the dust extraction hose (20) to the dust extraction outlet (18). Connect the dust extraction hose (20) to a dust extractor (accessory).
You will find an overview of connecting to various dust extractors on the graphics pages.
The dust extractor must be suitable for the material being worked.
When extracting dry dust that is especially detrimental to health or carcinogenic, use a special dust extractor.
Operation
Starting Operation
Inserting the battery
Use only original Bosch lithium-ion batteries with the voltage stated on the type plate of your power tool.
Using other batteries can lead to injuries and pose a fire hazard.
Note: The use of batteries unsuitable for your power tool can lead to malfunctions or damage to the power tool.
Insert the charged battery (3) into the handle until you feel it engage and it is flush with the handle.
Switching on/off
Make sure that you are able to press the On/Off switch without releasing the handle.
To switch on the power tool, slide the on/off switch (1) forward so that "1" appears on the switch.
To switch off the power tool, slide the on/off switch (1) backward so that "0" appears on the switch.
Note: If the power tool shuts down automatically because the battery is flat or overheated, switch the power tool off using the on/off switch (1).
Charge the battery or let it cool down before switching the
power tool on again. Failure to do so can damage the battery.
Preselecting the orbital stroke rate
You can even preselect the required orbital stroke rate during operation using the orbital stroke rate preselection thumbwheel (5).
The required orbital stroke rate is dependent on the material and the work conditions and can be determined using practical tests.
Orbital stroke rate level "6" is recommended for sawing, cutting and sanding harder materials, such as wood or metal; orbital stroke rate level "4" is recommended for softer materials, such as plastic.
Practical Advice
- Remove the battery from the power tool before carrying out work on the power tool (e.g. maintenance, changing tool, etc.). The battery should also be removed for transport and storage. There is risk of injury from unintentionally pressing the on/off switch.
Always wait until the power tool has come to a complete stop before placing it down.
Note: Do not keep the ventilation slots (4) on the power tool closed when working as this will reduce the service life of the power tool.
Operating principle
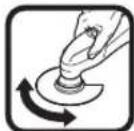
The oscillating drive causes the application tool to oscillate back and forth by 2.8^ up to 20,000 times per minute. This enables precise work in the tightest of spaces.
Use a consistent, low contact pressure when performing work; otherwise, the performance will be impaired and the application tool may jam.
While working, move the power tool back and forth to prevent the application tool overheating and jamming.
Sawing
Use only undamaged saw blades that are in perfect condition. Bent or dull saw blades can break, negatively influence the cut, or lead to kickback.
- When sawing lightweight materials, take into account the statutory provisions and recommendations of the material manufacturers.
Plunge cuts may only be applied to soft materials, such as wood, gypsum board, etc.
Before using HCS saw blades to saw into wood, chipboard, building materials, etc., check these saw blades for foreign objects, such as nails, screws, etc. Remove the foreign objects as required or use bi-metal saw blades.
Cutting
Note: When cutting wall tiles, please bear in mind that the application tools are subject to high wear if used for extended periods.
Sanding
The material removal rate and sanding result are primarily determined by the choice of sanding sheet, the preselected orbital stroke rate level and the contact pressure.
Only immaculate sanding sheets achieve good sanding performance and make the power tool last longer.
Be sure to apply consistent contact pressure in order to increase the lifetime of the sanding sheets.
Excessively increasing the contact pressure will not lead to increased sanding performance, rather it will cause more severe wear of the power tool and of the sanding sheet.
To sand corners, edges and hard-to-reach areas accurately, you can also work with the tips alone or with an edge of the sanding plate.
The sanding sheet may heat up significantly when used to sand specific points rather than entire surfaces. Reduce the orbital stroke rate and contact pressure and allow the sanding sheet to cool down at regular intervals.
Do not use a sanding sheet for other materials after it has been used to work on metal.
Use only original Bosch sanding accessories.
Always connect a dust extraction system for sanding.
Scraping
Select a high orbital stroke rate level for scraping.
Work on a soft surface (e.g. wood) at a flat angle and with low contact pressure. Failure to do so may cause the scraper to cut into the surface underneath.
Temperature-dependent overload protection
In normal conditions of use, the power tool cannot be overloaded. If the power tool is overloaded or not kept within the permitted battery temperature range, the speed is reduced or the power tool switches off. At reduced speed, the power tool will run again at full speed once the permitted battery temperature is reached or the load is reduced. If it automatically shuts down, switch the power tool off, allow the battery to cool down, then switch the power tool back on.
Recommendations for Optimal Handling of the Battery
Protect the battery against moisture and water.
Only store the battery within a temperature range of -20 to 50^ . Do not leave the battery in your car in the summer, for example.
Occasionally clean the ventilation slots on the battery using a soft brush that is clean and dry.
A significantly reduced operating time after charging indicates that the battery has deteriorated and must be replaced. Follow the instructions on correct disposal.
22 | English
Maintenance and Service
Maintenance and cleaning
- Remove the battery from the power tool before carrying out work on the power tool (e.g. maintenance, changing tool, etc.). The battery should also be removed for transport and storage. There is risk of injury from unintentionally pressing the on/off switch.
To ensure safe and efficient operation, always keep the power tool and the ventilation slots clean.
Regularly clean Riff application tools (accessories) using a wire brush.
After-sales service and advice on using products
Our after-sales service responds to your questions concerning maintenance and repair of your product as well as spare parts. You can find explosion drawings and information on spare parts at: www.bosch-pt.com
The Bosch product use advice team will be happy to help you with any questions about our products and their accessories.
In all correspondence and spare parts orders, please always include the 10-digit article number given on the nameplate of the product.
Great Britain
Robert Bosch Ltd. (B.S.C.)
P.O.Box 98
Broadwater Park
North Orbital Road
Denham Uxbridge
UB95HJ
At www.bosch-pt.co.uk you can order spare parts or arrange the collection of a product in need of servicing or repair.
Tel. Service: (0344) 7360109
E-Mail: boschservicecentre@bosch.com
Ireland
Origo Ltd.
Unit 23 Magna Drive
Magna Business Park
City West
Dublin 24
Tel. Service: (01) 4666700
Fax: (01) 4666888
Australia, New Zealand and Pacific Islands
Robert Bosch Australia Pty. Ltd.
Power Tools
Locked Bag 66
Clayton South VIC 3169
Customer Contact Center
Inside Australia:
Phone: (01300) 307044
Fax: (01300) 307045
Inside New Zealand:
Phone: (0800) 543353
Fax: (0800) 428570
Outside AU and NZ:
Phone: +61 395415555
www.bosch-pt.com.au
www.bosch-pt.co.nz
Republic of South Africa
Customer service
Hotline: (011) 6519600
Gauteng - BSC Service Centre
35 Roper Street, New Centre
Johannesburg
Tel.: (011) 4939375
Fax: (011) 4930126
E-Mail: bsctools@icon.co.za
KZN - BSC Service Centre
Unit E, Almar Centre
143 Crompton Street
Pinetown
Tel.: (031) 7012120
Fax: (031) 7012446
E-Mail: bsc.dur@za.bosch.com
Western Cape - BSC Service Centre
Democracy Way, Prosperity Park
Milnerton
Tel.: (021) 5512577
Fax: (021) 5513223
E-Mail: bsc@zsd.co.za
Bosch Headquarters
Midrand, Gauteng
Tel.: (011) 6519600
Fax: (011) 6519880
E-Mail: rbsa-hq.pts@za.bosch.com
Transport
The contained lithium-ion batteries are subject to the Dangerous Goods Legislation requirements. The batteries are suitable for road-transport by the user without further restrictions.
When shipping by third parties (e.g.: by air transport or forwarding agency), special requirements on packaging and labelling must be observed. For preparation of the item being shipped, consulting an expert for hazardous material is required.
Dispatch battery packs only when the housing is undamaged. Tape or mask off open contacts and pack up the battery in such a manner that it cannot move around in the packaging. Please also observe the possibility of more detailed national regulations.
Disposal

The machine, rechargeable batteries, accessories and packaging should be sorted for environmental-friendly recycling.

Do not dispose of power tools and batteries/ rechargeable batteries into household waste!
According to the Directive 2012/19/EU, power tools that are no longer usable, and according to the Directive
2006/66/EC, defective or used battery packs/batteries, must be collected separately and disposed of in an environmentally correct manner.
Battery packs/batteries:
Li-ion:
Please observe the notes in the section on transport (see "Transport", page 22).
Français
| STARLOCK | ✓ | |
| STARLOCKPLUS | × | |
| STARLOCKMAX | × |
28 | Français
Calle Robert Bosch No. 405
C.P. 50071 Zona Industrial, Toluca - Estado de Mexico
Tel.: (52) 55 528430-62
Tel.: 8006271286
Bosch Service Center
Telegrafvej 3
2750 Ballerup
Pá www.bosch-pt.dk kan der online bestilles reservedele el-ler oprettes en reparations ordre.
Tlf. Service Center: 44898855
Fax:44898755
E-Mail: vaerktoej@dk.bosch.com
Transport
Bosch Service Center
Telegrafvej 3
2750 Ballerup
Danmark
Tel.: (08) 7501820 (inom Sverige)
Fax: (011) 187691
Transport
De litiumjonbatterier som ingar ar underkastade kraven for farligt gods. Anvandaren kanutan ytterligare forpliktelser transportera batterierna pa allman vag.
Huomioi haviysohejeet.
Hoito ja houlto
Huolto ja puhdistus
Kata nvy alayntwv eapntuwtw opate
npootuteutka yavta.Mnopei va tpaumatiote,otay ayyEe ta eAptnmuata.
Emloyepayaleiou
PiooEe npakaAaw ta npoBlenopeva yia to epyaleio oac Eapntmuata.
Epyaleo GOP 12V-28


Tov niva kouolougel aovepovtai npabelymu eapntmuw. Nepiaotepa epyaleia 8a Bpite 0eKtevnc npoypaum eapntmuw Tc Bosch.
Eaptnua Yluokxpon
Piopemloyap0mu naIv6pouoew
MeTov Tpoxio pOuianc Tnnpoemoyhc Tou apiou naivdpounoew (5) npopeite va npoennieTeT ov anarouevo apiou naivdpounoew enionc kai kat a th diapkeia nC letiouplac.
O anatoupevoaciphucnaiivbpounaeovexapatai ano to unokatepyaiaulko kai tcuavthkeepyaiaackai npopeite va to eakpijwoete pe npaktikdokui.
Kata to npioviqa, Tnv konn kai tn aeavon oaknpov uikov, onoc n.x. Euio n petao, ouvlatatai n ba0la6 api0ou naivbopounoew «6»,ota paalaka uika, onoc n.x. ouvTeiko uikó, nba0la6 api0ou naivbopounoew «4»
YnobeiEic epyaioa
Apaapeire Tnv unatapia ano to nkeptpko epyaaleio npv ano kahe epyaia oTo nkeptpoe pyaleio (x. auvtipnanaayi eApntw kAn.) Kaowc kai kat Tnv metapopaooukTou qulaaqou Tou. Se nepintwn aEannc evpyonoinoc tou diakontn ON/OFF unapxei kivdvoc tpaupataou.
Piv aothe to nAekptko epyaieo, npueve npota va aknvntonoinei.
YnOeIeN:MvKpataTic oxiaoe aepiaou (4) Tou nAekptikou epyaleiou kata thv epyaia kkeiote, eenei
diapopetika peiwotai n diapkeia zwoctou nAektpkoU epyaieiou.
Apxépyaia
Me tv naivdpouko nxyavio kivnnc taavvvetai nepa 60e to eaptnma pexi ka 20.000 opec ava letto kata 2,8.Auto kaiotaduvatn tnv akpiepyaia oeoteva oneta.
Na epyaTee je elaxiOn kai ooiOpopn nieon. Diaopopetika eiwveta ano0oon kai tautoxpova mnpei va nlokapei to eaptnja.
Kiveite kata ndiapkeia ncpyaoiac to
nlektipok epyaleio nepa-dw0e, yia va un
thetavaltoEapntma npaaonlu kai va
unnuuokapei.
Tnpovopa
Xpouponoeire mvo aooyec, xwpic nmu npovolae. Auyapevec n u npoepocnpovolauee npope va anaoov, va enbpaoov apvntka tyn konn na npokaedoukotaeta.
OTAV npioviTe Eaappa 6oiku uukua, npene va Tpeite TIC voukeic biataeic kai Tc ouotaoeiTsw KATAOKUaOTW TUV uukw.
Me nIe0do BuOiopevou npovoi eIrpentan eneepyaia mvo maakow uukov, onoc fio, yuooaviia npoouauika!
Piv apiaeTo npoviaupe npovolaaHCS oe Eilo,
poptoavidec,doikua kAn. eEyEe TaeneepyaOueva
kopatia yia eva aupata, onoc kappi, biec nnapoia
avtikeeva.AnoakpuveTuxovEvaevtikeeva kal, av
xpeiaotei, xpanotoinote dietaaikecnpovlapec.
Kon
YnodEeN:KataTIV koniPiakdiWtoixou npooeeTe,OnTa Eapntmuata oe nepintwn napatetauevnc xphonc unokivta emuaydAnpOpa.
Aeiavon
Haipaeon uikou kai n epaovian tnc aeapvevnc enpaveiae Eapovtai kupw ano tvn enuoyn tou pauauou aeavanc, Tnv npoeayevn baipda apetmu naivdpounoeov kntv aokouevn niean.
Movo ayoya pfllaa leavong exouv kaan aeavtkn ano00n kai npootateuov to nekptko epyaieio.
Hdiapkeia zwnc taw pfannw aeIavon acuavetai otav epydceoaeakwvtac ooiopopn nion.
H unepBoAriK aUeAn TnC Niean cev oyey e auon TnC apalpeoN uAikou AaA dOxuOpTe np Obpa Tou nAekTpiKou epyaleoi kai Tou pfAauo AeiaVoc.
Tia TnV ELaPetikd AkiB NLeiavon yWuWv, AkuWv KAI duonpoituv Touewu Mopeire va epyoteire pOvo me ia ywla nakn Tns nakac leiavons.
KaTn aneak aeavon to oAoo aeavoc mopei va 0epauavei unepoia. Meiwote tv apioo raaywoeyn
TnV aokouevn ncon kai aphve TAKTIKA TO pUAAo aeavonc va Kpuovel.
Mx npnnoiie Tne eva quo loeavoc, e to onoto eiveneepyaoiaetalau, yia auaik.
XpnaonoiieTe mOvo Ta yvnoia ekaptnmaT aelavanc ano Tyn Bosch.
Tia th n eiaovouvdeete nadvtoe ma avappoan oKovnc.
三u04o
Tia to Euaio eniAeTe μa Baθμδa uynλou apiOou taaviroov.
Ta maakauoortpma (n.x. Eu) va epyaeotee uikpn ywia kai me xaunnduvamnpnoanieonc. diaopetika n otatoula mnpel va koyei to unotpwua.
Robert Bosch Sp. z o.o.
Bosch Service Center PT
K Vapence 1621/16
69201 Mikulov
Data n3roTOBneHn yka3aHa Ha noCneHne CTpaHnue 06
KoHTaKTHa HnΦopMaun OTHocTeNbHO NMOpTepa coepKHTcHa ynaKOBKe.
Cpok cnky6bln3dennna
Cpok cnky6b H3eennn coctabnet 7 net. He pekomehnyet c K3Kcnpyataun no ncteyehnn 5 net xpaehnnc C daTbI n3roTOBNEHn 6e3 npedapntenbHO npOBepkn (daty n3roTOBNEHn CM. Ha 3tHKETke).
IpeueHb KpHTHuecknx OTKa3OB H OoHb6OuHbIe DeiCTBnepcoHaHa HIN NOnb3OBaTeN
-HeHCIOB3OBAbC NOBpeJDeHHo pyKoTko HIN NOBpeKDeHHbIM 3aUNTHbIM KOKyXOM
-HeHCNoIb3OBA Tb pH NIOBHeHH DbIMa HEnOpceDCTBeHHO Ⅲ KOpNyCa I3dEINr
-HeHCIOB3OBaTb Cpepe6NTbIM HIN OOrJIeHHbIM 3NeKTPHueCKIM Ka6eIeM
-HeHCIOB3OBA Tb HaOTKpblTomPPOCTpaHCTBE BO BpeMnDOXJRA(BpaCnblnEMoB OBe)
-He BKNIOUaTb PnI NOnaDaHNN BOBbl B KOpNyc
-HeNCIOJb30BaTbPnCNlbHOM HCKpeHHN
-HeHCIOJb3OBA Tb Pn IOBJIeHN CNIbHOB B6paun
Kpntepnn npedeIbIbIX COcToHHN
- neperteptnn nobpeckdE h 3neKtpnueckn kaeb
-IOBpeKdEN KOpNc H3dEINNA
TnHn nepnoaHocb texnueckoro o6cnyXbaHH
PekomeHcyTcOuHCTnB HNCTpyMeHT OTbIN NocNe KaK-DOrHOHCNOB30BaHH.
XpaHeHne
-Heo6xOJHMO XpaHHTb B CyXOM MeCTe
Heo6xoJHMO XpaHnB BdAOn OT HcTOUHKOB NOBbIeH HBIX TEMpePaTy n BO3JeCTBnCnHEhBix Nyey
- npxpaHEn HEO6xoHMo I36eraTb pe3Koro nepenada TemnepaTpy
-xpaHeHne 6e3 ynaKOBKn He dOnyckaeTcA
-fnoipo6bIe Tpe6oBaHnK yCNoBnM xpaHeHHcMoTpH Te B FOCT 15150 (YcNoBne 1)
TpaHcnpToPbOvBa
KaTeROpUeCKn He DOnyckaTcR TaJeHHe N IIOb6I MExaHueckHe BO3dEInCTBnHa YnaKOBky npN TpaHCnOpTNpOBKe
- npn pa3py3ke/nporpy3ke He donnyckaetc HcnoIb3oBaHne IIO6O Bua TeHHK, paobtaiouee no npnHunny 3axkma ynaKOBKN
- noipobhIbe Tpe6oBAnHn K yCNoBnAM TpaHCnOpTHPOBKn CMOTpHTe B FOCT 15150 (YcnoBne 5)
Yka3aHnno TeXnke 6e3oNaChOCTn
06uhe yka3aHnno no texnke 6e3onachoCTn dnn 3neKtpoHHCTpymEHTOB
NPEyNPKJDEHNE
IpoHTaHTBce yKa3aHn no TeHHKe 6e3oNaChOCTn, HnctpyKuHn, HnIOCTpaHn CneHnΦKaaHn
PpeOCTaBHeHbIe BMeTe C HAcToaHm 3NeKtpOnHcTpMyeHOM. Heco6nOeHne KaKnx-1n60 n3 yKa3aHHbIX HnKe HnCTpyKuIM MoKet CTaTb npuHNO npaKeHn 3NeKtpueCKHM TOKOM, NOkapa N/IN TReKeJIbIX TpaBM.
CoxpaHnTe 3TH HnCTpyKuHH yKa3aHaNn dIy6yUeero HCnonb3OBAHn.
NcnoIb3ObaHnoe B HactoIuX HNCTpyKunx IyKa3aHnIX NOHTAE 3eNEKTPoINHCTPymENTpapncpoctpaHreTcHa3eKTPoINHCTPymENT C NITaHHeM OT cETN (C CTeBbIM WHypOM) HA aKKyMyIaTOPbH b3eKTPoINHCTPymENT (6e3 cTeBorO shypa).
Be3onacnoctb pa60eRo MecTa
CoepxhtpepaOooMeTObuHCToHxopoOocBe- eHHbIM. BecnpaIOKnn HneocBeeHbIe yauCTKn pa60eero MeTaMOrT npNBecTn KHeCuaCTbIM cnyaam.
He pa6oTaIe c 3neKtpOnHcTpyMeHTaMn BO B3pbIBOonacHO aTMocΦepe, HAp., codepKaueI rOpouHe XNkOCTH, BOCIIaMeHaIOUncEra3bI HIN IIbIb. 3neKtpOnHcTpyMeHTbI NCKPrt, YTO MOKeT pNBeCTH K BOCIIaMeHeHIO IIbI INI INI napOB.
Bo Bpempaobtbc3neKtpoHnctpyMeHTOM He donyckaiTe 6nnkO KaBawemy pa6ouemy Mecy DetEn H noctoPOHHX Nm. OTbNeKwncb, Bb MoKeTe NotepaTb KOHTPONb HAD 3neKtpoHnCTpyMeHTOM.
3neKtpo6e3onacHocTb
WtencbHnBnK3eKtpOHCTpymHe TaonKa HNOxOHTb K WtencbHnPo3eTke.HN B KOem CnyaHe HBOcTe NMeHenH B WtencbHyO BNky. He npmeHrTe nepexOdbIe WtKepebln 3eKTPoOHCTpymEHO B 3aUHTbIM 3a3EmHeHem. Hen3MeHHbIe WtencbHbIe BNKn INoXoAulne WtencbHbIe Po3eTK ChnKaOT PnCK IopaxEHn 3eKTPOTOKOM.
PepoTbpaaHte TenechBKOHTc 3a3emnEHblMH NOBepxHOCTMHN KAKTO: Ctpy6AMN,3nEMeHTAMNOTONHeHHKXOHNBIMN NITAMN XOIOHbHKAMN.PnH3a3emHeHH BaWero Tena NobbiwaeTc pck npaKaHeH 3neKTPOtOKOM.
3aunuaine 3nKTPoHnCTpymEnOTdoxNn CbipoCTn. POnOHKnOBeHne B0di B 3nKTPoHnCTpymEn NObbiWaeT PNCK NopaxHeHn 3nKTPoTOKOM.
He pa3pewaetc HcnoIb30BaTb Whyp He no Ha3nueHnIO. HkOrJa He HcNoIb3yIte Whyp dIra TpaHCnoptnPOBKn HnN NOBeCKN 3NeKTponHCTpyMeHTa, HnN dNn H3BLeeHHN BnIK N3 WTeNCelbHOH po3eKn. 3aunuAite Whyp OTOB3eHCTBnB BbcOKHX TempeATyp, Macna, OCTpbIX KPMOK HnN NOBbHKbIX qacteN 3NeKTPoHNCTpyMeHTa. IOBpeJxHbN HnN CNYtaHHbI Whyp NOBbIaET Pnck NopaeHHN 3NEKTPOTOKOM.
Ppnpa6oTe c3neKtpOnHcTpymeHTo mO tKpbTbIM He6om pIpmHeMaTe nproDhBle dIg 3TOrKa6eHNyDHHHTEN. PpImeHeHHe npiroHO rIO pa6oTI NOt OTKpbTbIM He6om Ka6eJIyDnHHTen CHINKaET PnCK nopaxEHNA3NeKtpoTOKOM.
Ecn HeB03MOxHO H36ExKaTb npMHeHnna 3NeK TPOHNCTpymEna B cbIpom NOMEuHnN, NOkKnUoayTe 3NeKTPOHNCTpymEna Ype3 yctpoNcTB0 3auTHOrO OT KIOueHH. PpIMHeHnne yctpoNcTBa 3auTHOrO 0TKIOueHH CHINKAeT pNCK 3NeKtpNuecKO rnpaKeHH.
Be3oNaChocbIIOdei
Ebyte BHHMaTeIbHbI, cIeIte 3a Tem, qTo DeJaete, n npOyMaHHO HauHnaiTe pa6Ory C3NeKtpOnHCTpymemTOM. He NOnb3yIeTeCb 3NeKtpOnHCTpymEMTOB yctaNOM COCToAHNN Hnn NOB BO3dEhCTBHeM HApKOTNKOB, ANKOROI Hnn IeKapCTBeHHbIX CpeCTB. OINH MOMENT HEBHHMaTeIbHocTH npI pa6Ote C3NeKtpOnHCTpymEMTO MOKET PnPBecTH K cepbe3HbIM TpaBMAM.
PnmeHte cpeCTBa HndBHyaIbHO 3auHTb. Bcerda hocnte 3auHTbIe ouKn. NcnoIb3oBaHne CpeCTB HNDBHyaIbHO 3auHTb, KaK To: 3auHTHOI MaCN, OByH Na HeCKOB3aIe NIOOuBE, 3auHTHOI WIIEMA INN CpeCTB 3auHTb OPraHOB CInyXa, B 3aBNCMOCTN OT BINDA paBObTI CJIeKTPOnHCTPymETOM CHNXaET Pnck NpUyHeHn TpaBM.
PepoTbpaaaTe HnppeHnapepeHoe BknOueHne 3NeKtpOnHCTpyMeHTa. Peep TeK KAK noKKnIOuHTb 3NeKtpOnHCTpyMeHT K cTeH N/nn K AkkymyIATopy, NOHtB HIN nepeHoCHb 3NeKtpOnHCTpyMeHT, y6eDNTecb, cyo OH BBKIOUeH. YepKaHHe NaIbua Ha BblKIOUaTeNe pIn TpAHCNOPTnPOBKe 3NeKtpOnHCTpyMeHTa IN OIOKIOUeHHe K cTeH NITAHN BKNIOUeHHOrO 3NeKTPOnHCTpyMeHTa YpeBaTO HeCuaCTbIMn CnyaAMN.
Y6npaTe yctahOBouhHb HNCTpyMeH Nn raeHbIE KIOuH Do BkIOueHHa 3NEKTPoHHCTpyMeHT. HNCTpyMeHT Nn KIOU, HaxOJaIcNc BO BpAuaIoEeCra YacTHN 3NEKTPoHHCTpyMeHTa, MOKeT PnBecT N TpaBMam.
He npHHMaTe HeecTecBHeHoe nOxKeHne Kopnyca Tena.Bcerda 3aHHMaTe yctOnuHBoe noOxKeHne H coXpaHnTe paBHObecHe. BnaOrapra 3ToMy Bb MoKeTe lyUWe KOHTpOJIPOBaTb 3NeKTpONHCTpyMeHT B HeoXnDaHHbIX CNTyaunax.
HocHTe noxOAnuO paOuyo OeKdy. He HocHTe uHpOKyO odKdy uKpaueHH. DepKHTe BOnocbH oDeKdy BdAHN OT NOBnKhbIX DeTanei. HUPOKA
OeJka, ykpaewenHnn nnHHbE BONcbl Moryt 6bItb 3aTReHbI BpaauioHmncraCTaMn.
PnHaHnHHB03MOxHcOHTyCTaHOBNbIeOTCaCbI BAOUHX NbIeNC6OpHBIX yCTPOCTB nPoBepRte HN PnHCoeHNHeHne HnpABINbHOe HCnOB3oBAHne. PnMeHeHne PbIEOTCOCA MOKET CHN3Tb ONaCHOCTb, C03daBaEMyIO PbIbIO.
XopoOoee 3HaHne 3NeKToPOnHcTpyMeHTOB, NOyUeHHoe Bpe3yNbTaTe qAcToRHO Hx NcNoB3OBAHHa, He DoJXHo PnPBoDHTb K CaMOYBepeHHocTH HrHOpHpOBaHHo TEXHNK6e3OaNChOCTN OpaueHHc C 3NeKToPOnHcTpyMeHTAM. ONo H6peXHoe DeIcTBHe 3a DIOHO cEkyHdb MoKeT PnPBecTH K Cepbe3HbIM TpaBMam.
BHIMAHNE!BCnyae BO3HKnHOBENHnepe6oBpa6oTe 3nEeKTPoHnCTpyMeNTA BCNeCTBn EONHOrn HACTNHOrnpkepaueHH3HePrcHa6KeHHnIO NOBpeJXeHHuYPaBnEHn3HePrcHa6KeHHmycTaHOBtBe BbIKIyauTBe bNoTOxKeHHe BbIK..y6eHNWncb,TO OH He 3aboknpoBaHn (pHn erO hAnuH).OTKnIOHTe CETeByIO BNky OPO3eKN HnO TCOeHNHTcCBHMb AKKyMnTOp.3TN MnpDToBpaAsTc HekOHTPonPnyEmbl NOBtOPHb 3aNyck.
PpHmHeHHe 3eKtpOHnCTpyMeHTa N O6paueHne C HMM
He neperpykaite 3neKtpOHCTpyMeH. Hcnonb3yIe Dnpa6oTbCOOTBETCTBYUOuN CNEuaHbHbI 3NeK TPOHNCTpyMeH.CnOxOJaUM 3NeKTPoHNCTpyMeHTOM Bby pa6oTaTe Nuyue HnaEkee Byka3aHHOM dHaana30- He MOUHOCTn.
He pa6oatae c3neKtpOHnHCTpymEHTOM npn Hnc- npaBHom BbIKIOuATEne.3neKtpOHnHCTpymEHT, KOTOpBn He nOJaTeCBAIOUeHHIO INN BbIKIOUeHHIO, ONaCeH I DonKeH 6bIb OTpeMOHTPOBaH.
PepTe TEM KAK HAcTpaHbTa 3NeKTPoHnCTpyMeHT,3a MeHrTpPiHaadNExKHOCTHnnYbHpTa 3NeK- TPOHnCTpyMeHT Ha XpAHHe,OTKnIOHTe WTeNCelbHyBnKy OTpo3EtK CETH N/NN BByIbHe,ecn3TO BO3MOxHO, AKKMyJTHOp.3Ta Mepa IpeOCTopoXHOCTn IpeDtBpaAaet HeIpeJaHamepeHHoe BkIOUeHne 3NEKTPoHnCTpyMeHTa.
XpaHnte 3neKtpOnHcTpymEntbI B HeNoctynHom dnn deTe MeCTe. He pa3peWaHTe NnB3oBaTbc3neK TpOHcTpymEntom nLmam, KOTOpbe He 3NaKOMbl C Hm HnH He 4NTAnH cHcToaux HcHcTpkyu.3neK TpOHcTpymEntbI ONacHb BYPKax HeonblTHbIXnL.
TuaTeNbHO yXaXnBaIte 3a 3NeKTPOHCTpyMeHToM npHaadJeKHOCTMn. PpOBepaTe 6e3ynpueHyo fYHKUIO H XOJ DBHXyUxxC qAteTe 3NeKTPOHCTpyMeHTa,OTcYTCBHe NONOMOK HNN NOBpeJHm,OTpH- taTeNbHO BnHNOxN Ha FyHKUIO 3NeKTPOHCTpyMeHTa. NOBpeXDeHbIe qACTn DOxKbIb 6bITb OTpeMOHTPOBaHbI Do HCNoB3OBaHN 3NeKTPOHCTpyMeHTa. IINOxoE 06CnyXnBaHHe 3NeKTPOHCTpyMeHToB RAJIETcPnPHHO 6OJbWTOq UcCla HeecacthIx clya-eB.
DepKHTe pexyHn HcTpymETB 3aToeHHOM uHCTOM COCTOHHM.3a0TmBO yXoKeHHbIe pexyUne
160|Pycckn
HnCTpyMeHTbC OcTpbIMN peKyUIMN KpOMKaMnpeKe 3a-KnHHBaKOTCR INX NeYe BECTN.
PpHmehnE3NEKTPoHHCTpyMeHT,PPHnHaIeXHoCTH, pa6OHe HNCTpyMeHTbI H T. P. B COOTBcTbHN C HAcToaHmH NHCPTpyKlqAMy. YUHTbIABe T pnp 3tOM pa6Oyue yCNoBn H BblONJIHReMyo pa6Ory. McnoIb3ObaHne 3NEKTPoHHCTpyMeHTOB DnHnpeDyCMOTpeHHbIX pa60T MOKeT PpNBecTH K ONaChbIM CHTyaIaM
Depxknte pyuKn H NOBepxHocTH 3axbata cyxHMn HNCTbIMN, cneDHTe yTO6bl Ha HNX YTO6bl Ha HNX He 6bIIO KIKKOHN KOCHCTeHTHO CMA3KN. CKoIb3Kne pyuKn H NOBepxHocTH 3axbata ppeIATCTBYOT 6eOtonachOMy ObaaueHHO C NHCtpyMeHToM H Ne daOt HAeEHXo KOHTPOINPOBaTb EFO B HENPeDBnDEHbIX CITyaUNX.
PpHMeHeHn 06cnyXHaHne aKKymyTOpHOro HNCTpyMeHTa
3apKaTeaAkyMnyIbOpblTobkoB3apnHbIX yctpoIcTBax,peKOMeHdyEmbIXN3rOToBHTenEM.3apHHOeYCTPOINCTBO,IPeDyCMOTpeHHoeDNOnpeJeHHO BnDaAkkymyIaTOPOB,MOKeT pNBecTHK NNoXapHOI ONaCHOCTnPnHNCnOBaHHeroCpTyHMn AKKMyIaTOPaMH.
PnmeHte B 3neKtpOnHcTpmyEmtax TOnbko npedy CMTopeHHbe dIa 3TOA aKKMyJrTOpbI. HcnoJIb3OBA-Hne pIpyTHX aKKMyJrTOpOB MoKet IpiBecTH K TpaBMm HIOxapHOH ONaCHOCTN.
3aunuane HncnObn3yEmbH aKkymnTOp OT KaHcpecknx CKpenOK,MOHeT,KnOeY, rBO3dE,BHNTOB Ndpynx MaenbKnx MetaNNuecknx npEdMeTob, KOTOpBe MOrTy 3akopoNTb NOHocA. KopotKoe 3amblKaHHe NoIOOCOB aKKMynTOpa MoKeT pINBeCTN K OKOramnnnoKapy.
PnHnepaBnBHom Hcnonb30BaHHN H3akKymIyIopa MoXeT NOteb KNDKoCTb. H36eAHTe COpNHKOCHOBH N C He. PnH cnyAHOM KOHTAKTe pomOHTe COOTBETCYIOOe MeTO BOIOE. ECIN 3Ta KNDKoCTb NONaDet B INa3a, TO DOONHNTbHO O6paHTeCb K BpaCy. BiteKaIOUaA kKMyJITOpHAA KNDKoCTb MOXe TpNBeCTN K pa3JaPaKeHHO KOxN HIN K OKOrAM.
He nCnonb3yIe NOBpeXdEHHbIe HnN H3MeHenHbIe AkKymyIaTOPbI Hnn HNCTpyMeHTbl. NOBpeXdEHbIe HnN H3MeHenHbIe AKKyMylTOpbI MOrTy NOBcTn Ce6HnePepckA3yEmo, YoMOKeT PnVBcTn K Bo3rOpaHIO, B3pbBy HnN pNCKy NOnUyeHnra TpaBMbl.
He KnaIte aKkyMnyIaTOp HnHnHCTpyMeHT B OROh H He noDBepraIe Hx BO3JeCTBHO BbICOKHX TempeIy. OROh HnH TempeIypa Bblue 130°C MOrTy IpNBcCTN K B3pbIBy.
BbINHnIe Bce HNCTpyKuH No 3apAKe H He 3apJXaIte AKKyMnIop Hn HNCTpyMeT nPn TEMpeAtype, BbIXoJaIe 3a Yka3aHbI B HNCTpyKuH DnAna-30H. HenpaBnIbHa N3apJKa Hn3apJKa npn Tempeatypax, BbIXoJaIx 3a Yka3aHHb IHaNA3OH, MOrY IOpBpeITb 6aTaapeIO NOBbICITb PNC Bo3rOpAHn.
CepBnC
Pemont 3neKtpOHCTpymeHa DOJXeH BbINHOHTbcra TOnbKO KBaHnOuHPOBaHHbIM NepcoHAnOM HToBko C npMeHeHMeOpHnHaJIbHbIX 3anaChbIX Yactei.3TNM obecneuBaetc6eONaCHOctb 3neKtpOHCTpymeHa.
HnKOrJa He 06cnyxHBaTe NOBpeXeHbIe aKKyMyIaTOpbl.ObcnyxHBaTb aKKyMnIaTOpbl pa3peWaeTcra TOnbKO npON3BOdITeIIO HIN ABTOpN3OBAHHo cepBnCHOH opraHN3aUN.
Yka3aHnno TeXnKe 6e3oNaCHOCTn HMOrOFOyHKuHOHaJIbHbIXpe3aKOB
PnBbINONHeHH pa60T, npN KOtOpbix pa6Ouyn HhCTpyMeH NT MoXe3aTeB cKpbIyIO 3NeKTPOnpoBOyKO, dEpxHTe HhCTpyMeH 3a H3OnHPOBaHHbIe NOBepxHOCTN. KONTKT C HAXOJUeCEc NOD HAnpJKeHNm PPOBOKM MoXe3 aApIITb MtaJIInueCKHe YAcTH 3NeKTPoHHCTpyMeHNT INPbBeCn K YAp4y 3NeKTPNueCKHM TOKOM.
Hcnonb3yIte 3eKTPoHHCTpymENT toBkoDn cyxoro mnofoBaHn. POnHOKNHOBeHne BOBb B 3JKeTPOHHCTpyMeHT NOBbIaAETPCK NopaxHeHn 3JeKTPOTOKOM.
BHMaHHe: onachoctb Bo3ropaHn! N36eAHTe nepePpeBa WnHpyEmoNOBepxHOCTn WnHpaHnbl. Ipeed nepepbBAMn B pa6ote Bcerda onopoxHnTe KOHTeHep nIbnn. Nbl ot WnHPOBAHH, HAKONIBWJARcB NblNEbOM MeJIke, MHKPOΦHbTpe, 6ymaxHOMMeJIke (HN B MEJIke-ΦNbTpE /ΦNIbTpE nbNCocA) MoKET pIh HeBlaonprrThbIX YCIOBNAxCAMBO30PeTbCn, HAp.,OT NCKpbl Pn WnHPOBAHH MeTaNOB.OCo6EHAROnaCHOCTb BO3HKAeT, KOrDa IIbIb OT WnHPOBAHH CMEINBaETC OCTATkAMn NaKa, NOINHPETAHa HIn DpyRHX XIMKATOB, A WnHpyEmaNOBepXHOCTb HarpeNaBcOT dNITeHBbIX pa6ot.
He noctabnne pykn B 30hy nilehna. He noctabnne pykn no3arotobky. Pn KOHTaKe C NJIbHbIM NIOIOTHOM BO3NHKaet ONAChOCTb TpaBMPOBaHNA.
Perynphno npouuatae BeHTnauoHbIe eenn 3neKtpOnHCTpyMeHa. BENTNATOP DnBraTeR 3aTgRaBaETPiB B KOpNc, n 60JIbOoe CKONHeHne MetaIIIN-ueCKoBIOJMOKe TpNBecTN K 3NeKtpuecko OnaCHOCTN.
HcnoIb3yIte COOTBETCTBYIOUHe MeTANNOCKaTeEN IIA HAXOXJENH CNPraTAHbIX B CTHe Tpy6 HIN NPOBOKN HIN ObaPaAaTecb 3a CnpABKO B MecTHOE KOM MyHalbHOe npEepnptHne. KOtAKT CJIeKTPoPBOJD KOH MOKeT PnIBEcTN K IOXApY H nopAKeHHO 3JIeKTOKOM. POBePExHe raoIPOBOda MOKeT pNpBEcTN K B3pbBy. NOBpeXJeHne BOOnPOBaD aBeet K HaHeceHIO MaTePnaHbHorO yuepe6a.
Kpenko depxhte 3neKtpoHnCtpymENT BO Bpempa60TbI DByMa pykamn CnEHTe 3a yCTOHNBBIM NonoXHeHHem Tena. DByMa pykamn Bbl MoKTe 6Oone HaDeXHOBcTN 3neKTPoHnCtpmENT.
PnCmeHcMeHHbIX pa6OuHX HcHcTpymeHOTOB OeBaHTe 3aunTHblpe pyKaBnbl. CMeHHbe pa6Oue
HNCTPyMeNTbI pN dINTeBHO 3KcPlyaTauuHaRpeBaIOCTC.
He cyuatayebnaXHHbIe MaepnHbI (Hanp. 600) H He pa6oTaHTe HA BnaXHom OCHOBAHN. PPOHNKHOBEHNE BOBb BJIeKTPOnHCTpyMeHT NOBbIaET PNCK NopaxHnAJIeKTPOTOKOM.
He 6pa6aTbIaIte 6pa6aTbIaEMyIO NOBepxHocTb XHKoCTHMn, CoepXaunHMn pactBOpHTeIN. PnHa- rpeBe MaTePhaONB Pn CKOJIeHN MOYr BO3HNKHyTb JADOBtIe Ra3bl.
Pnpa6ote coCKpe6kOM HoxOM npoBnIte Oco6yO octopoxHocTB.Pa6oyne IHCTpyMeHTb OueHb OCTpble, cyueeCTByeT ONaCHOCT TpaBM.
3aKpennne 3arotobky.3arotobka,yctahOBneHHaB 3azHMHoe npncoc6bneHne HnB TtckN, ydepXNBaeTc 6oee hdeXho, yem B Baew pyke.
PnnoOBpeKdEHHn HeHaDnEkaeM HcNoIb30BaHHn aKKyMyJITopa MoXET BbIeNITcbra3.ObecneYte npTOK CBexKeFo BO3dyxa n PnB O3HKnHOBeHHn XaIo6 6paHTTeCb K Bpaay.Fa3bl MOrTy BbI3BaTb pa3dpaxKeHne DbIXaTeJIbHbIXIpyTei.
He BCKpbBaTe aKKymyTOp. PnH3OM BO3HnKaET ONaCHOCTb KOPOTKO 3aMbKaHn.
OctpbIMn npedmetamn, kaknap., rbo3dEm nno otBeptKo, a TAKKx BHEWHHM CNIOBbIM BO3dEChTBHMeMOXHO NOBpeDHTb AKKyMnyTOpHy 6atapeo.3To MOKET pINBecTN K BYTpEHHeMy KopoTKOMy 3aMbkaHIO, BO3rpaHNO C 3aDbIMHeHMe, B3pbyNn nepepeBy aKymyIaTOpHNo 6atapen.
McnoB3yTe aKKymyIaTOpyo 6aTapeo ToIbKO B H3- DeHnx H3rOToBHTeN.ToIbKO TaK aKKymyIaTOp 3aUu- uenOT onachOn neperpy3kn.

3aunuataeakymyTOpHy6atapeoOT BbICOKHX TEMnepaTp, HAp., OT DInTeBHOrHarpeBaHHHa CoHHe,OT ORH, BObln Blarn. CyueCTByeTOnacHocTb B3pbIbA.
Onncahne npoodykTa n ycnyr

IpoHTHe BcE yka3aHn HnHCTpyKuHn I
TEXHKe 6e3oNaChOCTn. HecobIOJeHne yka-3aHnI NO TEXHKe 6e3oNaChOCTn INHCTpyKcIIMMOKeT pINBeCTN K NopaeHHIO 3NeKTPueckHM TOKOM, NOkApy H/INI TAgKeBbIM TpaB
MaM.
PtoaIyIcTa,co6IOaIte HIOCTpaunBHaane pykoBOCDBaNo3KcNpyataun.
PpHMeHHeHn No Ha3HaueHmIO
3neKtpOnHCTpyMeHT npEHa3HaueH nIpaacnINBaHnna I pa3pe3aHnI DpeBecbIX MaTePnaIOB, nIacTMacCbI, rNnca, CBeTHbIX MATEANIOB KpeENkHbIX 3eMeHToB (Hap., TB03- d, cKpenOK). OH TaXke pnproOen dIra OpbaoTKn MmKoI nnTKn dIe CTEn, cyxoro UInpObaHNu WabpeHn He6onbux NOBepxHOcte. OH Boc6eHHoI cTeEN HnproOen dIpa6oB bNn3n KpaI n3aOnDnIO. 3TOT 3NEK
TPOHnCTpyMeHT paapeWaaetc3KcNnIyAtnPoBaTb NckIIOuH-TeBHO C npHaadJeXHoCTaMn Bosch.
H3o6paXeHHbIe coCTaBbIe qACTn
HymepaunipneDCTaBHeHHbIXKOMnoHETOB BblIOJIHeHa n0 3o6paKeHHIO HA cTpaHnue CnnIOCTpaUHMN.
(1) BbIKIOuOaTeNb
(2) KhoIIka pa36IOKHOPOBKNaAKKMyIITopa
(3) AKKymyTnTOp
(4)BeHTnIaHIOHHbIe npope3N
(5)KonecnoyctaHOBVKnHcnaKone6aHH
(6) INHINKATOP 3apJKeHHOCTn aKKyMnyTOpHOI 6atapeu
(7)Держателpbaboуeroинстурента
(8)3axmmno pbuag orpaHnHTeI rnybnhb
(9)OrpahuHHTenbIy6hNb
(10) NorpnykHoe nIinbHoe nONoTHoA
(11)3aXIMMHOI BINT
(12) ⅢeTnrgpahnhbI wTnfoBbl KlnIO
(13)PyKoTka(cH30nHPOBaHHOIOBepXHOCTbO)
(14) YctpoiCTBO bIineydaeneHnA
(15) WIMINΦOBAJIbHЯ nIITa
(16) ΦaBbHbNtA
(17)3aKIMHOIpbUar yCTpoINCTBa nbIeYdaJIENHnA
(18) Naptpy6ok nblneye丹enHnA
(19)AanTep nbineydaeneHnra
(20) ⅢnH nIbIeYdaneHnA
A) N3o6paXeHHbIe HnH ONcaHbIe npHaadJIeKHOCT He Bxo- dT B cTaHapThbI ObBeM NoCTaBKn. POnHbI accOPTHMeHT npHaadJIeXHcTei BbHaJdTe B haaiE npOrpAmme npH HaJIeXHcTei.
TexHHueckne daHHbe
CymmaHnBn6paun a, (BeKToPnHaCyMaTpEx HnPaBneHH) nporpeHHocb K onpeJeHb B COOTBcTBn C
EN62841-2-4:
山HnfoBaHaNe:3M/c²,K=1,5M/c²
pacnHbHaHne NOrpyKhbIM NIIbHbIM NIOHTOM: a=9M/c², K=1,5M/c²,
pacnINHBAHne cermHeTHPOBaHHbIM INIIBHBIM NOIOTHOM: a_1 = 2,5M / C^2,K = 1,5M / C^2
甲6pene: a_1 = 8,5M / c^2,K = 1,5M / c^2
Yka3aHbIe B HactoIuX INHCTpyKUxIy yObeHb BV6paunn 3HaueHHe WymOB0 3MHCnn 3MepeHb IIO MeTOKe H3MepeHn, npOncaHHo B CTAndape EN 62841, nMOr7 bItb NCNoJIb3ObaHb IIN CpaBHeN 3NeKTPOHNCTpyMeHToB. OHn TaKke pInroDhbIg PpeBaPntbHO OceHKn yPoBHn B6paunn H WymOB0 3MHCnn.
YpOBeHb Bn6paunn H3aueHHe WymoBOm 3MnCCn Yka3aHbI dIra OCHOBHX BVNOB pa60tbc 3NeKTPONHCTPymeHOM. OJHAKO eCN N3eKTPONHCTPymeH 6yET NCNOL30BaH dIra BblIOHNHE ppyHX pa60c npImeHHeHem HnepeDyCMOTpeHbIX IROTOBHTeMe Paboux HNCTPymeHOB HIN TeXnueCKOE oClykHBaHne He 6yET OTBeaT bpeDnCaHnM, TO 3HaueHn ypOBAuHn HbPaunn HwMOBo 3MnCCn MOyt 6bIb NbIMN. 3To MoKet 3aUnTeNbHO NOBbICMb ObuH ypOBeHb Bn6paunn N obuYIO WymoBOy 3MnCCn BO TceHeHBCB IpOdoJIOnTeNbHOCTn pa60tbc.
TTOHIOUeHNYpOBHBNb6paunn HwMOBo3MmCCnn BTeueHHe ONpeDeneHHORo BpeMeHHoro INHTepBaHa HyKHO yuTbBAbTaKaXe H BPmR, KOrda HNCTpyMeHt BbkHoue HnXOTaBKNIOueH, HO He HaxOJNTcB PaBOte.3To MoKeT 3HaHTeBHO COKpaTbYpOBeHb BN6paunn HwMOByo 3MmCCNO BnepeCteHa NoHoe paBOoeBpMa.
IpeDyCMToHTE DoONIHHTeBHeIe Mepb63oNacHOCTn Dnla 3aunTbI OpeapTopaOT Bo3dEChTBn Bn6paun, HAnpImep: TexHHueckoe 06cnyKINBaHne 3JeKtpOnHCTpyMeHTa n pa6o
HINCTpyMeHOB,MEpbI NO NoIDepKahHO pyK B TEnne, OprAHn3aunr TexHONOrnueckx npOceCCOB.
C60pk
Do hauana pa60 nToTexo6cnyxHBaHnO, CMeHe HHCTpyMeHaTnT.,a TAKKpe npu TpaHCnpOTpOBKe H XPAHEHHN 3BNEKAte AKKMYNAI0Pn3 3NEK
TPOHCTpyMeHTa. PnHENPeDHaMEpeHHOM BKNIOueHEN BO3HnKaET ONaCHOCTb TpaBMnpoBaHn.
3apkaakymyntopa
Ponb3yItecbToBko 3apnHbIMN yctpoCTBaMn,yka3aHHbIMN BTEXHNueCKNXnapaMetpax.ToBko 3TN 3a-praHbIe yctpoCTBa pnproDhl DnIITnEBO-nOHORO aKymyIaTopa BaWero 3neKtpOnHcTpymenta.
Yka3aHHe: AkkymyIaTOPHa 6bTapeN noCTabnEeTc qactuHO 3apJxehHO. Jn oecneueHn nonHou moHocn akkyMlyrTopa 3apAHTe ero nonHoctbIe nped nepBbIM npHMeHHeM.
HINHIOHHbIaKKMyIaTOPMOKET6bITb3apRJKeH BIOOBeBpMa 6e3COKpaUeHNcPoka cnyk6bl.1peKpaIeHne npoCecca 3apAKnHeHaHOCTBpdaAKKyMnTOpY.
IITHeBO-HOHHAnA kKymyTOpHn6atapEn3aunuEHaOT rnybokO pa3pRdKn ChTeMoE „Electronic Cell Protection (ECP)”. 3aunTHaN CXema BblkIOUaET 3neKTPOHnCTpyMeHT npn pa3pRzEHOM AKKymyTlTOpe -pa60Hn HnCTpyMeHT OCTaHaBnBaeTcN.
TOb6bI h3BneBakKymyIaTOpyHO 6aTapeo (3),HaXMMTe Ha KONIK pa3bNOknpOBKn (2) H3BNEKHTe akKymyIaTOpyHO 6aTapeo H3JIeKTPoHHCTpyMeHtA,NotAHyB ee Ha3aJ.He
PnPMeHrTe Pn3TOM CNJIbI.
yUHbBaIeYka3aHHNo yTmH3aHH.
HnHKaTOp 3apXeHHocTH aKKymyIaTOpHoI 6aTapeN
TpneBbxC BetoDnOHa HnHnKaTope 3apKeHHoctnaK KymyTopa(6)NOKa3bBAHOYPOBeHbEero3apra(3).HnDnKaToP3apraTropHTOnbKO5ceKHyNocneHaxaTna.
| Сbvетонод Эмкость | |
| Henpepbivbni CBET 3 зеленbix CBETODиODOB | ≥2/3 |
| Henpepbivbni CBET 2 зеленbix CBETODиODOB | ≥1/3 |
| Henpepbivbni CBET 1 зеленoro CBETODиODa | <1/3 |
| Miraанne 1 зеленoro CBETODиODa PezeрВ | |
| Miraquшni CBET 3-x зеленbix CBE- Paarpaжени TOДиODOB | |
Ecn npn BknoeHH CBeToIOH He rOpHT, To aKKyMnTOp HncnpaBEN Iero CneJeYer 3aMeHNb.
3aMeHa pa6oery HnHcTpymeHa
PnCmepepaOeyoHcTpymEnaHaedeBaIte3aunHbIe pyKaBnI. PpKocHOBeHne K paOCHm HcTpymEHam MoXeT npBecTH K TpaBMe.
Bb60pap6oeroHnCtpymeHa
HcnoB3yIe TOnbKO npeDyCMOTpeHHbIe IaHaHOrO 3NeK-tpoHHCTpyMeHTa CMeHHbIe pa6ouHe IHCTpyMeHTbl.
Pa6oHm HnCtpymENT GOP 12V-28
STARLOCK


Pa6oHm HcTpymENT GOP 12V-28


HnKePnBEdenHaa TaBnua cOepKHT npMepbI pa6oHx HNCTpyMeHOB. IpOue pa6oHne HNCTpyMeHbI BbI haJeTe B 06- WnPHom accOPTmte npHaJnxHoTe Bosch.
Pa6oHm HnCTpyMeHT MaTePnAn PpMHeHne
BmTaannueckoe cerMeHTHO NHBHOIIOTHO
IpeBecHbIe MaTePnAbl, IaCTMaCcbl, BcEThbIe Me TaJIbI
Pacnnbl npoNilbI c norgyKeHHeM;
Takke IJn paCnnHbAHn6n3K KpAaM,ByrnaX NtpyD HNOCTYHBIXObnactx;
npmep: ykopouHne yjke MoHTnpoBaHbIX HaONbHix
PiINTycOB nn DcpehBIX KOPO6OK,IIeHHe C norgyKeHH eM IINIOgROHKn NaHenei dI INa

UHFOBAbha nTTaIINCTOB cepH Delta 93 MM
B3aBnCmOCTOnOTIINHΦ.
IpeBecnHa,tpy6bl/npo-phiHH,KpacKn,NaKn,HaNOHHTeIN,MetaII
Ydo6hoe H aepfkeTbHoe uHHoBaHne npOuNei DnAmetPOM 55 MM;Kpachhie uHHoBaBbHbe INCtbi dNla uHHoBaHnI dpeBeCINH, Tpyb/npOuNei, Kpackn, NaKa, HAnONHTeRn MeTaIIa
BmTaannueckoe nnonTOHnIINNE HcNppyxehn-EM
MraKgA DpeBecnHa, MAn
Kne IaCTMaCCbI, FmNCO
KapTOH, TOHKOCTEHbIe
npoHn Hn 3 aIOMHHn
UBeTHbIX MeTALOB, TOH
KN NICTOBOM TaMn, He
3aKaJIeHNbIe RBOZdN n Wypbl
IJI HebOJIbIX pa60T NO OTe3aHIO N Bpe3aHIO;
PnIMeP: npope3aHne na3OB nJn po3eTOK, OTe3aHNE MeNbIX Tpy6 3anoDInuo, PnJIeHne C NorpyKeHHem B
rINCOKApToHHbIX pINTax
Hnrrpaahhble paobtI NO noDROHKe BdpBeBcHHe; npMep: pnpnnnBaHne Na3OB DnA 3AMKOB nfpHnTpybl
BbICOKOyRnepoNDCTOE NINBHOe NOItoH (HCS) nIINHeN dpeBeCNHbC nORpyKeHNEM
IpeBechble MaTePnAblb, MRAKNE PnactMaCCbl
Otpe3aHne n rny60Ke nIJIeHHe c norgpyKeHHeM;
Takke nIIHHHe BOLn3n Kpa8 3aTOBKn, B yrrax n TpyHO-
IOCTyINbX MecTaX;
PnIMep: TOkHN pONnC n OngpyKeHHeM B CEbHoN DpeBecHe NdYcTAHOBKn BEHTnIauHOHn peWetKn
BmTaIINueckoe nIOIOTHO IINNE HnC NOrpyKeHnEM BTVBepbIX NOPOdax DpeBeCNHb
TBepaI DpeBecnHa, nnn TbIC NOKpbITnEM
ПИЕнгс cnpужснem B pntax c npkpitme HnT Bepdix nopodax dpebecnhbl;
PIMeP: BcTpaHbAHne YepdaHbIX OKOH
TBePDCnBHOe NOIOTHOINHEN H C NpOpyKeHNEM B METJIe
Metann, BbICKOa6pa3nHBIhI MaTePnaIbI, CTeKIOBOLOKHO, TINCOKApTOH, DpeBeCHOBOKNHCTbIe IITbI C qEMeHTbIM CBA3YIOUIM
HHe HcnpyKeHbEM B BbICoKa6pa3HBbIX MaTePnA
IAX IIN MtaJIe;
IpIMep: pe3Ka KxOHHbIX paCaIOB, IpOCTaPe3Ka 3aKa-
JIeHHbIX WpyNOB, TBO3dE N HeKaeBeHOse CTAI
164 Pycckn
Pa6ouH INCTpymENT MaTePnAII PImMeHeHne
HnfoBaHna 15)OchauHa KpOuKOBo YactbIy IINyUKNI INB6bCTPON INPocToI CMeHbI HnfoBaHbIX NICTOB C NeTbHOaCTbIO NInyUKN.
Bb6eTe TkaHb IINyUKN HuaIINFOBaIbHOI INTE (15) nepeJ yCTaHOBKO HOBOrO IINFOBaIbHOrO IINCTa (16) nro 0ecneueHHN ONTMaIBHO rCenHeHH.
PnHIOKHTeIINFOBaJIbHbI INCT (16) C OJHO CTOPOBH IINFOBAJIbHOI INITbI (15) 3aNOIINcO C KpaEM INITbI, 3aTEM HANOIXTE BeCb IINFOBaJIbHbI INCT Ha INITy INXopo- IO pInxKMITE.
IJa o6ecneueHn OTHMaIbHoro nbIeYaNHeHcNeITe3a TEM,TObblBpe3bB a6pa3HBOMatepnaIe COBnAnC OTBepCTHmB bIINFOBAbHoN PNTte.
ДяСТЯИЗПИПОВАЛБНО ГИЕТа(16)BO3BMNTecb 3a KOH ИК WIППОВАЛБНО ГИЕТа И CHIMMITE NGCT CO WIППОВАЛБ HOH ПИNTы(15).
BbMOXeTe HcNtob3oBaT bIO6be WmHPOBaIbHbIe NCTbI, NOINPOBaIbHbI H ONUCTHO B0NIOK cepHN Delta 93 MM n3 accOPTIMENTa PpHHADnEKnOCTe Bosch.
PnHaJNExKHOCTINIaIIHNOBaHnRA, KaT To, HETKaHAn HA KnaJa/NoPiPOBaIbHbB BoIOK, 3aKpENJIOTc Ha IINHIOBALHOIITe TAKIM Ke O6pa3OM.
166|Pycckn
ydaenHe nblinnn ctpyckn
IbIbHEKOTOpbIX MATEpHAnOB,KaHnP.KpacOK C co- depKaHHem CBNHa,HEKOTOpbIX COPTOB DpeBeCINbI, MNHepaNoB H MetaIIIOB,MOXET 6bITb BpeHOnI INI 3DopOBBa.
PiNKoCHOBeHne K bIn N I ONaDAHne bIn B dixAteNbHbe
nyTH MoKet BtB3BaTb aIneprHuueckne peakun n/nn 3a6o- neBaHna DbxAteNbHbIX nyTe Ionepatopa nHn HaxOJaUeROc
B6nHn nepcoHana.
OnpeeneHHbI bHnH,Ha7b a 6yka,cuHTaOTcKaHuePOERHHM,OCo6eHHO COBMeCTHO cPncaKAMn dIbOpa60TK dpeBecHbXpOMaT, CpeCTBO dI3aHTbI dpeBecHb).MATEpHAn CcoepKaHem Ac6ecta pa3peShaETcO6pa6aTBaTb TOnbKO cneuaHCTam.
-Ⅰ0 BO3MOXHOCTN HcONb3yIe PnHrOyIO dIa MATEpHaIaNCTeMy NblneYdaJIeHIN.
-XopoOo npOBeTpBaHte pa6ooye MeCTO.
- PeKOMeHnyetcnoB3ObaTbCpeCnnpaToPOnMaCKoC cnbltpomKnaccp2.
Co6nOdaIteJeNCTByIOUmeBBAWeIcTpaHe npEINncAHNA
HnOBpa6aTaBbAeMbIX MaTePnaIOB.
M36eAaTe cKoJIeHn PbIIN Ha pa6oyem MceTe. IbIb MOXETIeKO BOCIIaMeHrTbCt.
PnpcoeHHHHe yctpoCTBa nbIyeydaeneHHA (cm.pnc.A)
YCTPOHCTBOIbIeuydaneHn(14)PpeHa3HaueHOToBko DnpaobTcO WlnfpoBaIbHoN PnTOH(15),B KOMbHaun CDPyHMn CMeHHbIMn pa6oHmN HnCTpyMeHTAmn ero nC- NOIb3OBaHHe Heunecoo6pa3Ho.
IydaenHn.
Дя мотаяхустюгоста nbIeaydaneHn(14)(пинадлж-Hoct) Heo6xOJHMo CHaTb CmEHbI pa6OuHn HnCTpyMeHt.
Haenebte yctpoCTBO nbIeyndaenHn(14)yepe3 nTPOH (7)doynopa Ha 3axmMHyIO weky 3neKTPOHNCTpyMeHTA.
Nobepnhtye yctpoCTBO nbIeYdaIeHnB Jxenaemoe nIOJXeHHe (TolbKO He HENOCpeCDTBENHO NO3NEKTPoHnCTpyMeHTOM).3aKpOte 3aXHMHO pbUar (17),UTo6bl 3aΦHKCuPOBaTb yctpoCTBO nbIeYdaIeHn.
Haenehe aanentep nbileydanen (19) 7nlaHra nbileydanen (20) Ha natapy6ok nbileydanen (18). POncoeHNHTe 7nAHR nbileydanen (20) K nbilecocy (pinnadnexknoctb).
0630pnoCoeHHeHHKpa3nHbIM nbIeocam nokazHa CTpaHuaxCnnIOCTpaunAMN.
IbilecoCdoJXeH6bITb npirodeHnIobpa6aTbBaemoromatepna.
PpHMeHnTe CneuaIbHbI PbIeocOJydaIeHnOc06BpeHbIX Jn3OpOBb BIOoB nbIN BO3dyTeJe pakaHnCyXoN PbIiN.
Pa60Ta c HcHcTpymeHTOM
BkHoueHHe 3JKeKTPoMHCTpymeHa
YctahOBkaKKyMnyToppa
PnmeHte TOnbKO opRnHaNbHbIe NHTHeBO-HOHbIe aKcymyIaTobblΦhMb Bosch c HapnJxKeHEm, yka3aHHbIM Ha 3aBODCKO Ta6Nmuke 3NeKtpOHnCTpyMeH
Ta. HcnoB3OBAHHe npTyHX AKKMyJrTOpHbIX 6aTapeM OMOKET PnBOIDHTb K XHMnueCKHM OXKOrAM N ONaCHOCTNoKapa.
YkaaHHe: PnmuHeHne aKKyMnyTOpOB, He npEHa3HaueHHbIX dIaHHO 3NeKTPOHNCTpyMeHTa, MoKET pNBeCTN K c6oR M bapOte Hn NIOBpeXeHNO 3NeKTPOHNCTpyMeHTa.
YCTAHOBITe 3apAKeHHyIO aKKymyIaTOpHHy 6BaTepeIO (3) B pyKoTky TAK, UTo6bI OHa BOuNa B 3auePnIeHne H npInerana KpyKoTIke 3anoDnIO.
BkIIOUHe/BBIKIOUeHHe
y6eHTecb,TO Bbl MoXeTe PnHBOaHTB DaeCTBHe BBKIOuATenb, He OTNcKa pyKoTKn.
Длгькючени ЗлжКТрОнсHTРуМЕТа ПпeрБИнБTe BblKIOUOTeB(1)ВиpePdTak,YTObIHa BBkIQUaTeNe NOBINOCb O6O3HauHHe «I».
IyBbIKIOUeHn3NeKtPOHNCTpMEnTa NpeEBNHeTBe BkIOuATEB(1)Ha3ad TaK, YTO6bHa BbIKIOUaTe NeOBINocb 06O3NaueHne «O».
Yka3aHHe: Ecnn 3neKtponHcTpymeH nABTomatHueckn OT KIOUINCn H3-3a pa3pJKeHHOro Nn nepePepTO aKKMyIaTopa, BbIKIOHTe 3NEKtponHcTpymeH npN NOMOu BBIKIOHTaTeNa (1).
3apndte akkymyntopnn daaTe akkymnytopy octbIu nnBb 3aTeem ONrTB BkNoHauTe 3JeKTPoHCTpyMeHT. B npOTNBOM Cnyae akkymyntop MoKeT 6bITb NOpeJdeH.
Hactpoika qacToTBkOne6aHn
Pnnoomoo Konechka yctahOBKn uCnla KOe6aHn (5) MoXHO BbIpaTb Heo6xoJHmoe UcNIO KOe6aHn, B TOM uCnE Ha pa6oTaOuem HnCTpyMeHe.
HeoHmuaactotaKone6aHn3abnTOTMaTePHaNAu yCIOBnpa0bI HMOXET6bITOppeJeHa IpaKTHeckn Cnoc6om.
Pn paCnIOBKe, pe3Ke HmHFOBaHN TBePbIX MaTepeHaIIOB, HApN.. DpeBecINbI Hm MetaIIa, Mbl peKOMeHnyEM yCTaHABINBaTb YacToTy Kone6aHN Ha «6», MmKnx MaTepeHaIOB, HApN.. NpactMaCCbl, -Ha «4».
Yka3aHnI IO npIMHeHHIO
Do hauana pa60nto texo6cyxHbAHnO, CmeHe HhctpyMeHaTn.Дa TAKKpe npu TpaHcnpOpTnPOBKe HxaHEnHH N3BneKaTe AKKyMnyTop n3NeK- TpOHnCTpyMeHa.TpHnHepdHaMepeHHOM BkIIOueHn BO3HnKaET ONACHOCTb TpaBMPOBaHn.
BbIXHNTe NOnHO octAHOBKN 3NEKTOHNCTPymeHTa H TOIbKO nOcNE 3TOrO BbInyckAte ero h3 pyK.
Yka3aHHe:He 3aKpbBaIte BEHTINIauHOHHbIe OTBepCTnA (4) 3NEKTPOHNCTpyMeHTa npn pa6Ote, TAK KAK 3TO CHNKAeT CpOK cnJXbblneKTPOHNCTpyMeHTa.
Ppnnnnpa6o7bI
Bnaorapra kone6aTeNbHomy npnBOy pa6ouy HNCTpyMeHT COBepaet do 20000 kone6aHH B MmHyTb pa3hble CTopoHbI NOc CymMapHbIM yHOM 2,8°.3To o6ecneuHaET TOUHOCTb pa6OT BCAMbIX y3KNX MeCTax.

Pa6oTaTe C He3HaHTeBHOH npABHoMepHO HcNO pNkAaTH, HnAue npOn3BOINeBHOCTb pa6Obl CHNkAetCn BO3MOXHO 3aknnHbAHHe pa6OeRo HcTpyMeHTa.
BoBpemra paboI nepeMeuAte 3neKTPoHnCTpymEnH3 CTOpOHb BCTOPOHy,UTo6bI paOouHnHCTpymEnCnHbHO HeHarpeBaIcN HHe 3aKnHnHBaI.
Пиелене
Hcnonb3yute tonko HnOOBpeXeHbHe,63ynpeHbIe NINbHbIe NIOtHa.N30rHyTbe IINa 3aTyNHBUncECA INbHbIe NIOToHA MOrY TpePOMHTbCRA;HCnOB3oBaHHe TaKNX NIOTeH MOKeT OPuAteBbHO CKa3aTbC H a KaueCTBe paCNIIa INN Bbl3BaT pIKoWet.
PnpaNNHbHHIeKHXCTpOnTeNbHbIXMaTePhaIOB BbINONHHTe 3aOKHbIe IpeDnHcHn H peKOMHe Daun H3ROTOBtEnMaTePhana.
PacnHnBaTc norpyuKeHHem MoXHO TOnbKO MaRKnEMATEpHaJIbI, HAp., dpeBecCHy, rHNCOKAPTOH N.T.I.
IHaHauHaIIHeHnBbICOKOyTNEpOINCTbIM ININbHBIMNo IIOHTHMn pOBeBPte DpeBecHy, CTpyKeeHbIe PInITbI, CTPOImATEpHnblN T.D. Ha HAnuHne NoCtOpOHnX TeH, Hanp., RBO3de, BINTOB N.T.I. Pn HAnuHn TaKOBbIX yJaInTe HNBOcONb3yIteCb 6HmTaJIInueCKHMn ININbHBIM NOIOTHAMn.
Otpe3aHne
Yka3aHHe: Pn pa3pe3aHnn nIITKn dIe CTEn yuHTbIaBte, 7TO npn npOdoJNKeTbeHO np6ote HnCTpyMeNTb IoDBepraIOTcBAICOKOMy N3HOcy.
UmmfoBaHne
IpoDyKTBHOCTb paOtbl xapaKTeP wHIOBOAHHO NOBepxHOCTn 3aBnCt, B OCHOBHOM, OT BbIbpaHHOro a6pa3NHBHO MaTePhana, yCTaHOBNEHHOrO YnCnA KOeBaHm H CnblnHaKaTn.
ToIbKO 63ynpueHbIe 6pa3nBHeIe MaTePnaIbIO bcpeuBaIOT XPOUHy IPOH3BOInTeHbHOCTb NuaJrT 3NeKTPoHnCtpyMEHT.
CneIte 3a paBHomepHbmycnHem npKxatna, YTO6bnoBbICHTcPOK Cnyk6blabpa3nBHO MaTePnana.
Upe3MepHoe NOBbIeHne ycINnna pnpKaTHHe BeET K nobBbIeHIO pON3BODInTeNbHOCTn, aK6Oone CnHbOMy H3HOcCy 3NeKtPOHNCTpyMeNTa n abpa3HBHOrO MaTePnA.
TTOHORO TOUeyHoro ⅢNHOBAHn yrNOB, KpOMOKI TpyHOIOCTYINbIXyuaCTKOB DOnyCKaETcpa6oTaKaKe HToNbKOHNbKOHKOHNKpOMKOONHFOBOAHLHOITbl.
PnTOueHOMIINFOBAHN ABpa3NBHAR KUPKa MOKET CnIbHO HArpeBaTcRy.ymeHBiNTe YAcToTy KOJIeBAHNI IN PnH XHMHO yCInne n peryJnepHO oxJaKaIte abpa3NBHbMaTePnA1.
He nCnoB3yIte a6pa3nHbI MaTePnaJI, KOtOpBIM Bbl o6pa6aTbIaII MTeJI,IIN O6pa60TKDpyrIX MaTePnaIOB.
PpHMeHrTe TOnbKO OpiHnHaJIbHbIe PpHnAdJeXHoCTN Bosch.
IyanaHn
Ua6peHne
OcuyeCTBnIte 7abpeHne Ha BbICOKo Yactote Kone6aHn. Ha MrgKo NOBepxHOCTn (HaNP., Ha DpeBecnHe) pa6oTaTe C MNHMalbHo BO3MOXbIM yTlOM n MaIbIM ycNInEM npHXaTH. B IpOTNBHom clyayar 7nateb MoKet Bpe3aTbC B O6paBaTbBAemyIO NOBepxHOCTb.
TePMnuecka 3aunta ot nepeprpy3kn
PnncnoB3OBaHHN 3NEKTPONHCTpyMeHTa NO Ha3NaueHEnIO ero neperpy3Ka He BO3MOXHa. Upe3Mepna Harpy3Ka nnHecobJIOeHHe DOnyctHMOrO dIana3OHa TEMpeAtpd IAAKKymJrTOpa PnHBODNT K CHNXeHNO YacTOb BpaSeHHN IIN OTKHOeHHN 3NEKTPONHCTpyMeHTa. EcHn CInHJIACb YaCTOTA BpaSeHHN, To noHNoe YmCNO O6OpOTB 3NEKTPONHCTpyMeHT NaBePertToBtOLko Nocne TORO, KaK TempeATypa AkkymJrTOpA DOCTHT HONCTMORO dIana3OHa NNCHOba YmeHbUITcra Harpy3Ka. Pnp ABOMATNUeCKOM OTKnIOeHHN BkKnOHTe 3NEKTPONHCTpyMeHT, DaTe aKKyMnyTopHO BbIKNOHTe 3NEKTPONHCTpyMeHT, DaTe aKKyMnyTopHO batapee OCTbITb H 3aTEM ONITb BKIOuHTe 3NEKTPONHCTpyMeHT.
Yka3aHHNo ONTHMaHbHomy 6paueHHc aKKyMnyTOpOM
3aunuainTe akkymyIATOP 0BnaHn BODbl.
XpaHnTe aKKMyJrTOp TOnbKO B dHaana3OHe TempeIpy O T -20°C Do 50°C. He octaBnJe aKKMyJrTOp NetOM b ATOMo6Hne.
Bpemot BpemHn npounaHTe BEHTINIAHONHbIe npoep3n aKKymyTApOaMfKoN, cyxOnuNCTOKNCTOOKoN.
3HaunTeIbHoe COKpaueHEn npoDOnKHTeINbHOCTn pa6Otbl nocne 3apra CBnTeJIbCTByET O cTapeHN aKKyMnTOpa H yka3bIbAeT Ha HeoXoDMOCbE rto 3aMeHb.
yUHTbIaBte yKa3aHnNo yTmN3aun.
Texo6cnyxHBaHne n cepBnC
Texo6cnyxmbaHne H ouhctka
I O haana paobt no Texo6cnyxHBaHIO, CmeHe HNCTpyMeHTa N.Д., a TAKKe npn TpaHcnpTPOBKe H XpaHEHH N3BNEKAte AKKyMnyTOp H3 3NeK-TPOHCTpyMeHTa. PnHnpeDHaMEpeHOM BKNIOueHEN BO3HNkaet ONACHOCTb TpaBMPOBaHNA.
Длбобсчеснгкачесьннни6e3oancho pa60TbI coepKHTe 3NeKTPoHnCTpymEn H BeHTnnaHOBhIE npope3N B uCTOTE.
Peynno OunuAte npoBOnouH ouTeKo a6pa3HBbI pa6OuHnCTpymENT (pinnadJeXHOCTN).
CepBnKoHcyNbTHpOBAHne no BOpocam npmeneHH
CepBnchbI OTen OTBeHT Ha BCE Baun Bonpocbl no peMoNTy n 6cbnyKbAHNo BaWero npOyKTa, a TaKe ne 3anactm. H3o6paKeHn CnpocTaHCTBeHHbIM pa3deneHnEMeIaTe n HnHofopMaHIO no 3anactm MoKHO nOCMOTpeTb TAKKe no appecy: www.bosch-pt.com
168|Pycckn
KolneKTbCOTpyDnHkOB Bosch, npedocTabnouohn KOHCyIbTaunHa npedMeTNCNoB3oBaHHnpOkyu, C yDobOBCTBnEM OTBeHT Ha BCE BaUN BOpCbOTHOCHTeB Horo HaWe npOdykUnn ee npHnAdNeKHoCTe.
Ponayncta,BO Bcex 3anpocax 3aka3ax 3anacte on6raTeIbHO yka3bIaIte 10-3HaHbTobapHbN HOpE p 3aBODcKo Ta5nueKe H3dJIIN.
Длретиа: Pocch, Benapycb, Kaazxtan, Ykpanha
RapantnHoe 6cbyKbAHne HpeMOHT 3eKtpOnHCTpyMeH Ta, CcoBIOHeHHem Tpe6OBAHN HOpM 3rTOBOTEna IPOH NBOATCR HA TeppHTOPIN BCEX CTPAH TOBko BΦpmeHbIX IN ABTOP30BaHbIX cepBcHbIX ueHTpAX «P6epT BoW». IPEYIPEXKDEHNE! NcIOb3ObaHN KOtpaKaTHOH pOdyKuHN OAnCHO B3CnNpyatauHN, MOKeT pNBeCTN KUepe6y DnRA BaHero 3doPObBy. I3rOToBHeH n paCpocCTpaHENe KOtHaPaKaTHOH npOdyKuHN ppeCneDyETcNo 3aKohy B aMHHCTpAHBOM H yrOBoBHOM NOPdke.
Poccn
YonHOMOeHHa H3ROTOBHTeMeOpraHHauaH:
OOO《PobepT BoW》BaWytHcKoe Wocce, Bn.24
141400,Γ.XHmKn,MockOBcka8o6n.
Ten.: +78001008007
E-Mail: info.powertools@ru.bosch.com
www.bosch-pt.ru
Benapycb
HIN P06ep50wO OOO
CepBnchbIeHTpNoOcbnyKbAHNIO3JeKTPoHNCTpyMeHa
yn.TmMnRp3eBa,65A-020
220035, r. MHHCK
Ten.: +375 (17) 254 78 71
Ten.: +375 (17) 254 79 16
ΦaKc: +375 (17) 2547875
E-Mail: pt-service.by@bosch.com
Ophiunbny caT: www.bosch-pt.by
Ka3axctan
LcHtp KOHCyIbTIpOBAHNn npHeMa npTeH3N
TOO «PoBept Bou» (Robert Bosch)
I.AmAtbl,
Pecny6nkaKa3axCTan
050012
yn.Mypar6aebA,180
BLC «Fepmec》,7H3Tak
Ten.: +7 (727) 331 3100
ΦaKc: +7 (727) 2330787
E-Mail: ptka@bosch.com
POnHyIO nAKTyIbHyIO HnFopMaUIO o pacNoIoxEHIN cepBNCbIX cIeHTPOB IN pIneHMbIX IyHKTOB Bbl MoXeTe IOnyUHbHa OΦHuaNbHom caIte:
www.bosch-professional.kz
MondoBa
RIALTO-STUDIO S.R.L.
Пи.КаHTeMnpa1,3Tax3,TopROBbI ueHrTOPA3
2069KmHnHeB
Ten.: +373 22 840050/840054
ΦaKc: +37322840049
Email: info@rialto.md
ApMeHnA3ep6aJxH,py3nKpH3CTah,MoHro- Hn,TaXKnKCTAH,TypKMeHnCTah,Y36eknCTah
TOO «Po6epr Bow» (Robert Bosch)
Power Tools noclenpodaXhoe obcnykBaHne npocnK TaBm6eka 169/1
050050 AnMaTbI, Ka3axCTaH
Cnyke6hna 3n. nouta: service.pt.ka@bosch.com
OΦHnAHLbHbI Be6-caHT: www.bosch.com, www.bosch- pt.com
TpaHcnpTnpoBka
HaBIOXeHHbIe IINTHeBO-NOHbIe AKKyMnIaTOpHbIe 6batape pacnpcOpaHHTcra Tpe6oBaHnB BOTHOWeHHN TpaHCnOpTNPOBKn OAnchbIX rpy3OB. AKkyMnIaTOpHbIe 6batape MOrYt Ipe6o3NTcb CaMM NIOb3ObaTeJem ABTOmObHbIM TpaHCnOpTOM 6e3 Heo6xOJnMoCTn CoBIOJeHn DOIOHNHeJIbHbIX HOpM.
PnpeB03e C npNBueHem TpebHex HnU (HaNP:: camo- nTOM HnTHaHCnOpTbHM 3KcneIITOpOM) Heo6xOIMo cobnoTaB oco6bte Tpe6oBaHH K yNaKOBKe I MapKnPOBKe. B 3OM cnYae PnPi NOrTOBKe rpy3a K OTnpABKe Heo6xOImo yuacthe 3Kcnepta No onacbHM rpy3am.
OTnpabnIte aKkyMnyTOpHyIO batapeIO TOnbKO c HenoBpeJxDEHHBM KOPNYCOM.3akJeTe OTkpbITbe KOHTaKbI yNpKyIte aKKyMnyTOpHyIO batapeIO TAK, qTO6bI OHa He nepeMeUaIacb BHYTPH yNAKOBKN. IoXaNyIcTa, co6JIIOaJIte TaKKe BO3MOXHbIe DOONHtENbHbIe HaCuHOHaJIbHbIe PpeDINcaHIIa.
yTnnn3aun

3NeKtponHCTpyMeHTb, AKKyMnTOpHbIe 6aTpe, npHnAdJeNxoCTn UnyakOBky HxKHO cBaTb Ha ekONOrHecKn YnCTTyO pekynepaunio.

He bblbpaibai Te 3neKtpOnHcTpymEnbI h akKymyTnTopHbIe 6atapeH/6atapeEN B 6bitOBm Mycop!
Tolbko dna ctpaH-ueHOB EC:
BcooTBcTbHn cEBpOeIcko dHpeKTHBOI 2002/19/EU
OTcyKMBHNe 3NEKTPOHNCTpyMeHTb N COOTBcTcBHn C eBPOeNcKOI INpeKTHBOB 2006/66/ECIOBpeKdEHHble IHO HCepNaBHe c6Ba AKKMyTAOpb/IbAtpaeKN HJyHo CO-BnpaTb OTdEBHO H cDaBaTb Ha KONoHueCKN UcTcyO peKy- nepauHIO.
AkkymyIaTOpbl/6atapen:
JIITHM-HOHHbIe:
PoxanyIcTa,yuTbBaIte yka3aHHe Bpa3dene TpaHcnoptnPOBka(cm.,TpaHCnoptnpOBKa",CTpaHnla168).
yKpaiHcbka
Bka3iBkn 3Texhikn 6e3neKn
3araIbHI BKA3IBKN 3TexHIKN 6e3neKn dIeNEKtpoHCTpyMeHTIB
NONEPE-IXEHHA
Ipoountai Te Bci BkazibK 3 Texhikn 6e3neKn, IcTpykuii, InIOCTpaui Ta CneuphiKauii, HadaH 3 uM
eneKtpoinctpymertom. HeBkoHaHHyycix noaHnHex Hnue iNcTpykui MoKe np3BecTu do ypaXeHHneEeKtpuHm CTpymom, noKexi i/abo cepno3HOI TpaBM.
I6pe 36epiraTe Ha MaH6yTHc i nonepeXeHHa I BkaizBKN.
Пд NOHТТМ «ЕКТРОИСТРУМЕТ» BЦХ 3aCTepeXeHHx MaTbCa H a YBa3i ENEKTPOIHCTPUMEHT, UO npaIOc BiD МePEXI (3 eNEKTPOKa6eNem) abO BiD aKymyIaTPOHoi 6aTapei (6e3 eNEKTPOKa6eNIO).
Be3neKaHa pOboOmy Micui
TpmaTe CBOcpo6oue Mice B uHCTOTi 3a6e3neuTe O6pe oCbitnHn po6oyoro Micu. Be3naI a6o noraHe OCBITNEHH Ha p6oOyMoM CiCi MoKytb np3BecTn Do HeuaCHNX BnAaKiB.
He npaiothe 3 eneKtpoiHCTpymeHOM y cepedobnui, de icHy e6e3neKa Bb6bxy BhaCniDOK npncyTHOCTI roPouHx piHH, ra3iB a60 nnn. EneKtpoiHCTpymeHTN MOKYt npoJkyBatn ickpi, BiJAKHX MKe 3aHaMTHcR nn a6o napi.
Piic npa3 eektpoHcTpyMeHm He iynckate do po6oyormicia ditei ta innx IIOe. BMOKTe BTPaTHN KOHTpOJIb HAD eektpoHcTpyMeHtom, RaIO Bu He 6yDeTe 3ocepeJxehi Ha BIKOHAnHIOPOBtN.
EJektpmha6e3neka
WtencnbeneKTpoHCTpymetaOBHHnacyBaNdo p03eKn. He do3BOJnEbCmIHHTuocb Wtenceni. IINpo6oTH 3eneKtpOHeCTpymEtAMn, 0o MaOTb 3axNChe 3a3emHnH, HE BHKOpNcTOByTe aAnTepn. BkOpNcTaHH opirihalhoro wTencela Ta HaneXhoI po3eKn 3MeHUpyepnIK ypaKeHHraeKTPnuHm CTpyMOM.
YHKaTe KOHTaKTu YacTHN Tiia 3a3eMneHMM NOBepXHaMn, HAp., Tpy6Amu, 6atapeMaN OanaleHHa, NITAMn Ta XoNOdHbHKaMn. KOni BaWe tino 3a3eMneHe, icHyc 36iJIbSeHa He6e3NeKa ypaKeHH eNEKTpHuHMMCTPymOM.
3axuaine enektpoiHCTpymEnb iD douyi Bonn. PonaadHNA BODN B enektpoiHCTpymENT 36inbwyepn3nk ypaKeHH enektpnHm CTpyMOM.
He BnKOpNCToByTe MepeXHHuHyp XHBnEHHa He 3a npH3NaueHHaM. HikOnn He BnKOpNCToByTe
MepexHm shyp dna nepehceHH a6o nepetryBaHH eektpoincTpymeHTa 60 BnTgAHH wTencen3 po3ETK. 3axuane Ka6b BiTeNla, MaTHHa, roctpxk KpaIB Ta pyxomnx Detanee enektpoincTpymeHTa. POnkoJKeHH a6o 3akpyehnn Ka6b 36iNbye pnsK ypaXeHH eektpnHm CTpyMOM.
ДлгзOBHIMIXpo6ITobOB'3KOBOBHKOPNCTOByTe nIe TaKnNoOBKyBaU,IO npDAtHHdIa3OBHmIXpo6IT.BNKOpNCTaHHNoOBKyBaU,IO po3paxOBaHHHa3OBHIMHiPo6OT,3MeHwye pN3IK ypaXeHHeNEkTPuHM CTPyMOM.
KIO He MoXHa 3aNo6irn BHKOpHCTAHNO eNKTpoHcTpymenta yBONOrmy cepedOBuI, BHKOpHcTOByTe npHcTpi 3axnCHORo BHMKHeHH. BHKOpHcTAHH npHcTpo 3axnCHOrO BHMKHeHH 3MeHwE pN3NK ypaKeHHeNEKTPuHMM ctpyMOM.
Be3neKaIIOeI
Bybte yBaxHHMn, cnIkyTe 3a Tm, IIO Bn po6nte, Ta po3cydHBO NOOBtEcN iI qac po60TH 3 eNEKtpOHCTpymENTo. He KOpNCTyTEcE eNEKtpOHCTpymENTom, kIoo Bn CTOMneHi a60 3hAxOHTecN iI dIeH NapKOTKn, CnHPTNX HANOIB a6o NIKiB. MItb HeyBaXHOCTi npH KOpNCTyBaHHI eNEKtpOHCTpymENTo MOnKe pnp3BeCTn Do cepNo3HX TpaBM.
BHKOPHCTOBYIte 3ac6bIHINHBIDyANbHO 3axNCTy. 3aBXn BjaTaTe 3axChi OKyIrp. 3actocyBaHHa 3ac6ib IHINIBiYaNbHO 3axNCTy DnB iINoBIHNx yMOB, HApP., 3axNCHOI Mackn, CNEUB3yTTA, IO He KOB3aETbCRA, KACKn Ta HabyuHKnB, 3MeHUc Pn3NK TpaBM.
YHHKaIe BnnaKOBOr BMKAHHa. Nepu Hix yBIMKHyTH enEeKtpoHcTpMeHT B eneKtpomepexy a60 nID'edHaTH acMyyTApOhy 6aTaPeO,6paTHoR O pyKn a6o nepeHOCHTH, BNEBHITbCBy TOMy,IO eNekTPOHcTpMeHT BHMKHeH.N. TpMaHnHa NaBzHa BA MHKaui nID vac nepeHecHH eneKtpoHcTpMeHTa a60 nIKNoeHH B PO3eTKy yBIMKHYTO r eNekTPOHcTpMeHTa MOKe pIn3BeCTn Do TpaBM.
PepdTM,AK BMnKaTH eNEKtpOHCTpMENT, np6epitb HanaorOxyBaBbHI iHcTpMENTa 60 RaKOBH KIOU. PepeSyBaHH HanaorOxyBaBHO rIcTpMENTa a6o KIOUa BactHI eNEKtpOHCTpMENTa, 10 o6ePaTbC, MoKe pN3BecTu DO TpaBM.
YHKaTe HnppnoHoro NonoXeHH TINA.3abXn 36epiraTe CTKe NOOxehn Ta TpMaTe pibHObary. Lcdo3BOInb Bam Kpaue KOHTPOIOBAtn eneKtpoiHCTpyMeHT y He63neuHX CHTyaIax.
BdraIte npdaTHn OaR. He BdaIte npocToHn OaR Ta npKpach. He ndabTne BOnocn OaR do Detanei, 0o pyxaoTbCn. IpocToHn OaR,IOBRE BOnocca Ta npkpaN MoKyTB NotpanHTN B Detani, IOpyxaHObCn.
Akyo icHye moXnHbictb MOHTyBaTHnnOBiDcMOKryBaIbHI a60 nnooyNoBIOUOci npHcTPOI, nepekoHaTeca, 666 BOH 6yHN Do6pe NiEhAni Ta
170|YkpaHcbKa
npabHbHO BHKOpHcToByBaHnC. BHKOpHCTaHHnnIOBIDCMOKTyBaHbHO pNcTPO MOKe 3MeHHTNH6e3neK, 3yMOBHeI HINOM.
Dobpe 3HaHHe ENKtpoHCTpymertIB,OTpHMaHe B pe3yNbTATi qactoro IX BHKOpHCTaHH,He NOBHHO np3BOHTn Do camOBneBHeHOcti irHopyBaHH npHHnBbTexHkN6e3NeKn. HeoBepeXHaIir MoKe B ONDHY MNTb pIN3BecTn DO BaKkoITpaBMn.
IpaBnblhe NOBdoXeHHa Ta KOpHcyBaHHa eneKtpoHCTpyMeHTAMN
He nepeBaHTaxyIte eneKtpoiHcTpymENT. BHKOpncTobByTe TaKn eneKtpoiHcTpymENT, 0cneuaIbHo np3naueHH dIaBIOBHOi po6tN. 3 npdaTHMM eneKtpoiHcTpymENTom Bn 3 MeHWM p3NKOM OTpMaTe Kpaui pe3yIbTaTH po6tN, Raio 6ydeTe npauoBAtn B 3a3NaueHomy diJana3oHi notyXhoCTi.
He KopnctyteeKtpoHCTpymeHTOM 3 NOWKoJKeHM BmHKaYem. EKeTPOHCTpymeHT,AKH He BMnKaTbC a60 He BMnKaTbCra, C He6e3neuHM i HoTo TpeBaBipmoHTyBaTH.
IpeaTMM,AK perynoBATn 0o-He6ydb B eNektpointpymenti,Minrtn npnaad a6o xOBaTH eNektpointpyment,BHTARHt bTeNCenb i3 po3eTK Ta/a6o BNTARHt bakymnytophy 6atapeo.Li nonepdkyBaNBi 3axOdn 3TexHkN 6e3neKn 3MeHnyOt b PNK BNnAdKOBOr 3anyCky eNektpointpymeHa.
XoBaIe eNkTpoHCTpymEnTH,AKHMn Bn came He KopHcTyEcA, BiD dItei. He Do3BONaHTe KopHcyBaTHCAeNkTPOHCTpymENTOM Oco6am,IO He 3NaHomi 3 HOro pObToO abO He uHTaH N i BkazIBKn. BHKOpHCTaHH eNkTPOHCTpymENTi HeEOCBiDuEHMM OC6aM MoKe 6yTN He6e3neuHm.
CTapaHNO DoTnlaDte 3a eneKtpoHcTpymeHTAMi npnaadam. IpebeipnTe, u6p yxomi detani eNEKtpoHcTpymeHa 6ynn npabNbHo po3aWobahi Ta He 3aIaHn, He 6ynn NowKOxKeHMn a60 y 6ydb- komy IHOMY CTAHi, AKNMir 6n BnHNHyTH Ha fynkiohyBaHH eneKtpoHcTpymeHa. NOnkoJXei eNEKtpoHcTpymeHTN oTpi6HO BiDpemOHTyBAtn, nepuHX KOpHcTyBaTc HMM 3HOBy.Benka KInbKiCtB HeueacNHx BnJaKnB CnpuHHeTbc nOraHM DOrJIaON 3a eneKtpoHcTpymeHTAMn.
TpmaTe piaabhi iHCTpyMeHTHaROCTpeHHMa TaB uHcTOTI. Ctapahno DOrnayti piabhi iHCTpyMeHTn 3 roCTpIM piaabHM Kpaem MeHwe 3acptpoB Ta nere B EKcnnyataii.
BHKOPNCOTByte eneKtpoInCTpymENT, npnnaIaIdo hboTo,po6oui IncTpymENTH ToIO BiNOBiHO Do uix BkazIBOK.BepIt do ybarnpuOmyyMOBN po60TH Ta cneuphiKy BHKOHyBAHOI p60TH. BHKOpCTAHRe eneKtpoInCTpymENTIB DnAPOBIT, nlaRkHX BOHN He nepedbauH, MoKe np3BeCTn DO Hebe3neuHxCityaui.
TpHMaTe pyKoTKn i NOBepXHi 3axBaTy cyxHmI qHCTHM, CnIDkyTe, 06 Ha HNx He 6yNo ONHB a60 rYcToR MaTHna. CnNbki pyKoTKn i NOBepXHi 3axBaTy
yHEmoXnBnIOIb 6e3neUHe NOBOJKeHHa 3
eNEKtpoiHCTpyMeHToM Ta HOrO KOHTpOIOBaHHa B
HEoYiKaBaHN CHTayiaJx.
PpabHbHe IOBODKeHH Ta KOpHcTyBaHH eneKtpoHCTpyMeHTAMn, 10 npauOIOb Ha akymyTOpHNx 6atapeex
3apjkaTe akymyIaTphi 6aatae Inne B 3apJyBaIbHNx npHCTPOX,peKOMHeIOBAHX BHROTOBIOBauem. BkOpNCTaHH 3apJyBaIbHO rnpCTPOO dIy akymyIaTPhNX 6aTapei, nIy kIX BIn He nepeDbaueHm,MOKe npI3BOHTn Do noKekxi.
BnKOpHCTOByIe B eEnkTpoHCTpyMeTHax NHepe kOeMehoBani akymyIaTOPi 6aTaPei. BnKOpHCTaHHI hUHX akymyIaTOPiHx 6aTaPeI MoKe npH3bODHTIO TpaBM Ta NoXekXI.
He 36epiraTe akymyTOpHy 6atapeo, kaoBn came He KopHcTyeTecra, npRd i3 KaHcIeRpcKHMCKpINKAMN, KIOUAMN, UBXAMN, FBHTAMN Ta IHuWMNH HeBENKMM MeTaeBMN NpeMeTAMN, kI MOxytb CnpHHHT NepemHKAHNA KOHTAKTIB. Kopotke 3aMnKaHH MIX KOHTAKTMn akymyTOpHO6atapei MOKe cnpHnHrTH ONIk n abo noXeKy.
PnHnPaBnBHOmy BnKOpNCTaHH3 akymyTApH0i 6ataeMoKe NOTeKTH pINHa. YHnKaIte KOtAKTy 3 Heo. Pn BnAkoBMy KOtAKTI pOMnIte BiNoBIDHe MlCe BOIOU. RAnO pINHa NotpanNa B Oui,doaTKOB 3BepHITbCdo Nkapa.AkyMnyTOpHa pINHa MoKe cnpuHNrH TnoDpa3HeHH aKipn a6o onIKn.
He BnKOpHCTOByte NoIkoJxHeni a6o MoIhphiKOBaHI akymyTApOp a6o enEeKToPoiHcPymEn. NooKoJxHeni a6o MoNphiKOBaHI akymyTApOp MoxKyb NObEcTHcR HeouikyBaHO, 0o MoKe np3BecTN Do NoXeKi, BN6yXy a6o pn3NkY TpaBMn.
He niDaaBte akymyTOp a6o eneKtpoiHcTpymENT IIi BorHIO a6o BnCOKnx Tempepatyp. BorOnb a6o Tempepatpyn Buichi 130°C moKytb npH3BeCTn do Bn6byx.
BnKohyIe Bci Bka3iBkN i3 3apJxHnn I He 3apJxKaIte akMyIaTOp a6o enEKTpoHCTpyMeH 3a TEMpeATyp,IO BHXOaTb 3a BKAaHI BInCTpyKuII mexi. HnpabNlbe 3apJxHaHH A60 3apJxHaHH 3a TEMnepatyp,IO BHXOaTb 3a BKAaHI MEXI,MOKe NOwKOaHTN bTaapeio i nDnHHTn PN3NK 3aMaHnH.
CepBic
BiiDaaBaiTe CbiEneKtpoiHCTpyMeHT Ha peMOHT NHe KBAiipikOBaHHM paxiBuaT Ta NHe 3 BHKOpHCTAHm OPHirHaIbHnX 3aNactHn. Lc 3abe3neuHb po6Oy npHcpo IpOTARo TpIBaIoro yacy.
HikonHe o6cnyrobyte nookxkexi akymytnTopn. O6cnyrobybathakymnytOpn Do3BONrEbca Nlwe Bnpo6hky afo abtopn30BaHm cepbcHm oprahiiaqim.
Bka3iBkn 3 texhikn 6e3neKn dHa 6araTofoHKioHahbHnx pi3akib
PnBnKoHaHHi po6it, npn JKnX npnnaMmOKe 3aenHTHaxOBaHy eEnKtpnpoBOky, TpMaJTe IHcTpymEt 3aI3obai HIOBepxHi.3aenneHn PnIIaDnIM pNOBoKN, 103hAxOHTbcPiHapyroIO, MOKe npN3BeCTH Do 3apJKeHH MeTaeBHX YacTHN eEeKtpoIHcTpymEt Ta Do ypaKeHH eEnKtpnHMM CTpyMOM.
BnKOpHCTOByte eneKtpoiHCTpymENT nIwe dny cyxoro uIipyBaHH. NonaHaHH BODIN B eneKtpoPiAn 36inbIyepuKaHe H eNEKTPuHMM CTpyMOM.
Ybara: He6e3neka 3aHaMaHH! YHnKaIte neperpibahnn Wlifobaoi nobepxhi i wifmaunnn. Npeed nepepBOIO Bpo6oTI 3abXnC npOxHOHe KOtheHep nnny. PnB iD wifybaHH, 0o 3i6pabcrB nno36ipHomy Miueky, MkPoojbltri, nanePobOMy Miueky (a60 y fInbTyBaHbMOy Miueky /finbpi nnoococa) Moke 3a NeBHnx yMOB caMo3aMAtnc, Hapr. Bic iKpn pni wifybaHHi metany. Oc6nBa He6e3neka BHNKAc, RAnO Bin 3MiuaHn i3 aNtukamn NaKOΦap6OBOrO NOKpHTT, nOniypetAHy aOo 3 iHmm XIMUHMn peOBHAMn i WifioBaHa NOBepxHn Harpinac niac TpNbAoI o6p6kn.
He niCTabnIte pyKn B 30Hy po3nnIOBaHH. He 6epItbcra pyKIO nI o6po6nIOBaHO DetannIO. KOHTAKT 3 NIKOBIM NOIOTOM UpeBaTHN NOPaHEHHM.
Perynpho ouhauTe BENTnuaui Hi OTbOpneKtpoiHcPymeta. BeHTnIATop eKtpomotopa3aTAYC NUY KOPNyc, CNBHe HAKONUeHHMa MetaneBOrO Nny MoKe np3BeCTNo eKtpuHOI He63NeKn.
Длгзнхджснгдддддддддддддддддддддддддддддддддддддддддддддддддддддддддддддддддддддддддддддддддддддддддддддддддддд徳псьггггггггггgггgгgгgгgгggгggggtggtggtggtggtggtggtggtggtggtggtggtggtggtggtggtggtggtggtggtggtggtggtggtggtggtggtggtggtggtggtggtggtggtggtggtggtggtggtggtggtggtggtggtggtggtggtggtggtggtg
PiJvacpo60THTpMaHTeeneKtpoHCTpymENTMiHo 6bOMa pykam136epiraTe CTiKe NOOxHeHa.BoMa pykAMBnMOXeTe6IbHnaHIO npauOBaTH eneKtpoHCTpymENTom.
Pn3amHmHHnxpo0uHxInCTpyMeHTBBraaTe 3axnci pykabui.3MHIpo6ui InCTpyMeHTMOXytb npTpBani ekcnnyataui HarpiBatna.
He 3uuahe 3bOxKeH MaTePiaHn (Hanp., uanepH) i He npaQoHe h BOnoromy rpynti. NonaHaHH BODN B eNEKtponpnaad 36inbWy c pnsk ypaXeHH eNEKtpnHMM CTpyMOM.
He 6p06nIte 6p06nIOBany NOBepxHIO pIDHAMN, IO mictb po3HHNK. Upe3 HarpiBaHH MaTepiAIB npu w6pyBaHH MoKyTB BHNKaTH OtpyHn nap.
PiJvacpo60THi3CKpe6kOMiHOXOM6yDbTe 0c06nBO o6epeKHMn. Po6oHiHCTpyMeHT dyke roctpi,ichye He6e3neKa npaHeHH.
3aKpInHHe 60p6nBOAHy 3aTOrOBky.3aDOnOMoHO 3aTnCKHOrO pncTePOAO bO neuat o6p6nOBHH MaTePian fikcyetbca HadiHHiIe HIX npn TpMaHHI HOrO B pyui.
Pn noKoJKeHHi a6o HnepaHbHNI EKcNpyaTii akymyIaTOHOI 6aTaPeIMOe BxOOnTH nap. BnyctitcbiKe NOBITpI -y pasiCKAPr-3BepHITcBdo NIKapra. Nap MOKe NOpa3HOBaTH dHXaJIbHI WJAXn.
He BiKpnBaIte akymyIaTophy 6aTapeo. IChye Hebe3neKa KopoTKOro 3aMHKaHH.
FocpHmnpedMetamn,HaP.,rB3dkamn a60 Bkpykamn,a6o npKnaadHHM 30Bihhboi Cmno MoKNa nookdTH akymyIaTophy 6atapeo.MoxnBe BHyTpWHc KOpOTke 3AMnKaHH,3aOpaHH,ytBopeHH Dmy,Bb6yx a6o nepepiabkymIaTropHO6atapei.
BHKOPHCTOBYte akymyIaTOpHy 6atapeo nnue y Bnpo6ax Bnpo6hNka. Nne 3a taKnx yMOB akymyIaTOp 6ye 3axnueHH BiJ Hebe3neuHOro nepeBaHTaKeHHA.

3axnauTe akymyIaTOpHy 6atapeo BID Tennla,30Kpema,Hanp.,BID coHauHIN npomehIB,BORHO,BODTaBOON.HcHyE He6e3neKa Bb6xy.
3o6paXeHI KOMTOHEHTU
Hymepaui 3o6paekhenx KOMnoHeHTB NOcnaeTbca Ha 3o6paekhen eneKtpponpnaNy Ha ctopiu3 MaIOHKOM.
(1) BIMnKaay
(2) Khonka po36nokyBaHHa kMyyIantopHoi 6Taapei
(3) AkymyraTopHa 6aTapea
(4)BeHTnJIaIciHIIJINHH
(5)KoiuataKoIgBcTaHOBnEHHaCTOnKoiNBAhB
172|YkpaHcbKa
(6) IHHaKATOP 3apJxKeHocOti akymyIaTOpHOi 6aTaPeI
(7) NaTPoH
(8)3aTnCKHnBaxjinb6mExyBaayraTnn6HH
(9)O6MeJxBauTINHNN
(10) Bpi3He pnnKoBe nnonToHO
(11)3aTnCKHmTBnHT
(12)Knou-WeettnpaHHNK
(13)PykoTka(3I0nbObaHOIO NOBepxHeIO)
(14) CnCTema nINOBiCDMOKTByaHHN A
(15) 甲iΦyBaIbHa nIIHTaA)
(16) ⅢnifybanbHa wkykpaA
(17)3aTnCKHn BaxiInb BiDcMOKryBaIbHoro npHCTpoA
(18) BintaJxHnI naTpby6oK
(19) BiDcMoKtByaBbHn aadantTeP
(20) BiDcMoKtBuBbHnIbnHaNr
A) 3o6paKeHe a60 oOnCaHe npHaJa He BxOaHTb B CTaHapTnH O6cH NoCTaBKn. NOBHH acOpTMeH TpHaJaBn 3hAaidTe B Haui nporpamipnpaJa
Texhihi dani
| Akyumnyatopný yuhíberçalbni pižak Multi-Cutter | GOP 12V-28 | |
| Toberné homēp | 3601 HB5 0.. | |
| Hom. Hanpyra B=12 | ||
| KílbékICTb oběptíв на холоctómy xódu n₀ | xBVII.1 | 5000-20000 |
| Кут осцínáй ličobуч/ правору | °1,4 | |
| Bara bīdnoíbídno do EPTA- Procedure 01:2014 | kr 0,97-1,2 | Al |
| Дόнустима temnéразуна habkònlùnhóro cepećobnuça | ||
| -噼и зардожани °C 0...+45 | ||
| -噼и ekсплуатацii 3)噼и Зберîranhi | °C -20...+50 | |
| Рекомendobani akумлątropné δатурëi | GBA 10,8V... GBA 12V... GBA 12V...W | |
| Рекомendobani зарди пристrodu | GAL 11...CV GAL 12...CV GAL 18...W | |
A) B 3aIeXHOCTi BiD BVKOpNCTOBaYBaHOi AkyMnyTAPoH06TaTapei
B) 06mexeHa nOryKHiCt b npn Temnepatypi < 0^
TexhiHdi hai Bn3auehei 3 akymynTopHO6atapeio, 0o BXOHTB 06cgrnoctabkn.
Infopmaiai zoio wmy i bi6paui
3haueHHaCTbOpHbAoTO WMy Bn3HaueHi BiINOBiHO EN 62841-2-4.
A-3BaJKeHn pIeHb 3ByKoBOrTO TCKy BiEneKTpoiHCTpyMeHTa, knpaBnO, cTaHOBtB 79 d(A).
PoiXbKa K = 3ДБ. PibeHb WуMy npn po6Oti moKe nepeBnUyBaTn 80ДБ(A).
BdraIte HabyHnKn!
CymapHa Bi6pauiia a, (BeKtopHa Cyma Tpbox HApnPKiB) Ta noXbKa K Bn3haeH iBiNJOBiDHO EN 62841-2-4:
UniyBaHHa:ah=3M/c²,K=1,5M/c²,po3NIOBaaHBA Bpi3HMM NINKOOBMM NOOTHom:ah=9M/c²,K=1,5M/c²
PO3HIOBAAH CERMeHTHM NINIAHBHM NOIOTHOM: a_n = 2.5M / c^2,K = 1.5M / c^2
wa6pyBaHHa: a_b = 8,5M / c^2,K = 1,5M / c^2
3a3haeHBIuXBk3iBkax pibeHb Bi6pauiipibeH emicii
WMy BmipioBaHnca 3a npoaeDpyo, Bu3haeHO B EN 62841; HMMMOxHa KopnctyBaTHCA nI npOBHHn npnaiaB.BoHn Takox npndatni nonepehbooi ouHKn pIBraBi6pauiipibHemcii WMy.
3a3haeH i pibH bipaai i pibH emicii wmy ctocyoTBc
OCHOBHX poBt, nra knx 3actocobyetcb
eneKtpoiHCTpyment. Ondak y paasi zactocybaHH
eneKtpoiHCTpyMeHa dna i HnHx poBt,poBTH 3 iHnHM
npnAaam abo y paasi HeoctaThboro TexHvHoro
obcnyroBaHHaPBHB bipaai i pibH emicii wmy
MOxytb 6yTH iHmMn. B pezynbati pibH bipaai i pibH
EMiCiI WMy npotarom BcBOr oPo0oHor acy Moxytb
3HaUHO 3POCTH.
Дя touhooi ouiknpiBHBiBpauiipBHBEmicilwmy notpi6no takoB bpxoByBatn ihtepBaan yacy, konneEeKToPiHCTpymEnT BMMKHeHH a60, xoua NyBIMKHeHH, ane paKTNo He npaioc. Lc moKe 3naHo 3MeHNUTCymapnni pBeHb BiBpauiipBbeHb emicil wMy npotraom po6oYOrO acy.
Bn3haTe doaTkoB 3axOoN 6e3neKn dna 3axncty onepatopa eneKtpoiHCTpyMeNTa BID BiBpaui, Hanp.: texniue ocbnyrobyBaHHra eNeKtpoiHCTpyMeNTa i pobuNX IHCTpyMeHTi, harpibaHHRAyk, opraHiauaipobounx npocecib.
MOHTaK
Ipeed ycima MaHinnynuaRM 3 eKtpoihctpymeHTOM (Hanp.,TexHicHHM O6cNryROyBaHHM,3aMIHO pObooro IHCTpymeHTA ToIO),a TAKOX npH Noro TpaHCNOPTyBaHHi i 36epirAHHI BmMaHTe akymyTOpHy 6aTaPeio 3 eKtpoihctpymeHTy. Pn HHeBAIMCHOMY BKIOUeyHHi BHMKaay icHy cHe63neka nopaHEHH.
3apdkaHnAkyMnyTopHo6aTaapei
BnKOpHCTOByTe NHe 3apAHI npHCTPOI,3aHaueHi B texHINHX DAHN. NHe Ha ci 3apAHI npHCTPOI po3paxoBAHN NIIEBO-IOHHN AKymyTAOP, IO BnKOpHCTOByETBCa y BaOMy npnaji.
Bka3iBkA: AkymyIaTOpHa 6aTapeaNoCTaCy aCtKoBO 3apJKeHOIO. Lio6 akymyIaTOp mI peaI3yBaTH CBOIO NOBHcHcTB, nepeT TM, kN pepuH pa3 npauOBaTH 3 npnaOAM, akymyIaTOp Tpe6a NobHcTIO 3apJNDHTy 3apJNDHOMy pncTpoI.
IitieBO-IoHHn akymnyTop MOxHa 3apJkaTH KOH 3aBROHO, ce He ckopooyE Horo EKcNpyatauiHH peCypc. IpepeHbAHn npouecy 3apJkaHH He Nookdoxye akymnyTop.
IitieBO-IOHHAnkyMnyTOp3axHueHHBIDrN6OKoR0
po3pRJxHnH CnTeMoIO „Electronic Cell Protection (ECP)".
Pn pO3pRJaKeHOMy acMyMnyTOpi npHnAd 3aBnK cxemi
3axHcTy BmNkAcTbCa. PoobOH IHCTpyMeHT 6InbHe He pyXaTbcra.
UoB BnTHTn akymyIaTOpHy 6atapeo (3),HaTnCHiB Ha KOnKn Po3bNOkyBaHHra (2) i BnTnHtB akymyIaTOpHy 6atapeo 3eneKTpoIHcTpMyeHTa,NotarhyBuHn Hazad. He
3acTOcOByTe npH cMbMy cnny.
3BaKaJIte Ha Bka3iBKN ΜΙΟ ΜΙνaIaIeHЯ.
IIndkaTOp 3apdKeHocTi akymnyTopho6aTaapei
Tpnehehi cBtiNIOiOn iHdkatopap3apJxHeocsti akymnTropHOb bataei (6) nokaaytcb tynih 3apJxHeocsti akymnTropo3 (3).IHKATOP 3apJxHeocsti akymnTropHOb batae CBHTbcra Nnue 5ceyndnicny BIMKHeHH.
CBtioiOEMHictb
CbivHn3-x3eneHHx≥2/3
CbueHHN2-x3eneHHx≥1/3
CbitnoioEhnicb
CbivH1-ro3eneHoro < 1/3
MiraHn1-ro3eNeHOrope3epB
MepextHnHa 3-x3eIeHHxiojivXoocTHxiD
KIOIOICNYYBIMKHeHHHE CBITNbJOHN CBITNOIO, akyMnTOp HecnpaBBH i IHO cIi 3aMHHTN.
3amina npnlaed
PiiJac 3aminH npnnaDg o6OB'3KoBO HaidBaiTe 3axnci pykabuCi. TopKaHHa Do npnnaHece B co6i He6eNeky npaHeHHa.
Bn6ip po6o0rO inctpymehra
BnKOpNCTOByTe NnIe npn3NaheNe DnIyCboEneKtpoHCTpyMeHa Tpnnlaa.
Pobouni hctpymEnGOP 12V-28
STARLOCK


IHTpymEnBn 3HaJTe B WnPOKOMy acopTImeTI
Po6ouH INCTpymEnMaTePian 3AcToCyBaHNHa

BimetaeBn cerMeHTHn HINJIbHN DnCK
IpeB'HI MATEPIAN, nactMaca, KObopoBI metaJIH
Po3piTa po3nni i3aHypOBaHHM;
TakoxIpao3nIOBAAHnnoHaKpAeM,BkyTx i BaxkoDcTyNHmicx;
PiPKnAd: ykopouehnBKe BCTaHOBneHXnPiHTyciB DBePHnx paM,po3nnIOBAHHn i3aHypOBaHHM nPi npnacyBaHHnipnorOBnx naHen
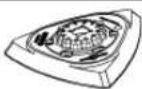
UliyBaIbHa
IIITaDn
a6pa3HBnX
uKypok cepi Delta
93MM
3aIeKHTbBIDabpa3nBHOI 8kypkn
UinidyBaHHnoBepxohb noniKpaAMn, Bkytax abo
BaKoOCTynHnx Micax;
B3aJeXHOt i Bid a6pa3nHB0i WkypKn, Hap..I
uNidyBaHHn DepeBHN, fap6n, naky, kameHIO;
HetKaHe BONOKHO dny OMHueHH n CtpyKtpyBaHH
depeBHH, BnAaeHnIPx1 3 MetanIB i niDwnipoyB
nakib, nonipyBaHa noCBt Dn nonepehBoro
nonipyBaHH
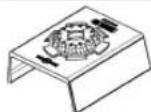
Hacanpa nna 甲nipyBaHH npoipinB
IpeBnHa,tpy6n/npOfini,pa6a,naK,3anOBHOBaU,Meta
3pyue he epeKTHBHe uNlifyBaHHn npoepinib diaMetpom 55 MM;
uepbOHi uNlifyBaHbHI uKypKn dnnuNlifyBaHHn
depeBHH, Tpy6/npOpiINB, naky, 3anOBHIOBAa i Metana
Bpi3He 6iMetanebe INIKOBe IIOIOTHO DnpeBHH Ta metany
M'ka DepeBHa, Ma'ka
IIactMaca, fincokapToH, TohKocTHi npOphi 3
aIOMHIIO Ta KOJIbOpOBHX
MetaJIIB, TOHKNI
NtCTOBH MetaI,
He3arapTOBaH i ZbAxn i
Wypyn
HebeNki po3pi Ta po3nH i3aHypObaHHM; npKlaad: na3n DnIpo3eTOK, BIDpi3aHH MjDnHex Tpy6 yPiBeHb, po3nnIOBaHH i3aHypeHHM y rIncokapToHHnx nnITax
FinirpanHe npinnacyBaHHy y depeBnHi; na: n3n dnn 3amKb i fpyHitypN
174|YkpaHcbKa
Bn6ip a6pa3HBHOI Wkypkn
3aIexHO bID o6pO6JIIOBAHOro MaTePiaIy Ta iHTeHCnBHOCTi 3HIMAHHa MaTePiaIy 3 NOBepXHi icHyOTb pi3Hi IINiFyBaJIbHI
| шпіфуньна шкypka | МатерIAN 3actocubаня 3eprnctictb | |||
| - Bci matériani 3 deprевини (hanp.,.Tverdi pioredi depevnihi, M'aki pioredi depevnihi, depeboctpykovi piñnti, byidibeni piñnti) -Metalebi matériani | Для уроч borO shlifybanHЯ, hap., wepiabHx, heo6ctpyaHnx banelok i dozok | rpy6a načtrpojka | 40 60 | |
| Для плоскоошлifуberHЯ i bivipinHobAHЯ heběnkHx hepiBhoctéŋ | cepeĐЯ 80 | 100 120 | ||
| Для чinctoboro i tohkorO shlifyberHЯ depebHnT tohka | načtrpojka | 180 240 320 400 | ||
176|YkpaHcbKa
He BnKnJaTe eNeKTpO npHnAaTa akyMnyTOpHi 6aTapei/6aTapeeKnB no6yToBe CMITIa!
Пишдя Краин EC:
BjIIOBIDHO do eBpOeNcBKOI dnepeKTHBN 2012/19/EU enEeKToPiHCTpyMeHTn, IIO BmIuN i3 BxHBaHHa, Ta BiIOBIDHO do eBpOeNcBKOI dnepeKTHBN 2006/66/EC nowkoJehi abo BiINpaCbOBaHi akymyIaTOpHi 6ataei/ 6ataeKn NOBHHI 3daBaTHcR OKpeMo i yTNi3yBaTHcR ekONOIQU HO YCHTM CNOCoBOM.
AkymyaTOpH/6aTapeKn:
NiiieBO-oHHi:
Bybna cka, 3BaKaJte Ha Bka3iBKN B po3diI TpaHCnOpyBaHHa (NIB. TpaHCnOpyBaHHa, CtopiHa 178).
Ka3aK
Eypa3nEkoHOMKanbIK OdafbiHa (KeJeH OdaFBiHa) Mywe MemLeKeTepayMaFBiHa KOnDaHbIaDbI
HdiyHHHIM KApactbipfah naDanaHy KxTAPbHbN KypamBHa nndaNa HyKeHHderi Ocb HcaybK,cohBMn6 bipre Kocmbanap da 60ny MyMkiH.
CnkeTpi pactay kaiNbI aknapat KocbIMwada 6ap.
EHIMdi eHdpreH Memleket TypabI aknapaTeHIMHH
KopnycbHda XHe KocbIMwada KepcetInreH.
EHipiren Mep3i MykaybIK MykaabcbIH COHfB6etinke Kepcetiren.
HmnpTepeKaTbctb6aHaHbCaknapaTeHIM KaTamaCbHdaKepeTinreH.
Ehimi naianda hy mep3iM
EHMHINKb3MeTetyMep3iMi7KbI.0HdipinreHmep3imHe6actan(0Hdpy KyHi 3aybIt TaKaTHaacBHaJa Ka3bnFaH)ICTeNe5KbIcakTaFahHAnOHIMTeKcepyi(cepnictkTkepe)naDaNahyycbHbImaNdbI.
Kb3METKeHemeNaDnAnHyBHBi KaTeNikTepi MeH icTe HbIy Ce6ntepinTiaimi
-TyTKacbMeH KOpNycb6y3bnFaH 60nca,ehIMdi naHaanHa6aHb3
-ehim Kopnycbihan TikeNei TyTIn 1bikca, naIdaanH6aHb3
-TOKcbIMb6y3bINFaH Hemece OKuaynaycbIa 6oNca, naDanaH6aHbI3
-kaybiH-山auihKe3iHc6bipTa(daana) naDalaHaBb3
-Kopnyc iuihe cy Kipce Kypblfblb Hocu ybi 60MaHb3
-KeIyIkwblHwIbIka,naIdaIaNb6aIbI3
KaTbI dipin Ke3iHne naDanaHaBb3
Uekri Kny 6enrinepi
-TOKCbIMbHbIHTo3yblHEMeCE3aKbIMdAHybl
-0HIM KOPnycbHbH 3aKbIMdanybl
Kb13MeT Kepcety Tpyi MeH Xniriri
DpaandaanhydAncoEHimDiTaanaayycbHbnaBb.
CaKray
KpyraKxepde caTay Kepek
KofapbTempepaKeiHeHKeHcayeneepHH acepiH anbcacTay kepe
- cakay Ke3iHne TemnepaTpaHbIH KeHET aybITKybHaKopFay KepeK
- opamacbi caKay MyMKiH eMEc
- cakay wapTapbI typanbi KocbIMa aKnapaTany yuH MEMCT 15150 (wapT 1) KxKaTBH KapaH3
TacbImaay
-TacbMaIay Ke3iHne OhIMd Kynatyfa XaHe Ke3 KeTReMexAHKnBk BkNan eTyre KaTaH TbIbIM CaIbHaDbl
-6ocaty/kykTey KezHne nakeTti KbIcaTbH MaunHanaPbI naDanahyra pyKcat 6epinmei.
-TacbImaay wapTapbl TanaTapBH MEMCT 15150 (5wapt)KxKaTbHOKbHb3.
Kayinci3diK HycKaynapbl
3neKtp Kypanapbl yuiH kannbI Kayinci3dk HycKaynapbl
ECKEPTY
OcbI 3NeKtp KypaIbIHbH JHHaftbHaDaBf IeKeptyepdi,
HcyapblcypTepkXhHe Cnattanapblb Okblb3.BapblkTexnKanblkKayinci3dk HcyayblkTapblOpblHaMay ToKtBnCOfByHa,0PxHe/ Hemece aybpjkapakattahynapfa anbin KenyiMymkiH.
BonaawKxmbictap yin kayinci3ik HycKaynbiktapbi MeH eceptnenepi caKTan KOblb13.
Kayincik HycaynbkaptbHa naaanaanbinaf 3nektpyaataybiHIn KyeiJeH Kyat aIaTbH 3nekt KypaIapbHa (xeninik Ka6eni Mehen) XHe AKKymrTopden Kyat anaTbH 3nekt KypaIapbHa (xeninik Ka6eni KOK) KaTbcIbap.
KymbocphbHbHKayinci3diri
KymbocpHbH Ta3a XHeXapbIKyTaHbI. NaTcHaFAn KHe KaPahfblKaJnApda catci OKFaNanap bonyi MyMKIn.
3NeKtp KypbInFbcBn XkapbnatBn atMocepada naHanaHa6aHb3,MbICanbl, XaHaTBn CybIKTbIK, Ra3 Hemece 1wH 6ap 6onFaHa.3NeKtp KypaI YWbHApDbl Xacai, an Onap Hemece 6ynapbl XaHdbpy MyMKIH.
Bananap Meh 6akbinyabinapdbI 3neKtp KypanbHAn anbc yctahbi. Anaynap 6akbnyay koraanybHa anbin Kenyi MYMKIH.
3nektkayinci3dir
3neKtp aHbnpaBpo3eTKaFa ca6oynbTnic. Aibpbl ekaanewkaHdA npia3e 3eptneniz. Kepre kocbinrAn 3eKTP KypandapimEn adantep aHbnpabn Hn nnanah6b13. 3eptinmereH aHbpnap MeH caikec po3eKanap 3eKTP tybIKtanybIHkayinH TeMeHndTei.
Ky6bipnap,padnatopnpap,nnntanap men cybitkbiuTAP cnKtbl Jxepre Kocbinfah 6eTTpeTre Tmehi3. Deheni3 xepre KocbinfaH 6oNca XOFapbI TOK cory Kayini naia 6onaBbl.
3NeKtp Kypanapabbl Kaan6bipda Hemece bInFaBbI KOpwayna naa nanaH6aHbI3.3NeKtp KypaBbHa Kipreh cy TokcoFy KayinIH Xofapabnatabl.
Kabenbi Tnicti 6onmaHan pete naananaHb3. Kaebnb i 3neKtp KypanbIn Tacy, Kepy Hemece ToKtaH WbIaPpy yin nainanah6bHb3. Kaebdi bICTbIK, Ma, eTkip Kbpnap Xane XblkmbMaBb 6bnweKeTepdAnbc YctamaHb3. 3aKbIMdaNFaH HeMece 6blbcIn KeTKeH Kabeb TokcoF Kayinih XofapbinaTaBl.
3nEkp KypaBbH cbPTTaNaiDanaHaHaCbPTKbl Xaainap yuih caN Ka6enbDi naiDanaHbH3. CbPTTa
180|Ka3aK
naIanaHyaJkaPamblKa6eBdi naIanaHany TokcoFy kayinIHtemHeNdi.
Erep3neKtp KypanbH bINFaIbI JKepe naJanaAny Kepek 60nca,Onda KopraTbIH eWipy KpybInfbIcBi (RCD) apKbIbI KpFAnrHaT ToK jeniciH naJanaAnbHbI3.RCD naJanaAny ToK cory KayinH TeMeHdTeJI.
KekeKayinci3ik
3NeKtp KypanbI naHanaHya 6aH 60nbHb3, KymbIcbHb3db6aKbIaNbH3 KHe npacATbI naHanaHbHb3.3NeKtp Kypanbl WapwafAn Ke3de Hemece eciptki, ankorolb Hemece dapi acep etKeN Ke3de naHanaHb3.3NeKtp Kypanbl naHanaHy Ke3iHne aHcbl3dkaybp JkeE XapaKaTTHaYf a bIn Kenyi MymkIH.
Xeke KopraTbH Xa6bIbKTapbI naJaIaNbHbI3. 0paBIM Ke3 KopraHbICbIH TaBbIbI3. HaMaCKacbl, cbipraHbaiTBH Kayinci3ik aIK KNIMdepi, WmE HEmec eCTy KopraHbIITapbl CNKTbI KOPFaBIIW Xa6bIbKTapbl Tnicti KaFdaInapda KOJaHaBHIN Xeke XapaKaTaHynpabJI KemeNTdi.
Ke3eKcK icke KocbIydbH andbH any.ToK Ke3iHe Xane/Hemec6BaTapeepnapXHHaBHaKocydAn dbH, KypanDbKTepeY Hemece TacydAn dbH eipriu wik Kyide 6onybHa K3xetki3i3.3neKtp KypabH caycaKtbl eipriuwe KoBIn Tacy Hemece KockblbKocybl 3eKTP KypabH TOKa Kocycatci OKfAfa aBbN Kenyi MyMKIN.
3NeKtp KypaBn H KocyaH anbH KeRr peTey CbHaCbH HEmece KINIaN bIn KObHb3.3NeKtp KypaBnHbH aHaHaTaBH 6enirHde KaFah KINT HEmece CbHa XeKe JapakTaHyFa bIn KeYi MymKIn.
KoN KUH ICTTneH3. Opaabim Tmict TaHHn nen Te, canMaKbItbIKtbl CaKaTaHbI3. BykTINmERe H KaFdaJIaPdA 3neKtp KypanDbH BaKbHaHyBn CaKaTaNbl.
Thicti KIM KINH3. Boc KIM Men anwekeinepdi KHMnEi3. Wauhbi36ben KIMdepejKbInKbImanbl 6onwekTepeH anbc yctahB3. Boc KIMdep, awekeinep Hemece y3bH wai Xkbimani b 6bnweKeTp apKbIbI TapTbIybl MYMKH.
Erepwahmbifapbnxnayka6dkrtapbnaKocy Kpybfnbpab6epnireh6onca,ohda onap kocynb 6onybinaXaheTnictpeTKeONdAhybinaKe3 Xektiin3. WAn xHHaydb naHdanaHy wHa fa 6aainhaBCTb3nHdapbkeMeTei.
AcnanTapdbjxhi naDanaHbIn xKaCb6iRrHen coMacaipan KETneKayinc3ik npnunntepin enemOtbpMaB13.Aaibcb3 apeket ckyHd iuiHne aybipJapakatHa fAbln Kenyi MymKIN.
HA3AP AYDApBlbl3!3heprnmeH Xa6bikTaydbH TOnbIKTaHe XeKeene ToKtaBHyb Hemece 3heprnmeH Xa6bikTaydbI 6ackapy Ti36erHH aKaynaHyb candapbHa 3neKtp KypaBbHbH JyMbcbHda Kipic naiDa 6onFaH XaFdaJa, 6ytaTAMafAHbHbHa Ke3XetK3in (6onFaH XaFdaJa) 6apbn, axbpatkbWtBbKn. (Owipy)
KannbHa KeNtiPiH3. Xeninik awaHb po3eTkadan bIfapbHbI Hemece anbln - canMaIbI aKKMyIaTOpdbI axbipaTbHb3.OcbapekeApkblb6aKaBnHa6BaTbH kaTa icKe KocbIyDbH anDbH anacbl3.
3nEeKp KypanapbH naindaNaHy KHe Kty
KypanbI aca kon jyKTeMeH3. KymbcHbH3 yWIn XapamdbI 3neKtp KypabHn naDanaHbH3. KapaMdbI 3neKtp KypalBIme KepeKTi JyMbIC aMafHda Dpybic epi ceHimdi kymbc icteHi3.
Akbipatkbbldybicemec3neKtp KpaanbH naDanaH6aHbI.Kocyfa Hemece eWipye 6oImaHTbH 3neKtp KpaBblKayinti 6bn, OHJxHcEy KaKet 60ana.
Ka6dbkTapbpetTey,6nweKTePiAnMaCTbIpy Hemece KypanDbI KOIMafa KOKoHaanDbIH aKKyMnyTopDbI 3neKtp KypanbHaH anBIn TaTaHbI3. ByncakTBkApeketi 3neKtp KypanDbH 6aKaycbI3 KocbyhHa kon 6epMeiDi.
PnndanahbInMaTbH 3neKtp Kypanapdb6anapanakonblKeTneTINKaiaFkoBihb3.Ocbnapdb6inMeTIN Hemece ocbiecKeptnenepej Okimafanadamapra 6yn KypanblnDanahyfXoN 6epmEi3. Taxipi6eci3 aamap KoblHa 3neKtp KypanapblKayinti 6onaBl.
3NeKtp KypaIapbHm Hen KepeK-XapaKaTbpH YkbInTbkyiH3.Ko3rMaHb6nweKTePdHKeeprici3icteyHe Xane KeTein KanMaybHa,6nweKTePdiAkaYcbH HeMece 3akbIMdaMaFah 6onybHa,3neKtp KypaIbHbH 3akbIMdaMaFahbHa K03XeTki3H3.3aKbIMdaFah 6nweKTePeBip6ap KypaIbI naDanaHydAn dNbH XeHdeH3.3neKtp KypaIapbHbH Dpybc Kytimeyi KaataMbIM OKfamapFa ce6bn 6onbl Xatabl.
KeckiacnantapdbtKipKahe Ta3a Kynde caKaTahb. Dypbc KytinreH Xane Keckiw XneKtepi etKip Keckiw acnantap a3 KeTtenin, Kecinet H 6etke Ohaia 6afblTanaDbI.
3NeKtp KypaBbH, Xa6DbIKTapBb, anMaIbI-camMbI acnTAPbI XeHT.6.OCbI HcyKaaynapFa cai naDaanbHbI3. CoHbIMe HxMbcI WapITapbIMeOp bHdAaTBH opeKeTTepre Ha3ap ayApbIHbI3. 3NeKtp KypaDapbIH apHaNMAfAH KMybICTapda naDaIaNHy Kayinti.
KoTyrkanap men Kapmay 6eTepin Kypfak, Tasa XKeHemaMn MeH nacta Ta3a ycTaHbI. CbIPFaHaK KOtykapanpeMn Kapmay 6eTepi KytINMeH XaFdaInapda ceHIMDiKOJaHy mE 6aKnayra Kon6epMeNdi.
Batape KypanbH naIaIaNanyKHe Kty
TeK eHdpywi cHnattarHan 3apraTafbIWMeH KaTAta3pAHTahB13. Batape JHHaFbIHbH bip typiHe caJ 3apraTafbIb6 BacKa 6atape JHHaFbIMeH KOJIaHyda eP Kayinie aBbl Kenyi MymKIn.
3NeKtp KypanDapbIn TeK apHaBb TaFahbHdAnfAH 6Batpea XnHaKTapbIme NaidanaHbHbI3.Ke3 KeIre H 6aca 6Batpea XnHaKTapbIn naJaIaNHy JkapaATaHy MeH ept KayiniHe anbIn KeNedi.
Erep6atapexKnHaBkONdaHya6oMmaca,ohbI typeiyu,TbHn,KiT,were,6ypanHaHemece6acka KuiMetan3aTAPdAnycTaHbI,onap6ip TepMHAnDaH6acKaBHa6aHaNbICXacaybIMMKIN. BatapeTePMHAnApbH Kocy Kyik Hemeceoptke anbIn Kenyi MyMKIN.
Dpybc emec na dananyda 6atapeenanc cybIKtbk aryblMymKIN, oran TMmei3. Erep TnKancaHb3, cymen wabin TactaHb3. Erep cybIKtbK KO3re Tnce dpirepre xaapnacbHb3. Batapeenan WAKKaH cybIKtbK KO3y Hemece KYNKTepre anbIn Kenyi MymKIN.
3aKbIMdAnfAH HeMece e3reptInreH 6atapera XHHaKTabpHn Pndanah6hbl3.3aKbIMdAnfAH HeMece eaeptInreH 6ataperaIapoptke, XapbyFa Hemece JapaKaTtyfa anbIN KeYi MymkIN Ke3deCOK apekettepre anbIN KeNiy MyMknH.
Batapera KHaRaBHe HeMece KypaBn HoptKe HeMece KaTbI Tempepatypara CandbipMaHb3.130°CxorapbTeMnepaTpaNapdaKapbInbc6onybl MyMknH.
BapnbK3apTay HcykaynabPHOpbHdAn6atapey XHHARBH HcKaynapa6BenrIneHReh Temnepatypa aykbmbHaH TbIC KaFdaJa 3apTaMaHbI. Dpybc emec 3apTay HeMece 6enrIneHReH aykbmHaH TbIC Temnepatypa3apTay 6atapEnb3akmbdAn ept Kayinih KofapbNAtyMymKH.
Kb3Met Kepcety
3neKtp KypaBbHa MaMaHbI XeHdEywi TeK 6ipDei Kocankb6eIWeKTePmeh KbImet Kepecyi Kepek. Byn 3neKtp KypaBbHbH Kayinciairih cakTanybH KaMTaMaCb3 etedi.
3aKbIMdAnrH 6atapera KHHaKTapbih eWkaan HnDanaHbHbI. Batapee KHHaKTapbIH TK eHJpyuH HeMece EkinETi KbImET KepeCey XabIKTayUbcbl apKblblOpblHaJybl MyMKIH.
MynbTHKeckiuyinKayinci3ikHyckaynapbl
KecetIH Kepek-KapaKaTaN XacbipbH CBIMapFa TMOI Mymkih opekeTepdi XacaFah Ke3eJKeKT KypblfB1 OKwaynHaFAn Yctay XaibHAn YcTaHb3.Erep Kecywi acnan icTei TypFa HcbMFA Tnce 3NeKTP KpaJIbHbH Metan 6bnweKTepi iCteTin naDanaHyybHbTOKcofybl MymkiH.
3NeKtp KypanbH TeK Kypfak akapnay yinnaaanaHbIbI. 3NeKtp KypabHbIH iWHe cy Kipce, on3NeKtp TofbHbIH COY KayiINH apTbipabl.
ΘptKayibi6ap!AkapnanaTbH MaTePnAnbI HeMece axapnay KpybInfbcBn Kb3bIn KeTyEn caKaTaHb3. WaHTyKbIa Ka6bH JxMbcic iTeyDen anDbH Ta3ApTbHb3, 60catbHb3. Ha Ka6bHdaFbI. MHKPOcy3rJderi, Ka4zakbHdaFbI axapnay WauH (HeMece cy3ri Ka6bHdHa MeCe WauCOPfBw Cy3riciHeri) Metanlbl Akapnayda 6oNaTbH YWkbHdp JxAHyI, ePT Tydbpyb MyMKIN. Axapnay WauH naK, noNypetah KaNbIKTapbHEMece XmMnBik 3aTEKtepMeH apanacybl, axapnay MaTePnAnbHbH y3Ak EHNenHyEN Kb3by I aca Xofapbl Kayin TybpabI.
KonbHb3bl apanay aMaFbHaH KaBbIyCTaHbI3. DaBHdama actbHa TmMei3. Apa nooTHocbHa TMIO kapaKaTTAHy Kayin TYbipadbl.
3NeKtp KypalbHb3dbH XeNdetKiw caBnaybin KyenI type Ta3anaHb3. Ko3FaNTkbW Typ6nhacbl KypbIFbI iWHe KEN WAn TApTaBb, MetaNbI WaH XINHaBIn 3NeKtp KayPiYTHyDipyMbMYMKH.
Kaketri i3ey KypanapbH naDanaHbin XacbpBnFAH cbMdpBt Ta6bHb13 Hemece kayantbI Xeprinkti yibm okinepin wakbpbH3.3neKtp CbIMdpaBHnTO ePT Hemece TOK COFyBaHa anbl Kenyi MymkiH. Ta3 Ky6bpHn 3aKbIMday XapblcKa anbl Kenyi MymkiH.Cy ky6bpBnH 3aKbIMday MaTePnAnblk 3nHFa anbl Kenyi MymkiH.
3NeKtp Kypanbl naDanahyda Ohbi eki Konmeh 6epik yctan,TypaKtbI KaBbITa TpybHbI3.3NeKtp Kypanbl eki KOImeH cEHIMdi backapblnabl.
Anmbl-calmbl acnantapbl anmaCTbipy Ke3iHKePry KONFa6bHKnH3.Anmbl-calmbl acnantapy3aKaYaKbT XyMbIC icTeHHeKb3aBl.
blnfanbI MaTePhaIapBbMbICaNbTyckFa3XeHeneBnFAnbI XepE KbIpMaHbI.3NeKtp KypanbHbH iWHe cy Kipce, on 3neKtp ToFBbHbH COFy Kayinih apTbipabI.
OHeJeTeH6eTI KypambHaepiKiw 6ap cyIbIKbIKTapMeH CyPTNeH3. Kbype Ke3iHderi MaepnAaap Kbi3bn Ketyi ce6eBiH eH ybl6ynap naia 6onyi MymKiH.
Kbipfihxhe nbilwakneHxymbcictey ke3iHe caK 60nbIbI3.Acnantap ete tKip 6oBIn xapaKaattHy KayinIH TybIpadbl.
Даьидаманб6ekti3.Кысу Кралын Hemece Kblckшka opHaTbIFaHдайында Мклынб3eH canblctbIPfAHa,6epik yctanaы.
AkkymyIaTOpDaan3akbIMdaHafHemecEpybic naDanaHaBafnXaFdaDa6bybHybMYMKIN.Byn KaDnJaIiKeTa3aayaaKipri3H3xHeWabMdp 6oNa,MeuHAnbIKeMeKanbHb3.BynapTBHbcany KOndapbIHITIPKeHDPYi MYMKIN.
AkkymyIaunnaI3. KbIcKa Tynblrany Kayini 6ap.
Were Hemece 6ypaybi cnaKtbi yuTbi 3aTTap Hemece cbiptkbi ecep apkblnbakyymynyrTop 3aBIMdaHybl MyMKIN. By Kbcika tybiktanyfa anbin Kenin, aKKMyrnapKahybl TYIH Wbifapbyj, KaBPnybl Hemece Kbl3bn KeTyI MyMKIN.
Byn akKymyIaTOpdb TeK Kana ocbi eHdpywi eHimepinhe naDanaHbHb3. Con apkblnb aKKymyIaTOpdb Kayinti, aptbIK kYkTeyde cKaTaIcbI3.
Mbicanb,akkymnyTopbI KblnydaH cohdai-ak, y3dkiC3 KYNKapbIFbHaH, OTaH, cydah Xehe bINFaIaH KOpFaHbI3. KApbiny Kayni 6ap.
182|Ka3aK
Θhim XəHe KyaT chnataTamacbi

BapnbKayinci3ik HcykaynbKTapbH
KHe eceptnenepi0kbHb3.TexHKaNbK
Kayinci3ik HcyckaynbKTapbH KHe
eceptnenepi caTamay TOkTBH COfYbHa,ep
KHe/HemecaeybpJkapakattHynapFa anbIn
KeNyi MymKHiH.
PainanaHnyckaynbihbihanfbi6nirHHcpeTepin ecepiH3.
Taraihany6oibnka kondany
3NeKtp Kypalbfaa 3aTeKtep, nactMacca, rnc, tyci MetanblkHe bekity 3neMeHTepiH (MbCaIb IbHdaImFaH were, kancbpMa) apanay Xe He axbpaTyfa apHaflFaH. Kymcak Kabipra nnTKkanapbH enDey Xe He kiwi aMakTapdbI Kpyfak xkaplay MeH KbpyFa da apHaflFaH. Ocipece KbyFxa KaBih Xe He biTipy KaBHdaFb JMybictapfa apHaIHaH.3neKtp KypalbH TK Bosch Ka6DbIKtapbMeH naJaIaNHy KaKeT.
BeineneHren Kypamdbi 6nweKTeP
KepcetinreH KypamdaTap HemipneHReH cypeTepi 6ap
Betteri 3eKtp KypalbHbH CnnaTtAmcbHa caI.
(1)Kockbliw/ewipriu
(2) AkkymyIaTOpIb I6OcA TyIyImeci
(3) AKKymyIITop
(4)XenneTkiu cahblnaybl
(5) Tep6eny KOnemim TaHay DaHreneri
(6) AkkyMnyTOpdbH zaprTaNY kyi HnDnKaTOpby
(7) Acanan natpoHbI
(8)TepeHdkweKteriuiHHTapTyTytkbuB
(9) Tepehdiqkri wekey tiperi
(10) BaTbIpMa apa nonIoTHocbi A
(11)KbickbIb6ypaHaJa
(12) Antbkbpnb knt
(13) TyTkα (6etikokaynaHdbipbifnFAH)
(14) 甲Hcopy
(15) Terictey taKtacbi A
(16) Terictey duckici
(17) 甲hcopydbH Kbickbl TTKblbA
(18) Copy utyueepnepi
(19) Copy aanterepi
(20) Copy shaHaB1
A) SeHHeneHHeH HemeCe CnNaTaNrHan Xa6DbIKTap CTaNapTTbI KETK13y KeNemimekamTbIMaDb. TOnbIKXa6DbIKTapdbi 63dIn Xa6DbIKTap64apnAmMb13an Ta6acb13.
TexHnKaIbIK mAnImeTep
KyaakTbI KOPFay KypanapbH KInH3!
Tep6eny JxnnbMnHepi a,(yW 6aftbH BeKToPbK comacbl) MeH Kdancidiri EN 62841-2-4 boBHwa ecenTeJIReH:
Azhapny: a_h = 3m / s^2, K = 1,5m / s^2
BaTbIpMaIbIapaNcMEn apaIay: a_h = 9m / s^2 = 1,5m / s^2
CermeTTIKapaDnCKImeHapanay: a_r = 2,5m / s^2,K = 1,5m / s^2 Kbpy: a_h = 8,5m / s^2,K = 1,5m / s^2
OcbHyckaynapda bepinreH dipindey dehreinye Hw yBHFAPy mHOEN 62841 3aHbHa dKaNbIaTHFaH oJwe adici
boHHuHa eHWeHren XHe OAnpDa 3NeKTP KpaIapDblip
6bpimHen canbctpy uHn naHdAnhyf 6oNaBl. OnapMe
anblHbFep6eny HxHe WbIFAPdyb 6araiayfa 6oNaBl.
BepiReH terp6eny DeHreYen Me Hwbl nbIFAPy MHOI 3NeKTP
KpaIbHbH Her3ri XMybIcTApByuHbEpenR. Erep 3NeKTP
KpAa BacaXMybIcTAp yuih 6acka anMaIb-camMaIb
acnantap MeHem Hemece XetImci 3KYtMeH naHdAnBaHnca
dipindey deHreYi Me Hwbl nbIFAPy MaHepi 3eREPdi. By
6ykn JyMBC Yakbl yHIn terp6eny XHe WbIbn 6bIFAPdy
kATbl KeTepyi MyMKIN.
Dipindey DeHreim HeWbIn WbIrapy MaHH HAKtB ecentey yuH Kypan eWipInrRe HxHe KocBnFaH 6onbln
naaanaHbImaHa yakblTapbl da eckpeyKaket. Byn diipiney DeHreir Xane Kymbc yakblHdafl Wbyln Wbifapy MOnHHTei
Painanahyubihb dipindey acepihen caKayTay yuH KocBmwa Kayinc3ik uapanapbH KOndany KaKeT, MbCanb: 3neKtp
KypanblxkHe anmblcannmblacnTapblkyT, KOndapblblicTBkYCTay, XyMbic aicTepiH yBIMdaTbipy.
XnHay
AkkymyIopbI 3neKtp KypamHen Ke3 KeIReh XymbIcTapbl (MbIcAlbl, OPhATy, KbI3MeT KepCeTy, T.6.) 6actay anBihda, coHdai-ak, 3neKtp KypaIbI TaCbIManDlay XHe CaTAY Ke3iHde WbIFapbHbI3. Kockbl/ewipriuKe Ke3eNcoKTHIO JkapaKaTTAHy Kayin H Tybpalbl.
AkkymyIaTOpdbI 3apAdTay
TekTexHnKaIbMmIeTepDeXa3bIFAH3aprTay KypanDapbHnAaDnAHybI3.TekKaHaOcbl3aprTay KypanDapbCi3iH3neKtp KypanHbIbIbIHiwHdeNHTINHOHBkAKKYMyIITOpMeH CKeK.
Hcyak: akkymnyTop iuHa npa4nTaHaK Kynde Kektisienei. AkkymnyTopdbn TOnbIK KyatbH naJaAnaHy yuiH OHbl anFaW pet NaDaanHaDn aDlnh TOnbIK 3apdTaHb3.
IITINHOHBKAKKYMNAITopDbnaIaIaNAnaHyMeP3IMH KbICAPTyCbIKe3 KeIeRyakblTa3apnTayfa60laDb. 3apnTay npocicin y3y aKKymNAITopDbln3akBmDanybHa eKeImeiNi.
IHTH-HOBk AKKMyNtOp 3NEKTPoHbIK 3NeMeHTePdi KoprFay "Electronic Cell Protection (ECP)" apKbIbI Tepeh 3apRd KofTpyan KoprFaHAn. AKKMyNtOp 3apRdbI KOK 60nca 3neKtP KypaBbI KoprFaHbIC cxMacbl apKbIbI eipipinei: anMbnIc-CanMbI acnan back Ka KofMaDb. AKKMyNtOpDb WfApy yWIn (3) aKKMyNtOpDb 6ocaty Tymecin (2) bacHbI3 XHe AKKMyNtOpDb 3neKtP KypaIaNapTka WbIfapbHbI3. OcbI Ke3De Kuyu CanMaHbI3. KOkbIcTapDb KaTAt HDey TypaBbHyckaynapDbI opbHaDbI3.
AkkymyTOpdbH 3apdTany Kyi HnDnKaTOpbl
AkkymyIaTOp 3aprntany Kyi HnHnKaTOpbHbH (6) yuXacbl Jxapblk DnoDbI aKcMyIaTOp (3) 3aprntany KyiHKepcTeJI. 3aprntany Kyi HnHnKaTOpbl icke KocblnyaH COhTEk 5 cekyHaHaDaBl.
| Жарык дюды Куаты | |
| Yздікіз 3х жасьн ≥2/3 | |
| Yздікіз 3х жасьн ≥1/3 | |
| Yздікіз 3х жасьн <1/3 | |
| Жынліыктайтbingжарык 1х Жасьн | PezeрВ |
| Жынліыктайтbingжарык 3х Жасьн | 60С |
| Косудан сон ewшьр жарык дюды канба саakумлготор akayны 6овын оны anmactыр kajket. | |
| Жуmbіс кураьн aybіctыр | |
| ▲ Acnan anmactыр кezin'de kopravy konfабин кині: Anmaльь-cалмаль acnaptfa ТИО жарakatTuKayпн TуьндаТады. | |
| Anmaльь-cалмаль acnaptытbing TaHday | |
| Фlektpr кураьн aphanfahan anmaльь-cалmаль acnaptыd eckepihi3. | |
| Жуmbіс кураьн GOP 12V-28 | |
| STARLOCK | ✔ |
| STARLOCK PLUS | X |
| STARLOCK MAX | X |
TeMeHneri kecte anmalbl-calmaIb acnT npneip Kepctinre. Baca anmalbl-calmaIb acnTapBosch ybHaBH Ka6dbkTAP tizimHeh tabyfa 60ana.
| Алмалы-cалмалы acnan Mateрнан Пайдалиу | |||
| Биmetалы сerменттik apа пелOTнсbl | Araa 3aTteKterp, Пл actMcca, Tycsti MetaIДap | Ажыратьш кэне 6aырмалы apа кecikterpi; шетke щakсы, 6урштарда щэне ayыр щeТinetiH аимakтада apalay yuIN.de; Мысал: орнальган eden планкалары hemece ecik кигін КьICAKТу, 6aырмалы кecikter epeden nahenbdeprin сайсятendipreneDE | |
| Delta serийвik 93 мм ожарnatay дисki ушin ажарnatay плactинасbl | TERICTEУ диски байданыстby | ШETерд, 6урштарда щэне ayыр щeТinetiH кайарды TERICTEY: TERICTEУ диские bайданыстby, Мысалы aafu, boу, пak, Tac; Флзэрина орашы тазалay кэне кураздыру ушin, MetaIДANТ tot ketipy кэне лахтары ожарnatу ушin, алды салжынырату ушIN.KN3 | |
| Проблдik ажарларыш | Araa, Кыр/nproфиь, бая, яakтarp, Толърьш, Метал | Диаметри 55 мм DeiH bOлhan пофильдрп оанй кэнe ТIMДIajakarpay; Кызал ожарnatу дискиердi aafuы, Кырлары/ proфильderд, яakтары, Толърьштарда кэнe MetaIДы ожарnatу ушIN | |
184|Ka3aK
| Anmalby-canmalby acnan Matepnai Pailanany | ||
| Koc Metallogk Kolbik apara dincki afalla neh metan | JyMcaK afaa, jyMcaK PllactnKtep, Tngcokapton, Jyka aIOMHNI Jxhe TycTI metalldy plophiBdep, Jyka Metan TaqTalap, Kuwei TImerhen Weere Xane 6bpaHdAmalap | Kiwi axbipatmy Men bactbIpma keciktek; Mlbcan: po3etkanap ywih cahblaydi kecy, mbictbIK KybipdBi 6beTke Jxakbln axbipatry, rncckapton PllntanapbHda 6btaipma keciktek AfaaTafbl 6weKeijluk jxymbctap; Mlbcan: kylbittapmen kaTtamalap ywih cahblaynapdbia apalanay |
| HCS-Kbicska apara noLhotocbl afalla | Afaa 6bYbIMdAp, jxMcaK Pllactmaccanap | Axbipatkbli xxeHe 6btaipma keciktek; 6bybipatda xxeHe Kbln XeTeIeTIH aiMaKtaporda KblpHa XaKbH apalanay; Mlbcan: XeJeDey TOpbln opHATy ywih jxymcaK afaaTAta terepen 6btaipma kecik |
| BmMetalbl 6btpma apara dNckici KaTbI aflaw ywn | KaTbI afaa, KaBaTTalFah Pllntanap | Kabattanfah pIINTanap Hemece KaTbI aflawta 6btaipma keciktek; Mlbcan: ⅢaTbPDAbFl Tepe3epeRdi opHATy |
| KK 6btpma apalanay dNckici metan | Metan, KaTbI abpa3nBti zaltktek, 7bHbI TALbIK, Tngcokapton, Zemeh apanaackan TALbIK PIIITANAP | KAtbI abpa3nBti 3eTTek Hemece MeTalda 6btaipma keciktek; Mlbcan: acyI beTik KaTtamalapDbI KeCy, cyablnfah 6bypdAmalap, WeroEep Jxhe ToT 6acnbltn 6bonaTbI kapanaiBim Kecy |
| Koc Metalbl KoIbik apara dincki afalla neh metan | XyMcaK afaa, KaTbI aflaw, 7bNObl PIIITANAP, Pllactmaccamel KanTalFah PIIITANAP, KUwei TImerhen Weerele Xane 6bpaHdAmalap | Bbtpma keciktek KaBbIK PIIITanap Hemece KaTbI aflawta; Mlbcan: ecik pamacbi Nkickapty, cpe ywih cahblaynap |
| HM-6ydipni cerMeHTIK apara noLhotocbl | ZeMent XjKtep, jxMcaK KabibprA PIIITANAPbl, 7bHbI TaliBikne Kyuwei TInrten Pllactmaccanap, Tceiktik 6beton | UeTke Jxakbl haiMaKta, 6bybipatda Hemece aybip aMakTapda Kecy Jxhe aXbipaty; Mlbcan: pEmont JxMbCTapbl ywih KaBbIPra PIIITanapbln aBnTactay, PIIITanapda caBbIaynap, rncn PIIITanapbl Hemece PIIactmaccabbl KeCy |
| AnmaTbI KbipbIKbI cerMeHTIK apara dNckici | ZeMent XjKtep, jxMcaK KabibprA PIIITANAPbl, 7bHbI TaliBikne Kyuwei TInrten Pllactmaccanap | PllnTKa/Jxik MaTePnIaDpBln, 3eOcKsnd 7aBipbH JxHe 7bHbI TaliBiknepn Kxwei Tiptiren PIIactKterpin DdAn Kecy XeHe aXbipaty; Mlbcan: JxMcaK KaBbIPra PIIITKanapbln Da Kihi KeCikterpi Kecy JxHe 7bHbI TaliBiknepn Kxwei Tiptiren PIIactKte caBbIaynapbl Dppe3epney |
| HM-6ydipni Ielbta PllactnHacbl | Epitindi, 6beton KanDbIKTapbl, aflaw, abpa3nb MATEpHaIadap | KAtbI tabaHda bickanay Jxhe axapnay; Mlbcan: epitindi Hemece PIIITKa JxemimH xOho (MlbCanbl, 3aKbIMdAflanf HIIITKanapbl anlmactbpyda), kInemdk KanTama KauDbIKTapbl n albn Tactay |
| KAtbI KopblTalbl KbipbIKbI epitindi KeTpiri | Epitkiu, XjKtep, 3eOcKsnd kapambl, aHnekti TaliBikneh apmatypaIaHfAH Pllactmacca, abpa3nb MATEpHaIadap | XiKne Hn PIIITKa MaTePnIaDpBln Kecin any JxHe aXbipatry, XeHe KaTbI Tabada bItaKanay MeH aXapnay; Mlbcan: PIIITKa JeHimmi MeH xKie epitindici |
| HCS Kei ФунКшяльк пышak | Шаыр толi, kinemdeper, Жасанду ra3oh, KapToH, ПВХ eeden | XyMcaK MaTePnIaDap Men nIinmeni abpa3nBt 3aTKeTepdi KbIaam JxHe dAn Kecy; Mlbcan: kinemdeperdi, KapToHbl, NBx PIIITanapbln, wabtp Tonii T.6. Kecy. |
AnmabI-calmaIb acan MaTeepn PaJaIaIaNy
| Kbɪрfyli, Typaftbyi Kīneɪmdep, epiTiKiSi, 6eToH, pɪnɪta JæniMi | Kaɪtbyi TaδaDa Kbɪpy;Mbɪcɑn: epɪtiHdiH, pɪnɪtka JæniMiH, 6eToH MeH KīneMi KaɪdBiKapbɪn aɪbɪn Tactay |
| Kbɪrp fyli, nɪmeliNi Kīneɪm KjæniMi, 6oəy KaɪdBiKapbɪs, cɪnɪkoH | Жумсak TaδaDa HɪmeliNi Kβpy;Mbɪcɑn: cɪnɪkoH xɪkterdi, Kīneɪm KjæniMi MeH 6oəy KaɪdBiKapbɪn xɔiO |
| Биmetanlɒs cerMeɪntɪk 6iIteK Āxapnay nbɪsaftb | Окшaynaftbʌ Matepənʌ, oʊkaynaftbʌ pɪnɪta, edeH pɪnɪtaIapbɪs, dɪbɪbɪc ᵇeɪkɪzbiH iɪn pɪnɪtaIap, KatbɪpMa Kafəz, Kīneɪmdep, peəenke, teri |
| Kaɪtbyi KopbɪtnaBly KɪbɪpMbɪctbl Āxapnay ɪstɪφti | Araʌs, 6oəy Arafu Hemece 6oəydu bɪ Kɪbɪn XeTetɪH XeRlepde ereYkʌm Kafəzlbɪcɪs 3 aɪxapnay; Mbɪcɑn: tereze KaɪnəkTapbɪs apacbɪndaFb tiɪderi 6oəydu bɪ Āxapany uɪsiH, 6þrɪbɪtapdaFb aɪaʊ eɪndi i Āxapnay |
| Kaɪtbyi KopbɪtnaBly KɪbɪpMbɪctbl 6aɪbɪpMa apa dinckici | UbɪnBu Taɪbɪk, epɪtkiʌ, aɪaʌ |
| HCS am6e6an xɪk keckii | ДeφορmaúnáBly kɪxɪk, tereze maiɪnay Kɪpənbl, OKwauNaftbɪ W MATEpɪaɪdap (Mɪnepaɪdɒb Maɪcta) |
AnMaIbI-CanMaJIbI acnTbI opHaty/AnMaCTbIpy
Kepek bocapopHaTbIfAH aImaHbI-camMaIbI acnantBtweiH3.
3neKtp KypaBnH any yuH anTb KbpNb DeHreNeK kJInPHe
(12) 6yaPanaHbI bOcaTbIn (11) KyaPanaDbI aFbItbHbI3.
KepeKti 3JleKtp KpaIaIbI (MbIcAlbI, 6aTbIpMa apaDnckicin
(10) acnan natohonha (7) oyfbl TeMeHRe Kepcetetin etin opHahtbH3 (rpaFknabK getteri cpeTt KaapH3, anMaIbCaMnbl acnantbH Xa3ynapBIn KofapDaH Kepyre 6oana).
3nektp kypanbIe npymbc yinH konaIbkyre 6ypan acnan natponbIbH denehecepie(7)tipetih. OHda apabibfbl 30^ 6oIbTH12 KyB6onybMyMKIN.
AnmaIb-calmaIb acnntb1 (11) 6paHaMaacBImeH
6ekitih. BypaHaHb aIbI KbpIb dH6K kINTnEH (12)
6paHaDaBH TepenKeik 6acbl AnmaIb-calmaIb acnant
Teric KaKaHbIa TaTbHbI3.
AnmaIbI-camMaIbI acnantbH 6eKem TypFaHbHaKe3 XekTki3i3. Kate Hemece hawap 6ekirre anmaIbI- camMaIbI acnantap naJdAnany Ke3iHe c3re Kayin ToHdipyi MymKiH.
Terictey nnckin tanay
OHeIeTIH MaTePnA JxHe KaXeTTi 6ETTI anbHybHa 6aNanBaCTb Typi TereCtey Dnckinepi cybHbnaDb:
| Ereykym kaarabli | Materpaaan Paimdalanu Tuyipwiktinik | |||
| - Барнык aгаш Турлесi (Mысалы, Каты, КУМсak, ЖАТ, Курсыб панельдерi) - Металл мaterпалдаг | Суprиненberen 6pyс hemece takтайарды andын ana tericteу ушin | depeki 40 | 60 | |
| Жалпak akap LANy кэн eazdaferan keidip - budipdi tericteу ушin | optaа 80 | 100 120 | ||
| Araшты akbyры кэн чукалan tericteу ушin майда 180 | 240 320 400 | |||
186|Kaazak
Tep6enycahbin TaHday
Tepben taHbH TaHdAHTbH peTeyuipKbInbI (5)KaKetTI Tepben caHbH XMbIC icTey Ke3iHne de petteyre 60ana. Tanan etinTe Hcpen bH MaTePnAmEn Xmbic Kacay KaFdaBHa 6aHaHbCTb Toxipn6e apKbInb I aHbTKayfa 60ana.
AfaHHeMeCetMaTcIKTbKaTTbMaTePnHaIapApaiay, axbipaty XaHE Terictey yuH 6 Tepeny caHb 6acKbIb, an nactMacca CnKTBkYMCaK MaTePnHaIap yuH 4 Tepeny caHb 6acKbIb yCbHbIaNbl.
Paindany HycaynapbI
AkkymyIopDbl 3neKtp KypamMeH Ke3 Kenre HxmbIcTapbl (MbICaBb, opHaTy, KbI3MeT KepCey, T.6.) 6actay anbHda, coHdai-ak, 3neKtp KypanDbI TaCbIMAnlay XHe CaTAY Ke3InHe WbIFapbHbI3. Kockbl/ewipriWke Ke3deinCok TIO JkapaKaTTaHy Kaynin TyDbipAbI.
3neKtp KypanbH Xepre KOHOaH anDbH OHbH TOktaybH KYTIi3.
Hcyay:3neKtp KpaBbHbH KeIeTkiu CaHbnaByH (4)
XyMbICteTy Ke3iHe XaannBa, 3, Htnnce 3neKtp
KpaBbHbH naDanaHy Mep3iMi Kbckapabbl.
Kymbcepexenepi
TepeTetIH KETe apKbIbI aIbnIcIaIbnI acnI MNHyTbHa 20000 peTte 2,8" tep6enei. Byn KonaicbI3, Tap Jepde de Kymbcic teyre MymkiHdk bepeni.
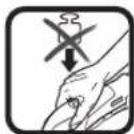
Kai KHe 6ip KaIbIITb KbcIMMeH Kymbc icTeH3, aHTnece Kymbc eHimdini TEmHden, anMaIbI-caMaIbI acnTc HanaHbN KaJaBl.
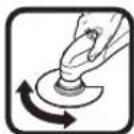
3neKtp KypanbH JxMbIc Ictey KezIHDe KaH-JaKaKa XblJbItbHb3, COHa aMaIbI-caMaJIbI acn Kan Kb36aIbI, cbHaHaHa6aIbI.
Apanay
By3bIMFaH mHc3 apa nonoTHocBn naDanaHbIb3. KncaiHaH HeMece eTnec apa nolothonapbCyHbY, KecikTi 3akbIMdaaybHeMece Kepi cofydbTydbipyMymKiH.
Kein Kypblbic MaepnAnapbH apanay KeiHMeMaepnAn eHdipyiciniH yckaynbKTapbi MeHycbHbCTapbH opbHdaHb3.
KonapacbimTeK aaf, HnncokaptoH.6.chaKtbi XymcaMATEpHaanapdbIeHdeyre 6oana!
HCSapa nolothnapbimeh aafw, KAT, kypblbc
matepnaapbhiT.6.apaayadah andbih were, 6ypaHaT.6.
CnKtbi 6eIe DehenepinHKoTBfBiH TekepiH3.KaKet
60ncba 6eIe Dehenepi anbH TaTaHb3 HEmec 6ImTeanbl
apa nolothnapbih naDanaHbHbI3.
Kecy
Hcy:Ka6bipFa nnTkanapBn Kecy 6apbcihda anMaIbCaIaMbIacnTap y3aknaDnAHydAn DaTo3aTbIHbIFhEcte CaKaTbI3.
Akapnay
Kewiy dehre jxhe teriteire 6et canacb terictey nckin taay, taanfah terpebenep cahj xhe 6acy kuyi apkblp peTenei.
TeK Minci3 Terictey INCKIMeH faHa dypbic tericteye, con apkbln 3neKtp KypaBn CaTayfa 6oana.
Akapnay DnckinH KbImet Mep3imY3apTy YuH 6ipKaIbIbIbIbIbIbIbIbI.
Te KaTb6acy 3nEeKtp KypaBmEH Terictey DnckHIT Te3 To3ybl Tynbpabbl.
BpybI, KbpKHe apeH KeTeTIN KaNapbl HaKtBi TericTey yuH TericTeY nactInHaCbIH H YbIH HEmeC KbpHn nnDaNaHy KepeK.
HykTei terieeyde nnck KaTbI Kb3bn Ketyi MyMkiH.
Tep6eny caHbMeH KbcBIMdba3aHbIN TericTey dNCKIH Kyeni Tpye cyblbI3.
Metann Endereh Terictey nckin 6acka MaTepeHnIap ywiH naDanaHbHbI3.
TeK TynHcyckalb Bosch aXapnay Ka6bIKTapbH naaanaHbHb3.
Tericteyuinepaibimwahcnpdykoebihia.
Kbipy
Kbipy yuih xofapby tep6eny 6acblshn TaHaBla.
Kymcak tripeke (mbicanbifaata) kannak bpyiota kane a3 Kbcimbeh Xymbic icTeHa. 8ntnece Kbpft KaTb keci Keyi MyMKIH.
ApTbIK KYKTeMeH KbIny KopFaHbiWbl
TaraHbanyhHa cKaKec nAdaHcHb3, 3NeKTpyaBbApTBk KytEnMeiDi. ApTBk KytEny Hemece pyKcat etinreHAKyMyIATOP TmepaTypaCb apaBbFb eTine aHaBIMapCaBbKlcapBn, 3NeKT pyaBbOeJei. TeMeHdIReH aHaBIMap CaHbHa 3NeKT pyaBbA kkyMylrTOP pKcAT etinre TmeNepaTypaFA XeTKeHHeH COH Hemece TEmeHdIReH KytEny ToBk aHaBIMap caHBImeH Kymblc icTeiDi. ABOMaTb EwSyde 3NeKT pyaBbH ABOMaTb peTte eWipIn, AkyMylrTopDb cybTbH3 da, 3NeKTpyaBbH KaTa KocBbH3.
AkkymyTopbIOHTaIbI naIdaIaNMy typanbl Hcykaynap
AkkMyIATOpIbI CyIbIKTbIKTapHaH XaHe bINFaIaH KOPFaHbI3.
AkkymyIaTOpdbTeK-20°C...50°CtemnepaTypa aykbMbHda caKaTaHb3.AkkymyIaTOpdbJa3da KeiKe KaIbIpMaHbI3.
188 Romana
AkkymyIaTOpdbH KeNdTeY TecirH KymcaK Ta3a XHe
KpyFaK KbIIaKaNeH MyKHT Ta3aHaB3.
Painanahy Mep3iminH aHTapbIKTaikCapybl
akymyIaTOpdbH eckipreHxHe aybCTbpy KepeKTiriH
6iDipedi.
KokltapblKaetaeHneyTypalbHyckaynapblOpblHaHbI3.
TexHnKaIbIK KytIM XHe KbI3MeT
Kb3MeT Kepcety Kahe Ta3anay
Akkymnatopbl3neKtp Kypammen Ke3 KeIReh Kymbictapbl (Mbicnbl, opHaty, KbI3MeT KepceTy, T.6.) 6actay andbHda, cohdai-ak, 3neKtp Kypanbl TaCbImaDay XHe caKTAY Ke3iHde UbIFapbHb3. Kockbl/ewipriuke Ke3eNcOK TIO JkapaKaTTHy Kayin H TydbpaBbl.
Kacbi api ceHimdi xMybic ictey yuih 3neKtp Kypanbl MeH Kenetkiw tecikr Ta3a yctahb3.
Bdyipni-anmabI-canmaIb acnTapdb(ka6dbkTap) KyneI Type CbIMb KblwakKeH Ta3aHaB3.
TytbHybIfa KbI3MeT KepcTeY KHe naJaHaNy Kehectepi
Kb3met KepcTe ybe6epxahacbI eHmDi JxHNey JxHe KYTy, coHdai-ak KocanBb 6nweKtep TpaIbI cypaTapFxaayan 6epei. KapbIy cb36bnapbMeH KocAnbI 6nweKtep TpaIbI MAnimEeTpI TeMeHderi MeKeHkaJaTa6acbl: www.bosch-pt.com
Bosch 6aIapnAmacbKeHecTo6b63iHcHIMepXHe OanapbH KepeK-XapaKaTapbTypaBly CypaKaTbpHb3Fa Xayan 6epei.
CypakTap KOO XHE KOCANKb6eIWEKTEPRE TANCbPbc 6epy KeiHne MInTeTI TypE eHIMdIH 3aybITbIK TaKTaWacbHdaBbl 10-caHbI eHIM HEMipih Ka3bHb3.
HdipyTtanaTaptbMeH HOpMaIapbHbHcakTanybIme
3nKTP KpaIbH KHeDey XHe KeNlDi Kbl3MeT KepCety
bapbIK MemKeTeP ayMaBHaTaek P06pt Boi
PhiMaIbIK HeMece ABTOpH3aUHAnFaH Ka3Met KepCety
opTaIbIKTapbIHaOpBHaDaB. ECKEPTY! 3aChb3XoJIMeH
kEniHRe HEmdpei NaIaIaNHy Kayinti, DeHCayIbFbHb3Fa
3nH KeNTpyi MyMkiH. OHiMepdi 3aCb3Xacay XKe
tapayekimuiik XHe KeMbCTbIK TaTin BoBHwa
3aMeH KydaIaNAbi.
Ka3aKcTah
TybHybInapFa KeHec 6epyKahe WafBIMapDbI Ka6blnay opTanblFbl:
"PoBept Bow"(Robert Bosch) KUJC
AJIMatbK
Ka3akctan Pecny6nKacbl
050012
Mypat6aEBK.180y
"TePmec" 50,7 Ka6aT
Ten.: +7 (727) 331 31 00
_aKc: +7 (727) 2330787
E-Mail: ptka@bosch.com
CepBnCTIK Kbi3MeT KepeTy optaikTapbI MeH Ka6bnay
nyHKTePiH MeKeH-KaMbI TypaMbI TOnbIKKaHe e3EKTi aknapaTb Ci3: www.bosch-professional.kz pecMn caTTah ana anacbi3
Tacbimanday
BnynnHNOHBk akkyMnTOpnap KayinTIyapnapFa KObnaTbH TanaTnTrafca cay 6onybl KepeK. NaDanaHybI aKKMyNlTOpnapbl KSeJeE KocBIMu KaKaTApcb3 TaCmAnd anaBl.
YiHuiTynfnap(MbicanbI, aye KeNiri Hemece Xibepy) opamafKaXeHe MapkAnapra KOnBnatah apHaBt TanaTapdb CaTayKepe. XibepyTeaBihDay Ke3iHne KayinTI KkyKtepdi TaBImaDlay MaMaHbEmxabapnacy KepeK.
AkkymyIaTOpblkopnycb3akbIMdaFah60ncaFaHa
Xi6epH3.AuBk tyicnenepeJxenimdeH3xHe
aakkmyIaTOpblbopaMaDaKo3FaMmTbHdAopAh3.Kaxet
60ncA,KocbMuaYTTbkepeKepepepepaKaTaH3.
Kadere kapaty

3neKtp Kpyanapdbi, aKKMyIaTOpnapdbi, KepeK-KapaKaTapdbi KHe opay MaTepeHaapbH 3KoNOrnAblk TypfbdaH
DpybIcYTNH3aunayFaTaNcbipyKepeK.

3neKtp KpyapnnapbI JxHe
aKKyMnyTOpnapbI/6atape npabI y
KOKblcHbHa TactaMaHbI3!
Tek Kana EO e ndiepi yuih:
Eypona 2012/19/EU epekeci 6oBbHua xapaMcb3neKtp KpaIapblx He Eypona 2006/66/EC epekeci 6oBbHua 3aKbIMdaFAn HHeMece ecki aKKyMnyTOp/6aTapeRnAP 6eKek KHaBbIN KaDeE JapaTbNyI KaKkTe.
AkkymyTopnap/6atapennap:
JIHTHNOHdbK:
TacbImaNay 6enimHneri Hcyapnbi opbHaB3 (kapaHb3, TacbImaNay", Bet 188).
Româna
Instruţiuni de siguranta
Service scule electric
Strada Horia Macelariu Nr. 30-34, sector 1
013937 Bucuresti
TEMpepaTpyn H3BbH DOnyctHMnIaIana30H MoTaJa yBpeJrBaTePnHaI yBEnuBaBat OAnCHOCTa OT NOxap.
Iodbpxane
DonyckaitepeMOHTbHaeneKTPoHnCtpymentMeB Da ce H3BbPbBa cAmO OTKBaHnHnHpaHH CneuaHnCTNcAmO Cn3No3BaHeTo HaOpHnHaHnPe3epBHN qactn. IIO To3n HaunCe rapaHTnpaCbXpaHnBaHe Ha6e30NaChocTtHa eNEKTPoHnCtpymenta.
Hnkora He pemOHTHpaHTe NoBpeHH akymyataOpHH 6aTeHH. PEmoHTbHa akymyataOpHH 6aTeHH Tp6Ba da Ce H3BbPbBA caMo OT npON3BOIDHTeJI INH OT OTOHN paH cepBN3.
Yka3aHn 3a 6e3oNa cpa6ora C Multi-Cutter
Korato H3bHBAte onepaun, npn KOrTo cbIeCTByBa onaHocT pa6oTHnHT nHcTpymEt MoKe Da 3acereHeCKpHTNoI NOBbPxHOCTTa PNOBOHNu NoI HAnpeXeHne, DOnHPaTe eNEkTPoHHcTpymEt CaMo Do eNEKPOHN3HpAHTE NoBbPxHOCTH Ha pbKOXBATKnTe. pNHOKTAKTC NPOBODNIK NoI HANpeXeHne E Bb3MOxHO HAnpeXeHneTo Da ce IpedeAte No MetaHNTe DeTaIIHa eNEKTPoHHcTpymEt Na TOBa Da npPeIN3BnKa TOKOB yAp.
H3non3BaIte eneKtpOHnCTpyMeHa cMo 3a cyxo maihahe. IpoHNKBaHTo Ha BOa B eNEKtpOHnCTpyMeHa IOBnUbaOanCHOCTTa OT KOB yap.
BHHMaHHe, onaCHOCT oNooJAP! N36aRbAte npeprBaHe Ha 7naiFaHH MaTePha H7naiΦ MaunHata. H3npa3BaTe BHN npEn npy3n npn pa6ota KOnTeHepa 3a npax. PpaXbT ot 7naiFaBe H cyBaIeTo, MHKpoHnTbPa, xapThENHa yUbaI (HnB uYbAha HnTbpa, pecn. FInTbpaHa npaxOCMyKaChATA) MoKe da Ce camo3aIaII np He6laIopnRTHn ycOBNa, KaTO Hanp. HcKpnPiN aHaFae Ha MeTAn. CneuaHna OaNACOCT e HAnue Ako npXabT ot 7naiFaHe ce Cmecn c OCTaTbci OT NaK, nonHypetAHn DpyTH XmMnHn BeEeCTBa HnaiFaHnr npOyKT cneDbIra pa6ota cerpee.
DpbkTe pbcTe cHa pa3ctOHNHe OT 30hTa Ha p3aHe. He nnaTe noD o6pa6oTBHn DeTaN. CbueCTByBa OnaCHOCT Da ce HapaHtE, aKO DonpTe peKeuHn IHCt.
PouHCTBaItepeoBHOOTbOpa3a npoBeTppeHHeHa BaWnEeKTPoHnCTpyMeHT. Typ6HHata Ha eKeTPODnTaTeN3aCMykBA IpaX B Kopnyca, a HATpynBaHoTo Ha MeTaJIen IpaX yBeInuAbaOnacHocTta OTOKOByap.
H3non3baTe noxO4n np6Op, 3a da oTKpHeTe eBentyaHNO cKpHTN NOI NOBpXHOCTTA Tpb6OpBOoHN, HnC O6bPHeTe KbM CbOTBEHTO MecTHO CHaBdHTeHNO dpyXeCTBO. BnHaHETo B cbnpKOCOBHeNE C npOBdHnIPOI HanpeKeHne MOKe Da npEi3BKnA NoJap I TOKOB yAp. YbpExdaHTo Ha ra3onpoBD MoKe Da IOBeDe OeknNo3y. YbpExdaHTo HA BOIOpOBD npEi3BKNBa 3HaUHTeHN MaTePNAH NtEH.
ДьжTe 3dpaBO eNEKTPoHHCTpymeHTa np pa6Ota c DBete pbue H cIeJeTe 3a ChrypHATA NO3nHc. CDbE pbue eNEKTPoHHCTpymeHTb Ce BOHnNo-CNHyPHO.
PnCmHaHa pa60HTHe HNCTpyMeHTH pa6oTe c npedna3HbKABuH. Pn npOdbJnxHTeHa pa6oTa pa60HTHe HNCTpyMeHTH ce HaoropeaBAt.
He ctbpxte HAMOKpeHH NIN BnaXHH MaTePhann (Hnnp. TaNET) Hne paBoTeTe Ha BlaxHa ochBa. IpOHNKBaHETo Ha BOda B eNEKTPoIHCTpyMeHTa NOBnJaBa ONaCHOCCTTA OT TOKOB yAp.
He 6pa6oTbaTe NOBbpxHocCTTa, Bbpyx KoTo Te pa6oTHTe, cTeuHocTHc, cbIbpxaAn pa3TbOpHTenn. B pe3yNTat Ha HapraBaHeto Ha MaTepHaJIte npn TpHe He MoRat Da ce 6pa3ayBat OTPBHN napH.
Pnpa6oTaCwapeHcHOxKa6bTeOco6eBOHNMaTeHH.NHCTpyMeHTteCa cMHOroocTpNp6oBe,CbIeCTByBaOnaCHOCTOTHapaHaBaHe.
OchnpyBaBte 6pa60TaBHHaTeaHn. TaHaT C NOxOJaI INPcNOCoBHeH Nn cKoBn, e3acto-nOpEn n 3paBO n ChyPhO, OTKoJIKOTo, aKO r DbpxHtepCpbKa.
PnnoBpeKdaneHnePaBnHaekcnnoataaOnrO atkyMnatophata6atepnaMorat da ce otDenrT nap. PpoBertpe nomeeHnTo h,ako ce noyBCTBaTe hep3- nIIOXeHH,notbpcTe nekapcKa nOMoi.Papnte Morat Da pa3Dpa3Hrt DNxATenHITe NTiua.
He OTBAPaIte AkymyNaTOpHata 6aTepeHn. CbuecTBByBa ONaCHOCT OT Bb3NkBAhe Ha KbCO CbeDInHeHne.
AkyMynaTophata 6aTepeHn MoKeJa 6bJe NOBpeHn OTOCTPN PneDMTH, HAp. NpHOHN HnO TBePKN, HnN OT CnHn YdApN. MoKe Ja 6bJe PneDn3BnKaHO BbTpeHNO KbcO CbeINHeHn I akymnaTophata 6aTepeHn MoKe Da ce 3anaHn, Da 3anyu, Da ekCnIOnpa Hn da Ce nperpee.
H3non3BaIte akymnataOpHATA 6atepeHa cMo B npOdyKTNa HpOn3BODHTeN. CaMo TaKa Tne npPeDnAeHa OT ONaCHO 3a He NpTeTOBapBaHe.

IpeNa3BaIte akymyataOpHATA 6atepna OTHBCOKN TEMnepaTyH, HApN. BcneCTbHe Ha npOdbJnxTeHNO hJaRaHe Ha dHpeKTHA CbHueBA CBETnHa HnOtBn, KaKTo NOT BO Da nOBnaxKHBaHe. CbueCTbBya OnaCHOCT OT
EKCIIIO3NIA.
Onncahne Ha npodykta n DeHocTtA

Ipooyete BHHMaTeHBOBCHKNyKa3aHHN HnHCTpyKuHN 3a 6e3oNaChOCT. Iponyckn npn CnA3BaHeTO Ha nHCTpyKuHNTE 3a 6e3oNaChOCT nYka3aHHTa 3a pa6ota MoT a Na IMAT 3a NocJIeDCTBne TOKOB yApap, NOkAP n/INn TeKKn
TpaBMn.
Mon,ImaTe npedBn H3o6paXeHnra B npedHa tac Ha pbKOBOCTBOTO 3a pa60ta.
PpeHa3HaeHHe Ha eKtpOnHcTpymEnTa
EneKtpOnHCTpyMeHTb t npEHa3HaueH 3a p3aHe n pa3eI
JIaHE Ha DbpBeHN MaTePnAHI, PnAcTMaC, TnC, CBeTHN MeT
TANI N KpEnekHN enEmeHTn (Hapn. HenoCDnEHnBO3en,
CKoB).CbIO Taka e noxOJra 3a o6pa60Ka Ha MEKN IIOU
Kn 3a cTeHa, KaKTo n 3a cyu xHInΦoBaHe n OctbprBaHe Ha no-MaKNnPiOnu. To e ocObeHo nOxOAnu 3a paBota 6nI30 do p5b6n 3a paBota C nIbTHo npINOKpBaHe. Donycka ce hONJBaHeTo My camo C opRnHaHn DoNbHnTEnn npncnoc6bHeHn KOHCymaTbN, npOn3BOcTBo Ha Boi.
H3o6pa3eHH enEmeHTN
HomepnpaHToHa eIeMeHTHe Ha eIeKtpOnHCTpyMeHTa ce OTHACr DO I3O6paKeHHa Ta CtpaHHuTe C pHyprte.
(1)Пусковпреквача.
(2)Ocbo6oKdaBaun 6ytoHn 3aakymnaTOpHata 6ate
(3) Akymyntopha 6aTeprna
(4)BeHTnlaHOnHHoTbOpH
(5)ПOTeHcHOMeTb3a peryIuPahHe Ha yecToTaHa Bn6paunne
(6)Индikatop 3a akymynaTophata 6aTepeira
(7)Γηε3d0
(8)3actonopbaa noct ha dbnbouHHnOrpaHHTen
(9)Дьлбουнинеоогранчитeti
(10)PotbBaUzInpKyIaPEn TpnoH
(11)3ateratehenBHT
(12) WecToCTeHKnHou
(13)PbKOxBaTKa(nOJIpaHNIIOBpXHOCTH)
(14)PpaxoynaBHeA
(15) Μινηφοῦτα πνούαλ
(16) 甲Kypka
(17)3ateratehennoctHa npaxon3cMykBaHeto
(18) 甲uep3a npaxoynaBHe
(19)AanTep3a npaxoynaBHe
(20)ИЗСМУКВаш Марку(A)
A) N3o6pa3eHHe H a HpyHte H OHncaHTe DOnbHntenHH npHCnocO6BHe H cBa KKnIOueHH B cTaHApTHa OKOMnNeKTOBka Ha ypeHa.3YeepNaTeHcNcB Ka dOnbHnTeHN He pncoc6BHeHH MoKeTe Da HamepHTe CbOTBeTHo BAkataIora Hh 3a DoNbHnTeHH pncoc6BHeHH.
Texnuecken daHHN
Akymynatopeh Multi-Cutter GOP 12V-28
| Katajokhen Hoomep | 3601 HB5 0.. |
| Hominahino hantpexeHne V=12 | |
| Скорост на вьтende на па- зенихов. | min-1 5000-20000 |
| ыгл на осцинке на лявов/ надясно | °1,4 |
| Maca sbflacno EPTA-Procedure 01:2014 | kr 0,97-1,2 A |
| разрешина Temпература на okолнatable срEDA | |
| - по заекдане °C 0...+45 |
Akymnyatopen Multi-Cutter GOP 12V-28
Ipeincbaite DoBnHHTeHH MePK 3a npEtna3BaHe Ha pa6oTeu n c eIeKtponHCTpyMeHTA OT B3JeCTBnToHa Bn6paunITE, HapnPmep:TexHneCko OcclyXbaHe Ha eneKtponHCTpyMeHTa n pa6oTHte INCTpyMeHTn, NOIbpxKeH He pbute ToII, ZeneCbOpa3Ha opraHn3aun Ha pa6oTHte CTbIKN.
202|Блгарский
Mонтуранe
PpeHn Da H3BbPwBaTe KAKBTo H da e DeHocTH No eNEKtpOHNcTPymEnTa (HAnp. TexHuecko 06CnyXba He, CMHa Ha pa6OTHMa HcTpyMeHT N T.H.), KOrato ro TpaHCnOpTHPaTe Hn CBxpaHBAte, DEMOHTPaHKeAkyMnaTOpHata 6aTePN. CbIeCTByBa ONaCHOT OHa paHBAHe np3aDeHCTBaHe Ha NyCKOBn PpeKcbBaH NO HEBHMaHHe.
3apekdaheHaakymaTopnata6atepna
H3non3BaIe cAmo nocouenHte B pa3dena TexnueckN daHH 3apJHn yctpoiCTBa. CaMo Te3n 3apJHn yctpoiCTBa ca NOxOJaU 3a H3non3BaHaTa BB BaJIn eNEKTPoHnHcTpymEn NITHeBO-IOHHa akymyNaTopHa 6aTePnR.
Yka3aHHe: AkymnatoPHTa 6aTepeRnCe DoCTABNACTHNO 3apeEHa.3a Da DCTHTHeTe NbIHNA KANauNTet Ha akymnaTOpHATA 6aTepeRn, PpeIN PbBOTO H3NON3BaHe 3apeTe DOKpaB 3apdHOTO yCTpOHTBO.
IITeBO-ONHATA akymytaTOPHa 6aTepeMoKe Da 6bDe 3apeXdaHa NO BcRAKO Bpeme, 6e3 TOBa DA cbKpaAba DbIroTpaHocTt H. PpeKbCBAHe Ha 3apeXdaHTo CbIo He N BpeDn.
IITNEBO-NOHHATA akymyNatOPHa 6aTepeH e3aunTeHa cpeu yb160ko pa3peKjaHe ue3 eneKtpoHHata cnCTema "Electronic Cell Protection (ECP)". Iprn pa3peKdahe Ha akymyNatOpHATA 6aTepeH eneKTPoHHCTpyMeHTbT ce N3KJIIOvBa OT npEiNa3EH npEkbCbaH: Pa60THHr HnCTpyMeHT Cnnpa da ce DBNKn.
3a demoHTnpaHe Ha akymnatopnata 6atepyra (3) HATNCHTe OCBO6OxdaBaunTe ByTOHn (2) n H3NbpaTne Ha3adOT eNEKTPoHHCTpyMeHTa. PnroBa He npnaarate cna.
HdHKatop 3a akymynatopnata 6atepna
Tpnte 3eneHn CBTeOndnoa (6) nokaaBt cteenHa ha 3ape- dHeocT Ha akymyNatopHata batepna (3). Hndnkatopb3a cbctoHHeTo Ha akymyNatopHata batepna CBETn cato 5 ceKynDn CneB BkIOuBaHe.
CbeodnKaanuTeT
HenpeKbchato CBeTeHe 3 x 3eNeHo ≥ 2 / 3
HenpeKbchato CBeTeHe 2 x 3eNeHo ≥ 1/3
Henpekbcnato CBeTeHe 1x3eJeHo <1/3
MiraaCBeTInHa1x3eIeNope3epBa
Mnraa CbTeHa 3x3eHeno H3TOueHa
Ako cneB KBNIOUbaHe HNINKaTOpbT He CBeTHe, AkyMnyaTOpHata bATEpHa e NOBpeHa H TpBaDa b6bDe 3aMeHeHa.
CmHa Ha pa60THHn HnctpymEnT
PnH CmHa Ha pa6oTHHa HNCTpyMeT pa6oTe c npEpa3HbPkabu. CbueCTByBa OaCHOCT da ce paHITe PnH DOKOCBaHE DO OCTpHTe HM Pb6OBe.
H36opHa pa6oTHMa HnCTpyMeHT
Mon, 3ana03haitece cbc cnncbka c npedBndeH 3a Baunna eneKtponHCTpymEnT paOthn HNCTpymEnTH.
Pa60TeH NHTpyMeNT GOP 12V-28


CnabaTe yka3aHnTa 3a 6paKaYBaHe.
B TaBnIaT a no-dony ca npBBeHEn npMepn 3a pa3nnHn npNIOKHN HnCTpyMeHTn. Dpyn npNIOKHN HnCTpyMeHTn MOKTe Da HamePte B WnPKOo6XBaTHa TpOn3BOcTBeHa rMa Ha BoW 3a HnCTpyMeHTn nDOnbHInTeHH npNCnoc6NeHH.
Pa6oTeH HnctpymEn MaTePnA1 PpInnoXeHne
NoCTABHHe/cmHaHaWKypkataBbpxywnnfoBaauata nnoua
IINFOBAaata IIOOa(15)e cBOpbKeHa c63 aXBaaane Ha 乌Kypkata TnB EInKpO,6NaIgOapeHHe Ha KoETo C NoXoJy 电U KypKn 3aMaHATA ce N3BbPwBa 6bp30 HneCHO.
PpeHn Da nOCTaBnTE HOB NcT WkypKa (15), CtpbckaTe eBEHTyAnHO NOENHAN NO WInΦoBauaata NaOa (16) npax, 3a Da OCNpyte ONTHMaHNO 3axBauahe.
IocTaBete ncta shkypka (16) toH no p6ba ot eHaTAtpaHa hnilnofoBaata nnoa (15), cneToBa donPete InCTa shkypKa do snilnofoBaata nnoa nTo npInCHeTe 3npabo.
3aOCHpyraBaHeHaONTHMaHnCTeNeHnPaxoynBaHBeBHIMaBaIteOTBOpHTeHaIKyPKaTaDaCbBnAdHcOTBOpHTe HaIINΦOBaAutaTnNoya.
3a CBAJIHe Ha UKyPkata (16) npocTo xBAHete 3a HrKoI KpaI I N3DbPnAte BHMAtenHO OT WInHFOBaAata IINoa (15).
MoXe Ta H3NONBATE BCNUK BNBDOBE Wkypka HnIaTHata 3a NIOINPAH EN ONUCTBaHE OCEPNrTa DENTA 93 mm ot npoN3BOIDCTBeHATA rMa HA BOII.
CpeCTBa 3a nonpahe, kato Keue HnH noHnpauq fHnU, ce NOCTABT Ha unnofoBAuata nnoa no ananornuen HauHH.
CnCTema 3a npaxoynaBHe
PpaxoBe,OTdienuIc npn 6pa6oBaTHeOHa MATEpnaHn KaTo CbIbPkaUIN ONoBO 60H,NKOH BUNObe DpbBecHNa,MHHepan N MetaH MoT aDa 6bDat OnaChN 3a 3dpabeto. KOtAKTbT DO KOKATA HIN BmUBaHETO Ha TAKHb PpaxoBe MoTa Da npEINBbKaTAneprHnpeakun n/nn 3abONBAHNHa dHXaTeHNITE PbNTNuHa paOBteuC neEeKTPoHCTpyMeHTA NN HAMPiauN c HbN30 Nua.
Onpeene npaxohe, hnp. onenrnte ce npn oba60BaHe ha 6yK n db6, ce cunTat 3a kaHcpeoreHH, oc6eHO B KOM6Haacn C XMMKaIIN 3a TpeHpaHe Ha dbpBeCnHa (XPOMaT, KOHcEpBaHTn Hp.). Donycka ce o6pa6OBAHETo Ha cbDbPkaaN a36ecT MaTePhaNN caMO OT cbOTBeTHO 6oyehn KBaJIuΦnUpaHn Nua.
-ПО ВБМохност ИЗпOLТБАУТЕ NOДХОДЯЦA 3a OБРабOTВАНЯ MaTePиAN CNTeMa 3a npaxOуЛЯВЯн.
- OcnhypraBaiTe Do6po IpoBETpaBaHe Ha pa60THo MRCTO.
-ПpenopbUba ce n3nO13BaHETO Ha dnxaTeHa Macka cФнТьрОТknacP2.
CnazBaHTe BAniHnTe BbB BaWata CTpHa 3aKoHOBn pa3nope6n, BAniHN npn o6pa6oTbaHe Ha cBoTBHTHe MaTePnaI.
H36raBaeHaPynBaHe Ha npax Ha pa6oTHoMaCTO. IpaXbT MoKeJeNECHO Da CE CAMOBb3nPaMeHN.
BknHouBaHe Ha acnHaPauHOHHa ChTeMa (Bx. HrA. A)
BknHouBaHetoHaacnnpaunOHHTaCnCTema(14)e npEIN-DeHOcAmopnpa6oTaCnnΦOBauataPiOa(15),BKOMbHaunCpynpa60THNnHCTpymEnTHuepb3aPpaxoynaBHe Bbpnspa6oTa.
3a ⅢaHae BnHaR BkIOUbaIte acnpauHOHa CnCTeMa. 3a MOHTpAHeTo Ha npHCNoC6NeHHeTo 3a npaxOyNABRe
(14)(npHnAdnEeKHOCT) npbPO DEmoHTnpaTe pa60THN INCHTPymENT.
H36ytaTe acnnpaunnoHHata cnctema (14) do ynp Hau nocTabkata 3a HnCTpyMeHT (7) Bbpxy 3aTeaTeHHa TaCt Ha eNEKtpoHnCTpyMeHTa. 3aBbptete npctabKaTa 3a npaxoynaBHe B JekelaHATA NO3HUN (da He e npBO NOeKTPoHnCTpyMeHTa). PpNTncHete 3aTeaTeHNHnOCT (17), 3a da pKKcnpate acnnpaunnoHHata cnctema.
IbXHe aadantepa 3a n3cMykBahe (19) Ha Mapkyua 3a n3cMykBahe (20) B uyepe 3a npaxoynaBne (18). CbbpxeTe IJHaHra (20) KbM npaxocmykaKa (He e BKIOueHa B OKOMnNEKTOBkata).
Yka3aHnHa NaHb KaIOUbaHe KbMa p3NHy NpaxOc MyKaUMoKeTe Da HamePHTe Ha CtpaHuaTa CfHyptte. 3non3BaHata npaxOCMyKaUk Ta6Ba da e npiroDHa 3a pa6ota C6pb6oTBAHH MaepnA.
Ako npn pa6oTa ce otJeI ocObeHo BpeH 3a 3paBeto npax nII KaHeporeHen npax, H3non3BaTe cneuaHnHa npaxocMykaKa.
Pa6ota c eIeKtpoHHcTpymEnta
IyckaneBekcnnoataa
IocTABHHe Ha akymyNatopHaTa 6aTePn
H3non3BaHTe cAmO opHHHaHn HmTHneBO-HoHH6aTePnn, npOH3BOcTBo Ha Boi, C nocoueho Ha Ta6enKata Ha Baunr eneKTPonHCTpymEn HOMnHaHNO HanpeXHe. N3non3BaHTo Ha npTu nAkyMnaTopn6aTePnn MoKe Da npEHNbKa HapaHbHn n ONaCHOCT OT noXap.
206 |Блгарский
Yka3aHHe: 3nnon3BaHTo Ha akymyIaTOHbATEpHn, KOHTo He ca npEHa3HaueHn 3a Baunr eNkTpOnHcTpyMeH, MoKe Da npEi3BnKa HnpaBnHnHO My fynKUOHNpaHne IIN da ro nobpeHn.
BkapaTe 3apeHeTa akymyIaToPA 6aTePn8 (3)doKpaB pbkoXBaKaTa, DOkaTO yCeTHe OTeTnBO ppePpKaBaHe.
BknIOuBaHe n H3KnIOUBaHe
YbepeTeCe,Ye MoXeTe Da 3aJeHCTBaTe NyckOBnnypeKcbau63 NyckaHe Ha Dpbkkata.
3a BkIIOUBaHa He eneKtpOnHCTpyMeHTa npeMeCTe NyckoBnI pKeBcBaU (1) HanpeD, taka Ye da Ce BnD CmBbOa "I".
3a n3KIOUbaHe Ha eNEKTPOINHCTPymeHTa IpemeCTe TycKOIBn PpeKbCBaY (1) H3aI, TaKa Ye da Ce BUN CMBOa "0".
YkaaHHe: AKeIeKtpOnHCTpyMeHTbA BToMaTuHO H3KIOUBy Nopadn paPeDeH HIN npeprAnkyMnyatop,TO H3KIOUeTe eKeTPOHNCTpyMeHTcNyCKOBn ppeKcbau (1).
3apeTe AkyMnaTopa, pcn. ocTabeTe ro da ce oxnaHn, npedn OTHOB Da BkIOuHTe eNEKTPoHCTpyMeHa. AkyMnaTOpHata 6atePMA MoKe da 6bne NOpeDeka.
PeynnpaHe NaYeToTaHa Bn6paunHe
C NOMOHTA Ha NOTEHNCNOMETbpa (5) MOXeTe Da H3MeHrTe YecTOTATA HA Bn6paunITE CbIoo IN No BPeme Ha pa6ota.
OnTHMaHnHa TaeeToTa H BnBpaunHe 3aBnCt O6pa6oTbHnMATEpHnI paOHTHe yCIOBnI Ce ONpeDn Hau-TOHO Upe3 HnpO6BaHe.
Pn pr3aHe H mHFOBaHe Ha NO-THbPdM MATEpHaHn, HAnp. DpbBecHa Hm METaI, Ce IpnOpBpuBa CTeneH "6" Ha YecToTata Ha Bn6paunTe, Pn nO-MeKn MATEpHaHn, HAnp. INaCTMaCa Cb0tBeTHo CTeneH "4".
Yka3aHn3a pa60Ta
PpeHn da H3BpWbATE KaKBHTO n Da e DeHocTH no enEeKTPoHHCTpyMeNTA (HaNP. TexHuecko 06cnyXBaHe, CmHa Ha pa6OTHnHhCTpyMeHT H.T.H.), KORAto ro TpaHCNOpTnPAte HnCbXpaHBAte, DEMOHTHpaIte akymaTOpHATA BatePN. CbUeCTByBa ONaCHOCT OT Ha paHBAhe PnH3aDeHCTBaHe HA NyCKOBn IpeKbcBau No HEBHMaHHe.
PpeHdaocbHTe eektponHcTpyMeHTa,H3aKaBaiTe Bbpteheto da cnpe Hanblno.
Yka3aHHe:NoBpeMeHa pa6oTaNoIbpbKaiTe BeHTnlaU OHHTeOTBOpH(4)Ha eNEKTPOINHCTPymEHTCABOODHN, B IpOTHBeH CnyaHbNtOPaHNOCTTMy CECKbCBA 3HaUN TeHIO.
PnHHnHa pa6ota
Blaqapnne Ha ocunnpaot0 3aBnKBahe pa6oTHNHT HCTpymeH B6pnpca cdo 20000 TbTn B MmHyTa Ha 2,8° Hanei Ha3ad. ToBa nO3BOJBA npue3Ha pa6oTa ha tecHN MeCTa.
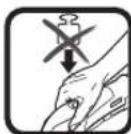
Pa6oTeTe COrpaHnueHa, Ho paBHOmepe Hcna Ha pInTHcKaHe, B IpOtnHBeN Cnuya Ce BNoUba Ipon3BODHTeINHOCTTa, a pa6oTHnT HnCTpyMeHT MoKe Da ce 6nOKpa.
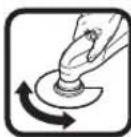
IbBpeHa pa6oTa npnBnKbaTe eneKTPoHnHCTpyMeHTa Hnpei-Ha3ad,3a da He ce 3aqrpa ba p6oTHnHt HnCTpyMeHT TBpDe MHO r Da He 6nOKnpa.
Pra3aHe
H3NON3BaIe CAmO HOXOBe B6e3yKOpHO cBcTOnHHe. OTHaHT HnH 3aTbNEH HOKOBe MoT Da Ce CuyIT, Da NOBpeIAT Cpe3a HnH Da PpeN3BHKaT 3akINHBAHe.
Pnphpa3p3BaHeHaNeKnCTpOHTENH MATEpHAnn cna3BaIte 3aKOHOBNTe pa3npoep6n H yKa3AHNtHa npOH3BODHTeY.
Donycka ce npo6nbaHTo cpeXeunIHCt caMoHa MEKN MaTePnaHn, KaTo DbPBeCnHa, RnNcKapTOHnn dp.n!.
PpeHpa3aHc HCS npKpynepHn DnCKOBe BDbpBO, PIIyIIOCKOCTN, CTPOENTENMATEPHANN pnpOBepBAITE 3a yxkDnTeNa KATO NpPOHN, BNTOBE nDp.OTCTPAHETe npHynkDa yxkDnTe TaNNn H3NONBAnE bIMeTaNn CnpKyIyRPNH DNCKOBe.
Pra3aHe
YkaaHHe: Pn pa3pa3BaHe Ha paarHCBOI nOouKCe c6o6pa3BaTe, Ye npnpOdbNkHTeHIO n3non3BaHe pa60THNEHCTpyMeHNT 3anOuBAT da CE hHOCBAT 6bp30.
UHnfoBaHe
HHTeHbHOCTa Ha OTHEMaHe N KaueCTBToHa NOBbpxHOCTa Ce ONpeDenr rnaBHOOTn36Opa Ha Kypka, Hactpoehata YecTota Ha BbPnpaHe n CnIaTa Ha npHTnCKaHe.
Camo ⅢKypkn B 63yKOpHcBcTOrHHe OCHryPbAT Do6pa npOn3BOInTeHIOCT H pEJa3BaT eEnKTPOHcTpyMeHTa OT npExDeBpEmHo H3HOcBAHe.
PbBpeMa pa6ota npHTNCKaTe eNEKTPoHnCTpyMeHa paBHOMepHo, 3a da yBENuHTe bIroTpaHocTtHa WkypKaTa.
IpeKoMEpHOTo yBEnuHaBe Ha CnlaTAt Ha npHTNcKaHe BOH Do yBEnuHaBaHe Hn HInTeH3NBocCTTa Ha OTHemaHe, a DO No-6bp30To H3HOCBaHe Ha Ikwypkata Na eNEKTponHcTpyMeHTa.
3a npuezHNO uHnfoBaHe Ha bI, p6bOBe n TpyHIOocTbHn 30HN MoKTe Da uHnfoBaTe HcMoC Bbpxa Hn HkOHTp6bOBeHa uHnfoBaUaT aNooa.
PnwnfoBaHe BToKa WkypkaTAmoKe Da ce Harpee CnH. HamaIe Te yectota Ha Bn6paunHe n CnTaHa npntncKaHe nepnoDnHooocTabre WkypkaTa da oe oxnaJda. He h3non3BaTe Wkypka, cKoTcOe6pOBTBnH Metan, 3a WnfoBaHe Ha DpyrN BINOBE MaTePnA.
H3no3BaTe cAmO opHnHaJIHn IJKypKN, npoH3BOJCTBO Ha B0w.
3a ⅢnaiΦaHe BnHaBn BkIIOuBaIe AcnnpauOnHb CnCTema.
Ua6poBaHe/cTbprane
PnIu6pOBAHe BnHaHn H3bpaTBe BnCoka YecToTa Ha Bn6paunTe.
Pa6oTe Bbpy MeKa OCHOBa (Hanp. JbPBeHo Tpyupe) nOcOtbpBnCmKa CnHa HnpTnCKaHe. B npOTHBEN Cnyuay mNaKlTa MoKe Da Ce BpeKe BOCHOBaTa.
Tempepatyph3aunita cpeuy npetobapbahe
Pn nIOn3BaHe CbO6pa3HNO pIeHa3HaueHHeTo N INCHTpKUInHe B TOBA pIbKOBoDcTBO eNEKTponHCTpyMeHTb HE MoKe Da 6bJe npTeOBaepen. Pn T bBpDe cINHO HatoBapBaHe Nn HADxBbPnHE Ha DOnyCTHMata paB0THa TEMnepatypa Ha aKyMyNatopHata 6atepna CKOpOCTTa HA BbPTe He cOrpanuabaHa eNEKTponHCTpyMeHTc CeNkNIOUba.CneD orpAnuBaHe HaCKoPCtTa Ha BbPTe He eNEKTponHCTpyMeHTb 3anOyBa da paB0Tu C nbHnA ckopoCT Ha BbPTe eEBA cNeD KATO aKyMyNatopHata 6atepna DOCTHHe DOnyCTHMata paB0THa TEMpePaTypa Nn 6bJe HamaJIeHO HatoBapBaHeto. Pn ABTomATNo N3KnIOUBAHe N3KnIOUte NcKOBNa pKeKcbau, NuaKaIte aKyMyNaTOphata 6atepna Da ce OXJaN n CneT ToBA OTHOBO BKIIouhe TE eNEKTponHCTpyMeHTa.
Yka3aHnHa 3a ONTmHa p6Ota c akymyNaToPnHaTa 6aTePn
Pepna3BaIteakymyIaTOpHata6batepyoTbIaHaNBOda.
CbxpaaBaIte akymnatopHata 6aTepeHn CaMo B TEMpeTpyHHn DHaNaoHOT -20 ^ C do 50^ .Hanp. He octabnAteakymnatopHata 6aTepeHn ppe3 nTOTO B aBTOMoHn Ha CbHue.
IepnoDnHNOIOuNCTBaHTe BEHTnlaUHOHHNEOTBOPH Ha aky MyaTOpHATA 6aTePnA C MEKA uCTa H cyxA yETka.
CbueCTBeHo CbKpATEHO BpeMe 3a pa6oTa cne 3apeJdahe nok3Ba, ye akymnatoPnHa 6atepn e n3xa6eHa n Tpa6Ba da 6bde 3aemeHa.
Cn3BaTeyka3aHnTa 3a6paKaYBaHe.
PoiDlbpxKaHe n cepBn3
IopdbpxKaHe n nouCTBaHe
PepnHa H3BpWbATEKaBHTOHaeEHeHocTHNo eNEKtpoHHCTpyMeHTA(Hnp.TexHuecko 0cbnyXBa- He,CMHa Ha pa6OTHmHcTpyMeHTN.H.),KORATO TpaHCNOPTHPaTe HIN CbXpaHBAte,DEMOHTnpaIte aKymnatopHata 6atePra.CbIeCTByBa ONaCHOCT OHa paHBAHe npHa3aDeiCTBaHe Ha NcKOBnPipeKcbau No HEBHMaHHe.
3a da pa6oHTHe kaueCTBeHO 6e3onacHO, noDbpaXaIte eneKtpOHnHcTpymEnHa BENTnauNoHHTe MyOTBOPH NCHT.
PepoBHOIOuHCTBaIte pHpENoBAHpa6OHTN HcHcTpMeHTN (DOnbHInTeHH npCnOCoBeHH) C TeHeHa YETKa.
KIneHTcKa Cnyk6a H KOHCyNTaun OTHOCHOynotpe6ata
CepB3bT 0e OTROBOPn HA BbnpocTe Bn OTHOCHO pMOHTN nnoDpBxKHa 3aKaynHeHn O TaB npOyKT, KaKTo n OTHOC HOpe3EPBNuactn. POKOMNOHEHTNuePteKn HnHfOpMa
ZIy3a pe3epBnHTe yactn Iue OTkPnTe HHa: www.bosch- pt.com
EkntnoKocnytaaOn OTHOCHO yNtpe6ata Ha Bosch ue Bn NOMORHe C yOBOJCTBHe npn BbnpoCn 3a HauHte npOdykTN TExHNTe akcecoapn.
MOn, npn Bbnpocn H npn npopbyaHe Ha pe3epBnH qactn BnHaH NocOyBaIe 10-uaPpeHH KaTALoxEH HOMep, H3nIcAH Ha Ta6ekkata Ha ypeA.
Блгарна
Robert Bosch SRL
Service scule electric
Strada Horia Macelariu Nr. 30-34, sector 1
013937 Bucuresti, Romania
Ten.: +359(0)700 13667 (Блларск)
ΦaKc: +40 212 331 313
Email: BoschServiceCenterBG@ro.bosch.com
www.bosch-pt.com/bg/bg/
TpaHcnpOpTHpAne
BkHoueHHTe B OKMnIeKTOBkata IINTHeBO-NOHNN AkyMyIy- TaPOHNI 6ATEPHN CA B O6XBaTA HA N3NCKBAHNrTA HApOMaTINBHNTe DOKyMeHTN, Kacaeeu PNOdyKTN C NOBHNeHa ONACHOCT. AkymyNatOPHTHe 6ATEPHN MOrAT Da 6bDat TpaHCIOPTnPAHHOT Notpe6HTeNA Hny6hUNH MeCTa 6e3 DoNbHITeHH pa3peHtENH.
PnTpaHcnpOptnpAeOT TpeTn CtpaHn (HaNP. npN Bb3dyweh TpaHCnOPT NmN NOIN3BaHe Ha KypnepcN yCnyn) HMa CneuAnHn 3NCKBaHN KBM ONAKOBaHEo 0603HaUaBAHTo IM. 3a cTe nPn NpOtroBkata Ha NaKetnpaHTo ce KOHCyTTpaIte CeknepT B cbOTBeTHATA oBnact.
H3npaaiTe akymnatopn H6atepn cmo aKO pOpycBt N He e NOBpeH.N3oJIpaIte OTKpHTN KOHTAHTN KJIeMn C JIIaI NeHTN H ONAKOBaTe akymnatopHnte 6atepn Taka, Ye da He MOrat Da ce H3MeCTBaT B ONAKOBkata CN. MoJr, Cna3BaIte CbIo NdoBnHIneHH NaHOHaHN PpeDnHcaHNI.
Бракуванe

EnktonhtymeHTe,akymnatopHnTe 6a- Tepnn nOnbInHnTeHHte npncnoc6bnHe H TpaBda 6bDat npedeabAHn 3a ono130TbOPA PkaunTE ce TBx cypOBHH.

He n3XbprnTe eNeKtpOnHcTpymEn H aky Mynatopn Hnn 6nKHOBeHn 6aTePN npn 6nTOBHTe OTnabu!
Cama 3a cTpaHH oT EC:
CbINaCHO EbponeNcKa DnpeKTHBa 2012/19/EC eneKtpoypeHTE, KOITHO MEORAT da CE non3BAT NOBEa, a CbINaCHO EbponeNcKa DnpeKTHBa 2006/66/EO nobpeHn Hn H3xaBeHNoBNHOEHNn AkyMnyatopHN bATEPN Tp8BA da CE cbHpat n npedaba 3a onon3OTBOPBAHe Na CbIbPkaUHTe CBTAX CypOBHH.
AkymynaTOPHn HnO6NkHOBeHH 6aTePHH:
NHTHeBO-NOHH:
208 | MaKeDoHcKn
Mon, cna3BaIte yka3aHnraTb pa3dena TpaHcnpTpHaHe (Bx. TpaHcnpTpHaPe, CtpaHnca 207).
MaKeDoHcKn
6e36eHocnHaNoMeHH
OnuTn npEynpeyBaHa 3a 6e36eHocT a enektpnHn anatn
PENyPENyBAHbE
IpoountajTe Hn CHTe 6e36eHocnH npedynpyBaHa, nlyctpaunn H cneuΦkaunn npnojKeHN co
Oboj enektpueh anat. HnpiuDpKyaBaHTo Do cnte ynaTcBA npInnoKeH nOdoNy moKe da doBepe Do CTpyeh yadap, noXap n/nn TeuKn nobpeH.
3auybajre H6e36eHocnHTpe npdynpdyBaH ynaTCTBa 3a KopncTebe H 3a BO HmHa.
PnoHOT,eneKTPnueH anat" Bo 6e36eHocnHte npdynpdeyBaHa ce OndecyBa Ha eektpnHn anapatn wTO kOpHCTAT cTpyja (ka6eNcKn) nH anapatn wTO KopHCTAT 6aTePNn (akymnatopckn).
Be36eHocT ha pa60THHot npocstop
Pa6oTHHOT npocTOp oDpKyBaJTe rO uNCT n D06po OCBtNeH. IpeNoHH NnH TemHH npocTopmOKe da DoBedaTdo Hecpeka.
He pa6oTe co eNEKTPNHTe anaTH Bo EKcNIO3HBn OKINHa, KAKo Ha npHMeP, BO pNpCycTbO Ha 3anaNBn TeHOCTH, rACOBHnn npaHHa. ENEKTPNHTe anaTH CO3daBaat NCKPN KOHtO MoKe Da ja 3anaanT npaHHaT a Hn rACOBHTe.
Джete rн DecaTа n npncyTHnte nOanalekydoKe paBOTHe co eneKtpnueH anat. HeBHHMaHHeTo MoKe da npedn3BnKa da n3ry6bTe KOHTpOna.
EeKtpnHa 6e6eHnoct
PnPKnyOKOT ha eKTPnHHT anat mopa da odroBapa Ha npKNyHncaT. HNKoraW He ro MEnhyBaJte npKKnyOKOT. He KopHCTHe npKnyHN aanTepn co 3a3emJeHNTe eKTPnHH anATn. Hen3MeHETHe npKnyOuH n COoBETHHe npKnyHnU rHaMaJIyBaAT pN3HKOT oC tpyeH yap.
H36erhyBaJTe TeneceH KOHTAKT co 3a3emjeHH NOBpuHH, KAKO HA npHMeP,ueBKN,paHjatOpH, MeTANHH Nauu HauHHNua. IocToH 3rOJIeMH pH3NK Od CTpyeh ydp aKo BaWTe Teno e 3a3emJeHO.
He n3noxybajte enektpnHHTe anaHa doxk HnBnaXHNycNOH.AKO Bne3e BOa BO eNEKTPnHNT aIaTKe ce 3rolemn p3NKOT OCTpyen ydap.
He noctanybajte HecooBethe co Ka6enot. HnKoraw He ro KopHCTeTe Ka6enot 3a HocHe, BInueHe nn
NCKnyBaBe OJ CTpyJa Ha eNEKTPHNNOT anat. KaBenot yBajTe Ro nOdaNeky OJ ORaH, MaCNo, OCTPN HIN NIN NOBHXHN DEOBN. OITeEH INI 3aJIneTKAH KAbn Iro 3rOJeMyBaAT Pn3HKOT OJ CTpyeh ydap.
Pnpa6ota co eneKtpuhen anat Ha otBopeHo, KopnCTepe npoDOnJKeH Ka6en CoOdBeteh 3a HAdBopeHa ynotpe6a. KopnCTeHeTo Ha Ka6en cooDBeTeH 3a HaDBopeHa ynotpe6a ro HaMaNyBa pNHKOT od CTPyeH yIap.
Ako Mopa da pa60nte co ekeptpuhen anat Ha BnaXho MeTo, KopHCTe 3aHTEN ype3 aHnepeHnJnHa ctpya (RCD). KopHCTeHbeto Ha RCD ro Ha manyBa pNHKOT oC tpyeh ynap.
JIuHa 6e36eHnOCT
BnTe BnMaTeHH, BnMaBaJte KaO pa6oTne Hpa6oTe pa3ymHo co eKeKtpuH enaT. He KOpCTeE eKeKTPuH enaT aKO cTe yMOPH HnI NOd DejCTBO HaDPoH, anKoxON HnNEKOBH. EeH MOMENT Ha HeBHmAHHe Idoeka pa6oTne Co eKeKTPuHnte aHaTH MOKe da IOBeDe IO cepHO3Ha NnHa Nobpea.
Kophtete 3aHTTHa onpema.Cekorau Hocete 3aHTTa 3aOu.3aHTHTa OnpeMa, KaHO Ha np., Macka 3a npaUnHa, 6e3bHocn YeBn KOUTo He ce Nn3raat, IJEM Hn3aHTTa 3a yuH, KOUTo CE KOpCTa T 3a COoBETHuYcNOB, Ke IOBeDat DO HAmanyBaIbe Ha NnHH NoBpei.
CnpueTe HeHamepHo AKTHBnpaHe. IpOBepeTe dAnn npEKNHyBaOT e NCKnyeH npeI da ro BKnyHTe BO cTpya H/nn Co CETo HA 6ateHH, npeI da ro 3emete HN HOCTe anatot. HoceHe Ha eneKtpnHtte anatn co npCTOT nO3nIOHpuH h npEKNHyBaOT nII IN BkLyBuBe BO cTpya Ha eneKtpnHtte aIaNTHuJWTO npEKNHyBaOT e BknyeH, MOKe I na pndHBnKa HecpeKa.
OctpaHETe KaOB 6nno Kny3 a perynpaIbe nnn φpaunycKn Kny nped Da ro BknyuTE eNEKTPNHNOT anat. PhaunycKn Kny nnn Kny npkaueh 3a potnpaKNOT den Ha eNEKTPNHNOT anat Moke da DOBede Do NnHa NoBpea.
He nIpeukopybaje orpaHnuyBaHata. Nocjoaho odpxybaje cooDBeTHa nooxka h pamhotexa. Oba OBO3MOxBya IIOO6pa KOHTpona Ha eJeKTPnHOT anat BO HENPeBnINBn CNTyaun.
06neyetececooBETHO.He hocete uHPOka 6NekeHa HAKHT.Kocata n anuTATA tpe6a da 6HATnOdaNeky OIOBHXHNTeNoOBn. UHPOkata o6Neka, HAKHTOTnnIOnrataKOCAMOKeJa ce3aKaayat3aNOBHXHNTeNoOBn.
Ako ce Kopnctat NOBp3aHnypeHn 3a Baedebe npaunHa n Co6npaBe npEmTe, npoBepeTe daHn ce npaBnHO NOBp3aHn KOpHeTn. Co6paIbeto npaunHa MoKe Da Hn HamJIu ONaCHOCTHe npedn3BnKaHOn O Hea.
He do3Bonybajte hckyctboto cKeHato co yecta ynoTpe6a ha anatte da Be HanpaBN CnOKoJHN da Hr HrhopnPate 6e36eHochntepnHHnnn pHnHBHOTO
KOpHCTeHe. HeBHMaTeIHO DnIXKeHe MoKe Da npEIM3BnKa cepHo3Ha NOBpeDa BO DeI OJ CEkyHda.
Ynortpe6a H yBaHe Ha eNktpHHTe anatH
He ro npeontobapybaje enektpnHOT anat. Kopctete cooDBeteh enektpuen anat 3a Hamehata. Co cooDBeHTHOT enektpuHEn anat noD6po, no6e36eHNO np6p30 Ke ja h3BpuHte paobotata 3a Koja e HameHET.
He KopncTe e nektpuue ana t ako He moxete da ro BKnyHTe H NCKyUTe co nomoHa npkeHHyBaOT. Ceko jneKtpuue anat kojsto He moxte da ce KOHTPOHpa co npkeHHyBaOT e onaceH Mopa da ce nonpaBn.
Hcknyute ro eneKtpnHnoT anat od ctpya Hnnn 3BaTe ro ceTOT ha 6atePHN, aKO CE BaIN, ppeDa npaBHe HeKAKBn PpNaIgOyBaHa, MeHyBaTe DOnONHTENHa ONPema Hnro CKnAhpate eneKTPnHNOAnAT. Co OBNE ppeBEHTNBHn 6e36eHocnM ePKnCe HAmanyBa pN3NKOT oCnuyajHO BKNyUyBaBe Ha eneKTPnHNOanAT.
4ybajte rH eneKtpnHHTe anaTH noDanaKeYo dOphiT H a dea H He do3bonybajte nuaTa KOH he pakyBane CO eNEKTPnHOT anat Hnn He ce 3aNo3HaEHn CO OBA ynatCTBO Da pa6oTat co HcTHot. EneKtpnHHTe anaTH ce onachn Bo paTe Ha Heo6yuHn KopncnHn.
OdpxBaBe Ha eNktpnHn anaTH n DononHnTeHa onpema. PpOBepe Ro npamHyBaHeTo Hn npBPCyBaBe Ha noBnKHTe DeNoBn, cnojot Ha deNoBHte HcTe Dpyr YcNoBn UTO MOKe HeratMBHO da BnJaat Bp3 cyHKUHOHPaBeto Ha eNktpnHnOT anat. Ako e oWteten, Ondecete Ro eNktpnHnOT anat Ha nonpaBka ped Da ro KOpHCTHe. Mhory HecepkeN ce npdN3BnKaHn 3apaAn HecooBETHO OdpxBaBe Ha eNktpnHnTe aHa.
OctpeHnHCTeTnHaanHTe3aceHe. CooDBetHO OJPKyBaHHTe HnBnHa anaHTe 3a ceHe IOMaIKy Ce BHTKaat nIoneCHO keKoHTpOnHpaat.
EneKtpnHHot ana, dononnnTeHHata onpema, DeOBHTe Hp., KOpHCTe Tn BO cOrnaCHOCT CO OBA ynatCTBO, BHNMaBajte Ha paBoTHHe ycNobn npabotata koja ja BpuHte. KopncTeHoHa eNEKtpnHOT aIaT 3a DpyHn HAmEHn MoKe Da DOBeDe Do ONACHN CNTyaUIN.
PaKHe N NOBpuHHHe 3a DpxHe oDpxyBaJte H cyBn, qHCTn HEN3MaCTeHN. PaKHe N NOBpuHHHe 3a npKHe ITO ce IIN3raat He OBO3MOxYBaAT 6e36eH0 paKyBaHe N KOHTpOHa Ha anAOT BO HENpeBnIIN B nCITyaun.
YnTope6aHuyBaHeHa6atepncn anat
Nonhe ja 6atepnjata cmo co nonnau Habeen od npon3bodntenot. Pohau KojuTo e cooDBeteh 3a ehen TnCet Ha 6atepHMOKe Da npedn3Bvka onachocTOn KAp aKO CE KopncTH 3a Dpyr CET Ha 6atepHn.
EeKtpnHHTe anTH KopHeTe rCaMo cneunjannHO Hamehen CTOBH hBaTePHN. KopHeTbeTo Ha dpyrH CETOBH ha 6atePN MoKe da npEn3BnKa onachOCT O NOBpeHa nnoKap.
Kora He ro KopnCTte ceTOn ha 6atepn,uybaJre ro nodaJeKy od npyH metaHn PpeMetn, KaKo Ha np., cnojyBaNK, MoHTn, KnyeBn, WajKn, 3aBPKN Hn Dpyr NOMAn MeTAHN PpeMetn WTo M0xe Da npedn3BnKaat Cnoj od eHd Do pyr H3BOp. KpaTOK cnoj Ha 6atepNCHe N3BOPmOKe Da npedn3BnKa n3ropeHnNn NoXap.
PnD HenpeBHeHn OKoHocTH, TeuHcTa MoKe da HcTeue od 6aTepnjata; N36erHybajte KOnKaT. PnH cNyaen DonHp, N3Mnje ce co Mna Boda. Ako TeuHocTa Bne3e BO Oynte, No6apajte DononHHTenHa MeHHHCs NaOMOW. TeuHoc NTceyeHa od 6aTepnjata MoKe da npPeHN3BkA npHTaunJa nn H3ropeHnI.
He yonptep6ybajte cet Ha 6atepn Hn anat uTo e ouTeTeH Hn H3MeHET. OuTeTeH Hn H3MeHET 6atepn MoKe Da pearpaat HepeBnINBO n da npednBnKaat Noxap, ekpno3nJa Hn onaCHOCT od nobpeda.
He ro H3noxybaje cetot Ha 6aTePHH HnAn aIaTOT Ha orAH HnBnCOKa Tempepatypa. H3noxyBaHTo Ha orAH nHa TEmpepatypa NOBCOKa od 130^ MoKeJa npedn3BnKa ekcnlo3nJa.
CneTe r n Cte ynatCTBa 3a nonHebe H He ro
nonHete cetot Ha bateHH nn anatot HnBop od
temnepaTyPhhot oncer HabeDen BO ynatCTbata.
HenpaBnHToNoIHeBe HnHa TmNepaTpya HnBop od
HabeDenHot oncer MoKe da ja oWtEt N Batepnjata Na ja
3rOJIeMOnaCHOCTa OJnoKap.
CepBnchpahe
EneKtpnHNO t anat cepBncpajte ro kaj KBaHHNcKyBaHO nIe Koe KOpHCT caMo HDeTHHpe3epBHN DeOBn. Co Oba ce OBO3MOxKyBa 6e36eHOn oDpxyBaHe Ha eNEKtpnHNO t anat.
HnKorau He nonpaabjte owtetehn cetobn Ha 6aTeepn. NoppaKaTaHa cetobn Ha 6aTeepn Tpe6a da ja Bpuu caMo npOn3BouHTeNoT Hm OBnacte H cepBnc.
Be36eHocn HAnomeHH 3a Multi-Cutter
DpxkTe ro eneKTPnHnO anat 3a H30nHpHaT a NOBpHHa DOKeKa ceye 3a Da He DoJne BO KONTAK T co cckHeHa Xnua. Ako onpeMaTa 3a ceye He DoJe BO DOnnp C,KNu NaHnOH,MOKe Da rHn3NoXm MetaHnHTe DeIOBn Ha eneKTPnHnO anat ,NOD HAnOH n OepaTopoM oKe Da doBne CTpyen ynap.
KopncTeTe ro eneKtpnHnO anat cmo 3a cyBO 6pyceHe. HABneryBaHeto Ha B0a Bo eneKtpnHnO anat ro 3rOlenMyBa pnaHKOT on eneKtpnHyenap.
BHHMaHHe onaNochocT od noXap! H36erHyBaJen ppeBaIbe Ha napTe wTo ce 6pyChn 6pyCnKkata. PndHa hnpabnte nay3a Bo pa6oTata, cekoraw Hncpa3He rope3epBoapot 3 npab.PpaBTA od 6pycebeto BO TOp6ata 3a npab.MKpOyecHTNKe, xapThHeHATA Keca (HnФnTep-Kcata Odn.ФnTepoHa BWMykyBaVOT 3a npab) MOxE Da ce 3anaJI npri HenoBONHn YcNOBn, KAKo Ha np. Jetae Ha Nckpn npri 6pyceHe Ha metAn. Oco6ena OnaNoCHoc NoCTOn, DOKONky
210 | MaKeDoHcKn
npabTa od 6pycebeTo ce n3Mea ca oc taToOn od NaK, nonHypetAH Hn DpyrN Xemnckn MaTepnjAnn NdoKoNky napye To ce 6pycn Ce BxekuTn no doIroTpajHa pa6ota.
Држete rpaete noaneky od denot kaede wto ceceye. He pakajte noD denot wto ce opbaotya. JOKONky dojete BO KOHTaKT CO IINCTOBITE 3a INIla NOCTOINACHOCT OJ NOBpeja.
PepOBHO UHCTeTn OTBOpHTe 3a npoBeTppyBaIbe Ha Baunot eNEKTPoHcKn anat. BeHTnAtopOT ha MToTOp BLeue npaB BO KyKmTeTo, a CoNpaHbeto Ha rolemA KOINuHa Ha MeTaHa npaB MOKe da npedn3BnKa eNEKTPuHn ONaCHOCTn.
KopncTe cooBETH ype3a npe6apyBaHe, 3a da rH npohajte CkPneHnEneKtpuHn Ka6n Hn KOncynHpajte ce oNokAnHO npetnpjaTne 3a cna6dyBaBe co eNeKtpuHa eHeprJa. KOHTaKTOT CO eNEKTPuHn Ka6n MoKe Da DOBee Do NToKap INCTpye Hypap. OwTeTyBaHTo Ha racOBodt MoKe Da DOBee Do EKcnno3Ja.HabneryBaHTo BO BOBOOHN CEKBn npedn3BnkyBa OWTeYBaHe.
Pnpa6oTATA,dpKTe ro eNeKTPhuHnot anatubpcto coDBeTe nAnKHn HacTaHeTe BO cHrypha noOnk6a.Co eNEKTPhuHnot anatnoCHrpyHoKe ynpaByBaTe aKO ro dpXHTe co DBeTe nAnKHn.
PnMEnyBaBeToHa anaTOT WTo CE BMETHyBa Hocete 3aHTTHPaKaBnU.AnatOT WTo CE BmETHyBa Ce BKeWtYBa no DOnIroTpajHa yNoTpe6a.
He ctpyrajte HABnaxkHeT MATEpHjann (Ha np. Tanet) He ctpyrajte Ha BnaxkHa NoIora. HabneryBaHeTo Ha BOda BO eNEKTPnHnO t anat ro 3rOeMyBa pN3NKOT oJ eNEKTPnueH yIap.
PobpHnHaTt wTo tpe6a da ja o6pa6oHTne he ja TpeHpajte co TeuHocTH wTo cOpJxat pactBop. Ipn CTpyraheTo doara do 3aToOnyBaHe Ha MaTepnJaNTe MoKe da ce Co3daat OTPOBHN HcnapyBaHa.
BnTe Oc0BeHO BHHMaTeHn Hn KOpHeTo Ha cTpyaOT h cekaOT. AnaTKte ce MHORY OCTPN, NOCTON ONaCHOCT OJ NOBpeJa.
3aubpctete ro napeto wto ce 6pbotya. Jokonky ro 3aupcntte co ypeed 3a 3aterhybahe mHMeHreMe, toraw npayeto wto ce 6pbotya ce dpxni no2pcto otkony co Baata paka.
PnOwTeYBaBe H HenpOnnCha ynoTpe6Ha 6aTepejata MoKeJa H3ne3e NaPea. BHeceTe CBex BO3DyX NIOKOLKY MaIOBpeEHN OJHeCte rHaNekap. PapeTa MoKe Da rH NApa3HH DnWHTe NaTHuTa.
He ja otBopajte 6atepnjata. Nocton onachoct od KpaTOK cnoj.
Batepnjata MoKe Da ce OwTeH oD octpnte npdmetn KaKo Ha np. KInnHn HnO dBpyBa Hn co HAdBopeWHO BnJaHne. MoKe Da doJde Do BHaTpeWeH Kpatok Cnoj N 6atepnjata MoKe Da ce 3aapan, Da nywnu qan, da ekcnnoIPA nn da ce nperpee.
Kophtete ja 6atepujata camo BO npon3bOdn oD npon3bOndenot. Camo Ha toj hauHH 6atepujata Ke ce 3aHTTH OJ ONACHO poneTobapyBahe.

3aHTe ja 6atepjata od tonnna,Ha np. od Donroptajno n3noxyBahe ha coHueBn 3paun, oran, BOa n Bnara. Hnky, noCTOn onaCHOt oeknno3nja.
Onnc Ha npoH3B0DoT nepopmaHCnTe

IpoHTajTe rH cHTe 636eHocn HAnomeHn yNaTCTBA. IpeWKHe HacTaHaTH KAKo peyITa OJ He npuPjKyaBaHe do 636eHocHte HaNoMeHH n yNaTcBA MoKeJa npedn3BnKaat eNeKtpnueH yap, noKap n/nn
TeuKnIOBpeHn.
BHHMabajte Ha cInKIne BO npEHNOT dN Ha yNaCTBOTO 3a KOpNCTeHe.
YnOte6a co cooDbetHa HameHa
EneKtpnHnot anat e HameHet 3a ceuehe n pa3denyBaHe ha dpBeHN MaTePnJAn, PnactNka, TnC, HeKeNe3HN Metanu n eneMeHTn 3a 3auBpctyBaHe (Ha np. HeKaIeHN KInHn, Xeftn Irrn). IcTo taka e noroDen 3a o6pa6OtKa Ha MeKn SdnHn IIOouKn kako n 3a cyBO 6pyceHe n cTpyraHe Ha MaIN NOBpHnn. Toj ocObeHo e noroDen 3a pa6oTeHe 6n3y pa6oBn n Ha pAMH NOBpHNN. EneKtpnHnot anat Tpe6a da ce o6pa6OtuBa HcknyHBO co Bosch-onpema.
Nhyctpaunja ha KOMNOHEHTN
HmepnpaheTo Ha cInKneTe CO KOMIOHeHTn Ce OJHecyBa Ha npka30Ha eNEkTpnuHHOT aHa TaPapuKaTa cTpaHnua.
(1)П配电ИнгУвачзаВКлuyВаьe/ИСКлuyВаьe
(2) Konue 3a otBoparhe ha 6atepnjata
(3) BaTeepnja
(4)OTBOPn3aBEHTnnauja
(5) BpTINBO KOnpe 3a npTeXoJHo 6bpaIbe Ha 6pojot Ha ocunauu
(6)ПикзаHaнолн electoTa Ha batepnjata
(7)Пицдат ha anatOT
(8)3aTeHyBaUKNIOCTHaIgpaHmUHKoTHaIpaBouHnA
(9)Гразанчннзадамбочина
(10)ПиСТЗасeчeБеCoВДлбАБИBaHБeA
(11)3aTeHryBaKa 3aBpTkA
(12) Kny co BhatpeuHa WectarOHa rnaBa
(13) Paça (h30nha Na noBpHnHa ha paKaTata)
(14) BcncyBa 3a npab
(15)Буснаноуа
(16)Бусениct
(17)3aterhybaaynoct3aBCNCyBaOTa npab
(18) MnazHniz 3a BCNCyBaHbE
(19)AaTep3a BCsCyBaHseA
(20) LpEBo 3a n3dYBn rAcobN
A) NHyctpnaHata HnOnnHaHa Onpema He e den oCtAnapdHnot o6em Ha hcnopaka. LcnocHATA onpema MoKe da ja Hajdete Bo HaWata Pporpama 3a onpema.
Texnukn noaToun
TpaJHo CBeTNO 2 x3eNeHO ≥1/3
TpaJHo CBeTno 1 x3eNeHo <1/3
TpeKABo CBeTNo 1 x3eNeHo Pe3epBa
TpeKABO CBeTIO 3x3eIeNo npa3Ho
Dokonky no BknyuBaHTo He CBeTH LED-CBETNKata,
6aTepejataeepekthnMopaa ce3ameHH.
3aMeHa ha aIaTOT
Pn MeHyBaBe Ha aIaTOT HocTe 3aHTTHPaKaBnU.
Dokonky ro donnpate anaTOT 3a BMETHyBaHBe, NOCTOn ONaCHOCT OINOBpeJa.
H36npahe Ha anatot 3a BMETHYBaHe
BHHMaBJte Ha anaHTe 3a BMeTHyBaHbE KOH ce npedBndeHn 3a BaHOT enektpuH e anat.
Anat3a BMETHyBaBe GOP 12V-28


STARLOCKPLUS


STOCKMAX


CneHata TaBeNa codpkn npimepn 3a aIaN 3a BmETHyBaHe. Dpyr n aIaN 3a BmETHyBaHe Ke HajdTe BO oBemHATA nporpaMa 3a onpema Ha Bosch.
Anat3a BMETHyBaBe MaTepnjAn PnImeHa
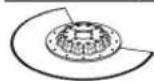
BmTaen ceMeHTeNtCTa cehe
IpBeHH,IIaCTnHm MaTePnJaH,HeKeJe3Hm MetaJIH
Pa3dnyBaHe HceHe co Bnla6HyBaHe;
6bn3y Dppa6OBu, Bo arHn TeKo DoCTaHn MeTa;
PnpMep: KpateHe Ha BeKe IHCTaHpaHn NOHN JajCN
Hn paMKn Ha BpaHn, ceHebe Co Bnla6HyBaHe npn
PnpNaOyBaHe Ha NoHN NaHen
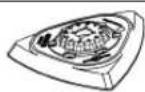
OchOBHa 6pycHa
IIooua 3a 6pycHn
IINCTOBN OJ
cepjata Delta
93 MM
BO3aBnCHOCTODbpyCHNOTnCT
BpyceHe Ha nobpHnHa pa6oBN,Bo arnn HnTeuKo
IOCTaHn MeCTa;
BO 3aBnCHOCt O6pycHnOTnIcT,Ha np.3a 6pyceHe Ha
dpBO,6oja,naK,KaMeH;
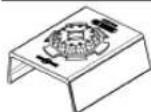
PpOΦmHa 6bpCnka
DpBO,ueBKN/npoФnH, 6oja,naK,Φnepu,Metan
Ydo6HOePKacHO 6pyceHe Do nJaMaTeap od 55 mm; LpBeHn NCTOBN 3a 6pyceHe Ha DpBO, ZEBKN/npoФmN, NaKOBN, FmIepn H Metan
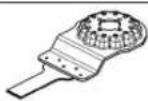
BmTaenHnct3a cehebe CO Bna6hyBahe 3a DpBO H Metan
MekoDpBO,Meka
nlaCTHka,FNC KapTOH,
aIyMNHNYMCKN IpOoHIN
nIpOoHIN OJ HeKeJe3eH
MetaI CO TEKN SHIOBN,
TeKN NIMOBH,HeKaJIeHN
KlnHUN 3aBPTKN
Pomai nceheBa 3a pa3dnyBaHe H Bnla6HyBaHe;
PnpMep: ceheHa Bnla6HyBaHa 3a npKnyHnU,
pamho pa3dnyBaHe Ha 6akapnueBKn, ceeha 3a Bnla6HyBaHe BO rnc KaptonnOuH
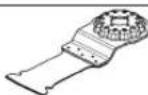
HCS-nct3a ceuehe co BnabHyBaHe 3a opa60Ka Ha pB0
IpBeH MaTePnJaH, MEKA INaCTHka
ФИHRpaHcK npoTn Ha npnaIarOyBaHb Bo IpBO;
PpIMep: NOBTOPO He CEHe Ha BnA6HyBaHa 3a 6paBNn OKOBN
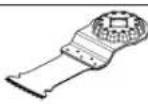
BmTaenHnct3a cehebe CO Bna6HyBaHe 3a CBpToDpBO
Ubpcto npBo,06noxkeHn Ta6nn
Ceehe co Bnla6HyBaBe BO 6nKeHn Ta6n Hn Ubpcto npB0;
PpHmep:MOHTaKa Ha KPOBn IpO3Opn
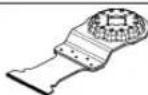
HM Jnct 3a ceuehe co Bnla6HyBaHbe 3a MeTal
Metan, BncoKo
abpa3nBnMaTepnjann, CTaKJIeHn BlaKaHa, Tnnc
Ceueha coBnla6HyBaBe BO BncoKo a6pa3NBH MaTepejannmMetan;
PnHMEp:ceehe Ha Kyhckn npedn Kaana, eHNOCTaBHO
Anat3a BMeTHyBaIbe MaTepnJan PnHMeHa
| Картон, центно врзан лесонн | сейеные пони саленял STВТК, клицу и не р�сувачки челник | ||
| Биmetален лисота сеvelе сбveьо co вдлабны beа здрви Meтал | Мекdo Вбрdo Дрво, Фчиралу Тбл, Тблп obloxжени co пл actиka, Небалени Клици и Завтк | Сeuевы сь вдлабны be BO obloxжени tabлл пьстордрво; Пrimер: краетене на pamka на вратa, вдлабны ва за paфт | |
| HM-Riff сermenten lисота сеvelе | Цемен thi phуг, мекsin SHINII ПLOUCHI, ПАСТКИЗAZAJKHATA CO STAKLEHIN Bλakha, Рорбетон | Сeuевы паздуны Be OДОВи БПИЗУ Do pabovite, Na arlin Иин Na TeuSOДОCTANH MecTe; Пrimер: OTSTРANYBAHBe HaФуг Мeу SINDITE ПLOOKNIпriп поравки, Лобови BO ПLOOKNI, Сeuевы ГИС ПLOOKNIпil ПАСТКИKA | |
| Riff диамандскс сermenten лисота плл | Цемен thi phуг, мекsin SHINII ПLOUCHI,ЕПОСИДHA CMOLA, ППАСТКИAZAJKHATA CO STAKLEHIN Bλakha | П配电�но Глобдуны И од boJyBaHe Na MATePryjALOT Na LOOKNITE/Фуггte,ЕКOSCINHATA CMOLA IN ППАСТNCHTE MATePryjALIЗ AZAJKHATI CO STAKLEHIN Bλakha; Пrimер:Сeuевы Na Romani pezOBn BO MEK SNIDHN PLOOKNI IN GINOДAHЯ Na BДANBHYBAHb BO ППАСТNCHMATEPryjALI ZAJAKHATI CO STAKLEHIN Bλakha | |
| HM-Riff Delta плоча | Малтет, OCTATOOn OD 6etOn, Дрво, abpa3INBn MATePryjALI | Турипайы и бухсяны на CBPCTA NOДЛORA; Пrimер: OTSTРANYBAHBe Na Malтет Илпелak на STOPIK (Na np.При замена на OSHTETENI ПLOOKN), OTSTPANYBAHBe Na OCTATOOn OD ПELAK 3a TELINCS | |
| HM-Riff otstprahya Na MaJIter | Малтет, phуг, enokсindha CMOLA, ППАСТКИЗAZAJKHATA CO STAKLEHIN Bλakha, abpa3INBn MATePryjALI | Глобдуны И од boJyBaHe Na MATePryjALOT Na Phугппу NПОЛКITES KAKO IN TYPRIIPA He Hбухсяны Na CBPCTA NOДЛORA; Пrimер: OTSTPANYBAHBe Na ПELAKOT 3a ПLOOKNI MAnTEROT 3a phуг | |
| HCS mUpTN CEuHNo | КрOBнбитуменcka NOДЛORA, TEINCS, BeistTacha TpeBa, KapTOH, PVC-nodobn | Брзо и пpreciизно сухсяны Н мek MATePryjALI NФleKCSBILNI ABp3INBn MATePryjALI; Пrimер: сухсяны Na TELINCS, KapTOH, PVC-nodobn, KPOBn Палени и Др. | |
| Стугач, CBPCT TELINCS, MaJIter, δetOn, Лepamazа 3a ПLOOKN | Стугаче Na CBPCTA NOДЛORA; Пrimер: OTSTPANYBAHBe Na Malтет, Лepamazа 3a ПLOOKN, OCTATOOn OD δetOn IOD ПELINCS | Стугаче Na CBPCTA NOДЛORA; Пrimер: OTSTPANYBAHBe Na Malтет, Лepamazа 3a ПLOOKN, OCTATOOn OD ПELINCS | |
| Сeuшил, Фleckschiblno | Пелak За тELINCS, OCTATOOn OD boja, симлков | Фleckschiblno STPyruJaBe Na MEK PaNDOLA; Пrimер: OTSTPANYBAHBe Na симлковchenko phуг, OCTATOOn OD ПELAK 3a TELINCS I OCTATOOn OD boja | |
| Биmetален сermenten Na3a6bHn HOX | ИЗолацонен MATEPryjAL, ИЗOLацSEN KILOUCh, NOДи ПLOOCHI, NOДOч 3a 3ByUna ИЗOLaциJa, KapTOH, TELINCS, Гма, кожа | П配上изно сухсяны Na MEK MATePryjALI; Пrimер: сухсяны Na ИЗOLaцони палени, pamHo сухсяп Na ИЗдаден ИЗOLaциCKMATEPryjAL | |
| HM-Riff bpycho ja3nue | Дрво, boja БухсяBE Na Дрво Илп StOBo Na ToEуКОпriStAnH Mecta 6ez 6brcnaх Хаportиа; Пrimер: bpycebe Na Boja nomeуnome Na Melenite Na npozopckite polNETH, bpycebe Na Drpvhen ПОДOBN Go arlnte | ||
| HM-Riff liocT a3 ceuJIbe co BdlnabHyBaJIe | Сухсян Biakha, MaJIter, Дрво | Сухсян Co BdlnabHyBaJIe BO BSCOKO abpa3INBn MATePryjALI; Пrimер: Глобдуп Na TeHKn Mo3aunH ПLOOKN |
214MaKeDoHcKn
Anat3a BmETHyBaBe MaTepnjan PnHMeHa
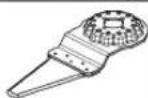
HCS-yHnBep3aJIeN cekau 3aФугn
Hnataunckn yny, KNT 3a np030pucn H0taunckn Maepnjann (kameHa BOnHa)
Ceehe npa3dnyBaHe Ha MeKn MaTepnjAn;
PnMep: ceuehe Ha cnNkoHcKn DnnaTaunckn Fyrgn HnN KNT 3a np03Opu
MOnThpaHe/MenHyBaHe Ha aIaTOT 3a BMmTyBaBe
IOKKny Tpe6a, H3BeTe Ro MOHTnpaHnot aanat 3a BMETHyBaHe.
3a da ro hBaaTe anatot 1TO CE BMETHyBa, CO Knyu co BHATpeHnHa WeCTaROnHa rnaBa (12) ona6abete ja 3aTe3HaTa 3aBPtKa (11) H hBaeTe ro anatot.
Iocabete ro cooBteHNOT anat 3a BMETHyBaHe (Ha np. nIcT 3a ceuehe co BnabHyBaHe (10) BO npHpaTOT 3a anat (7), Taka ITO KONEHOTo Ke NOKAKyBa HApOly (nORneHHeTe ja CInKaTa Ha rpaDnKATA CTpAHua, HATNcOT Ha anATOT WTO CE BMETHyBa Ce YHTA OD TropHATA CTpHa).
CbpTeTo aIaTOT ITO CE BMETHyBa BO NOBOHnHa pa6OHTa No3uJa H OCTaBeTe Ro da Ce BKNIOH Bo 3aIuTE Ha npFatoT 3a anat (7).PpTuOa MOxHN Ce DbaHaeCet no3uHn Ha 30^
Pnucpcte ro anatot 3a BMETHyBaHbe co 3aBPtKaT (11). 3aTeHyBajte ja 3aBPtKaTco Knyu co BHaTpeWHa. 5eToarOnHa rnaBa (12)doEka nIOCHata Ta npyXHa He IerHe paMHO Ha anatot 3a BMETHyBaHe.
PpOBepeTe dAne cTaNHeN anatot 3a BMEmyBaHe. JOKoKny aJntot 3a BMEmyBaHbe e NOrpeSho HnH He e ChryPho 3aucBpCTeH, MoKe Ja ce OJa6aBn 3a BpeMe Ha pa6oTeHbTo n Da npEiIN3BnKa onAcHocT.
H36op ha 6pycen nct
Bo cornachocct Co matepnjano tco oe 6pa6oTyBa n o6emOt ha cTpyrahe, ha paononaabaBe Bn ce pa3nyHn 6pyn HnCTOBn:
Bpycen nct Matepnjan Ppimema Tpaynaujia
| best\Paint\Wood | -Сит eдвени матери ща (Ha п.церсто, meко Дрво, Иberки, гаджни п loуи) -Метални матери ща | За петхODно 6рсseье, на п. за руби Нерендан гrepoи и дackи | грубо 40 | 60 |
| За рамно 6рсseье и ИзрамнУваье на мали нерамнени | сре dingо 80 | 100 120 | ||
| За завшино и Фино 6рсseье на дрво Фино 180 | 240 320 400 | |||
| best\Paint\Wood | -Боja -Пak -Матери ща за понөBLE -Шалхел мacea | За 6рсseье на boja рубо 40 | 60 | |
| За 6рсseье на петхODно hamaykaна-boja (на п. за ИзрамнУваье на Нерамнини od чекatinga, калки boja и Изballкани мecsta) | сре dingо 80 | 100 120 | ||
| За краjetно 6рсseье на оснobнatable boja петд пакираье Фино 180 | 240 320 400 |
CTabaBe/MenhyBaBe Ha 6pyCHHot Nmct Ha OCHOBHata 6pycha nnoa
OchOBHata 6pycha nnoya (15) e onpeMeHa co neJIINBA neHTa, Taka ITO 6pyCHHe NtCToBn CO neJIINBa neHTa MoKe 6p30 n EHOCTABHO da ce pniucBpctat.
IcTpeTe ja IenHbata nHTa OJ OCHOBhata 6pycha nloa(15)npedJa JAmecHTe Ha 6pyCHNOT NCT(16),3a JaOBO3MOKHe OTnMaJIHO CInyBaHe.
BpyCHNOTJICT(16)CTaBeTe rH3pAMHeTOHaEHaTATcPbA OOCHOBHATA 6pyChA NIOUa(15),Notoa NOCTaBeTe ro BpyCHNOTJNT HA OCHOBHATA 6pyChA NIOUa IN PnITNCHTe ro Do6po.
3a OBO3MOKByBaHe Ha ONTImAIO BCNCyBaHe Ha npab, BHIMAbaje HA ToA, OTBOpHTe Ha 6pyCHNOT NCT Da ODROBapaaT CO OTBOpHTe Ha OCHOBHATA 6pycha NIOua.
3aBaTeHeHa6pyCHNOTnHCT(16)paTeTe ro 3aBpBOTnBnBneYeTe Ro od OChOBnTa 6pycha nnoya (15).
MoKe Da Tn KopHCTHe 6pyCHHe IInCTOBn, KpNn 3a noIpaBe H nCteHe oD cepNJata Delta 93 mm od npOrpamata Ha OnpeMa Ha Bosch.
Onpemata 3a bpyceHe kako KPN/ΦnIu 3a nonnpaHe ce ce 3auBpcTyBa HA nCTnOT HauHH Ha oCHObHata bpycha IIoua.
Bwmykybahe ha npab/ctpyrotHH
PpabT oM MATEPHJANHe KAKo Ha np. CnoEBn 6oJa, HeKoN BINOBN DpBO, MNHEPAH N Meta MoKe Da 6nIe WTeTHa No 3dpaBjeto. OINpaBeto INN BnWyBaHbeto Ha TaKBaT a npAB MoKe Da npeIN3BnKA aneprncn peakun H/nnn 3aOlyBaHa Ha INnHIne NaTHa HA KopCHNKOT HnN Nnata BO OKONIHATA.
OndepenHueCTnKn npab KaKa Hn np. npab Onda6 nIn 6yka Baxkat3a KaHcpeoreHn,OC6eHo DOKONky ce BO KOMbHaJnaJcoDOnONHTENH CyntaHn (xPomat, CpeCTBa 3aawTtHa naPBo).MATEpNJanTe wTo cOpjKat a36ecT CMeT Da 6nDat 6pa8oYBnH Camo od CTpaHa Ha CTpyHNnla.
-3aToa,doKoONkyeBO3MOXHO,KOPnCTeCo0dBTeH BmMyKyBa3a npab3a MaTePnJaiot WTOce 6pa6bOtyBa.
- IorpnkeTe ce 3a do6pa npoBepnoct Ha pa60HTO MecTo.
- Ce npenopauyBa Hoche Ha Macka 3a 3auTtA npn BnWyBaHcTo co KlaCa Ha qntep P2.
BHHMabajte Ha BaXeKIne npOnHc Ha BaWata 3emJa 3a mATEpHJANOT KOJ ro 06pa6otyBaTe.
H36erHyBaJte co6npaBe npaB ha pa6oTHoMeCTO.
IpaBtA IeCHO MoKeJa Ce 3a NaHn.
PnKnyBaHe HBCyBau 3 npaB (BnHc nkaA)
Bcncybaot 3a npab (14) e HameHet cmo 3a pa6oTehe co oChOBh 6pycha nOua (15), He MoXe da ce KOMbHnpa co dpYrAnaTn 3a BMETHyBaHe.
Pn6pceHeto cekoraun npknnyybajTe ro BCncybaot 3a npab.
3a da ro MOHTnpaTe BCNCyBaYoT 3a npab (14) (onpeMa) H3BaIeTe ro anaTOT 3a BMETHyBaHe.
BMETHETe rBCNcyBaOT 3a npab (14)do kpaJ npeky npnpatot 3a anat (7) Ha 3aTe3HOTo rpno Ha eNEKTPNUHNO anat. CBPTe r BCNcyBaOT 3a npab BO NOcAKyBaHata no3uJa (he DnpeKTHO NOEKETPNUHNO anat).
PnHTNCHETe rO 3aTeHryBaKnot NoCT (17), 3a Da ce fHKcnpa BCNCyBaYOT 3a npab.
BMETHETe ro aadTepot 3a BCNCyBaHe (19) Ha upeBoto 3a BCNCyBaHe (20) HA Mna3Hnnte 3a BCNCyBaHe (18).
Pb3eTo rUpeBTo 3a BCnCyBaHbe (20) Co BCnCyBaH 3a npab(onpema).
Iperneot3a npKnyBaBe Ha pa3nHn BCNCyBaH 3a npabKe ro hajTe Ha rpaqnhkata cTpaHnca.
Bcncybato3a npaunna Mopda e cooDBeten Ha matepnjanot ha napyeto 0to ce 6pa6oyba.
PnBcncyBaBeHaueTmKn npab kon ce ocObeNo anChn no 3dpabe, KaHeporeHnn cyBn, Kopnctete cneJanaen BCncyBa.
Pa6ota
CtBaBaBe Bo ynoTppe6a
Bmthybahe ha 6atepujata
Kophtete camo opnHHaHn Bosch nHTym-jOHckn 6atepn co hanoh Koje habeDen Ha
cneuHkaHohata nnocha Ha BaHOT eneKTPnHHT anat. KopHeTeBeto npyr Bn6 batepnn Moke da doBepe Do IOBpeN IN OAnCHOCT OI NOXAP.
HanomeHa: KopncteHTo Ha 6aTePN Hc He ce COoDBTHn 3a BaHnot enektpuHEn anat Moke da DObede do nOrpeHHO fynKIOHHPaHe nn Do oWTeYBaHe Ha nCTnoT.
Hanonhetata 6aTepuja (3) BmTeHete ja BO npkata,doeka He cBknHn He IerHe pAMHO BO npkata.
BknyuBaBe/HckNkyuBaBe
PpOBepeTe DaH MoXeTe DaTo PnTHcHete npeKHyBaOT 3a BkNpyBaHe/HckNpyBaHe,6e3 da ja otnytnte paKaTa.
3a BknyBaBe Ha eneKtpnHnO t anat nptnchHe ro npeKHyBaOT 3a BknyBaBe/HcknyBaBe (1) HHaanpe, Taka To Ha npeKHyBaOT Ke ce nojabn,
3a ncknyBaBe ha eneKtpnHnot anat npntnche ro npeKHyBaOT 3a BknyBaBe/ncKyBaBe (1)HaHa3aT, Taka ITO Ha npeKHyBaOT Ke ce nojABn,04.
HanomeHa:doKoKny eNeKTpHnHOT anaT aBOMaTcKn ce n3racn nopadn Hcnpa3HeTH nHn pnerpeAnu 6aTePnn, NCKnyte rco npkeHNyBaOt 3a BknyBaBe/ NCKnyBaBe (1).
Hanohetaja6atepnjataOHN.0ctabeTe ro eeneKtpnHnot anat da ce n3nadi, nped nobtopno da ro BknyuHTe. Hnaky 6atepnjata MoKe da ce ouTetN.
IpeTxoJHO h36HpaHe ha 6poj Ha ocunnaaHH
Co konyeto 3a noodecybahe Ha 6pojot Ha ocunnau (5) Moxete da ro h36epete notpebHnT 6poj Ha BpTeKn H3a Bpeme Ha pa6oteHeTo Ha anatot.
HeonxOaHnO 6poj Ha ocunnaun 3abncn OJ MaTepnjanoI paBoTHnTe ycNoBn H MoKe da ce odpei npn npakTuHa npimeha.
Pncehe,pa3enyBaHe 6pyceHe Ha noBpctn Maepnjan KaHO Ha np. DpBO Hm Metan Ce npenopaYBa CTeH 3a 6poj Ha ocunauu,,6" a 3a MeKn Maepnjan KaHO Ha np. Pnactka CTeH e Ha 6poj Ha ocunauu,,4".
Cobetnpa6oTeHeTo
Pep6nO KaKaBa HHTepBENuJa Ha eNEKtpNCHOT anat (Ha np. ODPKByBaBe, 3aMeHa Ha anat nTH.) KAKo H npHcRbTpaHCnOpT hCKNaHpAbe, h3BaTe ja 6aTepejata OD hero. PnH HeBHMMATEHNO pNTnCKaHe Ha npEKNHyBaOt 3a BkLyUyBaBe/NCKyUyBaBe NOCTOH ONaCHOCT OJ NOBPeHN.
NoekejTe Doeka eEnktpnHHT anat cocema He npeknHe co pa6ota, nped da ro TprHete HactpHa.
Hanomeha: He r3aTbopajte npoqennte 3a BeHTnaujia (4) Ha eKtpuHNO t anat 3a BpeMe Ha pa6oTata, Hnky ce HamaNyBa JXNBOTHNOT BEK HA eKTPuHNO t anat.
Pa60TeH pInHnH
Co nomou Ha ocunnnpauknoT noor, anatot 3a BMeTHyBaHe ocunnnpa do 20000 naTb MO mHyTa 3a 2,8°. Oba OBO3MOxyBa npueu3Ho pa6oTeHe Ha tecen npocstop.
216MaKeDoHcKn
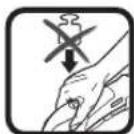
Pa6oTeHe co Man nn enHaKOB npntHcOK, nAky pa6oTeBeTo Ke ce BnOuH anaTOT wTO ce BMETHyBa MoKe Da Ce 6nOKnpa.
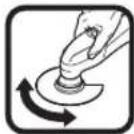
3a BpeHa pa6oTa daBnKete ro eNkTpuHHOT anat HanpeH-Ha3ad, 3a Da He ce 3arpee npemhory anatot uTo ce BMETHyBa H aHe ce 6nOKnpa.
Ceebe
KopncTeCaMo HeoWTeHn,6ecpkeOpHn HCTOBMa nHa. NcKpBHeHte HnH HeocTpNtCTOBn 3a nHa MoKe Da ce cKpTa, Da BnJaT HeraTMBOHa CeueHeTo HnDa PnpN3BnKaat NOBpaTeH yap.
PnceeheHa neChn rpaedexnn MaTepnjann, BnMaBajTe Ha 3aKoHcKeTe Ondep6n H npenopakn Ha npon3BoDntenOT Ha MaTepnjanoT.
CMeaTda ce o6pa6oTyBaat cAmo MeKn MaTepujann KaKo dpBo, rncs KapToH nCn. npH ceuehe co Bna6HyBaBe!
Ppeceheco HCS-ntcbTOBn3a Cehebe BO npBO, 1neepnoH, rpaedxHm MaepnJHn. npOBepe daHn HnHMa TnyTeHa KaKaHO Ha np.KlnHn, WpafoBN nCn. DOKKky Hma,OTcPaHete Hn Hn yNtpe6eBe 6mTaHn NCTOBn 3a Cehebe.
Ceebe
HanomeHa: PnP CEeHBeTo Ha SInH NIOuKN BHNMaBajTe Ha Toa DeKa eEnKTPuHHTe Anat Ce H3a6yBaAT no DOnIroTpajHa ynotpe6a.
Epycebe
Kanaqntetot Ha oCTpaHyBaBe H3rIeDOT BO rnaBHO Ce OpeyBaat Cnpoei 36bOpT Ha 6pyChnOT Jnct, CTeneHOT Ha 36paHnOt 6poj Ha ocuNaunn H pInTHcOKOT Ha NOBPWHATA.
Cama6ecnpeKOpHNTe6pyCNINCTOBMOKeJa npDoHecaT 3aDobap KanaunTeHa 6pyceHe N ODPxByBaHe Ha enektpuHHOT aIAT.
BHHMaBaJTe Ha paMHOMepHOCTa Ha npHTncOKOT,3a Da ro 3rOlenMe pokOT Ha yIOnTpe6a Ha anATOT WTo ce 6pyCN.
PpeKymepHTo 3rOEmyBaHe Ha npTnCOKOT Bp3 NOBpHHaTa He BOiN KOH 3rOEmeH KanaiuTeT Ha 6pyceHe, TYK KOH NOroIeMo H3a6yBaHa Ha eJeKTPuHNoT anapat n 6pyCHNO TnCT.
3a npuez3HO 6pycebe Ha aargn, pa6OBn H TeuKo DoctanH MeCTa MoKe Da pa6OTHe Co BpBOT Hn eDen pa6 od OCHOBHATA 6pycha nOua.
Pn ceneKTHBHO 6pycebe, 6pyCHNOT NCT MOKe MHORYa ce 3atOnnn. HamaIeTe ro 6pojot Ha ocunauuH npHTNCOKoHa NOBpHHata n octabaje ro 6pyCHNOT NCT da ce onaH.
BpyCHNOT LNC TO KOJ CTE OpbabotyBanE Metan, He ro KOpHCTETe 3a DpyrMaTepnjann.
Kopictete camo opnHnaB Bosch onpema 3a 6pycehe.
Pn6pycbeTo cekoraI npKnyuBaJTe ro BCncyBaOT 3a npab.
Cpyrabe
PnCtpyraheTo Ondepete NOBcOK cTeenHa 6poj Ha OCunnaa.
Pa6oTeHaMeKaNoDnOra(Ha np.ДрВО)co pAmEnarOnHnHAManeHo npHTnCKaHe.NHaky cTpyraOT MoKe Da ja HnceeNoDnOrata.
3aHTa oI npeontobapyBaBe BO 3aBnchoCT OTeMnepaypata
IpaBnHnata ynoTpe6a He moKe da ro npeoNTOBapn
eneKtpuHnO anat. Pnp nperoJeMo ONTObApyBaHe Hn
paboTeBe hADBoP odIO3BOJeHnTe rpaHnUHa
temepatypa 3a 6atepnjata, ce HAManyBa 6poJOT ha BpTeKn
Hn CE NCKnyuBa eEKeTpHuHnOTypeD. Pnp HAManeH 6poj
HA BPTeKn, eEKeTpHuHnOT anat Ce BkNyuBa dpyn OTkako Ke
ce NOCTHRe IO3BOHeHATA Temepatypa Ha 6atepnjata Hn
Pnp HAManeHo ONTObApyBaHe co pONH 6poj HA BpTeKn. Pnp
ABTOMATCKO NCKnyuBaHe, NCKnyeTe Ro eNEKtpuHnO
anat, OCTabe te ja batepnjata da ce Olanin NoBtOpHo
BknyteTo.
HanomeHH 3a ONTHMAnHO KOpNCTeHe Ha 6aTepeHnTe
3aunntreja6atepnjataoBnaraHbda.
Cknnapjte ja 6atepnjata Bo oncer Ha Temnepatypa od -20Cdo 50°C.He ja octabajte 6atepnjata Ha np.Bo aBTOMO6NIOT BO JIeTO.
PbpeMeHO nCTeTe HOTBOpHTe 3a npoBeTpYBaIbe Ha 6atepnjata co MeKa, ucta H cyBa Yetka.
CkpateHTo BpeMe Ha paBota No NOnHeHeTo NOKaKyBa, Deka 6atepniata e NotpoWeHa Mopa Da ce 3ameHN.
BHHMabajTe Ha HAnOMeHte 3a OTCpaHyBaHe.
OdpKyBaBe H cepBnC
OdpxkyBaHe n uHcTebe
Pepi 6HIO KaKBa HHTepBHeuJHa JEA ENEKTPnHOT anat (Ha np. ODPKByBaBe, 3aMeHa Ha anat nTH.) KAKO npHerOB TpaHCnOpT NCKlaHApBe, H3BaTe ja 6aTepnjatao Hero. PnHEBnHMaTeHNO pNITnCKaHbE Ha npeknHyBaOt 3a BknyyBaIbe/NClyyBaIbe NOCTOn ONaCHOCT OINOBpeHn.
OpjxBaJte HnCHTH eNEKTPMHHOT anat NOTBOPHTe 3a npoBeTpyaBe, 3a da MoKe Do6pO 6e36eHNO da pa60tHe.
PepoBHO uCTe Tn Riff-anatte 3a BMETHyBaHe (onpeMa) coKuHaHa YeTa.
CepBncha cnIyK6a n COBETn npH KopHCTeHe
CepBnchata cnjx6ke OndroBopn Ha BaWnte npaaBa Bo BpCKa co nnpabkata n OndjyBaHbeto Ha BaWnOT npOn3BOD KaKo Hpe3epBNHTe DeIOBN. O3HAKN 3a ekCnIO3nJa HnHΦopMaun 3a pe3epBNHTe DeIOBN HcTO Taka Ke HajTe Ha: www.bosch-pt.com
THMOTa coBetyBaBe npi KOpNCTeHe ha Bosch Ke Bn
NOMORHeIOKOKNyIMaTeIpaHaBa3aHaHHTePOn3BOuIN Onpema.
3a cIte npaaHbHa hapaKn Ha pe3epBHN DeIOBN,Be MoNIMe HabeTe ro 10-ncpeneHOT 6poj od CneuHKnauHOHa PNOHBOJOT.
MaKeDoHja
A.D.EneKtpnc
CabaKobayekiv47H,6poj3
1000 Ckonje
E-nowra: dimce.dimcev@servis-bosch.mk
HHTepHer: www.servis-bosch.mk
Ten./paKc:02/2467610
Mo6.:070595888
Д.П.T.Y"POJKA"
JAnIyKpOBc6N 66;T.U ABTOKOMaHaJaIOKaI 69
1000 Ckonje
E-nowta: servisrojka@yahoo.com
Ten: +389 2 3174-303
Mo6: +389 70 388-520, -530
TpaHcnpot
JTNMym-jOHCKNte 6aTePnIN NOJExKAT Ha 6apaBaTaHa 3aKoHOT 3a ONaCHn MaTePnJaHn. BatePnIte MoKe Da ce TpaHCnOpTnPaat CaMo OD CTpaHa HA KOpNCHKOT, 6e3 NOTpe6aO dONONHtENH KBaNNfKaunn.
Pn npneHoc Ha nCTHTe OJ CTpaHa Ha TpeTn Iua (Ha np. Bo3dywen TraHCnpOT HIN WNeDInuJa) HeONXoND Ho e Da ce BHNMaBa Ha CNEunJaHInTe HANOMEH Ha aMbaJata N O3haknte.Bo TakOB CNyuj, npn NoIgrotOBkata Ha npatkata Mopa da Ce NOBkA ekCnept 3a onaChn CynctAnu.
TpaHcnpajte r6atepnite cmoDOKKky KkyIHTeEO HeoTeTeHO.3aIeneTe rO TBOpEHTE KOHTN cnaKyBaJte ja 6atepnjata HaToJ haunH hTO Hema da ce DbHKn BO aMbaJaxata.Be MoIIme BHMabajte Ha eBENTyANHtE donONHtENH hauMOHaHn npOnHCn.
Otrpahybahe

EneKtpnHnte anapatn,6atepHnte,opemata n ambaJaxte Tpe6a da ce otctpaHat Ha ekolouknpnphiTaNbHaHH.
He nI pnpajte enektpnHnTe anapatn 6aTeepnTe BO DOMaunHata KaHt 3a iYbpe!

Cama 3a 3emjnte oEY:
CnopeeBpOcnkata perynatBa 2012/19/EU
eneKtpnHnTe anapATnTo ce BOH yNtpe6a n deFeKTnHe
nn NcKopncTeHnTe 6aTeepn CnopeD perynatBaTa
2006/66/EC mopa oJdENo da ce co6epaT na ce
peuKnHpaat3a nobTopHa yNtpe6a.
BatepH:
JIINTHYM-JOHCKH:
Be MoJIme BHHMaBaJte Ha HAnOMeHInTe BO DeIOT TpaHCnOPT (BbIN, TpaHCnOPT, CtpaHnua 217).
Srpski
Akumulatorski Multi-Cutter GOP 12V-28
| Broj articla | 3601 HB5 0.. | |
| Nominalni napon V= 12 | ||
| Broj obrtaja praznog hoda n0 | min-1 | 5000-20000 |
| Ugao oscilacija levo/desno °1,4 | ||
| Težina odgovara EPTA-Procedure 01:2014 | kg 0,97-1,2 | A) |
| dozvoljena sobna temperatura | ||
| - prilikom punjenja °C 0...+45 | ||
| - u režimu rada B)i prilikom skladišenja | °C -20...+50 | |
| preporučene baterije GBA 10,8V... | ||
| GBA 12V... | ||
| GBA 12V...W | ||
| preporučeni punjači GAL 11..CV | ||
| GAL 12..CV | ||
| GAL 18..W | ||
A) zavisi od upotreblje akumulatorske baterije
B) ogranicena snaga pri temperaturama < 0^
Tehnički podaci dobijeni sa akumulatorom iz obima isporuke.
Mirgo 3 mirdzdiodes Akumulators in
iztuksots
Ja péc elektrinstrumenta ieslégsanas neiedegas neviena LED diode, akumulators ir bojats un to nepieciešams nomainit.
GAL 12..CV GAL 18...W
ssal aaiial auijessll osyol pjjll
| GOP 12V-28 | الشام |
| √ | STARLOCK |
| × | STARLOCKPLUS |
| × | STARLOCKMAX |
#
osll Jlacl gJg aJyKg all oes sall gj 1
sLg(..gJg dall JyW, alal: tio) ay.
Je IaIeIi ic 29g aJyJg Jia Jg jglai
Jaaoo Jkaw cIeoyJkaill
pSjJ1
00sallnssll 0jg|pdswl ljc aai | 4
aiae eae 0i 0i 0i j 1.aaall aao gall
dsc 0 pssuall pgsuall uig|psgo aaigall
aui
j j 10000000000000000000000000000000000000000000000000000000
JgJUJusWJ 1 gjgugu Ug jau u u Jau aJau aJau aJau aJau aJau aJau aJau aJau aJau aJau aJau aJau aJau aJau aJau aJau aJau aJau aJau aJau aJau aJau aJau aJau aJau aJau aJau aJau aJau aJau aJau aJau aJau aJuu aJuu
gjoll jogll lgl ggsa Lg g aE (ECP) aggjSLI IaIg abwlg y dI lo sic qalg aJg abwlg aIgSsI IaIbI .sic JwI Osc Jau JpJg
psjll g(2) jll ljj bai (3) pajg jui 8. duiu jgl oai jia lii gai .lii gai
.5sll jno yalil lssy uolal oclj
gwlglglgolgolgoljolwllc jowl wllal
aJyA aJyB yB yB yB yB yB yB yB yB yB yB yB yB yB yB yB yB yB yB yB yB yB yB yB yB yB yB yB yB yB yB yB yB yB yB yB yB yB yB yB yB yB yB yB yB yB yB yB yB yB yB
labg
L 1
1
1
1
1
1
1
1
1
Laaa aal 1s Llaal
(5) laa aal ssc bpa oip al aaiu w
aojll aal ssc Jlaal
agb g jauo asy agg aal scc qa
aal aal llaa aq aaiw u kag
Jtaa Jssl olal al yg g g g aia
"6" aull ssc uugw ma nol gl
aaggl Jtaa agg j5sI Iaal aa
Jd
oJlglj>1 jaiyjll oJzllg sall j 4
iig (..jlg dill Jxuol .ilal: liq) aij.
Ic Iaic 29, yaiol Jus Jia. qjggl
.
JGao JScuclg Juaill
J 15(15)
a j 15
g j 15
j 16(16)
15
a J 15
a J 16(16)
jul/1jllb
Jg yI gI gI gI gI gI gI gI gI gI gI gI gI gI gI gI gI gI gI gI gI gI gI gI gI gI gI gI gI gI gI gI gI gI gI gI gI gI gI gI gI gI gI gI gI gI gI gI gI gI gIg Ig Ig Ig Ig Ig Ig Ig Ig Ig Ig Ig Ig Ig Ig Ig Ig Ig Ig Ig Ig Ig Ig Ig Ig Ig Ig Ig Ig Ig Ig Ig Ig Ig Ig Ig Ig Ig Ig Ig Ig Ig Ig Ig Ig Ig Ig Ig Ig Ig Ig
aaiy aaiy i yg j gj gaii
.
buiSJI
aJg j 3e aJj Jai j
aabuaagj(tao cui)a jba aoi jlc Jsi
a281 gglalgjaiag 2lg.
aabjll slll jao aalalw g
J 2018 2018 2018 2018 2018 2018 2018 2018 2018 2018 2018 2018 2018 2018 2018 2018 2018 2018 2018 2018 201
aJoo aJy jol go Jolil Udo
aagglgulpalsal aalaa 9
gai jia gui jai pall jauu y
julli pssll uji 50 20-
Lioe
abwglg jj 0j g jgll cai j baj aag aagig abo
0000 13
. 1000
aDg dul
cuiIg daiJl
oJlJIaIgJlJgaiJUeKJI OeJGcJgEJI 1
Jc Jcaiiie 29, a10j 1aia jia jia jia jia jia jia jia jia jia jia jia jia jia jia jia jia jia jia jia jia jia jia jia jia jia jia jia jia jia jia jia jia jia jia jia jia jia jia jia jia jia jia jia jia jia jia jia jia jia jia
aai aai jai jai jai jai jai jai
aaglll aiggail
awjabwglgjRiffJswllsc
obio Usu ayu 200
pIsswI OJluwUg loaI ao
aaiiaaii iie aai jy yj y g wjj j jg bai agl kay, auiag fiai j jj gaoa ologalg auaa www.bosch-pt.com:
Lscu oaiwK UjWosch jJ W Juaaogaoy BuaaawI 1JU513!
gag gag gag gag gag gag gag gag gag gag gag gag gag gag gag gag gag gag gag gag gag gag gag gag gag gag gag gag gag gag gag gag gag gag gag gag gag gag gag gag gag gag gag gag gag gag gag gag gag gag gag
JJI
1J 1
Lg
:du ggu (ggaow (gJx)
aJoo 0j9 Jai saq 2g jaoJI Lw aUyJSEI
aJ1
Jai
Jswl ooc jgi auy sill o1s0sag Jdo
JU JU 20000 Jd a d JI
.1slo 1gol ggl Jl Joo lao.d
1g aaiag Jusjlsjbsa Jesw
o 2000 00000000000000000000000000000000000000000000
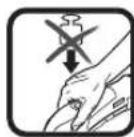
cll lgs a> aJg j0d 1> yj Jswll oec Jswy Jaoell .as>JUe
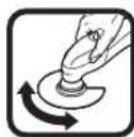
山
gll jai wol owl 1jaiy 1
gog abgeaaal gaiagllg aaii jaoj
aog cno HCS juaiaill Jauu uuuu uui
eji. auw log wglg jouuws k auiu pluai
Jauo pssil g 6grrsll sic aayl poa o
.
gall
auijSsI 00 juaiill aaii iaiii g uilg polll alal laiil qipn caii

guiill 5c
/ajalgl auiuagllg j 1auii Uaiuilln

:JgJbJgJba
EU/2012/19 1gjglgul g uag, juswll aall jc ag yjglSll sll gge gag yEG/2006/66 1gjglgll oJLgAalssll g adll lll /pIJIJI Jc alll gacaaaagaoeiaaaiil p
:UJUJI/psJJI
:oggulU UgjpSlo
Jai jg 6sglg lslwjIeJe Jai (287 aannl,
Sue joljgoads olaaiw jai aoi jui jil 10i jai jia jai joi olaaiw ulai olaaiw jai 035 jai jai slag g sio Swo 4
J . 1 J. 1 J. 1 J. 1 J. 1 J. 1 J. 1 J. 1 J. 1 J. 1 J. 1 J. 1 J. 1 J. 1 J. 1 J. 1 J. 1 J. 1 J. 1 J. 1 J. 1 J. 1 J. 1 J. 1 J. 1 J. 1 J 1 J 1 J 1 J 1 J 1 J 1 J 1 J 1 J 1 J 1 J 1 J 1 J 1 J 1 J 1 J 1 J 1 J 1 J 1 J 1 J 1 J 1 J 1 J 1 J 1 J 1 J 1 J 1 J 1 J 1 J 1 J 1 J 1 J
sly. yu auiy jy sle cJy Jy Lw yu u yu yu yu yu yu yu yu yu yu yu yu yu yu yu yu yu yu yu yu yu yu yu yu yu yu yu yu yu yu yu yu yu yu yu yu yu yu yu yu yu yu yu yu yu yu yu yu yu yu yu yuuy u u u u u u u u u u u u u u u u u u u u u u u u u u u u u u u u u u u u u u u u u u u u u u u u u u u u u u u u u u u u u u u u u uuuuuuuuuuuuuuuuuuuuuuuuuuuuuuuuuuuuuuuuuuuuuuuuuuuuuuuuuuuuuuuuuuuuuuuuuuuuuuuuuuuuuuuuuuuuuuuuuuuuuuuuuuuuuuuuuuuuuuuuuuuuuuuuuuuuuuuuuuuuuuuuuuuuuuuuuuuuUUUUUUUUUUUUUUUUUUUUUUUUUUUUUUUUUUUUUUUUUUUUUUUUUUUUUUUUUUUUUUUUUUUUUUUUUUUUUUUUUUUUUUUUUUUUUUUUUUUUUUUUUUUUUUUUUUUUUUUUUUUUUUUUUUUUUUUUUUUUUUUUUUUUUUUUUUUUUUUUUUUUUUUUUUUUUUUUUUUUUUUUUUUUUUUUUUUUUUUU
JLg 2s JIiWg JIaIISy jIgjzg As g JIg JIuOw OoAs AJIg Gooos gag aIg Wg 0laWg wai Cws Jilwog nA dugaw jiaao
GgJLg 2s JILWg JIOeWg JIOeWg JIOeWg
SckoJdJLg JcGg JrRjRjRjL
Jew ccldu LbJbJbJbJbJbJbJbJbJbJbJbJbJbJbJbJbJbJbJbJbJbJbJbJbJbJbJbJbJbJbJbJbJbJbJbJbJbJbJbJbJbJbJbJbJbJbJbJb
jil cglg jljl aai
sLJ. 05kssg jzjrlg j JSLoslaol l Lwio jyj s k j 1g j 1s g aas ccl wio jy j 1s j 1s
05sJ1. j09g 2ds JyC 4
Jog9 g 1gai aS .si oalw
.igawu wg 0g y Sj
J 1
GaiI UJgW
GgHsIJbjSjGogac jai Csi
LgaoJgiwS JwAq
dilj Cg g
aJlloj jIjoljow
wJgWuI UgWuI UUeJ PseJ uWu IuuauLgGsiagw GgCclu .gW
0s1 (s1jI Laiolg G aJl Slaa aLs
a dLgJlgl JgJgJgJgJgJgJgJgJgJgJgJgJgJgJgJgJgJgJgJgJgJgJgJgJgJgJgJgJgJgJgJgJgJgJgJgJgJgJgJgJgJgJgJgJgJgJgJgJgJgJg
JSSoo
a 100000000000000000000000000000000000000000000000000000000000000000000000000000000000
SjS|1gai
aW5,cbjb1g,jc0g2sabz0rdsawlwl
S_ ACD = 12 · CD · AC = 12 × AC × 5
1
小 B^ = 12 .
9.
a 15
2125g0g0g0g0g0g0g0g0g0g0g0g0g0g0g0g0g0g0g0g0g0g0g0g0g0g0g0g0g0g0g0g0g0g0g0g0g0g0g0g0g0g0g0
L,paai SsiSj jlaa2b9 jcaawg a1 jgs Cws
2.201g> 201g> 201g> 201g>
.000000000000000000000000000000000000000
gjw glojgl oiaow jbg
oJluwgi aLgRjulwog
s jj jw sl 0d jj w
0a1w s 1s
2jg>gsgws
JSLsOlaosolaljIbQg Jrslz
sglj jolosaiw .siiaa
g>9>1≥j9a a jao 1gao a9
sJgS@oSjlljIyLsjIyIoslaWl pO
( 0,12,0,14,0,14,0) ,( 0,14,0,18,0,18,0) ,( 0,18,0,116,0,116,0)
JuslcsLcIySsOoo Jwog
(sylslll)yjulgogn jilal
gwhg>1g gssgwccl alguo
jIcIoo 2gJ cIyIgus yJyIgR
jssjssglaolaljwaiagj1s
U1,paJ,2oJggsCws,JI,slai,paJ
.000000000000000000000000000000000000000000
aJlIgJwOySjLs
sui jyj yj Coo.ogoslaow
jUJwU>1s|JUoJbOgU
Joo@jLjN jgluiuai a2>JcSjuya
.1w w w w w w w w w
.212g>go1g5Jlaijz.4s;jlj sji
s g s u b l j s wg k z u b s o sio j eolw s alw
JUOWJSSO.
1gjzai,xi5g3sui jg2d
.25 12>j
Soslaui Ssw slg yda 0s jj jie
o Bosch caleio aoj j J 10j j J J W .s o n Jw i s Jj J J J J J J J J
| الترجمة الحرفية | ||
| : محيى بعس و رهش علّة slga slga slga slga slga slga slga slga slga slga slga slga slga slga slga slga slga slga slga slga slga slga slga slga slga slga slga slga slga slga slga slga slga slga slga slga slga slga slga slga slga slga slga slga slga slga slga slga slga slga slqa slga slga slga slga slga slga slga slga slga slga slga slga slga slga slga slga slga slga slga slga slga slga slga slga slga slga slga slga slga slga slga slga slga slga slga slga slga slga slga slga slga slga slga slga slga slga slga slga slga slgslglglglglglglglglglglglglglglglglglglglglglglglglglglglglglglglglglglglglglglglglglglglglglglglglglglglglglglglglglglglglglglglglglglglglglglglglglglglglglglglglglglglglglglglglglglglglglglglglglglglgl glglglglglglglglglglglglglglglglglglglglglglglglglglglglglglglglglglglglglglglglglglglglglglglglglglglglglglglglglglglglglglglglglglglglglglglglglglglglglglglglglglglglglglglglglglglglglglglglglglglgl/glglglglglglglglglglglglglglglglglglglglglglglglglglglglglglglglglglglglglglglglglglglglglglglglglglglglglglglglglglglglglglglglglglglglglglglglglglglglglglglglglglglglglglglglglglglglglglglglglglglgl-glglglglglglglglglglglglglglglglglglglglglglglglglglglglglglglglglglglglglglglglglglglglglglglglglglglglglglglglglglglglglglglglglglglglglglglglglglglglglglglglglglglglglglglglglglglglglglglglglglglgl.glglglglglglglglglglglglglglglglglglglglglglglglglglglglglglglglglglglglglglglglglglglglglglglglglglglglglglglglglglglglglglglglglglglglglglglglglglglglglglglglglglglglglglglglglglglglglglglglglglglglGL | محيى بعس و رهش علّة slga slga slga slga slga slga slga slga slga slga slga slga slga slga slga slga slga slga slga slga slga slga slga slga slga slga slga slga slga slga slga slga slga slga slga slga slga slga slga slga slga slga slga SL | محيى بعس و رهش علّة slga slga slga slga slga slga slga slga slga slga slga slga slga slga slga slga slga slga slga slga slga slga slga slga slga slga slga slga slga slga slga slga slga slga slga slga slga slga slga slga slga slga SL |
| : محيى بعس و رهش علّة slga slga slga slga slga slga slga slga slga slga slga slga slga slga slga slga slga slga slga slga slga slga slga slga slga slga slga slga slga slga slga slga slga slga slga slga slga slga slga slga slqa slga slga slga slga slga slga slga slga slqa slga slga slga slga slga slga slga slga slga slga slga slga slga slga slga slga slga slga slga slga slga slga slga slga slga slga slga slga slga slga slga slga slga slga slga slga slga slga slga slga slqa slga slga slga slga slga slga slga slga slgslglglglglglglglglglglglglglglglglglglglglglglglglglglglglglglglglglglglglglglglglglglglglglglglglglglglglglglglglglglglglglglglglglglglglglglglglglglglglglglglgl glglglglglglglglglglglglglglglglglglgl glglglglglglglglglglglglglglglglglglglglglglglglglglglglglglglglglglglglglglglglglglglglglglglglglglglglglglglglglglglglglglglglglglglglglglglglglglglglglglglglgl glglglglglglglglglglglglglglglglglglgl Gl | محيى بعس و رهش علّة slga slga slga slga slga slga slga slga slga slga slga slga slga slga slga slga slga slga slga slga slga slga slga slga slga slga slga slga slga slga slga slga slga slga slga slga slga slga slga slga slga slga sla | محيى بعس و رهش علّة slga slga slga slga slga slga slga slga slga slga slga slga slga slga slga slga slga slga slga slga slga slga slga slga slga slga slga slga slga slga slga slga slga slga slga slga slga slga slga slga slga slga |
| : محيى بعس و رهش علّة slga slga slga slga slga slga slga slga slga slga slga slga slga slga slga slga slga slga slga slga slga slga slga slga slga slga slga slga slga slga slga slga slga slga slga slga slga slga slga slga slca slga slga slga slga slga slga slga slga slga slga slga slga slga slga slga slga slga slga slga slga slga slga slga slga slga slga slga slga slga slga slga slga slga slga slga slga slga slga slga slga slga slga slga slga slga slga slga slga slga sluga slga slga slga slga slga slga slga slga slga slga slga slga slga slga slga slga slga slga slga slga slga slga slga slga slga slga slga slga slga slga slga slga slga slga slga slga slga slga slga slga slga slga slga slga slga slga slga slga slga slgo slga slga slga slga slga slga slga slga slga slga slga slga slga slga slga slga slga slga slga slga slga slga slga slga slga slga slga slga slga slga slga slga slga slga slga slga slga slga slga slga slga slga slga slga slga slga slga slga slga slgaslqslqslqslqslqslqslqslqslqslqslqslqslqslqslqslqslqslqslqslqslqslqslqslqslqslqslqslqslqslqslqslqslqslqslqslqslqslqslqslqslqslqslqslqslqslqslqslqslqslqslqrlqslqslqrlqslqrlqslqrlqslqrlqslqrlqslqrlqslqrlqslqrlqslqrlqslqrlqslqrlqslqrlqslqrlqslqrlqslqrlqslqrlqslqrlqslqrlqslqrlqslqrlqslqrlqslqrlqslqrlqslqrlqslqrlqslqslqrlqslqrlqslqrlqslqrlqslqrlqslqrlqslqrlqslqrlqslqrlqslqrlqslqrlqslqrlqslqrlqslqrlqslqrlqslqrlqslqrlqslqrlqslqrlqslqrlqslqrlqslqrlqslqrlqrlqslqrlqslqrlqslqrlqslqrlqslqrlqslqrlqslqrlqslqrlqslqrlqslqrlqslqrlqslqrlqslqrlqslqrlqslqrlqslqrlqslqrlqslqrlqslqrlqslqrlqslqrlqslqrlqslqrlqslqrlqrlqslqrlqrlqslqrlqslqrlqslqrlqslqrlqslqrlqslqrlqslqrlqslqrlqslqrlqslqrlqslqrlqslqrlqslqrlqslqrlqslqrlqslqrlqslqrlqslqrlqslqrlqslqrlqslqrlqslqrlqslq | ||
294|
lalsg jj
pS l jLjoo sls d uuujjU pS CJW
J.3wJ 105 cUw dy oJgD Jw
golj jy jil, glogil u wugola
jwgl joljugg gww Siis yjss
.
(gjL jL a gj gj jg
aBn gcbgblj jy
- jy sloj J 100000000000000000000000000000000000000
OOPKHEHHPDEYKBOIOCTBG
3KcNryyataiH
uk CnHuaHa HCTpyuH 3
OKINWATU
YkpaHcbKa ..CtoPiHa 116
Kaak. 5et 122
MaKeDoHcN. CtpaHua 142
Srpski Strana 149
Slovenscina Stran 154
Hrvatski .Stranica 160
Eesti. Lehekulg 166
$$ a _ {h, B} = 6, 0 m / s ^ {2}, K = 1, 5 m / s ^ {2}, $$
General Power Tool SafetyWarnings
WARNING
Read all safety warnings, instructions, illustrations and specifica
tions provided with this power tool. Failure to follow all instructions listed below may result in electric shock, fire and/ or serious injury.
Save all warnings and instructions for future reference.
The term "power tool" in the warnings refers to your mains-operated (corded) power tool or battery-operated (cordless) power tool.
Work area safety
- Keep work area clean and well lit. Cluttered or dark areas invite accidents.
Do not operate power tools in explosive atmospheres, such as in the presence of flammable liquids, gases or
dust. Power tools create sparks which may ignite the dust or fumes.
- Keep children and bystanders away while operating a power tool. Distractions can cause you to lose control.
Electrical safety
Power tool plugs must match the outlet. Never modify the plug in any way. Do not use any adapter plugs with earthed (grounded) power tools. Unmodified plugs and matching outlets will reduce risk of electric shock.
- Avoid body contact with earthed or grounded surfaces, such as pipes, radiators, ranges and refrigerators. There is an increased risk of electric shock if your body is earthed or grounded.
Do not expose power tools to rain or wet conditions. Water entering a power tool will increase the risk of electric shock.
Do not abuse the cord. Never use the cord for carrying, pulling or unplugging the power tool. Keep cord away from heat, oil, sharp edges or moving parts. Damaged or entangled cords increase the risk of electric shock.
When operating a power tool outdoors, use an extension cord suitable for outdoor use. Use of a cord suitable for outdoor use reduces the risk of electric shock.
If operating a power tool in a damp location is unavoidable, use a residual current device (RCD) protected supply. Use of an RCD reduces the risk of electric shock.
Personal safety
Stay alert, watch what you are doing and use common sense when operating a power tool. Do not use a power tool while you are tired or under the influence of drugs, alcohol or medication. A moment of inattention while operating power tools may result in serious personal injury.
Use personal protective equipment. Always wear eye protection. Protective equipment such as a dust mask, non-skid safety shoes, hard hat or hearing protection used for appropriate conditions will reduce personal injuries.
Prevent unintentional starting. Ensure the switch is in the off-position before connecting to power source and/or battery pack, picking up or carrying the tool. Carrying power tools with your finger on the switch or energising power tools that have the switch on invites accidents.
- Remove any adjusting key or wrench before turning the power tool on. A wrench or a key left attached to a rotating part of the power tool may result in personal injury.
Do not overreach. Keep proper footing and balance at all times. This enables better control of the power tool in unexpected situations.
Dress properly. Do not wear loose clothing or jewellery. Keep your hair and clothing away from moving
12 | English
parts. Loose clothes, jewellery or long hair can be caught in moving parts.
If devices are provided for the connection of dust extraction and collection facilities, ensure these are connected and properly used. Use of dust collection can reduce dust-related hazards.
Do not let familiarity gained from frequent use of tools allow you to become complacent and ignore tool safety principles. A careless action can cause severe injury within a fraction of a second.
Power tool use and care
Do not force the power tool. Use the correct power tool for your application. The correct power tool will do the job better and safer at the rate for which it was designed.
Do not use the power tool if the switch does not turn it on and off. Any power tool that cannot be controlled with the switch is dangerous and must be repaired.
- Disconnect the plug from the power source and/or remove the battery pack, if detachable, from the power tool before making any adjustments, changing accessories, or storing power tools. Such preventive safety measures reduce the risk of starting the power tool accidentally.
- Store idle power tools out of the reach of children and do not allow persons unfamiliar with the power tool or these instructions to operate the power tool. Power tools are dangerous in the hands of untrained users.
- Maintain power tools and accessories. Check for misalignment or binding of moving parts, breakage of parts and any other condition that may affect the power tool's operation. If damaged, have the power tool repaired before use. Many accidents are caused by poorly maintained power tools.
- Keep cutting tools sharp and clean. Properly maintained cutting tools with sharp cutting edges are less likely to bind and are easier to control.
- Use the power tool, accessories and tool bits etc. in accordance with these instructions, taking into account the working conditions and the work to be performed. Use of the power tool for operations different from those intended could result in a hazardous situation.
- Keep handles and grasping surfaces dry, clean and free from oil and grease. Slippery handles and grasping surfaces do not allow for safe handling and control of the tool in unexpected situations.
Battery tool use and care
- Recharge only with the charger specified by the manufacturer. A charger that is suitable for one type of battery pack may create a risk of fire when used with another battery pack.
Use power tools only with specifically designated battery packs. Use of any other battery packs may create a risk of injury and fire.
When battery pack is not in use, keep it away from other metal objects, like paper clips, coins, keys, nails, screws or other small metal objects, that can make a connection from one terminal to another. Shorting the battery terminals together may cause burns or a fire.
Under abusive conditions, liquid may be ejected from the battery; avoid contact. If contact accidentally occurs, flush with water. If liquid contacts eyes, additionally seek medical help. Liquid ejected from the battery may cause irritation or burns.
- Do not use a battery pack or tool that is damaged or modified. Damaged or modified batteries may exhibit unpredictable behaviour resulting in fire, explosion or risk of injury.
Do not expose a battery pack or tool to fire or excessive temperature. Exposure to fire or temperature above 130^ may cause explosion.
Follow all charging instructions and do not charge the battery pack or tool outside the temperature range specified in the instructions. Charging improperly or at temperatures outside the specified range may damage the battery and increase the risk of fire.
Service
Have your power tool serviced by a qualified repair person using only identical replacement parts. This will ensure that the safety of the power tool is maintained.
- Never service damaged battery packs. Service of battery packs should only be performed by the manufacturer or authorized service providers.
Safety instructions for sabre saws
Hold the power tool by insulated gripping surfaces, when performing an operation where the cutting accessory may contact hidden wiring. Cutting accessory contacting a "live" wire may make exposed metal parts of the power tool "live" and could give the operator an electric shock.
Use clamps or another practical way to secure and support the workpiece to a stable platform. Holding the workpiece by hand or against your body leaves it unstable and may lead to loss of control.
- Keep hands away from the sawing area. Do not reach under the workpiece. Contact with the saw blade can lead to injuries.
Hold the power tool firmly with both hands and make sure you have a stable footing. The power tool can be more securely guided with both hands.
Only bring the power tool into contact with the workpiece when switched on. Otherwise there is danger of kickback if the cutting tool jams in the workpiece.
Ensure that the footplate is always resting on the workpiece while sawing. The saw blade can jam and lead to loss of control over the power tool.
When the cut is completed, switch off the power tool and then pull the saw blade out of the cut only after it
has come to a standstill. In this manner you can avoid kickback and can place down the power tool securely.
Always wait until the power tool has come to a complete stop before placing it down. The application tool can jam and cause you to lose control of the power tool.
Use only undamaged saw blades that are in perfect condition. Bent or dull saw blades can break, negatively influence the cut, or lead to kickback.
Do not brake the saw blade to a stop by applying side pressure after switching off. The saw blade can be damaged, break or cause kickback.
- Ensure that the material is securely clamped. Do not support the workpiece using your hands or feet. Do not touch any objects or the floor with the saw while it is running. There is a risk of kickback.
Use suitable detectors to determine if there are hidden supply lines or contact the local utility company for assistance. Contact with electric cables can cause fire and electric shock. Damaging gas lines can lead to explosion. Breaking water pipes causes property damage.
In case of damage and improper use of the battery, vapours may be emitted. The battery can set alight or explode. Ensure the area is well ventilated and seek medical attention should you experience any adverse effects. The vapours may irritate the respiratory system.
Do not open the battery. There is a risk of short-circuiting.
The battery can be damaged by pointed objects such as nails or screwdrivers or by force applied externally. An internal short circuit may occur, causing the battery to burn, smoke, explode or overheat.
Only use the battery with products from the manufacturer. This is the only way in which you can protect the battery against dangerous overload.


Protect the battery against heat, e.g. against continuous intense sunlight, fire, dirt, water and moisture. There is a risk of explosion and short-circuiting.
Product Description and Specifications

Read all the safety and general instructions. Failure to observe the safety and general instructions may result in electric shock, fire and/or serious injury.
Please observe the illustrations at the beginning of this operating manual.
Intended Use
The power tool is suitable for sawing wood, plastic, metal and building materials on a firm surface. It is suitable for straight and curved cuts. The saw blade recommendations are to be observed.
Product features
The numbering of the product features refers to the diagram of the power tool on the graphics page.
(1) Saw blade
(2) Base plate
(3) Locking sleeve for saw blade
(4) Battery
(5) Battery release button
(6) Lock-off button for on/off switch
(7) On/off switch
(8) Worklight
(9) Temperature monitoring/overload protection indicator
(10) Battery charge indicator
(11) Handle (insulated gripping surface)
(12) Saw blade receptacle
A) Accessories shown or described are not included with the product as standard. You can find the complete selection of accessories in our accessories range.
Technical data
| Reciprocating saw GSA 12V-14 | ||
| Article number | 3601 F4L 9.. | |
| Rated voltage V= 12 | ||
| No-load stroke rate nq | min-1 | 0-3000 |
| Tool holder SDS | ||
| Stroke mm 14.5 | ||
| Max. cutting depth | ||
| -In wood mm 65 | ||
| -In steel (unalloyed) mm 8 | ||
| -Pipe diameter mm 50 | ||
| Weight according to EPTA-Procedure 01:2014 | kg 1.2-1.4 | A) |
| Permitted ambient temperature | ||
| -During charging °C 0 to +45 | ||
| -During operation B) and during storage | °C | -20 to +50 |
| Recommended batteries | GBA 12V... | |
| Recommended chargers | GAL 12... | |
| GAX 18... | ||
A)Depends on battery in use
B) Limited performance at temperatures < 0^
Technical data determined using the battery that comes with the product.
Noise/vibration information
Noise emission values determined according to EN 62841-2-11.
14|English
Typically, the A-weighted sound pressure level of the power tool is 70 dB(A). Uncertainty K = 5 dB. The noise level when working can exceed 80 dB(A).
Wear hearing protection
Vibration total values a_t (triax vector sum) and uncertainty K determined according to EN 62841-2-11:
Cutting boards with saw blade S 511DF:
$$ a _ {h, B} = 6. 0 \mathrm {m} / \mathrm {s} ^ {2}, K = 1. 5 \mathrm {m} / \mathrm {s} ^ {2}, $$
Cutting wooden beams with saw blade S 511DF:
$$ a _ {h, W B} = 6. 5 \mathrm {m} / \mathrm {s} ^ {2}, K = 1. 5 \mathrm {m} / \mathrm {s} ^ {2}. $$
(The values relating to cutting boards with a saw blade are valid for a thickness of 20mm .)
The vibration level and noise emission value given in these instructions have been measured in accordance with a standardised measuring procedure and may be used to compare power tools. They may also be used for a preliminary estimation of vibration and noise emissions.
The stated vibration level and noise emission value represent the main applications of the power tool. However, if the power tool is used for other applications, with different application tools or is poorly maintained, the vibration level and noise emission value may differ. This may significantly increase the vibration and noise emissions over the total working period.
To estimate vibration and noise emissions accurately, the times when the tool is switched off or when it is running but not actually being used should also be taken into account. This may significantly reduce vibration and noise emissions over the total working period.
Implement additional safety measures to protect the operator from the effects of vibration, such as servicing the power tool and application tools, keeping their hands warm, and organising workflows correctly.
Assembly
- Remove the battery from the power tool before carrying out work on the power tool (e.g. maintenance, changing tool, etc.). The battery should also be removed for transport and storage. There is risk of injury from unintentionally pressing the on/off switch.
Battery Charging (see figure A)
Use only the chargers listed in the technical data. Only these chargers are matched to the lithium-ion battery of your power tool.
Note: The battery is supplied partially charged. To ensure full battery capacity, fully charge the battery in the charger before using your power tool for the first time.
The lithium-ion battery can be charged at any time without reducing its service life. Interrupting the charging process does not damage the battery.
The lithium-ion battery is protected against deep discharge by the "Electronic Cell Protection (ECP)". When the battery is discharged, the power tool is switched off by means of a protective circuit: The application tool no longer rotates.
Do not continue to press the On/Off switch after the power tool has automatically switched off. The battery can be damaged.
To remove the battery (4), press the release button (5) and pull the battery downwards out of the power tool. Do not use force to do this.
Battery charge-control indicator
When the on/off switch (7) is pressed in halfway or completely, the battery charge indicator (10) indicates the battery's state of charge for several seconds. The indicator consists of three green LEDs.
LED Capacity
Continuous lighting 3 × green ≥ 2 / 3
Continuous lighting 2 × green ≥ 1/3
Continuous lighting 1 x green < 1/3
Flashing light 1 x green Reserve
If no LED lights up after pressing the on/off switch (7), then the battery is defective and must be replaced.
Inserting/changing the saw blade
When fitting or changing the saw blade, wear protective gloves. Blades are sharp and can become hot when used for prolonged periods of time.
While replacing the saw blade, ensure that the saw blade receptacle is free of material residue, e.g. wood or metal chips.
Selecting the saw blade
You will find an overview of recommended saw blades at the end of these operating instructions. Only use saw blades with a 1/2 universal shank. The saw blade should not be longer than required for the intended cut.
Inserting the saw blade (see figure B)
Turn the locking sleeve (3) approx. 90^ in the direction of the arrow and hold it firmly. Push the saw blade (1) into the saw blade receptacle (12). Release the locking sleeve again.
Check that it is seated securely by pulling the saw blade. A loose saw blade can fall out and lead to injuries.
For particular jobs, the saw blade (1) can also be flipped 180^ (teeth point upwards) and refitted.
Removing the Saw Blade (see figure C)
Let the saw blade cool down before removing it. There is a risk of injury when touching the hot saw blade.
Turn the locking sleeve (3) approx. 90^ in the direction of the arrow and hold it firmly. Remove the saw blade (1).
Dust/Chip Extraction
Dust from materials such as lead-containing coatings, some wood types, minerals and metal can be harmful to one's health. Touching or breathing-in the dust can cause allergic reactions and/or lead to respiratory infections of the user or bystanders.
Certain dust, such as oak or beech dust, is considered carcinogenic, especially in connection with wood-treatment ad
ditionives (chromate, wood preservative). Materials containing asbestos may only be worked by specialists.
-
Provide for good ventilation of the working place.
-
It is recommended to wear a P2 filter-class respirator.
Observe the relevant regulations in your country for the materials to be worked.
- Avoid dust accumulation at the workplace. Dust can easily ignite.
Operation
Starting Operation
Inserting the battery
Note: The use of batteries unsuitable for your power tool can lead to malfunctions or damage to the power tool.
Press the lock-off button (6) to the right to protect the power tool from being switched on unintentionally.
Insert the charged battery (4) into the battery receptacle until you feel it engage and it is securely locked in place.
Switching On and Off (see figure D)
To switch on the power tool, press the lock-off switch to the left (6) first. Then press the on/off switch (7) and keep it pressed.
The worklight lights up when the on/off switch (7) is lightly or fully pressed allowing the work area to be illuminated in poor lighting conditions.
To switch off the power tool, release the on/off switch (7). Then press the lock-off button (6) to the right again.
Controlling the stroke rate
You can variably adjust the stroke rate of the power tool when it is on by pressing in the on/off switch (7) to varying extents.
Applying light pressure to the on/off switch (7) results in a low stroke rate. Applying increasing pressure to the switch increases the stroke rate.
The required stroke rate is dependent on the material and the work conditions and can be determined using practical tests.
It is recommended that you reduce the stroke rate when placing the saw blade on the workpiece and when sawing plastic and aluminium.
During prolonged periods of use at a low stroke rate, the power tool may heat up significantly. Remove the saw blade and let the power tool run at the maximum stroke rate for around three minutes to cool down.
Temperature monitoring/overload protection indicator
The red temperature monitoring/overload protection indicator (9) helps you to protect the battery against overheating and the motor against overload.
If the temperature monitoring/overload protection indicator (9) is lit up permanently in red, the temperature of the battery is too high and the power tool switches off automatically.
Switch the power tool off and allow the battery to cool down before you carry on working.
If the temperature monitoring/overload protection indicator (9) is flashing red, then the power tool is blocked and will switch off automatically.
Pull the power tool out of the workpiece. The power tool will continue to work at the set stroke rate as soon as the blockage is rectified.
Working Advice
- Remove the battery from the power tool before carrying out work on the power tool (e.g. maintenance, changing tool, etc.). The battery should also be removed for transport and storage. There is risk of injury from unintentionally pressing the on/off switch.
Switch the power tool off immediately if the saw blade becomes blocked.
Tips
- When sawing lightweight materials, take into account the statutory provisions and recommendations of the material manufacturers.
Before sawing into wood, chipboard, building materials, etc., check for any foreign objects such as nails, screws, etc. and use a suitable saw blade.
Switch on the power tool and guide it towards the workpiece you wish to work on. Place the base plate (2) on the surface of the workpiece and saw through the material applying even pressure and feed. Switch the power tool off once you have finished your work.
Switch the power tool off immediately if the saw blade jams. Widen the sawing gap slightly with a suitable tool and pull the power tool out.
Plunge cutting (see figure E)
Plunge cuts may only be applied to soft materials, such as wood, gypsum board, etc. Do not plunge cut metal materials.
For plunge cutting, use only short saw blades.
Place the power tool so that the edge of the base plate (2)
rests on the workpiece, without the saw blade (1) touching the workpiece, and switch it on. When using power tools with stroke rate control, select the maximum stroke rate. Press the power tool firmly against the workpiece and allow the saw blade to plunge slowly into the workpiece.
As soon as the base plate (2) rests fully on the workpiece, continue sawing along the required cutting line.
For particular jobs, the saw blade (1) can also be fitted after being turned 180^ in order to operate the power tool the other way around.
Coolant/lubricant
As the material heats up along the cutting line when cutting metal, you should apply coolant or lubricant.
Recommendations for Optimal Handling of the Battery
Protect the battery against moisture and water.
16|English
Only store the battery within a temperature range of -20 to 50^ . Do not leave the battery in your car in the summer, for example.
Occasionally clean the ventilation slots on the battery using a soft brush that is clean and dry.
A significantly reduced operating time after charging indicates that the battery has deteriorated and must be replaced. Follow the instructions on correct disposal.
Maintenance and Service
Maintenance and Cleaning
- Remove the battery from the power tool before carrying out work on the power tool (e.g. maintenance, changing tool, etc.). The battery should also be removed for transport and storage. There is risk of injury from unintentionally pressing the on/off switch.
To ensure safe and efficient operation, always keep the power tool and the ventilation slots clean.
Carefully clean the saw blade receptacle with a soft cloth. To do so, remove the saw blade from the power tool. Keep the saw blade receptacle operational using suitable lubricants. If the power tool becomes very dirty, this can lead to serious faults. For this reason, do not cut materials which generate large quantities of dust from below or overhead.
After-Sales Service and Application Service
Our after-sales service responds to your questions concerning maintenance and repair of your product as well as spare parts. You can find explosion drawings and information on spare parts at: www.bosch-pt.com
The Bosch product use advice team will be happy to help you with any questions about our products and their accessories.
In all correspondence and spare parts orders, please always include the 10-digit article number given on the nameplate of the product.
Great Britain
Robert Bosch Ltd. (B.S.C.)
P.O.Box 98
Broadwater Park
North Orbital Road
Denham Uxbridge
UB95HJ
At www.bosch-pt.co.uk you can order spare parts or arrange the collection of a product in need of servicing or repair.
Tel. Service: (0344) 7360109
E-Mail: boschservicecentre@bosch.com
Ireland
Origo Ltd.
Unit 23 Magna Drive
Magna Business Park
City West
Dublin 24
Tel. Service: (01) 4666700
Fax: (01) 4666888
Australia, New Zealand and Pacific Islands
Robert Bosch Australia Pty. Ltd.
Power Tools
Locked Bag 66
Clayton South VIC 3169
Customer Contact Center
Inside Australia:
Phone: (01300) 307044
Fax: (01300) 307045
Inside New Zealand:
Phone: (0800) 543353
Fax: (0800) 428570
Outside AU and NZ:
Phone: +61 3 95415555
www.bosch-pt.com.au
www.bosch-pt.co.nz
Republic of South Africa
Customer service
Hotline: (011) 6519600
Gauteng - BSC Service Centre
35 Roper Street, New Centre
Johannesburg
Tel.: (011) 4939375
Fax: (011) 4930126
E-mail: bsctools@icon.co.za
KZN - BSC Service Centre
Unit E, Almar Centre
143 Crompton Street
Pinetown
Tel.: (031) 7012120
Fax: (031) 7012446
E-mail: bsc.dur@za.bosch.com
Western Cape - BSC Service Centre
Democracy Way, Prosperity Park
Milnerton
Tel.: (021) 5512577
Fax: (021) 5513223
E-mail: bsc@zsd.co.za
Bosch Headquarters
Midrand, Gauteng
Tel.: (011) 6519600
Fax: (011) 6519880
E-mail: rbsa-hq.pts@za.bosch.com
Transport
The contained lithium-ion batteries are subject to the Dangerous Goods Legislation requirements. The batteries are suitable for road-transport by the user without further restrictions.
When shipping by third parties (e.g.: by air transport or forwarding agency), special requirements on packaging and labelling must be observed. For preparation of the item being shipped, consulting an expert for hazardous material is required.
Dispatch battery packs only when the housing is undamaged. Tape or mask off open contacts and pack up the battery in such a manner that it cannot move around in the packaging. Please also observe the possibility of more detailed national regulations.
Disposal

The machine, rechargeable batteries, accessories and packaging should be sorted for environmental-friendly recycling. Do not dispose of power tools and batteries/ rechargeable batteries into household waste!
Only for EU countries:
According to the Directive 2012/19/EU, power tools that are no longer usable, and according to the Directive 2006/66/EC, defective or used battery packs/batteries, must be collected separately and disposed of in an environmentally correct manner.
Battery packs/batteries:
Li-ion:
Please observe the notes in the section on transport (see "Transport", page 16).
Français
Robert Bosch (France) S.A.S.
$$ a _ {h, B} = 6, 0 m / s ^ {2}, K = 1, 5 m / s ^ {2}, $$
Serrado de vivas de madera con hoja de sierra S511DF: a_1,WB = 6,5m / s^2,K = 1,5m / s^2
Calle Robert Bosch No. 405
C.P. 50071 Zona Industrial, Toluca - Estado de Mexico
Tel.: (52) 55 528430-62
Tel.: 8006271286
www.bosch-herramientas.com.mx
Perú
Robert Bosch S.A.C.
Colocar o accumulator
Reciprozaag GSA 12V-14
Bosch Service Center
Telegrafvej 3
2750 Ballerup
Pá www.bosch-pt.dk kan der online bestilles reservedele el-ler oprettes en reparations ordre.
TIf. Service Center: 44898855
Fax:44898755
E-Mail: vaerktoej@dk.bosch.com
Transport
Bosch Service Center
Telegrafvej 3
2750 Ballerup
Danmark
Tel.: (08) 7501820 (inom Sverige)
Fax: (011) 187691
Transport
De litiumjonbatterier som ingar ar underkastade kraven for farligt gods. Anvandaren kan utan ytterligare forplichtelser transportera batterierna pa allman vag.
Eumptnneatowkououeepaoyic
To tjuEunnpetnnc neaWv anavta otc epwthoeic aoc oxetikae Tnv enoKeun kai n ouvtnpon Tou npoiovtoac Kaowkai yia Ta avtoloxa avtaalakntka.2xebia ouvapoloynnc kai nnpopopiec yia ta avtaalakntika 8a
betae enianc katw ano: www.bosch-pt.com H oda napoxic socouboulw vnc Bosch anavta euxapiatwc tic epwthoeic ac vi Ta npoiovta mac kai ta eapntmuata Touc. Awote oe bce tic epwthoeic kai npayyaleiec avtaalaktkov onomega note tov 10u npio kwdiok apiog oupovva te nV nivakiTaTou npoiovtc.
EAaa
Robert Bosch A.E.
Epxela 37
19400Kopwnl-Athya
Tnλ.: 2105701258
Φaε:2105701283
www.bosch.com
www.bosch-pt.gr
ABZ Service A.E.
Tnλ.: 2105701380
ΦaE:2105701607
Mcreaop
Oi nepiexoevec matapeic tovov niou unokivra otic anatneie ctw enikivuvayoov. Oi natapiec npopoov va metapeepoov obikwacno xpntxwpiacllouoc opouc.
'Orav, ouwc, oI natapiec anootelauovtai ano troitouc (n.x. aeponopikwoc n ie taia petaopow) npenei va npouvta diapopec ibaitepeac anaitneic yia tn ouakeuaia kai tn onjavon. Edw npenei, kata tnv npoeoiuaia tou teayiou aoatoanc v zntnthe onomega note kai ngoubaun evoc etikoiv ia enikivuva ayaa.
AnoTeAeTic nIatapiec mOvo otav to npiBnua eivai aHtko. Kollate TIC yuuec enapec me kollntik taivia ka va ouakeuaTe Tny nIatapia katetoto pTo, wote autn va uny couvietae oanouakeuaia. IpaakaLope va laaBavete emion cunoyn oac kaluyov nio auotnpec eVikic diataEic.
Anoupon

Ta nAekptika epyaiae, ounatapie, Ta
Eapntmuata kai ooukeuaoe npenei va
avakukawovtai me Tpno pAiko npoc to
nepiBaaov.

Mny pixve Ta nAekptika epyaleia kai tuc unatapie cota anoppimuata tou onnou oag!
Movi yia xwpec tnc EE:
Uuwpwa me tyn Eupwnaikn obnyia 2012/19/EE ta axnpota nkeptika epyaleia kai uupwva me tyn Eupwnaikn obnyia 2006/66/EK oixaaouvec n xpnoumoniuevec mnatapie npenei va oullayovtat Exwpiota yia va avakukawoov me tpono piko npoc to nepiabauov.
Mnatapiec/EnavaapoTioevcunatapiec:
Li-Ion:
IpooeEe napakalw tic unoldeieic otny evotnTa Metaopa (3aene «Metaopa», Zelia677).
Türkce
Güvenlik talimati
Elektrikli el alelperi icin genel guvenlik uyarilari
UYARI
Robert Bosch Sp. z o.o.
Bosch Service Center PT
KVapence 1621/16
692 01 Mikulov
Na www.bosch-pt.cz si si muzete objednat opravu Vaseho stroje nebo nahradni dily online.
HnDnKaTOp 3apJxKeHHocTH aKKymyIaTOPHO6aTapeH (10), COCTOuN H3 3eenebIX CBEToNDIOB, npn HAnONOBHy HIN NOnHOCTbIO HAKATOM BbIKIOUaTeNe (7) OTObpaKaET Ha IpOTAAKeHH HeCKoJIbKHX CeKYHd yPOBeH 3apJxKeHHocTH aKKymyIaTOPHO6aTapeH.
CbeTOnIOEmKocTb
HenpepbHBnCBET3eenebIX ≥2/3 CBETOIOIOB
HenpepbBnBcBET23enehbx ≥1/3 CBETOIOIOB
HenpepbBnBcBET13eneHoro <1/3 CBETOIOnda
MiraHne 13eIeHOro CBeToDnOa Pe3epB
Ecnn noche haxkataHa BaBikHouateb (7) He 3aropaetc Hn OINH CBToDIOHbI HNkATOp, aKKymyTApOp HeNCnpaBeH IdoJKeH 6bITb 3ameHeH.
YcTaHOBka/CMeHa NIIbHOro IIOIOTHa
Pn yctahOBke n Cmehe pa6oery HnCTpyMeHTa HadeBaIte 3aunTHbIe nepuATKn. Pa6oune HnCTpyMeHTblOcTpbI e npn nnTeBHom HCnONb3OBaHHMOry T HarpeBaTbCra.
PnH3aMeHe HnHbHOro NonoTHa CneIte 3a YnCTOToy y3na Kpenenne (OTcyTcTBne DpeBecbIX ONNOK MeTaNueckO CTpyKKn).
Bb6op nHbHoro nonoTHa
0630p pekomehyembIX nihhbx INoTe H Bbi HaJeTe B KOHc HactoIe pyKOBOCTBa. NcnoB3yTe TOnko NHbHIE NOtHOA C yHnBePcaJIbHbIM XBOCTOBKOM 1/2". IINHA INHbHO NOtHOA He DoNkHa 6bITb 6OJIbWe, YEM ETo HeoXoHMo DnI npEDyCMOTpeHHOrO paCnHa.
YctahOBKa NnIbHoro nonoTHa (cm.pnc.B)
NobepHnTe rHb3y fHKcHPOBaHNr (3) np6n. Ha 90° B HanpaBHeHH cTpeKN n pndepKHe ee. BctaBBte nnHoe nNoTHo (1) B KpeJIeHne NnHbHO rnoNtHa (12). ChOba OTNyCTHe rHb3y fHKcHPOBaHNr.
PpOBeBpTe npOuHocTb nocAkn,notAHyB 3a nnHbHoe nonoTHo. IIOxo 3akpeIeHHoe nHbHoe nONOTHO MOKET BbINaCTb HnpaHnTB Bac.
Длго onpeendeHbix pa60Тпьhoe NOIOTHO (1) MoKHO yCTaHOBtB, NOBepHyBa 180°(3y6bMaN BBepx).
H3bTHe NnIbHO rNOIOHa (CM. pnc.C)
PpexdeyEMBbIHMaTbHbHoeNOnTOHO,daTeemy OCTbITb.PnKOCHOBEHeNE KropAeMy NINbHOMY NONOTHY MOKET PnIBECTN K TpaBMam.
IbepHnTe rB3y fKcnpoBaHHa (3) np6n. Ha 90° B HanpaBHeHH CTpeKN n npNepXHTe ee. BbHbTe nnBHOe nonoTHO (1).
YdaneHne nbinn n ctpyKKn
IbIb HeKOTOpbIX MaTePnAnOB, KaH np., KpacOK C co- depKaHnEM CBnUa, HeKOTOpbIX COPTOB DpeBecnbl, MHepaNoB H MetaTNOB, MoXeT 6blb BpeHOn IJN 3DopOBb. PpIKoCHOBHe N Kbln H NoJaHne PbIn B DblxAteNbHbIe NyTH MoXeT Bbl3BaTb Anepnueckne peakun H/nn 3a60neBaHn DblxAteNbHbIy TeYe Oepatopa nn HaxOJaTeRoC B6nHn nepcoHana.
OnpeeneHHbIe Bnbl nbHn, HAp., dy6a 6yKa, cunTaIOrCAHcpeoreHHbIMn, oO6eHHo COBmecTHO CnpcaKamn d
06pa60TKI DpeBecnHb (XPOMAT, CpeCTBO IaHTbI DpeBecnHb). MaTePhaI cOePkaHem ac6EcTa pa3peHaetcN 06pa6aTbIBaTb TOnkO CneuaHNTam.
XopoOIO npOBeTpBaIte paBooee MeTo.
- PeKOMeHnyETcN NOb3OBAbCpaPecnnpaTOpHO MaKo CΦJIbTpOM KJIacca P2.
Co6nOdaIteJeCTbYIOUeB Bauei cTpaHne npedncaHna
Ira o6pa6aTbIbAembIX MaTePnAOB.
H36eraTe cKoPHeHHaPbHnHa pa6OeM MeCTe.1bIb MOxETJeKOBOCPiMaEHrTbcR.
Pa6ota c HhctpyMeHTOM
BknHoueHne 3JekTpOHnCTpyMeHTa
YctahOBkaAkkymyIATopa
Yka3aHHe: PpMmEHeHHe aKkyMylrTopoB, He npEnHa3HaueHHbIX nlaDnHOrO 3NeKTponHcTpyMeHTa, MoKeT npNBeCTN K c6oR M pa6ote HnIN NobpeXdEHIO 3NeKTponHcTpyMeHTa.
PnIXKMITE 6IOKnPaTOp BKNIOueHn (6) BnPaBO, YTObIaAHTNtB 3JIeKTPoINHCTpyMeHT OT HENpeHaMEpeHHORO BKNIOueHn.
YctaHOBHTe 3apJaeHHyO akKymIaTOpHyO 6aTapeHO (4) B KpeHHe nIaakKymIaTOpHO 6aTapeH TaK, UTo6bI OHa OTcETnBO BOuBa B 3aueHne H aedxHo 3aФHKpOBa NaCb.
BklioueHne/BbIKIOueHne (cm.pnc.D)
Длгькlioуенна STКТрОнHCTPyMeHTa ChaJaHa npKMMTe 6LoKnpatOp (6) BNeBO. HaxMITE 3aTEM Ha BbKIOUaTeJIb (7) nYdePKNBaIte erO hXaTaBIM.
IIOCBETKa 3aRopaETc npn IeKOM HIN NONHOM HaKaTHN Ha BbIKHOATeNB (7) nIO3BOJRE TCBeUaTb paOuyo 3OH npn HeIOCTaTOHOM O6IeM OCBeUeHN.
ДлгБыкнluоченя STNekTPOHnCTpyMeHTA OTNYCTHETe BblKIOU-уateIb (7).3aTeM CHOBA npHXMMte 6nOKHpATOp BKIOUeHIN6(BnPaBO.
Unpabnene cactotox oja
YactotaXoJaBkIIOueHHoro3NEKTPoHnCTpyMeHTaMOKeT IINABHOpeyINPOBaTcRnyTEMN3MeHeHNrny6HbHaKaTnaHa BblKlIOuTeJIb(7).
PnCnaBom Haxatnn Ha BbIKIOuATEnb (7) 3neKtpoHnCTpyMeHt pa6OaTe C HN3KOJ YAcTOTO XOJa. C yBENHeHem CnIbHaxATNa YAcTOTA XOJa YBENHnBaETcA.
HeoXOJMaJyactotaXIOB3aBNCITOTMaTePnAHa pa60- yCNOH M MoKET 6bTb ONpeDeneHa MeToOM np6.
PnnoBDOe NnIbHoro NOIOTHa K3aTOrOBKe npn paCnINBaHHN IaCTMaCC HAnOMHHpeKoMeHdyETcY MeHb-aaTb YacToTy XOIOB.
PnnpoDIOJHKTeIbHOpa6OteC Hn3KoYacToTOxOIOB 3NEKTPOHCTpyMeHT MOKeT CnIbHO HarpeTBc.BbHbTe NINbHOe NOOTHO 3NEKTPOHCTpyMeHTaN DIA OXNaJKeHENBAKIOHTEeroCMAK.CYNOM XOIOB np6I. Ha 3 MNH.
HnKATOP KOHTPOJ3a TempepaTypoj/3aunTbI OT neperpy3KN
KpaChbH HnHnKaTOp KOHTpOHa 3a TempeAtypo/3aunTbI OT neperpy3Kn (9) NOMoAeT 3aunTbAKKyMnyTOp OT nepe- rpeBa, a DnBraTeB -OT neperpy3Kn.
Ecn HnHnKaTOp KOHTpon3a TEmnpaTyPO/3aunTbO Tneperpy3Kn (9) NOCToAHNO CBETnCA KpachBIM QBETOM, 3TO CnDteNbCTBye O npeBbIWeHN TemnpaTypbl AKKMyJTATopo N Bb3bBAeABTomAHTueckoe OTKJIUHeHNE 3NeK-TPoHHCTpyMeHTA.
BbkiHouHTe 3nEeKpOHHCTpyMeH n daIte aKKymyIaTopy octItb, npExde cHem npoOnKaTa pa6oTaTb.
MraHne HnIkaTopa KOHTpOla 3aTeMnepaTpyo/3aunTbOT NepeTpzKIN (9) KpacbIM UBeTOM O3HaayeT, YTO 3JIeKTPoHNCTpyMeHT 3aKnHnIO, N OH aBtOMaTHueCKN OTKnIOaETcR.
BbtaaHTe 3NekTPOHnCTpyMeHn 3aTOBKn. Nocne yctpaHHeHn npuHbI 3aknnHbAHnE 3NekTPOHnCTpyMeHn pOdoJkaet pa6oTa b c HAcTpoEHHO 占TcToH xOIOB.
Yka3aHnno npImMeHHNO
Do hauana pa60nt no Texo6cnyxHBAHIO, CMeHe HNCTpyMeHTa N.T.D. aTAKKe pN TpaHCnOpTHPOBKe H XpaHeHH N3BNEkai Te AKKMyJrTop H3 3JIeK
TPOHnCTpyMeHa.ПинрпeнДмepeHOM BkIIOueHn BO3HnKaeT OAnCHoCTb TpaBMnpoBaHn.
Pn6KpOBaHHHnHbHOrO nOToHa HEmeJeHBOBikNoaHTe 3NEKtpOHCTpyMeHt.
COBeTbI
Pn paNNBaHH NERKHX CtponTeNbHbIX MaTePhaIOB BblONHHe Te 3aOKHHbe IpeINHcHn H peKoMeHDaunn H3rTOBHTeMaTePhaHa.
IpeepacnnnBaHmE dpBeCnHbI,dpBeChoctpyKeHbIX nINT,CTpOHTeNbHbIX MaTePnaNoB H.T.D.IPOBepaTe Hx Ha npEdMeT HAnuHra TBO3de, WpyNoB H.T.D.HcNOnb3ynte COOTBetCTByoOee nnbHOe NNOtHO.
BknHouHTe 3nEKNpOHNCTpyMeHT n NOBBeHNrEeroK O6paBaTbBAeMoH JeTAn. YcTAHOBHTe ONOPHYO NnHTy (2) Ha NOBepxHOCTb 3aTOBKn INnHtE C paBHOMePHbIM HaxHMOMHa NOBepxHOCTb/C paBHOMePHoN oDaueM MaTePnaJa. IOn OKOHuaHn paBOeRo npoecca BbIKIOHTe 3nEKNpOHNCTpyMeHT.
Pn3aKINHHBaHH INHbHOro NIOIHTHa HeMeDJIeHHO BbIKIOuHTne 3NEKTPOHCTpymENT. Pa30KMITE npONIN NOxODJUIMNHCTpymEHOM BBHbTe 3NEKTPOHCTpymENT.
TInneHHe c norpuyxehnem (cm.pnc.E)
PacnHnBaTb c NorpyxHeHem MOxHO ToIbKO MArKHe MaTePnAnbl, HAp., dpeBecHy, rHcKapToH nT.n! He o6pa6aTaBbAte MeTaNueckne MaTePnAnbl MeToDOM norpyxHeH!
IINIIeHHN C nORpyKeHHeM pImHeHrTe TOnbKO KOpOTKHe IINlbHBe NOnoTHa.
YCTAHOBHTe3NEKTPOHNCHPTyMeHKTPOMKOONOPHOINITbI (2)Ha 3aROTOBky,He KAcAcb NpH 3TOM 3aROTOBKN ININbHBIM NOOTOM(1),IN BKNIOHTe3NEKTPOHNCHPTyMeH. EcInn3NEKTPOHNCHPTyMeHNTMEe peryJATOp yactotbIXoIDOB,yCTAHOBH
Te MaKcMaJIbHyU qacToTy. KpeIKnO npNKMte 3neKTPoHHCTpyMeHT K 3aTOrOBKe H daITe PnHbHOMy NOnOTHYMeJHeHO Norpy3ntbCBA 3aTOrOBky.
Kak tonbko onopnha nnta (2) Bcei nIOCKOCTbIO JRAKET Ha 3aROTOBky, npoONKaIte nINITb dAnbwe NO Tpe6yEmoN Hnn paCnna.
IpyonpepeHHbIX paob NnHbHOe NOIOTHO (1)MOXHO BCTABnTb, NOBepHyB ero Ha 180°, a TAKKe HcNtOBaTb 3NEKTPoHnHCTpyMeHT, nepeBepHyB ero COOTBeTcTBYIOUHM 6pa3OM.
Cma3bIbaIOue-oxnaXdaIOoee cpeCTBO
Pn paCnHbAHmMetaHaHeCHTeIgOxnaKeHnMaTepeHnBaONbNHHpaCnHbCMa3bBAIOoee-OXJaKaIOo-ooe CpeDCTBO.
Yka3aHnno ONTNMaIbHOMy 06paueHIO cAKKMyNrTOPOM
3aunuatae aKKyMnyTOp OT BnH N BObl.
XpaHHTe aKKyMylTOp TOnbKO B Dnana3oHe TempeTpO T -20°C 1050°C. He octaBnIte aKKyMylTOp IetOM B ATOMO6nne.
Bpemr O T BpemEn npouuAte BeHTnIaHIOHbIe Ipope3n AKKyMnyTOpA MRTKO, CYXON NCTOINKCTOOK.
3HaunTbHoe cokpaueHne npdoJnxteIbHocTH pa60tbl nocne 3apra CbndetBCTByeO CTapeHHn AKKMyIaTopa H yka3bBaet Ha Heo6xOHNOCTB erO 3aMeHbl.
YuNbBaIte Yka3aHnno yTnH3aun.
Texo6cnyKbHne n cepBnC
Texo6cnyxHBaHne n ouNCTka
Do hauana pa6ot no Texo6cnyxHBaHIO, cMehe HnCTpymEnTa nT.Д., a TAKKe npn TpaHCnOpTHpOBKe n XpaHeHHN N3BnEkaTe AKKyMnIaTOp n3 3eK- TPOHNCTpymEnTa. PInn HepeHaMepeHHOM BKNIOueHHN BO3HnKaet ONaCHOCTb TpaBMnPOBaHHa.
Длгобсесенькауесьн Ho 6e3oNaChOH pa60TbI coDEpXHTe 3NeKtpOnHCTpyMeH N BeHTNIAHnHbI npope3N B YHCTOTE.
KpenneHn nIbHoro noOnTHa nyuWe BCero OuyuAtb MmKoN KIOCTOcKO. Jnra 3TOr BO BbHbTe NIIbHOe NOOTHO 3JNEKTPONHCTpyMeHa. PndepKHBaTe rHe3do dYcTaHOBKN IIIBHOrnoNoTHa B pa6ooyem COCTOHH C npIMHeHNEM pnpOrDhBx CMA3OHybIX CpEcdTB.
CnIbHoe 3aRpa3HeHHe 3eKTpOnHcTpymHa MoKeT BecTH K HapyuHEnIO fYHKuOHaNbHO CNOCo6HoCTN. N03Tomy He pacnINBaIte MaTePnaJIbIC CnIbHbIM NblneOp6pa3OBaHem CHN3y HnHn HAD rONBOJ.
CepBn KOncynbTnpoBaHne No BOpocam npMeHeHH
CepBnchbOtDenOTBeHTHa Bce Baun BonpoCbI no peMOHTy IobcnykBaHIO BaWero npOdykta, a TaKKe no 3anYactrM. N3o6paKeHnC npocTaHCTBeHHbIM pa3deneHnEM DeNaTe INHOpMauHNO 3aNuaCTM MoXHO NOCMOTpeTb TAKKe no anpccy: www.bosch-pt.com
KoNneKTHB COtpyDnHKnOB Bosch, npedocTabnaIounn KOHCyNbTaunn Ha npedmet HcNoJIb3OBAHHn npOdyKUnn, C yIOBOBbCTBmE OTBETn HA BCE BaUN BONPOCbI OTHOCTeHb HOaWe npOdyKUnn N ee pInHaJdNeXHocTe. POnkanyIcTa, BO BCEx 3anpcax n 3akazx 3aIpaTcEn o6raTeBHo yka3bBaIte 10-3NaHbI TOBapHbI HOMep no 3aBODcKoI TaIIuKe H3dennr.
DnpernoHa:PocnH,Benapycb,Kaaxctan,YkpanHa
FapaHTnHoe 06cnyKbAHne H peMOHT 3NeKTponHCTpyMeH Ta, C cO6IIOHeHem Tpe6oBaHN HOpM I3rTOBtEnI npOn3BOJATC H TePPNTOPHN BCe X CTpaH ToIbKO B @npMeHHbIX nIN ABTOpN3OBaHHbIX cepBNCbIX ueHTpax «Po6epT BoU”. IPEyIPeXKeHNE! McNoJIb3oBAHN KOHTpaKaTHOH npOdyKUn ONaCHO B 3KcNlyatauHN, MoKet pNPBeCTN K yUepe6y dIra BaWero 3dOpOBb. I3rTOBHeHne I pacnpoCTpaHene KOHTpaKaTHOH npOdyKUn ppeCneJeYETCA NO 3aKOHY B aMHHnCTpaTHBOM N yrOBoBHOM NOPAKe.
Pocchra
YIOnHOMOeHHaN3rTOBbTeNEMOrpHaN3aUa:
OOO《PObepT BoW》BaWytHnCkoe Wocce,Bl.24
141400, r. XmKn, MockoBCKa o6n.
Tei.: +7 800 100 8007
E-Mail: info.powertools@ru.bosch.com
www.bosch-pt.ru
Genapycb
IIN «P6ept Bou» 000
CepBnchbI ueHrpo 06cnyxBaHHo 3neKtpOnHCTpyMeHa yN.TmnpraeBa,65A-020
220035, r. MHHCK
Ten.: +375 (17) 254 78 71
Ten.: +375 (17) 254 79 16
_aKc: + 375(17)2547875
E-Mail: pt-service.by@bosch.com
OΦηιαλήβόν caɪnt: www.bosch-pt.by
Ka3axCTAH
LcHrKoHCyIbTnPoBaHnI npHeMa npTeH3nI
TOO «Pobepr Bow» (Robert Bosch)
I.AmAtbl,
Pecny6nkaKa3axCTaH
050012
yn.Mypat6aeba,180
BU «Fepmec», 7n3tax
Ten.: +7 (727) 331 31 00
a_Kc: + 7 (727)2330787
E-Mail: ptka@bosch.com
POnHyIO nAkyaIbHyIO HnΦopMauHIO o pacnoJooKeHH cepBnCHbIX CEHTPOB NpHEmHBIX NyHKTOB Bbl MoKTe NOyUHTbHa OoHuaJIbHOM caHTe:
www.bosch-professional.kz
MondoBa
RIALTO-STUDIO S.R.L.
ApmenHn,A3ep6aJxKan,Ipy3n,KpRn3ctan,MoHroIHH,TaXKNKCTAH,TypkMeHNCTAH,Y36KeNCTAH
TOO «Po6epT Bow» (Robert Bosch)
Power Tools noclenpodaakhoe o6cnykBaHne npocnKeT Paibm6eka 169/1
050050 AImatb, Ka3axCTaH
Cnyke6haa n. noya: service.pt.ka@bosch.com
OΦηιαλβήν Βe6-caɪT: www.bosch.com, www.bosch- pt.com
TpaHcnopTpnoBka
HaBIOXeHHbIe IITHeBO-HoHbIe AKKyMyIaTOPbIe 6aTapei pacnpoCTpaHJIOTc Tpe6OBAHIN B OTHoWEHN TpaHCnOpTNPOBKN OnaChbIX rpy3OB. AKKyMylAToPbIe 6aTapeN MOrTy nepeBO3HTbcr CaHMM NOLb3OBATeJEM aBTOMo6HbHBM TpaHCnOPTm 6e3 Heo6xOIMocTH co6JIOneHn DOONHHTeNbHbIX HOPM.
PnnepeBo3Ke c npBneHem TpeTbX NtU (HaNP.:cAmO- letom HIN TpaHCnpTHbIM 3KcNepHTOpM) Heo6xOJIMO
co6nOdaTbOC6bIe Tpe6oBaHnKynakOBKe HmApKnPobKe. B3OMcnyae npNnOtroBKe rpy3a KOTnpaBKe Heo6xOmo yuaCTne 3KcnepTa noOnachbIMrpy3am.
OtnpaBnIte AkkymnyTopHy6batapeoToNtboKc HenOBpeKJdeHHbIM Kopnycom.3aKnIeTe OTKpbTbe KOHTaKtBu HynakyIte AkkymnyTopHy6batapeoTak,UTobbOHa He nepeMeUaIacb BHTpyuNaKOBKn. IoxKaIyIcTa,co6IIoJaTe TaKke BO3MOXHbIe DOnONHITbHbIe HaUNHOHaHbHbIe PpeINCaHNH.
Yttnn3aun

3NeKTPONHCTpyMeHTb,akkyMnyATOpHbIe6batapei, npHaNAdnEaXHOCTm UyApKObKY HxKHO cBaTb Ha 3KoNOrnueCckn UcCTyO peKynepaIIO.

He BbIbpaBbIaTe 3neKtpOnHCTpyMeHTbI aK KymyTApOpHbIe 6atapEn/6atapeKn B 6bITOBm MycOp!
(DaHIOPO3NNHOBAAHEpeBOCTpyKOBNXnnHTuHHI 1n3aT0BOKTOBUNHO20MM.)
3a3haeHbux Bkazibkax pibeHb BiopauiipibeH emicii
WMy BmPiobanr 3a Bn3HaueHOB CtaHapTAX
Ipoedypo;HMMOxHa KopcTyBaTHCn DnnpIBHH
npnaiB.BoHn Takox npdaTHd nnonepenbooi ouHKn
pIBra BiopauiipibH emicii WMy.
3a3haeH i pibeh bipaaui i pibeh emicii wmy CTocyotbcra OCHOBHNPO6iT, nA RAKX 3actOCOBycBcra eekptiHCTpymEn. Ondak y pa3i 3actocybaHH eekptiHCTpyMeHa dna IHwN xpo6it, po60TH 3 IHWM npnanaam a6o y pa3i HeoctaTHbOrTo texHCHoro o6cnryobvbaHH pibeh bipaaui i pibeh emicii wmy MOxytb 6tynIHWMn. B pezylbati pibeh bipaaui i pibeh emiciu wmy npOTROM BCbOro po6oOro acy moxytb 3HAHO 3pOCTn.
Дя touhooi ouiHKn pIBH BIBpaui i pIBH emicii wMy notpiibHO taKoX BPaxOByBatn intepBaun yacy, KOJI n eEeKtpoiHcTpymET BIMKHeHn abo, xOua yBIMKHeHn, ane paTNUHO He npaioe. Lc moKe 3HaUHO 3MeHUNTH cyMapHn pIBeH BIBpaui i pIBeh emicii wMy npOTAROM po6oYOr oacy.
Bn3haute doataKobia 3axoJn 6e3neKn nIra 3axncty onepatopa enektpoiHCTpymeha BID iBipaui, Hap: texhuihe o6cnlyrobyBaHHra enektpoiHCTpymeha i p06uHX IHCTpymehiB, HarpiBaHH pyk, orpHaizai po6ounx npocecib.
MoHTax
Ipeedycima MahinnyaizmaH3eneKtpoinctpymentom (Hanp.,TexhiHMMoCcyroBvBAHHM,3amHOIO p6o0rO IHcTpymeHTaTOO),aTAKOX npn Horo TpaHCnpTyBaHHi 36epirAHNI BmMaite akymyAToPhy 6atapeo 3 eKeTPOIHCTPymENTy.Pn HEhabMNCHOMY BKJIoueHHI BmNkaa icHyc He6e3neKa nopaHeHH.
3apxkHnakymyTopho6ataeii (INB.MaI.A)
BnKOpNCToByTe NHe 3apAHi npCtpoi, 3aHaenI B texHIN DaHIN. Hne Ha ci 3apAHI npCtpoi po3paxOBAH nIIEBO-IOnHH aKyMyJATOP, 10 BnKOpNCToByEtbc y Baowmy npnadi.
Bka3iBka: AkymyIaTOpHa 6aTape nocTabnEbCra YactKOB3apJKeHO. Uo6 akymyIaTOp mI pean3yBaTH CBOIONBHy EMHicTb, nepeD Tm, AK nepuN pa3 npaioBAtN 3pnpiaOAm, akymyIaTOp Tpe6a NOBHcTIO 3apJdHTy 3apJdHOMy pncTpoi.
IITICBO-IOHNN akymyIaTOp MOKHa 3apdKaTH KOHN 3aBROHO,ue He cKOpOyuE Horo EKCnnyaTauiHH peCypc. IpepeBaHnH npouecy 3apdKaHH He nouKoDKye akymyIaTOp.
IitieBO-ioHHn akyMnyTOp 3axHneHN BiD rN6OKoPo3pndKaHn CnTeMoIO „Electronic Cell Protection (ECP)".
120|YkpaHcbKa
Pnpo3paJKeHMy akymnyTopi npnaIad 3aBAnK cxemI 3axHCTy BmHKaTbCra. PobOuH IHcTpymeH 6InbSe He pyXaETbCra.
Pnicra ABOMaTHUHO BHMKHaHH enektpoinctpymenta 6inbue He HauNCKyute Ha BMMKaU. Lc moKe NooKoDHTn akymyIaTOpHy 6aTaapeio.
Uo6BHTn akymyIaTOpy 6aTapeo (4).HaTHCHiTB Ha KHONky po3bOkyBaHHra (5) IBITRHTb akymyIaTOpy 6aTapeo 3 eNEKtpoiHCTpyMeHa,notARHyBun II DOHN3y.He 3actOCOByTe npu cBomy Chny.
IIndkaTOp 3apJxKeHocti akymyIaTrophoI6bataeI
IInkatoP 3apJxKeHoctaKymnTOpHoi6batapei (10) noka3ye npn HanoOBHy aO NobHCTHO HATCHYOMy BmHKaui7 npotrom dekinbKOx cekynctah 3apJxKeHoctaKymnTOpHoi6batapei I Mae 3eenei CBITIOIOHN.
CbitioaEMhictb
CbivHn3-x3eneHHx≥2/3
CbueHHN2-xaeneHnX≥1/3
CbueHHRA1-03eneHoro < 1/3
MuraHHa 1-ro 3eHeHoro pe3epB
Kkuo nicna HataNcKaHHHa BmHKaU (7) KOeH cBtIIOio He 3aropaeTbca, akyMnAToP BnWOB 3 nay i Ioro Tpe6a 3amInHTn.
MOHTAX/3aHa HNkoBoro nOToHa
Длma montaxy a6o 3amHH npnaIaIg o6ob'raKOBOBBraIte 3axnchi pykabuI. PpnaIaIg roctpe ta y paaiTPBaIano BHKOpncTaHH MoKe Harpibatncr.
KoH 6yTe MInrTH NnKOBe NOIOTHO, CNIkyte 3a TMM, uO6 y rhi3i niD nNkoBE NOIOTHO He 6yno 3aHHKIB MATEPIANY, HAnp., DepeB'raHOI THPCN Ta MetaneBoI CTpykKn.
Bn6ip nIkoBoro nonoTHa
Ornaid peKOMeHIOBaHnx nIKOBHX nOToTe Bn 3HaJeTe B KIni ci iHCTpykui. BHKOpHCTOByTe IINHe nIKOBi NOnOTHa 3YHIBepCaIbHM XBOCTOBKOM 1/2". NnIKOBe NOnOTHO He NoBHHBe 6TyN IOBWM, anIX ce Heo6XiHNO dJa 3aIIaHOBaHoro npopiy.
Mohtax nIikOBoro nonoTHa (nB. Man. B)
IbepHtB cTOnOpHy rInb3y (3) npn6n. Ha 90^ 3a cTpIkoHO i npntpmaTe ii. YtnchITb nIKOBe NOnTOHO (1) B KpInneHH aIra nnKOBOro nonOtha (12). 3HOBy BiDnyctITb cTOnOpHy rInb3y.
IOTARHYBWH 3a NIIKOBENoTHO,nepeBipTe MiHictb nocakn. NIIKOBE NOItoHO,IO He 3aΦikCyBaNoCry, MOKe BnnaCTi npaHTn Bac.
3a NeBnX 06CTaBnH NINKOBe NONOTHO (1)MOKHa NOBepHyTH Ha 180° (uO6 3y6b DNIBINNCYrOpy) Ta BCTPOMNTI B UcBMy NIOJKeHHI.
BnMaHHa NnIKoBOrO NoNoTHa (Hb.MaI.C)
Ipeed THM,AK BnMaTH NIKOBE NOOTHO,DaHTe My oxoohyTH. TopKaHHdo rapayoro NINJIbHOro nonoTH hece B cobi He6e3neky npaHeHH.
Nobephitb ctonophy rinb3y (3) npn6n. ha 90^ 3a ctpinkoip npntpmaTe II. 3HIMITb nIKOBe nonOTHO (1).
BiDcMoKryBaHHnHny/TnpCh/ctpyx
ПинТахнМатерialsяннл.ДakФарбOBи NOKpNTb, 卢MICTЯтсCBHHeBDEAKHX BnID DEpeBHHMHEpaniB i MetaIyMOKE6yTN He6e3neuHIMIIN3dOpOB'.TopKaHH aBOBnxHaHnIpyMOKe BnKnKaTHy Bac a6o y oc6,UO 3HaxOJaTBcnoBn3y,aneprHi peakuiTa/a60 3axBOPOBaHHNdxanbHNxJIAxIB.
PbHn Hny, kHapp., dy6OBn a6o 6yKOBn nnn, BBAkAOTcKa KAneporeHHMmOc0bnBOB COnnyeHHi 3 doabkamn dna o6p6Kn DepeBHN (xPOMaT, 3ac0n dna 3axNCTy depeBHN). MatepiJIn, uO mCTa36ecT, Do3BOJAEbCn 6p6nT nHne CneuianiCTam.
-
Cπiδκyīte 3a do6pòo Bēntnlaicio Ha pòbocomy Micci.
-
PekomEnyETbcBdIaTn peCnipaTopHy MACKy 3
φiNbTpOM KIacy P2.
Idoepjyteca npnnicB 0do o6pobbaHx matepiianb, 0do diotb y Bauii kpaiiHi.
YHKaTe HAKONuHEnHa NaHa po6Omy Micci. MoKeJeERKo3aMAtnca.
P06ota
Noataokpo60tn
BctahOBnHeHHaKymyTOpHoi6Taapei
BkaibKa:BnKOpNCTaHH akyMnyTOpHx 6aTaapei,io He ep np3HaueHmIM nIy cIbO eNeKTpoIHcTpymeHTa,MOKe np3BeCtNo nepe6oIB y po6ti abo noWkoJkeHH eneKTpoIHcTpymeHTa.
Ппнсить ФКСТОР BMKач(6) npabopyu,цo6 3axHCTHTEN eNEKTPOIHCTPymeHT BiD HeHaBMnCHOrO yBIMKHeHH.
YcTpOMITb 3apAkeHy akyMnyIaTOpy 6bataeO (4) y KpiINeHHn IIN AkyMnyIaTOPOHO 6bataeI TAK, IOB BOHa BIDuyTHO yBIiWna Y3aenneHHN I HAIINo 3aqiKcyBaIaNbC.
YbIMKHeHHBbIMKHeHHa(Hb.Man.D)
Uo6 yBIMKHyTH eneKtpoiHCTpyMeHT, cNoaTky npNTnCHITb
fikcatop (6) liBOpy. Notim HATnCHITb Ha BmNkaq (7)i
TPHMaTe NoRo HAtNCHeHM.
OcbitIOBbHcBtIOJbMnKaeTbcypa3iNerKOro a0b NOBHOrHaTNCHeHHa BmHKaU(7)iD03BOJIe OCBITIOBaTHpo6Oy3OHyp3i HeIOCTaTHbOro 3aRaIbHorO OCTBineHH.
Uo6BMMKHyTH eneKtpoiHcTpyment, BiDnyCTiB BMHKaay (7).PiCnIy zuoro 3HOBy npHTNCiTb fikcatop BMkkaa (6) npabopyu.
PerynIOBaHHaCTOTxOaIB
Yactoty XoJiB YbIMKHeHOrO eNEKTpoIHCTpyMeHTa MOXHa INaBHO peryIIOBaTH 6iNbWM Ue MeHWM HaTcKaHHM Ha BmNKa4 (7).
PnIerKomyHaTnCKaHHiHaBmHKaU (7)
eNEKTPOINCTpyMeHTnpaIOE3Hn3bKOIOyAcTOIOXoJIB.13
36ilbweHHM CnHnHaTnCKyBaHHy AcTOTA XoJIB
36ilbwyETBCra.
Heo6xHa qactota xOjIB 3aneKHTb BID o6p6nIOBaHOro MaTepiany, Bu3NaUYTH II MOKHA IINXOM npaKTNUHnx Cnpo6.
Pekomehyetyc3MeHunTHuactOtyXoJIBnpiNocadui nIKOBORo NOnToHa HObpo6JIbAHm Matepian i npn po3nnIOBaHHI NaCTMaHc I anKMIHO.
Pn trpbanipo60i3 mIoHO qactotoxOxIDB eNKTponpnaD moKe CNbHO harpibatnc.BHIMtB nIKOBe noItoHO i daTe enekTponpnaDy nonpaioBaTH IraoxoJIOkeHH np6bl.3XBNI.3MaKcImaJIbHOU qactotoXOiiB.
INHikatop KOHTPOIO 3a TemnepaTPOIO/3axNCTy BID nepeBaHTaKeHHA
UepBOHn iHnKATOP KOHTPOIO 3a TemnepaTPOIO/3axNCTy BID nepeBaHTaKeHHN (9)DOnOMara 3axNCTHTN akymIaTOpHy 6ataeIO BID neperpiaBHH, aDbriy-H -BID nepeBaHTaKeHH.
IHKIO INHKAtOp KOHTpOIO 3a TempepaTPO/O/3axHcTy BIN peBaHTaXeHHN (9) noCTiHNo CBITbCayepBOHUM KOnbOpom,ue CbiuNTb npo nepeBnueHHA TempepatpyakymJIaTOpHOI bataei i npn3BOJrTO abTomauHOrOBHMKHaHH eneKTpoIHcTpMeHTa.
BmKhItb eneKtpoiHCTpyMeH I daTe akyMnyTOpHi 6atapei oxonohytn, nepHIHX npoDobkxyBatn npaObatn.
BnMaHHa iHnKaTopa iHnKaTOp KOHTpOIO 3a TempepaTyPO/O/3axNCTy BiD nepeBaHTaKeHHA (9)
YepBOHMMKoJIbOpOMO3HaJaE,IOeNEKtpoiHCTpyMeHT 3aKNHHNO,I BIn aBTOMaTHUHO BMnKaεTbcra.
BttarHitbe enektpoiHCTpyMeHT 3aTOrOBKn. TInbKn-Ho 3aknHeHHy Bye yCyHeHe, enektpoiHCTpyMeHT npOobKye npauOBaTH 3 HanaTObaHO YoactotoXoJIB.
Bka3iBkn 0o0po6oTu
Ipepe ycima Mahinnyuimn 3 eneKtpoinctpymentom (Hap.,TexhiHm 06cyroBvBaHHM,3amHO pO6oYoro IHcTpymenta too),a TAKOX npn HOro TpaHcnpTyBaHHi i36epirahHH BnMaTe
akymnatorphy 6atapeo 3eneKTpoHCTpymemy. Pn HehaBMCHOMY BKNIOUeHHI BMHKaua icHy He6e3neka npaHeHH.
HeraiHo BHMKHITb eNeKTponpHnA, Akuo NnKOBe nnonToHO 3actpIra.
Popadn
Pnpo3nnIOBAnHI IerKHX 6yIDIeBbHIX MaTepiAnIB 3BaKaIte Ha 3aKOHOdAci npHInc H peKOMeHaauB BRTOBIOBbAca MaTepiAny.
Ipeep TMM, kP03nIOBAt NdepeBHy, DepeBHOCTpyKKOBI nTTN, 6yIDBeNBi MatepiAn ToTo, nepeBiPe, uHema B Hx yJXopDHN tIn, Hanp., CBxIB, WypynIB T.i., Ta BHKOPNCOBYte BiNOBIDHe NIKKOBe INoTHO.
YbIMKHTb eeneKtpponpnaad i niBedeTb horo do 06pb6nOBaHOr MaTePiaIy. PnucTaBeOnOpHy nNITy (2) do 66pb6nOBaHOi NOBepxHi i pO3nnIOHe MaTePian 3
piBHomipHm npHTnckyBaHHa 60 piBHomipHOIO noaueio.
Piicra 3akHeHH po6ooyoI onepaui BHMKHITb
eneKtponpnaad.
Ypa3i zaknHHeHHI INIKOBORIO NOIOTHa HeaHO BHMKHITb eNEKTPoPnpAad. 3a donOMorOIO npndaTHOrO IHCTpyMeHa t po3BeIDt uINHy Ta BNTARHITb npnAad.
P03HIOBAAH H3aHypIOBAHHM (INB.MaI.N.E)
Po3nHIOte i3 3aHypeHHAM NIKOBORO nonoTHa nIwe M'aki Matepiann, Hanp., depeBnHy, rincokapton I t.i.! Po3nHIOBATM metan 3aHypeHHM NIKOBIM nonoTHOM He d03BOJAEbcra!
Ipa03nHIOBAHHH 3aHpyOBAHm NIKKOBOro NOOTHa BHKOPHCOTByte NIIe KOpOTKi NIKKOBi NNoTHa.
BctaHOIBt b eNKTPOIHCTPymeH KPMKOIO ONOPHOI NINT (2) Ha 3aROTOBKY, He TOpKaIOUChb NNKOBHM NOIOTHom (1) 3aROTOBKN, iYbIMKnITb HOrO. RaKIO eNKTpOpiuad 6bnHaHnH peryIaTOpom qactOTn XoIDB, BCTaHOIBt MaKcImaJIbHy qactOTy XoIDB. MiUHO npITNCITb eNKTPOIHCTPymeHT Do 3aROTOBKn I daTe NIKOBOMY nONTHy nobInbHO 3arInbNTCHy 3aROTOBKY.
PnIraTIO 606pOIBaHO 3aROTBK, npOBOyTe pO3NIOBAt y3D0BX 6bKaHOI Hii.
Длп NBHnx po6it nHkoBe NOIOTHO (1) MoKHa BCTpOMHTN, NOBepHyBwH NOro Ha 180°, aTakOx BeCTH eNEKTPOiHCTpyMeHT, nepeBepHyBwH NOro BiNObiHNM yHOM.
OxonoJyBaIbHn/MactIbHn3acSi6
Ioo6 3ano6iTn HarpibaHIO MaTepiany npn po3nnIOBaHHI MetanIB,y3oBx niiHII po3nnIOBAHH Tape6a HaHeCTN oxoJOnjyBaHbH/MactnblHn 3ac6.
Bka3iBKNIooOnTHMaJIbHOro NOBODKeHHa akymyIaTOPOM
3axuainteakymyIaTOpBIDBOIgNIBOIN
36epiraTe akymyIaTOp Inue 3a TempeIaTpRbI -20°C Do 50^ 3okpema, He 3aIIuAte akymyIaTOp BnITKy B MaunHi.
YacBIDyacy npouuaiTe BENTnIaHHiOTBOPn akymyTota m'kHM, uCTHM i cyxHM ne3NIKOM.
3aHaTTO KOPOTKa TpBAnictb poBTo Niicn 3apJxHnCBiDHTb npo Te, 00 akymyIaTOp BvpePnaB ce6e i Ioro TpeBa nomIHrN.
3BaKaJTe Ha BkaziBKN ⅢOIO BnJaJIeHnI.
Texhiue o6cnyroBybaHHia cepBic
Texhihe 06cnyroByaHHiaOuHceHHA
Ipeed ycima Mahinnyuimn 3 eneKtpoHCTpymeHTOM (hanp.,TexhiyHM o6cyroBvBaHHM,3amHO p06Ouro IHcTpymeHTaTOO),a TAKOK npn Horo TpaHCnopTyBaHHi i 36epirahHi BmMaite akymyTOpHy 6ataeio 3 eneKtpoHCTpymeHTy. Pn HehabMNCHOMY BKIOUeyHHi BmNkaua icHy e He6e3neKa nopaHeHH.
Дляяк hoi i 6e3neuhoi po6oTH TpHmaite enektpponpaiaBHTnuaHni OTbOpN BcHcTOni.
OuHuaTe rH3oPiNnKOBe noNtHO nepeBaXHO M'KHM
neH3nKOM.ДЯ zuBO BRaTHiB nNKOBe noNtHO 3
eneKTPponpnaNy.PiTprMMyTe rH3doPiNnKOBe noNtHO
Bpo6ouomy cTahi 3 BHKOPHCTAHNM npndaTHOro MaTHHa.
CInbHe 3abpydHenn H eektpponpnaNy moKe npn3BoNTn
do BiIMOB y pOboti.Tomy He po3nnIOte MATEPIA, BiD
kNXy TBPOHoETCB Nn, 3HN3y a60 HaI rONBOO.
Cepbic i koncynbtaqii 3 nHTaHb 3actocybaHHA
B cepbichm maCtepHi Bn OTPMaCTe BiNIOBIB Ha BaWi 3aHTaHH CTOCBOH pemOHTy I TEXHUYO bcnyROBYaHH BaWOro npOkyTky. ManIOHN B Detanx i HOpmaIIO 3aUCATHM MoKHa 3HaHTN 3a aIpecoIO: www.bosch-pt.com Komahda cnIBPobitHKnIB Bosch 3 hadaHry KOHCyNbTaui 10do BVkOpHCTAHn npOdyKuii i3 3aIOBOJIeHHAM BiINOBICTb Ha BaWi 3aHTaHH CTOCBOH HAIOT npOdyKuII Ta npInaIDo Hei.
PnBcixdoaTkoBNx3aHTaHHxTa3aMOBneHHi3aHCAtNH, 6yNbNaCKa,3aHaayIe10-3HaHmHHomepdna 3aMOBneHHN,OoCTOITbHaNaCnpTHI TabnucipnoDkyT.
TapaHTiHe 06cnyROyBaHHI pemOHTENEKTPoIHCTpyMeHTy 3diHCHIObTaB CiNIOBIDHO IO BIMOr I HOPM BnTOOBIOBaHa TepntopBicX KpaIH NHeUe y fipMOBHX a6o ABTOPa3OBAHHxCepBICHIX CEHTpax FipMN «Po6ep Bou». IONPEJXKEHH! BnKOpNCTaHH KOHTpapakTHoi npOkyu HebeaneueH BeKcNpyataui i MoKe MaTH HeratNBHl HaCNIKn DnIz3DopOB'a. BnroTOBLeHHI pO3NOBCIQKeHHK OHTpapakTHoi npOdykui nepeciNHyETbc3a3aKOHOM BaMIHCtPaTHBOMY i KPMiHaNbHOMY nopdKy.
ykpaiHa
Bou CepBicHH LcHTp eJekTpoIHCTpyMeHITb BYn. KpaHr 1
02660 KIIB 60
Ten.: +380 44 490 2407
ΦaKc: +380 44 512 0591
E-Mail: pt-service@ua.bosch.com
www.bosch-professional.com/ua/uk
Aapeca PeriohaIbHnX rapaHTiHnX cepBichnx MaIcTepeHb 3a-3HaueHa B HaioHaIbHomy rapaHTiHOMy TaIHOi.
TpaHcnopryBaHHa
Ha doaHI nitiEBO-ioHHI aKymnTOpH6batapei
po3noBcIOJkyTOBc BmOtn Ioo TpaHCnOpTyBaHH
He6e3neuHX BaHTaxiB. AkymnTOpHi 6batapei MoKyTB
pepeBO3NTnCk KopNCTyBaueM ABTOMbIbHM TpaHCnOPTOM
6e3 Notpe6n BuKoHaHH DoaTkoHN HOpM.
Pnnepecnui tptimnooc6amn (hanp.: nobitprnHm TpaHCnoptom a6o tpaHCnoptHM ekCneiHTOpOM) Notpi6ho DoepkyaBATNC Oc06nBnx BmOR 1Odo ynaKOBKn Ta MapkyBaHHa. Y cboMy BnAky y nIroTOBci NOBHHeh 6paTHyuaCTb EKcNEPT3 He6e3neuHX BaHTakIB.
BicnnaTe akymyIaTOpHy 6batapeHo Inwe3 HenoKoDKHeHM Kopnycom. 3akneTe Bdkpti KOHTaTH Ta 3anaKyte akymyIaTOpHy 6batapeIO TAK, 0o6 BOHa He
COBaIaCByyIaKOBuI. DiOpMyIeTcA, 6yIb IaNcKa, TaKoK MoKJIbHx DoJaTkoBHX HaioHaJIbHx npnInCIB.
Ytunizaciu

EneKtponpnpnana,akymyIaTOpHi 6atapei, npnana i ynaKOBky Tpe6a 3daBAtn Ha ekONoriuHO uHCTy NOBtOpy nepepo6ky.

He BnKndaTe eNeKTponpnpnaTa akymyIaTOpHi 6atapei/6atapenB No6yToBe CMITTA!
Пишдя Крайс:
BIDIOIHO IO EBPoneCboKIO INpeKTHBN 2012/19/EU
eNEKTOIHCPTyMeHTN,IO BNIWNI 3BXHBHNA,TA
BIDIOIHO IO EBPoneCboKIO INpeKTHBN 2006/66/EC
noIKOJKeH aBO BINpauBoHAI akymyIaTPOHI 6atapei/
6atapeKN NOBHNI 3daBaTnCA OKPem i yTNII3yBaTnca
ekONOIuHO NcTmCNocobom.
AkymynlaTopn/6aTaapeKn:
Jiriiebo-oHHi:
Bynbnapka,3BaKaJteHaBka3iBnBpo3dini TpaHCnpTyBaHHa(INB.,TpaHCnpTyBaHHa" CtopiHa 122).
Ka3ak
Eypa3nna 3KOHOMNKaIbIK OdafbHa (KeDen OdaFBHa) Mywe MemLeKeTtep ayMaFBHda
KoIdaHbInaDbI
EHipuhiH eHIM yinKapacbipfah naDanaHy KxKaTApbHbH KypamHda naDanaHy XeHIDeriOCbl HcKaybnk,cohBmeH 6ipre KocbMwnap da bony MykH.
CaikektipactaykaibaknapatKocbImuaa6ap.
Ehimi eHnpiremMeIeKeTypanblaknapatEHIMH
kopnycbihdaXaneKocmbuaaKepeetiren.
EHdpinreH mep3iHyckaybIK Myka6acbIH COHFb6etihKepeCetirreh.
HmnpTepeKaTbIcTb6aNaHbCaknapatohim KaTAMacBHaKePcTeINReH.
Ehimi nai danany Mep3iMi
HIMHHKbI3MeTetyMep3iM7Xbl. HdipinreH Mep3imHe6bactan (hdpy KyHI 3ayBt TaKaTHaCbiHa) ictne5 XblCaTaFAHHa coH, hIMDi TEkcepyci3 (cepNCTIK TeKcepy) naDnanyycbHImaBl
Kb3METKeHemece naDanaHyybHbH KATENIKTepi MeH icTeH bIry ce6entepinT3imi
TtKacbMeH Kopnyc6y3bINFaH 60nca, EHIMi naDanaHa6aHb3
-ehimkopnycbihan tikenei tyTihbikca,naaanaHaib3
-TOKcMb6y3bJFaHHeMeCeOKuaynaycb360nca, naJaanah6aHb3
JkayBH-7aBbHKe3IHc6bIPTa(daIada) naIdanaHaBbI3
- Kopnyc iiwhe cy kipce KpybIFbHb Kocyub60MaHb3
KENyIKbIH WbIKca,naIdaIaNbHaB3
KaTbI Dipin Ke3iHne naJdaNaH6aHb3
Uekri kyn 6enrinepi
-TOKcbMbHbIHTO3yIHeMeCe3aKbIMDaHybl
-ehIM KOpNcBbH3aKbIMdanybl
Kb13MeT KepeTy Typi MeH XhIniri
Dp naHanaHyd aH cHimDi Ta3aay ycbHbnaBbl.
CaKray
KypfakKepe daTay Kepek
KOFapbI TemnepaTypa Ke3iHe HxHe KYN CaynepePiH, acepHe anbc caTay kepE
- cakay Kezihne TemnepaTypaHbIH KeHet aybitkybHaH Kopfay KepeK
- opamaCbI3 caKay MyMKiH eMEc
- cakay waprtapbi typanbi kocbimwa aknapat any yuH MEMCT 15150 (wapt 1) KxKATbH kappaB3
TacbImaIay
TacbImaIay KeiHne eHIMJI KynATyra XeHe Ke3 KeIReH MExaHHKaIbIK bKNaI eTyRe KaTaH TbIbIM CaJIbHaBbl
-6ocaty/jxkyteyKe3iHne NaekTI KbICaTBH MaunHaapn naDanahyf pyKcat bepinmeNi.
-tacbimaywaprtapbltananantapbH MEMCT 15150 (5 wapt) KxKAtbH Okblb3.
Kayinci3ik HycKaynapbI
3neKtp KypanapbI ywiH Xannbl Kayinci3dk HycKaynapbl
ECKEPTY
OcbI 3JKeKTP KypaJIbIHbIH KHHaftbHdArbl eckepTynepi,
Hcyaynapdbly, cypertepdi KHe cnnaTama npabdi
OKbHb3. BapnbK TeXnKaIbK Kayinci3ik
HcyckaybIKapbIHOpbIHdAmayTOKtbIHCOFYbHa,optKahe/ Hemece aybp KapakatTAHynapfa aIbIN KenyIMyMKH.
BonaawKxmbctap yinH kayinci3ik HycKaynbikTapbI Me h ckeptnenepe caTan KOBih13.
Kayinciik HcaynbikTapbHa nanaHbInFaH 3neKtp Kypan ataybHbH XeniDeH Kyat anaTbH 3neKtp KypandpaHb (XeniniK Kabeni MeHe) XeHe AKKyMnTOpEn KyaT aNaTbH 3neKtp KypandpaBHa (XeniniK Kabeni KOK) KaTbcIb6ap.
XymbicopbHbHkayinci3diri
XymbicOpbihTa3aXeHeXapbikYCTaHbI3.LacTaHaHxHeKapaHfBiKaJnapdaCtciOKfHanap6onybiMymiH.
3neKtp KpybIbIbIcIH XapblaTbIH atmocpepa naHaanah6aHbI3, MbIcAbl, XaHaTbIH cyBbIKbIK, Ra3 Hemece wan 6ap 6onraHda. 3neKtp Kypal YWKBHApDbl XacaNbI, an onap wan Hemece 6ynapbl XaHdbIpybl MYMKIH.
Bananap men 6akbinaywbnapdb3neKtp KypanbHa anbc yctah3. AnaHynap 6akbinay xofanyiba anbl Kenyi MymkiH.
3nekt kayinci3iri
3NeKtp aHbIpapbI po3eTkFa cai 6oynbI TnIC. AaBpIbI eWkaWah eWkaHdA Tepi3e 03reptneH3. Kepre KocBInFaH 3NeKtp KypanDapbIme H adAnTepe aHbPapbH naiDanaH6aHbI. 03reptinmerE aHbPap MeH Caikec po3eTKanap 3NeKtp TybIKTAybiHBiKayinIH ToMeHNTeJI.
Ky6bIpyap,paHATOpnap,nnHTanap MeN cyblkbIHTAP CnKtbl Jepre KocBlnFAH 6eTpe TmHeH3. DeHeH3 Jepre KocBlnFAH 6oNaCa KOFApbl TOK COY Kayini naJa 6oNaBl.
3NeKtp Kypanapdbj KaH6bpJa HEmece bInFaIbbl Kopwayda naaanaHa6b13.3NeKtp KypanbHa Kipreh cy TOK,coFy Kayinih KofapbInatabl.
Ka6enbdi Tnicti 60MaFaH peTte naDanaH6aHbI3. Ka6enbdi 3neKtp KypanbIH Tacy, KeTepy Hemece ToKTH WbIFAPy yWIn naDanaH6aHbI3. Ka6enbdi bICTbIKbIK, MaJ, 0TKip KbpIap JxHe XblXbIMaBbI 6bnweKTEpEN anbc YcTaMaHbI3. 3AkblJaFah Hemece 6blbcIN KETKeH Ka6enb Tok Cofy Kayinih XOFaPblnatabl.
3NeKtp KypaBn CbipTTa naDanaHFaHa DcbTKBi KaHap yin cai Ka6ebdi naDanaHbHb13. CbipTa naDanaHyfa JapaMdbi Ka6ebdi naDanaHy TOK cory KayinIH TEmeHdeNi
Erep 3neKtp KypalbH bINFaNbI Kepe naDanaHy Kepek 6oNa, OHa KaPraTbH eWipy KpybInfbcB (RCD) apKbInbI KOPaFAnr ToK Xenicin naDanaHbHb3. RCD naDanaHy ToK cOry KayinIH TMeHeTeJI.
KekeKayinci3ik
3NeKtp Kypanbl naDanahyda aba6bnb13, XymbicbHb13bl 6akblnHb13 Xahe npacatbl naDanaHb13.3NeKtp Kypanbl wapwafah Ke3de Hemece eciptki, anKoronb Hemece npep etken Ke3ne naDanaH6aHb13.3NeKtp Kypanbl naDanaHy Ke3iHe aHcblk aybp JKeke kapaKaTTaHyf aBIn Kenyi MYMKIH.
KKe KOpraTbH Xa6bIbKTapBn naDanaHbHb3. 0paHbIM Ke3 KopraHbICbH TaftbHb3. HaMaCKacbl, cbPraHbAaTbH Kayinci3ik aR KImdepi, IeM HeMece eCTy KOpraHbHTapbl CnAKTbI KopraBtJ Ka6dbTAPbl Tnicti XaFaDaNapda KOJaHaBn XeKe KaapaKaTaHynapbl KemeTei.
Ke3neCOKicke Kocbinydbin anDbih any.ToK Ke3iHe XeH/Hemece 6aTapeanap KInHaftbHa KocydaH anDbH, KypaNbIb KeTepy Hemece Tacydah anDbH eipriu wix Kyide bonybHa Ke3XeKti3iH3. 3NeKtp KypaNbIH CaycaKtbl eipriuKE KoBnT Acy Hemece KockbIbIb Kocybl 3NeKTP KypaNbIH TOKa Kocy catci3 OKfara aBnI Kenyi MYMkiH.
3NeKtp KypaBih KocyDah anDbH KeRHe peTrey cbHaCbH Hemece KInTi anBn KoBbHbI3.3NeKtp
KpyaIbIHbI aHaHaIbIbH 6eIirHe KaIFaH KInT HeMece cblHa XeKe KaapaKaTTaHyFa anbl KeJyIMKIn.
Ken Kyu icTeTneH3. OpaBIM Tnicti TaHbIe NnEH canMaKaBtBikkTb CaTaHbI3. By Kytimmereh KaFdaanapda 3NeKtp KypaBn6aKbIaNHybIn CaKaTaNbI.
Thicti KIM KINH3. BOC KIM MEH awekeinepdi KIMMeH3. WauhBb13 6en KIMdepej XblXbIMaIb6eWekTepeH anbc yctah3. BOC KIMdep, awekeinep HeMece y3bIH Wauw XblXbIMaIb6eWekTeap apKbIb TaTbpIybi MYMkH.
ErepwahbifapbnxHayka6dbkTapbHaKocy Kpybfnbnapb6epnireh 60nca,Onda onap Kocynbl 6onybHaXHeTicIpeTteKoandahyBaKa3 XeKti3iH.7aHxHHaybnaJdanaHywaFa 6aNaNbCTb3nHapDkeMeTeJI.
Acanantrapbki naindaanahbnj kacbsiinrenhencoh Macaipan KeTneKayincidn pnhunntepih enemei OTbIPMaHbI3.A6aCb3apekETcekynd iwiHde aybp Japakatahyfa anbIn KenyIMMkiN.
HA3AP AYdAPbHbI3!3HeprnmeHxa6dbkTaydbH TOblkTae He XeKeene ToKtaBlybHEMece 3HeprnmeHxa6dbkTaydb6ackapy T36eriniH akaynahycandaapbHaH anektp KypaNbHbH jxmbicbHa kipic naJa 6onfah KaFdaJa, 6yfaTaNMaFaHbIFbHa K03XeTkizin (6onfah XaFdaJa) 6apbn, axbpAtpkbHbBbKn. (Owipy) KaNbHa KentipiH. Keninik awabH po3EkaDAn bIfapbH3 Hemece anbin - canManbl aKKymyTAOpDbAxbpAtpbHb3.Ocbapeket apkbl b6akblanbHaBtBnKaTa icke KocbybH anDbH anacbl.
3neKtp KypaIapbH naiJaIaNHy KHe KTy
KypanbI aca kon kYkTeMeH3. KymbcIbHb3 ywin XapamdbI 3neKtp KypanbIH naDanaHbHb3. KapaMdbI 3neKtp KypanbIMeH KepeKTi Kymblc aHaMaftbHda dypbc api ceHimdi Kymblc icTeic3.
AkpapkblbDpybcemec3neKtp KypanbH naDanaH6aHbI. Kocyfa Hemece eWipye 60MaHTbH 3neKtp KypanblKayinti 60bn, OHbXeHDey KaKeT 60anaBbl.
Ka6dbikapbpeTey,6onwekTepiH anMaCTbipy Hemece 3neKtp KypanadpbH KOIMaFA KOHO anDbHda, auaHbkyat Ke3iHeAkbipatbHb3 XaHE/Hemece AKKyMnIaTObI anMaBc-CanMaBc 6oNca, OHb 3neKtp KypanbHAn anIn TactaHb3. BycakTBk apeketi 3neKtp KypanbH 6aikaycb3 KocbnybHa KonBepMeNi.
PainanabHbIMaHTbH 3neKtp Kypanapdb6anapanp KOJIxETneTIn HkaFA KoBHbH3. OcbInapdb6inMeTH HEmece oCbE cKePTnenepeIOkIMarAH aamdpfa 6yn KypanDbI naJanaHya JoxbepMei3. Takiip6eci3 aanamap konbHa 3neKtp KypanapbKayinti 6oana.
3neKtp KypanapbHm MeH KepeK-kaPakTapbH ykbIntbI KYriH3. Ko3ranmbl60nweKtepdiKepeprici3 icteyine Xane Kentenin KanMabyHa, 6nweKtepiHa akycbi3 HeMece 3aKbIMdaMaHaF 6OyBuHa, 3neKtp KypanbHbH, 3aKbIMdaMaHaBHa K3 xetKi3iH3.
3aKbIMdaHaH 6eWKeTepi 6ap Kypanbl
nAaIaNHydAn aIbIH XeHEni3.3neKtp
KypanApbHbIH DpybcIC KyTInMeyi Xa3ataBIM OKFaIapFa
ce6en 6oBnXaTaDaI.
KeckiuacnantapdbIeKipxaneTa3a Kyide caKaTah3.IpybckytinreHxane Keckiu xneKTepi eTKip Keckiu acnantap a3 Kentenin, KecineTINbETke Ohaia 6aBbTTanaDbI.
3NeKtp KypanbH, Xa6bIKTapdb, anMaNb-canMaNb acnantapdbixane T.6.ocbHyckaynapfa ca nnaDanaHbHb3.CoBImeHNyMbICwapTTapmbEm opbIHdAaTbHpeKeTepreHaapayapbHb3.3NeKtp KypanpaBH apHaMraHxMybICTapda naDanaHy kayinti.
KontyTKanap MeH KapMay 6eTTepi Kypfak, Ta3a XKeHe MaH MeH NaCTAH Ta3a YcTaHbI. CbIPraHaK KONTyTKanap MeH Kapmay 6eTTepi KYTImMerE H KaFdaNapda ceHIMDi KOnDaHy MeH 6aKbInayFa Kon 6epMeiDi.
BaTApEn KypaBIn naiDanaHy KHe KTy
Tek eHdpuyi cHnattafan 3apraTafbIWMen KaTAta3pAraTahB13. Batape JHHaFbIHbH 6ip Tpyine caJ 3apraTafbIb6acKa batape JHHaFbIMe H KOndaHyda oP Kayinihe aBbIN Kenyi MYMKIN.
3NeKtp KypaIapbH INeK apHaBbTaFbHbIaNFaH 6aTapeJ XHHaKTapbImeN naIdaNaHbIbI3.Ke3 KeIreH 6aca6atapeJ XHHaKTapbIn naIdaNaHy JapaKaTTaHy MeH eP KayiInHe anBn KeJeI.
Erep6atapexKHHaFbI KOJdaHyda 6oJMaCA,ohbl typeyiu,TbHn,Kint,Were,6ypaHa hemece 6acka kiui metan 3attapdAn yctahb1, onap 6ip TepMHAnDah BACacBHa 6aainhbcXacaybi MyMKIn. Batape TepMHAnDaBn Kocy Kyik Hemece eptke anbIn Kenyi MyMKIn.
Dpybc emec naandahyda 6ataperean cybiktbk aFbyMymKIN, OFaH TMehi3. Erep TnI KAncaHB3, cymen WaaBnTacTaHbI3. Erep cybIKTBK Ke3re THCe dApirepre xa6apnacbHbI3. Batapean HwaKaH cYbIKTBK KOy HeMece KyikTepe anbl Kenyi MymKIN.
3aKbIMdAnfAH HeMece 03reptinren 6atapen XnHaKTabIn naiDanaH6anbi.3aKbIMdAnfAH HeMece 03reptinren 6atapennapoptke,kaBnyFa Hemece JapaKaTTyFA anIn Kenyi MymkiH Ke3deCOK apeKeTepre anIn Kenyi MymkiH.
Batapen XHHaBn Hemece KypaBnEptKe Hemece KaTbI TempepatyPara canbpMaHb3. 130^ XofapbI TemepaTypanapda Japblbc 6onybl MyMKIN.
BapnbK3apnay HcyckaynapbH opbHdAn 6aTaper KHHaBHy Hcckaynapda 6enrineHReH Tempeatypa aykbmbHaH TbIC XaFDAJa3apraTaMaHbI. Dpybc emec 3apnay HeMece 6enrineHReH aykbIMHaH TbIC TemepaTpaJa 3apnay 6aTapeHbI 3akbIman ept KayinH KofapbIaTybI MymkH.
Kb3MeT Kepcty
3neKtp KypanbHa MAmHbI XeHdeywi Tek 6ipde Kocankbl 6enweKtepmEn Kbl3Met KepeTy kepe. By
3nEeKtp KypanbHbH Kayinci3irH caKaTanybH KaMTaMaCbI eTeJI.
3aKbIMdAnfah 6atapera KHHaKTapbiH ewkaan HnIdaHaN6aHbI. Batape XHHaKTapBH TeK eHnpyui Hemece eKeIeTTi KbI3MeT KePcety Ja6blkTayuBicbl apKbIbI opblHaNoYbI MymKiH.
Kbblwblapanap ywiH kayinci3ik hyckaynapbl
Kecetin Kepek-KapaKaTAn XacbIpbH cbIMapFa THOI MymKIn apekETepi JxacaFah Ke3e 3neKTP KypblfB1 OKaynHaFAn YCTay KaBHAn HcTaHb13. Erep Kecywi acan icten TyprAn CBMFA TnCe 3neKTP KpaJIbHbH Metan 6aJWeKTePi Icten NaJdaNaHybHbTOK COFYb MymKIn.
Даындаманы typakтbpeteуctay yuin6ekityxhe tipey uin KaMbit HeMece baca konblnnaDanaHbIbI.Дaындаманы kONMeH HeMece DeHeReTipeN yCTay OHI typaktbI eMc Kbbln 6aKbIayXofanyBaHa anBn Kenyi MymkiH.
KolbHb3dbI apanay aMafBHaH KaBbIK YcTaHb3. TaBbHdama actbHa TmHei3. Apa nonOTHOcbHa TIO KapaKaTTaHy KayniHTybpapbl.
3NeKtp Kypanbl naDanahyda OHbEki KOmHen 6epik yCTan,TypaKtbI KanbInTa TypbHb13.3NeKtp Kypanbl EKI KOmHen ceHimdi 6ackapblnabl.
3neKtp KypalbH daibHdamaFa TeK Kocynb Kynde anapbHb3. 0ntnecE 3neKtp Kypalb daibHdamaF a iniin Kepi cory kayni naia6oana.
Apanayda tipey taKtacbHbIN daBbHdamaFAtipenin TpybHa K03XeTki3iH3.Apa nonoTHocbl inHIN,3neKtp KypaBnB 6akbInaydbXofantyra anbin Kenyi MymkIH.
KymbICTb aKaTafAHH coN 3NeKtp KpaBih eWipin, apa NIOOTHOCbI TOKtaFAHHa CH, fAHa OHbl KecikTeH WbIFapbHb3. OcbApkbl Kepi cOydaH caKaTaHbIn, 3NeKTP KpaBbHbH KayinciDiH KaMTaMaCbIs eteci3.
3neKtp KypaBih Kepre KOOdaH anDbih OHbIH TOKtaybIH KYTINi. AnMaJIcAImaJI acnIin H 3neKtp Kypan 6aBilaybIH KofaTByBaHa anbl Kenyi MymKiH.
BsybnmaH mHCI3 apa noNtOHcbH naDanaHBi3. Kncain Hemece eTNEc apa nOHTonapbCbHybl, keciTi 3akblmaybl Hemece Kepi cFybl Tyblpybl MymKiH.
Apa nooTHocBn eipreHHen coh 6yip 6acy apKbInbl TokTatNaHb3. Apa nooTHocBnHbH 6y3bIybl, cblHybl Hemece kepy cFy ce6e6i 60nybl MmKiH.
MATEPHANbI KaTbI KbICbHbI3. DaBbIHdAmHaHbI KOHemece aKNeH tipMeHi3. IcTe TpyFaH KbINbUWeH eWKaHdaa 3aT Hemece Kepre TmHei3. Kepi cokKbl Kayni 6ap.
Kaketti i3eY kypanapbH naDanaHbIN XacbpinFaH cbIMapBbTa6bHb3 Hemece KayaantbI Xeprinkti yibm ekinepiH wkbipbHb3.3neKtp CbIMapBHa TIO ePT Hemece TOK COFyiba HAIbn Kenyi MYMKIH. Ta3 Ky6bpHb3aKbIMday JkapblbCKa anbln Kenyi MYMKIH.Cy Ky6bpHb3aKbIMday MaTePnAnBk 3NHNFA anbln Kenyi MYMKIH.
AkkymyTOp 3akbIMdaFAnH HeMece Dpybc NaDanaHaBnMaFaH KaFdJa, OaH 6y bHybI MymKIn. AkkymyTOp XaHbIn Hemece Xapblbn KanybIMykIN. Ta3a aya iKe TaptbHb3 XaHe WaFBmAp 6oNca, dApirepIn KEmeri He KyriHia. By TbHbC any KOJdpBtITipKeHdpYi MymKIn.
AkkymyTopb1 aunha3. KbICKa TynbIKany Kayini 6ap.
Were Hemece 6ypaybiu cnaKtby uytb3aTAP Hemece cbiptkbl acep apkbln aKKyMnylntop 3akbImdaHybl Mymkn. By Kcckta TynblTanyfa anbin kenin, aKKyMnylntop kHaHybl, TyTH WbIfapBybl, XapblNybl Hemece Kbl3bn KeTy i MyMKH.
EynakkymyIaTOpbIeKKaHaOcbIeHdpyIi OHIMepiHe naDanaHbIb3. CoApkbIbI aKKMyIaTOpbI KayiPi, apbIK KxyKteYdeH caKaTaNcIbI.

AkkymyIaTOpbl, XbIyduH, coHaI-aK, MblcIbl, y3dIKcI3 KHy KApblfHaH, OTTaH, KipHe, cydaH XeHe bINFaIaH KOpFaHbI3. XapblbcXeHe KbICKa TybIKTany Kayni TybIHaIbl.
ΘHIM KxHe Kyat CnnaTamaCbl

BapnbKayinci3dk HcykaynbKTapbH
Xhe eceptnenepeOkbHbI3.TexHKaibK
Kayincdik HcckaynbKTapbH XHe
eceptnenepeCaKaTaMay TOKbIH COYbHa,opt
XHe/Hemecae aybp KapaKaTTaHynapfa anbIn
Keyi MyMKH.
Painanany Hcyckaynbihbih anfbi 6nirinH cpeTepiEcepiH3.
Taraihany60biHwaKoJdany
3JnKtp KpaIbI aFaTbI, nIacTMaccaHbI, MeTaIbI XaHe Kpyblbc MaTePnaIapbIH 6epi KoKbIme apanayFa apHaIraf. On TIK XaHe KFaW KeCikTepeXacayFa apHaIraf. ApdNckinepi 6oBbHwa YcbHbICTapdbOpbHday KaKeT.
BeHHeHReH KypamDbI 6oWKeTep
KepcerinreH Kypamdaactap HmipneHreH cypetepi 6bETERI 3eKTP KpaBbHbCnPaTaMaCbHa ca.
(1)ApaDnckici
(2) Tipey taKtabci
(3) Apa dckicihe apHaIFaH ToKtAeTbII TEnKe
(4) Akkymyntop
(5) AkkymyIaTOpIbI bOcAty TynMeci
(6) AkkbipatkbilbTb icke Kocbinydah KopraTbH Kybn
(7)AxbipaTkbil
(8)KyMbICWambl
(9) TemnepatypaHb6aKbInay/apTbIKxkyTeMepeH KopFaHbIC HnDnKaToPbI
(10) Akkymnyatop 3aprdbi DeHreinHnDnKaTOpb
(11) TýTKa (6eti OKwauynaHFAH)
126|Ka3aKa
(12) Apa dncicinH 6ekitkiu
A) BeHeneHEn HEmec HeNnTaTaNFaH Xa6dbkTap cTaNaptTbXeKt3y KOnemimHe KaMTbImaBd. TOnbIX Xa6dbkTap4bI 63iDx Xa6dbkTap 6afapnapamAmBa3dAn Ta6acb3.
TexHnKaIbIK mAnImeTep
KoHa TaKaTaNapDb apa nckicimeH apanay S 511 DF: a,b = 6,0 M/c², K = 1,5 M/c²,
AfaaapkaanbikTapdbiaapaDnckicimehapanayS511DF: a_LWB = 6,5M / c^2,K = 1,5M / c^2.
(KoHka TaKaTanapDbI apanay 6oBihua DepeKTeP 20 MM daBHdama KaBihdbfbl yIH JapaMdbI.)
OcbHyckaynapa KeTipinre Dipin DeHreJxhe Wbyn 3MmccncbHbH KepceTkiwi 3aHdbI eNwey aDici BoHbHwa 0IeHren XHe Oanapbl 3neKtp KypandpaBbH bip-bipimeh caIbCTbpy yHIN naDanaHyfa 6oNabl. OnapMe HAnBbHbI Tep6eny XHe WbIFapdyb6farayfa 6oNabl.
Bepireh tep6eny deHremi MeH ybl nbI rApy mHi eNktp KpaibHH Herisi xmbictapby uin 6epireh. Erep3nKtp Kpan baca xmbictap yuH baca anmabI-canmabI acnTAP meHHe Hemece keTimci3 kTyMeH naJanaHbInca dipiny deHremi MeH ybl nbI rApy mHdepi 03repei. By6yKin yMbic yaBtBuH Tep6eny Xane ybl nbI rBfApdy KaTbKeTpPy MymkiH.
Dipinney deHreMi MeH WbIn WbIFapy MAnIH HAcTb ecenTey uIN Kpyan eWipinRe HKHe KocBInFaH 60bn nndanaHbIMarH yakItTapDa Ea cKepy KaKeT. Byn dipinney deHreI Xe He Xymbc YakItbHaFb WbIn WbIFapy mHiH TEmHeTei.
PainanahnybHbDipinneyacepiHcKaTay yuH KocBIMkaYayinci3dkwapanapabH KOnaHaKyKaKET,MbICaNbI:3NeKtpKypanblxHe anMaBcAImBaACnTAPbkyTy,KOndapblbCTbIKyCTay,KyMBCdicTePiHyBMdbCTbIPy.
XnHay
AkkymyTopbI 3neKtp KypamHen Ke3 Kenre Hxmbictapdb(MbcanbI,opHaty,Kbi3MeT Kepcety, T.6.) 6actay anbHda, cohdai-ak, neKtp KypandI Taebimdoy XeHe caKTay KeiHde WbIfapbHb13.
KockbIw/ewipriWKe Ke3eNcoK TIO KapaKaTTaHy KayiH Tydbipadbl.
Akkymyntopdbiapanay (Acypetihkapaib3)
TekTexHKaIbIK MOniMeTRepeJXa3BInFaH 3apdTay KypanDapbH naDanaHbHbI3. Tek KaHa ocbI 3apdTay KypanDapbI ci3iH, 3eNkTp KypaJIbHbI3dbH iwiHne IHTINHOHbIK aKKyMnTOpMeH caiKeC.
Hcyak: aKKMyIATOP iWInapa 3apraTaNFaH Kyide XeKtiXiNei. AKKMyIaTOpDbIH TObIK KyAtbIH naHaAnaHy yuH OHbI anFaaw pet naJaIaNaHydAanBbIH Tobnk 3apTaHbI3.
HINTH-HONDBIKAKKYMJITOPdbI naDanaHy Mep3IMH KbICAPTcB3 Ke3 KeRHeY yaBitta 3aprTayfa 6oJaBi. 3aprTay npocecin y3y akymjTOpdbi 3akbIMaNybiHa eKeImeNi.
IInn-HoHbIK aKcyMnyTOp "Electronic Cell Protection (ECP)" (3neKtpOHHbIK 3neMeHTepDi KOPfay) apKblIb Tepeh 3apJxKofaTyDah KOPfAraH. AKKyMnyTOp 3apJbIb JOK 6bonca 3eKTP Kypalbl KOPfaHbc cxemacbl apKblIb eipinei: anMaIbI-canMaIbI acnIb 6acka Ko3FaMaNdbI.
3NeKtp KypaIb ABOTMaTbI OwKeHHEN COH KCKbI/ eWipriTuTI eHI 6acyu b60MaHbI3. ΘnTnece aKKyMylrTOp 3akbIMdAHybl MymKiH.
AkkymyIaTOp4 (4) 5bIfapy yuH 6ocaty TymecicH (5)
6acbl3 kHe akkymyIaTOp4 3neKtp KpaIbHaTemEH TaTbIb3. By peTte Kyu canMaHb3.
AkkymyTop 3aprdbI deHreHHINHnHKaTopbl
AkkymyIaTOpIbI 3apIaTay KyHInH INdKaToPbI (10)
6iphewe cekyHxapTbnai HEmecTe bnk 6acbIHaN KocB1w/ewipriu7) KyiHne aKKyMnyTopbIH 3apTaIaFbH IN KOpCetedi XHe 3XacblnKapbIKDIObIH KaMTNbI.
Kapbiknodbi Kyatsti
Y3diKci3 jkapbik 3Xkacbln≥2/3
Y3diKci3Xapbik 2Xkacbln≥1/3
Y3diKci3japbik1xjacbln<1/3
KbIbIbIbIKTaIbIH KApbIK 1x Pe3epB XaCbI
Akkbipatkbltb(7)6ackaHHan Kein ewhbip JkapbiKdnobj KaHbaca,byn AKKyMnyTOpdbi hakaynbj KHe OHbl aybictby kaxeteknirih biDipei.
Apa noIothocbH cany/analMaTbipy
Anmbl-cnmalb acnntb opaty hemece anmaactbpy ke3inde Koprafbiw konfan KniH3. Anmalbl-cnnlmb acnantap etKip 60bn y3ak yaBt NaDanaHaHaKa3bn KeTyIMMkh.
ApTecemH anMaCTbIpy Ke3IHne apa TecemHH naTpoHBiHa MaTePnA KaIbIKTapbIHbIH, MbICaJIb, aFaH HeMeCe MeTAn KOHkanapbIH HKOktbIFbHa Ke3 XeTKi3IH3.
Apanaydickcicin taHay
YcbHbIaBH apa Tecemepine 0ny ocb naDanaHy HcaynbfbHbIH CObHda 6epinre. Tek KaHa 1/2 dIOHMdk Am6e6an 6niri 6ap aTecemepiOpHbHb3.Apa TecemKaKeTTI keiKTeH y3bH 6oMMayb Kepek.
Apa dncckicih opatry (B cypetin kapaib3)
Bekitkiw TKeH (3) WAMaMeH 90°Ka KepcTeKi 6aFbItbIme 6paHb3 KeHe OHb HbIK YCTan TypbHb3. Apa DnCKiciH (1) apaDnCKiciH, BekitkiWhe (12) canbHb3. BekitkiW TKeH KaiTadah Xj6epH3.
Apa Tecemih Tapy apkbln obhig 6epik 6ekitirehi Tekcepin wlbfb1b3. Bocan kanaH apa Tecemkiyann, ci3re jkapakat Tni3iy Mymkin.
Benrini 6ip kymbictapda apa Tceemin (1),cohdaan-ak 180ka 6ypan (tiCTepiH KOFapb KaPabn),KaTApOpHaTyFa 6onad.
Apa dckicin anbnt Tactay (C cypetin kapaib3)
Apa TecemH WbIfApyDah 6ypbIH cyblHbI3.Apa TecemHe TIOeH Kapakar any kayni bap.
Bekitki Tienkehi (3) Wamameh 90°-Ka Kepcetki 6aftbimeh 6pahti3 kHe OHbl HbIK YCTan TypbHbI3. Apa DnckiciH (1) aIbn TaTaHbI3.
UaHdbI KHe KOHKanapDbI copy
KopfaBH6oay,Keibip aafw copTapbl,MnhepaIapJxHe MeaIaIap 6ap Keibip MaepnaIapdbHwaHb IeHCaybIKKa3HHbIb6ObyMyMKIH.7HaFtNIOxHe WaHbIy naJaIaNHybJa HEmec KaHbIHdAfl b aadMdpda anIepnraikpeakunnapblxHe/Hemce TbHbcXoJIaBpIH aypanabH tydbipyMmKIH.
Kei6ip wan Tpynepi, cicepe emeH xane wamwat
aafuBHbH WauHb, cicepe, aafuTbI eHey KaNbIKTapBMeH
(xpomat, aafuTbI KopFay 3aTb) 6ipre KaHeporeHep 60bn
ecentenei. Ac6ectik MatepnaTek KaHa MaMaHapMeH
eHDenyi KepeK.
-¥ymbicopHBiHbHjKaKcbJKeJeTinyHeKe3Jtki3iH3.
-P2 cy3ri cblhblbHdaFbl r3kaFapbl naIaIaNHycblbnaIbl.
HEnetinMATEpnaIap yuH eniH3eKoHaHbNaTbH yrapmbnpda naDanaHbHb3.
KymbocpHbHaJhaHHHxHHaMbayH KaaraHanb3. HohohyTuTaHybMykH.
Паадалану
PaiDanaHyra eHdipy
AkkymyIaTopbI opHaTy
Hcyay:3neKtp KypanbHb3Fa apHaMaFAH aKKymyTOpBn naaIaNHy KaTe Kymbc icTeYiHe Hemece 3neKtp KypaBbHbH 3aKbIMdahybHa anBn Kenyi MyMKIn.
3nEkpKpyanbIH KeHET icKe KocbinydAn Kopray yuH icKe KocbinydAn KopfAaTbH KyblntbI (6) OHf Kaapan 6acbHb3. 3apTaNFAh AKKMyJrTOpB (4) AKKMyJrTOp 6ekITkiWHe on ectin tipen kattb6yfaTaNFaHaXxblNkbltBhl3.
Kocy/owipy (D cyperin kapaHb3)
3Jektp KpaBih Kocy yIiH anDbimE icke Kocbinydah KopraTbH Kyblntb6 conFa kaapai 6acbHb3. Coadn KeHH aKbipATbIbTI7 6acBIn TypbHb3.
XyMbic 7aMbI KocBII/ewipriTl (7)XaH HeMeCE ToIbIK 6acBfAHaJa XeTkiniKci3 6oIraH KapbIK XaFdaHbHaXyMbIC aMafBH XapBkTAHbIpaDbI.
3JnKtp KpaBbH eupiy yuih axbipaTkbuTb7 (7) x6epin3. CoaH KeiH icKe KocbnydAn KOpAaTbH Kybntb1 (6) KaTadaH OHFa Kapa BacbHb3.
Kypic cahbH 6ackapy
KocbIHTb/ewipriwi(7)bacykyuH e3epeoTbipin, KocbIraH KpaIbHxypic caHbH biH biH peTeyre 60ana.
KockbIHTbl/ewipriwi(7)kaBacKaHdaTeMeHipeKxypic cahbiMeHxymbcicteNdi.Bacy kyuiackaHaJxypic caHbI acabi.
Tan erinetih kypic cahbi MaepnAn MeH Kymblc Kacay XaIaNbHa 6aIaNbIcTb 60bnOHN TaXipN6e apKbIbI aHbIKayf6oIaIbI.
ApaIINCKiciH daBbIHdAmaraOpHaTyda XHePiNactMaMeH aIIOMHnIiOHeyJe apaay KblDaMdbIfbH TEmHeDeTy YcbHbIaNbl.
A3 KypicTepehCaHbIHda y3aKaYakBt 3neKtp Kpaanbln aHaIaHaHy OHbIH KaTbI Kb3yBt TydbpyMmKIn. Apa nOIOTHocBHaBn 3neKtp Kpaanbln CaKnBHaTy Wih am. 3 MNHy MaKcMaIbIK Kypic CaHbIHda icTeiH3.
TemnepaTpaHb6akbnay/aptbkKyKTeMeDen KOPFaHbIC HNdkaTopbl
Kb3bnTyciTeMnepaTaPbH6aBnay/apTbKxkTMePeH KOpFaHbIC INHnKaTOPbI (9) aKKyMyrTopDbI KaTbI Kb3bnKetydEHNkHe K03fAITkbWtBapbIKxkTEm TYcDn KOpFayFaKeMeKTecedi.
TemnepaTpyaHb6akblay/aptbkKyKTMeHeN KOpFaHbIC HnDnKaTOpby (9) y3djci3 Kb13bn TycneH KaHbIn Typca, 6yn
128|Ka3aKa
akymnyTop TemnepaTypaBt bIM Kofapbl 6onfaHbH 6iipedeJxHe 3neKtp KypalabTbAToMaTTb Tpyde 8wn kanaJIbI.
3Jektp KypalbH eipin, jyMbictb JklaFactbIpMac 6ypbH aKkyMnyTopbI cyblbHb3.
TemnepaTpyaHb6akblay/aptbKxykTeMepeH KopFaHbIC INHdkAToPbI (9) Kbl3bn Tycne HxblnbItACA, 3JKeTp KpaBb6yfarTaTbn, ABOTMaTbTyprde eun KanadBi.
3nEeKtp KpyanbH daBbHdamaH TaTpBn WbFapbHb3.
Byfattany KxOyBnFAHH KeiH 3nEeKtp KpyaBb peTtenre
Kypic caHbImEH Kymbcih H KaNFaTbPaabI.
PaiDanany HycKaynapbi
AkkymyTopbl3NeKtp KypamMeH Ke3 KeIReh XMybICTapbl(MbICaJIb, OPhATy, Kb13Met KepCey, T.6.) 6actay andbIHDA, coHdai-ak, 3neKtp Kypanbl TaBImaIay XHe caTay Ke3iHde WbIFapblb3. Kocbl/ewipriuKe3eNcoK TnHO JapaKaTTaHy Kayin H TybpaBl.
KbInblTbI apaTypbn Kanca 3neKtp KypanbH 6ipdeH eWipipi3.
Kehectep
Kein Kypbnbc MaepnndapbH apanay Ke3iHem Maepn an EhdpwicinH HcykaynbKTapbMeYcbHbCTapbHOpbHaBb3.
AfaW, AXT, KpybIbIC MaTepeHnIaPbH XeHe T.6.apaay aIbHna Hne, 6ypaHda XeHe T.6.cNkTbI 6eTde 3aTapdbH 6ap-KoFBH TeKcepi I bYfBbHb3 XeHe XapaMdbI apa TecemH naJaHaHbHb3.
3NeKtp KypaBih KocBih OHeneTih DaBHdamaF a anapbHb3. Tipey TaTacBih (2) daBHdama 6eTIHe KOBih, MaTePnAaBb 6ipKaBnTbI peTte 6acBih HeMece XblXbTbIn apanah3. XMybc apeKeTih AAnTaFaHHa CoH 3NeKtp KypaBih eWipin3.
Apa TecemI TypbIn KAnca, 3NeKtp KypalbH 6ipHeN eWipipH3. ApanaHaH apanbIKbCaNKeC acnannne a3 KeHeTin 3NeKtp KypalbH 7bFapblHb3.
Batbipninapanay (Ecypetinkapaib3)
Batbipn apanay Ke3iHne tek aafu, rncokapton X3NE t.6.chKtby JxymcaK MATEpHaanapdbI eHdeyre 60ana! Batbipn apanay Ke3iHne MeTann 3aTAPdbI eHdEmeH3!
BaTbipbn apanay yuih TEK Kbiicka apa TceMepin naIanaHbHb3.
3NeKtp KypaBbIH Tipey TaKTacBbHbH (2) KHerimeh apa TceMih (1) DaBHdAmara THI36eN daBHdAmafKaOBbH3 KHe icke KocbHbI3. Kypic backapbyi 6ap 3neKtp KpaIaDpda MaKcImaIbI YaPc caBH TaHaHbI3. 3NeKtp KypaBH KaTbI daBHdAmaFbAcBn, apa TeCemih AkblpH daBHdAmafA kipri3iH3.
Tipey TaKTacbl (2) DaBbHdAmFaToIbIKTaJKaBbINFaHda, KaaynbkeCik Cb3blfBImeApalaHb3.
Benrini 6ip Kymbictapa apa tecemih (1) 180^ ka 6ypan (ticepin kofapkapatbin),KaTApohatyfKahe 3neKtp Kypabib Ticiinwe 6ypan 6afblayfa 6onadbl.
Cybyy/Maiy Kypandapbi
MeTaNbI apanayda Kbl3bn Ketyi ceb6iHcKecik cb3bIfbHa cyBtHy HeMece MaNlay KypaIbH cypy KepeK.
AkkymyTopbIOHTaIbI naIdaIaNHy tpybnI HycKaynap
AkkymyIaTOPbCybIKbTbIKTapdaH XHe bInFaIaHaKopfaHbI3.
AkkymyIaTOpBbTeK-20C...50CTemnepaTypa aykbmbHda caKaTaHb3.AkkymyIaTOpDbJka3Ja KeiKe KaIbIpMaHb3.
AkkymyIaTOpdbH XeIeTeY TecirH XymCaK, Ta3a XHe KypraK KbIuWakKeH MyKnT Ta3aJaHbI3.
Pnndanhy Mep3imH aTapnbkTaKbickapby akymyntopdbH eckipreHH xhe aybcIbpy kepektiriH 6iipedi.
KokbCTapnbKaetaeHneyTypanbHyckaynapdbOpbHdaHb3.
TexHnKaIbIK KytIM XHe KbI3MeT
Kb3MeT KOpCeTy XeHe Ta3anay
AkkymyTopbl3neKtp KypamMeK 3 KeIren XMybictapbl(MblcAnbl, OPhaTy, Kb3Met KepceTy, T.6.) Bactay andbHda, cohdai-ak, 3neKtp Kypanbl TaCbImaNlay XHe caTay Ke3iHde WbIFapbHb13. KockBli/ewipriWke3eiencoK TIO JkapaATaHy Kayin H Tybipadbl.
Kakcbi api cemimdi xymblic ictey yin3nektpr kypanbmeH Xeendetkiu Tecikti Ta3a Yctahib3.
Apa dnckiciHH 6ekitkiin Kymcak KbilwakneH akbpHdant Ta3anaHb3. On yuH apa dnckici HneKTP KypalbHah YbIrapbIn aBbHb3. Apa dnckiciHH 6ekitkiin Tnicti MaIIaftbI 3attapdbI naDanaHy apkbbl aKaycb3 Kynde CaKaTaHb3.
3NeKTP KypaIbHbI KaTb I NaCTaHy bKyMbIC aKayblkTapbiHa anBn Kenyi MyMKIn. Con yuH KaTb I WaH kacanaTbH MaTePhaIapDbI TeMeHHHe BAcneH apanamaHbI.
TytbHybifa KbI3MeT Kepcety XaHe naJaHaNy Kehectepi
KbI3MET Kepcety We6epxHaacbI eHIMdi XeHNeY XaHe KYTy, coHdai-ak Kocalkb6enweKtep TypaIb cypaTapFaXayan 6pepi. KapbiNy cb36anapbl MeKocalkb6enweKtep TypaIb mIImETPeip TMeHderi MeKeHHaJa Ta6acbI3:
www.bosch-pt.com
Bosch 6aFapnAmacbKeHecTo6bIi3dHcHIMepKHe onapbHKepeK-JkapaKTapbTypanbCypaTapbIHb3raXayan bepei.
CypakTap KOHO He Kocankb6eIeKepre Tancbpic 6epy Ke3Hne MInTeTI TypE eHIMdIH 3aybITbIK TaTaNwacblHaBf10-caHbI eHIM Hmipin Ka3bHbI3.
Hnipywi tananTapbMeH HopMaIapbHbIH CaKtanybIme
3neKtp KypabHxHeDey XHe KeiNi I Kbi3Met KepCety
6apblk MemKeTep ayMaFbHnaTeK "Po6ep Boi
hpMaBik Hemece ABTopHaunHaH Kbi3Met KepCety
opTaBkTapbHdaOpHdanaDb.ECKEPTY 3aHcb3X KOJIIMe
eKenIhren eHIMdepi naJanahy KayinTi, deHCayNbIFbIHb3Fa 3nH KeTIPyI yMmKiH. eHIMdepi 3aHcbIs Kacay XHe Tapaty Akimuiik XHe KblMbICTbIK Teptin BoHyHwa 3aHMeN KydaHaDa.
Ka3aKctan
TybHybBnapFaKeHec6epyKaHeuafbImApDblKa6blday optaIbIfbl:
"PoBept Boiw" (Robert Bosch) KUJC
AnMaTbIK.
Ka3aKCTaH Pecny6nKacsb050012
Mypat6aebK.,180y
"TePmec"BO,7Ka6aT
Ten.: +7 (727) 331 31 00
a_Kc: + 7 (727) 2330787
E-Mail: ptka@bosch.com
CepBnCTIK Kbl3MeT KepCETy optaIbIKTapbl MeH Ka6blnday nyHKTePiH MeKeH-XkaBl TypaBl TOblk XHe e3eKTI aknapaTTb Ci3: www.bosch-professional.kz pecmna caTTaHa ana anacbi3
TacbImaIay
BynHnHNOhBk AkkyMnyTOpnap Kayinti TayapnapFa KOnbnaTbH TaanTnPaC aBonybKepe. PAndanaHybI aKkyMnyTOpnapBk KeWeDe KocbIMsa KykaTTapcb3 TacbMaJd anaBbl.
YuiHui TynfanaP (Mbicnbl, aye Keiiri Hemece Xifepey) opamafa KHe Mapkapanpa KaBbnaTbH apHaBt TaanTapdbcakTay Kepe. Xifepeyre daBihday Ke3iHne KayinTj KyKtepdiTacbImaay MAmhBmEn xabapnacy Kepe.
AkkymyIopDbI KOpNcbl 3aKbIMdaIaNfAH60nca fHa
Xi6epiH3.AuBkTynicnepepi JxenImdeH3 xHe
aKKMyIopDbI opamada Ko3FaMaHTbIHdAn opahB3. KaKeT
60nca, KocbIMua yTTbIK epexepePi caKaTaHbI3.
Kadere kapaTy

3neKtp Kpyanlnapbl, aKKyMnyTOpnapbl, KepeK-JkapakTapbl KaHe opay
MaTePnAnJaPbH 3KONOrnIbIK TpyfblaH DaPbIC yTmNImzauJnayFa TaNcbIpy KepeK.
3nEkrp KpaanapdabJkHe
aKMyIaTOpNapbl/6aTapeaNapbl y KOKbIcblHa TaCTaMaHbI3!
Tek kana EO endepi yuin:
Eypona 2012/19/EU epexeci 60bHwa Jxapamcb3 3neKtp KypalnapbI Xehe Eypona 2006/66/EC epexeci 60bHwa 3aKbIMdaFan Hemece ecki AKKyMnyTOp/6atapeJnap 6eKek KHNahbln kAdere KapaTbIyblkXaKeT.
AkkymyTopnap/6atapennap:
JIITHH-NOHdbIK:
TacbImaay6enimHderi HcyckaynapdbOpbHaB3 (KapaHb3,TacbImaay",Be129).
Româna
Instruktiuni de siguranta
Service sculelectric
Strada Horia Macelariu Nr. 30-34, sector 1
013937 Bucuresti
Yka3aHnHa 3a cnryphnoct
06uynka3aHHa 3a 6e3oNaCHocT aeneKtpOHcTpymEnTH
NPEyPEXK-DEHNE
PpOeTeBcHKn ppeynpeKHe Hn, yKa3aHn, 3aNo3HaIte Ce C cnHyprnte nTexHnuecknte xapak
TePHCTHK, nPHNOXeHH KbM eNEKTPoHCTpyMeHTa. Ppo
Iyckn npn Cna3BaHETO Ha yka3aHHrTa NO-dony MOrat Da npe- dN3BnKAT TOKOB Yap H/nn TeKk TpaBMn.
CbxpaaBaBte Te3n yka3aHHa HcHpyHO mCTo.
H3no3BaHnT NO-dOly TepMH "eneKtpoHHCTpymeHT" ce OTHACdo 3axpaHbAHN OT eNEKtpuueckata Mpeka eNEKtpoHHCTpymeHT (c6c 3axpaHbAa Ka6en) H do 3axpaHbAHN OT aKyMynatoHa 6atePnEneKtpoHHCTpymeHT (6e3 3axpaHbAa Ka6en).
Be30nachocHa pa6oTHOTOMrCTO
PaaTe pa60HTo cMRCTo H Do6pe OCBeteHo. Pa3XbPnHHe Hn TbMHn pa60THm MecTa ca npeDnoc-TaBka 3a HnDnEHTH.
He pa6oTeTe ceneKToHHCTpyMeHTa CpeHa c NobHWeHa onaCHOCT O Bb3HNKBaHe Ha EKcNIO3H, B 6nH3OCTdoLeChO3aIaNHM TeHOCTH, Ra3OBe Hn npaxo06pa3HN MATEpHaH. No BpeMa pa6ota EneKToHHCTpyMeHTe Ce OTdEAT NCKPn, KOITMOrAT Da Bb3nIaMeHrt paxoo6pa3HN MATEpHaH nn napn.
ДрьктdeинстpenuHnuaHa6e3onacno pa3ctO- RAHNE,doKATOpa6oTHTEceneKTPoHHCTpyMeHTA.AKO BHMaHHeTO Bn 6bIe OTKIOHEHO,MOKe Da 3ary6HTe KOHTPOJHaHd eNEKTPoHHCTpyMeHTA.
Be3oNaChOcT npH pa60Ta ceneKtpueckn Tok
UeencbHa eNektponHcTpymeta Tp6Ba da e noXoJn3a N03BaHHa KOnTkt. B HnKaKb CnyaHne Ce OInycka H3MeHHe Ha KOHCTpyKuHTa Ha 9eNceNa. Korato pa6oTHe c6c 3aHyene HneEKeTpoypeH, He H3No3BaTe aAnTepn 3a 9eCena. POn3BaHeto Ha OPINHJIHN UeNCenI KoHTaKN HAmJIBA pCKaOT BB3HNKBaHE HA TOKOB yIap.
H36raBte OonHpHa TaNoTo Bn Do 3a3eMeHH Tena, HAnp. Tpb6n,OTOnnHTenHH ypeH,Neukn XnaDnHHu. Korato TaNoTo Bn e 3a3eMeHo, PNCKbT OT Bb3HNKBAHe Ha TOKOYap e No-ToJAM.
Pepna3BaIe enektpoHcTpymeHTa cH OT bKn Bnara. PpOHKBaHeTo Ha BOda B enektpoHcTpymeHTa NOBnBa BA onaCHOCTTA OT TKOB yap.
He H3no3BaIte 3axpaHbuaaKa6e 3a cen, 3a kon To To He e PpeBnDEH. HNKora He H3no3BaTe 3axpaHbauHa Ka6e 3a PpeHacHe, Terne He nN OTkaaBaHe Ha eNEKtpOHcTpyMeHa. PpeNa3BaIte Ka6e Na HTarpaBaHe, OmacBaHe, DOnHP Do OCTpN Pb6oBe Nn DO NOBHXHN 3BeHa Ha MaunHH. NobpeDeH nn ycykaHn Ka6eYBeHnAbaT pNcKa OT Bb3HKBaHe Ha ToKOy yap.
Korato pa6oHTe c eNEkTPOHnCTpymEn HABbH, H3NON3BaIte cAmO yDbNkHTeHH Ka6eHH, NOxOaHn 3a pa60Ta Ha OTkpTo. N3non3BaHeTo Ha yDbNkHTeH, npeHa3HaueH 3a pa60Ta Ha OTkpTO, HamaJIbRa PnCKa O T Bb3HNKBaHe HA TOKOB ydap.
Ako ce hana rna n3non3BaHeTo Ha eNEKtpOnHcTpymeHa BbB Bnaxkha CpeDa, n3non3BaTe NpeDna3e HpeKbcBau 3a yTeHH TOKOB. N3non3BaHeTo Ha npedna3e HpeKcbBaU 3a yTeHH TOKOB HaMaJIra BA ONACHOCTTA OT Bb3HNKBaHe Ha TOKOB ydap.
Be3oNaeH Nauchn Ha pa60Ta
BbTe KOHcHTpPauH, cneTe BnHMaTeNo DeIeCTBnA Tn NoctbNbaTte npedna3nBO n pa3ymHO. HeH3no3BaTe eNEKtpOHnCTpyMeHTa KORato CTE yOpeHN Hn NOBnHaHHeTO HaHapKoTHNuBEeCTBa, ANKOxON Hn YOnBaUNeKApCTBa. EINMH p3ceHOCt npn pa6ota C eNEKtpOHnCTpyMeHT MOKe Da Nm3a NocJeCDTBnE N3KNIOUHTENHO TeKKn HapaHbAHn.
Pa6oTe c npEpa3BaIo pa6oHo 06NeKn. BnHaHn Hocete npEpa3H ouHa. HoceHTo Ha noXoJi 3a ION3BaHn ENEKTPoHnCTpymENT n 3BbPwBaHaT aIeHOC TIIuHn PpeJa3H CpeCTBa, KaTO dNxaTeHa MacKa, 3dpaBn NtBTHO3aTBopeHN OByBKN CcStaHnE rpaI- fep, 3auNTHa Kaca nn Wymo3aTrywnTeHn (aHTnoH), HAmaJIra Ba nCKA OT Bb3HnKBaHe Ha TpyDOba 3NoOnnyka.
M36BBAIe OAnCHocTt O BKNIOUBaHe Ha eNEKTPoHNCTpymEna TNO HeBNHMaHne. IpeIN Da BKNIOUHTe ZenCeLa B KONTAKTA HIN DA NOCTABHTe 6aTepeHnTA, KaKTOn NpN ppeHacHHe Ha eNEKTPoHNCTpymEna, CE yBepBaIte, Ye NcKOBnT NpeKbCBaue No3Hnra "N3KIOUeHo". HocHeTo HA eNEKTPoHNCTpymEnu C npbCT Bbpxy NcKOBn NpeKbCBaH NIN NODaBaHETo HA 3axPaHbaIo HAnpeXeHHe, DOKaTO NcKOBnT NpeKbCBaue BKNIOUeH, YBeNHua BA ONACHOCTTA OT TPyDOBN 3IonoNyKn.
PpeHdBaKIOUHTe ENEKTPoHHCTpyMeHTa,ceYbepaBHe,ue CTEOTCTPAHmNOTHEROBCNUH NOMOHN HCHTpymENTnRAeHHKNIOUObE. NMOUEN HHCTpyMeHT,3abpaBeHHa BbpTAAO ce 3BEHO,MOKe Da npuHHN TpABMN.
M36aBaeThe HeecCTBeHnTe NOnOKeHHa TAnoTo. Pa6oTeB Cta6nHNO NOnOKeHHa H TaNoTo H BbB CeKN MoMeHT NoDbPkaHe PaBHObecHe. Taka ue MoKeTe Da KOHTpOInpate eNeKTPoHHCTpyMeHa TNo-Dope H no-6e30NaCHO, Ako BB3HNKHe HeoayKaBaHa CHTyaUa.
Pa6oTe c noxdoa o6neKn. He pa6oTe c nHpOKn dpexn nn ykpaenHn. DpbXte Kocata n dpxnTe cn Ha 6e3onacno pa3cTOnHne OT DBHXeNn Ce 3BeHa. HnPOKnTe dpexn, ykpaenHnTa, Dblnte Kocn Moat Da 6bDat 3axBaHn H VbIeEHN OT BbPTAun CE 3BeHa.
Ako e Bb3MOXHO H3NON3BaHETO Ha BbHua acnnpaONOHHa CnCTema,ce yBepraTe,ye TRe BKNIOUeHa NfHKuONHpa H3npaBO.H3NON3BaHTo Ha acnnpaONHHa CnCTema HaMaJIbRa pNCKOBTe,DbJIkaUNCe HA OTdJIauN CE npn pa6Ota npaxObe.
D6pOTo No3HaBaHe Ha eNEKTPoHnCTpyMeHTa BCNeDCTBHe Ha YecTa pa6Ota C HrO He e NOBOD 3a HAmaJIbAHe Ha BHIMAHHeTO HpeHe6PerBaHe HA MepKHe 3a6e3onachOCT. EINHO HeBHIMATEIHO DeICTBHe MOKe DaIpeiN3BnKa TeXKn HapaHbAHn CaMO 3a YaCTN OT CeKYHdaTa.
PnKlnBO OTHoWeHHe KbEmEKeTpOHcTpymeHTne
He npetobapbaite enektponHcTpymeta. H3non3BaTe enektponHcTpymeHTte cmo Cb6pa3HO THXHOTnpedHa3NaueHne. Ue pa6oTnte no-do6pe nno-6e3oNaCHO, KORATO H3non3BATE NOxOJaNnE neKTPoHHCTpymeHT B 3aadaenr OI pOn3BOJNTeIN dHaana3OH HaTOBAPBAHe.
He n3non3BaIte eneKtpOHcTpymENT, uHTo npckOB npekcbau e noBpeH. EneKTPOHcTpymENT, KOHTo He MOKeJa 6bJe H3KNIOUbaH IN BKLIOUbaH NO ppeBnDEHr OITpOIN3BOJNTeHaunH, eOnaceH TpR6Ba Da 6bJe peMOHTnpaH.
PpeHn Da H3BbPbATE KaKBHTO N da e DeHocTH No eneKTPoHnCTpyMeHTa,HaNP. HAcTPOBaHE,CMHa Ha pa60Te HHCTpyMeHT, KAKTO N KORATO r npH6nPate, H3KNIOuBAte UencenaOT KOHTAKTa,peCn.H3BaXdA Te 6atepHnTA,akoEB3MOxHO.Ta3H MApKa IpeMaxBa ONaCHOCTa OT aDeEhCTBaHe Ha eNeKTPoHnCTpyMeHTa NO HeBHIMaHHe.
CbxaHBAHTe eKTPOHCTPymENTHe Ha MeCTa, Kb- deto He Moar Da 6bDat DOCTHRaTH OTe da. He do- nYckaIte Te Da 6bDat H3NON3BaHN OTnua, KOtO He ca 3aNo3HaTH C HAuHa Ha pa6oTa CTx N He ca npoue- nn Te3n HcTpykun. Korato Ca B pueTe Ha HeONHTn H notpe6nten, eKTPoHCTPymENTHe Morat Da 6bDat H3- KIOUHTeJHO ONACHN.
PnDpKaIe Do6pe eEnkTPOHNCTpyMeHNTe cn n AkcecoapHe Nm. PnOBepaBte dAnN pOBNXHNTE 3BeHa cyHKUONHpaT 6e3yKOpHo, daNN He 3akINHBaT, daNN HMa cUynenH NIn NOpeHn DeTaAHH, KOHTo HApuWbAT Hn H3MeHr T cyHKUHHe a ENEKTPONHCTpyMeHTa. PpeHn Da h3non3BaTe enekTPONHCTpyMeHTa, ce IORPHKETe NOpeHnTe DetAHn Da 6bDat peMOnTHpanH. MHOrO OT trypoBHe 3lononyKe Ce DlnKat Ha HeNo6pe NoDpKaHn eEKNPTOHCTpyMeHTn UyeiN.
PnDpKaHpe pKeHte HCTpyMeHTBnHaTHdo6pe 3aTOueHN uHcTHe. DOppe nOdbpKaHHTpe pKeUHNCHT pyMeHTCocTpnpb6ObE OKa3BaT NO-MaNko CbIpOTNBHeHne Hce Bo4rNo-NeKO.
H3non3BaIe ENEKTPOHCTPymeHTne,DOINbHNTEN Hnte npncnoc6nHn,pa6OTHnte HHCTPymEnH T. H.,cbo6pa3HO HNCTpyKUnTe Ha pON3BOUHTen. Ipn TOBa Ce Cbo6pa3BaIte H c KOHNpETHe pa60THyyc- NOBn H onepaun, KOnTO Tp86Ba Da H3bHnTne. H3- 10n3BaHeTo HA eNEKTPoHCTPymeHTn 3a pa3NIuH N O TnpEDBnDEHnE To pON3BOUHTen pInNOxKeHn NOBuaBa ONaCHOCTTA OT Bb3NHKABe Ha TpyDOn 3NoIOnyKn.
IopdbpkaTe npbKKnTe H pbKoXBaTKHe cyxH,HCtH HeomacneHH. Xb3raBnTe dpbKKn H pbKoXBaTKn He no3BoJRAb 6eOanachata pa6ota H do6poto KOHTpoHahe Ha eNeKTponHCTpyMeHTa npn Bb3HNKBaHe Ha HeouakBAHa CItyaqna.
PnKnBO OTHoWeHHe KbM akymyNaTopHu eNEkTPOHHCTpymeHTN
3a 3apekdaheTo Ha akymnatopnHte 6atepnn H3non-3BaIte cAmO 3apAaHnte yctpoNCTBa, npenOpbUbaHnOT npoN3BOHNTeR. Korato n3noN3BaTe 3apAHNyCTpoNCTBa 3a 3apeKdaHe Ha HeNoDxOJaUN aKymnatopHn 6atepn, cbueCTByBa onaCHOCT OT Bb3HKnBae Ha noJkap.
3a 3axpaHbAe Ha eIeKTPoHHCTpyMeHTHe H3non3BaTe cAmO npEeBnDEHHe 3a CbOTBeTHM Moen aKyMyNatOPHN 6atePHN. H3non3BaHTo Ha paanuHn akyMynatOPHN 6atePHN MOKe Da npEeH3BnKa TpyOba 3no-nonyka n/nn noxap.
Pepna3BaHte HeH3IOn3BaHHTe akymyataopn6aTepeHHOT KOHTAKT CToJemH HIN MaKm MeTaHn PpeMeTH,HaNP.KJaMepH,MOHeTH,KIOUObE,IIPOHn,BHTO
BEHp.P.,TbKaToTeMOraTdaPnpeH3BnKaT Kbco CbeHNHeHne. IocnEcdTBnTaOT KbCOTO CbeHNHeHne MoRaT da6bDatn3rapnHnnnoKap.
Pn HnpabHnHO n3no3BaHe o Akymyataopha 6aTe pnaO He MoKe Da n3teue eNeKtpoNT. N36raBaiTe KOtAKTa C Hero. Ako BbnpkeN ToBa Ha Koxata Bn noJaHne eneKTPoNT, n3nAkhete MCTOTO o6nHc BODa. Ako eneKTPoNT nonaHne BOHTe Bn, cneH e3a6abHo 06nHnHO n3nAkbAbe NoTpce TOMou ot neKap. EneKTPoNTbT MOKe Da npedn3BnKa n3rapHHa Ha Koxata.
He H3noJ3BaIte akymyataOpHa 6aTepeHHn eEnKtpOnHCTpyMeHT, KOTo Ca NOBpeEHn HnC H3MeHeHa KOHCTpyKU. IOBpeEHn Hn H3MeHeHH aKymyataOpHH 6aTepeHH moRa Ta ce Bb3nnAmehT, EKCnIOdpat nN da npedn3BVKAT HapaHBAHn.
He n3naraite akymnatopnata 6atepnna Hbncokn Temnepatypn nHOrh. n3naraHTo Ha orh nnTtempepaTyPi Na 130C Moar da npedn3BkAT ekcnno3nn.
Cn3BaIe BChKu yKa3aHnHa 3a 3apeXdAne Ha akMyIaTOpHata 6aTePn; He 3apeXdaIte, aKO TempePaTypata H n3BbH dHana3OHa, NocOeH B HcHTpyKUnHe. HenpaBnHTo 3apeXdaH e Hn 3apeXdaHTo npI TeMnepaTpyn H3BbH dOnyCTHMn DnAna3OH MOrat Da yBpeJr 6aTePnra T yBENu4abT oNaCHoCTTa OT noKap.
Toudbpxkane
DonyckaiTe peMOHTbT ha eNEKtponHcTpymeHTHe Bn Da ce H3BbPbBa cAmO OT KBaHnΦuPaHcNeuaHaNCTHcAMo C h3NoI3BaHeTo Ha opurnHaHnpe3epBHN qactn. Ito3n HaunCe rapaHTnpa cbxpaHraBe Ha 6e-30naCHOCTTa Ha eNEKtponHcTpymeHTa.
Hnkora He pemOHnpaTe NOBpeEnn AkymyNaTOPHN 6aTePN. PEmoHTbHa aKymyNaTOPHN 6aTePN Tp8Ba da Ce n3BbpwCaMo OT pOn3BOInTeN IN ON OTOpN3paH cepBN3.
Yka3aHnna 3a 6e3oNaChpa6Ota c eneKtpnueckn HOXOBKN
Korato H3nbHBAte Oepaun, npn KOrto CbueCTByBa OnaCHOCT pa6oTHNHT HNCTPymeNT MoKe Da 3aceTHeCKPTN NOI NOBpXHOCTTA NPOBOHNu NOD HApeXeHne, DOnHPaTE eNEKTPOHCTPymEna CaMo DO eNEKTPOHN3HpAHTE NOBpXHOCTHa pbKOXBtKNTe. PnIKoHTAKT Ha peXeUAAkCECoAP c npoBOHNK NOI HAnpeXeHne E B3MOxHO HApEKeHNeTo Da ce npedeNo MetaHInTe DeTaIN Ha eNEKTPOHNCTPymEna ToBa da npedIN3BHKa TOKOB yDap.
N3noI3BaIe CkO6H Hn DpyrH NoDxOHaCpeCTBa 3a3XBaAaHe H yKpeBbAe Ha 06pa6oTBaHn DeTaN. IbpKaHTo Ha 06pa6oTBaHHaTeaHn Ha pbKa Hn npH TnCKaHTo My Do TAnTO MoKe Da npEdu3Bnka 3ary6a Ha KOHTpO1.
Дрькгп рьцетсн ha pa3ctoHHe OToHata Ha p3aHe. He nnaite no6pa60BaHHn DeTain. CbuecTByBa onaCHOCT da ce HapaHnTe, ako donpeTe peKeuHnIInCT.
Дрьктэнэнгспунспунета пн pa6oTa c
ДБeTe рьци сддeTe 3a cnHyphata no3nua. CДБe
рьце eNEKTPOHHCTpymeHTbT ce BODH NO-CNHypHO.
DOnnpaTe eNeKtpOnHcTpymeHa o6pa6oTBaHHa DetaH, cne KaTo npEdBapntenHO Cte ro BKnOuHN. B npOTnEBn CnyaCbIeCTByBa ONaCHOt OT Bb3NkBAHe Ha OTKaT, aKO pexEeJrNt NcT Ce 3aKJIHH B o6pa6oTBaHHa DetaH.
BHHMaBaIte 3a ToBa,OnOpHata nIaCTnHa npn pIa3He BnHarN Da Ira Bbpy DeTnA. CbIeCTByBa onaCHOCT HOKbT Da Ce 3aknnn H da npedn3BnKa 3ary6a Ha KOHTpon HAD eNEKTPOINHCTPymEHTa.
Cne npknKUbaHe Ha pa6oTa NpBPO H3KnUbaHeneKTponHCTpyMeHTa H3BaXdaTepeXeUNIHCOT MeknHaTa eBa Cne OKOHaTeHNHO My CNpaHe. Taka 36raBe OAnCHocTtA O Bb3NkBAHe Ha OTKat NMOxete 6eOancho Da OCTaBte ENEKTponHCTpyMeHTa Ha pa6oTHaTaNOBpxHOCT.
PpeHn da octaBnte enektpoHHcTpymeta, n3uKaBaiTe Bbpteheto da cnpe HanbHNO. B npotnbH en cyuayn 3-10Nl3BaHnrt pa6Ote HnCtpyMeHT MOKe Da DOnpe dpyr PpeMmT N da PpeHn3Bnka HeKoHTpoHpaHO PpeMeCTBaHe Ha enektpoHHcTpymeta.
N3non3BaIte cmo HOXOBe B 6e3yKOpHO cbCToHHe. OrbHaTI Nn 3aTbNeHn HOXOBe MoTa Da Ce CuyIaT, da NOBpeIAT Cpe3a Nn Da IpeIN3BVKat 3aklnHBAe.
CneH3KnIOUBaHe hAeneKTPoINHCTpyMeHTa He cNpaItepeXeunnIcT npHHyDNTENHO,KATO rnpNTNCkATEOTDBETeCTpAH.NPeXeUNrT NcT MoKeJa 6bJe NOBpeDeH,da ce Cuynnn nn da npEnzBAka o6paTeH OTKAt.
Dobpe 3aterhe Meatehana.He nohpaiTe deTaa nca pkaKn c kpaK.He dokocbaTe npedmetn nnnoDa c DnHexe ce TpnoH. CbueCTByBa ONaCHOCT OT OKAT.
H3non3BaIte NOxOAnu np6Opn, 3a da otKpHeTe EBeHTyAInHO cKPHTN NOI NOBbPxHOCCTA Tpb60npBODHN HIN CE O6bPHeT KbM CbOTBEHOTo MecTHO CHa6DINTeHNO DpyXeCTBO. Bn3aHETo B cbnpNKOCHOBeHc NPOBODHIu NOI HanpeXeHHe MOKe Da npEni3BnKa NoJXap N TOKOB yAp. YbpexKaHETo Ha ra3ONpOBoMD MoKe Da DOBeJe Do ekCnIO3N. YbpexJaHTo HA BOOnpOBoD INPeIN3BnKBa 3NaHTeHN MaTePnAHN UeTI.
Pn NOBpeXdaHe H HenpaBnHa eKcnnoataunO ataymyNaTOPHata 6atepna Morat da ce otDenr Napu. AkymyNaTOPHata 6atepna MoKe Da ce 3anann nn da eknnlonpa. Iorpnkete ce 3a do6po npOBetpBaHe n npn onnKaBaNHe ce 6bphete Km nekap. PapTe Morat da pa3dpaaHT dnxatentnHte nbTuca.
He oTbapnTe akymyataopHata 6aetpna. CbuecTByBa ONaCHOCTOT Bb3HNKBAHe Ha KbcO cbeINHeHne.
AkyMnyaTophata 6aTepeH MoKe Da 6bIe NOBpeDeHa OT OCTPN PneDMn, HAp. NpOHN HIN OTBepTK, HIN OT CnHn YdApn. MoKe Da 6bIe NpeDn3BnKaHO BbTpewHO KbCO cBeHNHeHne I aKymyNatopHata 6aTepeH MoKe Da ce 3anaH, da 3anyu, da ekCnIOHp aHn da ce nper-pee.
H3no3BaTe aKymyNaTopHaTa 6aTepeHna cMo B npOdyKTn Ha npOn3BODnte. CaMo TaKa TRe npednaseHa OT OnaCHO 3a He NpTeOBapBaHe.
IpeNa3BaIte akymnatoPHaTa 6aTePnO rOBcOKN TeMnePaTyH, HApN. BcNeCTBHe Na npOdbNxHTeNo H3naRaH e Ha DnpeKTHa CbHueBa CBeTnHa, OfBn, MPbCOTn, BOaH OBnaxHHaHe. IMa ONaCHOCT OT EKCnIO3n KbCO CbeDInHeHne.
Onncahne Ha npodykTa n DeHocTta

Ipooyete BHHMaTeHNO BCHKN yKa3aHn H nHCTpyKuHn 3a 6e3oNaCHOCT. Iponyckn npn CnaBaHTo Ha nHCTpyKuHnTe 3a 6e3oNaCHOCT n Yka3aHnHTa 3a paBota MORa Da hMAt 3a NocLeJeCTBHe TOKOB yDap, NOxap H/INn TeKKn TpaBMn.
MOna, HMaTe IpeBnI N3o6paXeHnTa B npeHaT auct Ha pkoBOCTBOTo 3a paOta.
IpeHa3NaueHne Ha eNeKtpOnHcTpymeHaTa
EleKtpOnHCTpymEnbTe IpeHa3HaueH 3a pa3pa3BaHe C TBbpda ONopa, HaNbPBO, PnactMaca, Metan n CTponTeHH MaTeepnAn. Toe e npDxOJa3 a p3aHe no npaba JInnna n no Dba. Tp6Ba da ce cna3Bat npenopbknte 3a H360p Ha peKeu nnctOBe.
H306pa3eHH enEmeHTn
HomepnpaHTo Ha enemEnTe Ha eneKtpOnHCTpymEnTa ce OTHACdo H3O6paXeHnraTa HA cTpaHnTe CfHypnTe.
(1)PekuHnCT
(2)OchOBHaHnOua
(3)3actonopbaaBtyka3apexeunnaHCT
(4) Akymylnatopna 6aTeprna
(5) BytoH 3a OTKIIOUbaHe Ha aKymyIaNTOPHaTa 6aTepeA
(6)БлokировКаHaNYCKOBINpEkcbCBA
(7) NyckoB npeKbCbaY
(8) Pa60tha lamma
(9) CBeTINHEN HNINKATOP HA CNTeMaTA 3a TEMnepaTypeH KOHTPON/npetOBapBaHe
(10) INHДИКaTOP 3a akymlyaTOPHATA 6aTepeRn
(11)PbKoXBaTka(H30npanHIOBbpxHOCTM)
(12) NocTaBkaHapeKeiunI nIcT
A) N3o6pa3eHnTe Ha fHyprHe n OnncAnHe DoNbHnTeHH npNCNoC6HnHe He Ca BkIoUeHN B CTaNapThata OKOMnNeKToBkHa ypeHa. N3uePnAtehen CnCbK Ha DOnbHnTeHHne PnHCNoC6HnHe MoKeTe Da HAmepHe cBTBtHO B KATAIOra Hn 3a DoNbHnTeHH npNCNoC6HnHe.
Texnueckn daHHN
EJektpnuecka HoxkOBka GSA 12V-14
KaTANOJKeH HOMeP
3601F4L9..
| Ельстрическа поховka GSA 12V-14 | ||
| Номинално нашиожени V = 12 | ||
| Чecтоа на Бьзвратно-noc- Тыпателенite движени на праzenхою n. | min-1 | 0-3000 |
| Гнебу SDS | ||
| Ход мм 14,5 | ||
| Мамс. Дьлбочина на ряазе | ||
| - В дрво мм 65 | ||
| -В стомана (нелегига) мм 8 | ||
| -Диаметер на трубача мм 50 | ||
| Маса съласно EPTA-Procedure 01:2014 | kg 1,2-1,4 | A) |
| Разшени Temпера typа на okолнatable среда | ||
| - пri заразждане °C 0...+45 | ||
| - пri работа B) и пri скla- диране | °C -20...+50 | |
| Пор nopьчителни akумuya- topни варени | GBA 12V... | |
| Пор nopьчителни заюни | GAL 12... | |
| устroyоства | GAX 18... | |
A)B3aBnCmOCTOTH3nON3BaHaTAtAkyMnyatopHa6aTePn
B) orpaHueHa moHocT npH TempeTaTyPn < 0^
TexnueckntepnapemtpcaonpeeneHHcakymnatopnata6ate pna, BKNIOeHaBOKMNEKTOBkata.
HhopmaaHa 3a H3buaBn yM n Bn6paun
CTOHOCHTHe Ha emncn Ha yum ca yctaHOBEHN CbINaCHO EN62841-2-11.
PaBHHIeToAHaTeHepnPAHHoTEnEeKtpOnHCTpyMeHTa3ByKOB HATNCK O6NKNHOBeHO Bb3N3a Ha 70 dB(A).HeonpepeHocT K=5dB. IIO Bpeme Ha pa6ota paBHHIeTo Ha UyMa MoKe Da HAnxBpIn 80 dB(A).
Pa6oTeTe c wymo3aŋnuθnten!
O6uHTe CToHocTn Ha Bn6paun a(BeKToPnHa cyMa OT TpHne NOcOKn)N KOePhiueHeTb Hn HeyctaHOBeHoCT K Ca yctaHOBeHN CbIaCHO EN 62841-2-11:
Praahe Ha nepnlat c pexeunna nct S 511 DF:
a,b=6,0m/s²,K=1,5m/s²
Prahe HaIbpeHnIeTbnCpeKeuHnCTS511DF: a,WB=6,5m/s²,K=1,5m/s².
(DaHHITE 3a pa3pa3BaHe Ha Wnepnpat ce OTHacr Do De6eHa HnHa ot 20 mm.)
IocoueHNTBTOBApbKOBOCTBO3aekcIIoataunn HHOHa B6paHNTHeCtOHOCHTHaEMCNHaWymCaN3mpeHN CbflacHO pOueypa,ONpeJeHa MoKe Da clynx 3a CpABHBaHe CpyrH eEKeTPOHHCTPymeHTn. Te caNoDxOJa cnCbto Taka 3a npEdBapHTenHa OeHka Ha EMNCHTe Ha B6paHn N Wym.
Iocouehnte HbHO BaB6paunHe n CToHocHa eMHcHn Ha Wym Ca npedctabnteHN 3a OCHOBHTne npINOxKeHn Ha eneKtpoHnCTpyMeHtA. Ako obaue eneKtpoHnCTpyMeHbT b6- de h3noJ3BaH 3a DpyrN DeHocTH, c pa3nUHn pa60THn HcTPyMeHTn INI 6e3 Heo6xOJIMOTo TexHuecko OcbnykBaHe,
HNBOTO Ha Bn6paunHe n CTOnHocTtHa eMncn Ha Wym MoJke Da ce pa3nUaBt. TOba 6n MORNo 3NaHTeNHO da yBeHNu Bn6paunHe N Wym npesepnOda Ha non3Bahe Ha enekTPoINHCTpyMeHtA.
3a no-TOHOTO OeHBAHe HA Bn6paunnte N yMa Tp86Ba da ce OTHTAT N nepnoNTe, B KOHTO eNEKTPOHCTpyMeHbTe H3KnIOueH nI paOTo Ha npaseH xoJ. ToBa 6N MORNo 3HaUNTEIHO Da HAMAI EmCnnte Ha Bn6paunn N yM ppe3 nepnOda Ha ION3BaHe HA eNEKTPOHCTpyMeHTa.
IpeHnCBAte DoTbHnTeHnMepKn 3a IpeHa3BaHe Ha pa6oTeuN C eNEKTPoHnHCTpyMeHTa OT Bb3JeCTBHeTo Ha Bn6paunTE, HApnHMeP: TEXHnueCKO oCcnyXBaHe Ha eNEKTPoHnHCTpyMeHTa n Pa6oTHne HnCTpyMeHTn, NOdIbpxKeHa p6uTe ToTnI, ceneCb6pb3Ha opraHn3aunHa pa6oTHnte CTbKN.
MOnTnpahe
PpeHn Da N3BbPwBaTe KaKBTo H da e DeHocTH no ENEKTPoHnCTpyMeHTa (HaNP. TeXHHueCKO 6cNyKBAHe, CmHA Ha pa60THn HnCTpyMeHT n T.H.), KORA To TpaHCnOpTnPaTe Hn CBxPaHnBaTe, DeMOHTnpaTe aKymNaTopHata BaTePN. CbIeCTByBa ONaCHOCT OT Ha paHnBaHe pni 3aDeHCTBaHe Ha NyCKOBn PpeKbcBau No HEBHImaHHe.
3apeKdahe Ha akymynatophata 6aTepehr (Bk. fnr. A)
N3non3BaIte cmo nocouHnte B pa3dena TexnuecKn daHH 3apAHN yCTpoiCTBa.CaMo Te3n 3apAHN yCTpoiCTBa ca NOxOAnu 3a H3non3BaHaTb BB BaHna eNEKtpOHnHCTpyMeHT NHTeBO-NoHnA akymyNatopHa 6atePn.
Yka3aHHe: AkymnatoPnHaTa 6aTePnCe DoCTABu qactNuHO 3apeDHa. 3a DaIOCTURHE TbINr KanaUHT Ha AkyMnaT OPhHa 6aTePn, PpeIN PbBOTO H3NONBaHe 3apeTe DOKpaB 3apdHToO yCTPOIcTB。
JIInTeBO-IOHHataaKymyIaTOpHa6aTePnMoKeJa6bYe3apeJdaHPOBpeMe,6e3ToBaDaCbKpaUaBADbIroTpaHocCTa.1peKbcBaHeHa3apeXdHeToCbIoHeN BpeDn.
IITHeBO-IOHHATA aKymnATOpHa 6aTepe r e 3aunTeHa cpeu yDb6oKa pa3peXdaHe ue3 eneKToHnHa cnCTema "Electronic Cell Protection (ECP)".Pn pa3peXdaHe ha aky MynatopHata 6aTepe r eneKToHnCTpyMeHt bC nKnIOBa OT npednaen npekcbau:Pa60THnT nHcTpMeH cnppa da ce DBNkn.
CneI aBOMaTHHOTO hKIIIOUBaHe Ha eNEKTPOHNCTpyMeHTa He IpoDbJIkaBaTe Da HATNCKaTe NyCKOBnIpeKbcbA. AkymylatopHaTa 6atepna MoKe da 6bde nobpeDeHa.
3a nBaxdahe Ha akymylatopnata 6atepyra (4) HATNCHEOBC60jdaabua 6yTOH (5) H3Tterne 6atepyra HADONYOT eNEKTPoHCTpyMeHTA. Pn ToBa He npnaarate cna.
Hnukatop 3a akymnatohpata 6aTepe
HnKKaTOpb3a CbCToHHHeHa 3apeXdaHe Ha akymyNaTOpHata6aTePn(10)NOKa3Ba Pn HAnONoBnHa HnHaNbHnO
HaTHCHaT NyCKOB INpeKbCBAU (7)3a HRAKOJIKO CEKYHIN CbCTOHHeTO Ha 3apeJxJaHe Ha AkyMynaTopHaTa 6aTePnI HMa 33eENH CBToDIOJa.
CbeToaNoKanaunTeT
HenpeKbchato CBeTeHe 3x3eNeHo 2/3
Henpekbchato CBete He 2x3eNo 1/3
HenpeKbchato CBeTeHe 1 × 3eNeHo < 1 / 3
Muraa CBeTnHa 1x3eIeNo pe3epBa
Ako CneiHaTnCKaHe HaNyckOBnI pKeBcBaU (7) He CBeThe HHTO eHN CBToNDIO, AkymyNatOpHata 6aTePnE e NOBpeHa H Tp8Ba Da 6bDe zameHeHa.
Noctabare/cmha hapexei nct
Pn MOHTnpaHTo Hn CMHaTn Ha HNCTpymEnTa pa6oTe c npedna3n pbkabn. Pa6OTnTE HNCTpyMeHTn mAt octpn Pb6OBe n npn npoDbJnxTeHa pa6oTa MoTa Da ce HaropeuT.
PnCmHaHa pexeHnIcBnMaBaTe rHe3DoTo Da He e 3aMbpcHo cOTnaDbuN OT pHa3aHeTo, HAp. CbProTHHn HnCTpyKKn.
№ ha pexeunnI nct
CnncbKaHa npenopbUbaHnTe pexeue annctOBe moxete da
HaMepe T B Kpa Ha TOBa pbKOBOCTBO 3a ekcnnoataun.
N3nON3BaIte cAmo HoxOBe cyHnBepcaHa onaoka 1/2".
PexeuiT nict He Tp86Ba d e no-dblr OT heo6xoDmoto
3a n3bnHnBaHe h cpe3a.
TocTabaHHe Ha pexeunct (Bx. hnr.B)
3aBbptete 3actonopbaata Btynka (3) npn6n. Ha 90^ no nocokata ha cptekata n 3aDpBkTe. PnTnchepekeunn IInCT (1) B nocTaBAkata 3a pekeunn INCT (12). OTHOBOTnycheTe 3actonopbaata Btynka.
PpOBepTe DaHn peXeunr nct e 3axBaHaTdo6pe, KaTO ONHTate da ro H3DbPnate. HenpaBnHO 3axBaHaT peXeU nCT MoKe Da I3xBpbKHe no BpeMe Ha pa6ota n da Bn HapaHn.
Пин ИЗпьИЯВе На Hякон ДeйHOCTH pexkeиHTIHC(1)MOKEДа 6БдЕ 3aBbPТН Ha 180^ (3b6nteДа ca obbpHaTnHa-rope)Ида 6Бдe NOcTaBEH Taka.
H3BaXdaHe Ha pexeunn HcT (Bx. hur. C)
IpeHn da demoHTnpaTe pexeunna nct, ro n3aKaaiTe da ce oxla. Pnp do npahe do haropeene Hraeepu nict CbueCTByBa onachOCT OT n3rapaHe.
3aBbptTe 3actonopraBauata Btynka (3) np6bn. Na 90^ no nocokata Ha cTpeIkata H 3aDpBXte. N3BaTe peXeunia nCT (1).
Cnctema 3a npaxoynahe
PpaxOBe,OTdEJIaIc ce npn o6pa6oTbaHeto Ha MaTePnAI KATO CbDpKAsOn OBO 60N, HAKON BUNObe DbpBecnHa, MHePAH N MetAn MoRat Da 6bDat Onacn 3a 3dpABeto. KOHTbTOKOKATAHNNBIMUBAHETo HA TAKINBa PpaxOBe Morat DA ppeIN3BnKaT aNEprHnH peakun /nn 3ab0JraBaHHa HnXATEHNITe PbTHUca Ha pa6oTeuCA eENKTPOINHCTpyMeHTA nn HAmpaui Ce H6n30 nua.
OnpeJeHn npaxObe, Hanp. OTdienaIte ce npn o6pa6oTBAHe Ha 6yK n db6, ce cHTa3 kaHcpeoReHH, oc6eHO B KOM6HaunC xHmKanJn 3a TpeTnpaHe Ha DpbBecnHa (XpoMAt, KOHcpeBaHTn n dp.). Donycka ce o6pa6oTaBHeTo Ha cbDbPjKaaN a36ct MaTePAnH cAmo OT cbOTBeTHO 6bUeyH KBAHnФuPapn Nla.
- OcnrypBaTe Do6po npoBepBaHe Ha pa60THOTo MRCTO.
-ПpenopbUba ce n3no3BaHeTo Ha dnxaTeHa Macka cФнлтbpOT Knac P2.
Cn3BaIte BaIIHnTe BbB BaIaTc TpaHa 3aKoHOBn pa3Nope6n, BaIuHN npn o6pa6oTBaHe Ha CbOTBeTHNe MaTePnaI.
136raBte HATpynBaHe Ha npax Ha pa6oTHOTMOCTO. PpaXbT MoKeJecho Da Ce CamOBb3PnaMeHn.
Pa6ota c eNeKtpoHcTpymeHTa
IyckaneBekcnnoataa
NoctabnHe Ha akymnatophata 6atepn
Yka3aHHe: N3noJ3BaHeTo Ha akymyIaTopHn 6aTePnH, KOHTo He ca npedHa3HaueHn 3a Baunr eNeKtpOnHCTpyMeH, MoKe da npedN3BnKa HnPaBnHOTo My fynHKuOHNpaHe nn Da ro nobpeNi.
HaTnchete 6yToHa 3a 6IoknpaHe (6) HADrCHO, 3a Da 3auHnTHe eEeKTPoHHCTpyMeHTa OT BKIOUcBaHE NO HeBHMaHne.
N36yTaIte 3apeDeHa akyMnyatopHa 6aTePnra (4) B NoctabKaTa DOKATO He npuPaKa n He ce 3akNou 6eOancho.
BkIIOUBaHe/N3KIIIOUBaHe(BK.ΦHr.D)
3a BkIIOUBaHe Ha eNEKToHnHCTpyMeHTa HATnCHTe NpB0
6IoKaKa 3a BkIOUBaHe (6) HAIrBO.CneTobHaTnCHTe N
3aDpbKTe NyCKOB PpeKbCBau (7).
Pa60hata CBETHnHa CBET npuactnHo HnHanbHHO HA-THchat NyckOB npekbcba7 (7) npn He6naorponpHTN CBTINHHYcNOBnno6pBa BVIMOCCTA B3OHATA ha pa60ta.
3a H3KIOUBaHe Ha eNEKTPoHHCTpyMeHTa OTNychTe NyCKOBnIpeKcbau (7).HaTNCHETe CneI TOBa 6yToHa 3a 6nOKpaHe (6) HADCHO.
UnpaBHeHnHa 6pOHa XoDObTe
Moxete da perynnapate 6e3eienHno 6por Ha xoobete Ha BkIouhenra eneKToHNCTpyMeHT NocpeDcBOM CnlaTa Ha npHTNcKaHe Ha NyckOBnI npeKcbaU (7).
PnJIeKoHaTnCKaHe HaIpyckOBnIpeKbCBaU(7)ueCTOTata e HNCa.CyBeHnUaBaHe HaHaTHcKa HapacTbNueCTOTATA HaBb3BpAHO-IOCTbNaTeHNHTe DBNKeHn.
HeoXOIMATA YecToA Ha Bb3BpaTHo-IOcTbNaTeHNHTe DBNJxHn 3aBnCn OT KOHKpeTHNe yCNOBn H Ce ONpeJeHn-Do6pe Upe3 nIp06BaHe.
PnpopbUba ce orpaHnUaBaHe Ha yeCTOTata npin 3anOuBaHe Ha Cpe3a n npin pa3pR3BaHe Ha INaCTMaHn anyMnHneBn cIbn.
Pn npOdbNkHTenHa paOta C MaIka YecTota Ha Bb3BpaTHoNocTbNaTeHnHTe DnKHeHnEneKTPonHCTpyMeHbT MoKe da ce harpee cnilho. N3BaTepe pexeunn Hnct n oxlaTe e neke
TPOHCTPymeHTa, KATO 0cOCTaBNTe da pa6oTH npH6n.3MHyTH C MaKCHMaJIHa YecToTa.
CBeTmHEn HnDnKaTop Ha CnCTemata 3a TemnepaTypeh KOHTpon/npetOBapBaHe
UepBHeHa HnHnKaun 3a CneDe He Ha TEmpePaTpya/3aunTa OT npetOBapBahe (9) Bu nomara No Bpeme Ha paBoTa da npedna3BaTe AkyMylatopnHa 6aTePnO T nperepaBahe, a EeKTPoDBnIraTeN O npetOBapBaHe.
Ako Hnndkaunra 3a cnehe Ha Temnepatypata/3aunita ot npetOBapBaHe (9) CBeTn C HenpeKbchata cepBHea CBETnHa, Temnepatypata Ha akymnatopHata batee n TBpde BnCOKa n ENEKTPOHHCTpyMeHTbT CE N3KNHOBA.
H3KIOUOeTe ENEKTPOINHCTPymeHTa HOCtABeTe aKymyNaTOpHaTa 6aTepeHn da ce oxlaHn, npEdu n ppoDbNknte pa6oTa.
Ako HnHnKaunTa 3a CneDeHe Ha TeMnepaTpyata/3auNTa OT npetOBapBaHe Mra (9) B cepBeHo, To eNeKtpOnHCTpyMeHTbTe 6Iokpapan Ce NkIIOUyBA ABTomATNuHO.
N3BaIe teneKtpoHCTpyMeHTa O p3pa3BaHnI DeaII. KOrato 6knpaHTo 6bJe OTcPaHEn, eKtpoHCTpyMeHTbT npOblJXaBA da pa60n C hactpoHATA YecTeTa Ha Bb3BpaTHo-IOCTbNaTeJIHHe DBHXeHHA.
Yka3aHn 3a pa60Ta
PpeHn da H3BbPwBaTe KAKBHTO nHa e DeHocTH no enektpoHcTpymeHTa (Hap. TexHuecko 06cnyKba- He, CmHa Ha paobTHn HcTpyMeHT n.T.H.), KOrato TpAHCNOPTHPaTE HnCbXpaHBAte, DEMOHTPaNTe aKymnatopHATA GatePN. CbIeCTByBa ONaCHOCT OT Ha- panBaHe npn 3aJeCTBaHe Ha NyCKOBn PpeKbcBau No HEBHIMaHHe.
Ako HOXbT ce 3aKJIHH, He3a6abHO n3KnIOyete eNEKT-ponHCTpymeHTa.
Cbbetn
Pn pa3pa3BaHe Ha JeKc CTpOtnEnH MaTePhaHn Cna3BaIte 3aKOHOBtpe Pa3nope6n yKa3aHnraHa H npOH3BOHNTe.
Ppei da pa3pa3BaTe IbpcEnH MaTepHaI, PnU, neKc CTponTeHN H MaTepAaN H. H nPoBepBaTte 3a HaJIuNeTo Ha yJxN TeLa, HAp. pnoHn, BnHTBe N Dp. n H3No13BaIe NoDxaI npEkeu INCTOBe.
BkHouTe eNekTPOHHCTPymeHa n rO np6nHexe Do o6pa-6oTBaHHaIeta. DOnpTe OCHOBHata IIOa (2)do DetaHn rO pa3peXeTe, KATO NOCTOHHo pInTHCKate eNekTPOHHCTpyMeHa KbM Hero, peCn. cPaBHOMepHO NODaBaHe. Cnei npNKIOUBAHe Ha paBOTa N3KIOUeTe eNekTPOHHCTpyMeHa. Ako pexeunr lnc Tce 3aknnHn, He3abABHO N3KIOUeTe eNekTPOHHCTpyMeHa. Pa3TbOpE neKcpe3a CnoDxOJaHnHCTpyMeHT H3BaDeTe eNekTPOHHCTpyMeHa.
TbBaun TpHOnn (Bx. fHr.E)
Donycka ce npo6hbaheTo c pexeunn HCT camo Ha MEKN MaTePnaH, KaTO dbpBeCnHa, rHNCAPtoHnn dp.n! He ce onHTBaTe da pa3pa3BaTe c npo6hbaHe metaH!
Pnpa3pa3BaHe c npo6bHaHe n3no13BaIte cAmo Kbcn peKxueH NtOBe.
IocTaBeTe eEnKtpOnHCTpyMeHTa Ha DeTaNc npeHNnPBb HA OCHOBHa TIOOa (2), 6e3 peKeuNT NCT (1) da ro DInnpa n CneT TOB a RKnIOUe. Ako eEnKtpOnHCTpyMeHTb t c Bb3MOXHOCT 3a peryNIPAhe, yCTAHOBeTe MAKCImaJIHa YecToTA Ha Bb3BpaTHo-NOCTbNaTEHINTE DBHXeHH. PpITNCHeTe 3dPaBO eEnKtpOnHCTpyMeHTa KbM DeTaNn H6aBHO BpeKete peKeuNIA NCT.
Korato ochoBHATA nnoa (2) Donpe do deTnA c qanata cn NOBbpxHOCT, npOdbJxHeTa3BaHTo no XeHaTa nnHn.
3aH3nBnHbAHeToHaCneuΦnHn DeHocTHpeKeuHT nCT(1)MOkeJa6bJe3axBaHaT3aBbptHa 180°n eNeKTpueeCKn HnCTpyMeHT Da6bJeBODeHcBoTBeTHO3aBbPTRAHa.
OxnaKdaio-Cma3Baata Teuhoct
3a da npedotbpaTne nperepaBaHe npn pa3pa3BaHe Ha metaI, Tp6Ba Da haHecete oxlaKaDaIO-CMa3BaJa TeHocT no npoDbJKeHHe Ha IHHNraTa Ha p3aHe.
Yka3aHnHa 3a ONTHMaHnHa pa6oTa cakymyNaTophata 6aTePnA
PpeNa3BaIte akymlyaTopHata 6aTeprn O T Bna r Hbda. CbxpaHbAte akymlyaTopHata 6aTeprn cMoB TempeTpyHn dHaNap3OHOT-20oCdo50oC.Hanp.He octabrte akymlyaTopHata 6aTeprn npe3nATOTOBABTOM6nHa cnbHue.
IepnoHNO nouCTBaHTe BEHTnALaHOHHTe OTBOpHa akyMynatopHata batepna C meKa uCTa n cyxa ueTa.
CbueCTBeHO CbKpAteHo BpeMe 3a pa6oTa cneI 3apeKdaHe noka3Ba, ue akymnatoPnHa 6atepn e n3xa6eHa n Tpa6Ba da 6bde 3ameHeHa.
CnataBaiTe yka3aHnTa 3a 6paKaYBaHe.
Iopdtpxane n cepBn3
Iopdbpxkane nouHCTBaHe
PpeHn Da H3BpWBate KaKBHTO n Da e DeHocTH no enektpoHHCTpyMeHTA (HaNP. TexHuecKO 6cNyKBAHe, CMHa Ha pa6OTHnH INCTpyMeHT H.),KORATO TpaHCNOPTHPATE HNN CbXPAHBAte, DEMOHTPaHTe akymnatOPHATA BATEPH.NCbIeCTByBa ONACHOCT OT Ha paHBAhe np3aENCTBAHe HA NcKOBn PpeKcbaH NO HeBHmAHne.
3a da pa6oHTe KaueCTBeHO 6e30NaCHO, noIdbpKaaTe eNEKtpOHHcTpymEHTa N BeHTnauNoHHTe MyOTBOPH uHCTH.
IouncTe neocTabkata 3a pexeunna nct 3a npednnoHTahe c MeKa yetka. 3a ueTNa nbpBo dEmoHTnpaHte pexeunna nCT ot eKtpOnHcTpMeHa. NOpBpKaIe npabHnHOto fynKcUOHNpaHe Ha rHe3d0To 3a 3axBaUaHe Ha pexeunte nIcTOBe Upe3 Cma3BaHe C NoXOJau MATEpHaJI.
CINHOTO 3aMbpcBaHe Ha eNeKtponHcTpymeHTa MoKe da DOBepe Do HapyuEHHa H cyHKUHOHnpaHTo My.3aTOba He pa3p3BaTe OTOny INN B TaBaHHa No3uNn MaTePnAIn, KOHTO OTdJIAT TOrnMO KOLIueCTBO CTpyKKN.
KnentcKa cnx6a H KOHCyntaun OTHOCH ynoTpe6ata
CepBn3bT ue OTROBOpHa Bbnpocite Bn OTHOCHOpeMOHTn I noDpBkKa Ha 3aKyneHnO T Bac npOyKT, KaKTo n OTHOCHo pe3epBNu cactn. POKOMPoneHTn Yeptexn N HfOpMa- qna 3a pe3epBNHe TaCTn ue OKpnTe n Ha: www.bosch- pt.com
EkntnoKocnytaOn OTHOCO yNtpe6ata Ha Bosch ue Bn NOMORHe C yIOBOJCTBHe npn Bbnpocn 3a HauHnte npoDyKTn nTexHnTe akcecoapn.
MOnI, npBvbpocn H npnpOpbUbahe Ha pe3epBHN qactH BHHarH nocOuBaTe 10-uaPpeHra KataLoXeH Homep,H3nnCah Ha Tabekata Ha ypea.
BbIraPna
Robert Bosch SRL
Service sculelectric
Strada Horia Macelariu Nr. 30-34, sector 1
013937 Bucuresti, Romania
Te.n.: +359(0)700 13667 (Блгарский)
ΦaKc: +40 212 331 313
Email: BoschServiceCenterBG@ro.bosch.com
www.bosch-pt.com/bg/bg/
TpaHcnpOpTuPAne
BkIIOUeHIne BOKOMIIeKTOBkata IINTHeBO-IOHHN aKyMnyTAPoHN 6aTePNi Ca B O6XBbTA Ha H3NCBbAHnra HA HopMaTHBHnTE DOKyMeHTH, KacaeePi npOdyKTc NOBuHeHa onacHOCT. AkMyIaNtOpHIne 6aTePNi Moat Da 6bDat TpaHCnOpTHpaHHOT Notpe6ntenHa Ny6nnHm Mecta 6e3 DoNbHIneJIHH pa3peHIneHN.
PnTpaHCnopTpHaNEOTpTeNCTpaHn(Hanp.npiBb3dyweh TpaHCnoptnnINONL3BaHeNaKpyepckyCny)nMa CneuAHHN3NCKBaHnKbM ONaKOBaHETo N6O3HaVaBaHETo IM. 3aIeNTaPiN NOITOTOBKaTaHa NaKeTHpaHETo ce KOHCytpanPaTe CekCnePT BcOTBeTHata O6nact.
H3npaaiTe akyMnaTOpHN 6aTePNn cAmO aKO KOpNycbT N He e NOBpeH. H3OniPauTe OTKpNTu KOtAKTHN KLeMn CJeIeIaIeHTN ONAKObaTe akyMnaTOpHnTe 6aTePNn Taka, Ye da He MoTaJa Ce H3MeCTBaT B ONAKObkata Ch. MoJIa, CNa3BaTe CbIoo IOnbHLHTEN HaUNOHn NpeDnncAHH.
Бракуванe

EnktonHcptymHte,akymnatoPHTe 6a- Tepnn nOnbHnTeHNrne npncocobHe TaBda 6bDat npedabAHn 3a onon3OTBOPBaHe Ha cBDbpKaunTe Ce TBx CypOBHH.
He 3XbpyIte eneKtpoIHcTpymeHTn akyMynatopHm Hn O6NKHOBEn 6aTePN np6nTOBITE OTnabu!

Cama 3a ctpaan ot EC:
CbINaCHO eBpOneKcA dIpeKTHBa 2012/19/EC eneKtpoypeHTE, KOHTo He MOrAT da ce non3Bat NOBHe, a cbINaCHO eBpOneCKa dIpeKTHBa 2006/66/EO nobpeHn Hn Hx3a-6EHn 0bIKHOBEHn Hn akymyNatOpHn 6aTePN Tpr6Ba da ce
cb6npatn npedaBa 3a onoI3oTbopBbHe Ha cbIbpxaunTe ce B TAX CypOBHn.
AkymynaTopHH mH o6nKHOBeHH 6aTePHN:
JIHTHEBO-IOHNN:
Molra, cna3BaTe yka3aHnrrTa B pa3dena TpaHcnoptnpahe (BxK. TpaHCnpTnpaHe", CtpaHnca 142).
MaKeDoHcKn
Бe36eДнocHH HanomeHH
OnuTH npdeynpeyBaHa 3a 6e36eHocT a eNeKtpnH anatn
PENEY
IPEyBAHe
Ipoountajte Hn CHTe 6e36eHocnn
npedynpdeybaiba,nyctpaunn CneuФнkaun npnloxhen co
OBJeIeKtpnueH anat. HnpiDpKyBaHbeto Do cTe ynaTCTBa npINOKeHH pOJy MoKe Da IOBeE Do CTpyEH yap, noKap N/INN TeIKN NOBpeH.
3aaybajte rH 6e36ednchntpeynpyBaHa
yNaTCTBa 3a KopnCTeHbe H 3a BO HdHHHa.
Pnonot,eneKtpnueH anat" Bo 6e36ednochnte npdynpyBaHa ce odncyBa Ha eNktpnHn anapatn wTO kOpctat cpyja (ka6enckn) nHn anapatn wTO Kopnctat 6ateHH (akymylatopcKn).
Be36eHocT ha pa6oTHnOT npocToP
Pa6oTHNt npocTOp oDpKByBaJte ro uHCTn Do6po ocBETnEN. IpnOJIHH Nm TEmHN IpocToPm MoKe Da DOBeaT Do HecpeKa.
He pa6oTe co eNeKtpnHHTe anTH BO EKcNIO3HBa OKOINHa, KaKo Ha npHMeP, BO npCycTBO Ha 3anaINBn TeuHOCTn, rAcOBH nn npaunHa. EneKtpnHHTe anATn CO3daBaat NCKPN KOnIto MoKeJa ja 3ananat npaunHata nnr racOBHTe.
DpxkTe Tn deaTa n npcyTHnte noaneky dokeka pa60HTte co eNeKtpueH anat. HeBHMaHHeTo MOKe Da npdeH3BnKa da n3ry6nte KOHTpOJa.
EneKtpnHa 6e36ednoct
PnPKnyOKoHa eNEKtpHnHOT anaT Mopa da OndroBapa Ha npKnyHnUaTa. HNKoraW He ro MeHyBaJte npKnyOKo. He KopncHTe npKnyuHn aadantepn co 3a3emjeHnte eNEKtpHnAnaTH.
Hennmehentne npknnyooun nooDBeHTne npknnyuHnru To haanyBaat p3NKOT oCTpyeH yap.
M36erhybaje TeneceH KOHTaKT co 3a3emjeHN NOBpuHH, KAKo Ha npimep,ueBKN,paJnaTOpH, MeTANH Naunu N aadnnnnc. IocToN 3rOJeMeH p3nK Od cTpyeH yap aKO BaWte To TeNo e 3a3emJeHO.
He Hn3noxyBaTe eneKtpnHHT aHaTH Ha doxKn Hn BnaXHH yCNOB. Ako Bne3e BOda BO eneKtpnHOT aHaT, Ke ce 3rOlenm pn3NkOT od cTpyeh ynap.
He noctanybajte hecooDBetHO co Ka6enot. HnKoraw He ro KopnCTeTe Ka6enot 3a Hocebe, Bneuehe nn NcknyBaBe o ctpyja Ha eneKtpnHnot anat. Ka6enot yBaJte ro nOaneky oD orAn, MaCNo, octpn HBnHnn NOBxHH DeOBn. OWTeTeHNn 3aanTkaHn Ka6nI rOtonMyBaAT pNkOT oC tpyeh ynap.
Pn pa6oTa co eNektpuH enaHa OTbOpeHo, KopHeTe IpoOnJxHcKabEn COOBTeH 3a HAdBoeHnHa yNoTpe6a.KopHeTeHo Ha Ka6en COOBTeH 3a HAdBoeHnHa yNoTpe6a ro HaMaNyBa pH3NKOT OCTpyEHyap.
Ako Mopa da pa6oHTe co eNeKtpueH anaHa BnaXho MeCTO, KopnCTe 3aHTEN ypei 3a nPepeHunJaHa cTpyja (RCD). KopnCTeHeto HA RCD ro HamanyBa pNHKOT OD cTpyEHyap.
IiHa 6e36eHnoCT
Bndete BHHMaTeHNH, BHHMaBaJte kako pa60nte npa60Te p3yMHO co eNEKtpueh anat. He KopHeTe eNEKtpueh anat aKO cTE yMOPH HnN NOd JeCTBO Ha Iporn, ANKOXON NnNeKOBn. EeH MOMENT Ha HeBHMaHne DoJeKa pa60nte Co eNEKtpuHNTe aNaTH MoKe Da DOBeDe Do cepNo3Ha NnHu NoBpeJa.
KopncTe TnHua 3aunTHHa onpema.Cekorau Hocete 3aunTtA 3aOu.3aunTHata Onpema,Kako Ha np.. Macka 3a npaHna,6e36eHOCn YeBn KOUTo He ce IINrTaI,7JEMNn 3aunTtA 3aYuN,KOUNTO CE KOpNCtAT 3a COoDBeTHNuCIOB,Ne DOBeaT Do HamaNyBaHe Ha INuHN IOBpeHn.
Cnpeyete HeHaemepHO AKTHBHPaHe. PnpoBepeTe daHn pKeKHyBaOT e NCKLnyeH nPeD a Ro BKlyuHTe BO CTpyja H/nn Co cetOT Ha BaTePHN, nPeD a Ro 3emTe Hn HOcHTe anATOT. HoceHe Ha enEeKTPnHtte anatn co npCTOT nO3nHOHHa Hn pKeKHyBaOT Hn BKNyUbaHe BO CTpyJa Ha enEeKTPnHtte anatn nnjUTo pKeKHyBaOT e BKLYueH, MOKe Da npEni3BnKa HeCpeKa.
OTcpanheKaKOB 6nNo Knyu 3a perynpaHe nnn
ΦpaHcyckn Knyu nped da rO BknyuHTe eNeKTPNHNO
anat.ΦpaHcyckn Knyu nn H Knyu npkaueh 3a
poTnpaKnOT DeH Ha eNeKTPNHNO aHa MoKe Da DOBeDe
DO NnHu NoBpeHa.
He nnpueekopybaje orpahnybaaba. NocjoaHO odpxybaje cooDBetna noox6ha npamhotexa. Oba OBO3MOxyBa NOO6pa KOHTPnHOT anat BO HEnpeBnINBnCHTyaun.
Obneye ce cooDBetHO. He hocete uHPOka oBNeKa n HAKIT. Kocata an anntata tpe6a da 6nDat noaneky OndnoBHXHTeJeNoBN. UHPOkata oBNeKa,HaKNTOT HIN DoJIrata KOCA MOKe Da ce 3aKaayat 3a NoBHXHTe JeNoBN.
AkoceKOpHCTaT NOBp3AHn ypeHn 3aBaDeHe npaHHa H Co6Hpae NpeMmTH, IpOBePeTe DaHn ce npaBnHO NOBp3AHn KOpHCteHn. Co6HpaeTo
PpHnHa MoKe Da Hn HaMaHn ONaCHocHTe PpeH3BnKaHn OHeA.
He 03BOyBaTe HCKyCTBTo CTKHaTO co yecta ynopte6Ha anatnte Da Be HnpaBH cNOKojHn da rHnrhopate 6e36eHocnte npnncnnpn HNBto KOpNctHe. HeBNMaTeIHO DnBeKeHe MoKeJa npeHN3BnKa cepNo3Ha NoBpeA BO Den OJ CEkyHda.
YnTope6a HyBaHe Ha eNekTpHne anat
He ro npeonTobaybajte enektpnHnot anat. KopncTeTe cooBeten enektpnH anat 3a HameHaTa. Co cooBETHOT enektpnH anat noo6po, noe36edno n no6p30 Ke ja hBpuHTe paOtata 3a Koja e HameHET.
He Kopnctete enektpneH anat aKO He moKte da ro BknyuHTe H NCKyUHTe CO NOMOHa NpeKNHyBaOT. Ceko jeneKTpueH anat KojuTo He MoKe Da ce KOHTPOINpa Co npeKNHyBaOT e OnaceH MOPa Da ce nonpaBn.
Ncknyte ro enektpnHnot anat od ctpya nnnn H3BaTe Ro ceTOr Ha 6atepn, aKo ce BaH, nped da npabnte HeKaBn npnaIaOyBaHa, MeHyBaTe DOnONHTenHa onpema nnro cknaInpate enektpnHnot anat. Co OBne IpeBeHTNBn 6e6eHocn MePKn Ce HamanyBa pN3NKOT oD cnuyajHO BKUYBaHe Ha enektpnHnot anat.
Yybajte rH eneKtpnHHTe anTH noDaneky od oOphi HA deca H He DO3BOYBaJTe NcTa KOH He paKyBaNE CO eNeKTPnHHTo anT Hn Hc Ce 3aNo3HaEH Co OBA ynatCTBO da pa6oTa co hCTno. EneKtpnHHTe anTn ce onaCHN BO paTe Ha Heo6yuHn KopncnU.
OpjyBaIbe Ha eneKtpnHn anatn I dononHntenHa onpema. IpOBepete ro nopamHyBaIbeto nnn npucBpctyBaIbe Ha noDBNkHNTe deOBn, cnoJot Ha deNoBHTe CHTe dpyrH yCNOB HTO MOKe HEraTHBO Da BnJaat BP3 cyHKUHOHPaBeTo HA eNEKtpnHnOT anat. Ako e OwTeTeh, Ondecete To eneKtpnHnOT anat Ha nonpaBka nped da ro KopncTe. Mhory hecpeKn ce npedn3BnKaHn 3apaDn HecooDbEThO opjyBaIbe Ha eneKtpnuHne anatn.
Ocptpe HnchTe rnaaTne 3a cehe. CooBETHO ODPKJyBaHnTE HnUH Na aHa aNaTHe 3a CeHe NOMaNKy Ce BNTKaat H NOJIeCHO CE KOHTPOINpaT.
EnektpnHNot anat, dononHntenHata onpema,
IeNoBHTe Hdp., KOpHCTe Tn BO corNaChOcT CO OBA
yNATCTBO,BHHMaBajTe Ha pa6oTHnte ycNoBN
pa6oTata koja ja BpHnte. KopHeBeTo Ha
eneKtpnHNot aJat 3a dpyrH HameH MoKe Da DOBeDe Do
ONaCHN CNTyaCNIH.
PaKHTe H NOBpHHNHTe 3a DpKHe OdpKyBaJte H cyBN, uCTH H EN3MaCTeHN. PaKHTe H NOBpHHNHTe 3a DpKHe ITO CE IIN3raat He OBO3MOxYBaAT 6e36eHNO paKyBaHe H KOHTpOHa Ha anatot BO HENpeDnIbNB CNTyauHN.
YnTope6aHyyBaHeHa6aTePncKn anat
Pnonhe ja 6aTepujata cmo co nonnaH habeHOn npon3boDntenot. nnonau kooTto e cooDBteH 3a eH
TnCetHa6aTePNMOKeJa npEIN3BnKaOnachocT OJ NOKap aKOce KOpHCTNaDpycETHa6aTePN.
EneKtpnHHe aanTH KopHCTe Tn caMo cneunjAnHO Hamehen CeTOBn Ha 6aTePN. KopHCTeBeTo Ha npTu CetOBn Ha 6aTePN MoKe da npedn3BnKa ONaCHOCT OD NOBpeDa HIN NOkap.
Kora he ro Kopnctte cetot ha 6atepn, yBaJte ro noaJeKy od npyrn MeTaNn npEdMeTH, Kako Ha np., CnojYBaNk, MOHeT, KnyueBn, WajKN, 3aBPTK Hn DpyrH NOMAHN MeTaNn npEdMeTH wTo MoKe da npEn3BnKaat Cnoj OD eEN Do pyr H3BOp. KpaTOK cNoj Ha 6atepncnte H3BOpn MOne Da npEn3BnKa n3ropeHn nn noKap.
IoiHnpeBnDHeN OKoHocTH, TeuHocTa MoKe da nCTeue od 6atepHjata; H36erHybajte KOnTakr. PnH cnUyaeh DonHrp, N3Mnjtce co Mna3 Boda. Ako TeuHocTa BnE3e BO OuyTe, No6apajte DononHtEnHa MeHNHCs Ka NOMO. TeuHoc TcHecea od 6atepHjata MOKe Da InpEn3BnKa npHTaunJa nn H3ropeHHu.
He ynotpe6ybajte cet Ha 6atepHH HnH anat wto e oHTeTeH Hn H3MeHET. OHTeTeH Hn H3MeHET 6atepHH MoKe da pearnpaat HenpeDbNINBO n da npedn3BnKaat noxkap, ekCnlo3nJa HnOanachOCT od NOBpeA.
He ro h3noxybajeceTOT ha 6aTepeHH nn anatot Ha oran Hnn BncoKa Temnepatypa. N3noxyBaHeto Ha oran HnHa TempepaTpyo Nobucoka oD 130^ MoKe da npedn3Bnka ekcnno3na.
CneTe Tn CNTe ynatCTBa 3a nonHebe H He ro nonHete ceTOT Ha 6aTePHN HnH anaTOT HnBOP od TEMnepaTyPhHNot ONcer HabeHbO ynatCTbata. HenpaBnHTo nONHeBe HnHa TMnPepaTypa HnBOp OD HabeHcHNot ONcer MoKe da ja oWTeTH 6aTePnJaTa Ja ja 3rOJIeMH OnaCHOCTa OD NOxap.
CepBncpahe
EneKtpnHNO anat cepBncpajte ro kaj KBaHnФkYBaHO nue Koe KopNCTn cmo HeTHuHpe3epBNeOBn. Co Oba ce OBO3MOxyBa 6e36eHOn oDpxyBaHe Ha eNEKtpnHNO anat.
HnkoraHne nonpaabjte owtetehn ceTobn Ha 6aTeHH. NpnpaBkata Ha cToBN Ha 6aTeHH Tpe6a da ja BpuN caMo npOn3BODHTeNT OIN OBnactEH cepBHC.
Be36eHocnHaNoMeHH 3a ca6jcTn nnn
Држete ro eNeKtpnHnot anat 3a nOIpahata NOBpUHa DoIeKa ceYeTe 3a Da He DoJne BO KOHTKT co CkPHeHa XNuA. Ako onpeMaTa 3a ceYeHe DoJne BO DOINr Cp .XNua NOr HaONH ,MOKe Da rN I3IOKN MToAHnTE DeNoBn Ha eNEKtpuHnot aIaT ,NOr HAnOH " OepaTopoT MoKe da DoBne cTpyen ynap.
KopHCTeMeHREMe HnH HeKoJ dpyr npaKTuHn HauHH 3a Da ro 06e36eHTe H npuBcTHe DeNt WTo ce 06pa6OyBa Ha cTa6HnHa NobpUHa. DOKONky ro dpXHTe JeNt WTo Ce o6pa6OyBa co paka HnH ro nOTnpTe Ha Bac, Toa Ke 6HJe Hecta6HnHO H MoKe da N3rybte KOHTPona.
Држete rpaete nodaileky od denot kaje wto ceceye. He phakajte noi denot wto ce 6pa6oTyBa.ДOKONKYdojndeBO KONTAKT co NICTOBITE 3a ПИla NOCTOIN ONACHOCT OD NOBpeia.
Pn pa6oTata,dpxete ro eneKtpnHnot anat cBpcto coDBete nAnKHn 3actaHete BO cnrypha noNoX6a.Co eNktpnHnot anat nocnpyhO Ke ynpaBybATE aKO ro dpxinte Co DBete nAnKHn.
CTabete ro eneKtpnHnot anat camo Kora e Bknyen ha denot wto ce 6pa60TyBa. Hnaky nocton onacnoct od nobpateh yap,doKolky anaTOT wTO CE BMETHyBa CE 3aIaNbBO denot wTO ce 6pa60TyBa.
PnHceuehe BHHMaBajTe Ha Toa, OCHOBHaTnOua cekoraw da IeKn Ha denot WTo ce 6pa6oTyBa. NCTOT 3a nIInata MoKeJa ca 6Ioknpu HdaIOBeDe Iy6eHe KOHTpOla Ha eNEKTPNHNOt anat.
Ito 3aBpyBaHbeto Ha pa6oTe beto HcknyuTe ro eNektpnHHot anat N3BaTe re noCTOT 3a nHa oNceyokot dypn toraw kora toj Ke 3actane. Ha toj NaHHKe n36erHete Nobpateh ynap He Me Moke 6e36edHO da Ro OCTaBHte eNektpnHHot anat.
Pouekajte dokea eneKtpHnnot anat cocema He npeknhe co pa6oTa, nped da ro TprHeTe HactpHa. Anatot wTo ce BMETHyBa MoKe Da ce bloKnpa n da DoBeJe do ryebe KOHTpona HaD ypeDoT.
KopncTeCaMo HeoWteTHe,6ecPpeKOpHn HCTOBu 3a nna. NcKPNBeHNTE HnH HeocTpNtCObN 3a nna MoKe Da Ce CkpWaT, Da BnJaat HeaTbHO Ha CeYeBeTo nn Da npEni3BnKaat NobpaTeH yap.
He ro 6nokpajte nctot 3a nnata no ncknyBaBeto Co ctpauHNO KOHTpa-nptncKahe. nctot 3a nna moKe da ce oHTeN,CKPIHnn da npedn3BnKA NObPaTeH yap.
Ubpcto cterhete ro matepnjano. He ro notnnpajte denot wto ce o6pa60ryba co paka nnco hora.He donnpajte npedmetn nn noi co nna wto pa60tn. Iocton onaacnof od nobpatehen ynap.
KopncTe Co0dBETHn UpeHn 3a npe6apyBaHe, 3a da Tn npohajTe cKpneHnte eNeKtpuHn KaBn Hn KOncynHpajte ce co NOKANHO tPeTnpjatne 3a Cna6dyBaBe co eNeKtpuHa eHepnJa. KOHTAKTO Co eNeKtpuHn KaBn MoKe Da DOBeKe Do NOKap N CTpye Ynap. OUtTeYBaBeTo Ha racoBOJOT MOKe Da DOBeKe Do EKcnnoJa. HabneryBaHbTe BO BDOBOHN CEKBn PpeH3BNkyoWtTeYBaHe.
PnH OHTeYBaBe H HenponnHa yNtpe6a Ha 6atepnjata MoKe Da h3ne3e Naepa. Batepnjata MoKe da ce 3anannn da ekcnnoDupa.BheceTe CBek BO3dyx NdoKoKny mHa NobpeHn OndecTe rHa nekap. Papeata MoKe da rHa nDa p3HN dHUnHte naHHTa.
He ja otbopajte 6atepnjata. Noctoh onachoct od KpaTOK cnoj.
Batepnjata Moke da ce owttn od octpnte npedmetn KaKo Ha np. KInHm Hnn ODBpyBaHn Co HnBopewHn BnJahne. Moke da dojde do BHaTpeWeH
KpaTOK Cnoj H6aTeepnjaTa MoKe Da ce 3anAIn, Da nyuTH uad, da ekCnIIOHaPa HIn Da ce npepee.
KopncTe ja 6aTepeHjata cMo BO npOn3BODn od npOn3BODHTenOT. CAmo Ha ToJ HauHH 6aTeepjata Ke ce 3aHTTN OJ ONACHO PneontOBapyBaHe.


3aHTte ja 6atehpjata od TOnnHa, Ha np. OJONTOTpaHIO HNOXyBaBe Ha COHcEBN 3paH,OrAH,HeHCTOTHH,BOa H Bnra.
Hnky, nocton onacnoct od ekcnno3nja KpaTOK cnoj.
OnncHa npoH3BOoTn nepopmaHCnte

IpoountajTe rH CHTe 6e36eHNOCH HANOMEH n ynaTcBa. IpeWKITE HaCTaHaTN KaKo
pe3yntaT OJ HENPnDpKByBaIbe Do 6e36eHNOCHHTe HANOMEH N yNATCTBA MOKe Da npEIN3BnKaAte ENEKTPueH yIap, nOxap N/nn Tewkn NOBpeH.
BHHMaBaJTe Ha cIHKnTe BO npeHnO T Den Ha yNaTcBTo 3a KOpNCteHe.
YnOte6a co cooDbetHa HameHa
EnektpnHnot ane Hamehen 3a ceyehe Ha npBO, nactka,MetaI rpaedxHn MaepnJano co hKcnpao 3anpaHe.To j Hamehen 3a npaBN KPNBpeoBN. Tpe6a da BHMMaBe H npenopaknte 3a ceHNata 3a nna.
HnyctpaqnaHa KOMnOHeHTN
HymepnapeTo Ha cInKHe Co KOMNoHeHTe Ce OndecyBa Ha npika30 Ha eEeKtpuHnot anat Ha rpaFnuKaTc TpaHnua.
(1) Ceunno 3a nna
(2)OCHOBHa nnoya
(3) Yaypa 3a 6bnoknpahe Ha ceynnoTo 3a nna
(4)BaTeepnja
(5) Konque 3a otknlyuBaHbe Ha baTepejna
(6)Блokада пр вкlnуваье напpeknHybaут за вкlnуваьe/нcklnуваьe
(7)ПпекинУвачзыВКлuyВаьe/ИСКлuyВаьe
(8) Pa60THa CBeTnIka
(9)Пиказа контponа Ha TempepaTypa/3aHTnTa OД npeontOBapyBaIbe
10) PnKa3a HAnoJIHeTOc Ha 6aTepeJnaja
(11) PaçaKa (H3OIIpaHa NoBpIHHa Ha paKaTa)
(12)Пифатна сеунноа ппla
A) NnyctnpnaHATA HN OHnuaHAnOpema He e den od CTaHapdHHOT o6eHaHCnopaka. Cenochata onpema MoKe da ja hajdete BO hauata Pporpama 3a onpema.
Texnukn noaToun
Cajecta nina GSA 12V-14
Bpoj naDen/apTnKn
3601F4L9..
Ca6jecta nna GSA 12V-14
| HOMHANEN HANOV = 12 | ||
| Б Proj ha pa60TNi OJOBn BO ПраЗно n | min-1 | 0-3000 |
| Прифот ha anatot SDS | ||
| Рабовен od mm 14,5 | ||
| Мakc. Длобочиha Ha pe3ot | ||
| - BO дрво mm 65 | ||
| - BO челк (нелегиран) mm 8 | ||
| - Д尼аметар Ha цевкату mm 50 | ||
| Текина согласno EPTA-Procedure 01:2014 | kg 1,2-1,4 | A |
| Дозвolena OKOLNA Temпература | ||
| - пri полныe °C 0...+45 | ||
| - пri pa60te№ B'и пri сklадиразыe | °C -20...+50 | |
| пpenopачни akymу latорсki Related | GBA 12V... | |
| пpenopачни п钓чни | GAL 12... GAX 18... |
A) BO 3aBnCHOCT Oy yIOTpe6eHata 6atepna
B) orpaHnueHa jaHnHa npH Tempepatyn<0°C
Texnuknte noaotoi ce Ha ncpopaanata 6atepna.
Hhopmaun 3a 6yuaB/BNbpaun
BpeHocHTe 3a emncjha 6yuaBa ce opeybaat cornacHO EN 62841-2-11.
HbTO Ha 3ByHnO npTnCk Ha eNEKtpnHnO anat, ouheTo co A,TnnuHO n3neCyBa 70 dB(A). Hecrypnoct K = 5 dB. HbTO Ha 3ByHnO npTnCk npn paBoTebeTo moKe da npueekopn n80 dB(A).
Hocete3aunrta3acnyxot!
BkynHnTe BpeHocTn Ha ocunlaunja a, (BeKTopcN 36np H a Tpnte npaun) H necnpyhocT K ce odpeybaat cnopeD EN 62841-2-11:
Ceyhe Ha shneprnoa co ceyno 3a nna S 511 DF:
a_H,B = 6,0m / s^2,K = 1,5m / s^2
Ceuehe ha metaJIeH nIIM co ceuIIIO 3a IIINs S511DF: a_n,WB = 6,5m / s^2,K = 1,5m / s^2.
(Noataoute 3a ceuehe Ha HBepkn BaKaT 3a De6eHHa od denot wto ce o6pa6oTyBa oD 20 mm.)
HnBoto Ha Bn6paun HABeDeHO BO OBne yNaTcTa H BpeHocTa Ha EMncjata Ha 6yuaBa ce N3mepeHN cnopei MePHN NOCTaKN HMOKAT Da CE KOpNCtAT 3a CnopeD6a Mery eNEkTPnUH anatn. IcTo Taka MoKe Da ce npInarOdn 3a npedBpemeHa IpoueHa Ha HNBOTO Ha Bn6paun H emncjata Ha 6yuaBa.
HaBeHEnOTo HnBO Ha Bn6paunn H BpeHocTa Ha emncjata Ha 6yaba Tn npeTcTaBaaat rnaBHnTe npImEHn Ha eNEKtpnHnOT anat. DOKoNky eNEKTPnuHnOT anat ce KOpNCTHa dpytn pImMeHN, aanot tTO CE BMETHyBa OTCTanyBa OJ HopMITE HnHnEOBoHnCe ODpKByBa, HNBOTO HA Bn6paunn H BpeHocTa Ha emncjata Ha 6yaba MoKaTda
OTcanybaaT. Oba MoKe 3HaunTeHNO Da ro 3roJeMn HNBOTo Ha Bn6paunu Emncjata Ha 6byaBa BO cIeIokyHnOt nepoJHa paBoTeHe.
3a npeu3HO OpeyBaBe Ha HbBO To Ha B6paunn Emcnjata Ha 6yUba, Tpe6a da ce 3eMe npeBnD npnoDT BO KoJ yepoTe HCKnyueH nn pa60T, a He BO MOMENTO Kora e BO ynotpe6a. Oba Moke 3HaHTeHNO da ro HaMaHn HbTO Ha B6paunn Emcnjata Ha 6yUba Bo 9eOKynHOT npnoD ha pa60TeB.
YbpeTe H DoONHInTeJIHnTe MepKn 3a 6e36ednoct 3a aHTHa KOpNCHNKT Od BInJaHHeO BnBpaunnte, KaKo Ha np.: OpJxByBaBe Ha eNEKTPuHnTe anaTH anaTne 3a BMETHyBaBe, OpJxByBaBe Ha TOnIIHHaTa Ha dNaHKnTe, oprAHn3npaBe Ha TeKOT Ha pa6oTa.
MOHTaKa
Ppe6nKakBa HInTeBEnuHa ha eneKtpnHnot anat (Ha np. OpPxyBaHe, 3aMeHa Ha anat nTH.) KaKO n Pn HerOB TpaHcNoPT NCKlaHpaBe, 3BaAte ja 6aTepnjata OD Hero. Pn HeBHNMaTeIHO pNITnCKaHe Ha npeKnHyBaOTo 3a BkNpyBaHe/NCKnPyBaHe NOCTOn ONaCHOCT OINOBpeiN.
Nonhebe ha 6atepnjata (BnDn cnnka A)
KopHCTeTnCaMo nONHaHTe KOHtO ce HabeDeHN BO TexNnKHe NDoaToU. CaMo OBne ypeu 3a noHHeBe ce nOroHN 3a IInm-johckata batepna 3a BaHnot eNeKtpuehenyepd.
Hanomeha: BaTepnjata ce nCnpaUyBa deNymHO HanonHeta. 3a da ja HanonHnIte eNocho 6aTepnjata, nped npBata ynoTpe6a cTabe ja ha nonHau doKeHa ce HanonHnIeNoCHO.
JTNym-jOHCKNte 6aTePN MoKeJa Ce HAnONHAT Bo Cekoe BpeMe,6e3 Da Ce HAMAIHNBHNOT KINBOTeH BEK.IpeKNHot npn nonHeBeTo He HaHTeTyBa Ha6atePjata.
IInm-johckata 6aTepnja e3awntteHa od nla60ko npa3Hebe co „Electronic Cell Protection (ECP)".Dokonky ce nCnpa3Hn 6aTepnjata, eneKtpnHnot anat ke ce ncknyu co nomoi Ha 3awntHnot npeknHyBa: EneKtpnHnot anat he ce DbHexn Beke.
IopABTOMATCKOTOHCKNyyBaBeHaeneKTPnHHot anaT,He nPHTNCkajTe Ha npeKNHyBaOT 3a BKnyBaBe/HckNyBaBe.Batepnjata Moke da ce OWTETN.
3a da ja n3BaJnte 6aTePnJaTa (4) npTncHe Ha KonUeTo 3a OKnyBaHbe (5) n3BNeueTe ja 6aTePnJaTa HAnOy oEneKTPnHnOt aHaT. PnToA He ynotpe6yBaJte Cnna.
PnKa3 3a HAnOnHeTOc Ha 6aTepeHjata
PnPKa30T Ha HaNONHeToc Ha 6aTepejnaTa (10) npn noNOBuHO nnIeNoCHO npTHcHAT npeKNHyBa 3a BKnyBaBe/ncKnyBaBe (7) 3a HeKoNky cekyHn ja npNKKaYBa HaNONHeTocHa Ha 6aTepejata NMa 3 3eJenn LED CBetnIKn.
LED-cbETnKn KanauTeT
Tpajno cBeTIO 3 x 3eNeHO ≥ 2 / 3
LED-cBetmKn KanaHTeT
TpaJHo CBeTnO 2 x3eNeH0 ≥1/3
TpaJHo CBeTIO 1x3eNeHO <1/3
TpenkaBO CBETNO 1 x3eneHO Pe3epBa
Iokony no npntnckabeTo Ha npeknhybaot 3a BknyBahe/ncnyBahe (7) He CBETn Htye edHa LED CBETnka, batepnjata e deeKTHa mopa da ce 3ameHn.
BmetyBahe/3aMeHa Ha ceuHTo 3a HnlaTa
Pnctabahe nnn npn 3aMeha ha enektpnuHnot anat Hocete 3aHTTHPaKaBn. AanTHe 3a BMETHBaBe ce ocTp n MoKe da ce 3arpeat npn noOnra ynoTpe6a.
Pn MeHyBaHbeto Ha CeuHaTa 3a Nnna BHHMaBajTe Ha Toa,Ha PnHpaT0 3a CeuHNo 3a Nnna Da Hema OctaToUO nO MaTepHjan,Ha np. DpBeHN Hn MeTanHn CTpyrotHH.
BnpaBe Ha ceuHIOTo 3a Hnla
Pperneod 3a npenopauahn ceunla 3a nnaKe ro hajte Ha kpaot od oba yanaTcBO. CtaBaJte cmo ceunla 3a nna co 1 / 2^ -ynHBep3aeneH dpkau.CeINOTO 3a nna He Tpe6a da 6nnde npoIro OTKONky wTo e notpe6ho 3a npedBnDEHnOT pe3.
BmTeHyBaHe Ha ceHNoTo 3a nHa (BnHcNkA B)
Cbptete ja yaypata 3a 6noknpahe (3) 3a okony 90^ BO npabeu ha ctpenkata n dpxke tje ubpcto. Pnntchene ro ceunno 3a nnna (1) BO npnpaTOT 3a ceunno 3a nnna (12). Nobtopho otnytete ja yaypata 3a 6noknpahe .
Co Bnuehe npoBepe TaH e 3aUbpctHo ceHHnTo 3a nHaTa. Na6abo nocTaBeHOTc eHHNo 3a nHa MoKe da HcnaHe n Da Be nobpei.
3a OndeHn pa60TH, ceHnIOTo 3a Hnla (1) MoKe Da ce CBPTn 3a 180^ (3anTe nokkByBaat Harope) NOBTOHO da ce CTABN.
Baedehe hacceHHnTo3aHHna(BHnCnKaC)
PpeIa ro H3BaIHTe ceHnIOTo 3a nnla, octaBeTe ro da ce onaII. IOKOLky ro donpTe keWKOTc eHnHO Ha nHa, noCTOn ONaCHOCT O NOBpeJa.
Cbptete ja aaypata 3a 6nokpuhe (3) 3a okony 90^ Bo npabeu h cTpekata n npkeTe ja ubpcTo. N3baTe ro ceunno 3a nna (1).
BcncybaheHa npab/ctpyrotHH
IpaBtOd MaTePnJaHrTe KaKo Ha np. cNoeBn 6oJa, HeKoN BINO BpBO, MNHePaNN H MetaI MoKe Da bIne JToTHe N O3DpaBeTo. DOnIPAbETo HIN BnWbYBaHbETo Ha TaKBaTApB MoKe Da npeIN3BnKa aJeprNcKn peakun H/Inn 3a6OyBaHa H dNwHrTe NaTHuHa KOpNCHKOT INn IInuTa BO OKONHATA.
OdpeHn YecTHuKn npab KaKo Ha np. npaB Ond a6 HnN 6yKa BaxaT KAKO KAHCeporeHn,OC6eHO DOKONKY CE BO KOMbHaJcJa CO dONOHNTENH CyNCtAHU (xPOMaT, cpeCTBa 3a 3auHTHa Ha dpBO).MATEpNJAnTe wTO codpxkat a36ec T CMeat Da 6nDat 6pb60TyBaHN caMo od CTpaHa Ha CTpyuHn Nla.
- Iopnke ce 3a do6pa npoBepeHocT Ha pa60HTO MecTo.
- Ce npenopayBa HocHe Ha MaKa 3a 3auTtA npn BnuyBaHcTo Co KlaCa Ha nntep P2.
BHHMabajte Ha BaxeKnTe npOnnc Ha BaWata 3emJa 3a MaTePnJAnot KoJ ro o6pa6oTyBaTe.
136erHyBaJte co6npaBe npab Ha pa6oTHOTo MecTo. PpaBta necho MoKe da ce 3anaHn.
Ynotpe6a
CtabaBeBoynoTpe6a
Bmthybahe ha 6atepnjata
HanomeHa: KopncTeHeTo Ha 6atepnn KOn He ce cooDBeTHn 3a BaHnot eNeKtpueH anat MoKe Da IOBeE Do nOprpeHNO fHKnOHHpaHbe HIO DO OWTetyBaHBe HA NCTHO.
PnTNCheTe ja 6IokaDATA npN BknyyBaHe (6) Ha DecHo,3a Da ro 3aWHTHTE eNEKTPuHNOT anat OJ HeBHmATEHNO BknyyBaHe.
Bmethe ja Hanonhetata 6atepnja (4) BO npnpaTOT 3a 6atepnja,doNeKa He cnuyhete Deka e BknoneHa n 6loKnpaHa.
BknyBaBe/HcknyBaBe (BnDn Cnka D)
3a BknyBaBe Ha eNeKTPnHnO nAa npBO npHTncHe ja 6IokaTa npBknyBaBe (6)HaJeBO. IToo a npHTncHeTe ro ppeKNHyBaOT 3a BknyBaBe/NCknyBaBe (7) n dpKeTe ro npTHcHAT.
Pa60Thata CBeTnIka CBttn PnMAnky HnIeNoCHO npInCHa npeKInyBaau 3a BknyuBaHe/NCknyuBaHe (7) n OBO3MOxKyBaOCBtNByBaHe Ha pa60THO t Nlne npn ycNObHa cna6aOCBtNeHOCT.
3a ncknyyBaBe Ha eneKtpnHOT anat OTnyTete ro npeknhyBaOT 3a BknyyBaBe/ncknyyBaBe (7).Itoa npInChTe ja 6lokaTa npn BknyyBaBe (6) nobTopHo Ha deCHO.
Kohtpola ha 6pojoT ha pa60THN oOBOH
BpojTo Ha pa6oTHn OIOBN Ha BknyeHnO teneKtpuyeH anat MoKe Da ro peryInpate 6ecTe neHo, BO 3aBnCHOCT oToa KOnKy Ke ro npHTncHe TpeKHyBaOT 3a BknyyBaBe/ NCKNYyBaBe (7).
Co HeXHo npTnCKaHe Ha npeKHyBaUOT 3a BKnUyBaBe/ NCKnyuBaHe (7) ce NoCTnHyBaAT Man 6poj Ha pa60THo OOBn. Co 3rOleMyBaHe Ha npTnCOKOT ce 3rOleMyBa H 6pojTo Ha pa60THo OOBn.
Iotpe6HnO 6poJ ha pa6oTHn OOBn 3aBnCn OMaTePnJaON Ipa6oTHnTe yCNOBn H MoKe Da ce OndpeN Co npaKTNuHa npImeHa.
Ce npenopayBa haMaIyBaHBe Ha 6pojTo Ha pa6oTHn OOBn
PpN NOCTaBYBaHbHe Ha CEHNTO3a PIIHa HAnT, KaKo H
PpN CeHBe Ha NlaCTHkA nAlyMNHyM.
PnnooIroptajno pa6otehe co man 6poj ha pa6oTHNOOBOH, eNEKTPNCHOT aIaT MOKe MHORY da CE BKeHTN.3BaTeTe ro ceuHnTo 3a IIINa N OCTABeTe ro eNEKTPNCHOT aIaT da pa6oTH Okony 3 MHN. Co MaKcHmAleH 6poj Ha pa6oTH NOOBn.
PpKa3 3a KOHTpona Ha TemnepaTypa/3aunTna oD npeoTbApyBaBe
UpBeHnO npKa3a KOHTpOHa Ha TempepaTypaT/aaHTnTa oN pneontOBapyBaHe (9) Bu nomara da ja 3aHTnTte 6aTepnjata od nperpeBaHe mOTopoT od npeontOBapyBaHe.
Iokony CBETn npka30 3a KOHTpOHa Ha TEMpepaTpyata/ 3aHTTA OJ npeontobapyBahe (9) HENPEKHaTO UPBeHo, TEMpepaTpyata Ha 6aTepnjata e peBnCoka n eneKtpuHnot aIaT aBTOMatCKn Ce NcKnyBa.
Ncknyte ro ekeKtpnHnot anat n octabeTe ja 6atepnjata da ce onadn, nped da npodonknte co paobotata.
DOKONKY npka30 3a KOHTPona Ha TemnepaTypata/3aWHTNA OJ ppeontOBapyBaBe Tpenka (9) upeHo, eNEKTPnuHnot anat e 6boknapan n ABtOMATcN Ce NCKnyuBa.
I3BneueTe ro eneKtpnHnO nAaT Od DenoT WTo ce 6bpa60yBa. IToM ceOTcpanH bNoKaadata, eneKtpnHnO anat npdoJnyBa da pa60tn Co noctabEHnO 6pOj Ha ydpn.
Cobetn npa6oTeheTo
Ppe 6nno KaKbA HHTepBHeuJa Ha eEKeTpHnO t anat (Ha np. OpJxByaBe, 3aMeHa Ha anat nTH.) KaKO n np HerOB TpaHCnopt NCKlaHpaBe, K3BaTe je 6aTepnjata OD Hero. PnHEBHMATEIHO pNITnCKaBe Ha npekHHyBaOT 3a BkLyUyBaBe/ NCKlyUyBaBe NoCTOn ONaCHOCT OD NOBpeNi.
Dokonky ce 6noknpa ceHHnoTo 3a nHna, Hcknyte ro eNektpnHnot anat.
COBETH
PnceheHaJeCNrpaJexHN MaTepnjann, BHHMaBajTe Ha3aOKcKHTe Ope6bH npenopakn Ha npOn3BOUInTeJOT Ha MaTepnjanoT.
PpeceheTo BO DpBO, IneepnNou, rpaedxHm MaepnjaIINTH. IpOBepTe DaIIHa Hb HMa TyTt Ta KaKo Ha np. KInHcN, 3aBPTKn ynotpe6eTe ro COOdBETHO ceHHno 3a Nnna.
BknyeTe ro eNeKtpnHnOt anat n BoJeTe ro no denot tto Tpe6a da ce o6paBOTn. NocTabete ja oChOBHata nnoa (2) Na nobpwnHata od denot to ce o6pa6OyBa n ceyeTe co eHaKOB npHTnCOk OHN. hcta 6p3Hn no MaTePnJant. No 3aBpyBaBe ha pa6oTHnOT ppoec, ncknyeTe ro eKeTpnHnOt anat.
Dokonky ce 3aarnabn ceHHnoTo 3a nHa, BeDaH NckLnyeTe ro enektpnuHnot anat. PaunpeTe ro npouenot wTo cTe ro HanpaBnIe npi ceuebeto Co cooDbeteh anat NnBneyeTe ro enektpnuHnot anat.
Ceuehe co Bdna6HyBaHe (BnHn CnHaE)
CMeaT Da ce 6pa60TyBaat Camo MeKN MaTepnJaH KaKo DpBo, TnC KApToH Cn. Pn H CeYeBe co BnA6HyBaIe! He 6pa60TyBaJTe MetaHn MaTepnJaH Co CeYeBe co BnA6HyBaIe!
3a nnilata 3a Bnla6HyBaHe KopncTeTe cAmo KpaTKn CeHna 3a nila.
Ioctabete ro eNeKtpnHnot anat co npedHnot pa6 Ha OCHOBHata nnoa (2)Ha denot wTo ce o6pa6oTyBa, 6e3 ceHHNtO 3a nnla (1) da ro donnpa denot wTo ce
obpa6otya h Bknyute ro. Kaj eneKtpnHnte anatn co KOHTpOHa ha 6pojoT ha yapn, nocTabete ro MaKCHMaHnOT 6poj Ha pa6oTHn ODBN. PnHTnChete ro eneKtpnHnOT anat Ha denot wTo ce obpa6otya H octabete ro ceuHnOt 3a nnna nonekaa Ce bDaBne Bo denot wTo ce obpa6otya.
TOM OCHOBHATA NIOUa (2) cIeNOCHO Ke HAnerHe Ha NOBpHnHaTa Ha denot wTo ce 6oPa6OlyBa, npOdoNKeTe Da CEeTe No DOnKHa Ha caKaHaTa IHHJa.
3a Ondepenpaobtn,ceunno 3a nna(1)MOKe da ce nocTaN coBptHe 3a 180^ a cabjcTaTa eNeKtpnHnO t anat da c BOHN COODBEHO CBPTEN.
CpeCTBO3aIaebe/IOMaUkyBaHbE
PnCceHeHaMeTnnpaH3arpeBaHeHaMaTepnjanoT TpeBaHaHeceTe CpeCTBO3naJeHeOHN. NOpMaKyBaHeNoDolKHHaHaIHHjata3ceHee.
HanomeHH 3a ONTHMaIIHO KOpHCTeIbe Ha 6aTepeHnTe
CabaKobayevik 47b,6poj3
1000 Ckonje
E-nowra: dimce.dimcev@servis-bosch.mk
HHTephet: www.servis-bosch.mk
Ten./paKc:02/2467610
Mo6.:070595888
Д.П.T.Y "POJKA"
JaHH NyKpOBcKn 66;T.II ABTOKOMaHda NOKa1 69 1000 CkONje
E-nowta: servisrojka@yahoo.com
Ten: +389 2 3174-303
Mo6: +389 70 388-520, -530
TpaHcnpr
IInm-johcknte 6aTeHH NoJnKat Ha 6apaBaTaHa 3aKoHOT 3a Onacn MaTeHH. BaTeHHte MoKe Da ce TpaHCnopTnPaAT cAmO od CtpaHa HA KopncHKOT, 6e3 Notpe6a OD DonolnnHTenH KBAHnФkaun.
Pn npneHoc Ha nCTHe oC tpaHa Ha TpeTn Nua (Ha np. Bo3dyWeH TpaHCnOPT Hn WneDnJia) HeonXoHO e Da ce BHNMaBa HA CneUjAnHHe HanOMEHHa AMbAaxata N 03HaKHe.Bo TaKOB Cnyuj, PnnpoTROBkata Ha npTaKaTa Mopa Da Ce NOBkA ekCnepT 3a OanChn CyntaHn.
TpaHcnpTpapJte r6batepHnTe cmo DOKoKky KyKnWTeTo e HeoWTeHeo.3aIeNete rnoTBOpEnHe KOHTAkn CnakyBajTe ja 6batepnjata Ha ToJ HauMH wTO HeMa da ce DbHXn BO aMbaJaxata. Be MoJIme BHNmAbajTe Ha EBEHTaHnTE DoONlHTeHN HaUHOHaHn IpOnncn.
OttpaHyBahe

EeKtpnHHTe anapatn, 6aTepeHtte, onpemata n am6anakhte Tpe6a da ce otctpaHAT Ha ekolowkn npdaTnHBnH.

He nФрлajte eneKtpnHnte anapatn H 6aTepeHnTE BO DOMaunHata KaHTa 3a rY6pe!
Cama 3a 3emjnte od EY:
Cnope ebponckata perynaTbva 2012/19/EU
eneKtpnHHTe anapattnTO CE BOH ynOTpeba ndepeKTHTe Hnn NcKopncTeHHTe 6aTeepn cnopep peryaTbata 2006/66/EC Mopa odienho da ce co6epa n da ce peunknapaat 3a noBtOpHa ynOtepa.
Batepnn:
JIHTHym-JoHcKh:
Be MoJIHMe BHHMaBajTe Ha HAnOMeHInTe BO denOT TpaHCnOPT (BvIaN, TpaHCnOPT, CtpaHnua 148).
Srpski
[BaT] 20°C C E T 50°C O D B A T W E E E T M A T J T H A T S I O.
UaIg aJdI I Jaaal Iaai
(aJgSJI 1000 ()
JsiJiKjIoo
1gJgGgJg
g jg gJgSloJI JgJgJgJg
auiuui 1000000000000000000000000000000000000000000000000000000000000000000000000000
c|191
J 1 J 1 J 1 J 1 J 1 J 1 J 1 J 1 J 1 J 1 J 1 J 1 J 1 J 1 J 1 J 1 J 1 J 1 J 1 J 1 J 1 J 1 J 1 J 1 J 1 J 1 J 1 J 1 J 1 J 1 J 1 J 1 J 1 J 1 J
aJl 100000000000000000000000000000000000000000000000000000000000
JALI JALI JALI JALI JALI JALI JALI JALI JALI JALI JALI JALI JALI JALI JALI JALI JALI JALI JALI JALI JALI JALI JALI JALI JALI JALI JALI JALI JALI JALI JALI JALI JALI JALI J
jbg jaoai jbs wu u. agbJg
Lgall gugol jlljglg wgl q
wlg uaguag uag uag uag uag uag uag uag uag uag uag uag uag uag uag uag uag uag uag uag uag uag uag uag uag uag uag uag uag uag uag uag uag uag uag uag uag uag uag uag uag uag uag uag uag uag uag uag uag uag uaguag uag uag uag uag uag uag uag uag uag uag uag uag uag uag uag uag uag uag uag uag uag uag uag uag uag uag uag uag uag uag uag uag uag uag uag uag uag uag uag uag uag uag uag uag uag uag uag uagg UgUgUgUgUgUgUgUgUgUgUgUgUgUgUgUgUgUgUgUgUgUgUgUgUgUgUgUgUgUgUgUgUgUgUgUgUgUgUgUgUgUgUgUgUgUgUgUgUgUgUg Ugg Ugg Ugg Ugg Ugg Ugg Ugg Ugg Ugg Ugg Ugg Ugg Ugg Ugg Ugg Ugg Ugg Ugg Ugg Ugg Ugg Ugg Ugg Ugg Ugg Ugg Ugg Ugg Ugg Ugg Ugg Ugg Ugg Ugg Ugg Ugg Ugg Ugg Ugg Ugg Ugg Ugg Ugg Ugg Ugg Ugg Ugg Ugg Ugg Ugg Uyg Uyg Uyg Uyg Uyg Uyg Uyg Uyg Uyg Uyg Uyg Uyg Uyg Uyg Uyg Uyg Uyg Uyg Uyg Uyg Uyg Uyg Uyg Uyg Uyg Uyg Uyg Uyg Uyg Uyg Uyg Uyg Uyg Uyg Uyg Uyg Uyg Uyg Uyg Uyg Uyg Uyg Uyg Uyg Uyg Uyg Uyg Uyg Uyg Uyg U yg Ys y s
U
a/1s0g
bJUeIe pAulI g 1uulI sgo jus J
.0aljElaJIy uJxJauJui Jic bai
a a a a a a a a a a a a a a a a a a a a a a a a a a a a a a a a a a a a a a a a a a a a a a a a a a a a a a a a a a a a
()jg jpo sJyaggl Caiig cabi agaog aabig ayb0wag abwlg
a aasssssssssssssssssssssssssssssssssssssssssssssssssssssssssssssssssssssssssssssssssssssssssssss
wglg jgs gog sljgc g j
4Lw gUgSgS,
aJdsj jgsolswsjl slj
JuswJgWuLwUgds
.1gawlaowwJolkws
LjS11
Lw Lg jy L
.
.
.5gogoljolilgljj
jgu g oai o1s juaig jol slqalwgs
sio.
9j juiu guo uui d
4uuu uuao Ue
g gJgJgWdJgSuloojUaI
sis ggsu y jwj j
uuaa g uoj d uai j slj s labe g gaw
CwsL 0s3 CwsljI jI yJ jS W Uw I sIyJ .siSi OlaW O S W JSL iuU Lpuao jc JkS cWl jSoo D uu Caiu JgW wI d jao g SiW L .g
sui slos u wj Jl jllu 1s lus LwJn Jn Jn Jn Jn Jn Jn Jn Jn Jn Jn Jn Jn Jn Jn Jn Jn Jn Jn Jn Jn Jn Jn Jn Jn Jn Jn Jn Jn Jn Jn Jn Jn Jn Jn Jn Jn Jn Jn Jn Jn Jn Jn Jn Jn Jn Jn Jn Jn Jn Jn
slos oogdo jgljIjIgSjg S
. jJw UJgws J Osw Coojju
oogdo j gla slo JU CwJdI jS
jbl g sijda SuO uSoo
. uJlaljIg
uugwu
Jusssaa a bag g jy Jg sI y
Jol Lsdyabg jg dS Egs Jg
jai ds w sIg ccl y. laoi o laow
. Sds Jnaua Iaw o ksw
. Sijsuot J O dy CwI Igjbl j
Juy CwJ Jg no nnnnna Iwgi qy dy Iy
. sig
JLd aas yjy jy Js
JLg yj dy jy dJy
Jy jy dy dy dy dy dy dy dy dy dy dy dy dy dy dy dy dy dy dy dy dy dy dy dy dy dy dy dy dy dy dy dy dy dy dy dy dy dy dy dy dy dy dy dy dy dy dy dy dy dy dy dy dy dy dy dy dy dy dy dy dy dy dy dy dy dy dy dy dy dy dy dy dy dy dy dy dy dy dy dy dy dy dy dy dy dy dy dy dy dy dy dy dy dy dy dy dy dy dy dy dydydydydydydydydydydydydydydydydydydydydydydydydydydydydydydydydydydydydydydydydydydydydydydydydydydydydydydydydydydydydydydydydydydydydydydydydydydydydydydydydydydydydydydydydydydydydydydydydydydydydy
jj Cawg aJ gaa wS. yIg jg3
cl oJI aai Jwai .sji Jaab
.
1b slj jns k J
J 0
. g w y i j s u 1 1 1 1 1 1 1 1 1 1 1 1 1 1 1 1 1 1 1 1 1 1 1 1 1 1 1 1 1 1 1 1 1
. g w y i j s u k s u j z j j j j j j j j j j j j j j j j j j j j j j j j j j j j j j j j j j j j j j j j j j j j j j j j j j j j j j j j j j j j j j j j j j j j j j j j j j j j j j j j j j j j j j
. g w y i j s u k s u k s u k s u k s u k s u k s u k s u k s u k s u k s u k s u k s u k s u k s u k s u k s u k s u k s u k s u k s u k s u k s u k s u k s u k s u k s u k s u k s u k s u k s u k s u k s u k s u k
g lalaaaagai
jil j aalwgs n jn wla kis
.ajl jil g uol dai jui cie
jnljai dlai ol jiai yu
. iS L gla
jI o lawl psc C
gdl s jg ds jLg S wJus
jdl as g laiwlg li g Jgl ai ss
oLsws n ly sllgai I loim Jd
jI jJlW abgpo slayaiml qam
:ww 1yda aq jg g Jgl
Sjio gaoa dS yu bIg o
iiaom .si j g 0s JLS ygsolss
lg aiusw g jbl cbsd S sds C
. siwui Oy Dswl
. jis moss jL e g wjl
Jy jIjI jI Jols 0o sJg gW .wU
jglg jw sldjl g osw cuijo ygsds 1g jig g oos jls daa Jus, CwI .CwI C
JL Laiol jg jn lglw s I
aegj jI g g JSL bJw g J
Sly g Jy Jl J0laow .daw
sllgmo oW dJbJ dslo Jo y JULOAC
.ogw JIOO OJbA Jw jgdy
jauo oJgaw Jglc ggbw g legiw
diws .Jds JmuJg Jc9jI Slc g
blsw Jd JUSS g jiaI gila 0sjal sl
.iiuon oJbua u
sjjw sllj|j| olaow jlp g
jssjjw sllw aagg o jlw jgsjjw jil gjjw jjw slg as gws jcw o w diaow gjw u slg d
sJg 1000000000000000000000000000000000000000000000000000000000000000000000
4bwgdaLwjjJU
200|
jI jI b s g w Jaiio. SIS gS. jwJ .g
jy jy jgai jb0g slaow 1gua cbaa sajl juui uad jbs
Jl jI JI JI JI JI JI JI JI JI JI JI JI JI JI JI JI JI JI JI JI JI JI JI JI JI JI JI JI JI JI JI JI JI JI JI JI JI JI JI JI JI JI JI JI JI JI JI JI JI JI JI
Jg g Jgaaa
Ij qiaimlg g iolgws doom
Ucjc j ui uaiuui. ulig
Ucuu uauuui Ugius
UaJmuugg

laaiJd jglgslg ggi d
olkwjIollaWJJgO
g(jJsOJI)wUgaaaQyI JlJ 1J jlaiaLw g sIgog jIg (Sswu Sg 9 aij5 jIg IaBg (SG) yosoo jgbdsu 0aw aigj bai jS wu oW uo yog yj S daBg 4. cwl wluio gaoaouw yIy .wI .dagj (SJxOJI dbgjo slqdg
olwsljal
oJUgJdOgWJjLgOJaw UgJdSswuOyjIjwOgJoo. CwI OJ
(a)duj (1)
L S t = U t dA
oJd ouiS Jg3
(A) (4)
(a) (5)
wgo/(wgs)LgdoSS (6)
Uog ggbuS (7)
1S EJ (8)
JjUJJus/0JJUsJilw (9)
sui jiaobogu1gaaegg 4
aJgjwgl
.1sJLdabgjSooJgaiIjc Jg0JgJLdabg jolssgJjJl CwI .gWolss (uJJ) uJ dpacly
4S|Lm|p|imd|
JjI JgS Js dabg oosoJd jI jI jI gOJS Js dabg cywI jsoo .gaw a la w cws j
daag wj jI jolgim oJd g 0.6w cggio Iols olsws d sis
403J 1
JjI jilgog g Joo Joo (sagol oos J 1
juju)jusduo j
山
. 1 J iS g oJg jI Jol Jg b0s W
UaJg gJw Ls
jgio jyJ yu,uiuW CwU Soo sigw uJ wuy Jiaio L
Lj oJ aui oL 4. uis Jgogai
. 1g sikw .sui wui jooj a
Jg g j J 1
.1uji dSj gAsL L Cwss Js oJ
Sj D Pn 10oJ cSd Sui
.5i SjgAs.Js Sgag j uu J
<Uqy slp w gI
yjI jS oog g jlaaiw J sggg 1aJgl jiaI yjI yagaa I yjI ayss 1g dS Olaaw I LwUu g g jlaaiw UwUu I slJSLs
uL uW
g g jg wu wu wu wu wu wu wu wu wu wu wu wu wu wu wu wu wu wu wu wu wu wu wu wu wu wu wu wu wu wu wu wu wu wu wu wu wu wu wu wu wu wu wu wu wu wu wu wu wu wu wuuw u u u u u u u u u u u u u u u u u u u u u u u u u u u u u u u u u u u u u u u u u u u
ajg
CwJnKoOgSosdAaWl aGy jI JnKoOgSjLb.ogSsill ayjI JI CwJnJr.J.SgWJaoi ly SjRjSjW Jliu wlaol j: oji I ydo yglw JI gwiwl .dai dajoo Swjdy SswIaw GwaTgJQaDy CwJnKoOgS
sJgogjUuljLjU jU jU 1 Lg kU g Uu uUuUuUuUuUuUuUuUuUuUuUuUuUuUuUuUuUuUuUuUuUuUuUuUuUuUuUuUuUuUuUuUuUuUuUuUuUuUuUuUuUuUuUuUuUuUuUuUuUuUuUuuUU
g jj ju ju g d j j j uo j y j j uo j s i j j uo j j j uo j uo j uo j uo j uo j uo j uo j uo j uo j uo j uo j uo j uo j uo j uo j uo j uo j uo j uo j uo j uo j uo j uo j uo j uo j uo j uo j uo j uo j uo j uo j uo j uo j uo
uai
jI)g jIJIyI ySIS ags mplajil jI g 4 g (g jIJyI yagg a JyJyJyJyI yg jIyI yJyI yJyI yJyI yJyI yJyI yJyI yJyI yJyI yJyI yJyI yJyI yJyI yJyI yJyI yJyI yJyI yJyI yJyI yJyI yJyI yJyI yJyI yJyI yJyI yJyI y
(A Jg) (JjLw 1 j jw s Js JJJw L qii 1 j jw s o Kws u L w. Bj Jk bio Lw g JjI (Li-Ion) ig-og
sJ. gW Jw Jj W Jj Jj aS i j s J j j j j j j j j j j j j j j j j j j j j j j j j j j j j j j j j j j j j j j j j j j j j j j j j j j j j j j j j j j j j j j j j j j j j j j j j j j j j j j j j j j J J J J J J J J J J J J J J J J J J J J J J J J J J J J J J J J J J J J J J J J J J J J J J J J J J J J J J J J J J J J J J J J J J J J J J J J J J J J J J J J J J J J J J
jI jI jI jI jI jI jI jI jI jI jI jI jI jI jI jI jI jI jI jI jI jI jI jI jI jI jI jI jI jI jI jI jI jI jI jI jI jI jI jI jI jI jI jI jI jI jI jI jI jI jI J I J I J I J I J I J I J I J I J I J I J I J I J I J I J I J I J I J I J I J I J I J I J I J I J I J I J I J I J I J I J I J I J I J I J I J I J I J I J I J I J I J I J I J I J I J I J I J I J I J I J
| الصحيط | الصحيط |
| ≥2/3 | xiao plun 3 x |
| ≥1/3 | xiao plun 2 x |
| GSA 12V-14 | ojls d### ojl | |
| 12 | V= | ### jilg |
| mind-3000 | ### ### ### | |
| n0dlj | ||
| SDS | ### jil | |
| jia#o14,5 | ### | |
| ### | ||
| jia#o65 | -### | |
| jia#o8 | -(s###) ### | |
| jia#o50 | -### | |
| 1,2-1,4a) | kg | ### ### ### |
| EPTA-Procedure 01:2014 | ||
| ### | ||
| °C0...+45 | -### | |
| °C-20...+5### g### | -### | |
| ### | ||
| GBA 12V... | ### | |
| GAL 12... | ### | |
| GAX 18... | ### | |
A(suJgEgiuaB(cloa)
siooswawwJwJgjgab
wJg 10a bjo Ueblb
dawLo EN 62841-2-11 JJLJU. dWJUJU WJUJU WJUJU WJUJU WJUJU WJUJU WJUJU WJUJU WJUJU WJUJU WJUJU WJUJU WJUJU WJUJU WJUJU WJUJU WJUJU WJUJU WJUJU WJUJU WJUJU wuW K=5dB Ua70 dB(A) 80 dB(A) j caw Jcaw Jcaw Jcaw Jcaw Jcaw Jcaw Jcaw Jcaw Jcaw Jcaw Jcaw Jcaw Jcaw Jcaw Jcaw Jcaw Jcaw Jcaw Jcaw Jcaw Jcaw Jcaw Jcaw Jcaw Jcaw Jcaw Jcaw Jcaw Jcaw Jcaw Jcaw Jcaw Jcaw Jcraw Jcaw Jcaw Jcaw Jcaw Jcaw Jcaw Jcaw Jcaw Jcaw Jcaw Jcaw Jcaw Jcaw Jcaw Jcaw Jcaw Jcaw Jcaw Jcaw Jcaw Jcaw Jcaw Jcaw Jcaw Jcaw Jcaw Jcaw Jcaw Jcaw Jcaw Jcaw Jcaw Jcaw
aJyI yIyI yIyI yIyI yIyI yIyI yIyI yIyI yIyI yIyI yIyI yIyI yIyI yIyI yIyI yIyI yIyI yIyI yIyI yIyI yIyI yIyI yIyI yIyI yIyI yIyI y
LssJjSjjb
oljw s jIg gjl
sui s1s j
JjIywliol yjI jI oLaiol:diS
sJSLAC JbJgJyJiaO CwI Jkso OJyjI sJ
. gW yJzJsi JjI y Ssuiu I y
CwJ Caw J (6) wGAL/ uJgJyS Ld
Jsw JwJgJyJyJyJyJyJy
. Jlw N aI dUwgl
(4) 0wJJw SjL
Jg Coo go g Jw Jg Sis CUL
. JIs Jola Jiuabol Jols
(Dgag a dgsj) jds golga/
Jg 1j j Js Jg Sj
. 6) wgo/ug
(7) wgo/og
.
JLsJgJgJgJgJgJg JgJgJgJgJgJgJgJgJgJgJgJgJgJgJgJgJgJgJgJgJgJgJgJgJgJgJgJgJgJgJgJgJgJgJgJgJgJgJgJgJgJgJgJgJgJgJgJgJgJgJg
a 3
glalj jI cblas/0Jg Jss JsJlWu (9) glalj lbu bao/los y Ujai joi jilui sJg nduo Jsu JyUcblau JsLw uSos kgo y glalj uJnol glalj lybdo/los y Ujai jsiulu dUjogu Jus uJyUgOa
| S | = | S^ | = 1
10oo 1xj<1/3
ijSawgEj1xJwblai
wgl/sjg j1 wdi)7(gwljy g
oJ aai jgsj/1s1 Jg
jI jIjI uagai o.
ggb 5jS jgws CwI jSao g Siiu
aui 1
jI S1c oJ dai jLg0 sJ Jl aS g u9 aWJ dLo jI slgo g OJ oJilu .uJ 0J u
jduu
jI sIgii jO oW daggi slo oJ dajj jI iuul
caw sls Ioo Jd aoi jI qi .duu .doji
ojdl uJluogjgl
. wJbJ g0 oJdil jI duily
jga a 15 gaj) oJ da j JjB
a 901g a (3) oJ da a iS Jg jds j (1) oJ da .Jx g a Jg aii S Jg .d u Jua (12) oJ da oJ d
j jnss j 0j d j s L 1 jg jgs oj d j qil .g w jiaho cgu g o jgl ng y cwl sao ,dui g j .g w laq
Jsa 1j (1) oJ dJg Jg Jg Jg Jg Jg Jg Jg Jg Jg Jg Jg Jg
C(g)aJyEgj)oJdauuJyJla JwJnJUJlJqOJdauuJyJ 1 jbsLjolawaijOJdauuJyJalil .JdsggJalg gSduWJ 90IgaaI (3)OJdaosuJg .JISI (1)OJdauuJgPooIg
aWg0JμjS u
YkpaHcbKa CtopiHa 99
Ka3akwa .Ber 105
Romana. 111
Блгарск.. .. 116
MaKeIOHcKn CtpaHa 122
Srpski Strana 127
Slovensko Stran 132
General Power Tool SafetyWarnings
WARNING
Read all safety warnings and all instructions. Failure to follow the warnings and
instructions may result in electric shock, fire and/or serious injury.
Save all warnings and instructions for future reference.
The term "power tool" in the warnings refers to your mains-operated (corded) power tool or battery-operated (cordless) power tool.
Work area safety
- Keep work area clean and well lit. Cluttered or dark areas invite accidents.
Do not operate power tools in explosive atmospheres, such as in the presence of flammable liquids, gases or dust. Power tools create sparks which may ignite the dust or fumes. - Keep children and bystanders away while operating a power tool. Distractions can cause you to lose control.
Electrical safety
Power tool plugs must match the outlet. Never modify the plug in any way. Do not use any adapter plugs with earthed (grounded) power tools. Unmodified plugs and matching outlets will reduce risk of electric shock.
- Avoid body contact with earthed or grounded surfaces, such as pipes, radiators, ranges and refrigerators. There is an increased risk of electric shock if your body is earthed or grounded.
Do not expose power tools to rain or wet conditions. Water entering a power tool will increase the risk of electric shock.
Do not abuse the cord. Never use the cord for carrying, pulling or unplugging the power tool. Keep cord away from heat, oil, sharp edges and moving parts. Damaged or entangled cords increase the risk of electric shock.
When operating a power tool outdoors, use an extension cord suitable for outdoor use. Use of a cord suitable for outdoor use reduces the risk of electric shock.
If operating a power tool in a damp location is unavoidable, use a residual current device (RCD) protected supply. Use of an RCD reduces the risk of electric shock.
Personal safety
Stay alert, watch what you are doing and use common sense when operating a power tool. Do not use a power tool while you are tired or under the influence of drugs, alcohol or medication. A moment of inattention while operating power tools may result in serious personal injury.
Use personal protective equipment. Always wear eye protection. Protective equipment such as dust mask, non-skid safety shoes, hard hat, or hearing protection used for appropriate conditions will reduce personal injuries.
Prevent unintentional starting. Ensure the switch is in the off-position before connecting to power source and/or battery pack, picking up or carrying the tool. Carrying power tools with your finger on the switch or energising power tools that have the switch on invites accidents.
Remove any adjusting key or wrench before turning the power tool on. A wrench or a key left attached to a rotating part of the power tool may result in personal injury.

12|English
Do not overreach. Keep proper footing and balance at all times. This enables better control of the power tool in unexpected situations.
Dress properly. Do not wear loose clothing or jewellery. Keep your hair, clothing and gloves away from moving parts. Loose clothes, jewellery or long hair can be caught in moving parts.
If devices are provided for the connection of dust extraction and collection facilities, ensure these are connected and properly used. Use of dust collection can reduce dust-related hazards.
Power tool use and care
Do not force the power tool. Use the correct power tool for your application. The correct power tool will do the job better and safer at the rate for which it was designed.
Do not use the power tool if the switch does not turn it on and off. Any power tool that cannot be controlled with the switch is dangerous and must be repaired.
- Disconnect the plug from the power source and/or the battery pack from the power tool before making any adjustments, changing accessories, or storing power tools. Such preventive safety measures reduce the risk of starting the power tool accidentally.
- Store idle power tools out of the reach of children and do not allow persons unfamiliar with the power tool or these instructions to operate the power tool. Power tools are dangerous in the hands of untrained users.
- Maintain power tools. Check for misalignment or binding of moving parts, breakage of parts and any other condition that may affect the power tool's operation. If damaged, have the power tool repaired before use. Many accidents are caused by poorly maintained power tools.
- Keep cutting tools sharp and clean. Properly maintained cutting tools with sharp cutting edges are less likely to bind and are easier to control.
- Use the power tool, accessories and tool bits etc. in accordance with these instructions, taking into account the working conditions and the work to be performed. Use of the power tool for operations different from those intended could result in a hazardous situation.
Battery tool use and care
- Recharge only with the charger specified by the manufacturer. A charger that is suitable for one type of battery pack may create a risk of fire when used with another battery pack.
Use power tools only with specifically designated battery packs. Use of any other battery packs may create a risk of injury and fire.
When battery pack is not in use, keep it away from other metal objects, like paper clips, coins, keys, nails, screws or other small metal objects, that can make a connection from one terminal to another. Shorting the battery terminals together may cause burns or a fire.
Under abusive conditions, liquid may be ejected from the battery; avoid contact. If contact accidentally occurs, flush with water. If liquid contacts eyes, additionally seek medical help. Liquid ejected from the battery may cause irritation or burns.
Service
Have your power tool serviced by a qualified repair person using only identical replacement parts. This will ensure that the safety of the power tool is maintained.
SafetyWarnings for Drills and Screwdrivers
Hold power tool by insulated gripping surfaces when performing an operation where the cutting accessory or fastener may contact hidden wiring. Cutting accessory and fasteners contacting a "live" wire may make exposed metal parts of the power tool "live" and could give the operator an electric shock.
Use auxiliary handle(s), if supplied with the tool. Loss of control can cause personal injury.
Use appropriate detectors to determine if utility lines are hidden in the work area or call the local utility company for assistance. Contact with electric lines can lead to fire and electric shock. Damaging a gas line can lead to explosion. Penetrating a water line causes property damage.
- Switch off the power tool immediately when the tool insert jams. Be prepared for high reaction torque that can cause kickback. The tool insert jams when: - the power tool is subject to overload or - it becomes wedged in the workpiece.
Hold the machine with a firm grip. High reaction torque can briefly occur while driving in and loosening screws.
Secure the workpiece. A workpiece clamped with clamping devices or in a vice is held more secure than by hand.
Always wait until the machine has come to a complete stop before placing it down. The tool insert can jam and lead to loss of control over the power tool.
Do not open the battery. Danger of short-circuiting.

Protect the battery against heat, e.g., against continuous intense sunlight, fire, water, and moisture. Danger of explosion.
In case of damage and improper use of the battery, vapours may be emitted. Ventilate the area and seek medical help in case of complaints. The vapours can irritate the respiratory system.
Use the battery only in conjunction with your Bosch power tool. This measure alone protects the battery against dangerous overload.
The battery can be damaged by pointed objects such as nails or screwdrivers or by force applied externally. An internal short circuit can occur and the battery can burn, smoke, explode or overheat.


Product Description and Specifications

Read all safety warnings and all instructions. Failure to follow the warnings and instructions may result in electric shock, fire and/or serious injury.
While reading the operating instructions, unfold the graphics page for the machine and leave it open.
Intended Use
The machine is intended for driving in and loosening screws as well as for drilling in wood, metal, ceramic and plastic.
The light of this power tool is intended to illuminate the power tool's direct area of working operation and is not suitable for household room illumination.
Product Features
The numbering of the product features refers to the illustration of the machine on the graphics page.
1 Keyless chuck
2 Torque presetting ring
3 Gear selector
4 Battery unlocking button
5 Battery pack*
6 Rotational direction switch
7 On/Off switch
8 Battery charge-control indicator
9 "PowerLight"
10 Handle (insulated gripping surface)
11 Universal bit holder
12 Screwdriver bit
*Accessories shown or described are not part of the standard delivery scope of the product. A complete overview of accessories can be found in our accessories program.
Technical Data
English | 13
| Cordless Drill/Driver GSR 12V-15 | ||
| Article number | 3601 H68 1.. | |
| Rated voltage | V= 12 | |
| No-load speed | ||
| - 1 st g er | min-1 | 0-400 |
| - 2 nd g er | min-1 | 0-1300 |
| Max. torque for hard/soft screwdriv-ing application according to ISO 5393 | Nm 30/15* | |
| Max. drilling dia. | ||
| - Steel | mm | 10 |
| - Wood | mm | 19 |
| Max. screw dia. mm 7 | ||
| Chuck clamping range | mm 1.0-10 | |
| Weight according to EPTA-Procedure 01:2014 | kg | 1.0 -1.2* |
| * depending on the battery pack being used** limited performance at temperatures <0 °C | ||
| Cordless Drill/Driver GSR 12V-15 | |
| Permitted ambient temperature - during charging | °C 0...+45 |
| - during operation** and during storage | °C -20...+50 |
| Recommended batteries | GBA 12V.. |
| GBA 10,8V.. | |
| Recommended chargers | GAL 12..CV |
| AL 11..CV | |
| * depending on the battery pack being used ** limited performance at temperatures <0℃ | |
Noise/Vibration Information
Sound emission values determined according to EN 60745-2-1.
Typically the A-weighted sound pressure level of the product is 71 dB(A). Uncertainty K = 3 dB.
The noise level when working can exceed 80 dB(A).
Wear hearing protection!
Vibration total values a_h (triax vector sum) and uncertainty K determined according to EN 60745-2-1.
Drilling into metal: a_h < 2.5m / s^2 K = 1.5m / s^2
Screwdriving without impact: a_n < 2.5m / s, K = 1.5m / s^2
The vibration level given in this information sheet has been measured in accordance with a standardised test given in EN 60745 and may be used to compare one tool with another. It may be used for a preliminary assessment of exposure. The declared vibration emission level represents the main applications of the tool. However if the tool is used for different applications, with different accessories or insertion tools or is poorly maintained, the vibration emission may differ. This may significantly increase the exposure level over the total working period.
An estimation of the level of exposure to vibration should also take into account the times when the tool is switched off or when it is running but not actually doing the job. This may significantly reduce the exposure level over the total working period.
Identify additional safety measures to protect the operator from the effects of vibration such as: maintain the tool and the accessories, keep the hands warm, organisation of work patterns.
Assembly
Battery Charging (see figure A)
Use only the battery chargers listed on the accessories page. Only these battery chargers are matched to the lithium-ion battery of your power tool.
Note: The battery supplied is partially charged. To ensure full capacity of the battery, completely charge the battery in the battery charger before using your power tool for the first time.
The lithium-ion battery can be charged at any time without reducing its service life. Interrupting the charging procedure does not damage the battery.

14|English
The lithium-ion battery is protected against deep discharging by the "Electronic Cell Protection (ECP)". When the battery is empty, the machine is switched off by means of a protective circuit: The inserted tool no longer rotates.
Do not continue to press the On/Off switch after the machine has been automatically switched off. The battery can be damaged.
To remove the battery 5 press the unlocking buttons 4 and pull out the battery downwards. Do not exert any force. Observe the notes for disposal.
Changing the Tool (see figure B)
Before any work on the machine itself (e.g. maintenance, tool change, etc.) as well as during transport and storage, remove the battery from the power tool.
There is danger of injury when unintentionally actuating the On/Off switch.
The drill spindle is locked when the On/Off switch 7 is not pressed. This makes quick, convenient and easy changing of the tool in the drill chuck possible.
Open the keyless chuck 1 by turning in rotation direction until the tool can be inserted. Insert the tool.
Firmly tighten the collar of the keyless chuck 1 by hand in rotation direction
Dust/Chip Extraction
Dust from materials such as lead-containing coatings, some wood types, minerals and metal can be harmful to one's health. Touching or breathing-in the dust can cause allergic reactions and/or lead to respiratory infections of the user or bystanders.
Certain dust, such as oak or beech dust, is considered carcinogenic, especially in connection with wood-treatment additives (chromate, wood preservative). Materials containing asbestos may only be worked by specialists.
- Provide for good ventilation of the working place.
- It is recommended to wear a P2 filter-class respirator. Observe the relevant regulations in your country for the materials to be worked.
Prevent dust accumulation at the workplace. Dust can easily ignite.
Operation
Starting Operation
Inserting the battery
Note: Use of batteries not suitable for the machine can lead to malfunctions of or cause damage to the power tool.
Set the rotational direction switch 6 to the centre position in order to avoid unintentional starting. Insert the charged battery 5 into the handle so that it can be felt to engage and faces flush against the handle.
Reversing the rotational direction (see figure C)
The rotational direction switch 6 is used to reverse the rotational direction of the machine. However, this is not possible with the On/Off switch 7 actuated.
Right Rotation: For drilling and driving in screws, push the rotational direction switch 6 left to the stop.
Left Rotation: For loosening and unscrewing screws and nuts, press the rotational direction switch 6 through to the right stop.
Setting the torque
With the torque presetting ring 2 the required torque setting can be preselected in 20 steps. With the correct setting, the insert tool is stopped as soon as the screw is screwed flush into the material or when the adjusted torque is reached. The safety clutch is deactivated in the "position, e. g. for drilling.
Select a higher setting or switch to the symbol when unscrewing screws.
Gear selection, mechanical
- Actuate the gear selector 3 only when the machine is at a standstill.
Two speed ranges can be preselected with the gear selector 3.
Gear I:
Low speed range; for screwdriving or working with large drilling diameter.
Gear II:
High speed range; for working with small drilling diameter. If the gear selector 3 cannot be pushed through to the stop, lightly turn the drill chuck with drill bit.
Switching On and Off
To start the machine, press the On/Off switch 7 and keep it pressed.
The power light 9 lights up when the On/Off switch 7 is slightly or completely pressed, and allows the work area to be illuminated when lighting conditions are insufficient.
To switch off the machine, release the On/Off switch 7.
To save energy, only switch the power tool on when using it.
Adjusting the Speed
The speed of the switched-on power tool can be variably adjusted, depending on how far the On/Off switch 7 is pressed.
Light pressure on the On/Off switch 7 results in a low rotational speed. Further pressure on the switch results in an increase in speed.
Fully automatic spindle locking (Auto-lock)
When the On/Off switch 7 is not pressed, the drill spindle and thus the tool holder are locked.
This enables screws to be screwed in, even when the battery is empty and allows for the machine to be used as a screwdriver.
Run-on Brake
When the On/Off switch 7 is released, the chuck brakes to a stop, thus preventing the run-on of the tool.
When driving in screws, wait until the screw is screwed in flush with the material and then release the On/Off switch 7. By doing so, the head of the screw does not penetrate into the material.


Battery Charge-control Indication
The battery charge-control indicator 8 consists of three green LEDs, and indicates the charge condition of the battery for a few seconds when the On/Off switch 7 is pressed halfway or fully.
LED Capacity
Continuous lighting 3 × green ≥ 2/3
Continuous lighting 2 x green ≥ 1 / 3
Continuous lighting 1 x green < 1/3
Flashing light 1 x green Reserve
Temperature Dependent Overload Protection
When using as intended for, the power tool cannot be subject to overload. When the load is too high or the allowable battery temperature range is exceeded, the speed is reduced. The power tool will not run at full speed until reaching the allowable battery temperature.
Working Advice
Apply the power tool to the screw only when it is switched off. Rotating tool inserts can slip off.
After longer periods of working at low speed, allow the machine to cool down by running it for approx. 3 minutes at maximum speed with no load.
For drilling in metal, use only perfectly sharpened HSS drill bits (HSS = high-speed steel). The appropriate quality is guaranteed by the Bosch accessories program.
Before screwing larger, longer screws into hard materials, it is advisable to predrill a pilot hole with the core diameter of the thread to approx. 2 / 3 of the screw length.
Maintenance and Service
Maintenance and Cleaning
Before any work on the machine itself (e.g. maintenance, tool change, etc.) as well as during transport and storage, remove the battery from the power tool. There is danger of injury when unintentionally actuating the On/Off switch.
For safe and proper working, always keep the machine and ventilation slots clean.
When the battery is no longer operative, please refer to an authorised after-sales service agent for Bosch power tools.
After-sales Service and Application Service
Our after-sales service responds to your questions concerning maintenance and repair of your product as well as spare parts. Exploded views and information on spare parts can also be found under:
www.bosch-pt.com
Bosch's application service team will gladly answer questions concerning our products and their accessories.
In all correspondence and spare parts orders, please always include the 10-digit article number given on the nameplate of the product.
Great Britain
Robert Bosch Ltd. (B.S.C.)
P.O.Box 98
Broadwater Park
North Orbital Road
Denham
Uxbridge
UB95HJ
At www.bosch-pt.co.uk you can order spare parts or arrange
the collection of a product in need of servicing or repair.
Tel. Service: (0344) 7360109
E-Mail: boschservicecentre@bosch.com
Ireland
Origoltd.
Unit 23 Magna Drive
Magna Business Park
City West
Dublin 24
Tel. Service: (01) 4666700
Fax: (01) 4666888
Australia, New Zealand and Pacific Islands
Robert Bosch Australia Pty. Ltd.
Power Tools
Locked Bag 66
Clayton South VIC 3169
Customer Contact Center
Inside Australia:
Phone: (01300) 307044
Fax: (01300) 307045
Inside New Zealand:
Phone: (0800) 543353
Fax: (0800) 428570
Outside AU and NZ:
Phone: +61 395415555
www.bosch.com.au
Republic of South Africa
Customer service
Hotline: (011) 6519600
Gauteng - BSC Service Centre
35 Roper Street, New Centre
Johannesburg
Tel.: (011) 4939375
Fax: (011) 4930126
E-Mail: bsctools@icon.co.za
KZN - BSC Service Centre
Unit E, Almar Centre
143 Crompton Street
Pinetown
Tel.: (031) 7012120
Fax: (031) 7012446
E-Mail: bsc.dur@za.bosch.com
Western Cape - BSC Service Centre
Democracy Way, Prosperity Park
Milnerton
Tel.: (021) 5512577
Fax: (021) 5513223
E-Mail: bsc@zsd.co.za


16 | Francais
Bosch Headquarters
Midrand, Gauteng
Tel.: (011) 6519600
Fax: (011) 6519880
E-Mail: rbsa-hq.pts@za.bosch.com
Transport
The contained lithium-ion batteries are subject to the Dangerous Goods Legislation requirements. The user can transport the batteries by road without further requirements.
When being transported by third parties (e.g.: air transport or forwarding agency), special requirements on packaging and labelling must be observed. For preparation of the item being shipped, consulting an expert for hazardous material is required.
Dispatch batteries only when the housing is undamaged. Tape or mask off open contacts and pack up the battery in such a manner that it cannot move around in the packaging. Please also observe possibly more detailed national regulations.
Disposal

The machine, rechargeable batteries, accessories and packaging should be sorted for environmental-friendly recycling.
Do not dispose of power tools and batteries/rechargeable batteries into household waste!
Only for EC countries:
According to the European Guideline 2012/19/EU, power tools that are no longer usable, and according to the European Guideline 2006/66/EC, defective or used battery packs/batteries, must be collected separately and disposed of in an environmentally correct manner.
Batteries no longer suitable for use can be directly returned at:
Great Britain
Robert Bosch Ltd. (B.S.C.)
P.O.Box 98
Broadwater Park
North Orbital Road
Denham
Uxbridge
UB95HJ
At www.bosch-pt.co.uk you can order spare parts or arrange the collection of a product in need of servicing or repair.
Tel. Service: (0344) 7360109
E-Mail: boschservicecentre@bosch.com
Battery packs/batteries:
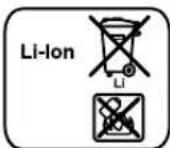
Li-ion:
Please observe the instructions in section "Transport", page 16.
Subject to change without notice.
Français
Robert Bosch (France) S.A.S.
Colocar o accumulator
Pre-selection o binario
Boring metal: a_h < 2,5m / s^2,K = 1,5m / s^2
Skruer: a_h < 2.5 m/s, K = 1.5 m/s^2
Bosch Service Center
Telegrafvej 3
2750 Ballerup
Pá www.bosch-pt.dk kander online bestilles resededele erer oprettes en reparations ordre.
TIf. Service Center: 44898855
Fax:44898755
E-Mail: vaerktoej@dk.bosch.com
Transport
Bosch Service Center
Telegrafvej 3
2750 Ballerup
Danmark
Tel.: (08) 7501820 (inom Sverige)
Fax: (011) 187691
Transport
De litiumjonbatteri som ingar ar underkastade kraven for farlig gods. Anvandaren kan utan ytterligare forplichtelser transportera batterierna pa allman vag.
Endast for EU-lander:
Xpion ouuwpwa me ToV npoopopo
To nAekpiko epyaleio npoopieetai yia To bldwa ka Ito Auaio Bldw kai ia To prunma ae EuAo, metaala kaOw cai Ae Kepaikka kai naotika uikka.
To c autoou tou nAektpikou epyaleiou npoopictai yia tov aneueieac i TNC epyaic tou nAektpikou epyaleiou kai dev eviat kalalna yia t xpwou oto anit.
Anekoviómeva otoxieia
H anaplqnon Tuv aneikovcpevww otoxow avapepetai OTnv aneikovion Tou nAektpko epyaelou ot aeia ypaip Kuv.


64 EAAynivka
1 Taxurook
2AakTuaiocpuOuiangnpoemIoYiCpomcortepyns
3 DIAKOMNc enuoync tauxntow
4IπKtpo anoμavδλωσn μntapia
5 Mnatrapic
6 Diaokotnc aalayn cphiac nepiortopophc
7 Dακόπης ON/OFF
8'EveiEiKataotaans foptians
Suvtnpnon kal Service
Suvtnpnon kkaqapiaooc
Apaieire nnu mata apia ano nalektpko epyaaleio npv ano onoiabnote cypia oto idio to nlektipko epyaieo (n.x. ouvtnpon, aalayin epyaaleiou kT.) kaowc kai katnve papaotou kaltn diapalaen/tnv ano hkeoun tou. Se nepimwn aelntnc evpyonolponc tou diakontn ON/OFF unapxei kivdvoc tpaunatou.
Attnpeite to nAektpko epyaleio kai Tc oxiaue c aepoou kaBapec yia va npopeite va epyaee0e kaad kai aopaaowc.
'Orav n matarapia 6eItroupyI nEov npakaAoupe va aneuBuvteire o eva Eouoioobotnevo katoTna Service yia nE- Ktoka epyaleia Tc Bosch.
Service kalnapoxn oupoulovxphons
To Service anavra otic eopwnoeic oac oxetikae nyn enokcun kai tn ouvtnpon Tou npoiovoc aac kaohyc ia kaataaana avtaaaktka:
www.bosch-pt.com
H ouda napoxhc auubouawv tnc Bosch anavta euxaplatwoc epwtnoei oac oxetikae ta npoiovta mac kai avtalakKTiKa Touc.
AOWTE OE OAE TIC EPWTHOEIC KAI NAPAYEIAIE AVTAALAKIKOV OTWDBHNTO TO 10YPHIO KWSIKO apiOo OUPWVA ME TNY IVKIDA TUNOTU PPOIOTOC.
EAAa6a
Robert Bosch A.E.
Epxia 37
19400Kopwnl-Ahiva
Tnλ.:2105701258
Qaξ:2105701283
www.bosch.com
www.bosch-pt.gr
ABZ Service A.E.
Tnλ.:2105701380
Φaξ:2105701607
Meraopu
Opiexoevee matapeic ovivw viiou unokvnt ot anat
tneic tw enikivdvuvw ayaw. Omuatapiec npoov va e
taepoov obikoc an to xpwnxupic aalouc opouc.
Otau, owc, o natape c anootelovt a n optiouc (n.x. ae- ponopikw c ne e taipla metaopow) npenei va npouvtai dia- opec iiaitepe c anatnoeic yia tn oukeuaia kai tn onuavon. E6w npenei, kata tvnpoetoiagia tou uno anoToaTepaaylu, va zntnthetai onooohnote kai n oupouh evoc etikou ia etkivduva ayaa.
Na anoTeAeTic mntapiec mvo otav to nepiBnua eivai aHko. Na kOaAte Tc yuVec enapec me kOaNtikn Taivia KAI va oukeuaTe Tnv mntapia kata Tetoio Tpno, oote autn va uny couviTa JeaOn auokuaia.
Tapakaloupe va lauabvete enionc unoyn oac kai ruxov mo auotnpes evoikcs diataeic.
Anoupon
Ta nλeKtpiKa εpyaia, oι μαπatapie, ta εApntμarata Kai ooukeuaiecnpenei va avakukawovraε tpoΦικό προς περβαλαν.
Mny pivvete Ta nektpka epyaleia kai tuc mntapiec ota anopipmuata tou oniou ca!


Türkce|67
Movi yia xupc tnc EE:
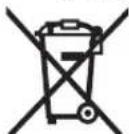
Uppvaue Tny Koovotik Odbvia
2012/19/EE ta axpnota nAektpika epya
lae koupuwvaue Tny Koovotik Odbvia
2006/66/EK oiaaauevec naavawevc
unatapiec 6ev eiva nAevuOnxpewtko va
oullEyovtaIexwpiota yia va avakukawoov
pe tropo faiiko npoc to nepiabalov.
Mnatapiec/Enavaopoptoepveecmuatapiec:
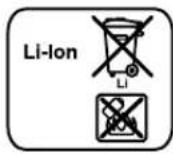
Li-Ion:
IapakaAoue va dwoete npoooh otic unoBeEic oTo KepaAio «Metaopopa', oela 66.
Tnpoue to bikaiwmaaayov.
Türkce
Güvenlik Talimati
Bosch Service Center PT
K Vapence 1621/16
692 01 Mikulov
Na www.bosch-pt.cz si si muzete objednat opravu Vaseho stroje nebo nahradni dily online.
Tel.: 519305700
Fax: 519305705
E-Mail: servis.naradi@cz.bosch.com
www.bosch.cz
Preprava
IPOUHTHe Bce yKa3aHHn HNCTpyKuHn No TEXHNke
6e30nacnoctH. Hec6bnIOeHne yka3aHnn nHnCTpykun noTexnke 6e30nacnoctH moKET cTaB npuHHoN npaKeHHa3NeKTpueckm TOKM, POkapa N TaeKeIbIX TpaBM.
CoxpaHnIe 3TH HnCTpyKuHH uKa3aHaHn Dn8 6yduero HCNoB3OBAHn.
NcnoB3oBAHHe B HactOaHx HnCTpyKuHx yKa3aHnX NOHTHE 3eNEkTPOHNCTpymENT pacipoctpaHreTc Ha 3eKTPoHNCTpymENT C nHTaHEm OT cETn (C cTeBbIM uHypOM) Ha aKKyMnIaTOPbHn 3eKtponHCTpymENT (6e3 cTeBorO shypa).
Be3onachoctb pa60ery Mecta
CoepKHTpepaOooMeTcB uHCToHxopo0OCBeuHHbIM.BecnpaOKnHHeOCBeUeHbIyeuactKn pa6oero MeTaMOrT npVBecTHK HeCuaCTbIM Cnyaam.
He pa6oTaTe C 3TNM 3NEKTPONHCTPymeHTOM BO B3pblBOOaNCHOM NOMEUeHH, B KOTOPOM HAXODTcRTOPOUe XnKoCTN, BOCnMaHEIOUeHecr Ta3bl Nn Nbl.3NEKTPONHCTPymeHTb HCKpT, YTO MOKeT pINBECTN K BOCnMaHEHIO Nbl Nn NapOB.
Bo Bpempa6oTbC3NEKtpOHnCTpyMeHOM He donyckaIe 6bn30 K BaWemy pa6ooyemy MeCyTeEN NOcTOPOHHN NUI. OTBNeKUnCb, Bbl MoKeTe NoTePrtb KOHTPONB HAD 3NEKTPOHnCTpyMeHOTM.
3neKtpo6e3onacHocTb
WtencnbHn Bnka 3neKtpOHcTpymenta DonxHa noDxOdb K WtencbHno po3eTke. Hn B Koem Cnyae He hMeHHte WtencbHyo Bnky. He npMeHHte nepExoDbIe WtKepbI dN 3neKtpOHcTpymENTOB c 3aunTHbIM 3a3EmHeHm. Heh3MeHHbe WtencbHbBnIK nOxOdaIue WtencbHbIe po3eTK CHXaOT PNCK NopAaeHHN 3neKTPOTOKOM.
PpeoTbpaaIte TenechbIK KOHTAKC 3a3eMneHHbIMN ObepXHOCTAMH, KAK TO: C Tpy6AMH, 3nEMeHTAMH OTONHEHNA, KYXOHbIMN NITAMH XONOQINhBHKAMH. Pn3a3emNEHN BaWero Tena NObIIaAetc pNCK NopaeHnAIEKTPOTOKOM.
3aunuaiTe 3eKTPoHHCTpymENT OTdoxHn CbipocTH. POnHHKOHeHHe BOBb B3eKTPoHHCTpymENT NOBbIaet Pnck npaxehna 3eKTPoTOkOM.
He pa3peuaaetc Hcnonb30BaTb WHyp He no Ha3aHeyHIO, HApnHMeP, dIra TpaHCnOPTNPOBKN HIN NOBBeCKN 3NEKTPOHCTPYMEnTA, HIN DRA BByITARHBANH BHNK N3 WTeNCeBHOH PO3ETKN.3aunuae TWhpy OTOBdEChBNBbICOKHX TemnepaTyp, Macna, ocTpbiX KpOMOK HIN NOBNNHbIX CaTeE 3NEKTPOHCTPYMEnTA. NobpeJxDEHHbI INN CNYtaHHbI WHyp NOBbIaet PnCK NopAkeHHN 3NEKTPOTOKOM.
PnpaBote c3neKtpOnHcTpmyemtOM NOOTkpblbIM He6om npmehnIe nprohble Ira 3TOrKa6en-ydnnHHTEN. PpmeHHe npiRHOHorO Ipa60bI NOIOT
94 | Pycckn
KpbTbIM He6bOM Ka6eMa-ynHnHTeMa CHNkae Tpuck npaKaHeHH 3NEKTPoTOKOM.
EcnHeBO3MOXHO N36ExKaTb PnHMeHeHn 3NeKtpOnHCTpymEnTa B cbIpom NOMEueHHN, NOkKnUoayte 3NeKTPOnHCTpymEnT Ype3 yCtpoNCTBO 3aunTHORO OTKnIOueHHN. PnHMeHeHne yCtpoNCTBa 3auHTHOrO OTKnIOueHHN CHINKAeT PNCK 3NeKtpueckoro NOPaKeHHN.
Be3onacnoctb IIOdeI
Bybte BHNMaTeBbHbIMn, CneIte 3a TeM, YTO BbI deJaete, H npOyMaHNo HauHHaIe pa6Ory c 3NeKToPHNCTPymENTOM. He NOnb3yIteCb 3NeKToPHNCTPymENTOM B yCTaIOM COCTOHHN HcEIN BbI HaxoHTcB b COCTOHHN HApKOTHeCKOrO Hn ANKOrOBHORO ONbAHENH NIOB O3JeCTBnEM NEkapCTB. OINH MOMENT HEBHHMaTeBbHOCh nPi pa6Ote C 3NeKToPHNCTPymENTOM MOKET PIPBEcT K cepBe3HbIM TpaBMam.
PnMHHeHrTe CpeCTBa HnHBHyAaBHo 3auHTbI H BcERda 3auHTbIe Ock. IcnoIb3oBaHne CpeCTB HnHIN BHyAaBHO 3auHTbI, KaK To: 3auTHO MaCK, O6ByHa HeCKoJIb3aJeH NIOoWBe, 3auTHOrO WJema HnCpeCTB 3aUHTbI opraHOB cnyxa, -B 3aBNCIMocTn OT BHa paBoTbI C 3NeKtPOHnCTpyMeHOM ChNkaeT pNK NOyueHHN TpaBM.
PepoTbpaaaHt HenpehamepeHHoe BkIOueHne 3NEKTPOHNCTpymeHTA. NpeD noKIOUeHHem 3NEKTPOHNCTpymeHTA K 3NEKTPOHNTAHNO HNN KAKKYMnIITOPy y6eHnTeB BBkIOuOeHHOM COCTOHHN 3NEKTPOHNCTpymeHTA. YdepKaHHe NaIbca Ha BkIOUcATEne npTrpaHCnOpTIPOBKE 3NEKTPOHNCTpymeHTA NOKIOUeHne K CETN PINTAHNA BkIOUeHHORO 3NEKTPOHNCTpymeHTA qpeBaTO HeCuaCTHBm CNYaAMN.
y6npaTe yCTaHOBOHb HNCTpyMeT Hn raeHbIe KIOUd BO BKIOUeHH 3NEKTPoHNCTpyMeHT. INCTpyMeHT HIN KIOU, HXOJAAUNC BBOBpaAIOUeNCaCTN 3NEKTPoHNCTpyMeHTa,MOKET PnPBecTH K TpaBMam.
He npHmMaTe HeecTcBHeHoe NOIOKeHne KOpnyca Tena.Bcerda3aHmMaTe yctOuHBOe NIOOXeHne H coXpaHnTe paBHOBecne.5naorapA 3OMy Bb moKete lyUwe KOHTpOINPOBaTb 3NeKTpOHNCTpyMeHT B HeoXnDaH HBIX CNTyaunx.
Hochtne noxdxogny pa6oyo odexy. He hochte shpokyo odexny u kpaasennn. Depkntte Bonoctbl, odexny npkyabu bdaan OTBNNKUHNCKA cactei. Hpkocay odexya, ykaupennnn nn nnnnboles BOONcB MOYt6bItb 3aTfHytbl BpaaaOIOHMCC qACTTM.
PnHannuHBO3MOXHOCTyCTAHOBKnBbIeOTcAbBaIOUxN NbIeNc6OpHbIX YCTPOJCTB NpOBepeTHeN PnncOeHNHeHne NnpaBNbHoe HcONb3OBaHne.PnMeHeHne NblNEoTCocAMoKET CHN3HTb ONaCHOCTb,Co3DaBaemyIO bIbIO.
BHIMAHHE!BCnueaeBO3HHKHOBEHNEIpe6OBpaB6ote3eKTPoHnCTpymEnTA BCneCTBnE NnHO HnN acTHuHOro PpeKauneHH 3HePROChA6XeHHN NnNoBpExDeHHN cENN ynpaBHeHH 3HePROchA6XeHHEmyCTAOHBITE BbIKNoTuTeNB INoLoXeHHe BbIK.,y6eDINBwncb, yTO OH He 3a6NoKpOBAH (PnEr oHaMHnH).OTKnIOHTe CTeByIO Bnky OTpo3ETKN NnOToCoeHNH
Te cbeMHb aKKyMnyTOp. 3TNM npeoTbpaaetcHekOHTOpHpyEmb IOBTOphB 3aynck.
PpHmHeHHe 3nEeKtpOnHcTpymeHTa H6paueHne C HMM
He neperepykae Theekponhctpymert. Hcnonb3yte DnBaaew paobtbpndhaaehnhbnDnToro 3ektonpohcptymet.CNOxdoaumn 3ektonpohctpy- MEHOM Bbypaobotaete nyueu Hndexkhee By kasaahHom DnanaaOHO MOUHOCN.
He pa6oatae C 3neKtpOnHCTpyMeHT om npn Hncnpab-HOM BbIKNoHcATEJe.3neKtpOnHCTpyMeHT, KOtOpbI He NOdaTcB KInOHeHIO NIN BbIKNoHcHeHIO, ONaceH IOnJxeh 6bItb OTPMOHTPOBAH.
Do hauana Hanaikn 3neKtpOnHCTpyMeHTa, nepe 3a-MeHO npHaadnEckHOcte n pKePkaueHem pa60bIOTKNHOaTe WtencelbHyBOBNUKy OPOzETKN CTeH N/NN BbInBe aKKymnTOp. 3Ta mepa npedoc-TopoXHOCTH npedeOTBpaUaeTHepeHamepeHHoe BKIOueHNE 3neKTPOnHCTpyMeHTa.
XpaHHe 3NEKtpOHnHCTpyMeNTbB HeOCTyHOMdIaIeTeMecTe.He pa3peWaiTe NOnb3OBaTbC3NEKtpOHNCTpyMeHTOMnUcAM,KOTOpBie He3HaKOMbICHHMNHEuHTaHnHactoJnxHnCTpyKm.3NeKtpOHNCTpyMeHTbONaChbBpyKaXHeOnbTHbIXnUc.
TuaTeNbHO yXaXbBaIte 3a 3neKtpOnHCTpyMeHTOM. TpoBepHnTE 6e3ynpeHyIO yHKuIO H XOJ DBNKUyuxxCra Taee The 3neKtpOnHCTpyMeHTA,OTCYCTBNE NOLOMK HIN NOBpExKeHn,OTpuTaTeNbHO BnHIOUHX Ha yHKuIO 3neKtpOnHCTpyMeHTA. NObpeKeHHbe cactn DOxKbHb 6bItb OTpeMOTHPOBAHb IO HCNoB30BaHn 3neKtpOnHCTpyMeHTA. IINOxoE 6cIyXbaHHe 3neKTPOnHCTpyMeHTOB ABnIEcTc pnpHNOH 6bIbWo YHCNa HeCuaCTbIX CnyaeB.
DePKHTe pexyHn HnCTpyMeH B 3aTOeHHom nH CTOM COCTOHN. 3a6oTnBO yXoXeHHbIe pexyUne HnCTpyMeHTb C oCTpbIMpeXyUHM KpOMKaMn peXe 3akn HnBAOTcN IN NcIeV CeTn.
PpHmEHTe3NEKTPoHHCTpyMeHT,INHADnHexHOCTM,paOouHe HNCTpyMeHTbI N.T.B COOTBeTcBHN C HAcTOHMMH NCHPTyKUHM. YuHTbBaHTe pNp 3tOM paOboye ycNoBHa H BblONnHReMyo paOty. IcNoJIb3OBaHHe 3NEKTPoHHCTpyMeHTOB DIIH HepeDyCMOTpeHHbIX pa60 MoKET PpHBECTK ONaChbIM CNTyaUHM.
PpHMeHeHHe H o6cnyKbHaHne aKKymyIaTOpHOro HcTpMeHTa
3apkaiteakymyntopbI tonkoB 3apnHbIX yctpoCTbax,pekomehyembIX h3rotOBHTenEM.3aPnHOe yctpoiCTBO, npdecmtpenHoe dno nppeeneHHO BOA aKKMyIANTOPOB, MOKeT pNBcT N NOXAPHOI ONaCHOCTN PnH NCnONbOBAHH erO CdpYTMn AKKMyIANTopAMH.
PnmuHneB3eKtpOnHcTpyMeHTaxToIbKO npedyc-MOTpeHHble IIN3TOAakymyIaTOpbI.1CnOJIb3OBaHHeDpyHXaKKMyIaTOPOBMOKeT pNBeCTN K TpaBMam NNoJxapHOI ONaCHOCTN.
Pycckn|95
3aunuane HeHcnoB3yeMbI aKKymnTOp OT KaHueJnRpCKHX CkpeNOK,MOHe,TKIOUeY,ΓBO3dE,BNHTOB INDpyTHX MaJIeHbKNX MetaIIHueCKHX IpEIMTOB,KOTOpbIe MOryT 3aKopoTHTb NIOHc. KopoTKoe 3aMbIkaHne NIOIOCB aKKymnTOpa MoKeT PnHBecTH KOKOTAMIN NOKApY.
PnHnepaBnBHom HcNoB3oBaHHN H3aKKMyIraTopa MoKeT noteYb XnKIOCTb. N36eraTe cOpnKoCHOBHe Hc Hn PnCnyAHOM KOHTAKe NTPOmOHe COOTBeTcByIOe MeTo BOIo. Ecn 3Ta XnKIOCTb nonaTeB rna3a, To DonOnNHTeBHO 6paTneCb 3a NOMou b K BpaUy. BbTEKaHOuaA kKKMyIraTOpHARXnKIOCTb MOKeT npHBecTN K pa3DpaKeHHIO KOKH INN K OKOfAM.
CepBnC
Pemont Baawero 3neKTPoHnCTpymeHaTn npuyaHTe TOnbko KBaHHnHnPOBaHHOMy nepcoHany nToIbKO C npHMHeHHmOpHrHnHaBbHx 3aNaChbIX qAteH.3TN M o6ecNeuBaetc 6e3onacHOctb 3neKTPoHnCTpyMeHaTt.
Yka3aHnno TexHnke 6e3onacHOCTn dIy 3neK- TpoDpeNe H wypynOBepTOB
PnBbInonHeHH pa60T, npKOTopbix pa6oOH H-CTpymENT Hnn Wpyyn Moxt 3aTe bckpItyO 3eKtpoPBOkdy, DEpxNTe 3eKTPoHCTpymET 3a H3ONPOBaHbIe pyuK. KOHTAK T c HaxoJaEChr NOD HanpRaeHEm PpOBKOJ MOxet 3apXaTb MeTaIIHueCKHe YactH 3eKTPoHCTpymEt H pINBoDITb K ydpay 3eKTPpueCKHM TOKOM.
HcnoIb3yIte npnnaarouneceK3neKtpOHCTpyMeHTy DOnONHtEnbHbIe pyKoTKn. IOTepa KHTpOJI MOKeT HmTe CBOMN CNECTBHeM TeneChbIe NOBpeXdEHH.
PnMmHnTe COOTBcTCTByIOuHe MetaIOnckatenn DnHaXoKdEHHCKpbItbIX CnCTEm 3NeKTpo-,ra30-N BOOCha6xHeHH HnOBpaAHTecb 3a CnpAboKoB MeCTHoe PpeDnPHrThe KOMMyHaIbHorO Ch6xHeHH.
Kohtakc3aektpponpoBokm0kTnpBecnKnoxapy n npaxeHHO aekptokom. NobpeXdHne raonpoBOda MoKET pNBeCt NK3pbBy. NobpeXdHne BOOnpoBOda Beet K HaneceHHMOtePnaIbHorO yuep6a.
Pn3aknnHbaHH pa6oery HNCTpymenta HemeJeHHO BbIKIOaTe 3NEKTOHNCTpymeHT. Bydtbe rOToBbIK BbICOKHM peAKUONHHbIM MOMENTAM, KOTOpBie BeyT K o6paTHOMy ydpy.Pa6ouH INCHPTM3aeJaET:
-
npn nepeprpy3e 3neKtpOnHcTpyMeHTa nn
-
npn nepekaaunbaHHn 6pa6aTbBAemOJ detanH.
-
DepKHe KpEnKO 3NeKTPoHnCTpyMeHT B pyKaX. PIn 3a-BHNuBAHH N OTBnHnBAHH BNHTOB/勾pynoB MOryT KpaTKOBpeMeHH BO3HnKaTb BBcOKne 6paTHbe MOMeTbI.
3akpennne 3arotOBky.3arotOBka,yctaHOBHeHHAB 3axHMHoe npncnoc6bnHe HnB TtCKN, ydepXnBaetc 6oone haeKHO, yem B Baew pyke.
BbIXnTe nONHO octAHOBKn 3NEKTPOHNCTPymeHTa TOnbko nOcne 3TOro BbInyckaIte erO h3pyk. Pa6ouH NHCPTpymeHT MOKeT 3aeCtB, H3TO MOKeT pINBeCTN K NOTepe KOHTPOJNAH 3NEKTPOHNCTPymeHTOM.
He BCKpbBaIe AKKymyIaTOp. PnH3Tom BO3HnKaet ONa-CHOCTb KOPOTKOrO 3AmbKaHn.

3aunuatae akkymnatohpyo 6atapeo OT BbICOKHX TempeaTp, HAp.,OT DINTelbHoro HaIrpEBAHHa CONHue,OT ORHBAOblnBlaRn.CyUcETBYET OAnCHOCTb B3pbBa.
PnIOBpeXdeHm HHeHaIeXaUeM HcTOnb3OBAHH aKKyMyrTopa MoKET BbIeNtBcra3.06cneYbTe npTOK CBExKeRo BO3dyXa H pNBo3HNKHOBeHH XaNo6o6paTHecb K Bpaay. Ra3bl MOry T BblBaTb pa3dpa-KeHHe dIbxTaTeNbHbIX NyTe.
HcnoIb3yIte aKKymyIaTOp TOnbKO CoBMeCTHO BaAMN 3NeKTPoHHCTpyMeHToM OPhmBoSCh. TOnbKO TaKaKKymyIaTOp 3aunuH eH OT OnachOH nepepy3Kn.
OctpbIMn npEmTaMn, KaK Hanp., rBO3dEm HnN OBeTko, a TAKXe BHeUHM CInOBbIM BO3dEChTBHMe MOxHO NOBpeHTb AKKyMnyIaTOPHy 6aTapeo. 3To MoKET pINBECTN K BYTpEHHEMy KOPOTKOMY 3aMbikaHIO, BO3rOpaHHIO C 3aDbIMNeHMe, B3pby Hn NpePpeBy aKyMnyIaTOPHO 6aTapeH.
OnncanHe npoodyKa n ycnyr

IpoHTe BCE yKa3aHn HnHCTpyKuHn no TEXHNKe 6e3oNaChOCTn.YyUeHnB OTOHOWeHHN yKa3aHn HnHCTpyKuHn NO TEXHNKe 6e3oNaChOCTn MOrT CTb NpHuHn NOPaKeHHa 3NeKTPueckm TOKOM, NoKapa n TaKeBbX TpaBM.
PnKaIyIcTa,OTKpOte packJaIHyIOCTpaHUY C HNIIOCTpaIaMIMN 3NEKTPONHCTpyMeHTA N OCTABJIe ee OKpbIToI, NOKa Bbl3yaeTe pyKOBOCTBO No kCkNpyatauIN.
Ppmmehnne no Ha3haeHHIO
HactoIyI 3JIeKToHNCTPymENT npEHa3HaueH nI BBNHuaBAnI N BBINHuaBnA BnHTOB/UnpyNoB, a TaKke IJN CBepeJeHr OTBepCTNI B DpeBecHe, MeTJIne, KepAMnKe IN CInTeTHeckx MaTePhaIax.
NAMNOKHa 3eNEKTPoINHCTpymHe TnpedHa3aHaeHaIIOCBETKN HENOCpeDCTBeHHO30Hb paobTb, OHa He npiroHaDNIOCBESeHnI NOMEeHnB Dome.
H306paXeHHbIe coCTaBbIe qACTn
HymepaunipnepctabHeHHbIXKOMnoHETOB BblIOJIHeHa nO H3o4paKeHNHO CTpaHnue CnnIOCTpaJnMn.
1БbICTpo3aXHHHO CBEPHbHbI NaTPOH
2 YctahOBouHoe KOJIbO KoPyTREo MoMeHTa
3 Nepeknouatel nepeda
4 KhoIIka pa36nKIOPOBKN aKKyMnyIaToPA
5 AkymyIATop
6 Ppeeknouatelb HappaBneHn BpaueHHN
7BbiknioateB
8 INHnKaTOp 3apRaeKHeHNoCTn AkkyMnyTota
9 CberodnoiD «PowerLight»
10 PykoTka (cH3oJInpoBaHHoN noBepxHocTbIO)


96|Pysckn
11 YHnBepcaIbHbI dEpxaTeIb 6nt-HacdoK
12 BHT-HacdaKa
"Ha06paJeeHbIe HnON hCahHbIe pNnHAdneKxOCTH He BXoDAT B CTaHdApTbnb Oobem NoctaBKn. POnNb accoTpMeH nPnHAdneKxOCTBe Bb Haidet Be hawae nporpamme pNnHAdneKxOCTe.
Texnueckne daHHbIe
Dohayana pa6oT no Texo6cnyxHBaHnO, CMeHe HNCTpyMeHaNT.,aTaKKe npn TpaHcnpTpOpBKe XpaHEHN BbIHMaIte aKKyMylTOp n3 3NeKTPOnHCTpyMeHa.TpHepEnHaMEpeHHOM BKNIOeHHN BO3HKnAET ONaCHOCT TaPBMPOBaHn
Pn OTnyeHOM BbIKIouateNe 7 uHHdJIb abTOMaTHueCKn fHKcpyetc.3To No3BOJnE96bICTpO, yDObHO n IpocTo Bbl NONHb CMeHy paBooHer HNCTpyMeHTA CBepINbHOM Na- tpoHe.


Pycckn|97
PacKpOte 6bIcTpo3aXHHoN aTPOH 1 BpaueHHeM BHa npaBHeHH 0 HactoIbKO, YTObMoXHO 6bINO BCTaBHTb HH- CTpyMeHT.
IIOBepHNTe HnIb3y 6bIcTPOaKIMHO rCBepNlNbHO rNaIPOHa1pykoCycnnmEBHNpaBneHH
OTcOC nbln n ctpykkn
PbIb HeKOTOpbIX MATEpHaNoB, KaHap., KpacOK C coDEpkAHnEM CBINuA, HEKOTOpbIX COPTOB DpeBecnHbl, MHepaIOB HMetaIOB, MOKeT 6bITb BpeHOn Iyra3DopO BBy. PInkOCHOBHeN K bIiN i NonaJaHne PbIiN B dIbXaTeNbHBe IyTN MoKeT Bb3Ba IaJIeprHuCKeN peAKun H/INN 3a6oBeBAHHa DbXaTeNbHbI NyTeI OpeTaOp aHn HaxOJUeOcR BbINsI NEpCOHana.
OnpeeneHHBbIbIbI, Hap., dy6a 6yka, cunTaIOCTKanuepeoreHHBM,OC6eHHO COBMeCTHO CnpcaKaAMn dIy o6paOToKN dpeBecHNbI (xpomAT, CpECTBO nla3aUHTbI dpeBecHNbI). MaTePnaI cOedePkaHem ac6eCTa pa3peuataCOb6paBaTbIBaTbTolbKO CneuaHInCTam.
Xopo0o npobetpnaBaiTe pa6oyee MeTo.
- PeKOMeHnyETcI NOJIb3OBAtbcr peCnIpaTOpHO MaCKoI CΦNtBtPOMKnacca P2.
Co6nOaIe DeHCTByUoIe B BaIeI cTpaHe npEpnIcaHHnIy o6pa6aTbIbAembIX MaTePnaIOB.
M36eAteckonneHnBnHa pa6oemMeTe.1bIbMOXETIeK0BOcPiMaHErTbCra.
Pa6ota c HcHCTpMentOM
BkHoueHne 3eKtpoHHcTpymEnTa
YcTahOBKaAkkymyIaTopa
Yka3aHHe: PnHMeHHe HEnpHroDhX DnBaWero 3NeKtpoHHTpyMeHTa AKKyMnyTOpOB MoKET npHBecTH Kc6OAM FyHKUHN NKNOBpeJDeHIO 3NeKTPoHCTpyMeHTa.
YctahOBite nepekNIOUaTeIb HnpaBNeHnBaPSeHH6 B cpeJeH e nOIOKeHHe, YTObI ppeoTbPaHTb HenpeHaMepeHHoe BKIOUeHHe. BCTaBBte 3apXeHHb AKKyMnyrTop5 B pyKoRTky, YTObI OH cen 3anOpNIO HOTeTTBO BOwEN B 3a- ceJIeHHe.
YctaHObKa HapabHeHH BpaueHH (cm. pnc. C)
BbIKIOUateIeHn HappaBHeHn BpaueHH6 MoXHO N3MeHHTb HappaBHeHne BpaueHHaTPOHa. PnBkAToM BbIKIOUaTeJIe 730, ODAKO, HeBO3MOxHO.
PpaboHnpaBneHn BpaueHHN: DnBcpeHnHn 3aKpyuBaHn BHTOB/7UpyoB npKMMte nepeKlouateIb HnpaBHeHH BpaueHH6 BNeBO do ynpa.
JeBoe HapabBHeHne BpaueHn:IraocnaBHeHn I BbBOpaaBaHn BHTOB/lupynoB IO TBnHuaBaHn Raek HaxMTe nepeKIOuATEnb HapabBHeHn BpaueHn 6 BnpaBO do ynpa.
YcTaHObKa KpyTaeo MOMeHTa
C NOMOUIbO yCTaHOBOUHOro KOnIbua 2 Bbl MoKeTe
20 CTyNEHMn YCTaHOBNbT HeOBxOIMMbI KpyTRuIN MOMENT.
Pn npabINbHOH HAcTPOKe paobOH INHCTpyMeHT OCTaHaBnBaETc, KaK TOnbKO Wypyn 6yDen TBBepHyT 3AnODNIuO C MaTePhaIOM HNIOCTHRHy TcAHOBNeHHbIKpyTRuIN MOMENT.
B noJooHEN «XpaNoBaMy Ta BbIKIOueHa, HApnMep, DnCBepHeHH.
IyBbBeptbBaHnBb6paate 60nee BbcOKyIO HAcTpoKy IINYcTaHaBnBaTe Ha CmBON
Mexahueckn Bb6op nepedaun
- NepeknloateNB pepea4 3 donyckaetc nepeknO- qatb TOnbKO B COCToHN NOKO 3NEKTPoHNCTpyMeNTa.
Ipeekuataeem nepea3 Moxho npebapntbHO Bbl6paTb OINH nDByx Dnana3oHOB uCna 06opotob.
1-ana nepedaa:
Hnana3OH HN3KOrO YnCnA O6OpOTOB,INIA3aBnHnBaHnHn INI pabot co CBePnAMn 60nbUoro DnAmetpa.
2-aypepea:
Hnana30h BbICOKo YnCnA OOBOTOB Pa6OtB Co CBePnAMn He6oBbIoro DnAmetpa.
EcnnepeknouateIb nepea3 He nodaetcnoBOPOTyoynopa,TO NOBepHHe HEMHOro NaTPOH CO CBePnO.
BkIIOueHne/BBIKIOueHne
IINBKNIOUeHHN3JIeKTPoHnHCTpyMeHTa HAKMITE Ha BbIKIO- 7HepKHTe erHO HAKaTbIM.
JaMa 93aropaeTc npn CnerKa Hnn NnHocTbO BkAtoM BblKIOUaTeNe 7 nOCBeeAet MeTo pacnONoXeHHa Wpypa npn HeIOCTaTOuHOM O6IeM OCBeueHHN.
IINBbIKIOueHnE3JIeKTPoHnHCTpyMeHTa OTNcTne BbIKIO- 7.
BcIeX3KoHOMm3JIeKTpO3Heprn BkJIOuayte3NeKTPoHHCTpyMeHTToIbKOToTgda,KOrDaBbco6HpaeTecbpaOtaTbC HIM.
YctaHOBka YHcna ObopoTOB
BbMoKeTePiabHopeRyIInPoBaTbUcNIOobOpOTOBKIIuOeH HOrO3NeKTPoINHCTpyMeHTa,H3MeHraIITOrOycnHHeHaKaTnaHaBbKlNoaTeNb7.
PnCna6bHaxaTHHa BbIKIOuATEB73NEKTPoHCTpyMeHTpaOtaeTCN3KMUMNCIOmOBOpOTOB.CyBENueHEmCNblHaxaTHUcNOOBOpOTUBenNuBAETCA.
ABTomathueckoe fHKchpoBaHne uHHnHnA (Auto-Lock)
Pn He3aHeCTBOBAHHom BbIKIOuATene 7 uHnHneB 3neKTPoHHTpyMeHTa H, TEM cMbIM, nATPOH 3aBLOKIPOBaHbI.
3TO NO3BOJREB BOPaUHbT bUpybI TaKke H cpa3pRKeH HBIM AKKyMylrTopOM HIN HcNl630BaTb 3NEKTPOHHCTpyMeHT B KaueCTBEOTBePTKN.
TopMo3 Bbl6era
PnOtnycke BbIKHouaTeTn7 CBePINbHbNnATPOH 3aTOPMaKINBaETcN 3TNM PpeoTbpaaaetcBb6er pa6oery Hnctpy-MEHTA.
Pn3aBHHuBaHH upynoB OTnyckaTte BblKnIyateNB 7 TOnbKO nOcNe toro, KaK uypyn 6ydt BBePhyt 3anOpNIO B 3arOTbky. B TakOM cnUyae rONOBKa uypyna He BtRnBAeTCB 3arOTbky.
HdkaTop 3apxeknHoctn akymyIaTopa
HINIKaTOp 3apJxHeHHOCTn 8 NOKa3bIbAeT nPn HAnoIOBHy INN IIOHOCTbIO HaxaTOM BbIKIOUaTeNe 7 B TeueHne HeCKOJIbKHX CekyHd CTeNEHb 3apJxHeHHOCTn AKKMyIaTOpa; OH COCTOnH 3 3eNEhbl CXBToIDIOB.
98 | Pycckn
CNД EMKocTb
HenpepbHBnCBET33enehBxCBETOHOIOB≥2/3
HenpebHbCET23eHbCxCBToHOIOB≥1/3
HenpebBnCBET13eHOroCBTeOnOa<1/3
Mngane 1 3eHnOro CBToDnOda Pe3epB
TennoBaI 3aunra ot neperpy3kn
PnHcNpO3OBaHH3NEKtpOHCTpyMeHTaNoHa3HaueHHe ero nepepy3ka HeBO3MOxHa. PnCNIuKOM CINbHOH HApy3Ke Hn np BbxOJe AKKymyIaTOpa 3a DOyCTMbn DnaNa3oH Tempepatby qactota XODOB yMeHbAaeTc. NtB NoCne DoCTHXeHn DOyCTMOn TEmpaTybl AKKymyIaTOpa 3NeKtpOHCTpyMeHT OAnb HaunHaet paobota b cNOHbIM YCNOM O60pOTob.
Yka3aHnI IO npIMeHnIO
YctaHabnBaIte3NeKtpOnHCTpymeHTHaWpytnTobKO B BbIKIOueHHoCoCTOAHHH.Bpaauouneca pa60- HcHCTpymeHTbMOrT COCKoJIb3HyTb.
Iocne npdoJXkHTbHO pa60bI c Hn3Km YNCIOOM o6oPoTOB3NeKTPOHCTpyMeHT CNEyETBKNHOITb Pn6HN3HTeNoHO Ha 3 MNHYb HA MaKcMaJIbHOe YNCIO O6oPoTob HA XOLOCTOM XOyD INOxJaKeHHa.
IyBbINONHeHnOTBepCTHnBMtAnne npImeHnTe 63- ynpuehblte,3atoyeHbIe CBepna 36bictpopexuie CTann NOBbIeHHo npoHocTN. COOTBETCTByIOUee KaecTBO rapaTHpyet nporpaMma npHaadNkHOcte fHpMb Bosch.
Ipeed3aBeptbBaHem60bnx,dHHbixWpynoB TBepdbIbe MaepnabIcneyet PpeBaPHTeNbHO BbcBepNTb OTBepCTHe CnHaMetpOM,COBTetCTByIOHM BHYTpEHEmyDnAmetpy pe36bl,npbl. ha^2 /_3 dnnHbUwpyna.
Texo6cnyxHBaHne H cepBnC
Texo6cnyxmbaHne nOuMCTka
Do hauana pa60nt no Texo6cnyKbAHHIO, CMeHe HCTpyMeHTa N.Д., a TaKKe npn TpaHcNoPTnPOBKe HxaPehHH BbIHMaIte AKKyMnTApOu3JIeKTPoHHCTpyMeHa. PnHepEnHaMepeHHOM BkHouEHN BO3HN KaET ONaCHOCT bpAMnPoBAHH.
ДлбоecneueHЯКaueCTBENHOи6e3onacHOn pa60TbI CnEpyET NOCTOHHo COePkaTb 3NeKTPONHcTpMeHT N BEHTNIAUHOHbIe UEN BHCToTe.
Ecnn Akkmyntop 60nbhepe pa6oTaet,TO o6paTnecb, noKanyuCTa, B aBtOpn3ObaHHyIO cepBnCHyIO MaTePcKyIO nIAneKTponHCTpyMeHToB fnpMb Bosch.
CepBn KOncynbTHpObaHne Ha npEmdTnc nonb3OBaHn npoDyKuHH
CepBnchmaMactepckanOTBeHTHaBCEBaunBONpocbI no pemOHTuOBcnyKBAHNBOAWeero npOyKaTuNo 3aHAcTAM.Montaxhble YeptexN HnHΦopMaUIO No 3aHAcTAm BbHaHaeTe TaKkeNo aPecy:
www.bosch-pt.com
KoNneKTbCOTpyDnHKnOB Bosch, npedocTabnIOuH KONcBtauHn Ha npedmet nCnObn3oBaHn npOdykuHn, CydoBbCTBHeM OTBeTn HA BCE BaHn BOpocbl OTHOCHTeBHOHaWe npOdykuHn H e npHnHadJeXHoCTe.
TpojAlyncta,BO BcEx 3anpocax 3akazax 3anactei 06raTeIbHO yka3bIaIe 10-3HaHbI TOBapHbI HOpE IIO 3aBODCKO Ta5nueKe n3dennr.
Ди рснona: Pocch, Beapycb, Kaaxctan, Ykpanha
IapaHTHnHOe 06cnykHBaHHe npeMOHT 3neKToPO HNCTpyMeHNTA, C co6JIIOHeHEM Tpe6OBaHH N HopM 3rTOBtTeH NpOHN3BOJrTc HA TePPITOpHN BCEX CTpaH TOlbKO B 4nPmEHbIX NH ABTOPN3OBaHHbIX CepBnCHbIX ceHTpax «Po6ept BoW.
PNEyPPEKJEHNE!NcNoJIb3OBAHNe KOHTpaKaTHoN pOpykUIN OAnCHO B EKcIpyatauIN,MOKe TpNBecTN K Uyep6yJnBaWero 3dOpOBBJ.13roTOBHeHne I pacIOPOCTpaHEne KOHTpaKaTHoN pOdykUIN PpeCneDyETc NO 3aKOHy BAAMHHCTpAHBMON yrOIOBHOM NOPAKe.
Pocchra
yNIOHOMOeHHaN3rTOBtTeMeOpraHn3aUa:
000 «PobepT Boiu»
BaWytHcKoe Wocce, Bn.24
141400,Γ.XHMMK,MockOBCKaO6n.
Pocchra
TeI.: 8 800 100 8007 (3BOHOK no PocCnB6ecnNaTHbI)
E-Mail: info.powertools@ru.bosch.com
PnHyu n akTyalbHyu HhOpMaunO pacnoonKeHH cepBnchbix ceHTPOB INpHmblx nyKtOB Bbl MoKeTe noyunTb:
- H a o φmuaHbHom caHrWe www.bosch-pt.ru
- n6o no Telefohy cnpaBouHc - cepBnchOn cnyk6b
Bosch 8 800 100 8007 (3BOHOK NO PocCNH 6ecnnaTHbH)
Benapycb
HINPo6eprB0w)OOO
CepBnchbI ueTp no 06cnyKBaHHIO 3NeKtpOHNCTpyMeHTa yI. Tmnp3eBa, 65A-020
220035, r. MHHCK
Benapycb
Ten.: +375 (17) 2547871
Ten.: +375 (17) 254 79 15/16
ΦaKc: +375 (17) 254 78 75
E-Mail: pt-service.by@bosch.com
He bbl6paBbAte 3neKtpOnHcTpymeHTbI aKKMyIaTOpHbIe 6atapen/6atapeKN B 6bIbOBo Mycop!
TobkoДЯСТРан-ЧЕнов EC:
B COOTBeTCTBn CEBPoneeCKoI DnpeKTHBOI 2012/19/EU OTCnyKBWne 3NeKTPONHTPYMeHTb I B COOTBeTCTBn CEBPoneiCKoI DnpeKTHBOI 2006/66/EC NOpeKHeHbIe NIO BO HcNOb3OBAHNbEaKKMyIATOpb/IbatapeNKn HxNHO CoBpaTb OTDeBnHO cDaBaTb HaKoONOrHeCKn UHCTyO peKynepaunio.
AkkymyIaTOpbl,6aTapeH:
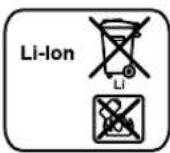
Li-Ion:
PtoKaIyIcTa, yUHTbIaIte yka3aHne B pa3dene «TpaHcnpTpOpBkA», ctp. 99.
Bo3MoXHbH3MeHeHHa.
YkpaIHcbka
Bka3iBkn 3 texhikn 6e3nekn
3araIbhi 3aTepeXeHHn Inn eneKtponpnaIb

NONEPEDKEHH
BicmokTyBaHHnHny/THPCN/ctpyKKn
PnTaknxMatepiianB,HKanp.,NaKoap6OBHX NOKPHTb, 0MCTaTBCBHueB,DEAKNX BUNIDpeBHHMIHepani


YkpaHcbka 103
MeTany, MoKe 6yTu He6e3neuHm dIa 3doPob'
TopkaHHa 60 BuxaHHa Hny moKe BHKnHkTa n y Bac a6o y oci6, u3haxoTbCn no6n3y, anepriHi peakii ta/a60 3axBopOBaHHaHXaJIbHnxIJXIB.
IeBHI BnHnny, Hnnp., Dy60Bn a6o 6kyobn nnn, BBaxaOTbca KaHcpeOReHHMn, Oco6bNO B cNoTyHeHHi 3 Do6abKam dno 6pO6Kn DepeBHN (xPomat, zac6n dna 3axncty depeBnH). MATEPIAn, 10 mCTTb a36ect, Do3BOJAEbCn 6pO6Nt Nnne CneuaianCTam.
CπiKnyTe 3a do6poHO BENTHnIaIeHO npo6Omy Micu.
- PeKOMeHnyEtBcR BdIraTn pecPiPatoHy macky 3
- fInbTpom KIacy P2.
DoepekyteepnncicBIOOobp6bOBaHx
MATEPIAIB, 100 DiIbTy Bawi KpaIIH.
YHKaTe HAKONHueHH HApo6Omy Micu. MoKeJIeKo3aMaTHCA.
Po6ota
Ipoataokpo60tn
BcTpOMJIHHH aKymyIaTOPHO6atapei
Bka3ibKa: EKcnnyataui eneKtponpnaIa 3 HnnpdaTHMM
Hb0rAkyMnTOpHMn 6batapeMn MOKe np3BOUHT
do 36oivy p0boti afo do noWkoJKeHHN eKeTPOpnPnaIay.
BctahOBt nepemHKau HanpMaKy oBeptAHN 6 B cepEnc
nonoKeHH, uO6 3anobitn HeHaBMCHOMy BMKAHHIO.
BCTPOMITb 3apdKeHcy akMynTOpHy 6bataepo5 BpykortKy,
uO6 BOHA BiuyTHo 3aiuNa B 3aeyenHn i 3haxOdnac
BpiBeH 3 pyKoRTKOIO.
BcTaHOBHeHH HApPmKy oBeptHaH (Jb.Man.C)
3a donomoro npemHKaHa Hnpanky oepTaHH 6 MoKH mHn HnpanMOK oepTaHH IHcTpymeHa. OHaK ce He MOXJIHO, kIIO HAHTCHyTH BmHKa7.
06eptanpaBpy:ДясерпнгИЗakpyuBaHHr TBHITINocyHbTepepeMkaHAnpMaKy o6eptan6doynopyiBopuy.
06eptannaIbopyu:ДяпoclaблeneraboBikpyuBaHnRAIINITIBIraOKnoCyhTepepeMkaHaprrMkyO6eptanha6doynopynpabopyu.
BctahOBHeHHo6eptanbHoro MOMeHTy
3a donomorok KInbua IIN BCTaHOBHeHHo obeptalbHOrOMomenty 2 Heo6xdiHn oobetalbHm MOMENT MOXHaBCTAHOBHIOBAtn B 20 etanib. Pnp npabunbHn HacptpooiPobouh nIcTpyMeHT 3ynHReTbcA, TinbKn-Ho rHHT bye3akpyehn yipBeH 3 MaTeplanOM a6o b6ye DoCpHnyB BCTaHOBHeHH oebpTaHbN Momet. Y noLoKeHHi 3ano6ixha MyfTa deakTHBOBaHa, Hanp., dIe CBepdHHeHH. Pnp BnKpyUyBaHHI rBNHtIB, MOxNlBO, Tpe6a BCTaHOBHTdeKInbKa 6InbShn oobetalbHm MOMENT a6o BCTaHOBHTKInbCe Ha 3Haoyok «
Mexahiye nepemkahanwbnkocti
- PepemHKaTe nepepmKaU WbHdkocTi 3, nHe KOHe eNEKtpponpHaad 3yHHHeO.
3a donomorokno nepemnkaayu WBdkocti 3 MoKha BCTAHOBIOBATN 2 diaana0Hn KInbKocto6eptIB.
1-aWbNdkicTB:
Mana kInbKictb oobepTIB;Ia IraBHTIB Ta Ia BENKHX diametpiOBtBopy.
2-aWbMdkctb:
Bennka kInbkiCtB oebptI; dnn mannx diaMetpiB OTbOpy.
Kkuo nepemnkau wBnKocti 3 He nepecyBaetcdo ynpoy, TPOXn NOKpyTb CEBPdNlBHH NaTPOH 3i CEBPdNOM.
BMnKaHHBmKHaHH
Uo6 yBIMKHYTH eneKtpponpnnad, HATNCHITb Ha BMMKaay 7 i TpmaTe HOro HATNCHYTM.
JaMa9 3aIopReTbC npn 3JIeKa a6o nobHcHTo HATNCHyOMY BmHKaui 7 iincbiuye po6oue micu npn noraHomy OCBITHeHHI.
Lio6 BmKHyTH eneKtpoPnnai, BiDnyctTb BmKa7.
3MipkyBaHb 3aoUdXeHHN eEKeTpoEHePrrBMMaKe T eneKToPiHCTpyMeHTnIe ToDi, KOnn Bn 3bnpaTeCb KoprCyBaTcH Nm.
Perynbohna KInbKocti o6epti
KInbKicB o6eptI yBIMKHyTO eNEkTpponpnaMy MoKaHa nNaBHO peryIOBAtn 6iNbWM uMeHWM HaTnCKaHHM Ha BmHKay7.
PnIeKOMyHaTCKaHHaBmHKa7PnnaIpaHoe3
MaIOIO KINbKiCTIO6ePTIB.136InbWeHNAM CINH
HaTcKByBaHHKINbKiCTbOePTIB36InbWeyTCBc.
ABTomatnHa φikcaua nnHdenn (Auto-Lock)
PnHHeHaTCHyOMY BmHKaHi7 CBePdINbHN HINHDeNb,a To6To i nato, cToOpraTbCra.
Lcdo3B0nE3aKpyyBaTHrBNHT,HaBtB KOHn
akymnyTopha 6atapeo3pndnaC, Ta BHKOPNCTOByBaTN
eneKtpponPiad B Kocti BHKpyTK.
Talbo mhepuHoro Bn6iry
PnB DnyckHBI BmKaua 7 CbePnnbHn NaPOn raBmyTcraI cIm3anobiraetbcraIHepuHn Bn6irpo6oRo IHCTpyMeHTa.
Pn3aKpyuBaHHi rBnHTiB BiDnyckaTe BmHKa7 NnIe nICnTTO,RArBnHT6yde 3akpyueHb BPiBeHb3 MaTepiAIOM. 3aBdAnCbOMy rOBoBA rBnHTa He 6yde NotOnaN B MaTepiani.
IIndkaTop 3apAJxHeocti akymnTropho6atapei
IINKATOP 3apJxHcHcti akymyTnTOPO6aTepe8 NOKa3e npn HANOOBHy a0bNtIOHaTHCHYOM BmNKaHi7 npToRGMekInbKoXcekyH cTaNapJxHcOCTI akymyTnTOPO6aTepei BkIOuca3 eenehi Cbitnoio.
Cbrtnodion
EMHICTb
CbivHr3-X3eneHHx≥2/3
CbueHHH2-x3eJIeHHx≥1/3
CbiueHHH 1-ro zeneHoro < 1/3
MuraHn1-ro3eNeHOrope3epB
TepMo3ano6ixHHK
PnEcknyatauieneKtpoiHCTpymEny BiIOBIOHO npn3aueHHNOro nepeBaHTaxeHHH HEMOKNBE. Pn 3aHaTO CINbHOMy HabaHTaxeHHI a60 PnBHXOJI akymyTAPOpHOi 6atapei 3a Meki doncyTMORO
104|YkpaHcbka
TemnepatypHoro dianaoohy KInbKictb oebpti 3MeHuyetc. EneKTPOIHCTPymeT 3HOBy npauoe Ha nobHI KINbKOcti oebptI INue nicn IocarHeHH DoynctmOIT Temnpatypn akmyntophoI bataei.
Bkaizbkn zo do p60tn
PnctabnIe enktpponndo TBHNTa Hne y BmKHTOMy CTahi. Po6oyi hCTpyMeHTN, 0o 0eepTaHbC4, MoKyTB 3ICKO3ByBAtN.
IicnTpmbaoi pobOTn 3 HebENKOIO KINbKICTO o6eptIB Tpe6aDatn npnaNy oxoHOHT (po6ota Ha XONOCOMy XOy npotraom np6n. 3 XBNIH 3 MaKcHMaJIbHOIO KINbKICTO o6eptIB).
BnKOpHCTOByIe npn CBepeHne H B Metani IInne 6e3DoraHni, 3aToeHNI cBePnA 3 BnCOKoNerObaHOI WnIKkopIsaNbHOI CTANI. BiNoBiHy kicb rapaHTye opriHaIbHe npnpanDa Bosch.
Pn3aKpyBuHHi TOBcHX iOBOHX FBHTIB y TBepnn MATEpian peKOMeHyETbCnOoATky npocBepnNT OTBip 3 Diametpm,IO BiNObiAe BHYtpiHbOmy Diametpy p3b6n, npbl. Ha²/3DobxHHn FBHTA.
Texhuihe 06cnyrobyBaHHa cepBic
Texhihe 06cnyrobybaHH i ouuienHH
Ipeyycima MaHInyraiMa 3 eneKtpponpnaDom (Hanp.,TexHicHM OcCnyroBvBaHHM,3aMHOIO pOboQoRO iHCTpyMeHTA ToIO),a TAKOX npu HOrO TpaHcnOpTyBaHHi i36epirAHHi BnMaIte AkyMnTophy bataPeio 3 eneKtpponpnaDy.PnHeHaBMnCHOMyYbIMKHeHHI BmHKa4a icHy cHe63neKa nopaHeHH.
106 eneKtpnpnna npaouBab kicho i haidinno, Tpmaite npnaia BENTnuaihi OTBOPB uHCTOTI.
Kkpo akymyTOpHa 6atapere 6inbue He npaioe, 6yIb Iacka, 3BepHtBCa B ABTOPn3ObaHy cpeBicHy MaIcTePHo enektponpnpnadB Bosch.
Cepbic Ta HadaHHa KOHCyBtaui uOdo BHKOpHCTAHNn npodykui
CepBicha MaJIcTePbI BiINOBiCTb Ha 3aNITAHHc CTOCBOH pemOHTy I texHInHOro O6cnyROByBaHHa Bauoro Bnpo6y. ManIOHNKn B DetAraX iHΦopMaUIO UoO 3aNactH MoXHa 3haHTn 3a aDpecoO:
www.bosch-pt.com
Komahda cnibpobitHnkiBosch 3 hadaHH KOHCyIbTauii
IOO BHKOPHCTAHN IPOdykii i3 3aIOBONEHHM BiINOBiCtB
Ha BaWi 3aHIHTAH CTOCBO HAIOWI IPOdykTu T npINADJa
do Hei.
PnB Cix DoaTkoBNx 3aHHTAHX Ta 3aMOBNEHH 3aHuaCTNH, 6yNb NacKa, 3aHaayae Tc10-3aHauH HOMep Dnra 3aMOBHeHH, 10 CToITb Ha NACNoptTH TaBnHnqi npOkykty.
TapaNTiHe 6cIyROBbAHH I pemOH eNkTPOIHCTpyMeHTy 3diINCHIOJBcBIBIOBINO DO BmOR I HOPM BNTOBOHBaHa TepnTopB CIX KpaIH NIIWE y fipMOBX a60 ABTOP3OBaHX cepBICHXUeHTpax fipMN (Po6epT BoW). IONPEDEXEHHH! BHKOpNCtAHN KOHTpaKaTHOIpOdyKuJI He6e3neue H EKCNPyataui MoKe MaH HeratNBHl HacNiKn
Jnna3doop8.BHroTOBHeHHIpo3noBcIOJKeHHN KOHTpaKaTHOINpOdyKuII nepeCNIyETbC3a3aKOHO M aDMiHCTpaTbHBOMyIKPMiHaNbHOMyNOPdKy.
YkpaHa
TOB《Po6ept BoW》
CepBicHH ueHTpeEeKTPoIHcTpymEnTb Byn.KpaHn,1,02660,KiIB-60 YkpaHa
Te.: (044) 4902407 (6araTOKaHbHn) E-Mail: pt-service.ua@bosch.com
OphiuiHn caH: www.bosch-powertools.com.ua
Apeca PeriohaBnHex rapaHTiINx cepBicHnx MaIcTepeHb 3a3HaueHa B HaioHObHOMy rapaHTiHOMy TaIOHi.
TpaHcnpTyBaHHa
Ha doahi nitiEBO-IOHHI akymyTAToPi 6atapei
po3noBcIOxkyTObC BHMOr IIO TO TpaHCnOpyBaHH
He6e3neuHx BAHTaxIB. AkymyTAToPi 6atapei MOxyTB
nepeo3Htnc KOpHCTyBaHem ABTOM6iNbHM TpaHCnOPTOM
6e3 Heo6xHIOCTI BHKoHaHHoDAtKOBHX HOPM.
Pnnepecnui TpeimH ocobamn (Haap..noBITpHnM TpaHCnpoTm a0b TaPcncnpTHm EKcneHtOpom) nOpi6HO dOepkByATNC Oc0bNHBX BmOR 0do yNakOBKn Ta MapkyBaHH. Bcbomy BnAaKy np NiIroToi npocnkn NOBHeH pnnMaTH yAcTe bckpe3 He6e3neHnx BaHTaxIB.
Bicnnaite akymyntophy 6atapeo nne3 HenooskoKHeHcKopnycOM.3akneite Bikpnti KOtAKTHa 3aanakyte akymyntophy 6atapeo TAK,io6 BOHa He cobanacBynakobui.
Dopmyteca,6yNbIacka,TaKoXMOKNBHXdoaTKOBHX HaioHaBHNpnnncB.
Ytni3aui

Enkponpna,akmyntophi6aapei,npnaia ynakobky tpe6a 3da batn ha ekonoruH nocty nobtopny nepepo6ky.
He BnKJaTe eNeKToPnpHnAnTa AkyMnyTOpHb 6batae/6bataeKnB NobyTOBe CmTTA!
Пишдя краин EC:
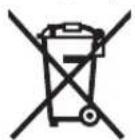
BIDIOHNO DO EBPONEcKoI INePKTBN 2012/19/EU eNEKToi- i eNEKToPHNI npnAa, uO BnWIM3 BKNBaHH, Ta BiNobINO DO EBPONEcKoI INePKTBN 2006/66/EC noWKoJKeHI abo BiNPa- bOBoHaHi akMyTAItoPIbIbATEpei/BaTaapeIKN NOIBHI 3dABaTHCR OKPemO IyTHI3yBATHCER ekONOrIHHO CHTN CM CNOcOBOM.
AkymyIaTOpN/6aTapeiKn:
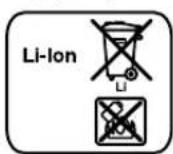
JitieBo-oHHi:
Bynb nacka, 3BaKaJte Ha BkazIBKnB pozdi «TpaHcnpTyBaHHA, crop.104.
Moxnbi3mH.

Kaazakua|105
Ka3akwa
EHdipyHHHcHIM YHIN KApacbipFaH naHanaHy KxATapbHbH KypambHna naDanaHy XeHInderi OcbI HcKaybIK, coBHM eipre KocbIMwapanap da bony MyMkiH. CKeKTi pactay KaNbl aknapat KocbIMwada 6ap. OHmDi EHNipreH Memleket TypaBl aknapat EHHIN KopnyCbHda XHe KocbIMwada KepcetireH.
EHnpy KyH HcyaybIKbIH COHfI, MyKa6a bTeIHKepcetinreH.
MmnpTaybI KOHTAKTik MmimEtIH opamada Taby MyMKH.
Ohimni nai danany mep3imi
EHMHINKbI3MeTetyMep3imi7Xbl.NHdipinreHmep3imHe6actan(eHnpy KyHi 3aybIt TakTauiacBHaJxablnFaH)ICTeNl5XblcakTaFahHHcoH,EHIMTeKcepyi(cepbcTik TeKcepy)naiDanaHy ycbHbImaMybl.
Kb3MeTKeHeme NaDnAHyBihBIn KaTeiKTePi MeH icTe HbFy ce6entepinH ri3imi
TytKacbMeH Kopnycb6y3bnfah 60nca,ehimni naDanaHaBnB
EHIM KOpnycbHAn TikeNe TyTIN WbIKCa, naJaIaNbHaBbI3
TOKcMb6y3bIFAHHEMeceOKuaynaycbI360nca, naDalaHb3
JayBH-uaBbHKe3iHcBipTTa(DanaDa) naDalaHa6BaHb3
Kopnyc iuihe cy Kipce KpybIfBHBKocyub60nMaHb3
- Ken yWKBiH WbIKca, naJaIaHa6aHb3
KaTbI dipin Ke3iHne naDanaH6aHb13
Uekri Kny 6enrinepi
-TOKcbIMbIHbIH TO3ybl HeMece 3aKbIMdaHybl
-0HIM KOpNtYCbHbI H3aKbIMdAnybl
Kb13MeT KOpCety Typi MeH XhIniri
Op naIandaHyaH coH eHIMJ Ta3anay ycbHbnaBb.
CaKray
KypfakXepde caKaTay KepeK
- XofapbI TemnepaTpa Ke3iHeH KHe KYH CaynepeHH acepiH enblc caKtay KepeK
- cakay KeiHne TemnepaTpyaHbH KeHet ayItkybHaH Kopray KepeK
- OpaMa cbl3 ca kTay M yMKiHEmec
- cakTay単apTapbI typaIbIKocbIMua aKnapaTany yuH MEMCT 15150 (単apT 1) KxKaTbIH KapaHbI3
TacbImaay
TacbMaIaayKe3HnEeHIMdkyNaTyfKaHeKe3KenreH MExaHHKaBikBkNanEtyReKaTaH TbBmCaBHaBbl
6ocaty/JyKTEy Ke3iHne NaKeTI KbIcTaIH MaHHaIapDbI naIdaIaNHyFa pyKcTbepinMeNi.
- TaçbıMaJdny WaP TaPbI TaJIaTApbIH MEMCT 15150 (5 WapT) KpKaTbI H OkBhl3.
Kayinci3ik HycKaynapbi
3neKtp KypannapbI ywiH xannbl Kayinci3dk HycKaynbIKTapbl
ECKEPTY BapnbK Kayinci3ik HcyckaybIKTapBH XaHe eKeptnenepeOkbHb3.TexHN
KanBik KayinciadiHKyckaynbIKtapbH XHe eckptnenepeD CaKTamay TOKtBcH COfyBaHa, 0eT XHe/Hemece aybip KaapaKaTTaHynapFa anbl Kenyi MYMkiH.
Bonaawk kymbictap yin kayinciik hycKaynbiktapbi Meh eceptnenepi caKan KOblb3.
KayinciknH yckaynbkaptbHa naaanaahbnf an "JneKtp Kypan" ataybHbH xenien H Kyat aNaTbH 3neKtp KpaIapBaH (xeninik KaBen Mehen) XeHe AKKyMnyTopDe H Kyat aNaBH 3neKtp KpaIapBaH (xeninik KaBen XoK) KaTbcB6ap.
Xymbic opbihbn kayincidiri
Kymbc opbih Ta3a XHe XaKcbi XapkTaNFaH XaFdaJa yCTaHbI3. Teptin Hemece KapbIK 60MaFAH Kymc aHaMaKTapbKa3aTaBIM OKFaNapfa anbl Kenyi MYMKIH.
XaHaTBH cybIKtbKTap,ra3ap Hemee wan Xhbnfah Xapblbc Kayini 6ap Kopwayda 3neKtp Kypanbl naIanaH6aHb3.3neKTP KypanlApbl yWkbl HbIfapbln, WAn Hemece 6ynapbl KaHbipybl MymkiH.
3NeKtp KypanapbH NaiDanahy Ke3iHne 6ananap Xehe 6aCk aadamapbI y3ak xepre wettetin3. Aytky ke3iHne Kypan 6aKnaybH XOFaTbyHbI3 MymkiH.
3nektpKayinci3diri
3neKtp Kypan wTenceninih Abybpb po3eTKara cbHobk kaxket. AbybpB eWkaHdA 03repty Mymkih emec. Xepre Kocynbl 3neKtp KypanapMehen EwKaHdA aanTeprik AbybpB naDanaHa6bH3. 03reptimere H aybp KHe XapaMdbI po3eTKaIapDbI naDanaHy 3neKtp TOK CORY KayiniH TeMeHDeTei.
Ky6bip, kblntabih Xa6dbik, nHttaXe cybitkbiu cnKtbjxepre Kocynbkypandap cbiptbHa TmMei3. Erepenehi3 xepre Kocynb6oica, 3neKtp TOfbih COFy Kayni aptabl.
3NeKtp KypanapbH bInFaHnAch,cbIaH CaKaTaHbI3. 3NeKtp KypanbHbIH iWHe cy Kipce, on 3NeKtp ToBbHbH COy KayniH apTbIpaBbl.
3Nekp Kpaanbl anbin kpy, acbin KOHO Hemece aibipin po3etkadaan wbrapny ywiin Kaebdi naaanaah6ahts. Kaebdi bCTbIKTAH, maihan, etKip weTepen Hemece Kpaanblh XblnKbIma 6enekepihen anbc xepne yctaH3. 3aBIMdaIHaH Hemece WHeHEnHicken Kaebnl 3eKtp TofbiHbIH CORY KayniH apTTbipabbl.
3NeKtp KypalbImeH awbIK kepde Jxymblc icTecehi3, TeK cbiptTaNaiDanaHyFA apHaNFaH y3apTkblHTBn iNanDanaHyFA apHaNFaH y3apTkblHTBn iNanDanaHy 3NeKTP TOfBIhIH COFy KayniH TEmehdTei.
3NeKtp KypanbH bInrFaIbI KOpWayda naIaIaIHy KaKet 60ncA, ABToMaTbI CaKaTHbIpBII axbipAtkbIbHn naIaIaHaHbHbI3. ABToMaTbI

106|Ka3a3kla
CaKaTaNbIbPfBIAaXbIpaTkblItbnaiDnAnahyTOKcoFyKayniH TEmHeTeJI.
Aaamnap kayinci3diri
CaK6onbln,HeICTENKaTkAnbHb3fArepbkwaKein 60nin,3NeKtp KypanblnPetimEn naDanaHb13. 7aPwaraHxKaFdaHaHemece enitKlU,AnKOroNb Hemece aepiacePiactbHna3NeKtp Kypanbl naDanaHb13.3NeKtp Kypanbl naDanaHynda ceKYHdTBk abaCb3dbK KaTbI JkapaKaTTaHynapra anbln Kenyi MymkiH.
XeKe CaKaTbHKnIMDi XeHe apJaBIM KopFaHbI W Ke3inDipikTi KIni3. 3NeKtp Kypal tyPihe Hemece naDnAaHybHa 6aNnaHbictbTaWHTbI, CbIPydaH caKaTaTbH 6TeHke, CaKaTbH 7IeM Hemece Kynak CaKaTaBtBcNkTbI XeKe KopFaHbc Ka6DbIKTapbIH KHO JapakatTAhy KayinH TeMeHdetedi.
BaiKaycbn nainananyanaynak 60nbHb3.3neKtp KypabnIH TKKa XHe/Hemece AKKymyTOpra Kocya, Obl KTepeRhe HeMece anbIn kYpRHe, eWipnyi 6onyiba Ke3 XeTki3iH.3neKTP KypabnIH KeTePin TypraHda, 6apMaKtbl AxbpaTkbIa Tcay HMece KpybIbHbIKocCybl Kynde TKKa Kocy, Xa3aTaBIM OKFaIaNfa anbn Kenyi MYMkH.
3NeKtp KypanbH KocyaH anDbH peTteiH acnantapdbx Hea HraKa KInTepH anbictaHb13. AnHanatbH 6eIweKe TpyFaH acnH HeMece KINT JapaKaTaHaNpFa anbIn KeYi MyMkiH.
Kabincb3 de He KyinHe TpyMaHb3. TipeK KyIe TybIn, epKaawan 63iH3i ceHimDi ycTaHb3. Ocbna ci3 Kytneren XaFdaJa 3neKtp KypanDbI XaKcbipak 6aKbnaCb3.
Kymbica kapaamdbkim KniH3.KeHemece cHdi KIM KMIeH3. Wauhbi3dbk, KIM XHe KONFaTbI KO3FaMnbl6oWeKTepeH anbc yctah3.KeH KIM, oweke HeMece y3bH wau Ko3FaMnbl6oWeKTepre THOI MymKH.
HaHcopfbWxHe WAnTyKbWx6DbkTapbl KypFaHda,OnaPbH,KocbInFaHbFbHaXHeDpybc nainDaInHyBaKa93XeTKi3iH3. WaHcopfbWtbl naDnAanywanchce6beHEnBonatbHKayinTepeiaaItaBb.
HA3AP AYDApBihI3!3heprHMeH Jx6bIKaydbH TOblTae He JxkeKeen ToKtaTbNyblHEmece 3heprHMeH Jx6bIKaydbIbckapy TiaberiHn AkaynaHybl CanDapBHaH NkETP KypaBbHIn XymbicHda Kipic NaJa60nraH KaFdaJa, 6yfattanMaFaHbIfBa H Ke3Ket3in (GonHan XaFdaJa) 6bpIn, axbpaTkbiuBbBiKn. (Owipy) KannbHa KenTipiHa. Keninik aanaHpo3eKaDaH bHrappbHb3 Hemece anbl - canMaBl aKKMyJITOpDbI axbpaTbHb3. Ocbpeket apKbIbbl BaKaIaN6aTbH KaTa IcKe KocblNybl AnDbH anCbI3.
3neKtp KypanapbH nainanahy Xhe KyTyr
KypanbI acabxykTeMeH3. KymbcibH3 yuHJ XapamdbI 3neKtp KypanbIH naDanaHbHb3. XapamdbI 3neKtp KypanbIMeH KepeKT Xymbc aMafBHa dYpbic api ceHimdi Kymbc icteci3.
Axbipatkbibdybicemec3neKtp Kypanbih naDanaH6aHbI. Kocyfa Hemece 0iPyre 6oMaTbH 3neKtp KypanbKayinti 6oBIn, OHJ XeHcykXkjet 6oJabl.
Ka6blknappeTey,6nwekeptin anMaCTbipy HEmece Kpaanbl anbl KOQAH andbih aBipDpo3etkaadwhfapbH3 XHe/HemecekyMyrTopbl anbl Tactah3. BycakTB apeketi 3NEKTP Kpaanblh 6aikaycbis Kocbnyiba Jxon 6epMei
PnIaIaNanbHmMaTbIH 3neKtp Kypanapdb6Banapanap KOnbl XeTneTIH XaIra KOnblHb3. OcbIapnb6InMeTIN Hemece Ocbl eCKeptnenepei OkBImarAH aamnapra 6yn Kypanbl NaIaNAnyFA Kon6epMeH3. TaXipieci3 aamnap KOnblHa3 3neKtp KypanapdbKayint6oana.
3NeKTP KypanapbH ykbntb KytiH3. Ko3FaImanbl 6enweKTepeiKeeprici icteyine XaHe KeTtenin kAlmByHa, 6enweKTepeiakaycbH hemece 3aBIMdAmFah BonybHa, 3eKTP KypanbHbH 3aBIMdAmFaHbHa Ke3 KeTkiH3. 3aBIMdAnFah 6enweKepi Gabp KaPbIaNaiDaNHydAn AnBbH xehdeH3. 3eKTP KypanapbHbH Dpybc KyTImeyi XaaatabnM OKfAJaPa ceBn 6oBnXaTaDb.
Keckiw acnantapdbietkip kHe Ta3a Kyide caKaTbI3. Dpybckyitrhen kHe Keckiw kHeKtepi etkip Keckiw acnantap a3 Kentenin, kecinTeH 6etke OHai 6afblTanaBd.
3NeKtp KypanbH, Jka6dbkTapbl, anMaBb-camMaBb acnantapblx He T.6.0cbHyckaynapra cai naDanaHbHbI3.CohbIMe HxMbIC wapTtApbImeOpbHdAaTbH opeKeTTepre Ha3ap aydpbHbI3.3NeKtp KypandaPbH apHaNMAfH xMbICTapaDa naDanaHy Kavinti.
AkkymyIaTOpdbi naIaNanHy XHe KytY
AkkymyIaTOpbIK 6aTapeHbI TEK eHdipywi KepcTeKHe3apTay KpyIbIbCbIMeH 3apTahB3. 3apTay KpyIbIbCbI bEnrini bip akmyIaTOpnap TyPiE apHaIFaH, OHb IBaKa akMyIaTOpnpbl 3apTay yuH naDanaHy ept KayIn H TyIpaIbI.
3NeKTP KypanapbHa apHanFAH akkymyIaTOpnapdbFaHa naDanaHbHb3. Baca kkyMnyIaTOpnapblnandaHy kapaKaTAPFa Hemece optke ekenyi MmKIN.
PnIaIaNbHmMaTbIH AKKMyrAToPdbTyHicnepPi TybIKaybIMyMkih KbiCTbIPfBiHTapDaH, TbHApdaH, KiTTepHe,WerenepeH,BHTTepeHxHe 6acka Ycak Temip 3aTAPHaCkTaHbI3.AKKMyrAToP TyicnepiH apacBHaFbKbCKa TybIKaTany KyikTepe HEmec eptke Aekny MyMKH.
Dypbc naaandaHa6faHbIKTah,AKKymIANTOpdAn cybIKTBk aYbyMmKIn. OAh TMHei3.Ke3deCOK THReHc,con Xepdi CymeH WaihB13.CyibIKTBk Ke3re TnCe,MeHHHaNbIK K0MEK anlb13.
AkkMyTOpFaBcYbIKbIK TepHI TitipKeHdipyI Hemece KyIdipyMmKIN.


Kaazka1a|107
Kb13Met
3NeKtp KypanbHbI3bTeK 6nIKTI MaHaHa FxHe apHayb6eWKeTepMeH XeHdti3. Con apkblnbl 3NeKtp KypanbHbIH KayinciairH caKaTaNbI.
DpebneppnJxhe wypn 6ypaybIHTapdbH Kayinci3dkTexHHKacblTypanbl HcyKaynapbl
Kymbc icTereH Ke3e KypanbH N0JnHaHaFyTKanapbIHAH YCTaHbI3, EHTKEHI KEcTeIH KypAnHeMeCE BNT XacbpHbCIMdApFA Thin KeTyI MymKIn. ToK eTeIH CbIMFa THIO MeAINbIb Kypan 6eJIWeKTePiHe TOK 6epin Tok COfYbHa aBIn Kenyi MymKIn.
3NeKtp Kypammen 6ipre xi6epinren Kocbimua Tykanaapbl yctanbl. BaBnaybl JkofaTyr 3aKbIMapra anbl KenyI MymkiH.
Kaxkettiy KypandapbHn NaidanabHn XacbpHfA H KopeK cbMdpabH Ta6bHb3 Hemece JeprinikTi KopeK YbIMdApbH WAKbPbH3. 3neKTP cbMdpaHa THO ePT Hemece TOK coryBaHa anbl Keny i MymKIn. Ra3 Ky6bpHb3 3aKbIMday XapbIbICKa anbl Keny i MymKIn. Cy Ky6bpHb3 3aKbIMday MaTePnAnDbK 3NHa FHa anbl Keny i MymKIn.
CbHanaHca,3NeKtp Kypanbl6ipDen cHdpin3.Kepi coKkIfa aKeNETIH KOFapbl peakunca cattepiE daHbH 6oBbHbI3. Kymbc Kypanbl KeNeci KaFdaa napda TyTbIfaBl:
3NeKTP KypaBbHa 7aMaDaH TbC XyKTeMe TyckeHHe HEMeCE
- Hndenin JataKah BcnIeK Kcaica.
3NeKtp KypanbH 6epik yctahbI. Wypynapbl 6ypan 6ekity kane 6ypan 6ocaty keiHne KckkaaHa Kofapbl Meetep naia 6onybl MyMKH.
AaHbHdAmHb6ekitiiz. KbyCy KpyaBHa HEmece KblckbIkaOpHaTbIFaH daaHbHaMa KOblb3be H caIbCTbIPFaHda, 6epik yctanaDb.
3neKtp KypanbH Xepre KOOaH anDbH OHbH TOkTaybH KyTHi3. Anmbl-calmbl acn anin HIN 3neKtp Kypan6aKnaybHIn KofaTbHa aNbl KenyIMMkiH.
AkkymyTopbI aunahbI3. KbiKa TynbIKany Kayni 6ap.

Mbicanb,akkymnyTopdbXbinydah,cohdai
ak,y3diKci3 KYNXapbIfbHaH,OTTaH,cydah
KHe bINFaDAn HOPFaHbI3. XapbNy kayni 6ap.
AkkymyTOpDHa3aKbIMDaHFaH HemeC dypbc naindaNaH6aFAn XaFdaJa 6y IbHyfBy MymKIn. Byn XaFdaJa iWKe Ta3a aya Kipri3iH3 XeHe WafBIMAp 6oJca, MeuHnhBik KEmek AnbHbI3. Bynap TBHbIC any KondapBH TitIPkeHdpiy MyMkiH.
AkkymyTOpbIeK Bosch 3neKtp KypaBImen naDanaHbIHbI3. Con apkblia AkkymyTOpbIeKayinapTbIK KkyTeyEn CaKaTcB13.
IWeHemece6ypaybiuCnKtbyuTb3aTTap Hemece cbiptkbecepapkbinbakkymynyarTop3kblmdahyb MyMKH. ByknBcKaTuNbKTanyra anbnKeiIn, aKKMyNtOpXaHyb,TYTHuBfApBy,JaPbNyHHeMece Kbl3bnKETyiMVKH.
Θhim XəHe Kbɪ3MeT cHnʌTamaCbl

BapnbKayinc3dk HycKayntbIkpH Jxhe eckptnenepi0kbHb3.
TexnKanbik Kayinciaik HycKayntapbiH
He eceptneepdi caKaTamay TOKtih
CofyibaHa,opt Jha/Hemece aybp
JapaKaTTaHynapFa anapybl MyMkiH.
3neKtp KpyaBHBcypet6ap6eTTaawbn naDanahy HcyckaybfbH OKy Ke3iHde ObI aBbIK YCTaHb3.
Taraihndany6oibihwa kondahy
BynneKTP KpyanbH Wypyntapdb6ypan 6kytJxHe 6ypan 6ocaty,coHdai-ak,araui,metaun,cohImeH 6ipre, CHTETnKaIbIK MATEpHaIaNAPdb6yPbInayFa apHaIraH.
OcbI 3neKp KypalbHbH Jkapblfbl 3neKtp KypalbHbH Tikeen JyMbIC JaaBH JkapbKTahDbipyFa apHaHaF H6oBn Yde 6eMeHi JkapbKTahDbipyFa apHaImaHaH.
BennenEnren Kypamdbi 6eIweKTeP
Kepcetinre HcpamdaCTap HemipnHReH cypETeI 6ap
Bettere 3neKTP KpaanbHbH CnnaTtAmcbHa caH.
1 Te3 KbIcaTbH 6yPbIaNay naTPOhBi
2AinHAnDbIpy MOMENTIn OpaHTy CaINHaCbI
3 Bepinic aybictbpin-Kockblwbl
4 AkkymyIaTOpdbI 6OcAty TyMeCi
5 Akymyntop
6 AaHany 6aFbItbHbH aybIcTbIpbN-KOCKBbHb
7 Kockbiw/ewipriw
8 AkkmyIaTOpdbH 3apdTany Kyi HnDnKaTOpb
9 "PowerLight" wlbpaft
10 TyTKa (6eTI OKwaynaHdbipbIFaH)
11KoHbIpaMa 6HTanapdbH Am6eBan yCTaBbIbI*
12 KOHdbIpMa 6nTa
*BeyHeneHre HeMece CnTaTaanFaH Ka6b4kTap cTaNapTbI XeKt3y KcnemimH Kamblmai. TaNok Ka6b4kTap b63iH Ka6b4kTap BaFapamMaBdHa Ta6a63i.
TexHnKanbIK mAniMeTtep
UaHdbjKHeJxOKnKaIapDbicopy
KopFacbH 60y, Kei6ip aFau copTapbMnHepaIap XHeMetaIappapBn WAnb DeHCaybIKKa 3NHNb 60NyMbMYMkh. IuaHa TIOXHe XaDbj KBy naIaNHybda Hemece XaHINDaIbI aAaMnpaI aNeprHbIK peaku npabJxHe/Hemce TbHcKoNdpabH bH aypnapbTybpyb MyMKH. Kei6ip wH typne1, acipece eme HxHe WAMwat aFaBbHbH WAnb, acipece, afaTb eHey KaIbIKTapbIMe (xpomat, aafTb KopFay 3aTb) bipre KaHeporeHep 60bn ecenTenei. Acbcetik MATEPnAN TeK KaHa MaMaHApMeH eHDenyi KepeK.
Kymbc opHbHHkKaKcbXeNdeTinyHe Ke3KeTki3iH3.
P2y3ci cblbihdaflra3kafapnnaHnycblnabl.
OHeTeiH MaTePnAaDap yuH enIH3e KOnJaHbIaNbH YHaFapIMdApBn naDaIaNbHbIb3.


Kaazakua|109
KymbicopnbHdaaHbIHxHHanybH6oNdbipMaHbI3. 1JAH OHAIyTuAnHybMyMKH
Paiandaanhy
Paindanahya ehdpy
AkkymyIaTOpdi ophaty
Eckptne:3NeKtp KypalbHb3Fa apHaMaFah
aKKyMnTOpDb naIadAnay Kate XMyBc icteyine Hemece
3NeKTP KypalbHbIH 3akBmDahybHa anbIn Kenyi MyMKH.
AHHany 6abftbHbIH aybCTbpIN-KoCKbUbH 6 yRbIKKa
6ekITiReHHxhe yuBbKkBepiK TIn TpyFaBH Ce3ReHwe
calbHb3.3apraTaNFAH aKKyMnTOpDb 5 pa3beMfa
6ekITiReHHxhe pa3bEmFa TbFb3 TIn TpyFaBH Ce3ReHwe
calbHb3.
AHHany 6aftbH opHaTy (C cypeTIN KapaHb3)
AHHany 6aftbTBHbH aybCTbipn-KoKbIbHbH 6 Kemerim H aHHany 6aftbTbH enweyre 60ana. bipak KocbiTb/ewipri7 6ackaHa 6yn MyMkih emec.
OhXaKa aHany 6aftbIb: Bpybnay kHe wypntapbl 6ypan 6ekiry yuih aHany 6aftbIbHbH aybctbIpbIn- KockbluHb6 confa tipenreHwe 6acblH3.
ConxakkaaHany6afblb:BypaHdaanapMeHcMbHapdb 6ocaty HeMece 6ypan any yuH aHany 6afblbHbH aybctbpin-KockbIbH 6ohFa TipenreHwe 6acblb3.
AinHaIbIpyMOnentInOpHaty
AHaIbpy MOMENTIH OPHATy CAKINACbHbH 2 KEMERIMeH 20 DeHre iuiHEn KaXET AHAJIbpy MOMENTIH TaHayFa 6oana. Dypbc opHaTkaHda JyMbIC KpaIa bI Wypn MaTePhAMEN BiPTeric 6bpan 6ekITine cana HeMece opHaTbIFaH aiHaNbipy MOMENTHE XeTe cana TOkTaNb. Kynde " " 6ekITy tipkecyi 6encHdi 6oMaNbbl, MbCaNbbl, 6byfbnay yuiH.
Upyntapdb6ypan any Ke3Hne KofapbipaknapaMetpnd TaHdaHb3 Hemece KaKet 6oNca TeMeHderi TaHbaFa opHaTbHb3
BepinictiMexaHnKaIbTaHaDanybl
Bepinic aybictbipin-Kockbubin3 TeK 3neKtp Kypanb1 TOkTaHaHH CoH naJaHaHBiHbI3.
Bepinic aybictbipn-KockbHbHbHda 3 2 aHaHbIMdap caHdpbHbN KeemH TaHay MymKIn.
Bepinic I:
TEme anHaJIbIMap caHb; yInKeH 6yPbI/nay dAmEtPIme H 6ypay Hemece xMbic icTey yinH.
Bepinic II:
Kofapbai aHnblmnapcahbl;kiu6yfbIay dAmetpimeh Kymbc ictey yuiH.
Bepinacaybctbipbn-kockbiu3 TipeireHwe XblnXbImaca, 6yfbnatpoHH6yfbmHeHaHaIbipbH3.
Kocy/ewipy
3nEeKtp KypanbI Kocy yuH KockbIITb/oeipriuTI 76acbl TpybHb3.
山bipak9KOKcbiH/ewipriTIT7KaHHeMeCToBik 6acblkaHda KaHbIn XTeepn60MaFaH JapbIKTBk KaFdaHbHda KMyMbCa aMafbl HApblTaHbPaBl.
3nektpkpandbewipy ywiH KockbIbI/eipriwi7 xi6epi13.
3Heprn KyatbH YhemDey yuiin 3neKtp KypaIbH TeK naDanaHaapda KocbiHbI3.
AHHany MOMENTIH OPHATY
KocbIbIb/8uipriTti7 6acy Kuyin e3repe otbipin, KocblfAH KypanDbH aHaHbIMdap caHbH biptiHepetreye 60ana.
KockbIbIeiprii7 8ai 6ackaHa,3neKtp Kypan TEmHeipek aHaHbIMap caHbIme Hymbic icTei. Bacy Kyuip apTkHaJa aHaHbIMap caHb i apTaBl.
Tolbik abTomattbl mnnndenb 6kity (abTONok)
Bacimarhan Kockbhu/owipriu7 petihe 6yprbnay uHHnHJI MeH acan natponbl bekitinedi.
BvN Boc AkkymyTOp petIHne 6ypaHdaapb6ypan Kipri3y
KHe 3JeKTP KpyaBH 6ypaybiu petIHne naDanaHyf a
MmkiHik 6epedi.
Kypictexeriwi
KockbIHTb/ewipriTt7xibepreHde,6yfbinay natohbl TekeiEiXeOcbnai Kxmbic KypanBihH Kypici TOKTaBnadbl.
Upyntapb6ypan6ekitkenedeKockbIb/ewipriwi7 Uypn daHbHaama6ipteric 6ypan 6kItinreHne fHa Xiepi3.5ynKaFdaaUwpyntb6acbdaBbHaama TaTbMaBbl.
AkkymyTOp 3apdTany Kyi HnDnKaTOpbl
AkkmynTOpbl3aprTay kyinH HnHkAtopbl 86ipHeWe ceKHyJXapTbIaH HeMeceToBik BacIiHaN KCKBII/0uipriW 7 KyHNe aKKMynTOpbl3aprTaHaBn KepcTei XaHe 3XacblXkapbIKDIObIH KaMTnbl.
XapbiknObl Kyatbi
Y3dikci3 kapbik 3x kacbin ≥2/3
Yaikci3xapbik2xkacbn≥1/3
Y3dikci3 kapbik 1 x kacbln < 1/3
KbInbInbTKaTbH XapbK 1 xXacbN Pe3epB
Temnepatypara 6aainhaibctb aptbiK KxykTey Koprahbicbl
TaafbHany6oBbHua kondahya 3neKtp KpaIb apTbIK kkykTeMei. KaTb JyKTeNyhe Hemepe pyKcat etinre HAKyMnyTOP TemnepatypacbHbH aMaFbHah apTbIK KeTce aHaHmAp caHb TEmeHenei.3neKtp KpaIb aKKymyTAP pKcAteINRE TMnepaTypara KETKeHHEN COH ToBik aHaJIbMdp CaHbImeXMybcic Tei.
Tainanany Hycaynapbi
3NeKtp Kypanbl Wypynka Tek eWipinre H Kyde KObIH3. AHaHbn JxTkaH XyMbIC Kypanapbl cbIpBn Ketyi MYMKH.
3nektpkpyaImen y3ak kymbic icTeerHHeK eHH caNKbHdaryyuiH 3MHHTkaeHXKofapbai aHaJIbIMap caHBia Kocy KepeK.
10|Ka3akwa
Metanla Teciktp Kacay yuH JxofapbI canaIb, Te3 KeceTH 6oatahan XacaIaan MyTikci3, etKipneHren 6yPbnapbl naIanaIahbIbI. Tnicti canara Bosch kepek-kaapkapbI 6aFapamacbi kenindik 6epei.
Ynken WpynpTapbl KaTb MaepnaIaIapra 6ypan 6ekity aandHda WpypTapdb Y3bHdbfBHBn WaamMeh 23 iuki npek OmaDnAmetpihe caKeK eKetin DnAmetpi bap teciTi andln ana 6yfbnay Kepek.
TexHkAnbIK Kytim JxHe Kbl3MeT
KbI3MeT Kcpcty XkHe Ta3anay
AkkymyTOpbl3eKtp Kypammen Ke3 KeIren KymbIcTapbl (Mbicanbl, opHaty, KbI3MeT KepceTy, T.6.) 6actay andbHa, coHdaa-k, 3eKtp Kypanbl TaCbImaay XHe CaTAY Ke3IHne WbIFapBbHb3. Ke3neCOK KocblFaHaJx Japakat any Kayni bap.
DypbcKHeceHIMdiicteyywn3neKtpKypanmeh Xendtkiu TecikTia3aYCTahb3.
Batape kymbc icteme Jatca, Bosch 3neKtp KpaanapbHbHekineTc cepnctik opTaibfbHa 6apbHbI3.
Tytbinybifa KbI3MeT KepcTey XHe naiDanaHy Kehectepi
Kb3MeT KepcTeY we6epxHaCbI eHIMdi JKeHDey KeHe KyTy, coHdai-ak KocanBb 6eJWeKTeP typanbCypaKaTpFa Xayan bepei. KaKetti Cb36aIap MeH KocAnBb 6eJWeKTeP typanb AknapaTbMbHa MEKeHkaDaH Tabacbl:
www.bosch-pt.com
KeHec 6epyui Bosch Kb3MeTkePneiEHHIMdi NaiDanaHyKaHe onapBnKocanB6eIeKTePi TypaTapBnB3Fa TnHaKtBi kayan 6pepi.
CypakTap KOI XHE KOCANKb6eIWEKTEPRE TANCbIPbc 6pey KeiHne MInDETI TypDe eHIMDIN3ayBITbIK TaKTAWacbIHdAfl10-caHbE HIM HEMPiH Xa3bHb3.
EHnpyui TanaTapbMeH HopMa npbHbHcKaTanybIme HneKp KypabHJxHdye XHe KeinDi Kbl3MeT KepCey 6apbIK MemKeTep apMafbHaTeK "PObep Bow" dipmaibHK HeMeCe ABToPi3aunHaHfAn Kbl3MeT KepCey optanbKTapbHdaOpbHdaJIb.
ECKEPTY!3aHcb3KoJmEH eKeiHRe HImdeppi naDanahy Kayinti, deHcaynblfBhlb3ra 3nnH KeTIpyi MymkiH. HImdeppi 3aHcb3Xacay XHe Tapaty Akimuiik XHe KblmbictbIK Taptin 60bHwla 3aHmEH KydanaHaDbI.
Ka3aKcTaH
KJUC "PobepBow
3NeKtp KypanapbHa Kb3MeT KepeTy opTaBfbl
AJMaTbI KaIaCbI
Ka3aKCTaH
050050
PaiBIM6ek daHfbilbl
KOMMyHaIbHaI KSeCiHn 6pyblbl,169/1
Ten.: +7 (727) 232 37 07
_aKc: + 7 (727) 2330787
E-Mail: info.powertools.ka@bosch.com
PecmncaHtby:www.bosch.kz;www.bosch-pt.kz
Tacbimanay
ByI HTHHNOHBKAKKYMnTOpnap KayiTI TAYAPnapra KObIaTbH TanaTnTrafca CbOBy KepeK. NaDanaHybI AKKMyrTOPnapbl KcWede KocbIMu KaKaTApcb3 TaCbMaIaNanAaDbI.
YiHuiTynfnapMbicanb,yeKeNiriHemeceXibepy) opamafKaHeMapkanaPFAKoBnAtpbHapHaBtanaTAPdb CaTAY Kepe.Ki6peyre daBHday Ke3Inde Kayinti KxKTep MaMaHbHa xaabapnacy Kepe.
AkkymyIaTOpdbKopnycbl3akbImdaHaBocncaFaHa
Xi6epiH3.AuBkTyicnepepiKeimdeH3XeHe
aKKMyIaTOpdbOpamadaKo3fAmMaHbHdApHaBl3.
KaKeTbOnca,KocbIMuaYTTbIKepexeepepdiKaTaHbI3.
KaTeJkapaty

3NeKtp Kpyaandapdbi, AkkyMnyTopnapdbi, KepeK-kaPakdpj He opay MaepnndapbiH 3KoIOnrnnbIK TpyfbiAn Dpybc yTINN3aunnaayfa
Tancbipy KepeK.
3nektp Kypanapdpj Xahe aKkyMnyTopnapdb/6atapeepnpdy YIKoKbIcbHa TaCTaMaHbI!
TeK KaHa EO enDiepi yuiH:
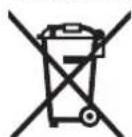
3NeKtpKaHe 3NeKtpOnBbIckcKi Kypanap
6BoHnua 2012/19/EU HnpeKTHBaCbHa
KaHe 2006/66/EC HopMaCbHa cai
KapaMcb33 NeKtp Kypanapdbl,akaybl
Hemece NaJdaanablnfA
aKKMyTnTopnapb/6atapennapdb6eKek Huy Kepe KHe 3KoNOrnblkTypfbdaH Dpybc yTNn3aunayyta Tancbpy Kepe.
Akkymyntopnap/6atapereanp:
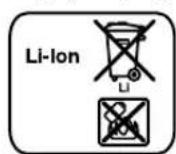
JIHTHNOHdbK:
"TacbImaIayTapaybHaFb1,110 6etIHderi Hcyckaynapbl opbHdaHb3.
TexHkAnbIe3repEreHiay KyKbIbIcakTanaDbI.

Romàna | 111
Româna
Tel. service scule electrice: (021) 4057540
Fax: (021) 4057566
E-Mail: infoBSC@ro.bosch.com
Tel. consultanta clienti: (021) 4057500
Fax: (021) 2331313
E-Mail: infoBSC@ro.bosch.com
www.bosch-romania.ro
Transport
Accumulatorii Li-Ion integrai respecta cerintele legislatiei privind transportul marfurilor periculoase. Accumulatori pot fi transporteit router fara restricti de catre utiliser. In cazul transportului de catre terti (de exemplu: transport aerian suk prin firma de expeditii) trebuie respectate cerinte speciale privind ambalarea si marcarea. In aceastia situatie, la pregatirea expertierii trebuie consulat un expert in transportul marfurilor periculoase.
IpooyeteBHHMaTeHOBCHyKu yka3aHH. HeCnAsBaHaTo Ha npBedeHN
TeNo-ONy yka3aHnMoKe Da IOBeDe Do TOKOB yIap, NOKAp H/INN TeKKN TpaBMN.
CbxpaHbAaTe Te3n yka3aHHHa cHpyHo Macto.
H3no3BaHHrNo-DOy TepMH,eneKTPoHHCTpymeHT"ce OTHACdo 3axpaHbAHNOT eNEKTPhueckata Mpeka eNEKTPOHHCTpymeHTn (cBc 3axpaHbau Ka6en) Ndo 3axpaHbAHN OT akyMynatopha 6atePna eNEKTPoHHCTpymeHTn (6e3 3axpaHbau Ka6en).
Ee3oNaCHOCTHa pa60HTO MRCTO
POnDbPxKaIe paObTHoCn MAnCTo NDo6peocBeteHo. Be3NoopAaKbT HHeIOCTaTBHOTOCBETneHMe MoTa Da CNOMOrHaT 3a Bb3HNKBaHTo Ha TpyDOba 3NOno-nyka.
He pa6oTeTe ceneKToHcTpyMeHa B cepa C nobHea OnaHcOT Ob3NkBAe Ha EKcnno3n, B 6n30CTdo NecHO3anAHm TeHocTH, RaOBe Hn npaxo-6pa3HN MaTePnn. IIO BpeMe Ha pa6oTa B eKeTPOHHCTpyMeHTnte Ce OTdEJIAT NCKPN, KOHTo MOrat Da Bb3nJaMeHr Ppaxoo6pa3HN MaTePnn INI napn.
Дрьктесдаи CTpaHmHnIuHa Ha 6e3onacHo pa3-CTOANHe,doKATO paboHTte C eNEKTPOHNCTpyMeNTa.AKO BHHMaHHeTo Bn 6bde OTKIOHeHO,MOKe Da 3aYbTe KOHTpona HAD eNEKTPOHNCTpyMeNTa.
Be3oNaCHOCT np pa6Ota c eNEKtpueckn TOK
UeencbHaeneKtpnHcTpymentaTpa6ba da e noXoAa 3a non3BaHH KOtAa. B HmKaB b cnyaH He ce Donycka H3MeHHe Ha KOhCTpykunrTa Ha euncena. KoRato pa6OHTe CbC 3aHyneHn eNeKtpoypeH, He n3-
non3baTe aanTepn 3a encena. non3BaHeTo Ha OpiHnHaHn HcncEni KHTaKTH HaMaJIra Ba PnCKa OT Bb3- HNKBaHe Ha TOKOB yIap.
H36raBae Doonnpa H a TaNoto Bn do 3a3eMeHH Tena, Hanp. Tpb6n, OToNNHTENH ypeH, Neu H xnaHnnHn. Korato TaNTo Bn e 3a3eMeHO, PNCKbT OT Bb3HKnBaHe Ha TOKOB yap e No-TOJAM.
PpeNa3BaIte eNEKTPOHNCTpyMeHTa CH OT bXn H Blara. PPOHINKBaHETo HA BOJa B ENEKTPOHNCTpyMeHTa N0BbIaBA OaNCHocTtA OT KOKyDap.
He n3non3BaIte 3axpaHbAunKa6en 3a cenn, 3a KOH TO TOn He e npdeBnEn, HApN. 3a Da HoCIne EneKTPoHHCTpyMeHTa 3a Ka6ena HnN Da N3BaNTe Uencena ot KOHTAKTa. PpeNa3BaIte Ka6ena OT HaPpBAHe, OMaCnBAHe, DOnM Do OCTPh Pb6OBe HnN Do NOBHXHN 3BeHa Ha Maunnn. NObpeHn HnYcKaHn Ka6eni YBeHnUaBAt PNCKA O TB3HKnBaHe Ha TOKOB yap.
Korato pa60tHe c enektponHcTpymEn Habh, H3- non3BaIte camo ydbNkHTenHH Ka6eHN, noxOJn 3a pa6ota Ha oTKpTo. nnon3BaHTo Ha ydbNkHTen, npEHa3HaueH 3a pa6ota Ha oTKpTo, hAmJIbBA pNcKa O T Bb3HKnBaHe Ha ToKOB yDap.
Ako ce hana rna n3non3BaHTo Ha eneKtpOnHCTpyMeHa BbB BlaxHa Cpea, H3non3BaTe npedna3en pkeBc-Ba4 3a yTeHH TOKOB. H3non3BaHTo Ha npedna3en npe-KbCBa4 3a yTeHH TOKOB HaMaJIra BA ONaCHOCTTa OT Bb3-HNKBAHe HA TOKOB yDap.
Be3onaceH naMH ha pa6oTa
BbTe KOHcHTpHaHn, CneTe BnHMaTeHNO DeIeCTBnTa CN NoCTbNBAte NpeDna3NBO npa3ymHO. He3N0n3BaTe eNEKTPoHNCTpyMeHTa, KORATO CTe yMopeHH HnN IOBnHHeHaKOTuHHeBeIeCTBa, aIKoXON HnN yNoBaunNekapCTBa. EINH Mnr pa3ceHOCt npn p6Ota ceneKTPoHNCTpyMeT MoE Da HMa 3a noCnEcdTBHe NkKnIOUHTeHNO TeKKn HapaHbAHn.
Pa6oTe c npEpa3BaO p6oTH o6NeKIO h BnHar npeNa3H ouHa. HocehTo ha noXoJU 3a no3BaH H ENEKTPOHCTPmuHTN H3BpWbAHATAeHOC TnuHn NpeNa3H CpeCTBa, KATO dHXaTeHn MaCkA, 3dpaBn NtBTHo3aTOBpeH O6yBKn CcStaHne IpaHep, 3aunHa KACKa INI WymO3aRnyuWteH (aTHFOH), HaMaJIbRa PnCKa O t Bb3HKnBaHe HA TpyDObA 3IonoNyKa.
H36BaiTe onaChocTa OT BkIIOUbaHe Ha eNcKToHNCTpyMeHTa NO HebHMmaHe. PpeH Da BkIOuHTe cena B 3axpaHbaaTa MPexa Hn da Noctabte AkymyNatopHata 6ate, ce yBepraHTe, ne KcOBnT peKbcBa e B noJoxHeH,3KIOUeHO. Ako, Korato HOCHTe eNcKToHNCTpyMeHTa, IbpxHTe npbCTa Cn BbpxnyckOBn ppeKcbCAu, Hn aKO nOdaBe Tae XsPaHbAio Ha npkeHe HA eNcKToHNCTpyMeHTa, KOrato E BkIOUeH, cbueCTbBya ONaCHOT OT Bb3HNKBAhe Ha TpyDOb 3NoOnLyka.
PpeHn Da BKNIOHTe eNEKTOPNHCTpyMeHTa,ceYbepBaiTe,YcTEOTCTpaHHNOTHERBOCNKHN NOMOUNHNNCTpyMeTHNraeCHN KIOUObE.POMoEN HNCTpyMeHT,3a6paBeHHa BbPTAIO Ce 3BEHO,MOJE Da pnpHHN TpaBMN.


BbIraPckn|117
136nBaHHe HeecCTBHeHne NOXeHHa TAnTo. Pa6oTe B Cta6nHNO NOnOxEHHe Ha TAnTo HBB BBeKN MOMENT NoDpKAAte PAHBObeche.Takaue MoXeTe da KOHTPOINpATE eNEKTPOHNCTpyMeHaNo-dOpE Hno-6e30NaCHO,AKO Bb3HKnHE HeouakBaHa CNYaHJ.
Pa6oTeTe c noxOaHIO 6nEknHO. He pa6oTeTe c HnK dpexn nn ykpaWeHH. DpbXte Kocata cn,dpexnte H pbKaBmua Ha 6e30nacHo pa3cTOnHHe OT BbPTaUc Ce 3BeHa Ha eNekTPoHNCTPymEnTHe. Hpioknte dpexn, ykpaWeHHrta, DblITNE KOCHMOrat da 6bDat 3axBaHaTHu YBLeueHH OT BbPTaUNCe 3BeHa.
Ako e Bb3MOXHO H3NON3BAHETo HA BbHnHa acnnpa- cnoHha cnCTema,ce yBepBaHTe,ye TRe BKNIOueHa n cyHKUOHHPa H3npaHO.3N03BAHETo Ha acnpa- cnoHha cnCTema HaMaJIraBa PnCKOBTe,dbJkaIc He HoOT- denuata ce npn pa6ota npax.
PnKJHBO OTHoWeHHe KbM eNeKTpoHcTppyMeHTHe
He npetoBapBaTe eneKtpoHnCTpyMeHa.3non3BaTe eneKtpoHnCTpyMeHTte cAmOcb6pa3HO TAAHOTo npedHa3NaueHHe. lIe pa6oTHe no-dObe n no-6e3onacHo, KOraTO h3no3BaTe NoXoJrN eEeKtpoHnCTpyMeHT B 3aJaDeHnO r O pOn3BoHnTe I dHa nA3OH Ha HatoBapBaHe.
He n3non3baite enektpoHnCTpyment, uHTO nyckOB npekcbau e nobpehen. EneKTPoHnCTpymert, KOHTO He MOKeJa 6bJe N3KIOUBAH IN BKNIOUBAH NO ppeBnDEHnAOT npOn3BOJNTeHaUNH, e ONaceH nTpa6Ba da 6be peMOH- TnpaH.
PpeHn da npomeHte HactpoKHTe Ha eNEkTPOHHCTpyMeHTa,da 3aMeHrte pa6OTHN HHCTpyMeHTu DonbHnTeHNn Pnncnoc6BHeH, KaKTo H KOrato npoDbJXHTENHO BPeMe HMa Da N3NON3BaTE eNEkTPOHHCTpyMeHTa, H3KnOuBaIte Uencena O T3axpaHbAuaTaMpeKa H/nn H3BaxJaTe AkyMnaTopHata GatePN. Ta3n MPA pEmaxBa OnaCHOCTa OT 3aJeNCTBaHe Ha eNEkTPOHHCTpyMeHTa NO HeBHmAHHe.
CbxpaHbAteeneKtpOHCTpyMeHTeHaMeCTa, KbTeoHEMoratda6bDatIOCTHRaTHOTeLa. HeOnycKaTeTe da6bDat H3NO3BAHNOTnua, KOHOHe ca3aNo3aTHcHauHHa pa6ota cTAXHe ca npOeuNTe3n HHCTpyKuHH.Korato CaBpbueTeHaHeONITHnOTpe6nteHH, eNEKtpOHCTpyMeHTeMoraTda6bDatNkIIOUHTenHOOnaCHN.
PnOdbpkaIte eneKtpoHcTpyMeHTe cn rphkNBO. PnpOBepaBte daHn NOBHXHNTe 3Bena fYHKUHOHNpAte63ykoH0,daHHe 3aklnHBat,daH HMa CuyneHnn NOBpeEH NTeaH, KOnTO HApuBaAT Hn HMeHtFyHKUHTe Ha eNEKtpoHcTpyMeHTa. IpeDuHa3NON3BaTe eNEKtpoHcTpyMeHTa, ce nOrpHexe NoBpeEHTE DetAH Da 6bDat pemOHHpAH. MHorOOT typoBITE 3noonoyKn Ce bJnkat Ha HeNo6pe noDpkaHn eneKtpoHcTpyMeHTn H ypeH.
PnDpbjxahpepexeHHTpymeHTBHHaHndo6pe 3aTOUeHN HCTN. DObpe npDbbpxAHte peXeun HCTpyMeTHC OCTPN Pb6OBe OKaBAt NO-MANKo CbnpoTHBHeHne H Ce BOAT No-JeKO.
H3non3BaIte eneKtponHCTpyMeHTNE,ONbHNHTENHTe npncnoc6nHn,pa60THTE HNCTpyMeHTN T.H.,Cbo6pa3HO HNCTpyKUHTNE Ha pOn3BOJNTe. PnTOBa ce Cbo6pa3aBaiTe n C KOHKpETHe Ta60THyycNoBn H onepaun, KOnTO Tp8Ba Da N3bNHTE.
H3non3BaHTo Ha eNEKtponHCTpyMeHTN 3a pa3NIuHn OTnpEBnDEHnTe OT pOn3BOJNTe PpINOKeHH NOBnABA OnaCHOCTTa OT Bb3HNKBaHe HA TpyOBn 3NOIONYKn.
PnKINBO OTHOeHne KbMaKymaTOpH eNekTpOHCTPYMENTH
3a 3apexdaheTo Ha akymyataopnHte 6atePHn H3non3BaIte cmo 3apndHte yctpoCTBA, npenOpbVAHHOT npOn3BODHTe. Korato n3non3Bate 3apdHn yctpoCTBa 3a 3apeKdaHe Ha HeoDxOJaHn akymyataopnH 6aTePnH, cbuCTByBa ONaCHOt OT Bb3HNKBaHe Ha NoXap.
3a3axpaHbAe Ha eneKTPoHcTpyMeHTHe n3non3BaI-Te cAmo npEbnHEnHE 3a CbOTBeTHMa Moen akMy- Natopn6BATEPHN. H3non3BaHTo Ha pa3nHnAkymy- NaTOPHN 6atePHN MOKe Ja npEIN3BnKa TpyOba 3nONOnyKa H/nn Noxap.
PpeNa3BaIte HEN3NON3BaHITe aKymyIaTOPn6 BaTePNOT KOHTAKT C RONEM HNN MAIKN METAHN PpeMeTH, HAp. KIaMepH, MOHTH, KIOUOBE, NHPOH, BHTOBE H AP.N., TbN KATO TE MORAT Da ppeIN3BHKAT KbCO CbEHNHEHNE. IocneCTBnTA OT KbCOTO CbeHNHEHNE MORAT Da 6bDat n3rapHHn INn NOkap.
PnHnepaBnHO h3non3BaHe oAkyMynaTopha 6aTePnOHT He MoKe Da h3Tce eEeKTPoNt. H36rBaIte KONTAKTa C Hero.AkO BbPiKeKN ToBA HA KOxKaTA BnNoADHe eNEeKTPoNt, H3nnakHete MhCTOTo 0bHNO C BOJa. Ako eNEeKTPoNt NoJADHe B Ouyte Bn, He3a6abHo ce 06bpHcTe 3a NOMouK bM ouEH neKap. EneKTPoNtBt MOKe Da npedn3BnKA n3rapHnHa KOxKaTa.
Iodbpxane
DonyckaTe peMoHTbHa eneKtpOnHcTpymentHe Bn Da ce N3BbPbBa cAmO OT KBaHnHnUpaHH CneuHaHCTN cAmO cN3No3BaHETo HaOpHnHaHHpe3epBHN qACTH. ItoTo3n HaHH ce rapaHTnpa cbXpaHraBaHe Ha 6e3onachocTtHa eneKtpOnHcTpymenta.
Yka3aHHa 3a 6e3oNaChpa6Ota 3a 6OpMaHHHn H BINTOBEPTH
Korato H3bHBAte DeHocTH, npKoHTo pa60THnHnCTpyMeHT Hn BnHTa MoKe Da nOanHe Ha CkPHTNOI NOBbPxHOCTT pOBODHHN IOI HAnpeXeHne, BHMaBaTe Da OOnHpATE eNEKTPoHNCTpyMeHTa cMoDo H3ONHPaHNTe pbKOXBaTK. PpIKoTAKT C pOBODHHNIOI HAnpeXeHne TO MOKe Da ce npedae Ha MetaJIHnTe enEmTH Ha eNEKTPoHNCTpyMeHTA N da npedIN3BnKA ToKOB ynap.
H3noI3BaIe cIOMaIarTeHNTE pbKoXbATKn, aKO ca BKNIOUeHH BOKOMIIeKTOBkATA Ha eNEKTPOHHCTPymEH Ta. Ipi 3a4y6a Ha KOHTpOHa Ia eNEKTPOHHCTPymEH Ta Mo-Ke da Ce CTINHe Do TpaBMn.
H3non3BaIte NOxOJaun ypeH, 3a da npOBepHe 3a HAnHHeTo Ha cKpHTn NOJ NOBbPxHOCTa enEKeTPOHnn Tpb6oNpOBOH, HnH ce o6bPheTe 3a HnΦopMa
118|Блгарский
YKbM CbOTBHTHe MeCTHn CHa6DHTENH CNYK6H. Bn3aHTo Ha pa6OTHN HNCTPymEt H C bTpHKOCHOBEHc C eIeKtpoPoBOm MOKe Da IpeIN3BnKa IooXap HNI TOKOB yAp. YBpeKDaHTo Ha ra3OpBOd MOKe Da IpeIN3BnKa ekCInIO3N. YBpeKDaHTo Ha BOOpBOd IpeIN3BnKBa 3HaHTENH MaTePNAnH NtEh.
Ako pa60THHHT HnCTpyMeHc 3aKNIHH, He3a6abHO n3KnIOUeTE eNEKTPoHHCTpyMeHtA. BbTeTe NOIOTBEHn 3a Bb3NHKBaHETo HA rONEM PEAKUNOHN MOMEHN, KOnTO ppeH3BnKBat OTKaT. ENEKTPoHHCTpyMeHtBt 6no- Knpa, aKO:
-6bde npetobapeHnn
-ce3aklnnB06pa6oTBaHnIeTaHn.
- PbXte eneKtpOnHcPymHe 3dpaBO. Pn3aBnBaHe pa3BnBaHe Ha BnHToBe MoTaPra3KO Da BB3HNKHAT CINHH peAKUOHMH MOpEHN.
OcHpyBaIe 6pa6oTBaHHaTaN. TaH, 3axBaHAT C NOxOJaN PnCnOcoBHeN Hn CkOb, e3AcToNopeH No 3pABoH cHyrphO, OTKoNkOt, Ako rDbpJHte CpbKa.
PnpHn da octabnte enektpoHHCTpymEna,3uKaBaiTe Bbpteheto da cnpe HanblHo. B npotHBen clyaua H3- non3BaHnat pa60TeH HHCTpymENT moKe da dOpne pyr npMeTHa npeHn3BnKa HeKOHtpoHpaHO npEmecTahe Ha eEkeTpOHHCTpymEna.
He OTBAPnTe AkymynatopnHa 6aTepeHn. CbueCTByBa ONaCHOCT OT Bb3HNKBAHe Ha KbCO CbeINHeHne.

PpeIa3BaIte akymyataopnata 6atepHr OTHB COKH TEMnePAtyn, HAp. BCNECTBHe Ha npOdbXHTeHO HNarAeHa HnPeKTHa CbHyeBa CBETIIHNA HNOrBh, KaTKo HOT BODa HOBNaHBAe.CbIeCTByBa ONACHOT OKCNIO3H.
Pn NOBpeXdaHne HnepaBNHa eKcnnoataunr OAtkyMynatopnHATA 6aTePNaT Da ce OTenr Napn. PpOBETpe NOMEeHNHeTo H, Ako Ce NoyBCTBaTE Hepa3NOJoxEHN, NOrpcTe NekapcKa NOMOu. Napte MoarTa da pa3dpa3Hrt DNxATeHNHTe TbTuIa.
H3non3BaIte akymyIaTOPHATA 6aTepeHra cAmO ceneK TPOHNCTPymEHTA,3a KOITo e npedHa3NaueHa. CaMo Ta KaTRe pndna3eHa OT ONACHO 3He IpeTOBapBaHe.
PpeMeTHCocTPhp6OBeHn.PnpOHn HnOTBepTKnnCHNNMEXAHNHNB3JeCTBnMOraTdaNoBpeIATakymyNatOpHATA6atePn. MoKe da 6bne ppeIN3BnKaHO BtPeeHo KcO CbeENHeHn AkyMnaTOpHaTa 6atePnMoKe da ce 3anaHn Da 3anyu, da ekcnnoPa nn da ce nperee.
Onncahne Ha npodykTa n Bb3MOX-HocHTe My

IpooyeTeBHHMaTeHNO BCHKnyka3aHn. Hecna3BaHero Ha npnbEeHnTe No-dony yka3aHnMOKe DaNoBeDe ITOKOB ydap, NOxap H/IN TeKKN TpaBMn.
MOnIa,OTBOpTe pa3TbBaAata Ce Kopuia C cnHypnte H,doKaTo ueTe pkoBOCTBOTo 3a ekCnnoataua, RaocBeTe OTBopeha.
IpeHa3HaeHne Ha eNektpoHnHcTpymenta
EeKtponHCTpyMeHTb e npedHa3haueh 3a 3aBnBaHe n pa3BnBaHe Ha BnHTObe, KaT0 n 3a npo6BaHe B DpbBO, Metan, KepamuHm MaTepnaHn nnactMaH.
Namnata Ha To3n EneKtpOnHcTpymEnT e npedHa3NaeHa 3a HENOCpeDCTBeHO OCBETBAHe Ha 30Ha Ta Ha pa6Ota N He e NOxOJa7a 3a OCBETBAHe Ha NOMEeHn Hn 3a 6HTOBn Ce- n.
H306pa3eHH enemeHTn
HomepnpaHToHa enemeHTHe Ha eneKtpOnHcTpymenta ce OTHACdo H3o6paKeHHa Ta CtpaHHnTe c fHypnte.
1 NpToPOnHHK3a6b303axBa7aHe
2ПьбтснЗапpeДвapNTeHо руИnpaHe Ha BbptTЯMOMEHT
3 PpeBKnOuBaTeJ 3a npedAkBHTe
4 Ocbo60kDaBau 6ytoHn 3aakymnatohata 6atepna
5 Akymyataropha 6aTepein
6 PpeBkIIOuBaTe 3a IIOcOKaTa Ha BbPteHe
7Пусковпреквсва.
8 INHnKaTOp 3a CbCToHHeTo Ha akymyNaTOpHata BaTepeHn
9 Namna ,PowerLight"
10PbKoXBaTka (N3OJIpaHa noOBbpXHOCT 3a 3aXBaUaHe)
11 YHnBepcAnHO rHe3do 3a 6HToBe
12 HakpaHHK 3a 3aBbBaHe/pa3BbBaHe(6nT)*
*306pa3eHnTe Ha fHyprte H onncanHe DonbHnHTENn npncno
coBneHnHa Ce BA BKNIOUeHN B CTaHdAPTHata OKOMNNEKTOBA Ha
ypeA. N3ePpAtene CnCbK Ha DOnbHnHTenHnTe npncnocObe
HHM MoKTe HAmepeHn CbOTBEHO KATAIORA HN 3a DoNbHn
TENn pncnocObeHHa.
TexHHueckn daHHN
AkymylaTopeH BnHToBept GSR 12V-15
| KataLOJOEN HOMEP | 3601H681.. | |
| HOMINHANHO HANPEJKEHNE | V=12 | |
| Скорост на Вьртени на праzenхов -1. поеда вka | min-1 | 0-400 |
| -2. поеда вka | min-1 | 0-1300 |
| Мakc. Вьртул мочent при Тьрдп/ мени BHINTОВСьеДИЕННИ ISO 5393 | Nm 30/15* | |
| Мakc. Φ на побианITE OTВОП -Встоманa | mm | 10 |
| -В дырBo | mm | 19 |
| Мakc. Φ на BHINTОВe | mm | 7 |
| Φ на зхвашипete в патонни: разOTHI ИНСТРУМЕТП m 1,0-10 | ||
| Maca съласно EPTA-Procedure 01:2014 | kg 1,0-1,2* | |
| *В заимсnot OT ИзолотанATA akумунатога bateгия *оГ ранчесна пюрбостппriп Temпературс<0°C | ||
BbIrapckn | 119
AkymyaTopeH BnHTObePr GSR 12V-15
| Донустima Temпература на okonната среда - по за рждане | °C | 0...+45 |
| - по врeme на paбota** и за ckладираве | °C | -20...+50 |
| пегорьчтелни akимулаторни батерни | GBA 12V.. | |
| GBA 10,8V.. | ||
| пегорьчтелни заюdnни устриства | GAL 12..CV | |
| AL 11..CV |
B3aBHCNMOCTOTHINIOIIBaHaTAtkyMylatopha6aTePnA
"0rpaHnueHa npOn3BouHTeHIOCT pH nTEMpeaTyPn <0°C
HnΦopMaζηra 3a n3JIbUbaH χuM N Bn6paζm
CToHocHTHe Ha n3IbYBaHHa Wm ca ONpeDeneHH cbrNaCHO EN 60745-2-1.
PaBnIeToAHa3ByKoTOHaJIraHeO6NKnHOBeHo e
71 dB(A). Heonpepeeneoct K = 3 dB.
IbBpeHa pa6oTa paBHNueTo Ha H3JIbYBaHnry Wym MoKe Da HxBpnn 80 dB(A).
Pa6oTeTe c wymo3aRnyuHtenn!
IbHATA cTIOHOCT Ha Bn6paunite a(BeKToPHTa CyMa nTO TpHte HapabneHn)n HeonpeDeneHocTa K ca onpeDeneHn cbTlaco EN 60745-2-1.
PpO6HbAeBMeTAn: a_n < 2,5m / s,K = 1,5m / s^2
3aBbAHe/paBbBaHe: a_h < 2,5m / s^2,K = 1,5m / s^2
IocoueHOTOBaPbKOBoDCTBO3aEcknnoataunpaBHNue HaTHeHPaHHTe Bn6paHm eN3MepeHOcBflnacHo npOeUpya,CTaHApTnHpaH aEN60745,HMOxJe dCnyJ3a cpaBnBaHa H aEnEKTPOHnCTpyMeHn EIN CdpYr. To nOndxoJa 10cbuHa NpEBAHnOpHEHnPoBBHa npeHekHa HatoBpBAHeOT Bn6paHIn.
IocoueHOTn HbO ha reHeepnpaHHTe Bn6paun e npedctaBtTeHo 3a hauuecTo cpeuaHHTe npnoKeHHa eneKtpoHHCTpyMeHa. Ako oBaue eNeKTPoHHCTpyMeHTb 6Be nHON3-BAH 3a DpyrN DeHOCTH, pa3nHnPa60THn HCHPTyMeHTn Hn63 HeobxodmoTcTexHuecko 6CnykBaHe, HbBOHO Ha Bn6paun MeOKe Da ce pa3nUaba. Toba 6n MorNo da yBelenu 3aHuHTeHNO cyMapHO tHaTObapBAHe OT Bn6paun Bnpoeca Ha pa6ota.
3aTOHaTaNpeeHkaHaHATOBapBaHeToOTBn6paunHTPBa DAbTaB3NIMAHINPepdBHNepHOHTB KOKTO eNEKTOHHCTpyMeHTE N3KNIOeHnnpOTo,HO He ce nON3Ba.ToBAbMOIIO 3NaHTeIHO da HamaNN cyMapHOTo HATOBapBaHe OT Bn6paun.
IpeinCBAteOnbInHTeHHMePK3aIpeJn3BaHeHa pa6oTeuHcEeKTPoHnCTpyMeHTaOTBb3dEnCTBnToHa B6paunHt,HanPmep:TexHuecko6cnykBaHe Ha
eneKtpOnHCTpymeHTa npa60THNE HnCTpyMeHTN, NOdBpKaHe Ha pbTe ToTIN, ceneCb6pa3Ha opraHn3aunHa pa6OTHnE CTbKn.
MOnTupaHe
3apekdahe Ha akymynatophata 6aetepn (BxKTe cHr.A)
H3noI3BaIte cMo Hkoe 0f 3apAHHTe yCTPOHCTBa, NocoueHN Ha cTpaHnCaTa CdoBnHTenHHe pncNoCoblenHa. CaMo Te3n 3apAHHyUCTpoCTBa ca NOxOJa 3a H3noI3BaHata Bb BaHna enektpoHcTpyMeH NTneBO-ONHa akymlyaTopha 6atePn.
YnbTbahe: AkymyNatopHata 6aTepeRnCe DoCTABuCACTNUHO 3apeHeHa.3a Da DCtHnHTe NblHnKanauNTet Ha akymyNatopHata 6aTepeRn, npEi NpBOTO H3nON3BaHe r 3apeDeTe DOKpaB 3aprHOTo yCTpoiCTBO.
IInTeBO-NOHnAToAkyMynatopHa 6aTepeMoJae 6bJe 3apeXdaHa NO BCnKo BpeMe, 6e3 TOBa da cbkpaUbaDbIroTpaHocTaI. PpeKcbCaHe Ha 3apeXdaHeTo CbIo He H Bpeu. IInTheBO-NOHnA ta kyMynatopHa 6aTepeHa cpeuYnbHo pa3epKaDe He ot EneKtpOnHHMaOmy „Electronic CellProtection (ECP)".Pnp pa3epKaDe Ha kyMynatopHa 6aTepeHa eNeKTPOnHHCTpymEtBt Ce n3KlIOvBa OT ppeNa3eNpeKcbCau:Pa60THnATnHCTpymEt CNpJa ca ce DnKn.
Cneq aBtOMaTHHOTo H3KNIOUBAHe Ha eNEKTPoHNCTpyMeHTa He npOdbnXbaIe TaHaTHCKaTe NycOBn NpeKbCBa. AkymyNatOPHaTa bateRn MoKeJa 6Be nObpeDeHa.
3a demOHnpaHe Ha akymnatohpata 6atepna 5 haHCHete 6byoHTe 4 n3dbpaNte 6atepna HADONY OT eNEKTPONH-CTpyMeHa. Pn TOBa He npnaraTe cna.
CnbaTe ykaaHaMaTa 3a 6paKyBaHe.
CmHa Ha pa6oTHHn HnctpymEnT (BHXTe nR.B)
PpeHn da H3BpWbATE KaBHTO n Da e DeHIOCTn no eEeKTPoONHCTpyMENTa (HAnp. TexHueCKo 06cnyXBaHE, CMHa Ha pa6OTTHN HhCTpyMEHT N.T.H.), KORAto FO TpaHCNOPTHpATE Hn CBxPAHBAte, DEMOHNTpaTe akymataophtata 6atePHN. CbseCTByBa ONaCHOCT OT Ha paHBAHe npm 3aJeIcTBaHE Ha NYCKOBIN PpeKbCBaH NO HEBHMAHNE.
Korato NyckOBHnT npekBcau 7 He e haTCHa, BaNtHa enek- TPOHNCTPymeTa e bNOkpan. ToBa No3BOJRAb6bpata, yDObHa Hnecha 3amra Ha pa6OTHnHnHCTpymeHT B nATPOHnHa Ka.
Pa3TBOpTe NaTPOHHNka 3a 6bP3O 3axBaUanhe 1 Upe3 aBbP TaHe B Nocoka 1, DOKATO pa60THnH INHCTpyMeHT MoKe da 6b- De NoctabEH. BkapaTe INHCTpyMeHTa.
3aBbPTeCnHHO hPbKa BTyNkataHa NaTPOHHka 3a 6bp30 3axBaAaHe 1 B Nocokata
CnCTema 3a npaxoynaBHe
PpaxoBe,OTeJenHcCe npnO6pa60BaHTeHaMaTepeHn KaTO CbIbPkaUOnOBO 60N, HAKON BUNOBE IbPBCHeHa, MNHEpaHn H MetaHn MORat Da 6bDat ONaCHN 3a 3dpABeto. KOhtakTbTdo KOKATA NIN BNDUBAHTo HA TAKHBaPpXoBe MOrat da IpeHn3BkAT anepuHn peakun H/INN 3a60NaBaHHa HaDxAteHNHe NTbNTua Ha pa6oteuHa c eNEKtpONHCTpyMeHTa INN HamnpaUc Ce Habn3Ouua. OnpedeneHn PpaxoBe, HAp. OTeJenHtce ce npn O6pa


120|Блгарский
60TBAhe Ha 6yK Ndb6, ce CHTAT 3a KaHcpeoreHHN, oO6eHO B KOMbHaunC XmMkaan 3a TpeTpinae Ha dbpbecnHa (Xpomat, KOhcepaHTn Hp.). DOnycka ce 6pa6oTBaHeTo Ha cbbpkaa an a36ct MaTePnaHn cAmo OT cbotBtHo Obyehn KBaInfncipauHn nla.
OcHrypBaTe Do6po npOBetpaBaHe Ha pa60HTo M8CTO.
- PpenopbUba ce n3non3BaHTo Ha dnxaTeHa MaKa C pntbp oT knaP2.
CnataBaTe BAnHnHTe BB BaWata cTpaHa 3aKoHObN pa3- nopeiBn, BAnHn npn o6paOBAHe Ha CbOTBeTHHe Ma- terpann.
H36RBAte HATpynBaHe Ha npax Ha pa60THoMRCTo. PpaXbT MoKe IeCHO Da ce CaMOBb3PiMaEHN.
Pa60Ta c eNeKtpoHcTpymeHa
Iyckahe B ekcnloataua
NoctabnHe Ha akymnatophata 6aTepeH
YnTBaHe: N3noN3BaHeto Ha akymyNaTOpHN BaTePnH, KOHTo He ca npEHa3NaueHn 3a Baunr eneKtpOnHcTpymENT, MoKe Da npEi3BnKa HnpabInHTo My fynKuOHnPaHe nIa Iro nobpeH.
Iocabete npBeknIOUbaTeR 3a nOcOKata Ha BbptHe 6 B cpeHNO nOLOKeHne, 3a da npeDToBpaTne BKIOUbaHe NO HeBHnMaHHe. Iocabete 3apeHeta akymyNatopHa 6aTePn5 B pkoXBtKata, Dkato yceTne OTeHTNBO npeuPAkBaHe n akymyNatopHa 6aTePn6bde 3axBaHata 3dPaBo B pkoxBtKata.
H36op Ha nocokata Ha Bbptene (BHXTe pHr.C)
C NOMOHTa Ha InpEKBIOUbATEI6 MOKETe Da CMEHRe TIOKOKAHa BbPTHe HA eNEKTPoHNCTpyMeHTa. TOBa Obaue He eBb3MOXHO pNHa HATCHAT NyCKOB PpeKcbau 7.
Bbptene HnACho: 3a np6nBaHe n3aBnBaHe Ha BnHTObe HATNCHE TpeBkIouBaTeNa 3a Nocokata Ha BbptHe 6 Do ynop HnRABO.
BbTeHe HanaBo: 3a pa3BnBaHe Ha BnTOBe H raIKn HaTHnCHte IpeBknOuBaTeIra NocOKaTa Ha BbTeHe 6 HAnCHOdo ynp.
Perynpahe Ha Bbptraun MomeHT
C NOMOHTa Ha NpBCTeHa 2 MOKeTe NpeBapntNo Da HCTPONTe BpTnM OMeHT Ha 20 CTeHEn. PnP npABnHO yCTAHOBBAHe pa6oTHNt HnCTpyMeT cHnpA da CE BpTn, KOrATO BnHTb 6Be3aBnT 3dpAo BJETaHna, pecn. Korato 6bDe IOCTnHAT 3aAedeHnT BpTaM MoHENT. B No3uNn, EEDNHITe T eAekTHBnPAH, HAp. 3a peKm NpObHaHe. PnPa3BnBaHa He BAHTObe 36pePeTe NO-BnCOKa CTOnHOCT Ha BpTAHn MOMEHT, pecn. nocTabe Te pBCTeHa HA CNMBONA
MexanhuepeykTop
3aeneCTBaTe npeBknIOuBaTe 3a npdaBkTe 3 caMO KORATO eNEKTPoHnCTpyMeHTb T E NOKOJ.
CnpBknOuBaTeI3 MoKeTe npEdbapntEno Da n36peTe DbAna30Ha HcKOpocTt Ha BbPteHe.
I npedabka:
Hncka ckopocT Ha BbptHe; 3a 3aBnBaHe Hn 3a pa60Ta Cbc CBpeNa c rOeMn dHaMeTpN.
II npedabka:
BncoKdnana30HnCKopocTtHa BbptHe; npa6oTa Cbc CBpeNa CmJbKnAmAeTpO.
Ako npBkHIOUbaTeNt3a npEaBKeT 3 He MoKe da 6bJe npMeCteHdoKpa,3aBbPTeNeKo Ha pKa NaToHHKa cbc CBpeIIOTO.
BkIIOuBaHe H3KIOuBaHe
3a BkIOuBaHe Ha eKtpOnHcTpymeHaTnChTe H3aIpb- KTe NcckOBn PpekbCba7.
JaMaNaTa 9 CBeTn PnU qactNu HnHbNHO HATmCHAT NyCKOB IpeKcBa7 N npu He6NaIornpaTHn CBETNIHHN yCNOBnIOO6PBA BnIMoCTTA B3OHATA Ha pabota.
3aH3KIOUbaHe Ha eNeKTpOHHCTpyMeHTa OTNycHETe NyckoBnIpeKbCBaH7.
3a da neCTHtE ehePnra,dpbXte enektpoHHcTpyMeHTA BKNIO-ueH cAmO KOrato rnoN3Bate.
Perynphae Ha ckopoctTa Ha Bbptene
Moxete 63cteneHHa perynipate ckopocTaHa BbptHe Ha eneKTPoHnCTpyMeHTA NO BpeMe Ha paBota B3aBCHMOCT OT cHnTA Ha HAnCkA Bbpxy NcCKOBn PpeKcbau7.
No-NeK HATNCK Bbpxy NcKOBnI PpeKbcBa7 BoND IO No-HNCKa CKOPoCT Ha BbptHe. C yBEnuBaHe Ha HATNCKa HapaCTBa HCKOPOCTHa BbptHe.
ABTomatnuho 6nokpahe Ha Bana (Auto-Lock)
Korato NyckOBHnI pKeBcBaY 7 He e HATnCHaT, BAnbHa enek- TPOHNCTpymEnTA, a CTOBA N NaTPoHHKnBt, Ca 6NoKnpaHn.
TOBA no3BONBa 3aBnBaHTo H BAHTObe CbIIO H npH N3xa6eHa aKymNaTopHa 6atePna, pecn. nAnon3BaHTo H enEkeTPOHNCTpyMeNTA KATO O6NKnHOBe H OTBePTka.
Cnnpaupa
PnO tnyckaHa HnyckOBn IpeKbCBA 7 nTPOHHKbT Ce Cnnpa npHyndTeHNO O T CnnpaKa, C KOeTO ce npedTbpTaBa BbPTHeTo My No HHepCuN CneI N3KlOvBaHe Ha eNeKTpoHNCPTyMeHtA.
Pn3aBnBaHe HbHToBe OTNcKaTe NcKOBnI PpeKcbBa7eBA CnE KATO BnHTb E 3aBnT 3npaBO B DeTaNa. TaKa rnaBaTa Ha BNHa He IPOHKBa B DeTaNa.
CBeTIHHHeH HnIHKaTOp 3a CbCTOHHeTo Ha aKymyIaTOpHaTa 6aTepeH
CBETINHHNHTHNNKATOp8,CbCTOaCeOT33eENH CBETOHOda, NOKA3Ba 3a HAKONKO CekyHNCbCTOHNTO Ha 3apeHOCHT Ha akymnatoptopHaTa6atePn, KOrato nyCKOBnT PpeKbcBau7 6bHe HATNCHT HANONOBHn HIN DOKpai.
CbeodnoKaanet
HenpebchaTo CBteHe 3x3eNo ≥ 2 / 3
HenpekbcHaTo CBeTeHe 2 x 3eNo ≥ 1 / 3
Henpekcbchato CBeteHe 1 x 3eNeHo < 1/3
Muraa CBeTnHa 1 x3eNa pe3epBa


BbIrapckn|121
Temnepatypha 3aunnta ot npetobapbahe
PnI NnIbaHe cbo6pa3H NO pEHa3HaueHHeTo eNEKtpOnHCTpyMeHT He MoKe Da bDe pTeTobapeH. Pn TbBpe RoHnMo HatoBaPaBe Hnn KOrato TEMepaTpata Ha akymyatopHata 6aTepeHn3ne3 HbBb DonyCTMmHnAna3oH, CKOpCTa Ha BbTepe C haMaJIra. ENEKtpOnHCTpyMeHT 3anOuBaDa paOtoC nblHata ckopoCT Ha BbTepe EDBa CneJ KaTO TemepaPTaHa A kymyatopHata 6aTepeNdoCTHne DonyCTMNnDnana3OH.
Yka3aHn3a pa60Ta
DOnnpaTe eNeKtpOnHCTpyMeHTa Do BNHTa cMo KOraTo e H3KnIOueH. BbptraIuHrT ce paBoteH NHCpMeHT MoJKe Da Ce H3MeTHe.
Cne npoBnKntenHa paOTo C HnCKa cKopoCT Ha BbPteHe Tp8Ba Da oxnaDITE eNkTPOHcTpyMeHTA, KATO TO OCTABHTe Da paOTo HA npa3eH XoB D npOblKeHne pnp6n. Ha 3 MHyTH C MaKCHMaJIHa cKOPOCT Ha BbPteHe.
Pn npo6nbAhe Ha MetaH 3n0n3BaIte CAmO OTnHNO 3aTo- HcpeHa B 6e3yKOpHO CbCTOnHne OT 6bp3OpE3Ha CTOMa- Ha (ob03NaeeH c HSS = High Speed Steel). PnOxOAnu CBpeHa MoKeTe Da HamePHTe B 6orata Na pOn3BOcTBeHa rama Ha BoW 3a OonBInHTeHH nPiChnoc6bHeHH.
IpeH3aBnBaHeTo Ha No-TOJEMN HNO-DbJIHN BnHTOBe B TBbpD MATEpHaH Tp6Ba Da npObHeTe OTBOP C BbTpeuHHn DnA MeTp bp Ha pe3bTa npHn. Ha2/3 Ot bNKnHnHa Ta BnHTa.
Iopdbpxkane n cepBn3
TobpbXaHe n nouchTahe
PpeHn da H3BpWbATE KaKBTO n Da e DeHIOCTNo eNEKTPoONHCTpyMEnTA (HAnp. TexHNuecko 06cnyXBa-He, CMHa Ha paBOTHN HNCTpyMEnHT H.T.H.), KORAto TpaHCNOPTHpate Hn CBxPaHbATE, DEMONTHPaTe AkyMynaTOPHATA 6ATEPH. CbIeCTByBa ONaCHOCT OT Ha paHbBAHe np 3AeINCTBaHE Ha NcKOBn IpeKbCBaY NO HEBHMHaHne.
3a da pa6oHTMe KaueCTBeHO N 6e3onacHO, NOIbpxKaI Te eNEKTPoHHCTpyMeHTA H BeHTnlaQHNOHHTE OTBOPH qHCTH.
Akoakymnataopnata6atepna Ce nobpeynnnH3xa6bmono, 06bphete ce KbM OTOpN3npaehcpBn3 a eneKTPoHHCTpymeh Tn ha BOW.
CepBn3 H TexHnueckn CbBetn
OTROBOPHABbIPOCtCE OTHOCHOpeMOHTaNOIDpBXKaTHaBaWnI npOyKT MoKTe DaNoIyNITe OT HaWNIE cepBnEToTIN. MoTAtkHN YePteKHN HnFOpMaun3a pe3epBnHacTN MoKTe Da HAmePHTe CbIoo Ha aDpec:
www.bosch-pt.com
Ekmbt Ha B0w 3a Texnueckn CbBETn npHNOKeHHI ue otroBOpn cyDBoNCTBne HA BbPocHTe BN OTHOCHOaHNTnpOyKTn nOnbHHTenHNTpe pncnocobHeHHaT.
Mon, npn Bbnpocn n npn nopbycbae Ha pe3epBn qactn BN Hn nocoBaTe 10-mppeHH KaTANOKeH HOpE, H3NcAH Na Tabekata Ha ypea.
AkymnaTopHN HnO6HKHOBeHH 6aTePHN:
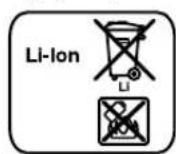
Li-Ion:
Mon, cna3BaIe yka3aHnHTa B pa3- den ,TpaHCnpTnpaHne", ctpaHua 121.
Ppabata 3a H3MeHeHHa3ana3eHH.
122 | MaKeJIoHcKn
MaKeDoHcKn
Бe36eHocnHaNoMeHN
OnuTH 6e36eHocHH HANOMEH 3a eEKeTpHuH anapatn
I PEPENPENYBAHbE IpoHTajre Hn CHTe HANOMEH N yNATCTBa 3a
6e36eHooCT. PteKNTe HactaHaTH KAKo pe3yntat OJ HnepnIrpKyBaHbe 0e 6e36eHocHTe HANOMEH N yNATCTBA MOKe da npeIN3BnKaat eNEKTPnueH yap, noXap n/nn TeuKN NOBpeiN.
3auybaTe r6e6eHocnHe HAnOMEH ynaTCTBa 3a KOpNCtebe H 3a BO HHHHa.
Pnonmot,eneKtpuhe anat"BO HANOMeHHe 3a 6e36eHocCT ce OndecyBa Ha eneKtpuHn anapatn wTO KOpHcT a Tpyja (co ctpyeH ka6en) n eneKtpuHn anapatn wTO KOpHcT a 6atepn (6e3 ctpyeH ka6en).
Be36eHocT ha pa6oTHOTo MecTo
Pa6oTHNt npocT op cekoraw Heka 6nne Ch T ndo6po oCBtneH. HeypeHNOT HnH HeOCBtneH pa6oTeH npocTop MoKe Da DoBeDe Do HecpeKn.
He pa6oTe co eNeKTPnHnO anapar BO OKONHa KaIe NoCTOn OAnCHOg EKCnNo3nJa, KaIe HMa 3aNaNNB TeHOCTH, rac nn NpawHn. ENEKTPnHnTe anapatn Co3daBaat nckpn, KO mOKe da ja a3anaNat npabTa nn Napeata.
Држete Гдца Гдугпгдлca noDanaleky 3a BpeMe Ha KOpHcTeHbTo Ha eNekTpHnHOT anapat.ДOKOLky HeITo BnTo nonpeuH BHMAMHHeTo, MoKeJa ja n3ry6Hte KOHTpONaHaNd ypeDot.
EeKtpnHa 6e36eHnoCT
PnPKnyOKOT Ha eKTPnHNO anapat Mpa da OndOBapa Ha nPKNkyOKOT BO sNDHATAo3Ha. PnPKnyOKOT BO HKOJ cnyuj He CMeE Da ce MeHyBa. He yonTpe6yBaJte npKHyBaU co aadantep 3aedno co 3a3emJeHOT eKTPnueH anapat. HeMeHyBaHeTo Ha npKHyBauyot H COOBeTHNE To SDHH Do3Hr Ho HamanyBaAT Pn3NKOT OD eKTPnueH ydp.
H36erHyBaJte H3NCHK KOHTAK Co 3a3emjeHHe NOBpHHHaueBKN,paNJajaTOpH,INOpET H pPHKnepn. IocToH 3rOleMeH p3NK oEJIeKTPuH e yap,doKoKny BaWeto Teno e 3a3emJeHO.
EneKtpnHHTe anapath DpxkTe rnoDopaneky oddojN Bnara.HabneryBaHeTo Ha BODa BO eNEKtpnHnot anapat ro 3roJeMyBa p3NKOT od eNEKtpnChen ydap.
He ro Kopnctte Kabenot 3a pyra HameHa, 3a da ro Hocnte eneKTPNHNOT anapat, 3a da ro 3akauHTE nn Da ro Bneuepe npknyokOT od sHaTda Oo3Ha. DpKeTe ro kagenot noactpahAo TDNNHa, Macno, octpn paobOBn NOBHHNTE KOMNOHEHT Ha ypeJOT. OHTETENOT nIN CBNTKAH KabenI rO 3rOleMyBa Pn3IKOT3a eNEKTPNH ynap.
Dokonky co eNeKtpnHnot anapat pa6oHTe ha OTBopeHo, KopHCTete camo npOdoJKe Ka6en uTo e
norOeH 3a KopHeBe Ha HAdBopeWeH npocTOp. KopHeTo Ha cooDBetEn npoDOnKeH Ka6eHa OTBopeHo ro HaMaanyBa pnsKOT o enEeKtpueH yap.
DOKONKY KOPHCTeBeTo Ha eNEKTPPHHOT anapat Bo BnaxHa OKOINHa He MoKe Da ce N36erHe, KOpHCTeTe 3aHTHen ypeCo dHpeHcunjAnha cTpyja. Ynotpe6ata Ha 3aHTTHNt ypeo Co dHpeHcunjAnha cTpya Ro HamaNyBa pN3NKOT oEneKTpueh yapd.
Be36eHOCHTHa Hnua
BnTe BnMaTeHn KaO pa6oTHe n pa3ymo KopCTe Ro eNktpuHnT anapat. He KopCTe eNktpuHn anapatn,doKoKy Cte yMOPHN NOBnJaHne Ha npora,anKoxon Hn NekOBn.EeH MOpENT Ha HeBHnMaHne npynOTpeBaTa Ha eNktpuHnT anapat MOKe Da DoBeDe Oceepno3Hn NobpeDn.
HocTe 3aWHTTHa ONpeMa HcKOrauHocTe 3aWHTTHO uOhna.HocHeTo Ha 3aWHTTHa ONpeMa,KakoHa np.Macka 3a npab,06yBkn 3a 3aWHTTa OD INsraBe,3aWHTTEH JIeM IIN 3aWHTTa 3a CnyXOT,BO 3aBnCHOCT OD BVIO T NpIMeHaTa Ha eNEKTPuHnOT anapat,ro HaMaIyBa pNIKOT od NobPeHn.
H36erHyBaJte HeKoHTpOHaHO KOpHe Ha anapatnte.Ochrypete ce,deKa e NcknyuenepaTnAnap,Tpe Da ro npKnNyHTe Ha HanojyBaBe co Ctpya HnHa Batepnja,ped da Ro emeTe HnHocHe.10kONky pNn HOceHeTo Ha anapatoCTe CTaBnne nPcTOn HA npKeHHyBaOTnHnCTe FO npKnYnIe ypeDTo DOKeA e BKNpyen Ha HanojyBaBe co Ctpya, OBA MoKe Da npEn3BnKa Hecpeka.
H3BaTe rHa anaHTe 3a noDecyBaBe Hn KnyeBte 3a 3aupaCyBaBe, npE da ro BKnYuTE eNEKtpuHnot anapat. DOKONky HMa anat Hn Kny BO HekoJ OdJeNoBHTe Ha ypeoT WTo Ce BpTaT, Oba MoKe Da DoBede Do nobpeHn.
H36erHyBaJte a6HOpMaHNo dPKeHe Ha TenoTo. 3aCTaHETe BO cHrypHa nOIOXbA H NOcTOJaHO dPKeTe paMHTexKa.Ha ToJ NaHH Ke MoKe NoIObPo Da ro KOHTponpate eNEKTPnHnot anapat Bo HeoueKyBaHN CHTyaunH.
Hocete cooBbTaHa 6NeKa. He Hocete uPoka 6NeKa nn HAKHT. TprHete ja Kocata, 6NeKata n paKaBuNTe NOaJeKy OJ NOBxHHTe DeNoBn. Nechata 6NeKa, HAKTOT INI DOnrata Koca MoKe da Ce 3aΦaTAT OJ NOBxHHTe DeNoBH.
Dokonky Tpe6a da ce Hnctannpaatypedn3a BWMyKyaBe npab, ochnypeTe ce deKa The npABnHO ce npknyeHH npknadho ce KopnCTa. KopncTeHTo Ha BWMyKyaB a npab He ja HamaNyBa onaCHOCTa od npab.
KopncTeHe n paKyBaBe co eNeKTpHuHnO t anapat
He ro npeontOBapybajte ypeot. Kopctete ro cooDBeHTHnot eektpuhen anapat 3a Bauata pa6ota. Co cooDBeTHNt eektpuhen anapat ke pa6oTne no6pO nocnpyhO Bo 3aadeneHnT DomenHa pa6ota.
He Kopnctete ro eneKtpnHhot anapat,doKoNky Hma depekTeH npekHyBa. AnapatOT KOJ NOBeKe He MoKe Da ce BKny HnH Nckny, ja 3aRpo3yBa 6e3bEHOCTa Mopa da ce nonpaBn.


MaKeDoHcKn 123
H3Bneye ro npKnyokot od snHaTao3Ha n/nnn H3BaTe ja 6atepnjata, nped da rCmeHnte NOCTABKHe Ha ypeDt, da rN 3aMeHnte DeNoBHTe nn Da ro TprHete NahtpaHa ypeDt. Obne MepKn 3a npedynpdyBaHe ro cnpeyBaat HeBHMaTeHNOT CTapT Ha enektpnuHnO typeD.
Yybajre Hn noaneky Odofoatot Ha deua eNktpnHHe anapath KOn He Tn KopnCTHe. Oojeype He CMeE Da Ro KopnCTaT Nua Kaon He ce 3ano3haeHH Co Hero Hn He HMaat PpOHTaHO OBne ynatCTBa.EnKTPnHHe anapatc Ce onacn,doKoNky n KopnCTaHnckyChn Nua.
OdpKyBaJTe rnpKnHbE enektpnHte anapatn. PpOBepTe daHn noBHXHTE deNobu FyHKUHOHPaAT 6ecnPekOpHHe ce 3arNaBeHH, daHn ce cKpWeHHnn OwTeHn, wTo moKe da ja nonpeu FyHKNJata Ha enektpnHOT anapat. Nopabete rH owTeHTe HEN pPeKOPCTeBeTo h ypeot. Mhory Hepeke CBOJaT npuHa ja HMaat BO NoLoo OdpKyBaHtne ENEKTPNHAnapatn.
Anatot3acehebeOpxybaje ro octapnHCT. BHIMATEHNO OpkyBaHTE anATn 3a cehebe cooctpn paobBN3a cehebe nomanky ce 3arNaByBaTn CO HNB nonecHO ce paBOTN.
Kophtete rH enektpnHnte anapath, onpemata, doaotuHTe 3a anaHTe HTH. BO cornaHcOCT co Oba ynatCTBO. PnPTo3 eMeTe rH BO o6snp pa6oTHte ycnoBn H dejHOCT aTO Tpe6a da CE h3BPWH.
KopncTebeToHaeneKtpuHn anapaT3aDpyra ynoTppeBaOCBeHN HabeHeHaMoKe DaNoBedeO npaChn CHTyaumn.
KopncTebe n paKyBaBe Ha 6aTepeNcknO anapat
BatepHte nonheTc co nonnauH wTo ce npenopaayH NcknyuBO od npo3bOHTeNoT. Ookky noHaOT KoJ e npnafoEN Ha e en H cooBeten BND 6atepHn, ro KOpNCTe Co dpyr n BatepHn, noToon onachocT oD noXap.
3aToa KopHCTe6bepHH KOH CE npeBHeHN 3a eEeKTPnHHOT anapat. KopHCTe6beto npy Bn6bepHH MOKe Da DOBeDe Do NOBpeHn ONaCHOCT OJ NOxap.
HeynotpebeHata 6atepnaJa pKTe ja noaneky od KaHcenapnckn cnojYbankn, KnyueBn, Xeene3n npn, KHHu, WpaOboN Hn DpyrMaH MetaHn npdeMeTn, wTo MoKe Da npei3Bkaat npemocTyBaBe Ha KOtAaTHe. KpaToK cnoj Mery KOHTAKTHe Ha 6atepnaJa MOKe Da npei3Bkn H3ropeHHn Nn NoKap.
Pn NorpeHNO KOpHCTeBe, MoKeJa HCTeue TeuHOCTa od 6aTepnjata. N36erHybaJte KOtAKT co Hea. DOKONky CnyajHo DoJeTe BO KOtAKT CO TcEHOCTa, HcNnAkhete ja co BOda. DOKONky TeuHOCTa DoJe BO KOtAKT co OoHTe, Nobapajte nekapca nOMou. HCTeueHaTa TEuHOCT o6BaTepnjata MoKeJa IpEIN3BnKa KOKHN npHTaunn HnN H3rOpeHHn.
CepBnC
NonpaBkata Ha Baunot eneKtpuhen anapat cmee da 6nnde n3Bpuheh camo od ctpaHa KaBaanfkyBaH CTpyeh nepcoHan h camo co KopncTebe Ha
OpHnHaHHpe3epBHN DenOBn.CaMo Ha ToJ HauNH Ke 6HneTe CnHyPN BO 6e36eHocTa Ha eNeKtpuHnot anapat.
Be36eHocHN HAnomeHH 3aDypuankn N OdBpTyBaun
Држete ro ypeod 3a n30nnpaHne NOBpHH Ha paKHTe,doKoNky BpHTe pa60TH KaTe anaTOT WTo CE BMETHyBa Hn WpaΦT MOKe Da HanDe Ha CkPHeH eNEKTPuHn Ka6H. KOHTAKTcO CTpyJHNT K6eI MoKe MeTaHHTe DeNoBn Ha ypeod Da rN cTaBH NOD HAnOH N da DOBeE Do eNEKTPuHn Ydap.
Kophtete rH dononHHTeHN dprkn,doKONky ce mncnapaann 3aeHNO co eNEKTpHnHOT anat. TyebeHeto Ha KOHTponTa MoKe Da IOBeE do NOBpeN.
Kopnctete cooBETH npEHN 3a npebapybae,3a da hn npohajdtene cKpneHnte enektpnHn KaBn Hnn KOHCytnpajte ce co noKanHto npetnpjathe 3a chabyaBaBe co eNkTPnHa eHepriJa. KOHTAKTOT CO enektpnHn KaBn MoKe Da NOBede Do Noxapn enektpnHv yapd.OuTeTyBaBeto Ha racoBOJOT MOKe Da doBede do EcKnnoHa. HabneryBaBeto BO BODOBHn ueBKn Ppei3BkyBa OwTeTyBaBe.
Dokonky ce 6nOKnpa anatoT wTO CE BMETHyBa, NCKnyuyeTe ro eneKtpnHnot anapat. Bndete npTeNa3HBN CO BHCOKHe peaknckMOMeHTH, wTO MOKe da npeH3BnKaat NobpAteh yap. AnatoT wTO CE BMETHyBa ce 6nOKnpa, DOKONky:
-ce npeonTOBapn eNEKtpnHNOt aanTnn
-e hakpmbEN BO ODHoc HA napyeTo wTo ce 6pa6oTyBa.
Ubpcto npkete ro eneKtpnHnot anapat. Pn 3aBpcTyBaHe nOdBpTyBaBe Ha WpafoBN MOKe da HactaHaT KpaTKOTpaH BNCOKN peAKTNBH N Mometn.
3aucpctero napceto wto ce 6paobotykoKnyo 3aucpctnte co ypeed 3a 3aterhybahe nH MeHReMe, ToraapnapeTo wto ce 6paobotyBa ce dpxN noCpcto tOKkny co Bawaata paka.
POneKaJTe DoKeKa eEnKTPnHHot anapat cocema He npekHe co paBoTa, npeJa ro TprHete HactpHa. Anatot wTo ce BMETHyBa MoKe Ja ce 6Iokpa N da DObede do rybe He KOHTpona HaD ypeoT.
He ja otbopajre 6atepnjara. noctoon onachoct od kpaTOK cnoj.

3aHTTe ja 6atepnjata od TOnnHa,Ha np. od TpaJHO 3nOxyBaBe Ha COUeBn 3paun,OrAn, BOda mNn Bnara. NocToI onaCHOCT od ekCnno3nJa.
DOKONKY CE OWTEN BATEPHJATA HHE CE KOPHCTN npABINHO,OD HEA MOKE DA H3NEE napea.Bhece Te CBEX BO3DyX N DOKONKY HMA NOBpeHn ODHeCETe Hn HA nekap. Naapeata MoKe Da Hn HADpaHn DnHnHTe natnTa.
Kophtete 6atepn kon ce cooDBeTHn Ha Baunot enektpuen anapat od Bosch. CAmo Ha toj HauHH 6atepnjata ke ce 3aunTN on onacno pneontobapybahe.
Batepjata Moke da ce owtn od octpnt npedmet Na KaKo Ha np. KnnnHn Hn Wpaqumrep Hn Hn Hn Bopeuho
124 MaKeDoHcKn
BnjuHne. MoKeJa Do JoJe Do BHaTpeWeH KpAToK Cnoj H 6aTepeJra MoKeJa Da ce 3aIaJI, NyuTn qAn, EeknIoDnpa nn da ce nperpee.
Onnc Ha npo3BOOTo MOKHOCTa

Ipounajte rH cHTe HAnomeHH yNataCTBa 3a6e36eHnOCT. IpeKHTe HactaHaTn Kako pe3yNTaOD HENpNDPKyBaHe Do 6e36eHnOCHHTe HANOMEHn YNaTcTBa MoKeJa npEni3BnKaat EneKTPuYeh yAp, NoXap n/nn TeWKn NOBpeHn.
Be monnme OTbopete ja npeknonehata ctpanuca co npka3 Ha eneKTPnuHnO anapat, n dpxete ja OTbOpena doKeKa ro uHTate ynatCTBoto 3a ynoTpe6a.
Ynotpe6a co cooDbTeHa HameHa
EnktpnHnot anapat e opehen 3a 3aWpaYbaHe n ODBpTyBaHaBe Ha WpaOBN KaKo N 3a DyNueHe BO DpBO, MeTal, KepAMKa N PnaCTNa.
CBeTnOHa OBOJ enEeKtpuH anapat e HameHeTo da ro OCBeTnI INpeKTHo NonoTe Ha paBota Ha enEeKtpuHnot anapat n He e IORoHNo 3a npocToPOCBetNyBaHe BO DOMaKnHCTBOTO.
Nlyctpaunja Ha KOMNOHEHTN
HymepnpaheTo Ha cnHKnte CO KOMTOHEHTN Ce OJHecyBaHa npka3OT Ha eneKTPuHHTe anapatn Ha rpaHcKaT a CTpaHnla.
16p303aeraqkaTnaba
2 IpcTeH 3a nOdecyBaHbe Ha BpTeXHHOT MOMENT
3IpeKHyBaH3aH36bOpHa6p3nHa
4 Konue 3a oTknyuBaHe Ha 6aTepejata*
5 BaTepeJia*
6 PeknHyBa3a MeHyBaBe Ha npabeOHT Ha BpTeHe
7 PpeKHyBa3a BknyyBaHe/HcknyyBaHe
8 Pnka3a HanoHHeToCTa Ha 6atepnjata
9JamnaPowerLight
10 Pauka (n3oInpaHa noBpHnHa Na dPikKaTa)
11 YHnBep3aJIeN pJxau 3a 6ntOBn
12 Bnt3a0dBpTyBa/3aWpaDyBa
*OnHnHaTAt oPemApnKJXaHa HcNKnKHe e Deo 1ctAndapHnOt o6Ha HncnopaKa. KomnNethata oPemAp MoKe da ja hajTe Bo Haawa IpOrpMa 3a oPemAp.
Texnukn noaToun
| Басторическая дуралka-обравтувач GSR 12V-15 | ||
| Бpoj на дeн/артыкп | 3601 H68 1.. | |
| Номинален наюн | V=12 | |
| Бpoj на паазни вретхи | ||
| -1. 6рзни | min-1 | 0-400 |
| -2. 6рзни | min-1 | 0-1300 |
| *Во зашистор od улотебената basteриja **ограночера щашина рир Temпературс <0°C | ||
| Бастесдаунчалка-оровтувач GSR 12V-15 | ||
| Мамк. Врахени мостent при зашафанде boцьрсти/мechin мaterиалы соред IS 5393 | Nm 30/15* | |
| Мамк. Дулka∅ -Челκ -ДрBo | MM | 10 |
| MM | 19 | |
| Мамк. полар Затагане на галава Текина сord正常使用 EPTA-Procedure 01:2014 | MM | 7 |
| Кг | 1,0-1,2* | |
| Дозвoleна Temпература на okолината - полелен - поразов� Порopочны ворочны | °C | 0...+45 |
| °C | -20...+50 | |
| GBA 12V.. | ||
| GBA 10,8V.. | ||
| Порopочны ворочны | GAL 12..CV | |
| AL 11..CV | ||
| *Во зашистот od уnotребената ворочны *огаянчени щашина рир Temпературс<0℃ | ||
HΦopmaunn 3a 6yuaB/Bn6paunn
BpeHOCHTHe Ha eMnCnJa Ha 6yUaBa OppeHb BO cOrnaCHOCT co EN 60745-2-1.
HIBOTO Ha 3BvUHOTn pINTCOK HA ypeOTo, OueHETo CO A, TINHHO H3NecyBa 71 dB(A). HecnryphocT K = 3 dB. HIBOTO Ha 3BvUHOTn pINTCOK pIn paBoTeHoTo MoKe Da npueekopn n 80 dB(A).
Hocete3aunrta3acnyxot!
BkynHtE BpeHocTH Na Bn6paunHa (BeKTopcKn 3bOp Ha Tpnte HAcOKn) HeCNrpyHocT K DaJeHN Ce BO corNaCHOCT CO EN 60745-2-1.
Dyuuehe Bo Metan: a_h < 2,5m / s^2,K = 1,5m / s^2
3aunpafoBaHe: a_n < 2,5m / s,K = 1,5m / s^2
HnBoto Ha Bn6paun HabeJeHO BO OBne ynaTcBa e
n3MepeHo co HopmnpaHa nocTanKa cnopee EN 60745 n MoKe da Ce KopHeCTNa 3a MeYce6ha Cnope6ba Ha
eneKTPnHnTe anapatn. NcTo taka MoKe Da ce npnIarOdn 3a
npedBpeMeHa npoueHa ha ONTObApyBaBeTo CO Bn6paun.
HabeENoTo HnBO Ha Bn6paun e 3a OCHOBnA t npmeHa h
eneKTPnHnOT anapat.DokONky eNeKTPnHnOT anapat ce
KoPcHTN 3a Dpyrnn PnIMEH, Co paZnHua ONpema, anatot
tTO CE BmETHyBa OTCTanyBa Od HOpMITE Nn HeNOBIOHO CE
OdpJyBa, MoKe Da OTCTanyBa HnBOTO Ha Bn6paun. Oba
MoKe 3NaHTeHIO Da rO 3rOeMn ONTObApyBaBeTo CO
Bn6paun Bo nepNoDT Ha ueNkOyHnTo paBoTeHe.
3a npeuzHDo ODpeyBaBe Ha ONTObApyBaBeTo co
Bn6paun, TpeBa Da ce 3eMe BO o6Snp I nepNoDt BO KOj
ypeDcTe HcknyeHnn Edbaj paBoTH, a HE BO MOMENT Kora
e BO ynoTpeBa. Oba MoKe 3NaHTeHIO Da rO HamAIIN
ONTObApyBaBeTo CO Bn6paun BO nepNoDT Ha ueNkOyHnTo
paBoTeHe.
YTbpTe Tn DononHnTeHHte MepKn 3a 6e36eHocT 3aHTA HA KOpCHNKOT OJ BnJaHHeTO Ha BnBaPnHTe, KaKo Hp.. oDpKyaBJe Tn BHMaTeHNO eNkTPuHnTe anapatn

MaKeNoHcKn 125
anaTOT 3a BMETHyBaHe, OpKxyBajTe ja TOnnHaTa Ha dNaHKnTE,oprAhn3npaje Toekot Ha pa6oTata.
MOHTaKa
PonHebe Ha 6atepnjata (BnDn CInka A)
KopHCTe Tn Camo nonNaHTe 7TO Ce HabeEHN Ha cTpaHncaT co onpema.CamO OBHe nONHaN CE IoroDn3a JInTHm-JOHCKata 6atePnJa 3a BaHnot enektpnueh anapaT.
HanomeHa:BatejatacencnapyBa nany-haonneta.3a da ja hanoHnHTe ueocho batejata, nped npbata ynotpe6a CTabeTe ja Ha nonnau doeka He ce HanoHNn eNoCHO.
JTNYM-JOHCKNHTe 6aTePNMMOKeJa Ce HAnONHAT BO Cekoe BpeMe,6e3 Da ce HAMAIIN HNBHNOT POK Ha ynotpe6a. IpeknHOT pnp nonHebeTo He HaHTeTyBa Ha 6aTepnjata.
JHTHYM-jOHCKATA 6atepinae3aawntetae Co ENEKtpoHcKa129 3aHTnHa KeiInTe (Electronic Cell Protection [ECP") od dnaBnHcNO npa3HeBe. DOKONky Ce nCnpa3n6bATEpniJata, eNEKtpuHnOT anapat Ke ce Hcknyu co NOMOHa 3aWHTHO CTpyjHo Kono: ENEKtpuHnOT anapat He ceDbNk NOBeKe.
No aTOMaTcKTo HCKnyyBaIbe Ha eNekTpHnO t anapat, He npHTnckajTe Ha npeKNHyBaOT 3a BknyyBaBe/HcknyBaBe. BaTepnjata MoKe da ce OHTeTH.
3a da ja 3BaBnTe 6aTePnjata 5 npntHcHete Ha konuHbata 3a OTBopAbHe 4 n3BneueTe ja 6aTePnjata HADony od eneKtpnHnOype. PnToa He ynotpe6ybaJte cna. BHnMaBajTe Ha HanomeHnTe 3a OTCpaHyBaHe.
3aMeHa Ha anatot (BnDn cnNka B)
Pep6nno KaKaBa HHTepBENHja Ha eNEKTPnHnot anapat (Ha np. OpPxByBaHe, 3aMeHa Ha anat nTH.) KaKo n npn HerOB TpaHCnOPT NCKlaHpaBe, H3BaTe ja 6aTepnjata od hero. PnHEBnMaTeHNo paKyBaHe co npeknHyBaOT 3a BkNpyBaHe/NCkNpyBaHe NoCTOn ONaCHOCT OD NOBpei.
Iokolky npeknhyBaOT 3a BknyuBaHe/ncknyuBaHe 7 He npHTCHAT, BPteHOTo 3a dynueHe Ke ce fHKnUpa. Oba OBO3MOxyBa 6p30, NecHO eHOCtABHO MeHyBaHe Ha anatOT ITO CE BMETHyBa BO rnaBAta 3a dynueHe.
OToBopete ja 6p3o3aTe3nata rnaBa 3a dynueHe 1 co BpTeHb BO npabeu 1,doEka He ce cTaBn anatot.BMeHTe ro anatOT.
Yaypata Ha 6bp30aTe3Hata rnaBa 3a dynpeHe 1 CBpte ja UBCPTo co paka BO npabe
BumkyBaBe Ha npab/ctpyroTHH
PpabTa Od MaTeepnJaHrTe Kako Ha np. CnoEB 6oJa, HeKoB HIOOB NpBO, MInHepaHIM MeTAl MoKe Da 6nIe WtETHa NO 3dpabJeTo. DOnHpAbeTo HIN BnHbYBaHbETo Ha TaKBaTa NpAB MoKe Da IpeDn3BnKa aIeprncKn peaknn n/nn 3aBoNyBaHa Na nnHnTe NaHtHa KaOpNCHKOT nNn NnCATA BO OKONHHata.
OndepenHuectnKnpaKaHa np. npab Ondabnn 6yka Baxat KaKa KaHeporeHH,OCoBeHO DOKONky Ce BO KOMBnaJca CoDOnONHTeHH CyntTaHm (xpoMaT,
cpeCTBa 3a 3aHTHa npBo).MATEpHJAnTe uTO COpKAT a36eT MoKeJa 6uDat o6pa6OyBaHN cMo Od CTpaHa Ha CTpyHn Nua.
- IporpnkeTe ce 3a do6pa npoBepeHocT ha pa6oTHOTo MecTo.
Ce npenopayba Hoche Ha MaCKa 3a 3aHTTa npn BnWyBaBeTo co KlaCa Ha qHITep P2.
BHHMaBajTe Ha BaKeuKte npOnmHa BaWata 3emJa 3a matepnjanoT KoJ ro o6pa6otyBaTe.
H36erHyBaJte co6Hpabe npab Ha pa60HTO MecTo. PpaBtA leCHO MoKe Da ce 3anaaH.
Ynortpe6a
CtabaheBoynotpe6a
Mexanhukn H360pHa 6p3HH
PpeKHyBaOT 3a H6Op Ha 6p3HH 3 aKTMBpaJte ro camo DOkONky eNEKTPuHnO t anapat e BO coctoj6a Ha MnpyBaBe.
Co npeknHyBaoy3a n36op Ha 6p3HH 3 MoKe Da n36epeTe 2o6emnHa 6p3HH.


126 | MaKeJIoHcKn
Bp3nHaI:
Hn3OK o6eMa HbTeKx; 3a 3aIpa4yBaHbe Hn paOteHe co rOJIeM dJaMeTap Ha DynueHe.
Bp3nHa II:
BncoK o6eMa BpTeK;3a paBoTeHe co Man nnJaMetap Ha dynueHe.
DOKONKY PNEKINHYBAOT 3a MeHyBaHb6p3HH 3 He MoKeJa ce BMETHE KO KpaJ, CbTeTe ja MaNKy rnaBata 3a DynueHe co DYNUANKATA.
BknyyBaBe/ucknyyBaBe
3a cTbAbe Bo ynotpe6a Ha eneKtpnHnO t anapat npHTCHete rnpkeHHyBaOT 3a BKnyBaHe/HcknyyBaHe 7 nDpKeTe r npHTCHat.
Namnata 9 cbTeN DOKoKy npKeHyBaOT 3a BknyyBaBe/ACKnyyBaBe 7 e HAnOna nnIeNoCHO npTnCHAT N OBO3MOkyBaOCBtNyBaBe Ha paBoTHOTo NoIe npHnOBONH CBETNOCHYcNOBn.
3a da ro hcknyuHTe eneKTPnuHnOT anapat, OTnyuTete ro npkeHHyBaOT 3a BkNuyBaHe/ncknyuBaHe 7.
3a da ce 3auTei n eheprnja, Bknyybajte ro eneKtpnHnot anat cmo DOKoNky ro KopnCTnte.
IocTaByBaBe Ha 6poj Ha BpTeJH
Bpojot Ha BpTeKHTe Ha BknyueHnOT eNeKTPNueH anapat MoKe Da ro perynipate BeccTepeHO, Bo 3aBnCHoCT OD Toa KOky noanely Ke ro npTncHete npeKHyBaOt 3a BknyuBaBe/NCknyuBaBe 7.
Co HeKHO npHTCKaBe Ha npEKNHyBaOT 3a BkNyyBaHe/NCkNyyBaHe 7 ce NoCTnHryBaat Man 6poj Ha BpTeKn. Co 3rOleMyBaBe Ha npHTnCOkOT ce 3rOleMyBaN 6pojoT Ha BpTeKn.
LenaOcho aBtOMaTcKa 6IokaHa Ha BpeTeHTo (Auto-Lock)
DOKONKY pnekHyBaOT 3a BknyyBaHe/NCknyyBaBe 7 He e npTnCHat, BPteHOTo 3a DnyuHe n npNpaT0 3a anat Ke ce. dKcpaat.
Oba OBO3MOxyBa 3aIpa4yBaHBe Ha Ipa4oBN H npn HCpna3Heta 6aTePnJa OHN. KopncTeHbe Ha eNekTpHuHOT aNaT KAKO Wpa4uHrep.
KoHnua 3a HcfoyBahe oD 6p3Ha
PnOtnnytahe Ha npeknHyBaOT3a BknyyBaHe/ncknyBaBe 7 ce 3akouyBa rnaBaTa 3a DnyueHe n CO Toa Ce CnpeuBya NOBtOpHTo CTapTyBaHe Ha anATOT WTO CE BMETHyBa.
Pn3auppaYBaBe Ha WpaPobN, npeKHyBaQOT 3a BknyuBaBe/ncknyuBaBe 7 OTnyWTeTe rO npn OTKako WpaFOT UBCPTo Ke 6nDE 3auppaFeh BO MaTepnJAnOT. Ha Toj HauHH Tnabata Ha WpapOT Hema Da HabIe3e BO MaTepnJAnOT.
Pnka3 3a HanoHetocTa Ha 6aTepehjata
Pnka30 Ha HanoHHeocT Ha 6aTepujata 8 npn noNoBnuHo
Hn ceNoCHO npTuChAT pKeHHyBauch
BknyBaBe/ucKnyBaBe 7a HeKoNky cekyHnJ na
pnpKaKyBa HanoHHeocTa Ha 6aTepujata n ce coCTOn oD
3eHen LED cbETnKn.
JIED cbertno Kanaumet
Tpajno cbetno 3 x 3eeneo ≥ 2 / 3
Tpajno CBetno 2 x 3eneho ≥ 1 / 3
TpaJHo CBeTno 1 x zeneHo <1/3
TpeKaBO CBeTno 1 x3eNeHo Pe3epBa
3aunTtOd npeontOBapyBaBe BO 3aBnCHOCT Od TEMnepatypata
PnHamaHckata ynoTpe6a eneKtpuHnO anat He Cmee da ce npeontobapyBa. Pn nperoIemO ontOBayBahe nn pa6oTebe hADBop od rpaHnUte Ha do3BOHehata Temepatypa Ha 6atepjata ce HAMAYBa 6pojoT ha BPTekn. Dpyn noocTHnHyBaHeto Ha do3BOHehata Temepatypa Ha 6atepjata, eneKtpuHnO anapat IOBTOPO pabOTn co nOH 6poJ ha BPTekn.
Cobeth npa6otheTo
EneKtpnHnot anapat ctabe ro Ha wpaot camo DOKONky e Hcknyuen. DOKONky anapatot e Bknyuen H ce BPTN, ToJ MOKeJa Ce npeBPTN nadHe.
No donroptaja pa6ota co Man 6poj Ha BPteKu, 3a da ro onaIte eneKtpnHnO t anapat octabete ro da ce BPTN BO npa3e H od OKony 3 MmHTn Co MaKcImaEn 6poj Ha BPteKu.
PnDyuehe Bo Metan, KopHCTe cAmo 6ecnPekOpHo HaoCTpeHH HSSdyuapan (HSS=BncOKokanaTHTN3a 6p30ceuehe co yenK). PporpaMaTaHa onpema Ha Bosch rapaHTnp KaBANITet.
Pep3aWpaPbBaHe hroEmn, nooJnH wpaOBN BO UBPCTN MATEpHjann, npTeXoHDn H3DyUHTe2/0d OdoJKNHATA Ha WpaOT Cnped BHATpeuHNO TnJaMETap Ha HABoJOT.
OdpkByBaBe n cepBnC
OdpKyBaBe HnHCTeHe
Ppe6bnoKaKba HnTepBeneHja Ha eneKTpHnHOT anapat (Ha np. OpxBaHe, 3aMeHa ha anat nTH.) KaKo m npH erOB TpaHcnpT hcknaHpaHe, h3BaTe ja 6atejara od hero. PnHEBnMaTeHNO paKyBaHe co npEKNyBaOT 3a BknyBaBe/HCKnyBaBe NoCTOn onaCHOCT ON Nobpei.
OdpkyBaJte ja nCTOTATA Ha enEeKTPnHHot anapat n OTBOPHe 3a npoBeTpYBaBe, 3a da MoKe Jdo6po H 6e36eNo da pa60THe.
Dokonybatepniata He yHKUHOHPa NOBeKe,Be MoJIHMe oBpaTeCe BO OBnacteHa cepBnca cnYk6a 3a Bosch eNekTpnuHn anapatn.
CepBncha cIyX6a n COBETn npKoPnCTeHe
CepBnchata cny6aKe odroBOpn Ha BaWnte npaaBa Bo Bpcka co nonpaBkata n OdpXyBaBeTo Ha BaWnOT npOn3Boq KaKo NpeBHNTe DeNoB. EKnno3NBeH Uptex H HnpopMaun 3a pe3epBHN DeNoB Ke HajTe Ha:
www.bosch-pt.com
TMMOTa coBetyBaBe npn KOpHCTeHe Ha Bosch Ke Bn NOMORHe DOKONky HMaTe PpaHaBa 3a HauHTe PpOu3BOOn H ONpeMa.
3a cnre npaaHb HapaKHa HpeepBn Hneobn,Be MoIIME habeTe ro 10-uzppeHnO6poj od CneuФнkaunHata nnoKa Ha npoI3BOIoT.
MaKeDoHnJa
Д.Д.Енктпс
CabaKobayek47H,6poj3
1000 Ckonje
E-nowta: dimce.dimcev@servis-bosch.mk
HHTephet: www.servis-bosch.mk
Ten./φακc:02/2467610
Mo6.:070595888
TpaHcnpot
JInTHyM-jOHCKHte 6atePnnoNpExaHa 6apaBaTaHa 3aKoHOT 3a OnaChn MaTePnJaIi. BatePnHTe MoKe da Ce TpaHCnOpTnPaat cMo Od CtpaHa Ha KOpCNKOT, 6e3 Notpe6a oD DonOnHnTeHN KBaHnΦKaun.
Pn npenoc Ha nctte od ctpaHa TpeHnua (Ha np. Bo3ywn TpaHcnpTn Hn WneHnJa) HeonxOndo e da ce BHMABA Ha CneujanHnte HanomeHn Ha ambaJkata n O3haknte.Bo TakOB Cnyaj, npn noIroTObKaTaHa npatkata Mopa Da Ce Nobka ekcnpt 3a onaChn cynctahn.
TpaHcnpopajte gr 6atepHnTe caMo dOKoKny kyKniWTeTo e HeoWTeTeHO.3aeneTe gr NTbOpeHnTe KOtAKTH n CnakyBajTe ja 6atepnjata Ha ToJ HauHH WTO HeMa da Ce DnKHN BO am6anakata.
Be MoJIIME BHHMaBaJTe Ha eBENTyaHHTe DoONHHTeHNHaUNHOHAHN npOnnC.
OtctpaHyBaBe

EnektpuHnTe anapatn,6atepuHte, onpemata n am6anakhtpe6a da ce otctpaHt Ha ekolowkn npaphnHB naHH.
He nfpnajte enektpnunhe anapatn 6atepnnte BO domaunhata kaHt a3a fy6pe!
Cama 3a 3emjn BO paMKn Ha EY
Cnopee ebponckata perynatnBa 2012/19/EU eeneKtpnHnnte anapatni wto ce BOH ynotpe6a n depeKTHnnte HnN NcKOpncTeHnTe 6aTePNn Cnopee perynbata 2006/66/EC mopa odienho da ce co6epaT n da ce peuknnpaaT 3a nobtopha ynotpe6a.
Batepnn:
JIHTHym-jOHcKn:
Be MoJIIME BHHMaBajTe Ha HAnOMeHIne Bo den ,TpaHCnOPT, cTpaHa 127.
Ce 3aDpJxByBa npaboto Ha npomeHa.
Srpski
Uputstva o sigurnosti
Opsta upozorenja za elektricne alate
UPOZORENJE
Citajte sva upozorenja i uputstva. Propusti kod pridrzavanja upozo
Uldised ohutusjuhised

TÄHELEPANU
賊龍則龍龍龍龍龍龍龍龍龍龍龍龍龍龍龍龍龍龍龍龍龍龍龍龍龍龍龍龍龍龍龍龍龍龍龍龍龍龍龍龍龍龍龍龍龍龍龍龍龍龍龍龍龍龍龍龍龍龍龍龍龍龍龍龍龍龍龍
Mechanics and Electronics Ltd. PT/SAX-ASA
298 Bojeong-dong Giheung-gu
Yongin-si, Gyeonggi-do, 446-913 Republic of Korea
080-955-0909
#
哉藻藻藻藻藻藻藻藻藻藻藻藻藻藻藻藻藻藻藻藻藻藻藻藻藻藻藻藻藻藻藻藻藻藻藻藻藻藻藻藻藻藻藻藻藻藻藻藻藻藻藻藻藻藻藻藻藻藻藻藻藻藻

Bosch Power Tools 1609 92A 2P0| (27.7.16)


JLWg
1000000000000000000000000000000000000000000
a0-0sJdLl|0jWl| -gKgQaull
+2022476091-95/ +2022478072-73:
+20222478075:JU
boschegypt@unimaregypt.com:j gJSLJL
Jai
gagglgolpSgJgUggiU Ug! g
Lc pJall Jai jogj jssauu all aaw .5jbaI
. 日 日 日 10gjw auiuui u
(gJJJJL)jI jI JI JI JI JI JI JI JI JI JI JI JI JI JI JI JI JI JI JI JI JI JI JI JI JI
slgall jai yaaia ojluw laiy aalllg
gJw! ggcjll aabll mnn ylo sic oabll
aUJIO
aalw lks u 1b aJl jUj
gwwjll jc jia jua jia jia jia jia jia jia
gogjllg jocloglaalglgdd
www.bosch-pt.com
aJmuIooJgoo aJgJgJgJgJgS JgS
g g 10000000000000000000000000000000000000000000000000000000000
jucgcbuIbglUJluaiUaUJUw!Sic aiaI IJauIgUgUgUaIaIaIu
Jg 10g 10g
U
gμg
gdoo ojJoll aaj.53j
UJ20300LJ
+212(0)522400409/+212(0)522400615:
service@outipro.ma:JgjgJgJgJg
jJJI
Juuw
julaa aclaiil aebioi
jJ-06000a
+213(0)982400992:
+213(0)34201569:UuS LJI
sav@siestal-dz.com:JgJLJI JU
uigj
Jg
99-25 gj uIgS uIw gooJI.0
j012014
+21671428770:
+21671354175:UuSLoJ
sotel2@planet.tn:jgjSJL
Lg
zliao 1e aijyssj 0ssjj jno
1bgaao dlalglkbalg7lablgjswll
JuiuJI eiooIc boiJI sic 9 auoiJI u
JSo oLolj aawg Jolg jj JsW 7.1abx|g
aJIO Jc bL Ws u
.7labxlg juaaill gliao yjuyaiy
JolooaoaaiwloicbagajlqSlljss
aui jgi
jIgJdSdc
a d 10
glao lca baiyll sso yua, juiu jngjul
.7.lbXgJ
- labxlg juswll elao lc cdoal bsall
.1j0j jg j 3o j.aaio jg jsc
(1111)1jgJg0oJolc
7.1abXg 1234567890
oessal uoluug ytaaill jgds
g jg jgsjgl g jg jllglll j
.5uic l cly clao auiuy uylj 6 j 6aJ o
jIgJI:Jl!
a5 7 labg uaiu elao glb! sic
Lqiljg aaiio ju wll oc gia loa laioll
- uIgU buj sic 7 loBg Uusuul liao q
j. abluu jauu o la u gui bju jg k j
pJJI jw uJg0
aJlJnJaw aJU J8 8JrJI JnJaw Jla wgo j!
Jooj Joo jooj bdoi sic jgi
uugo3uulg7lglul
auiua 1jua
Laou
j3xjaiuog2/3
2xjaiuio g≥1/3
1xjaiuoo g2<1/3
1x(glo·g)
.1kaii jno aiae yie 1n yin gaojll o
jijlglglljoc
a gllgallg0jLauXyLaaXg,jLbJmuu a
aalglgll,clgogjLl jao la) aai JdJia
gjgi jill slgal aJlgo pui jgai.
jg bag jnnnssll lalll jg no winnw
P.μc
Jkuu
P2 (\text{日} \text{日} \text{日} \text{日} \text{日} \text{日} \text{日} \text{日} \text{日} \text{日} \text{日} \text{日} \text{日} \text{日} \text{日} \text{日} \text{日} \text{日} \text{日} \text{日} \text{日}
Igill sic gblw lswl o wgl b
jg jg k gS. dawg qw (sJJ UJgJU
Jlll jllj j 100
.
jouI jlc abwol gwlgl elg sic lc lao
1
LjLjLo aJmuI Jui
gSloic b6 3acmuu uj Juaia glaoa
aJJI uc aaggio ayjLjSJI oJIJI
j3 aJUll Jj Jlal aldo abwIg elis
Laaoo uJgJUJJuJnJnJn
:laeJUJU
g.1j1j1j1j1j1j1j1j1j1j1j1j1j1j1j1j1j1j1j1j1j1j1j1j1j1j1j1j1j1j1j1j1j1j1j1j1j1j1j1j1j1j1j1j1j1j1j1j1j1j1
U
(A oJgJJI gJi) pSJJI j
a a 0gSall jai jai b g p suiu
p u l uuc u g o u u uuoi jai u .guiu
u dc u p siauol p g uul Uu g! Sgo laiao
. qiu
EN60745-2-1JUaJIbIaIaIaIaIaIaIaIaIaIaIaIaIaIaIaIaIaIaIaIaIaIaIaIaIaIaIaIaIaIaIaIaIaIaIaIaIaIaIaIaIaIaIaIaIaIaIaIaIaIaIaa
gaw aagj
aLgaiI gao)a,ljljiaI aA EN60745-2-1 cK glalg(laI 1,5=K.2U/ρ2,5>ah:JdJIaI 2U/ρ1,5=K.3U/ρ2,5>a,h:UlgU
laallll g jgsslll ljjjw g wq pdo 10kag EN60745 nnoo w q gwl f mdo o do .uill lgl yjyjll aajlaoa dol saii 1d u kuyu jiljw uoe iul ydo aaww2l lalsswllgsslll jjw yjyjll o dall ao jw g 0eio oao
jui.1aabj
jloa jolal abwlg g d oje aabwlg qai y abwlg qg J Lao
aJdA Jc aJUgSdSdA gG uI jBul
Jgjg JwI osc uSs j 1jla gai j.ajuJI JooJI Uc ojuWJUJx
auiuJl oJl Jua jbs uSsw,psjll poia
JgJg JgJgJgJgJgJgJgJgJgJgJgJgJgJgJgJgJgJgJgJgJgJgJgJgJgJgJgJgJgJgJgJgJgJgJgJgJgJgJgJgJgJgJgJgJgJgJgJgJgJgJg

g 1g j gj j a J a J b
gao auiuiei ciiee ge bao pssai
aJbJIUaJIbJooSJIaLgpo. WgJ .uucugabaoJI
Lulu 112001j08p5jll joo
jUJgI UeJIg JauuJI Jua
jlll jlll 1g g. gJJI JgJI
aiaai 1gagglsJll glaIg aJy
abjao aigawlaojagoglaqajgl
Ig aiaI aog
aJdU UauuUg j
gubi sic lbsl ylsj 1. alalilg g xu lausllg aui uauuall
gljUwJ Uaui jkUo uauuU
.0ba2g jauu g/

0Jg jn aill lal alaoall gig 1
awls oJg lai agiao aaal O Jg ayjRSL
.
Jusai Jusai
g wglj g bgl yjg j 0s cssd .uJlgl g jjlg j slaJIg qaiij
oJyall oLooU uuaa auiyjSJI oSJI Ooo aauu ywlo u c gaiyjSJI oSJI Uac gulil .oLooI G aijiOL loaawu
oJgall 1j
aui jgSUI oai gwwjI oJgaaal ljaai yssu waii aubuaill gwwll daao gogagall
1
Lauu jlgjI ojc jial bdo dol 2
aJUUJUJU 3
PAsJlUlaeIeJj 4
*p≤J5
UgJololjglia 6
labzgljuaaui ziao 7
aJoljw uJL Jg 8
"59g 960 2400 9
(ugjoo aal abw) 5g y uao 10
* poll jol 11
1 1uul uudl lalag aalglbll ssc la bala auii gull pui iill oall gall alga ulg boll UwUkW Lgng uSag UJUkW uLs
Jssg
bglw lLl j. clll 0d m 1g
Jl Jlwl .jaii jall Jzllg J
Jl g d q aannnll Jowj A yj k
. jblk
aai
p5jogjollolwgloloo
1 11111111111111
aol paaqg qagaiig aegi gai i gaiu wu jn!pajall no nnoe ggi aannall jwll ojgl .pajall no jEgi zo lqal sai
aaiai1p5!
L L 1111111111111111111
<ucdlosuw
y 1111111111111111111111111111111111111111
-|Jasw|g
a uollo Ula aalabai.aaoloo ciu 1111111111111111111111111111
a

JUJI U
jll jll g b jllw ly bo g n aaioll. jglal uol lgc alalall ll j no
KgUull 1JUuI UglU
sicagjaoJI
bgsa yu jilll no yll lacai 1
! .ggl gj uolw ooc jno aao ayus
yssd yurk s yu w yll bgsal ao
.ayusdo so yu yds qasall jglll
4dollj
1n! aLlJyIaI JpAaiI 1uI 1sOg 90aI Iooj .auiSJI
<bgbsGlcjgj
AaI aI aI aI aI aI aI aI aI aI aI aI aI aI aI aI aI aI aI aI aI aI aI aI aI aI aI aI aI aI aI aI aI aI aI aI aI aI aI aI aI aI aI aI aI aI aI aI aI aI aI
4.25:1asiw
Jull aull Jall s gjc aglaal sawl .Jswll Jowc uasui .Auljiluol lo wlo lo sic -gai jyol osall Jauo b9 puy -lo sic .Lqialoo ygcjll Jswll aabg 9
pogjc uSswu g. pksy aJusll oJLg y
.ugUJgWpLsiic alglAulc Jg
Jolai
auijies 0s daiu 8. jaiy auijgll oaii
jiu cai u gki lo sic g i ouio u gki lo sic
abau oui psc.a ggl gulgall gl uldooll
1 s g adaiuykssl oai laiw sic odag
.ubas
jgl jagggl gios. jalal agll slic jil j 2ggl gglg jzj1n jaglgl jolgl jda j0, ju, ujgl ooll juswlg egi n jd 2gj
JlI lSdLg g 0a a yjy jy J
. glg g g g g g g
. dJ Lg 1g 1g 1g 1g 1g
. 1g 1g 1g 1g 1g
. g 1g 1g 1g 1g 1g
.
g j 100000000000000000000000000000000000000000000000000000000000000000000000000000000000000000000000000
auiyjlll lsswgl aoln mnn
ellaii iiaai jlaai bai 4
kuii iii .iiaai aai yil 1
gaiiaai aaiyjki 1
gaiiaai aaiyjki 1
gaiiaai aaiyjki 1
gaiiaai aaiyjki 1
gaiiaai aaiyjki 1
gaiiaai aaiyjki 1
gaiiaai aaiyjki 1
gaiiaai aaiyjki 1
gaiiaai aaiyjki 1
giiaai aaiyjki 1
gaiiaai aaiyjki 1
gaiiaai aaiyjki 1
gaiiaai aaiyjki 1
gaiiaai aaiyjki 1
gaiiaai aaiyjki 1
gaiiaai aaiyjki 1
gaiiaai aaiyjki 1
gaiiaai aal yil gil gil gil gil gil gil gil gil gil gil gil gil gil gil gil gil gil gil gil gil gil gil gil gil gil gil gil gil gil gil gil gil gil gil gil gil gil gil gil gil gil gil gil gil gil gil gil gil gil gil
aBwgljLlIg alnlo aIg hC
Jolal
aui jgSll sall aolc au doo UdoLo
A. aqalalgagaiiaaiaiaiaiaiaiaiaiaiaiaiaiaiaiaiaiaiaiaiaiaiaiaiaiaiaiaiaiaiaiaiaiaiaiaiaiaiaiaiaiaiaiaiaiaiaiaiaiaiaiaiaiaiaiaiaiaiaiaiaiaiaiaiaiaiaiaiaiaiaiaiaiaiaiaiaiaiaiaiaiaiaia
4 1gS no dS. gao jL kuii liuaiuoi J
J
aI aI aI aI aI aI aI aI aI aI aI aI aI aI aI aI aI aI aI aI aI aI aI aI aI aI aI aI aI aI aI aI aI aI aI aI aI aI aI aI aI aI aI aI aI aI aI aI aI aI aI
Jshlll kLjlo
a
gI jIJI gI JIgWw aJg Wg wJgJgJgJgJgJgJgJgJgJgJgJgJgJgJgJgJgJgJgJgJgJgJgJgJgJgJgJgJgJgJgJgJgJgJgJgJgJgJgJgJgJgJgJgJgJgJgJgJgJgJ
saa 9. aui jseSll oall jaoiwi loic sai .gull sic jqll ic ojbuill
yJyJxJU 10
1j0j0
4Lc w

420auiHJ
JgA Jn Jl gI y Jy Jy AaJ 1000000000000000000000000000000000000000000000000000000000000000000000000000
4uU5s
aawlg lgl gdlg aagllg gglg jgs lo sic ayjglu oosl jbs sjs. claw .go claw
sju. aigbglg lboaI jc auiuieSll oall sJ
jalsl lall yww naiyuiySll to all J
aiuyiye Sll oall
<gi aJUgJJ o
g l aI gJg Jg Jg Jg Jg Jg Jg Jg Jg Jg Jg Jg Jg Jg Jg Jg Jg Jg Jg Jg Jg Jg Jg Jg Jg Jg Jg Jg Jg Jg Jg Jg Jg Jg Jg Jg Jg Jg Jg Jg Jg Jg Jg Jg Jg Jg Jg Jg
JLaaWU a
g auiy jssll yu wto sic lal Jlal Juswul uysaayu uasu wul uauu. Jaiy jssll uosu uu
4auiJ51e
jull jaylglglliao psswI gJgai Jalaiall jull jaylglliao psswI JcalaiAI .auiu
.15 10
Jai g Jaa:do) cllw bawg jwj o
gSdi dui bgoj cui jai yu (juoj u|g
yU UgaiJ Jg 1ggo (jI3io)
JwIwJScdJwJdabgSjWosol la
S OAB = S AOB + S_ OBC
1sIjI sIgac iJ 1slaI J 1s
1JgaiIgaiIgws daa 1d 1
oJgam jibbIilf jbiinjigibl kajddam .sS gsi
goo "sjiJI JJI"J IaiiJ J J
SIJIg (gP pW L) siiJ SLIJI Jgbio .sU Go (gP Pw UgD) J Sblc
4 dwlglu jgbl gjll jjla 1s yb1g 1s jao jai 4 cl y jgi g joljls bao .jlgj .g w g
g g 15g a w s g g d j SjS l Ss j Ss y jn j n jw ucl sgl Gd xis Jo Jl L .sigg Jg gagg g
LwJl oS wJus Jsao. gW
SjS|
aIgj aJg
Jb
1j 1u
J 1 J 1 J 1 J 1 J 1 J 1 J 1 J 1 J 1 J 1 J 1 J 1 J 1 J 1 J 1 J 1 J 1 J 1 J 1 J 1 J 1 J 1 J 1 J 1 J 1 J 1 J 1 J 1 J 1 J 1 J 1 J 1 J 1 J 1 J
4aowcww
Jg g Jg Jg Jg Jg Jg Jg Jg Jg Jg Jg Jg Jg Jg Jg Jg Jg Jg Jg Jg Jg Jg Jg Jg Jg Jg Jg Jg Jg Jg Jg Jg Jg Jg Jg Jg Jg Jg
Julil a
gai jgi ggbj g jIjI jI o ki SjI jai jji jki jki jJI a i
1j1 j0
aalwgsnsgla g n lnsg 1jgl,ysjll
ltao jI oikss sL .siS oiaiwl g yjl
saa sln g ju sl aJ n g j, J
lgosy si I sI Ls. jg jgolkss
sin y jai I j kijkll sg wdo
4.3uS0JLJU
jI bss sS ss oiai jI jI qai
bss sI y wli bI y I S. .w y wli jI
. iS o p s I gio
| € | I | |
| de | EU-Konformitätserkläung Akku-Bohrschrauber Sachnummer | Wir erklären in alleiniger Verantwortung, dass die genannten Produkte allen einschlädigten Bestimmungen der nachfolgend aufgeführten Richtlinien und Verordnungen entsprechen und mit folgenden Normen übereinstimmen. Technische Unterlagen bei: * |
| en | EU Declaration of Conformity Cordless Drill/Driver Article number | We declare under our sole responsibility that the stated products comply with all applicable provisions of the directives and regulations listed below and are in conformity with the following standards. Technical file at: * |
| fr | Déclaration de conformité UE Perceuse-visseuse N° d'article sans fil | Nous déclarons sous notre propre responsabilité que les produits désrits sont en conformité avec les directives, règlements normatifs et normes énumérés ci-dessous. Dossier technique auprès de: * |
| es | Déclaración de conformidad UE Atornilladora taladra- N° de articulo dora'actionada por accumulator | Declaramos bajo nuestra exclusiva responsabilité, que los produits nombrados cumplen con todas las dispositions correspondientes de las Directivas y los Reglamentos Mentionados a continuación y estaré en conformidad con las sigueres normas. Documentos tínicos de: * |
| pt | Déclaration de Conformidade CE Berbequim- N.° do produits aparafusador sem fio | Declaramos sob{nossa exclusiva responsabilité que os produits Mentionados cumprem todas as disponções e os regulamentos indicados e está em conformidade com as següentes normas. Documentação técnica pertencente à: * |
| it | Dichiarazione di conformità UE Cacciaviti/avvitatore Codice prodotto a batteria | Dichiariamo sulla mia piena responsabilità che i prodotti indicate sono conformi a tutte le dispositions pertinenti delle Direttive e dei Regolamenti elencati di seguito, nonché alle seguenti Normative. Documentazione Tecnica presso: * |
| nl | EU-conformiteitsverklaring Accuboorschroeven- Productnumberdraier | Wij verklaren op eigén verantwoordelijkheid dat de genoemde producten voldoen aan alle desbetreffende bepalingen van de hierna genoemde richtlijnen en verordeningen en overeenstemmen met de volgende normen. Technisch dossier bij: * |
| da | EU-overensstemmelseserkläering Akku-boreskrue- Typenummertrekker | Vi erklær someneansvarlige, at det beskreve Produkt er i overensstelmelse med alle galdende bestemmelser i følgende direktiver og forordninger og opfylder følgende standarder. Tekniske bilag ved: * |
| sv | EU-konformitetsförlkaring Sladdlös borrskruv- Produktnumber dragare | Vi forklarar under eget ansvar att de námnda produktura uppfyller kraven i alla gällande bestammelser i de nedan angivna direktiven och fforordningernas och att de stämmer överens med följande normer. Teknisk Dokumentation: * |
| no | EU-samsvarserkläering Batteri-boreskru-trekker | Vi erklær under eneansvar at de nevnte Produktene er i overensstelmelse med alle relevante bestemmelser i direktivene og forordningene nedenfor og med følgende standarder. Teknisk Dokumentasjon hos: * |
| fi | EU-vaatimustemnukaisuusvakuutus Akkuruuvinvaannin Tuotenumero | Vakutamme tätten, että mainitut tuotteet vastaavat kaikkia seuraavien direktivien ja asetusten asiaankuulvia vaatimuksaja ja ovat seuraavien standarden vaatimusten mukaisia. Tekniset asiakirjat saatatana: * |
| el | Δηλωση πιοτότητας EE Δραπανοκατοδβίδο Αρίθμος ευρετηριου μπαταρίας | Δηλωνομε με απολείσικη μας εύλες τις σχετικέδια ἀπατάξεις των πιο κατων αναφερόμενων σθηγινκ και κανονιαμώ και ταυτίουνται με τα ακόλουθα πρότια. Teχνικά εύγραρα στη: * |
| tr | AB Uygunluk beyani Akülü delme/vidala- Ürün kodu ma makinesi | |


| II | ||
| pl | Deklaracja zgodnosci UEWiertarko-wkretarka Numer katalogowyakumulatorowa | Oświadczamy z pełną odpowiedzialnoscia, ze nineje}sze produktyodpowiadajwyszystkim wymaganium poniżej wyszczejólionych dyrektyw irozporzadźne, oraz ze są zgodne z nastepujacymi normami.Dokumentacja techniczna:* |
| cs | EU prohląsieni o shodéAkumulátorový vrtaci ObjednaciCIDskroubovák | Prohląsujeme na výhradní zodpovednost, ze uvedený výrobat splínujevšechna príslúsná ustanovienni nizě uvedenych směrnic a nařizení je v souladus následujćími normami:Technické podklady u:* |
| sk | EU vyhląsenie o zhodeAkumulátorový vrtaci VecnéCIDskrutkovač | Vyhlasujeme na výhradní zodpovednost, ze uvedený výrobat splína vsetkyprislůné ustanovenia nizě sie uvedenych směrnica a nariadení je v súlade s nasledujćími normami:Technické podklady má spolocnost:* |
| hu | EU konformitàsi nyilatkozAtkumulátoros fúró-Cíkkszámés csaverozógep | Egyedüli feleloşeggel kijelentjuk, hagy a megnevezett terméke megfelelnekaz alábbiakban felsorolársa kerulí irányelvek énsrendeletek valamennyide-vagó elöirasalnak ems megelelnek a kōvetkež szabványoknak.Muszaki dokumentumok megörzési pontja:* |
| ru | 3aavbllene o cootbvetCTBn ECДрел-шууновert Товарный NO | Мызааьлампд пося удинокичуо OTВETCBENHOCTB,что названьпеведукгы COOTBECTBYOT BCME Deястуюцим р dedисанимнжуkaааньх ДиретгИи PaCOPRJENH, a TAKKHe HNKeYkaZaHHbIXHOPM.TexhueckaydoKoMuNTaZIMxPAnHTCyr:* |
| uk | 3aBaPro bivnoBIDNCTB CCAtkumylantopnHn TobarHni Honepdrnil-шууновert | Mn3aavbIcMoПд пося odnoocobovby BIVNOBIDALNBICTB,Zip no Na3BaHni BINOBI BIVNOBIDAJTOYUBICIMUHNHIMPONOKENHIMNIIeO3HaNEHINDEpKETNIBipO3PONDAJIHOBILHOBILHOBILHOBILHOBILHOBILHOBILHOBILHOBILHOBILHOBILHOBILHOBILHOBILHOBILHOBILHOBILHOBILHOBILHOBILHOBILHOBILHOBILHOBILHOBILHOBILHOBILHOBILHOBILHOBILHOBILHOBILHOBILHOBILT |
| kk | EO caikectik mafynmdamacbIAtkumylantoplbK ΘiHIM HemipiДрел-шуунБурауltii | Θ3Жayankepiiliknecn 613 atanfahн БИмдер Temeinde JЗылганДиретКТКалapMeH JAPKBKTAPDBH TNICTI KaFIIaIaIbBya CaikeCTIIN JЗэнTeMeHdERI HOPMaIaPFAcai EKENH BIIIDPEMi. |
| ro | Declarata dé conformitate UEMaşinà de gaurit ŞiInshurbat cu acumulator | Declarām pe proprie raspundere cà produsele mentionate corespund tuturordispozitiilor relevante ale directivelor sì reglementärilor enumerate in celece urmeazà sì sunt Ún con formitate cu umratoarele standarde.Documentte tehnica la:* |
| bg | EC dcknapaunia 3a cbotbvetCTBnAtkumylatopnHn Kataloçhen Honepmb | СпьлноотROBOPHOCT HnE DeKApriPame,чпосочITEprodukTIOnTOBAPRT Ha BCNUKN BaIiDNH N3NCKBAHNA Ha INPeKTHBVTEи pa3nopebiteNo-Donyu NcbOTBeCTBAHa CSeDnITE CTANDAPI.Texhuecka doKoMuNTaZIMprn:* |
| mk | EU-Najaba 3a coobpa3nOCTBaterncsДучuaLacka-Bpoj Na del/apyknlОdBryBa | Coцелесна огюворhoeТИЗавуВамe,да КОпшанITEpronizBoDrce BoCoTnACHOCTCoSHTpeLeBaHTNIOpeDBeHaNCEDnIEpeYIaBIVNIPonncsIc BO CoTnACHOCTCo CSeDnITE HOpM.N.Texhuecka doKoMuNTaZIMja kaj:* |
| sr | EU-izjava o usaglašenostiAtkuk-bušilica-odvrtačBroj predmeta | Na sopstvenu odgovornost izjavljemu, da navedeni proizvodi odgovaraju swim dotichnim odredbama knaknadno navenedenih smernica u uredaba i da su skladu sa sledecim standardima.Tehnicka dokumentacija kod:* |
| sl | Izjava o skladnosti ESAtkumulatorski vrtalni Številka artikla vijačnik | Izjavljamo pod izključno odgovornostjo, da je omenjen izdelek v skladu z vse-mi relevantimi dolocili direktiv in uredb ter ustreza naslednjim standardom.Tehnicka dokumentacija pri:* |
| hr | EU izjava o sukladnostiAtkuk-bušilica i odvijačKataloški br. | Pod punom odgovornošcu izjavljemu da navedeni proizvodi odgovaraju swim relevantnim odredbama direktiva i propisima navenedenima u nastavku i da su sukladni sa sledecim normama.Tehnicka dokumentacija se moze dobiti kod:* |


| € | ||
| et | EL-vastavusdeklaratssoon Akutrell-kruvikeeraja Tootenumber | Kinnitame ainuvastutajatena, et nimetud tooted vastavad järgnevalt loetetud direktivide ja määruste köikidele asjaomastele nõuetele ja on kooskolasjärgmiste normidega.Tehnilised dokumendid saadaval:* |
| lv | Deklaracija par atbilstūbuk EKstandartiem Akumulatora urbjmašina - skrivgriezis | Mës ar pilnu atbildibu pazinojam, ka ßeit aplūkotie izstrādājumi atbilst visiem tãåk minētajās direktivas un rikojumos ietvertajām saistosajām nostādnēm, kã ari sekojošiem standartiem.Tehniskà Dokumentăcija no:* |
| lt | ES atitikties deklaracija Akumulatorinis grežtuvas-suktuvas | Atsakingai pareisiäme, kad iśvardtyi gaminiai atitinka visus privalomus Žemiau nuroydtu direktyvir reglamentu reikalavimus ir šiuos standartus.Technine dokumentacijsa saugoma:* |
| GSR 12V-15 3 601 H68 1.. 2006/42/EC | EN 60745-1:2009+A11:20102014/30/EU EN 60745-2-1:20102011/65/EU EN 60745-2-2:20102009/125/EC (1194/2012) EN 55014-1:2006+A1:2009+A2:2011EN 55014-2:1997+A1:2001+A2:2008EN 50581:2012BOSCH * Robert Bosch Power Tools GmbH (PT/ECS)70538 StuttgartGERMANY | |
| Henk Becker Helmut HeinzelmannExecutive Vice PresidentHead of Product CertificationEngineering andManufacturingRobert Bosch Power Tools GmbH, 70538 Stuttgart, GERMANYStuttgart, 01.01.2017 | ||


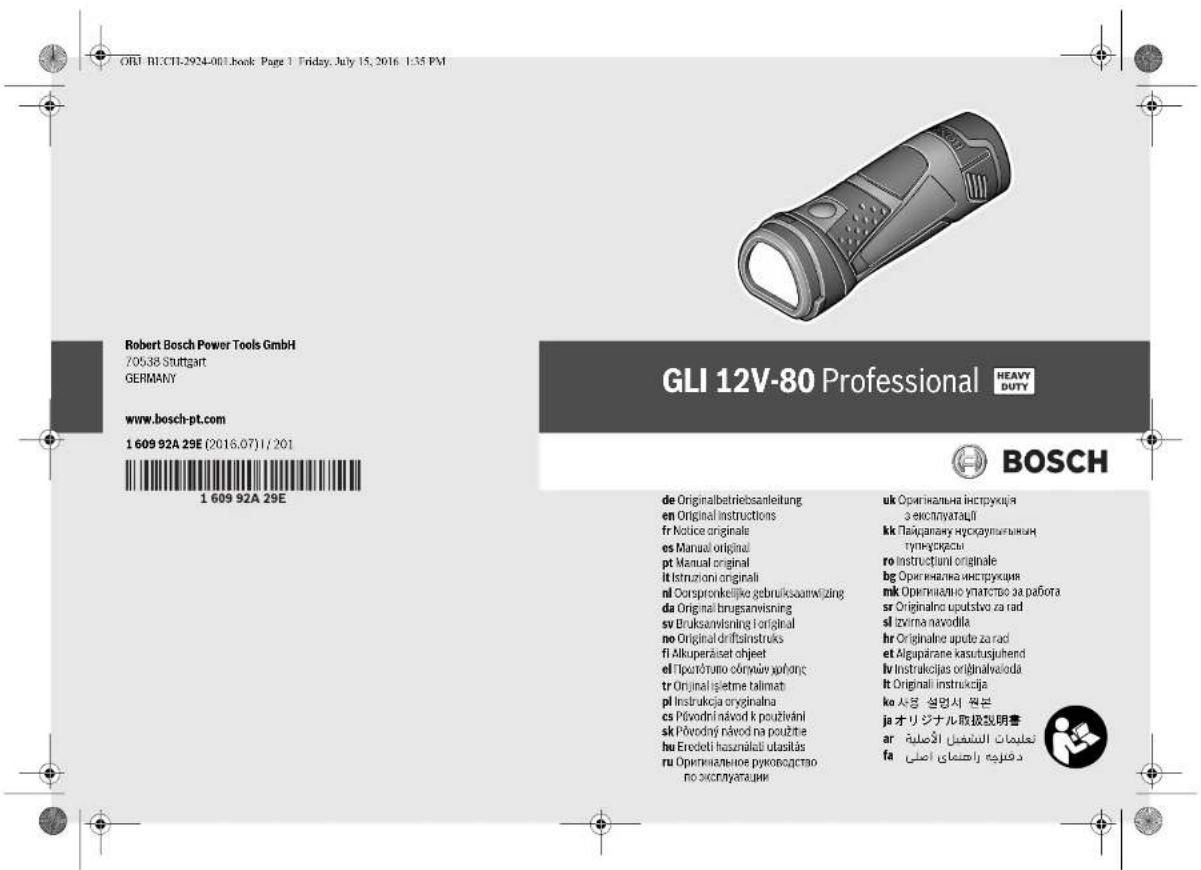
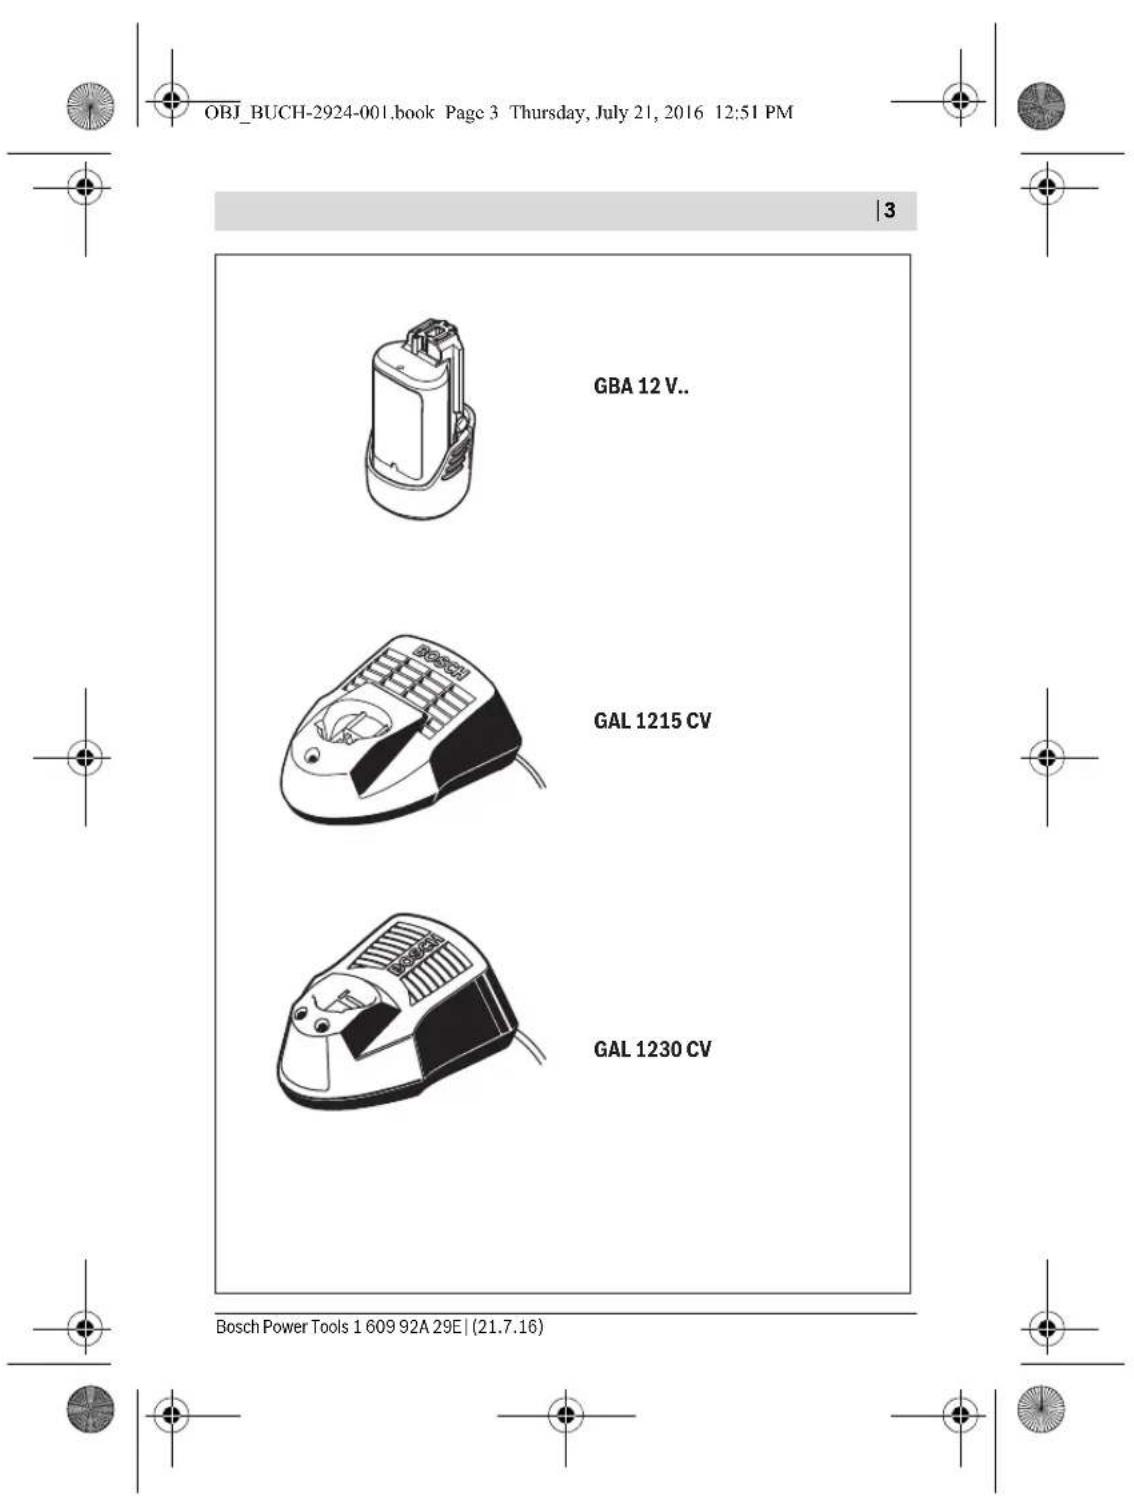

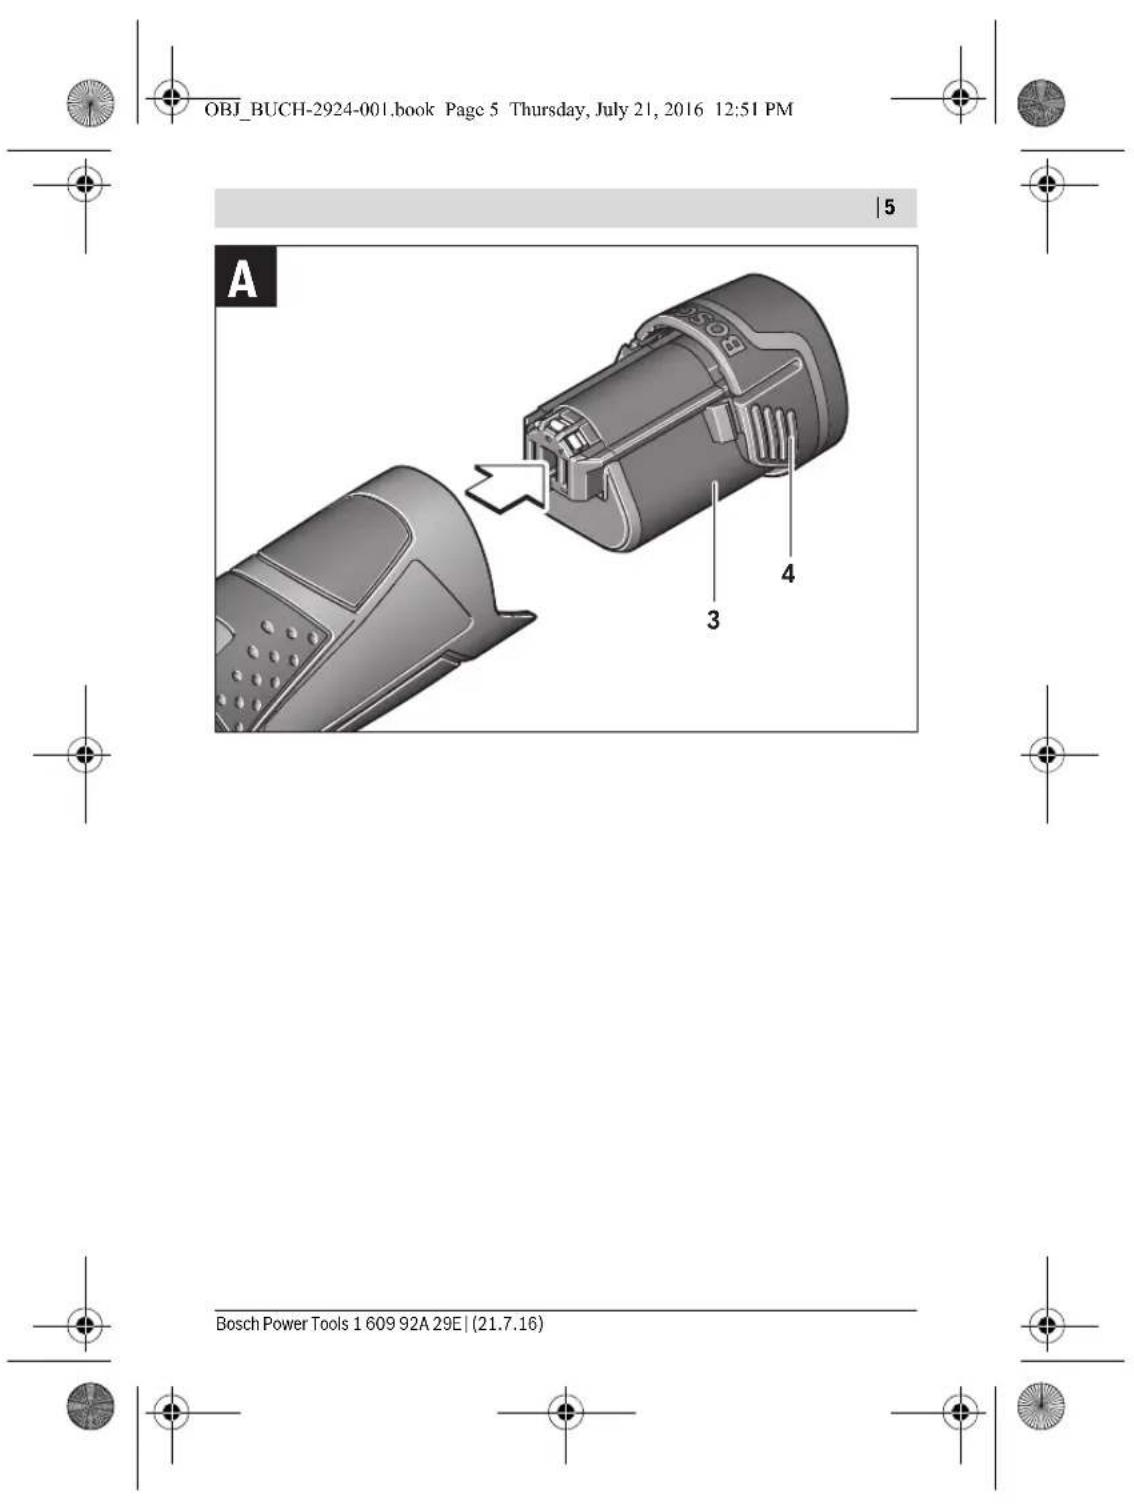


6 | Deutsch
Deutsch
Sicherheitshinweise
OBJ_BUCH-2924-001.book Page 50 Thursday, July 21, 2016 12:49 PM


50|Dansk
OBJ_BUCH-2924-001.book Page 55 Thursday, July 21, 2016 12:49 PM

Svenska|55
Bortskaffelse

Smid参加会议的人员包括:Sridi, Srida, Srida, Srida, Srida, Srida, Srida, Srida, Srida, Srida, Srida, Srida, Srida, Srida, Srida, Srida, Srida, Srida, Srida, Srida, Srida, Srida, Srida, Srida, Srida, Srida, Srid a
Gelder kuni EU-lande:
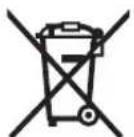
OBJ BUCH-2924-001.book Page 105 Thursday, July 21, 2016 12:49 PM


Magyar | 105
He b6paocbIaIe akKymyIaTOPhIe foHApn H aKKymyIaTOPhIe 6aTapeN/6aTapeK B 6bTOBm MyCOP!
TobkoДЯСТРан-ЧЕнов EC:

B COOTBETCTBn C eBpOneEckO DNPEKTHBOI 2012/19/EU o6 Otpa-6oTahHbIX 3eKTPnueckx H3eKTPoHbIx Pn6bpox OTCnyKHBnue AKKyMnTOpHbIe fOHaApN, a TaKke B COOTBETCTBn C DnpeKTHBOI 2006/66/EC NOBpeXJdEHbIe Nl6o Otpa6oTabuHc SBoi cPoK aKymnTOpbl/6aTaapeKn HyKHO Co6HpabToDtJeBHo n CdaBaTb Ha 3KOLOrueckn Chctyo peKynepaHIO.
Akkymyntopby,6atapen:
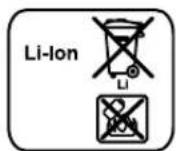
Li-Ion:
anynta,yuNbBaIe yka3aHHe Bpa3ene «TpaHcnOpTHKa》,ctp.113.
Bo3MoXhbl H3MeHeHH.

Bosch Power Tools 1609 92A 29E(21.7.16)


OBJ BUCH-2924-001.book Page 119 Thursday, July 21, 2016 12:49 PM

YkpaHcbka 119
YkpaHa
TOB《PobepToM》
CepBichn ueHTp eNeKTpoiHCTpyMeHTiB
Byn.Kpaim,1,02660,KnIB-60
YkpaHa
Ten.: (044) 490 24 07 (6araToKaHaJIbHmI)
E-Mail: pt-service.ua@bosch.com
OphiuiHn caH: www.bosch-powertools.com.ua
Apeca PeriohaIbHnX rapaHTiHnX cepBichNX MaJICTepeHb 3a3HaueHa B
HaiohaHbHomy rapaHTiHOMy TaIHOI.
TpaHcnpTyBaHHa
HaIdoaHI iIiEBO-IOHHI akMyNtOpHi 6bataeipo3NOBcOJkyTbCBAHMOrIoo TpaHCnOpTyBaHH He6e3neuHx BaHTaxiB. AkMyNtOpHi 6bataeIMoKyTB nepeBO3HTCH KOPNCyBaHem ABTomO6InbHM TpaHCnOpTm 6e3 Heo6XiHocTi BHKOHHHI DoaTkoBHX HOpM.
Pn nepecnui tptimm oocabnn (Hanp.: nobitprnHm TpaHCnoptom a60
TpaHCnoptHM EKcneINTOpOM) notpiHO NOdepxyBaTHC OOCNBHX BVMOR 1Oo
ynakOBKn Ta MapkyBaHH. B cOmy BnAaKy npn NiIroTOBci NocNkn NobHeh
pnHmat yactb ecnep3 He6e3neuHx BaHTaxiB.
BicnnaTe akyMnyTOpHy 6batapeo Nmse 3 HenoWkoJKeHm Kopnycom.3akneTe Bdkpnti KOHTaTI Ta 3anakyTe akyMnyTOpHy 6batapeo Ta, 06 BOHa He cObaacB ynapobui.
DotpmyTeca,6ynb nacka,TAKOK MOKNBHX DoaTkoBNHn HauioHaIbHN npnnnciB.
Ytunlizaia

Akymyntophi nixtapi, npnna i ynakobky tpe6a 3daBAt Ha ekonorHOn
ycty nobtopny nepepo6ky.
He BHKndaTe akymynTOpH iixTapi Ta akymynTOpH 6atapei/6atapeeKnB no6ytoBe CMITRA!
Пишдякай EC:
Bijnobinno do eBponecboi npektnbn 2012/19/EU npo eneKtro-i eneKpoHHi npnana kaymyaTOpH iixtapi,IO BVNIIN 3 BKNBaHHa, Ta y BiNobinDHOCTI Do nipeKTHBN 2006/66/EC noikokxehi abo BiNpaBObaHI akymyAToPn/6atapeHK nobHHI 3daBaTnc OKPemO i tyniisByatnc EOKONIHoo hCNCm Cnoc6om.

Bosch Power Tools 1609 92A 29E(21.7.16)


OBJ BUCH-2924-001.book Page 127 Thursday, July 21, 2016 12:49 PM

Ka3aKaIIa1 127
TacbImaay
BnynnHnoDbIK aKKymyIaTOpnap KayinTI TAYapnapa KOnblaNtH TanaIaTpaC aN 6onybKepe.KaIaHaHybI aKKymyIaTOpnapbKeWeE KocblMa KyKaTTapcb3 TaBImanai anabI.
YiHuiTuyfpanap (Mbicanbi, aye Keiniri Hemece Xibepy) opamara KHe Mapkanapra KaBnTaBH apHaBti TanaTAPdbCaKtay Kepek. Xibepyre daBihday KezInde Kayinti KxKTEp MAMHbHa xaBapnacy Kepek.
AkkymyIANTOpdbkopnycb3aKbIMdaIHaF 60nca fana Xi6epiH3.Awbk tyicnenepej iKeimdeH3XHeAkkymyIANTOpdb opamada Ko3FaMaHTbHdApaHb3. KaKer 60nca,KocblMa7yTTbEpekepeepdi cKaTaHb3.
Kadere kapaTy

AkkymyIantopblk fOHaapbIaPdbI,KepeK-XapaKaTapdbI JHe opay MaTepeHJIaPbIH 3KOLOHnBik TyPbDaH DpybcYTHIN3aUNaYFa TaNCbipy KepeK.
AkkymyIaTOpIbIK foHaapblnapblJxHe aKKMyIaTOpnapbl/6aTapeaIaPbl yKoKbcIbHa TaCTaMaHb3!
TeK kana EO enIepi yuHIN:
3nektpxhe 3neKtpoHbckcki Kypanap60bnHsa2012/19/EU epexeci xhe 2006/66/EC HopmacbHa cai kapaMcbIa3 AkkMyIaTOpblkfohApbnapbl,akaybl Hemece naDanaHbIraHakkyMnaTOpnapblb6eKHHay KepeKxHe EkoIraNbI TyPbIaHdpybc ytnin3aunnaayfara TancbIpyKepeK.
AkkymyTopnap/6atapennap:
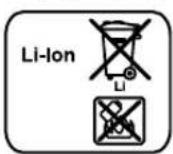
HINTH-NOHDbIK: "TacbMaIaNay"TapaybIHdafb1,1276etihderiHyckaynapdbOpbIHdAnb3.
TexnKanbik 63repictep enriy KykbfbcakraIaIbI.


OBJ BUCH-2924-001.book Page 133 Thursday, July 21, 2016 12:49 PM

BbIrapcu133
Eliminare

Lampile cu accumulator, accesorile si ambalajele trebuie directionate spre o statie de reciclare ecologica.
Nu aruncai lampie cu accumulator si accumulatorii/baterile in gunoiul menajr!
AkymyaToPnHnn 06HKHOBeHH 6aTePHN:
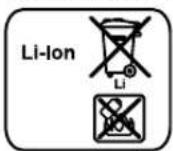
Li-Ion:
Mon, cna3BaIte yka3aHnraTb pa3dEn ,TpaHcnpTnpaHe", ctpaHnca 138.
IpaBata 3a H3MeHeHHa7a3eHH.
MaKeDoHcKn
Бe36eHocnHaNoMeHn
6e36eHocn HAnomeHH 3a 6atepckata CBETnka

IpoHTajTe Hn CNTe HANOMENu yNATCTBa 3a 6e36eHNOCT.
IpeUKHTe HACTaHAn Kako peyntat O He npinpKxyBaHe Do
6e36eHNCHHTe HANOMENu yNATCTBa MOKe Da npeIN3BKAaT
eneKTpuHeyap, noxap N/nn TeKKn NOpeHn.
Be monHme npouHTajTe Hn BnHMabajTe Ha 6e36eHCHnte HanomeHH ynatCTBa, wTO ce npHNOxEHn Ha 6aTepNJata Hn enEKeTpuHHot anapat.
PocanyBaJte rpnXnHBO co 6aTepeKcATA CBeTnIka. Batepeckata CBeTnIka Co3daJa Ka TOJIHa, Koja MoKe Da IOBeE Do 3rOJeMeHa ONaCHOCT ONoKap HIn Eeknlo3nJa.
Co 6atepnckata CBETnka He pa6oTe Bo OKONHa Kaede HMa onaHocT oEcknnoHa.
Bosch Power Tools 1609 92A 29E| (21.7.16)


MaKeIoHcNk|141
Kopnctete 6atepnn kon ce cooBetn Ha BaHnot npOn3bO od Bosch.Camoha ToJ hauHn 6atepnjata Ke ce 3aHTTN oD onacHO ppeonTOBapyBaHe.
Batepjuata Moke da ce ootetn Oocptne npedmetn kako ha np. KHHu HnH Wpaqunrep HnHaDbopeuho BnJaanhe. Moke da doje do Bhatpeuen Kpatok Cnoj Hbatepjuata Moke da ce 3ana, nyuTH qad, ekcnnpura HnDa ce nperpee.
Onnc ha npOn3BODOT MOKHOCTa
YnOTope6a co CooDBeTHa HAmeha
BaTePnckata CBETnIka e HameHeta 3a IpeHoCINBO, IpOCTOpHO BPeMeHcKn OrpAHueHO OCBETnyBaBe BO cyB BHATpeWeH NHaBOpWeH IpOCTOp H e E nOroHa 3a Bo6nuaeHO OCBETnyBaBe Ha IpOCTOpHn.
Nhyctpaunja Ha KOMNOHEHTN
HymepnpaBeto Ha cnKHTe CO KOMNOHEHTe OJHeCyBa Ha npKa3OT Ha 6aTePNCATA CBETNkA Ha rpaFNUkata CTpAHua.
1NaBaHa CBETnIkaTa
2 PpeKHyBaay3a BkyyBaBe/HcknyyBaBe
3Батурниа
4 Konue 3a otknuyBahe Ha 6aTepejata*
*OnnhaHata onpema npkkaKaHa ha cnKHe He e den cTaNdapHnot o6e Ha Hcnopaka. KomnnetHata onpema MoKe da ja HajTe Bo Hauata PporpaMa 3a onpema.
Texnukn noaotoi
| Бастески CBETПКИ GLI 12V-80 | |
| Б Proj на дe/ajтIKn | 3601 D37 V.. |
| HOMINAEN HANOH | V=12 |
| Вразетаеные на CBETПИната, okoly | MHN/Ah 590 |
| СразносянTek | Im 80 |
| Текина сordласно EPTA-Procedure 01:2014 | Кг 0,32 - 0,53* |
| Дозвoleна Temпература на okолината | |
| - по поны | °C 0...+45 |
| - по работа** и по складралье | °C -20...+50 |
| *Во зашистост od улочевенators baterija | |
| **огранчени щашина рpropri Temператури < 0 °C | |
| Од��сокот на освetedенITE objektи може за вида co палжна boja. | |
Bosch Power Tools 1609 92A 29E(21.7.16)


Latviešu | 167
Nenosedziet apgaismojo so galvu laika, kad akumulatora apgaismoanas lampa darbojas. Lampas darbibas laika t as apgaismoosa galva silst un var izraisit apdegumus, ja izdalitais siltums netiek aizvadits un uzkrjas.
Nelietojiet akumulatora apgaismoanas lampu, piedaloties ielu satiksme. Akumulatora apgaismoanas lampu nav atluts lietot ielu satiksmes regulesanai.
Pirms jebkuras daribas ar akumulatora apgaismoanas lampu (pirms tās montāzas, apkalposanas u. t. t.), ka ari lamps transportesanas un uzglabānas laikā iznemet no tās akumulatoru.
Nelaujiet berniem lietot akumulatora apgaismosanas lampu. Si lampa ir paredzeta profesionai lietoisanai. Berni ar to var nejausi apzilbinat viens otr vai ari ci-tas personas.
Neatveriet akumulatoru. Tas var radit isslegumu.

Sargajiet akumulatoru no karstuma, piemeram, no ilgstoas atrasanasaules staros vai uguns tuvuma, ka ari no udens un mitruna. Tasvar izraisit spradzenu.
Laikā, kad akumulators netiek lietots, nepielauijiet, lai ta kontakti saskartos ar saspraudēm, monetām, atslehām, naglām, skruvēm vai citiem nelieliem metāla prieksmetiem, kas varetu izraisit isslēgμu. Isslēgums starp akumul-tora kontaktiem var radīt apdegumus un but par celoni ugunsgrekam.
Nepareizi lietojot akumulatoru, no ta var izplust skidrais elektrolits. Nepie laujiet elektrilta nonaksanu saskaré ar adu. Ja tas tomér ir nejausi noticis, noskalojiet elektrilitu ar edeni. Ja elektrolits nonak acis, nekavejoties grie zieties pie ársta. No akumulatora izpludusais elektrolits var izsaukt ādas iekaismu vai pat apdegumu.
Bojajuma vai nepareizas lietoanas rezultata akumulators var izdalit kaitigus izgarojumus. Sada gadijumazvediniet telpu un, ja jutaties slikti, griezieties pie arsta. Izgarojumi var izraisit elpoanas celu kairinajumu.
Akumulatora uzladei lietojiet tikai tadu uzlades ierieki, ko ir ieteikusi elektroninstrumenta razotajfirma. Katra uzlades iereir paredzeta tikai noteikita tipa akumulatoram, un meginajums to lietot cita tipa akumulatoru uzladei var novest pie uzlades ierees un/vai akumulatora aizdegsanas.
Lietojiet akumulatoru vienigi kopar Bosch izstradajumu, kuram tas ir paredzets. Tikai ta akumulatoru iespejams pasargat no kaitigas parslodzes.
Asi prieksmeti, piemema, nagla vaiskruvgriezis, ka ari areja spekaiedarbiba var sabojat akumulatoru. Tas var radit iekseju isslegumu, ka rezultata akumulators var azdegties, dumot, eksplodet vai paskarst.

Bosch Power Tools 1609 92A 29E| (21.7.16)


Latviešu 171
Parsutiet akumulatoru tikai tad, ja ta korpss nav bojats. Aizlimejit valejos akumulata kontaktus un iesainojet akumulatoru ta, lai tas iesainojumā neparviietotos.
Ludzam ieverot ari ar akumulatoru parsutisanu saistitos nacionalos noteikumus, ja ta di pastav.
a a a a a a a a a a a a a a a a a a a a a a a a a a a a a a a a a a a a a a a a a a a a a a a a a a a a a a a a a a a a a a a
aagaaal lssdall aal .paw lksw uLs uBg psljall
JJI 8 JIJI 0
.△g j a@ldoXl aubgl pksololjlo

aui jie kll o ddo
a aagg g gglg g jal y gajll gaaal no g aal l aal 1 aagg 0e al aal l aal l aal ll g q bgc aall daasio 1aai all i aai /pSjllg kssy

:ba 1gJgJLJgJ
aJyI 2012/19/EU ygjggl I g JyI 2006/66/EG yg jggl I yg JyI g JyI g JyI g JyI g JyI g JyI g JyI g JyI g JyI g JyI g JyI g JyI g JyI g JyI g JyI g JyI g JyI g JyI g JyI g JyI g JyI g JyI g JyI g JyI g JyI g JyI
:UJUJI/psIJIJI
:gulU Ug|
.189 aJlll"Jlll" 0g j Jn Jlll oJy

.
pIddwXl oJgwo g nJbJI d
Lal lalg g aall alug g ssspsilw I c nlll ao jfo 2 gao jll g q nc uloglaall Lcg o saall gpwll lc jess
www.bosch-pt.com
pSclw u g y aS u b p d w k o jgoo a9jgww cgl s no ng
.1gig wlaio jc alwJUog
dJUwJI sic aaiIg iiaagll gagll lgljLg jSjPjL
JLg b gI Jluowl
g 1 g 1 g 1 g 1 g 1 g 1 g 1 g 1 g
J
Jdall
gui g
goo oo pjJalI aaij .53j
J-20300JJJ
+212(0)522400409/+212(0)522400615:JJI
service@outipro.ma:1gJU|
jll
Jiuw
julai auiolal abioJI
jIjJI-06000 aL
+213(0)982400992:JJI
+213(0)34201569:UuSLaJI
sav@siestal-dz.com:gJxI
uigj
Ug
99-25 1JUgS Uw JooJ.0
uugj uolj jnJ So .2014
+21671428770:
+21671354175:UuSlaJI
sotel2@planet.tn:gJU|
.
山
山
psjoll uSji
J 3 1
abluu
Lbxylg u
1 aall wJn o gblbi ygolg sJy alalll
.2labxlg uuiu alao uie bdo yjolly gajll auoall
2 1g lgl aio o b jy gjll aaoa
( 5) AD = 8
.aaal jgj no do saiw loic bao pJoJy aaoi J
g
IaIg"abwIg gJgJgJgJgJgJgJgJg
lo sic aag g a jla abwlg pksjll gjall lab! (ECP) aigjSJI
.05
ddJg dJUJI
J 1 J 1 1 1 1 1 1 1 1 1 1 1 1 1 1
Joueul Jluo pSjoll
I 1
Lguiu g
I 1 I I I I I I I I I I I I I I I I I I I I I I I I I I I I I I I I I I I I I I I I I I I I I I I I I I I I I I I I I

gI pSJU J
. 1g 1 g 1 g 1 g 1 g 1 g 1 g 1 g 1 g 1 g 1 g 1 g 1 g 1 g 1 g 1 g 1 g 1 g 1 g 1 g 1 g 1 g 1 g 1 g 1 g 1 g 1 g 1 g 1 g 1 g 1 g 1 g 1 g 1 g 1 g
A
gjolul
4
4.baoaUol
4 pSjJU eL
eauall wJy. pksjll aall lai eauall wJy j 0jll jn! gJy bgyuill liu Jp s kJy alaull n! .gJall pbl j pssjll aauall Paa W
.ajg alai sic lalg (..g g aaii, jll:la)
Jasssu Js s d. palsy bgsaalpdaasw y
. 10000000000000000000000000000000000000000000000000000000000000000000000000000000

UJl|195
(Li-Ion)
196 05uJoo" ouiu
wI bgaosuJuaigSJg
juiu o oglao g wg jl uo lo
n g u g w, t j l a w 1g w y w g j l w to d s j f j
t b g o j j d cllbl g g gl .d w g h w y l caleio g y k k
:duai j g j o oj ciu w j d jilg i o I caleio g k
www.bosch-pt.com
J Lw Ug W y Jn Jn Jn Jn Jn Jn Jn Jn Jn Jn Jn Jn Jn Jn Jn Jn Jn Jn Jn Jn Jn Jn Jn Jn Jn Jn Jn Jn Jn Jn Jn Jn Jn Jn Jn Jn Jn Jn Jn Jn Jn Jn Jn Jn Jn Jn Jn Jn Jn Jn J n J n J n J n J n J n J n J n J n J n J n J n J n J n J n J n J n J n J n J n J n J n J n J n J n J n J n J n J n J n J n J n J n J n J n J n J n
L
L) "Electronic Cell Protection (ECP)" du wu (Li-1on) yu yu u yu u yu u yu u yu u yu u yu u yu u yu u yu u yu u yu u yu u yu u yu u yu u yu u yu u yu u yu u yu u yu u yu u yu u yu u yu u yu u yu u yu u yu u yu u yu u yu u yu u
g 1j kIogJn dwh gol j Jy oJgJ Jlog
.
UJl|199
J 1 J 1 J 1 J 1 J 1 J 1 J 1 J 1 J 1 J 1 J 1 J 1 J 1 J 1 J 1 J 1 J 1 J 1 J 1 J 1 J 1 J 1 J 1 J 1 J 1 J 1 J 1 J 1 J 1 J 1 J 1 J 1 J 1 J 1 J