DPSW-220-01 - Welding machine MSW - Free user manual and instructions
Find the device manual for free DPSW-220-01 MSW in PDF.

| Product type | Spot welding machine for dent removal |
| Model | MSW-DPSW-220-01 |
| Rated voltage | 230 V / 50 Hz |
| Rated power | 3000 W |
| Rated input current | 16 A |
| Maximum instantaneous current | 6800 A |
| Protection rating | IP21 |
| Max. spot welding thickness | 1.2 mm |
| Dimensions (L x D x H) | 465 x 245 x 270 mm |
| Weight | 27.3 kg |
| Ground cable length | 150 cm |
| Gun cable length | 150 cm |
| Welding functions | 7 functions: carbon rod heating, stud welding, wave line welding, pull hammer, triangular spot welding, single-sided spot welding, etc. |
| Welding modes | Manual and automatic (intelligent) |
| Protection system | Overheat protection with automatic shutdown and audible alarm |
| Automatic pulse system | Available for functions 4 and 6, reduces carbonization |
| Required power supply | Single-phase 230 V, circuit breaker > 60 A, copper cable 4 mm² max. 20 m |
| Maintenance | Clean and polish welding surfaces, check connections, use original accessories |
| Safety | Wear leather gloves, apron, safety shoes, face shield; avoid humidity; disconnect before maintenance |
| Spare parts and repairability | Use only original MSW accessories; maintenance by qualified technician; do not modify the machine |
| General information | Designed for industrial and professional use; compatible with automotive bodies |
Frequently Asked Questions - DPSW-220-01 MSW
User questions about DPSW-220-01 MSW
0 question about this device. Answer the ones you know or ask your own.
Ask a new question about this device
Download the instructions for your Welding machine in PDF format for free! Find your manual DPSW-220-01 - MSW and take your electronic device back in hand. On this page are published all the documents necessary for the use of your device. DPSW-220-01 by MSW.
USER MANUAL DPSW-220-01 MSW
This User Manual has been translated using machine translation. We have made every effort to ensure the translation is accurate, but please note that automated translations are not perfect and are not meant to replace human translators. The official version of the User Manual is in English. Any differences between the translated version and the original English are not legally binding. If you have any questions about the accuracy of the translation, please refer to the English version, which is the official reference. More language versions are available upon request via info@expondo.com.
Technical data
| Parameter description | Parameter value |
| Product name | Dent Puller Spot Welder |
| Model | MSW-DPSW-220-01 |
| Rated voltage [V~] / Frequency [Hz] | 230 / 50 |
| Rated power [W] | 3000 |
| Rated Input current [A] | 16 |
| Protection rating IP | IP21 |
| Ground cable [cm] | 150 |
| Pistol cable length [cm] | 150 |
| Spot welding thickness [mm] | 1.2 |
| Instant maximum current [A] | 6800 |
| Rated Input current [A] | 16 |
| Dimensions [Width x Depth x Height; mm] | 465 x 245 x 270 |
| Weight [kg] | 27.3 |
1. Precautions for power-on:
- Ensure that the product is connected to the grounding wire and that the grounding power wire is in good condition. (Any screw on the machine shell can be grounded.)
- Ensure that the workbench is connected to the grounding device. (Any screw on the machine shell can be grounded.)
- Prevent the operator from contacting the metal parts to be welded when there is no protection or when wearing wet clothes.
- Avoid touching the area to be welded.
- Do not perform spot welding in very humid areas or on wet floors.
- Do not use frayed or cut cables for welding. Check that the cable has proper insulation, and inspect for exposed copper wires, loose connections, leaks, and other potential hazards.
- When replacing the electrode wire, ensure the machine is turned off first.
- Before all inspections and maintenance, turn off the machine and disconnect the power plug directly.
2. Protection of eyes and body:
- When welding, operators should wear protective clothing to prevent molten metal from splashing, including leather gloves, leather aprons, safety shoes, and either a face shield or protective glasses.
- Eye protection should also be used when polishing or hammering.
- Avoid wearing conductive objects such as rings, watches, and jewelry, as they may cause severe burns.
- All protective signs and marking boards must be in good condition and securely positioned.
3. Power supply:
• This series is equipped with single-phase power options: 230V,
- Note: If the circuit breaker trips, check whether it meets the required specifications for use and ensure it is of adequate quality.
The equipment is designed for industrial and professional environments. In various settings, achieving full electromagnetic compatibility may be challenging due to conducted interference and radiation.
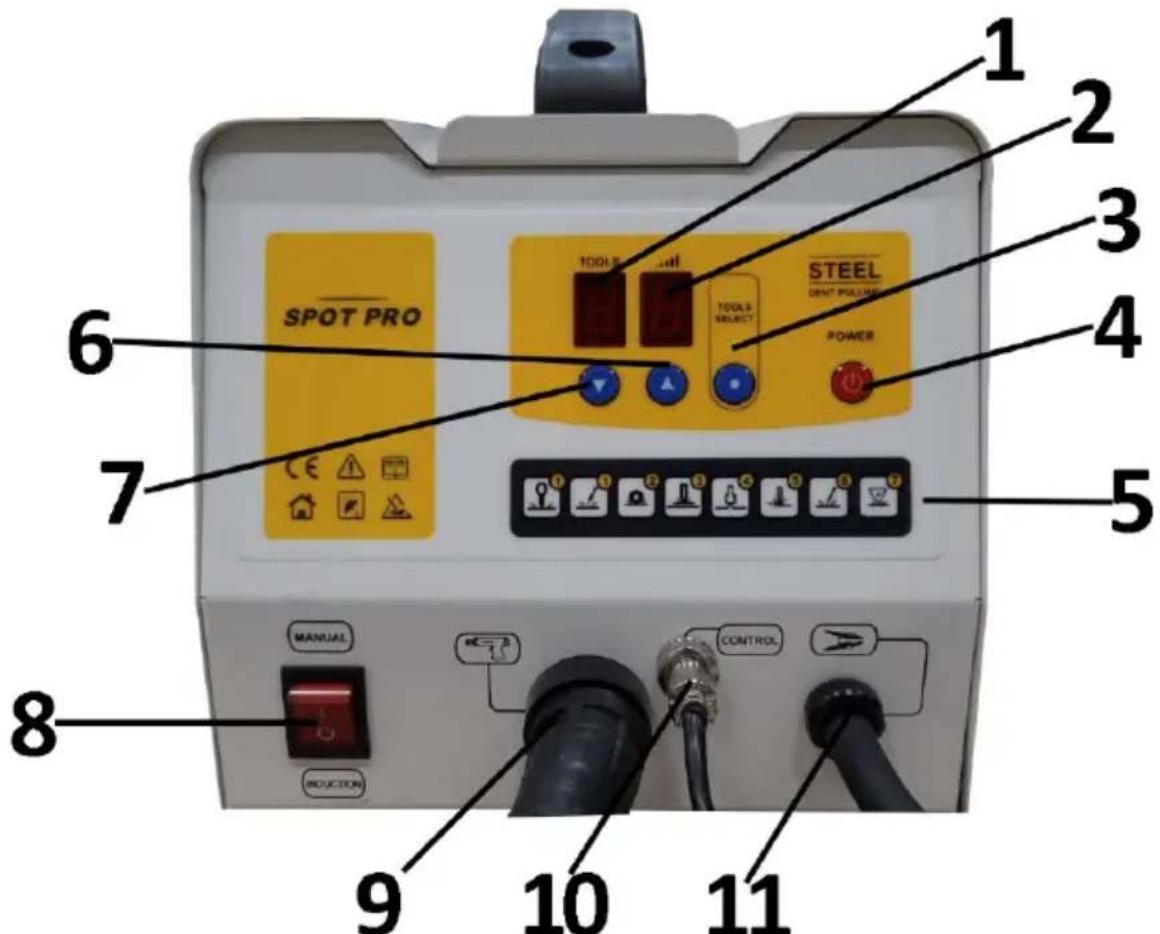
4. The function of each part
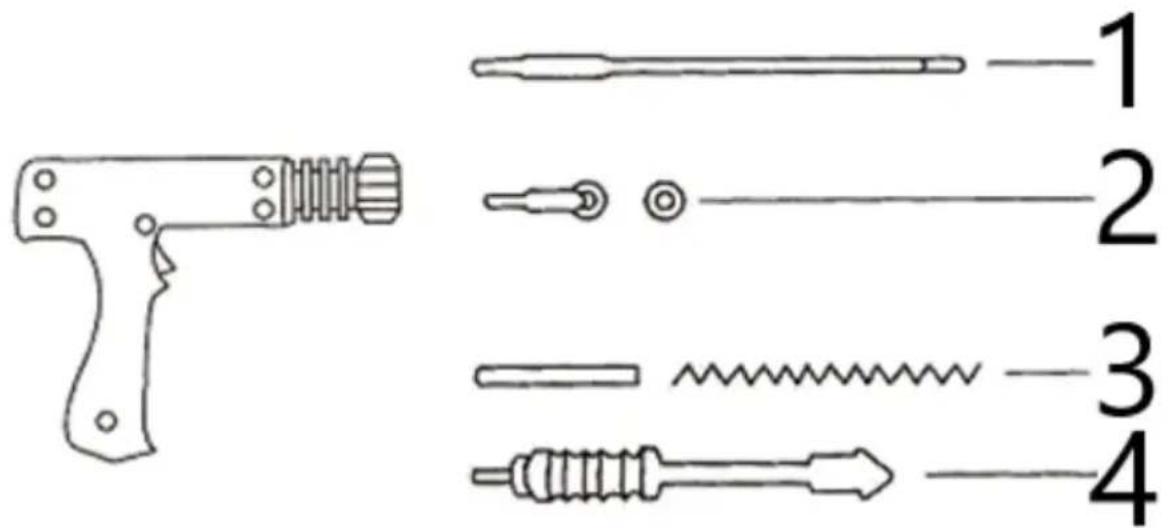
| 1 | Carbon rod heating |
| 2 | Meson Welding |
| 3 | Wave line welding |
| 4 | Pulling Hammer |
6. Operation
Panel operation:
- Connect the product to an appropriate power source, then press the switch. The display will show function (on the left) and power (on the right).
- To adjust the power intensity (current level), use the arrow up or arrow down buttons.
- To change the function, press the tools select button. Once in function selection mode, you can use the arrow up or arrow down buttons to select the desired function number.
- Manual welding and intelligent welding:
- Manual mode: Connect the torch switch connector and set the switch to manual mode.
- Smart mode: There is no need to disconnect the torch switch connector; simply set the switch to smart mode.

5
| 1 | Function adjustment | 7 | Current/Function - |
| 2 | Current regulation | 8 | Switch between intelligent and manual welding |
| 3 | Function selection | 9 | Welding gun interface |
| 4 | Power switch | 10 | Control interface |
| 5 | Function code | 11 | Grounding wire |
| 6 | Current/Function + |
 | |||
| OT meson welding | Data Delicate repair | Circular meson welding | Wave line welding |
EN
| Hot flattering | Single-side spot welding | Carbon rod heating | Triangle spot welding |
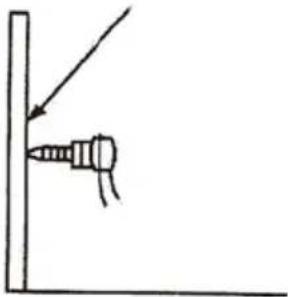
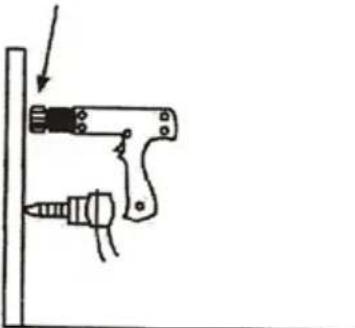
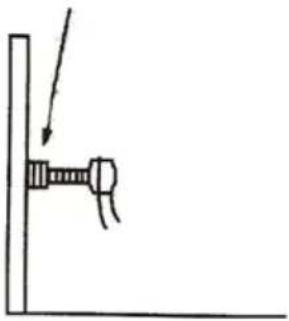
Grounding operation
| Put the grounding wire in the position that need to be repaired | Puth the welding torch near the ground wire for welding | Tighten the nut of the grounding head |
 |  |  |
Welding operation
The machine supports both manual and automatic welding modes:
- The host automatically detects the short-circuit condition of the welding gun, generating a welding spot within 1 second.
- To continue welding, disconnect the welding gun from the welding surface for 0.5 seconds before proceeding to the next point. Welding can be performed sequentially in this manner.
- Manual mode: When switched to manual mode, use the gun switch to control welding manually.
Host overheating protection system
The product includes an automatic overheating protection system. In cases of excessive use, the machine will automatically pause for a few minutes to cool down. During this period, the buzzer will sound continuously with a “buzz... buzz... buzz...” tone.
Automatic pulse system
The product is equipped with an automatic pulse system, available in functions 4 and 6. To activate, ensure full contact between the welding gun and the steel plate. The host will automatically detect the short circuit of the welding gun and start operation within 1 second. This feature reduces carbonization, enhancing both work efficiency and equipment longevity.
7. Solutions to common problems:
- Welding technique: Do not use excessive force.
○ Welding can be strong and secure with a light touch. Applying force can result in weaker welds.
- Grounding device compatibility: Only use the original grounding device.
The original grounding device is optimized for this machine. The tip of the grounding device serves as a stabilizer, while the copper nut conducts electricity. Ensure the nut is tightly secured for effective grounding.
- Power supply compliance: Ensure the power source meets the machine's requirements, as it needs a high instantaneous current during operation.
- The power cord should be a copper-core cable with a minimum national standard of 4 square millimeters, and no longer than 20 meters.
- The power cord should be a continuous length, without any plugs, sockets, ground drags, wiring splices, or cable trays.
- Use an air switch or leakage protector rated above 60A.
- Preparation of welding surfaces: Thoroughly clean and polish welding parts.
○ Original sheet metal often has electrophoresis and phosphating layers under the primer, which may not be visible but can impact welding quality. Ensure the welding area (including the grounding point) is fully sanded. For best results, use a wire grinding head or diamond grinder to remove any old paint effectively.
- Check component connections for firmness:
- Verify the connection between the welding gun wire and the host to ensure there is no looseness.
○ Inspect connections between the welding gun and other components like the pulling hammer and meson.
- Tighten the nut on the grounding device as needed.
8. Safety regulations and general precautions
The machine's manufacturer is not liable for any damage to persons or property caused by the following situations:
- Modifying the machine's safety features or interfering with its operation without authorization.
- Failing to follow the instructions and requirements outlined in this manual.
- Modifying the product’s performance without approval.
• Using non-original or incompatible accessories.
- Not complying with the regulations and standards of the country where the machine is installed.
Notice:
- Disconnect the power plug before disassembling the machine's casing.
- Ensure the operator has received appropriate training before using the machine.
- Maintenance should be performed only by a professionally qualified technician.
- The operator is responsible for protecting the car manufacturer's electrical and electronic equipment (e.g., computer display panel, radio, alarm, airbag).
- Be cautious: the electrode, welding arm, and other conductive parts can reach very high temperatures and may stay hot for some time after the machine stops operating. To prevent burns, allow components to cool before handling and ensure regular preventive maintenance inspections are conducted.
9. Circuit schematic
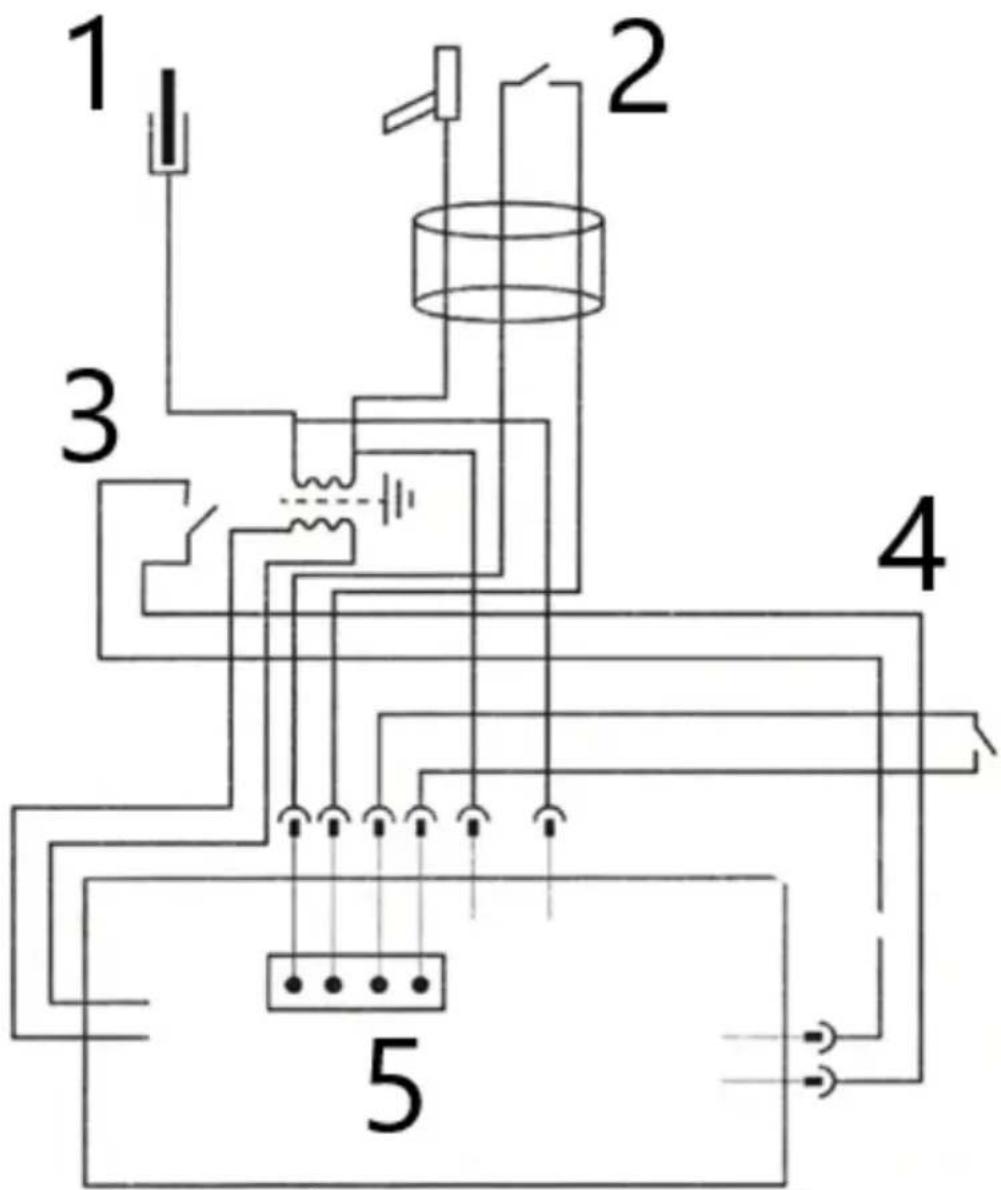
| 1 | Ground Cable |
| 2 | Gun Cable |
| 3 | Thermo Switch |
| 4 | Mode Switch |
| 5 | Control Board |

| 1 | Verwarming van koolstofstaven |
| 2 | Mesonlassen |
| 3 | Golflijn lassen |
| 4 | Trekhamer |
6. Bediening
Paneelbediening:
| 1 | Aquecimento de haste de carbono |
| 2 | Soldagem de mésons |
| 3 | Soldagem por linha de onda |
| 4 | Martelo de puxar |
6. Operação
Operação do painel:
| 1 | Vyhrievanie uhlíkovej tyče |
| 2 | Meson Welding |
| 3 | Zváranie vlnovou čiarou |
| 4 | Ťahacie kladivo |
6. Prevádzka
Obsluha panela:
natural_image
Simple line drawing of a screwdriver inserted into a corner, no text or symbols present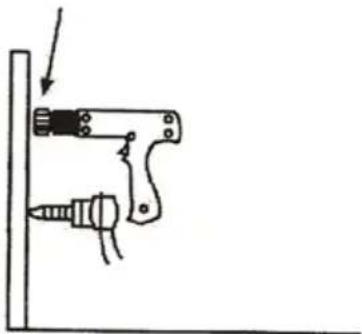
natural_image
Simple line drawing of a mechanical device with a screw and lever, no text or symbols present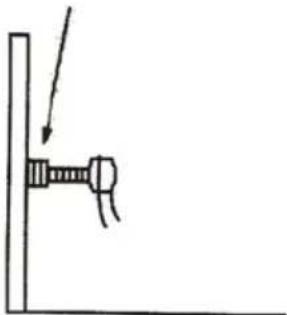
natural_image
Simple line drawing of a screw being inserted into a vertical post (no text or symbols)| 1 | Grijanje karbonske šipke |
| 2 | Mezonsko zavarivanje |
| 3 | Zavarivanje valovitom linijom |
| 4 | Čekić za povlačenje |
6. Operacija
Rad ploče:
- Spojite proizvod na odgovarajući izvor napajanja, zatim pritisnite prekidač. Zaslon će prikazati funkciju (lijevo) i snagu (desno).
- Za podešavanje intenziteta snage (trenutne razine) koristite tipke sa strelicom gore ili strelicom dolje.
- Za promjenu funkcije pritisnite gumb za odabir alata . Kada ste u načinu rada za odabir funkcije, možete koristiti tipke sa strelicom gore ili strelicom dolje za odabir željenog broja funkcije.
- Ručno zavarivanje i inteligentno zavarivanje:
- Ručni način rada: Spojite konektor prekidača gorionika i postavite prekidač na ručni način rada.
- Pametni način rada: Nema potrebe za isključivanjem konektora prekidača gorionika; jednostavno postavite prekidač na pametni način rada.
5
| 1 | Podešavanje funkcije | 7 | Struja/funkcija - |
| 2 | Trenutni propis | 8 | Prebacivanje između inteligentnog i ručnog zavarivanja |
| 3 | Odabir funkcije | 9 | Sučelje pištolja za zavarivanje |
| 4 | Prekidač napajanja | 10 | Upravljačko sučelje |
| 5 | Kod funkcije | 11 | Žica za uzemljenje |
| 6 | Struja/funkcija + |
 | |||
OT mezonsko zavarivanje | Data Delikatan popravak | Kružno mezonsko zavarivanje | Zavarivanje valovitom linijom |
| Vruće laskanje | Jednostrano točkasto zavarivanje | Grijanje karbonske šipke | Trokutno točkasto zavarivanje |
For the disposal of the device please consider and act according to the national and local rules and regulations.
CONTACT
expondo Polska sp. z o.o. sp. k.