
PowerSaw 250/18V P4A - Saw GARDENA - Free user manual and instructions
Find the device manual for free PowerSaw 250/18V P4A GARDENA in PDF.

| Product type | Battery chainsaw |
| Brand | Gardena |
| Model | PowerSaw 250/18V P4A |
| Reference | 14790 |
| Guide bar length | 250 mm |
| Chain speed (at idle) | 8 m/s |
| Chain type | Oregon 90PX040X |
| Guide bar type | Oregon 104MLEA041 |
| Drive link thickness | 1.1 mm |
| Oil tank capacity | 150 ml |
| Weight (without chain, bar, oil, battery) | 3.3 kg |
| Battery voltage | 18 V DC |
| Included battery capacity | 4.0 Ah (Li-Ion) |
| Battery system | POWER FOR ALL PBA 18V |
| Charging time (4.0 Ah battery) | Approx. 228 min |
| Sound pressure level (LpA) | 87 dB(A) |
| Guaranteed sound power level (LWA) | 101 dB(A) |
| Hand-arm vibration (ahw) | 3 m/s² |
| Charger input voltage | 220-240 V AC, 50-60 Hz |
| Charging temperature range | 0 °C to +35 °C |
| Protection class | II |
| Safety features | Chain brake, motor brake, start lock, front/rear hand guard, chain catcher |
| Lubrication | Automatic, with recommended bio chain oil |
| Tool-free chain tensioning | Yes (SDS) |
| Intended use | Cutting wood and small trees (diameter < guide bar length) |
Frequently Asked Questions - PowerSaw 250/18V P4A GARDENA
User questions about PowerSaw 250/18V P4A GARDENA
0 question about this device. Answer the ones you know or ask your own.
Ask a new question about this device
Download the instructions for your Saw in PDF format for free! Find your manual PowerSaw 250/18V P4A - GARDENA and take your electronic device back in hand. On this page are published all the documents necessary for the use of your device. PowerSaw 250/18V P4A by GARDENA.
USER MANUAL PowerSaw 250/18V P4A GARDENA
natural_image
Technical line drawing of a chain-link robotic device (no text or symbols)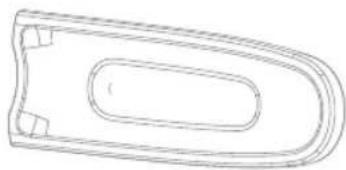
natural_image
Line drawing of a U-shaped mechanical component with a central oval cutout (no text or symbols)PowerSaw 250/18V P4A Art. 14790
Original instructions
- SAFETY INSTRUCTIONS ..... 16
- ASSEMBLY 20
- OPERATION 22
- MAINTENANCE....24
- STORAGE....24
- TROUBLESHOOTING ..... 24
- TECHNICAL DATA....25
- ACCESSORIES/SPARE PARTS .....26
- WARRANTY / SERVICE....26
- DISPOSAL....26
1. SAFETY INSTRUCTIONS
1.1 Symbols on the product
→ Read operator's manual.

→ Do not expose the product to rain.

→ Wear safety goggles and hearing protection.

→ Always use the chainsaw with both hands.

→ Be careful of chainsaw kickback and avoid touching the guide bar tip.
1.2 General safety instructions
1.2.1 General machine safety warnings

WARNING!
Read all safety warnings, instructions, illustrations and specifications provided with this machine.
Failure to follow all instructions listed below may result in electric shock, fire and/or serious injury.
Save all warnings and instructions for future reference.
The term „machine“ in the warnings refers to your mains-operated (corded) machine or battery-operated (cordless) machine.
1) Work area safety
a) Keep work area clean and well lit. Cluttered or dark areas invite accidents.
b) Do not operate machines in explosive atmospheres, such as in the presence of flammable liquids, gases or dust. Machines create sparks which may ignite the dust or fumes.
c) Keep children and bystanders away while operating a machine. Distractions can cause you to lose control.
2) Electrical safety
a) Machine plugs must match the outlet. Never modify the plug in any way. Do not use any adapter plugs with earthed (grounded) machines. Unmodified plugs and matching outlets will reduce risk of electric shock.
b) Avoid body contact with earthed or grounded surfaces, such as pipes, radiators, ranges and refrigerators. There is an increased risk of electric shock if your body is earthed or grounded.
c) Do not expose machines to rain or wet conditions.
Water entering a machine will increase the risk of electric shock.
d) Do not abuse the cord. Never use the cord for carrying, pulling or unplugging the machine. Keep cord away from heat, oil, sharp edges or moving parts. Damaged or entangled cords increase the risk of electric shock.
e) When operating a machine outdoors, use an extension cord suitable for outdoor use. Use of a cord suitable for outdoor use reduces the risk of electric shock.
f) If operating a machine in a damp location is unavoidable, use a residual current device (RCD) protected supply. Use of an RCD reduces the risk of electric shock.
3) Personal safety
a) Stay alert, watch what you are doing and use common sense when operating a machine. Do not use a machine while you are tired or under the influence of drugs, alcohol or medication.
A moment of inattention while operating machines may result in serious personal injury.
b) Use personal protective equipment. Always wear eye protection. Protective equipment such as a dust mask, non-skid safety shoes, hard hat or hearing protection used for appropriate conditions will reduce personal injuries.
c) Prevent unintentional starting. Ensure the switch is in the off-position before connecting to power source and/or battery pack, picking up or carrying the machine. Carrying machines with your finger on the switch or energising machines that have the switch on invites accidents.
d) Remove any adjusting key or wrench before turning the machine on. A wrench or a key left attached to a rotating part of the machine may result in personal injury.
e) Do not overreach. Keep proper footing and balance at all times. This enables better control of the machine in unexpected situations.
f) Dress properly. Do not wear loose clothing or jewellery. Keep your hair and clothing away from moving parts. Loose clothes, jewellery or long hair can be caught in moving parts.
g) If devices are provided for the connection of dust extraction and collection facilities, ensure these are connected and properly used. Use of dust collection can reduce dust-related hazards.
h) Do not let familiarity gained from frequent use of machines allow you to become complacent and ignore machine safety principles. A careless action can cause severe injury within a fraction of a second.
4) Machine use and care
a) Do not force the machine. Use the correct machine for your application. The correct machine will do the job better and safer at the rate for which it was designed.
b) Do not use the machine if the switch does not turn it on and off. Any machine that cannot be controlled with the switch is dangerous and must be repaired.
c) Disconnect the plug from the power source and/or remove the battery pack, if detachable, from the machine before making any adjustments, changing accessories, or storing machines. Such preventive safety measures reduce the risk of starting the machine accidentally.
d) Store idle machines out of the reach of children and do not allow persons unfamiliar with the machine or these instructions to operate the machine. Machines are dangerous in the hands of untrained users.
e) Maintain machines and accessories. Check for misalignment or binding of moving parts, breakage of parts and any other condition that may affect the machine's operation. If damaged, have the machine repaired before use. Many accidents are caused by poorly maintained machines.
f) Keep cutting machines sharp and clean. Properly maintained cutting machines with sharp cutting edges are less likely to bind and are easier to control.
g) Use the machine, accessories and machine bits etc. in accordance with these instructions, taking into account the working conditions and the work to be performed. Use of the machine for operations different from those intended could result in a hazardous situation.
h) Keep handles and grasping surfaces dry, clean and free from oil and grease. Slippery handles and grasping surfaces do not allow for safe handling and control of the machine in unexpected situations.
5) Battery tool use and care
a) Recharge only with the charger specified by the manufacturer. A charger that is suitable for one type of battery pack may create a risk of fire when used with another battery pack.
b) Use machines only with specifically designated battery packs. Use of any other battery packs may create a risk of injury and fire.
c) When battery pack is not in use, keep it away from other metal objects, like paper clips, coins,
keys, nails, screws or other small metal objects, that can make a connection from one terminal to another. Shorting the battery terminals together may cause burns or a fire.
d) Under abusive conditions, liquid may be ejected from the battery; avoid contact. If contact accidentally occurs, flush with water. If liquid contacts eyes, additionally seek medical help. Liquid ejected from the battery may cause irritation or burns.
e) Do not use a battery pack or machine that is damaged or modified. Damaged or modified batteries may exhibit unpredictable behaviour resulting in fire, explosion or risk of injury.
f) Do not expose a battery pack or machine to fire or excessive temperature. Exposure to fire or temperature above 130 °C may cause explosion.
g) Follow all charging instructions and do not charge the battery pack or machine outside the temperature range specified in the instructions.
Charging improperly or at temperatures outside the specified range may damage the battery and increase the risk of fire.
6) Service
a) Have your machine serviced by a qualified repair person using only identical replacement parts. This will ensure that the safety of the machine is maintained.
b) Never service damaged battery packs. Service of battery packs should only be performed by the manufacturer or authorized service providers.
1.2.2 Safety instructions for chain saws
1) General chain saw safety warnings:
a) Keep all parts of the body away from the saw chain when the chain saw is operating. Before you start the chain saw, make sure the saw chain is not contacting anything. A moment of inattention while operating chain saws may cause entanglement of your clothing or body with the saw chain.
b) Always hold the chain saw with your right hand on the rear handle and your left hand on the front handle. Holding the chain saw with a reversed hand configuration increases the risk of personal injury and should never be done.
c) Hold the chain saw by insulated gripping surfaces only, because the saw chain may contact hidden wiring. Saw chains contacting a „live“ wire may make exposed metal parts of the chain saw „live“ and could give the operator an electric shock.
d) Wear eye protection. Further protective equipment for hearing, head, hands, legs and feet is recommended. Adequate protective equipment will reduce personal injury from flying debris or accidental contact with the saw chain.
e) Do not operate a chain saw in a tree, on a ladder, from a rooftop, or any unstable support. Operation of a chain saw in this manner could result in serious personal injury.
f) Always keep proper footing and operate the chain saw only when standing on fixed, secure and level surface. Slippery or unstable surfaces may cause a loss of balance or control of the chain saw.
g) When cutting a limb that is under tension, be alert for spring back. When the tension in the wood fibres is released, the spring loaded limb may strike the operator and/or throw the chain saw out of control.
h) Use extreme caution when cutting brush and saplings.
The slender material may catch the saw chain and be whipped toward you or pull you off balance.
i) Carry the chain saw by the front handle with the chain saw switched off and away from your body. When transporting or storing the chain saw, always fit the guide bar cover.
Proper handling of the chain saw will reduce the likelihood of accidental contact with the moving saw chain.
j) Follow instructions for lubricating, chain tensioning and changing the bar and chain. Improperly tensioned or lubricated chain may either break or increase the chance for kickback.
k) Cut wood only. Do not use chain saw for purposes not intended. For example: do not use chain saw for cutting metal, plastic, masonry or non-wood building materials. Use of the chain saw for operations different than intended could result in a hazardous situation.
m) This chain saw is not intended for tree felling. Use of the chain saw for operations different than intended could result in serious injury to the operator or bystanders.
2) Causes and operator prevention of kickback
Kickback may occur when the nose or tip of the guide bar touches an object, or when the wood closes in and pinches the saw chain in the cut.
Tip contact in some cases may cause a sudden reverse reaction, kicking the guide bar up and back towards the operator.
Pinching the saw chain along the top of the guide bar may push the guide bar rapidly back towards the operator.
Either of these reactions may cause you to lose control of the saw which could result in serious personal injury. Do not rely exclusively upon the safety devices built into your saw. As a chain saw user, you should take several steps to keep your cutting jobs free from accident or injury.
Kickback is the result of chain saw misuse and/or incorrect operating procedures or conditions and can be avoided by taking proper precautions as given below:
a) Maintain a firm grip, with thumbs and fingers encircling the chain saw handles, with both hands on the saw and position your body and arm to allow you to resist kickback forces.
Kickback forces can be controlled by the operator, if proper precautions are taken. Do not let go of the chain saw.
b) Do not overreach and do not cut above shoulder height. This helps prevent unintended tip contact and enables better control of the chain saw in unexpected situations.
c) Only use replacement guide bars and saw chains specified by the manufacturer. Incorrect replacement guide bars and saw chains may cause chain breakage and/or kickback.
d) Follow the manufacturer's sharpening and maintenance instructions for the saw chain.
Decreasing the depth gauge height can lead to increased kickback.
1.2.3 Explanation of chainsaw safety features Switch-on lock [Fig. A1]
The switch-on lock ⑫ prevents the start lever ⑩ from being pressed when the chainsaw is switched off. This prevents unintentional startup.
Motor brake
The motor brake stops the saw chain as soon as the start lever ⑩ is released. This reduces the risk of injury from a running saw chain.
Front hand guard [Fig. A1]
The front hand guard ① protects the left hand from being injured by the saw chain if the saw chain jumps out of the notch in the guide bar ④ or breaks.
Chain brake [Fig. A1]
The front hand guard ① is also the chain brake handle①.
The chain brake is disabled when the chain brake handle ① is pulled backwards and locked.
The chain brake is enabled when the chain brake handle ① is pressed forwards toward the guide bar ④. This then blocks the running saw chain in a fraction of a second.
The chain brake is enabled:
- If the chain brake handle ① is pushed forwards towards the guide bar ④ with your left hand (to check the function) or
- If your wrist pushes the chain brake handle ① forwards due to kickback.
The chain brake cannot prevent kickback. It only reduces the risk of injury if the guide bar ④ strikes the user's body in the event of kickback.
Before using the chainsaw, always check that the chain brake is working properly in the working position.
If the chain brake does not work, you must not use the chainsaw. In this case, contact GARDENA Service.
Rear hand guard [Fig. A1]
The rear hand guard ⑧ protects the right hand from being injured by the saw chain if the saw chain jumps out of the notch in the guide bar ④ or breaks.
Chain guard [Fig. A1]
The chain guard ② protects against injuries caused by the saw chain during transport and storage.
Chain catcher [Fig. A1]
The chain catcher ⑥ is located in the sprocket cover ⑦ and prevents the saw chain from being thrown toward the user if the saw chain jumps out of the notch in the guide bar ④ or breaks.
Setting the correct chain tension can prevent the saw chain from jumping out of the notch in the guide bar④ or breaking (see "2.4 Tightening the saw chain [Fig. A4]").
Error LED [Fig. 04]
The error LED ⓦ indicates battery and chainsaw faults (see "6.1 Error table").
1.3 Additional safety instructions
1.3.1 Intended use
The GARDENA Battery Chainsaw is intended for cutting wood and smaller trees (trunk diameter no larger than the length of the guide bar).
The product is not suitable for continuous operation (professional operation).

DANGER!
Risk of injury!
The chainsaw is not suitable for tree felling (trunk diameter greater than the length of the guide bar).
→ Do not use the chainsaw for tree felling.
1.3.2 Safety instructions for batteries and battery chargers

Read all safety warnings and instructions. Failure to follow the warnings and instructions may result in electric shock, fire and/or serious injury.
→ Store these instructions in a safe place.
Only use the charger if you can fully evaluate all functions and carry them out without restrictions, or if you have received corresponding instructions.
→ Do not use the product in explosive atmospheres.
→ Supervise children during use, cleaning and maintenance. This will ensure that children do not play with the charger.
→ Only charge lithium-ion batteries of the POWER FOR ALL system type PBA 18V with a capacity of 1.5 Ah or more (5 battery cells or more). The battery voltage must match the battery charging voltage of the charger. Do not charge any nonrechargeable batteries.
Otherwise there is a risk of fire and explosion.

Only use the battery charger in closed rooms and keep it away from moisture.
Water entering a power tool will increase the risk of electric shock.
→ Keep the battery charger clean. Dirt poses a risk of electric shock.
→ Always check the battery charger, cable and plug before use. Stop using the charger if you discover any damage. Do not open the charger yourself, and have it repaired only by a qualified specialist using only original replacement parts. Damaged chargers, cables and plugs increase the risk of electric shock.
→ Do not operate the battery charger on easily combustible surfaces (e.g. paper, textiles etc.) or in combustible environments.
There is a risk of fire due to the charger heating up during operation.
→ If the connecting cable needs replacing, this must be carried out by GARDENA or by an authorised after sales service centre for GARDENA power tools to avoid safety hazards.
→ These safety instructions apply only to lithium-ion batteries of the POWER FOR ALL system PBA 18V.
→ Use only battery chargers that are recommended by the manufacturer to charge the batteries. A battery charger that is suitable for one type of battery may cause a fire hazard if used with other batteries.
→ Vapours may escape if the battery is damaged or used improperly. The battery can set alight or explode. Ensure the area is well ventilated and seek medical attention should you experience any adverse effects. The vapours may irritate the respiratory system.
→ If the battery is defective, liquid may leak out and wet adjacent objects. Check affected parts. Clean these parts or change them if necessary.
→ If used incorrectly or if the battery is damaged, flammable liquid may escape from the battery; Contact with this liquid should be avoided. If contact accidentally occurs, flush with water. If the liquid comes into contact with your eyes, seek additional medical attention.
Liquid ejected from the battery may cause irritation or burns.
→ Only use the battery in POWER FOR ALL system partner products.
POWER FOR ALL-marked 18V batteries are fully compatible with the following products: all 18V POWER FOR ALL system partner products.
→ Observe the battery recommendations in the operator's manual for your product. This is the only way to operate the battery and the product safely and to protect the batteries from dangerous overloading.
→ Only charge the batteries using battery chargers recommended by the manufacturer or by POWER FOR ALL system partners. A battery charger that is suitable for a certain type of battery poses a fire hazard when used with other batteries (battery type: PBA 18V etc. / Compatible battery chargers: AL 18 etc.).
→ The battery is supplied partially charged. To ensure full battery capacity, fully charge the battery in the charger before using your power tool for the first time.
→ Keep batteries out of the reach of children.
→ Do not open the battery. There is a risk of short-circuiting.
→ Do not short-circuit the battery. When the battery is not in use, keep it away from paper clips, coins, keys, nails, screws or other small metal objects, that can make a connection from one terminal to another.
A short circuit between the battery contacts may result in burns or fire.
→ The battery contacts can be hot after use. Be careful of hot contacts when removing the battery.
→ The battery can be damaged by sharp objects such as a nail or screwdriver or by external force.
An internal short circuit may occur, causing the battery to burn, smoke, explode or overheat.
→ Never service damaged battery packs. Service of battery packs should only be performed by the manufacturer or authorised service providers.
→
Protect the battery from heat, including prolonged exposure to sunlight, fire, dirt, water and moisture. There is a risk of explosion and short-circuiting.
→ Only operate and store the battery at an ambient temperature between - 20 °C and
+50 °C. Do not leave the battery in a car in summer, for example. At temperatures < 0 °C, performance may be reduced depending on the device.
→ Only charge the battery at ambient temperatures between 0 °C and +45 °C. Charging at temperatures outside this range can damage the battery or increase the risk of fire.
→ After use, allow the battery to cool down for at least 30 minutes before charging or storing it.
1.3.3 Additional electrical safety instructions

DANGER!
Risk of cardiac arrest!
The product generates an electromagnetic field during operation. This electromagnetic field may affect the functionality of active or passive medical implants (e.g. pacemakers), which may result in serious injury or death.
→ Consult your doctor and the manufacturer of your implant before using this product.
1.3.4 Additional personal safety instructions
→ Follow all instructions when cleaning accumulated material from the chainsaw, storing it or performing maintenance tasks. Make sure that the switch is switched off and the battery is removed. Unexpected operation of the chainsaw when removing accumulations of material or during maintenance can result in serious injury.
Personal protective equipment [Fig. S1]:
When using this chainsaw, the user must wear the following proper protective clothing:
- Close-fitting protective clothing,
– Safety shoes with fixed soles, shock-proof toe caps and cut protection,
– Gloves with cut protection (protective gloves), - Protective goggles or a face shield,
- Ear protectors,
- Protective helmet (in case of danger due to falling objects).
Personal protective equipment is available from suitable specialist dealers.
2. ASSEMBLY

DANGER!
Saw chains can cause lacerations
If the product starts unintentionally, people can be injured by the saw chain.
→ Remove the battery before assembling the product.
→ Wear protective gloves.
2.1 Scope of supply
| Art. No.14790-20 | Art. No.14790-55 | |
| Battery chainsaw | x | x |
| Chain guard x x | ||
| Battery charger | x | - |
| Battery (4.0 Ah) | x | - |
| Operator's manual | x | x |
2.2 Key [Fig. A1]
| 1 Front hand guard | 7 Sprocket cover | 13 Cover latch |
| 2 Chain guard | 8 Rear hand guard | 14 Chain tensioner |
| 3 Spiked bumper | 9 Rear handle | 15 Oil tank cover |
| 4 Guide bar | 10 Start lever | 16 Oil level indicator |
| 5 Saw chain | 11 Front handle | 18 Battery |
| 6 Chain catcher | 12 Switch-on lock | 19 Battery state of charge indicator on product |
2.3 Fitting the saw chain [Fig. A2/A3]
![GARDENA PowerSaw 250/18V P4A - Fitting the saw chain [Fig. A2/A3] - 1](/content/2026/04/721580/images/be6f12b1bebf790c98352417869be93e3fd10c7ff3b41f1a25b9b2a08012b23b.jpg)
DANGER!
Physical injury!
Risk of injury from an incorrect saw chain or guide bar.
→ Only use original GARDENA saw chains and guide bars.
You can obtain the spare parts for Art. 14790 from your GARDENA dealer or directly from GARDENA Service.
• GARDENA Saw Chain Art. No. 14790-00.600.24
• GARDENA Guide Bar Art. No. 14790-00.690.00
- Fit the saw chain on a firm surface.
- Rotate the cover latch ⑬ anticlockwise until it turns easily.
- Remove the sprocket cover ⑦.
- Hold the guide bar ④ firmly and turn the chain tensioner ⑱ anticlockwise as far as it will go.
- Pay attention to the direction in which the saw chain is moving ⑤. The sharp side of the saw teeth must point forwards on the upper part of the guide bar ④ (see the "Power For All 18 V" lettering on the guide bar ④).
-
Start at the guide bar tip. Place the saw chain ⑤ around the guide bar ④. While doing so, guide the drive links ⑪ of the saw chain ⑤ into the notch ⑨ in the guide bar ④.
-
Guide the saw chain ⑤ around the sprocket so ⑲ that the drive links n of the saw chain ⑤ are located in the ⑲ sprocket cutouts.
- Slide the guide bar ④ onto the retaining screw⑳.
- Make sure that no drive links ⓝ of the saw chain ⑤ are outside the notch ⑨ of the guide bar.
- Rotate the chain tensioner ^⑱ clockwise until the saw chain ⑤ is slightly tensioned on the guide bar ④.
- First, guide the hook of the sprocket cover 7 into the chainsaw and then press the sprocket cover 7 onto the chainsaw.
- Rotate the cover latch ^⑬ clockwise until it is firmly seated.
- Tighten the saw chain⑤ (See “2.4 Tightening the saw chain”).
2.4 Tightening the saw chain [Fig. A4]
![GARDENA PowerSaw 250/18V P4A - Tightening the saw chain [Fig. A4] - 1](/content/2026/04/721580/images/73067dde5e510fe8f3428e5076f5d9bb8dd779c21db172cd211e05650d357695.jpg)
DANGER!
Risk of burns
The saw chain and guide bar heat up during operation.
→ Do not tighten the saw chain immediately after use.
→ Wait until the saw chain has cooled down.
Tightening the saw chain ⑤ correctly means it will cut better and also extends its life span.
- A saw chain ⑤ that is too tight can overload the motor and result in damage.
- A slack saw chain ⑤ can cause the saw chain ⑤ to jump out of the guide bar ④.
→ For this reason, check the chain tension regularly (approx. every 10 minutes), as the chain can stretch during use.
→ If the saw chain is new, check the chain tension at shorter operating intervals (every few minutes).
- Check whether the saw chain is still sharpened correctly (see "4.1 Sharpening the saw chain").
- Unscrew the cover latch ⑬ anticlockwise until the chain tensioner ⑭ can be rotated.
- Rotate the chain tensioner ⑭ clockwise until the saw chain ⑤ is slightly tensioned on the guide bar ④ (hold the cover latch in place while ⑬ doing so).
- Check the chain tension: Pull the saw chain ⑤ away from the guide bar ④ (the gap should be approximately 2 - 3 mm).
- Chain tension is too low (the gap is greater than 3 mm): Rotate the chain tensioner 14 clockwise (while holding the guide bar tip up).
Chain tension is too tight (the gap is smaller than 2 mm): Rotate the chain tensioner ⑭ anticlockwise (while holding the guide bar tip up).
- If the saw chain ⑤ is correctly clamped: Rotate the cover latch ⑬ clockwise until it is firmly seated.
- Finally, check that the saw chain, ⑤ the guide bar ④ and the sprocket cover ⑦ are correctly attached and the saw chain ⑤ is correctly tensioned.
2.5 Lubricating the saw chain

DANGER!
Broken saw chains can cause injuries
Insufficient lubrication of the guide bar can cause the chain to break, resulting in serious injuries.
→ Pour a sufficient amount of chain oil into the chain-saw.
→ Check that the oil lubrication system is working.
Approved chain oil:
The organic chain oil is not included in the scope of delivery.
We recommend only using GARDENA Bio Chain Oil
Art. No. 6006 or biodegradable chain oil from specialist retailers.
2.5.1 Adding the chain oil [Fig. A5]
If the oil level on the oil level indicator ^16 is below MIN, top up with fresh chain oil.
- Unscrew the oil tank cover ⑮.
- Pour the chain oil into the filler neck ⑰ until the oil level indicator ⑱ shows it is full. Take care not to spill chain oil on the chainsaw (if this occurs, clean the chainsaw and filler neck thoroughly).
- Screw the oil tank cover ⑮ back onto the filler neck ⑰.
2.5.2 Checking the oil lubrication system [Fig. S2]
- Point the guide bar at a light woodcutting surface at a distance of approx. 20 cm.
- Start the chainsaw (see "3.4.1 Starting the chainsaw").
After one minute of operation, the woodcutting surface should show clear traces of oil ② .
3. OPERATION

DANGER!
Saw chains can cause lacerations
If the product starts unintentionally, people can be injured by the saw chain.
→ Remove the battery before checking or transporting the product.
→ Wear personal protective equipment.
3.1 Charging the battery [Fig. O1/O2/O3]
![GARDENA PowerSaw 250/18V P4A - Charging the battery [Fig. O1/O2/O3] - 1](/content/2026/04/721580/images/0a09f008677c382d0a01f2486300b966f683c26adfdac71e6d4e36cfa6e34054.jpg)
CAUTION!
Damage to property.
If the voltage of the power source does not match the specifications on the battery charger rating plate, the battery charger may be damaged.
→ Note the mains voltage.

DANGER!
Risk of injury.
You may trap your fingers when inserting the battery.
→ Mind your fingers.
Thanks to the intelligent charging process, the charge condition of the battery is automatically detected and then charged up with the optimal charge current depending on battery temperature and voltage. In this way, the battery is treated with care and remains permanently fully charged when it is stored in the charger.
- Press the release button Ⓐ and remove the battery Ⓑ from the battery holder Ⓓ.
- Connect the battery charger Ⓒ to a power outlet.
- Slide the battery charger ① onto the battery ⑧. If the battery charge indicator ⑲ on the battery charger flashes green, the battery is charging. If the battery charge indicator ⑳ on the battery charger glows continuously green, the battery is fully charged (charging time, see 7. TECHNICAL DATA).
- Examine the charge status regularly while you charge.
- Once the battery Ⓑ is fully charged, the battery can be disconnected from the battery charger Ⓒ.
3.2 Meaning of display elements
3.2.1 Battery charge indicator on the battery charger [Fig. O3]
Flashing battery charge indicator ①
![GARDENA PowerSaw 250/18V P4A - Battery charge indicator on the battery charger [Fig. O3] - 1](/content/2026/04/721580/images/378c2ecebba841bca9816b4a737487c78787d4540c3bf04f3f06808bfe83f07b.jpg)
The charge cycle is indicated by the battery charge indicator flashing Ⓛ.
Note: The charging procedure is only possible when the battery temperature is within the allowable charging temperature range, see 7. TECHNICAL DATA.
Battery charge indicator shows solid light ①c
![GARDENA PowerSaw 250/18V P4A - Battery charge indicator on the battery charger [Fig. O3] - 2](/content/2026/04/721580/images/26292df45cd60dffeadbad7cc4da206ca753e85aee6a2a75db1da24f857c7519.jpg)
A solid light on the battery charge indicator signals that the battery is fully charged or that the temperature of the battery is outside of the permissible charging temperature range and it cannot therefore be charged. As soon as the permissible temperature range is reached, the battery is charged. If the battery is not inserted, a solid light on the battery charge indicator signals that the mains plug is inserted into the power outlet and that the battery charger is ready for use.
3.2.2 Battery state of charge indicator Ⓟ on the product [Fig. O4 / A1]
After starting the product, the battery state of charge indicator Ⓟ is displayed for 5 seconds.
| Battery state of charge indicator | Battery state of charge |
| 11, 12 and 13 light up green | 67–100% charged |
| 11 and 12 light up green | 34–66% charged |
| 11 lights up green | 11–33% charged |
| 11 flashes green | 0–10% charged |
If the LED Ⓐ flashes green, the battery needs to be charged.
If the error LED Ⓦ lights up or flashes, see 6. TROUBLESHOOTING.
3.3 Working position [Fig. S2]
→ Hold the chainsaw in an upright position with your left hand on the front handle ⑪ and your right hand on the rear handle ⑨.
3.4 Starting/stopping the chainsaw [Fig. A1/O1/S2]
![GARDENA PowerSaw 250/18V P4A - Starting/stopping the chainsaw [Fig. A1/O1/S2] - 1](/content/2026/04/721580/images/02823969b7c4439b4979a7601d2d5b9d1e4cb803a5bbf5aa946e9f472b1b6d2d.jpg)
DANGER!
Risk of injury
Risk of injury if the product does not stop when the start lever is released.
→ Do not bypass the safety device or switches.
→ For example, do not attach the start lever to the handle.
→ Do not make any changes to the product that are not described in this manual.
3.4.1 Before starting
- Check that the saw chain is ⑤ sharpened correctly (see "4.1 Sharpening the saw chain").
- Check that the saw chain is ⑤ correctly tightened (see "2.4 Tightening the saw chain [Fig. A4]).
- Check that there is sufficient chain oil in the reservoir (see "2.5.1 Adding chain oil [Fig. A5]).
3.4.2 Starting the chainsaw
The product is equipped with a two-hand safety device (start lever ⑩ and switch-on lock ⑫) that prevent the product from being switched on unintentionally.
- Pull the chain guard ② away from the guide bar ④.
- Insert the battery Ⓑ into the battery holder Ⓓ until it clicks into place.
- Hold the chainsaw in an upright position with your left hand on the front handle ⑪ and your right hand on the rear handle ⑨.
- If the chain brake handle ① is enabled, disable the chain brake handle ①.
- Push the switch-on lock ⑫ forwards and pull the start lever ⑩ towards the rear handle ⑨. The chainsaw starts.
- Check that the oil lubrication system works before using the chainsaw (see "2.5.2 Checking the oil lubrication system [Fig. A6]").
3.4.3 Stopping the chainsaw
-
Let go of the start lever ⑩. The chainsaw stops.
-
Wait for the saw chain ⑤ to stop moving.
- Enable the chain brake handle ①.
- Remove the battery Ⓑ.
-
Slide the chain guard ② over the guide bar ④.
-
Rotate the chain tensioner (14) anticlockwise by one turn to release the tension in the saw chain.
The saw chain shortens as it cools down. This prevents the saw chain from being damaged when it cools down.
3.5 Transporting the chainsaw [Fig. A1/S3]
![GARDENA PowerSaw 250/18V P4A - Transporting the chainsaw [Fig. A1/S3] - 1](/content/2026/04/721580/images/e7e440429eeca3a1d70122eaab5eb5941cd595c27ea80435644c28ab4b6cbf04.jpg)
DANGER!
Risk of injury
If the chainsaw is ready for operation and is carried by the rear handle ⑨ only using the switching elements, it is possible that the switch-on lock and ⑫ the start lever could be accidentally ⑩ activated at the same time and the chainsaw started.
→ Only transport the chainsaw by the front hand.
- Enable the chain brake handle ①.
- Slide the chain guard ② over the guide bar ④.
- Remove the battery Ⓑ.
- Transport the chainsaw by the front handle ⑪.
3.6 Sawing instructions
3.6.1 Sawing on a sawhorse [Fig. S4]
We recommend that first-time users should at least practise cutting round wood on a sawhorse ② or frame.
This is the safest way to use the chainsaw.
- If possible, clamp the wood to the sawhorse.
- Then saw from top to bottom. Make sure that you have a firm footing.
3.6.2 Using the spiked bumper [Fig. A1]
If possible, use the spiked bumper ③ to make safe cuts.
→ To do so, press the spiked bumper® into the bark or the surface of the trunk so that you can control the chainsaw more easily.
3.6.3 Sawing off branches
When sawing off branches, take care to ensure that other persons are not exposed to danger, that no supply lines are hit and that no damage is caused to property.
If a branch comes into contact with a supply line, inform the utility company immediately.
When sawing on a slope, the chainsaw operator should be positioned on the terrain above the branch being sawn because the branch is likely to roll or slip downhill after sawing.
Plan an escape route before sawing and clear the route if necessary.
Before sawing, check the natural inclination of the tree, the location of larger branches and the wind direction to assess the direction in which the branch will fall.
Remove any dirt, stones, loose bark, nails, clamps and wire from the branch.
3.6.4 Limbing [Fig S5]
Limbing means removing the branches from a felled tree. During limbing, do not initially cut larger, downward-facing branches that are supporting the tree. Remove smaller branches, as shown in Fig. S5, in one cut. Branches that are under tension should be cut from the bottom to the top to prevent the chainsaw from getting trapped.
3.6.5 Sectioning [Fig. S6/S7/S8/S9]
Sectioning means cutting a felled tree into sections. Make sure you have a firm footing and distribute your body weight evenly over both feet. If possible, the trunk should be supported and held in place by branches, beams or wedges. Follow the instructions in "3.6.1 Sawing on a sawhorse [Fig. S4]".
If the entire length of the tree trunk is lying evenly, as shown in Fig. S6, saw through it from above.
If the tree trunk is resting on one end, as shown in Fig. S7, first saw through one third of the trunk diameter from the bottom, then cut through the rest from the top at the level of the undercut.
If the tree trunk is resting on both ends, as shown in Fig. S8, first saw through one third of the trunk diameter from the top, then cut through two thirds from the bottom at the level of the top cut.
When sawing on a slope, always stand above the tree trunk, as shown in Fig. S9. To maintain full control at the moment of cutting through the trunk, reduce the downwards pressure toward the end of the cut without loosening your firm grip on the chainsaw handles. Make sure that the saw chain does not touch the ground. After completing the cut, wait for the saw chain to stop before removing the chainsaw. Always switch off the chainsaw motor before changing from tree to tree.
4. MAINTENANCE

DANGER!
Saw chains can cause lacerations
If the product starts unintentionally, people can be injured by the saw chain.
→ Remove the battery before servicing the product.
→ Wear protective gloves.
4.1 Checking the sharpness of the saw chain [Fig. A4]
If cutting performance decreases or the teeth ⓣ are shorter than 3 mm, the saw chain should be replaced.
The battery chainsaw can only be used efficiently if the saw chain is in good condition and sharp. This also reduces the risk of any kickback.
The saw chain can be sharpened by any specialist dealer. Do not attempt to sharpen the saw chain yourself unless you have suitable tools and the required experience.
→ Have the saw chain sharpened by a specialist dealer.
4.2 Cleaning the chainsaw

DANGER!
Risk of injury!
Risk of injury and risk of damage to the product.
→ Do not use water or a water jet (especially a high-pressure water jet) to clean the product.
→ Do not clean with chemicals, including petrol or solvents. Some can destroy critical plastic parts.
The airflow slots must always be clean.
- Use a damp cloth to clean the chainsaw.
- Clean the ventilation slots ② using a soft brush (do not use a screwdriver).
- Clean all moving parts after each use.
4.3 Cleaning the battery and the battery charger
The surface and contacts of the battery and of the battery charger must be clean and dry before connecting the battery to the battery charger.
→ Do not use running water.
4.3.1 Cleaning the battery
Do not use any chemical substances to clean the battery.
→ Use a soft, clean, dry brush to clean the ventilation slots and the contacts of the battery from time to time.
4.3.2 Cleaning the battery charger
→ Use a soft, dry cloth to clean the contacts and the plastic parts.
5. STORAGE
5.1 Shutting down
The product must be stored away from children.
- Slide the chain guard ② over the guide bar ④.
- Remove the battery Ⓑ.
- Charge the battery (see "3.1 Charging the battery [Fig. O1 / O2 / O3]).
- Clean the chainsaw, the battery and the battery charger (see "4. Maintenance").
- Store the chainsaw, battery and battery charger in a dry, enclosed and frost-proof location.
6. TROUBLESHOOTING

DANGER!
Saw chains can cause lacerations
If the product starts unintentionally, people can be injured by the saw chain.
→ Remove the battery before troubleshooting product errors.
→ Wear protective gloves.
6.1 Error table
Problem Possible Cause Remedy
| Cut is unclean | The saw chain is damaged or worn. | → Replace the saw chain or have the saw chain sharpened. |
| Run time is too low | The saw chain is tensioned too tightly. | → Check the chain tension. |
| Chainsaw does not stop | Start lever is jammed. | → Remove the battery and loosen the start lever. |
| Chainsaw does not start or stops.LED (1) flashes green [Fig. 04] | Battery is empty. | → Charge the battery. |
| Chainsaw does not start or stops.Error LED (Wp) lights up red [Fig. 04] | Battery temperature is outside the permissible temperature range. | → Wait until the battery temperature has dropped back to between 0°C and +45°C. |
| There are drops of water or moisture between the battery contacts. | → Remove the water drops or moisture using a dry cloth. | |
| Obstacle is blocking the motor. | → Remove the obstruction. | |
| Chainsaw does not start or stops.Error LED (Wp) flashes red [Fig. 04] | Chainsaw is defective. | → Contact GARDEN Service. |
| Chainsaw does not start or stops.Error LED (Wp) does not light up [Fig. 04] | The chain brake handle is enabled. | → Disable the chain brake handle. |
| Battery is defective. | → Replace the battery. | |
| Chainsaw is defective. | → Contact GARDEN Service. | |
| Charging is not possible.Battery charge indicator (Lo) lights up green continuously | The battery is not pushed onto the battery charger correctly. | → Push the battery onto the battery charger correctly. |
| Battery contacts are dirty | → Clean the battery contacts (e.g. by connecting and disconnecting the battery several times). Replace the battery if necessary.) | |
| Battery temperature is outside the permissible temperature range. | → Wait until the battery temperature has dropped back to between 0 °C and +45 °C. | |
| Battery is defective. | → Replace the battery. |
Problem Possible Cause Remedy
| Charging is not possible.Battery charge indicator 1c does not light up | The mains plug of the battery charger is not plugged in correctly. | → Insert the mains plug fully into the power outlet. |
| Socket outlet, mains cable or charger is defective. | → Check the mains voltage.→ Let the charger be checked, if necessary, by an authorised specialist dealer or the GARDENA Service. |
NOTE:
Repairs must only be done by GARDENA service departments or specialist dealers approved by GARDENA.
→ Please contact your GARDENA service centre in the event of other faults (see reverse).
7. TECHNICAL DATA
Battery chainsaw Unit Value (Art. No. 14790)
| Chain speed at idle m/s 8 | ||
| Guide bar length mm 250 | ||
| Saw chain type Oregon 90PX040X | ||
| Guide bar type | Oregon 104MLEA041 | |
| Drive link thickness | mm 1.1 | |
| Oil tank volume | ml | 150 |
| Weight (without saw chain, guide bar, guide bar cover, oil, battery) | kg | 3.3 |
| Tool-free chain tensioning (SDS) | x | |
| Automatic chain lubrication | x | |
| Sound pressure level L_pA^1) | dB(A) | 87 |
| Uncertainty k_pA | dB(A) | 3 |
| Sound power noise level L_WA^2) :measured/guaranteed | dB(A) | 99 / 101 |
| Uncertainty k_WA | dB(A) | 3 |
| Hand-arm vibration a_hw^1) | m/ s^2 | 3 |
| Uncertainty k_vw | m/ s^2 | 1,5 |
Measurement methods according to:
^1 EN IEC 62841-4-1 ^2 RL 2000/14/EC/S.I. 2001 No.1701
System battery Unit Value (Art. No. 14905) PBA 18V 4.0Ah W-B
| Battery voltage V (DC) 18 | ||
| Battery capacity Ah 4.0 | ||
| Number of cells (Li-Ion) | 10 | |
| Appropriate POWER FOR ALL system battery chargers | AL 1810 CV/AL 1815 CV/AL 18V-20/AL 1830 CV/AL 1880 CV | |
| System battery charger AL 18V-20 P4A | Unit Value (Art. No. 14911) | |
| Mains voltage | V (AC) | 220–240 |
| Mains frequency | Hz | 50–60 |
| Rated Power | W | 26 |
| Battery charging voltage | V (DC) 18 | |
| Max. battery charging current | mA | 1000 |
| Battery charging time (approx.) | ||
| PBA 18V 2.0Ah W-B | min. | 115 |
| PBA 18V 2.5Ah W-B | min. | 136 |
| PBA 18V 4.0Ah W-C | min. | 228 |
| Permitted charging temperature range | °C 0–35 | |
| Weight | kg 0.17 | |
| Protection class | ☐/II | |
| Suitable POWER FOR ALL system PBA 18V batteries | PBA 18V | |
8. ACCESSORIES/SPARE PARTS
| GARDENA Saw Chain | To replace a worn saw chain. | Art. No. 14790-00.600.24 |
| GARDENA Guide Bar | To replace a worn guide bar. | Art. No. 14790-00.690.00 |
| GARDENA Bio Chain Oil | Oil to lubricate the chain | Art. No. 6006 |
| GARDENA System Battery P4A PBA 18V/45 P4A PBA 18V/72 | Battery for additional duration or for replacement. | Art. No. 14903 Art. No. 14905 |
| GARDENA Quick Charger | Charger for fast charging the POWER FOR ALL System Batteries PBA 18V..W-. | Art. No. 14901 |
9. WARRANTY / SERVICE
9.1 Product registration
Please register your product at gardena.com/registration.
9.2 Service
Please find the current contact information of our service on the back page and online:
• United Kingdom: https://www.gardena.com/uk/support/advice/contact/
• USA:
https://us.gardena.com/pages/contact
• Canada:
https://www.gardena.com/ca-en/c/support/contact
• Australia:
https://www.gardena.com/au/support/advice/contact/
- New Zealand: https://www.gardena.com/nz/support/advice/contact/
- South Africa: https://www.gardena.com/za/support/contact/
- Other countries: https://www.gardena.com/int/c/support/contact
10. DISPOSAL
10.1. Disposal of the chain saw
(in accordance with Directive 2012/19/EU / S.I. 2013 No. 3113)

The product must not be disposed of together with normal household waste. It must be disposed of in line with local environmental regulations.
IMPORTANT!
→ Dispose of the product through or via your local recycling collection centre.
10.2. Disposal of the battery

The battery contains lithium-ion cells that must be disposed of separately from normal household waste at the end of its life span.
Li-ion
- Discharge the lithium-ion cells fully (contact GARDENA Service about this).
- Ensure that the lithium-ion cell contacts do not short-circuit by placing tape over them.
- Dispose of the lithium-ion cells properly through or via your local recycling collection centre.
EE/S.I. 2013 Ap. 3113)

Štitnik Ianca [Sl. A1]
^11 EN IEC 62841-4-1 ^2 RL 2000/14/CE / S.I. 2001 N.1701
- https://www.gardena.com/lv/serviss-un-atbalsts/meklet-veikalu-servisa-centru/
10. UTILIZĀCIJA
Registreer uw product op gardena.com/registration.
9.2 Service
^1 EN IEC 62841-4-1 ^2 :RL 2000/14/EC/S.I. 2001 No.1701
Systembatteri Enhet Verdi (art. nr. 14905) PBA 18 V 4,0 Ah W-B
| Batterispenning | V (like-strøm) | 18 |
| Batterikapasitet Ah | 4,0 | |
| SystembatteriPBA 18 V 4,0 Ah W-B | Enhet Verdi (art. nr. 14905) | |
| Antall celler(litiumion) | 10 | |
| Egnede batteriladerefor POWER FOR ALL-systemet | AL 1810 CV/AL 1815 CV/AL 18V-20/AL 1830 CV/AL 1880 CV | |
| SystembatteriladerAL 18V-20 P4A | Enhet Verdi (art. nr. 14911) | |
| Nettspenning V (veksel-strøm) | 220–240 | |
| Nettfrekvens Hz 50–60 | ||
| Nominell effekt W | 26 | |
| Batteriladespenning | V (like-strøm) | 18 |
| Maks. batteri-ladestrøm | mA | 1000 |
| Ladetid for batteriet(ca.) | ||
| PBA 18 V 2,0 Ah W-B | min. | 115 |
| PBA 18 V 2,5 Ah W-B | min. | 136 |
| PBA 18 V 4,0 Ah W-C | min. | 228 |
| Tillatt ladetempera-turområde | °C | 0–35 |
| Vekt | kg | 0,17 |
| Beskyttelsesglass | ☐/II | |
| Egnede PBA 18 V-bat-terier for POWER FORALL-systemet | PBA 18 V | |
- TILBEH∅R/RESERVEDELER
| GARDENA sagkjede | Utskifting av et slitt sagkjede. | Art. 14790-00.600.24 |
| GARDENA sverd | Utskifting av et slitt sverd. | Art. 14790-00.690.00 |
| GARDENA bio-kje-deolje | Olje for å smøre kjedet | Art. 6006 |
| GARDENA system-batteriP4A PBA 18 V / 45P4A PBA 18 V / 72 | Batteri for ekstra varighet eller for utskifting. | Art. 14903Art. 14905 |
| GARDENA hurtiglader | For rask lading av POWER FOR ALL System-batterier PBA 18 V...W-... | Art. 14901 |
9. GARANTI/SERVICE
9.1 Produktregistrering
Registrer produktet ditt på gardena.com/registration.
9.2 Service
• Portugal:
https://www.gardena.com/pt/suporte/advice/contacto/
- Outros países: https://www.gardena.com/int/support/advice/contact/
10. ELIMINAÇÃO
^1) EN IEC 62841-4-1 ^2) RL 2000/14/EC/S.I. 2001 No.1701
Baterie de sistem Unitate Valoare (nr. art. 14905) PBA 18 V 4,0 Ah W-B
- Romania:
https://www.gardena.com/ro/asistenta/advice/contact/ - Alte tări:
https://www.gardena.com/int/support/advice/contact/
10. ELIMINAREA CA DEŞEU
- https://www.gardena.com/int/support/advice/contact/
10. УТИЛИЗАЦИЯ
2.5 Mazanie ret'aze pily

NEBEZPEČENSTVO!
EN IEC 62841-4-1 ^2 RL 2000/14/EC / S.I. 2001 No.1701
| Akumulatorska baterija sistema PBA 18V 4.0Ah W-B | Enota Vrednost(št. izdelka 14905) | |
| Napetost akumulatorske baterije | V (DC) 18 | |
| Zmogljivost akumulatorske baterije | Ah 4,0 | |
| Število celic(Litij-ionskih) | 10 | |
| Primerni akumulatorski polnilniki sistema POWER FOR ALL | AL 1810 CV/AL 1815 CV/AL 18V-20/AL 1830 CV/AL 1880 CV | |
| Sistem polnilnika akumulatorske baterije AL 18V-20 P4A | Enota Vrednost(št. izdelka 14911) | |
| Omrežna napetost V (AC) | 220-240 | |
| Omrežna frekvenca | Hz | 50–60 |
| Nazivna moč | W | 26 |
| Napajalna napetost akumulatorske baterije | V (DC) 18 | |
| Najv. polnilni tok akumulatorske baterije | mA | 1000 |
| Čas polnjenja akumulatorske baterije (pribl.)PBA 18V 2,0Ah W-B | najm. | 115 |
| PBA 18V 2,5Ah W-B | najm. | 136 |
| PBA 18V 4,0Ah W-C | najm. | 228 |
| Dovoljeno temperaturno območje za polnjenje | °C 0–35 | |
| Teža | kg | 0,17 |
| Razred zaščite | ☐/II | |
| Ustrezne akumulatorske baterije sistema POWER FOR ALL PBA 18V | PBA 18 V | |
- DODATNA OPREMA/NADOMESTNIDELI
| Veriga GARDENA | Za zamenjavo obrablje- ne verige. | Št. izd. 14790- 00.600.24 |
| Meč GARDENA | Za zamenjavo obrablje- nega meča. | Št. izd. 14790- 00.690.00 |
| Bio-olje za verigo GARDENA | Olje za mazanje verige | Št. izd. 6006 |
| Akumulatorska baterija sistema GARDENA P4A PBA 18 V/45 P4A PBA 18 V/72 | Dodatna ali nadomest- na baterija. | Št. izd. 14903 St. izd. 14905 |
| Hitri polnilnik GARDENA | Polnilnik za hitro polnjenje akumulatorskih baterij sistema POWER FOR ALL PBA 18V..W-.. | Št. izd. 14901 |
9. GARANCIJA/SERVIS
9.1 Registracija izdelka
Izdelek registrirajte na spletnem mestu gardena.com/registration.
9.2 Servis
- https://www.gardena.com/int/support/advice/contact/
10. ASGJËSIMI
- https://www.gardena.com/int/support/advice/contact/
10. ODLAGANJE U OTPAD
10.1. Odlaganje u otpad motorne testere
(u skladu sa Direktivom 2012/19/EU /
S.I. 2013 br. 3113)

- Kulak koruyucular,
^1) EN IEC 62841-4-1 ^2) RL 2000/14/EC / S.I. 2001 No.1701
| Declaration of Conformity [only for UK]The manufacturer, GARDENA Germany AB PO Box 7454 S-103 92 Stockholm Sweden, hereby certifies, when leaving our factory, the unit(s) indicated below is / are in accordance with the UK Regulations, designated standards of safety and product specific designated standards. This certificate becomes void if the units are modified without our approval. | |
| Description of the product: Chain Saw | |
| Type: PowerSaw 250/18V P4A | |
| Article number: 14790 | |
| UK regulations: S.I. 2008/1597S.I. 2016/1091S.I. 2012/3032S.I. 2001/1701 | |
| Designated standards: EN ISO 12100:2010EN 62841-1:2015 +AC:2015 +A11:2022EN 62841-4-1:2020 | |
| Approved body: DEKRA Testing and Certification GmbHHandwerkstraße 1570565 Stuttgart; Germany | |
| Noise level: mesured / guaranteed 99 dB(A) / 101 dB(A) | |
| Conformity assessment procedure: According to S.I. 2001/1701 Art. 11 Schedule 9 | |
| UK importer: Husqvarna UK LimitedPreston Road, AycliffeCounty Durham, DL5 6UPUnited Kingdom | |
| Deposited documentation: GARDENA Manufacturing GmbHTechnische Dokumentation, M. JägerHans-Lorenser-Str. 4089079 UlmGermany | |
Ulm, 03.06.2024Authorized representative Martin LienhardSenior Vice PresidentBusiness Unit Electric and Battery Martin LienhardSenior Vice PresidentBusiness Unit Electric and Battery |
ROBERTO C. RUMBO S.R.L.
Predio Norlog
Lote 7
Benavidez. ZC: 1621
Buenos Aires
Phone: (+54) 11 5263-7862
Husqvama Australia Pty. Ltd.
Locked Bag 5
Central Coast BC
NSW 2252
Phone: (+ 61) (0) 2 4352 7400
customer.service@husqvarna.com.au
Aliyar Aliyev 212, Baku, Azerbaijan
Sales: +994 70 326 07 14
Aftersales: +994 77 326 07 14
www.progress-garden.az
info@progress-garden.az
Bahrain
M.H. Al-Mahroos
BUILDING 208, BLOCK 356,
ROAD 328
Salhiya
Phone: +973 1740 8090
almahroos@almahroos.com
Belarus / Беларусь
000 «Мастер Гарден»
220118, г. Минск
No 207, Song Hong Rd.,
Chang Ning District,
Shanghai, PRC. 200335
上海市长宁区淞虹路207号明
基广场B座3楼, 邮编: 200335
Colombia
Pantelis Papadopoulos S.A.
92 Athinon Avenue
Athens
10442 Greece
Phone: (+30) 21 0519 3100
infocy@papadopoulos.com.gr
Czech Republic
Gardena
Service Center Vrbno
c/o Husqvarna
Manufacturing CZ s.r.o.
Jesenická 146
79326 Vrbno pod Pradedem
Phone: 800 100 425
servis@gardena.cz
Denmark
GARDENA DANMARK
Lejrvej 19, st.
3500 Værløse
Tlf.: (+45) 70 26 47 70
gardenadk@husqvamagroup.com
www.gardena.com/dk
Dominican Republic
BOSQUESA, S.R.L
Carretera Santiago Licey
Km. 5 ½
Esquina Copal II.
51000 Dominican Republic
Phone: (+1) 809-562-0476
26, Abdel Hamid Lotfy St.
Giza
Phone: (+20) 3 761 57 57
Estonia
Husqvarna Eesti OÜ
Valdeku 132
EE-11216 Tallinn
info@gardena.e
Finland
Oy Husqvarna Ab
Juurakkotie 5 B 2
01510 Vantaa
www.gardena.fi
France
Husqvarna France
70, Bellashvili street
0159 Tbilisi, Georgia
Number: (+995) 322 14 71 71
info@transporter.com.ge
www.transporter.com.ge
Service Address and
Importer to Great Britain
Husqvama UK Ltd
Preston Road
Aycliffe Industrial Park
Newton Aycliffe
County Durham
DL5 6UP
Phone: (+44) (0) 344 844 4558
info.gardena@husqvarna.co.uk
Greece
info@papadopoulos.com.gr
Hong Kong
Tung Tai Company
151-153 Hoi Bun Road
Kwun Tong, Kowloon
Hong Kong
Phone: (+852) 3583 1662
admin@tungtaico.com
Hungary
Plot No. 185, Industrial Area,
Phase-2, Ram Darbar
Chandigarh
160002 India
Phone: (+91) 98140 06530
raman@jaganhardware.com
Iraq
Alshiemal Alakhdar Company
Al-Faysalieah, Near Estate Bank
Mosul
Phone: (+964) 78 18 18 46 75
Ireland
Liffey Distributors Ltd.
309 NW Business Park, Ballycoolen
15 Dublin
Phone: (+353) 1 824 2600
info@liffeyd.com
Israel
HAGARIN LTD.
2 Nahal Harif St.
8122201 Yavne
internet@hagarin.co.il
Phone: (+972) 8-932-0400
Italy
Husqvarna Italia S.p.A.
Al Rai- Fourth Ring Road – Block 56.
P.O Box: 1976 Safat
13020 Al-Rai
Phone: (+965) 24 73 07 45
info@palms-kw.com
Kyrgyzstan
OOsO Alye Maki
Av. Moladaya Guardia 83
720014 Bishkek
Luxembourg
Magasins Jules Neuberg
Glomedic International Sdn Bhd
Jalan Ruang No. 30
Shah Alam, Selangor
40150 Malaysia
Phone: (+60) 3-7734 7997
oase@glomedic.com.my
Malta
I.V. Portelli & Sons Ltd.
85, 86, Triq San Pawl
Rabat - RBT 1240
Phone: (+356) 2145 4289
Mauritius
Espace Maison Ltée
La City Trianon, St Jean
Quatre Bornes
Phone: (+230) 460 85 85
Zapopan, Jalisco, Mexico
Phone: (+52) 33 3818-3434
isolis@afosa.com.mx
Moldova
Convel SRL
Republica Moldova,
mun. Chisinau,
sos. Muncesti 284
Phone: (+373) 22 857 126
www.convel.md
Mongolia
Soyolj Gardening Shop
Namii Rd
Ulaanbaatar
14230 Mongolia
Phone: +976 7777 5080
soyolj@magicnet.mn
Morocco
Proekip
Husqvarna New Zealand Ltd.
PO Box 76-437
Manukau City 2241
Phone: (+64) (0) 9 9202410
support.nz@husqvarna.co.nz
North Macedonia
Sinpeks d.o.o
Ul. Kravarski Pat Bb
7000 Bitola
Phone: (+389) 47 20 85 00
sinpeks@mt.net.mk
Norway
Husqvarna Norge AS
Gardena Division
Trøskenveien 36
1708 Sarpsborg
info@gardena.no
Northern Cyprus
Mediterranean Home & Garden
No 150 Alsancak, Karaoğlanoğlu
Caddest Girne
Phone: (+90) 392 821 33 80
info@medgardener.com
Oman
General Development Services
P0 1475. PC - 111
Seeb
111 Oman
Phone: 96824582816
gdsoman@gdsoman.com
Paraguay
Agrofield SRL
AV. CHOFERES DEL CHACO
1449 C/25 DE MAYO
Asunción
Phone: (+595) 21 608 656
consultas@agrofield.com.py
Peru
Royal Dragon Traders Inc
10 Linaw Street, Barangay
Saint Peter Quezon City
1114 Philippines
Phone: (+63) 2 7426893
aida.fernandez@rdti.com.ph
Poland
Gardena Service Center Vrbno
c/o Husqvarna Manufacturing CZ
Takhassusi Main Road P.O. Box:
86387 Riyadh 12863
40011 Saudi Arabia
Phone: (966) 11 482 8877
webmaster@saco-ksa.com
Al Futtaim Pioneer Trading
5147 Al Farooq Dist.
Riyadh 7991
Phone: (+971) 4 206 6700
Owais.Khan@alfuttaim.com
Serbia
Domel d.o.o.
Slobodana Đurića 21
11000 Belgrade
Phone: (+381) 11 409 57 12
office@domel.rs
Singapore
Hy-Ray PRIVATE LIMITED
40 Jalan Pemimpin
02-08 Tat Ann Building
Singapore577185
Phone: (+65) 6253 2277
info@hyray.com.sg
Slovak Republic
Gardena
Service Center Vrbno
ç/o Husqvarna
Manufacturing CZ s.r.o.
Jesenická 146
79326 Vrbno pod Pradedem
Phone: 0800 154044
servis@gardena.sk
Slovenia
Husqvarna Austria GmbH
Industriezeile 36
4010 Linz
Phone: (+43) 732 77 01 01-485
service.gardena@husqvarnagroup.com
South Africa
Husqvarna South Africa (Pty) Ltd
Lifestyle Business Park
Ground Floor Block A Cnr
Beyers Naude Drive and Ysterhout
Road Randpark Ridge, Randburg
Phone: (+27) 10 015 5750
service@gardena.co.za
South Korea
Kyung Jin Trading Co., Ltd
8F Haengbok Building, 210
Gangnam-Daero 137-891 Seoul
Phone: (+82) 2 574 6300
kjh@kjh.co.kr
Spain
Hunter & Company Ltd.
130 Front Street
Colombo
Phone: 94-11 232 81 71
hunters@eureka.lk
Suriname
No. 46 Wu-Kun-Wu Road
New Taipei City
Phone: (+886) (02) 2298 1486
salesgd1@7friends.com.tw
Tajikistan
ARIERS JV LLC
39, Ayni Street, 734024
Dushanbe, Tajikistan
Thailand
Spica Co. Ltd
243/2 Onnuch Rd., Prawat
Bangkok
10250 Thailand
Phone: (+66) (0)2721 7373
surapong@spica-siam.com
Tunisia
Al-Futtaim ACE Company
L.L.C Building, Al Rebat Street
Festival City, Dubai
7880 UAE
Phone: (+971) 4 206 6700
ace@alfuttaim.ae
Ukraine / Україна
АТ «Альцест
Hasanboy QFY, THAY yoqasida