
Spot ONE SC - Lamp STEINEL - Free user manual and instructions
Find the device manual for free Spot ONE SC STEINEL in PDF.
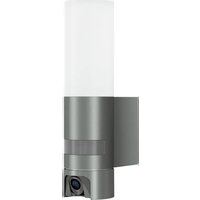
| Product type | Outdoor LED lamp with infrared motion detector |
| Brand | Steinel |
| Model | Spot ONE SC |
| Dimensions (Ø × D) | Ø 97 × 175 mm |
| Power supply | 220-240 V, 50/60 Hz |
| Power consumption | 7.9 W |
| Luminous flux | 512 lm |
| Color temperature | 3000 K (warm white) |
| Color rendering index (Ra) | > 80 |
| Average lifespan | > 20 000 h (L70B50 at 25°C) |
| Detection angle | 90° |
| Detector range | max. 10 m |
| Light source | GU10-LED (max. 9 W) |
| Adjustable delay | 5 s to 60 min (via app) |
| Adjustable triggering threshold | 2 to 2000 lx |
| Protection rating | IP44 |
| Protection class | I |
| Ambient temperature | -20 to +40 °C |
| Connectivity | Bluetooth 2.4 - 2.48 GHz |
| Main functions | Infrared detection, adjustment via STEINEL Connect app, timer, networking up to 10 luminaires |
| Maintenance and cleaning | Clean with a damp cloth, without detergent |
| Safety | Disconnect power before intervention, installation according to NF C-15100 |
| Spare parts | Replaceable GU10-LED light source (max. 9 W) |
| Warranty | 3 years manufacturer warranty (excluding light sources) |
Frequently Asked Questions - Spot ONE SC STEINEL
User questions about Spot ONE SC STEINEL
0 question about this device. Answer the ones you know or ask your own.
Ask a new question about this device
Download the instructions for your Lamp in PDF format for free! Find your manual Spot ONE SC - STEINEL and take your electronic device back in hand. On this page are published all the documents necessary for the use of your device. Spot ONE SC by STEINEL.
USER MANUAL Spot ONE SC STEINEL
Spot ONE Spot ONE S Spot ONE SC Spot DUO S Spot DUO SC

DE....8
Textteil beachten!
GB....19
Follow written instructions!
FR....30
3. Spot ONE / Spot ONE S / Spot DUO S Spot ONE SC / Spot DUO SC
Spot ONE S / Spot DUO S
Spot ONE S / Spot DUO S
Werkseinstellungen
- Please read carefully and keep in a safe place.
- Undercopyright.
Reproduction either in whole or in part only with our consent.
- Subject to change in the interest of technical progress.
Symbols

Hazard warning!

Reference to other information in the document.
2. General safety precautions

Disconnect the power supply before attempting any work on the unit.
- During installation, the electric power cable to be connected must not be live. Therefore, switch off the power first and use a voltage tester to make sure the wiring is off-circuit.
- Installing the light involves work on the mains voltage supply. This work must therefore be carried out professionally in accordance with national wiring regulations and electrical operating conditions.
- Only use genuine replacement parts.
- Repairs may only be made by specialist workshops.
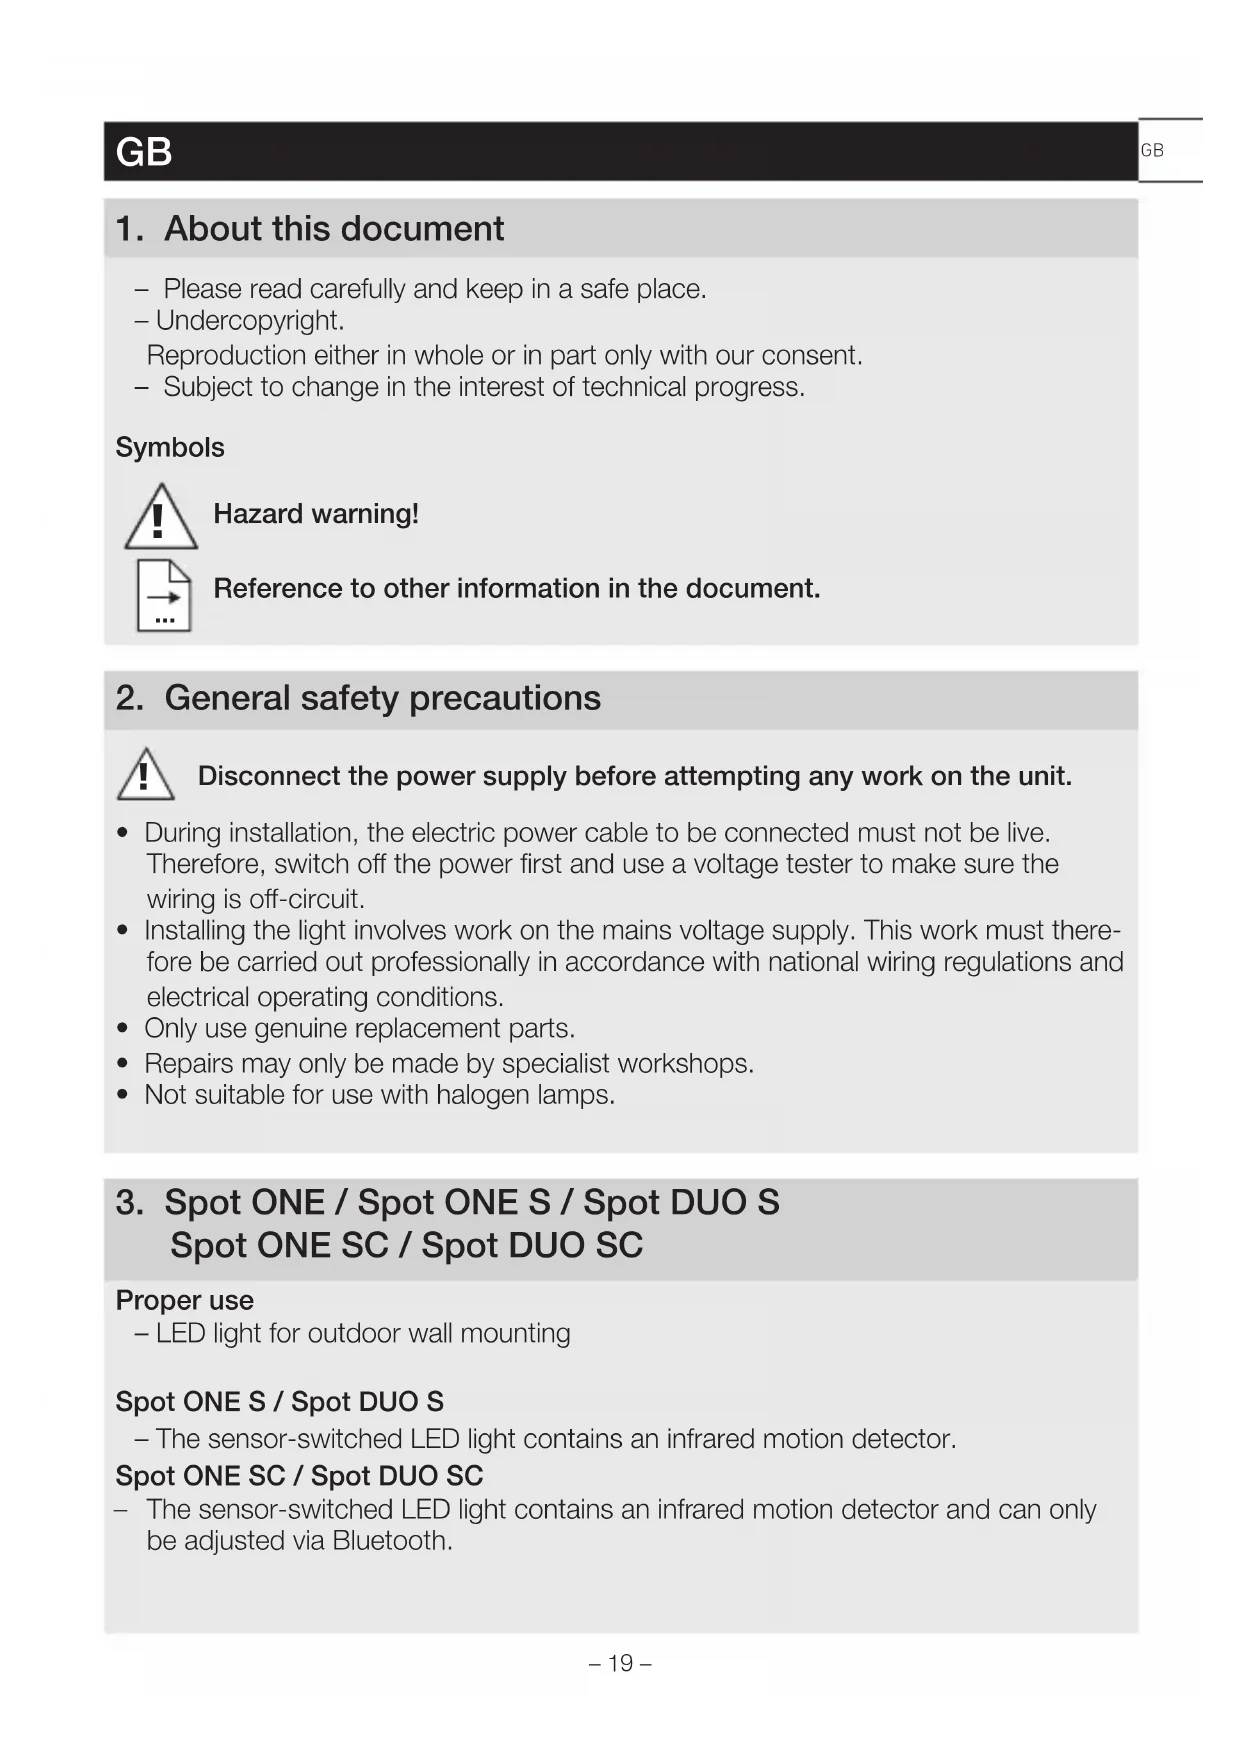
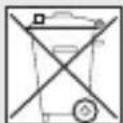
- Not suitable for use with halogen lamps.
3. Spot ONE / Spot ONE S / Spot DUO S Spot ONE SC / Spot DUO SC
Proper use
- LED light for outdoor wall mounting
Spot ONE S / Spot DUO S
- The sensor-switched LED light contains an infrared motion detector.
Spot ONE SC / Spot DUO SC
- The sensor-switched LED light contains an infrared motion detector and can only be adjusted via Bluetooth.
Non-intended use
- The LED light cannot be dimmed.

Not dimmable
Spot ONE package contents (Fig. 3.1)
- Light
- Three screws
- Three ground plugs
-Three spacers
Spot DUO package contents (Fig. 3.2)
- Light
- Four screws
- Four wall plugs
Four spacers
Product dimensions
Spot ONE (Fig. 3.3)
Spot DUO (Fig. 3.4)
Product parts (Fig. 3.5)
A Wall mount
B Connecting terminal
C Locking screw
D Light base
E Light enclosure
F Twilight setting (Spot ONE S / DUO S only)
G Time setting (Spot ONE S / DUO S only)
Spot ONE S / DUO S detection zone (Fig. 3.6 - 3.8)
Luminous intensity distribution (Fig. 3.9)
4. Electrical connection
Wiring diagram (Fig. 4.1)
The supply lead is a three-core cable:
L = phase conductor (usually black, brown or grey)
N = neutral conductor (usually blue)
PE = protective-earth conductor (green / yellow)
If you are in any doubt, identify the conductors using a voltage tester; then disconnect from the power supply again. Connect phase (L), neutral (N) and protective-earth conductor (PE) to the terminal.
Important:
Incorrectly wired connections will produce a short circuit later on in the product or fuse box. In this case, you must identify the individual conductors once again and reconnect them. A mains power switch for turning the unit ON and OFF may of course be installed in the mains supply lead.
Interconnection
"used for interconnecting lights. As many as 10 lights of this type can be connected in parallel. (Fig. 4.1)
5. Mounting
- Check all components for damage.
- Do not use the product if it is damaged.
- When installing the light, make sure the installation site is not subject to vibration.
- Select an appropriate mounting location, taking the reach and motion detection into consideration.
The most reliable way to detect movement is given by mounting the light to point across the direction in which people walk and by making sure no obstacles (e.g. trees, walls etc.) interrupt the line of sensor vision.
Mounting procedure
- Switch OFF power supply. (Fig. 4.1)
- Undo locking screw and detach light enclosure from wall mount. (Fig 5.1)
- Detach plug-in terminal and remove light enclosure from wall mount. (Fig. 5.2)
Mark drill holes. (Fig. 5.3) - Drill holes and fit wall plugs. (Fig. 5.4)
- Concealed mounting. (Fig. 5.5)
- Surface-mounted installation with spacers. (Fig. 5.6)
- Attach retaining strap to the wall mount and fit plug-in terminal. (Fig. 5.7)
- Connect conductors. (Fig. 5.8)
- When interconnecting several lights, break out safety tab. (Fig. 5.8)
- Fit light enclosure onto wall mount. (Fig. 5.9)
- Screw in locking screw. (Fig. 5.9)
- Switch ON power supply. (Fig. 5.9)
Make settings "6. Function"
6. Function
Spot ONE S / Spot DUO S
Factory settings
Twilight level: 1,000 Lux
- Time setting: 8 seconds
Twilight setting (Fig. 6.2 F)
The chosen response threshold can be infinitely varied from approx. 2 to 1,000 Lux.
- Control dial set to = daylight mode (not depending on ambient brightness)
- Control dial set to = night-time operation (approx. 2 lux)
The control dial must be turned to when adjusting the detection zone and performing the functional test in daylight.
Time setting (Fig. 6.2 G)
The light's stay ON time can be set to any period from approx. 8 seconds to a maximum of 35 minutes. Any movement detected before this time elapses will restart the timer.
- Control dial set to + = approx. 35 minutes
- Control dial set to - = approx. 8 seconds
Note:
After the light switches OFF, it takes approx. 1 second before it is able to start detecting movement again. The light will only switch ON in response to movement once this period has elapsed.
Spot DUO S
Factory configuration:
Both light heads are interconnected and always switch ON and OFF at the same time. To operate the two light heads separately, the connection between the terminals must be removed (↓1 and ↓2).
Spot ONE SC / Spot DUO SC
Factory settings
Twilight level: 2,000 lux
- Time setting: 5 seconds
STEINEL Connect App
To configure the light via smartphone or tablet, you must download the STEINEL Connect App from your app store. You will need a Bluetooth-capable smartphone or tablet.

Android iOS

The following functions can be set via STEINEL Connect App:
- Time setting
Twilight setting - ON and OFF times
- Automatic / manual control, depending on situation
- Interconnection
- Grouping
- Naming groups and lights
Note:
After the light switches OFF, it takes approx. 1 second before it is able to start detecting movement again. The light will only switch ON in response to movement once this period has elapsed. The Spot Connect has an internal clock for time-based activation and deactivation. This automatically synchronises with the clock of the connected smartphone via the STEINEL Connect App each time a Bluetooth connection is established. To ensure correct function following an interruption in the light's power supply, it must be re-connected via the STEINEL Connect App.
The internal clock is re-synchronised with the smartphone clock.
7. Light tilting / swivelling range / changing lamp
Light swivelling / tilting range (Fig. 7.1/7.2)
Changing lamp
- Undo glass cover and detach from light enclosure. (Fig. 7.3)
- Disconnect and remove lamp. (Fig. 7.4)
- Insert new lamp and twist to engage. (Fig. 7.5)
- Fit glass cover and turn to engage. (Fig. 7.6)
Important:
Only use GU10 LED lamp with a wattage up to 9 W.
Note:
On changing a lamp, make sure that the seal and sealing surface are not soiled or damaged.
8. Maintenance
The product requires no maintenance.
The light can be cleaned with a damp cloth (without detergents) if dirty.
Note: The control gear cannot be replaced.
9. Disposal
Electrical and electronic equipment, accessories and packaging must be recycled in an environmentally compatible manner.
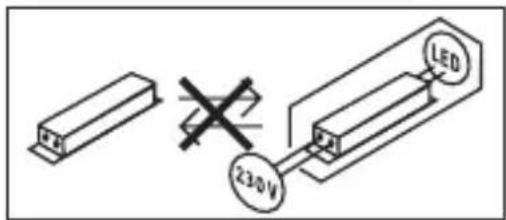
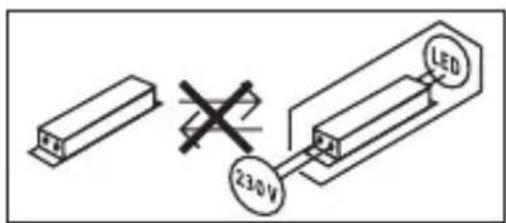
Do not dispose of electrical and electronic equipment as domestic waste.
EU countries only:
Under the current European Directive on Waste Electrical and Electronic Equipment and its implementation in national law, electrical and electronic equipment no longer suitable for use must be collected separately and recycled in an environmentally compatible manner.
10. Declaration of Conformity
Hereby, STEINEL GmbH declares that the radio equipment type Spot ONE SC / Spot DUO SC is in compliance with Directive 2014/53/EU.
The full text of the EU declaration of conformity is available at the following internet address: www.steinel.de/en/declarations-of-conformity
11. Manufacturer's Warranty
Manufacturer's warranty of STEINEL GmbH, Dieselstrasse 80-84, DE-33442
Herzebrock-Clarholz, Germany
All STEINEL products meet the highest quality standards. For this reason, we, the manufacturer, are pleased to provide you, the consumer, with a warranty under the following terms and conditions:
The warranty covers the absence of deficiencies which are proven to be the result of a material defect or fault in manufacturing and which are reported to us immediately after detection and within the warranty period. The warranty shall apply to all STEINEL products sold and used in Germany - excluding STEINEL Professional products.
You can opt for warranty cover in the form of repair or replacement which will be provided free of charge (if applicable, in the form of a successor model of the same or higher quality) or in the form of a credit note.
The warranty period for the STEINEL product you have purchased is 3 years (5 years for products from the XLED home range) in each case from the date on which the product was purchased.
We shall bear the shipping costs but not the transport risks involved in return shipment.
Statutory rights accruing from defects, gratuitousness
The warranty cover described here shall be applicable in addition to the statutory rights of warranty - including special consumer protection provisions - and shall not restrict or replace them. Exercising your statutory rights in the event of defects is gratuitous.
Exemptions from the warranty
All replaceable lamps are expressly excluded from this warranty. In addition to this, the warranty shall not cover:
- any wear resulting from use or any other natural wear of product parts or any deficiencies in the STEINEL product that are attributable to wear caused by use or other natural wear,
- any improper or non-intended use of the product or any failure to observe the operating instructions,
- any unauthorised additions, alterations or other modifications to the product or any deficiencies attributable to the use of accessory,
- supplementary or replacement parts which are not genuine STEINEL parts,
- any maintenance or care of products that is not carried out in accordance with the operating instructions,
- any attachment or installation that is not in accordance with STEINEL's installation instructions,
- any damage or loss occurring in transit.
Application of German law
The warranty shall be governed by German law excluding the United Nations Convention concerning the International Sale of Goods (CISG).
Making claims
If you wish to make a warranty claim, please send your product complete and carriage paid with the original receipt of purchase, which must show the date of purchase and product designation, either to your retailer or directly to us at STEINEL (UK) Ltd. - 25 Manasty Road, Axis Park, Orton Southgate, GB- Peterborough Cambs PE2 6UP United Kingdom. For this reason, we recommend that you keep your receipt of purchase in a safe place until the warranty period expires.
| 12. Technical specifications | |
| Dimensions (Ø × D) (H × W × D) | Spot ONE / ONE S / ONE SC: Ø 97 × 175 mm Spot DUO S / DUO SC: 98 × 247 × 175 mm |
| Supply voltage 220 – 240 V, 50/60 Hz | |
| Power consumption (Pon)* Spot ONE: 6.7 W | Spot DUO S: 2 × 7.5 W |
| Spot ONE S: 7.5 W | Spot DUO SC: 14.6 W |
| Spot ONE SC: 7.9 W | |
| Luminous flux / brightness light* Spot ONE: | Spot DUO S: |
| 512 lm; 76.4 lm/W | 2 × 512 lm; 68.6 lm/W |
| Spot ONE S: | Spot DUO SC: |
| 512 lm 68.6 lm/W | 1,024 lm; 70.1 lm/W |
| Spot ONE SC: | |
| 512 lm; 66.6 lm/W | |
| Standby (light) Spot ONE S: | Spot DUO S: 2 × 0.5 W |
| 2 × 0.5 W | Spot DUO SC: 0.42 W |
| Spot ONE SC: .42 W | |
| Luminous flux Lamp 620 lm 92.5 lm/W | |
| Power consumption Lamp 6.7 W | |
| Standby Network Spot ONE SC: 0.42 W Spot DUO SC: 0.42 W | |
| Colour temperature* 3,000 K (warm white) | |
| Colour rendering index* R a > 80 | |
| Average rated life expectancy* L70B50 at 25 °C: > 20,000 hours | |
| Colour consistency SDCM* Starting value: 6 | |
| Luminous intensity distribution* | |
| Sensor technology | Spot ONE / DUO S, ONE / DUO SC: Passive infrared |
| Detection zone: | Spot ONE / DUO S, ONE / DUO SC: 90° |
| angle of coverage | |
| Detection zone: | Spot ONE / DUO S, ONE / DUO SC: 90° |
| angle of aperture | |
| Detection reach | Spot ONE / DUO S, ONE / DUO SC: max. 10 m |
| Lamp | GU10 LED lamp (max. 9 W) |
| Time setting Spot ONE / DUO S: 8 s - 35 min Spot ONE / DUO SC: 5 s - 60 min |
| Twilight setting Spot ONE / DUO S: 2 - 1,000 lux Spot ONE / DUO SC: 2 - 2,000 lux |
| IP rating IP44 |
| Protection class I |
| Ambient temperature -20 °C - +40 °C |
| Bluetooth frequency Spot ONE / DUO SC: 2.4 - 2.48 GHz |
| Bluetooth transmitter power Spot ONE / DUO SC: 5 dBm / 3 mW |
| Energy efficiency class This product contains one / two energy efficiency class "F" light source(s). |
- for LED lamp provided
13. Troubleshooting
GB
Malfunction Cause Remedy
| LED light does not switch ON | ■Fuse has tripped, not switched ON, break in wiring | ■Activate, change fuse, turn ON mains switch, check wiring with voltage tester |
| ■Short circuit | ■Check connections | |
| ■Lamp faulty | ■Change lamp | |
| Sensor-switched LED light does not switch ON | ■Twilight setting in nighttime mode during daytime operation | ■Reset |
| ■Mains switch OFF | ■Switch ON | |
| ■Fuse has tripped | ■Activate, change fuse, check connection if necessary | |
| ■Detection zone not correctly adjusted | ■Readjust | |
| Sensor-switched LED light does not switch OFF | ■Continued movement within the detection zone | ■Check zone and re-adjust if necessary or apply shroud |
| Sensor-switched LED light keeps switching ON / OFF | ■Animals moving in detection zone | ■Tilt sensor higher; adjust detection zone |
| Sensor-LED light switches ON when it should not | ■Wind is moving trees and bushes in the detection zone | ■Change detection zone |
| ■Cars in the street are detected | ■Change detection zone | |
| ■Sudden temperature changes due to weather (wind, rain, snow) or air expelled from fans, open windows | ■Adjust detection zone or install in a different place | |
| ■Sensor-switched LED light is swaying (moving) due to gusts of wind or heavy rain | ■Mount sensor-switched LED light on a firm surface |
FR
3. Spot ONE / Spot ONE S / Spot DUO S Spot ONE SC / Spot DUO SC
Utilisation conforme aux prescriptions
Spot ONE S / Spot DUO S
Spot ONE S / Spot DUO S
Application STEINEL Connect
3. Spot ONE / Spot ONE S / Spot DUO S Spot ONE SC / Spot DUO SC
Spot ONE S / Spot DUO S
Spot ONE S / Spot DUO S
Fabrieksinstellungen
- Schemerinstelling: 1.000 lux
- Tijdinstelling: 8 seconden
3. Spot ONE / Spot ONE S / Spot DUO S Spot ONE SC / Spot DUO SC
Spot ONE S / Spot DUO S
Spot ONE S / Spot DUO S
3. Spot ONE / Spot ONE S / Spot DUO S Spot ONE SC / Spot DUO SC
Uso previsto
Spot ONE S / Spot DUO S
Spot ONE S / Spot DUO S
3. Spot ONE / Spot ONE S / Spot DUO S Spot ONE SC / Spot DUO SC
Utilização prevista
Spot ONE S / Spot DUO S
Spot ONE S / Spot DUO S
3. Spot ONE / Spot ONE S / Spot DUO S Spot ONE SC / Spot DUO SC
Spot ONE S / Spot DUO S
Spot ONE S / Spot DUO S
3. Spot ONE / Spot ONE S / Spot DUO S Spot ONE SC / Spot DUO SC
Korrekt anvendelse
Spot ONE S / Spot DUO S
- Sensor-LED-lampen indeholder en infrarod beveegelsessensor.
Spot ONE SC / Spot DUO SC
Spot ONE S / Spot DUO S
Standardindstlinger
- Skumringsindstilling: 1.000 lux
- Tidsindstilling: 8 sekunder
Skumringsindstilling (Fig. 6.2 F)
3. Spot ONE / Spot ONE S / Spot DUO S Spot ONE SC / Spot DUO SC
Spot ONE S / Spot DUO S
Spot ONE S / Spot DUO S
Tehdasasetukset
3. Spot ONE / Spot ONE S / Spot DUO S
Spot ONE SC / Spot DUO SC
Forskiftsmessig bruk
Spot ONE S / Spot DUO S
- Sensor LED-lampen inneholder en infrarod bevegelsessensor
Spot ONE SC / Spot DUO SC
Spot ONE S / Spot DUO S
Fabrikinnstillinger
- Skumringsinnstilling: 1.000 lux
- Tidsinnstilling: 8 sekunder
Skumringsinnstilling (III. 6.2 F)
3. Spot ONE / Spot ONE S / Spot DUO S Spot ONE SC / Spot DUO SC
Xpnoσuφwva με touc kavovioouc
Spot ONE S / Spot DUO S
Spot ONE S / Spot DUO S
3. Spot ONE / Spot ONE S / Spot DUO S Spot ONE SC / Spot DUO SC
Spot ONE S / Spot DUO S
Spot ONE S / Spot DUO S
Fabrika ayarlari
- Alacakaranlik ayan: 1.000 lux
Zaman ayari: 8 saniye
Alacakaranlik ayari (Sek. 6.2 F)
3. Spot ONE / Spot ONE S / Spot DUO S Spot ONE SC / Spot DUO SC
Spot ONE S / Spot DUO S
Spot ONE S / Spot DUO S
Gyári beallitások
3. Spot ONE / Spot ONE S / Spot DUO S Spot ONE SC / Spot DUO SC
Spot ONE S / Spot DUO S
Spot ONE S / Spot DUO S
Nastavení z vyroby
3. Spot ONE / Spot ONE S / Spot DUO S Spot ONE SC / Spot DUO SC
Správné použivanie
Spot ONE S / Spot DUO S
Spot ONE S / Spot DUO S
Nastavenia z vyroby
- Nastavenie stmievania: 1.000 lx
- Nastavenie Času: 8 sekünd
Nastavenie stmievania (Obr. 6.2 F)
Požadovaný prah citlivosti svietidla sa može plynulo nastavit od cca 2 lx do 1.000 lx.
- nastavovaci regulator nastavený na = prevadzka pri denom svetle (nezávisle od jasu)
- nastavovaci regulator nastaveny na = prevadzka pri stmievani (cca 2 lx)
Pri nastavovani oblasti snimania a za učelom testu funkčnosti pri denom svetle musi byt nastavovaci regulator nastavený na
3. Spot ONE / Spot ONE S / Spot DUO S Spot ONE SC / Spot DUO SC
Spot ONE S/Spot DUO S
Spot ONE SC/Spot DUO SC
Spot ONE S / Spot DUO S
Ustawenia fabryczne
Spot ONE SC /Spot DUO SC
Ustawenia fabryczne
3. Spot ONE / Spot ONE S / Spot DUO S Spot ONE SC / Spot DUO SC
Spot ONE S / Spot DUO S
- Lampa cu LED Şi senzor contine un detector de miscare cu infrarosu.
Spot ONE SC / Spot DUO SC
- Lampa cu LED.si senzor contine un detector de miscare cu infrarosu si se poate regla numai prin Bluetooth.
Conectivitate in retea
"serveste interconectarii lampilor. Se pot connecta in parallel pana la 10 lampi de acest tip. (Fig. 4.1)
5. Montaj
Spot ONE S / Spot DUO S
Reglaje din fabrica
Luminozitate de comutare: 1.000 lucsi
Temporizare: 8 secunde
3. Spot ONE / Spot ONE S / Spot DUO S Spot ONE SC / Spot DUO SC
Namenska uporaba
Spot ONE S / Spot DUO S
Spot ONE S / Spot DUO S
3. Spot ONE / Spot ONE S / Spot DUO S Spot ONE SC / Spot DUO SC
Namjenska uporaba
- LED svjetiljka za zidnu montažu u vanjskom prostoru
Spot ONE S / Spot DUO S
- Senzorska LED svjetiljka sadrži infracrveni dojavnikPokreta.
Spot ONE SC /Spot DUO SC
- Senzorska LED svjetiljka sadrži infracrveni dojavnik Pokreta i moze se podesiti pomocu Bluetooth.
Nenamjenska uporaba
-Intenzitet svjetlosti LED svjetiljke ne doit se regulirati.

Ne moze se smanjiti intenzitet
Spot ONE S / Spot DUO S
Tvorničke postavke
3. Spot ONE / Spot ONE S / Spot DUO S Spot ONE SC / Spot DUO SC
Nōuetekohane kasutus
- LED-valgustid valitingimustes seintele paigaldamiseks
Spot ONE S / Spot DUO S
- Anduri LED-valgusti sisaldab infrapuna-likumisandurit.
Spot ONE SC / Spot DUO SC
- Anduri LED-valgusti sisaldab infrapuna-liikumisandurit ning on vaid Bluetooth kaudu seadistatav.
Spot ONE (Joon. 3.3)
Spot DUO (Joon. 3.4)
Lulitite plan (Joon. 4.1)
Spot ONE S / Spot DUO S
Tehaseseadistused
- Hämaruse seadmine: 1.000 lx
- Aja seadmine: 8 sekundit
Hämaruse seadmine (Joon. 6.2 F)
Aja seadmine (Joon. 6.2 G)
3. Spot ONE / Spot ONE S / Spot DUO S Spot ONE SC / Spot DUO SC
Spot ONE S / Spot DUO S
- Sensoriniame LED šviestuve yra infraraudonju spinduliu judesio sensorius.
Spot ONE SC / Spot DUO SC
Spot ONE S / Spot DUO S
Gamyklos nustatymas
Prieblandos lygio nustatymas: 1.000 liuksu
- Laiko nustatymas: 8 sekundès
Prieblandos lygio nustatymas (6.2 F Pav.)
3. Spot ONE / Spot ONE S / Spot DUO S Spot ONE SC / Spot DUO SC
Pareiza lietošana
Spot ONE S / Spot DUO S
- LED sensorgaismeklis ietver aktivu infrasarkano kustibu ziñotáju.
Spot ONE SC / Spot DUO SC
- LED sensorgaismeklis ietver aktivu infrasarkano kustibu ziŋotaju un ir iestatams tikai caur Bloeth.
Nepareiza lietošana
-LED gaismeklis nav aptumšojams.

Nav aptumšojams
Piegades apjoms Spot ONE (3.1 Att.)
-Gaismeklis
- Tris skruves
- Tris dibeli
-Tris starplikas
Piegades apjoms Spot DUO (3.2 Att.)
-Gaismeklis
- Cetras skruves
Cetri dibelji
-Cetras starplikas
Izstrādājuma izmēri
Spot ONE (3.3 Att.)
Spot DUO (3.4 Att.)
Spot ONE S / Spot DUO S
Rupnicas iestatijumi
- Kreslas iestatijums: 1.000 luksi
-Laika iestatijums: 8 sekundes
Kreslas slieksna iestatijums (6.2. F Att.)
Velamo gaismekla reakcijas slieksni iespejams iestatit bez pakapem no apm. 2 fidz 1.000 luksiem.
3. Spot ONE / Spot ONE S / Spot DUO S Spot ONE SC / Spot DUO SC
YnoTpe6a no npedHa3NaueHne
- LED-Jamna 3a MOHTaXK Ha CTeHa Ha OTKpNUTo
Spot ONE S / Spot DUO S
- Ceh3OpHaTa LED-lamna cbIbpxka nHΦpauepeBcH3Op 3a dBIXeHne.
Spot ONE SC / Spot DUO SC
- Cēn3OpHaTa LED-lamna sbdþpka INΦpauepeBcH3Op 3a DBNXeHne N MOXe Da ce HacTpoiBa camo npe3 Bluetooth.
YnoTpe6a He no npedHa3NaueHne
-LED-Jamnata He Ce dnmnpa.

He ce dnmnpa
CbDpbXaHne Ha KOMnJIeKTa Spot ONE (pnc. 3.1)
- lamna
- TPN BnHTa
- TpN IIO6eJa
TprnnoIIOXKIN
CbIbpxaHne Ha komnIeKta Spot DUO (pnc. 3.2)
-
lamna
-
Yetnupn BnHTa
- YeTnpi IIO6eJa
- Yetnp noJnoKKn
Pa3mepn
Spot ONE (pnc. 3.3)
Spot DUO (pnc. 3.4)
PpeIeHa npOdyKta (pnc. 3.5)
A CToiKa 3a cTeHa
B KneMa 3a Cbbp3BaHe
C O6e3oNaCTeJIeH BnHT
D Kpak
E Kopnyc Ha Jlamnata
F Hactpoika Ha cBeTIOUyBCTBNTeHocTTa (cMo Spot ONE S / DUO S)
G Hactpoika Ha BpeMeTo (cAmo Spot ONE S / DUO S)
Диапазон на отугтане Spot ONE S / DUO S (pnc. 3.6 - 3.8)
Pa3npedeJeHne Ha cBeTInHaTa (pnc. 3.9)
4.Електу�能свьр3Ванe
CxemaHa cBbp3BaHe (pnc.4.1)
Ka6eJIbT cIbIbpxka 3 npoBODnka:
L = φa3a (O6nKHOBeHo YepeH, KaΦB nIi CNB)
N = Hγla (OδиКHOBEHO CnH)
PE = 3a3eMaBauI npOBoHnK (3eJIeH / KbIIT)
Pn CbMHeHne, PNOBOnHnUte Tp6Ba Da 6bDaT NDeHTnOuPaHn C ypei 3a npOBepKa Ha HApEKeHnEtO, CJeI KOeTO OTHOBo Da 6bDaT CBp3aHn, Be3 HApEKeHne. a3aTa (L), HylaTa (N) n 3a3emraunr PNOBOnHK (PE) ce CBbp3BaT KbM KJIeMaTa.
BaxkHo:
Pa3mHa Ha npOBODHnCITe BODI DO KbCO CbeINHeNc B ypea IIn Ta6JIoTO C npEdPn3nteJI. Ppi TaKbB Clyuayi BCEKn npOBODnK Tp8Ba OUe BeHNbX da 6bJe NdeHTnΦnUpaH n HAOBO CBbp3aH. KbM CSCTemata, pa3bnpa ce, MoKe da 6bJe Do6aBeH npEKBcBauch, 3a BKJIIOUcbHe n N3KJIIOUbaHe.
Cbbp3BaHe B MpeXa
"↓" clyxni 3a Cbbp3BaHe Ha IamnTe B Mpeka. NapaneHNO Morat da 6bdaT BKJIIOUeHN HAI-MHO DO 10 IaMn OT TO3N TIN. (pnc. 4.1)
5. MoHTaX
- BcnuKn yactn da ce npOBepr3a uetn.
- Пи поваши рожукъда He ce nyska B ekcnnoataця.
- Пи мотай Ка Лампа Тд Сслд Зд StabnHTo 3aKpePbBaHe.
- Да се ИЗбеpe похODЯЦо мяСTO 3a MOHTaЖ, сьОБразЯВaIGN ce c OБXBaTAИ 3acnHaHTo Ha DBNKeHne.
Ha-chnypnoTo 3acnuaHe ce noJyauBa, KOrato ypeT ce MOHTnpa cTpaHnUHO cnPMA IOcOKata Ha dBIXeHne HnIoo He Ipeu Ha BnIMOCCTTa Ha cEH3Opa (kato NaPp. DbPBeta, CTEN N T.H.).
IocneIOBATEJIHOCT3aMOHTax
-Да ceи3клioун eileKtpo3axpaHbaHeTo. (pnc. 4.1)
- Obe3oIacnteHnT BnHT da ce OTBnHTn I KopnyCbT Ha JAmNaTa da ce OTdJI NOT CToiKaT a 3a CTeHa. (pnc 5.1)
- KnieMaTa Da ce ocBcOoN i KopnycbT Ha IaMnata Da ce OTdJIi OT cToiKaTa 3a CTeHa. (pnc. 5.2)
-Да ce МаркираТ мecтata 3a побиBaHe. (pnc.5.3)
-Да ce npo6nT dynknte n da ce noctabrt IIObeJIte. (pnc. 5.4)
CKPNT MOHTaX (pnc. 5.5)
- MoHTaK OTKpUIn KabeJIc N IOJIoXKn (pnc. 5.6)
- ObesonacnteHata JeHTa da ce 3aKpeNHa cToiKaTa 3a cTeHa n da ce nocTaN KJIeMaTa. (pnc. 5.7)
- Ka6eInte da ce CBbpxkaT. (pnc. 5.8)
-Писвьрзвае на Няково Лампда се пруши обezонасьацда Клима.(pnc.5.8)
KopnycBt Ha JIaMnata Da ce NoctabH Na CToiKaTa 3a CTeHa. (pnc. 5.9)
- Obe3onacnteJIHHrT BnHT Na Ce 3aBnHTn. (pnc. 5.9)
- EneKtpo3axpaHbaHeTo da ce BKJIouH. (pnc. 5.9)
- Да се наразов可不是
[ \rightarrow "6. Функця" ]
6.Функця
Spot ONE S / Spot DUO S
3aBOcKn HacTpoiKn
- HactpoJaHa CBeTIOuYBCTBnTEJIHOCTTa: 1.000 JyKca
- Hactpoika Ha Bpemeto: 8 cekyHn
Hactpoika Ha CBetIIOUyBCTBNTeJIHOcTTa (pnc. 6.2 F)
XeJahnIrpar Ha 3aJeCTBaHe Ha JAmNaTa MoKe Ja 6bJe peRyInpaH 6e3cteneHHOOTOKONo2do1.000nykca.
- Perynatop B no3nua = HeBeH peXIM (He3aBNCIMO OT OCBeTeHoCTTa)
- PerúnaTOp B no3nua = cna6a cBeTnHa (okoJIo 2 lyKca)
PnHaCTpoiKa Ha 0xbata n npn npOBepka Ha yHKuNTe Ha dHeBHa CBETJIHa
peryntopbT TpaBa da e Ha
Hactpoikha HbpeMeTo (pnc. 6.2 G)
KeHaHata npoBnKnteHocT Ha CBeTeHe Ha lamnata Moke da ce perynpa 6e3te- nEHOOTOKO8ceHydIdoMaKc.35MnHyTN.BcAko 3aceyeHO dBXKeHne npedi N3TuHaHe Ha BpeMeTO BpbUa YacOBnKa B nbpBOHaJHa No3uZna.
- Perynatop + = OKONo 35 MInHyTN
- Perynatop - = OKONo 8 cekyHn
CbeHne:
CleI BcRAKO N3KJIIOUByAHe Ha JAMnTa 3aCnUHaTeO Ha HOBn DnIXKeHnCe IpeKbCBA 3a OKoJIo 1 cekynda. EDbA CJeT ToBa JAMnTa MoKe Da ce BKJIOnu npN 3aceYeHO DnIXKeHne.
Spot DUO S
CbCTOHNIE npN DoCTaBka: DBeTe JAMn Ca CBbp3aHn B MpeXa N BInHaN eINHOPEMeHHo Ce BKJIIOuBAt N I3KJIIOUByat.
3a ININBnDyanalha yNtpe6a Ha DBeTe IaMnBpb3KaTa MeKdy KJIeMITE Tp8Ba da 6bJe OTCpaHeHa ( 1 n2).
Spot ONE SC / Spot DUO SC
3aBoDcN HacTpoiKn
- Hactpoia Ka Ha CBETIOUyBCTBNTeJIHOCTTta: 2.000 JyKca
- HactpoIka Ha BpeMeTo: 5 ceKyHnI
STEINEL Connect App
3. Spot ONE / Spot ONE S / Spot DUO S Spot ONE SC / Spot DUO SC
按规定使用
- 适用于室外壁装的LED灯
Spot ONE S / Spot DUO S
Spot ONE S / Spot DUO S
出厂设置
IpepeeataKa, TaKke BbIepxkkamn, TolbKO C hAWeRo corlaCna.
- Mbl coxpaHЯem 3a co6oB npaBO Ha n3MeHeHn, KOTOpbIe CJyKaT TexHnueCKOMy nporpeccy.
Pa3bAChHeNc CmBOJIOB

PpeynpeXdHne 6 onacnoctx!

Yka3aHne Ha TeKCT B DOkymeHTe.
2.Оьи ue yka3aHЯ IO texHnke 6e3OpaCHocTIn

Ipeed haayalom IIO6bIX pa6OT, npoBODmblx Ha npi6ope, cJeNyET OTKJIIOHTb HnprjXeHne!
- Пи поведен MOHTажа подкюаemь сл ekрпорobODdoЖeн 6ытб obecтоен.ПOTOMYВпервуочepь сл endyET OTKIOHTbpoaу TOKa n pO-BepNTb OTCytCTBnE HapJxHЯ CnomoшьИнДИКaTopa HapJxHЯ.
MoHTaXHbIe pa6OtBI NO NOKJIIOHeHIO CBETINbHnKA OTHOcTcK KaTeOpn pa6OT C CeTeBbIM HApJxKeHnEM. NToTOMy Pn MOHTaXe CBETINbHnKOB CJeDyET CO6JIIOAtb yKa3aHnI yCIOBnI, PnIBeDEHHbIE B INHCTpyKlUNI NO NOKJIIOUeHnIO. - Испосьзоваты ТолбКО оригиналовные заимасту.
- PeMoHT pa3peWaeTcB BbINOJIHrTb TOJbKO B CneIaIIIN3IPOBaHHbIX MaCTepCKNX.
He npoxoIIT IJI INCPOJb3OBAHnC rAIOReHHbIMN OCBETHTeHBHbIMN CpeICTBaMn.
3. Spot ONE / Spot ONE S / Spot DUO S Spot ONE SC / Spot DUO SC
PpIMeHHeNoHa3HaueHnIO
- CBeToIDNoIbIcBETnJIbHnK IJNa HAcTeHHOro MOHTaXka Ha yJIuCe
Spot ONE S / Spot DUO S
- CeHcOpHbI CBeToIDNoIDhI CBeTnJIbHNK CoJePKHT INHΦpaKpaCHbI DaTnIK DBNXKeHJ.
Spot ONE SC / Spot DUO SC
- CechopbI CBeToIOHbI CBeTbHKn CoepKNT HΦpaKpaChbI DaTnK DBxKeHn I MoXeT peYlnpOBA TbCra TOnbKO nocpeDcTBom Bluetooth.
PpimHeHne He no Ha3HaueHIO
Spot ONE S / Spot DUO S
3aBoDcKne HaCTpOiKn
- YctaHOBka cymepeHHoro nopora: 1.000 Jk
BpemBaKJIIOUeHnJaMnbl:8cekyHd
YcTaHOBka cyMepeHOro BkIIOueHnra (pnc. 6.2 F)
Heo6xOIMbI NOPor cpa6aTbIBaHnRA CBeTNbHnKa MOXeT 6bITb yCTaHOBJIeH PJIaBHO B DnIa3OHe OT npM.2 Jkdo 1.000 Jk.
- PeryjIaTOp, yCTaHOBJIeHHbI Ha =peXIM dHeBHOrO OCBeUeHnY (He3aBVCIMo OT JrpKocTn)
- Peryjntop, yctaHOBJIeHHbI Ha = peKIM cyMepeuHoro ocBeueHnra (ok. 2 Jk.)
Pn yCTaHOBKe 30HbI ObHApUxKeHn I npn IpOBeHn N KcNpyaTauHOHO TecTa npn DHeBHom CBTe peYJrTOP DoJIxHn 6bITb yCTaHOBJeH Ha
PergunpoBka BpemeHn (pnc. 6.2 G)
Heo6xOIMoe BpeMg OCBeIeHnMaOKeT 6bITb yCTaHOHa CBETINbHnke PJIaBHO B dnaIa30He ot 8 cek. do MaKc. 35 MmN. KaKdoe 3apeIcTpnpOBaHHoe DvIXeHne Do nCTeHnE 3TOrO BpeMeHn 3aHOBO HaunHaet OTcET BpeMeHn.
- YctaHOBOUHbI peYJrTOp Ha + = OK. 35 MInH.
- YcTaHOBOHbI peYJrTOp - = OK. 8 ceK.
Yka3aHne:
IocJe KaXdOro npOecca OTKJIHcHEnr CBETnJIbHnKa O6HApUxKeHne HOBOrO DBNJxEHn IpepbIbAeTcR npIM. Ha 1 cekyHny. Toblko nO nCTeueHn 3TOrO BpemeHn CBETnJIbHnK MOKeT CHOBa BKJIIOuHaTb CBET npN DBNXeHn.
Spot DUO S
CoCTOHNe npi nocTaBKe: OBe rOIOBKn CBETnIbHnKa CoeINHeHb B Cetb N BceTda BKJIHOaHTcN I BBIKJIHOaHTcN OINHOBpeMeHHO.
Дя Иndидауально pa6obtbi obexx roIobOK CBETnIbHnka Heo6xoIIMO ydaJIITb COeINHeHne MeJky KJIeMMaMn (↓1 n ↓2).
Spot ONE SC / Spot DUO SC
3aBODCKne HacTpoKn
- YctaHObKa cymepeHoro nopora: 2.000 Jk
- BpemBkJIIOUeHnIJaMnbl: 5 cekyHd
STEINEL Connect App
Для конфурази CBETиьнka C NOMOцью CMapTфОн Или Планшета Heo6xodmo сачатb STEINEL Connect App n3 AppStore. Heo6xODIM CmapTфОн Или ПланшетсBluetooth.

Android iOS

Cleyuonne yHKun MOyT yCTaHaBnBaTbcra nocpeDcTBOM STEINEL Connect App:
Bpemr BkIIOUeHnIJaMnbl
- YcTaHOBKa CymepeHHOrO BKJIIOueHnA
- Bpemr BkIIOueHn I BbIKIOueHn
- CnTyaTnBHoe ynpabJIeHne aBTOMaTnka / pyHoe
- OБъединения в се刘邦
-Образовны групн
-псваиBaHneHa3BaHnIpyPnAmN CBeTNJIbHnKaM
Yka3aHne:
После кадоу поцecа OTКюченя CBetиьнka obnapухенue HOBOrOBnJxehnI npepbBaetcЯ пим. Ha 1 cekyHny. Tolyko no nCTeueHnN 3TOrO BpeMeHnCBetnilbHnK MOKeT CHOBA BKJIIOUaTb CBETпрДВИЖeHnN.
Дя вклоченя и Вьклоченя по Врemeи Spot Connect ochaшиen BHytpeHnIMu Yacam.Он aBtOMaTneCKn CInxpoHn3npyOTc npi KaKdOm CoeHnHn no Blueteoth nocpeIcTBom STEINEL Connect App c Yacam nOdkloueHHoro cMaprfoHa. TTo6bl rapaHTnpOBaTb KoppeKTHyIO pa60Ty, nocJIe npepbBaHnA 3JIeKTPoNITaHn CBetnlbHnka MoXHO yCTaHOBNTb CoeINHeHne nocpeIcTBom STEINEL Connect App. BHytpeHnne Yacbl CHOBA cInxpoHn3npyOTc c Yacam m CmaprfoHa.
7. Дniaразоворота CBETильнka / 3aMeHa OCBETITeHbIX cpeДСТВ
Диапазон NOBOPOTa CBETINbHnka (pnc. 7.1/7.2)
3aMeHa OCBeTHTeJIbHbIX CpeIcTB
- OTcoeHnHTb nlafoh OT Kopnyca CBetnJIbHnKa N BblTaunTb. (pnc. 7.3)
- OTKpyTbI BbITaUHTb OCBETnTeJbHoe CpeIDCTBO. (pnc. 7.4)
BCTaBnTb n 3aKpyTnTb HOBOE OCBETnTeJbHOE cpeCTBO. (pnc. 7.5)
HaTeB n npKpyTnTB nlafoH. (pnc. 7.6)
BaxHo:
IcnoB3OBaTb TOnbKO CBeToNDnOHNbIe OCBETNtEbnHbIe cpeCTBa GU10 mKc. 9 Bt.
Yka3aHne:
→ПиЗamHe OCBeTnTeIbHbIX CpeIcTB OBeCneuHTb, YTO yNIOTHHe N yNIOTHeJIbHa NOBepXHOCTb He 3aRpa3HeHbI IIN He NOBpeKdEbl.
8. TexHnueckoe obcIyXnBaHne
IpoDyKT He Tpe6byet TexHnueckoro 06cnyKnBaHn. 3aRpy3HeHnHa CBeTnBnKe MOxHO ydaJIaTb BnaXhblm CyKHOM (He nCNoJb3yra MoIOUne cpeiCTBa).
Baxho:Pa6oee n3dJIe 3aMeHITb HeIb3ra.
9.Ут Tunnel3aцnia
3JIeKTPoPnIbOpbl, KOMJIeKTyIOUne I yNaKOBky CJIeNyET HApBaJIaTb Ha 3KOJIoHHyO BTOpNUHyO Nepepa60Ky.

He BbIbpaBbTaB 3JIeKTpOpnp6Opbl B 6bITOBbIe OTXoDbI!
TolbkoДЯстразн EC:
Corglacno DeiCTBvUoIe EbponeckOJnpeKtNBe NO OTPa60TaHOMy 3JIeKtpueCKOMy I 3JIeKTPoHHOMy O6OpUoBaHnIO N ee peaJIn3aUIN B HauNHOHaJIbHbIX 3aKO HOdaTeJIbCTBax OTPa60TaHHbIe 3JIeKTPoPnpnbOpbl DoJXHbI CObIPaTbcr OTdEJIbHO IN HaPpABJIaTBcRa Na 3KOJIoTNHyU BTOPNHyU nepepa60TkY.
10. CeptnuΦnkaT COOTBETCTBnA
HacToaM KOMnHaNra STEINEL GmbH 3aBlaeT, YTo paIIOaAnpaTpya TIna Spot ONE SC / Spot DUO SC OTBeuAeTTre6oBaHnMa DnpeKtNbBi 2014/53/EU. NOnhB TeKCT cepTnΦnKaTa COOTBeTCTBnE EC DoctyPeH nO cIeDyIoUeMy aIpeCy B INTePHeTe: www.steinel.de.
11. Гараня пponЗвориетя
Данhoe Издени прпьбдва Steinel blio C ocobim BHMmaHem n3roTOBJIeH NO INcblTaHO Ha pa6OTocno6bOCTb I 6e30nacHOCTb 3KcPlyatauIN COOTBETCTBEHNO DeIcTBYIOUIM INHCTpyKUJAM, a NOTOM IODBeRHyTO BbIBOpOHOMy KOHTPOJIIO KaYeCTBa.ФИрмASTEINEL rapaHTnpyET BBICOKOE KauEcTBO N HAdexKHyIO pa6OTy n3dJIЯ.ГарANTиньсpoK 3KcPlyatauIN COCTaBJIeT 36 MeCyaIeB CO DnA npOdaXN n3-DeJIЯ.ФИрмОБЯ3yETcY UcTpaHNTb HeIOCTaTKI, KOTOpBIE BO3NHKN BCJeDCTBVE DepeKTA MaTePnaIa IIN KOHCTpyKUJIN. DepeKtBI YcTpaHryOTcI NyTEM peMOHTa n3-ДeJIЯ JIn6O 3aMeHOn HeNCnPabHBIX DeTaleN IO YCMOTpeHIO PhIPMb.I. TarapHTniHbI CPOK 3KcPlyatauIN He pacnpoCTpahReTcN Ha nobpeXdEHN I DepeKtBI, BO3NHK-We B pe3yIbTaTe n3HOca DeTaleN, HeHaJIeXaUeN 3KcPlyatauIN uXoJa.ФИрмA He Hecet OTBETCTBEHHOCTN 3a MaTePnaJIbHbI yUeep6 TpeTbIX LIIc, HaNecEHbI B INPOUCE 3KcPlyatauIN n3dJIЯ.
TapaHTnI npEIOCTaBJIeTc TOnbKO B TOM CInyae, ecN N3dJIne B CO6paHOM n UYNAKOBaHHOM BVIDE C KpaTKIM OINCAHNEM HENCINPABHOCTH 6blIO OTnpaBHeO BMecTe C pNILOXeHHbIM KACCOBbIM YeKOM NII KBrTaHcUeN (C DaToN IpoJaxN IN PeaTbIO TOPROBOrO npEINPnTn) NO aDpeCy cepBnCHoM MaCTepCKoN.
PemOHThbI cepBnC:
ПО ИСТЕЧЕМ RApaHTиHOrO CpOKa IJIИ рпн HаIINuHn HeNOLaDOK, NCKJIIOUToxRrapaHTnIO, obpaTITeCb B 6JIIXaJUWece cepBnCHoe ppeIprnTne, YTObI NOJyHTb INΦOPMaZNU O BO3MOXHOCtI peMOHTa.

- Spot ONE / Spot ONE S / Spot DUO S Spot ONE SC / Spot DUO SC
- Spot ONE S / Spot DUO S
- Werkseinstellungen
- Symbols
- General safety precautions
- Disconnect the power supply before attempting any work on the unit.
- Proper use
- Spot ONE SC / Spot DUO SC
- Non-intended use
- Not dimmable
- Spot ONE package contents (Fig. 3.1)
- Spot DUO package contents (Fig. 3.2)
- Product dimensions
- Product parts (Fig. 3.5)
- Electrical connection
- Important:
- Interconnection
- Mounting
- Mounting procedure
- Function
- Factory settings
- Twilight setting (Fig. 6.2 F)
- Time setting (Fig. 6.2 G)
- Note:
- Spot DUO S
- STEINEL Connect App
- Light tilting / swivelling range / changing lamp
- Changing lamp
- Maintenance
- Disposal
- EU countries only:
- Declaration of Conformity
- Manufacturer's Warranty
- Manufacturer's warranty of STEINEL GmbH, Dieselstrasse 80-84, DE-33442
- Statutory rights accruing from defects, gratuitousness
- Exemptions from the warranty
- Application of German law
- Making claims
- Troubleshooting
- FR
- Application STEINEL Connect
- Fabrieksinstellungen
- Utilização prevista
- Korrekt anvendelse
- Standardindstlinger
- Skumringsindstilling (Fig. 6.2 F)
- Tehdasasetukset
- Spot ONE / Spot ONE S / Spot DUO S
- Forskiftsmessig bruk
- Fabrikinnstillinger
- Skumringsinnstilling (III. 6.2 F)
- Fabrika ayarlari
- Alacakaranlik ayari (Sek. 6.2 F)
- Gyári beallitások
- Nastavení z vyroby
- Správné použivanie
- Nastavenia z vyroby
- Nastavenie stmievania (Obr. 6.2 F)
- Ustawenia fabryczne
- Spot ONE SC /Spot DUO SC
- Conectivitate in retea
- Montaj
- Reglaje din fabrica
- Namenska uporaba
- Namjenska uporaba
- Nenamjenska uporaba
- Tvorničke postavke
- Nōuetekohane kasutus
- Tehaseseadistused
- Hämaruse seadmine (Joon. 6.2 F)
- Aja seadmine (Joon. 6.2 G)
- Gamyklos nustatymas
- Prieblandos lygio nustatymas (6.2 F Pav.)
- Pareiza lietošana
- Nepareiza lietošana
- Nav aptumšojams
- Piegades apjoms Spot ONE (3.1 Att.)
- Piegades apjoms Spot DUO (3.2 Att.)
- Izstrādājuma izmēri
- Rupnicas iestatijumi
- Kreslas slieksna iestatijums (6.2. F Att.)
- YnoTpe6a He no npedHa3NaueHne
- He ce dnmnpa
- CbDpbXaHne Ha KOMnJIeKTa Spot ONE (pnc. 3.1)
- CbIbpxaHne Ha komnIeKta Spot DUO (pnc. 3.2)
- Pa3mepn
- PpeIeHa npOdyKta (pnc. 3.5)
- 4.Електу�能свьр3Ванe
- BaxkHo:
- Cbbp3BaHe B MpeXa
- MoHTaX
- IocneIOBATEJIHOCT3aMOHTax
- 6.Функця
- 3aBOcKn HacTpoiKn
- Hactpoika Ha CBetIIOUyBCTBNTeJIHOcTTa (pnc. 6.2 F)
- Hactpoikha HbpeMeTo (pnc. 6.2 G)
- CbeHne:
- 3aBoDcN HacTpoiKn
- 按规定使用
- 出厂设置
- Pa3bAChHeNc CmBOJIOB
- 2.Оьи ue yka3aHЯ IO texHnke 6e3OpaCHocTIn
- PpIMeHHeNoHa3HaueHnIO
- PpimHeHne He no Ha3HaueHIO
- 3aBoDcKne HaCTpOiKn
- YcTaHOBka cyMepeHOro BkIIOueHnra (pnc. 6.2 F)
- PergunpoBka BpemeHn (pnc. 6.2 G)
- Yka3aHne:
- 3aBODCKne HacTpoKn
- Дniaразоворота CBETильнka / 3aMeHa OCBETITeHbIX cpeДСТВ
- 3aMeHa OCBeTHTeJIbHbIX CpeIcTB
- BaxHo:
- TexHnueckoe obcIyXnBaHne
- 9.Ут Tunnel3aцnia
- TolbkoДЯстразн EC:
- CeptnuΦnkaT COOTBETCTBnA
- Гараня пponЗвориетя
- PemOHThbI cepBnC:
Brand : STEINEL
Model : Spot ONE SC
Category : Lamp