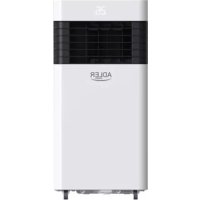
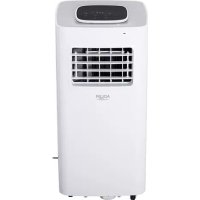
USER MANUAL AD 7916 ADLER
SAFETY CONDITIONS. IMPORTANT INSTRUCTIONS ON SAFETY OF USE PLEASE READ CAREFULLY AND KEEP FOR FUTURE REFERENCE
- Before using the device, read the operating manual and follow the instructions contained in it. The manufacturer is not liable for damages caused by using the device contrary to its intended purpose or improper operation.
- The device is for home use only. Do not use it for purposes other than its intended use.
- The device should only be connected to an AC outlet with a grounded 220 240V 50Hz . To increase operational safety, multiple electrical devices should not be connected to one current circuit at the same time.
- Use extreme caution when using the device when children are nearby. Do not allow children to play with the device, and do not allow children or people unfamiliar with the device to use it.
- WARNING: This equipment may be used by children over 8 years of age and people with limited physical, sensory or mental ability, or people who have no experience or knowledge of the equipment, if this is done under the supervision of a person responsible for their safety or have been granted them information on the safe use of the device and are aware of the dangers of using it. Children should not play with the equipment. Cleaning and maintenance of the device should not be performed by children, unless they are over 8 years old and these activities are carried out under supervision.
- Always disconnect the power plug by holding the socket with your hand after use. DO NOT pull on the power cord.
- Do not immerse the cable, plug and the whole device in water or any other liquid. Do not expose the device to atmospheric conditions (rain, sun, etc.) or use in conditions of high humidity (bathrooms, damp mobile homes).
- Periodically check the condition of the power cord. If the power cord is damaged, it should be replaced by a specialist repair shop to avoid danger.
- Do not use the appliance with a damaged power cord or if it has been dropped or damaged in any other way or if it is not working properly. Do not repair the device yourself, as there is a risk of electric shock. Take the damaged device to an appropriate service center for checking or repair. All repairs may only be carried out by authorized service points. Incorrectly performed repairs can cause serious danger for the user.
- Place the device on a cool, stable surface, away from hot kitchen appliances such as: electric stove, gas burner, etc.
- Make sure that nothing is blocking the air inlet and outlet of the device.
- Use the device only on a level surface to prevent the condensation from spilling out.
- To provide additional protection, it is advisable to install a residual current device (RCD) in the electric circuit with a rated residual current not exceeding 30mA . Ask an
electrician for this.
- Clean the air filter regularly. The frequency of cleaning depends on the cleanliness of the air.
- After turning off the machine, wait at least 5 minutes before turning it back on.
- Do not use the device in sunny places. When the device overheats, the overheat protection will switch on the device.
- To ensure effective cooling, a distance of at least 60 cm should be kept between the side walls of the device and the wall or furniture or curtains.
- Due to the limited performance of the device, if the difference between the target temperature and the ambient temperature is too great, the target temperature may not be reached.
- To reduce the risk of fire, electric shock or injury when using the air conditioner, observe the following basic precautions: a) Connect to a grounded outlet with 3 pins. b) Do not remove the grounding prong. c) Do not use the adapter. d) Do not use an extension cord. e) Disconnect the air conditioner before servicing. f) Use two or more people to move and install the air conditioner.
- Do not use agents accelerating the defrosting or cleaning process other than those recommended by the manufacturer.
- The device should be stored in a room without constantly operating sources of ignition, for example: open fire, gas appliances or electric heaters.
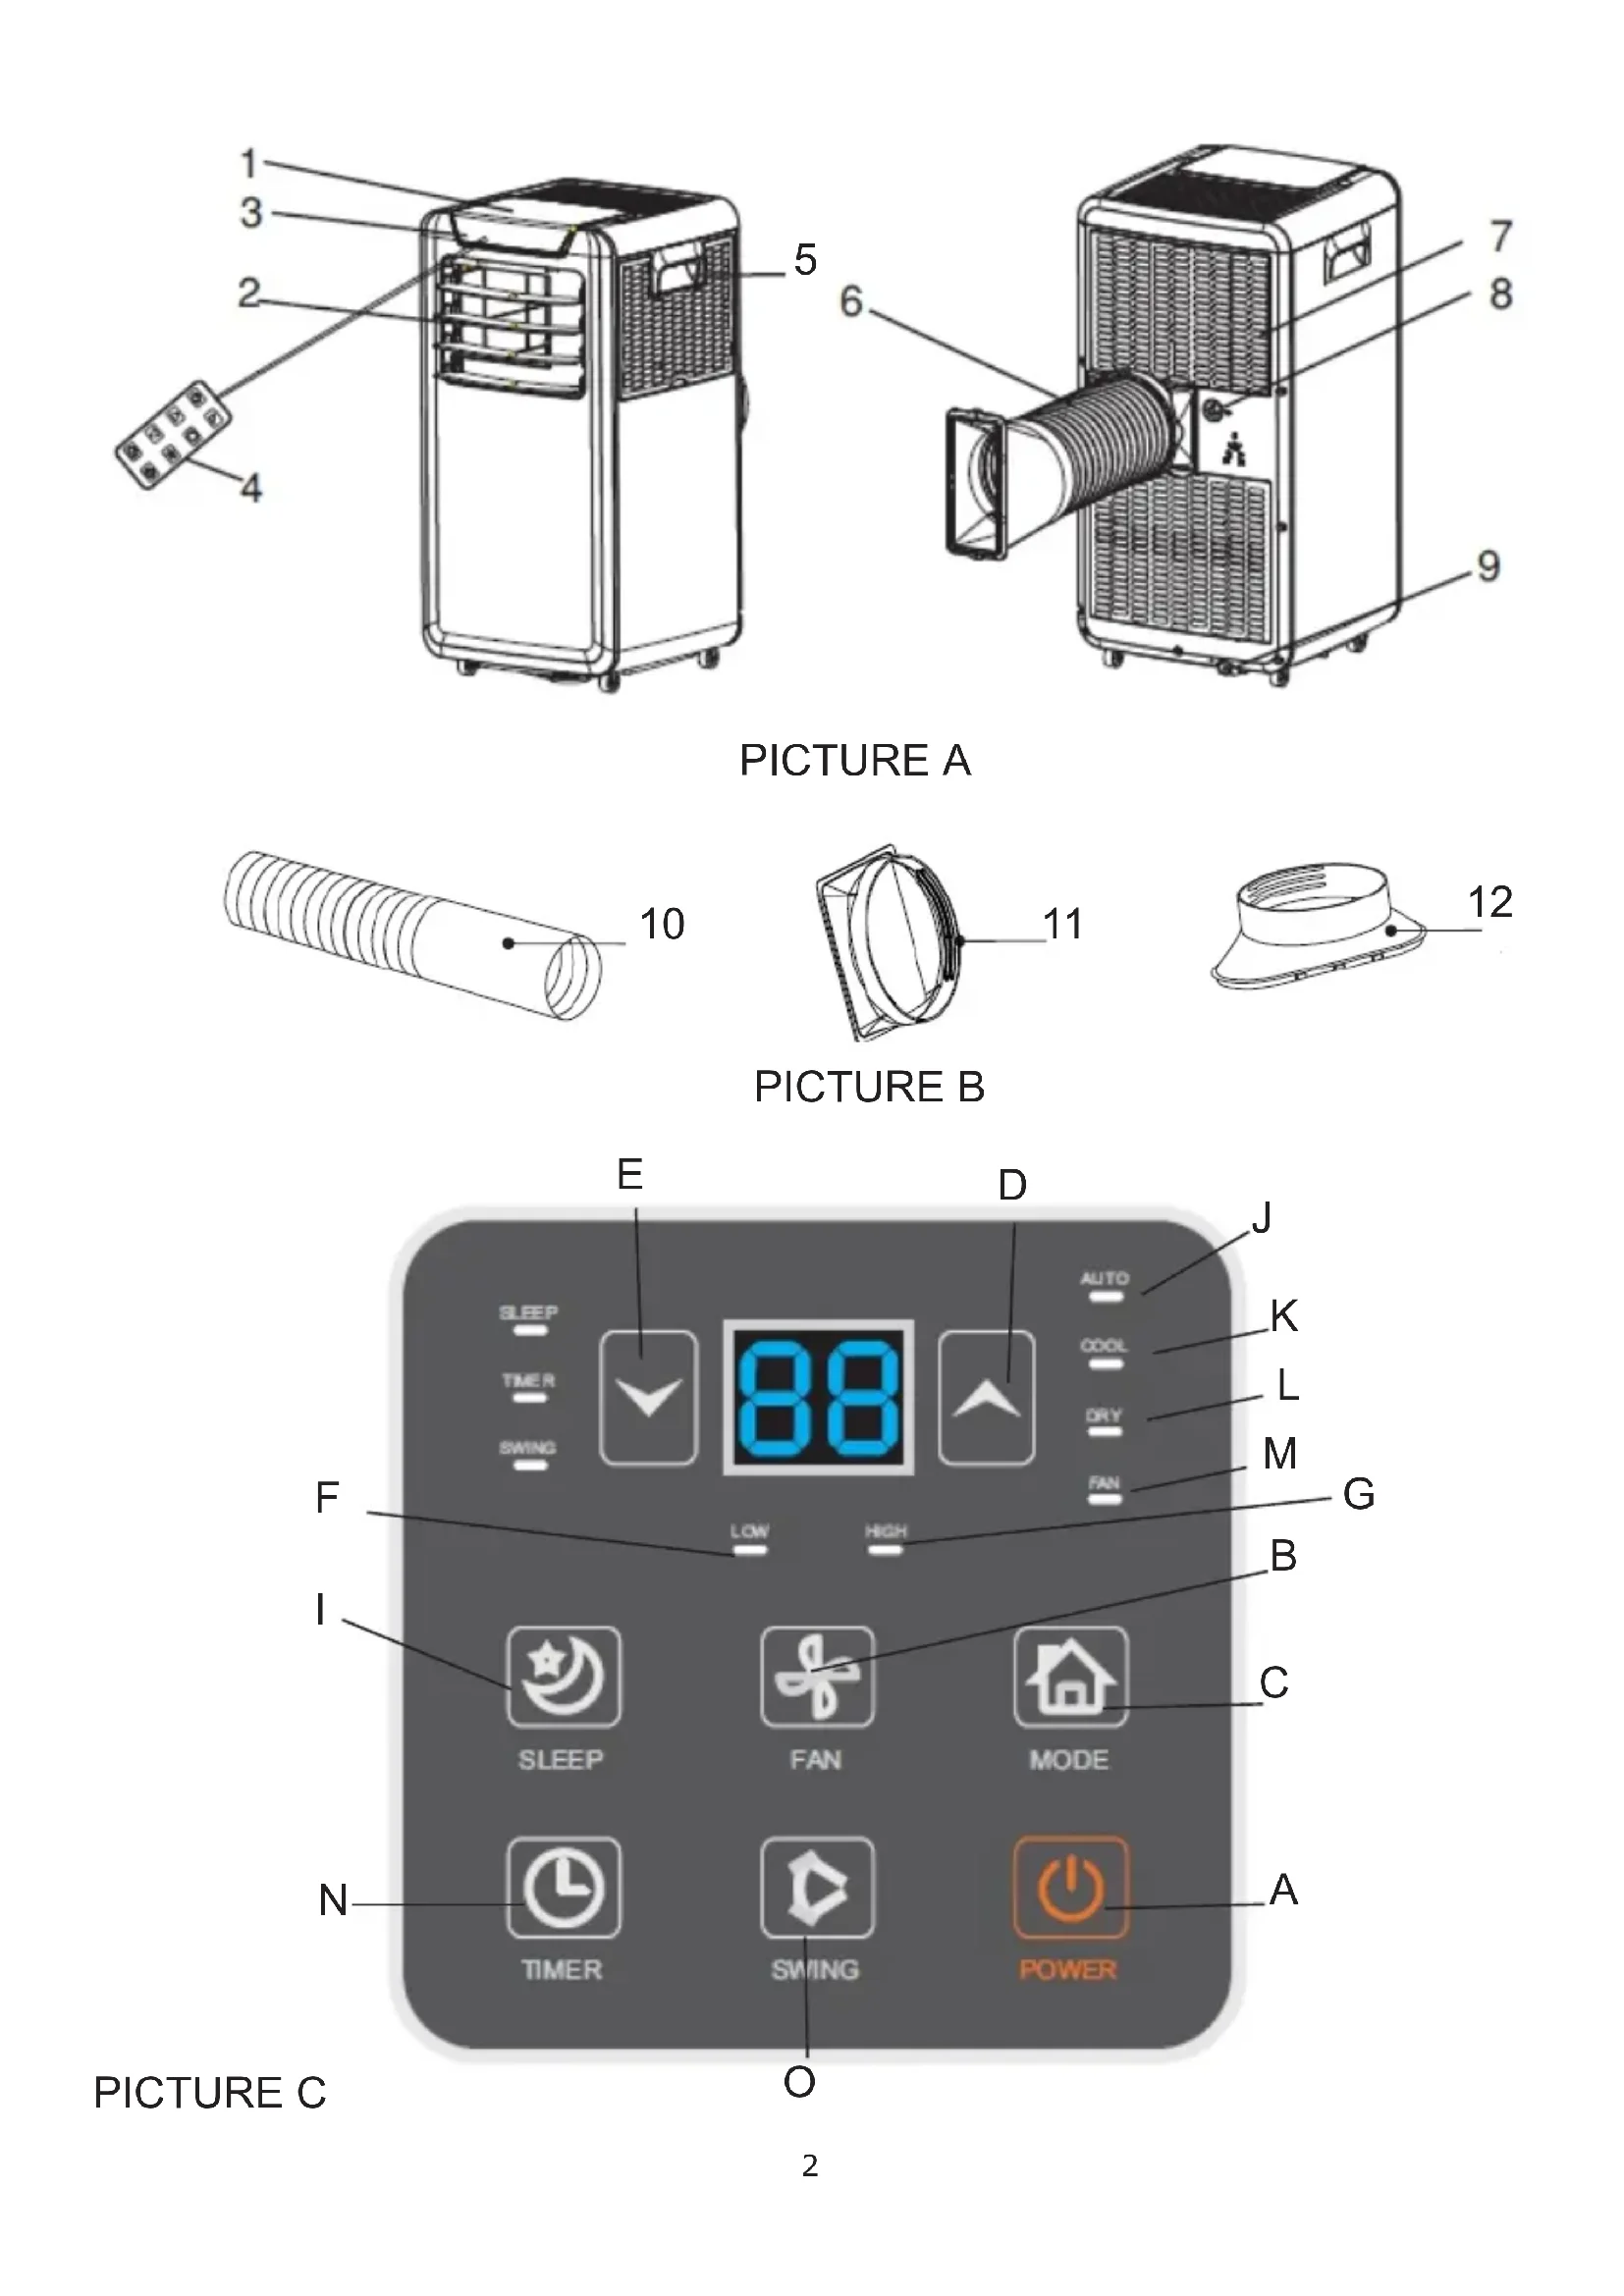
BEFORE FIRST USE - (picture E)
Connect the connectors to the air exhaust duct as follows:
- Extend the air exhaust duct (10) by drawing out the two ends of the duct.
- Screw the air exhaust duct (10) into the connector of air exhaust duct (11).
- Connect the connector of air exhaust duct (11) to the device.
- Keep the unit at least 1 meter away from TV or radios to avoid electromagnetic interference.
- Do not expose the unit under direct sun light to avoid surface color fading.
- Do not tilt the unit for more than 35° or upside-down while transporting. If the device has been turned over during transport, put it down correctly and wait 2-4 hours before starting it.
- Place the unit on a flat surface with less than 5° inclination.
- The unit operates more efficiently in certain room locations, select the best location:
- Beside a window, a door or a French window.
- Keep the required distance from the return air outlet to the wall or other obstacles at least 60 cm
- Extend the air hose to ensure that other end of the air hose has clearance between the window door, or French window, or wall hole.
- Air outlet or intake cannot be blocked by protective grid or any obstacle.
To extend the life of the unit, drain the condensed water from the upper (8) and lower (9) cooler drain holes before putting the unit into storage at the end of the season.
DEVICE DESCRIPTION (pictures A and B)
- Control panel 2. Cold air outlet
- Signal receptor 4. Remote controller
- Transport handle 6.Exhaust duct
- Evaporator inlet 8. Upper cooler drain hole
- Down cooler drain hole 10. Air exhaust duct
- Connector of air exhaust duct 12. Window exhaust adapter
CONTROL PANEL (picture C)
A. Power button ON/OFF B. Fan speed button C. Mode button D. Timer / Temperature up button E. Timer / Temperature down button F. Low speed lamp G. High speed lamp
I. Sleep button J. Automatic mode
K. Cool mode L. Dry mode M. Fan mode N. Timer button O. Oscillation button
REMOTE CONTROLLER - picture D
The remote controller transmits signals to the system.
Button "A" - the appliance will be started when it is energized or will be stopped when it is in operation, if you press this button.
Button "C" - press it to select operation mode: "J", "K", "L" or "M".
Button "B" - press it to select fan speed in sequence.
Button "D" / "E" - press to adjust the room temperature and the timer.
Button "l" - press to set or cancel sleep mode.
Button "N" - press to set the time of automatic off and automatic on.
Button "O" - press to set or cancel louvers swing mode.
a) Connect the device. b) Press the "A" button, then the device beeps once and turns on. c) LED diode displays room temperature and starts working in automatic mode.
2. Choose the operating mode
Press the "C" button to select the desired mode of operation by sequence:
Automatic mode "J" -> Cooling mode "K" -> Drying mode "L" -> Fan mode "M"
- Adjust temperature
The temperature can be set within a range of 15°C to 31°C. Press "D" or "E" button to increase or decrease the temperature by 1°C per press. The device LED panel shows the target temperature for 5 seconds and then displays the room temperature.
- Adjust fan speed
Press the "B" button to select a desired fan speed shown by sequence:
Low speed "F" -> High speed "G"
- Power
When you press the "A" button again, the device will sound "di" and stop working.
- Press this button "I" to enter the sleep mode of the device.
- Press this button "N" to set a timed shutdown.
- Press this button "O" to set air swing oscillation up-down.
Each mode working principle:
AUTO "J" mode:
Once the "J" operation is selected, the indoor temperature sensor operates automatically and it selects one of the following operation modes:
- When the room temperature is ≥ 24°C, the unit will automatically select cool mode "K" mode.
or
- When the room temperature is < 24°C, the unit will automatically select high fan speed mode "M".
Dry "L" mode:
- The up centrifugal fan will run at low speed, and the speed cannot be adjusted.
- The compressor will stop after running 8 minutes, then run again after 6 minutes.
- The device adopts constant temperature dehumidifying mode, and the adjustment of temperature is not effective.
WARNING:
When operating the device in conditions of varying humidity, the down cooler drain hole (9) should be constantly open and ensure constant water drainage.
COOL "K" mode:
- When the room temperature is higher than the set temperature on the control panel, the compressor starts to run.
- When the room temperature is lower than the set temperature on the control panel, the compressor stops and the upper fan operates at the original set speed.
Fan "M" mode.
- The upper centrifugal fan runs at the set speed, and the compressor does not run.
- The adjustment of temperature is not effective.
Timer operation "N":
- Press the "N" button to set the automatic off time while the unit is running.
- Press the "N" button to set the automatic on time while the unit is ready.
- The time can be adjusted within a range of 1 hour to 24 hours by pressing the "D" (+) or "E" (-) buttons.
Sleep mode "I" operation:
- The sleep mode operates when the unit is in cooling "K" mode.
- Press the "I" button in cool mode "K", then the unit will work under sleep mode and the upper centrifugal fan will turn to low speed automatically. The set temperature will increase by 1°C after one hour, and increase by 2°C after two hours. After six hours, the unit will stop running.
Swing "O" mode operation:
When the device is on, press the "O" button, the vertical louver will turn on or off. When it is on, the louver can swing back and forth within 60 degrees. Press the "O" button again, the louver will stop swinging.
Notice:
The main control board has memory function. When the device is ready to run but in stop status, the main control board can memorize the initialization of working mode. When you turn on the unit, it will work as the same enactment of working-mode as last time, no need to reset
the working mode again. (This condition is not available when the unit is under AUTO mode "J".)
REMOTE CONTROLLER
- Slide the back cover to open and take off the isolating film on the batteries.
- Put the batteries inside the slot, must be corresponding to the signs of "+" and "-" on the remote control.
- For long time no use, take out the batteries.
- To prevent environmental pollution, take out the used batteries and dispose safety and appropriately.
To operate the device, aim the remote controller at the signal receptor. The remote controller will operate the device at distance 5 meters when pointing at signal receptor of the device.
PROTECTIVE DEVICES
The protective device may trip and stop the appliance in the cases listed below:
- at cooling mode: indoor air temperature is over 43°C (109°F)
- at cooling mode: room temperature is below 15°C (59°F)
- at dehumidifying mode: room temperature is below 15°C (59°F)
If the device runs in cooling "K" or dry "L" mode with door or window opened for a long time when relative humidity is above 80% , dew may drip down from the outlet.
The protective device will work in the following cases:
- Restarting the device immediately after stopping work or changing the selected mode while working: you must wait 3 minutes.
- If the plug has been removed, after restarting the device will return to the original mode, and TIMER ON and TIMER OFF must be set again.
REMARK: there is condensing water recycling hidden within this unit. The condensing water is partly kept recycling between the condenser and the water plate. When the water level rises to the upper level, the float switch and water full indicator (E4) lights on to remind draining water. Please cut off the power supply, move the appliance to a suitable place, remove the drain plug, drain water completely. After the drain, re-install the plug, or the appliance may leak and make your room wet.
If the appliance is placed in a position admitting drain water, you also can connect the drain hole to the drain port to drain the water. Drain pipe is not added to kit, it should be: inner diameter 9mm, outer diameter 12mm, material: PVC.
Troubleshooting
1) Trouble: Do not work. Analysis: a) maybe the protector trip or fuse is blown, please wait for 3 minutes and start again, protector device may be preventing device from working. c) maybe batteries in the remote controller are exhausted. d) maybe the plug is not properly plugged in. 2) Trouble: works for a short time only
Analysis:
a) if the set temperature is close to room temperature, you can lower the set temperature. b) maybe air outlet is blocked by obstacle. Take the obstacle away. 3) Trouble: Works but not cools
Analysis:
a) maybe door or window are open. b) maybe in close distance there is another appliance heat-working like heater or lamp, etc. c) the air filter is dirty, please clean it. d) air outlet or intake is blocked. f) set temperature is too high.
4) Trouble: Water leak during moving.
Analysis:
a) drain the condensate before moving. b) to avoid water leakage, please locate the device on flat ground. 5) Trouble: Do not work and water full indicator "E4"
Analysis:
a) pull out rubber plug to drain water. b) if it is often in this state, please contact qualified service technical.
Troubleshooting
6) Trouble: Device fails to start up.
Analysis:
a) Maybe it is not plugged in. So, plug it in. b) Maybe the plug or socket is damaged. Replace it by the service provider. c) Maybe the fuse is broken. Replace the fuse by the service provider (specification: 3.15A/250VAC). 7) Trouble: Device automatically stops.
Analysis:
a) Timing shut down or set temperature reached. Restart it or wait for auto-switch. 8) Trouble: No cold air under COOL "K" mode.
Analysis:
a) Room temperature is lower than set temperature. This is a normal phenomenon; the machine will auto-switch when the room temperature is higher than the set temperature. b) Device enters into anti-frost protection. The device will auto-switch after anti-frost protection is over. 9) Trouble: LED displays failure code "E2"
Analysis:
a) Room temperature sensor fails or is damaged. Replace the room temperature sensor by the service provider. 10) Trouble: LED displays failure code "E3"
Analysis:
a) The evaporator oil pipe sensor fails or is damaged. Replace the evaporator coil pipe sensor by the service provider. 11) Trouble: LED displays failure code "E4"
Analysis: a) Water-full warning. Drain out the water.
CLEANING AND MAINTENANCE
Device maintenance
- Turn off the device first before disconnecting from power supply.
- Wipe with a soft and dry cloth. Use lukewarm water below 40°C to clean if the appliance is very dirty.
- Never use volatile substances such as gasoline or polishing powder to clean the device.
Air filter maintenance
It is necessary to clean the air filter every 2 weeks if the device operates in an extremely dusty environment. Clean as follows:
- Stop the device first, push up the air filter (Picture F).
- Clean and reinstall the air filter.
- If the dirt is conspicuous, wash it with a solution of detergent in lukewarm water. After cleaning, dry it in a shaded and cool place, then reinstall it.
Maintenance after use
- If the device will not be used for a longer time, be sure to pull out the rubber plug of the upper cooler drain hole (8) and the rubber plug of the lower cooler drain hole (9) of the drain port, in order to drain the water.
- Keep the appliance running with fan only for half a day during a sunny day to dry the appliance inside and prevent it from going moldy.
- Stop the device and pull out the power cord plug, then take out the batteries of the remote controller and store the device properly.
- Clean the air filter and reinstall it.
- Remove the air hoses and store them properly, and cover the hole tightly.
TECHNICAL DATA:
Cooling capacity at BTU: 9000 BTU / hour
Cooling capacity in watts: 2600
Energy consumption (cooling) W: 950 W
Volume: ≤ 65 dB
Air flow: 380 m³/h
Energy class: A
Timer: 24 hours
R290 coolant weight: max. 200 grams
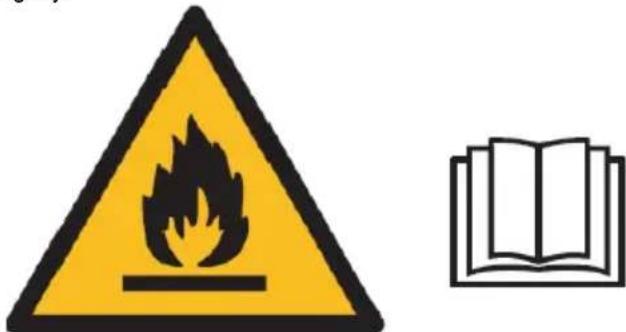
Caution, risk of fire.
Do NOT pierce or burn.
Be aware that the refrigerant may not contain an odour.
The maximum refrigerant charge amount: 200g.
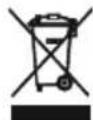
To protect your environment: please separate carton boxes and plastic bags and dispose them in corresponding waste bins. Used appliance should be delivered to the dedicated collecting points due to hazardous components, which may effect the environment. Do not dispose this appliance in the common waste bin.
GERMAN
Speed "F" -> High speed G
5. Power
Pressing button "A" again, the device will beep "di" and stop working.
- Press this button "I" to put the device into sleep mode.
- Press this button "N" to set the off time.
- Press this button "O" to set the air swing oscillation upward.
Operating principle of each mode:
AUTO "J" mode:
Fan "M..." mode.
Operation in "O" mode in motion:
PROTECTIVE DEVICES
The protective device may switch off and stop the device in the following cases:
- In cooling mode: The air temperature in the room exceeds 43 °C (109 °F) 2. In cooling mode: The room temperature is below 15°C (59°F)
- In dehumidification mode: The room temperature is below 15°C (59°F)
If the device operates in cooling mode "K" or in dehumidification mode "L" with the door or window open for a long time, when the relative humidity exceeds 80%, water may drip from the outlet.
The protective device will operate in the following cases:
- Restart the device immediately after stopping operation or changing the selected mode during operation; you must wait 3 minutes.
- If the plug was removed, after restarting the device will return to the previous mode, TIMER ON and TIMER OFF - must be set again.
NOTE: This device has a hidden recirculation of condensed water. The condensed water partially recirculates between the condenser and partially drains. When the water level rises to the upper level, the float switches of the water full indicator (E4) activate to remind you to drain the water. Please, disconnect the power, move the unit to a suitable place, remove the drain plug, and completely drain the water. After draining, install the plug back in place, otherwise the unit may leak and make your room wet.
If the unit is in a position that allows water drainage, you can also connect the drain outlet to a drain opening for water drainage. The drain hose is not included in the kit; it must be: inner diameter 9 mm, outer diameter 12 mm, material: PVC.
Troubleshooting
1) Problem: It does not work.
Analysis:
a) Possibly, the protective device is tripped or the fuse is blown. Please, wait 3 minutes and start again; the protective device may prevent the device from working. b) Possibly, the batteries of the remote control are discharged. d) Possibly, the plug is connected incorrectly. 2) Problem: It works only for a short time
Analysis:
a) If the set temperature is close to room temperature, you can lower the set temperature. b) Possibly, the air outlet is blocked by an obstacle. Remove the obstacle. 3) Problem: It works, but does not cool
Analysis:
a) Maybe, the door or window is open. b) Maybe, there is another device nearby that emits heat, for example, a heater or a lamp, etc. c) The air filter is dirty; please, clean it. d) The air outlet or air intake are blocked. e) The set temperature is too high. 4) Problem: Water leaks during movement.
Analysis:
a) Check the condensate before moving it. b) To avoid water leakage, place the device on a flat surface. c) Fault: The fill indicator does not work in "E4" mode.
Analysis:
a) Pull out the drain plug to drain the water. b) If it is often in this state, contact technical support.
Fault: The device does not start.
Analysis:
a) Possible disconnection. Check the connection. b) Possible damage to the plug or socket. Replace with a service provider. c) Possible blown fuse. Replace the fuse with a service provider (specification: 3.15A / 250VAC). 7) Problem: The device stops automatically.
Analysis:
a) The set temperature has been reached. Restart it or wait for automatic restart. 8) Fault: No cold air in cooling mode "K".
Analysis:
a) Room temperature is below the set temperature. This is normal; the machine switches automatically when the room temperature exceeds the set temperature. b) The device enters defrost protection. It restarts automatically after defrost protection ends. 9) Fault: The light displays error code "E2".
Analysis:
a) The room temperature sensor is defective. Replace the room temperature sensor with a service provider. 10) Fault: The light displays error code "E3".
Analysis:
a) The discharge pipe sensor is defective. Replace the discharge pipe sensor with a service provider. 11) Fault: The light displays error code "E4".
Analysis:
CLEANING AND MAINTENANCE
Device maintenance
1. Before connecting the device to the power supply, first turn off the device. 2. Wipe with a dry cloth. Use clean water with a temperature below 40°C for cleaning if the device is dirty. 3. Never use flammable substances such as benzene or abrasive powders to clean the device.
Air filter maintenance
It is necessary to clean the air filter every 2 weeks if the device operates in a very dusty environment. Clean as follows:
1. First stop the device and remove the air filter (Figure F). 2. Clean and reinstall the air filter. 3. If dirt is noticeable, wash it with a solution of mild detergent in warm water. After cleaning, dry it in a shaded or cool place, then reinstall it.
Maintenance after use
- If the device will not be used for an extended period, be sure to remove the rubber plug from the drain hole of the upper cooler (8) and the rubber plug from the drain hole (9) to drain the water. 2. Keep the device turned on with the fan only for a short period of time under sunlight to dry the device inside and prevent mold.
- Stop the device and unplug the power cord, then remove the batteries from the remote control and store the device properly.
- Clean the air filter and reinstall it.
- Remove the air guides, store them properly, and then close the opening.
TECHNICAL DATA:
Cooling capacity in BTU: 9000 BTU/hour
Cooling capacity in watts: 2600
Power consumption (cooling): 950 W
Volume: 65 L
Air flow: 380 m3/h
Energy class: A
Timer: 24 hours
Mass of cooling liquid R290: max. 200 grams
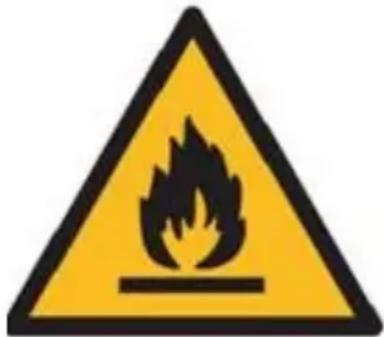
Caution, fire hazard.
Do not pierce or burn.
Remember that the refrigerant cannot smell.
Maximum amount of refrigerant charge: 200 g.
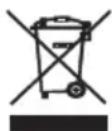
Please dispose of the cardboard packaging at the recycling point. Polyethylene bags (PE) should be disposed of in the plastic recycling container. Dispose of the used device at the appropriate collection point, as the hazardous components contained in the device may pose a threat to the environment. Dispose of the electrical device in such a way as to limit its reuse. If the device contains batteries, they must be removed and disposed of separately at the collection point. Do not dispose of the device in the household waste container!
- Keep the unit at least 1 meter away from TVs or radios to avoid electromagnetic interference.
- Do not expose the unit to direct sunlight to prevent the surface color from fading.
- The unit by a foreign organization or organization (e.g., an organization of foreign companies, individuals, or persons)
- The unit by a foreign organization or organization (e.g., an organization of foreign companies, individuals, or persons)
- The unit by a foreign organization or organization (e.g., an organization of foreign companies, individuals, or persons)
- The unit by a foreign organization or organization (e.g., an organization of foreign companies, individuals, or persons)
- The unit by a foreign organization or organization (e.g., an organization of foreign companies, individual, or persons)
- The unit by a foreign organization or organization (e.g., an organization of foreign companies, individuals, or persons)
- The unit by a foreign organization or organization (e.g., an organization of foreign companies, individuals, or persons)
- The unit by a foreign organization or organization (e.g., an organization of foreign companies, individuals, or persons)
- The unit by a foreign organization or organization (e.g., an organization or organization of foreign companies, individuals, or persons)
- The unit by a foreign organization or organization (e.g., an organization of foreign companies, individuals, or persons)
- The unit by a foreign organization or organization (e.g., an organization of foreign companies, individuals, or persons)
- The unit by a foreign organization or organization (e.g., an organization of foreign companies, individuals, or persons)
- The unit by a foreign organization or organization
- Place the unit on a flat surface with an inclination of less than 5 degrees.
- The unit operates more efficiently in certain locations; choose the best placement:
- Near a window, a door, or a French window.
- Keep the desired distance from the return air outlet to the wall or other obstacles at least 60 cm.
- Extend the air hose to ensure that the other end of the air hose has distance between the window door or the French window or the wall hole.
- The air outlet or inlet must not be blocked by protective nets or any obstruction.
Ventilator "M..." mode.
INSTRUCTIONS FOR USE - (Figure E)
Connect the exhaust air hose to the exhaust air connection.
- Extend the exhaust air hose (10) to the end of the hose.
- Connect the exhaust air hose (10) to the exhaust air connection (11). 3. Connect the exhaust air hose (11) to the unit.
NOTES:
- Keep the unit at least 1 meter away from the television or radio to avoid electromagnetic interference.
- Do not expose the unit to direct sunlight to avoid discoloration of the surface.
- Do not tilt the unit more than 35 degrees or turn it upside down during transport. If the unit has been tilted during transport, let it stand for 2-4 hours before starting.
- The unit can be tilted up to 5°.
- The unit operates optimally in certain installation positions; select the best position:
Control panel "I":
Volume: < 65 dB
Airflow: 380 m3/h
Energy class: A
Timer: 24 hours
Refrigerant weight R290: max. 200 grams
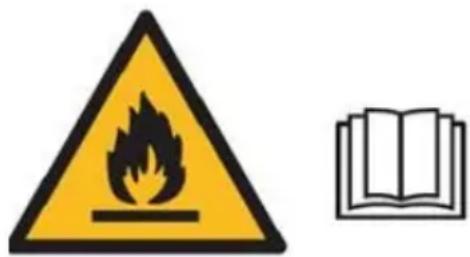
Control panel "O":
When the unit is turned on, press the "O" button; the vertical louver will not move up or down. When turned on, the opening can be adjusted back and forth within a 60-degree range. While pressing the "O" button, the grille will stop moving.
Control:
The main control panel has a memory function. When the unit is set to move but is in a stopped state, the main
control panel can activate the movement of the previous mode. When turned on, it will operate as before, and there is no need to set the operating mode again. (This condition does not apply when the unit is in auto mode "J.")
REMOTE CONTROL
1. Remove the cover on the back of the remote control and insert the batteries. 2. Insert the batteries correctly, which must match the "+" and "-" signs on the remote control. 3. Remove the batteries if the remote control is not used for a long time. 4. To ensure proper operation, remove the batteries and store them safely in the appropriate manner.
The device is controlled by the remote control. The device can be controlled from a distance of up to 5 meters, provided the signal receiver is not obstructed.
DEVICE PROTECTION
The device protection may stop the device in the following cases: 1. In cooling mode: The air temperature in the closed space is above 43°C (109°F). 2. In heating mode: The room temperature is below 15°C (59°F). 3. In fan mode: The room temperature is below 15°C (59°F).
If the device operates in cooling or dehumidification mode with open doors or windows when the relative air humidity is above 80%, condensation may form on the unit.
The device will not operate in the following cases:
1. If the device is restarted immediately after being stopped during operation, you must wait 3 minutes. 2. If the unit is turned off, after restarting the device will not return to the previous mode; the timer and the timer off must be set again.
NOTE: There is a water collection container inside this unit. The water for condensation is continuously collected between the condenser and the water pump. When the water level rises to the upper level, the water pump indicator (E4) lights up to drain the water. Stop the power supply, move the device to an appropriate place, open the drain plug, and completely drain the water. After that, set the unit again, and the device will operate and make your room dry.
If the device is installed to supply fresh water, you can open the drain outlet to drain the water. The drain hose should not be connected to the drain outlet; it should be: inner diameter 9 mm, outer diameter 12 mm, material: PVC.
Troubleshooting
1) Problem: It does not work.
Analysis:
a) Maybe the protection device is activated. Wait 3 minutes and restart. The protection device may stop the device. b) Maybe the batteries in the remote control are exhausted. c) Maybe the unit is not properly connected. 2) Problem: It works only for a short time.
Analysis:
a) If the set temperature is close to the room temperature, you can lower the set temperature. b) Maybe the air outlet is blocked by an obstacle. Remove the obstacle. 3) Problem: It works, but it does not cool.
Analysis:
a) Make sure the door and window are open. b) Make sure there is sufficient distance from the appliance to the heat source, as well as from the IIN light, etc. c) Check the air filter and clean it. d) The air outlet is blocked. e) The set temperature is too high. f) Problem: Water leakage from the appliance.
Analysis:
a) Empty the condensate before operation. b) To avoid water leakage, place the unit on a level surface. c) Problem: The unit does not display the water full indicator "E4".
Analysis:
a) Remove the water drain plug. b) If this condition persists, contact a qualified technical service.
Troubleshooting
b) Problem: The unit does not start.
Analysis:
a) It may not be plugged in. So, plug it in. b) The thermostat may be faulty. Replace the thermostat. c) The fuse may be blown. Replace the fuse from the service side (specification: 3.15A / 250VAC). d) Problem: The unit stops automatically.
Analysis:
a) The timer for the set temperature is activated. Turn it on and wait for automatic restart. b) Problem: No cool air in the "COOL" mode.
Analysis:
a) The room temperature is lower than the set temperature. This is normal; the machine will automatically restart when the room temperature rises above the set temperature. b) Check the defrost function. The unit will automatically restart after the defrost cycle ends. c) Problem: The LED display shows error code "E2".
Analysis:
a) The room temperature sensor is not working or is damaged. Replace the room temperature sensor from the spare parts supplier. b) Problem: The LED display shows error code "E3".
a) The light sensor is damaged or not working properly. Replace the light sensor for scanning with a service professional. 11) Problem: The display shows an error "E4"
Analysis: a) Use for filling the boiler.
CLEANING AND MAINTENANCE
Cleaning the appliance
1. Before cleaning, unplug the appliance. 2. Wipe with a damp cloth. For cleaning if the appliance is very dirty, use mild soapy water up to 40°C. 3. Never use flammable materials such as benzene or thinners for cleaning the appliance.
Cleaning the air filter
It is necessary to clean the air filter every two weeks if the appliance operates in a particularly dusty environment. Clean it as follows:
- First, turn off the appliance and remove the air filter (Fig. 4).
- Clean and replace the air filter.
- If it is very dirty, clean it with a solution of mild detergent and warm water. After cleaning, dry it in a shaded place, then reinstall it.
Do not bend or damage it.
Keep in mind that the cleaning agent may not be suitable for plastic.
Maximum amount of cleaning agent: 200g.
For disposal of the appliance: Please separate cardboard boxes and plastic bags and place them in the appropriate recycling bins. The appliance should be disposed of at the designated collection point due to its components, which may affect the environment. Do not dispose of this appliance in the general waste bin.
SWEDISH
GENERAL SAFETY CONDITIONS
IMPORTANT SAFETY INSTRUCTIONS READ NOW AND SAVE FOR THE FUTURE
Warning, risk of fire.
B. Fan speed button
C. Mode button
D. Timer button / Temperature increase
E. Temperature decrease button
F. Low liquid lamp
G. High liquid lamp
I=J. Sleep button / Automatic mode
K. Dehumidification mode
L. Drying mode
M. Fan mode
N. Timer button
O. Khonka KoJINBaHb
BIVDAJIIEHO KOHTPOJEP -MaJIIOHOKD
Iybl dtnctaHIO Horo KepyBaHH nepe dae CnHaJI nCtEmi.
KhONka"A"- npJna3aynctntb8c, KOIN Bn niiKNoeHm do Hapyrn a6o 6yde 3ynHeHn niD vac pOboTn, kUo HaTncHTn cI KhoNky.
Khonnka "C" - HatnchItb ii, 106 Bnbpatnpexm npo6To: "J", "K", "L" a6o "M".
KhoNka"B" - HATNCiHb ii, 06B Bn6paT NocIIOBHO WbNDKiCTb BEHTNIArTopa.
Khonnka "D" / "E" - Hatncihb, 06 peynkobatn Temnepatypy B npmiueneHH ta Taimep.
KhONka "r" - HATNCHTb, 06 BCtAHOBNTn a6o CKacyBaTN peKIM CHy.
KhONka "N" - HATNCiTb, 106 BCTaHOBHTuac ABTOMATUHORO BMKHeHHr Ta aBTOMATUHORO yBIMKHeHHr.
Khonnka "O" - HATNCHTb, 0o6 BCaTHOBNTn a6o cKacyBaN pexm po3nay xan3i.
Eknpnyataia naheJI ynpabnHH
ABTOMATNUH / OXIAIHI / CYXI / BeHTNIJIaTOpN
- YbimKHiB npncTpii. a)PiKInOHTb npnCTpi. b) Hatncitb Khonky "A", nicra yoro npicpii noa3 3ykoBm cnHan oDnH pa3 iYbIMKHiTb. B) CbTIOIOHN IIOB BIDOBpaKaC KIMHaTHy TeMnePaTy pI NOUHaC npaIOBaTN B aBTOMaTHuHOMy peXMI.
2.Bn6epiB pexmpo6oTu
HaTNCHTb KHOHnky "C", 106 bBn6paTn nOtpi6Hn peXm pO6To3 a NocniIDOBHcHIO:
Automatic mode "J" -> Cooling mode "K" -> Drying mode "L" -> Fan mode "M."
- Adjust the temperature.
The temperature can be set between 15°-31°C. Press the "D" or "E" button to increase or decrease the temperature by
1°C each time you press it. The remote control displays the set temperature for 5 seconds, then shows
the room temperature.
- Adjust the fan speed.
Press the "B" button to select the desired fan speed in sequence:
Low speed "F" -> High speed "G"
- Auto
When you press the "A" button again, the air conditioner stops and no longer operates.
- Press the "r" button to enter the timer mode.
- Press the "N" button to set the automatic shut-off time.
- Press the "O" button to set the number of repeated oscillations.
Test each mode:
Automatic mode "J":
When the temperature in the room is above the set temperature, the device automatically selects the operating mode "K".
- When the temperature in the room is ≥ 24°C, the device automatically selects the cooling mode "K".
or
- When the temperature in the room is < 24°C, the device automatically selects the high humidity fan mode "M".
Drying mode "L"
- The upper centrifugal fan will operate at low speed, and the speed cannot be adjusted.
- The compressor will stop for 8 minutes, then restart after 6 minutes. The device maintains the set temperature, but temperature regulation is not effective.
WARNING:
When the device operates in conditions of varying humidity, the drain hole (9) of the lower pipe must be constantly open and ensure constant water flow.
Cooling mode "K":
- When the temperature in the room is above the set temperature on the control panel, the compressor starts to operate.
- When the temperature in the room is below the set temperature on the control panel, the compressor stops and the upper fan operates at a preset low speed.
Fan mode "M"
- The upper centrifugal fan operates at a set speed, and the compressor does not operate.
- Temperature regulation is not effective.
Press the "N" button:
- Press the "N" button to set the automatic shutdown mode for the device.
- Press the "N" button to set the automatic shutdown, until the device is ready.
- The time can be adjusted from 1 hour to 24 hours by pressing the "D" (+) or "E" (-) buttons.
When the device is placed in a position that is convenient for water intake, you can also connect the water intake hose to the water inlet for water intake. The water hose is not included in the kit; it should have an inner diameter of 9 mm and an outer diameter of 12 mm.
Troubleshooting
1) Problem: It doesn't work.
Analysis:
a) Possibly, the protection device is triggered or the fuse is blown. Wait a few minutes and restart. The device's protector may switch the device back on. b) Possibly, the battery in the remote control is dead. c) Possibly, the plug is incorrectly connected. 2) Problem: It works only for a short time.
Analysis:
a) If the set temperature is close to the ambient temperature, you can lower the temperature setting. b) Possibly, the air outlet is blocked. Remove the blockage. 3) Problem: It works but does not cool.
Analysis:
a) Possibly, the door is open. b) Possibly, at close range there is another heat source, such as a working body, a heater, or a lamp. c) The air filter is dirty. Please clean it.
d) The air outlet or outlet is blocked. e) The set temperature is too high. 4) Problem: Water leaks during operation.
Analysis:
a) Drain the condensate before operation. b) Plug into a water outlet, be careful, place the device on level ground. c) Faults: not working and indicator full "E4"
Analysis:
a) Pull out the drain plug to drain the water. b) If it is often in this state, contact a qualified service technician.
Troubleshooting b) Problem: the device does not start.
Analysis:
a) May not be plugged in. Plug it in. b) Possibly damaged power cord or socket. Replace the power cord. c) Possibly blown fuse. Replace the fuse with a new one (specification: 3.15A / 250VAC). 7) Problem: the device turns off automatically.
Analysis:
a) Time of operation or set temperature. Adjust it or set automatic heating. 8) Problem: lack of cold air in COOL mode "K".
Analysis:
a) Room temperature is lower than set temperature. This is normal, the machine automatically switches, when the room temperature is higher than set temperature. b) The device enters frost protection. The device automatically switches after the frost protection ends. 9) Problem: the display shows error code "E2"
Analysis:
a) The room temperature sensor is disconnected or faulty. Replace the room temperature sensor with a new one. 10) Problem: the display shows error code "E3"
Analysis:
a) The evaporator coil sensor is disconnected or faulty. Replace the evaporator coil sensor with a new one. 11) Problem: the display shows error code "E4"
Analysis: a) Check the water level, add water.
Technical maintenance of the devices
- Before turning off the power, turn off the device.
- Wipe with a soft, dry cloth. Do not use water hotter than 40°C if the device is very dirty.
- Never use solvents, benzene, or abrasive powders for cleaning.
Technical maintenance of the air filter
Check the air filter and the 2 seals if the device operates in a heavily polluted environment. Clean as follows:
1. First, turn off the device, press the air filter (item F).
- Clean and reinstall the air filter.
- If the filter is dirty, wash it with a mild detergent in warm water. After cleaning, dry it in a shaded and ventilated place, then reinstall it.
Technical maintenance during non-use
- If the device will not be used for a long time, be sure to unscrew the drain plug of the upper water tank (8) and the drain plug of the lower water tank (9) to drain the water.
- Keep the device running with the fan for about half an hour to dry the inside of the device and prevent mold.
- Turn off the device and remove the power plug, then remove the batteries from the remote control and store the device properly.
- Clean the air filter and reinstall it.
- Take the device out of the packaging and place it on a flat surface, and close the hole tightly.
TECHNICAL DATA:
Cooling capacity in BTU: 9000 BTU/hour
Cooling capacity in watts: 2600
Power consumption (cooling) in W: 950 W
Volume: 65 dB
Air flow: 380 m3/hour
Energy class: A
Timer: 24 hours
Refrigerant R290 weight: max. 200 grams
Be careful, fire hazard.
Do not pierce or burn.
Note that the refrigerant may not contain any odor.
Maximum refrigerant charge: 200g.
Take care of the environment.
Dispose of the cardboard packaging in the waste paper container. Put the plastic bag (PE) in the recycling container. The device should be disposed of in the appropriate collection point, as it contains materials that may pose a risk to the environment. Electrical appliances must be returned to limit reuse. If the device contains batteries, they must be removed and taken to the appropriate collection point.
WARRANTY CONDITIONS
IMPORTANT INSTRUCTIONS FOR WARRANTY - READ CAREFULLY AND KEEP FOR FUTURE REFERENCE
- Before using the device, read the operating instructions and follow the instructions in them. The manufacturer is not responsible for damages caused by improper use of the device, contrary to the intended use or incorrect operation.
- The device is intended for household use only. Do not use it for purposes other than those for which it is intended.
- The device must be connected only to a power supply with a grounded 220-240V ~ 50Hz outlet. To increase safety during operation, multiple electrical devices should not be connected to the same power outlet at the same time.
- Use caution when using the device near children. Do not allow children to play with the device, and do not allow people who are not familiar with the device to use it.
- WARNING: This device can be used by children aged 8 and above, and by persons with reduced physical, sensory or mental capabilities, or lack of experience and knowledge, provided they have been given supervision or instruction concerning use of the device in a safe way and understand the hazards involved.
WARNING: To ensure your safety, the information about safe use of the device and the hazards of its use is provided. The device should not be used by children. Cleaning and maintenance of the device should not be performed by children unless they are over 8 years old and supervised by an adult. 6. Always disconnect the plug from the power outlet before cleaning. Do not pull the power cord. 7. Do not immerse the cord, plug, or device in water or other liquids. Do not expose the device to atmospheric conditions (rain, sun, snow) or use it in high humidity environments (bathrooms, damp rooms for mobile phones). 8. Regularly check the condition of the power cord. If the power cord is damaged, it must be replaced by a specialized repair service to avoid danger. 9. Do not use the device with a damaged power cord or if it has been dropped or damaged in any way, or if it does not work properly. Do not repair the device yourself, as there is a risk of electric shock. Take the damaged device to an appropriate service center for inspection or repair. All repairs must be performed only by authorized service personnel. Incorrect repairs can cause serious danger to the user. 10. Place the device on a flat, stable surface, away from hot kitchen appliances such as electric stoves, gas burners, etc. 11. Make sure that nothing blocks the air inlet and outlet of the device. 12. Use the device only on a flat surface to prevent the release of condensation. 13. To ensure additional protection, it is recommended to install a residual current device (RCD) in the electrical circuit with a rated residual current not exceeding 30 mA. For this, consult an electrician. 14. Regularly clean the air filter. The frequency of cleaning depends on the air pollution level. 15. After turning off the machine, wait at least 5 minutes before turning it on again. 16. Do not use the device in sunny places. When the device overheats, the overheat protection will activate and turn off the device. 17. To ensure efficient operation, maintain a minimum distance of 60 cm between the side walls of the device and the wall, furniture, or curtains. 18. Due to the design of the device, the difference between the set temperature and the ambient temperature is very large, so it cannot be adjusted. 19. To reduce the risk of fire, electric shock, or injury from improper use of the air conditioner, follow these basic safety precautions: a) Connect to a grounded outlet with 3 pins. b) Do not remove the grounding prong. c) Do not use an adapter.
r) At the end of the cable, insert it into the device before servicing. r) Use two people to lift and install the air conditioner. 20. Do not use means to accelerate the defrosting process or cleaning, except those recommended by the manufacturer. 21. The device must be placed in a room without constantly operating heat sources, for example: open flame, gas appliances, or electric heaters.
BEFORE USE - (Figure E)
Connect the connectors to the exhaust gas duct as follows:
1. Extend the exhaust gas duct (10) by pulling out both ends of the duct. 2. Insert the exhaust gas duct (10) into the connector of the exhaust gas duct (11). 3. Connect the connector of the exhaust duct to the air (11) with the device.
INSTALLATION:
- Keep a minimum distance of 1 meter from the TV or radio to avoid electromagnetic interference.
- Do not install the unit under direct sunlight to avoid color fading on the surfaces.
- Do not tilt the unit more than 35° or sideways while transporting. If the device has been tilted during transport, place it correctly and wait 2-4 hours before starting it.
- Place the unit on a flat surface with a tilt of 5°
- The unit operates continuously in a specific location in the room, choose the most suitable location:
- Near a window, door, or French window.
- Keep the required distance from the exhaust air to the wall or ceiling at least 60 cm. -Extend the air duct to ensure that the other end of the air duct has a gap between the window, French window, or wall opening.
- The exhaust air inlet must not be blocked with a protective grid or any other obstacle.
To extend the operation of the unit, make sure to clean the upper (8) and lower (9) filters before storing the unit at the end of the season.
DESCRIPTION OF THE DEVICE (Figures A and B)
- Control panel 2. Air outlet
- Power switch 4. Control panel
- Transport handle 6. Air outlet duct 7. Air inlet 8. Drain hole for condensate 9. Hole for draining the condensate hose 10. Air outlet duct
- Exhaust gas duct connector with air 12. Adapter for exhaust gas through the window
Control panel (figure C)
A. On/Off button B. Fan speed button C. Mode button D. Timer/Temperature up button E. Timer/Temperature down button F. Low speed indicator G. High speed indicator H. Sleep mode button I. Automatic mode J. Fan mode K. Dehumidify L. Fan mode M. Timer button O. Oscillation button
CONTROL PANEL - figure D
The control panel sends a signal to the system. The device starts when you press the button or stops when it is in function, if you press this button. Button "C" - press it to select the operating mode: "J", "K", "L" or "M". Button "B" - press it to select the fan speed in low. Button "D" / "E" - press to adjust the temperature in the room and the timer. Button "H" - press to set or cancel the sleep mode. Button "N" - press to enable the time for automatic shutdown and automatic startup. Button "O" - press to set or cancel the oscillation mode.
OPERATION OF THE CONTROL PANEL
AUTOMATIC / COOL / FAN / HEAT
- Turn on the device.
a) Plug in the device. b) Press the "A" button, then the device will beep and turn on. c) The LED diode shows the current temperature and starts working in automatic mode.
2. Select the operating mode
Press the "C" button to select the desired operating mode in sequence:
Automatic mode "J" - Heating mode "K" - Dehumidifying mode "L" - Fan mode "M"
3. Adjustment of temperature
The temperature can be set in the range of 15°C to 31°C. Press the "D" or "E" button to increase or decrease the temperature by 1°C with each press. The LED will show the set temperature for 5 seconds and then display the current temperature.
4. Adjustment of the fan speed
Press the "5" button to select the desired fan speed according to the following:
Low speed "F" -> High speed "G"
5. Power
When you press the "A" button again, the device will turn off and stop working.
- Press this button "J" to enter the timer mode of the device.
- Press this button "N" to set the time delay.
- Press this button "O" to set the air swing up and down.
Each operating mode:
Auto mode
When "J" is selected, the operation is selected, the indoor temperature sensor works automatically and selects one of the following operating modes:
- When the room temperature is ≥ 24°C, the unit will automatically select the cooling mode "K". - When the room temperature is < 24°C, the unit will automatically select the mode with high fan speed "M".
Capacity: 2600
Input power (nominal) W: 950 W
06em < = 65dB
This appliance is for household use. Cardboard packaging should be placed for recycling. Plastic bags (PE) should be placed in the recycling container. The used device should be handed over to the appropriate collection point, as the components contained in the device may be hazardous to the environment. The electrical device should be handed over to a facility that will enable its reuse and recycling. Since the device contains a battery, it must be removed and handed over to the collection point.
SLOVAK
GENERAL SAFETY CONDITIONS
IMPORTANT SAFETY INSTRUCTIONS READ CAREFULLY AND STORE FOR FUTURE USE
j"0"-claiell jjiie glll jbnial bniol.
sill 1
iogjy/12j/2j/
- jiu li jiào xià pǎ
jiee
jll bcniol ( "A" 14aie pia jdoal o jao jg j
LLED
2.
jll bcil "C" Jduilll yolall jll
The minimum value of a i aai is k .
= ( n - q 12 - q 22 - q 32) x - 2( nx - yq 1 - zq 2 - wq 3)
Electric heating pad AD 7415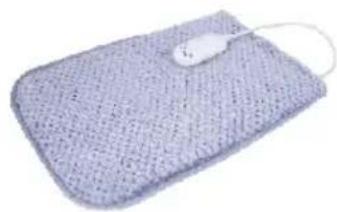
SORBET MAKER AD 4477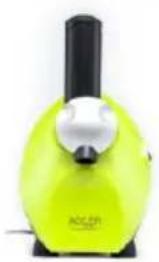
LED illuminated mirror AD 2159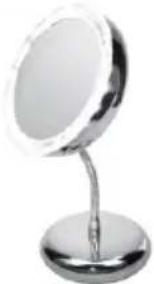
Coffee grinder AD 443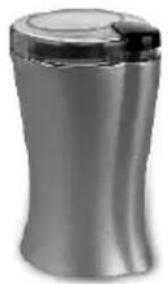
Desk fan 15 cm with clip AD 7317
Hand Blender AD 4616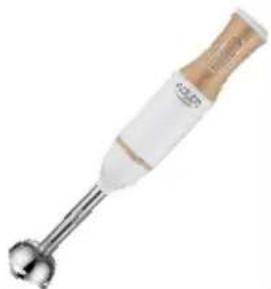
Food dryer AD 6654
Steam cooker AD 633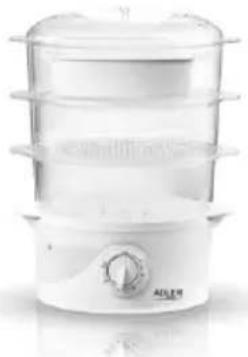
Air fryer AD 6307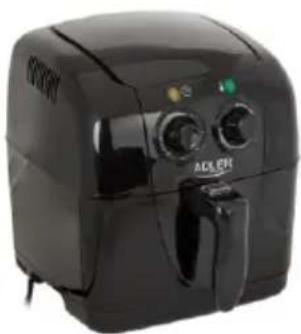
Air Purifier AD 7961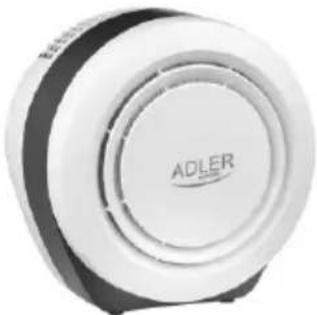
Automatic Hair Curler AD2110
Popcorn Maker AD 4479
Electric kettle 1.8L AD 1246
Mini washing machine with spinning function AD 8051
Canister vacuum cleaner AD 7022