
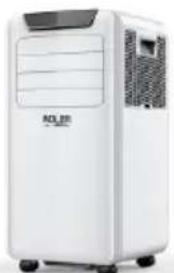
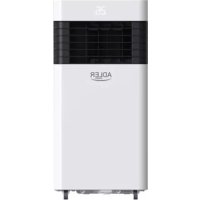
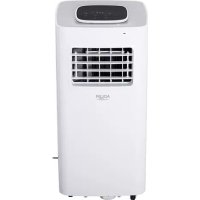
AD 7921 - Air Conditioning ADLER - Free user manual and instructions
Find the device manual for free AD 7921 ADLER in PDF.
| Product type | Evaporative air cooler |
| Brand | Adler |
| Model | AD 7921 |
| Power supply | 220-240 V ~ 50 Hz |
| Rated power | 60 W |
| Maximum power | 300 W (pump active) |
| Water tank capacity | 5.5 L |
| Water consumption | 300 ml/h |
| Fan speeds | 3 (low, medium, high) |
| Fan modes | Normal, Natural, Sleep |
| Timer | 2, 4, 6, 8, 10, 12 h |
| Horizontal oscillation | Yes (70°) |
| Remote control | Yes, CR2025 battery (included) |
| Cooling function | Water pump + cold accumulators (2 containers) |
| Filters | Mesh filter + paper evaporative filter |
| Tank cleaning | Every 3 days: drain, clean, fresh water |
| Descaling | Every 3 months with suitable descaler |
| Filter cleaning | Every 2 weeks: wash with clean water |
| Casters | 4 casters included, manual installation |
| Weight | Approximately 6 kg (approx.) |
Frequently Asked Questions - AD 7921 ADLER
User questions about AD 7921 ADLER
0 question about this device. Answer the ones you know or ask your own.
Ask a new question about this device
Download the instructions for your Air Conditioning in PDF format for free! Find your manual AD 7921 - ADLER and take your electronic device back in hand. On this page are published all the documents necessary for the use of your device. AD 7921 by ADLER.
USER MANUAL AD 7921 ADLER
SAFETY CONDITIONS. IMPORTANT INSTRUCTIONS ON SAFETY OF USE PLEASE READ CAREFULLY AND KEEP FOR FUTURE REFERENCE
The warranty conditions are different, if the device is used for commercial purpose.
1. Before using the product please read carefully and always comply with the following instructions. The manufacturer is not responsible for any damages due to any misuse.
2. The product is only to be used indoors. Do not use the product for any purpose that is not compatible with its application.
3. The applacable voltage is 220-240V, 50Hz . For safety reasons it is not appropriate to connect multiple devices to one power outlet.
4. Please be cautious when using around children. Do not let the children to play with the product. Do not let children or people who do not know the device to use it without supervision.
5. WARNING: This device may be used by children over 8 years of age and persons with reduced physical, sensory or mental capabilities, or persons without experience or knowledge of the device, only under the supervision of a person responsible for their safety, or if they were instructed on the safe use of the device and are aware of the dangers associated with its operation. Children should not play with the device. Cleaning and maintenance of the device should not be carried out by children, unless they are over 8 years of age and these activities are carried out under supervision.
6. After you are finished using the product always remember to gently remove the plug from the power outlet holding the outlet with your hand. Never pull the power cable!!!
7. Never leave the product connected to the power source without supervision. Even when use is interrupted for a short time, turn it off from the network, unplug the power.
8. Never put the power cable, the plug or the whole device into the water. Never expose the product to the atmospheric conditions such as direct sun light or rain, etc.. Never use the product in humid conditions.
9. Periodically check the power cable condition. If the power cable is damaged the product should be turned to a professional service location to be replaced in order to avoid hazardous situations.
10. Never use the product with a damaged power cable or if it was dropped or damaged in any other way or if it does not work properly. Do not try to repair the defected product yourself because it can lead to electric shock. Always turn the damaged device to a professional service location in order to repair it. All the repairs can be done only by authorized service professionals. The repair that was done incorrectly can cause hazardous situations for the user.
11. Never put the product on or close to the hot or warm surfaces or the kitchen appliances like the electric oven or gas burner.
12. Never use the product close to combustibles.
13. Do not let cord hang over edge of counter.
14. Do not immerse the motor unit in water.
15. Do not insert fingers or any other objects in the housing grille of the device.
16. Do not block the outlet.
17. When done, prior to putting it away, drain water from the device.
18. If the device is not used for a long time, unplug it from the power source.
19. Always use new batteries to replace the drained batteries in the remote control.
20. Do not move the device when the inner tank is filled with water.
- Do not place any objects on the device.
- The device can be used only with properly working ventilation.
- To provide additional protection, it is advisable to install a residual current device (RCD) in the electric circuit with a rated residual current not exceeding 30mA . Ask an electrician for this.
WARNING
- It should be remembered that a high level of humidity may favor the development of biological organisms in the environment.
- Do not get wet the device or wet the area around the device. If moisture appears, reduce the efficiency of the humidifying function.
- Do not allow absorbent materials such as carpets, curtains, tablecloths to get wet.
- Never leave water in the tank when the device is not in use.
- During filling and cleaning, disconnect the device from the mains.
-
Clean the device and water tank before using it again.
-
WARNING: When the water is not replaced and the tank is not properly cleaned every 3 days, microorganisms that may be present in the water or in the environment where the device is used or stored may develop in the water tank and be blown out to the surroundings. This can cause a very serious health risk.
WARNING: Every three days, empty the water tank and top up with clean water. Before refilling, clean the tank with fresh tap water or using detergents. Remove any scale, deposits or film that has formed on the sides of the tank and on the interior surfaces. After washing, wipe all surfaces dry.
DESCALING
- Perform the descending procedure in accordance with the instructions of the descending agent specified by the manufacturer.
2.Use descending agents intended for this purpose. - Carry out the descending procedure at least every 3 months.
- Descaling only the water tank with the device turned off.
DEVICE DESCRIPTION (Fig. A)
-
Plastic containers to frozen the water inside
-
Upper cover
- Upper water tank
- Louver
- Air outlet
- Bottom water tank
- Water level indicator
- Casters
- Control panel
- Power cord
- Mesh filter
- Drain plug
- Evaporation paper filter
- Remote control
15.Bracket
CONTROL PANEL DESCRIPTION (Fig. C)
A. Power switch ON/OFF
B. Cooling / Humidify button
C. Mode choice button
D. Horizontal air osculation button
E. Fan speed button
F. Timer button
G. Slow fan speed indicator
H. Medium fan speed indicator
I. Fast fan speed indicator
J. Normal air wind mode
K. Natural air wind mode
L. Sleep wind mode
M. Power indicator
N. Horizontal air osculation indicator
A noticeable reduction in the temperature of the outlet air occurs after putting into the water tank plastic containers attached to the product previously frozen in the freezer. Those 2 plastic containers can use circularly. The content of plastic container is prohibited to edible. It is recommended to fill the tank with cold tap water.
Installation instructions for casters:
Take out the 4 casters from package. Turn the device upside down, align the caster shaft with the caster installation hole in the body bottom and press firmly to the end. Look at figure B.
USING THE DEVICE
Buttons on remote control (14) is same as the control panel (9). Don't put any stuff in the front of the remote control's receptor.
- Place the device on a dry, flat surface.
-
Open upper cover (1) and pour the water to MAX level at water level indicator (7). Connect the device to the power supply.
-
Turn on the device using the power switch (A) button on the control panel (Fig. C). default setting is middle fan speed. Press power switch (A) again, product is in standby.
- The fan speed button (E) on the control panel (9) allows you to change the speed of the fan. The following fan speeds can be selected by pressing again: medium (H) -> slow (G) -> fast (H) -> medium (H) -> ...
- Cooling / Humidify button (B) lowers the temperature of the air by running the water pump. Additionally, you can put to upper water tank (2) attached plastic containers (3). Plastic containers (3) should be filled up to max level by water and frozen in the freezer in advance.
To blow the cool air, the device must be filled with water. When the device is operating, periodically check the water level to see whether to add water. NEVER switch on the water pump when the bottom water tank (6) is not filled by water to minimum level at least. - Pressing the horizontal air osculation button (D) to start the oscillation of slats that provide even distribution of cold air stream in range 70^ . Horizontal louvers (4) do not move automatically, so if necessary, manually adjust them to point up or down.
- The TIMER button (F) allows for programming the amount of time during which the device will operate before turning itself off automatically. Available time period selection is: 2-4-6-8-10-12 hours.
- The mode choice button (C) allows for changing the fan mode. In addition to the normal fan air wind mode, you can select natural and sleep modes.
Normal fan mode (J) allows to set up fan speed between: medium (H) -> slow (G) -> fast (H) -> medium (H) -> ... Each time the fan is turned on again it will start operation in normal mode.
The natural mode (K) mimics the natural wind action by repeating the fan speed sequence:
-on fan speed set to low speed (G): the fan will blow 5 seconds at low speed and turn off for 5 seconds and next repeat this cycle;
-on fan speed set to middle speed (H): the fan will blow 5 seconds on each speed: middle, low, middle, stop, low, middle, low, stop and next repeat this cycle;
on fan speed set to fast speed (I): the fan will blow 5 seconds each speed: middle, low, fast, middle, fast, low, fast, stop and next repeat this cycle.
Sleep mode (L) was designed to use the effects of nature wind to easier fall asleep. It will gradually decrease the speed of fan in 30 minute increments:
-on fan speed set to low speed (G): the fan will run the same as low speed natural mode;
-on fan speed set to middle speed (H): the fan will blow 30 minutes on middle speed natural mode, then switch to low speed natural mode;
-on fan speed set to fast speed (I): the fan will blow 30 minutes on fast speed natural mode then switch to middle speed natural mode for 30 minutes, then switch to low speed natural mode.
To start remote control (14) operation pull out the installing film. To replace the battery push the release tab and take battery out the battery carriage. Replace by same type battery.
CLEANING AND MAINTENANCE
Please ensure that the device and all of its parts are cleaned regularly to reduce the risk of limescale and bacteria forming. Unplug the device before cleaning. Do not soak the control panel in water.
- Clean with soft, dry cloth. Do not use chemical solvents because they can cause permanent damage or deformation of the device.
- If the device is not used for three or more months, take the batteries out of the remote control.
- After long time operation, mesh filter (11) and evaporation paper filter (13) will be clogged with the dust, which will greatly affect the machine's performance of cooling. If long time no changing water, there may be mold and mildew. We suggest to clean the mesh filter (11) and evaporation paper filter (13) once every two weeks. The clean procedure is as below:
a)Unplug the device, remove the screw of the back housing and then take mesh filter (11) and evaporation paper filter (13) out.
b) Wash the evaporation paper filter (13) in a mild detergent and warm water solution by soft brush, then rinse in clean water. Take care not to pierce the evaporation paper filter (13).
c)Wash the mesh filer (11) with flowing clean water. Use a soft brush for cleaning.
d) Dry both filters. The evaporation paper filter (13) must be installed flatly in order to avoid leakage. Screw bracket (15) with evaporation paper filter (13) and mesh filter (11) to housing. - Drain the water before storage by removing the drain plug (12) at the bottom of the water tank after each use.
- Before season storage clean bottom water tank (6) after unscrewing 3 screws. Then dry water tank, filters and housing to avoid the moisture damage.
- Assemble the device and store it in a dry place until the next season.
TECHNICAL DATA:
Power source: 220 - 240V 50Hz
Power: 60W
Power Max: 300W
Tank capacity: 5,5 liters
Water Consumption: 300ml / hour
Remote control supplied by lithium type battery CR2025 (3V), included
To protect your environment: please separate carton boxes and plastic bags and dispose them in corresponding waste bins. Used appliance should be delivered to the dedicated collecting points due to hazardous components, which may effect the environment. Do not dispose this appliance in the common waste bin.
DEUTSCH
Petrosnja vode: 300ml / sat
Ukljucen daljinski upravljač isporučen sa litijumskom baterijom CR2025 (3V)

Brinuci za okolis.
Molimo Vas da kartonska pakovanja odnesete u otkup optdnog papira. Polietilenske džakove (PE) bacajte u kontejner za plastiku. Iskorišćen uredaj treba odneti na odgovarajuću deponiju, jer opasni sastojci koji se u njemu nalaze, mogu biti opasni za okoliš. Elektrčni uredaj treba odneti na nacin, koji ogranicava njegovu ponovnu upotrebu i korištenje. Ako se u uredaju nalaze baterije, treba ih izvaditi i odvojeno predati na deponiju.
Urejaj se ne smije bacati u kontejner za komunalni otpad!!
MAGYAR
BIZTONSAGI FELTÉTELEK. FONTOS UTASITÁSOK A FELHASNZÁLASRA KERJUK, OVOSAN OLVASSA EL ES TARTSA A JÖVÖBENI REFERENCIAT
TEXHNUECKNE DAHHBIE:
IcToUHnK nTaNHa: 220-240 B 50 T
MoUHocTb:60BT
MaKcImaJIbHaJaMoUHocTb:300BT
EMKoCTb 6aka:5,5NITPOB
Pacxod BoDbl: 300 mJ/ yac.
TnB T nctaHOnHO ynpabHeHHaTaetcO TnHTneBOB 6aTapen CR2025 (3 B), B KOMJIeKeTe

3a6078c b 6Kpykaioe cpe.. Ynakobky n3 kaptoHa nepedaite, noxanyiTa, Ha Maynatpy. POniTuHneHOBbIe MeuKn (PE) Bblknd TaB B peshyap dny iNactMaccb. H3nooHoe yctpoCTBO hdo nepeDaB CootBETCTBYUOyTOuy Kxpanehnra TAK KaHaxoJuecey UCTPOCTBeONAChtie CoCTABNIOUme MOYr ABnTBCsry IyPo3oDnIg OKpykaoue cpe. 3NeKTpncEcoe yctpoCTBO hao nepeDaTb TakIM o6pa3om, yTo6bI orpAHmHTb erO nobTOHoe yonTepe6neHne NcNoJIb3OBAHHe. EcnB yctpoCTBe HaxoJATc6BaTapeu, ux hao BbyTb N pepeDaB TOUYXPAHENHOTdNbHo. UcTPOCTBO He BBkndAeB PeepByap dny KOMMyHbHbIX OTxODo!
SLOVENSCINA
VARNOSTNI POGOJI. POMEMBNA NAVODILA O VARNOSTI UPORABE
PROSIMO, DA PREBERITE POZORNO IN NADALJUJETE ZA PRIHODNJO REFERENco
Garancijski pogoji se razlikujejo, ce se naprava uporablja v komercialne namene.
Potrosnja vode: 300ml / sat
Ukljucen daljinski upravljač isporučen s litij baterijom CR2025 (3V)

Vodimo brig u prirodnom okolisu. Kartonsku ambala zu molimo prenjeti na opadni papir. Polietilen (PE) vrece bacati u kontejner za plastiku. Istrošena oprema treba biti premješena na prikladno mjesto za pohranu, jer sadrze u ureadju opasne tvari mogu predstavlji opasnost za okolis. Elektrni uredaj mora biti predat u takvom stanju da se smanj mogucnost njegove ponovne upotrebe. Ako vaš uredaj ima baterije, treba njih ukloniti predati na mjesto za pohranu odvojeno.
ITALIANO
CONDIZIONI DI SICUREZZA. ISTRUZIONI IMPORTANTI PER LA SICUREZZA D'USO SI PREGA DI LEGGERE ATTENTAMENTE E CONSERVARE PER RIFERIMENTI FUTURI
APPARAATBESCHRIJVING (Afb. A)
MaKcImaJIHa MoKHOCT:300W
KanaunTeHa pe3epBoaP:5,5nTpn
Ntpoubyauka Ha Boda: 300ml / yac
Bknyeh e daneyHcknOT ynpabvbaucnOpauah o6bATEpjuata oTINOT Ha NITynm CR2025 (3V)
Ce rpnKIme 3a npnpOHaTc cpeHnHa. KapTOHckNte NaKOBKn MOJInme Da ce HameHaT 3a peUKNipAhe. POnIeTNHeOBInTe Kecn (PE) da ce oPnat BO KOHTeHep 3a Npactnka. NcKOpNCtEHNOt ypeD Tpe6a Da ce npeDaTe BO COODBeTHNOt CKJaDnpaQnnyKt, 6nDejkn He636bHNTE COCToJkn KOn CE HAOaAT BO ypeDTo MOKaT Da 6nDaT 3arpo3yBaHbe 3a CpeHNaTa. ENEKtpuHnOT ypeD Tpe6a Da ce npeDaTe Ha HauH Koj Ke OHeBO3MOxN HerOBA NOBtOpHa YNOTpe6a NcKOpNCtYBaHbe. Iokolky BO ypeDTo NMa 6aTePN, Tpe6a Da ce N3BaDat NnoceBHO Da ce npeDaT BCKJaDnpaQnOT nyHKT.
SVENSKA
SÄKERHETSVILLKOR, VIKTIGA INSTRUKTIONER OM ANVÄNDNINGSSÄKERHET LAS VANLIGHT OCH HALL FOR FRAMTIDA HANVISNINGAR
NotpouBa Bode: 300mN / cat
YKbUeyen daBunckn ynpabJbau nCnOpyuEn ca Jntjymckom 6aTepnjom Lp2025 (3B)
3a 3aHTy JXIBOTHE CpeHHe: MOJIMBO Bac Da ODBojnte KAPTOHcKe KyTJe N PIIactuHHe Kece N OJIOXITe INx y odroBapajye Kahte 3a CmeH. Kopuhe Hnypeh Ja 6yde nCnpuyen Ha HameHcKe CakyIbane TaKe 360r OWtpnx KOMHOENTn, WTo MoKe yTucaTn Ha XJBOTHy CpeHIny. HeMoJTe OJNarATn OBaj ypehaj y 3ajeHNcy Kopny 3a OTnatke.
SIKKERHEDSBETINGELSER. VIGTIGE INSTRUKTIONER OM BRUGSSIKKERHED LAES VENLIGST NØJTTIGT, OG BEHOLD FOR FREMTIDIG REFERENCE
3ACTOCYBAHHI PNPCTPOIO
KhoNnHa npIbTi dinCTaHcuiHoro KepyBaHHra (14) Ondakoi 3 naheJIJIIO KepyBaHHra (9). He KnaIITb HiaKnx peey y npeDnO uacTHHy peuentopa npIbTa dinCTaHcuiHoro KepyBaHHra.
- Nomicitb npicpii Ha cyxy piBHy NOBepxHIO.
- BiikpnTe BepxHIO KpiuKy (1) Ta HAnIte BDOy Do pIBHa MAKC. PnPi Noka3NkU pyIBHa BOIN (7).PiKJIouiTb npicTpIe do DkepeNa
- YbIMKHTb npncptpi 3a donomoroIO KhoNkBnMkaa JxNBneHHA (A) Ha naheJI kepyBaHHa (pnc. C). HanaWtYBaHHa 3a 3amOByBaHHa -cepeHn IwBnDkiCTb BeHTnIaTopa. 3HOBy HaNTCHiTB Ha BmNKaay NkBneHHA (A), Bnp6 3haxOndbcB pexkmi OikyBaHHa.
- Khonka wBnKocTi o6epTaHnBeHTnIaTopa (E) Ha naHei ynpabnHHn (9) 03BOJIe 3MiHOBaTu WbNkicTb o6epTaHn BeHTnIaTopa. NobTOpHM HATnCKaHHm MOxHa Bn6paTu HAcTyHni WbNkocTi o6epTaHn BeHTnIaTopa: cepdHi (H) -> nobInbHn (G) -> wBnKn (H) -> cepdHi (H) -> ...
- Khonka oxoloxhen / 3booxhen (B) 3Hnkye TemnepaTy pOBiTp, 3anyckauu BOJHn Haoc. KpIM TORO, Bn MOxete noCTaHTy y BepxHn pe3epByap dIra BoDn (2) npKpiPiNeHi INaCTNKoBI KOHeHepr (3). INaCTNKoBI EMHOCTI (3) cNlD HAnOBHTn BOIO DO MAKcMaJIbHorO PiBHa I 3AmOp03HTN B MoP03NJbHI KaMePI 3a3dAnerIb.
Ioo npOdytn npoxoJOnHe noBITpy, npNCTpii nOtpi6Ho HAnOBHnTn BDOIO. KOn npNCTpii npaioe, nepioDnHNo nepeBipraTe pBeHb BOIN, nn nOtpi6HO doDaBaTHn BOy. HIKON He BMkaiTe BOJHn Haoc, KOJI HIXHI pe3epByap dJa BOIN (6) He 3anOBHeH N BoOIO do MINImalbHorO pIBHa.
- HATNCKAHNM KONKn rOp3oHTaIbHOrO KOINBaHH NOBITpR (D) 3anyckaCTbcra KOINBaHH pHaHOK, 0o 3a6e3neuyTOb piHOMipHn po3noi nnotoky xonodHoro nobITpr B dianaoHi 70^ . TOp3oHTaIbHi KaJIHOsI (4) He pyxAIOTbcra ABTomTuHOn, TOM npn Heo6XiIDHOCTI BpyHy BiDperuHIOte ix TaK, 0o6 BOH byn cnpMaBOH i Bropy a6o BHN3.
- Khonka TIMER (F) Do3B0JaE nporpaMyBaTu KInbKicTb Yacy, npotraom Jkoro npncTpii Byde npaioBaTu, nepw Hixk ABTomauHO BmKHyTncb. DocTyHnBnBip nepioy yacy: 2-4-6-8-10-12 roHH.
- KhoIka Bn6bpy pexmmy (C) Do3BOnrE 3MiHTn pekm BeHTnIaTopa. Ha doTaK do 3BnuaHoro pekmmy BeHTnIaTopa Ha nobITpi, BN MoKeTe Bn6paTn npnpOHHn pekm impekm cHy.
3BnHnpeHMBeHTnIaTopa(J)O3BOJnE BCTAHOBnT WbNkicb o6eTaHHBaHTnIaTopa mix:cepeHim (H)-noBilhIM (G)-WbNdkm(H)- cepenHim (H)-...KoXHoro pa3y, KOIN BeHTnIaTOp BMKaETbc 3HOby,BiH 3anyckaetbpo60Ta B HopMaJIbHomy pexmi.
PnpOHH pexHM (K) imIy e npnpOHy dIO BVtp, NOBTOPOUCh NocCIOOBHicb o6eTIB BEHTNtTopa:
-Ha WBNKoCTi o6epTaHHB BeHTnIaTopa, BCTaHOBHeHn Ha Hn3bky WBNkictb (G): BeHTnIaTOp 6yde yTu 5 cekyHn Ha Hn3bki WBNkoCTi i BmKHyncb Ha 5 cekyHn, a NOTIM NOBTOPTu ue LnkJI;
-Ha WBNIKOCTI BEHTNIAITOPA, BCTAHOBNEHNI HA CEpeHNIO WBNIKICTB (H): BEHTNIAITOP 6ynde IyTN 5cekyHn HA KOxHNI WBNIKOCTI: CEpeHn, HN3bKa, CepeHn, 3ynHnKa, HN3bKa, CepeHn, HN3bKa, 3ynHnKa i NaCTyHn NOBTO pboT ONUKny;
-Ha WBNKoCTI OeepTaHHB BeHTnIaTopa, BCTaHOBHeH H a WBNkU WBNkICTb (I): BEHTnIaTOp 6yde DytN 5 cekHy HA KOKHy WBNkICTb: CepdH, H3bKa, CepdH, WBNkA, H3bKa, WBNkA, 3ynHk Ta HaCtynH NOBTO pBoro LKJy.
Pexm Chy (L) 6yb po3pObeHn IaB BnKOpNCtAHn epeKTIB npnpoHoro Bitpy, 06 leIe 3acHyTn. Lc 6yde nocTynoBO 3MeHsuBaTH WbNDkCTb BEHTNlAToPA 3 KpOKOM y 30 XbnlnH:
-Ha WBNKoCTi o6epTaHHB BeHTnIaTopa, BCTaHOBHeH Hn3bky WbNdkicTB (G): BeHTnIaTOp npaIOBaTmE TAK cMo, kI Hn3bKOWBnDkICHn PnpOAnHn peXm;
-Ha WBNKoCTI OeepTaHH BENTINrTopa, BCTaHOBHeHn Ha CepeHIO WBNKICtB (H): BeHTNlAToP 6yde yTu 30 XbUNH y peKMI CEpeHBoi WBNKocTI B pnpOHOMy peKIMi, a NOTIM NepeKJIooHTncra Ha npnpOHN peKIM 3 Hn3bKOIO WBNKicTIO;
-Ha WbNdkocti OeepTaHHBcHTnIaTopa, BCTaHOBHeHi Ha WbNky WbNdkicTb (I): BeHTnJIaTOp 6yde yTu 30 XbNInH y WbNdkichomy npnpOHOmy pexmI, Notim nepemKHyTncb Ha npnpOHI pexm cepedhboi WbNdkocTi Ha 30 XbNInH, a notim nepeYtn B npnpOHI pekm Hn3bKOi WbNdkocTi.
Ioo6 po3nooy npo6oty nybta dntaHuiHoro kepyBaHHra (14), BnTyrHtB MOHTaxHy pIIIBky. Ioo6 3amHITN akymyIaTOp, HATNCiTB Ha fikcatop i BnMIb akymyIaTOp 3 KapETKn. 3amHITb 6atapeIO odHoro TUny.
OuHJEHRAOBCJYTOBYAHH
IpekeohaiTeca, 10 npicpi Ta BcH OraTnH perynapHO uCTbC, 106 3MeHunr pN3K yTBopeHHB HAnho HAnbOy Ta 6aKeepi. Ipeed YuueHHM BiKnHcyPi npctpi Bid Mepeksi. He 3amoyte naHeJ ynpabInHHy BOidi.
- YnCTiB M'AKOIO cyXIO TKaHHIO. He BnKOpNCTOByIe XIMU Hi PO3uHHNK, OCKJIbKn BOH N MOxTyb CnpuHNHTN NOUKoJKeHHa60 deOpMauiio npntpoio.
- Aku npucptpi He BnKopncOByetcb Tpu a6iBle MicaicB, BnMItb 6atapei 3 nyIbTa dntcaHio Horo KepyBaHHA.
3.ПicnTpBnAoIO pOBoTHn ciTuaCTnФiNbTp (11) Ta BnnapHn nanepoBnФiNbTp (13) 3acmuyotbcra nINOM, 0o 3naHNO BnNBAe Ha epeKTHBnicbOxONODKeHHaMaunHn. RaIpo npToRAM TpBnAoro Yacy Boa He 3miHoETbcR, MoKInBi cBilb i Cblb. Mn npOnohmo ChCTNTn ciTuaCTnФiNbTp (11) Ta BnnapHn nanepoBnФiNbTp (13) pa3 Na DBa TnxHi. UcTa npocedpya HabeDeHa HxKHe:
a) BiD'edHaTe npncTpri, BnMIb rBnHT 3aHbOrO Kopnycy, a NotIM BnMIb ciTuactn fIbTp (11) i BnnapHn nanepobn fIbTp (13).
b) PpomnTe nanePobm FipbTp dIy BnnapoBvBaHra (13) M'KIM Po3HOM MIOOTO 3ac06y Ta TeNIO BOHO 3a DOnOMOrO M'Koi itkn, a notim npomnte uCTOBO DOIO. Bybte obepekhi, 06 He npobtn FipbTp dIy BnnapoBvBaJbHorO nanepy (13).
B)ПомиTe cIuaCTHn HAnOBHOBaU (11) npOToHIO uNCToIO BOIOU.ДЯ ChISeHnB VbKOpNCTObYTe M'ky itKy.
r) BicuItb 6nDb aIbTp n. IanepeBOn fIbTp dna BnnapoByBaHHa (13) noBHeH 6yTN BCTaHOBeHn pIOcK, o6 yHNKHyTn BNtOKy.
PnKpyTitb KpOnHTeH (15) 3 BnnapHM nanepoBm fIbTpom (13) Ta cituaCTM fIbTpom (11) do Kopnycy. - 3niTe Bovy nepei 36epiraHHM, BmMaIOUH 3NIBHy npo6ky (12) Ha dHi pe3epByapa IJRA BoN nICJI KOKHOBOB KOpNCaHHA.
- Ipeed ce30HHM 36epirAHHm Ouchitb HxHHi pe3epByap dna BODn (6) nCJIa BnKpyuBaHHra 3 rBnHTiB. Iotim npocuyiTB 6ak dIy BoDn, fiJbtpn ta Kopnyc, uOb yHNkHyTu NookdKeHHBONrN.
- 36epiB npicpi i 36epiraTe Horo B cyxomy MiCi Do HacTyHoro ce3oHy.
TEXHIUHDAHI:
Jxepeno KINBneHHa:220-240B\~50
NotykhHcTb:60BT
MaKc. TOnTyKhHicTb: 300 BT
O6'em 6aka:5,5nitrpa
Bntpata BOi:300m/ro
IyntdncTauHOro KepyBaHHa,IO NoctaTaebc BiN niTeBoi 6aTapei CR2025 (3B), BxOHTb Do KomnneKty
aaii jai i aaiia aaiia aaiia aaiia aaiia aaiia aaiia aaiia aaiia aaiia aaiia aaiia aaiia aaiia aaiia aaiia aaiia aaiia aaiia aaiia aaiia aaiia aaiia aaiia aaiia aaiia aaiia aaiia aaiia aaiia aaiia aaiia aaiia aaiia
C. x1 + x2 = 4
a 1
Jill
jie#i
- jiuang cai zhaowu jie jia jin
Y. 1al jaiy jayi (Y) cll s ginae gao ic ginaa aill clall kglg (1) ydl lcll
Aell lai jia jia (A) aill cia iiaiaiaiaiaiaiaiaiaiaiaiaiaiaiaiaiaiaiaiaiaiaiaiaiaiaiaiaiaiaiaiaiaiaiaiaiaiaiaiaiaiaiaiaiaiaiaiaiaiaiaiaiaiaiaiaiaiaiaia
(A) 12a
E. aagall ae jj j all cawy (E) buaia: sji a jbaically aillll aegall cie jw y aai (9) saill aay (H)->
G) -> (H) -> (H) -> ...
- 1j / j (B) 1 (Y) 1 j 1 j 1 j 1 j 1 j 1 j 1 j 1 j 1 j 1 j 1 j 1 j 1 j 1 j 1 j 1 j 1 j 1 j 1 j 1 j 1 j 1 j 1 j 1 j 1 j 1 j
aLill 1 aee e aee 1 (r) aee aee aee aee aee .
a a a a a a a a a a a a a a a a a a a a
J 1
E
ii
y 1
MaKc. MOLUHOCT: 300W
Pe3epBoap:5,5π
Kohcymaunna ha Boda 300ml / hour
Bkiuoyeno nctaunnoHnypaBHeHne,3aeHcIITnEba 6ateprr Tn CR2025 (3V)
3a da 3aunntte OKonhaTc cn cpea: MOJ, OTJeTe KAPTOHnTE KyTNn HauNoHOBtE TopbNKn n nn 3XBbpneTe B CbOTBeHTHe KOUHTe 3a OTNaDbu. N3noJI3BaHnT ypeI Tp6Ba Da 6bJe DoCTABeH Do CneuaHnTe NyKTOBE 3a Cb6pahe, KOnTO MoRat da NOBnraT Ha OKoHaTc cpea. He n3XbPnIeTe To3n ypeD B O6NKOBen KoW 3a OTNaDbu.
ADLER
EUROPE
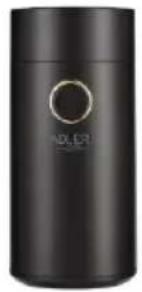
COFFEE GRINDER
AD 4446
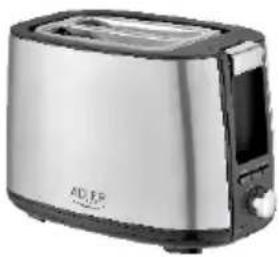
TOASTER 2 SLICE
AD 3214
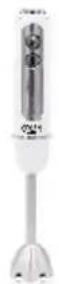
HAND BLENDER
Ad4625
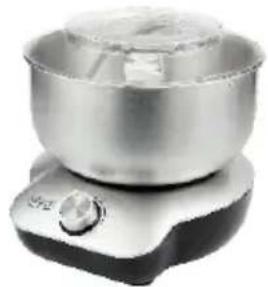
MIXER WITH BOWL
AD 4222
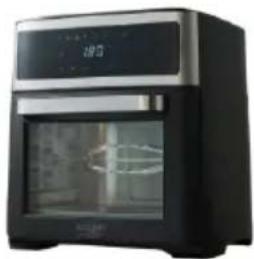
AIR FRYER OVEN AD 6309

MICROWAVE OVEN AD 6205
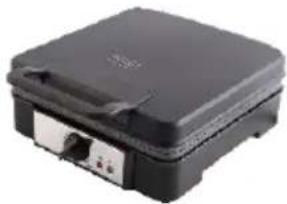
WAFFLE MAKER AD 3049
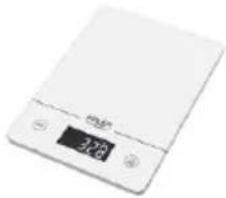
KITCHEN SCALE AD 3170

ELECTRIC KETTLE AD 1286
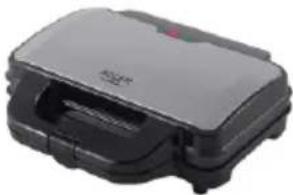
SANDWICH MAKER AD 3043
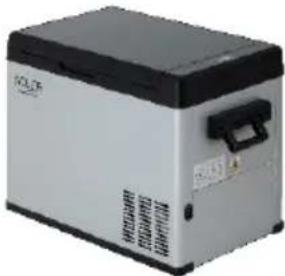
PORTABLE FRIDGE AD 8077
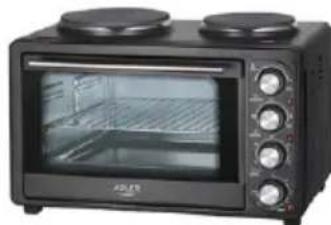
Electric Oven With HOB AD 6020
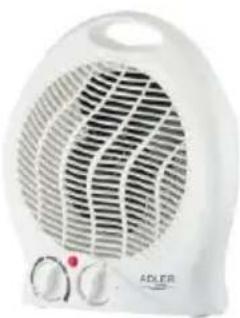
FAN HEATER AD 7728
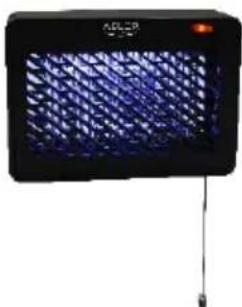
MOSQUITOLAMP AD7938

HEATED PAD AD 7433
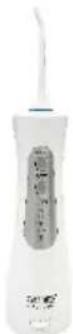
ORAL IRRIGATOR AD 2176
ADLER
EUROPE
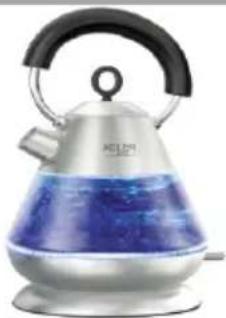
Electric Kettle AD 1282

Burr Coffee Grinding AD 4450
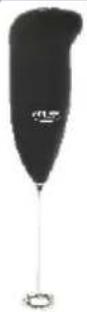
Milk Frother AD 4491
Sandwich Maker AD 3055
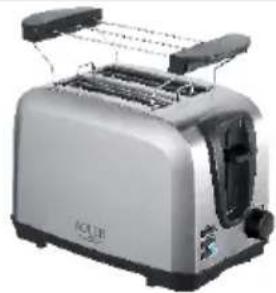
TOASTER 2 SLICE AD 3222
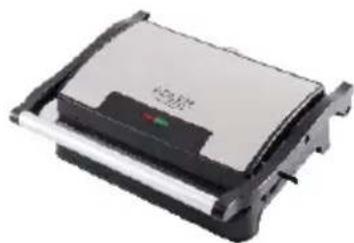
ELECTRIC GRILL AD 3052

CITRUS JUICER AD 4009

PERSONAL BLENDER AD4081
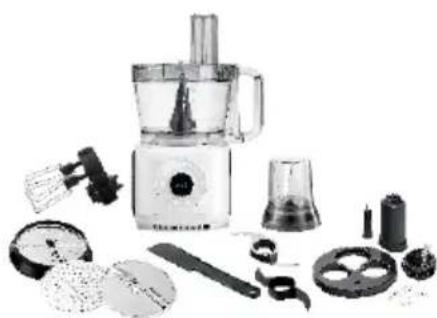
FOOD PROCESSOR AD 4224
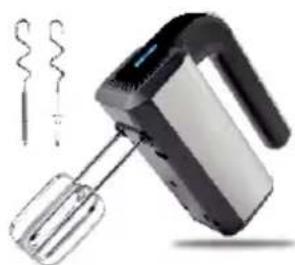
MIXER AD 4225
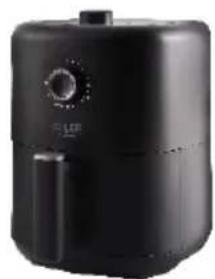
AIR FRYER AD 6310
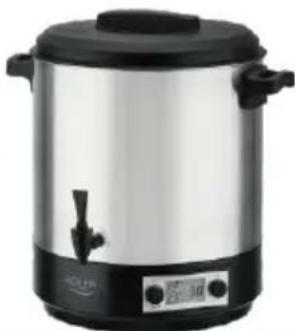
PASTEURIZATION POT AD 4496
AIR CONDITIONER AD 7916
AIR HUMIDIFIER AD 7966
FAN HEATER AD 7725
KITCHEN SCALE AD 3166
- SAFETY CONDITIONS. IMPORTANT INSTRUCTIONS ON SAFETY OF USE PLEASE READ CAREFULLY AND KEEP FOR FUTURE REFERENCE
- WARNING
- DESCALING
- DEVICE DESCRIPTION (Fig. A)
- CONTROL PANEL DESCRIPTION (Fig. C)
- Installation instructions for casters:
- USING THE DEVICE
- CLEANING AND MAINTENANCE
- DEUTSCH
- MAGYAR
- BIZTONSAGI FELTÉTELEK. FONTOS UTASITÁSOK A FELHASNZÁLASRA KERJUK, OVOSAN OLVASSA EL ES TARTSA A JÖVÖBENI REFERENCIAT
- SLOVENSCINA
- ITALIANO
- CONDIZIONI DI SICUREZZA. ISTRUZIONI IMPORTANTI PER LA SICUREZZA D'USO SI PREGA DI LEGGERE ATTENTAMENTE E CONSERVARE PER RIFERIMENTI FUTURI
- APPARAATBESCHRIJVING (Afb. A)
- SVENSKA
- SÄKERHETSVILLKOR, VIKTIGA INSTRUKTIONER OM ANVÄNDNINGSSÄKERHET LAS VANLIGHT OCH HALL FOR FRAMTIDA HANVISNINGAR
- SIKKERHEDSBETINGELSER. VIGTIGE INSTRUKTIONER OM BRUGSSIKKERHED LAES VENLIGST NØJTTIGT, OG BEHOLD FOR FREMTIDIG REFERENCE
- 3ACTOCYBAHHI PNPCTPOIO
- OuHJEHRAOBCJYTOBYAHH
- ADLER
- EUROPE
Brand : ADLER
Model : AD 7921
Category : Air Conditioning