
CR 4623 - Hand blender CAMRY - Free user manual and instructions
Find the device manual for free CR 4623 CAMRY in PDF.
| Product type | Immersion blender |
| Brand | Camry |
| Model | CR 4623 |
| Power | 1000 W (maximum power 1600 W) |
| Power supply | 220-240 V, 50/60 Hz |
| Maximum continuous operation | 1 minute |
| Cooling time before restart | 1 to 2 minutes |
| Variable speed | Yes, with variable speed control and turbo function |
| Included accessories | Blending leg, whisk, chopper, purée accessory, dice cutter accessory, slicing/shredding disc, measuring cup with lid, food processor bowl |
| Leg material | Stainless steel |
| Safety | Do not immerse the motor unit; sharp blades; automatic shut-off in case of overheating (not specified) |
| Use | Household use only |
| Cleaning | Hand wash; do not use abrasive cleaners; do not immerse the motor unit |
| Spare parts | Available from the retailer |
| Repairs | Only by authorized service centers |
Frequently Asked Questions - CR 4623 CAMRY
User questions about CR 4623 CAMRY
0 question about this device. Answer the ones you know or ask your own.
Ask a new question about this device
Download the instructions for your Hand blender in PDF format for free! Find your manual CR 4623 - CAMRY and take your electronic device back in hand. On this page are published all the documents necessary for the use of your device. CR 4623 by CAMRY.
USER MANUAL CR 4623 CAMRY
GENERAL SAFETY CONDITIONS.
IMPORTANT SAFETY INSTRUCTIONS FOR USE
READ CAREFULLY AND KEEP FOR FUTURE REFERENCE
- Before using the device, read the instruction manual and follow the instructions contained therein. The manufacturer is not responsible for damage caused by using the device contrary to its intended use or improper operation.
- The device is for domestic use only. Do not use for other purposes incompatible with its intended use.
- Connect the device only to a grounded outlet with a voltage of 220 - 240V 50 / 60Hz . In order to increase the safety of use, multiple electrical appliances should not be connected to a single circuit at the same time. In order to increase the safety of use, multiple electrical appliances should not be switched into a single circuit at the same time.
- Be especially careful when using the device when children are around. Do not allow children to play with the appliance do not allow children or persons unfamiliar with the appliance to use it.
- WARNING: This equipment may be used by children over 8 years of age and persons with limited physical, sensory or mental ability, or persons without experience or familiarity with the equipment, if it is done under the supervision of a person responsible for their safety or they have been given instructions on the safe use of the equipment and are aware of the dangers associated with its use. Children should not play with the equipment. Cleaning and maintenance of the equipment should not be performed by children unless they are over 8 years of age and these activities are performed under supervision.
-
WARNING: Do not leave the device plugged into an outlet unattended.
-
WARNING: Keep the device out of the reach of children.
- WARNING: Improper use of the device, may result in injuries such as cuts, abrasions or electric shock, among others.
- WARNING: Always remove the plug from the power outlet after use by holding the outlet with your hand. DO NOT pull on the power cord.
- WARNING: Do not use the unit near flammable materials.
- WARNING: Unplug the power cord from the outlet before cleaning and washing the unit.
- WARNING: Before filling the device with water, unplug it from the power supply.
- WARNING: Always unplug the blender from the power supply if it is left unattended, and before assembling, disassembling or cleaning the
- WARNING: Do not move the appliance during operation.
- Do not immerse the cable, plug or entire unit in water or other liquid. Do not expose the unit to weather conditions (rain, sun, etc.) or use in high humidity conditions (bathrooms, humid camping houses).
- Periodically check the condition of the power cord. If the power cord is damaged, it should be replaced by a specialized repair facility to avoid danger.
- Do not use the device with a damaged power cord or if it has been dropped or damaged in any other way or is not working properly. Do not repair the device yourself, as there is a risk of electrocution. Return a damaged device to a competent service center for inspection or repair. All repairs may be made only by authorized service centers. Improper repair may cause serious danger to the user.
- Place the appliance on a cool stable, level surface, away from hot kitchen appliances such as an electric stove, gas burner, etc..
-
The power cord must not hang over the edge of the table or touch hot surfaces.
-
To provide additional protection, it is advisable to install in the electrical circuit, a residual current device (RCD) with a rated residual current of not more than 30mA . In this regard, consult a specialist electrician.
-
Do not insert fingers or any other objects into the container when the device is turned on.
-
Handle cutting blades with care to avoid injury.
-
Be careful not to let long hair, scarves, ties, etc. hang over the cup and working parts of the device.
-
For safety reasons, use only original accessories and spare parts adapted to your blender model, sold by an authorized service center.
-
When removing accessories, manipulate the blades very carefully: they can injure.
-
Change accessories only when the device is turned off. Disconnect the device from the power supply.
-
Do not put products other than food and liquids into the blender cup. Do not place hot products in the cup.
-
The device is not suitable for whipping egg whites and kneading dough
-
Do not use aggressive deterrents to clean the housing, as they may cause the removal of applied informative graphic symbols such as graduations, markings, warning signs, etc.
-
Do not run the mixing cup without the product.
-
MAXIMUM UNINTERRUPTED BLENDER OPERATION TIME IS 60 seconds. After 60 seconds of continuous operation, wait 1-2 minutes before restarting it.
-
Do not pour hot liquids (above 60^ ) into the cup.
-
If the blades are blocked, always unplug the power cord from the electrical outlet before removing the blocking parts.
PRODUCT DESCRIPTION (Figure 1)
-
Variable speed controller
-
Speed button " - "
-
Speed button "="
-
Motor unit
-
Release buttons
-
Blender foot
-
Whisk gear
-
Whisk
-
Measuring cup with lid
-
Masher gear
-
Masher
-
Masher blade
-
Chopper gear
-
Chopper blade
-
Chopper bowl
-
Pusher
-
Lid
-
Dicing blade
-
Cutting grates: 8 × 8 ~mm or 11 × 11 ~mm 20. Dicing blade attachment 21.a Slicing/shredding blade
21.b Potato grater disc
-
Disk support
-
Bowl
Before first use
- Turn off the device and unplug it from the mains before assembling, disassembling, storing and cleaning it.
- This device is intended for domestic use only. If the device is used improperly or for professional or semi-professional purposes, or if it is not used in accordance with the instructions in the user manual, the warranty is void and the manufacturer denies any responsibility for damage caused.
- Keep the motor away from heat, fire, moisture and dirt.
- Never fill the measuring cup, chopper bowl or food processor bowl with ingredients at a temperature higher than 80 ^ C / 175^ F .
- Do not process frozen foods, fruits with seeds or seeds.
- If you notice that the handle becomes hot (hotter than 50^ / 122^ ), unplug the appliance and allow it to cool for at least 60 minutes.
Preparing for use
- Allow hot ingredients to cool before processing them with the appliance.
- If you are using a hand blender or chopper, cut large ingredients into cubes about 2cm in size before processing them. If you are using a food processor with a slicing/shredding disc or dicing knife, cut the ingredients into pieces that will fit through the lid's inlet opening. Be careful that the pieces are not too large so they don't get stuck in the tube.
- Assemble the device properly.
Set the speed
When you press the "-" speed button to process food, you can manipulate the speed control to get a variable speed. The higher the speed setting, the faster and more accurate the cutting results will be.
When you use the "=" speed button, the machine operates at maximum speed. In this case, you cannot adjust the speed with the speed controller.
Operation of the hand blender (6) (Figure 2)
The hand blender is designed for: blending liquids (e.g., dairy products, sauces, fruit juices, soups, blended drinks and smoothies), blending soft ingredients and pureeing cooked ingredients (e.g., baby soups).
- Attach the blender foot to the motor unit ("click").
- Dip the blade guard completely into the ingredients.
- Press the speed button to turn the unit on.
- Move the device slowly up and down and in a circle to blend the ingredient.
When mixing directly in the saucepan while cooking, remove from the heat first to protect the unit from overheating.
Operation of the chopper (13, 14, 15) (Figure 3)
The chopper is designed for chopping meat, cheese, onions, herbs, garlic, carrots, walnuts, hazelnuts, almonds, etc. Use the " = " switch to chop hard dishes. Do not chop very hard foods such as nutmeg, coffee beans and grains.
Before chopping pre-cut meat, cheese, onions, garlic, carrots, chilies. Remove stems from herbs, shells from nuts.
Remove bones, tendons and cartilage from meat.
- Place the shredder blade in the bowl of the shredder.
- Place the ingredients in the bowl of the shredder.
- Place the coupling unit on the shredder bowl.
- Attach the coupling unit to the shredder bowl.
- Press the normal or turbo speed button to switch the unit.
Operation of the whisk (7, 8) (Figure 4)
The whisk is designed for whipping cream, whipping egg whites, desserts, etc.
- Insert the whisk into the device into the whisk coupling unit.
- Connect the coupling unit to the motor unit.
- Place the ingredients in a bowl (use a large and deep bowl for best results).
- Dip the whisk completely into the ingredients. To avoid splashing, start processing at low speed.
Operate the potato cutting/shredding disc or potato grating disc (16, 17, 21, 22, 23) (Figure 5)
The chopping / shredding disc is designed for slicing or shredding vegetables such as cucumber, carrots, potatoes, leeks and onions, and some types of cheese. The granulating disc is designed for grating potatoes into pancakes.
- Place the blade support on the center pin of the bowl, place the disc in the blade support and turn it to lock.
- Attach the food processor lid to the bowl. Turn clockwise to lock the lid.
- Insert the motor unit into the lid until it locks into place (click).
- Fill the food to be processed into the inlet opening of the lid. Never reach into the filling opening while the unit is on. Always use the pusher to insert the food.
- Press the speed button to switch the appliance.
Operation of the puree masher (10, 11, 12) (Figure 6)
The puree can be used to puree cooked vegetables, such as potatoes, rutabagas and carrots. Do not stir hard or uncooked food - you may damage the device.
- Cook the vegetables and drain them.
- Attach the puree coupling assembly (10) to the puree tip (11) by turning it counterclockwise.
- Turn the puree upside down and fit the mixer (12) into the central hub and turn counterclockwise to fix. (If the thinner coupling assembly (10) is not installed, it will fail to install the mixer (12) in place).
- Attach the thinner assembly (10 + 11 + 12) to the motor unit.
- Connect. Place the puree in a saucepan or bowl, etc. and select a low speed to turn on the unit. Move the puree until the desired result is achieved.
- After use, release the speed button and remove the plug.
- Unplug the puree, remove the mixer (12) by turning clockwise.
- Unscrew the coupling assembly (10) from the end of the puree (11).
Important:
- Never use the puree in a saucepan while cooking. Always remove the saucepan from the heat and let it cool.
2.. Use a spatula to scrape excess food from the edges of the dish/pot. - For best results when mashing, never fill a saucepan, etc., more than half full of food.
Operation of the dicing attachment (16, 17, 18, 19, 20, 23) (Figure 7)
The dicing attachment is designed to cut cooked vegetables and fruits into small cubes.
Do not process hard ingredients such as fruits with seeds, tough vegetables, meat off the bone or frozen ingredients. They can block and damage the dicing attachment.
NOTE: THE DICING ATTACHMENT IS ONLY FOR PRE-COOKED, SOFT VEGETABLES, AND FRUITS.
Tip: If you want to process different ingredients without cleaning the attachment always start with the most delicate ingredients. For example, for a fruit salad, start with a banana, continue with mangoes and finish with apples.
- Open the 4 metal clamps (20a, b, c, d) of the dicing attachment (20).
Insert the selected griddle (19) into the opening of the dicing attachment (20), insert the blade (18) and close the 4 metal clamps (20a, b, c, d). The cutting edges of the blade and grate are very sharp, so handle with care! - Put the attachment (20) on the bowl, inserting the four notches of the attachment into the four hooks in the inner edge of the bowl (Figure 8). Take special care to fix the attachment (20) horizontally in the bowl.
- Put on the lid. Turn the lid clockwise until you hear a ("click").
- Attach the motor unit to the bowl cover ("click").
- Place the ingredients in the inlet opening of the lid. Pre-cut large ingredients into pieces so that they loosely pass through the lid inlet opening. When you need to process a large amount of ingredients, divide into small batches (250 g max) and lightly shake the bowl to distribute the cut ingredients in the bowl. Empty the bowl after processing 500g.
- Press and hold the speed button to turn on the machine.
- Lightly press down on the pusher.
Note: If the ingredients get stuck, unplug the machine, disconnect the motor unit, press the button on the handle and turn the lid counterclockwise, open the lid and remove the ingredients that are stuck in the lid inlet hole. -
After use, press the release button on the motor unit and remove the motor unit from the lid of the food processor.
-
Press the button on the handle and turn the lid counterclockwise to remove it from the bowl.
- Remove the attachment (20) from the bowl. Open the 4 metal clamps (20a, b, c, d), remove the blade (18) and the dicing grid (19). Then empty the bowl.
Care and Cleaning
Do not immerse the motor unit (4), chopper cover (13), robot cover (17) and coupling unit (7, 10) in water or other liquid, do not rinse under running water. Use only a damp cloth for cleaning. Never use abrasive cleaners or aggressive liquids such as gasoline or acetone to clean the unit.
Carefully clean the blades, dice cutting grids and discs. Their cutting edges are very sharp.
- Disconnect the device from the power supply before cleaning. Disassemble the accessory.
- Clean the cup (9), robot bowl (23), shredder blade (14), shredder bowl (15), dicing blade attachment (20) and cutting grids (19) and discs (21) in warm water with dishwashing liquid.
- The blender foot (6) and whisk (8) can be cleaned while still connected to the motor unit by immersing them in warm water with dishwashing liquid and letting the unit run for a while.
Technical specifications:
Power: 1000W
Maximum power: 1600W
Power supply: 220-240V~50/60Hz
Continuous operation: ≤ 1 min. Cooling time of the device before restarting: ≥ 1 min
Power consumption in the off state 0.00W


For the sake of the environment. Information about waste electrical and electronic equipment In accordance with Article 13(1) and (2) of the Law of September 11, 2015 on Waste Electrical and Electronic Equipment, we inform you about the proper handling of waste electrical and electronic equipment:
- It is forbidden to place waste electrical and electronic equipment together with other waste - this is confirmed by marking in the form of a "crossed out basket", ordering selective collection of this type of waste.
- Electrical and electronic equipment may contain hazardous substances, mixtures and components that, when released into the environment, can cause serious danger to the health and life of humans and living organisms. They can lead to numerous health ailments, such as vision, hearing and speech disorders, and can also damage the kidneys, liver and heart, and cause skin diseases. Harmful substances, can also have adverse effects on the respiratory and reproductive systems and lead to cancerous changes. Consumption of plants growing on contaminated soils, and products made from them, can risk the aforementioned health effects.
- Waste electrical and electronic equipment should be handed over only to authorized collection points, a list of which should be included on each Municipality's website.
- The household plays an important role, in contributing to the reuse and recovery, including recycling, of waste equipment. It also plays a key role in the waste electrical and electronic equipment management system due to the possibility of direct delivery to authorized collection points and the elimination of undesirable social habits resulting in leaving waste equipment in places not intended for it.
In addition, Donate waste electrical and electronic equipment at the point of delivery. A distributor, when supplying equipment intended for households to a purchaser, is obliged to take back used household equipment free of charge at the place of delivery of such equipment, provided the used equipment is of the same type and performed the same functions as the supplied equipment.
Cardboard packaging and polyethylene (PE) bags should be placed in the appropriate containers for separate collection of municipal waste according to their description. If there are batteries in the equipment, remove them and separately dispose of them at a collection and storage facility.
Do not dispose of the device in the municipal waste container!!!
Service If you wish to purchase spare parts or report any complaints, please contact directly with the seller who issued the receipt.
DESCRIPTION DU PRODUIT (Figure 1)
Veski too (7, 8) (joonis 4)
PykoBoDcTbO nOJIb30BaTeJIa (RU)
OBIIIE YCJIOBnB E3OIIACHOCTN.
- He haJIINBaIte B yauIy rOpIyHe JnIkoCTn (BbIIe 60^)
- EcJINJIe3BnIa6JIOKInpOBAHbI, BceIgA BbIHMaITe BNJIky IIHypa IINTaHnI H3 pO3eTKN, IIpeJKe Yem cHIMaTb 6JIOKInpyIOIIne JeTaJIH.
OIIINCAHNE IPOJYKTA (pnc. 1)
-
PeryJITop ckopoctn
4.БлokДВигатейя
7.ⅢeTepeHBeHHka -
IIecTePnB36nBaTeTn
- Ilectepn H3MeJIbYHTeJIa
- ToJIkaTcJIb
-
PeIeTKN IJIa Hape3KN: 8x8 MM HJH 11x11 MM
21.bIuCKIIJIaTepKn KapToΦeJIa -
KhoIIka ckopocTH"-"
- KhoIIKn pa36JIOKnpOBKn
-
BeHnK
-
Ionoactb IIaB36HbaHHa
14.JIe3BHe H3MeJbYHTeJIa
17. Kpbiiika
20. Hacaikka IJIa Hape3KN Ky6nKamn
22. Onopa nia nka
- KhoIIka ckopocTN " = "
- Hoxka 6JIeHepa
- MepHbI cTaKaHc KpbIIKOJ
- MHKcep JIA KyXOHHOKOM6aHa
- YaIIa n3MeJIbYHrTeJIa
- JIe3BHe IJIЯ HApE3KN Ky6HkAmn
21.a INCK JIA HHHKOBKH/H3McJIbYCHHJ - Yama
Ipea IepBbIM HcIOJIb3OBAHHcM
- Ipeje c6opko, pa36opko, xpaehnem nHCTKoB BbIKJIOHTe np60p HOTCOeHHNTe cro ot cetn.
- 3TOT IIpH6Op IIpeHa3HaueH ToJIbKO IJIg 6bITOBOrO HcIOJIb3OBaHHr. EcJIN IIpH6Op HcIOJIb3yETcR He IIO HA3HaueHnIO, B IIpoΦeCCHOHaJIbHbIX IJIH IIpyIpyeCEChOHaJIbHbIX IeJIAX IJIH HE B COOTBeTCTBHN C IHCTpyKIIHMN, IIpHBeJeHHBMN B pyKOBoDCTBe IOJIb3OBaTeJI, rapaHTnI TepReT cJIy, H IIPOH3BOdHTeJIb CHHMaet C ce6Ba BCIO OTBeTCTBeHHocTh 3a IIpHuHHHeHHy yIep6.
- XpaHHTe IBHrAteIb BdaJIn OT TeIIJa, OTH, BJIaHn Irp3H.
- HNKoRda He HanoJIHnIte MEPbI cTaKaH, YaIIy H3MeJIbHTeJIa HIN YaIIy KxOHHO KOM6aHa HHRpeJHeHTAMn IIpn TeMnepaType BbIe 80^ / 175^
5.He 6paabaBbAte 3amopOKeHHbIe npOyKtbl, pkykTbIC KocToyKaMH HIN cEmHaM. - EcJIH BbI 3aMeTHIN, YTO pyuKa cTajia rOpayeN (6oJce 50^ / 122^) , OTKIOHTe IIpH6op ot cTe H JaHTe cMy OCTbITB TeueHHe He MeHee 60 MmHyT.
IIOJROTOBka KHCIOJIb3OBAHnHO
1.ДаHTc ropHMM HHPcENCHTAM OCTbITb, IIpeKJc YCM o6pa6aTBbATbHX C IIMOIOIbIO IIpHbopa.
2. EcIN BbI HcIOJIb3yeTe pyHoi 6JIeHNep HIn H3MeJIbYHTeJIb, IpeE O6pa6OTKoHapeKbTe KpyIIbIe HHTpeHHTbHa Ky6KN pa3MepOM OKJIO 2 cm. EcIN BbI HcIOJIb3yeTe KxOHHI KOM6aIH C INCKOM JIra Hape3KN/H3MeJIbYeHn HIN HOKOM JIra Hape3KN Ky6HKAMn, HapeKbTe HITPeINHeTb Ha KycOuKn, KOtOpBie IpoNHyT Upe3 BXoIHoe OTBepCThe KpbIHKn. CJIeHnte 3a Tem, YTO6bl KycOuKn He 6bln cJIINIKOM 60JIbHIMn, YTO6bl OHn He 3actpJIH B Tpy6Ke.
3. Co6eprHe npH6op npaBnJIbHo.
YcTaHOBka ckOpocTH
Korla KhoIIka ckopocTH -HaKaTaN O6pa60TKN IpoyKTOB, MoKHO MaHHIyIInpOBAbpeRyIaTOPOM CKOpocTH dIJI IOCTHKeHHI NepemehHoi ckopocTH. YcM BblIe cKOPOCTb, TeM 6bIcTepe H ToUHee 6yDyT pe3yJbTaTbI Hape3Kn.
Прин ИСИОЛБЗOBАНН KНОПКСΚΟΡОСТН "" =" MaIIHHa pa6OТаСТ HA MaKCHMaJIbHOД ckopoСТН.В 3TOM cIlyae ckopoСТь He MoKER 6bITb OTpeRyJIHPOBAHA C IПМОПьIOpeRyJIrTOpa ckopoСТN.
Pa6ota pyuHoro 6JIeHepa (6) (pnc.2)
PyHoi 6JIeHep IpeHa3HaueH IIIA: CMeIINBaHnJ KIIKocTei (HaIPHMep, MOIOUHbIX IpoIyKTOB, COYCOB, pyKTObIX cOKOB, cyIOB, CMeIaHHbIX HAITKOB HcMy3H), CMeIINBaHnMgIKHX INHrpeIHeHTOB IN IIOpHPOBaHHN IpiHrOToBJIeHHbIX INHrpeIHeHTOB (HaIPHMep, JeTcKHX cyIOB).
1.Прнкpennte HoKKу 6JIeHДера KMOTOpHOMy 6JIOky ("KJIHK").
2.ПоJOHOCbIOIINrpy3HTe3aIHHTbIKoKyxHOKaBHHrpeJHeHTbl.
3. HaKMHTe KHOIIky ckOpocTH, YTO6bI BKIOHouHTb Ipn6op.
4. MeIIeHNO IIepMeIaIte IprbOp BBePx-BHN3 HIO Kpyr, YTO6bl CMeIaTb HHHpeIHeHTbl.
EcJH CMEIHIBAHNE IPOHcXoIHNT HcIIOcpeCTBcHHO B KAcTpIOJIe BO BpcM IIpHIrTOBJIeHHN, ChaJa CHHMHTe IIpH6Op c ORH, YTO6bI 3aIHTHTb erO OT NepeIpeBa.
YtpaBJIeHHe H3MeJIbYHTeJIeM (13, 14, 15) (pnc. 3)
I3MeJIbYHTJIb IIpeJHa3HaueH IJIa H3MeJIbYeHnR Ma ca, cbpa, Jyka, 3eJIeHH, YecHOKa, MOpKOBn, rpeIKHX opexOB, yHdyka, MHNJaJIa N T.Д. IJIa H3MeJIbYeHnR TBepIbIX IIpoJyKTOB HcIOJIb3yIte IpeKJIIOUaTeJIb "=". He H3MeJIbYaAHTe OyeHb TBepIbIe IIpoJyKtBi, TAKHe Ka K MycKaTHbI opex, KoΦeHbIe 3epHa N 3JaKn.
IpeHnH3MeJIbYeHHeM IIpeBapHTeJIbHo HapeKbTe Mco, cbIp, IyK, YecHOK, MOpKOBb, YHaJIHTe Cte6JIn C TpaB, cKOpJyNc opexOB. YdaJIHTe H3 Mca KocTH, cyXoxKHJIn H XpIuN.
- IomeCTHTe HOK JIJI H3MeJIbUeHHB YaIIy H3MeJIbUHTeJIY.
- IomeCTIe HnIpeHneHTb B YaIIy N3MeJIbYHTeJIa.
- YcTaHOBHTe MyfTy Ha aIy N3MeJIbYHTeJIa.
4.Пнкрпгte coeHHTeJbHbI y3eJI KHaIIe H3MeJIbHrTeJIЯ. - Haxmnte KhoNky HopmaJIbHoi HJIn Typ6o-cKOpocTH, TTo6bl IpeKeJIIOHTb ycTpoCTBO.
Pa60Ta BeHnka (7, 8) (pncyHok 4)
BHeHnK IIpeHa3HaueH IJI B36HbAHn CJIHBOK, HnHbIX 6eIKOB, JecepTOB n. I.
- BcTaBbTe BeHnK B coeHHHTeJbHbI y3eJI BeHnKa npH6opa.
2.ПоцoeHHHTe MyФу K DBHraTeJIIO. - IomeCTHTe HnrgpeHHeHTb B MnCKy (JIIa IOCTHXKeHHa HAnIyUHx Pe3yJIbTaTOB HcIOJIb3yHTe 6OJIbHIyIO HJIy60kyoMnCKy).
4.ПОЛИСТБIO IIOrgу3HTE BeHcHK B HnIgpeJHeHTbI. YTO6bI H36eKaTb pa36pbI3rBaHHa, NaHHaJIte 06pa6OTky Ha HH3KoI cKOpocTH.
Pa60ra IINcKa IJIpe3KN/H3MCEJbUeHHN HJI INcKa IJI TepKn KapToΦeJI (16, 17, 21, 22, 23) (pncyHOK5)
PekyIIN/H3MeJIbHaIOII INCK IIpeJIna3HaueH IJI HApe3KN HIN H3MeJIbYeHH TaKHX OBOIIeN, KaK orypeu, MOpKOBB, KAPTOfeJIb, JYK-IIopeN IN peIHTBn JYK, a TAKKe HeKOTOpBX BINOB cbipa. Dnck IJIra IpaHyJInpObaHH IpeJIna3HaueH IIN H3MeJIbYeHH KAPTOfeJIb B INPOJIKN.
- YcTaHOBHTe ONopy IJIa HOKeI Ha IeHTpaJIbHbI IIapHnP YaIIH, IIOMeCTHTe IINCK B OINOPy IJIa HOKeI N IOBepHHTe ee lo fIKcaIIHH.
2.Прнкрпгte Крьшky Кухонloro Kom6aина KЧаш.ПовернITE ПО ч�обоч CTpeЛke,ЧТо6ы 3aФнсрobatb Крьшky. - BcTaBbTe MOTOpHbI 6IOK B KpbIuKy, Ioka OH He 3aΦHKChpyeTc (IIeJIuO).
- 3acbIbTe o6pa6aTbIbAeMbIe IpoIyKtB I B 3arpy3OuHoe OTBepCTHe KpbIIKN. HNKoRJa He TAHHTecb K 3aIpy3OuHOMy OTBepCTnHO, KOra IIpH6Op BKIIIOueH. BcerIa HcIIIOJIb3yIte ToJIkaTeJI bI JIA 3aklaIKN IPOdyKTOB.
- HaxMMTe KhoNNK cyckopocTH, YTObbl BKNIOHTb npH6Op.
YIIpaBJIeHHe IIOpE (10, 11, 12) (pIc. 6)
IIOpe MoKHO HcIOJB3OBaTB IJIg IIpHrTOBJIeHHN IIIOpe H3 Bapehbx OBOIIe, TaKHX KaK KapToOeJIb, 3aMIIHa MOpKOBB. He IIepemeuBaIte TBepIbIe HJIN HeIIpHrTOBJIeHHbIe IIPOdyKTbI - Bbl MOKeTe IOBpeDHTb Ipn6op.
1.Пнг�овьт eBOин cJIeHrTe BOу.
2. IIpHcoeHHHTe MyfTy IJIa IIOpe (10) K HakoHeuHNKy IJIa IIOpe (11), IOBepHyB erO IpOTNB YacOBON CTpeJKN.
3. IpeBepHHTe IIope BBepx IINOM, yCTaHOBHTe MHKcep (12) B IeHTpaJIbHyIO BTyIky H IOBepHHTe IpoTHB YacOBoi CTpeJIKN, yTO6bl 3aΦHKCHPOBaTb. (EcJIn y3eJI MyΦTbI OYHCTHTeJI (10) He yCTaHOBJieH, OH He CMOKeT yCTaHOBHtMHKcep (12) Ha MeTo).
4.ПпсоeДнHTe y3eI npOyBKN (10+11+12) K6JOKy IbHrTaTeJIa.
5. IIOKJIIOHTE.IOMeCTHTEIIOpe B KAcTpIOJIO HJIN YAIIY H.T.I.N.HBbIbepHTe HN3KYIO cKOpocTb IIIA BKJIIOueHHN IpiH6opa.IIepemseMaTe IIOpe IOIoCTHKeHHaKeJaEMoTO pe3yIbTaTa.
7. IocJIe HcIIOJIb3OBAHHa OTIyCTHTe KHOIIKy cKOpOCTH N BbIHbTe BnIKy H3 PO3eTKH.
8. BbHbTe BnIKy H3 po3cTK, cHHMHTe MHKcep (12), IOBepHyB erO IIO YacOBoC tpeJIke.
9. OTBnHTHe y3eJ MyfTbI (10) ot KOnHa IIope (11).
Baxho:
- HNKOrIa He IcIOJIb3yIe TIOpe B cOTeiHnke BO BpeM IprHrOToBJIeHHN IINIIH. BcerIa cHMaIte cOTeiHnK C orHra I daIte emy ocTbITb.
2.. C IIOMOIbIO JIOIaTKn COCKpe6HrTe H3JIINIKN IIINc KpaEB 6JIOJa/KacTpIOJIN.
3.Дя IOCTNKeHnHaHJIyUHnx pc3yJIbTaOB IIpr HIIpHrTOBJIeHHN IIHOpe HNKoIgA He 3aIOJIHЯTe cOTcHnK n T.I. 60JIee Yem HaIOJIOBHHy.
Pa6oTa HacaIKN IJIa Hape3Kn Ky6HkAmn (16, 17, 18, 19, 20, 23) (pnc. 7)
HacaIka IJIa Hape3KN Ky6HKAMN IIpeIHa3HaueHa IJIa Hape3KN IIpHrTOBJIeHHbIX OBOIIe N φpyKTOB Ha MeJIKHe Ky6HKN.
He 6pa6aBbAitte TBepIbIe HnrrpeHnHTbI, TaKne KaK pykTBi C cemeHaMn, KecTKne OBOIIH, Mco 6e3 KocTe HIN 3amOpOkeHHbIe HnrrpeHnHTbI. OHN MoYr 3a6IOKnPOBaTb I IOBpeHnTb HacaIKy IJIA Hape3KN Ky6HKAMN.
ПИМЕЧАНЕ: HACAJKA ДЛЯ HAPE3КИ KYБИKAMN ПIEДHA3HAUEHA TOJIБКО ДЛЯ
IPEBAPHTJEbHO IIPNTOOBJIEHHbIX, MArKHX OBOUEN H PPyKTOB.
CoBET: Ecln BbXoHTHe o6pa6aTbIBaTb pa3HbIe HnHpeJnHeHTb 6e3 OuHCTKn HacaJKN, BceIJa HaunHaHTe C caMbIX DeJIHKaTHbIX. HanpHmep, IJI npHrOToBJIeHHN fpyKTOBO rCaJIaTa HauHHTe c 6aHaHa, 3aTeM IpeEINTE K MaHro N 3aKOHHTe J6JIOkAMn.
- OtkpoIte 4 metaJIINuecknx 3aJHMa (20a, b, c, d) HacaIKn IJIa Hape3Kn Ky6Kamn (20).
BcTaBBTe Bb6paHHyO peIeTKy (19) B OTBepCTHe HacaIKH JIA Hape3KN Ky6HKaMn (20), BcTaBBTe Jc3BHe (18) H 3aKpoIte 4 MCTaJIINueCKHX 3aKHMa (20a, b, c, d). PekyIuHc KpOMKn HOka H pIeTKn OChb OcTpbc, IIO3Tomy 6paIaIteCb C HMMN ocTopoJHo! - YcTaHOBHTe IpnCIOco6JIeHHe (20) Ha YaIy, BCTaBB YeTbIpe BbEMKn IIpNCIOco6JIeHnB YcTebIpe KpIOUka H bHyTpEHHem Kpae YaIIIN (pnc. 8). CJIeHTte 3a TeM, YTO6bI HacaJka (20) 6blJa 3aKpeJIeHa B TaIIe TropN3OHTaJIbHO.
- YcTaHOBHTe KpbHkUHa MeCTo. IIOBepHHTe KpbHkU BnPaBO Io IIeJIuKa.
4.ПпнкрenteMOTOPHbIб6IOKКkpblIkeЧaIIIN("IeJIhOK"). - IOMeCTHHe HnIpeDHeHTb BO BXoIHoe OTBepCTHe KpbIuKn. KpyIhBiie HnIpeDHeTb IIpeIbApHTeJIbHO pa3peKbTe Ha YaactH, YTO6bI OHn CBO6OJHO IIPOXoINHn Yepe3 BxOJHO eTBepCTHe KpbIuKn. EcIIbAM HyJHo 6pa60TaTb 6OJIbIOe KOJInuEcTBo HnIpeDHeHTOB, pa3DeJIHrTe Hx Ha He6OJIbHne NapTHN (He 6oJee 250 r) n CJierKa BcTpXHnTe YaIHy, YTO6bI paCIIpeDJIHb Hape3aHHbIe HnIpeDHeTb B YaIe. OIIopoJHnTe YaIHy NocJIe 6pa60TK 500 r.
- HaKMHTe H yIepKHBaIte KHOIIky ckopoCTH, TTO6bl BKJIOHHTb MaIIHHy.
- CJIeRka HaIaBHTe Ha ToJikateJIb.
IpiHMeaHHe: EcJH HHTpeJHHeTb 3acTpJIH, OTKIOOHTe MaIHHy OT ceTH, OTCoeIHHTe MOTOpHbI 6JOK, HaKMHTe KHOIIky Ha pyUke I IOBepHHTe KpbIHKy IIpoTHB YacoBOI cTpeJKN, OTKpOIte KpbIHKy I yJaIHTE HHRpeJHENTbI, 3aCTPRAIIHHe BO BXOJHOM OTBepCTHN KpbIIIKN.
- IocJIe HcIOJIb3OBaHHaHaxMHTe KHOIIKy fHKcaIHn Ha 6JIOKe JBHrAteJIa n CHHMITE 6JOK JBHrAteJIa c KpbIINK KyxOHHO KOM6aIIHa.
- HaKMMTe KhoIky Ha puYke H IOBepHnte KpbIHKy IpoTHB YacOBOn CTpeJIKN, YTO6bI CHaTb ee c YaIIIN.
- ChHMMTe HacaIky (20) c yaIIH. OTKpoIte 4 MeTaJIINuecknx 3aJHMa (20a, b, c, d), ChHMMTe JIe3BHe (18) n peIeTky IJIHape3Kn Ky6HKamn (19). 3aTeM onOpOJHnTe yaIIy.
YXoI N OuNCTka
He IIOpykaIte MToOpHbI 6IOK (4), KpbIkuN H3MeJIbUHTeJIa (13), KpbIkuP o6Ota (17) N coeINHITeJIbHbI y3eI (7, 10) B BOy HJIN IpyTuO JHKIOCTb, He IIpOMbIbAaTe IOI IIpoTOuHOB BOIO. IJIA OCHcTKN HCIOJIb3yIte TOJIbKO BJIaIKHyTO TKAHb. HNKOrJa He HcIOJIb3yIte JIIa ONUCTKN YcTPOcTBa a6pa3HBbIe YnCTaIInc cpeIcTBa HJIN arpeccNBbIe JHKIOCTH, TaKHe KaK 6eHN HJIN aUeTOH.
TtataJIbHO OuHuaIe Te Je3Bna, peIeTKn IJIa Hape3Kn Ky6Kamn n IINCKN. Hx peKyuIne KpOMKn OueHb ocTpbc.
1.IpeEi HcTKo OTKIHOHTe Ipn6Op OT 3JIeKTPocetH. JEmOHTHpyTe IpnHaJIeKHOCTH.
2. OuHCTHTe YaIIy (9), YaIIy po60ta (23), JIe3BHe H3MeJIbYHTeJIa (14), YaIIy H3MeJIbYHTeJIa (15), HacaIKy IJIa Hape3KN KU6HKamn (20), a TAKKe peKyuIhe peIeTKn (19) INCKN (21) B TEIIIOI BOJe C MOIOIH M cpeIcTBOM.
3. HoKky 6JIeHepa (6) H BeHcHK (8) MoKHO YHCTHTb, He ChHMa C DIBHrTaTeJIa, IORpy3HB Hx B TeJIyIO BOy C KHNKOCTbIO IIJI MByI IOcyIbI N aB yCToHCTBy IopapOraTb HeKOTOpoe BpeM.
TexHHueckne daHHbIe:
MoHocTb:1000BT
MaKCHMaJIbHaЯ MoIHHoCTb: 1600 Bt
3JIeKtpoIIrTaHHe:220-240V\~50/60Hz
BpeMa HeIpepbIBHno pa6OBy: ≤ 1 MmH. BpeMa OXJaXeHHn IpeE Ipe3aYyckOM: ≥ 1 MmH
IITpe6JIeMaMoIIIOHcTB B BbIKHOeHHOM COCTOHH:0,00BT.


B HHTepecax oxpansokpykaioe ipebl. HnOpmaHn 60xOaX 3Ktprueckoro n 3KtpnoHHo 60pyobauHH B COOTBCTBHN co ctaebn 13(1) n (2) 3aKaHn 60xOaX 3Ktprueckoro n 3KtpnoHHo 60byOBAHn oT 1 cHTb6p8 2015 rdaMbXoTeHn bI npOHIOFPmnpoBaTB Bac O IaIIeKaAem 6paIeHH n c xOaAMn 3Ktprueckoro n 3KtpnoHHo 60pyobauHH: 1. 3anpeHaaTc paaMeaTb OTxOaH 3Ktprueckoro n 3KtpnoHHo 60pyobauHH BMeCte C pyTHMn OTxOaAMn - 3TO IOITBePjJaetc MapKnpoBkO B BNde "pepeKHyTo yHb", ppeINCbBAIOe CEKETHNBI c6op daHHORo BNda OTxOaOB.
2.3Jektpnueckoe H 3JekTPOHHe O6OpjIOBaHHe MoKet coIepKaTH oNacHbE BIEeCTBA, CMEcH N KOMHOeHTb, KOToBle Iprn IOnaDaHHN B OKpykaHOu CpeLy MOrY IpeCtABnIB TcebpCHyO Uy03 Ly3IOpOBbI N KHN HcIOBcKa N KHNbIX opraHHMOB. OH MOrY IprnBcCTN K PdIy IpiobJem Co 3IOpOBbEM, TaHX Ka Knap HApUHeHn 3peHn, CyXa N peH, MOrY TaKke IOBpeHbTb IOoHKn, NeeHb N cepIIue, Bbl3BaTb KOKhbc 3a0bCaBHn. BpeHbc BcIeCTBa TaKke MOrY OKa3bBAbT hCrtAHBoc BO3JeCTBNC Ha JbIXaTeJIbHyIO n pcHpOyKTHBHyIO cHCTMbe H pRnOBDHT K paKOBbIM 3a0bIeBHn. YIoHpe6JIeHBe H IIHIy pactChn, pactUxH N 3a4p3HCHbIX IOOBax, H IpoDyKTOB, IOIyHeHHIX HIN, MoKet IpnBEcTH N B bIIeHMyONHytBM IOcNECTBHN M I3IOpOBb.
-
OxOJIb 3JIEKTPHueCKORIO H 3JIeKTPoHHOrO 6OppyOBaHH CJIeIyET cIaBbT TOJIbKO B yIOJHOOMOeHHbIe IyHKTBcOpa, cIHcOK KOTOPbx IOJKeH 6bITb pa3MeIeH Ha caIte KaKJOrO MyHHIIINaIITeTA.
-
DomaiHec X03HCTBO HrpaT BAKHyO POB B COnHeCTBHN IOBTOPHOMY HcIOJIb3OBaHHIO BOCeTAHOBcHHIO, BKIOHua HepepaOTky, OtpaOtaHHORo 06OpyOBAHn. OHO TaKke HpTaet KIOUeByO POIb B CHTeMe YIIpaJIeHn OTXdAMN 3JIeKTPueCKORO H 3JIeKTPoHHORO 06OpyOBAHn 6JHaOApra BO3MOKHOCTN IprMoONIOCTABKN BYIOIHOMOeHHHE NHyKTHb cOpa H yCTpaHEHIO HeKeJATEJIbHbIX COIHAIbHBIX IIpHBbck, IIpHBOIHIX K OCTABIEHHIO OtpaOtaHHORO 06OpyOBAHn B MceTx, HC IIpcIIa3HAChHHbIX DIN 3THX CJIcH.
Kpome toro,Bo3bpaiaaIte OtpabotanHoe 5eKtprueckoe H 5eKtponHoe 60pyobaiHne IIO MecTy IOCTABKH. HcTphbIOTop,IOCTABJIA HO60pyOBaHHe, PEPnHa3NaeyHHe IINOMaHHX XO3AHTB, 603AH BepnHMAHbTOxO1bIO60pyOBaHnOTOMaHHX XO3AHTB B MeCte IOCTABKH 3TO rO60pyOBaHn, PPH YCOBH, TTO HcNOJI3OBaHHe 60pyOBaHHe TORO JKe THII H BIIIOJIHETe Kc FyHKHH, TTO H NOCTABJIHcO60pyOBaHHe.
KapToHHyIO ynaOBky HIOHHTHeHOBBie (II3) NaKeTb CJIeIyET NOMeIaBb B COOTBeCTByIOHHe KOHTHeHepb IaPa3DeJIbHorO c6opa 6blTOBbIX OTXIOOB B COOTBeCTBHH CHX OINcAHem. Ecln B IIpH6ope HMeIOTc6aTapeH, Hx IeO6xoHMo H3BJeH bYTHIN3HPOBaTb OTdJIbHO B IyHKTC c6opHa XpaHCnn.
He bI6paIbIaIIe IINH6p B KOnTeIIepeIg bIITOBIX OTxOIOB!!!
CepBcEcHbI XOTHTe IINpHOpeCTH 3aIacHbIe YAcTH HJIH IpeTbABITb IpTeH3HN,IOXaJIyHcTa O6paIIaIteCb HeIOcpeCTBeHHO K IIPOdaBHy, BbIaIBIeMy qK.
Pa60ra c IIOpTeO (10, 11, 12) (fHrypa 6)
IIOpeTo MoKeJa Ce H3nOJI3Ba 3a NaChpAHe Ha BapeHn 3eJeHuYiK KaTo KapToΦH, 6o6eHH 3bPHa N MOpKOBn. He pa3oBpKaBaITc TBbPJa HIN HccrOTBeHa XpaHa - MoKe Ja IOBpeJNTe ypcJa.
1.Cbapete3JIeHuyuHTe HnOTUeTe.
2. CBbpxKeTe CbeHnHnTeHHBb3eJ 3a IIope (10) KbM HaKpaHHKa 3a IIope (11), KaTO rO 3aBbPTHTe B Iocoka, o6paTHa Ha YacOBHNKBoTa CTpeJIka.
3. 06bpeTe IIopeTo C rIaBaTa H aOJy I NocTaBeTe MHKcepa (12) B IeHTpAlHaT a TJIaBnHa H 3aBbPTeTe o6paTHo Ha yacOBHHKOBaTa cTpeJIka, 3a Ia Ro fHKcHpaTe. (Ako cbeINHHeJIHHrT Bb3eJI Ha YNCTaYKaTa (10) He e MOHTnpaH, Toi HMa JIya ycIIee Ja MOHTnpa cMeCHTEJI (12) Ha MAcTo).
4.ПинкpeneteКБМбLOkaHaДВHraTeJЯсгIO6KaTаHaIIpoUHCTBaIINMaMexaHH3bM(10+11+12).
5. CBbpxke. IocTabete IIOpeto B TeHkepa Hn Kyn Hn36peTe HHcKa cKopocT, 3a Ja BKIOHTe ypeJa. Ippemecte IIOpeto,doKato ce IocTHrHe JeJAAHnT pe3yIITat.
7. CJIeI yInotpe6a ocB6oJTe 6yToHa 3a H36op Ha cKOpoc T H3BaJeTe IeInceJa.
8.ИЗКЛЮЧЕ ПИОРЕОТ селктуческага Мржka, ИЗВаде ТМКсера (12), KaTO 3aBbPTHTe NO IIOcOKa Ha YacOBHKNKOBaT a cTeJIka.
9. OTBHITc bceHHHTeHHBb3eI (10) ot Kpa Ha IIIOpeTo (11).
BaKHO:
- HNKORA He H3IOJI3BaIte IIHOpeTo B TeHJKepa IIO BpeMe Ha rotBcHe. BnHaH CBAJIaIe TeHJKepaTa OT KOTJOHa I octabraIte Da ce OXlaIaIh.
2..H3noi3BaaiTe Hnatayla, 3a da ocTbPkeTe H3JIHHHaTa XpaHa oT Pb6oBeTe Ha cbJa/ TeHJKePaTa. - 3a Hau-Do6pn pezIITATn IIINpHpaHe HHKOra He IIbJIHeTe TeHKePaTa H T.H. IIOBee OTOIOBHNHaTc XpaHa.
Pa6ota c npncTabkaTa 3a Hap3BaHe Ha Ky6yeta (16, 17, 18, 19, 20, 23) (hrypa 7)
Ipnctabkata 3a Hapra3BaHe Ha Ky6yeta e IpeHa3HaueHa 3a Hapra3BaHe Ha crotbeHn 3eJeHuHn IIOIOBE Ha MaJKN Ky6yeta.
He 6pa6oTbaIe TBbpHn CbCTaBKn, KATO IIOIOBE cbc cemKn, TBbpHn 3JIeHuH, MECO cKoCTH HIN 3aMpa3EHn CbCTaBKn. Te MoRat Da 6IOKHpA H da IOBpeJr IpHcTaBkata 3a HapraBaHe Ha Ky6yeta.
3A6EJIEXKA: IPINCTABKATA 3A HAPJ3BAHE HA KYBCHETA E IPEJHA3HAUHCA RAMO 3A IIPEDBAPNTJIHO CBAPEHN, MEKN 3EJEHUYUNI IIOJIOBE.
CbBeT: Ako hckaTe Ja o6pa6oTBaTe pa3JInuHc bCTaBKn, 6e3 Ja IIOuHCTBaTe IpNCtABKaTa, BHHaHn 3aIOuBaIte c HauJIHKaTHHe TcBcTaBKn. HaipHMep, 3a IIOJIOBa caJaTa 3aIOuHHeTe c 6aHaHa, IPOJbJIKeTe C MaHROTo N 3aBbPWeTe C J6bJIKNTe.
- OTbOpete 4-Te MeTaJIHH cKo6H (20a, b, c, d) Ha IIpHcTAbKaTa 3a HapJ3BaHe Ha Ky6eHa (20).
IocTaBcTe H36paHaTapeWetka (19) B OTbopa Ha IIpHCTaBkata 3a Hapra3BaHe Ha Ky6ycta (20),IOCTaBcTe ocTpneTo (18) H 3aTbopete 4-Te MeTajHn cKo6n (20a, b, c, d). PexeHTpe p6OBe Ha ocTpneTo H peWetka Tca MHOrO ocTpH, 3aTOBa 6opabete C TEx BHHMaTeJIHo!
- IocTaBcTe IIpHCTaBkata (20) Bbpxy Kynata, KATOIOCTaBHTe YcTHPHTe HAp3a Ha IIpHCTaBkata B YcTHPHTe KyKnKnHa BbTpeHHnPa6 Ha Kynata (fNpya 8).O6bPHeTe cIeIHaJIHO BHNMaHHe Ja fHKcnpaTe IIpHCTaBkata (20) XOpH3OHTaJIHo B Kynata.
- NocTabete KaNaka Ha MAcTTo My. 3aBbPTeTe KaNaka HAdAChO, IOKaTO YyeTe IIpaKaBaHe.
4.ПикpenTe MToPnHЯ 6JIOK KbM KaIaKa Ha KynIaTa ("IIpaKaBaHe"). - IocTabeTe cBCTaBKHTe BB BxOHNH OTBOP Ha KaIaKa. IIpeBapHTeJHO HapeKeTe rOIeMHTe cBCTaBKn Ha napYeTa, Taka Ye CBO6oJHO Da IIpeMHHaBAT IIpe3 BXOHNH OTBOP Ha KaIaKa. Korato Tp86Ba Da o6pa6OTBaTe rOIAMo KOJIueCTBO cBCTaBKn, pa3JeIeTe rH Ha MaIKN IapTIN (MaKCHMym 250 r) n pa3KIaTeTe JeKO KUInaTa, 3a da pa3IIpeJIHrte HAp3aHHTe cBCTaBKn B KUna. II3IIpa3HeTe KUnaTa cIeD o6pa6OTKaTa Ha 500 r.
- HatncheTe H 3aPbKTe 6yToHa 3a ckOpocT, 3a Ja BKIOuOHTe MaIHHaTa.
- Hattchete JIeKO HaJIOJIy 6yTAJOto.
3a6eJekKa: Ako c6ctabKHTe 3aceHnat, H3KJIIOUcTe MaIIHHata OT cIeKTPnueCKaTa MPeka, H3KJIIOUcTe MOTOPHn8 6JIOK, HATNCHEc 6yTOHa Ha IpBKKATA N 3aBbPTcE KAIaKa O6paTHO Ha YacOBHKOBaTa CTrpeJIka, OTBOpCTe KaIIaKa H3BaJeTe c6CTaBKHTe, KOINTO ca 3aceINHJIN BBB BXODINN OTBOP Ha KAIIaKa. - CJIeI yIIOrpe6a HATNCHeTe 6yToHa 3a OCBO6OJdaBaHe Ha MOTOpHn8 6JIOK n H3BaJeTe MOTOpHn8 6JIOK OT KaIIaKa HA KxHHeHckn8 po6Ot.
- HATNCHETe 6yToHa Bbpy IpbKkAra H 3aBbPteTe KaIaKa o6paTHo Ha YacOBHHKObaTa cTpeJIka, 3a Ja rO H3BaJHTe OT KynIata.
- Извашипставкata (20) ot Купа. OTворе 4-Te металн ско6и (20a, b, c, d), ИЗвашие ocтрнeto (18) И ршета за наразьане на Кубчeta (19). След тoba Изпраэнete Купа.
PnKn H IOuHcTBaHe
He notanrte motopnna 6IOK (4), kana Ka ha xeJIHKoITepa (13), kaaka Ha po6Ora (17) n cbeHNHTeHHN 6IOK (7, 10) BB BOJa HIN dpyra TeuHocT, He H3IIaKaBte IOI TeuaBa DOa. I3IOJ3BaTe caMo BIAkHa KbPNa 3a IIouHCTBaHe. HNKora He H3IOJ3BaIte a6pa3HBH NOpHcTBaUH INpeIapATH HIN arpeCBHH TeuHocTH, KATO 6EH3HH HIn aUcToH, 3a IIouHcTBaHc Ha ypcda.
BHHMaTeJIHO IOuHCTBaIte ocTpneTa, peIIeTKHe 3a Hapra3BaHe Ha ky6yeta n IINCKOBete. TexHHTe pexeun p6oBe ca MHoro octpn.
- IIpeiINIOHCTBaHc H3KJIHOHTe ypeaOT eJIEKTPnueckOTO 3axpaHbHe. DEMOHTHpaIte akcccoapa.
2.Почнсте чаша (9), Купа Та Н робота (23), остprпето Ha peзачкata (14), Купа Та Н peзачкata (15), Ириськata 3a НарязbaHe Ha Kyбчete (20) И рeшетКITE 3a рязache (19) И диckobete (21)В толлвoda c TeунocTа MнeHe. - KpayeTo Ha nacaTopa (6) H metlaTa (8) Moar Ta Ce IOuHCTBaT, IOKaTO Ca BCE OIIe CBbp3aHH KbM MOTOpHH 6JIOK, KaTO ce IOTOnrB TOIIa BOJa C TeUHOCT 3a MHe He Ha cbIOBe H ce OCTABrT da pa6OIT H3BecTHo BpeMe.
TexHnueckn daHHn:
MoHHoCt:1000W
MaKCHMaJIHa MoIHHoCT: 1600W
3axpaHbaHe:220-240V\~50/60Hz
HeIpeKbchata pa6ota: ≤ 1 MHH. Bpeme 3a oxJaKaHaCe IpeHn pecTapHaHe: ≥ 1 MHH
KoHcyMaIIHa eHepnB H3KJIIOueHo cIbCTOAHne:0,00W.


B HmTo Ha oKoJHaTa cpea. HhOpMaHn 3a otNaIbHn ot eIeKtpuecko H eIeKtpoHno 60pyBaHe B cbOTBeTcBHe C nEeH 13, npaipaHn 1 2 ot 3aKaOHa 3a ot NaIbHnTe ot eIeKtpuecko H eIeKtpoHNO 60pyBaHe ot 11 ceITeMbpHn 2015 r. 6HXMe NCKaHn da BN HhOpMnPaMe 3a npaBnHnTO 6opBaHe c ot NaIbHnTe ot eIeKtpuecko H eIeKtpoHNo 60pyBaHe:
-
3a6paIIbBa ce IIOCTABHIETO IA OITAIbIIN OT eIEKTPHueCKHO eIEKTPoIIIO o6OpYBaIIe 3aeIIIO cIpyTH OTIIbIH - TOBa CE IOTIBpKdAba CMapKNPOBkA IOI dOpMaTHa "3auePKHAT KOHTHeHep", KATO CE HApEKAe CEJEKTHBHO c6HpAne HA TOH BNIO TIIAbI.
-
EeKTPnueckoto H eKTKPOHNO TO 60pyBaHE MoKe Ia CbIbPka OIIacHN BIIeCTBa, CMECH N KOMIOHOHTN, KOHIOHYCKAHe B OKoJIHATA cpcda MOAT Ia IIpcIcTABIIBAT cePHO3Ha 3aIIaXa 3a 3IpaBTO H JKBOTa Ha Xopata H JKBHTC OPIAH3MH. Tc MOAT Ia IOBcDAT IO peHHa 3IpaBOcTobHIN IIO6JIeMHI, KATO IaIpIHMePapUWeHn HA 3peHHeTO, Clyxa H RObopa, MOrAT cbIO To Taka Ia YbpeJIT 6b6peHInTe, UepHna IIO6 H cbPiETo H Ia IIpUHHN T KOKHn 3a6OJIbAHn. BpeHInTE BeIEcTBA MOrAT Ia IMAT H He6IIaONpHnTHO Bb3JeHCTBHe Bbpxy IIHXATEIIHATA H peIPOdykTNBHATA cHcTeMa H Ia IIOBeatd IO paKOBn 6bpaYBaHn. KOHCMAIIHTA Ha pactEHn, pactHIN Bbpx 3AmbpceHH IOuBH, H Ia IIOykyTH, INIOJyEHH OT TIX, MOKe Ia IIOBeIe IO TOpeCNIOMeHAtIe cΦcKTH Bbpx 3IpaBeto.
-
OIIaIbIHTe OT eJIeKTPHuecKO H eJIeKTPoHHO 6OpOyIbAte Tp8BaJa ce IpeIaBAt caMO B oTOpH3HpAH IIyHKTOBe 3a cb6Hpae, HInTo cINcIK Tp8BaJa 6bIe BKIOueH Ha ye6caIHa II BCKa O6HIIa.
-
IOMaKHeCTB0rO Hrpa BaxHa POJI B IOIpyHacHrETo 3a IOBtOpHata yIOTpe6a H ONIO3OBpBaHrO, BKIOHTeJHO peINKInHpAeTO, Ha OTHaIByIO To o6opyBaIE. To cIIO Taka Hrpa KIOObO PAoi B CHTeMaTAta 3a yIpaJIeHHe HA OTIIABHTe O EIEKTPuYeCKo H eIEKtpoIHIO o6opyBaHE NopAH Bb3MOxHocTt A 3a INpeKTHo PpeIbAbeHa H OTOPH3HPaHrTe IyHKToBe 3a cb6HpAe H eIMMHnHpAe Ha HeKeJIaHHTe coIIHAIIHN IIABHIN, BODeIIH NO OCTaBHe IIA OTIIABHTe OT o6opyBaHr He MeCTa, KOHTo IE ca IIpeDIIAHIeHH 3a TaKHBAJeIH.
Ocben ToBa, BpbHnIe OTnIbHnIe OT cIEKTPHcECKHO cIEKTPoHHIO O6OpYBaHe HA MCTOTO HA JOCTABKa. HCTPb6yTOptB, KOITIO DOCTABHa KUYBaHa O6OpYBaHe, PpeH3HaHcEHO 3a DOMAKHNCTBA, e IJIbKeH Ia IIpHMe O6paTHO H3IOJ3BaHOTO O6OpYBaHE OTO OMAKHNCTBaTII MAICTOI HA IOCTABKa IIA TOBa O6OpYBaHIE 6e3IIaTHO, IIH yCIOBHe Ye H3IOJ3BaHOTO O6OpYBaHe e ot CbIH N H3IIIBINBa CBHInTe cyHKIN KaTO IOCTABeHOTO O6OpYBaHe.
KaptonHeIte ONAKOBH H NOJIHeHJIeHOBHT (PE) Top6HcK Tp6Ba JAc ce NocTABRT B c0tBeHHTe KOHIEHep 3a pa3JeHIO cb6hpAne Ha 6HbOH OTnAaBbH B c0tBeTcBHe C TxAHOTO ONHCaHHe. Ako BypeHa HMa 6aTePHN, Te Tp6Ba Ja ce H3BaJIT H Da ce H3XbPJT Pa3JeHIO B cbOpJbKeHHe 3a cb6HpAne H cbxpaHeHne.
He n3XbpaHneYpeDa B KOHTeHepa 3a 6HTOBn OTNaIbHn!!
CepBn Ako KaeIae Tda 3aKyHHTpeepBHH aactn HIN da IpcBHTpeKlamaH, MOH ce O6bpHcTe dhpckTHO KbM TbproBa, KOITTO H3daI Kacobata bceKka.
Brugsanvising (DA)
GENERELLE SIKKERHEDSBETINGELSER. VIGTIGE SIKKERHEDSINSTRUKTIONER TIL BRUG LEs OMHYGGELIGT OG OPBEVAR TIL SENERE BRUG
PRODUKTBESKRIVELSE (Figur 1)
VAŽNE SIGURNOSNE UPUTE
PAZLJIVO PROCTAJTE I SACUVAJTE ZABUDUCU REFERENCE
-
Pije upotrebe ureăja, pročitajte uputstvo za upotrebu i slijedite uputstva koja se u njemu nalaze. Proizvodačnice odgovoran za bilo kakvu štetu nastaluzloupotrebom ili nepravilnim rukovanjem ureăjem.
-
Ovaj urežaj je namijenjen samo za kućnu upotrebu. Ne koristite ga u druge svrhe osim za one za koje je namijenjen.
- Urešaj treba prikljuciti samo na uzemljenu utićnicu napona 220-240V~ 50/60Hz. Da biste povećali sigurnost rada, nemojte istovremeno spajati više elektricnih urežaja na jeder strujni krug. Da biste povećali sigurnost rada, nemojte istovremeno spajati više elektricnih urežaja na jeder strujni krug.
- Budite izuzetno oprezni pri korištenju urežaja kada su djeca u blizini. Ne dozvolite djeci da se igraju s urežajem. Ne dozvolite djeci ili bilo kome ko nje upoznata s urežajem da ga koristi.
- UPOZORENJE: Ovu opremu mogu koristiti djeca starija od 8 godina i osobe s ograničenim fizickim, senzornim ili mentalnim sposobnostima, ili osobe koje nemaju iskustva ili znanja o opremi, pod uvjetom da su pod nadzorom osobe odgovorne za njihovu sigurnost ili da su im date upute o sigurnom koristenju opreme i da su svjesne rizika. Djeca se ne smiju igrati s opremom. Čišćenje i korisničko odžavanje ne smiju obavljati djeca osim ako nisu starija od 8 godina i nisu pod nadzorom.
- UPOZORENJE: Ne ostavlajte uredaj uključen u utićnicu bez nadzora.
- UPOZORENJE: Urejad držite van dohvata djece.
- UPOZORENJE: Nepravilna upotreba urežaja može uzrokovati povrede poput posjekotina, ogrebotina ili strujnog udara.
- UPOZORENJE: Uvijek isključite utikač iz utičnice nakon upotrebe držeći utičnicu rukom. NE povlačite kabel za napajanje.
- UPOZORENJE: Ne koristite uredaj u blizini zapaljivih materijala.
- UPOZORENJE: Prijje Čišćenja i pranja urežaja, isključite kabel za napajanje iz utićnice.
- UPOZORENJE: Prijje punjenja uredaja vodom, isključite ga iz elektricne mreže.
-
UPOZORENJE: Uvijek isključite blender iz struje ako ga ostavljate bez nadzora i prije sastavljanja, rastavljanja iliČišćenja
-
UPOZORENJE: Ne pomicite urejad dok je u radu.
- Ne uranjajte kabel, utikač ili cijeli urežaj u vodu ili bilo koju drugu tekucićnu. Ne izlažite urežaj vremenskim uvjetima (kisha, suntce itd.) niti ga koristite u uvjetima visoke vlažnosti (kupaonice, vlazne kamperske kabine).
- Povremeno provjeravajte stanje kabla za napajanje. Ako je kabl za napajanje ostecen, treba ga zamijeniti kvalifikovana radionica za popravku=kako bi se izbjegla opasnost.
- Ne koristite uredaj s ostecenim kablon za napajanje, ako je ispao ili je na bilo koji način ostecen, ili ako ne radi ispravno. NePokušavajte sami popraviti uredaj, jer to može dovesti do strujnog udara. Ostecene uredaje vratite u ovlašeni servisni centar na pregled ili popravku. Sve popravke trebaju obavljati samo ovlašeni servisni centri. Nepravilno izvedene popravke mogu predstavljati ozbiljnu opasnost za korisnika.
- Urečaj postavite na hladnu, stabilnu i ravnu površinu, dalje od vručih kuhinjskih aparata kao što su elektrčni štednjaci, plinski plamenici itd.
- Kabl za napajanje ne smije visiti preko ruba stola niti dodirivati vruce povrsine.
- Za dodatnu zašitu preporučuje se ugradnja diferencijalne strujne sklopke (RCD) u elektrčni krug s nazivnom diferencijalnom strujom koja ne prelazi 30mA . Za to se obratite kvalificiranom elektrčaru.
- Ne stavljajte prste ili bilo koje druge predmete u posudu kada je urejaduključen.
- Pažljivo rukujte ostricama za rezanje kako biste izbjegli ozljede.
- Pazite da duga kosa, šalovi, kravate itd. ne vise preko vrča i radnih dizelova urežaja.
- Iz sigurnosnih razloga, treba koristiti samo originalnu dodatnu opremu i rezervne dijelove pogodne za dati model blendera, koje prodaje ovlasteni servisni centar.
- Prilikom skidanja pribora, pažljivo rukujte oštricama: mogu
uzrokovati povrede.
- Pribor se smije mistrnjati samo kada je uredaj isključen. Isključite uredaj iz izvora napajanja.
- Ne stavljajte nista osim hrane i tekuciina u vrč blendera. Ne stavljajte vruce predmete u vrč.
- Urečajijke pogodan za mućenje bjelanjaka i miJEšenje tijesta.
- Ne koristite agresivne deterdžente za Čišćenje kućistra, jer mogu ukloniti graficke informativne simbole poput skala, oznaka, znakova upozorenja itd.
- Ne koristite vrč za miješanje bez proizvoda.
- Maksimalno vrijeme neprekidnog rada blendera je 60 sekundi. Nakon 60 sekundi neprekidnog rada, pricekajte 1-2 minute prije ponovnogPokretanja.
- Ne sipajte vruce tecnosti (iznad 60^ ) u šolju.
- Ako se ostrice blokiraju, uvijek isključite kabel za napajanje iz elektricne utičnice prije uklananja blokirajućih componenti.
OPIS PROIZVODA (Slika 1)
-
Regulator promjenjive brzine
-
Dugme za brzinu "-"
-
Dugme za brzinu = 1
-
Motorna jedinica
-
Dugmad za otpušanje
-
Noga blender
-
Oprema za mućenje
-
Umutite
-
Mjerna posuda sPoklopcem
-
Zupčanik brisaca
-
Vrh brisača
-
Mikser za rende
-
Oprema za drobilicu
-
Ostrica sjeckalice
-
Posuda za sjeckalicu
-
Potiskivac
-
Naslovnica
-
Ostrica za sjeckanje
-
Rezačke mreže: 8x8mm ili 11x11mm 20. Nastavak za nož za sjeckanje 21.a Disk za rezanje/sjeckanje
21.b Disk za rendenje krompira
-
Podrska za diskove
-
Zdjela
Prije prve upotrebe
- Isključite uredaj i iskopćajte ga iz elektricne mreze prije sastavljanja, rastavljanja, skladistjenja i cisćenja.
- Ovaj urežaj je namijenjen iskljucivo za kućnu upotrebu. Ako se urežaj koristi nepravilno ili u profesionalne ili poluprofessionalne svrhe, ili ak se ne koristi u skladu s uputama u korisničkom prisćniku, garancija ce biti nevažće a proizvodac se odriče svake odgovornosti za bilo kakvu prouzrokovanu štetu.
- Držite motor dalje od toplote, vatre, vlage i prljavstine.
- Nikada ne punite mjernu posudu, posudu sjeckalice ili posudu multipraktika sastojcima toplijim od 80^ / 175^
- Ne preradujte smrznutu hranu, voce s kosticama i sjemenkama.
- Ako primijetite da se ručka zagrijava (toplija od 50^ / 122^ ), isključite uredaj iz struje i ostavite ga da se hladi najmanje 60 minuta.
Priprema za upotrebu
- Ostavite vruce sastojke da se ohlade prise nego sto ih obradite u uredaju.
- Ako koristite ručni mikser ili multipraktik, prise obrade narežite vece sastojke na kockice od 2 cm. Ako koristite
multipraktik s diskom za rezanje/usitnjavanje ili ostricom za kockice, narežite sastojke na komade koji ce proci kroz otvor za punjenjePoklopca. Pazite da ne narežete prevelike komade kako biste sprijecili da se zaglave u otvoru za punjenje.
- Pravilno sastavite uredaj.
Podesavanje brzine
ONHC HA IPOH3BOJOT (CJnka 1)
- KoHTpoJIep 3a IIpOMCHJINBa 6p3HnHa 2. KOnIc 3a 6p3HnHa "-" 3. KoIIc 3a 6p3HnHa "="
4.MotopHa eHHHua 5.OcIO6oJeTe rKoINHbata 6.Hora 3a 6JIeH,ep - Onpema 3a MaTeHbe 8. MaTeHbe 9. MepHa YauHa co KaIak
- OIIpeMa 3a 6pHuaH 11.BpBOr Ha 6pHuaOT 12.MHKcep 3a peHde
- OIIpeMa 3a yHHHTyBaBe 14. CeHIO 3a cKau 15. HHHja 3a ceKaBaBe
- Typkau 17.Покрь 18.Ceунлоза ceuebe koцкн
- Ceyebe Mpekn: 8x8mm HIN 11x11mm 20. PpHKIyOK 3a ceyebe ceHIO 21.a IInck 3a ceyebe/cHTHaBe
21.6 Iinck 3a peHne 3a KOMIInpn 22. PoIdpIka 3a IIncKOBn 23. YHHja
IpeI npBaTa yIIOrpe6a
- Ncknyte ro ypeot n Ncknyte ro od eJeKtpnHaT a Mpeka nped da ro cKIOHTE, packIOHTE, CKJaIHpate H nCTHTe.
- Oboj anapaT e HameHET cAmo 3a domaHa yIOTpe6a. IOKOJIky aIAPAToT ce KOpHCTn HeIIpaBnHO HIN 3a IpoΦecHOHaJIHH INI NOIyIPOΦecHOHaJIHH ueHN, INI h AKO He CE KOpHCTN BO COrJIacHOCT co YIaTcTBaTA BO yIaTcTBOTo 3a yIOTpe6a, rapaHJnJaTa Ke 6HNe HeBaKeUka H IPOH3BOJNTeJOT ce OTKaJyBa Od CeKaKBA OITROBOPHOCT 3a KaKBa 6HIO IIpeIN3BHKaHa IITeTa.
3.Држete ro MOTOPOT IOJaIeKy OJ TOJIINHa,OraH,BJIar a H NeuHCTOTnJa.
4. HNKORAII He ja IIJIHETe MepHaTa HaIIa, caIOT 3a cCkAbe HJN caIOT 3a IIpoIecop 3a XpaHa co cocTojKN IIOIIN oJ 80^ / 175^
5.He npepa6otybajre 3amp3HaTa xpaHa, OBOiJe co cEMKn H cEMKn.
6. Ako 3a6eJKeHTe Iek paKaTa ce 3aIpeBa (IOToIIa OI 50^ / 122^) , NcJIyTe ro ypeIo n cTpyja n octaBeTe TO da Ce OJaH HajMaJIky 60 MmHyTH.
IIOIOROBka 3a ynoTpe6a
- OcTaBete rH ToJIInTe coCTojKn Ia ce H3JaIaT npeI da rH o6pa6oTHte Hn3 aIapatot.
- Ako Kopnctnte paueh 6JIeHep HIN Ipoecop 3a xpaHa, Hceye Te rI roJeMHTe coCTojKn Ha KOUKN o2 cm nped obpaotkata. Ako Kopnctnte Ipoecop 3a xpaHa co nck 3a ceyebe/peHneBe HIN CEuNIO 3a ceyebe, HceyeTe rI cocTojKhte Ha napHbA IITO Ke ce BkIoIAT HN3 IeBkATA 3a BHeCyBaBe Ha KaIaNOT. BHIMAbaje Da He rH Nceye TnpunHbTa IpmHOry RoJEMN 3a da cIpeYHte Da ce 3aIabat BO IeBkata 3a BHeCyBaBe.
- IIpaBnJIOCKJIOIeToypeJOT.
IIOCTaByBaIbe Ha 6p3HnHaTa
Otkako Ke ITOIHTHCHETe KOJIHTO 3a 6p3HHa,--" 3a 6pa6OTka Ha XpaHa, MoKTe Ja FO MaHHITyJHpAte peYJAtopOT 3a 6p3HHa 3a Ja IOCTHHeTe IPOMeHJINBb 6p3HHN. KoJIky e IIOROJIema IocTaBkata 3a 6p3HHa, ToJKy IIO6p3N H IIOJIpeUH3HKe 6HnAT pe3yJITaTHTe OI ceHeBeTo.
Kora ro KopnCTHHe KOJyTo 3a 6p3HHa "=", ypeIOT pa6OTn co MaKCHMaJIHa 6p3HHa. Bo OBOJ cIyuaJ, 6p3HHata He MoKe Ja ce IIpHJAroDn Co IIOMOII Ha KOHTPOJIepOT 3a 6p3HHa.
Pa6oTa co paueH 6JIeHIIep (6) (cJIHKa 2)
PaHHOT 6JIeHHepe HameHeT 3a: MeIIaBe TeuHocTH (Ha IIp. MJIeYHN IPOH3BOJN, COCOBN, OBOIHH COKOBH, cyIIH, MEIIAH NIIJaIOUH IN KOKTeJIN), MEIIaBc MKeN COctOjKN IN IIpe OJ BapeHN COctOjKN (Ha IIp. 6e6eIIka cyIIa).
1.Пикачete jaHorapkaTHa 6JIeHIEpOT Ha MOTOpHaTa cINHHIIa(.,KJHK")
2. IeJIOcHo IIOToIe ja 3aHTHTHaT a foJIJa BO cOcTOjKHTe.
3. IIpHTHCHETc FO KOIHcTe 3a 6p3HHa 3a Ia FO BKJIyUHTe ypcIOT.
4.ДижкетуурсOTПОJOKaHAROpE-HaIOJyИBOKpyROBn3aJa jaH3MeINaTecoctojkata.
Kora Meiatae INpeKTHO BO TeHuepeTo 3a BpeMe Ha TOTBeIbTe, IpBO TprHeTe Ro Od Oran 3a Da Ro 3aHTHTte anapatot oI IperpeBaIbe.
Pa6ota co np6nIkaTa (13, 14, 15) (CJnka 3)
CeykaJIkata e HameHeTa 3a ceYkaIbe MecO, cHpeIbe, KpOMH,I, 6HJKN, JyK, MOpKOBN, opeBn, IeHHHIN, 6aJeMH NTH. 3a ceYkaIbe TBpIa XpaHa, KopncTeTe ro IpeKHyBaOTo "=". He ceYkaJIte MHOry TBpIa XpaHa KaKO IITo ce MycKaTHO opEBue, 3pHa KaIe H KHTapKn.
IpeIa ceKATE IpeTxOJHO HceUeHO MECO, CHPeBc, KpOMH, JyK, MOpKOHN uHJIN HIIIEPKN, OTCTpaHETe rH cTe6JIaT a OJ 6HJIKHTe H JyUHHTe OJ jATKaCTHTe IIIOOBH. OTCTpaHETe rH KOckHTe, TETHBHTe N 'pCKaBHuaT a OJ MecOTO.
- CtaBete ro ceuHJIOTo Ha ceUkaJIkata Bo caIOT 3a ceUkaJIkata.
- Ctabete rH coctojknte BO caJOT 3a ceuKaIbe.
- NocTaBete ja cnojHata eHHHa ha caTOT 3a ceKaIbe.
4.Пикачete ro ckJOIOrHa cnojkaTa Ha caIOT 3a ceKaU.
5.ПптнсkaиеHaКочero3aHOPMaJIHaHINTyp6o6p3HHa3aДaФВКЛуЧteуpeДOT.
PaKyBaHbe co KnHaTa 3a MaTeHe (7,8) (CJIka 4)
MaatajkaTa e HameHeTa 3a MaTeHbIaKa, MaTeHb6JIKN oJajua, IecepTH nTH.
- BmETHeTe ja KnIaTa 3a MaTeHb e Bo aIapaTOr, Bo cNojkaTa 3a KnIa 3a MaTeHb e.
- IIobp3eTe ja cnojHaTa eHHHua co MOTOPHaTa eHHHua.
- Ctabete rH coctojknte BO caI (3a HajIO6pn pe3yITaTH, KOpHCTeTe roJem, IJa6OK caI).
- Ieiocho notoihe ja Knata 3a MaTeHe BO coctojkHe. 3a Ja H36erHete npckaHe, 3aIOuHete co o6pa6otkaTa Ha Maja 6p3Ha.
Pa6ota co dncKOT 3a ceuebe/cntnhahe nH dncKOT 3a peHdaIbe kOMnnpn (16, 17, 21, 22, 23) (CJHKa 5)
IINCKOT 3a ccehe/cpeKcbe e IIN3ajHnpaH 3a ceeHe HeJIN dpo6He 3eJIeHcyK KaIO ITO ce KpactaBnH, MOpKOHN, KOMIIINPN, IIpa3 H KpOMH, KAIO H HeKOH BnIOBn CInpeHe. INCKOT 3a rpaHyJnPaBe e IIN3ajHnpaH 3a peHdaHe KOMIIINPN BO IIIECKaBnH.
- IocTaBete ro npkaoyr 3a ceHJIOHO HcHTpaJIHaTnHJaO nnHHjata, CTaBeTe r nckOT BO npkaoyr 3a ceHJIO
3aBpTeTe ro 3a da Ro 3aKJIyUHTe.
- IIpHKaHTe ro KaIIAKOT Ha IIPOUecOpOT 3a XpaHa Ha caIOT. CBPTe rO BO HAcOKa Ha cTpeJIKNTe Ha YacOBHNKOT 3a Da rO 3aKJIyHnTE KaIIAKOT.
- BmTeHe ja MOTopHaTa eHNHua BO KaIaKOT IoJeKa He ce 3aKJyU (KJIHKHe).
- HanoHHe ja xpaHaTa IIO TO Tpe6a Da ce o6pa6oTH BO OTBOPOT 3a IOBOI Ha KaIIaKOT. HNKOraII He NocerHyBaJTe BO OTBOPOT 3a DOBoI DoIEKa aIapAToT e BKlIyueH. CekoraII KopHcTe Ro TypKaHOT 3a Da ja BaBMHTe XpaHata.
- p t c a e Ha KOnyeTo 3a 6p3nHa 3a npedePnyBaHe Ha ypeIOT.
PaKyBaHeco6pHnHaOT(10,11,12)(CJIHKa6)
BJIeHJepOT MoKeJa Ce KOpHCTn 3a 6JIeHJnpaBe Ha BapeH 3eJIeHcyK KaKO ITO ce KOMIIINpH, pena H MOpKOBn. He 6JIeHJnpajTe TbPda HJIN HeBapeHa XpaHa, 6JIeJKn Toa MoKe Ja rO OITeTH aIapAToT.
1.CbapeTe ro 3eJHeuKOT HnCyuWeTe ro.
2.Пикayete ro ckIionot ha cnojkaTа 3a 6pHuaHn (10) Ha BPOT ha 6pHuaOT (11) co BpTeHe cnpOTHBHO oD CTpeJIKNTE Ha YacOBHNKOT.
3. CBpTeTe ro 6pnHauOT HAOIIaKy HIOCTabete Ro MHKepeoT (12) BO ueHTpaJIHaTa TlaBnHa H 3aBPteTe ro cIpOTHBHO oI CTpcIKHTe Ha YacOBHHKOT 3a Da rO IIpHbpcHTe. (Ako CKJIOHr HA cIOjKaTa 3a 6pnHauH (10) He c IIOCTaBcH, MHKepeoT (12) Hema Da Ce BKJOHN Ha CBOETo MecTo.)
4.Пркауerte rockллOT ha 6prHuaHTe (10 + 11 + 12) Ha moTOpHaTa eHHHIIa.
5. Bknyte ro Bo ctpya. Ctabete ro 6JIeHepot Bo TeHuepe HnCn HTN. H36epete MaJia 6p3Ha 3a da ro BkIyHTe anapatot. DBrKete ro 6JIeHepot IOnEka He ro NocTHHETe NocakyBaHHOT pe3yTTaT.
7. IIO yIOTpe6a, OTnyIITeTe ro KOnyTe 3a 6p3HnHa H NcKJyUeTe ro Od cTpyja.
8.ИcknyeTe ro 6pHIIaHT, H3BaIeTe ro MHKcePOT (12) BpTejKn rO BO HAcOKa Ha CTpeJIKNrte Ha YacOBHHKOr.
9. OdBPTeTe ro CKJIOIOT Ha cnojkaTa (10) oI BpBOT Ha 6pHuaOT (11).
BaXHo:
- HNKORA He KOpHCTe Te IHe Bo TeHuepe IoTeKa RotBHTe. CekoraI trpHete ro TeHuepeTo oI oraH n octaBeTe rda cc OJaIi.
- Kopnctere Hnatayla 3a Ia ro H3rpe6te BnIOKOT xpaHa oI pa6OBHTe Ha caIOT/TeHnepcTo.
- 3a Hajio6pn pe3yIITaTH IIINrMceHc, HNKORAIIH He IOJHHe TcHuepe ITH. IOBKe OI IOJIOBHa co XpaHa.
PaKyBaIbe co IIOaTOKOT 3a cceIbe (16, 17, 18, 19, 20, 23) (CJnka 7)
IodatoKOT 3a ceeHebe nH3ajHnpaH 3a ceeHeBaPe H3eJHcyK OBOIIJIe Ha MaJIN KOIIKN.
He 6p607yBajTe TbpHn CoCtojKn KaKo IITc Ce OBOIIje CO cEmKn, TbpI 3eJIeHcyK, MECO CO KocKn HIN 3aMp3HaTH coCtojKn. The MoKat Da rO 3aTHAT N OHTETAT JOIaTOKOT 3a CEkaIbe.
3A6EJIIEIIKA: IOIATOKOT 3A CEUEHBE E IIOIOBEH CAMO 3A IIPETXODHO CBAPEH, MEK 3EJIIEHYK H OBOIIJE.
Cobet: Ako caKate da o6pa6otybaTe pa3JInuHn coctojkn 6e3 da ro uHCTnTE IOnaTOKOT, cekoraIIN OuyHyBaJte CO HajdeJIHKaTHHe coctojkn. Ha npHmep, 3a OBOIIHa caJaTa, IOnHcTe co 6aHaHaT, IpOIOJIKeTe co MaHrTo H 3aBpIeTe co ja6oJIkata.
- OTBOpTe rH 4-Te MeTAlHH cTeHN (20a, b, c, d) oI IIOaTOKOT 3a ceueHe (20).
BmETHeTe ja H36paHata peHietka (19) BO OTBOPOT 3a IIpHbPcTByBaIbe (20), IIpHKaHTe Ro cEHJIoTO (18) H 3aTbOpTe I4-Te MeTaJIHN cTeHn (20a, b, c, d). CeHHaTHa ceHHIoTO H peHietKaTc e MHOry ocTpH, 3aToa paKyBaJte co HNB BHMaTeJIHO! - NocTabete ro doataKOT (20) Ha caTcO CBmTHyBaIbe Ha Yetnptte 3aceHn Ha doataKOT BO yeHTnpTe KYN HA BHaTpeHHNt pa5 Ha caTc (CJHKa 8). BHNMaBajTe da ro npHbpcTHe doataKOT (20) xOpHoHTaIIHO BO caTc.
3.BpaTeTe ro KaIaNokr. CbptTe Ro KaIaNokr BO Hacoka Ha cTpeJIKNrHe NaCobHNKOr DoKeHa He CJyHHeTe KJIHK.
4.Пикayete ja motopHaTa eHHHua Ha KaIIaKOT Ha caIOT (.,KJIHK). - Ctabete rH coctojkHTe BO IeBkata 3a cHa6dyBaHe Ha KaIaNOT. IpTeXoJHO HceyeTe rH rOJIemHr ceCtojKN 3a JecHO da Ce BkIOIaT Hn3 IeBkata 3a cHa6dyBaHe Ha KaIaNOT. IOKoJky Tpe6a da o6pa6OTHe rOJIema KOJIuHHa COcTOjKN, IooJIeTe rH Ha MaJIH cepHN (MaKc. 250 r) H neJHo IpoTpcecTe ro caIOT 3a da rH paCIIpeJeHrte HceUKaHHTe coCTojKn Hn3 IeJInOT caI. IcIIpa3Hete ro caIOT OKaKO ke o6pa6OTHe 500 r.
- IIpHTHcHeTe H 3aIpaKeTe ro KOnHeTo 3a 6p3nHa 3a da ro BKInyUHTe ypeIoT.
- JIecho npHTnCHete ro Typkaqot.
3a6cJIeIIka: IOKOJIky coctojkHTe ce 3aJIaBaT, HCKJIyHcTe r aIAPAToT oI cTpyja, HCKJIyUcTe ja MOTOpHaTa eINHHua, IIpHTHCHeTc r KOIIuHcTe Ha paHKATA n CBPTeTc r KAIIaKOT cIIPOTHBHO OI cTpeJIKHTc Ha YacOBHHKOT, OTBOPeTc r KAIIaKOT H3BaJeTe rH COCTojkHTe 3aJIaBeHN BO OTBOPOT 3a BJIe3 Ha KAIIaKOT.
-
IIO yIIOrpe6a, IIPTHcHHeTe rO KOIIeTo 3a OTIIyIITaIbe Ha MOTOpHaTa eINHHua H N3BaIeTe ja MOTOpHaTa eINHHua OJ KAIAKOT Ha IPOUecopot 3a XpHa.
-
IIpHTHCHETe I KOIHTO Ha paHKaTn CBPTe I Go KAnAKOT CIIPOTHBHO OJ CTpeJIKNTE Ha YAcOBHNKOT 3a Ja Ro H3BaIHTe OJ caIOT.
- OTeTpaHete ro IdoaToKOT (20) oI caIoT. OTbOpTe r 4-Te metaJIHH cTeHn (20a, b, c, d), n3BaJeTe rO ceuJIIOTo (18) npEeTKaTa 3a ceueHe (19). IToToa HcIIpa3HeTe ro caIoT.
Pnka nHcTeHe
He ja nToIyBajTe MToOpHaTa eHnHua (4), KaIaNkOT Ha ceKaoyot (13), KaIaNkOT Ha npOecopot (17) H cnojHaTa eHHHa (7, 10) BO BOna HJN dpyTa TeHocT H He rH IIaKHeTe IOn MJa3 BOJa. KopHcTeTe cAmo BJIaKHa KpHa 3a YHcTeBe. HIKORAII He KopHcTeTe a6pa3HNbHcpeiCTBa 3a YHcTeBe HJN aRpeCBHn TeHocTH KaKO IIITO ce 6eH3HH HIn aUeToH 3a YHcTeBe Ha ypeIoT.
BHHMaTeJIHO HcHCTeTe rH ceuHlaTa, peIeTKHe 3a ceYebe n IINCKOBHe. HnBBHTe ceyHa ce MHOry ocTpH.
1.Ппдчнстelve,нckлучete ro ypeiodOT on ctpya.Отсранete rodoTaKOT.
2.Исунсте ja ушат (9),caTOT 3a Meшаьe (23),ceHJIToTo 3a ceYebe (14),caTOT 3a ceYebe (15),doJaTOKOT 3a ceYebe (20)иpeHTKHTE 3a ceYebe (19)иДнСКOBHTe (21)ВОТПЯ BOДа co calnyHIIa.
3. OchOBaTa Ha 6JIeHJIepOT (6) H JxHuaTa 3a MaTeBc (8) MoKe Ia Ce YHCTa TIOJeka Ce cé yIITc IOBp3aHH Co MOTOpHaTa cIHINHa co ITOIpyBaHc BO TOIIa BOJa CO MAJIky TeUHOCT 3a MHeBc caIOBn H OCTaBaHc Ha aIapatOT da pa60TH HeKoe BpeMe.
Texnukn noaToi:
Mokhoct: 1000W
MaKCHMaJIHaMOKHOC:T:1600W
HaiojyBaHe: 220-240V\~50/60Hz
KoHTHHynpaHO pa60TeHe: ≤ 1 MHH. BpeMe Ha JaIeBe IpeI pceTApHaBc: ≥ 1 MHH.
IotpouyBaKaHa cHeprnja BO HcKJyuYeHa coToj6a 0,00 W.

3apn 3aHTHa HKnBOrTHa CpeHna. HhOpmaunn 3a OHaHa cIeKtpnHa H cIeKtpoHcKa onpema. Corlacho yich 13, crabobn
1 H 2 Od 3aONOT OH 11 ceTEmBPH 2015 roHnHa 3a OTnAHa eEeKtpnHa H eEeKtpoHcKa oIPeMa, co OBA Be HINΦopMHPame 3a IpaBnIIOTo pakyBaHbC co OTnAHa cEeKtpnHa H cEeKtpoHcKa oIPeMa:
1. 3a6paheo e pfaiehe ha ynoIpebeha eektpnHa h eektpoHcKa Onpema 3aeHO co npy rOTH -OBa e HOTBpHeo co O3HaKaTa BO fOpMa Ha "HpcupraHa KopHa 3a oTHIOU" CO koja ce bapa cckkTHBO cobnpaHc Ha OBOJ BnO tHAd.
2. EeKtpHInIte H eEeKtpOnckHtte ypeH MoKeJa coDpKaT onAcIH CynCTAHHH, Cmecn H KOMIOHINTH KOH, DOKOJIy Ce HcNIIITAT BO KHBOTHTA cpcHnHa, MOKat Ja IpcETabYbaaT cpcHO3Ha 3a3paBjTO H KHBOTOT HA JYfTO H KHBITE OPAHH3MH. THc MOKAT Da IOBeJAT Do 6poJHH 3dpABCTBEHN 3a0bIJyBaHa, KAKO IIITO CE OHITETyBAHe Ha BnIO, CUYXOT HOBOPOT. The HcTO TAKA MOKAT Da IIN OHITETAT 6bype3HTE, IIPIHOT IPOH N CpTeO H IIpeDNBbHAKT KOKIH 3a0bIJyBaHa. IIIrTHTHe cyIeTAAHH, HcTo taka, MOKAT IIrTaBHNO DA BJIhaat Ha pceHapopTOpHnH To peIPOyKTHHHNHT CTChEM N da IOBcIAT DO paK. KOHCymHpHeTo pactCHHa IITO pACTAT BO KOTAMHHPAPA HIOBa H IPOHBOIDIOIOBHeH ON HIBMOKeJa IpcETCTABYbaaT PNHIK OJ OBHe 3pApCtBEHN HOCJEINH.
3. YIIOIpe6eHATA cIEKIPnHa H cIEKITPOHcKa OIIpMa Tpe6a Ja ca DCIOCTAByBa cAmO Jo OBJIACTeHN MecTa 3a CObHpAbe, HJ CINHCOK Tpe6a Da 6NHe IOCTaEN Ha Be6-CTpaHHaTa Ha cekoja OHIIIHTHHcKa KaHJIeHApJa.
4. DomaknHCTBATA Hpaat Baxha yIora BO npHIOHCCOT KOH IOBTOHPATA yIOITpc6a HOBYBaHcTo, BKJyHTeHO H PCIKHHpAeTO, Ha yIOPTpebybHaTAt OINPema. The nTO Taka Hpaat Knyuia yIora BO cHCTeMOT 3a ynpabyBaIe co OTnAD ON yIOPTpebybHa eIEKTPNHa I CKeTPOHcKa OHPCMA, OBO3MOyBAjK INpckTeH INpCHOC HA OTnAD IOn OBIACTEH MecTa 3a CObPAbc H CImMHHNpaHc Ha HcIOKcJIHHTC CoIHJaHH HABKN II TO pezITnPaAT co OCTabAhe HA OTnDAHA ONPeMa HA HeHAMEHT MeCTa.
IIOJIINHTeJHO, Bpate ja yIOTpe6eHATA eIeKTPuHa H eIeKTPoHcKa OIIpeMa Do MeCTOTO Ha HcIopaka. IIpi HcIopaka Ha OIIpeMa 3a IOMaKHNCTBO DO KUHyBaOT, INCTPb6yTePOE IOJIKEN 6ecnIHATHO Ja ja IIOHITHE yIOTpe6eHATA OIIpeMa 3a IOMaKHNCTBO HA MECTOTO HA HcIopaka, IIO YcIOB yIOTpe6eHATA OIIpeMa Da e OJ HCT TIN H da ClyKHa HcTATA HAMEHa KaKO HcIopapaHaHa OIIpeMa.
Kaptonckata am6aJka H noHETnEICHTRE (PE) kech tpe6a Jc ce pIaT BO cooDBeTH KONITEJIepn HAmeIETH 3a celenkTHBIO co6hpaiBe Ia KOMyHaJIeH OTnA, kako IIto e onHHaHO. IOKOJIky ypeIOT coIpKn 6aTePHN, Tne tpe6a Jc ce otCTpaHAT N da ce OHeCat Ha nOce6Ho MeTo 3a co6Hpae H oTcPAnhyBaIe.
He fo p.p.a.jte ypeodr BO KOMyHa.IeH OTHaI!!
CepBnIOKIOky cakate Ja KYNHTpe3epBHN DeIOBN HIN Da IIOHecete 6HIO KAKBa KaJIb6,Be MOIhme KOHTaKTHpajTe INpeKTHO co npDabayOT KoJ ja H3daI cmETkata.
Korisnicki priručnik (HR)
OPCI SIGURNOSNI UVJETI.
VAŽNE SIGURNOSNE UPUTE
PAŽLJIVO PROČITAJE I SACUVAJTE ZA BUDUCU REFERENCU
- Pije upotrebe uredaja procitajte upute za uporabu i slijedite ih. Proizvodačnice odgovoran za bilo kakvu štetu uzrokovanu zlouporabom ili nepravilnim radom uredaja.
- Ovaj urežaj je namijenjen samo za kućnu upotrebu. Ne koristite ga u druge svrhe osim za one za koje je namijenjen.
- Urežaj treba spajati samo na uzemljenu uticnicu napona 220-240 V~ 50/60 Hz. Radi povećanja sigurnosti rada, nemojte istovremeno spajati više elektrčnih urežaja na jeder strujni krug. Radi povećanja sigurnosti rada, nemojte istovremeno spajati više elektrčnih urežaja na jeder strujni krug.
- Budite izuzetno oprezni pri korištenju urežaja dok su djeca u blizini. Ne dopustite djeci da se igraju s urežajem. Ne dopustite djeci ili bilo kome tko nje upoznao s urežajem da ga koristi.
- UPOZORENJE: Ovu opremu mogu koristiti djeca starija od 8 godina i osobe s ograničenim fizickim, senzornim ili mentalnim sposobnostima ili osobe bez iskustva ili znanja o opremi, pod uvjetom da su pod nadzorom osobe odgovorne za njihovu sigurnost ili da su do bile upute o sigurnom koristenju opreme te su svjesne rizika. Djeca se ne smiju igrati s opremom. Čišćenje i korisnicko oderžavanje ne smiju obavljati djeca osim ako nisu starija od 8 godina i nisu pod nadzorom.
- UPOZORENJE: Ne ostavlajte uredaj uključen u utićnicu bez nadzora.
- UPOZORENJE: Urešaj držite izvan dohvata djece.
- UPOZORENJE: Nepravilna uporaba uredaja moze uzrokovati ozljede poput posjekotina, ogrebotina ili strujnog udara.
- UPOZORENJE: Nakon upotrebe uvijek isključite utikač iz utičnice držeci utičnicu rukom. NE povlačite kabel za napajanje.
- UPOZORENJE: Ne koristite uredaj u blizini zapaljivih materijala.
- UPOZORENJE: Prijje cisćenja i pranja uredaja, isključite kabel za napajanje iz utičnice.
- UPOZORENJE: Prijepunjena uredaja vodom, isključite ga iz
elektricne mreze.
- PeryJIaTOp IIIBnIkoCti
2.KHOIIKa IIBNIKOcTI"-"
-
KhoIIka IIIBNIOKocTi " = "
-
MoToPnHn 6JIOK
-
KhoIIKN po36IOKYBaHHa
6.Hixka 6JIeHepa
- Binhue
8.36nHTe BInHnKOM
-
MipHH cKaHcK 3 KpHIIKOIO
-
IIecTePnKJIooUHCHNka
-
KiHnK cKJIOOuNCHNka
-
Tepka-Mikcep
-
IIeTepeH IpeIepa
-
Ie3o IIopip6HIOBauHa
-
YaIIa IIopI6HIOBaHa
-
IIIToBxaU
17.06KJIaIHHka
-
JIe3O IJIЯ Hapi3KN Ky6Hkamn
-
Pizkyi ciTKN: 8x8 MM a6o
11x11 MM -
HacaIka Ha Je3o IJIa Hapi3aHHa Ky6Hkamn
21.aIckIIJIa Hapi3aHH/IIIHHkyBaHH
21.bIncK terkn IJIa KapToII
22.ПдгмкднскIB
- Yama
IpeepIePIMBMBKNOpHCTaHHM
- BnMKHITb IIpncptpi Ta BiI'cHaHTe Ioro BiI MepeKl IepcI cKJaHaHHM, PO36HpAHHM, 36epiraHHM Ta OHIIeHHM.
2.IeI IprHJIaIIIprH3HaueHHJINHIEI JIOMAIHIBO BHKOpHCtAHH. JIKIO IIprHJIaI BHKOpHCtOByETbc HcIIpaBNIbHO, y IpofeciHHx Hn HAIIBIpOfeciHHX IIJax, a6o JIKIO BIH BHKOpHCtOByETbc He BiIOBIHO Do IHCTpyKIIi, HabeJeHNx Y NocioHNY KOpNCYBaHa, rapaHTia 6yde aHyJBObaHa, i Bnpo6Hk 3HimaC 3 ce6 6yJb-ky BiIOBIAJIbHicTh 3a 6yJb-ki 3aIOJiHi 36HTKN. - TpmaIte IINrHyN IOaJIi BiI TeIIJa, BOrHIO, BOJIoN Ta 6pydy.
- HikoHN He HAnOBHIOHTe MIPHy YauKy, YauNy IooPi6HIOBaYa a6o YauNy KxOHHOro KOM6aHa iHrpeDiEHTAMN, TcMIncparypa kKHX IIpcBnUy 80°C/175°F.
- He obpo6JIte 3amOpOKeHi IIPOJyKTH, pyKTH 3 KICTOCHaMn Ta HacIHHM.
6.Якшивпимити,在ураногрьаetбс(6iJIbIe 50^ / 122^) ,BID'cHaiTe npncptiB iI MepeKt Ta IaHT My oxoJIOHYTH IIOHaMHMcHIIc 60 XBHNH.
PyHn 6JIeHep npH3HaueHH nIa: 3MiUyBaHH pIINH (HaPpHKJaI, MoIOuHNx IpoOyKTiB, coyciB, fpyKTOBHX cOKiB, cyIIB, HAnoIB Ta KOKTeJIIIB), 3MiUyBaHH M'KHX iHrpeicHTiB Ta IIOpEioDHH BapeHH iHrpeicHTiB (HaPpHKJaI, IITaYoro cyIy).
1.Пикpiniiтбижky6leHepado6IOkyIbHryHa(«Knau>)
2.Повпсюзауртесхнкокухл3aВигpeientH.
3. HatncHITb KONky IIBNIOKcTi, 0o6 yBIMKHyT npHCTpii.
4.Повьлбу pyхайтпpresчтейВcropуТаВиЗ,а takож IO KOJy,IOБпершати ИгpeДeHt.
PiJ qac NOMiYBaHH6c3IOcepeHbO B KAcTpyJI iJ qac npHroTyBaHH cNoaTky 3HIMITb 3 BORHIO, IIO6 3aIIO6irTH neperpiBaHHIO pnilady.
Po6oTa nOpi6HIOBaHa (13, 14, 15) (PncyHok 3)
Iopip6HIOBau IIpH3HaueHn IINI IOpi6HeHHa M'ica, cHy, u6yli, 3eJIeHi, YachHKy, MOpKBH, BOIOcbKHX rOpiixIB, yHdyka, MngdaIIIO ToIO. IINI IOpi6HeHHa TBePdIXN IpoDyKTIB BHKOpHCToByIte IepemHKaY " = " . He Ioppi6HIOHTe Jyke TBePDI IpoDyKTH, TaKi JK MycKaTHH rOpiX, KaBOi 3epHa Ta KpyIIH.
IpeH TM, HApia3aTH IIOpeHbO Hapi3aHe M'aco, cnp, u6yio, uacnK, MOpKBy Ta nepeuB uHJI, BuaJIITb IIOdoHIXKN 3 TpaB Ta IIkapaiyny 3 ropixIB. BuJalitb 3 m'ca KICTKn, cyxoxnnla Ta xprni.
KcpyBaHHcKIOOChHkOM (10, 11, 12) (MaHOH6)
EJIeHep MOKHa BHKOpHcTObyBaTH IINI IOpi6HeHHa BapeHHx OBOuHb, TaKHX KAPToIIa, pIIa Ta MOpKBa. He IOpi6HIOHTe TBepi aO bCnpI IIPOdyKTn, oCKJIbKn Ie MoKe IIOIKoIHNT IIpHJaI.
- 3Bapitb OOCh Ta BnCyHITb ix.
- IIpHKpiiITb By30JI MyfTH cKJIooUHcHHka (10) IIO HAKOHeuHnKa cKJIooUHcHHka (11), NOBepTaOHn Ioro IpoTH roHHNKoBOI cTPIJKN.
- IpeBepHITb cKIOOuHcHKn IOrOpH dHOM Ta BcTaHOBITb 3MiIyBaH (12) y ueHTpaJIbHy BTyJky, a NotIM IOBepHiTb IpoTH roHHNKOBoi cTpJIKN, IIo6 3aKpInHn. (YKIIIO By3OI MyfTH cKIOOuHcHnKa (10) He BcTaHOBJIeHN, 3MiIyBaH (12) He BcTaHe Ha Micie.)
4.ПинкріпітБу30ЛСКЛоОчнснka(10+11+12)До6лOKуДВИгуна. - IIKIOHITb 6JIeHJep IO MepeKi. IOMictIb 6JIeHJep y KactpyIIHO a60 MHcky TOIO Ta Bn6epiTB Hn3bKy IIIBNkicTB, IIo6 yBIMKHyTH INpIIa.I. IpepeiHTe 6JIeHJep, IOKH He IocraHete 6aKaHOrO pe3yJIbTaTy.
- IicIa BHKOpHCTAHHa BiIyctItb KHOIIky IIhIKOcTi Ta BnIMiTb i3 MepeKi.
- Bi'd'cHaTe cKIOOuHcHk, 3HIMtB 3MiUyBaU (12), IOBepHyBUnn HOro 3a RoDHHNKOBOHO CTpiJIKOIO.
- BiKpyTtB By30J 3ueHHeHHa (10) BiHaKOHeHHKa cKIOOuHcHHka (11).
BaKJIINBO:
- HikoJIH He BnKOpHeTOByIe IIOpe B KAcTpPyJI iI d ac npHrOyBaHHI iKi. 3aBxJN 3HimaTe KAcTppyJIO 3 BOrHIO Ta JaiTe II OXJOHOHTN.
- BnKopHcTObyIe IIOIaTKy, IIo6 3iIKpe6TH 3aiBy iKy 3 KpaIB NocCydy/KacTpYIi.
3.ДЯнКрашнpe3yЛьтавпд ac noDiPI6HeHn HikoH He HAnOBHIOHTe KacTpYJIO ToIIO npOdyKTAMn 6JIbIe HIX HaIOJIOBHy.
KepyBaHHaHacaIkoIO IJIa Hapi3aHHa Ky6HaAMn (16, 17, 18, 19, 20, 23) (PcCyHok 7)
HacaIka-Hap3ka npn3haeHa IJIa Hap3aHHBapeHNX OBOuIB Ta pykTIB pI6HMN Ky6HKamn.
He 6p06JIte TBePdi iHrpeiEHTn, Taki JK pykTH 3 KICTouKAMn, TBepDi OBOUi, M'co 3 KicTkamn a6o 3amopOkeHi IIpoIyKTn. BOHN MOkyTb 3acmitHTn Ta IIOIIKOHTn HacaIKy IIA Hap3aHHKy6HKAMn.
IIPIIMITKA: HACADKA JIJI HAP13AHH KYBHKAMN IIXOINTb JINIIIE IIOIPEIDhBO IIPIIOTOBJEHNX, M'IKNX OBOUIB TA ΦPYKTIB.
Iopapa: KIO BxOueTe o6p06HTn pi3Hi iHrpeiEHTN, He ouHsUoH hacaIKy, 3aBkIN IooHHaTe 3 HaiHIXHX iHrpeiEHTIB. HanprKlaJ, IIra fpykTOBO rCaIarTy noCHtB 3 bHaHa, IpoIOBjYte MaHro Ta 3aKiHyTe J6JyKaMn.
- BiKpnIte 4 MeTaeIeBi 3aTnckaui (20a, b, c, d) HacaIKN IJIaHapI3aHn Ky6nKaMn (20).
BcTaBTe Bn6paHy citKy (19) y otBip IJIa KpiIJIeHHa (20), IIpHKpiIITb Jle3o (18) Ta 3aKpnIte 4 metaJIeBi 3aTHCKaI (20a, b, c, d). Pikyui KpOMKn Jle3a Ta citKn Iyke IocTpI, Tomy IIoBOIbTeec 3 HmH o6epKHO! - BcTaHOBtB HacaIKy (20) Ha YauH, BCTaHBbHIN OHTnPH BIMKn HA HacaII B OHTnPH RaKN Ha BHyTpIHbOMy KpaIO yauHI (MaJIIOHOK 8). ByIbTe o6epeKHi, IIo5 3akpiHIn HacaIKy (20) ropH3OHTaJIbHO bAHI.
- BcTaHOBItb KPNKny Ha3a.IIobepTae KPNKy 3a roHHNKOBIO cTpiJIO, IOKn He NoOyTe KJaHaHH.
4.Пикріпіть 6лok ДВИгУнаdo Кршкичansi(«Клauнітб») - Iomictitb inIrpEicHTB O TBip IIJIIOaI KpnIKn. IOnpeHbO HApIXe BeNIki iInrpeicHTN, IO6 BOHN JERKO npoxoJINH uepe3 OTBip IIJIIOaI KpnIKn. JaIIO BAM IOTpi6HO o6pO6HTN BeINKy KJIbKICTB iInrpeiEHTIB, po3IIITb ix Ha HeBeJIHKI napTII (MaKc. 250 r) ta o6epexHo ctpyciTb yAùy, IO6 po3IOJIHTN IOpi6HeHi iInrpeicHTN IO BCi N aIài. CnopokHtB yAùy NiCIA O6pO6KN 500 r.
- HatncHbIy ytpHMyIte KHOIIky IIbIKOcTi, IIIO6 yBIMKHyTH npHCTpii.
- 3JIerKa HaTHcHITb Ha IITOBxau.
Ipnmitka: Ikuio iHrpdeiieHTN 3actpargn, BiE'edhaite npnaB BiMpekei, BiE'edhaite 6IOK dBHyHa, HATNCiTB Khoiky Ha pyuui Ta IOBepHITb KPNkU IpOTn rOHNHHKOBOI cTpiJIKN, BiKpHITe KPNkU Ta BNIIMt b IHrpcdiEHN, IIO 3actpargn y BXiINHomY OTbopi KPNkN.
8. IicJIy BHKOpHcTaHH HaTnchIb KHOIIky iKcaiiHa 6JIOi IBnHyHa Ta 3HIMITb NOrO 3 KpHIIKN KyXOHHO KOM6aIIHa.
9. Hatncnhtb knonky ha pyu hi Ta nobephitb kpnki npotn roHHNKOBoi ctpjIK, 063Hrti 3 aHI.
10. 3Himitsb HacaKy (20) 3aani. BiKpnite 4 metaJIeBi 3aTHcKai (20a, b, c, d), 3Himitsb JIe3o (18) Ta peiiITky IJIa HapiaHHa Ky6nKaMn (19). IOTIM cnopoknHt yaiy.
IorJIra Ta HnHennr
He 3aHypioIte 6IOK DnHyHa (4), KPNK Ky IOppi6HIOBaua (13), KPNK Ky IpoIecopa (17) Ta 3'eINHyBaJIbHN H6IOK (7, 10) y BOy a6o 6yJb-ky iHMy pIHHy, a TAKOJK He IppOMBaIte ix IIpIPOTOHO BOIOO. BHKOPcHCTOBuYTe JIA OUnIeHHN JIIHIE BOIgry TKAHHy. HiKOLn HE BHKOpHcTObUyIte abpa3HBHI 3acO6N JIA YUNIeHHN A6o arpeCnBHPiINHH, taki JK 6ch3HH a6o aIcToH, JIA OUnIeHHN IprHcTPOJO.
Petelbho ouhctitb Ie3a, peiitkn Hn Hapizahn Kyokamn Ta nckn. Ixhi piKyui KpaI nyke roctpi.
- Ipepei HnHHeHM BiEeHaIe TepcpiB iI MepeKi. BnMItb akcccyap.
2.ПомиTe yaiky (9), qayIy IJIa 3mIyBaHnIy (23), pIXyIHI (14), qaiy IJIa IIOpi6HeHHy (15), hacaIky IJIaJIe3a IJIa HApIzAHnI KYbHKamn (20) ta pIXyI peIIITkn (19) i IINCKN (21) y TeIIIIM MIIbHi BODI.
3.Ochoby 6JIeHepa (6) Ta BInHrk (8) MoKHa OUnCTHTN, NOK BOHN Ie NiIKIOueHi Do 6IOKy DHBryHa, 3aHypNBIN ix y TeIIJy BDOy 3 HeBeJIHKOIO KJIbKicTTO 3acOBy IJI MHTTg NocUy Ta DaIBIH INpNJIAy IIoppaIIOBATH DeKHN qac.
Texhiu hi:
IotyKHicTB:1000Bt
MaKcHMaJIbHa IOTyJxHicIb: 1600 Bt
JKepeJIO KHBJIeHHra: 220-240 B 50/60 T
Bc3nepepBHa po6oTa: ≤ 1 XB. Yac oxOIOJKeHHIpeEIOBTOpHM 3aIyckOM: ≥ 1 XB.
CIOXHBaHa IOTyKHicThb y BHMKHeHomy cTaHi 0,00 Br.


3apaHIOBkiII. IHOpMaHIN Ipo BixOHN eIKTPHnHO Ta eIKTPoHHORO 6laHaHHa. BiIOBiiIO IO CTATRI 13, yNtB1 1ra 2 3aKohy BiI 11 BepeChra 2015 pOKy IPO BIXOHN eIKTPHnHO Ta eIKTPoHHORO 6laHaHHa. IM NOBiOMJIeMo Bac Ipo HaeJHe IOBOJKeHHI 3 BIXOAMH eIKTPHnHO Ta eIKTPoHHORO 6laHaHHa:
-
3a6oPiHCTb8 po3mIiyBaTH BnKOpHCTa eIeKtPnHc Ta cIeKtPOHHc oIIaIIaHIIpa3OM 3 IINHM BIXOAMH -Ie IIITBepkkyctbcMapkyBaHHM y BnJIyIi «NepeKpIeHORO KOHTHeHaP», IIO BnMarac po3IbHoro 360py Iboro BNy BiXoJIB.
-
EeKTPHHi ta eJeKTPoHHI pHCTPOI MOKyTB MICTHT Hebe3neHPI peOBHH, cyMIiTa KOMIOHEHT, kki y pa3I NtpaIIHHB HABKOJIINHC cepEOBHHe MOKyTB cTAHOBTH CEPHO 3aRpo3y IJIA 3IOPOB' Ta JIKTHI IOJe i JKBHX OPAIH3MIB. BOHN MOKYTB INP3BecTH IO HICJIeHHX 3aXbOPBOAHb, TAKHX JIKIPOyIIeHHH 3Opy, CJIyXy TA MOBJEHH. BOHN TAKOK MOKYTB IOIIKOHT HHPKN, NEHkY ta cepue, a TAKOK cPiPHHHTH 3aXbOPBOAHH IIKIPH. IIKIDINIpeOBoHHN TAKOK MOxy TB HerATHBHO BIIINBAITH Ha DIXAJIbHY Ta peIPOyKTHBY CHCTEMH TA INP3BOHTH IOpaky. BkHBAAHH PocHH, IIIO POcTyB Ha 3a6pyIHeHOMY IpyHTI, Ta IPOyKTIB, OTPMAHNX 3 HHX, MOKc cTAHOBTH PH3HK IHX HACIIKIB IIN 3IOPOB'.
-
BHKOPHCTAIE eKTPnHTE Ta eKTPoHNE 6JIaIIaIIHcI I3I 3BaBH JINHIE Do ABTOPH3OBAHx IIYIKTIB 360py, cIHcOK KHX Mac 6yTH IOCTYHHH Hb6caHRI KOKHORO MYHIuHaJIbHO YIpaBJIHH.
-
JOMOROIOIAPCTBA BIIIRPAOTB BAKJINBY POIB y IOBTOPHMY BHKOPHCTAHNI TA yTHI3aII, BKHOHAIOHN IepeoKy, BKNBaHOrO 6bHaHaHH. BOH TAKOK BIIRPAOTB KIOHOBY POIB y cHTeMI YPPABJIHHN BIXOAMN IJI IN BKNBaHOrO eIEKTPnHOrO TA eIEKTPoHHORO 6bHaHaHH, IO3BOIIHOH 6e3IOCEpeHbIOpeDAbaTH BIXOIM NO ABTOPH3OBaHH NyHKTRIB 360py Ta ycBAOH NcuaJIbHI 3BNUKH, AKI IN3BOIDITB DO 3aIIHHeHH BIXOIN B6bHaHHY IepeD6aeeHx Micix.
Kpim toro,IOBepHb BHKOpHcraHe cIEKTPHHe Ta eIEKTPOHHe 6aHaHHaMciu IOCTABKn. IIuacIOCTABKn IIOBYOTexnIKN OkyIIO INCTPbIO TOp 3O6OB43aHH63KOHTOBIO 3a6paTH BHKOpHcTAny IObyTOBy texnIKY B Miciu IOCTABKn, 3a yMOBN, IIO BHKOpHcTAnA TEXnIKA toro Jx TNIy Ta cIyKHTb Tii cami Meri, IIO uIOCTABIneHa texnika.
Kaptony ynaokky ta noiietnienbi (PE) nakeTH cnI yTHINIBYbAHT y BINOBI KOnTEHne npH3aueeII pOzDIIIOHO 60py 106byTOBx BIXOxAIO, kO HCAHO. KIO npHcpiPi MiTtB 6aTepeKN, IX cNl BHHIT Ta BIHeCTn DO NyHKry OKPcmo 360py Ta
ynytcTb0 3a ynoTppe6y (SR)
ОППITи YCJIOBи BE3БЕДHOCТИ.BAЖHA BE3БЕДHOCHA YIYTCTBAIIAJbIbBO IPOUHTAJTE IN CAUYBAJTE 3A BvIyTHy YIOTPEbV
- Пpe упOTpe6e ypehaja, прочтajTe yIyTcTBO 3a yIIOTppe6y И слдпTe yIpyTcTBA koja ce y HeMy HaJa3e. ПрOn3BohajЧи je OДТВОВОПан 3a 6HJIo KaKBy IITeTy HacTaJY ycJIeД 3ЛoyПOTpe6e ИИн HeIIpaBnJIHor paДa ypehaja.
2.Obaj ypehaj je HamebeHcMo 3a KyhHy yIIOTppe6y.He KopnCTHTe ray npyTe CBpxe OcHM OHe 3a KoJy je HamebeH. - Ypehaj Tpe6a IIprHKJbYHTN cAmO Ha y3eMJIbeHy yTHHNUy HAnoHa 220-240V~ 50/60Hz.Да 6nCTe IIobehaII IN 6e36eIHocT paIa, HeMoJTe IcTOBpeMeHO IIOBe3INBaTN BIIIE eJIeKTPnHnx ypehaja Ha jeIHO KOJIIO.Дa 6nCTe IIobehaII IN 6e36eIHocT paIa, HeMoJTe IcTOBpeMeHO IIOBe3INBaTN BIIIE eJIeKTPnHnx ypehaja Ha jeIHO KOJIIO.
4.Будnte n3y3eTHO onpe3Hn KaJa KOpNCTHte ypehaj KaJa cy DeIa y 6JIINHH. He Do3BOJInTe IeIa Ce nIrpajy ypehajem. He Do3BOJInTe IeIi HJIH 6HIO KOME Ko Hnje yIIO3HaT ca ypehajem Ia ra KopnCTH. - YIIO3OPEHBe: OBy onpeMy Mory KOpNCTHTn DeIa cTapHa oI 8 IIOINHa H Oco6e ca OgrpaHnueHm H3nUKNM, ceH3OpHN MJIIM MeHTaJIHN M cIOOCbHocTHMa, HJIN OCO6e Koje HeMajy NcKycTBa HJIN 3HaBa O ONpeMH, POn ycIIOBOM Ja cy POn HaI3OpOM Oco6e OITROBOPHe 3a HbHXOBy 6e36eIHOCt HJIN Da cy IIObJIe yIpyTCBa O 6e36eIHOM KopHIshHeBy ONpeMe n Da cy CBeCHe pN3nKa. DeIa He Cmejy Da Ce Iprajy ONpeMOM. UHIshHe BnOdpJkaBaHe He Cmejy 6abJbATn DeIa OcHM aKO Hncy cTapHa oI 8 rOJInHa HnCy IIO
HaI3OpOM.
- YIIO3OPEHbE: He ocTaBJIbajTe ypehaj yKJbUyeH y yTHNu 6e3 HaI3Opa.
- YIIO3OPEHbE: Iprknte ypehaj BaH IomaiiJa deie.
- YIIO3OPEHbE: HeIIpaBnJIHa yIIOrpe6a ypeJaja MoJKe IIOBeCTN Io IIOBpeJa Kao IITO cy IIOceKOTHe, orpe6oTHe HJIc TpyjHN yIap.
- YIIO3OPEHbE: YBeK hckJbUyHTe yTnKaU n3 yTnUHnIe HaKoH yIIOrpe6e IprKeHn yTnUHnIu pykOM. HE ByuHTe Ka6JI 3a HapajaHe.
- YIIO3OPEHbE: He kOpncTHTe ypehaj y 6JIH3HH 3aIIaJbHBHX MaTePnJaJa.
- YIIO3OPEHbE: Ipe quHHeBa n IpaBa ypehaja, NcKJbUyHTe Ka6JI 3a HapajaBe n3 yTnHnIe.
- YIIO3OPEHbE: IIpe HeTo IITo HAnyHnTe ypehaj BOJOM, NcKJIbUHTe Ra I3 cTpyje.
- YIIO3OPEHbE: YBeK nckJbUyHTe 6JIeHep H3 cTpyje aKO je ocTaBJbeH 6e3 HaI3Opa I IIpe cKJIaIIaHa, paCKJIaIIaHa bA HJIH chiHeBa
- YIIO3OPEHbE: He IomepajTe ypehaj IOK je y paIy.
- He notanajte Ka6JI, yTnKaU nJIn ueo ypehaj y BODy nJIn 6HIO Kojy npTu TeuHocr. He n3JaXHTe ypehaj BpeMeHcKHM ycJIOBHa (KNIIa, cyHnce nTII.) HHTN rA KOpHCTHTe y ycJIOBHa BMCOKe BJIaXHOCTH (KUYIaTHJIa, BJIaXHe KaMII Ka6HHe).
- Перношино повераяльные саные кабла за нараима ще. Ако ща нараима ще ошто跟他, тpeba ra заменту у KBалифпковаяю раднони по се исогocт.
- He koprncntte ypehaj ca oiiTeheHm Ka6JIO m3a HapajaHe, nIaKo je hCnYiTeH nIi Ha 6nIo KoJn HauHH OiiTeHeH, nIi je HeHcIIpaBaH. He IOKyuaBajTe camn Da IIoppaBHTe ypehaj, jep To MoKe IOBeCTn Do cTpyjHOr yIapa. BpaHTe oiiTeHeH eypehaje y OBJIaIIeHN cepBnCSn IeHTap Ha IpeJIeN IJIn IIOpPaBky. CBe IIIOppaBKe Tpe6a Da obABbAjy camo OBJIaIIeHN cepBnCSn IeHTpn. HeIIpaBNIHO N3BrIIeHe IIOppaBKe MOry IpeIcTaBJaATn O36NJbHy
OIIaCHoCT 3a KOpIscHnKa.
- ПocтавиTe ype Haj Ha XJIaIHy, cTa6HJIHy, paBHy IOBpIIHHy,ДаJBe OJ BpyHnx KUxHbCKnX aIapaTa Kao IITO cy eJIeKTpHuHn IIIIOpeTH, rachN rOpHOHN HtI.
- Ka6JI 3a HApajaHe He cMe Ia BnCn IIpeKO HbHcE CToJIa HHTN Da IoOpHyje BpyHe IOBpHInHe.
- PaДи ДОДаТHe 3aIITHTe, Ирелоручye ce yIpaДиBa 3aIITHTHOrIypeJaja (RCD) y eJIeKTpNHO KOJO ca HOMHaJIHOM IINΦepeHIIJaJIHOM cTpyjOM Koja He IIpeJIa3N 30 mA. 3a OBO ce KOHCsyIITyjTe ca KBaJIHΦHKOBaHIM eJIeKTpNApem.
- He cTaBbajTe IIpcTe HJIH 6IIIO Koje IpyTe IIpeIMeTe y IocuIy KaJa je ypehaj yKJbUyeH.
- Пажьно рукутесуньма за се uebe kaoko 6нсте n36eглповре. Повре.
- YBepHTe ce Ia Iyra Koca, IlaIOBn, KpaBaTe NTI. He BInce IIpeKO 6okaja H paDNHX IeIOBa ypehaja.
- Из 6e36eДHOCHHx pa3JIOra, Тpe6a KOpHCTHTN caMo opHrHHaJIHy IOДaTHy OПрЕМу И pe3epBHe ДeJOBE ПОГДнE 3a ДaTи MОДeЛ 6JIeHДера, Koje IIpoДaje OBlaIshHeH cepBnCHN IeHTap.
- Пплком укlaьаьа ддathe onpeMe, пжьнво pykyjTe ceивma: могу ИЗa3ВaTN ПOBpeIe.
- Дова на опера се може мьати само када ќуpe Haj Искъун. Искъуне урай ИЗ ИЗВора на паява.
- He cTaBJIbajTe HnIITa OcHm XpaHe N TeuHocTn y 6OKaJI 6JIeHJepa. He cTaBJIbajTe BpyHe IpeIMMeTe y 6OKaJI.
- Ypehaj Hnje IIOrgan 3a Myhebe 6eHaIaIaI MeceHe TecTa.
- He kopructte arpecbHHe JeTepeHTe 3a YnIshHeBe KyhHITa, jep Mory yKIOHNr rpaΦnue cHm6OJIe ca HΦopMaunjama KAO IITOCy cKaJIe, O3HaKe, 3HaKOBn yIPO3OpEHa NTД.
- He koprncHTe IocuIy 3a MeIIaJIbe 6e3 IIpoN3BOJa.
-
Мaktionмално врeme непразкнIHOR paДа 6JIeHДepa je 60 ceKynI. Habon 60 ceKynIи непразкнIHOR paДa, caYeKaJTe 1-2 MHHyTa IIpe IOHOBHor ПOKpeTaHa.
-
He cinnajte Bpyhe TeuHocTn (Ipeko 60^) y IIOJbY.
- Ako ce ceuBa 6JIOKnpajy, yBeK nckJbUyHTe Ka6JI 3a HapajaHe I3 eJIeKTpHne yTnUHnIe Ipe HeFo IITo yKJOHHTe KOMIOHeHTe Koje 6JIOKnpajy.
OIIHC IPOH3BOJa (CJnka 1)
| 1. PerúIaTOp IIpOMeHJbHBe 6p3HHe | 2. ДуTme 3a 6p3HnY „-“ | 3. ДуTme 3a 6p3HnY "=" |
| 4. MoToPHa jeIiHnIa | 5. ДуTmaI 3a OTnyIITaHBe | 6. HoJHnIa 6JIeHdepa |
| 7. ПиБop 3a MyHeIb | 8. УМУТHTe | 9. МерHa ⅢOЛЯba ca IIOKJIoiIeM |
| 10. 3yIuHaHnK 6pIcAua | 11. Bpx 6pIcAua | 12. МИКсeр 3a peHne |
| 13.ОпрЕма 3a ДрбнЛиц | 14. СeчИВо | 15. ПocуДa 3a ceIICaIbe |
| 16. ПOTиСКИВaU | 17. HacILOBHIuIa | 18. СeчИВо 3a ceIICaIbe |
| 19. PeIeTke 3a ceYeIbe: 8x8 MM ИП 11x11 MM | 20. ДoДaTak 3a ceYeIbe Ha KoIICnIe | 21.a ДИсК 3a ceIICaIbe/peCkAbe |
| 21.6 ДИСК 3a peHNe 3a КрOMIInp | 22. ПОДРИКa 3a ДИСК | 23. УИнJa |
Ipe npBe yIOTpe6e
- NckbyHrte ypehaj H NckbYHrte ra H3 MpeKcJIaHaBa, paKJIaHaBa, cJIaHNITcBa HnHHeBa.
2.Obaj ypehaj je HamebeHcMo 3a KyhHy yIIOTe6y.AKO ce ypehaj KopHCTN HeIpaBnHO HIn y IpofoecHOHaJIHe HIN IIOJYIIPOODECHOHaJIHe CBpxE, HIn Ako ce He KopHCTN y cKJaCy ca YIpyTCBnMa y KOpHCnHKOM IIpHpyHHky, rapaHnJa he 6HTN HeBaKeha N IPOH3BOHaCce OIpHue CBAke OIOROBOPHOCTH 3a 6HJIO KaKBy HaCTaJIy IIITeTy.
3.ДркнTe MOTOp ДаJBe OJ TOnJIOTe, BaTpe, BlaRe H IIpaBbITInHe. - HnkaJa He NyHrTe MepHy IIOJbY, NocuIy ceIkaJIHcE HJN NocuIy KxHbCKoI pOIEcopa cacTojIma ToIIINJHM oJ 80^ / 175^
- He o6pahyjre 3amp3Hyty xpahy,Bohe ca KOITHIiama H cEmeHkama.
- Ako npHMeHTe Ia ce IpIka 3arpeBa (ToJIHje OJ 50^ / 122^) , NcKbYHTe ypehaj n3 cTpyje n octabHTe ra da ce XlaHn HajMahe 60 MNHyTa.
Pnnpema 3a ynoTpe6y
- OctabnTe Bpyhe cactojke da ce oxlae Ipe Hero To Hx o6paHte yypehajy.
2.AKO KOPHCTHTIITAIHH 6JIeHep HIN IPOIECOP XpAHe, HceIHTe KpyIIHe cactoJke Ha KOIKHue OI 2 IM IIpe o6paIe.
Ako KopnCTHTe IPOIecop XpaHe ca INsKOM 3a ceIIkaIbe/peckaiBe HIN CEuHBOM 3a KOIIKNue, HceINTE cactoJke Ha KOMaIe KoJH he npohn KpO3 IIeB 3a IIyIbe IIOJIOnua. Ia3HTe Da He HnceYete IpeBEJIInke KOMaJe KAKO 6NCTe CIIpeHH da ce 3aIJIabe y IIeBN 3a IIyIbe.
3.Праинлсастуpeшaj.
Iopdeiabahe6p3HHe
HaKoH IITTO IIHTHCHeTe DyTME 3a 6p3HHy ,-“Ia 6nCTe 0bpaHJIN XpaHy, MoKeTe MaHHNpyJIncaTH peRyJiaTopOM 6p3HHe Ia 6nCTe IocTHrJI IN IpOMEHJbHe 6p3HHe. IITTo je Beha IIOeIIaBaHe 6p3HHe, pe3yJITaTH ceYeBa he 6HTN 6pKn H IIpeuH3HJH.
KaJa KOpHCTHTe IyIme 3a 6p3HHy , = " , ypehaj paHn MaKcHMaJIHOM 6p3HHOM. Y OBOM cIyaujy, 6p3HHa ce He MoKe IIOdecHTn Iomohy peryJLatopa 6p3HHe.
YIpaBbAbe pyuHIM 6JIeHApom (6) (cJIHKa 2)
PyHH 6JIeHJep je HAMcHbch 3a: MIIaHc TeHOCHTN (HIIp. MIeHHX IIPOH3BOJa, COCOBA, BOHHX cOKOBa, cyHa, MEIaHnx IHHa N KOKTeJa), MEIIaHbe MeKHX cacTojaka N IacHpAHx KyBaHx cacTojaka (HIIp. 6e6he cyIe).
1.Пичврстпу HOЖИУ 6JIeHДера Ha MToTPhy jeINHIIU (.,KIIK")
2.ПOTNYHIO NOTONITE IITNTNk ceHbya cactojke.
3.ПпгнснгteугмезбрнHyдбнгeукьчниуpe Haj.
4.Плakоnomepajte ypehaj rope-ДоЛe nу крутOBHMaДабпстпOMeIIaIN caCToJaK.
KaIa MeIaTe IInpeKTHO y loHcy ToKOM KyBaHa, npBO cKIOHHTe ca BaTpe Ia 6HCTe 3aIIHTHIN ypehaj O
IperpeBaBa.
PykoBaHbeceuKaJIHHoM(13,14,15)(cJHKa3)
CeikaiiHa je Hamebca Ha 3a ceikabe Meca, cpa, npHOr Jyka, 3aHHcKor 6Hba, 6cIor Jyka, IIaprapie, opaxa, IeHHka, 6aema HT. 3a ceikabe TBpIXx HAMnPHIIa KopncHTte PpeKnJa"=". He ceikajre Beoma Tbpde HAMnPHIIe KAO ITO cy MyIKaTHN opaunh, 3pHa Kafe n JKTapHne.
Ipe ceikkaiba npetxooHIO Hceeyenor meca, cnpa, npnor Jyka, 6eJor Jyka, IIIaprapene H JbTyHX IannpHnHa, yKIOHHTcTa6JbHKe ca 3aHHckOR 6Hba H JbYcke ca opaaactnx IIIOIDA. YKIOHHTe KocTH, teTHe H xpckabNHy Meca.
1.CtabHTeceHHBOceKKaJIHHe y nocydy ceKKaJIHHe.
2.CtabHrte cacTojke y nocyu ceKkAJIHe.
3.ПoctabHTe cnojHy jeINHHuHa nocydu CEkaJIHne.
4.ПичвстпсckллкваунlaHaпocудуceцкалпe.
5.Пптнсkom Ha Дугме 3a HормалHy ИлТурб6рЗИну Ппeбaинte ypehaj.
PykoBaIbe MeTJIHIOm (7,8) (cJIHKa 4)
MyTHNJHua je HamebeHa 3a MyheBe IIIIra, MyheBe 6eJHaa, DecepTa HTI.
- YMeTHHrTe MyTHJINuIy yypehaj y jeINnNtu 3a cnajaJIbe MyTHJINHe.
- CnojHrte cnojHnU cy moTOpHOM jeHHnOm.
- CtabHrte cacTojke y nocydy (3a Haj6oJbe pe3yIITate Kopnctnte BeHHky, dy60ky nocydy).
- Ntnyho nToOnnTe MyTHnHuy y cactojke. Da 6hcte H36erI npckaIbe, noHHTe ca o6paIOM Ha MaJIOJ 6p3HH.
PykoBaHe ⅡNcKOM 3a ceYeIe/YcHTbAbaHe HIN ⅡNcKOM 3a peHJaIbe KpOMnpa (16, 17, 21, 22, 23) (cJIka 5)
IINCK 3a ceKKaHe/pe3aHe je HameHbEn 3a ceKKaHe HIn ycHTBaHaBe IOBPha Kao IITo cy KpaCTaBn, IIaprapena, KpOMnnp, Ipa3Hlyk H IpHN LyK, Kao H Heke BpcTe cHpa. IINck 3a rpaHylnpaHe je HameHbEn 3a peHdaHe KpOMnnpa Y IIbcckKaBnue.
- NocTaBnTe Hocau ceyHbHa cpeINIIbN KJIIN HOCyIe, NocTaBnTe IINCK y Hocau ceHbHa n OkpeHnTe ra da 6ncte ra 3aKJbYuaJIi.
- IIpHvBpCTHTe NOKJIOIaI KxHbckor Ipouecopa Ha NoCydy. OkpeHnte ra y cMepy Ka3aJIbke Ha caty da 6ncte 3aKJbhyaII NOKJIOIaII.
- YmETHHTe MOTOPHy jeHHHny y IOKJIOIIaI IOK cE He 3aKbUyA (KJIHKHe).
- Cnajte xpaHy KoJy JeHnte Da o6pahyjete y OTBop 3a NpIbe He nokJIOnu. HnKaJa He nocekhte y OTBop 3a NpIbeHe JOKjc ypehajykJbUeyH. YBeK KopHCTHe IOTnckHBa3a y6aINBaBe XpaHe.
- IIpHTNcKOM Ha IyrMe 3a 6p3HHy Ipe6aIHTe ypehaj.
YIpaBbAbe6pHcauem (10, 11, 12) (cJIka 6)
BJIeHJep ce MoKe KOpHCTHTN 3a 6JIeHNIPAhe KyBaHor IOBPha Kao IITO cy KpOMnHp, pena H IIaprapena. He 6JIeHNHPajTe TBPdy HIN HeKyBaHy xpaHy, jep TO MoKe OITeTHTN ypehaj.
- Ckybajre noBphe n ocyuHrTe ra.
- IIpHvBpcHTte cKIOII KBAuHJIa 6pHcaHa (10) Ha Bpx 6pHcaHa (11) OKpeTaIbem y cmepy cyIpOTHom OJI Ka3aJIbKe Ha caty.
- OkpeHHTe 6pHcaH HAOIIaKc H IOCTaBHTe McIaH (12) y IcHTpaJIHy TJIaBHy H OKpeHITc Ra y cMepy cyIipOTHom OJ Ka3aJIke Ha caty da 6ncTe ra oChrypaH. (Ako cKIOI KBaUHa 6pHcaHa (10) Hnje IOCTaBJbeH, MeIaH (12) Hehe CTaTH Ha cBOJe MeCTo.)
4.Пичвстnte ckIoIбрпау (10 + 11 + 12) Ha jeINHnUy MoTopa. - YKJbYnTe 6JIeHnep y cTpyjy. CTabnTe 6JIeHnep y IIeepny HIN nn Hnnjy nT.I. H3a6epnte MaIy 6p3Hny da 6ncte yKJbYnHn ypehaj. IOnepajte 6JIeHnep dok He nocTHnHe Te JKeJbeHN pe3yIITat.
- HakoH yIOTpe6e, OTyIcHTte IyTme 3a 6p3HHy H NCKJbYUHTe Ra I3 cTpyje.
- NckIbYHTe 6pHca, yKIOHITe MeIIaJIHUY (12) OKpeTaHbEm y cMepy Ka3aJIbKe Ha caTy.
- OdBpHnTe cKIOI KBaUHna (10) ca Bpxa 6pHcaHa (11).
BaJxHo:
- HnkaJa He KopHCTHTe IIpe y IeepIN TOKOM KyBaHa. YBeK cKnOHHe TseepNy ca pHHJIe N octaBHTe Ja ce oxJaHN.
- KophtHTe IIaTyIy Ia cactpyKeTe BIIaK XpaHe ca HbIa Iocye/IOHua.
- 3a Haj6oJIbe pe3yJIITate IIpHJINKOM IHeueHeBa, HHKaJa He IIyHInTe JIOHaII NTД. BHNIE OI NOJIa XpaHOM.
PykoBaIbe IdoaTkom 3a ceikkaIbe KOIKHua (16, 17, 18, 19, 20, 23) (cJHKa 7)
Iodatak 3a ceikabe je HamebeH 3a ceikabe KybaHOr IOBPha H BOHa Ha MaJIe KOIKHIIe.
He o6pahyjte TBpIe cacTojke kao ITO cy BoHe ca KOITHUma, TBpIO IOBphe, MECO ca KocTHMa HIN 3aMp3HyTH cacTojH. OHN MOry 3aueHTH N OHTeTHTN DoTaK 3a CeKKaHbe.
HANIOMEHA: IOJATAK 3A CEICKAJE JE IIOIQAH CAMO 3A IIPETXODHO KYBAHO, MEKO IOBPHE I BOHe.
CABET: Ako JIHTe Ia 6pahyjte pa3HHHTe cactoJke 6c3 HIIHcHa IOnaTka, yBek IIouHHTE ca HajocetJBHBHjM cactoJtHa. Ha npHmep, 3a BohHy caJaTy, IOuHHTE ca 6aHaHOM, HacTaBHTE ca MaHROM IIIaBPHTe ca ja6yKaMa.
- OTbOpHTe 4 metaJIHe cTe3aJIke (20a, b, c, d) IOnaTka 3a ceIkaIbe (20).
YMeTHTe Oda6paHy peIeTKy (19) y OTBOp 3a IIpNvBpIHbAbe (20), IIpNvBpcTHe ceHBO (18) H 3aTbOpHTe 4 MeTaJIHe cTe3aJIke (20a, b, c, d). IbHnE ceHbA n peIeTKe cy BeOMa oITpe, 3aTo NaKJBHO pyKyjTe HnHa!
2.ПocstabHte IodataK (20)HaIocuLy taKo IITo heTe yMeTHyTn YeTHnp 3ape3a Ha IodatKy y YeTHnp KyKNHe Ha yHyTpaaHbOJ HbUHN IocUyde (cInka 8).BoInte paUyHa da IodataK (20)XOpH3OHTaJIHo pIpyBpCTHTe y IocuYn. - BpATHe NOKJIOHa. OkpeHrTe NOKJIOaY cMepy Ka3aJIbKe Ha caTy JOK He YjjeTe KJIHK.
4.ПичврстmeМOTOPHу jeINHHuHa nOKJIIOuaI nOcye(.,KIIHK") - CTaBHTe cacTojKe y IeB 3a IIyBeIbe IOKJIOIIa. HceIITe BeJIHke cacTojKe KaKo 6n IaKo MoIIN Da IpoHy KpO3 IeB 3a IIyBeIbe IOKJIOIIa. AKO TpeBa Ia ObpaIITe BeJIHKy KOJIHNUHcy cacTojaka, IIOJIHTe Hx y MaIbC IopUInjc (MaKc. 250 r) I NaIarHO IIpoTpeCHTe IocuNy Ia 6NCTe paCIOpeIIN HceIkaHc cacTojKe IIO UeJOJ IocuH. IcIIpa3HNTe IocuNy HAKOH o6pAe 500 r.
- IIpHTHnHTe H npKHTe Lyrme 3a 6p3Hny da 6ncte yKJbYnn ypehaj.
- JaraHIO IIPTNCHHTe IOTNCKHBaU.
HaIOMeHa: Ako ce cacToJH 3aJIaBe, HCKbUHTe ypehaj H3 cTpyje, OcCIOJHTe MOTOp, INHTncHTe IyrMe Ha npTHcHTe IyrMe Ha npTHcHTe IyrMe Ha npTHcHTe IyrMe Ha npTHcHTe IyrMe Ha npTHcHTe IyrMe Ha npTHcHTe IyrMe Ha npTHcHTe IyrMe Ha npTHcHTe IyrMe Ha npTHcHTe IyrMe Ha npTHcHTe IyrMe Ha npTHCHTe IyrMe Ha npTHCHTe IyrMe Ha npTHCHTe IyrMe Ha npTHCHTe IyrMe Ha npTHCHTe IyrMe Ha npTHCHTe IyrMe Ha npTHCHTe IyrMe Ha npTHCHTe IyrMe Ha npTHCHTe IyrMe Ha npTHCHTe IyrMe Ha npTHcHTe IyrMe Ha npTHcHTe IyrMe Ha npTHcHTe IyrMe Ha npTHcHTe IyrMe Ha npTHcHTe IyrMe Ha npTHcHTe IyrMe Ha npTHcHTe IyrMe Ha npTHcHTe IyrMe Ha npTHcHTe IyrMe Ha npTHdTe IyrMe Ha npTHdTe IyrMe Ha npTHdTe IyrMe Ha npTHdTe IyrMe Ha npTHdTe IyrMe Ha npTHdTe IyrMe Ha npTHdTe IyrMe Ha npTHdTe IyrMe Ha npTHdTe IyrMe Ha npTHdTe IyrMe Ha npTHdTe IyrMe Ha npTHdTe
8. HakoH yIOTpe6e, npHTnCHNTe IyrMe 3a OTnyIITaIbe Ha MOTOPHOJ jeIHHHIN H3BaIHTe MOTOPHy jeIHHHUY I3 IIOKJIOnIIa KxNbCKor po6Ota.
9. IIpHTHCHHTe IyIgme Ha IpruHn H OKpeHHTe IOKJIIOHa y Cmepy cyIipOTHom OJ Ka3aJbKe Ha caty Ja 6hcte Ra yKIOHN H3 NocyIe.
10. YKIOHHTe IdoIaTak (20) ca nocyuJe. OTBOpHTe 4 MeTaJIHe cTe3aJbKe (20a, b, c, d), H3BaIHTe ceuHBO (18) HpeIeTKy 3a CeUkaHc (19). 3aTHM HcIIpa3HHTe nocuy.
Hera n nnhhebc
He notanajte motopny jeiHHu (4), noknna ccaKaJIne (13), noknna nponecopa (17) n cnojHnu (7, 10) y BOy HJN 6HIO Koju npTy TeHocT, HHTN Hx HCIIpajTe IOI MIA3OM BOJe. 3a YHIIheBe KopHCTHTe caMO BJaKHy KpIy. HkaJa He KopHCTHTe a6pa3HBHa cpeCTBa 3a YHIIheBe HJN arpeCBHe TeHOCTH IOnyt 6EH3HHa HJN aTeToHa 3a YHIIheBe ypehaja.
IpaKbHBO OCHNTHe ceHHBa, peHETKe 3a ceKaiBe HnCKOBe. IbHXOBe HnHc cy Beoma oHITpe.
1.Пpe uHHeBa,нСКьуHTe ypehaj n3 cTpyje.YKJOHHTeДоДaTHy OINpEmy.
2. OuHCTHTe IIOJbY (9), IocUy 3a MeIIaIbe (23), ceUHBO 3a ceIIkaIbe (14), IocUy 3a ceIIkaJIbe (15), HAcTaBAK ceINBa 3a ceIIkaJIbe (20) n peIeTke 3a ceUeJIbe (19) n IIncKObE (19) y ToIIIOJ BOII ca cAnyHom.
3.Базабileндара(6)и мутлпа(8)могу ce ouhctHTNdoK cy joiy yBek IOBe3aHn ca MOTOPOM Tako IITo hete nx IOTOnHTN y ToIIy BODy ca MaIO TeuHocTH 3a IIpaIbe Nocyha H ocTabHTN ypehaj da paIH HeKO BpeMe.
TexHHUKNIPOJaUN:
Chara: 1000W
MaKCHMaJIHa cHaRa: 1600W
HannajaBe: 220-240V~50/60Hz
HeIpeKnIHn pa: ≤ 1 MHH. BpeMe xJaheBa Ipe IOHOBHor NOKpeTaHa: ≥ 1 MHH
IIOToPiHa eHeprJey HcKJbYueHOM cTaHy 0,00 W.


3a 06p06HT KHBOTHE cpeHHe. HhOpmaHJe o OTnAHOJ eJEKTPuHoj H eJEKTPoHcKOj ONpEMH. Y cKaIaIy ca YHaHOM 13, CTAB 1 N 2 3aKoHa OJ 11. cTeTm6pa 2015. rOJIHe o OTnAHOJ eJEKTPuHoj H eJEKTPoHcKOj ONpEMH, OBHM Bac 06aBcHITABAMO O IpaBbIHOM pyKOBaHcy OTNADHom cIEKTPuHOM H cIEKTPoHcKOM ONPOMOM:
- 3a6paIbeHIO je oJIIraJIe KOpHIhHe eIEKTPHIIe H eIEKTPOINcKe OIPMe 3ajeIIIO ca OCTaIHM OTIIADOM - To je NTBPHEIO O3IIAKOM y 0bIKy ,uPcUPrAHe KAHTe", Koja 3axTCBa cCJekTHBHO cakyIbIbIc OBC BpCTe OTIIaIa.
- EektpHnH HeektpoHcN ypehajn Mory da caipke onache cynctaHne, Cme H KOMIOHeIte KoJE, aKOe HCncyTe y KHBOTHy cpeHHy, MORY IepCTABHbATn O36bHbHy IepTHy IO 3npabBe H KJBOr JHNKJBHX OprAHn3ama, Mory IOBcTn IO 6pojHx 3IpaBCTBEHHX Tero6a, KAO IIIO cy oHTHeBa BnHa, clyxa H RObopa. TaKoHe mory oOHTHTn 6bype, jETpy H cpE, H 3a3BaTH NOKJI 6oJIeCTH. IIITHe CYNTAHI MOrY herATBHO YTHINu HA peCINHpOpTN H penPOyKTHBHN CHTem H IOBcTe DO paka, KOHTAMHHpAHOM 3mLbHHTy H npOH3BOda IO6hJCHNX OIO bHex MOKe IpcCTABHbATn PH3NK OIO OBHX 3IpaBCTBCHNX IOCEJHna.
- KopHHHeHa eIeKTPHnHa H eIeKTPoHcKa OIIpema Tpe6a Ja ce IOCTaBaJa cAmO Ha OBaHHeHa MecTa 3a cakyIbAbe, Hja JIncta Tpe6a Ja 6yJeIOCTyIHHa Ha Be6 CTpaHnH CBAke OHITINHKe KaHJIepJe.
- DomahnictBa Hrpajy BaKny yIory y IOnpHIOcy IIOBIOJ yIOTpebHy npOpaKy, yKbUyjyhy nepKIAky, KopHHe oIpeMe. OHa taKohe Hrpajy KByHy yIory y ChTeMy yIpaBbaHa OTaOM OI KopHIthe eJeKtpuHne H eJeKtpoHcke OIpeMe, omryhaBJyhy dIpuKTAH
IpeHoc OTHa Ha OBJIaIIHeHa MeCTa 3a cakynBaHe H eJIMMHnHyH HeIOKeJbHe HApYITBcHe HABHKe KOJE IOBOJe JOOCTaBAHa OTHaHE OIIpeMe HA HeIpeBnHeHM MecTHa.
Iopei tora, bpaHTte KopHnHeHcy eKcTPhuH cy eekTPOlcky Onpemy HMa MeCTO HcNOpky. IprHHKOM HcNOpky KfHnx anapata KynHy, dctp6yTepe 06abe3an da 6ecPiATHO npey3me KopHnHe He KyhHe anapate Ha MecTy HcNOpky, nOJ ycIOBOM da je KopHnHeHa onPema HcTO rHnHa JcIyKHLHa HcTOJ HAMEIH KAO HcNOpuyEHa ONpema.
KapToHcky am6aKy H NOJIHeTHJeHcKe (IIE) Kece tpe6a OJNarath y OIOBapajyhe KOHTeJHepe HAmeBeHe 3a ceJEKTHBHO cakyIJaHe KOMyHaIHor OTHaJa, kao IITo je OINcaHo. AKO ypehaj caipkn 6atepHje, tpe6a Hx yKIOHHTn OJHETn Ha IOcc6HO MecTO 3a cakyIJaBaHc N OJiarabe.
He 6aajte ypehajy komyhaannn otnaa!!
CepBc YKJIHKo KJIHTe Ja KIHTe pe3epBHe JeIOBE HJH Da IIOIIeCETe 6HIO KaKBe peKJIaMaHJe, o6paHTe ce IInpeKTIO IIpoABy KoJH je H3do paTuH.
(RA)
a
aegil 1 aIe
Jaaal 1
jglalj
1
J
Y
Jaaiaal
10.~g 24.
.
J 2.40000000000000000000000000000000000000
J 1
1 0
Jg 1 g dgdal aiaa 1 g aai 1 g aiai 1 1 1 1 1
1 1
Jg 1 g j 1 g
J 1
a 1
.
aJrnnnns nss ygog jglj: 6
Jb1 Jgii jj 7
J 8
a
山:y 9.
aoll
10.
11.
12
13
a. iii 1
14.
J 10
jll jll l
()
17
.
J 1V
J 1
1
J 1
Jiaiiaioll 18
1
.19
(RCD)
1
.
. 21
.22
g 1111111111111111111111111111111111111111111
JgJgJgJgJgJgJgJg
aaiiiaaiy 24
. 1
.25
2.17
alalal alalal alalal alalal alalal alalal alalal
- C, S, all, a.e., 1.
1.("j"
2.
3. j_L = 1 _____小
4.125
y jll jie yj gall jie jg jil j
(3.5) (15·14·13)
aaii aaiiaaiie 1
11 1
jlll jll llll jlll 5
(4.5) (8.7)
aill l Iog ygall g aal yg aal g aal
aalal lssg sgs jld jglal g aalal Jd.1
2
(10e, 15s e, gdo (jlll Jgall) 1e, gclkall
Aiaiaiaie aay bally gai bali jui qiu li gai gai lalai ygai yai
(5) (23·22·21·17·16)
a a a a a a a a a a a a a a a a a a a a a a a a a a a a
j 1
1.1
Acllll alc ool c 11) clalall (10) clalall jg a.2
(1·)a#llj#(j#j#l])A#lll a#ll j#e o#c o#o (j#j#j#gall(14)b#ll #ie
()
(12+11+10)
aagall aagllg llaai g bllal alj. aiaiaiae ie jay kai jalele g jalele g jalele jalal jalal
jlll lalgl 1111111111111111111
aLl aolj 00 (12) bll all jy
.(11) aal (10) aal
:
1
- c 且 c 与 b
pabllnai jni jki lii iia la jie 1u Y, yjnl the jililil Jle uusull.3
(7) (23·20·19·18·17·16)
3y 100000000000000000000000000000000000000000000
golal 15121111111111111111111111111111111
boll
a aalaaal aal alal alal alal alal alal alal
aill abll jss sll lglie aess sll sally bldla gall aabn nn nnnn
Ooggogogggom " = " boBjSmoL qoMs3b, aoymooosds yodssnoo boBdsoom ayosmls.
fo5ufo 0ofoombo60b, y3mou, b630b, 6030b, bogomolus ofohsoq, afo5ofoafoafofofofofofofofofofofofofofofofofofofofofofofofofofofofofofofofofofofofofofofofofofofofofofofofofofofofofofofofofofofofofofofofofofofofofofofofofofofofofo
- Bm3gol 306o Bm3gol m5uO dmsoogoo
2.058699953000000000000000000000000000000000 - dmsosgugo gdsgonggoogm0 Bmgsol osb9g.
- 0osdsg6gn gssdymnob g3ggsb m3goh onsb9g.
- 4y0000000000000000000000000000000000000000000000
b003g0b (7,8) 2a0y0g0a (w06004)
b003030 5539036000056880b, 33968b0b 0c00b, gglg6g0b 0s s.a. s0j390000
- Bgogogbdoafoafoafoafoafoafoafoafoafoafoafoafoafoafoafoafoafoafoafoafoafoafoafoafoafoafoafoafoafoafoafoafoafoafoafoafoafoafoafoafoafoafoafoafoafoafoafoafoafoafoa
- agsgoog oagsgooggmo 0030 d6s0b 305b.
- 056gogbgoa oosbsbgon osbdo (sagcoggbaggaoboo3o aodmooygbo goo, 6ds oslo).
- bsod30go doomosbsq byssoo obagogogobdo. gubnygob oussoo5 sssGogmo, qosyds3jos
Qssmo bojsno oofoygo.
Lgmo/ogdsgmo oob3o 5s mgoomol bsngmo oob3o (16, 17, 21, 22, 23) sdoogbs (Lgso 5)
b5600 qoob30 856003600000000000000000000000000000000000000000000000000000000000000000000000000000
- dmsosgugon 3omob luyngbo osbol gbsnogm jodolosg, dmssgugon qofo 3omob luyngbdo
Qs dmsosgugon ogo do bqusgogjogsg. - osbdoosagmo 33805 36mglofoosglsbmo. osgbsbmoosgsogluomgmo lssnoob oboo bdoosmogmo dmsmosmo.
-
d6g30 b800 b800 b800 b800 a800 a800 a800 a800 a800 a800 a800 a800 a800 a800 a800 a800 a800 a800 a800 a800 a800 a800 a800 a800 a800 a800 a800 a800 a800
-
80000000000000000000000000000000000000000000000000000000000000000000000000000000
- dymo mdo gosnogobgocgossfngnbojnoosy.
bsjg60b (10, 11, 12) 6300y68s (b6666666)
gogogol gdo yggos agsdgagnos aobsagnoob,gsmoos, sfo
gogobgob g bsogommb ssbgggmoa. 60ssbgbgmoa sdo bs390, 6085sds agodmgosssbosmb dmhyoogmms.
1. aobsagoo oobogno gssagno
2. bsfo60oB aqos8dGmmbol 336s (10) oosdsagmo bfo6bog 336g (11) lssnoob oubo bfo6ssdggam doosmooggoo dmgobgoo.
3. 888888888888888888888888888888888888888888888888888888
4. dosdo6go bsjag60o 35b6gos (10+11+12) d6s30s8mm36g.
5. agsngmo. dmssgmo gmbgno 3sdo sb osdo qos bsongm oosmo boBsg. smdsgmo
8mggno lusgmo aogab mad sdoqhoom.
7. ydooygbobdoadqg, ydo30o bojshobc0s 0s ydoomogon qbohysmoosb.
8. 8aennnngnnsbgs, sannnnn nn dgn (12) bssnoo oobn oosn nnnn nn aanyns
9. ambgboa aosdagcmn8o 36gds (10) bsjgbqofo 36moosb (11).
60d36gcm35bo:
1. amdbsgdsb ssbqmb gdoomgfo 3s80 006ygo 006ygo 006ygo 006ygo 006ygo
2.. 13sGmoon amsamog bgaaggo lo 3308o f6jomob/3a0b 30ggoos5.
3. 0s8d3olsb lssg3oogb m aqagabol dobs6h3s, sbsuohmls sh ssgmo j3sdo q s.d. 6sb93sdqj 5s33000.
39803980b b6gmo qo56no (16, 17, 18, 19, 20, 23) ydooyg68s (y6sso7)
3980398000000000000000000000000000000000000000000000000000000000
s6 qssagssmo s8sno o86gogog, 6mngosss yh3osboo, d8s6o bmb6ywo, d8wosbo
bmo 58 syobgno obagogoggo. dso agdmoosqosc0m5 qss6bos6m6 y803dsq osbsf6co
omhymdoomss.
g6035: 2803800 qusfmo qosdsgo abommo fobuohm dmbsgymo, odmo dmbooyolss boomoloss agusggmo.
6835: 0y yuynn bn3qub3o obnggogbgoaagda3ds gssbsgob sddgbqol ynn3m030b
997y0 y39660 ng o66gogbdo. dssmoos, bocnu bsmonol030, osygyo
885b0, 8886dggon dsgmno qsssbugcgon 3dmoon.
- 356800380380005 (20) 4 0000500038060 (20a, b, c, d).
Bssgog 19) bsagob qomdo (20), dossgog 3o6o (18) qos gno 4 mno5b o 20a,b,c,d). 3o6oos 3oogoo dsosb b6os, sdoqgd 6oobocog
dgsmo dso! - aomssgugagus3s0 (20) msbg agus3sgob mofo hcmob hsldo onsbouo 3oggbg s6bgymoa b3yfo (bysso 8). gmbocoo qssdgugagus3s0 (20) 3mboombgymso olaio.
- 0ssbgyno ooslusbnyo. aosgmosyog no oslsbvyno lssnol obmol ddsmygdo, lbsd qsh3s3y6ydo sngmgbdo.
4.dos3o 8mm30 dosds86goo oslsu sbgy6g (,osf3s3g5go" - 06a6qo6b6g8o dmss3b8o os3s6b6n6s 6d6p6q8o 6o0o 600o 600o 600o 600o 600o 600o 600o 600o 600o 600o 600o 600o 600o 600o 600o 600o 600o 600o 600o 600o 6
(250 a) 6s gobomg y5xogm oslo, 6ss 6hmo o8gwoydo oom osdo
855hogb. 500 aosd3o1o agoogog
-
amymoombo Bausnoosgoofoaogoo afoa ofofofofofo
-
abgdojoo gssfo6gon bsgb.
afo36: oogobgogb0o 8ofoos, aodmgon dhymdocmoos qboos5, aodmgon dss30, gongon bsbgngs bgsygmooq osms30 qas dmsoosomn lsbghgoossnol oohol bsboessdggg.
doosmgoggoo, asbgbnn bsbgno 0s saomog ongogogbgo, mdagogb bsbgns30 agusbgaem
6b36o yom sfoqoo.
-
aadmy6gds 2d003, 0ssfomn dssg 8mm36b 5ubgym 4ssos3obgym qms3b 0s sdmoogm
dsg 8cm30 33gns 3mGjumnab sbgns05. -
onbogob sambgogos qssfoqon bsbgog6bg 6bgo gocssb qos aososongo bsghso lssnoob ohol bsboagaaaegn aoedmooggoo.
-
0sbuqos6 sdoomgoo 0bs36o (20). 0sbuqoo4 oommbob qodgno (20a, b, c, d), sdoomgoo 3ofo (18) qo5
30030000000000000000000000000000000000000000000000000000000000000000000000000000
66 Bgymo d6s0b 8mm3o (4),Bm3gmoI bsgo (13),36m3gmoI bsgo (17) qo ydsngogmo 8mm3o (7,
10) ysgdo 5b3s loobdo 0s s6 aeggbmo obobo aagob6ghyemol d3j. ahsfqbsq gdo moygbo
abmmnog 5b6osfo glmgo. dmnyoaoombol gssfghqos soaumglo saomgymo
lsdgo oo ssyogdo 5s aglvoymo loobgdo, mgnnooss 86fo 5s 8Gmbo.
gbooboo 8fo000 30600, bfo000 80000 00000. 00000 30000 00000 dsosbdsos.
-
85g50s0g g aamooon o amyogocmoos qg50b yysm0s5. admoogon agjubysno.
-
85fdo0g0 (9), 85f0g0 (23), 85f0g0 (14), 85f0g0 (15), 85f0g0 (2)
85f0g0 (30) (20) (2) (20) (20) (20) (20) (20) (20) (20) (20) (20) -
800000000000000000000000000000000000000000000000000000000000000000000000000000000
0g503g6o 005g6g8g:
1000 30
a:1600 3
33gob y6m:220-240 3\~50/60 3g630
g30o dss: ≤ 1 00. a8aogmgo bgmbsbms B60g3d: ≥ 1 00.
gogamcbbsgsgsaanso 0.00 W.

gabob 0000000000000000000000000000000000000000000000000000000000000000000000000000000

FOODPROCESSOR CR4223

MIXER CR 4220
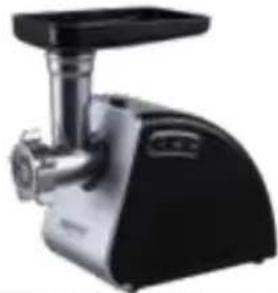
MEAT MINCER CR 4812
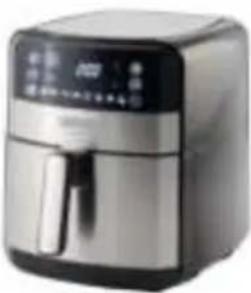
AIR FRYER OVEN CR 6311

BAGLESS VACUUM CLEANER CR 7046
AIR DEHUMIDIFIER CR 7851
Trimmer CR 2921

CERAMIC FAN HEATEROIL FILLED RADIATOR CR 7732 CR 7812

PORTABLE FRIDGE HEATED ANIMAL DEN CR 8076 CR 7431
camry
Premium
ELECTRIC KETTLE CR 1292

HAIR DRYIER CR 2261
TOASTER 2 SLICES CR3217
ELECTRIC GRILL CR 3044

PERSONAL BLENDER CR4615
WAFFLE MAKER CR 3046

GARMENT STEAMER CR 5033

AIR HUMIDIFIER CR 7964

GLASSHEATER CR7721
WASHING MACHINE CR 8054
OIL FILLED RADIATOR CR 7810
HEATING LUNCHBOX CR 4483

MOSQUITO KILLER LAMP SONIC TOOTHBRUSH CR 7935 CR 2173


HEATING UNDERBLANKET CR 7430

HAIR DRYER CR 2256
www.camryhome.eu
| AFTER SALE SERVICE NOTICE | ||
| GB | If you want to buy spare parts or make any complaints, please contact the seller who issued the receipt directly. | |
| DE | Wenn Sie Ersatzteile kaufen oder reklamieren möchten, wenden Sie sichitte direkt an den Verkauf, der die Quittung ausgestellt hat. | |
| FR | Si vous souhaitez acheter des pièces de rechange ou faire des réclamations, veuillez contacter directement le vendeur qui a émis le reçu. | |
| ES | Si desea comprar repuestos o presenter alguna queja, comuniquese directamente con el vendedor que emitió el recibo. | |
| PT | Se você quiser comprar peças de reposicao ou fazer alguma reclamação, entre em contato diretamente com o vendedor que emitiou o recibo. | |
| LT | Jei norite isigyti atsarginiu daliu ar pateiki nusiskundimu, susisiekite tiesiogialu su kvita išdavusiu pardaveju. | |
| LV | Ja vêlitasiegadátties reizes dalas vale izteikt pretenzijas, ludzu, sazinieties tiei ar pärdeveju, kürs izsniedza Čeku. | |
| EST | Kui soovite osta varuosi vovi esitada pretensioone, vôtle otse uhendust kviltungi vãjastanud mūjaga. | |
| HU | Ha pôtalkatrészeket szeretne vásárolni, vagy panaszt szeretne tenni, forduljon kozvetlenul a bizonylatot kiàllito eladóhoz. | |
| BS | Ako zeilite kupiti rezevne dijelove ili napravitil reklamaciju, obratite se direktno prodavaçu koji je izdao račun. | |
| RO | Ecnb bly xoHTNE kynHtB zanactn Hm npedlbRbTb kackHe-lmbo npetehann, noxakayhcta, cabkmttcb hnaprMycn c npodauqom, bvdauuHmM Yek. | |
| CZ | Chcete-li zakoupit nahradni dilly nebo uplatnit jakoukolì reklamaci, kontaktujte prfimo prodejce, který učtenku vystavil. | |
| RU | Dacā doriti sā cmpárati pièse de schimb sau sā faceti vreO reclamajtie, va rugām sā contactati direc'tvanzárotur care a emis chitanja. | |
| GR | Ecv θEAEVE VA ayopáOETe avtaLAAKTIKI à yva káVETe OTIOAβNTOTe TAPATVO, ETIKOVWYJTE ATREUθEIAç με tvn πλληπι Φu eftδωτ Μγν αTTOBEξη. | |
| MK | Ako cakate da kynITE pesERbHn delobovn Hm da nondecete kackBn bno nonlaikn, Kontaktmpajte dinpeKTNO co npodauqanOT KOJ na HDan cmetykata. | |
| NL | Als u reserveonderdelen wilt kopen of een klacht wilt indienen, neem dan rechtsstreks contact op met de verkoper die de bon heeft afgegeben. | |
| SL | Če zeilite kupiti nadomestne dele al vižiti relkamacije, se obmite neposredno na prodajalca, ki je izdal račun. | |
| FI | Jos haluat ostaa varaosia tai tehdä valituksa, ota yhteyttā suoraan kuitin antaneeseen myyjään. | |
| PL | W przypadku checi zakupu czésci zamiennych lub zgloszenia ewentualnych reklamacji nalezykontaktowac sie bezposredniz ge spredawca, ktróy wystawil paragon. | |
| IT | Se desideri acquistare peszii di ricamblo o presentare reclami, contatta direttamente il venditore che ha emesso la ricevuta. | |
| HR | Se desideri acquistare peszii di ricamblo o presentare reclami, contatta direttamente il venditore che ha emesso la ricevuta. | |
| SV | Om du vill kopa reservdar eler góra nàgra reklamationer, vänligen kontakta säljaren som utfardat kvittot direkt. | |
| DK | Hvis du ensker at kabe resevdele ell er reklamere, bedes du kontakte sælgerten, som har udstedt kvitteringen, direkte. | |
| UA | Ящо вхоче пindabtam zarnactnHm abo noDatn byd-baКлпетнii, зернithсь CBanocopendhno do npodauqan, кун bddavчek. | |
| SR | Ako xeIITNE da kynITE pesERbHn delobovn Hm da ynpokite peknaMaunjy, obpatnte ce dinpeKTNO npodauqу koji je HDan pauny. | |
| SK | Ak si chcete kupit nahradne diely alelo uplatnif akukolvek reklamaciu, kontaktujte priamo predajcu, ktorý učtenku vystavil. | |
| AR | i juaia Juaiai juaia iuaia iuaia iuaia iuaia iuaia iuaia iuaia iuaia iuaia iuaia iuaia iuaia iuaia iuaia iuaia iuaia iuaia iuaia iuaia iuaia iuaia iuaia iuaia iuaia iuaia iuaia iuaia iuaia iuaia iuaia iuaia iuaia iuaia iubaia iuaia iuaia iuaia iuaia iuaia iuaia iuaia iuaia iuaia iuaia iuaia iuaia iuaia iuaia iuaia iuaia iuaia iuaia iuaia iuaia iuaia iuaia iuaia iuaia iuaia iuaia iuaia iuaia iuaia iuaia iuaia iuaia iuaiah | |
| BG | Ako xckate da zakypnte pesERbHn chaCTN Hm da hnpabnte onnKaBaHn, MONA, CBpjkete ce dinpeKTNo c npodauqan, koIte e HDan kacobata Bemekka. | |
| AZ | Ehtiyat hisseleri almaq va ya haransi gskayatet etmek isteyirsinizse, qebzi veran satici ile birbaça alaqe saxlayin. | |
| ALB | Nëse déshironi tī blini pjesë kembini ose tfe beni ndonje ankesë, ju lutemi kontaktoni drejtpredrejt shitësin ùka leshuar faturën. | |
| KA | ng alugon lwnaganganganganganganganganganganganganganganganganganganganganganganganganganganganganganganganganganganganganganganganganganganganganganganganganganganganganganganganganganganganganganganganganganganganganganganganganganganganganganganganganganganganganganganganganganganganganganganganganganganganganggangangangangangangangangangangangangangangangangangangangangangangangangangangangangangangangangangangangangangangangangangangangangangangangangangangangangangangangangangangangangangangangangangangangangangangangangangangangangangangangangangangangangangangangangangangangangangangangangangangangangANGANAGANAGANAGANAGANAGANAGANAGANAGANAGANAGANAGANAGANAGANAGANAGANAGANAGANAGANAGANAGANAGANAGANAGANAGANAGANAGANAGANAGANAGANAGANAGANAGANAGANAGANAGANAGANAGANAGANAGANAGANAGANAGANAGANAGANAGANAGANAGANAGANAGANAGAN AGANAGANAGANAGANAGANAGANAGANAGANAGANAGANAGANAGANAGANAGANAGANAGANAGANAGANAGANAGANAGANAGANAGANAGANAGANAGANAGANAGANAGANAGANAGANAGANAGANAGANAGANAGANAGANAGANAGANAGANAGANAGANAGANAGANAGANAGANAGANAGANAGANAGAN | |


- Before first use
- Preparing for use
- Set the speed
- Operation of the hand blender (6) (Figure 2)
- Operation of the chopper (13, 14, 15) (Figure 3)
- Operation of the whisk (7, 8) (Figure 4)
- Operate the potato cutting/shredding disc or potato grating disc (16, 17, 21, 22, 23) (Figure 5)
- Operation of the puree masher (10, 11, 12) (Figure 6)
- Important:
- Operation of the dicing attachment (16, 17, 18, 19, 20, 23) (Figure 7)
- DESCRIPTION DU PRODUIT (Figure 1)
- Veski too (7, 8) (joonis 4)
- PykoBoDcTbO nOJIb30BaTeJIa (RU)
- OIIINCAHNE IPOJYKTA (pnc. 1)
- Ipea IepBbIM HcIOJIb3OBAHHcM
- IIOJROTOBka KHCIOJIb3OBAHnHO
- YcTaHOBka ckOpocTH
- Pa6ota pyuHoro 6JIeHepa (6) (pnc.2)
- YtpaBJIeHHe H3MeJIbYHTeJIeM (13, 14, 15) (pnc. 3)
- Pa60Ta BeHnka (7, 8) (pncyHok 4)
- YIIpaBJIeHHe IIOpE (10, 11, 12) (pIc. 6)
- Baxho:
- YXoI N OuNCTka
- Pa60ra c IIOpTeO (10, 11, 12) (fHrypa 6)
- BaKHO:
- Pa6ota c npncTabkaTa 3a Hap3BaHe Ha Ky6yeta (16, 17, 18, 19, 20, 23) (hrypa 7)
- PnKn H IOuHcTBaHe
- Brugsanvising (DA)
- GENERELLE SIKKERHEDSBETINGELSER. VIGTIGE SIKKERHEDSINSTRUKTIONER TIL BRUG LEs OMHYGGELIGT OG OPBEVAR TIL SENERE BRUG
- PRODUKTBESKRIVELSE (Figur 1)
- OPIS PROIZVODA (Slika 1)
- Prije prve upotrebe
- Priprema za upotrebu
- Podesavanje brzine
- ONHC HA IPOH3BOJOT (CJnka 1)
- IpeI npBaTa yIIOrpe6a
- IIOIOROBka 3a ynoTpe6a
- IIOCTaByBaIbe Ha 6p3HnHaTa
- Pa6oTa co paueH 6JIeHIIep (6) (cJIHKa 2)
- Pa6ota co np6nIkaTa (13, 14, 15) (CJnka 3)
- PaKyBaHbe co KnHaTa 3a MaTeHe (7,8) (CJIka 4)
- Pa6ota co dncKOT 3a ceuebe/cntnhahe nH dncKOT 3a peHdaIbe kOMnnpn (16, 17, 21, 22, 23) (CJHKa 5)
- Pnka nHcTeHe
- Korisnicki priručnik (HR)
- IpeepIePIMBMBKNOpHCTaHHM
- Po6oTa nOpi6HIOBaHa (13, 14, 15) (PncyHok 3)
- BaKJIINBO:
- IorJIra Ta HnHennr
- ynytcTb0 3a ynoTppe6y (SR)
- OIIHC IPOH3BOJa (CJnka 1)
- Ipe npBe yIOTpe6e
- Pnnpema 3a ynoTpe6y
- Iopdeiabahe6p3HHe
- YIpaBbAbe pyuHIM 6JIeHApom (6) (cJIHKa 2)
- BaJxHo:
- Hera n nnhhebc
- (RA)
- camry
- Premium
Brand : CAMRY
Model : CR 4623
Category : Hand blender