BL 500e Kit - Blower STIGA - Free user manual and instructions
Find the device manual for free BL 500e Kit STIGA in PDF.
| Product type | Battery-powered handheld garden blower |
| Brand | STIGA |
| Model | BL 500e Kit |
| Intended use | Moving and gathering by blowing leaves, grass, various lightweight debris |
| User type | Private individuals, amateur use |
| Power supply | Lithium-ion battery (not included, to be purchased separately) |
| Compatible batteries | See technical data table in the manual |
| Charger | Fast or standard charger (optional accessory) |
| Weight | Approximately 4.5 kg (without battery) |
| Total length with tube | Approximately 100 cm |
| Adjustable blowing speed | Yes, 3 speeds via speed button |
| Safety button | Yes, activation/deactivation device for electrical circuit |
| Carrying harness | Optional, adjustable shoulder strap |
| Optional battery carrier bag | Allows using two batteries simultaneously |
| USB port on battery carrier bag | Yes, for charging external devices |
| Sound power level | Indicated on the identification label |
| Automatic shut-off | Yes, after one minute of inactivity |
| Periodic maintenance | Cleaning after each use, screw check, store dry |
| Recommended protective equipment | Safety glasses, noise-cancelling headphones, anti-vibration gloves, safety shoes |
| Warranty | Coverage of material and manufacturing defects, according to conditions |
| Country of manufacture | Italy (STIGA brand) |
Frequently Asked Questions - BL 500e Kit STIGA
User questions about BL 500e Kit STIGA
0 question about this device. Answer the ones you know or ask your own.
Ask a new question about this device
Download the instructions for your Blower in PDF format for free! Find your manual BL 500e Kit - STIGA and take your electronic device back in hand. On this page are published all the documents necessary for the use of your device. BL 500e Kit by STIGA.
USER MANUAL BL 500e Kit STIGA
EN Portable battery-powered garden blower OPERATOR'S MANUAL
WARNING: read thoroughly the Instruction booklet before using this machine.
MANUAL DE INSTRUCTIUNI
ATENTIE: inalte de a utiliza masina, cititi cu atente manualul de fata.

IopTaHbHbI caOBbI nbIEcOC c 6aTapeHbIM nHTaHnEM
PYKOBODCTBO NO 3KCNJYATAUIN
BHIMAHHE: PpeKd Yem noIb3oBaTbc8 o6OpyObaHHeM, BHIMATEJIbHO npOHTte 3TO
pykoBOdCTBO no 3HcNlyaTaun.

Prenosny akumulatorovy zahradny fukač
NAVOD NAPOUZITIE
UPOZORNENIE: pred použitím stroja si pozorne prećfajte tento námod.

[16] Batarya sirt cantasi
[17] Batarya simulatoru
6. USO DELLA MACCHINA
BcnyKn yka3aHnna "IpeDnO", 3aDnO", "JrCHO" n "JIABO" ce pa36npaT cnpaMo pa60thata No3nua Ha onepaTopa.
1.2 CIPABHN
1.2.1 Φιγρή
Hnpynte B Te3n Hnctpykun 3a ynoTpe6a 3a HomepupaHn 1,2,3 n T.H.
HOMnoHENTte NocOeHN Ha nHyprnte ca O6eJn3aHn C 6yKbTe A, B, C n T.H.
CnpabKaTa 3a KOMnoHEnTa C Ha fHrypa 2 ce nocOyBa cHaJnca:"Bk. fnr. 2.C" nn npocTo "(fnr. 2.C)". FHyprnte ca noka3aTeJIHN. DeIcTBInTeJIHnTe yactn MoKe da ce pa3JIuYabAT OT Te3N, KOINTo ca NOKa3aHN Ha fHrypata.
1.2.2 3aIabn
PbkoBODCTBOTo e pa3dJeHcHa rIaBn n nparpaΦn. 3aIaBHeTo Ha nparpaΦ "2.1 O6yehne" e eo3aIaBHe Na "2. IpaBnla 3a 6e3oNacHocT". OTHacraHnra Ta do 3aIaBn ynn ToKn ca OTbeJraHn cbc CbKpaSeHnTo "rI." nn "nap." n CbOTBeTHn Homep. HanpImeP: "rI. 2" nn "nap. 2.1".
2. INPABNIA 3A BE3ONACHOCT
2.1 OБуЕнгE
Pa3yete n CBHHete c KOMaHnIte n C NOxOJaTO N3NoJ3BaHe Ha MaunHaTa. Hayete ce da n3KJIouBate 6bp30 MaunHaTa. Hecna3BaHeTo Ha npedynpexJeHnraTn HHCTpykUnTe MOHe da npuHHn HHnDeHTn HnJIe Cepno3Hn HapaHbAHn.
- HnKora He nO3BoJBaIte MaunHaTa Da 6bDe n3NoJ3BaHa OT Deca NIn OT Xopa, KaKTo n OT LnUca C HamaleHn fN3NuYeCKn, CETNBn NIn yMCTBeHN CnOCo6HOCTn, 6e3 ONHT N IO3HaHn, KOnTO He ca 3aNo3HaTHn DOCTaTbYHo C INHCTpyKcHnte. MeCTHnte 3aKOH MoKe da IpeDbNJaT MmHImaJIHa Bb3pact 3a IpaBO Ha n3NoJ3BaHe.
2.Да He ce n3noJ3Ba MaHHaTa KOraTo NOTpe6nteJIe YMOpEn nIi Hepa3NoJIoJHeN, IIn e BImMaI JeKapCTBa, HApKOTnU, yNtpe6nI aJIkoXoI nIi BpeDnBWeJecTBA,BIIReuHa CnOcO6HoCTTa My 3a peFleKcn Ha BHImaHHeTO My. - He 3a6paBnyTe, ye OnerpaTOpBT nIIN NOTpe6nteJIe T e OTROBOpeH 3a npOn3wecTBnI HEnpeDnDEHN Cb6HTN, KOHTO MORat Da NaCTbIaT 3a dpyrX opa IIN 3a TAXHaTc CO6CTBEHOCT. YactOT OTROBOPHOCTTa Ha NOTpe6nteJIe nPeueHkata Ha Bb3MOJHNte PNCKOBe Ha TepeHa, NO KOnTo Tp8Ba Da ce pa6OTn, KaHTO N B3EmaHeTo Ha BCNUKN PpeDnA3Hm MEPKn, Heo6xOdHMn 3a rapaHTnpaHe Ha HerOBaTa 6e30NaChOcT n Ta3n Ha dpYrInTe Xopa,OCo6eHo, KOrato Ce pa6OTn
HnHaKIOHn, HepaBn, Xlb3raBn nn HeCTa6nJIHn TepeHn.
- B clyuay, ye nckaTe da daTe Hn 3aemete MaunHaTa Ha HnKOrO, yBeTeCe, ye NotpeBnteJrT ce e 3aNo3HaI C nHCTpyKnnte 3a ekCnloataa, CbDbpKaun Ce B HactoToTO pBkoBOdCTBO.
2.2 PPEДВAPNTEJIHN ONEPAÇN
JIuHn npeHa3Hn cpeCTBa (JInc)
- Hocete noxoadjo 6IeKIO, yToHnBn pa6OTn 6yBKn C HexJIb3raaC Ce IODMeTKN N Dblr NaHTaIoHN. He 3aJeNCTBaTe MaunHaTa, KOrato CTe 6OCh nIn Hocnte OTBOpEn CaHdaJI. Hocete ClyuJaKN 3a 3aUNTa Ha cLyXa, PbKaBnU aHTNB6paOnOHn IN MacKn IpOTNb npax.
2.ИЗползВанetoHa aKуСТиЧи 3aДиТи мОже Да HabмлсnoCobHocTTa Дa ceЧУВаТ eBEHTyaJIHn IpeDyIpyeJdeHЯ (BnKOBe Ил aIapMn).БbДeTe MHOro BHNMaTeJHn KaKBO ce ClyuBa OKOLO pa6OTHaTa 3OHa. - He hocete shaIOBe, pN3n, KOJIneTa, rPbBn, dpexn C pa3BaAsn Ce qactn nIIN CHa6DeHn C Bp3Kn, KaHTO IN BpaTOBp3Kn N BscAun IIN ShINOHN AOKCECoApn, KONTO 6nxAmorJn Da ce ONJeTaN MaunHaTaN B PpeDMTe NmMaTePnaJn, KONTO Ce HamnpaT Ha pa6OTHO TcTo.
4.ДрьжTe ДалачOT peшETkaTа,КОЯTO ceHamnpa Ha BXOD Bb3dUx,BaShaTa Koca, 3aIoTO 6n MoIa Da ce 3aJIeTe B pa6OTHOTo KOJIeLo (poTopa) И Да пчHH TeJKN HapAHЯВанЯ.
Ako HMaTe DbIgN Kocn, BbpJxHeTe rNo NODXODaHauH.
Pa60Tha 30Ha / MaunHa
- BhimataJIHO npOBepeTe 3aIaTa pa6oTHa 30Ha n pa3nIeTeTe pUHo KaTO 3IOJ3BaTe rpe6Io HIn MeTla OCTaTbUte IOTCTpaHeTe BCNUKO OHOBA, KOeTO MoKe Da 6bDe N3XBbpJeHO OT MaUnHaTata.
- Пи усLOBиЯ на пашени. Терен e пpenopьчпелно за НавлajнITE Леко NOВьхhoeTTa.
- 3a Да ИЗБERHeTe риСКа OT NOЖAP, He OCTaВЯТe MaшИнHaTа C TOnbЛ ДВИrATeЛ CpeД ЛИСТа ИПсуХа TpeBa.
2.3 IO BPEME HA H3IOJ3BAHE
Pa60tha 30Ha
- He n3noJ3BaIte MaunHaTa B NOTeHuaJIHO eKcIIIO3NBHa aTMocΦepa, npn HaJIuYe Ha 3aJaIMN TeUHOCTn, Ra3OBe nI npax. EJeKTpUueCKnTe ypeDN Cb3dAbAT NCKpn, KOHTo MoKe Da IODnAIArT npax nI IN 3npaPeHna.
- Pa6oTeTe cAmO Ha dHeBHa CBETInHa Hn npn Do6po N3KcTBeHO OCBeTJIeHne N YcIobnHa Ha Do6pa BnDnMoCT.
- OTdajleyeTe xopa, Deca n JKNBOTHn OT pa60THaTa 3OHa. Heo6xOJIMO e DecaTa da ce Ha6JIIOJaBaT OT dpyr Bb3paCTeH. DecaTa He 6nBa Da nIgpaTc C ypeDa.
- Побере тдалл дугнхopa се hamupaТ ha pa3ctOЯнne nohe 15 MeTpa OT paDnUca Ha DeiCTBHe Na MaShnHaTa.
5.ИЗбягваite da paBOTte BbB BlaJHHa TpeBa, KOraTO BaJIи D'BJKД И npn 6ypn C ONaCHOCT OTMbJHIN.
6.ИЗбягваite,ДOKОЛКOTO e Bb3MOJHNO,pa6OtaHaBlaJKeH N Xlb3raB TepeHи HepaBHN IIN CTpMbHn MeCTa, KONTO He OCHrypRaT yCTOnuHbA NO3nCnHa ONePaTopa NO BpeMe Ha pa6Ota.
7. He n3JIaraiTe MaunHaTa Ha IbJd NII HA BlaJHb OKOJIHa cpeJa.BoJaTa, KOrTo npOnHKBa BVnCTpyMeHTa,yBeliuAba pIcKa OT eJeKtpnueckn yIap.
8.Obbphete ocobeho BHIMaHHe Ha HepaBHOCTnte Ha 3eMaTt (n3daTnHH, BdJIb6HaTnHH), HaKIOHN,CKPHTN ONaCHOCTN 3a HAIChneTO Ha eBEHTyajH N ONaCHOCTN, KOHTO 6HXa MOJIN Da OprAHuAT BVNDMOCTTa.
9. BhimaBaTe MHORO B 6JIH3OCT DO CTpBmHHN, KaHaBKN Hn HaCn..
10. KoraTo MaunHaTa ce nol3Ba 6n3o Do nT, BHNMaBaIte C DnHexHeNo.
11. Празецяваши Виагни посока на На ватьра и НИКORA He paBOTete сршу ватьра.
12.He n3noJ3BaIte MaunHaTa B6n3OCT DO OTBOpEHn Ip03OpuN.
13. He n3noJ3BaIte MaunHaTa Bbpxy naBupaHa NOBbpxHocT nn YuKaBJI, 3a da ce N36eHHe EBeHTyaJIHO HapaHЯBaHe OT OTCTpaHeHMaTePnai.
14.ИЗБЯВаTe HaTpynBaHe NaOTCTpaHEnHa MaTePnaJ B3OHaTa Ha N3nPa3BaHe, 3aTOTo TOBa MoKe Da 3aTpPydHi nPaBnHOTO OTCTpaHЯBaHe N da NpeDn3BnKa HacpeuHn Ydapn Ha MaTePnaJI NocpeDCTBOM acnnpauOnHHte OTBOpN.
Поведене
- ПоврemeHa pa6oTa, npn n3noJ3BaHe KaTo 6dnyXbaa, MaunHaTa Tp6Ba BnHaI Da ce DbpxN 3dpaBO
CЯchata pKa nOCTaBeHa Bbpy rohata pkoxbatka.
2.ИЗБЯВайTe KOHTaKT
Ha TЯЛOTO CbC 3a3eMeHn
ПОВьрхНоCTN, KaTO Tpb6N,
paДиАТОпи, KUxHHeHСКи ПeчКи,
XlaДиЛнИцN. PиСКьТ OT
eLEKТрИЧЕСКи yДap ce yВeЛИЧаВа
aKO TЯЛOTO e 3a3eMeHo.
3. 3aemeTe HeNoBnKHo H CTa6HnHO nOIOKeHne H 6bDeTe BnHaRn BHMaTeJIHH.
4. He ryebepe paBHOBeCne.
5. BhimabaTe Da He
YdprTe CnIHO ypeDa B ChkDn
TeJa, KaKTo N 3a EBeHTyAJIHn
N3XBbPJIHHa MaTePnaJn
IpaX, PpeDN3BnKaHN OT Bb3dyxa.
6. He hacouBaTe Bb3dUshHaTa CtpyKbM Xopa HIN JHIBOTHN.
7. Пи уnotpe6а кato
обдухвашиа Maшина, Винаги
Внимаразе MHORO, 3a Да ce
иЗбгHe, Ye OTСТраняВанят
MaTeРпал Или BДИГНаТЯТ прах
MOraТ дa пчUnHЯТ НарЯВаня
Ha Xopa Или JИВOTHи, Или Уети
Ha TЯХHATA COБСТBEHoCT.
8. He TnuaTe HNKORA, a XoJeTe.
9.ДрьжTe BnHaRn JIuZeTo, pBcTe N TJIATO DaJIeue OT acNIPAQUHHaTa peWetKa N OTBOpa 3a N3TlaACKBaHe Ha Bb3dUx N He 3aNyUbaIte Bb3dUshHtE KaHaJN, KaKTO NO Bpeme Ha 3aJeCTBaHe, TaKa N IO Bpeme Ha N3POn3BaHe Ha MaShInHaTa.
10. BbptTAAnte ce qactn MOraT Da npuHrT cepNo3HO HapaHraBe; Da ce n36yRBA KOHTaKT C BbptTAAnte ce qactn, KOrato Te BCE OSe CE BbptT.
BcnyaHa CuynBaHn Hn HnIeHTn IO BpeMe Ha pa6ota, CnpTe He3a6abHO dBnraTeIa I
OTdaleteMaunHaTaNo TaKbB
HauHH,Ye da He npedn3BnKaTe
DOIbJIHHTeHNuETN;BClyuaa
Ha 3IOPOJyKn,CBbp3aHn C
TeleChn NOBpeDNn Ha TpeTn
LIuCa,He3abABHO 3aDeEChBaIte
Ppoedypnte 3a PbpBa
NOMO, KOHTO Ca NODXoAuzn
3a KOHKPeTHaTcNTyaUzna
Ce CBbpKeTe c MediunHcKa
CTpykTypa 3a Heo6xOJMOTO
JeueHne. OTCtpaHete
CTapaTeJHo EBeHTyaJHn
OTNaDbu,KOHTO MoRat Da
HaHeCat uetn nIn yBpeKdaHn
Ha Xopa nn JHBOTn, aKO
He 6bDaT 3a6eJra3aHn.
- PobJIHNTeJIHOTo n3laHaHe Ha BnOpaun MoJc Da DoBede Do yBpeJdaHn I CmUeHn Ha HEPBHaTa N KpbBOHOCHaTa CNCTema (No3HaTHN KaTO "CnHdPOM Ha PeiHo" nn "6Ja pKa"), Oco6eHo 3a CTPadaaunte OT CmUeHn Ha KpbBOHOCHaTa CNCTema.CmPTOMHTe MoJc Da 3acraT pBcTe, KHTKHe, npbCTIte N Ce IpOBAvBAT CbC 3aRyBa Ha YyBCTBNTeJIHOCCTTa, N3TpbnBaHe, Cbp6eK, BoJka, 3aRyBa Ha cBt Nn CTpykTyPhN npomeHn Ha KOJaTa. Te3n eΦeKTn MOJc Da Ce ycJrT OT HNCHTe TEMpePaTpyn Ha OKoJHaTa CpeDa n/nn OT npEkaJIeHO CTnCKaHe Ha dpBxKHTe. Pn npOraBa Ha CmMTOMHTe, Tp6Ba Da Ce HamaJIb BpeMeTo Ha yNOTpe6a Ha MaUnHaTa n da Ce NocBBeTBaTe CJIekap.
OrpaHnueHna ynoTpe6a
-
Maшина т He Tp6Ba Da ce N3NoJ3Ba OT Xopa, KOnTO He ca B CbCTOJHne DaЯДbPkaT 3dpaBO C DBe PbUe N/Niln Da CToT CTaBnIHO B paBHOBeCne Ha KpaKaTa Cn NO BpeMe Ha pa6Ota.
-
HnKora He n3noJ3BaIte MaunHaTa C NOBpeDeHn IIN JInCBAuN 3aUHTN, INHn HEnpaBnJHo N03nOHOHpAHn.
- HnKora He n3noJ3BaIte MaunHaTa, aHO He ca MOHTnpaHn npedBnJeHnte 3a BcKa yNoTpe6a akcecoapn.
4.He n3KIOUBAHTe,He DeaKTbIbpaIte,He CBaJIaITe HJIH He MoDnΦNcIpaIte HaJIuHNTe CNCTeMn 3a 6e3ONaCHoCT/ MKNPONpeBKnIOUByAteJIi. - He n3noJ3BaJte
eJIeKTPnueCKnT nHCTpyMeHT,
aKO npeKbCBAuT He e B
CbCTOJHnE Da rO BKJIIOUH nIi
Da rO n3KJIIOUH HOpMaJHo.
EJIeKTPnueCKn HnCTpyMeHT,
KoITo He MoJHe Da 6bDe BKJIIOUeH
OT npeKbCBAuHa, e OnaCeH n
TpJ6Ba Da 6bDe nonpaBeH. - He noДlaTe MaUnHaTa Ha npeKaJIeHO HaTOBapBaHe n He H3NoI3BaIte MaUnHa C MaIbK KaNaIITeT 3a TeJka pa6Ota; H3NoI3BaHETo Ha nOxDxOJa7a 3a ZeI-Ta MaUnHa HaMaJIaBa pNcKa n YBeJIInuBa Ipon3BOJNTelHOCTTa.
2.4 IOJINPbJHKA, INPbIPaHE 3A CbXPAHEHNE
N3BbpyBaHeTo Ha npaBnHa
NoDpBjKHa N np6npaHe
3a CbXpaHHeHne, 3ana3Ba
6e3ONaChOCTTa Ha MaunHaTa
HNBOTO Ha HeHaTa
PON3BOdntelHOCT.
PoaepbKka
HnKora He n3noJ3BaIte MaunHaTc C n3HOceHn nn NobpeDeHn qactn. NobpeDeHnte nn n3HOceHn qactn Tp6Ba da 6bDaT 3aMeHeH, a He nonpaBeHn.
- Почиствано иTekушату подрьжka He Тразбада
ce n3BbPwBaT OT Deca 6e3 Na6JIoDeHne.
HNBOTO Ha shym n Bn6paqnn, yka3aHO B hactoIte HNCTpyKcHn, ppeDCTaBIABa MaKcHMaJIHnTe CTOHOCTH npu ynotpe6a Ha maunHaTa. Heo6xOJMo e, da ce B3eMaT PpeBaHTHBn MepKn 3a OTCTpAHraBe Ha eBEHTyaJIHN BpeDi bJIkaUc Ce Ha BHCOKnIaYM n BV6paCIOHnHn HAToBapBaHn; n3NoJ3BaITe MaunHaTa npn NOCToRHHa CKOpOCT, dpbXtE 3dpaBO pkoXBaTKaTa C NOxOJaCa cIIa, n3NoJ3BaITe MaunHaTa npn HEo6xOJIMn MInHMaJIen peKm 3a n3BbPbWAHe Ha CbOTBETHaTa pa6ota, Hocete cLy7aJIkn IpOTNb Shym, n3BbPbWBAITe YecTN n NOxOJaI npay3n No BpeMe Ha pa6ota.
6.2 IPOBEPHN 3A BE3ONACHOCT
I3BbpuTe cneHnTe npOBepKn 3a 6e3oNaChocT nPpOBepTe daHn pe3yJtATnTe OTROBaprTaHa nocOeyHOTo B TaJIuNTe.
Ipeu da n3no3BaTe MaunHaTa, 13BbpuBaIte BnHar npOBepHn 3a 6e3onacHOCT.
6.2.1 067a npoBepHa
7.2.3 NOBTOPHO MOHTIpaHe Ha aHyMyNaTopa
CneKaTo 3aBbPm3apeHdaHeTo:
- cBaJIeTe aKymyIaTopa OT rHe3dOTo Ha 3aprAnHOTo yCTpoiCTBO (ΦnR. 16.A) (N36BraHKn Da rDbPHTe POnd 3apeHdaHe Dblro BpeMe CLeI npe3apeHdaHe);
- pa3kahe 3apAHHOTO yCTPOINCTBO (ΦnR. 16.B) ot eIektpnueckKaTa MpeHa;
- NOCTaBeTe aKymyIaTopa B rHe3dOTo My, NOCTaBeHo Ha MaunHaTa (ФИг. 11.A) Ил В eДно OT rHe3dA-Ta Ha paHnCtA Ta 3a nOmeuBaHc H aKymyIaTopa (ФИr.6) (aKo e npEduHO)
- HATINCHETe Do IbHO aKMyIaTOPa DOKaTO yCETnTe "UpaKBaHe", KOEtO 3aKJIIOuBa B NIOLOKeHne IN OCNrpyBa eJEnKTpNueCKN KOHTAHT.
7.3 NOUHCTBAHE HA MAUNHATA HHA DBNATELA
3a da ce haMaII npCKa OT noHap, NOUcTBaIe MaunHaTaNOCO6eHO DBnraTeJIaOT OCTaTbCNIOT JNCTa,KIOHN.
-ПочнстваiteВинагиMaшинотаСледИЗПОЛ3ВаHe KaTOИЗПОЛ3ВaTeЧNTаКьрna,НавлakнHeHa B HeYTpaleH NOчNTBaU npenapat.
OTCTpaHЯBaIte BcKaHbCaJIeJa OT BlaRa, KaTo cn NocLyKHe C MeKa H cyXa Kbpna. Blarata MoKe Da npEiN3BnHa pNcKObe OT TKOBu ydApn.
He n3noJ3BaIte arpeCnBn noocTbaun npenapatn nn pa3TBOpnteJn 3a noocTbaHe Ha nlaactMacOBInTe qactn nn pboXbATKnTe.
He n3noJI3BaIte Ctpyn BODa Hn36BaIte Da mOKpnte DnIraTeJn eJeKTPnuecknTe YacTn.
-ПодьрхаiteВинаг pa60THOTOKoJIeLo (poTopa) nCTOи6e3 npaxиocTaTBu,OBdYBaHKn CbC cTbCTeH b3dUx npe3 peWetKaTa. He npbckaIte pa60THOTOKoJIeLo (poTopa)cBODa.
3a da ce n36erHn nperepaBaHe n nobpeJdaHe Ha DnIraTeJI nn aKymyIaTopa, npOBepraBaIte BnHaRn DaJIi acnnpauHOHHTe peWeTKn Ha OXJaKaIaIaIaII Rb3dYx Ca qNCTn N CBO6Odn OT OTNaDbu.
7.4 ΦИКСИРАЦИ ГAIKHи BИNTOBE
IopbpaTe 3aTeHaTn raHKeTe n BnHTOBeTe, 3a Da cTe cnHyprH, ye MaunHaTa ce HAMnpa BnHaRn B cbCToRHeNe da fynKNoHnpa 6e30NaCHO.
- PpOBeRbAtepeoBHOaIIN pBkoXBaTKHe ca 3aKpeNeHn 3dpabo.
8. ПИБИРАСЕСБХРАЕНЕ
BAHHO IpaBnIaTa 3a 6e3OnaCHOCT, KOHTpRbBa Da ce Cna3BaT NO BpeMe Ha OepaunTe 3a np6bpaHe 3a CbxpaHraBe, Ca OncaHn B nap.2.4.Cna3BaYte CTpNKTHo Te3N yka3aHn, C qel npedOTbPaTBAHe Ha cepNo3HN pNcKOBe NIn ONaCHOCTN.
8.1 INPENPAHE HA MAUNHATA 3A CbXPAHEHNE
Korato MaunHaTa Tp6Ba Da ce npnbepe 3a cbxpanHeHne:
- CBaJIeTe aKymyIaTopo OT rHe3dOTO My n pIncTbIeTe KbM HeROBTo Ipe3apeKdahe (nap. 7.2.2);
-
octaBeTe DnraTeIa Ce OxlaI, IpeIa Inpi6epeTe MaunHaTa 3a CbXpaHHe B HRAKBO NOMEueHHe;
-
n3BbpeTe nouchTbahe (nap. 7.3);
- Повере Te ДдИ НЯ ма разхлбен Ип NOВpeDEн KOMПОHEнТи. Ако e Heo6xOДМо, CmHeTe NOBpeDEHITe KOMPOnEHTи 3aTeRHeTe EBEHTyaJIHn pa3XЛбEH N BIHTObe n 6OЛTOBe Ипс ce CBpJKeTe c OTOpN3IupaH cepBn3eH ueHTbp;
- Ппберете машина за съханен: [ \text{Съханен} = \frac{\text{Съхан}}{\text{Съхан}} = \frac{\text{Съхан}}{\text{Съхан}} = \frac{\text{Съхан}}{\text{Съхан}} = \frac{\text{Съхан}}{\text{Съхан}} = \frac{\text{Съхан}}{\text{Съхан}} = \frac{\text{Съхан}}{\text{Съхан}} = \frac{\frac{\text{Съхан}}{\text{Съхан}}}{\frac{\text{Съхан}}{\text{Съхан}}} = \frac{\frac{\text{Съхан}}{\text{Съхан}}}{\frac{\text{Съхан}}{\text{Съхан}}} = \frac{\frac{\text{Съхан}}{\text{Съхан}}}{\frac{\text{Съхан}}{\text{Съхан}}} = \frac{\frac{\text{Съхан}}{\text{Съх gan}}}{\frac{\text{Съх gan}}{\text{Съх gan}}} = \frac{\frac{\text{Съх gan}}{\text{Съх gan}}}{\frac{\text{Съх gan}}{\text{Съх gan}}} = \frac{\frac{\text{Съх gan}}{\text{Съх gan}}}{\frac{\text{Съх gan}}{\text{Съх gan}}} = \frac{\frac{\text{Съх gan}}{\text{Съх gan}}}{\frac{\text{Съх gan} - 1}{\text{Съх gan}}} = \frac{\frac{\text{Съх gan}}{\text{Съх gan}}}{\frac{\text{Съх gan}}{\text{Съх gan}}} = \frac{\frac{\text{Съх gan}}{\text{Cxa x gan}}}{\frac{\text{Cxa x gan}}{\text{Cxa x gan}}} = \frac{\frac{\text{Cxa x gan}}{\text{Cxa x gan}}}{\frac{\text{Cxa x gan}}{\text{Cxa x gan}}} = \frac{\frac{\text{Cxa x gan}}{\text{Cxa x gan}}}{\frac{\text{Cxa x gan}}{\text{Cxa x gan}}} = \frac{\frac{\text{Cxa x gan}}{\text{Cxa x gan}}}{\frac{\text{Cxa xgan}}{\text{Cxa x gan}}} = \frac{\frac{\text{Cxa x gan}}{\text{Cxa x gan}}}{\frac{\text{Cxa x gan}}{\text{Cxa x gan}}} = \frac{\frac{\text{Cxa x gan}}{\text{Cxa x gan}}}{\frac{\text{Cxa x gan}}{\text{Cxa x gan}}} = \frac{\frac{\text{Cxa y gan}}{\text{Cxa y gan}}}{\frac{\text{Cxa y gan}}{\text{Cxa y gan}}} = \frac{\frac{\text{Cxa y gan}}{\text{Cxa y gan}}}{\frac{\text{Cxa y gan}}{\text{Cxa y gan}}} = \frac{\frac{\text{Cxa y gan}}{\text{Cxa y gan}}}{\frac{\text{Cxa y gan}}{\text{Cxa y gan}}} = \frac{\frac{\text{Cxa y gan}}{\text{C xa y gan}}}{\frac{\text{Cxa y gan}}{\text{Cxa y gan}}} = \frac{\frac{\text{Cxa y gan}}{\text{Cxa y gan}}}{\frac{\text{Cxa y gan}}{\text{Cxa y gan}}} = \frac{\frac{\text{Cxa y gan}}{\text{Cxa y gan}}}{\frac{\text{Cxa y gan}}{\text{Cxa} \times \mathrm{{yran}}} = \frac {\frac {\mathrm {H e n e t i c a l} _ {1} ^ {2} + 1}{2} + 1}{2} + 1}
B CyXO NOMEUHHeN;
-3aunTeHaOT He6laaropnAHTN aTMOCOepHn ABJehn;
-HaMRCTo,HeIOCTbIHO3aIeua,
-KaToCe yBepnTe,Ye CTe CBaHINN KIIOyBT NII IN HCTpyMeHTNTe N3NOJ3BaHN 3a NOIDpbHKKaTa.
8.2 IPNBNAHE HA ANUMYJATOPA 3A CbXPAHEHNE
AkymylaTopa Tp86Ba da ce cbxpaHbHa CaHka, Ha XnaHIO IN Cpea 6e3 Bnara.
3ABEJIENHKA B cnyuHa npOdbJHKHTeJHo
HEN3NOJ3BaHe,3apeKJaTe aKymyIaTopa Ha BCEKN Dba Meceua,3a Da yJbJIHNTE HEROBnT JN3HEN LNKbl.
9. INPEMECTBAHE IN TPAHCNOPTIPAHE
BceKn nT, KOrato TpR6Ba Da npMeCTBaTe NIn TpaHCnOPTnpaTe MaunHata, e Heo6xOdmo:
-cnpTe MaunHaTa (nap. 6.5);
- CBAIeTe aKymlaTopa OT rHe3dOTo My nPnCTbIeTe KbM HeROBOTO npEzapeJdahe (nap. 7.2.2);
-XBaAaIeMaunHaTa eHnCTBeHO 3a DpbHKnTe HacOuBaTe Tp6bnte, TaKa Ye da He Cb3dAbaTe npenrTcTBne.
Korato ce TpaHcnpTnpa MaunHaTa C TpaHCnOpTHO cpeCTBO e Heo6xOdmo:
-ДаCBaJInte Tp6nTe;
- npn TpaHcnpOpTnpahe o6e30naceTe NO NODXoJH NaHn KaTO n3NoJ3BaTe BbKeTa HnBepn;
- MaWInHaTa Da Ce N03nHOpHa TaKa, Ye Da He npEcdTaNbRA ONaCHOCT 3a HIKORO.
10. TEXHnueCHO O5CJIyJXBAHE N IONPABKN
TOBa pBKOBOCTBO IpeoCTaB BcHKn yTBAHN, Heo6XODIMn 3a ynpabIeHneTo Ha MaunHaTa n 3a n3BbPwBaHe Ha npabNHa OCHOBHa PnDpBxKHa ot nOpTeJIb. BcHKn onepaunn PO perylnpaHTo n POnDpBxKHaTa, KOtO He ca ONICAHN TOBa pBKOBOCTBO, Tp6Ba Da 6bDat n3BbPwBaHn npn BaWn dNCTpn6byTop
IINB CneuHaHnepHTbP 3a O6cLyKBaHe, KOITo pa3noJaRa C Heo6XODIMITE N03HaHnY INHCTpyMeHTn 3a npAByHnTO H3BbPbWAHe Ha pa6OtaTata, KaTo ce 3ana3N CTeneHtA Ha 6e3OpacHOCT IpbBOHaJHnOTo CbCTOJHnE Ha MaunHata. Onepaun, n3BbPweHn OT HeKBaJIuΦnUpaHn IInua IInn HEnoDxOJaUu ΦnPM BODr DO OTnAdaHe Ha BC8KaKBa rapaHnU BC8KaKBO 3aDbJKeHnE IInn OTROBOPHOCT Ha POn3BODnteJI.
- Camo OTopn3npaHn pa60TnHnCn 3a TexHnuecko 06cIyKBaHe MORAT da n3BbPwBAT nonpaBKn n noIpbkKa, KORATO MaunHaTa e B rapaHnJ.
- OToPn3HpaHnTe pa60TnIHnIte 3a TeXnuecko 06CJyKBaHe n3NoJI3BaT eINHCTBeHO opRnHaJIHn pe3epBn qactn. OpRnHaJIHnTe pe3epBn qactn n npHaJIeXHoCTn Ca cneuaJIHO pa3pa6OTeHn 3a MaunHInTe.
He ce oO6pBaHa3noJ3BaHTo Ha HeOpnHaJIHn pe3epBHN Yactn I npHaJleKHOCTn; H3noJ3BaHTo Ha HeOpnHaJIHn pe3epBHN Yactn I npHaJleKHOCTn KOMnpomEtnpa 6e3oNaChOCTTa Ha MaJInHaT a OCBO60XdAba POn3BOJTeJIrT OT BcKaKBO 3aDbJLKeHne N OTROBOPHOCT. - IpenopbUba ce da 3aKapate MaunHaTa BeHbB BToDnHaT B OToPn3npaHa pa6OtnHnca 3a TexNuecko 06CnyKBaHe, 3a N3BbPwBaHe Ha NpOdpbXKa, TexNuecko 06CnyKBaHe n npOBepKa Ha NpeDnA3HnTe yCTPOINCTBa.
11. TAPAHUNOHNOKPNTNE
IapaaHnra TnOKpnaB BcNHN DeeHTn Ha MaTePnAIn, KaKTo n npOn3BOndBeHn DeeHTn. Nol3BaTeJrT P86Ba Da CLeDBA BHNMaTeJIHO BCNUn PpeOCTaBeHn HnCTpyKnn B pniloKeHaTa DOkymeHTaCn.
IapauhunraHe noKpBaBpeDn/ceTn DJIkaNcHa:
- HENo3HaBaHe Ha npHpyKaBaAaTaDOKyMeHTaun;
- HeBHHMaHHe;
- HenpaBnIHo N3NoJ3BaHe M MoHTaK NIN HecBOJCTBeHO N3NoJ3BaHe;
- INIIN3BaHe Ha HeOpHnHaJIHH pe3epBHN acTH;
- I3noI3BaHe Ha npHaJaTeKHOCTN, KOITo He ca DOCTaBeHn INI TaKINBa, KOITo He ca OIO6peHn OT pON3BOIDTeJIa.
Ocbe ToBa, rapaunra Ta He nokpnuBa:
HOPMaJIHOTU3HOCBaHE Ha KOHCyMaTHuBITE;
- HopmaJIHOTO n3HOCBaHe.
Poi3BaTeIe 3aUHTeH OT DeiCTBaIoTO
HaUHOHaIHO 3aKOHODaTeJIcTBo. IpaBaTa Ha
Poi3BaTeIe PpeBnDEH NOT DeiCTBaIoTO
HaUHOHaIHO 3aKOHODaTeJIcTBO IO HnKaKBb HAuHH
He ce OrpaHuaBaT OT HAcToIaTa rapaHcy.
12. TÁBJNÇA HA ONEPAÇUNTE ПО ПОДРьЖКATA
6.4 PRACOVNI CINNOST
These Maschine woke me up. "I'm sorry, I don't know what to do," he said.
14.4 EOMOIΩTHMnATAPIA
Egoiowthn patiaoc: ookun n onoia, eav tooetntheta oto nepiBma tou mxaavmuatoc, ettpenTm xpon Tou oakidiou matapiw.
INDICE
- GENERAL INFORMATION 1
2.SAFETY REGULATIONS. 2
3.ABOUT THE MACHINE 6
3.1 Machine description and intended use 6
3.2 Safety signs 7
3.3 Product identification label 8
3.4 Main components.. 8
- ASSEMBLY 8
4.1 Assembly components 8
4.2 Assembly / disassembly of the blower tube.... 9
4.3 Assembly of the harness connection point (if available) 9
4.4 FITTING OF THE BATTERY BACKPACK (if available) 9
5.CONTROLS. 9
5.1 Safety button (activation/deactivation) 9
5.2 Throttle control lever.. 10
- USING THE MACHINE 10
6.1 Preliminary operations 10
6.2 Safety checks 10
6.3 Start-up 11
6.4 Operation 11
6.5 Stop 12
6.6 After use 12
- ROUTINE MAINTENANCE 13
7.1 General Information 13
7.2 Battery 13
7.3 Cleaning the machine and the engine 14
7.4 Nuts and bolts 14
- STORAGE 14
8.1 Storing 14
8.2 Storing the battery 14
-
HANDLING AND TRANSPORT 14
-
ASSISTANCE AND REPAIRS 15
- WARRANTY COVERAGE. 15
12.MAINTENANCE TABLE 16 - TROUBLESHOOTING 16
14 ACCESSORIES ON REQUEST 17
14.1 Alternative batteries.. 17
14.2 Battery charger 17
14.3 BATTERY BACKPACK 17
14.4 Battery simulator 17
1. GENERAL INFORMATION
1.1 HOW TO READ THIS MANUAL
Some of the paragraphs in this manual contain particularly important information in terms of safety and operation, and are highlighted differently, according to the following criteria:
NOTE or IMPORTANT these give details or further information on what has been previously indicated and aim to prevent damage to the machine or cause other damage.
The symbol highlights danger. Failure to observe the warning can lead to possible personal and/or third party injury and/or damage.
The paragraphs highlighted in a dotted grey square indicate optional characteristics not available on all models documented in this manual. Check if the characteristics are available on this model.
Whenever reference is made to a position on the machine "front", "back", "left" or "right" hand side, this refers to the operator's working position.
1.2 REFERENCES
1.2.1 Figures
The figures in these instructions for use are numbered 1, 2, 3, etc.
Components shown in the figures are marked A, B, C, etc.
Reference to component C in figure
2 is indicated with the wording: "See fig. 2.C" or simply "(Fig. 2.C)".
The figures are provided by way of example. The actual pieces can differ from those illustrated in this document.
1.2.2 Titles
The manual is arranged in chapters and paragraphs. The title of paragraph '2.1 Training' is a sub-title of "2. Safety regulations". References to titles or paragraphs are marked with the abbreviation chap. or para. and the relevant number. Example: "chap. 2" or "para. 2.1.
2.1 TRAINING
Become familiar with the controls and the proper use of the machine. Learn how to stop the machine quickly. Failure to follow the warnings and instructions may result in fire and/or serious injury.
- Never allow children, persons with reduced physical, sensory or mental capabilities or lack of experience and knowledge or persons unfamiliar with these instructions to use the machine. Local laws may establish a minimum age for users.
- Never use the machine if the user is tired or unwell, or has taken medication, drugs, alcohol or substances that impair reflexes and concentration.
- Remember that the operator or user is responsible for accidents and unexpected events that can occur to other people or property. It is the user's responsibility to assess the potential risk of the area where work is to be carried out and to take all the necessary precautions to ensure his own safety and that of others, particularly on slopes or rough, slippery and unstable ground.
- If the machine is sold or lent to others, make sure that the operator looks over the user instructions contained in this manual.
2.2 PRELIMINARY OPERATIONS
Personal Protective Equipment (PPE)
- Wear suitable clothing, strong work shoes with anti-slip soles, and long pants. Do not operate the machine barefoot or wearing open sandals. Wear ear-protection devices, anti-vibration gloves, protective goggles, and a half mask respirator.
- Use of hearing protections can reduce the ability to hear any warnings (shouting or alarms). Be careful of what occurs around you in the work area.
- Never wear scarves, shirts, necklaces, bracelets, loose flowing clothing, laces or ties or any hanging or flapping accessory that could catch in the machine or in any objects or materials in the work area.
- Keep hair away from the air intake grille, as it could get tangled in the rotor and cause serious injuries. Tie your hair back if it is long.
Work / Machine Area
- Thoroughly inspect the whole work area and use a rake or yard brush to manually untangle debris, remove anything that could be projected by the machine.
- When operating in dry dusty soil conditions, it is recommended to moisten the surface slightly.
- To avoid the risk of fire, do not leave the machine with the motor hot on leaves or dry grass.
2.3 DURING OPERATION
Work area
- Do not use the machine in environments that pose the risk of explosion, in the presence of flammable liquids, gases or powders. Power tools create sparks which may ignite the dust or fumes.
- Work only in daylight or with good artificial light in good visibility conditions.
- Keep people, children and animals away from the work area. Children must be supervised by another adult. Children shall not play with the appliance.
- Check that there is nobody within at least 15 metres of the machine's range of action.
- Avoid working with wet grass, in the rain and when there is a risk of a thunderstorm, especially lightening.
- Where possible, avoid working on wet, slippery ground or on uneven or steep ground that does not guarantee stability for the operator.
- Do not expose the machine to rain or wet environments. Water entering a power tool will increase the risk of electric shock.
- Pay careful attention to uneven ground (hills, dips), slopes, hidden hazards and obstacles that could limit visibility.
-
Be very careful near ravines, ditches or embankments.
-
Look out for traffic when using the machine near the road.
- Always assess wind direction and never work against the wind.
- Do not use of the machine near open windows.
- Do not use the machine on paved or gravel-covered surfaces, to avoid that the removed material causes injuries.
- Do not allow processed material to build up in the discharge zone; this may prevent proper discharge and can result in kickback of material through the intake opening.
Conduct
- When performing work utilising the machine as blower, the machine must always be held firmly with the right hand on the upper handgrip.
- Avoid body contact with earthed or grounded surfaces, such as pipes, radiators, cookers and refrigerators. There is an increased risk of electric shock if your body is earthed or grounded.
- Always use caution and take on a firm and well-balanced position.
- Do not lose your balance.
- Make sure to avoid violent impacts against foreign bodies and prevent the air low from throwing any material and dust.
- Do not direct the air jet towards persons or animals.
-
When used as a blower always pay the utmost attention to prevent removed material or dust from injuring people or animals or damaging property.
-
Never run, always walk.
- Always keep your face, hands, and body away from the intake grille and air outlet and do not obstruct the airways both when starting and utilising the machine.
-
The rotating parts can cause serious injuries; avoid contact with these parts while they are still rotating.
-
If something breaks or an accident occurs during work, turn off the motor immediately and move the machine away to prevent further damage; if an accident occurs with injuries or third parties are injured, carry out the first aid measures most suitable for the situation immediately and contact the medical authorities for any necessary health care. Carefully remove any debris which could cause damage or injury to persons or animals if ignored.
-
Prolonged exposure to vibrations can cause injuries and neurovascular disorders (also called "Raynaud's syndrome" or "white finger"), especially to people suffering from circulation disorders. The symptoms can regard the hands, wrists and fingers and are shown through loss of sensitivity, torpor, itching, pain and discolouring of or structural changes to the skin. These effects can be worsened by low ambient temperatures and/or by gripping the hand grips excessively tightly. If the symptoms occur, the length of time the machine
is used must be reduced and a doctor consulted.
Restrictions of use
- Do not use the machine if you are unable to hold it with both hands or keep steady on your legs while working.
- Never use the machine with damaged, missing or incorrectly positioned guards.
- Never use the machine without having installed all the attachments required for each use.
- Never disengage, deactivate, remove or tamper with the safety systems/ micro switches installed.
- Do not use the power tool if the switch does not turn it on and off. Any power tool that cannot be controlled with the switch is dangerous and must be repaired.
- Do not strain the machine too much and do not use a small machine for heavy-duty work; if you use the right machine, you will reduce the risk of hazards and improve the quality of your work.
Ensure regular maintenance and correct storage to maintain machine safety and high performance levels.
Maintenance
-
Never use the machine with worn or damaged parts. Faulty or worn-out parts must always be replaced and never repaired.
-
Cleaning and user maintenance shall not be made by children without supervision.
The noise and vibration levels shown in these instructions are the maximum levels for use of the machine. Suitable preventive measures must be adopted to eliminate possible harm caused by high noise levels and vibration-induced stresses; utilise the machine at constant speed, firmly hold the handgrip with adequate strength, utilise the machine at the minimum speed required to perform the work, wear ear-protection devices, make frequent and adequate pauses during the work.
Storage
- To reduce fire risks, do not leave containers with debris inside a room.
2.5 BATTERY/BATTERY CHARGER
IMPORTANT The following safety instructions are in addition to the safety requirements provided in the specific battery and battery charger manual delivered with this machine.
- Only use battery chargers recommended by the manufacturer to recharge batteries. An inadequate battery charger may cause electric shock, overheating or corrosive liquid to leak from the battery.
-
Use only batteries specifically designed for your power tool. The use of other batteries may cause injuries and fire risks.
-
Make sure that the machine is switched off before inserting the battery. Inserting a battery in a machine which is switched on can cause a fire.
- Keep all unused batteries at a distance from paper clips, coins, keys, nails, screws or other small metal objects as contact with the same can cause short circuits. Short circuits between battery contacts can lead to explosion or fires.
- Do not use the battery charger in places where there are inflammable vapours, substances or on easily inflammable surfaces like paper, fabric, etc. During recharge, the battery charger becomes heated and may cause fire.
- When transporting batteries, make sure the contacts never come into contact with each other and never use metal containers to transport them.
2.6 ENVIRONMENTAL PROTECTION
Protecting the environment must be a significant and top priority for machine use, to the benefit of civil co-habitation and of the environment that we live in.
- Avoid being an element of disturbance to the surrounding area. Use this machine at reasonable times of the day only (not early morning or late evening when the noise could cause disturbance).
- Scrupulously comply with local regulations for the disposal of packaging, deteriorated parts or any elements with a strong environmental impact; this
waste must not be disposed of with regular waste, but must be separated and taken to collection centres, which will recycle the materials.
- Scrupulously comply with local regulations for the disposal of waste materials
- When the machine is withdrawn from service, do not dispose of it in the environment, but take it to a waste disposal facility in accordance with the local regulations in force.
Do not throw electrical equipment away with domestic waste. According to the European Directive
2012/19/EU on electrical and electronic equipment waste and its implementation in compliance with national standards, old electrical equipment must be collected separately, for eco-compatible recycling. If electrical equipment is disposed of in a landfill or in the ground, the harmful substances can reach the water table and enter the food chain, damaging your health and well-being. For further information on the disposal of this product, contact your dealer or a domestic waste collection service.
At the end of their working life, dispose of batteries safely in an eco-friendly manner.
Batteries contain material classified as hazardous for you and the environment. They must be removed and disposed of separately at a facility that accepts lithium-ion batteries.

Separate waste collection of the products and packaging used allows the materials to be
recycled and reused. Reuse of recycled materials help to prevent environmental pollution and reduces the demand for raw materials.
2.7 RESIDUAL RISKS
Even when all safety rules are observed, there may still be certain residual risks which cannot be excluded. From the kind and construction of the tool the foreseeable potential endangerments can be:
- Hurled materials that may injure the eyes;
- Damage of the hearing, if no protection of the ears is carried.
3. ABOUT THE MACHINE
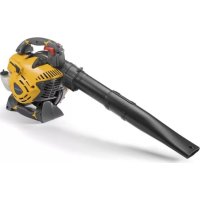
3.1 MACHINE DESCRIPTION AND INTENDED USE
This machine is a garden tool, specifically a portable battery-powered garden blower.
It basically consists in a motor that activates a rotor which is able to produce a high-speed air flow.
3.1.1 Intended use
This machine was designed and manufactured for:
- the movement and accumulation, by blowing, of leaves, grass, debris of various limited weight and modest dimensions.
3.1.2 Improper use
Any other use that does not comply with the above, can be dangerous and cause damage to
people and/or property. Examples of improper use may include, but are not limited to:
- accumulation and collection of inflammable or explosive products, hot embers or combustion material without a flame, lit cigarettes, pieces of glass, sharp objects, metal objects, stones and any other object that could be dangerous to the operator and others;
aiming the air shot towards persons and/or animals; - allowing object to enter the suction grid;
- using the machine without the accessories specifically supplied by the manufacturer for specific uses, or use of accessories in a way not intended in these instructions;
- using of the machine by more than one person.
IMPORTANT Improper use of the machine will void the warranty and relieves the Manufacturer of any liability, placing all responsibility for damage or injury, to him/ herself or third parties, on the user.
3.1.3 Type of users
This machine is intended for use by consumers, i.e. non-professional operators. It is intended for "hobby-related activities".
3.2 SAFETY SIGNS
The machine has various symbols on it (fig. 2). Their function is to remind the operator of the correct conduct for use, with due care and caution.
Meanings of the symbols:

WARNING! DANGER! The failure to use this machine correctly can be hazardous for oneself and others.
WARNING! Read the owner's manual before using the machine.

Use goggles protection.

Do not leave the machine in the rain (or in damp conditions).
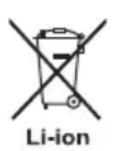
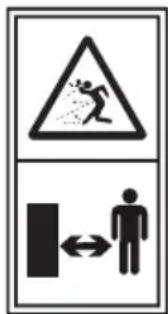
PROJECTION HAZARD! Pay attention to possible flying debris projected by the air flow: which may cause serious injuries to persons or damage to objects.
PROJECTION HAZARD! People or pets must be kept at least 15m away when using the machine!
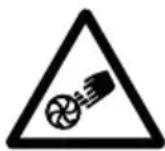
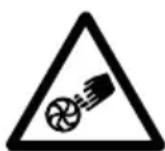
Mutilation hazard! Always keep the hands away from the air intake grille. The rotor in motion can cause serious injuries.
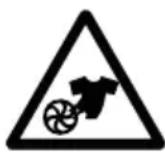
Serious injury hazard! Keep loose clothing away from the air intake grille, since it could become trapped in the rotor and cause serious injuries.
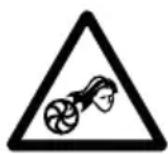
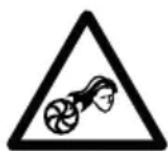
Serious injury hazard! Keep hair away from the air intake grille, since it could become trapped in the rotor and cause serious injuries. Tie your hair back if it is long.
IMPORTANT Any damaged or illegible decals must be replaced. Order replacement decals from an Authorised Service Centre.
3.3 PRODUCT IDENTIFICATION LABEL
The product identification label provides the following data (fig. 1):
- Name and address of Manufacturer
- Type of machine
- Sound power level
- Conformity marking
- Power voltage
- Year of manufacture
- Serial number
- Article code
- Class II; Dual insulation
Write the identification data of the machine in the specific space on the label on the back of the cover page.
IMPORTANT Quote the information on the product identification label whenever you contact an Authorised Service Centre.
IMPORTANT An example of the Declaration of Conformity is provided on the last pages of this manual.
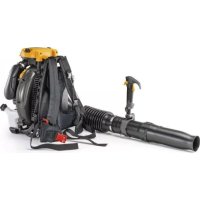
3.4 MAIN COMPONENTS
The machine is composed of a series of main components that have the following functions (Fig.1):
A. Power unit: it drives the rotor.
B. Blower tube: it is the component through which the air flow is discharged.
C. Handgrip: it makes it possible to control the machine.
D. Harness (if available): device made up of a fabric belt which, placed over the shoulders, helps to support the weight of the machine during work.
E. Harness connection point (if available): where the harness is connected to the machine.
F. Battery (accessory available upon request, paragraph 14.1): device that supplies electric current to the tool; its specifications and regulations for use are described in a specific manual.
G. Battery charger (accessory available upon request, paragraph 14.2): device used to recharge the battery; its specifications and regulations for use are described in a specific manual. Two battery charger models are available: G1 (fast battery charge); G2 (standard battery charge).
H. Battery backpack (attachment on request, par. 14.3): device in which the batteries are placed.
I. Connection cable: cable used to connect the machine to the battery backpack.
J. Battery simulator (attachment on request, par. 14.4): device that, if inserted in the machine housing, allows the use of the battery backpack.
4. ASSEMBLY
IMPORTANT The safety regulations to be followed are described in chap. 2. Strictly comply with these instructions to avoid serious risks or hazards.
For storage and transport purposes, some components of the machine are not installed in the factory and have to be assembled after unpacking. Follow the instructions below.
Unpacking and completing the assembly should be done on a flat and stable surface, with enough space for machine handling and its packaging, always making use of suitable equipment. Do not use the machine until all the instructions provided in the "ASSEMBLY" section have been carried out.
4.1 ASSEMBLY COMPONENTS
The packaging includes assembly components.
4.1.1 Unpacking
- Carefully open the packaging, paying attention not to lose components.
- Consult the documentation in the box, including these instructions.
- Remove all the unassembled parts from the box.
- Remove the machine from the box.
- Dispose of the box and packaging in compliance with local regulations.
Before assembling, make sure the battery is not inserted in its housing.
4.2 ASSEMBLY / DISASSEMBLY OF THE BLOWER TUBE
- Align the locking device (Fig.3.A) with the protrusion (Fig. 3.B) on the air outlet (Fig. 3.C).
- Push the tube (Fig. 3.D) until it hooks up firmly with the drive unit with a "click" when it locks in place. - To remove the tube, press the button (Fig. 3.A) and then slide it out.
IMPORTANT Stop the machine and always remove the battery (paragraph 7.2.2) whenever the blower tube is removed.
4.3 ASSEMBLY OF THE HARNESS CONNECTION POINT (IF AVAILABLE)
- Place the harness connection point in the protrusion on the left side (Fig.4.A) or on the right side (Fig.4.C) of the machine.
IMPORTANT Place the connection point on the left side if you are working holding the machine with the right hand, or on the right side if you are working holding the machine with the left hand.
2. Screw the harness connection point with the supplied screw (Fig.4.B)

Pressing the speed button (Fig.8.B) sets the air power and the 3 corresponding LEDs turn on (Fig. 8.D). If work is interrupted (without turning off the machine), the machine will resume at the previously set speed.
LEDs off: The electrical circuit is completely deactivated.

IMPORTANT Do not keep your finger on the button when moving the machine to avoid accidentally enabling the machine. The "Warning" icon (Fig. 8.E) comes ON in the event of machine fault (refer to the troubleshooting table, par. 13).
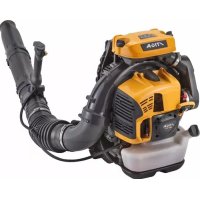
4.4 FITTING OF THE BATTERY BACKPACK (IF AVAILABLE)
The battery backpack is delivered already assembled (Fig. 1.H) and can be released from the strap support (Fig. 5) and carried by hand. To release the battery backpack, press on the two upper buttons (Fig. 5.A). The battery compartments are located on both sides of the backpack (Fig. 6). The following can be found on the right side of the backpack:
- cable socket (Fig. 7.A)
- battery selector (Fig. 7.B)
- one USB port for charging other devices (e.g. mobile phones) (Fig. 7.C)
To avoid any loose cables, there are grooves on both sides and at the rear, in which the power cable can be inserted.
5. CONTROLS
5.1 SAFETY BUTTON (ACTIVATION / DEACTIVATION)
Press this button (Fig. 8.A) to activate and deactivate the machine's electrical circuit; the corresponding LED comes "ON" (Fig. 8.C).
5.2 THROTTLE CONTROL LEVER
Operating the throttle control lever (Fig. 8.F) allows the machine to start / stop and simultaneously engages / disengages the fan.
For machine start up: -press the throttle control lever.
The machine stops automatically as the throttle control lever is released.
6. USING THE MACHINE
IMPORTANT The safety regulations to be followed are described in chap. 2. Strictly comply with these instructions to avoid serious risks or hazards.
6.1 PRELIMINARY OPERATIONS
Before starting to work, it is necessary to carry out several checks and operations to ensure you can work efficiently and in maximum safety.
6.1.1 Checking the battery
The machine is supplied without the battery. Purchase the battery with the capacity that most suits your operational requirements and fully charge it according to the instructions in the battery booklet. The list of approved batteries for this machine can be found in the "Technical Data" table.
- Before each use: - check the battery charge status following the instructions provided in the battery booklet.
6.1.2 Using the harness (if available)
The harness must be put on before connecting the machine to the special coupling (Fig. 4.A, 4.C) and the belts must be adjusted to suit the operator's height and build.
The belt (Fig. 9.A) must pass over the right or left shoulder and follow the side.
Never wear the harness across your body. Wear it over just one shoulder so you can rapidly move the machine away from your body in case of danger.
6.1.3 Use of the backpack (if available)
- Insert the battery in one of the compartments of the battery backpack (Fig. 6) and push it completely, until hearing the click that signals its locking in position, ensuring thus the electrical contact;
- Connect the cable to the backpack in the specific socket (Fig. 7.A) and rotate it until hearing the specific click that signals its locking in position, ensuring thus the electrical contact;
- adjust the straps and close the harness in the front (Fig. 10).
6.2 SAFETY CHECKS
Run the following safety checks and ensure that the results correspond to those outlined in the tables.
Always carry out the safety checks before use.
6.2.1 General check
| Object Result | |
| Hand grips (Fig. 1.C.) Are clean, dry and fixed firmly to the machine | |
| Harness connection point (Fig. 1.E) | Correctly positioned |
| Screws on the machine Correctly tightened (not loose) | |
| Cooling air ducts Not clogged | |
| Blower tube (Fig. 1.B) Correctly installed. |
| Rotor No signs of damage |
| Guards No signs of damage |
| Battery (Fig. 1.F) No damage to the casing, no liquid leakage |
| Machine No signs of damage or wear |
| Throttle control (Fig. 8.F) It must move freely and not be forced. |
| Test driving No abnormal vibrations. No abnormal sound |
6.2.2 Machine operating test
| Action Result | |
| 7. Fit the battery inside its housing (par. 7.2.3).8. Switch on the machine by pressing the button (Fig. 8.A).9. Press the throttle control (Fig. 8.F). | The machine starts and the rotor starts rotating. |
| 1. Release the throttle control (Fig. 8.F). | 1. The control should return automatically and quickly to the neutral position and the machine should stop. |
If any of the results fail to match the indications provided in the tables below, do not use the machine! Take it to a service centre to be checked and repaired if necessary.
6.3 START-UP
6.3.1 Start-up with battery
- Adopt a firm and well-balanced position;
- make sure that the blower tube is not directed towards any bystanders or debris;
- insert the battery correctly in its housing (Fig. 11) (par. 7.2.3);
- press the safety button (Fig. 8.A)
- press the throttle control (Fig. 8.F).
6.3.2 Start-up with battery simulator (if available)
- Adopt a firm and well-balanced position;
- make sure that the blower tube is not directed towards any bystanders or debris;
- insert the battery simulator correctly in its housing on the machine (Fig.11.J)
- connect the connection cable to the battery simulator (Fig.11.I)
- select the battery using the selector (Fig. 7.B)
- press the safety button (Fig. 8.A)
- Press the throttle control (Fig. 8.F)
6.5 STOP
To stop the machine:
- release the throttle control lever (Fig. 8.F);
2.deactivate the safety button (Fig.8.A)
It takes a few seconds for the rotor to stop after the machine has been turned off.
Always stop the machine:
- when moving between work areas.
When moving, never leave your hand on the throttle control in order to avoid accidental start-ups.
6.4 OPERATION
While working, the machine must always be held firmly with the hand on the upper handgrip (Fig 12).
NOTE During use, the battery is protected against total drainage with a protective device that switches off the machine and prevents its operation.
NOTE After one minute of inactivity, if switched on, the machine will automatically switch off.
6.6 AFTER USE
6.6.1 After use with the battery
- Remove the battery from its housing and recharge it (para. 7.2.2);
- allow the engine to cool before storing in an enclosed space;
- Clean (para. 7.3);
- Make sure there are no loose or damaged components. If necessary, replace the damaged components and tighten any screws and loose bolts or contact the authorised service centre.
6.4.1 Adjusting the speed
it is always advisable to set the rotor speed in relation to the type of material to be removed using the button (Fig. 8.B).removed:
- low blowing speed to move light material and small branches on the lawn;
- medium blowing speed to move grass and light leaves on asphalt or packed soil;
- high blowing speed (3 LEDs ON, Fig. 8.D) for heavier materials such as fresh snow or bulky dirt.
6.4.2 Operating suggestions
Proceed slowly keeping the end of the blower tube at a suitable distance from the ground (Fig. 12).
To avoid dispersing the material to be removed, direct the air flow towards the outer edges of the pile of material. Never direct the air flow to the middle of the pile.
6.6.2 After use with battery simulator (if available)
- Move the battery backpack selector to "OFF" (Fig. 7.B);
- remove the battery simulator from the machine (Fig. 13.J);
- remove the battery backpack;
- disconnect the connection cable from the battery simulator (Fig.13.I) and from the backpack (fig. 7.A)
- remove the battery from the backpack (Fig. 14) and charge it (par. 7.2.2);
- allow the engine to cool before storing the machine in an enclosed space;
- Clean (para. 7.3);
- Make sure there are no loose or damaged components. If necessary, replace the damaged components and tighten any screws and loose bolts or contact the authorised service centre.
IMPORTANT Always remove the
battery (para. 7.2.2) whenever the
machine is unused or left unattended.
7. ROUTINE MAINTENANCE
- a rotor speed not suited to the type of material to be removed (paragraph 6.4.1).
7.1 GENERAL INFORMATION
IMPORTANT The safety regulations to be followed are described in chap. 2. Strictly comply with these instructions to avoid serious risks or hazards.
Prior to carrying out any maintenance operation, you need to:
stop the machine;
- Remove the battery from its housing and recharge it (para. 7.2.2);
- allow the engine to cool before storing in an enclosed space;
- use suitable clothing, protective gloves and goggles;
- read the relevant instructions.
Warning! Risk of injuries due to dangerous moving parts!
- The frequency and types of maintenance are summarised in the "Maintenance Table" (see chapter 12). The table will help you maintain your machine's safety and performance. It summarises the main interventions to be made and the frequency applicable to each of them. Carry out the relevant task as soon as it is scheduled to be performed.
- The use of non-original parts and accessories could have negative effects on machine operation and safety. The manufacturer declines any responsibility for damage or injury caused by said products.
Genuine spare parts are supplied by Authorised Assistance Centres and Dealers.
IMPORTANT Any maintenance and adjustment operations not described in this manual must be carried out by the local dealer or by an Authorised Service Centre.
7.2 BATTERY
7.2.1 Battery power reserve
Battery power reserve (and therefore the cuttable area before recharging is required) mainly depends on:
- operator behaviour that should be avoided: - switching the machine on and off frequently whilst working;
To optimise battery power reserve it is always recommended to:
- set a rotor speed suited to the type of material to be removed.
If the need arises to use the machine for sessions which exceed the capability of a standard battery, it is possible to:
- purchase a second standard battery to immediately replace the discharged battery, without compromising the continuity of operations;
- purchase a battery with an extended power reserve compared to the standard version (para. 14.1).
7.2.2 Battery removal and recharging
- Press the locking button located in the battery on the machine (Fig. 13.A) or on the backpack (Fig. 14.A) (if available);
- remove the battery from the machine (Fig. 13.B) or from the battery backpack (Fig. 14.B) (if available);
- fit the battery (Fig. 15.A) in the battery charger housing (Fig. 15.B);
- Connect the battery charger (Fig. 15.B) to a power socket with the voltage indicated on the rating plate;
- fully charge the battery according to the instructions in the battery/ battery charger booklet.
NOTE The battery is equipped with a protective device that inhibits recharging if the environmental temperature is not between 0 and +45^
NOTE The battery can be recharged at any time, even partially, with no risk of damaging it.
7.2.3 Refitting the battery
When recharging is completed:
- Remove the battery from its housing in the battery charger (Fig. 16.A) (do not continue recharging once recharging is completed);
- Disconnect the battery charger (Fig. 16.B) from the electrical mains;
- insert the battery in its housing on the machine (Fig. 11.A) or in one of the housing of the battery backpack (Fig. 6) (if available)
- push it completely, until hearing the click that signals its locking in position, ensuring thus the electrical contact.
7.3 CLEANING THE MACHINE AND THE ENGINE
To reduce fire hazards, keep the machine and, in particular, the motor free of leaves, branches.
Always clean the machine after use with a damp cloth dipped in neutral detergent.
- Remove all traces of humidity using a soft damp cloth. Humidity can generate risks of electric shocks.
- Do not use aggressive detergents or solvents to clean the plastic parts or hand grips.
- Do not spray water onto the motor and electrical components and prevent them from getting wet.
Always keep the rotor clean and free of dust and debris, by blowing compressed air through the grille. Do not spray water on the rotor.
- To avoid overheating and damage to the motor or the battery, always keep the cooling air vents clean and free of debris.
7.4 NUTS AND BOLTS
- Keep all nuts, bolts and screws tight to be sure the equipment is in safe working condition.
- Check regularly that the handles are fixed firmly.
8. STORAGE
IMPORTANT The safety regulations to be followed for storage are described in paragraph 2.4. Strictly comply with these instructions to avoid serious risks or hazards.
8.1 STORING
When the machine is to be stored away:
- remove the battery from its housing and recharge it (para. 7.2.2);
- allow the engine to cool before storing in an enclosed space;
- Clean (para. 7.3);
- Make sure there are no loose or damaged components. If necessary, replace any damaged components and tighten any screws and loose bolts or contact the authorised service centre;
- Store the machine:
-in a dry place;
- protected from inclement weather;
- in a place out of children's reach;
- making sure that keys or tools used for maintenance are removed.
8.2 STORING THE BATTERY
The battery must be kept in a cool, shaded place without humidity.
NOTE If unused for a long time, recharge the battery every two months to prolong its service life.
9. HANDLING AND TRANSPORT
Whenever the machine is to be handled or transported you must:
stop the machine (para. 6.5);
- remove the battery from its housing and recharge it (para. 7.2.2);
- only hold the machine using the handgrips and position the tubes so that they do not case obstruction.
When transporting the machine on a vehicle, always:
- remove the tubes;
- fasten the machine securely with cables or chains;
position it so that it does not cause a hazard to anyone.
10. ASSISTANCE AND REPAIRS
This manual provides all the necessary information to run the machine and for correct basic maintenance operations which can be performed by the user. Any regulations and maintenance operations not described herein must be carried out by your Dealer or Authorised Service Centre, which have the necessary knowledge and equipment to ensure that the work is carried out correctly, maintaining the correct degree of safety and the original operating conditions of the machine. Any operations performed in unauthorised centres or by unqualified persons will totally invalidate the warranty and all obligations and responsibilities of the manufacturer.
- Only Authorised Service Centres can carry out guaranteed repairs and maintenance.
- The Authorised Service Centres only use genuine spare parts. Genuine spare parts and attachments have been designed specifically for machines.
- Non-original parts and attachments are not approved; use of non-original spare parts and attachments will jeopardise the safety of the machine and relieve the Manufacturer from all obligations or liabilities.
It is advisable to send your machine once a year to an Authorised Service Centre for servicing, assistance and safety device inspection.
11. WARRANTY COVERAGE
The warranty covers all material and manufacturing defects. The user must follow all the instructions provided in the accompanying documentation.
The warranty does not cover damage caused by:
- failure to become familiar with the documentation accompanying the machine;
12. MAINTENANCE TABLE
- carelessness;
- incorrect or forbidden use or assembly;
- use of non-genuine spare parts;
- use of attachments not supplied or not approved by the manufacturer.
The warranty does not cover:
normal wear and tear of consumable materials;
normal wear and tear.
The purchaser is protected by his or her own national legislation. The purchaser's rights under the national laws or his or her own country are not in any way restricted by this warranty.
| Intervention Frequency | Notes | |
| MACHINE | ||
| Check all fasteners | Before each use para. 7.4 | |
| Safety checks/check controls | Before each use para. 6.2 | |
| Check the battery charge status | Before each use * | |
| Recharge the battery | After each use para. 7.2.2 * | |
| Cleaning the machine and the engine | After each use para. 7.8 | |
| Checking for any damage to the machine. If necessary, contact the authorised service centre. | After each use - | |
- Refer to the battery/battery charger manual.
13. TROUBLESHOOTING
| PROBLEM PROBABLE CAUSE SOLUTION | ||
| 1. The machine does not start when the throttle control is activated | Battery is not inserted or is inserted incorrectly | Make sure that the battery is inserted correctly (para. 7.2.3) |
| Low battery Check the battery status and | recharge if necessary (para. 7.2.2) | |
| Faulty throttle control or damaged blower | Do not use the machine. Immediately turn off the machine, remove the battery and contact a service centre. | |
| 2. The motor shuts down whilst working | Battery is not inserted correctly Make sure | that the battery is inserted correctly (para. 7.2.3) |
| Low battery Check the battery status and | recharge if necessary (para. 7.2.2) | |
| 3. The rotor rotates, but the air does not come out from the blower tube | Blocked or clogged blower tube Stop the | machine, remove the battery and remove any obstructions. |
| 4. Excessive noise and/or vibration is experienced whilst working | Loose or damaged parts Turn off the machine | remove the battery and: - inspect for damage; - check for and tighten any loose parts; - have any damaged parts replaced or repaired with parts having equivalent specifications. |
| 5. The machine gives off smoke whilst working | Damaged blower. Do not use the machine. Immediately turn off the machine, remove the battery and contact a service centre. | |
| 6. Battery power reserve is low | Severe working conditions requiring greater current absorption | Optimise operations (para. 7.2.1) |
| Battery is insufficient for operating requirements | Use a second battery or extended battery (para. 14.1) | |
| Decrease in battery capacity Purchase a new battery | ||
| 7. The battery charger is not recharging the battery | Battery is not correctly inserted in the battery charger | Check it is correctly inserted (par. 7.2.3) |
| Unsuitable environmental conditions Recharge the battery in places with suitable temperatures (see battery/battery charger instruction manual) | ||
| Dirty contacts Clean the contacts | ||
| The battery charger is not energised Check it is plugged in and the power socket is energised | ||
| Faulty battery charger Replace with an original spare part | ||
| If the problem persists, refer to the battery/battery charger manual | ||
| 8. The LED indicator (Fig. 8.E) remains ON in steady mode | Self-check failed | Do not use the machine. Immediately turn off the machine, remove the battery and contact a service centre. |
| 9. The LED indicator (Fig. 8.E) remains ON in flashing mode | Battery communication error | Do not use the machine. Immediately turn off the machine, remove the battery and contact a service centre. |
| Rotor blocked | Do not use the machine. Immediately turn off the machine, remove the battery and contact a service centre. | |
| Current overload | Optimize machine usage. | |
| PCB overheated | Do not use the machine. Immediately turn off the machine, remove the battery and contact a service centre. | |
If problems persist after implementing the solution, contact your Dealer.
14. ACCESSORIES ON REQUEST
14.1 ALTERNATIVE BATTERIES
Different capacity batteries are available to suit specific operating requirements (Fig. 17). The list of approved batteries for this machine can be found in the "Technical Data" table.
14.2 BATTERY CHARGER
Device used to recharge the battery: fast (Fig. 18.A), standard (Fig. 18.B).
14.3 BATTERY BACKPACK
The device is used to place the two batteries and provides the electrical power required for the operation of the machine.
It is provided with a cable used for the connection to the machine (Fig. 1.I) and with a selector (Fig. 7.B) to select one of the two batteries (position "1" and "2") and "OFF".
14.4 BATTERY SIMULATOR
Battery simulator: device that, if inserted in the machine housing, allows the use of the battery backpack.
INDICE
- INFORMACION GENERAL 1
-
NORMAS DE SEGURIDAD 2
-
CONOCER LA MAQUINA 7
1.1 KUIDAS JUHENDIT LUGEDA
14.1 VALINNAISET AKUT
9. MANUTENTION ET TRANSPORT
OrpaHnUyBaHaHa yNtpe6aTa
- Maшина т He Tpe6a da ja KOpNCTaT LInca WTo He ce BO COcToJ6a Da ja DpHAt UBrpCTo Co OBeTe paue N/ nIi Da ODPKHyBaat Cta6nJIHa paMHOTeKa Ha HO3eTe BO TEkOT Ha pa60TaTa.
- HnKorai He KopncTeTe ja MaunHaTa CO OwTeTeHa 3aHTIa, aKO HeIOCTacyBa nIaKO He npaBnHNo NOCTaBeHa.
- HnKorai He KopncTeTe ja MaunHaTa 6e3 da rN nocTaBnte npedBnIeHNTe DOnoJIHNTeJHn DeIOBn 3a DaDeHa ynoTpe6a.
- He ncknybajte, De3aKTHBnpajTe, BaJeTe rMaHometapOT N 6e36eHNCHNTcNCTeMn/MNKpOnpKeKNHyBaun.
5.He KopncTeTe ro eIeKtpnHnot anapaT aKO IpeKENHyBaHT He e npaBnHO NOCTaBeH BO nO3njuJa 3a BKLyUyBaHbe HIn NcKlyUyBaHbe. Ako eIeKtpnHnot anapat He MoJHe Da Ce BkLuyu Co IpeKENHyBaHT, Toj e Onacen 3a yNtpe6a N Tpe6a Da ce nonpaBn.
6.He n3IooKyBajTe ja MaunHaTa Ha HeNoTpe6Hn CnInnHe KOpNCTeTe MaJa MaunHa 3a N3BeDyBaHbe TeuKn pa6OTn; aDeKBATHO KOpNCTeHbE Ha MaunHaTa Ro HamaLyBa pN3IKOTnro Noo6pyBa KBaJIHTeTOT Ha pa6OTaTa.
2.4 ODPKHyBAHbE, OIOJXyBAHbE
PepOBHO OndpKyBajTe N npaBnHNO odloKeTe ja MaunHaTa 3a Da
ja odprknte 6e36eHocTa Ha MaunHaTn HNBOTo Ha pa60Ta. OdpKyBaHe
- HnKoraw He KopncTeTe ja MaunHaTa CO KOpNCTeHn nn OwTeTeHn DeIOBn. OwTeHnte nn DeΦeKTHnte DeIOBn TpeBa Da ce 3aMeHaT, Hnkoraaw Da He Ce nonpaBaat.
- DeçaTa He cMee da ro cnpoBényBaat peDObHOTO yncTeHBe n OdpKyBaHbe DOKOLKy He ce nopd HaD3Op.
Дадени Te HNBOa 3a 6yuaBa n Bn6paunn BO OBA ynatCTBO Ce MaKcHMaJIHN BpeJHOCTn Prn ynoTpe6a Ha MaShHaTa. Mopa Da npesemTe 6e36eJHOCn 3aHTTHM MepKn I Da Tn N36erHeTe MoHHTe 7tETn 3apAn 3roJeMeHa 6yKa n HenpnaTHOCT OJ Bn6paunTe KopncTeTe ja MaShHaTa co NoctoJaHa 6p3Ha n dpKeTe ja CBpCTO paKaTa CO COOdBETHa 6p3Ha n Ha MnHmAleH peJHM KoJwTo e Notpe6eH da ce 3aBpShn paBoTaTa. Hocete 3aHTnTa npOTnB 6yUaBa n npabEtYeCTn NaY3n, COoDBetHn 3a pa6oTaTa.
Складиралье
3aHaMaIyBaHBe Ha pN3IKOT Od OraH, He OCTaBajTe NOLHN KOHTejHepn BO 3aTBOpeH npocSTOP.
2.5 BATEPNJA / NOJIHACH 3A AHUMYJATOPOT
BAKHOO CTeHnTe 6e36eHNOCHN INHCTpyKcNn rOnpaKaaT 6e36eHNOCHTe 6apaHa HaBeJeHn BO DaHeHOTO yNaTCTBO 3a aKymylaTOPOT N NOHaOT Ha aKymylaTOPOT wTO Ce DoCTaByBa 3aeDHO CO KocJIkHaTa.
KopncTeTe cAmo nolHaun 3a noJIHeIbe Ha 6aTepeInTe 7TO rN npenOpauyBa npOn3BODnTeIot. HecOoDbTeH nolNa 3a 6aTeepJaTa MoKe Da npedn3BnKa eJeKtpnueh ydap, ppepeBaHe nn IpoteKyuBaIbe Ha Kopo3NBHaTa TeuHOCT oD 6aTeepJaTa.
- KopncTeTe cAmo 6aTeepnco CneuФнkauzn 7TO ce npedBndeHn 3a Baunot anapat. Ynotpe6a Ha dpyrn 6aTeepn MoKe Da npedn3BnKa nOBpeNi pN3NK OJ PJIaMeH.
- Правец дали anapatot e nckluyehnped da ja ctabite 6atepnjata. Ctabahe 6atepnja BO BKluyeh eJeKtpnueh anapat MOKe Da npedn3Bnka noJap.
-Чува对接а щыгови, Игли, Habртуни
- Дугш малmaлнпраздmetи
- StTo може за праздвиkaaT
- КразК сюж на Конттite.
- КразК сюж на Конттite на
- StTo може за дobede
- Do ekсплозия и памен.
He ro KopncTeTe noHaCyOT 3a aKymylaTop Ha Mecta KaDe wTO hMa 3aapanBn napen, cynctaHcNn nIi JeCHO 3aapanBn NOBpShHH, KaKO wTO ce XapTna, TkaeHNHa N CInuHO. 3a BpeMe Ha NoJIHehBeTo, aKymylaTopOT ce 3arpeBa n MoJke da npedn3BnKa nOxap.
3a Bpeme Ha TpaHcnpT Ha akymylaTopnTe, Obphete BHIMaHne KOHTaKTnTe Da He DojdaT BO Cnoj Mey Ce6e H He KOpNCTe MeTaJIH N KyTn 3a TpaHCnOpT.
2.6
3AWTNTA HA JKNBOTHATA CPEINHA
3aHTtataHa JHBOTHaTcpeHnHa Tpe6a Da e npOpntetPn KOpncTeHe Ha KocnIkaTa, Ida 6nDe oJ KopnCT 3a rpaHanTeN 3a JHBOTHaTcpeHnHa.
- Избернувajte заю BOЗнемирва对接 COCEДСТВОТ. Корисс来不及 симо BO pa3умно Врeme (He Mногу paHO haytroи доцна Habечep кORA може заю BOЗнемирпеслу'reTO).
- DocleIHO CLeTe rH IOKaIHnTe 3aKOHn 3a φpIaHbE Ha aM6aIaJkata, DeIOBn BO paCpaIaHe nII KAKBn 6NlO eIeMeHTn CO WtETHO BInJaHne BP3 KINBOTHaTcpeDnHa OBNe OTnAIOuN He Ce φpIaAT BO ry6pe, TyKy TpeBa Da 6nDaT pa3delenHn I da Ce DoCTaBat Do COODBeTHN cEHTPn 3a Co6nPaHbe Ha NCTnTe, KOI Ke ce NOrpnKaT 3a pezIKlnpaHbE Ha MaTePnJaJIte.
CleTe Tn Bo celocT IokaHnTe 3aKoHn 3a pIaHbE Ha MaTePnJaHnTe wTo ce pe3yIITaT Ha CeYeHbETo
Kora Kocnilkata Ke ce paCnne, He ja nCpplajTe HaDBOp, TyKy Ondecete ja BO DeNoHjata 3a OTpaHn MaTepnjaJI, COIlaCHO N03HTNBHnte loKaJIH Nope6N.
He pjaTe rH eKtpnHte anapatn 3aeHNO co domaWeH otna.Bo corlaacnoct co dnpeKtNbata Ha EV 2012/19/ EU,OTnADOT wTO ce coCTOn Od eKtpnHn n eKtpoHcKn anapatn e Bawa oDroBOPHOCT n, BO corlaacnoCT CO hauNoHaJIHNTe ODpe6n,eKtpnHte anapatn
3aФрlaHe Tpe6a Da ceФрlaT 3ace6Ho 3aДa MoJKe NpOuHa NOBTOPO Da CE yNToTepeBaT Ha EKO-KOMPnATNoBnJIeH NaHn. Ako eIeKTPnUHnTe anapatn Ce OAnoJHa T ha rYbPnWte nIn Ha 3emJa, WTeTHnTe COCTOjKn MOJKe Da CTanat BO KOHTaKT CO eIeMeHTnte BO NoCbAta I Da HABLe3aT BO CINuPoT Ha NCxpaHa, Co UTo Ke Ce HApUwAT BaWeTo 3dPaBje N 6laRococToj6aTa. 3a NODeTaJIHn INΦOpMaun OkOlyФpLaHBeTO Ha OBOJ PpON3BoD, KOHTaKTnpajTe CO KOMNeTeHTHN IHCTNTyCUn 3aФpLaHBe DOMaWeH OTnaI nIi CO 3aCTaANHKnOT.
Ha Kpajot Ha pa6oTHnoT
Bek, ocIIO6OJeTe ce
OD aKymyIaTOPOrHa
6e36eDen n eKOLOwKn
Hauchn. BaTepnjata codpxn
MaTePnjaI ITO e ONaCeH 3a BAc n 3a CpeDnHaT. Tpe6a Da Ce N3BaAn i PaCKIoNn BO 3ace6eH caI ITO MoKe Da COdpKIn IHTnymCKn JoHN.

3ace6HOTOCO6HpaHe HaIPOH3BOIDHTe INCKOPINCTeHNTE NaKyBaHaOBO3MOJyBa peuNKInpHaBe
Ha MaTePnJaJInte N NOBTOpHa yNOTpe6a. NOBTOpHaTa yNOTpe6a Ha peuKInpaHNTe MaTePnJaIcNpeCyBa StTeTa Ha JINBOTHaTa CpeDInHa I ja HamaJyBa NOTpe6aTa 3a npImapHN MaTePnJaIi.
2.7 ДPyгИ PM3NцИ
Dypn n Kora ce noHTyBaat cnte 6e36eHocn npdeynpeDyBaHa, Cenak MoJc Da ce noJaBaT OndepEnn dpyrnpzniKoH He MOJc Da Ce NcNlyaT. Bo odHoc Ha TInOT Ha KOHCTpyKuJa Ha MaShHaTa, MOxHNTe ppeBnDeHn ONaCHOCTM MoJc Da 6nDaT:
- HcφpIaHbe DeIobN KOIHTOMOKe Da rN OWTeTaT OuHTe,
- Повсян на ушinte ako He ce Hocn HnkakBa aKyctUnHa 3aWtNTa.
3. ΠΟ3HABAHbE HA MAUINHATA
3.1 ONIC N YNOTPEBA HA MAUHATA
ObaMaunHa npeTCTaByBa rpaHapcKa onpema N KOHKpeTHo npehocen DyaBau 3a rpaHnHa 6aTePnn.
TenepeaHNO, MaunHaTa ce coCTOn Od MOTOp KOJUTo pa6OTn Ha BpTeHN 3a Da npOn3BeDe IpOTOK Ha BO3DyX CO TOLema MOKHOCT.
3.1.1 Ппебидауnotpe6a
Obaa MaunHa e npoeKtnpaHa n KOHCTpynpaHa 3a:
-премecтува bene и Натусява bene co NOMOШ Ha Дуваот, Ha Лостови, Трева, OCTаTOци OД Косеные CO paЗИЧа TEЖИHA И СрEDн Гolemн.
3.1.2 HecooDbetHa ynoTpe6a
Cekoja pa3nHa ynoTpe6a oJ, ropeHaeDeHaTa MoKe da 6nde Opancha n/nn Da npedn3BnKa WTeTHa IInca nnnpdmTe. Ce otPpIaa Tprn HnepaBnHa ynoTpe6a (kako npimep, Ho He ce orpaHcyBa Ha cJeDHOTo):
BwMyKyBaHBe HnCobpaHBe Ha 3anaJINBn PON3BOOn Hn KOn PpeTCTaByBaat Pn3NK Od EKcnIIO3NJa, BpeJarJIeH Hn MaTePnJaHn WTo Ropat 6e3 nnAmeH, n3raceHn CnIrapn, CTaKJIeHN NapHbA, OCTpN DeJIOBN, MetaJIHN PpeDMETN, KameHbN cE npyro wTO MoKe Da npeTCTaByBa OnaCHOCT 3a 6e36eHOCTa Ha ynpaByBaOT Co MaunHaTa N Ha OCTaHaTNTe,
HacOyBaHBe Ha BO3dyXOT KOH JnUa HJIN KHBOTHN,
BMeTHyBaHBe NpeDMETN BO peWetKaTa 3a BWMyKyBaHBe,
- ynoTpe6a Ha MaunHaTa 6e3 npaBnHNOCTabeHa DOnOpHNHeJIHa ONPeMa KaKO ITO HaIarappon3BOJNTeIOT 3a pa3HnTe HaunHn Ha ynoTpe6a HnHecOOdBETHa ynoTpe6a Ha MaunHaTa,
- ynoTpe6a Ha MaunHata OCTpaHa Ha NOBeKe Lyre.
BAHHO HenpaBnHOTo KOpNCTeHe Ha MaunHaTa ja NOnuStyBa rapaHcNjaTa n ro OcNo6OyBa PpOn3BOJNTeIOT oCekAHa BA ODROBOPHOCT, N celaT a ODROBOPHOCT 3a WtETa NII NOBpeHa Ha KOpNCHNKOT NII TpeTn INuca, ja Chocn KopncHKnOT.
3.1.3 TnHaKOpncnK
ObaMaHHa e HameHeTa da ja KOpNCtAT KOpncnU, T.e. OepaTopn KOnuTo He ce npocecnoHaJIu. HameHeTa e 3a HenpocecnoHaJHa ynotpe6a.
3.2 O3HAHn 3A BE3BEdHOCT
Ha maunha ta mca cmboln (cI.2).HbHaTa yhkzja e da ro notceT aKOpncnKOT Ha HeoXoHDocTa oD BHMaTeJIHa ynotpe6a.
3NaueHeHa CnM6OJIHTe:

PNEyPENEYBAHBe! ONACHOCT!Obaa MaunHa MOHe da 6nDe onaCha 3a Bacnn 3a dpyrnte DOKOLHy He ce KopncTn npabnHo.
PNEyPENyBAHe! PpeJa ja KopnCTnte Obaa MaunHa, npouHajTe ro yNaTcBTo 3a yNoTpe6a.

KopncTeTe 3aWntTa 3a yuHnTe nOHTe.

Ha He Ce H3IOHyBa Ha DOxD (HIN HA BIAKHOCT).
ONACHOCT OJ NCΦPJIHA!
BHHMaBaJTe Ha MoKHN
HcΦpIyBaHa Ha OCTaTOCu
PpeIN3BnKaHn OJ IpOTOKOT
Ha BO3dYx: WTo MOKaT Da
PpeIN3BnKa CepNo3HN
NOBpeHn Ha IInuA NIn
OwTeTyBaHBe Ha PpeDMeTn.
ONACHOCT OI NCΦPJIHbA!
CnTe Iuca mIeHnHbTaTpeBa da 6nDat HajMaIky15 MeTpNi POnaJIeky DoJeKa pa60Tu MaunHaTa!
OnacHocT oJ ocaKaTuBaHBe! Cekoraaw dpKHeTe rna paute Te nOdaJeKy od peWeTKaTa 3a BLe3 Ha BO3dYxOT. PoTopOT MOKe da npedn3BnKa HecpeKnI NOBpeN.

OnachocT od cepno3Hn NOBpeH! DpKeTe ja IaneaBaTa o6NeKa NoadJeHy od peWetKaTa 3a BHe3 Ha BO3dyXOT 6nDejKn MoKe Da ce 3aKaCh 3a pOTOpT n da npEHN3BnKa cepno3Hn NOBpeH.
OnachocT od cepno3HN
NoBpeN! DpKHe ja Kocata
NoJaJIeKy od peWetKaTa 3a
BLe3 Ha BO3dYXOT bNeJKn
MOKe Da ce 3aKaCh 3a potOpOT
n Da npEIN3BnKa cepno3HN
NOBpeN. CooDbETHO pnp6epTe
ja Kocata DOKoJHy e DoJra.
BAHHO CHTe OHTeHn Hn HeuNTnBn 03HaHmopa da ce 3aMeHaT. Hapauajte pe3epBnO3HaKn oD OblaTeH cepBnceH ueHTap.
3.3 ETNIKETA 3A INDEHTNPHAKUNJA HA IPOIN3BOJOT
EtkeTaTa 3a ndeHTnФkaunja Ha npOn3BOoT rncDpKn cIeHnTe noaTou (cI.1):
1.Иme n aDpeca Ha npOn3BODnTeJOT
2. TnHa MaunHa
3. HnBO Ha akyCTuHa MOKHOCT
4. O3haka 3a ycorJIaceHOCT
5. HanoH hanojyBaHe
6. TOnHa Ha npOu3BOdCTBO
7. Cepinckbproj
8. KoI Ha npOn3BOI
9. Klaça II; Dual n3olaúnaja
3aHnseTn noaTOuHTe 3a NDeHTnKauJa 3a MaHHaTa Ha COoDBeTHnTe MeCTa Ha daHeHaTa etHKeta OD BHaTpeHHaTa CTpaHa Ha KaNaKOT.
BAHHO HabeTe rH noaTouNTe Od etnKeTata 3a ndentnKauJa Ha npOn3BODOT cekoraaw Kora Ke ro KOHTaKtnpaTe OblaCTehNt cepBnCeH ueHTap.
BAHHO IprimeHa N3jabata 3a COo6pa3HocT Ce Haora Ha IocNeHaTa CTpaHua BO Oba yNaTCTBO.
3.4 TJIABHIN DEJIOBN
MaunHaTa Ce COCTOn Od CJIeHNTe rnaBn DeIOBN KOnWTO COoDBeTCTByBaat Ha CJIeHNTe FyHKcNn (Cn.1):
A. EdnHnca CO MOTOPOT: OBO3MOxYBa DnHexHe Ha potOpOT.
B. UeBHa Ha DyaVOT: eIeMeHT npeDnDEH 3a H3JIe3 Ha IPOTOKOT Ha BO3dYX.
C. PauHa: OBO3MOxHyBa ynpaByBaHBe Ha MaunHaTa.
D. Nojac (dohokny e doctaneh): onpema ITO CE COCTOJ OJ PIIaTHEHn peMeH ITO MHyBaAT Ha pameHnIte, NOMaIa Da Ce H3dPKN TeKINHaTa Ha MaunHaT Bo TEkOT Ha pa6oTata.
E. Touka 3a 3akaulybahe Ha nojacot (dOKoIky e dOCTanHa): Tyka ce 3aKaulyBa NojacOT 3a MaunHata.
F. Batepnja (donoHnTeHa onpema no n36op, nacyc 14.1): ypeJ wTo o6e36eDyBa eHeprJa 3a cTapTyBaHe Ha ypeoT; HeROBtE CneuKauuN i npaBnla 3a KOpNCTeHe ce OnnsaHN BO CneuJaHnOT pnpaHnK.
G. Полнач за бateрида (дононтелна onpema по ИЗбор, nacyc 14.2): уретшто се Корисни за полесье на akумлалотор; Herobinte сецифкади и павILA за корисни ce опшани BO сециjalнnot npupaЧИК. Достанс le mo'delи на полесни за DBa Akумлалotopa: G1 (3a 6p30 полесье на akумлалot); G2 (3a CTahdapdno полесье на akумлалot);
H. Paneu 3a 6aTepnja (doaTOK Ha 6apaHe, nac.14.3):ypeB BO KOJ ce CTabaat 6aTepnnte.
I. Ka6eJ 3a noBp3yBaHe: Ka6eJ UTO Ce KOpHCTn 3a NOBp3yBaHe Ha MaunHaTc o paHeOt 3a 6aTepeJa.
J.Cmmyatop Ha 6aTepnja (doataKnHa 6apaHe, nac.14.4): ypeI wTO, KORA e BMETHaT BO KyKNiTTo HAmaunHaTa, OBO3MOkyBa yNtpe6aHa paHeOT 3a 6aTepnja.
4. MOHTNPAHBe
BAHHO Be36eHochnTe Mepnu Tpe6a Da rncIeIte ce daene Hb norg.2.Ctporo npndpkybaJte cdo Tne ynaTCTBa 3a da n36erHeTe cepno3Hn pn3nui nn HecepEn.
3a noTpe6nte Ha cKlaIpaHbe n TpaHCnOpT, OndepEni KOMNoHEHTn Ha MaunHaTa He Ce
MOHTnpaHn BO fo6pnKaT, TyKy Tpe6a da CE MOHTnpaaT NO HeJ3HHOT OtnaKyBaHe. CneJeTe r yNaTcTBaT noDony.
PacnayBaBeTo u cenaTa MOHTaHa Tpe6a Da ce N3BpwaT Ha cBpCTa N paMa HOBpuHa CO DOBOJHO IpocTOp 3a NOMeCTyBaHe Ha MaunHata N Ha ambaJHATA KopNCteJKN Cekoraaw CooBETHu aIaN. He ja KopNCteTe MaunHata nped da rN npOuHTate yNaTcTBaTa HabedeHN BO denot ,MOHTPAHbE".
4.1 DELIOBN 3A MOHTIPAHBe
NakyBaHbTo rncOdpKn DeIOBnTe 3a MOHTaHa.
4.1.1 PacnayBahe
- OTbOpTe ro naKyBaHbeto BHIMaTeJHo 3a Da He rnpacpplnte deJIOBHTe.
2.Почитajte ja дokум entaunjaTa BO KytnjaTa Kaide ce HabeHEn OBne yNaTCTBa.
3.ИЗваде Te ng OY KyTuJaTa CnTe DeJIOBи WTO He CE MOHTnpaHn.
4.ИЗbaDéTe ja MaùnHaTa OД КуТиJaTa. - ΦρπeTe rH KyTjata n am6aIaKaTa corlacho loKaJIHnTe oDpeδn.
IpeJda 3anoyheTe co MOHTHpaIbe, yBepTe ce deHa 6aTepujata He e Ha CBOeTo MeCTo.
4.2 MOHTNPAHbE/DEMOHNTPAHbE HAUEBHATAHA dyBAyOT
- Nopamhe ro ypeoT 3a 3aKnyyBaHBe (Cn.3.A) co deLoT (Cn. 3.B) Ha oTBopoT 3a n3ne3 Ha BO3dyxot (Cn. 3.C).
2.ПиТиСнeTe ja ueBkata(Cn.3.D)doJa He ce npuBpCTn CO nOroHcKaTa eDnHnua n He KlnKHe KOra Ke Ce BMeTHe Ha CBOeTO MecTo.
-3aJa ja n3BaJnte ueBkata, npHTNCHeTe ro konyeto (Cn. 3.A) n n3Bleueye ta.
BAHHO 3anpeTe ja MaunHaTa n 13BaTe ja 6aTepnjata (nacyc 7.2.2) npu ceKoe BaHeBe Ha ueKaTa Ha dyBaOT.
4.3 CHJONYBAHbE HA TOyHATA 3A 3AHauYBaHbE HA NOJACOT (DOHOJIHy E DOCTANHA)
- Ctabete ja ToUKaTa 3a 3aKaUyBaHbe Ha NojacOT BO NcnaKHaTHHa Ta Ha JleBaTa ctpaHa (Cn. 4.A) nIn Ha DecHaTa ctpaHa (Cn. 4.C) Ha MaunHaTa.
BAHHO NocTabe je TaOkaTa 3a 3aKaUyBaHe Ha IeBaTa CtpaHa aKO 3a BpeMe Ha pa6oTata ja DpKHTe MaunHaTa CO DeChTa paka, HnHa DeChTa CTpaHa aKO 3a BpeMe Ha pa6oTata ja DpKHTe MaunHaTa CO JeBaTa paka.
2.Пицьрсте ja tochata 3a 3aKaUyBaHHe Ha nojacot co daJeHaTa 3aBPTka (Cn.4.B)
4.4 NOCTABYBAHbE HA PAHEcOT 3A BATEPNJA (DOKOLHy E DOCTANEH)
Paheot 3a 6aTepejna ce nCnpaYBa cKlOneH (CJ.1.H) mOHe da ce n3BaAno od dpKaOT Ha peMeHOT (CJ.5) n Da ce Hocn BO paKa.
3a da ro n3BaIte paHeoT oD peMeHOT, npHTnCHeTe Ha DBeTe rOpHKnOnHbA (Cn. 5.A).
IperpaTe 3a 6aTepnjata ce haoraat odDbete cTpaHn Ha paHeoT (CJ.6)
Obne pa6oTn MoKe Da rH hajTeHa deChata cTpaHa Ha paHeuOT:
- npnKnyHnua 3a Ka6eI (Cn. 7.A)
- n36bpa7 3a 6aTepejna (Cn. 7.B)
- eHa USB nopTa 3a noJIHe He Ha pyrHypeI (Ha np. Mo6nHn TenefoHn) (Cn. 7.C)
3a da rnpuBpCTHTe Ka6JIHTe,da He BnCat, HMa JIe6OBN OJ DBETe CTPaHN I OJ3aDN, BO KOH MoKe Da Ce BMeTHe Ka6EJOT 3a CTPyja.
5. KOMAHДИ 3A KOHTPOJI
5.1 B6E6EДHOCHO HONU (AKTINBINAe / DEAKTNBINAe)
PnTncHeTo ro Oba konue (CJ. 8.A) 3a da ro aKTHBnpuTe n DeaKTHBnpuTe eKeKtpnHOTo KOLO Ha MaunHaTa; Ke ce BKNyUH COOdBetHaTa JEd cnjaJIuca (CJ. 8.C).

Co npHTnckHaBe Ha KOnyTe 3a 6p3Ha (C1.8.B) ce nocTaByBa MOHOCtHa BO3dyXOT N Ce BkIyuYbaat 3-Te COoDbETn LED cnJaNc (C1.8.D).Ako pa6oTaTa e pKeHHaT (6e3 NCKLyUyBaHe Ha MaunHaT),PnIOBTOpHO BKlyuYBaHBe, MaunHaT Ke NoChe Co npTeXODHo nOCTaBeHaT 6p3Ha.
JIED cnjajnnte ce ncknyybaaT: eJektpnHOTOKoI0e ueLOCHO De3aKTHBnpaHo.
BAHHO Pn npemecTyBaHbe, HNKORAHe ro CTaBajTe npCTOT Ha KOnyeTo 3a Da He DoJde DO HeHaJejHo CTapTyBaHBe Ha MaunHaTa.

IkoHaTa 3a ,PpeDynpedyBaHbe" (Cn.8.E) ce BKNUyBA Bo cnyaj Ha deΦeKT Ha MaunHaTa (BnTe ja TabelaT a 3a peuabaHe Ha npo6lemn, nac.13).
5.2 KOMAHDA HA PAHATA 3A 3A6P3YBAHbE
Co pakyBaHe ha paKaTa 3a 3a6p3yBaHe (Cn. 8.F) OBO3MOxHyBa CTapTyBaHe / 3aHnpaHe Ha MaunHaTn HcTObpeMeHO aKTHBnpaHe / DeaKTbBnpaHe Ha BeHTnlaTopoT.
3a napehe:
- npntncheTe ja paKaTa 3a 3a6p3yBaHe.
MaunHaTa 3aCTaHyBa aBTOMaTcKn Co nyTaHe Ha paKaTa 3a 3a6p3yBaHbe.
6. YNOTPEBA HA MAUNHATA
BAHHO Be36eHOnCHte MepKn ITO Tpe6a Da rncnTe ce daen H BO nOr.2.Ctporo npdpkyBajTe cdo Tne ynaTCTBa 3a da N36erHeTe cepno3HN pn3nui nn Hecepkn.
6.1 PPEJIIMMHAPHN OEPALUN
Ipei Da 3anoyheTe co pa6oTa, HeonxOndo e da cnpoBeTe cepjia KOHTpOIn n Oepaunn 3a da o6e36eHte DeKa pa6oTaTa Ke ce ODBNBA Ha ePhiKacEH aHH N CO MaKcImaJIHa 6e36eHocT.
6.1.1 KOnTpOJa Ha 6aTePnjata
MaunHaTa ce DoctaByBa 6e3 6aTepuja.
Ha6abete 6aTepnja co COOdbTeH KanaunTe3a pa6oTHnTE 3aDaun HnpBO HanoJHeTe ja dokpaj cneJeKn rN yNaTcTBata wTo ce codPxA t BO yNaTcTBOTo 3a 6aTepnjata. CncoKOT Ha 6aTePN KOuTto Ce COoDbETn Da ce KopncTat Co OBaa MaunHa ce HaoRa BO Ta6eIata,TexHnUKN POnaTOuN".
- Ppei cekoja ynoTpe6a: - npOBepeTe ja cocto6bTa Ha HanoJIHeTOcT Ha aKymlaTOPOT cIeJeJKN Hn HAcOKnTe DaDeHn BO yNaTCTBOTO 3a aKymlaTOPOT.
6.1.2 Ynotpe6aHa nojacot (doKoJHy e doCTaneH)
Nojacot Mopa da ce CTabn nped da ce 3aKaun MaunHata 3a COOBeTHNOT npuBpcTyBaC (Cn.4.A,4.C) npemeHnte Tpe6a da ce perylnpaat BO ODHoc Ha BncnHaTa n rpa6aTa Ha onepaTopoT.
Pemehot (Cn. 9.A) Mopa da nominyba npeky dechoto nHn lebOTO pamo Ida OND KOH cTpaHaTa.
HnHoraW He Hocete noJac npeny TeIOTO. NocTabete ro npeny eHOTO pAMo 3a da MOHe 6p30 da ja TaPrHe MaunHata NoJaEny Od BaWeTo TENO BO Cnyaj Ha OnachOCT.
6.1.3 Ynotpe6a Ha paheoT (doKoIky e doCTaneH)
- Bmethe ja 6aTepnjata BO eHa oN nperpapnte Ha paHeoT (Cn. 6) n TypHeTe ja 3a da BJe3e DoKpaj, ce DoNeKa He CnyuHete KInkHyBaHe uTO CNrHaHn3npa DeKa 6aTepnjata ce fKnCnpaIa BO nperpapTa, a Notoa npOBepTe ro eEKeTpnuHnOT KOHT;
- NOBp3eTe ro Ka6eIot co paHeuOT BO COoDBetHaTa npKluyHnua (Cn. 7.A) n potpaTe ro ce doNeKa He cLyshHeTe KInKHyBaHe wTO CNHaJn3npa DeKa Ka6eIot ce fNkCnpaI Bo npKluyHncaTa, a noToa npOBepTe Ro eJeKTPNHNO T KOHTaKT;
- noodeceTe ro pemeHOT n 3aKoNuaJTe ro nojacot HanpeD (Cn.10).
6.2 BEE3BEOHCHNOHTPOJIN
CnpoBeTe rN cIeHNrte 6e36eHocn HcHTpOIn nPPOBepTe daJI np3yJrTaTHe COoDBetCTByBaAT co DaJeHOTo BO Ta6eJaTa.
Cehoraw npOBepyBajTe r6e36edHocHTe HOHTpOu nped pa6ota.
6.2.1 OnwTa KOHTpOJa
2.6 BESCHERMING VAN DE OMGEVING
7.4 MOEREN EN SCHROEVEN VOOR BEVESTIGING
2.4 VEDLIKEHOLD, LAGRING
12. VEDLIKEHOLDSTABELL
6.1 CZYNNOSCI WSTEPNE
CpeiCTBa HnBnDaJbHoJ 3aunTbI (CN3)
- HadeHBTe noDxOJaUO OeJdy, npOuyIO paOuyIO oByBb Ha HeCKoJIb3aIeN NOOUIBE N dInHHbIe 6pIOKn. He 3ayncKaIte MaunHy 6ocnKOM nIN B OTKpbITbIX caHdAIInx. HadeBaIte HayuHNKn IJIy3aIHTbl OPraHOB Clyxa, IpOTNBOBnOpaauOHhbIe nepaATKn, 3aIHTbIe OUY, PbJIe3aIHTHyIO MaCKy.
2.Использоване 3auntbI OprанOB clyxa MoжET CHN3NTb CnOCO6HocTb CbluataB npedynpexKdEHHaJIbI. BydbTe Oc06BHNMaTeJIbHbIK TOMy,чTO npOxCxOДТ BOKpyr pa6oey 3OHbl. - He haideBaIte 7apbbl, xalaTbI, KOJIbe, 6pacIeTbI, pa3BeBaIOUcOra ODeJy, a TaKHe ODeJy CO UHypKaMn I rAclTyKn, a TaKHe IIO6bIe BInCayne NIIu ShIpOKHe akCECCyApbl, KOTOpbIE MOrYT 3aCTPbB MaunHe NII B npEdMeTaX n MaTePnaJax, HaxODaIUXcR Ha pa6Ooyem MeCTe.
- Cnéinte 3a Tem, yTo6bI BOJOCbI HAXOДИNcB Ha paCCTOJHn OT BO3dYxO3a6OpHoN
peWETK, NOTOMy YTO OHN MOryT 3aCTpA Tb B KpbIbYaTKe N Bbl3BaTb Cepbe3HbIe TpaBMBI. DOLJIHbIM O6pa3OM CO6epnTe DInHHbIe BOJOCbl.
Pa6oyn yuaCTOK / MaunHa
- BнмATEьHo OCMOTpnte BeCb pa6OuH yUacTOK n BpyHyIO, C NOMOuI IO rpa6eJIb IIN MeTJIb, pa36epNTe OTXoDbI N y6epNTe BCE, YTO MoJKeT 6bITb OT6poUHeO MaunHOH.
- EcIn 3eMJIyIbIbHaJ, peKOMeHdyETcCJIeRka CMOHTb NOBepXHOCTb.
3.Bo n36eJHHe noJapHOn ONaCHOCTn, He OCTaBnIte MaunHy C rOpAum DnraTeJeM CpeDn IInCTbeB Hn CyXoTpaBbl.
2.3 BO BPEMRA PABOTbl
Pa6oyn yuaCTOK
- He nCnoJb3yIte MaShInHy BO B3PbIBOONaCHOcpeDe, NObJIIN3OCTn OT rOpUChX HnIDKoCTe, Ra3a IIn PbIIn. 3JeKtpoO6OpyDoBaHne ReHepnpyeT NCKpbI, KOTOpblE MOrTy pNBeCTn K Bo3rOpaHnIO PbIIn IIn NapOB.
- Pa6oTaIe ToIbKO npn DHeBHom CBete NII npH XOPOWeM NCHyCCTBeHHOM OCBeUeHIn, B YcIOBnX XOPOWe BNDIMOCTH.
- Ha pa6ooyem yuacThe He doJIHHO 6bITb B3pOcIbIX IIOJei, DeTei N JHNBOTbIX. Heo6xOJMo, YTO6bl DpyroB B3pOcIbI YeJIOBeK CMOTpeI 3a DeTbMn. DeTI He doJIHHbI INrpaTb C O6OpyIDOBaHNEM.
- Пюверьт, чTo Дугп
Людн НховяТсЯ на paСТоHиN,
пО мeньшЕ Меpe, 15 MeТpoВ
OT радуca paБOTы MaSHиHbl.
5.ИЗбэрэнpeрабовиHa MOKроТраВe,пд Дождем Или
ecn6n3ntcraP03a,oco6eHNO ecn BO3MOJHbIMOJIHN.
6.ИзбeraиTe, no BO3MOJHOCHTn,pa6OtaTb Ha MOKpoI nII N CKOJIb3KoI NOUBe, nII Na IIO6Oi KpyToi nII HEPOBHOI NOBepXHOCTN,He OBeCneuBaIOUeYcTOUHBOCTN ONEpApota BO BpeMpa6Otbl.
7. He noDBepraTe MaunHy BO3dIeCTBnIO DOJDA HIN BlaRn. Boa, npOnHkaIOUaB BVHTpb O6OpyIDOBaHn, NOBbIuaET pNCK 3JIeKTPnuecKO rO yDapa.
8.Оврацайт e ocoboe BнIMанe Ha HepOBHocTи NOUbI (KouchN, KaHaBbl),Ha yKIOH,Ha CkpbITbIe ONaCHOCTHи HAJIuYne BO3MOxHbIX IpeЯTCTBn, KOTOpbIe MOryT OrpaHnHTb BnDnMoCTb.
9.Собл�дай Te octopoхнocь,pa6OTaЯ ряdom c obpbIBaMn,KaHaBaMn n bepeamN BODOEMOB.
10. KOrda Bbl pa6oTaTe Ha MaShnHe PraDom C npoe3JKe YacTbIO, yuHTbIBaIte NOTeHuaJIbHOe npCytCTBne TpaHCnOpTHbIX CpeIcTB.
11. Bcerda yuHTbIbaIte HnpaBLeHne Betpa n HNKoIda He pa6OtaIte npOTNB Betpa.
12. He nCnoJb3yIte MaunHy N06n3OCTN OT OTHpbITbIX OKOH.
13.He nCnoJIb3yIte MaunHy Ha NOBepxHOCTH C DOpOJHbIM NOKpbITHeM HIN TpaBHeM BO N36eKaHne TORO, YTO6bl NODHrTbIM MaTePnaJI He HaHeC TpaBMbl.
14.ИЗбerte скОплени
ПОДНЯТOrO C 3eMЛn MaTeрнaja
В 3ОHe BbI6pOca, NOСКоЛьКу
OH мОжET пeРЯТCTBOВaTb
ПраВиЛьHOMy BbIXOДу
HapyЖу И Bbl3bIBaTb OTСКОн
MaTePnajaYepe3OTBepCTnaДЯBCaCbIBaHnI.
IpaBnla nobedeHna BO BpeMa pa60TbI
1.BoBpempa60TbIB KaueCTBe BO3dYxOyBKN Heo6XoNMo Bcerda npOHy UdepHnBaTb MaunHy npaBOy pyKoHa BepxHei pyKoTke.
2.ИЗбERA Te COprNKOCHOBEHnA TeLa C TaKHMn 3a3eMJIeHHbIMN NOBepxHOCTaMn, KaK Tpy6bl,paINaTOpbl, KxOHHbIE PINTbI, XOJODINbHNKn. Pnck 3JIeKTPnueCKoro ydapa NOBblaaeTcR npi COprNKOCHOBEHnN TeJa C 3a3eMJIeHNEm.
3. Примпуctоиньoe
И почhoe поожене, И
соблдаite OCTOPOXHOCtB.
4. CoxpaHnTe paBHOBeCne.
5.И36eraTe cHbIX yIapOB O NOCTOpOHHe IpeMeTbI N yHTbIBaITe BepoTHOCTb OT6paCbIBaHN MaTePnAJa N PbIIN P0D BO3DeIcTBnEM NOTOKa BO3dYxa.
6. He ha npabIaTe ctpyIO B03dyXa Ha IIODeI NII JINBOTbIX.
7. Korda Maunha
Применьетсь в Качев
ВОздухови, Heобхонmo
разотаь очени OCTOPОжно,
Чтобл собанные OTXды
Или понтыя пьль He
Наhecл Травл Людам Или
ЖивOTьIM, a TaКже He Hahecл
Ушерба сбстваности.
8. HnKoIa He paOtaTe 6eROM, TOnbKO WaROM.
9. Bcerda depxnte liuO, pykn n TeLo Ha pacctoHn OT BO3dyx03a6OpHoN peWeTKn I OTBepCTnBblnycka BO3dyxa, a BO BpeM 3ayncHa N cNoIb3OBaHn MaunHbI He 3a6nBaITe KaHaJIbI, PNO KOTOpblm npoxoHT Bo3dyX.
- Bpaaounecyaactn Moryt HaheCTN cepbe3HbIe TpaBMbl, NOrTomy H36eRaTe KOHTaKTa C 3TmN YaCTaMn, KOrda OHn HaxoJrTCB DBNKeHN.
Bcnyae NOLOMOH nIb aBapn BO Bpempa60tbl He3aMeJInTeJIbHO BbIKJIIOUHTb DBnraTeJIb N y6paTb MaunHy, YTO6bl OHa He HaHeCla eIe 6OJIbShn yIep6; ecn npOn3oWeJI HechactHbI clyuah N OEPaTOP IIN TpeTbn INuca NoLyuNN TpaBMbl, He3aMeJInTeJIbHO PnHNrTb Mepbl NO NOMOUs NocTpadaBShm, HAn6OJeE NOxODJaIeB KOHKpeTHoN CNTyaUHN, N ObpaTnTbcB B MeDnCnHCKoe UypeJXdEHe N IaHEOBxOJIMoro leueHna. TzatelbHo ydaJIte MaTePnaI, KOTOpBI MoKeT HaHeCTN yIep6 IIN TpaBMbl JIOJAM N JKNBOTHBIM, KOTOpBle MOryTe erO He 3aMeTnTb. - pOdoJHNTeIbHoe BO3dEInCTBHe BV6paunn MOKeT HaHeCTn yUep6 HepBHO-CocyndcToI CNCTeMe (3TN COCTOHNr I3BeCTHbI KaK "CnHDPom PeHNO" nII "6eIoN pyKn"), OOCbeHNO y IIODei, CTpadaIOuXn pacCTpoINCTBOM KPOBOo6paUeHn. CmPTOMbl MOrYT npoRbIaTbcra Ha pyKaX, 3aPAnCTbAx n NaJIbCuax B BVde NOTepn YyBCTBHTeJIbHOCTn, OHemEHn, 3yda, 60JI, 6IeDHOCTn N I3MeHENr CTpykTpybl KOxN. 3TN CmPTOMbl MOrYT ycNlHTbcra IOd BO3dEInCTBHeM Hn3KOJ TempePaTypbI OKpykaIOUeI Cpebl n/nil CnIshKom CnJIbHOrO CJHMaHry pyKoYtOK. Ppr NOABLeHHn CmPTOMOB CJIeDyET CHn3HTb BpEmr NCNoJIb3OBAHn MaShINbI N O6paTITbCSK Bpauy.
OrpaHnueHnB npImeHnN
- HeIb3Я nO3BOJrTb pa60TaTb C MaUHOn JIOJrM, KOTOpbIe HcB COCToHn KpeNko yIepKInBaTb ee DBymrykamn I/IIn HaxOJNTbcra B INoIooKeHn yCToHNVBOrO paBHOBeCnBa BVpeMra pa60Tbl.
- HnKoIa He noJIb3ObaTbcra MaunHO C NOBpeJdeHHbIMN, OTCyTCTBYIOUIMN IIN He npabInbHo paCNOJIOKeHHbIMN 3aHTbIMN pncnOC6JeHHaMn.
- HnKoIa He nCnoJIb3yIte MaunHy, ecn He yCTaHOBJeHbI BCE dONOHHTeJIbHbIe npncnOC6JeHn, PpeDycmOTpeHHbIe IJa DaHHoro pnpMeHEnra.
4.He OTHJIIOUaHTe,He BbIKIIOUaHTe,He CHIMaHTe H He pa36npaHTe HMeIOuNEcA 3aUNTHbIE yCTPOHCTBa/ MNKPOBbIKIIOUaTeJI. - He nCloIb3yIte 3JIeKTPoO6OpUdoBaHne, ecIN BbIKJIIOuYaTeJIb He B COCTOHN IpaBnIbHO BKIOUYtB INN BbIKJIIOUHTb eRO. 3JIeKTPoO6OpUdoBaHne, KOToOpoe HeJIb3AaNyCTNTb PnI NOMOUI BbIKJIIOUaTeJIa, AIBJeTcR ONaChbIM HHyJdaETcR BpeMOHTe.
- He noDBepraTe MaunHy Upe3MepHbIM Harpy3kam N He nCnoJb3yIte MaJIeHbKyIO MaunHy IJa BbINOJIHeHnRA TjKeJIoPa6Otbl; NCNoJb3OBaHne NOdXoJaueMaunHbI CHNkaET PnCK N NOBbIaet KaueCTBO pa6Otbl.
2.4 TEXHnueECHOE OBCJIyJHKINBAHNE, XPAHEHNE
PerylaepHoTeXnueckoe 6cnyKbAHne n npaBnIbHoe XpaHHeYBIAOTc
3aIorom 6e30nacHOCTM MaHbI N PdepKaHna ee 3KcNlyaTaunOHbIX KaueCTB.
TexHnuechoe o6cIyJHbAHne
HnB Koem clyuae He
HCNoJIb3OBAt b MaunHy
C N3HOCHBWHMNCa NN
NOBpeJdeHHbIMN YaCTaMM.
IOBpeJdeHHbIe N
N3HOCHBWHIEcA DeTaJIb BCERda
Heo6XODIMO 3aMeHЯTb, OHN
He NOJaJIeKaT peMOHTy.
OuHCTKa nTexHnueeCKoe 06ClyKnBaHne He OJHKhbl BbINOJIHaTbCra DeTbMn 6e3 npncmOTpa.
3HaueHn yPoBn IyMa
N Bn6paun, yKa3aHHbIe B
HactoJem pyKOBoDCTBe,
YBIAOTc MaKcHMaJIbHbIMn
pa6OuHM 3HaueHnA
MaHNbl. Heo6xOdmo npHnTb
PPOHJaKTtueckne MepbI
IJa YCTpaHEnr BO3MOJHO
Uep6a, BbI3BaHHoro BbICOKM
yPoBHeM 7yMa n Bn6paCNoHHbIMn
Harpy3KaMn; NcNoIb3OBaTb
MaINHy Ha NOCToRHHo CHOpOCTn,
KpeNKo DEpKaTbCS 3a pyKoTky C
HaJeKaSei CNIOJb3OBaTb
MaINHy B MNHmAlbHOM
Heo6xOdHmOM peKlme dJa
BblONHeHn pa60Tb, HAdeBaTb
IpOTNbOwymHbIe HayShnKn,
DeJaTb YaactbIe i HaJeKaUne
PepepbIBb BO BpeM pa60TbI.
XpaHeHne
Bo Bpem TaHcnpTnpoBKn aKHyMylrTOPOB CLeIe NTe 3a TEM, YTObI KOHTaKTbI He cOpnKaCaJIncb MeJdY CO6oN, n He NcNoJIb3yJTE DnA Hx TpaHCnOPTnpoBKn MetaJIInueckyU Tapy.
2.6 OXPAHA OKPYHJAIOJIEN CPEIbl
OxpaHa OKpykaIOUeI CpeB1 DOJHHa YBJIaTbCBAJHbIM I npHOpHTeTHbIM acNEKTOM pN IOJb3OBaHHMaSHHO, B COOTBeTCTBnC INHTepecmO6UeCTBa I CpeB1, B KOTOPoMbl JKNBEm.
CTapaNTecb He 6ecnOKoHTb OKpykaOuX. HcnoJIb3yIte MaunHy TOJIbKO B pa3ymHOe Bpem (He paHO yTpOM H He N03dHO BeYePOM, KOrDa Bbl MOKeTe NOMEaTb OKpykaOuM).
CTpOro c6bIouaIte MeCTHbIE HOpMbI NO yTHnI3aUHN yNaKOBKn, NOBpeJKeHHbIX qAcTei NII JIO6bIX 3JIeMeHTOB CO 3HaunTEJIbHbIM BInrHHeM Ha OKpykaIOuSyIO Cpey; 3TN OTXoDbI He DOJIKNbIBbIbpaCbIBaTbcra C 6bITOBbIM MycOpOM, a CObnpaTbcra OTdEJIbHO I nepeDaBaTbcRA B CneuaJIbHbIe UeHTpbI c6opa OTxODOB, BblONHIAUcne IH nepepa60TKy.
CTpOro co6IouaIte DeHCTByIOUe Ha MeCTHom yPoBHe npaBnla nOB BbIBO3y OTXoIDOB
Iocne 3aBepseHnA cpoKa CnyKbI MaunHbI He Bbl6paCbBaIte ee C 6bITOBbIM Mycopom, a o6paTNTecb B ceHTp
C6opa OTXODOB B COOTBETCTBnC DeIcTByIOUIM MecTHbIM3aKHOdaTeJIbCTBOM.
He BbI6paCbIBaIte 3JIeKTpOo6OpyIOBaHne BMeCTe C 6bITOBbIMN OTXODAMN. B COOTBeTCT
EbponeckoI npekTboB 2012/19/ EC OTHOCHTelbHO BbIEDeHHoro n3 3KcNlyatau nn 3JeKtpnueckoro n 3JeKTPOHNO O6OpydoBaHnna H ee npimeHenem COrlaCHO npabnilam CTpaHbI 3KcNlyatau, BBBeDEHHOE n3 3KcNlyatau nn 3JeKTPOO6OpydoBaHne DOJHKHO OTnpaBnTbcra Ha nepepaboTKy B COOTBETCTBnC TpeBOBAHNMAH NO OxpaHe OKpykaIOUe CpeDbI OTdJIbHO OT dpyHX OTXODOB. Ecnn 3JeKTPoo6OpydoBaHne Bbl6pacbIBaETcra Ha CBaIKy ININ 3aKaNbIBaETcra B 3EmIO, BpeDNbIE BeSeCTBa MOYr IPOHNKHUTb B CLOI NOZEMhBX BOH INONACTB B NIIeBbIe IPOdykTbI, QTO pNBEdet K HAnecEHNO ysepbBa BaShemy 3DopOBbIO IN XOPOShemy cAmOuyBCTBNIO. DInr POnyehn6 Bolee NoDPo6HO INHΦopMaunn IO nepepa6OTke 3TOTO N3deLNaObpaAsaTeCB ByypeJKeHne, OTBETCTBeHHoe 3a nepepa6OTky OTXODOB, INN K BaShemy DnCTPn6bIoTopy.
IIO 3aBepWeHn CpOHa cLyK6bI 6aTapei oBeCneYte Hx yHnTuXeHne, KOToOpoe He HaHeCet BpeDa OKpyKaIOUeN CpeDe.
BaTapeЯ copeKHT MaTePnaI, ONaChbI IaR BaC N DIA OKpykaHouSeI cpebl. BaTapeIO HeOxOJMo N3BLeUb I OTDeJIbHO CdaTb B ceHTp Nepepa60TKI OTXODOB, KOTOpbI PpINHMaet JInTH-NoHHbIe BaTapeN.

Pa3dJIbHbIc6Op
HCIOJIb30BaHHbIX N3deJIi
N yNAKOBOHybIX MaTePnaJIOB
N03BOJAErpepa6aTbIBaTB
N IOBTOPHO HCIOJIb30BaTb
OJaJIb.IIOBTOphOE
Mb3OBaHHe BTOpUH0
Oa6OtaHHbIX MaTePnaJIOB
TaET YMeHbWHTb 3aRpy3HeHne
KaHOUsE CpeDbI N CHN3NTb
e6HOCTb B IepBnUHOM CbIPbe.
2.7 OCTATOUHbIE PNCHN
HecmOTpHa Bce Co6IIOJeHne BCEx Mep IpeOCTOpOXHOCTN, MOrYT BbIABNTcR HeKOTOpBIE OCTaToUHbE pNcKn. B 3aBnCmOCTN OT TINoLOrH N KOHCTpyKcH N MaunHbIMorYr HMeTb MeCTO CLeDyUoUe NoteHuaJIbHbIe PpeBnDnMbIe pNcKn:
OT6paBbAHne MaTePnaja, KOTOpBIMoKeT HaHeCTN TpaBMY rla3aM;
-Поврждени Слуха, ecn He nCNoIb3yETcHnKaKa aKycTnuecka 3aunTa opraHOB Clyxa.
3. O3HAKOMJIENHE C MAUNHOI
3.1 ONHCAHNE MAHHbI IN PDEYCMOTPEHHOE PNIMHEHNE
HaHnMaHnHa BnAeTc CaIOBbIM
OBOpyIOBaHHeM, a HMeHHO NpTaTHBbIM CaIOBbIM
PiIeCOm C 6aTapeHbIM NITaHHeM.
Maunha coctoHT n3 DnIraTeJIa, KOtOpbI npBODHT B DeiCTBHe KpbIbUaTHy, rHepeHpyIOuYIO NOTOK BO3DyXa C BbICOKO CKOPoCTbIO.
3.1.1 IpeyncmptpeHHoe HcnoIb3ObaHne
3Ta MaunHa pa3pa6oTaHa nH3rOToBHeHa dJa: NepemeueHn HaKOpJIeHn PyTEm CdyBaHn JInCTbeB, TpaBbI dpyrNx OTXoOB, O6laDaIOuNX He60JbWIM BecOM n pa3Mepom.
3.1.2 HenpaBnJIbHoe nCnoJIb3OBAHne
IIO6oe npyroHcNOb3OBAHne,OTINHoe OT BblweynomrHyToro,MOKET CO3daTb ONaCHocTB IN pInuHHb yuepe6 IIOJAM H/INn HmUeCTBy.BxOHTB NOHRTne He npabNlBHO rNCNoJIb3OBAHna(B KaueCTBe npimepa,Ho HE OrpaHnUBaRcB 3TNMI CnyaAMN):
HaKoJIeHne HnC6Op rOpOuHX N B3pIbOONaChbIX MaTePnaIOB, rOpAUX yrLei MATEPnaJa, HaxOJaUeOcR B COCToAHN BecPnAmEHNOro RopENH, He NotTuWeHHbIX CnIapeT, OCKoJIKOB CTeHJa, OCTpOKoHeuHbIX OblOMKOB, MeTaJIInueckNX PpeDMeTOB, KaMHei N DpyHX OTXoDOb, KOTOpBe MOrYt 6bITb ONaCHbIMn DnI ONePaTopaN I DnI OkpyKaIOxN;
- HappaBbTb CtpyIO B03dyXHa HIOeN/INn JINBOThbIX;
3aCobBaTb npdMeTbB BO3dyx03a6OpHyIO peWeTHy;
ICN0JIb3OBaTbMaUNHy6e3PnCnOCo6JIeHNI, CNEuHaJIbHO npeyCMOTpeHHbIX N3rOToBHTeJIeM IЯ pa3IINHOrO npIMHeHnI,IIIn NCNoJIb3OBaTb dpyIne, HENpeyCMOTpeHHbIe pncnOCo6JIeHNI;
- NOIb3OBAHHe MaUNHO HeCKoJIbKIMn OpepaTopaMn.
BAKHHO HeaJIeKaIe ee NcNoIb3OBaHne
MaunHbI BLeueT 3a C6oOyTpAty CnJIbI rapaHTIN H CHNMAET C N3ROTOBNTeJI BcIO OTBETCTBEHHOCtB, BO3JaRa Ha NOLb3OBaTeJI OTBETCTBEHHOCtB 3a N3dePJKN B CnYae NOPuN NmUyeCTBa, NOnUyeHn TpaBM INI HAHeCEHn yUepeBa TpeTbIM NInaM.
3.1.3 Tn noIb3OBaTeJIa
HaMaHnHa npedHa3HaYeHa nIpyoKOro
NoTpe6nte, HnHe npOeCCHOHaIbHOrO npIMHeHn.
Oh npedHa3HaYeHa IIO6HtBckOrO npImHeHn.
3.2 3HAHN B63ONACHOCTN
HaMaHHe HMeIOCT pa3NHyIbe CnMBoJIb (pnc.2).OHN np3BaHbI HaONHHaTb OepaTOpy O Heo6XoIMOCtB BHMaTeJIbHOH IOCTOpOHHO HcNPlyatauIN.
3haueHne CImBOJIOB:

BHIMAHHE! ONACHOCTb!
Ipeed BbInonHeHem MoHTaHa yOCTOBepbTecb TOM, YTO 6atape He BCTABHeA B COOTBETCTBYUoN OTcEh.
4.2 MOHTAH/DEMOTAH TpybI BO3dYXOyBHN
- BbipOBHnIte paCnoJooKeHne 6NoKnpUoJero yctpoiCTBa (Pnc.3.A) C BbICTyNOM (Pnc.3.B) OTBepCTnIa IyBnYcKa BO3dyxa (Pnc.3.C).
- HaHMMTe Ha Tpy6y (Pnc. 3.D) TaK, YTO6bl npHKpeINb eK CNIOBOMy aIperaTy, pNn 3TOM DOJKeH npo3ByuAtb XapaKTEpHbI uEJIuOH, CBNDeTeJIbCTByUOuO 6NoHPOBKe.
-HTo6bI CHrTb Tpy6y,HaKMnTe Ha KHOHky (Pnc.3.A) n BbITAHnTE eE.
BAHXO BbIKNoaayMe MaunHy N Bcerda n3BleKaIte 6atapeo (nyHKT 7.2.2) KaKdbi pa3 npn DeMOHTaKe Tpy6bl Bo3dyXodyBKn.
4.3 MOHTAH TOUHN KEPJIENHNA CNTEMbl NOdBECN (Pn HAJNUH)
- PacnoJIOKHeToHy KpeJIeHnI CNCTEmbl NOBBeCKN B BbICTyPe C JbeBOI CTOpOHbl (pnc. 4.A) nIc c npaBoi CTOpOHbl (pnc. 4.C) MaunHbl.
BAHHO PaonolohnTe ToHy KpenneHnCLeBOI CTOpOHbI,ecnB0 Bpempa6oTbI BblyepKnaBaTe MaunHy npaBoi pyKo,nnC npaBOI CTOpOHbI,ecnB0 Bo Bpempa6oTbIBblyepKnaBaTe MaunHy leBOpyko.
2.3aФнсруTe TOUky KpeJIeHnCnCTeMbI NOBBeCHN NOCTaBJIeEMbIMB KOMJIeKTe BnHTOM (pnc.4.B)
4.4 HOMJIeKTAUPAHcEBOTO DEPHXATEJIAI BATAPEI (PNHANH)
PaHcEbI depKaTeJI bIaTapeINocTabJIeTcB yJKe CO6paHHOM BnDe (pnc.1H), n ero MoKHOOTCOeHNHTb OT KpeJIeHHn DnI pemHe (pnc.5) I nepeHocNTb BpyHyIO.
Длг OTCOeHHeHЯ paHcEBOr
DEpKaTeJIЯ 6aTapeH HaKMITEHa
DBe BepXHne KhoNKn (Pnc.5.A).
IHe3da IJRA 6bTapeI paCNoIaraiOTcra c ObeHX
CTopoH paHcEBOr DEpKaTeJI (Pnc.6)
C npaBoI CTopoHbI paHcEBOr DEpKaTeJI
pacnoLoKHeHcI CJeDyUOuHKe KOMnHOHeHTbl:
pa3bem npoBoda (pnc 7.A)
- nepeknouateIb 6aTapen (pnc.7.B)
USB-pa3bemДЯЗAPAnDpyrNx yCTpOINCTB(HAnpIMeP,MO6nIbHbIX TeJefoHOB)(pnc.7.C)
Bo n36eKaHHe hAInuH He3aKpeIeHHbIX npoBOIOB ppeDyCMOTpeHbI HnPaBIAUcne c o6eHX CTOpOH paHcEBOrO DePkaTeJI N B erO 3aHHeY uactN, Upe3 KOToPbIE MOxHO ppoJoxHTb Ka6eJI NITAHIN.
5. YCTPOICTBA YNPABJIEHNIA
5.1 INPEDOXPAHNTIELbHA HHOHKA (YCTPOIcTBOIOKJIIOUeHnA /OTHIIOUeHnA)
HaKaTHeM 3ToH KHOHN (pnc.8.A) MOxHo BkIIOuHaTb N BbIKIOUaTb 3JIeKTPnueckyU cENb MaUNHbI, npN 3TOM 3aRopaETc4 COOTBeTCTByUoHcNBcTeODnO (pnc.8.C).
PnHaKaTHNa KHOKnky
ckopocn (pnc.8.B) perylnpyeTc
MOuHOCtB BO3dyxa n 3aRopaIOTC
3 COOTBeCTByIOxN CBEToNDoA
(pnc.8.D).Ecn npepBaTb pa60Ty
(He BbIKNoUaMaunHbl),TO npn
BO3O6HOBJIeHN MaUNHa NaHET
pa60Tu Ha 3aDaHHo paHee ckopocn.
CBeToaNoDbI He ropT: 3JIeKtpnuecka Yenb NOHOCbIO OTKIOUcHeHa.

BAHHO BoBpMa nepemueHnHa KONKe BO n36eKaHne CnyaHoro 3anycha.
3HaOK «BHMaHne» (pnc.8.E) 3aRopaETcB Cnycae HeNCnpaBHOCTMaHHbI (O6paauTecbK Ta6nue OnpedeHHeNCnpaBHOCTe, NyHKT 13).
5.2 PbIaR ynpABLeHnA DPOCEJIEM
PnBBeHHe B DeInCTBne pBHa rYnpaBHeHHI DpOcCeHem (Pnc.8.F) 06ecneuHbaeT 3anyck/OctahOBky Maunhbl I OndHObpemHeHBOKIOUaET/OTKIOUaET BEHTINATOP.
6.2 IPOBEPHN B3ONACHOCTN
BbIIOJIHnTe cIeMyUOuNe npOBepKn 6e3oNaChocTn yIOCTOBepbTEcB, YTO pe3yJbTaTbI npOBepOK COOTBeTCTByKOT DaHHbIM, pINBEeHHbIM B Ta6JIne.
IpeKHe yem npnctyntb K pa6ote, Bcerda npOBepaHte 6e30nacHOCTb MaunHbl.
6.2.1 06ua npoBepha
EcnI Tpe6yeTcNcNoJIb3ObaTb MaunHy 6oJee npOIOJIHKeIbHoe BpeM, Yem TOrO N03BOLaRc CTaHApTHa6 batape,TO cyueCTbyOT CJeDyUOuNE BO3MOxHOCtN:
- PnnoobpeTn BTOpyo CTaHdapTHyO 6aTaapeIO, YTO6bl cpa3y 3aMeHNtB pa3pRKeHHyO 6aTaapeIO, He npepbBa rpa60TbI;
- npnoobpeCTn 6aTapeo C 60Jee BbICOKO aBTOHOMHO TIO cpaBHeHIO CO cTaHdApTHo6BaTapee (nyHKT 14.1).
7.2.2 3BleueHne 3apdka6atapei
- HaxMMTe Ha KhoNky 6IOKnpOBKn Ha 6aTaapee B MaunHe (pnc. 13.A) nIn B paHceBOM depKaTeNe (pnc. 14. A) (npn HauuH);
- n3BLeKeNTe 6aTapeIO n3 MaunHbI (pnc. 13.B) nnnn3 paueBOrO depKaTeJIa (pnc. 14.B) (npnHaUNuN);
- BCTaBtBe 6aTapeKo (Pnc. 15.A) B CneuaJIbHbIOTcEK 3apJHOrO yCTpoNCTBa (Pnc. 15.B);
- NOIDCOEINHInTe 3apJHnOe yCTpoNCTBO (Pnc. 15.B) K PO3eTKe, HAnpJKeHne KOToPOI COOTBeTCTByeT YKa3aHHOMy Ha Ta6JIuHKe;
5.BbINOHNTE NOHHyO 3apAky, CJeDyryKa3aHnM, INIOXKeHHbIM B pyKOBOcTBe6atapeN/3apAHOrO yCTpOJCTBa.
PIMMEUHNE BaTapeOBpyoBaHa 3aunToi, KOtopa npenTCTByeT 3apRKe, eCIn TempepaTypa B NOMeueHH He haxOHTcB npeDEx oT Odo+45°C.
PIMMEUHNE MoJHo 3apRJaTb 6aTaPeIb IIO6oe BpEMr, B TOM YnCNe YactNtHo, 6e3 PnCKa NOBpeKdEHH.
7.2.3 NOBTOPHAR yCTAHOBKa 6aTapeN
PocIe 3aBepseHnI 3apAdkn:
- INBILKNTe 6aTapeH N3 COOTBeTCTByIOUeRO OTCeKa B 3aprHOM yCTpOHTe (PNC. 16.A) (He DEpHXnTe ee NOdKNIOUeHHoB TteueHne DInTeJbHOrO BpemEHN nocIe 3aBepWeHra 3aprKn);
2.OTCOEHNHTE3apHHOeYCTPOIcTBO (Pnc.16.B)OT 3neKTPocEtN; - BCTaBbTe 6aTapeo B COOTBeTCTByIOOe THe3Do BMauHHe (pnc.11.A) HnB Ondo n3 THe3D paHcEBOr DepKaTeIg 6aTapei (pnc.6) (npnHaJIuNn)
- BCTaBbTe 6aTapeIO Do KOHua n npOTOnKHnTe Do ⅡeJIHa, YTO6bI 3a6JIoKInpoBaTb H yHKHom NIOJOKeHHN I OBeCneuHT bJeKTPnuEckn KOHTaKT.
7.3 OYNCTHA MAUINHbI IN DBNATEJI
YTO6bI CHN3HTb pNCK NOHapa, OCHUaJIte MaUNHy, IN B YACTHOCTN DBIRATeB,OT OCTaTKOB JNCTbeB,BETOK.
Bcerda ouHnauTe MaunHy nocLe HcnoIb3ObaHna, npotepeB ee uCToB BlaJHO TpAIOHKO, cMOeHHOH HeITpaIbHBIM UCTAAUM CpeDCTBOM.
- ydaIte BcIO ocTabWyIOc BnaIy MmKoN cyXoTpIIOHKO.BlaHHocTb MOKeT BbI3BaTb pIck nopaKeHnA 3JIeKTPNueCKIM TOKOM.
He nCnoIb3yIte arpeccBHBle YnCTaIe CpeIcTBA nn paTbOpTeIN DnOuCTHn PnlaCTMaCCOBbIX uactEn npKoTOK.
He nCnoB3yIe cTpyu BObI u 36eraIte nonaDaHn BObI Ha DBIrateJIb u 3JeKtpnueckne y3JIbI.
Bcerda noDepKnBaIte KpbIbUaTKy B uCTOTE n ydaJIaIe Tne IbIb N OTXoDbI, npOdyBaI ee CkaTbIM Bo3dYxOM uepe3 peWeTkY. He pa36pbI3rNaIte BOy Ha KpbIbUaTKy.
Bo n36eKanHe neperpeBa n nobpeKeHnnaBnraTeIaNb6atapeN Bcerda npOBepaIte,TO BO3dyXo3a6OpHbIe peWetKn dIaN OxlaKeHnYncTbIe NHa HNX HeT OTXoDob.
7.4 HPEENXHBIEI RAIHN BNTbl
CneIte 3a TEM, yTo6bI rAikn IN BInHtB 6bln 3aTAYtB, IJyBepenHOCTN B TOM, YTO MaunHa BCerda 6e3oNaCha npu paBoTe.
- PepnoDnueckn npOBepaTe npOuHocTb 3akpenIeHn pyKoTOK.
8. XPAHEHNE
BAHHO IpaBnla 6e3oNaCHOCTn npxXpaHeHMaHnHbI npBedeHbI BnyKTe 2.4.Ctporo co6JIOdaJe daHHbIe yka3aHbBO n36eKaHne cepBe3HbIX pncOB n ONaCHOCTN.
8.1 XPAHEHNE MAUINHbI
IpeKdE yBpaT MaunHy Ha xpaHHe:
1.ИЗБЛЕКИТЕ 6aTapeIOи COOTBeTCTBlyIQUeRO rHe3ДаиЗapAДNTe ee (nyHKT7.2.2);
2.ДаTe OcTbITb DBIraTeIIO nepeI nepeMeUeHnEM MaUNHbIB KaHOe-JINBO NOMEuEHeN;
3.npoBedeTe OChcTKy (nyHKT 7.3)
4. npoBepbTe, YTO HET OCLa6JIeHHbIX NIN NOBpeJDeHHbIX KOMNoHEnTob.EcNHeO6XoDnMo,3aMeHNTe NOBpeJDeHHbIe KOMNoHEnTbI,a TaKKe 3aTaNHTe OCLa6JIeHHbIE BnHTbI N 60NTbI NIN O6paTInTeCb B aBTOpN3OBaHHbI cepBnCHbI ueHtp;
5. XpaHnTe MaunHy:
-BCYXOM NOMEUeHIN,
-3aunueHHOMOTNORHOBO3dEICTBn
-BHE DOcraeMOCTN DeTei
-yIOCTOBepeBTeCb, yTO Bbl y6paJIIN KIIOuN INHCTpyMeHT, NcNoJIb30BaBUnHeCg DnIyOBCJyKINBAHN.
8.2 XPAHEHNE BATAPEN
BaTapeIdoJHxpaHnTBcB THeN, B npoxlaHOM MeCTe IN NOMEueHEN, rDe OTCyTCTByET BnaXHOCTb.
PIMMEUHNE Bcnyae dnttehoro npocToI 3apJkaIte 6batapeIO pa3B daMeHa, cy06bl npOaNTb cpoK ee cnX6bl.
9. INPEMEUEHNE I TPAHCIOPTNPOBHA
KaHbpa3, KOrda Tpe6yETcnapeaBnHyTb Hn nepeBe3Tu MaunHy:
- BbIKIIOHITe MaunHy (nyHKT 6.5);
-ИЗВЕКЛТЕ 6аТаpeи ИЗ COOTВETCTBYЮУЕ Ге ЗдЯ И зарДNTe ee (nyнт 7.2.2)
--6paTb MaunHy, NcNoIb3yra ToIbKO pyKoRTKn, HnHaPpAblrTaTy6bl TaHIM 06pa3OM, YTO6bl OHn He Meuann.
PnpeB03Ke MaunHbHa aBToTpaHCnOpTe Heo6xoDIMO:
-CHATb Tpy6bl;
-3aKpeNtB MaunHy Pn NOMOu COOTBeTCTByUOxh TPOCOB JIN Ueenei;
- pacnoIIOXHTbe ee TaKIM o6pa3OM, YTO6bI OHa HN Dn KOrO He npeDCTaBnla OnaCHOCTH.
10. CEPBUNCHOE OBCJUYKINBAHNE IN PEMOHT
B 3TOM pyKOBODCTBE H3JIOKeHbI BCE yKa3aHnIA, Heo6xOdImbIe DJIy ynpabJIeHnMaunHOH N DJI npABINbHOro BblNOJIHeHr OCHOBhIX Opeaui TExNHueCKOrO 06cJyKuBaHnRA, KOTOpoe DOJIKeH BblIOJIHaTB NOlb3OBATeJI. DJIy BblIOJIHeHr BCEx DeNCTBNI PO peryIInpOBKe I O6cJyKuBaHnIO, He ONCuAHbIX B 3TOM pyKOBoDCTBe, o6paauTEcB K BaewMy DCsTprb6IoTopuy IN B CneUaJIIN3IPOBaHHbI CepBnCHbI CEHTP, paCNoIraKUmI NODTOBLeHHbIM NepCOHaJIOM IN O6OpYDoBAnHem, Heo6XoDMbIMN DJI npABINbHOro BblIOJIHeHra Pa6ToBtI, NODepKHaHnY yPoBHr 6e3OJaCHOCTn IN BOCCTaHOBLeHnR NEPBOHaJALbHOr COCTOHNMAuHHbI. O9epaun, BblIOJIHeHbIe B HEnOxDoAux X DJI 3TOr CTpykTypax INI HekBaIIuΦnIpOBaHHbIMN IIOdBMI, PnIBOaIT K aHHyIInpOBaHHIO BCEX BVIOB rapaHTn IN CHIMaOT C n3rTOBOTeJI RBCIO OTBETCTBEHHOCTb IN 063aTeJIbCTBa.
ToIbKO aBTOpIN3OBAHhbIE cepBnCHbIE ueHTpbMOryT BbIOJIHrTB rapaHTmHbIMpeMOHT N 06cLyKHBaHne.
- ABTOH3OBAHHbIe cepBnCHbIe CEHTpbI NCIOJIb3yIOT TOJIbKO OpiRHaJIbHbIe 3aIacHbIe YactN. OpiRHaJIbHbIe 3aIacHbIe YactN I DOnOJIHInTeJIbHOe 6OboYDoBaHHe 6blN CNEUaJIbHO pa3pa60TaHbI DIA MaUN H daHHOro Tuna.
- IcnoIb3OBAHHe HeOpnHnHaIbHbIX 3aIacHbIX qacteN IdoJIoHNteJIbHO6OpyIOBaHnHE yTbePKeHO N3roTOBHTeJeM; IcnoIb3OBAHHe HeOpnHnHaIbHbIX 3aIacHbIX qacteN IdoJIoHNteJIbHO6OpyIOBaHn CHNkae TypOBeH 6e3ONaCHOCTMaIIHbI, a TaKHe CNHaMaET C N3rTOBOTeJIa BCE O6ra3aTeJIbCTBa I OTBeTCTBeHHOCTb.
- PekomEnyTeTc pa3 B roD OTB03Nt b MaunHy B aBTOpN3OBAHHbI CepBnCHbI ueHTp dJa 6CbJynBaHnry, yXoDa n npOBepKn NCpnaBHOCTn npEdoxpaHnteNbHbIX yCTpoiCTB.
11. YCIOBnI IAPAHTN
TapaHTnI NOKpbIBaET BCE DeΦeKTHb MaTePnAIOB nN3rOToBLeHn. Nolb3OBaTeIb DOJIKeH 6yDeT CKpyNyIe3HO CNeIOBaTb BCem Yka3aHnM, N3JIOKeHHbIM B PnIOHOHeHNo DOKyMeHTaCm. TapaHTnI He NOKpbIBaET yUep6, Bb3BaHHbI:
HEIOCTaTOUHbIM O3HaKOMJIeHnEM C COPOBODHTeHbHOJ DOKyMeHTaUnei;
HEBHHMaTeJIbHOCTbIO;
- HEnpaBnIbHbIMN INH Hepa3peeHHbIMN 3KcPnyatauueH MOHTaHOM;
- INCNoJIb3OBAHnEM HeOpINHaJIbHbIX 3aIyAcTei;
- IcnoIb3ObaHnEM dOnoJIHnTeIbHbIX npCnOC6JIeHn, He nOCTaBHeHHbIX nIi H YeYTBepKdEHHbIX N3rOToBnTeJem.
TapaHTnTaKHe He pacnpocTpHaReTcHa:
- eCTeCTBeHHbI IN3HOC paCXoIDhbIX MaTePnaJIOB;
- ECTECTBENHHN IN3HOC.
IpaBa nokynataTe 3aunuaet 3aKoHoaTeNbCTBO erO cTpaHbI. HactoUa rapaHTnHaHK He orpaHnYBaET npab nokynataTe, npedyCMOTpeHHbIX 3aHOHaM erO cTpaHbI.
12. ABJIuCA TEXHnueCkOTo OBCJyHXNBAHN
14.2 3APRAHOE YCTPOICTBO
yctpoicBO, npedHa3NaeHHoe dIa 3apn6aTpei: 6bictpoe (pnc. 18.A), ctaHapTHoe (pnc. 18.B).
14.3 PAHUEBbI DEPHXATEJIb IIA BATAPEI
YcTpoIcTBo Dnla pa3MeUeHnA DByx 6aTapei, oBeCneuBaIOUe ee Heo6xoDmOe Dnla pa60tbl MaunHbI 3JIeKTPoNITahHe. OHO OChauEHO npOBOD mIra CoeHNHeHn C MaunHo (pnc.1.I) n nepeKluOyatelem (pnc.7.B),no3BOJALIOUm BbIbnpaTb ONDHy n3 DByx 6aTapei (noLoXeHne «1» n «2») n noLoXeHne «OFF» (BblKJI.).
14.4 3MUYJTOP BATAPEN
3MyIaTOp 6aTapeH: yCTPOiCTBO, yCTaHaBJIbBaEMOE B THe3do MaINHbI I NIO3BOJHOUeE HcNoJIb3OBaTb paHcEBbl DEpKaTeIb DnI 6aTapeH.
INDICE
- VSEOBECNE INFORMACIE 1
- BEZPECNOSTNE POKNY 2
- OBOZNÁMENIE SA SO STROJOM 7
2. BEZPEČNOSTNÉ POKNY
2.1 INŠTRUKTÁŽ
6.4 PRACOVNA CINNOST
Pochas pracovnej cinnosti je potrebné pavne drzat stroj rukou za hornu rukovat (obr. 12).
- Reference to harmonised standards:
EN 60335-1:2012+A15:2021
EN 50636-2-100:2014
EN ISO 12100:2010
EN 62233:2008
ENIEC55014-1:2021
ENIEC 55014-2:2021
EN IEC 63000:2018
UK DECLARATION OF CONFORMITY
(Supply of Machinery (Safety) Regulations 2008, S.I. 2008 No. 1597, Annex II, part A)
- The company: ST. S.p.A.- Via del Laboro, 6-31033 Castelfranco Veneto (TV)- Italy
- Hereby declares under its own responsibility that the machine (function):
Hand-held garden Blower
a) Homologation type: AB 500 Li 48
c) Serial number: 22A**BLO000001 ÷ 99L**BLO999999
d) Engine: battery-operated
- Conforms to UK Regulations:
S.I. 2008/1597 - Supply of Machinery (Safety) Regulations 2008
S.1. 2001/1701 - Schedule 8 - Noise Emission in the Environment by Equipment for use Outdoors Regulations 2001
S.I. 2016/1091 - Electromagnetic Compatibility Regulations 2016
S.I. 2012/3032 - The Restriction of the Use of Certain Hazardous Substances in Electrical and Electronic Equipment Regulations 2012
- Reference to harmonised standards:
EN 60335-1:2012+A15:2021
EN 50636-2-100:2014
EN ISO 12100:2010
EN 62233:2008
EN IEC 55014-1:2021
EN IEC 55014-2:2021
ENIEC 63000:2018
g) Measured sound power level: 93,4 dB
h)Guaranteed sound power level: 96 dB
k) Flow of air: 0,2 m³/s
n) Person authorised to compile the technical file:
ST.S.p.A.
Via del Lavoro, 6
31033 Castelfranco Veneto (TV) - Italia
o) Castelfranco Veneto, 20/12/2023
CEO Stiga Group
Sean Robinson

UK Importer: STIGA LTD
Unit 8, Bluewater Estate Plympton,
Devon, PL7 4JH, England

| FR (Traduction de la notice originale) | EN (Translation of the original instruction) | DE (Übersetzung der Originalbetriebsanleitung) |
| Déclaration CE de Conformité(Directive Machines 2006/42/CE, Annexe II, partie A)1. La Société2. Déclaré sous sa propre responsabilité que la machine : Souffleur de jardin portatifa) Type / Modèle de Basec) Série d) Moteur: accu3. Est conforme aux prescriptions des directives :e) Organisme de certification4. Renvoi aux Normes harmoniséesg) Niveau de puissance sonore mesuréh) Niveau de puissance sonore garantiék) Flux d'airn) Personne habilitée à établier le Dossier Technique :o) Lieu et Date | EC Declaration of Conformity(Machine Directive 2006/42/EC, Annex II, part A)1. The Company2. Herby declares under its own responsibility that the machine: Hand-held garden Blowera) Type / Base Modelc) Serial numberd) Engine: battery-operated3. Conforms to directive specifications:e) Certifying body4. Reference to harmonised Standardsg) Sound power level measuredh) Flow of airn) Person authorised to create the Technical Folder:o) Place and Date | EG-Konformitätserklarung(Maschinenrichtlinie 2006/42/EG, Anhang II, Teil A)1. Die Gesellschaft2. Ertlart auf eigene Verantwortung, dass die Maschine:Hand gehaltener Laubbläsera) a) Typ / BasismodelleSeriennummerd) Motor: Batterie3. Den Anforderungen der folgenden Richtlinien entsprichteZertifizierungsstelle4. Bezugnahme auf die harmonisierten Normeng) Gemessener Schalleleistungspegelh) Garantierter Schalleleistungspeggelk) Luftstromn) Zur Verfassung der technischen Unterlagen befugte Person:o) Ort und Datum |
| NL (Vertaling van oedorspronkelijkegebruiksaanwijzing)EG-verklaring van overeenstemming(Richtlijn Machines 2006/42/CE, Bijlage II, deel A)1. Het bedrivf2. Verklaart onder+zijn eigenverantwoordelijkkheld dat de machine:Draagbare Blazera) Type / Basismodelc) Seriennummerd) Motor: accu3. Voldoet aan de specificaties van derrichtijnen:e) Certificatie-instituut4. Verwijazingaar de Geharmoniseerde normeng) Gemeteniveau van geluidsvermögenh) Gegerandeerdiveau van geluidsvermögenk) Luchtstroomn) Beveogd persoon voor het opstellen van het Technisch Dossiero) Plaats en Datum | ES (Traducción del Manual Original)Declaración de Conformidad CE(Directiva Maquinas 2006/42/CE, Anexo II, parte A)1. La Empresa2. Declara bajo su propia responsabilidad que la maquina: Soplador portátil de jardina) Tipo / Modelo Basec) Matriculad) Motor:bateria3. Cumple con las espécificaciones de las directivas:e) Entre certificador4. Referência a las Normas armonizadasg) Nivel de potência sonora mediodh) Nivel de potência sonora garantizoak) Fluo de airen) Persona autorizada a realizar el Manual Técnico:o) Lugar y Fecha | PT (Traducción do manual original)Declaração CE de Conformidade(Directiva de Maquinas 2006/42/CE, Anexo II, parte A)1. A Empresa2. Declara sob a propria responsuldadete que a maquina : Soplador portátil de jardima) Tipo / Modelo Basec) Matriculad) Moto:Baterla3. É conforme às espécificações das directivas:e) Orgão certificador4. Referência às Normas harmonizadasg) Nivel medido de potência sonorah) Nivel garantido de potência sonorak) Fluxo de arn) Pessoa autorizada a elaborar o Caderno Técnicoo) Local e Data |
| EL (Metáfpaaan Tounpwototünu Touv obniúv xρηθος)EK-àlωan συμραφωση(Obniía Mηχavów 2006/42/CE, ΠapárptnμaII, μερος A)1. H Etapiá2. Δηλωνι utreúbuv át ni μηχavñ φορητός φυσητηρας κητουa | TR (Orijnal Talimatlarrn Tercūmesi)AT Uygunlk Beyani(2006/42/CE Makine Direktifi, Ek II, böümlemA)1. Širket2. Şahsi sorumluluğ-altinda asāgūdaki makininen : Bahçec Eighthe alde tāsinabilir Üfleyicia) Tip / Standart modela) Sicil numarasiD) Motor: batarya3. Asāgūdaki direktifiner özelliklerine uygun olduŋun buyen etmektedir:g) Sertifikalandiran kurum4. Harmonize standartlare atufg) Ölülen ses guc seviyesi h) Garanti edilen ses guc seviyesi k) Hava akisi n) Teknik Dosayi olusturmaya yetkili kisi: o) Yer ve Tarih | MK (Πρέονι Na opηνηналнite уnalctba)Декnapaúniaja 3a yocorglacnoct co EY (Диерк�ва за машених 2006/42/CE, Анекс il, дeL A)1. Kompanhajata2. Ильавва селесна лима odroborpoct deuka cnejda naшima : П repenocen Paśdývyвачa) Tínl / ochoben moelénC etniketaD motop: akymylatop3. уcorlacocho co sceiuФицait�пспесуpeдіретимье:t evelo за сецуф�ацию4. РEperepenzi за уcorpласениHopмативи g Akystčné npriitncok h)Изменихно Нимо на Звуна мок霍стК вбрашии на paцeteН овл正常使用 полеса за составвае на Т电商чата бразураооMe Meço и datуm |
| a) Apiθμóc μπτρωu4. Kevntραc μπταρία4. Σμρορφνεται με τις προδίγράρες τιςobniác;e) Opyaiváρος πιστοτοίησι4. Avapopó ασούς Kavoviáροςεναρονiαnsigj) Στάμη μετρτοίας ακουστική στχύοςh) Στάμη ευγυμένης ακουστική στχύοςk) Poináépán) Εξουσιδοντμενό ατομο για πγν καταρτίαητηου Teçyikov ou Φιλαδιou: o) Tótoç kai Xρóvos | ||
| NO (Oversettelse av original brussanvisning) | SV (Översättning av brussanvisning i original) | DA (Oversättelse af den originalebrugsanvisning) |
| EF-Samsvarserklæring(Maskindirektiv 2006/42/EF, Vedlegg II, delA) | EG-försakran om överensstammelsee(Maskindirektiv 2006/42/EG, bilaga II, de la)1. Företaget2. Försakrar på eget ansvar att maskinen:Bärbar Lovblås - for trädgårdsbruk | EF-overensstammelseeserklaresing(Maskindirektiv 2006/42/EF, bilag II, del A)1. Firmaet2. Erklaer på eget ansvar, at maskinen:bæbar haveblæser |
| 1. Firmaet2. Erklaer på eget ansvar at maskinen: blasemaskin for hagera) Type / Modelc) Serienummerd) Motor: batteri3. Oppyller kravene i direktiven:Seffiriseringsorgan4. Henvisning til harmoniserte standarderg) Målt lydeffektnivah) Garantert lydeffektnivak) Luftstrømningn) Person som har fullmakt til ä utferdigetelek documentason: o) Sted og dato | 3. Överensstämmer med foreskriftnairedirektivet e) Intygssrgan_Anmält organ4. Referens till harmoniserade standarderg) Uppmärt ljudeffektnivah) Garanterad ljudeffektnivak) Luftflöde n) Auktoriserad person for upprättandet avden tekniska documentationen: o) Ort och datum | a) Type / Modelc) Serienummerd) Motor: batteri3. Er i overensstammelse medspecifikationerne iffolge direktiverne:Seffiriseringsorgan4. Henvisning til harmoniserede standarderg) Målt lydeffektniveauh) Garanteret lydeffektniveauk) Luftflown) Person, der har bemyndigelse til udarbejde det tekniske dossier:o) Sted og dato |
| FI (Alkuperäisten ohjeiden käännös) | CS Překlad pūvodniho námodu k použivani) | PL (Tlumaczenie instrukcji oryginalej) |
| EY-VAATIMUSTENMUKAISUUSVAKUUTUS(Konedirektivi 2006/42/EY, Liite II, osa A)1. Yritys2. Vakuuttaa omalla vastuullaan, että kone:N Kannettava puutarhapushallina) Tyyppi / PerusmalliC) Sarjanumoder) ) Moottori: akku3. On yhdenmukainen seuraavidenirektilvien asettamien vaatimusten kanssa:e) Sertificointyritys4. Viittaus harmonisoituih in standardehinh) Mitattu äänitehotasoh) Taattu äänitehotasoik) Ilmavirtausn) Teknisten asiakirjojen latamiseenvaltuituttu henklö: o) Paikkja ja päävämäärä | ES - Prohläseni o shodé(Smörnice o Strojnic zäfzenich 2006/42/ES, Přilola II, cask)1. Spolčnost2. Prohläsuje na vlastní odpovědnost, ze stroj: Přenosny zahradní foukáa) Typ / Záklandnì modelc) Výrobní ČíslódMotor: akumulátor3. Je ve shodě s nafrizenimi směrnici;e) Certifikacné organdOkazyna na Harmonizované normyg) Naměřena uroveť akustického vykonuh) Zarucená uroveť akustického vykonuk) Proud vzduchun) Osoba autorizovaná pro vytrořeniTechnického spisu: o) Misto a Datum | Deklaracja zgodnosci WE(Dyrektywa maszynowa 2006/42/WE,Załacznik II, częsć A)1. Spóka2. Oświadźna na wlasnadyopowsydianoc, ze maszyna: Przenośćdmuchawa ogrodowaaTyp / Model podstawowyc) Numer serynchySilnik: akumulator3. Spelnia podstawowe wymoginastepujacych Dyrektyw:edJednostka certyfikujacadNodyniesienie do Norm zharmonizowanyachZmierzony poziom moc akustyczneyh)Gwarantowy poziom moc akustyczneykPrzejwy powietrzanOsoba upoażniona do zredagowania Dokumentaci technicznej:O) Mlejscowość i data |
| HU (Eredeti hasznalati utasités forditása) | RU (Перевд оригиналынхи Иструнцу)ДемлачаюоошоцуngуошпсЕдзговпьу legiváteуrolу�уrolу�уrolу�уrolу�уrolу�уrolу�уrolу�уrolу�уrolу�уrolу�уrolу�уrolу�уrolу�уrolу�уrolу�уrolу�уrolу�уrolу�уrolу�уrolу�уrolу�уrolу�уrolу�уrolу�уrolу�уrolу�elirásainak:e) Tanusitó szervH. Hivatkožá a harmonizált szabványokrag) Miert zajteljesitményszint h) Garantál tajteljesitményszintk) LevegóáramláncusMZuszaki Dosszí sterkesztésérefelhalmazott személy:O) Helye és ideje | HR (Prijevod originalnih uputaEk Izjava o sukladnosti(Direktiva 2006/42/EZ o strojevima, dodatakII, dioA)1. Tvtrka:2. pod vlastitom odgovornošću izjavljuce da je stoj: Prijenosna vrtna puhalicaa) Vrsta / Osnovni modelc) Matčni brojd) Motor: baterija3. sukladan s temeljinm zahtjevima direktiva:Certifikacijski tijelo4. Primijenjene su silijeće deharmoniziranenorme:Izjmjerena razina zvučne snageZajamčena razina zvučne snageK Protok zrakaOsoba ovlašte na pravljenje Tehnicke datoteke:O) Mjesto i datum |
| SL (Previd ozvirnih navodil) | BS (Prijevod originalnih uputa) | SK (Preklad pôvodného navodu na použitie) |
| ES Izjava o skladnosti(Direktiva 2006/42/ES), priloga II, del A)1. Družba2. pod lastno odgovornostj zojavlja, da je stroj: Prenosni vrtni Puhalnika a) Tip / osnovni modelc) Serijska stevilkad) Motor: baterija3. Skladen je z dolovi direktiv :e) Ustanova, ki izda potrdillo4. Sklicevanje na uskrajene predpisesg) Izmerjen no nivo zvočne mochlh) Zagotovljen no nivo zvočne moči k) Pretok zraka n) Oseba, pooblaščena za sestavo tehnčenknjizice: o) Kraj in datum | EZ Izjava o sukladnosti(Direktiva o mašinama 2006/42/EZ, Prilog II, deo A)1. Firma2. Daje izjavu pod vastitom odgovornosću da je mašina: Baštenski ručni Duvača) Tip / Osnovni modelc) Serijski brojd) Motor: akumulator3. sukradna s osnovnim zahtjevimadi directivesivc) Certifikaciono tjel0. Pozivanje na uskladene normeg) Izmjereni nivo zvočne snageh) Garantovani nivo nivo zvočne snagek) Protok vazduha n) Osoba ovlašena za izradu tehnickebrojure:o) Mesto i datum | ES vyhlásenie o zhode(Smernica o Stojních zariadeniach 2006/42/ES, Priloha II, čast' A)1. Spoloužnost'2. Vyhlasuje na vastnú zodpovednost', ze stroj: Prenosny záhradný fukac |
| RO (Traducerea manualului fabricantului)CE-Declaratie de Conformitate(Diretica Mašini 2006/42/CE, Anexa II, partea A)1. Societatea2. Declară pe propria raspundere că mașina: Suflantă portablă de grădinăa) Tip / Model de bazăc) Număr de séried) Motor: baterie3. Este in conformitate cu speciţaile directivlor:e) Organism de certificare4. Referinta la Standardele armonizateg) Nivel de putere sonora mészurat h) Nivel de putere sonora garantatk) Flux de aern) Persoană autorizata să intocmească Dosarul Tehnico) Locul Şi Data | LT (Originaliu instrukcjù vertimas)EB atitikties deklaracija(Mašinu direktvya 2006/42/CE, Priedas II, dalis A)1. Bendrové2. Prisiima atsakomybe, kad jrenginys:Rankinis lapu Püstuvasa) Tipas / Bazinis Modelisc) Serijos numerisd) Variklis: baterija3. Atitinka direktyvose pateiktaspecifikacijas:e) Sertifikavimo jstaiga4. Nuoroda j suderintas Normag) lsmatuotas garso galios lygis h) Užtikrinamas garso galios lygisk) Oro strutasn) Autorizuotas asmuo sudaryti Technine Dokumentaciçaa) Vieta ir Data | LV (Instrukciju tulkojums no originalvalodas)EK atbilstifbas deklaracija(Direktiva 2006/42/EK par mašinam, pielikums II, daß A)1. Uzŋēmums2. Uznemoties par to pilnu atbildibu, pazijo, ka mašina: Rokturamals dárza Pūtejsa) Tips / Bazes modelisc) Sérijas numursd) Motors: akumulators3. Atbilst šādu direktivu prasibam:e) Sertifikacjas iestade4. Atsauce uz harmonizetiem standartiemg) Izmēritais skanas intensitātes fimenish) Garantētals skañas intensitātes fimenisk) Gaisa plūsma9) Pilvarotais darbinieks, kas sagatavojatehnisko dokumentáciju:o) Vieta un datumss |
| SR Previd originalinh uputstval)EC deklaracija o usaglašenosti(Diretica o mašinama 2006/42/EC, Prilog II, deo A)1. Preduzće2. Daje izjavu pod vastitom odgovornosću da je mașina: Baštenski ručni Duvača) Tip / Osnovni modelc) Serijski brojcd) Motor: akumulator3. u skladu s osnovnim zahevima direktiva: e) Sertifikaciono telo4. Pozivanje na usklašene norme g) Izmereni no nivo zvučne snageh) Garantovani nivo zvučne snagek) Protok vazduha n) Osoba ovlašćena za sastavljane tehnickébrojureo) Mesto i datum | BG (ПревOD на оригинал阴道и Иструнции)EO.Deétrnapацяза з съOTBETCTBNE(DírepKTbBa Машени 2006/42/EO,Прложенье II, чат A)1. Дужевтоу2. На собстVENA OTTOBOPHOCDEKLAPRIPA,чешиминATA: Ресовсima радинскадухалкaja) Вид / Базисné мodyелc) Сереньеморd)Мотор: akumларot3. E в съOTBETCTBNE сьс спецфinkата надírepKTbВITEe:Ceptnfniuraо нахарmonиизретиюмg) НИВО на Измерега щавочна мошисту(h) Гарantsрано НИВО на лыостунношостКБДушени notokn) Лице, ульtonsимошени дьсстовпТекием�сátдожимentаць:OЯсту и datа | ET (Algupārase kasutusjuhendi tõlle)EÜ vastavusdeklaratsionn(Masinadreiiv 2006/42/EU, Lisa II, osa A)1. Firma2. Kinnitab omal vastutusel, et masin: Kaasaskantav aiapuhura a) Tūup / Pōhimudelc) Matrikkeld) Mootor: aku3. Vastab direktivide nõuetele: e) Kinnitav asutus4. Viide ühlustatud standarditeleg) Mõdetud helvöimsuse taseh) Garanteeritud helvöimsuse tasek) Ohuvooln) Tehnilise Lehe autoriseritud koostaja: o) Koht ja Kuupäev |
EN · The content and images in this User Manual were produced expressly for ST. S.p.A. and are protected by copyright - any unauthorised reproduction or modification to the document, either partially or in full, is prohibited.
STIGALTD (UK Importer)
Unit 8, Bluewater Estate Plympton Devon,PL74JH,England