
Indego S+ 350 - Lawn mower BOSCH - Free user manual and instructions
Find the device manual for free Indego S+ 350 BOSCH in PDF.
| Product Type | Cordless robotic lawn mower |
| Brand | Bosch |
| Model | Indego S+ 350 |
| Weight | 8 kg |
| Power Supply | 18 V lithium-ion battery (2.5 Ah); 24 V DC charger, 230 V AC mains power supply |
| Cutting Width | 19 cm |
| Cutting Height | 30, 40 or 50 mm (adjustable) |
| Recommended Mowing Area | From 20 m² to 350 m² |
| Maximum Slope | 15° |
| Average Runtime | 30 min |
| Charging Time | 45 min (max.) |
| Protection Type | IPX4 (mower and station); IPX7 (charger) |
| Main Functions | Manual mode, timer programming, Bosch AUTO Calendar, obstacle detection, alarm, PIN code, automatic stop when lifted or tipped over |
| Care and Cleaning | Clean with soft brush or cloth; no water or solvents; check and replace blades regularly |
| Safety | Disconnector, red stop button, lift, tip-over, impact and slope detectors; blade stop in case of danger |
| Spare Parts and Repairability | Reversible blades, blade screws, boundary wire, charging station, adapter; Bosch genuine parts recommended |
| General Information | Cable length supplied: 100 m; max length: 250 m; USB port for software update; operating temperature: 5 °C to 45 °C |
Frequently Asked Questions - Indego S+ 350 BOSCH
User questions about Indego S+ 350 BOSCH
0 question about this device. Answer the ones you know or ask your own.
Ask a new question about this device
Download the instructions for your Lawn mower in PDF format for free! Find your manual Indego S+ 350 - BOSCH and take your electronic device back in hand. On this page are published all the documents necessary for the use of your device. Indego S+ 350 by BOSCH.
USER MANUAL Indego S+ 350 BOSCH
OBJ DOKU:56979-002 Fin Page 1 Friday, December 2, 2016 12:08 PM
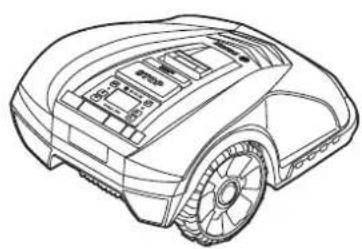
natural_image
3D rendered illustration of a futuristic car with visible engine and wheels (no text or symbols)
natural_image
Isometric illustration of a device housing with labeled components (no readable text or symbols)Robert Bosch Power Tools GmbH
70538 Stuttgart
GERMANY
www.bosch-garden.com
F016 L81 221 (2016.12) O / 376

Indego 350 | Indego 400 Indego 350 Connect | Indego 400 Connect

BOSCH
natural_image
Line drawing of a Bosch backpack with visible branding (no text or symbols beyond logo)
natural_image
Simple line drawing of a gavel and handle (no text or symbols)
natural_image
Line drawing of two pliers, one open and one closed, shown in side profile (no text or symbols)4|
1

text_image
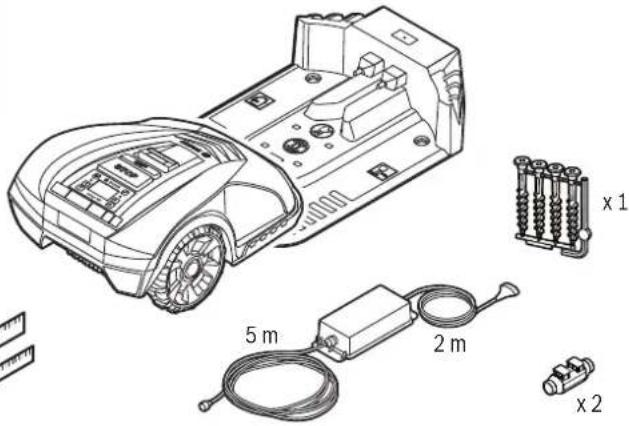
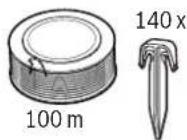
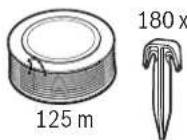
x 1 5 m 2 m x 2Indego 350
Indego 350 Connect
Indego 400
Indego 400 Connect
2

text_image
Diagram illustrating a physics problem with stick figure, weights, and a hand holding a weight, accompanied by an unknown symbol for unknown mass.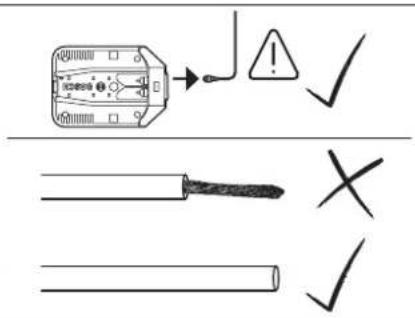
text_image
Electrical hazard warning diagram showing a fuse with warning symbol and three safety symbols below: a switch, a screwdriver, and a pipe.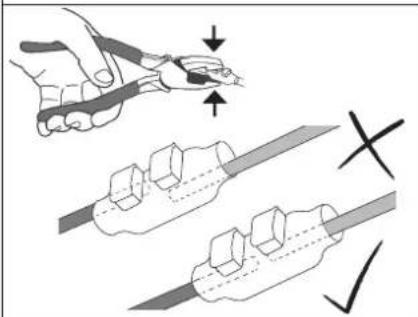
text_image
Diagram illustrating a hand holding a tool with arrows indicating movement and checkmark indicators below.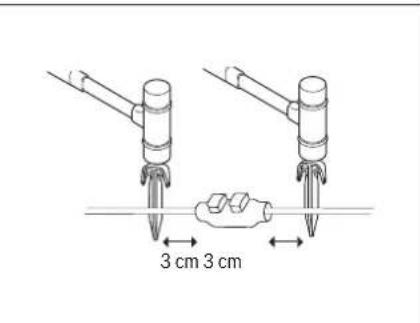
text_image
3 cm 3 cm3
text_image
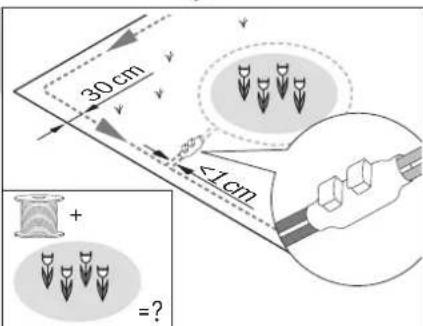
30 cm ≤1 cm + =?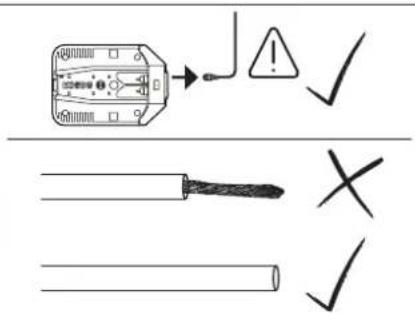
text_image
Electrical warning symbol and safety instructions for a fuse, including warning sign, checkmark, and cross symbols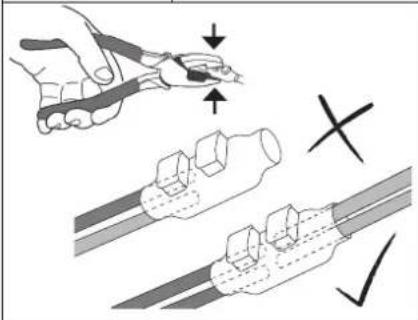
text_image
Diagram illustrating tool application and inspection steps for a dental procedure, with labeled arrows and checkmark indicators.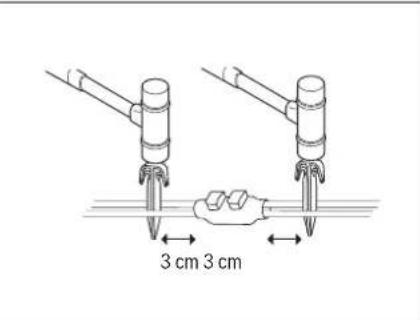
text_image
3 cm 3 cm6|
4
text_image
Diagram showing a person assembling a mechanical device with labeled parts and a magnified inset highlighting the component.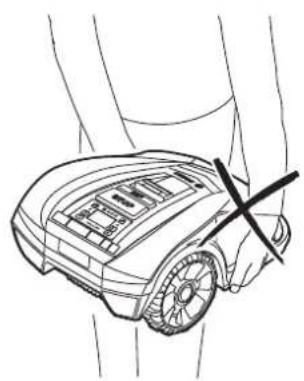
natural_image
Line drawing of a robotic car with a black X mark on the wheel (no text or symbols)5

natural_image
Line drawing of a robotic car with visible engine and wheel components (no text or symbols)

text_image
1 STOP MAX MIN 50 mm 40 mm 30 mm
text_image
2 STOP MIN MAX 30 mm 50 mmA

text_image
Technical diagram of a mechanical device with labeled parts and directional arrows indicating assembly or inspection steps.B

text_image
Technical diagram of a mechanical device with numbered parts and a labeled component, showing internal components and tool paths.Bosch Power Tools F 016 L81 221 | (2.12.16)
8|Deutsch
Deutsch
www.bosch-garden.com
Thank you for purchasing the Indego Robotic Mower.
Please read the safety instructions provided below before installing the Indego.
Safety Notes
Warning! Read these instructions carefully, be familiar with the controls and the proper use of the machine. Please keep the instructions safe for later use!
Explanation of symbols on the machine

General hazard safety alert. Ensure no exits are blocked or obstructed by the machine.

Warning: Read user instructions before operating the machine.

Warning: Operate the isolator switch before working on or lifting the machine.

Caution: Do not touch rotating blades. Sharp blade(s). Beware of severing toes or fingers.

Wait until all machine components have completely stopped before touching them. The continue to rotate after the mass switched off, a rotating blade use injury.

Pay attention that bystanders are not injured through foreign objects thrown from the machine.

Warning: Keep a safe distance from the machine when operating.

Do not ride on the machine.

Battery charger contains a safety transformer.
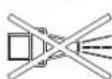
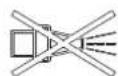
Do not use a high-pressure washer or a garden hose to clean the machine.

Check the perimeter wire is fully pegged to the ground avoiding any slack lengths of wire. Any loose wire can be a trip hazard.
English | 21
Operation
▶ Before working on the machine itself (e. g. maintenance, tool change, etc.) as well as during transport and storage, switch off the machine by the isolator switch.
▶ Children should be supervised to ensure that they do not play with the machine.
▶ Never allow children, persons with physical, sensory or mental limitations or a lack of experience and/or knowledge and/or people unfamiliar with these instructions to use the garden tool. Local regulations may restrict the age of the operator.
▶ Do not operate the machine when barefoot or wearing open sandals, always wear substantial footwear and long trousers.
- Avoid mowing in bad weather conditions especially when there is a risk of lightning.
▶While operating and as well while approaching the garden tool take sufficient precaution to keep balance at all times particularly on slopes and wet grass. Do not stretch yourself too much forwards. Do not operate the machine in a rush.
▶The user is responsible for accidents or hazards occurring to other people or their property.
▶ If any hazard occurs whilst the machine is operating immediately press the red stop button.
▶ Ensure correct installation of the perimeter wire as instructed in the installation guide.
▶Periodically inspect the area where the machine is used and remove all stones, sticks, wires and other foreign objects.
▶ Do not run any live mains cables in the working area. If a mains cable or becomes entangled in the robotic mower it must be isolated before any attempt to remove it.
▶ Periodically inspect to see that the blades, blade bolts and cutter assembly are not worn or damaged. Replace worn or damaged blades and bolts in sets to preserve balance.
▶ Never operate the machine with defective guards or without safety devices.
▶ Do not put hands or feet near or under rotating parts.
▶ Never pick up or carry the machine while the motor is running.
▶ Do not leave the machine to operate unattended if you know that there are pets, children or people in the immediate vicinity.
▶ Start the machine according to the instructions standing well away from rotating parts.
▶ Do not use the product at the same time as a sprinkler or use the schedule to ensure that the two systems never run simultaneously.
▶ If for any reason the product is submerged, take it away from water and turn it off using the isolator switch. Do not attempt to switch the product on but contact your Bosch Service Centre.
22 | English
▶ Do not modify this product. Unauthorized modifications may impair the safety of your product and may result in increased noise and vibration.
Turn off the product using the isolator switch:
– before clearing a blockage,
– before checking, cleaning or working on the machine,
- before storage
- if the machine vibrates abnormally (stop and check immediately),
– after striking a foreign object. Inspect the machine for damage and get advice on necessary repairs from your Bosch Service Centre.
Maintenance
▶ Always wear gardening gloves when handling or working near the sharp blades.
▶ Before working on the mower, turn it off using the isolator switch.
▶ Before working on the docking station or power supply, remove plug from mains.
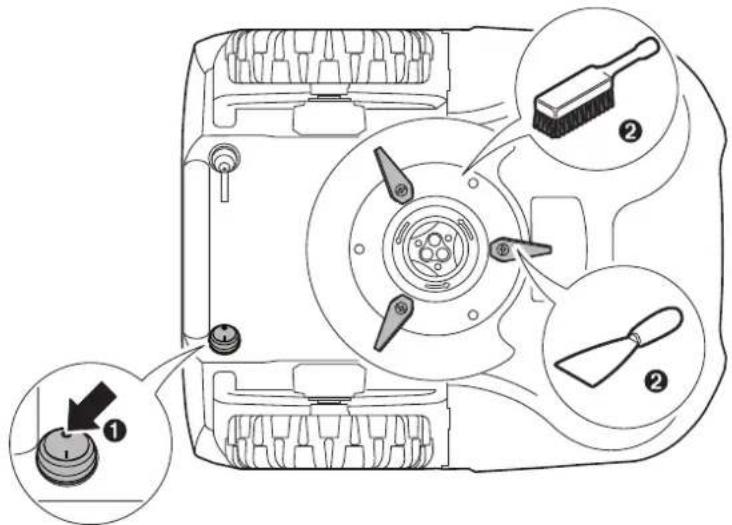
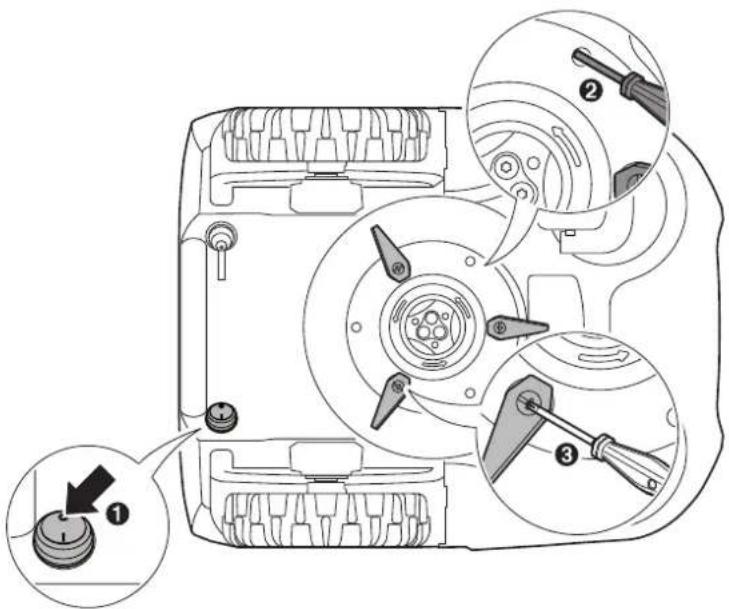
Clean the exterior of the machine thoroughly using a soft brush and cloth. Do not use water, solvents or polishes. Remove all grass and debris, especially from the ventilation slots.
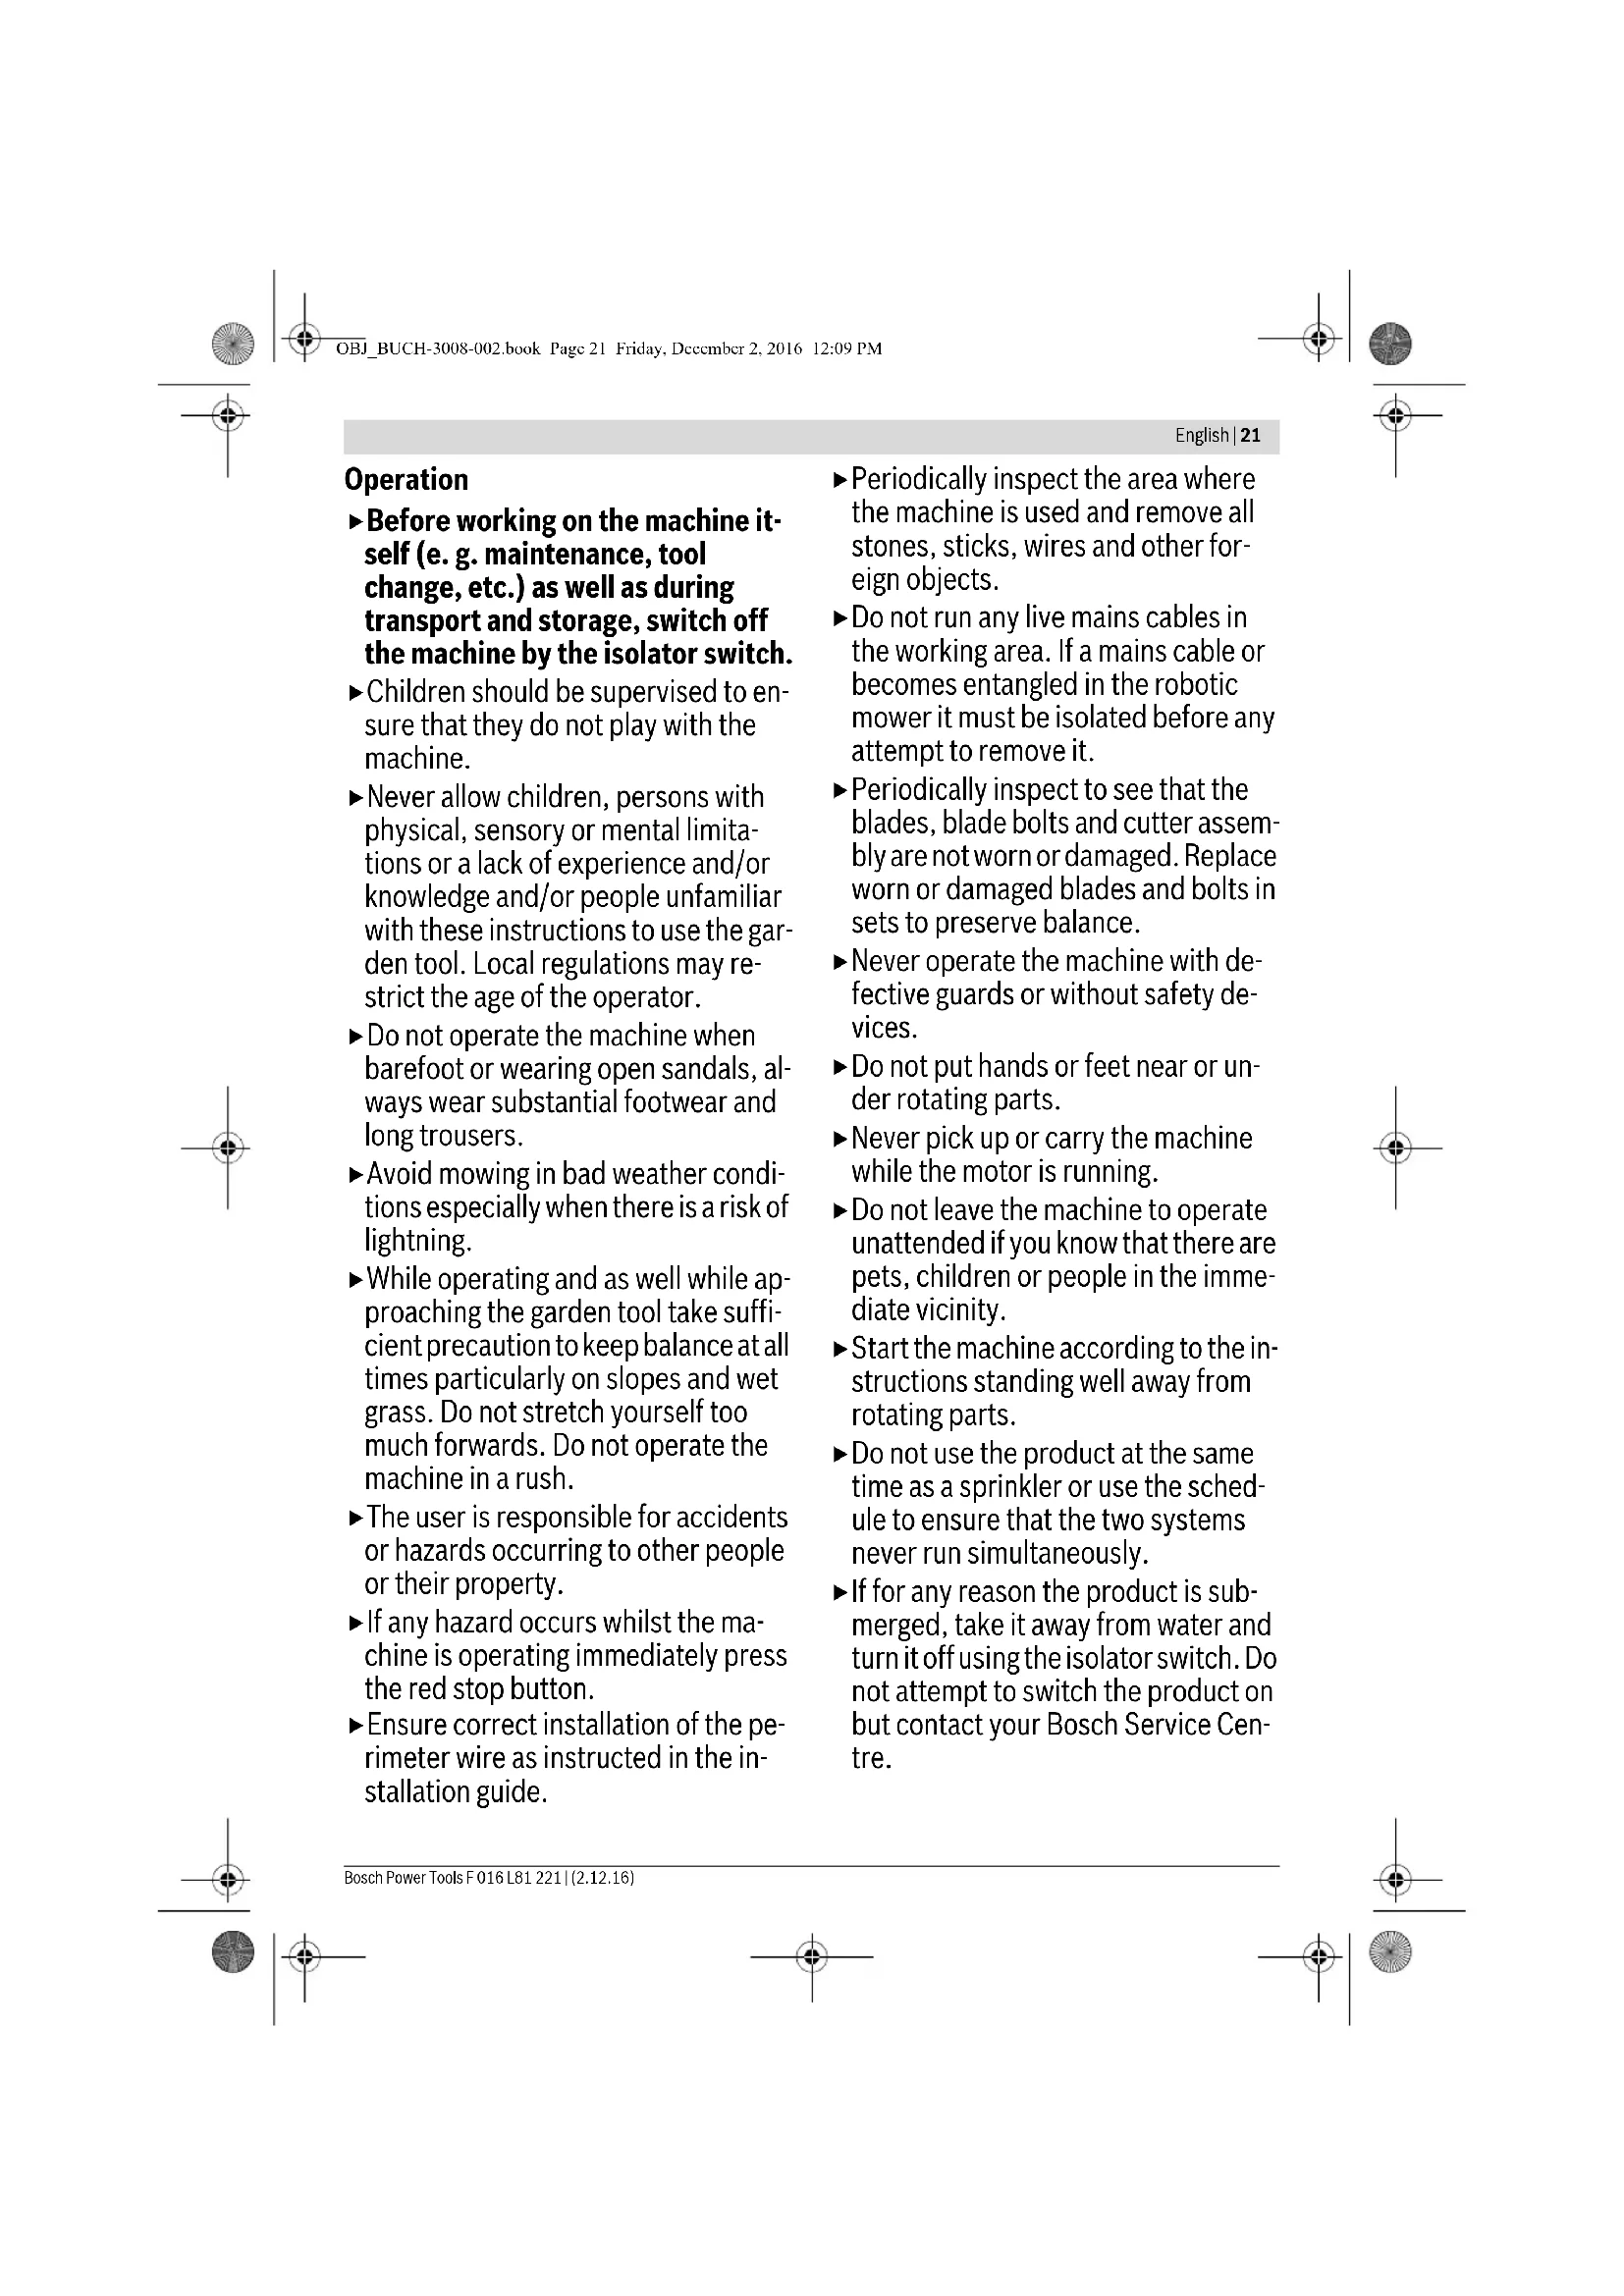
Turn the machine on its back and clean the blade area regularly. Use a stiff brush or scraper to remove compacted grass clippings. (see figure A)
Blades are reversible. (see figure B)
- Keep all nuts, bolts and screws tight to be sure that the machine is in safe working condition. (see figure B)
▶Periodically visually inspect the machine and replace worn or damaged parts for safety.
▶ Ensure that only official Bosch replacement parts are used.
▶ Replace all blades and bolts as a set as required.
Winter Storage and Transportation
▶ Turn off the machine using the isolator switch.
The Indego will operate between 5 °C and 45 °C. During the winter season once the temperature in the garden is consistently below 5 °C store the machine and the docking station in a secure, dry place, out of the reach of children.
Do not place other objects on the mower or docking station.
It is recommended to use the original packaging when transporting the Inde-go over long distances.
The mower can also be stored using the Indego 400 storage bag accessory.
▶ Store the machine only within a temperature range between -20^ and 50^ . As an example, do not leave the machine in the car in summer.
USB
▶The machine has a USB interface for Software Updates only. Use only approved USB.org sticks and approved USB.org OTG cables.
▶ Do not use the USB interface for any additional purposes. Do not plug any external devices.
Battery Hazards
▶ Recharge only in the Bosch approved docking station.
The Indego will operate between 5 °C and 45 °C. If the battery temperature is outside this range the Indego will display a message and will not leave the docking station. If operating it will return to the docking station or stay on place.
▶ In the unlikely event of liquid being ejected from the battery avoid all contact with the machine. If contact with the liquid occurs, seek medical advise.
▶ If the battery becomes defective, liquid can escape and come into contact with adjacent components. Check any parts concerned and contact the Bosch Service Centre.
▶ Do not open the machine or battery. Danger of short circuit and electric shock.
▶ Protect the machine against fire. Danger of battery explosion. In case of fire or battery explosion contact the emergency services.
▶ In case of damage and improper use of the machine, vapours may be emitted from the battery. Provide for fresh air and seek medical help in case of complaints. The vapours can irritate the respiratory system.
Safety Warnings for Docking Station and Power Supply
▶ Only use the official Bosch docking station and power supply to charge the mower. Otherwise there is danger of fire and explosion.
▶ Check the docking station, power supply, cables and plugs periodically. If damage or aging is detected, isolate from the mains and do not use the docking station or power supply. Never open the docking station or power supply. Have repairs performed only by a qualified Bosch technician and only using original spare parts. A damaged docking station, power supply, cable or plug increases the risk of an electric shock.
▶ Do not operate the docking station and power supply on easily flammable surfaces (e. g., paper, textiles, etc.) or surroundings. The heating of the docking station and power supply during the charging process can pose a fire hazard.
▶ Supervise children at all times. This will ensure that children do not play with the docking station, power supply or the machine.
▶The voltage indicated on the power supply must correspond to the voltage of the power source.
▶ We recommend that the power supply is only connected into a socket which is protected by a circuit-breaker that would be actuated by a 30 mA residual current. Check your RCD at regular intervals.
24 | English
▶The supply cord must be inspected for signs of damage at regular intervals.
▶ In the event of flooding of the docking station turn off power supply at mains and contact Bosch Service Centre.
▶ Never touch the mains plug or any other plugs with wet hands.
▶ Do not run over, crush or pull the cables. Protect the cables from heat, oil and sharp edges.
The power supply is double insulated for safety and requires no earth connection. The operating voltage is 230 V AC, 50 Hz (for non-EU countries 220 V, 240 V as applicable). Contact your Bosch Service Centre for details. If in doubt contact a qualified electrician or the nearest Bosch Service Centre.
Products sold in GB only: Your product is fitted with a BS 1363/A approved electric plug with internal fuse (ASTA approved to BS 1362). If the plug is not suitable for your socket outlets, it should be cut off and an appropriate plug fitted in its place by an authorised customer service agent. The replacement plug should have the same fuse rating as the original plug. The severed plug must be disposed of to avoid a possible shock hazard and should never be inserted into a mains socket elsewhere.
Symbols
The following symbols are important for reading and understanding the operating instructions. Please take note of the symbols and their meaning. The correct interpretation of the symbols will help you to use the garden product in a better and safer manner.
Symbol Meaning

Wear protective gloves

Permitted action

Prohibited action

Accessories/Spare Parts
Intended Use
The garden product is intended for domestic lawnmowing. Do not operate your robotic lawn mower indoors.
Do not use the robotic lawn mower for any other purpose because of the increased risk of accidents and damage to the garden product. Never attempt to modify the robotic lawn mower in any way since this may result in accidents or damage to the garden product.
Technical Data
| Robotic Lawnmower | Units | Indego 350 | Indego 400 | Indego 350 Connect | Indego 400 Connect |
| Article number | 3 600 HBO 0.. 3 600 HBO 0.. 3 600 HBO 1.. 3 600 HBO 1.. | ||||
| Cutting width | cm 19 19 19 19 | ||||
| Height of cut | mm | 30 - 50 | 30 - 50 | 30 - 50 | 30 - 50 |
| Slope angle (max.) | ° | 1 | 5 | 15 15 15 | |
| Working area size | |||||
| - m a x i m u m | m^2 | 350 | 400 | 350 | 400 |
| - minimum | m^2 | 20 | 20 | 20 | 20 |
| - per charge up to* | m^2 | 35 | 35 | 35 | 35 |
| Weight | kg 8 8 | 8 | 8 | ||
| Degree of protection | IPX4 IPX4 IPX4 IPX4 | ||||
| Serial number see rating label on the garden product | |||||
| Battery | Li-Ion | Li-Ion | Li-Ion | Li-Ion | |
| Rated voltage | VDC 18 18 18 18 | ||||
| Capacity | Ah | 2.5 | 2.5 | 2.5 | 2.5 |
| Number of battery cells | 5 5 | 5 | 5 | ||
| Operating time, average* | min 30 30 30 30 | ||||
| Charging period (max.) | min 45 45 45 45 | ||||
| Perimeter Wire | |||||
| Perimeter wire | |||||
| - W i r e s u p p l i e d | m | 100 | 125 | 100 | 125 |
| - minimum working length | m | 20 | 20 | 20 | 20 |
| - maximum working length | m | 250 | 250 | 250 | 250 |
| Docking Station | |||||
| Article number | F 016 L68 963 | F 016 L68 963 | F 016 L68 963 | F 016 L68 963 | |
| Input voltage | VDC 24 24 24 24 | ||||
| Power consumption charging/ perimeter wire running | W | 55/12 | 55/12 | 55/12 | 55/12 |
| Charging current (up to) | A | 2.3 | 2.3 | 2.3 | 2.3 |
| Allowable charging temperature range** | °C | 5 - 45 | 5 - 45 | 5 - 45 | 5 - 45 |
| Weight | kg | 1.65 | 1.65 | 1.65 | 1.65 |
| Degree of protection | IPX4 IPX4 IPX4 IPX4 | ||||
| Power Supply | |||||
| Article number | |||||
| Switzerland | F 016 L69 439 | F 016 L69 439 | F 016 L69 439 | F 016 L69 439 | |
| United Kingdom | F 016 L69 437 | F 016 L69 437 | F 016 L69 437 | F 016 L69 437 | |
| Rest of Europe | F 016 L69 170 | F 016 L69 170 | F 016 L69 170 | F 016 L69 170 | |
| South Korea | F 016 L69 441 | F 016 L69 441 | F 016 L69 441 | F 016 L69 441 | |
| Input AC | V | 220 - 240 | 220 - 240 | 220 - 240 | 220 - 240 |
| Protection class | ☐ /II | ☐ /II | ☐ /II | ☐ /II | |
| Frequency | Hz | 50/60 | 50/60 | 50/60 | 50/60 |
| Output DC | V | 2 | 4 | 24 24 24 | |
| Degree of protection | IPX7 IPX7 IPX7 IPX7 | ||||
| Weight | kg | 0.8 | 0.8 | 0.8 | 0.8 |
*Depends on cutting height, grass conditions and moisture
**Battery internal temperature range
The values given are valid for a nominal voltage [U] of 230 V. For different voltages and models for specific countries, these values can vary.
26 | English
Noise/Vibration Information
Sound emission values determined according to EN 50636-2-107.
Typically the A-weighted noise levels of the product are: Sound power level 61 dB(A). Uncertainty K = 2 dB.
Explanation of Installation Guide (see pages 3-7)
Action Figure Page
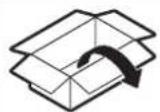
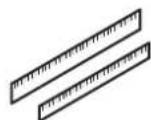
| Delivery scope/unpacking product | 1 4 | |
| Extend perimeter wire | 2 5 | |
| Lay perimeter wire around new inner object 3 5 | ||
| Lift up and carry the machine | 4 6 | |
| Set height of cut | 5 6 | |
| Cleaning | A 7 | |
| Maintenance | B 7 |
Installation
For a video guide on how to install the Indego please visit www.bosch-indego.com or use the following QR-Code. Alternatively follow the installation guide delivered with the product.

Note: The docking station must be positioned on the wire at an outer edge of the cutting area. It cannot be positioned by the side of a shed or workshop that appears as an island within the cutting area.
Note: The maximum distance between perimeter wire and Indego at any point within the mowing area must not exceed 16 m.
Objects on the lawn below 5 cm height e.g. ponds, flower beds etc. must be delimited in a clockwise direction around the object.
Note: If extra perimeter wire is required this can be added using a wire connector. (see figure 2-3)
The wire can be extended up to a total maximum allowed length of 250 m.
The perimeter wire can be buried up to 5 cm under the ground if verticutting or raking is intended, avoid the perimeter wire area.
When laying out the wire avoid angles of less than 45^ . This can affect performance.
Screen
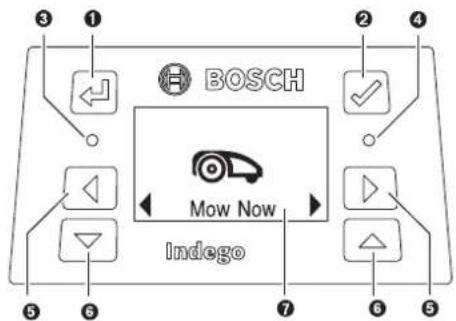
text_image
BOSCH Mow Now IndegoSymbol Meaning
| 1 | ← | Back button |
| 2 | √ | Confirm button |
| 3 | ○ | Red LED on: mower error |
| 4 | ○ | Green LED on: mower is onGreen LED off: Product is inactive and itwill require your four digit PIN code to activate the mower. Or the product is isolated, and it will require the isolator switch tobe turned on and your four digit PIN codeto activate the mower. |
| 5 | ◀ ▶ | Left, right button |
| 6 | ▽△ | Down, up button |
| 7 | Display with dialog screen |
Mowing
▶ Do not let children ride the machine.
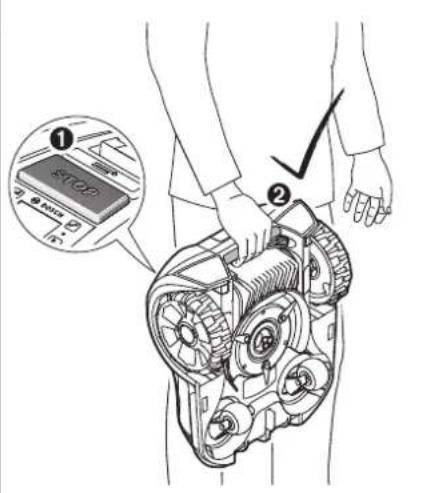
▶ Press stop button on top of the mower before lifting. Always lift the machine at its handle. (See figure 4)
After a successful installation you can either immediately begin to mow by confirming "Mow now" with the confirm button or wait for the next scheduled cutting period, as programmed by the Bosch AUTO Calendar Function (previous acceptance required).
A mowing schedule can also be set up according to your needs. Approximate runtimes to complete a full garden coverage are quoted below. Please note that the runtimes will vary depending on the lawn complexity and number of objects within the lawn area.
| 100 m^2 | 4.5 h |
| 350 m^2 | 12 h |
| 400 m^2 | 14 h |
For best mowing results, set up a frequent mowing schedule for longer lasting battery and for preventing debris on the lawn.
English | 27
It is recommended to mow your lawn with a conventional mower before installation and before the first use every new season (when clippings will be longer than 5 mm).
Note: The Indego's cutting system is designed to cut small lengths of grass (3–5 mm) so that the clippings can mulch down and fertilise the lawn.
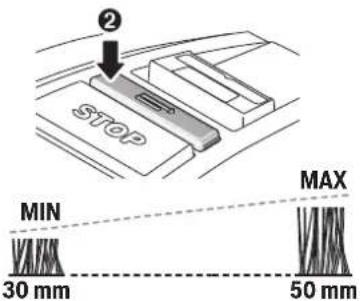
The height of cut for Indego can be adjusted to 30, 40 and 50 mm. Press the height of cut button once to move it to 40mm, twice to set it to 30 mm, and the height of cut reset button (_) to return to 50 mm (See figure 5).
Note: For the first few weeks of usage set the height of cut to 50 mm to prevent the perimeter wire being cut. Afterwards the wire will be covered by the lawn.
Once mowing has started
- in the "Manual" mode, the machine operates until the lawn area has been cut or until the manual stop button is pressed. It only pauses mowing for charging.
- in the programmable "Calendar" mode or with the Bosch auto calendar function, the machine operates continuously within a time slot. It only stops mowing for charging. To stop mowing before the machine has finished a time slot, press the manual stop button or send the mower home. If the lawn area has been completed before the end of a time slot the machine will return to the docking station.
Sensors
The machine has the following sensors:
- lift sensor, will be activated if the machine is lifted and cause the machine and cutting blades to stop
- roll over sensor, will detect when the machine is inverted and cause the machine and cutting blades to stop
- obstruction sensor, tactile detection for objects/obstacles anywhere in the full width of the path of the machine and cause the machine to change its direction
- tilt sensor, will be activated if the machine reaches an angle of 32^
If one of the sensors is activated, such as lift sensor, the screen will show a message, e. g. "Lift up"
Battery Charging
The battery is equipped with temperature monitoring that allows charging only if the battery internal temperature is in the range between 5 °C and 45 °C.
The battery is charged whenever the mower is in the docking station.
The lithium-ion battery is supplied partially charged. To ensure full capacity of the battery, completely charge the machine in the docking station before first use.
The lithium-ion battery can be charged at any time without reducing its service life. Interrupting the charging procedure does not damage the battery.
When the battery is run down or discharged, the machine is shut off by means of a protective circuit: the blade no longer moves.
Menu Navigation
Following tables show the various menu items.
| Settings Sub-menu 1 Sub-menu 2 Explanation | ||
 Mow now Mow now | Indego will start to mow in manual modeIt will send the mower to mow by pressing the confirm button | |
 Calendar Calendar | Bosch Auto * Edit number of full cuts a weekEdit day of a week | Bosch AUTO Calendar Function suited to your lawn size.Within the AUTO Calendar Function it is possible to edit:- number of full cuts a week (1 to 3) and- days of the week (eg. to exclude sunday) |
| Schedule Edit (Current Day)Don’t mow | Program a mowing schedule by setting individual mowing days and slots (up to 2 per day).It will delete all current slots for the selected dayNumber of full cuts per week for the chosen days and times is displayed at the bottom | |
| Off/Manual | Choose this option when no schedule should be used. Indego will start to mow only by activating “Mow now” (or via the app for Connect models). | |
| * Only Indego 350/400 (available via the app for Connect models) | ||
28 | English
| Settings Sub-menu 1 Sub-menu 2 Explanation | |||
| Settings | Security | AutolockOn | PIN code is required for reactivation after auto-lock and safety shut-down. |
| Off | Buttons are always ready for input | ||
| Change PIN | Changing of a PIN code needs entering of existing PIN code first | ||
| AlarmOn | Alarm is activated | ||
| Off | Alarm is deactivated and it will not sound | ||
| Date & Time | Change time and date | ||
| Language | Change display language | ||
| Info | System Status | Information on Connectivity signal strength, battery charge, system information and operating and charging time for the mower | |
| Error Log | History of errors held by the mower | ||
| Advanced | Wire ID | Change wire ID when possible interference nearby | |
| Lawn Condition | Select between Uneven, Normal and Slippery. Mower bump sensor will become more or less sensitive depending on lawn condition selected. | ||
| Remap | It will delete the current map | ||
| Factory Reset | Reset of the machine to factory setting will delete all personal settings (not PIN).After a factory reset the mower will need to map the garden | ||
| Tools | Level | Information about the ground angle of the mower. When mower in dock, if dot out of radar then position in a different flat location | |
| Wire Signal | Detects the signal received from the perimeter wire | ||
* Only Indego 350/400 (available via the app for Connect models)
Troubleshooting
Online Support

http://www.bosch-indego.com


Problem Possible Cause Corrective Action
| The LED on docking station flashes | The perimeter wire is broken, too long or too short. Wire not connected and mower not in the docking station | Check perimeter wire is not broken and is between 20 and 250 meters in length. Then switch off and on power supply.Follow instructions in Installation guide to install the mower. |
| Excessive vibrations/ noise | Blade nut/bolt loose Tighten blade nut/bolt to torque of 2.5 Nm | |
| Cutting blade damaged Replace the blade | ||
| Machine not docking reliably | Perimeter wire not properly setup around dock | Follow instructions in installation guide to align wire |
| Perimeter wire close to a source of interference | Leave adequate distance between your perimeter wire and source of interference (approx. 1 m)Change perimeter wire ID in the menu | |
| Machine fails to operate | Isolator switch not turned on Remove mower out of the dock, turn on switch and replace mower back in the dock (ensure dock is on - LED is solid green). Press confirm button for screen to light up. Enter 4 digit PIN to activate your mower | |
| Possible clogging Always turn isolator switch off first, then check underneath the mower and clear out as necessary (always wear protective gloves) | ||
| Battery not fully charged Replace mower in the docking station to charge. Docking station must be on. | ||
| Grass too long Mow garden to at least 40mm before using Indego.Increase height of cut | ||
| Battery too hot/cold Allow mower to cool/warm or move dock to area of shade. Mower runs when battery internal temperature is between 5°C - 45°C | ||
| Perimeter wire close to a source of interference | Leave adequate distance between your perimeter wire and source of interference (approx. 1 m)Change perimeter wire ID in the menu | |
| Machine does not charge | Battery too hot/cold Allow mower to cool/warm or move dock to area of shade. Mower runs when battery internal temperature is between 5°C - 45°C | |
| Docking station not switched on Switch on power supply to docking station or contact your Bosch service centre | ||
Bosch Power Tools F 016 L81 221 | (2.12.16)
30 | English
| Problem | Possible Cause | Corrective Action |
| Areas left uncut Mower requires more cuts to finish the garden / too many objects in close proximity | Allow mower to run for 3 full cuts to cover whole lawn area | |
| Time slot not long enough for garden size Increase mowing time slot or use Bosch auto calendar function | ||
| Distance between wire is too small Increase distance between the wires around separate marked objects to at least 75cmLeave at least 75cm between wire around marked object and wire at the edge of the lawn | ||
| Rough lawn conditions Select uneven ground from Lawn condition within the menu.Flatten garden/remove bumps/mark out areas with perimeter wire – follow installation instructions | ||
| Grass too long Mow garden to at least 40mm before using Indego.Increase height of cut | ||
| Slopes in garden are too steep Ensure mower only operates on slopes of 15 degrees or less and full garden is not on a slope. | ||
| Mower cutting in wet grass conditions Do not set the mower to cut in bad weather conditions | ||
| Too many objects inside the garden Remove objects/obstacles from inside the garden or de-limit them with perimeter wire | ||
| Metal construction underneath or next to the lawn area Follow instructions in installation guide for objects | ||
| Machine gets stuck in garden | Mower cutting in wet grass conditions | Do not set the mower to cut in bad weather conditions |
| Objects/obstacles not marked out Remove objects/obstacles from inside the garden or de-limit them with perimeter wire | ||
| Machine unintentionally cuts flowers etc. in garden or runs over certain obstacles | Objects/obstacles below 5 cm not marked out | Mark obstacle using perimeter wire leaving 30cm from object or remove objects/obstacles |
| Machine does not appear to cut logically | Logical cut system depends on the garden conditions (e.g. mower may go to the closest unmown area rather than to the last mowed spot)Mower does not always go in a straight line when traveling between areasWire crossed when marking an object | Further information available in installation guideWhen area is not mowed or mower repeats action often: remap gardenNo corrective action neededCheck wire is laid around object in a clockwise direction Check installation |
| Perimeter wire keeps being cut | Wire is not taut between pegsDistance between pegs is more than 75cm | Make wire taut and ensure distance between pegs is maximum 75cm.Use the wire connectors to repair the break. Avoid using a verticutter, scarifier, etc. over the perimeter wire |
| Machine leaves ragged finish/poor quality of cut | Height of cut too low Increase height of cut | |
| Mower requires more cuts to finish the garden | Allow mower to run for 3 full cuts to cover whole lawn area | |
| Cutting blades blunt Reverse or replace blades (recommended every new season) | ||
| Possible clogging Always turn isolator switch off first, then check underneath the mower and clear out as necessary (always wear protective gloves) | ||
| No charging procedure possible | Charging pins corroded | Clean the charging pins |
| Perimeter wire not detected | Wire terminal has become corroded | Re-strip the wire for a proper connection |
F016 L81 221 | (2.12.16) Bosch Power Tools
Problem Possible Cause Corrective Action
Height of cut button Possible clogging Always turn isolator switch off first, then check under- stuck neath the mower and clear out as necessary (always wear protective gloves)
After-sales Service and Application Service
www.bosch-garden.com
In all correspondence and spare parts orders, please always include the 10-digit article number given on the type plate of the garden product.
If the machine is requested to be sent to the service centre, the Indego robotic lawnmower, power supply and docking station must always be sent together.
Additionally be aware of your product's software version (see "Menu > Settings > System Options > Info").
Great Britain
Robert Bosch Ltd. (B.S.C.)
P.O. Box 98
Broadwater Park
North Orbital Road
Denham
Uxbridge
UB 9 5HJ
At www.bosch-pt.co.uk you can order spare parts or arrange the collection of a product in need of servicing or repair.
Tel. Service: (0344) 7360109
E-Mail: boschservicecentre@bosch.com
Ireland
Origo Ltd.
Unit 23 Magna Drive
Magna Business Park
City West
Dublin 24
Tel. Service: (01) 4666700
Fax: (01) 4666888
Australia, New Zealand and Pacific Islands
Robert Bosch Australia Pty. Ltd.
Power Tools
Locked Bag 66
Clayton South VIC 3169
Customer Contact Center
Inside Australia:
Phone: (01300) 307044
Fax: (01300) 307045
Inside New Zealand:
Phone: (0800) 543353
Fax: (0800) 428570
Outside AU and NZ:
Phone: +61 3 95415555
www.bosch.com.au
Republic of South Africa
Customer service
Hotline: (011) 6519600
Gauteng - BSC Service Centre
35 Roper Street, New Centre
Johannesburg
Tel.: (011) 4939375
Fax: (011) 4930126
E-Mail: bsctools@icon.co.za
KZN - BSC Service Centre
Unit E, Almar Centre
143 Crompton Street
Pinetown
Tel.: (031) 7012120
Fax: (031) 7012446
E-Mail: bsc.dur@za.bosch.com
Western Cape - BSC Service Centre
Democracy Way, Prosperity Park
Milnerton
Tel.: (021) 5512577
Fax:(021)5513223
E-Mail: bsc@zsd.co.za
Bosch Headquarters
Midrand, Gauteng
Tel.: (011) 6519600
Fax: (011) 6519880
E-Mail: rbsa-hq.pts@za.bosch.com
Transport
The contained lithium-ion batteries are subject to the Dangerous Goods Legislation requirements. The user can transport the batteries by road without further requirements.
When being transported by third parties (e.g.: air transport or forwarding agency), special requirements on packaging and labelling must be observed. For preparation of the item being shipped, consulting an expert for hazardous material is required.
Disposal
Do not dispose of garden products, battery chargers and batteries/rechargeable batteries into household waste!
Only for EC countries:
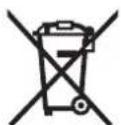
According to the European law 2012/19/EU, electrical and electronic equipments that are no longer usable, and according to the European law 2006/66/EC, defective or used battery packs/batteries, must be collected separately and disposed of in an environmentally correct manner.
32 | Français
Batteries no longer suitable for use can be directly returned at:
Great Britain
Robert Bosch Ltd. (B.S.C.)
P.O. Box 98
Broadwater Park
North Orbital Road
Denham
Uxbridge
UB 9 5HJ
At www.bosch-pt.co.uk you can order spare parts or arrange the collection of a product in need of servicing or repair. Tel. Service: (0344) 7360109
E-Mail: boschservicecentre@bosch.com
▶ Integrated batteries may only be removed for disposal.
Opening the housing shell can damage or destroy the garden product.
▶ Integrated batteries may only be removed for disposal by service agents.
Battery packs/batteries:
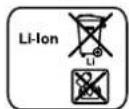
Li-Ion:
Please observe the instructions in section "Transport".
Subject to change without notice.
Français
www.bosch-garden.com
Robert Bosch (France) S.A.S.
www.bosch-garden.com
www.bosch-garden.com
www.bosch-garden.com
www.bosch-garden.com
www.bosch-garden.com
Bosch Service Center
Telegrafvej 3
2750 Ballerup
På www.bosch-pt.dk kan der online bestilles reservedele eller oprettes en reparations ordre.
Tlf. Service Center: 44898855
Fax: 44898755
E-Mail: vaerktoej@dk.bosch.com
www.bosch-garden.com
Bosch Service Center
Telegrafvej 3
2750 Ballerup
Danmark
Tel.: (08) 7501820 (inom Sverige)
Fax: (011) 187691
Transport
www.bosch-garden.com
www.bosch-garden.com
www.bosch-garden.com
www.bosch-garden.com
www.bosch-garden.com
Robert Bosch Sp. z o.o.
www.bosch-garden.com
Bosch Service Center PT
K Vápence 1621/16
692 01 Mikulov
www.bosch-garden.com
www.bosch-garden.com
www.bosch-garden.com
www.bosch-garden.com
www.bosch-garden.com
www.bosch-garden.com
Tel. service scule electrice: (021) 4057540
Fax: (021) 4057566
E-Mail: infoBSC@ro.bosch.com
www.bosch-garden.com
www.bosch-garden.com
www.bosch-garden.com
Molimo navedie kod svih pitanja i naručivanje rezervnih delova neizostavno broj predmeta sa 10 mesta prema tipskoj tablici baštenskog uredjaja.
www.bosch-garden.com
www.bosch-garden.com
Kod svih upita i naručivanja rezervnih dijelova molimo neizostavno navedite 10-znamenkasti kataloški broj sa tipske pločice vrtnog uređaja.
Ukoliko je potrebno, robotsku kosilicu i stanicu za punjenje uvijek zajedno pošaljite u Bosch ovlašteni servisni centar.
Dodatno je potrebna verzija softvera vašeg vrtnog uredaja (vidi „Izbornik > Postavke > Opcije sustava > Informacije“).
Hrvatski
Robert Bosch d.o.o
Kneza Branimira 22
10040 Zagreb
Tel.: (01) 2958051
Fax: (01) 2958050
Transport
www.bosch-garden.com
www.bosch-garden.com
www.bosch-garden.com
* Bosch Lawn and Garden Ltd., PT-HG/ENS-PA2, Stowmarket, Suffolk IP14 1EY, England
Henk Becker Executive Vice President Engineering and Manufacturing
Helmut Heinzelmann Head of Product Certification

i.v. h=w
Robert Bosch Power Tools GmbH, 70538 Stuttgart, GERMANY Stuttgart, 01.01.2017