
FHE 116 18.0EC - Drill Flex - Free user manual and instructions
Find the device manual for free FHE 116 18.0EC Flex in PDF.
| Product type | Rotary hammer (hammer drill) |
| Brand | Flex |
| Model | FHE 116 18.0EC |
| Rated voltage | 18 Vdc |
| No-load speed | 0 - 810 rpm |
| Impact rate | 0 - 4500 bpm |
| Max. drilling diameter (wood) | 13 mm |
| Max. drilling diameter (metal) | 8 mm |
| Max. drilling diameter (concrete) | 18 mm |
| Impact energy (EPTA 05/2009) | 1.5 J |
| Tool holder | SDS-plus |
| Weight (without battery) | 1.4 kg |
| Battery type | Li-ion (compatible AP 2.5, AP 5.0, AP 8.0) |
| Battery weight | 0.42 - 1.18 kg depending on capacity |
| Operating temperature | -10 to 40 °C |
| Charging temperature | 4 to 40 °C |
| Storage temperature | < 50 °C |
| Sound pressure level (LpA) | 87 dB(A), uncertainty K=3 dB |
| Sound power level (LWA) | 95 dB(A), uncertainty K=3 dB |
| Vibration (drilling in concrete) | 18.10 m/s², uncertainty K=1.5 m/s² |
| Functions | Drilling, hammer drilling, variable speed, reversible rotation, central lock |
| Lighting | LED work light |
| Safety | Auxiliary handle, switch lock, restart protection |
| Maintenance | Regular cleaning of ventilation slots with dry compressed air |
| Repairability | Repairs by authorized service; spare parts available at www.flex-tools.com |
| Certifications | CE, compliance with directives 2014/30/EU, 2006/42/EC, 2011/65/EU |
Frequently Asked Questions - FHE 116 18.0EC Flex
User questions about FHE 116 18.0EC Flex
0 question about this device. Answer the ones you know or ask your own.
Ask a new question about this device
Download the instructions for your Drill in PDF format for free! Find your manual FHE 116 18.0EC - Flex and take your electronic device back in hand. On this page are published all the documents necessary for the use of your device. FHE 116 18.0EC by Flex.
USER MANUAL FHE 116 18.0EC Flex
Symbols used in this manual

WARNING!
Denotes impending danger. Non- observance of this warning may result in death or extremely severe injuries.

CAUTION!
Denotes a possibly dangerous situation. Nonobservance of this warning may result in slight injury or damage to property.

NOTE
Denotes application tips and important information.
Symbols on the power tool

Read the instructions

Wear protective goggles!

Wear ear defenders!

Use lightweight breathing protection!

Disposal information for the old machine
VVolts
/minRotationrate
Important safety information

WARNING!
Before using the power tool, please read the follow:
these operating instructions,
the "General safety instructions" on the handling of power tools in the enclosed booklet (leaflet-no.: 315.915),
- the currently valid site rules and the regulations for the prevention of accidents.
This power tool is state of the art and has been constructed in accordance with the acknowledged safety regulations.
Nevertheless, when in use, the power tool may
be a danger to life and limb of the user or a third party, or the power tool or other property may be damaged.
The power tool may be operated only if it is
for its intended use
- in perfect working order.
Faults which impair safety must be repaired immediately.
Intended use
The rechargeable hammer drill FHE 1-16 18.0-EC is designed
- for commercial use in industry and trade,
- for hammer drilling in concrete, brick and stone.
for drilling without impact in wood, metal, ceramic and plastic.
to be used with suitable tools recommended by the manufacturer for this power tool.
Hammer safety warnings

WARNING!
Safety instructions for all operations.
- Wear ear protectors. Exposure to noise can cause hearing loss.
Use auxiliary handle(s), if supplied with the tool. Loss of control can cause personal injury.
Hold the power tool by insulated gripping surfaces, when performing an operation where the cutting accessory or fasteners may contact hidden wiring.
Cutting accessory contacting a "live" wire may make exposed metal parts of the power tool "live" and could give the operator an electric shock.
Safety instructions when using long drill bits with rotary hammers
- Always start drilling at low speed and with the bit tip in contact with the workpiece. At higher speeds, the bit is likely to bend if allowed to rotate freely without contacting the workpiece, resulting in personal injury.
Apply pressure only in direct line with the bit and do not apply excessive pressure.
Bits can bend, causing breakage or loss of control, resulting in personal injury.
Additional safety rules
- Secure the workpiece. Clamping devices or a vise will hold the workpiece in place better and more safely than holding it by hand.
- Do not drill, fasten or break into existing walls or other blind areas where electrical wiring may exist. If this situation is unavoidable, disconnect all fuses or circuit breakers feeding this worksite.
- Position yourself to avoid being caught between the tool or side handle and walls or posts. Should the bit become bound or jammed in the work, the reaction torque of the tool could crush your hand or leg.
Use suitable detectors to detect concealed power supply cables or consult your local supply company. Contact with electric cables may result in a fire and/or electric shock. A damaged gas pipe may cause an explosion. Cutting into a water pipe will cause damage to property or may cause an electric shock. - When working, hold the power tool firmly with both hands and ensure that you have a secure footing. The power tool is controlled more securely if held with both hands.
- Only use tools with SDS-plus tool holder. Pull on the tool to check that it is locked properly.
- Dust released from materials, such as lead paints, some types of wood, minerals and metal, may be hazardous to the operator or people in the vicinity. Inhaling or touching such dust may result in respiratory diseases and/or allergic reactions.
- Ensure the workplace is well-ventilated.
- If possible, use external dust extraction.
- It is recommended to wear a respirator mask belonging to filter class P2.
- Do not work on materials which release hazardous substances (e.g. asbestos).
- Use only original batteries with the voltage indicated on the type plate of your power tool. The use of other batteries, e.g. imitations, reconditioned batteries or other makes, increases the risk of injury and damage to property by exploding batteries.
-
Recharge batteries only with chargers recommended by the manufacturer. A charger that is suitable for one type of battery may create a fire hazard when used with another battery.
-
The battery may be damaged by pointed objects such as e.g. nails or screwdrivers or by external application of force. This may give rise to an internal short circuit, causing the battery to burn, smoke, explode or overheat.
Before carrying out any work on the power tool, move the direction preselector switch to the middle position. - Operate the direction preselector switch only when the tool is stopped.
- Identify the power tool with stickers only. Do not drill any holes into the housing.
Noise and vibration
The noise and vibration values have been determined in accordance with EN 62841. The A-weighted noise level of the power tool is typically:
Sound pressure level L_PA 87 dB(A);
Sound power level L_WA : 95 dB(A);
Uncertainty: K = 3 dB.
Total vibration value:
Emission value a_h,HD:18.10m / s
Uncertainty: K = 1.5 m/s

CAUTION!
The indicated measurements refer to new power tools. Daily use causes the noise and vibration values to change.

NOTE
The vibration emission level given in this information sheet has been measured in accordance with a measurement method standardised in EN 62841 and may be used to compare one tool with another.
That the declared vibration total value(s) and the declared noise emission value(s) may also be used in a preliminary assessment of exposure.
However, if the tool is used for different applications, with different cutting accessories or poorly maintained, the vibration emission level may differ.
This may significantly increase the exposure level over the total working period.
To make an accurate estimation of the vibration exposure level, it is also necessary to take into account the times when the tool is switched off or running but not actually in use.
This may significantly decrease the exposure level over the total working period. Identify additional safety measures to protect the operator from the effects of vibration such as: maintain the tool and the cutting accessories, keep the hands warm, organisation of work patterns.

WARNING!
- that the vibration and noise emissions during actual use of the power tool can differ from the declared values depending on the ways in which the tool is used especially what kind of workpiece is processed; and
- of the need to identify safety measures to protect the operator that are based on an estimation of exposure in the actual conditions of use (taking account of all parts of the operating cycle such as the times when the tool is switched off and when it is running idle in addition to the trigger time).

CAUTION!
Wear ear defenders at a sound pressure above 85 dB(A).
Technical data
| Tool | FHE 1-16 18.0-EC | ||
| Type | Rotary hammer | ||
| Rated voltage Vdc 18 | |||
| No-load speed /min 0-810 | |||
| Impact rate /min 0-4500 | |||
| Max. drill diameter | |||
| Drilling in wood mm 13 | |||
| Drilling in meatal mm 8 | |||
| Drilling in concrete mm 18 | |||
| Impact energy (according to "EPTA procedure 05/2009") | J 1.5 | ||
| Tool holder SDS-plus | |||
| Weight according to"EPTA Procedure 01/2003" (without battery) | kg | 1.4 | |
| Battery | AP 2.5 | AP 5.0 | AP 8.0 |
| Weight of battery/kg | 0,42 | 0,72 | 1,18 |
| Working Temperature | -10~40°C | ||
| Charging Temperature | 4~40°C | ||
| Storage Temperature | <50°C | ||
| Charger | CA 10.8/18.0, CA 18.0-LD | ||
Overview (see figure A)
The numbering of the product features refers to the illustration of the machine on the graphics page.
1 Function selector
2 Locking sleeve
3 LED worklight
4 Direction preselector switch (forward/ center-lock/reverse)
5 Variable-speed trigger switch
6 Soft grip
Instructions for use
Before switching on the power tool
Unpack the power tool and accessories and check that no parts are missing or damaged.

NOTE
The batteries are not fully charged on delivery. Prior to initial operation, charge the batteries fully. Refer to the charger operating manual.
Inserting/replacing the battery
Press the charged battery into the power tool until it clicks into place (see figure B).
- To remove, press the release button (1.) and pull out the battery (2.) (see figure C).
CAUTION!
When the device is not in use, protect the battery contacts. Loose metal parts may short circuit the contacts; explosion and fire hazard!
Battery state of charge
- Press the button to check the state of charge at the state of charge indicator LEDs. (see figure D).
If one of the LEDs flashes, the battery must be recharged. If none of the LEDs light up after the button is pressed, the battery is faulty and must be replaced. The indicator goes out after 5 seconds.

NOTE
Follow the instructions for charging the battery set out in the charger operating manual.
Inserting tools with SDS-plus shank

CAUTION!
Used cutting accessories may become hot. Wear protective gloves!

WARNING!
Remove the battery before carrying out any work on the power tool.
- Place the direction selector switch 4 in the center position to lock the trigger switch 5.
Clean tools and lightly grease the shank (see figure E) - Insert the SDS drill bit into the bit holder with a turning motion until it automatically locks (see figure F).
- Check lock by pulling on the cutting accessory.
Removing the accessories

WARNING!
Remove the battery before carrying out any work on the power tool.

CAUTION!
Used cutting accessories may become hot. Wear protective gloves!
Pull the locking sleeve backwards (1.) (see figure G).
Remove the cutting accessory (2.) (see figure G).
Direction preselection

CAUTION!
Change the direction of rotation only when the tool is stopped.
Move the direction preselector switch to the required position (see figure H):
- Left: clockwise (drill, insert screws, tighten down screws)
- Right: counterclockwise (remove screws, release screws)
- Middle: switch-on interlock (tool change, when working on the power tool)
NOTE
The hammer will not run unless the direction preselector switch 4 is engaged fully to the left or to the right.

WARNING!
Battery tools are always in operating condition. Therefore, the direction preselector switch 4 should always be locked in the center position when the tool is not in use or when carrying it at your side.
LED worklight (see figure 1)
The tool has an LED worklight 3 to illuminate the work area and improve vision when working in areas with insufficient light. The LED worklight 3 will switch on automatically while the trigger switch 5 is depressed.
If the LED worklight 3 begins to rapidly and continuously flash when the switch on the tool is depressed, the battery pack power has run out, and the battery pack should be recharged.
Setting the operating mode (see figure J)

CAUTION!
Do not change the operating mode until the power tool has come to a stop.
It is possible to use the hammer drill in two different modes.
To select the required mode of operation, turn the function selector (1) to the positions indicated (see figure J).
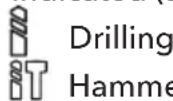
To select the required mode of operation, turn the function selector 1 to the positions indicated.
i NOTE
The rotary knob must audibly click into place in all positions.
Switching on the power tool (see figure K)
- To switch the tool on: Press and hold down the trigger switch (5). The power tool trigger switch enables the speed or impact rate to be increased slowly to the maximum value.
To switch the tool off: Release the trigger switch (5). The variable-speed feature is particularly useful. It also enables you to select the best speed for a particular application.
i NOTE
It is recommended to use the variable-speed feature for a short time only. Do not continuously operate the tool at different speeds. It may damage the switch.
WARNING!
Please start the tool for 2-3 minutes first before use, while the temperature is below zero and there is no impact phenomenon after you turn on the tool.
Hole drilling (see figure L)
When attempting to drill a large diameter hole, it is sometimes best to start with a smaller drill bit then work up to the required size. This prevents overloading the drill. If the drill bit snags, switch off immediately to prevent permanent damage to the drill. Try running the drill in reverse to remove the bit. Keep the drill in line with the hole. Ideally, the drill bit should enter at right angles to the work. If the angle is changed during drilling, this could cause the bit to snap off blocking the hole and perhaps causing injury. Reduce pressure as the drill is about to break through the item being drilled. Don't force the tool, let it work at its own pace. Keep the bit sharp.
Drilling wood (see figure M)
For maximum performance when drilling larger holes, use auger bits or spade bits for wood drilling.
Set the tool to the drill mode.
- Begin drilling at a very low speed to prevent the bit from slipping off the starting point. Increase the speed as it bites into the wood.
- When drilling through holes, place a block of wood behind the workpiece to prevent ragged or splintered edges on the back of the hole.
Drilling metals
For maximum performance, use HSS drill bits for metal drilling.
- When drilling metals, use light oil on the drill bit to keep it from overheating. The oil will prolong the life of the bit and increase the drilling efficiency.
Set the tool to the drill mode. - Begin drilling at a very low speed to prevent the bit from slipping off the starting point.
- Maintain a speed and a pressure that allow cutting without overheating the bit.
Applying too much pressure will:
Overheat the tool.
- Wear the bearings.
Bend or burn bits.
- Produce off-center or irregularly shaped holes.
Drilling masonry (see figure N)
For maximum performance, use high quality carbide-tipped masonry drill bits when drilling holes in brick, tile, concrete etc.
- Maintain a speed and a pressure that allow cutting without overheating the bit or tool.
Applying too much pressure will:
Overheat the tool.
- Wear the bearings.
Bend or burn bits.
- Produce off-center or irregular-shaped holes.
- Apply light pressure and medium speed for best results in brick. Apply additional pressure for hard materials such as concrete.
- When drilling holes in tile, practice on a scrap piece to determine the best speed and pressure. To prevent the drill bit from skidding/ sliding, first apply two pieces of masking tape to create an "X" shape over the intended drilling spot.
- Begin drilling at a very low speed to prevent the bit from slipping off the starting point.
Maintenance and care
WARNING!
Remove the battery before carrying out any work on the tool.
Cleaning
CAUTION!
when cleaning with compress air, always wear goggles.
Regularly clean the power tool and ventilation slots. Frequency of cleaning is dependent on the material and duration of use. Regularly blow out the housing interior and motor with dry compressed air.
Repairs
Repairs may be carried out by an authorised customer service centre only.
Spare parts and accessories
Other accessories, in particular cutting accessories, can be found in the manufacturer's catalogues. Exploded drawings and spare-part lists can be found on our homepage: www.flex-tools.com.
Disposal information
WARNING!
Render redundant power tools unusable:
- mains operated power tool by removing the power cord,
battery operated power tool by removing the battery.

EU countries only
Do not throw electric power tools into the household waste!
In accordance with the European Directive 2012/19/EU on Waste Electrical and Electronic Equipment and transposition into national law used electric power tools must be collected separately and recycled in an environmentally friendly manner.

Raw material recovery instead of waste disposal.
Device, accessories and packaging should be recycled in an environmentally friendly manner. Plastic parts are identified for recycling according to material type.
WARNING!
Do not throw batteries into the household waste, fire or water. Do not open used batteries.
EU countries only:
In accordance with Directive 2006/66/EC defective or used batteries must be recycled.
i NOTE
Please ask your dealer about disposal options!
(€)-Declaration of conformity
We declare on our sole responsibility that the product described in "Technical specifications" conforms to the following standards or normative documents:
EN 62841 in accordance with the regulations of the directives 2014/30/EU, 2006/42/EC, 2011/65/EU.
Responsible for technical documents:
Technical Director Head of Quality Department (QD)
Exemption from liability
The manufacturer and his representative are not liable for any damage and lost profit due to interruption in business caused by the product or by an unusable product.
The manufacturer and his representative are not liable for any damage which was caused by improper use of the product or by use of the product with products from other manufacturers.
UK Declaration of Conformity CA
We as the manufacturer: FLEX
Elektrowerkzeuge GmbH, Business address: Bahnhofstr. 15, 71711 Steinheim, Germany
declare under our sole responsibility, that the product(s) described under "Technical specifications" fulfills all the relevant provisions of The Supply of Machinery (Safety) Regulations S.I. 2008/1597 and also fulfills all the relevant provisions of the following UK Regulations:
Electromagnetic Compatibility Regulations S.I. 2016/1091, The Restriction of the Use of Certain Hazardous Substances in Electrical and Electronic Equipment Regulations S.I. 2012/3032 and are manufactured in accordance with the following designated Standards:
BS EN 62841-1:2015+A11:2022; BS EN 62841-2-6:2020+A11:2020
Place of declaration: Steinheim, Germany.
Responsible person: Peter Lameli, Technical Director - FLEX-Elektrowerkzeuge GmbH
Contact details for Great Britain: FLEX Power Tools Limited, Unit 8 Anglo Office Park, Lincoln Road, HP 12, 3RH Buckinghamshire, United Kingdom.

Peter Lameli Klaus Peter Weinper Technical Director Head of Quality Department (QD)
01.03.2023
Specifications techniques
Perceuse a percussion
Battery state of charge
accu's worden gerecycled.
OPMERKING
Technical Director Head of Quality
Department (QD)
Ooyniec aopaaeiac yia bAe ts epyaoeis.
Opate wtonpoataia. H ek0eon oTo 0puo mnpei va npoka0e1 anwlaia ako?
XpnoiunoiieBONnTKeCxEipoaBeC, epooVnapexovtaieTo nAektpiko epyaio.H anwlaeAeyxou npoei va oynnoeIe Tpaumatouc.
Kpaatae to nAektpiko epyaiaio ano TIC movwEves λaβες, otav npayatonoite epyaoc onou ta napελkóμεva konnc ηοι σργκTηpeç μnopei va ερθouv σε εnaφη με kpuε
kaawdioei. Eav ta napelkouva Konng epoov oE enaqn uE nektpoopa kaawia evexetai Ta kTe0eiva μeTaaliká epn Tou nektpikoU epyaaiou va kataoov kai auta nektpoopa kai va npokaléosov nektponlaia otov xepiotn.
Odbnyiec aopaliaic kata tn xphon Tpunaviw ueyalou mKouc me Nepiotpoqikcs opupes
Eevate navta tn diatponon mexaunna taxutnta kai me tn mutn toutpunaviou oE enapn eTO TEuayio neneepyaiaac. 2e uynolotepecs taxtntec, n uutn npopei va luyioe i av nepiotpapei eueoepa xwiic va piokeetai oe enapn me to TEmaxio neneepyaoiac, npokaawvtaoc Tpaumatio.
Aokite nioon mvo otny iia uthetaia me tn mtn kai va mnu aokite unepoikak eyaanieon. H mtn npoei va luyioeikai va npoka oei opaun n anwlaea exyou, e ouveneia tpaumatioo.
Peter Lameli Klaus Peter Weinper Technical Director Head of Quality Department
Ioctabrahe/3amraHa ha 6aTepeyra
HaTnchete 3apeeHaTa 6aTePnB eAekTpueckn INHCTpyMeHT,doKaTo upaKHe Ha Macto(BnxTe fNrgpa B).
3aOTCTpaHЯBaHeHaTnchTe6yToHa 3aOCBO6OxKaBaHe(1.)uN3AbpnaIte 6aTepyTa(2.)(BnKTefngrypaC).
BHUMAHNE!
Korato yctpoicTBOTHe e B ynoTpe6a, 3aunTeTe KOHTAKNTe Ha 6atepnaTa. Cbo6oHN MeTAHN qactn Morat Da CBpbKaT Ha Kbco KOHTAKNTe, Aa npuHrT eKCnAo3n I noXap!
CbctoHne Ha 3apeKdaHe Ha 6aTepeYta
HaTnchete 6yToHa 3a npOBepKa Ha cbCToRHeTo Ha 3apeKdaHe n HAnkATOpHIne CBeToADNoHn Ha cbCToRHeTo Ha 3apeKdaHe. (BnK fNrgpa D).
Ako eAnH OT CBeToADNoAHTe Mna, 6aTeepnra Tp8Ba Da 6bDe 3apeDHa. Ako HNKoI OT CBeToADNoAHTe He CBETn CKeA, HATNCKaHe Ha 6yToHa, 6aTeepnTa e Hen3npabHa n Tp8Ba Da 6bDe 3aMeHeHa. INHdkaTopbT n3racBa CKeA, 5 ceKyuHAn.
i BEAEXKKA
CneDbaiTe HNCTpyKuHte 3a 3apeXdaHe Ha
6aTeepnTa, ONiCaHN B pBkoBOdCTBOTO 3a yNoTpe6a Ha 3apAHOTo yCTpOINCTBO.
BmbkbaHe Ha nHcTpymeHTn c onaoka SDS-plus
BHUMAHVE!
V3no3BaHnTe aKcecoapn 3a p3aHe MORatda cTahat ropeu. Hocete 3auNTn npbKaBnU!.
I PEAYIPEXKAEHNEI
OCTpaHete 6aTePnTa npEAn Da u3BbPwnte KaKBato N Da 6uNo pa6ota no eAekTpueckn INCHTpymENT.
Iocabete npebkauoBaTea 3a n36op Ha nocoka 4 B cpeHNO nooXeHne, 3a Da 3akauhTe cnycbKa npebkauoBaTeA 5.
I OuaHCTe HNCTpyMeHTnte N AekocmaKTe onaKaTa (BnX fNrgpa E)
IocTaBete CBpeAOTO OT TnSDS B abpkaHa Ha KaPaHnC ABNXeHne Ha
3aBbPTaHe, DOKaTO TO aBTOMaTHUHO Ce 3akAnuBa (BnK fNrgypa F).
PpOBepeTe 3aKIAUObBaHeTo Upe3 AbpnaHe Ha akcecoapa 3a p3aHe.
IpeMaxBaHe Ha akcecoapnte PPEyPEXKAEHNE!
OtcpaHete 6aTePnra TpeAn Da n3BbPwnte KaKbato Nda 6nlo pa6ota no eAekTpueckn HNCTpyMeHT.
BHUMAHNE!
I3no3BaHnte aKcecoapn 3a p3aHe MORATda cTahat ropeu. Hocete 3aunTHn pbKaBnU!
U3AbpnaTe 3aKIOyBaUaTa BTyIka Ha3aA (1.) (BnK fHyp a G)
U3BaAeTe aKcecoapa 3a pR3aHe (2.) (BnX nrypa G).
LED pa6oTHa lamna (BnKTe cnrgupa I)
HCTpyMeHTbT mHa LED pa6oTHa
Aamna 33a OCBetraBe Ha pa6oTHaTa
3OHa n NO6pRAbe Ha BnIMOCCTTa
Pn pa60Ta B 3OHn C HeoCTaTBuHa
CBeTAnHa. LED pa6oTHata Aamna 3 ue ce
BKAIOUH ABTomTuHO, DOKATO CNYCbKbT
PipeBkIOUBaTeA 5 e HATNCHaT.
AkoLED pa60thata lamna 3 3anouehe 6bp3o n HnpeKbchato da mna, KOrato npebkIOUoyBaTeaHT ha nHCTpyMeHTa e HaTnCHaT, 3axpaHbaHeTo Ha 6atepnaTa e n3eepnaHO n 6atepnaTatp6Ba da ce npe3apeu.
3aDaBaHe Ha peXnMa Ha pa6ota (BnK fNrgpa J)
BHIMMAHUE!
He npomehnye pexmuHa pa6ota,dokaTo eAlektpoHnHcTpymEnbT He cnpe.
Bb3MOxH0e Da n3noA3BaTe yApHaTa 6opMaunHa B Da pa3AuHn peKmHa.
3a da n36epete Heo6xOaMnna peKm Ha pa6ota, 3aBbptete cealeKTopa Ha yHKun (1) AO NocOeHnTe No3uCn (BnK fNrypa J).
Ppo6nBaHe
IT yAapHo npo6nBaHe
3a da n36epeTe Heo6xOAMnna peKmHa pa6ota, 3aBbPteTe ceAeKTopa Ha cyHKun 1 Ha NocOueHInTe N03n.
i BEAEXKKA
BbptauoTo ce konue Tpa6Ba 3ByKOBO Da ce _HKCupa Ha MACTO BBB BCNUKN N03NUN.
BkIoUbaHe Ha eAeKTpNueckn HnHCTpymEt (BnK fNrgpa K)
3a Da BKAIOUHTe INHCTpyMeHTa: HaTnCHete N 3aApbXTe HaTnCHat cnYcbKa npeBkAIOuBaTeA (5). CnycBkBT npEbkAIOuBaTeA Ha eAEKtpOnHCTpyMeHTa NO3BOAra BCKOPoCTTa HAn YeCTOTata Ha yDapa Da Ce yBeAunuBaT 6abHO Do MaKcMaHaTAt CTOnHOCT.
3a Da n3KluOHTe nHCTpyMeHTa: Ocbo6oTe cnycbKa npebkauybaTeA (5). yHKnraTApomehnBa ckopocTe oco6eHO noe3Ha. Ta cbto Taka Bn no3BOJBA Da n36epTe Hau-Do6pata ckopocT 3a KOHKpeTHo npAnOxKeHne.
i BEAEXK4
PpeOpbHTeHHO eAa H3NOA3BaTe yHKnraTApomeHaNBaCKopocCaMo 3a kpaTKo BpeMe. He pa6oTeHe npkecbato c HHCTpyMeHTa npn pa3AnuHN CKopocTu. Toba MOKe Da NOBpeAn PpeBkIOUoyBaTeA.
IPEyIPEXHEHNE!
Moi, npbpo cnapaite uHctpymeHa 3a 2-3 MnHytn npeu ynoTpe6a, Korato TeMnepaTypata e NOd HyaTa N HMa HMa yApHo AeiCTBHe, CaeA KaTo BkIoUHTe INHcTpymeHa.
KORATO NOUCTBaTe CbC CrbCTeH Bb3AUY, BuHaH NOCETe Ppe4n3HN OuHa.
PeOBOHO NOUcTBAuTe eAeKTpnuCeKnn HNCTpyMeHT N BEHTNaaUNoHHnTe OTBOpN.
YeCTOTATA Ha NOUcTBAHe 3aBnCn OT MaTePnAHa N pOaJbAaKnteAHOCTTa Ha pa6ota. IepNoAnuHo n3dYXbaIte BbTpEwHocCTTa Ha Kopnyca N ABnraTeAa Cbc Cyx CrbCTeH Bb3Ayx.
PemOH
PemOHHTHnTe AeHocTn Tp6Ba Da ce n3BbPWBaT cAmO OT OToPn3npaH ceHTbp 3a 06cayXbaHe Ha KAneHTn.
Pe3epBHN qactn n akcecoapn
3a npyn akcecoapn, no KOHKpeTHO 3a
pejeku akcecoapn, BnKTe KaTAL03Nte Ha
npon3BOAnTeA. YepTeKn B pa3rAo6eH BnD
n Cnncbui Ha pe3epBHNte YaCTN MoKeTe Da
HaMePHTe Ha DOMaShHaTa CTpaHnca:
www.flex-tools.com.
Информацnia 3a ИЗХвьрЯHe

IPEAYNPEXKAEHME!
Hapabete n3AmuHnTe eAleKtpnuYeCKn HNCTpyMeHTn Heu3NoA3BaEMN:
- 3aADBKBaHNTe OT Mpekata eAekTpueckn INHCTpyMeHTn 4pe3 npemaxBaHe Ha 3axpaHbau nka6eI,
-pa6oTeuHte Ha 6aTePnEeKtpnueckn HNCTpyMeHTn Upe3 npemaxBaHe Ha 6aTePnTa.

Camo 3a ctpaHn ot EC He n3XbpbAynTe eAekTpueckn INHCTpyMeHTN B DOMaKNHCKNTe
OTnAdbu!
B cbOTBeTCTBnE c EbPoneNcKa AnpeKTHBa 2012/19/EC 3a OTNaDbUHO eAeKTPnuecko n eAeKTPoHNO O6OpyDbaHe n HeHOTO OTPa3raBaHe B HaunOHaANHTe 3aKOHn, N3NoA3BaHnTe eAeKTPnueCKn INHCTpyMeHTv Tp8Ba Da 6bDaT cb6npaHn OTdEAnHO n peuKNpaHn NO Cbo6pa3EH C ONa3BaHeTo Ha OKoAHata CpeDa HauH.

PeunKAnpaIte CypOBHHTe, BMeCTO Da rN N3XBbPArTe Ha OTNa4bHTe.
UcTpoNCTBa, akcecoapn n onakOBKn Tp86Ba Da 6bDat peuNKlnpaHn no cbo6pa3eH C ONa3BaHTo Ha OKoHaTa CpeDa HauH. IAActMacOBtte qactn ca 0603HaueHn 3a peuNKlnpaHe cnopeD Tnna Ha MaTePnAa.

IPEAYPPEXKAEHME!
He n3XbBpAynTe 6aTeepnnte B DOMaKnHCKnA OtnaBk,OrbH nn BOda.He OTbapnTe n3NoA3BaHnTe 6aTeepn.
Camo 3a cTpaHn oT EC:
B cbOTBeTCTBnE c AnpeKTHBa 2006/66/EO AeΦeKTHnTe nAn n3NoA3BaHnTe 6aTeepn Tp86Ba Da 6bDat peuKAnpaHn.

BEAEXKKA
MOn, nonntaune CBOr TbproBeu 3a Bb3MOxHOCTNe 3a N3XbPAAHe!
(E-KeIapau3a CbOTBeTCTBHe
AeknapameHa CBOA OTROBOPHOCT,
Ye npOaYkTB OINcAH B,TexHnueckn
CneuNphiKaun"OTRObApHa CAneHNTe
CTaHapTN HAN HOpMaTHNBH NOKyMeHTN: EN 62841 B cBoTBeTCTBVe c peryJaunTe Ha DnpeKtNBn 2014/30/EC,2006/42/EO, 2011/65/EC.
OTROBOPEN 3a TexHnueCKNte DOKymeHTN: FLEX-Elektrowerkzeuge GmbH, R & D Bahnhofstrasse 15, D-71711 Steinheim/Murr

Ptep Aamei (Peter Lameli) Texnueckn pbkoBOAnTeA
Klayc NeTep
Bainnep (Klaus
Peter Weinper)
HaayanHK Ha OTaEa
3a KaueCTBO (QD)
HaCTOaUne HNCTpyKuUN NO 3KcIyatauNN;
-06uue Hhctpykunno TeHHke
6e30nacnoctn npu o6pauehennc 3AektpoHnCtpyMeHTaMn B npnaaraemom 6yKaeTe (6yKaeT N° 315.915);
- npabHnA, AeNCTByIOuIe B pa6ooyen 3OHe N Mepbl NO ppeAOBpaueHnIO HeCyaCTHBIX CAYaEB.
3TOT 3AeKTPoHCTpyMeHT OTBeueaET
cMbIM COBpeMeHHbIM Tpe6OBAHnM N
6blcKOHCTpyuPoBAH B COOTBcTbN C
06UePpN3HaHHbIM npaBnAmn 6e3ONaCHOCTN.
TeM He MeHee, pN INCNOb3OBAHnN
3AeKTPoHCTpyMeHT MoKeT PpeAcTaBnTb
ONaCHOCTb AAN KIN3HN N KOHeYHOCTeN
IOAb3OBaTeA Nn TpeTBx ANL. KpOME TORO,
3AeKTPoHCTpyMeHT N APyROE NMyUcECTBO MOrYT
6bITb NOBpeXdEhbl.
3AeKTPoHCTpyMeHT MoXHo 3KcNAYaTnpoBaTb
TOAbKO:
-IOHa3HaueeHHIO;
B NdaaHbHom pa6ooyem COCTOHN. HeucnpabHOCTN, KOtOpbIE BAJIOHT Ha 6e30NaCHOCTb, OAnKHbI 6bITb HEmeAeHHO yCTpaHeHbl.
06laactb npImeHnna
AkkmyaTopHa ydapHa ApeIb FHE 1-16 18.0-EC npeHa3HaueHa:
A KOMMepueckoro NcnoAb3OBaHnB nPomblwaeHHoCTN TOpROBa;
- yapHOrO cBepAeHn86ToHa, KnpNua n KaMn;
- 6e3yapHOro CBepeHnAepeBa, MeTaAa, KepaMnKn n PAActnKa;
- ANCNOb3OBaHnC NOxOaIIMn HNCTpyMeHTaMn, peKOMeHDoBaHHbIMn npOn3BOaNTeAem dAaHHoro 3AEKTponHCTpyMeHa.
IpeAynpeJdeHnnoTexHnke 6e3oNaChocTn np pa6ote c ydaapHOJ ApeAbIO

IPEAYNPPEKHEHME!
HCTpyKuH No TexHuKe 6e3oNaCHOCTA ABA BCEX onepaH.
NcnoB3yTe cpeAcTba 3aunTbI opraHOB cayxa.Bo3eInCTBne Wyma MoKet npnbecn K notepe cayxa.
IcnoAbyTe BcNoMOraTeAhbHbIe pyKoTKn, BXOJaUne B KOMnAeKT HhCTpyMeHTa. IOpTePRA KOHTPOA MoXeT npINBeCTN K NOAyHeHIO TpaBMbl.
■Пи ВьЮАнEHn pa6OT,ВхОдe KOTOpbIXpeKyuSIN3AeMeHr HAN KpeIaENHe MOryT KacaTbCЯСkpBtOJ 3AeKTPoNpOBOaKN,ApExHTe HHCTpymENT 3a N3OAnPoBaHHbIe NOBepXHOCTN.KacAHne peKyuSIN 3AeMeHrOM pIOBOaKN IOd HapPraJKeHNEM MOxET npNBecTN KпepeDAue HapPraJKeHNHa MeTaAUNYeCKNe YactN 3AeKTPoHnCTpymEHTa N IopaJKeHNIO OpepaTopa 3AeKTPuYeCKM TOKOM.
Yka3aHnno TexHnke 6e3OnaChOCTn npNcNoAb30BaHHn AAnHHbIX CBepA
Bcerda NaHHaHTe CBepAeHne Ha Hn3KoN CKOpOCTu, npn 3TOM KOHeC CBepAA DOAXKeH KacaTbC4 3aROTOBKN. Pn BpaueHN C BBICOKoN cKOpOCTbIO 6e3 KOtAKTa C 3aROTOBKOJ CBepAO MoXeT COHyTbC, YTO pINBeET K TpaBMe.
PnKlaaBbAaTe DaABeHne ToAbko No npraMoI AnHHN OTHOCHTeA bHO CBepa H He daBNTe cAnWKOM cA bHO.CBepMOxket CoHcyTbcra, YTO npNBeTe K NOAOMKe, nOtepe KOHTPOA IN TpaBMam.
AnohnteBhie npabna 6e3oNaCHOCTN
3akpennte 3arotbky.3aKHMhie npncnoc6aehnna TnCKn 6ydyT yApKnBaTb 3arOTbky Ha MeTe AyuWe n HaJeKHee, Yem ecAn 6bl OHa yApKnBaAacb BpyHyIO.
He CBepAnTe H He OAn6Nte CTeHbI HAn APyrHe HEnpOcMaTpPnBaEmbIe 06Aactn, rAe Bo3MOxHO HaAnuNe 3AEKTPoPBOAoKn. Pn Heo6XoAMOCtN BbINOaHEnr TaKnx pa6OT OTKAIOUHTe BCE PpeOxApaHNTeAN HAn BBkAIouyTeAN, NITaIOUne 3TOT yAcTOK pa6OT.
3aIMnTe Tako nOAnKeHne, yTo6bI He OKa3aTbCra 3aXaTbIM MeKdY HHCTpymEhOM n CTeHO. EcAn BO BpeMpa60TbI CBepAo 3aKAnHHT IAN 3acTpRHeT, B pe3yAbTaTe BO3eNCTBnKpyTaeo MOMeHTa INCTpyMeHT MoKet pa3ApO6ntb HOry nn pyKy.
IcnoB3yTe NOxOaIe
AteKTOpbl AIA O6HapXKeHn
CKpbTOn 3AekTpOPOBOKn NAn
IpOKOHcyAbTnpYiTecb B MeCTHO
3HeproCha6JkaIOUeKOMNaHH. KOHTaKT
C 3AekTpOPOBOkO MoKeT PpNBecTN K
BO3ROPaHnIO IN NOPaXeHnIO 3AeKTpnuCeKNM TOKOM. NOBpeXdEHNr Ra3OBoN Tpy6bl MOxET PnVBecTN K B3PbBy. NOBpeXdEHNe BOaONpOBOAo MOnKET PnVBecTN K NOpue IMyUeCTBa IAn NopaxKeHnIO 3AeKTpnuCeKNM TOKOM.
Pn pa6ote Kpenko AepKnte 3AektpoHCTpyMeHT o6eIMN pykamn n CaeNTe 3a yctOnuHBim NOAOXeHNem Tea.3AektpoHCTpyMeHT hAdexKHee AepKaTb o6eIMN pykamn.
Icnoa3yTe TOABko HnCTpyMeHtbi C natoHOM SDS-Plus. NotAHnte 3a CBepAo, 4TO6bI y6eAHTbcra, 4TO OHO npaBnAbHo 3aΦNKcnpoBaHo.
IbIb, BbIeAIOUaCn 3 TaKx MaTePnaAOB, KaK CBHIOOBbie KpaCKN, HeKOTOpbIE BnAbI ApeBeCNHbl, MHePaABI N MeTaALbl, MoXeT IpeACTaBAArTB ONaCHOCTb AAn ONePAToPA HaxOAduXxCra No6An3OCTn AIODei. BbIXaHne nn npIKoCHOBeHne K 3TOI nbIaN MOKeT BbI3BaTb peCnnpaTOPhie 3a6oLeBaHnR n (nAN) aAeepeckne peakun.
- Y6eAnTeScb, yTo pa6ooye MeCTO xopoWIO npOBetpNBaeTc.
- IO BO3MOXHOCTN NcNOAb3yIte BHeuHHee nblAeydaaHHe.
- PeKOMeHdyetcHaDeBaTb peCnnpaTop c ΦNAbTpom Kλacca P2.
He pa6oTaIe C MaTePnaAamn, BbIeAIOUIMN OaChbIe BeIecTBA (HapnMpE, ac6ecT).
NcnoB3yTe TObKO opnHbHbIe aKKMyAToPbIC HAnpJKeHHeM, COOTBetCTByIOUIM 3HaueHIO Ha NaCnOpTHoT Ta6AnuKe 3AEKTPoHHCTpyMeHTa. Pn INcNoB3OBAHIN ApyrNX aKKMyAToPOB, HApPmep aHaIoRnHybIX, BOCCTaHOBaeHHbIX IAN aKKMyAToPOB ApyrNX IPOIN3BOAnTEeN, NOBbIaETCra PnCK IOnyueHn TpaBM, a TaKxpeNObpeHnI NMyuectBa B pe3yAbTaTe B3pblBa aKKMyAToTopa.
3apKaTe aKKMyAToPbI ToAbko C NOMOuBIO 3apAnbIX yCTpoiCTB, peKomeHApEMbIX N3ROTOBHTeAem. 3apAdHoe yCTPOiCTBO, npEaHa3NaueHHoe AAD OAnHO TnPa aKKMyAToPob, MOKeT CTaTb PpUHNoNoXapa pni NCNOAb3OBAHn C dpyrIm aKKMyAToPOM.
AkkymyIaTOP MoKeT 6bITb NOBpeKdEH OCTpbIMn PpeMetam, TaKMM KaK rBO3An NAn OTBePtKa, An6o BHeuHm BO3AeIcTBnEM. 3To MoKeT npNBecrN K BHyTpehemy KopOTkOMy 3aMbIKaHnIO, a TAKKe BO3rOpAHIO, BbldeAEHNIO dBMa, B3pBlv NAn nepepeBy akMyIaTopa.
■IpeaBbINOHeHnEMKaKnx-An6o pa6OT c3AeKTPoINHCTpyMeHTOM npeBeaNTe nepeKaIOuATEb Bb6Opa HappaBaeHnB CpeAHee NOAOKeHne.
Icnoa3yTe nepeKaIOuATEb Bb6opa HnpaBHeHr TObKO pN OCTaHOBHeHHOM nHCTpyMeHTe.
Ara MapKnpoBkn HnCTpyMeHt a nCNOa3ynte ToaKo HaKaen. He npocBepaBaTe HkaKx OTBePCTn B Kopnyce yctpOcTba.
Wymn Bn6paun
UpoBn Wyma N Bn6paunu 6bln ONpeJeHbI B COOTBeTCTBnC O CTaHdapTom EN 62841. OueHeHHbI ypoBeH b Wyma 3JIeKTPoHnHCTpyMeHTa A O6bIyHO IMeET cIeNyIOUne 3HaueHnY.
- YpoBHeB 3ByKOBOrO daBJIeHnA LpA: 87 d6(A);
- YPOBEHb 3ByKOBOI MOUHOCTN LwA; 95 dB(A);
- NorpeuHocTB: K = 3 dB (A).
O6uee 3naeHne Bn6paun. - 3Nauchenne BO3dienCTBna a_h,HD:18,10 M / c^2
- NorpeuHocTB: K = 1,5 M/c

BHUMAHME!
YKa3aHHbIe N3MepeHn OTHOCATcK HOBbIM 3AeKTpOHnHCTpyMeHTam. EKeAHeBHOe NCNoB3OBaHnE npNBOAnT K N3MeHeHIO 3HaueHn Wyma n Bn6paunu.

NPMMEAHHE
YpoBHeB Bn6paun, yKa3aHHbI
B DaHHOM AOKyMeHTe, N3MepeH C
NOMOsbIO CTaHApTN3uPOBaHHOro TecTa,
COOTBeTCTByIOSeero AnpeKtNbAm EN62841,
IMoKET NcNoA b3OBaTbCra AAn CpabHeHn
OAHOro INHCTpyMeHTa CApYrUm.
Yka3aHHOe 06uee 3NaueHne Bn6paunu Yka3aHHbI yPOBeHb UyMa TaKKe MOrytNCNoA b3OBaTbCra AAn IpeDabPnteBHOOnOueHKN yPOBHa BO3dEInCTBn.
OHaKO eCn INHCTpyMeHT NcNoA3yETcA Apynx ceAe, C apyHMn npHaAeXHOCTaM
HnB HeHaIeJaIeM COCTOAHN, yPOBeHb Bn6paun MoKeT OTAnuTaBCa.
3TO MOXET 3HaHTeA bHO NOBbICNTb yPOBeHb BO3dEhCTBnB TteHHe Bcero BpeMeHn pa60Tbl.
Ara ToHOn OueHKn yPoBn BO3aEcnTBn Bn6paun Heo6xoAMo TaKxe yuHTbBaTb BpeM, KOrda HnCTpyMeH TblKaIOUeH nn pa6Otaet, Ho aKTnueckn He nCNoAb3yeTcR.
3TO MOKET 3HaunTeIbHO CHN3NTb yPOBeHb BO3dEINCTBnB TteHHe Bcero BpeMeHn pa60Tbl.
Heo6xoAMMO npdeYCMOTpeb DOONAHHTeHbHbIcNoCob3aunTb ONepaTopa OT BO3dEhCTBnBn6paun, TaKne KaK 0cbayxnbAHneNHCTpyMeHTOB INpHaAeXHoCTeN, 3aunTa pyk OT XoAoDa, OprAHn3aunpeXmAp6Otbl.

NPEAYNPEXAEHNE!
- PeaBbHbI ypoBeHb Bn6paunu ypoBeHb UyMa 3AekTpOHcTpymeHTa MOryt OTAnuTaBcHOTyKa3aHHbIX B 3aBnCmOCTN OT CnOCoBa NCNoB3OBaHnU HcTpyMeHTa N B Oco6eHHocTH OT O6pa6aTbIBaEmo3aRTOBKn.
-Heo6xoAMo ONpeAeANTb Mepbl 6e30nacHOCTN AIA 3aunTbI ONEpaTOpHa OCHOBE OueHKN BO3AeNCTBnB PeaBHBIX YCAOBHX NCNOABAHNA (yHTbIBaB BCE NepnoAbI pa6Oyeo uKLa-BpeM, KOrda INHCTpyMeNT BbIKIoUeyH KOrda OH pa6OtaET BXOAOCTyIO,a TaKKe BpeM 3anycka).

BHVMAHME!
VcnoB3yIte cpeAcTba 3aunTbI opraHO BByxa npu ypoBHe 3ByKOBOrO aABAeHn Bblwe 85 A5 (A).
TexHnueckne
XapakTepnCTnKn
YcTaHOBka NHCTpymeHTOB C XBOCTOBnKOM SDS-Plus
BHUMAHNE!
B npoecc nCnoA6BaHnI npHaAeXHOCTN HarpeBaIOrca. NcnoA63yIte 3aunTHbIe nepaATkn!
IPEyIPEXHEHNE!
IpeA BbIOHAHeHEm AIO6bIX pa6OT nO 06cAYKINBAHNIO 3AeKTponHCTpyMeHTa N3BAEKaIte aKKyMyAITOp.
YCTaHOBInTe NepeKIOUOaTeAb HAnpaBHeHn4 B UeHTpaBHoE NOAOKeHne, YTo6b3a6AOKuPoBaTb KypKObI peyATop cKOpocTn 5.
OuNTte npHaAeXHocTn n cAerKa CMAKbTe XBOCTOBNK (CM.Pnc.E).
BCTaBbTe CBePAn SDS B NaTpoH BpaataeAhbIM ABNXKeHNEm, NOKa OHO He 3aΦHKcnpyeTcA BtOMaTHueCKn (CM. Pnc.F).
PpOBepeTcKcauIO,NOTaHyB3aCBepAo.
I3BLeueHne npHaAeXHoCTe I PPEyIPEKdEHNE!
IpeA, BbIOAnHeHnEM AIO6bIX pa6OT nO 06cAYKINBAHNIO 3AekTpONHCTpyMeHTa N3BIAKeAInTe aKKyMyAToP.
BHIMMAHVE!
B npoecc uCnoA63OBaHnI npHaAeXHOCTN HarpeBaOTc. UcnoA63yIte 3aunTHbIe nepuATkn!
NotAHnTe cTOnOpHyIO MyoTy Ha3aA (1) (cm. PnC.G).
U3BaeKeNTe CBepAo (2)(CM.Pnc.G).
Bb6op HappaBHeHn
BHIMMAHVE!
MeHnTe HappaBHeHne BpaueHnraTObKO Torda, KOrda 3AeKTPoHcTpymeHTOCTaHOBAEH.
YcTaHOBnTe nepeKIoOaTeA b Bbl6opa HnPaBAnEHN B HyXHoe NIOoXeHne(CM. Pnc.H).
- AeBOe: no yacobOy CTpeAke (CBepeHne, 3aKpyuBaHne u 3aTgUbaHne BuHTOB).
- PpaBoe: npOTnB YacOBoB CTpeAKN (ocla6aHHeN e OTKpyuNbAHne BnHTOB).
CpeAHee: 6AnKnPoBka HNCTpyMeHtA (AA CMeHbI 6NT N O6cayXNBaHnna 3AeKTponHCTpyMeHTa).
i IPNMEYAHNE
YdapHbIn uHCTpyMeHT He 6yAet pa6oTaTb, eAN nepeKluOateAeB bIbopa HAnpaBLeHn4 HE NOAHOCtBu YCTaHOBAEH B AebOE NAn npaboe NooXKeHne.
IPEAUYIPEXKAEHNEI
Pa6otaioune ot aKKymyAToPOB
HnCTpyMeHTbI Bcerda roTOBbl K
HCNOAb3OBaHHIO. N03tomy nepeKaIOuateAb
BbIbopa HnPaBaEHn4 Bcerda AOJKeH
HaXoAHTbcB U ceHTpaAusbHom IOAOxHeHH,
eAHn HHcTpyMeHT He HCNOAb3yETcH HAI
Npeehocntca.
CBeToaNoaHa NoAcCBetKa (cm.Pnc.1)
3TOT INHCTpyMeHT OCHaIeH CBETOAnoHOH NOcBETKoN 3AyUyUeHHo63opa pa6Oey O6AActn B yCAOBINx HeOCTaTOH0 NCBeueHHocTN. CBETOAnoHaN IOcCBETKa 3 BKIOuAetcABTomATnueckn npn HaxKatn Ha Kypok 5.
Ecn npn HaxkataHn Ha Kypok CBeToaNoHa na NoCBeTka 3 NaunHaet 6bictpo n HepepbIBHO MraTb, 3TO O3Haayet, yTO aKKymyAaTop pa3pJxKeH erO Heo6xoAIMO 3apAaNTb.
HactpoJa peKIma pa6Otbl (cM. Pnc.J)
BHUMMAHVE!
He MeHnTe pexm pa60tbl, noka 3AeKTPoHnHCTpyMeHT He OCTaHOBUTc.
AaHHbI INHCTpyMeHT MoXeT pa6OtaB B AByx pa3AnuHbIX peKIMax.
AЯ Вьбopa Heo6xOAMorpo peKmpa60tby NOBepHnte nepeKaIOUaTeaIb yHKcN1 B hyxHOe noAOKeHne (cm.Pnc.J).
CbepeHne
IT yAapHoe cBepAeHne
AЯ Bыбopa Heo6xOAMOro peKIma pa60TbI NOBepHnTe nepeKaIOuATEaB cyHKcN 1В HxHHOe nAOXKeHne.
i IPNMEYAHNE
BpaaKoUncpepyAToPdoAKeH
fIKCnPOBaTbCABO BCEX NOAOKeHNx CyeTKO
CAblIMMbIM UeAUkOM.
BkaIoueHne
3AekTpOHcTpymeHTa (cm.Pnc.K)
BkauoHne HNCTpyMeHTa.
HaKMMte n yAepKINBaIte KypKObBi peryAITop ckOpOCTn 5. KypKObBi peryAITop 3AeKTponHCTpyMeHTa N03BOAerT MeAeHHo YBeAunBaTb CKOpOCTb IAN YAcTOTy yApOB AO MaKcMmaBHO 3HaueHnR.
BbIKAnOueHHe NHCtpymeHTa.
OTnyCTnte KypKObBi peRyAToP cKOpocTn 5.
Функци n3MeHEnr cKOpocTn OyeHb
noIe3Ha.OHa no3BOaReT Bbl6paTb
ONTNMaAbHyIO cKOpocTb AAR KOHKpeTHOIN
3aDaun.
i IPNMEYAHNE
Функию ИЗмehня ckopoctu peKOMeHApETc NcnoB3OBaTb B TeueHne KOpOTKOro BpeMeHn. He MeHnTe ckopoCTb NOCTOHHO npu pa6ote C uHCTpyMeHTOM. 3TO MOxKet npNBecTu K NOBpeXdEHNIO peryAToPA.
NPEAYNPEXHEHNE!
Ecn TeMnepaTypa OkpykaiouecpeDbI HNKe Hyn Cpa3y NocAe BkIooyehn INHCTpymEtHaapHoe CbePHeHne He pa6otaet, 3anyctnte INHCTpymEnT 3a 2-3 MNHyTbI AO hauaPa6oTbI.
CbepeHne OTBepCTn (cm.Pnc.L)
Pn CBepeHn OTBepCTn 6oAboTO
DnAmETpa HOrda Auywe Haatb Co CBePa
MeHbIero pa3Mepa, a 3aTeM OOnTu DO
Tpe6yemoro pa3Mepa. 3To nO3BOAnr
n36eKaTb n3AnuHHeHarpy3Kn Ha CBePLO.
Ean CBepAo 3actpAAo, HeMeAeHNO
OTKAOHTe INCTpyMeHt, yTO6bl n36eXaTb erO
cepBe3HO r NOBpeJKeHnry. 4TO6bl n3BAeYb
CBepAo, nonpo6yIte n3MeHnTB HApPabAEHne
BpaUeHNr ApeN. AePKnte ApeLb Ha
OHOH AnHHn C OTBepCTnEM. B nDeAe
CBepAo DOxKHO BXoANTb B OTBepCTne IOd
PnPmbl yrAOM. Ecan BO BpeMa CBepeHnra
yroA n3MeHnTCr, 3TO MoKet PnPBecTI
K NOBpeKJeHnIO CBePAs, 6AOKnpOBKe
OTBepCTnR I NoAyueHnIO TpaBMbl.
Korda cBepAo 6yAeT roTOBO npoHTn HAcKB03b Yepe3 3arOTOBky, CKeAyeT CHN3NTb CKOpocTb.
He neperpykaaTe nHcTpymeHT, OHdoAkeh pa6oTaB HOpMaAbHom Temne.
CaeNTe 3a Tem, yTo6bl Cbepaa 6bln OCTpbIMN.
CbepeHne ApeBeCNHbI (cm.Pnc.M)
AmaKcMaBHOJ 3ofoeKTHBHOCTn npn CBepaHn OTBepCTn 6oBwOro DaNaMeTp a NcnoAb3yIte BnHTOBBe CBepa nn EpbeBle CBepa Aa CBepaHn no AepeBy.
BbI6epnte peXm cBepAeHn.
HaunhaTe CBepAnb Ha OyeHb Hn3KoC KOpOCTn, YTO6bI CBepAo He COCKOuAo C HaMeueHHoT OuyKn. YBeaunBaIte CKOpOCTb, KOda CBepAo HaUHeT BXoAHTb B ApeBO.
■Pn CBepeHn CKBO3HbIX OTBepCTn 3aKpeNITE c 3aDHei CTOpOHbI aROTOBKn Kycok DepeBa, YTo6bl N36ExKaTb HepOBHOCTe IAn paCSeHnEHHa DepeBa Ha o6paTHoI CTOpOHe 3aROTOBKn.
CbepeHne MeTaAa
AЯ MaKcMaMbHOJ 3ΦΦeKTHBHOCTN
NCNoMb3yIte CBePAnu3 6bICTpOpeJxUeIN
CTaAN, PpeHa3HaueHHbIe AЯ CBePAnHnno
MeTaALy.
■Пи CBepHmн MeTAAHaHeCnTe HEMHOro MacaHa CBepAo, YTO6bI OHO He NpeperpeBaOcB. MacAo npOdaeBaet cPOK CAYK6bl CBepA n yAyUshaET pON3BOAnTEAbHOCTb CBepAeHn.
BbI6epnte peXm cBepAehna.
HaunhaTe CBepAnTb Ha OueHb Hn3KoNCKOPoCTN, YTO6bl CBepAo He COCKOuAo C HameeHHo TQKN.
IcnoB3yTe TakyIO CKOpOCTb N DaBAeHne, TTo6bl CBePAn He nepepeBaAocb BO BpeMa pa60Tbi.
Pe3yAbTaTbI npIMeHnry qpe3MepHoro DaBHeHn:
- neperpeb nHCTpyMeHTa;
- H3HOC NOAUNHHKOB;
- AeΦOpMaζηι έ ΦΩΠλaBΛeHηe CΒερλα;
CockaKuBaHne CBepA u HapyuWeHne OopMbI OTBepCTn.
CbepeHne KnpnHOn KlaAKn (cm.Pnc.N)
AmaKcMaBHOJ 3ofoektNBHOCTN
PnCBepAHN OTBepCTN B KnpNue,
NAHTKE,6eTOHE N T. A.NCPOAb3yIte
BbICOKOKaueCTBeHHble CBepA C
TBepAOcPAAABHbIM HAKOHeuHKOM AAR
CBepAENRA KpNNuHON KAAkN.
IcnoB3ynte Takyo Ckopoctb n daBHeHne, yTo6bl CBepa u HnCTpyMeHT He neperpeBaAncb BO BpeMa pa60tbl.
Pe3yAbTaTbI npIMeHnry qpe3MepHoro DaBHeHn:
- neperpeb nHCTpyMeHTa;
- H3HOC NOAUNHHKOB;
-deΦopMaunnnoaBHeNcBepna;
CockaKbHaHne Cbepa HapyuHeHnE OOpMbI OTBepCTn.
AHaHAnyUwero CBepeHnKnpnua nCNoA3yIte He6oAboe DaBaeHne n CpeaHIO CKOpocb. PpImeHnTe DOOnAHHTeAbHOe DaBaeHne AAR CBepAehn
TBepbix MaTePnaAOB, HAnpImeP 6eToHa.
IpeAcbepaehnem nNTKINOTpeHpyntecbHa He6oAbwom KycOcKe,HTO6bl ONpeAeANTb ONTImaABHyIO CKOpocTBn DaBHeHne. YTO6bl npEoTbpATnTBCOCKaAB3bIBAHne CBepa, CHaayaaPnPKAEiTe DBA Kycka MaJrPHOrO cKOTBaΦOpMe 6yKbbl «X» Ha npEaONaaraEmoeMeCTO pOcBepANBaHHra OTBepCTnI.
Haunhaite CBepantb Ha ouehb Hn3KoNCKOPoCTN, YTO6bl CBepAo He COCKOuAo CHaMeueHHoTouKn.
O6cayxmbaHne n yxoA
IPEAYIPPEKDAEHNE!
IpeA BbIOHAHeHEm AIO6bIX pa6OT NO OBCAYKINBAHIO 3AekTpOHCTpyMeHTa N3BIAKeAHTe aKKyMAYTOp.
OuNTka
BHUMAHVE!
Pn OuNCTKe CKaTbIM BO3AUYXOM Bcerda HaedeBaIte 3aunTHbIE OyKn.
Peryaepno ouuauTe 3eKtponHcTpyment n ero BENTnAunOHhle OTBepCTn.
Yactota ounctkn 3abncnt OT MaTePnaa an npoAOKNTeAbHOCTN nCNOAB3OBAHNA.
PeryA npOyBaIe BHyTpEHIO Yactb KOpnyca N ABnraTeA b c NOMoUb cyXoro CxAtoro BO3aYxa.
PemOH
PemOH TdoXKeH BbINOAnHaTbcra ToaBko ABTOpU3OBAHHOM CepBnCHOM cHTpe.
3aapanchbIe qactn npHnHaAeXKHOCTN
AЯ noayehn nHOpMaun O apynx npHaAeXHocTax (HaPpMep, AЯ pe3kn) cm. KaTALrnpoN3BOaNTeJe. 1306paXeHHB pa3O6paHHom BnDe n CnCKn 3aNaChbIX qacteM MoxHo HaHTn IaDpecy: www.flex-tools.com.
HΦopMaζη o6 yTHAn3aζηn
IPEAYIPEXKAEHNEI
YTO6bI CTapbI 3AeKTPoHCTpyMeHT HeAb3A 6bIAO NcNOAb3OBaTb:
-otpekxbteka6eAb nTuHaHnra;
- HN N3BAEKNTE aKKyMyAANTOp.

ToaBkoAAnCTpaH EC He BbI6paCbIbaiTe 3AeKTPoHnHCTpyMeHTbI BmecTe C
6bITOBbIMn OTXoAmn!
B COOTBETCTBUN C EBPOJNECKO AnpeKTHBOI 2012/19/EC no TpaHcnpTnpoBKe n yTuAn3aunn OTXoAOB 3AeKTpnueCKoro n 3AeKTPoHHOrO 6OpyAoBaHnra Coancho HaunHOHaBHOMy 3aKHOdaTeAcbCTBy NCNOAb3OBaHHbIe 3AeKTPnueCKne np6Opbl OAnxHbI c6HpTaTbCra OTDeAboHO n yTuAn3nPoBAtbcr 3KOAnrueckn 6e3OnachbIM cnoc6om.

PerehepauncbipbBMeTo yTHAN3aUN OTXoAOB.
YCTPOIcTBO, npHaAeXHOCTH uynaKOBKa DOAXHHbI 6bITb yTNAn3NpOBaHbI 3KOAOrueCKn 6e3OnaChbIM cNoC6oM. IAACTNKOBbIe qactn MoryT 6bITb nepepa60TaHbI B COOTBeTCTBUN C TINOM MaTePnaAa.
IPEAYIPPEKAEHNEI
He BbIbpaCbIBaHTe aKKyMMyAToPbI BMeCTe C 6bITOBbIM MycOpOM, a TaKxHe bPoCAHTe INX B OROHb HAN B BOy. He BCKpbBaHTe NCNOAb3OBAHHbIE aKKyMMyAToPbI. ToBko AAn CTpaH EC.
B COOTBETCTBUN C AnpeKTHBOJ 2006/66/ EC HenCnpaBHbIe NcNoA3OBaHHbIe aKKMyAToPbI Heo6xoAMO yTnAn3NpOBaTb.
i NPMMEAHNE
AII NOUyehn HOpMaun O BapnaHTax yTHN3aUNO6paNTecb K npoAAuY.
(-AeklapauncoOTBETCTBn
Mbl c noAHOJ OTBETCTBEHHOCTbIO
3aBAAEM,HTO N3AeAne,ONUcaHHoe B
pa3dEAne «TexHnueckne xapaKTepcntKNI»,
COOTBETCTBYET CLeAyoUIM CTaHApTaM N
HOPMaTnBhBIM OOKyMeHTaM:
CTaHdapr EN 62841 B COOTBeTcTBn C Tpe6
ObaHnMaMn DnpeKtNb 2014/30/EU,
2006/42/EC, 2011/65/EU.
OTBeTCTBENHbI 3a TexHnuecKyIO
Ncnoa3ObaHnHa3eAneM.
Pon3BOaNTeA h ero npdeCTaBNTeA h
HecyT OTBETBEHHOCTN 3a AIO6oYuep6,
BbI3BaHHbI HeHpaBnAbHbIM NcNoA3OBaHHeM
yctponctba nn nCNOb3OBaHHeM
yctpoiCTBa Cn3dAeAmaMn Apyrnx
Pon3BOAnTeIeN.
jgl/1c aoLul, aaleia//Jboc/2L0
pKwJkai
1
J 1
FHE 1-16 18.0-EC
-1.
- . > 2 g,
aalg 1
JLg
Jg no gagall aawll algwlgo pssu
aJlll alolll ayly oig aeiaai ai
aaiy baaall aaoaalll
yizi
laalgaz aol/ aoLw/ lae
eogaiu.
.
[1] (aolly jalal) oolyl jaiall
aJyI Jc oJbssll 69 sJg .aJyI g o laq jns
.aaawy
JLJyJyJyJyJy
Jlacl,olll iic alg alge all
a 1
lo gog.《j>》 jI 100 go gboalgfo
Jasll pww jll aeball aaalll a9> aoSo go
eaiyI Jaaell Jai, aieeJcJxie .Llc
aabll aawxlo o golglgll
sogg s2gogogogc Jaaal pss
pIaewu aeaowbbs baaill gubg
Jzj 100000000000000000000000000000000000000000
gI JwSj S 10 gag pJU
a aaw uol gao wllg laleo
a@yI aoxuI xG
glaal 1gai gaa 1gaaaall
jgl jai jkiy gilso aaball alzai!
Lulu Loo
aJJI JI JI JI JI JI JI JI JI JI JI JI JI JI JI JI JI JI JI JI JI JI JI
JLwI Jg 1s rJyI yI glaalgl
JQ9.ao JAO Y aqgai [a]uS1j].aui
ggo sia jll ojll gblg jolal
.1iJaaJI
g aJy jn Jy g y aawia aag o j
a> f.0dAgl 1jnn Jg Jlq
p y d y aal y aai I aai J
. qw g Jk Jd
y k f y aai I y aai J
. gllg ll ay g o Jolg g aai J
y w y y bds y bs Jy Aai L K
y bss y bs y bs Jy Aai J
y bss y bs y bs Jy Aai J
y bss y bs y bs Jy Aai J
y bss y bs y bs Jy Aai J
y bss y bs y bs Jy Aai J
y bss y bs y bs Jy Aai J
y bss y bs y bs Jy Aai J
y bss y bs y bs Jy Aai J
y bss y bs y bsJy Aai J
y bss y bs y bs Jy Aai J
y bss y bs y bs Jy Aai J
y bss y bs y bs Jy Aai J
y bss y bs y bs Jy Aai J
y bss y bs y bs Jy Aai J
y bss y bs y bs Jy Aai J
golglgolglgglgglg 1 gglgglgglgglgglg
.P2
J) 15ggo gabll Jc Jae y
(ugssw)
jgl jll aolal lpaal bq po
20 15cogall jlrkgeo gag
Jsw.9aIbIaIaIaIaIaIaIaIaIaIaIaIaIaIaIaIaIaIaIaIaIaIaIaIaIaIaIaIaIaIaIaIaIaIaIaIaIaIaIaIaIaIaIaIaIaIaIaIaIaIaI aJlal IJsw Jc s rJrJrJrJrJrJrJrJrJrJrJrJrJrJrJrJrJrJrJrJrJrJrJrJrJrJrJrJrJrJrJrJrJrJrJrJrJrJrJrJrJrJrJrJrJrJrJrJrJrJrJ
gllpdlswlyyjllal y>psy Y >lill.aaiaaii aai jn no gogall abc lwi d jllaln no gol gai all egni n o bpa go aoiaaui iic gur> w
juiy jiy juy juy juy juy juy juy juy juy juy juy juy juy juy juy juy juy juy juy juy juy juy juy juy juy juy juy juy juy juy juy juy juy juy juy juy juy juy juy juy juy juy juy juy juy juy juy juy juy juy juy jiy jiy jiy jiy jiy jiy jiy jiy jiy jiy jiy jiy jiy jiy jiy jiy jiy jiy jiy jiy jiy jiy jiy jiy jiy jiy jiy jiy jiy jiy jiy
JaaBIO 3 DEL Jaoa aJy
OeYI cIgAaJI
5 3 DEL Jaoa aJy
aJyI gJaoa I y
Jaoa Jaoa Jy
.5 3 DEL Jaoa Jy
aJyI gJaoa Jy
Jaoa Jy
Jaoa Jy
(J Jkll jbl) Jjwll gog b
/aww
.101 111/111 121 111 111 111 111 111 111 111 111 111 1
(1) aBgl 2000 Jgall gog yJ (J kwl jbl) lJl wll gol all
1 1 aagll ddo jgall gogd
10
g/la//ga> Jkll jil) aIbll alolal Jj
K 1 Jy I JyI 5) S W J C L aal y Lc c wll go bdo 0y jyj 11 11 11 11 11 11 11 11 11 11 11 11 11 11 11 11 11 11 11 11 11 11 1
wJyBjLg 10000000000000000000000000000000000000000000000000000000000000000000
Jn Jn Jn Jn Jn Jn Jn Jn Jn Jn Jn Jn Jn Jn Jn Jn Jn Jn Jn Jn Jn Jn Jn Jn Jn Jn Jn Jn Jn Jn Jn Jn Jn Jn Jn Jn Jn Jn Jn Jn Jn Jn Jn Jn Jn Jn Jn Jn Jn Jn Jn
Jgagabawgagwagb
aIalIabgag. gag
aiwrllalall
aaolgljg j,bllll g aic
gyjlgai. nsslaall bajllg acjll
bshnnsnbsgogygl g qlll aael
jzll abo;ggg X> Jkwhcliy gdoill aabqll
.0gsaall
aalgl 12 aaoia acjw yll |y
-aiy1 aogjll jIg 20, gJU aIol/ aJU aWJL -
.(J)aIbW gJU aIol/ aJU aWJL
-1golgl pall clw l 9y yj Jy j
JJIJI 12012/19/EU aJgill g JI JI JI JI JI JI JI JI JI JI JI JI JI JI JI JI JI JI JI JI JI JI JI JI JI JI JI JI JI JI JI JI JI JI JI JI JI JI JI JI JI JI JI JI JI JI JI JI JI JI J
y 1
.
aIgSog aJalg jgej g w oscl J 2
aLdJglj>ll y 2y .aA aO aB 2
.oslalg gol ggrdl ocl alas
i
J 1 Jai// 1 Jai// 1 Jai// 1 Jai// 1 Jai// 1 Jai// 1 Jai// 1
:ba9 9gJyJyJy
JU 2006/66/EC a>gll g.
i 1
aal jy aol
f g
g
g
g
EN 62841 g JJglsc IJtps
JJG2014/30/EU, 2006/42/EC, 2011/65/EU.


- Symbols used in this manual
- WARNING!
- CAUTION!
- NOTE
- Symbols on the power tool
- Important safety information
- Intended use
- Hammer safety warnings
- Safety instructions when using long drill bits with rotary hammers
- Additional safety rules
- Noise and vibration
- Overview (see figure A)
- Instructions for use
- Before switching on the power tool
- Inserting/replacing the battery
- Battery state of charge
- Inserting tools with SDS-plus shank
- Removing the accessories
- Direction preselection
- LED worklight (see figure 1)
- Setting the operating mode (see figure J)
- i NOTE
- Switching on the power tool (see figure K)
- Hole drilling (see figure L)
- Drilling wood (see figure M)
- Drilling metals
- Drilling masonry (see figure N)
- Maintenance and care
- Cleaning
- Repairs
- Spare parts and accessories
- Disposal information
- Raw material recovery instead of waste disposal.
- (€)-Declaration of conformity
- Exemption from liability
- UK Declaration of Conformity CA
- Perceuse a percussion
- OPMERKING
- Odbnyiec aopaliaic kata tn xphon Tpunaviw ueyalou mKouc me Nepiotpoqikcs opupes
- Ioctabrahe/3amraHa ha 6aTepeyra
- BHUMAHNE!
- CbctoHne Ha 3apeKdaHe Ha 6aTepeYta
- i BEAEXKKA
- BmbkbaHe Ha nHcTpymeHTn c onaoka SDS-plus
- BHUMAHVE!
- I PEAYIPEXKAEHNEI
- IpeMaxBaHe Ha akcecoapnte PPEyPEXKAEHNE!
- LED pa6oTHa lamna (BnKTe cnrgupa I)
- 3aDaBaHe Ha peXnMa Ha pa6ota (BnK fNrgpa J)
- BHIMMAHUE!
- BkIoUbaHe Ha eAeKTpNueckn HnHCTpymEt (BnK fNrgpa K)
- i BEAEXK4
- IPEyIPEXHEHNE!
- PemOH
- Pe3epBHN qactn n akcecoapn
- Информацnia 3a ИЗХвьрЯHe
- IPEAYNPEXKAEHME!
- IPEAYPPEXKAEHME!
- BEAEXKKA
- (E-KeIapau3a CbOTBeTCTBHe
- 06laactb npImeHnna
- IpeAynpeJdeHnnoTexHnke 6e3oNaChocTn np pa6ote c ydaapHOJ ApeAbIO
- IPEAYNPPEKHEHME!
- Yka3aHnno TexHnke 6e3OnaChOCTn npNcNoAb30BaHHn AAnHHbIX CBepA
- AnohnteBhie npabna 6e3oNaCHOCTN
- Wymn Bn6paun
- BHUMAHME!
- NPMMEAHHE
- NPEAYNPEXAEHNE!
- BHVMAHME!
- TexHnueckne
- XapakTepnCTnKn
- YcTaHOBka NHCTpymeHTOB C XBOCTOBnKOM SDS-Plus
- I3BLeueHne npHaAeXHoCTe I PPEyIPEKdEHNE!
- BHIMMAHVE!
- Bb6op HappaBHeHn
- i IPNMEYAHNE
- IPEAUYIPEXKAEHNEI
- Npeehocntca.
- CBeToaNoaHa NoAcCBetKa (cm.Pnc.1)
- HactpoJa peKIma pa6Otbl (cM. Pnc.J)
- BHUMMAHVE!
- CbepeHne
- BkaIoueHne
- 3AekTpOHcTpymeHTa (cm.Pnc.K)
- NPEAYNPEXHEHNE!
- CbepeHne OTBepCTn (cm.Pnc.L)
- CbepeHne ApeBeCNHbI (cm.Pnc.M)
- CbepeHne MeTaAa
- CbepeHne KnpnHOn KlaAKn (cm.Pnc.N)
- O6cayxmbaHne n yxoA
- IPEAYIPPEKDAEHNE!
- OuNTka
- 3aapanchbIe qactn npHnHaAeXKHOCTN
- HΦopMaζη o6 yTHAn3aζηn
- IPEAYIPEXKAEHNEI
- PerehepauncbipbBMeTo yTHAN3aUN OTXoAOB.
- IPEAYIPPEKAEHNEI
- i NPMMEAHNE
- (-AeklapauncoOTBETCTBn
- aaiy baaall aaoaalll
Brand : Flex
Model : FHE 116 18.0EC
Category : Drill