
ComfortCut Li1823 - Grass trimmer GARDENA - Free user manual and instructions
Find the device manual for free ComfortCut Li1823 GARDENA in PDF.
| Product type | Battery-powered grass trimmer |
| Brand | Gardena |
| Model | ComfortCut Li1823 |
| Cutting width | 23 cm |
| Rotation speed | 9500 rpm |
| Rated voltage | 18 V (DC) |
| Rated current | 2.3 A |
| Weight (without battery) | 2.0 kg (ref. 9876) / 2.1 kg (ref. 9878) |
| Battery type | Lithium-ion, BLi-18 system |
| Battery capacity | 2.6 Ah (ref. 9839) or 2.0 Ah (ref. 9865) |
| Charging time (80% / 100%) | 3.5 h / 5 h (for 2.6 Ah); 2 h / 2.5 h (for 2.0 Ah) |
| Sound pressure level (Lpa) | 72.5 dB(A) (ref. 9876) / 70.5 dB(A) (ref. 9878) |
| Sound power level (Lwa) measured/guaranteed | 83 / 85 dB(A) (ref. 9876); 86 / 88 dB(A) (ref. 9878) |
| Hand-arm vibration (ah) | < 2.5 m/s² |
| Cutting head angle | 0° (standard) / 90° (for edging) |
| Working positions | 3 (standard, intermediate, low for obstacles) |
| Shaft length | Adjustable (telescopic) |
| Power supply | Rechargeable battery 18 V |
| Splash protection | Protective guard and plant protector hoop |
| Maintenance and cleaning | Clean with a soft brush; do not use water or chemicals |
| Safety | Two-switch system (start lever + lock button); remove battery before maintenance |
| Main spare parts | Plastic blade (ref. 5368), blade holder, battery (ref. 9839/9865), charger (ref. 8832/8833) |
| Warranty | 2 years (private use) |
| Intended use | Home garden, lawn trimming and cutting; not suitable for prolonged use |
Frequently Asked Questions - ComfortCut Li1823 GARDENA
User questions about ComfortCut Li1823 GARDENA
0 question about this device. Answer the ones you know or ask your own.
Ask a new question about this device
Download the instructions for your Grass trimmer in PDF format for free! Find your manual ComfortCut Li1823 - GARDENA and take your electronic device back in hand. On this page are published all the documents necessary for the use of your device. ComfortCut Li1823 by GARDENA.
USER MANUAL ComfortCut Li1823 GARDENA
RU INHctpyKu no 3KcnIyaTaun
AkkymyIaTOpHbI TpIMMep
Translation of the original instructions.
This product may be used under supervision, or if instruction regarding the safe use of the product has been provided and the resulting dangers have been understood, by children aged 8 and above, as well as by persons with physical, sensory or mental disabilities or a lack of experience and knowledge. Children must not be allowed to play with the product. Cleaning and user maintenance must not be performed by children without supervision. The use of this product by young people under the age of 16 is not recommended.
Intended use:
The GARDENA Trimmer is intended to trim and to cut lawn and areas of grass in private domestic gardens and allotments.
The product is not intended for long term use.
DANGER! Risk of injury!
Do not use the product to cut hedges, to chop up material or to make compost.
1. SAFETY
IMPORTANT!
Read the operator's manual carefully before use and keep for future reference.
Symbols on the product:

Read operator's manual.
Keep bystanders away.

Always wear approved hearing protection.
Always wear approved eye protection.

Remove the Battery before cleaning or maintenance.

Do not expose to rain.
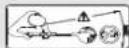
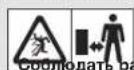
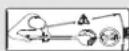
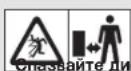
DANGER! Risk of injury to other people!
Keep other people out of the area where you are working.

For the charger:
Remove plug from the mains immediately if the cable is damaged or cut.
General safety warnings
Electrical safety

DANGER! Electric shock!
Risk of injury due to electric shock.
The product must be supplied through a residual current device (RCD) having a rated residual operating current not exceeding 30mA .
Do not overreach and keep the balance at all times. Always be sure of the footing on slopes. Walk, never run.
Do not touch moving hazardous parts before the machine is disconnected from the mains and the moving hazardous parts have come to a complete stop.
Always wear substantial footwear and long trousers while operating the machine.
Safe operating practices
1 Training
a) Read the instructions carefully. Be familiar with the controls and the correct use of the machine.
b) Never allow children or people unfamiliar with these instructions to use the machine. Local regulations can restrict the age of the operator.
c) Keep in mind that the operator or user is responsible for accidents or hazards occurring to other people or their property.
2 Preparation
a) Before use check the supply and extension cord for signs of damage or aging. If the cord becomes damaged during use, disconnect the cord from the supply immediately. DO NOT TOUCH THE CORD BEFORE DISCONNECTING THE SUPPLY. Do not use the machine if the cord is damaged or worn.
b) Before use, always visually inspect the machine for damaged, missing or misplaced guards or shields.
c) Never operate the machine while people, especially children, or pets are nearby.
3 Operation
a) Keep supply and extension cords away from cutting means.
b) Wear eye protection and stout shoes at all times while operating the machine.
c) Avoid using the machine in bad weather conditions especially when there is a risk of lightning.
d) Use the machine only in daylight or good artificial light.
e) Never operate the machine with damaged guards or shields or without guards or shields in place.
Switch on the motor only when the hands and feet are away from the cutting means.
g) Always disconnect the machine from the power supply (i.e. remove the plug from the mains, remove the disabling device or removable battery)
1) whenever the machine is left unattended;
2) before clearing a blockage;
3) before checking, cleaning or working on the machine;
4) after striking a foreign object;
5) whenever the machine starts vibrating abnormally.
h) Take care against injury to feet and hands from the cutting means.
i) Always ensure that the ventilation openings are kept clear of debris.
4 Maintenance and storage
a) Disconnect the machine from the power supply ii. e. remove the plug from the mains, remove the disabling device or removable battery) before carrying out maintenance or cleaning work.
b) Use only the manufacturer's recommended replacement parts and accessories.
c) Inspect and maintain the machine regularly. Have the machine repaired only by an authorized repairer.
d) When not in use, store the machine out of the reach of children.
Additional safety warnings
Battery safety

DANGER! Fire risk!
The battery to be charged must be placed on a nonflammable, heat resistant and non-conductive surface while charging.
The battery must not be charged unattended.
The supply terminals are not to be short-circuited.
Keep corrosive, flammable and easily combustible objects clear of the battery charger and the battery.
Do not cover the battery charger and the battery while charging.
Disconnect the battery charger immediately in the event of smoke formation or fire.
Only use GARDENA batteries for the GARDENA battery product. GARDENA cannot accept any liability for the batteries of other manufacturers. If they are of minor quality, they could cause a fire or explosion hazard!
Do not use the GARDENA charger to charge external rechargeable batteries, as GARDENA cannot guarantee compatibility and could therefore present a risk of fire or explosion.
Do not charge non-rechargeable batteries.

DANGER! Risk of explosion!
Protect batteries from heat and fire. Do not leave on radiators or expose to strong sunshine for long periods.
Do not operate in explosive atmospheres, such as in the presence of flammable liquids, gases, or dust. Batteries may create sparks which could ignite the dust or fumes.
Check your battery before each use. Visually check the battery before each use. A non-functioning battery must be disposed of correctly. Do not send by post. For further details, please contact your local disposal companies.
For risks of injury do not use the battery as a power source for other products. Only use the battery for the GARDENA product intended.
Only charge and use the battery in ambient temperatures of between 0^ and 40^ . Allow battery to cool down after long periods of use.
Check the charging cable regularly for signs of damage or ageing (brittleness). Only use it in perfect condition.
Do not stow or transport the battery above 45^ or in direct sunlight. Ideally, the battery should be stored below 25^ so that self-discharge is low.
Do not expose the battery to rain, water (immersion) or wet conditions.
Keep battery in order (clean) especially air vents.
If usage of the battery is not planned for a certain time (winter period) reload the battery to avoid a deep discharge.
Do not store the battery in a product to prevent self-discharge, misuse and
accidents
Do not store the battery in places where static electricity is present.
Electrical safety

DANGER! Cardiac arrest!
This product makes an electromagnetic field while it operates. This field may under some conditions interfere with active or passive medical implants. To decrease the risk of conditions that can possibly injure or kill, we recommend persons with medical implants to speak with their physician and the medical implant manufacturer before you operate the product.
Only use the battery product between 0^ and 40^ .
Disconnect the battery in case of emergency.
Do not use the product nearby a water, or for pond care.
Personal safety

DANGER! Risk of suffocation!
Small parts can be easily swallowed. There is also a risk that the polybag can suffocate toddlers. Keep toddlers away when you assemble the product.
In case of heavy vibration replace the blade and check the blade holder for damages.
Check the wear rib if ok before usage.
Transport on front handle.
Use personal protective equipment.
Wear gloves for cleaning the cutting device.
Always wear eye protection.
Protective equipment such as gloves, non-skid safety shoes, or hearing protection used for appropriate conditions will reduce personal injuries.
Be careful during adjustment of the product to prevent entrapment of the fingers between moving and fixed parts of the machine, or while assembling the protective cover.
Don't use water, or chemical substances for cleaning the guard or other parts of the trimmer.
Keep all nuts, bolts and screws tight to be sure the product is in a safe working condition.
Do not disassemble the product further than the delivery status.
Warning! When wearing hearing protection, and due to the noise produced by the product, the operator may not notice persons approaching.
While operation and transport pay special attention to the hazard for other people.
Stay alert, watch what you are doing and use common sense when operating a power tool.
Do not use a power tool while you are tired or under the influence of drugs, alcohol or medication.
A moment of inattention while operating power tools may result in serious personalinjury.
2. ASSEMBLY
DANGER! Risk of injury! Cut injury when the pro
Wait for the plastic blades to stop and remove the battery before you assemble the product.
To assemble the protective cover and the plant guard [Fig. A1/A2]:

The product may only be used when the protective cover is assembled.
- Slide the front part of the protective cover (3) onto the trimmer head (1) until it engages.
- Slide the rear part of the protective cover ② onto the trimmer head ① until it stops.
- Tighten the both screws ④ carefully.
- Slide the plant guard ⑤ onto the trimmer head ① until it engages.
To attach the plastic blade to handle [Fig. A3]:
The scope of delivery includes 5 plastic blades ⑧ There are 4 spare plastic blades in the openings ⑨ on the handle.
For the assembly of the plastic blade into the blade holder, see
6. TROUBLESHOOTING To replace the plastic blade.
3. OPERATION
DANGER! Risk of injury! Cuts injury when the pro
Wait for the plastic blade to stop and remove the battery before you adjust or transport the product.
To charge the battery [Fig. 01 / 02]:
CAUTION!
orvoltage damages the battery and the battery charger.
Make sure that you use the correct mains voltage.
For the GARDENA Battery Trimmer Art. 9876-55 / 9878-55 there is no battery and no charger in the scope of delivery.
Before you use the battery the first time, the battery must be completely charged.
The lithium-ion battery can be charged in any state of charge and the charging process can be disconnected at any time without to damage the battery (no memory effect).
- Push the locking button(s) A and remove the battery B from the batteryholder 0 on the handle.
- Connect the battery charger ⑥ into a mains socket.
- Connect the battery charger cable (E) to the battery (B).
When the charging control lamp at the charger flashes green the battery is being charged.
When the charging control lamp ⑥ at the charger illuminates permanently green the battery is completely charged (Charging time, see 7. TECHNICAL DATA).
- Examine the charge status regularly while you charge.
- When the battery (8) is completely charged, disconnect the battery (8) from the charger (6).
- Disconnect the charger 忍 from the mains.
Battery charging indicator [Fig. 03]:
Battery charging indicator during charging:
| 100 % charged | ①, ② and ③ illuminate (for 60 sec.) |
| 66 - 99 % charged | ① and ② illuminate, ③ flashes |
| 33 - 65 % charged | ① illuminates, ② flashes |
| 0 - 32 % charged | ① flashes |
Battery charging indicator during operation:
Push the button ⑥ on the battery. The battery charging indicator is displayed for 5 seconds.
| 66 – 99 % charged | ①, ② and ③ illuminate |
| 33 – 65 % charged | ④ and ② illuminate |
| 11 – 32 % charged | ① illuminates |
| 0 – 10 % charged | ① flashes |
To set the working position:
Working position 1 [Fig. O4]:
For standard trimming.
Working position 2 [Fig. O5/O6]:
Trimming beneath obstacles.
The tube can be lowered from standard position 1 to two lowered positions 2 or 3 for trimming beneath obstacles.
- Put the trimmer on the floor.
- Hold the trimmer by the tube ① with both hands so that you can push the unlock button ⑨ with one finger.
- Push the unlock button and lower the tube to the required position.
- Release the unlock button 6 and let the tube 7 engage again.
Working position 3 (only for Art. 9878) [Fig. O7/O8]:
Cutting at lawn edges.
CAUTION! The trimmer may only be used when the trimmer head is locked at 0^ or 90^ .
To rotate the trimmer head ① to 90^ ,the tube must be in standard position1.
- Hold the trimmer by the tube ⑦ with both hands so that you can push the unlock button ⑩ with one finger.
- Push the unlock button ⑩ and rotate the trimmer head ① from 0^ to 90^ until it engages.
- Release the unlock button (1) and let the tube (7) engage again.
To adjust the tube length [Fig. 09]:

DANGER!
The product must not be used when the tube is completely inserted (transport position).
- Loosen the clamping sleeve ⑥
- Pull out the tube ⑦ to the required length.
- Tighten the clamping sleeve again 6
To adjust the position of the additional handle [Fig. 010]:
The position of the additional handle can be adjusted to your body height. 1. Pull the lever (2).
-
Tilt the additional handle (3) to the desired position.
-
Release the lever again.
If the trimmer is correctly set to the body height, the posture is upright and the trimmer head in working position 1 is tilted forwards slightly.
Hold the trimmer by the main handle and additional handle in such a manner that the trimmer head is tilted forwards slightly.
To adjust the plant guard:
- Work position [Fig. O11]
Park position [Fig. O12]
Pull off the plant guard ⑤ and put it on into the required position until it engages.
To start the trimmer [Fig. 013]:

SER! Risk of injury!
of injury if the product does not stop when you release the start lever.
Do not bypass the safety devices or switches. For example do not attach the start lever to the handle.
The product is provided with a two-switch safety device (start lever with starting lockout) to prevent the product from being turned on by accident.
To start:
- Put the battery ⑧ into the battery holder ⑩ until it audibly engages.
- Hold the additional handle with one hand.
- Hold the main handle with the other hand, slide the starting lockout forward and pull the start lever. The trimmer starts.
- Release the starting lockout ⑤ again.
CAUTION! Avoid contact of the plastic blade and the blade carrier with hard objects (walls, stones fences etc.) to prevent the plastic blade and the blade carrier from wearing or breaking.
To stop:
- Release the start lever ⑥. The trimmer stops.
- Push both locking buttons ④ and remove the battery ⑧ from the batteryholder ①
4. MAINTENANCE

GER! Risk of injury!
injury when the product starts accidentally.
bit for the plastic blade to stop and remove the battery before you maintain the product.
To clean the Trimmer [Abb.M1]:

GER! Risk of injury!
x of injury and risk of damage to the product.
not clean the product with water or with a water jet (particular high-pressure water jet).
not clean with chemicals including petrol or solvents. Some can destroy critical plastic parts.
The airflow slots must always be clean.
-
Clean the airflow slots with a soft brush (do not use a screwdriver).
-
Clean all movable parts after each operation. Especially remove any grass and dirt from the protective cover ②.
To clean the battery and the battery charger:
Make sure that the surface and the contacts of the battery and the battery charger always are clean and dry before you connect the battery charger.
Do not use running water.
Clean the contacts and the plastic parts with a soft and dry cloth.
5. STORAGE
To put into storage:
The product must be stored away from children.
- Remove the battery.
- Charge the battery.
- Clean the trimmer, the battery and the battery charger (see 4. MAINTENANCE).
- Store the trimmer, the battery and the battery charger in a dry, enclosed and frost-free place.
Disposal:
(in accordance with RL2012/19/EC)
The product must not be disposed of to normal household waste. It must be disposed of in line with local environmental regulations.

IMPORTANT!
Dispose of the product through or via your municipal recycling collectioncentre.
Disposal of the battery:
The GARDENA battery contains lithium-ion cells that should not be disposed of with normal household waste at the end of its life.

Li-ion
IMPORTANT!
Dispose of the batteries through or via your municipal recycling collectioncentre.
- Discharge the lithium-ion cells completely (contact the GARDENA Service).
- Protect the contacts on the lithium-ion cells against short circuits.
- Dispose of the lithium-ion cells properly.
6. TROUBLESHOOTING

GER! Risk of injury!
injury when the product starts accidentally.
Wait for the plastic blade to stop and remove the battery before you troubleshoot the product.
To replace the plastic blade [Fig. T1/T2]:

DANGER! Risk of cutting injuries!
Do not use metal cutting elements or spare parts and accessories not intended for use by GARDENA.
If the wear rib is no longer visible, the blade carrier must be replaced. Contact the GARDENA Service.
The plastic blades may only become worn to half the original length at most. Only use original GARDENA Spare Blades RotorCut. Spare plastic blades are available from your GARDENA dealer or direct from GARDENA Service.
GARDENA Spare Blades RotorCut for Turbotrimmer Art. 5368
To remove the plastic blade:
- Turn the trimmer over.
- Push the end of the plastic blade down slightly (A), slide the plastic blade inside through the blade carrier (B) and pull out.
To insert the plastic blade:
Slide the new plastic blade ⑧ from inside through the slot in metal of the blade carrier ⑧ until it audibly engages (click). When the new plastic blade is correctly inserted, it can be moved more easily.
Problem Possible Cause Remedy
| Trimmer is not cutting cleanly or not cutting at all | Plastic blade is worn or too short. | \( \rightarrow \) Replace the plastic blade. |
| Plastic blade is broken off. \( \rightarrow \) Replace the plastic blade. | ||
| Trimmer vibrates severely Plastic blade is excessively worn and creates an unbalance. | \( \rightarrow \) Replace the plastic blade. | |
| Blade carrier is worn. \( \rightarrow \) Replace the blade carrier. | ||
| Trimmer does not start Battery | is not put completely into the battery holder. | \( \rightarrow \) Put the battery completely into the battery holder until it audibly engages. |
| Battery is empty. | \( \rightarrow \) Charge the battery. | |
| Engine is blocked. | \( \rightarrow \) Remove the obstacle. Start again. | |
| Trimmer can no longer be stopped | Start lever is stuck. | \( \rightarrow \) Remove the battery and loosen the start lever. |
| Error-LED on the battery flashes [Fig. 03] | Battery overload. | \( \rightarrow \) Let the battery cool down and start the trimmer again. |
| Under voltage. | \( \rightarrow \) Charge the battery. | |
| Battery temperature is out of range. | \( \rightarrow \) Use the battery in surround- ings where temperatures are between \( {0}^{ \circ }\mathrm{C} \) and \( {40}^{ \circ }\mathrm{C} \) . | |
| Error-LED on the battery illuminates [Fig. 03] | Battery error/ battery defective. | \( \rightarrow \) If the battery cannot be reset by connecting it to the charger, contact the GARDENAService. |
| Charging control lamp on the charger does not illuminate [Fig. T3] | Battery charger or charging cable are not connected correctly. | \( \rightarrow \) Connect the battery charger and charging cable correctly. |
| Charging control lamp on the charger flashes red [Fig. T3] | Battery temperature is out of range. | \( \rightarrow \) Use the battery in surround- ings where temperatures are between \( {0}^{ \circ }\mathrm{C} \) and \( {40}^{ \circ }\mathrm{C} \) . |

NOTE: For any other malfunctions please contact the GARDENA service department. Repairs must only be done by GARDENA service departments or specialist dealers approved by GARDENA.
7. TECHNICAL DATA
| Battery Trimmer | Unit | Value (Art. 9876) | Value (Art. 9878) |
| Rated current | A 2.3 2.3 | ||
| Rated voltage | V (DC) | 18 | 18 |
| Cutting width | cm 23 | 23 | |
| Rpm of blade carrier | R/min. | 9500 | 9500 |
| Weight (without Battery) | kg | 2.0 2.1 | |
| Sound pressure level \( L_{pa}^{1)} \) | dB (A) | 74 | 70 |
| Uncertainty \( k_{pA} \) | 2.5 | 2.5 | |
| Sound power level \( L_{wa}^{2)} \):measured/guaranteed | dB (A) | 83 / 85 | 86 / 88 |
| Uncertainty \( k_{wA} \) | 1.6 | 1.8 | |
| Hand/arm vibration \( a_{thw}^{1)} \) | \( m/s^2 \) | < 2.5 | < 2.5 |
| Uncertainty \( k_a \) | 1.5 | 1.5 | |
Measuring process complying with: EN 50636-2-91 RL 2000/14/EC

NOTE: The stated vibration emission value has been measured according to a standardized test procedure and can be used for comparison of one electric power tool with another. It can also be used for preliminary evaluation of the vibration emission value can vary during actual use of the electric power
| System Battery BLI-18 | Unit | Value (Art. 9839) Value (Art. 9865) | |
| Battery voltage | V (DC) | 18 | 18 |
| Battery capacity | Ah | 2.6 2.0 | |
| Number of cells (LI-Ion) | 5 | 5 | |
| Battery charging time 80% / 100% (approx.) | h | 3.5 / 5 | 2 / 2.5 |
Appropriate GARDENA System Batteries BLI-18: Art. 9839/9865/9866/9867
| Battery Charger 18 V | Unit | Value (Art. 9825-00.630.00) |
| Mains voltage | V (AC) | 100 – 240 |
| Mains frequency | Hz | 50 – 60 |
| Rated Power | W | 16 |
Battery Charger 18 V Unit Value (Art. 9825-00.630.00)
Output voltage V (DC) 21
Max. output current mA 600
Appropriate GARDENA Gallery Chargers 18 V: Art. 8832 / 8833
8. ACCESSORIES
GARDENA Spare Blades As replacement for consumed plastic blades. Art. 5368 RotorCut for Turbotrimmer
GARDENA Replacement Available via the GARDENA Service. blade carrier
GARDENA Wheel set for For easy cutting of lawn edges. Art. 9880 trimmer (only for Art. 9878)
GARDENA Replacement Battery for additional duration or for replacement. Art. 9839 BatteryBLI-18
GARDENA Replacement Battery for additional duration or for replacement. Art. 9865 Battery BLi-18/36
GARDENA Battery Charger Charger to charge the GARDENA Batteries BLi-18, Art. 8833 18 V
GARDENA Battery Quick Charger for fast charging the GARDENA Batteries Art. 8832 Charger 18 V BLI-18.
9. SERVICE/WARRANTY
Service:
Please contact the address on the back page.
Warranty statement:
In the event of a warranty claim, no charge is levied to you for the services provided.
GARDENA Manufacturing GmbH grants a warranty for all original GARDENA new products for two years from the date of original purchase from the retailer, provided that the devices have been for private use only. This manufacturer's warranty does not apply to products acquired second hand. This warranty includes all significant defects of the product that can be proved to be material or manufacturing faults. This warranty is fulfilled by supplying a fully functional replacement product or by repairing the faulty product sent to us free of charge; we reserve the right to choose between these options. This service is subject to the following provisions:
- The product has been used for its intended purpose as per the recommendations in the operating instructions.
- Neither the purchaser nor a third party has attempted to open or repair the product.
Only Original GARDENA replacement parts and wear parts have been used for operation. - Presentation of the receipt
Normal wear and tear of parts and components (such as blades, blade fixing parts, turbines, light bulbs, V-belts / toothed belts, impellers, air filters, spark plugs), visual changes, wear parts and consumables are excluded from the warranty.
This manufacturer's warranty is limited to replacement and repair of products in accordance with the abovementioned conditions. The manufacturer's warranty does not constitute an entitlement to lodge other claims against us as a manufacturer, such as for damages. This manufacturer's warranty does not, of course, affect statutory and contractual warranty claims against the dealer / retailer.
The manufacturer's warranty is governed by the law of the Federal Republic of Germany.
In case of a warranty claim, please return the faulty product, together with a copy of the receipt and a description of the fault, with postage paid to the service address.
Consumables:
The plastic blade and the blade carrier are consumables and are not included in the warranty.
FR
Satta in plastkniven:
Til standard-trimming.
Trimming under forhindringer.
FARE! Fare for kvelning!
Mindre deler kan lett svelges. Plastposer utgjor fare for kvelning for smabarn. Hold smabarn pa vasant under monteringen.
For standard-trimming.
Trimme under hinder.
MeTAPpaon Taw npwrotunow oyniow xpnoC.

AutoTo npoiov EITPepETai va xpnoiopoTIOIEiT aTO naiaA AVW Twv 8 ETAV KAeC KAI ano atoua e uiewevec TIG
quikc, aioentiKc n diavonTkec IKAVOTnTEc n
ue eAeisipac kai yywoewv, epooov EITINpouvtai h exouv evnpwtheta iia tvn aoopaahn
xpon Tou npoiovtoc kai touc evdoexoevouc KIVduvouc. Ta naia dev eTTIPTETaia v naizouv m
to npoiov. O kaepiaooc kai o epyaiec ouvtnhpnoc Tou EKTALouVTai ano Tov nEATn Dev eITPepNTai va EKTALouVTai ano m EITNPoupeva
piiaia. Suviotoume tn xpon Tou npoiovtoc
movo ano atoua Aw twv 16 stw.
Pnoβλεπόμενn χριση:
To GARDENA Kouputko npoepctai yia ta koupeka kai tvkoiy kyaov kai emapavv ypaiaoi ou idiokc katokic kai spaoiexvi- kouc,knouc.
To npaiov dev evdeikvutai ia aeitoupyia meyalnc diapkeiac.

KINADYNO! Ipokknon oomegaic BαβnC!
Mn xpoaioioite To npoiov ia Tny konn ppaKTu v ano aouoc, Tov Teiau ouiKv n ia liuaa.
1.A∑ΦAΛEIA
ZHMANTIKO!
MeAeTnOte I pIooox n Tc oBnyie xPnO Kx paUaTe Tc yix eAevovtnKpnOxy
Σμβαεπανωστο προιν:

obnyiec xphane.
TNEVNTOTE EYKEKPIEVEC WOaONIIEc, TNEVNTOTE EYKEKPIEVA yuaia npootaoiac.

PivrnoepyaoleKaopiaou ouvtnpnonc aepote Tn mataipia.

TeTeTo mXxavnua Otn Bpoxn.
KINAYNOI KIVouoc Tpauiatoua Aaiuv aotuov! Anouakpuve taatao aon to xwpo otov otole epyaoe.

TαTOΦOPTIOTH:
AnououvEeTe aqoucTo qic ato Tny npica aqoucO otav To kaiwdo exei unootri qnicie h eixi konei.
Eviec unooeiEic aepaaiae
HAekTpikxopaxieia

KINADYNO!HaeKtpoanIa!
Kivuvoc tpaunapou ou an nektponanxi.
→To npoiov npenei va tpoooboteirai e peuiaeawvntalektpoanEikouδiaokottn(RCD)μepeyioTOOVAOATIKoepuauantocεuEnc 30mA
Anopuye un quaiayn taon Tou ouatoc kai statnpite naTyn 100pia oia yva atekote navra otepa ce nayie. Na nepntate, npyexte.
Mny ayitee KIVOUVA EIKIVUva np np To npxovna aouuvdeBc ano Tn ouvdo nAekpikou kdtu Ka Ta KIVOUVA EIKIVUva np np AKNVTOI-0ouvEvTeAc.
Kata n xphon tou mncawmuoc npenei va opate navtar oaepea unoohn-pata kai jakpu naveAovl.
Aoapacnlc aeitoupyia
1 Ekaioeuon
a) Diadote Tc ondyie npoekntkE Eoikelteje To a npyaavexyox kTAYEVbSeBvynxphon Tou npxaVHAPACO;
B) Mny eTnpttnene Tne Tn xpnn TnC nunxavic nce aotra ta onol oev exouv Eoikkeoiie me autnc iac nyicnv, ne tnaia. Evdextar va unapax opio naiklae me faan Tc ixououoc voukies biatefae stav toto xonycn.
V) PpooEeTe o i 0ioc oxipntnc sivai unebuvoc ia atuxnmuata n Kivouvouc anevavti ae aaoa taoa kai Tny nepioudia touc.
2 PpoTeoia
a) Pw an to xon to kawio duo oveoong kai npokraoc npetiv a Eaeyewei vnaevelie Cnuiac h yhpavanc Av to kawio unooti quid KATA th diapkeia nXpnc, npenei va to aoauvdeae tqueowc amto Tn nAekptiko sktuo.
MH ANTRIZETE TO KAAQAOI NPOTOY AYTO ANOZYNAEGEI ANO TO HAEKTPIOKAIKTYO.
Mn xpoiaioaie to unxawma, ao to kaiwio exei untootei nia ypeo
3) Pivn an n xphon to npxvna npneia va Exyetai ot tntka yia npoota Teutkeic diatocic n npoatae ta kakmuataou exuv uortcel 1nida, Aineuv h exuvomtoenot Baeovoe.
y) Mn GETETe note To unxavnna aae laioupyia av Bpikovtai kovta atopa, 1iaitaepa taiia, n katokiia.
3 Aetroupyia
a) Kpatnote paKpia To KaWio ouVbeoC kai npoeKtaoc an to th biota
B) 2e oan th xpvikn diapkexia xphancou tou naxavmatooc npenei va xonapo- noie npoataeutika yuaia kai yepa unooheta.
V) Pneneva ano paeuyan in npn oou xavauooc o ae aqnec kaipiekacuovknc, iiaeipra o nepintwn kivuvu kepuvou.
8) XpnoaioeTe To unxovnua mvo aTo PwC TNC nepac n pa KaAo TeXVnto pwnio.
Mn xnpaonpoie note to unxavnae kaauma npoataeutikdi taEn nou exi cnaia xwupic kauuua npoataeuteukc diataek.
01) Evpeynonnohe Tov KInnnpa Moyo OraV Ta xepia KaI Ta nOla aoc Bpiko VtaekTcN eBbEaeiaC TcBtAeNC konHc.
2 Anouovbde nVTA to npyndvna and tvnAektpknnapox (nNaa) ByCteTo pK and tvnAektpknnpia, apapceTe T dxataen KaeWpaToc nTv npapapewm npatopla
1) novrtoav apnyveTo npynovma xnpic enBAn.
2) npv ano Tny apaipean unokapiaqatoc,
3) nov ano tov eevx, tov kaepiaou h trv eneepyacia tou npxavitoc,
4) mTa thy enaeppe eva Evo a
5) nava, atav to npxayvnpa apyicva bovalra pa aovnEto Tpno.
1) Poooxyvi a tpaunaoouc and n diataen konnc oia noia kai ta xepia.
3)EfagapakKe TnVTo aTt aoVolypaTa aepicpuo Ta elva eaepepa ane Eev aupata.
4 Eepic Kai puaaEn
a) To npxuynpa npnei va anouovbctaeon ao Tny nkeptpkn npoxh (n), anouovbdeeto piao any nkeptpkn npoxh, apoeite tn diatoen paoync nTv npapoueun mntatopia) npiv ao Tny eKteean epayaouv auynponng hKaabapaiou.
B) Ppeneva xpaonaiouvtaoov ta auviotapeva ovataaakkkaia npaekeva.
V) To mXavnma npenei va eAeyetai kai va ouvtnpetai taktika. Avoeote to aepBic Tou mXavnpatoc movo ae uaeBaanueo auvepyelo.
8) Av to npynovnpa 8e xnpaipnoiieitai, npeneiv a qunaocetai 8e npoc anou dev exau npocbaan niaia.
Ppoo0eTc uno0e1Eic aepaaiaoc
AopaaHxepipiaoc twu npataiw

KINAYNO! Kivouoc npkaiaic!
Hnataia nou poketai va optotni npentei va bioketai kato t hiapkei ndi diikaiiaic opoptione eun uepkntk anektn k ont eoipnta kai anuyuyn enipoviae.
Hmuataopiaev npentei va ophiIeTai xwpiEiBaeyn.
Oeaoepc ouvdeanoev emtpentai v paoukkawouv.
KpTHTOJEAKPIA ANTO TO pOPTIOTK KAI TIV NTATOPIX KAUOTIKKA KUI EUPAEKQ AVTKEIJVEA.
Mny kaunTETO FOPTOTKAI TNY MNTAPXIA KATAN DApKEIA TNC 6aikkaacpoptians.
Ze npiituan deniuyoay karnouh npotac aotouu deote apoei tto any nayekprikn Tpoepdoia.
Tio npotov mntatapie GARDENA xpoiionoiire anokaeionika mntatapie GARDENA H GARDENA ev ovalaupveia kajia eyunon ia mntatapie dawkataaekauoavot. Autc napovuvv aykuipovoviv kivduvo npukayiac kai ekpnnc ev iival katopnpn noitnac!
Mny xnpoieitto popnH GARDENA yia tn poption npataipov tptow katoakeauotw, emiH n GARDENA dev npoei va eyyungel n auPbaTOTnai yia to loyo auto kai attnepintwn autn 8a npopooe va unapxkivduoc npokayidc kai ekpnng.
Mny opntire natapie nou dev eiv anavapoptoevec.

KINADNOsI Kivouoc EKPENc!
Pootateute TIC mntatapcic AOTeepoTnKa qwiA. Mny anoTeTe Tyn mntatapia naov oeepuavtikouwata kui npv kny eKTeTeYia meyalo daotnuae Evvtov nlaikn aktrovoBai.
Anayopeueta n aeitoupyla oe nepioxec me kivuo evknpnc, n.x. Kovra e upekea uypa, aepia ouooupeueic okvnc. Kata tn xphon mtaTapiuvmuopov va npokanbel oxnatiaqoc anivhpw,paw toolw umpoei va yivee ovapaeEn okvocn n atuw.
Na eeyene Tny nparapia npn ao kae xpon. Na eeyene otinka my nparapia npn ao kae xpon. Mia axonot naoy natapia noener va anopppiterou oupuva me touk kavovipouoc, Sreale ny raxupokic. Fia neepootepeannpopoece aeneuweelte any eaipeia sboeanc, anopipmuatw nnc npoxn oac.
Mn xnpaonpoite try mntatapia cmy nyn peuapac vi a dma npoiovra. Ynptaei kivbuc tropaiaou. Xnpaonpoite try mntatapia anokaiotka via ta npbaenepva npoivora GARDENA.
PoptiTe kai xpoiaonoe Tny enawaopoptoueun mntapla anokssionka de Bepkoala nepaAovoc taefo 0 Ck40 C.Aghate nTv npatapa va kooe me aon oen neyaoLnc dipeKac.
Na EYEETE TAKTIA TO KAALDIO opPTIcY iA eVDIEEIC nuaic n aaiotnTAC (eUpaTuTnTA). Na xonpmaoite To kALDIO pOvo oe owyn Karataaan.
E Kajia neipwn ano0nkeute oute metapepes nTv enavaopnpizoeun mntapao ie 0epkpoia daw tv 45 C n kteceiev aneueoioc nTnynaiakn akivnoBlaovikn mntatpala npere v laqdoetae o Bepokocie cKawto 25C yia vaoi aonpnelae e xanlndn eminea no auto- ekpoptian.
MnveEETeTn mntapia de Bpox, vepo (epBamian) uypocia.
Attnpnty Tny nattapia Kaogn npnavoc t oxieoc cepouu. Otav n nattapia dev xnoiopoeiota yaydeia diaotma (jelwac) aprotite nnpwoc Tny nattapia yia va atropeueh ng baidia ekpoption
Mny aoenkee Tn natapla eo oe eva npoiy vay nTny cxopuyn autokopopion, Aaveaaevxphonkai aunynatw.
Mny amoNkEeTe Tny mntapia oe xupouc oauoc onoiouc npokaleitai nKpOoTAtikKeKpOpTio.
HAektpikxopaeia

KINADYNOI KApdiakn avakotn!
AutoTo npoiov dnoupyei nektpoayvntko nepio kata n aeitoupiia. AutoTo nepio niopoei uno opiaevc ouovhkec va etnpaeetn taieuoyia evpeyntkiv n aanthnvutipikiv eputeuauw. Ia va atokleotei o kivuvoc kataoataewiou nu npovuv x kalneoue o oeapouc hovaaouc tpaunatouoc, ta atopa nou pepov utpiko epuua npeteeva uououauotuv to iatpo Tou hov katakeauotn tou epuupucatoc npotou xpnoioutnooov to juxxnuva.
Xpnoipnoite to npaiov mataipacpovo peto0 8oC40°C.
ByaTe TnV npotapia de nepimwn ekTaktnc avayknC
Mn xpoaonoeite To npoiov kovta o vepo n yia tvnpoinon pikpv Mlivov.
Atouikxopαeia

KINADNOs! Kivduoc aouEiaq!
Mikpa EApntjmuatapouov va katatoovuEukal. H naoiknakouA Lykovel kivvoa aepuiac iaikpnaiaia ATOAPKUVETa naia KATA TNI BIAKPOI TNC OAVUAPLOVJNAC.
Se pimwn iayuap kpaadauov ayinkataoantno To paaiip Kai sEyTe Tn Baoan To paaiipyia y Cnjuie.
Pip an T xphon eneyxere ov elva evtae n p6epopvnpaBswan, Metapopao an T nppoativn AaBn.
XpapnoiHATE aToiKo npOaTeuTko EOnAio.
DopoeTe yVaTia vay Kaeapioo nnc dataEnc konh
Na copa navTn npootatutikya uaiia
PpOToTeUInKc DiAt&Sc DnW yavTia, AvTIAaBntiKa UroBmTa acaepAie; n PpOToTeUInKa AkoHc TnXpNlAioTuovTia va AvTIOxec AvThke; pEouVoc Tc Taupaiaouo.
NaIe IpoaekkIO kato Tpuouio Tou npovotoc ia tv anopuyi eykaiqicou Toakdunmuetavu KNTWauTOWtAepawepou Tou unvapuaoc n kato T ouvapauynon Tou npootateutukkoauauatoc.
Mn xnpjiaomie Teo hynikeoc ouic vi Tov kaoepiauou npotarukitou aawyun taywauTou KOUEPUKIO.
Aiaatnpse 6a Ta naqiaia, ta mauovia Kai Tic bice apyieva ypa ia va daapaaote on n oukeun bioketao aopaa kataotaan yepyaio. Mny anouavapuoyeite to npoiov nepiaotepo an tvkataaton npapaoonc.
PioofoonoinO Tov ox xphotnc npopao npootaeutika kcoic kai Akyou Tou Oepouou nupayetai an to npoiov ox photnc mnpoe va npapaaepei taou nnaiaocvou.
Kata Tn diapkeia Tnc aeitoupyiac npoeEte idaihepaTov kivuvo yia aAa atoua.
Na e tae evpyopan, va npatnpesit Kavete kai va xpaionoiite Tny Kovn Aoyikkata thxpnv Evoc naktpikou epaiaiou.
Mn xpaonpoite kavva nAektpko epayaeio eW eTc Koupaaevoi un Tny enpeia vapkwnikw,ovornuuupatoc n apukwv.
Mia atiyun ampoaeElaac kata th xpian nAektpikov epyaleiwu mopoi va oBnyoepoe ae oaoapocu Tpaupatauouc.
2. ΣYNAPMOΛΟΓΗΣH

NO!Ppoknon OwmaTiknc BaoBnc!
VOC npokanp Taauatw konc oe nepintwnruxiaac Ekkivnnc Tou npoiovtoc.
M800oc metponnc kata to npotuno: EN 50636-2-91 RL 2000/14/EC

YIIOAEHEH: H avaepoeeyi TNI EKQaoum Kpaaoov npoobioTKe ouuwoa ie Tn npotum eBdo Acyxou Ka nnpoi v Ta npnoonoiBv ia TuoykpiqNpEyaAeOe meTuOc,AuTni n npoic va
xponoionbei ianc yia nypnoopnai aiaolayon nnc ekEanC. H tuii ekmoumc Kpctaouyn monei va diapepei kata n diapkeia nnc npayatikic xponc tou naektpkouepyaieoi.
Mnataia ouotnatoc MovaTtiu (Kw6.9839) Tmu (Kw5.9865) BLI-18
IpebeoOpnHnHaBbIX HnCTpyKm.
IaHHoe n3dJIeMn MOKeT NcNoJIb3OBaTbCnTeMbN BO3paCTOM OT 8 let N IINuAMNC OOrpaHnueHHbIMn Φn3NuYeCKmN, CECOPHBIMN INI yMCTBeHHbIMN CNOco6HOCTAMN INI C HeIOCTaTOUHbIM ONbITOM N3HaHnAIMN, ECNI OHN bdyt paOToTb NOI HaI3OpOM, IMbYET pa3bAcHEN POpAOK Be3oNaChOn paOToBIC YCTPOINCTBOM IN CBraHHbIE C 3TNM ONaCHOCTN. He DOnyckaetc INrpa DeTeN C N3dJIeEM. DeTm He pa3peWaeTc BblIOJHrTa YnCTKyn O6cnjXnBaHne yCTpoiCTBa 6e3 HAn3opaB3PoCbIX.Mbl He peKOMHeyem NOnb3OBaTbCn3dJIeMn DETm MnaDwe 16 let.
PnmeHne B COOTBETCTBn C Ha3Haayehm:
GARDENA Tpmmep npedHa3HaeH dna 6pe3Kn n CTpnkkn ra30HO n Lykaek B HaCTbIX CaJax H Na Daayax.
Iaene He npedHa3HaeNo dny npoDOnKHTeBHO pa6Oth.

ONACHO!OnachocbIyueHnTpaBmbl!
He nCnoB3yIte H3dEne IIN o6pe3Kn KyCTapHnKa, dIN H3MeNB-ueHHMaTePnAna HIN dN KOMnOCTnPOBaHH.

1.5E3ONACHOCTb
BAKHO!
Noxayncta, BHMMATEbHPOOHTAe 3Ty HNCTpykLMO NO cNOJb3oBauHIO uCOXPAHTE eE nnTtHNEu BdaJIHeWEM.
CNMBONbHaH3dennn:

HctpyKuIO no 3Knnyatau.
TOnHO HcNnOyIte paapeweHbIe cpeCTBa 3auMTbI
TocToHIO HcNtOByIte paapeweHbIe cpeCTBa
bb Iraa.

3apkeHO Ha 33-65% n CEBTATC
3apKeHO Ha 11-32% CBETTCB
3apKaHeHa 0-10% Muraet
YcTaHObKa pa6oeryo nOOnKeHHa:
Pabouar no3n4 1 [Pnc.04]:
ДЯ STaHdApTHOrO KOWeHnTpaBbI.
Pa6oay no3n2 [Pnc.05/O6]:
KoWeHHe TpaBbNoD npenrTcbnM.
KoWHeH NIOI npenTCTBnRM Mtahra MoKet ONyCKaTBcR 3tAapTHOrO NOIOKeHr1 B DBA HxHxN XIOJOeHr2M
1.YCTAHOBNTEPUMMMEpHa rpyHT.
2.YdepxnBaTe TpmmMepykamna3a TuTahry ① TaK,TO6b MoKHO 6bIHO HAdabNTb NaIbCm Ha KONKa p36NkoPobKn (10)
3.HaKMMTe Ha KONky pa36nOKuPOBKN 8n onyCTnTe wTaHry 7 B Tpe6yEmoe noIOKeHne.
4. OTnyctnte KhoNky pa36nokpOBKn n CHOBA 3aФNKcpynte UToHry ①.
Paboua no3nua 3 (Tolbo kI apt.9878) [Pnc.07/O8]:
KoWeHne y KpOMOK r30HOB.
BHIMAHHE! TpHMMep MOxHO HcNoIb3OaTb ToNbKO npu ycNOBnФKcaunr rONOBKn B NOJoxKeHN 0° nnn 90°.
IINrTO,OT6bMOxHO 6bIO NOBEPHyb rOIOBky TpMMepa ① Ha90°,TaHra DOJXHA HAXOHTCB CCTAHdAPTHoN03uHn1.
1.YdepKbIeTpMMepDyMpykam3aHTAHrY TAK,TO6bMOHO bIIO HAdaBnTB NaBcEm Ha KONKa p36NkoPobKn
2. HαKmTE Ha KONky pa3bNOkPOBKB ① N IOBepHnTe rOIOBky TpMMepa ① IN NOJKeHnO 0° B NOJKeHnE 90° Do IeNtka ΦIKcTopA.
3. OTnyCTInTe KhoNky pa36nOKuPobBkn 1n CHOBa 3aФNKcPuyTe UTAHry ①
HacrpoKa nnHHbI WtAHn [Pnc.09]:
![GARDENA ComfortCut Li1823 - Pa6oay no3n2 [Pnc.05/O6]: - 1](/content/2026/03/480180/images/1e388639aeb6d39e445417f15c106d221d84c27421e306a78e2420cbd41690dc.jpg)
ONACHO!
HEnb3ra NOIb3ObaTbcN 3dennem, KOrda WTAHra nONHO 3aDbHyTa (TpacnOpTHoe nOnoxKeHne).
1.Ocna6bTe 3aHHMHHyIO TnIb3y 6
2.BbITAHHTe WtAHry ⑦ DO HxHHOI DnIHbI.
3. CHOBA 3aTAHNTe 3aXIMMHYIO rINb3y ⑥
Hacpoika noJooKeHH nnonHHTbHO pyKoTKn [Pnc.01]:
Ponokene dononHnTeBHO pyKoNTKN MOKeT 6bITb HAcTpoEHa Ha Baw poCT.
- NotAHnTe pbHar 12
- HaknoHnte DOnonHnte lyHyO pyKoRtKy 8B Tpe6yEmoe NOJoxHeHc
- Otnyctnre pbuH ②
Ecnn TpMMpe npabnHb NaCTPOeH Ha pOcT, To TEHO HaxoOnTCB B npaBnBHom NIOXeHNr NOLOBA TpMMpeBa paoHe No3mU1 HAKNOHEHaEMHORO BnepeD.
→YdePKNBAITEpTMMep 3a OCHOBHyIO pyKoRTKy 8NdoONHnTeBHyIO pyKoRTky 8Tak,HTO6blrONoBkA TpIMMepa 6bIa CnerKaHaKnHOHeBApePe.
HactpoKa CkO6bln 3aunTbI pacthen:
- Pa6ooye noJoxeHne [Pnc.011]
- NapkoBOOHOe NOIOXeHne [Pnc. O12]
→BbIaHHTeCKO6yIJI3aunITbpaCTEHIN⑤NcBnHbTe ee B Tpebyemoe nooKeHne do ueNka fukcaTopa.
3anyck Tpmmpepa [Pnc.013]:
ACHO!Onachocb noJyehn TpaBmb! CyueCTbyET onachocb TpaBMPOBaHH,ecnn n3dene He octaHaBNBaetc npn OTnyckaHm NyckOBoro pbuara.
→ He 06xOInTe npEdoXpaHInTeNbHbIe yCTpoINCTBa HnN nepeKlIOuATEIn. HanpIMep, He 3aKpenIIe Te nYCKOB pBuAr Ha pyKOarTke.
H3dJIeNE OCHaSEHO pIeDOXPAHNTeBbHM yCTPOIcTBOM C dByMn BbIKHOuATeLMn (NyCKOBO BYUar C 6LOKIPOBKO BKIOUeHN), KOTOpOE pIeD0TBApaaET cNyuaHoe BKIOUeHEN H3dJIeN.
3anyck:
1.Bctabte aKKMyIHTOP B OTBETHIOaCTb aKKMyIHToppa DnO 电NkaΦKcTopa.
2.YepKbAtepykO dononHHTbHyIO pykoRTky 18
3.YdepKINBA rnaBHyO pyKoRTky 1pyRyO pyKO, cDNHbTe 6NOKpOBKy BKNIOUeHnE 18BnepeI nOTnHnte 3a NyckOBBo pHuar 18. TPhMMep 3aryCkaeTc.
4. CHOBA OTNcyTne KONky 6nOKnPOBKN BkJIIOHHeHn 15
BHIMAHME!Bo n36eKaHHe n3HOca mnn NOLOMKn pNactMaccBOrO HOKa Hn HOKepeKxATEJI N36eRaTe KOHTaKTA pNactMaccBOrO HOKa HNOKepeKxATEJI C TBepdIMN oBekTAMN (CTChI, KaMHn, 3a60pbl N.T.D.).
OctahOBka:
-
OTnyctnte nycKOBoB pbHar 6. TpMMep octaHaBnBaetcA.
-
HAKMITE Ha 06e KHOKN pa36IOKINPOBKn A N BbHbTe aKKMyIHTOP Bn3 OTBtHOJ HAcTn aKKMyIHTopaD.
4. TEXHnueCKOE OBCJYXINBAHNE

CHO!Onachoctb nonyueHHaTpaBmbl!
CHOCTb Iope3OB npHnHepeHaMepeHHom 3anycke H3dennr.
→ДОЖДNTECB octAHOBKN ПАCTMACCOBOr HOKa H BbIHbTe AKKMyIATOp,пждчЕ symпсTуNTь K TeXHnuecKOMy 06CnyXBauHIO M3dENn.
UcTka TpMMepa [Pnc.M1]:
![GARDENA ComfortCut Li1823 - UcTka TpMMepa [Pnc.M1]: - 1](/content/2026/03/480180/images/2c26310ffe4cdeb659f8806405895a260708dc1ef61e94f3b7a639ef2f26029e.jpg)
CHO! OnachocTb nonyuene TpaBmbl!
CHOCTb TpaBMPOBaHnI n pNCK NOBpeXDeHnI H3dEINr.
→He pa3pewaaetc8 ouuatab n3dennB BOe HnnoCTpye BoDbl (BOco6eHNOCTN c NOMOsbMOEK BbICOKOr DaBneHN).
→He npOn3BOgnte YNCTky C nOmoIbXnMnKATOB,B TOM YNCNE 6en3Hna IIN pACTBOpENTe HeKetOpBle BeeCTBa MOryt p43pyuNb BaxKnBe INaCTMaCCObble DeTAn.
BeHTnRAUHOHHbIe eenn DOnKHBbl 6bItb NOCTORHNO YcTbIMN.
- OHTNTBEHTNIAHIOHHIe Ⅲ MANKOJIETKOH (HE NCNOJb3yITe OTBepTKY).
- NocleKaJdOrOHCNOJIb3OBAHnOcNCTnTe BceNoDBNKHbIe HaCTn. B c06eHHoCTOn ydaJIte OCTaTN TpaBbIy n rpa3b N-ND, 3aunTHoro KOKXyxa ②
UcTka aKKymyIaTopa n 3aprHoro yctpoNCTBa aKKymyIaTopa:
PpeepnoKluHHeMe3apAHOrOyCTpoIcTBAaKKymIaToppa y6eIntec,TONoBepXHOCTN KOHTaKtblaKKymIaTToPA n a3pAHOrOyCTpoIcTBAaKKymIaTPOu CTbIe N cyHXe.
He noIb3yIeTcB npOTouHoi BOIO.
→OuuaTe KOHTaKTHI IN PnactMacCOBbIE DeTaNN MmRKO cyXoN canfoTko.
5.XPAAHHEHNE
BbIOu n3 3KcNpyaTuH:
Haeine Heo6xOIMO XpaHnB HeoCTyIHOM dH deteMeCTe.
- CHIMMTEAKKMYJITOP
2.3apndte akkymyIaTOp. - Ouchntte Tprmmep, aKkyMnyIaTOp n 3apAHOe yCTpoIcTB oKkyMnyIaTopa (cm.4.TEXHUYECKOE OBCJNYHUBAHIE)
- XpaHnTe Tpmmmed, AkkMyIaTOp IN 3apAHOe yCTpoINCTBO akkyMlyIaTOpa B cyXOM, 3AkpbITOM IN 3aauuHHeHHOM OT OPnuCaTeNbHix TEMnepatypnomoeHHm.
yTHH3aunr:
(cornacno Dpokm 2012/19/EC)
He donyckaetc Bb6pacbtaBt N3dennec O6bHbM b6Tobm MYCOPOM.ErHO60xMOYTNIN3NPOBaTBCCOTBECTBn CdeCTByoIMMeCTbIMPiEINCAHMRN NO 3aunneOkyKaXoue cpeBu.
BAKHO!
→Ytlnn3npyTe n3deneYepe3 MeCThbl NyHKT npneMKNBTOPCbipb.
YtHnHaaAkkymyTOpa:
GARDENA akkymyntop npctctabnnet co60n IHTNHO HTHO 6aTapeIO, KOTOPAN IO nCTeHNO cPcOa CJNbBd OLOKHA yTNIN3NPOBaTbCSOtDEhBOoO6bHORo BbTOBO MyCopa.
BAXHO!
→YTINH3NpyTe aKKyMnTOpblYepe3 MeCTHbI PyHKT npEeMKBTOPCbIPbR.
1.ПОИСТБIO p3a3PAnTe IHTM-NHnHbIe 6aTApEN (O6paTnTEcB B GARDENA cepBnchI ueHTp).
2.3aunuainTe KOHTbI NITH-NOHbIX 6atapeoTkoR0 3ambykaHnR.
3. HAdnEkaumm 6pa3om yTuHn3pyTe JNTN-NOHbIe 6aTapei.
6. YCTPAHEHNE HENCPPABHOCTEIN

CHO! Onachoctb nonyueynra TpaMbbl!
CHOCbI NOpe3OB Ipn HnpeHnAmepenHOM 3anycke H3denn.
→ДоЖдNTeCb NOHoi OCTaHOBKn ПlaCTMaCCOBOrO HOxA m BbHbTe AkkMyIaTOp, npeXdYe YcTpaHaTb HEnCpPaH HOCTn N3dJIeNIA.
3aMeHa PnactMaccoboro HOka [Pnc. T1/T2]:

ONACHO!Moxno nopeaTbcr!
→ He nCnoIb3yIe METaIIuHcEckHe pExyuIe 3JIeMeHTbl IINI 3aIacHbIe qactn I npHnAdJeKHOCTn, He npEduCMOTpeHHbIe fipmO GARDENA.
EcnH3HocOCToHKoe pe6po 60JIbIe HeBnIMHOe6XoHNMO 3aEMHTb HoKeepKataIb. O6paTHe B GARDENA CepBnC- Hn CEHTp.
PnactMaccoBbIe HOHn pa3peWaaetc CTAuNbBaTb He 6oJee cem Ha NoOBHy Nx DnHbI. P3apeWaaetc npImeHbT bONkoOpnHaNBhIE 3aNaChbE HOHn RotorCut ot GARDENA. 3anachbIe nactMaccoBbIe HOHm MOXHO npNo6pctN y Baewero ToproBoro npedCTabntTeIg GARDENA Hn HenocpeDCTBeHHO B cepBnCHOM ceHTpe GARDENA.
3anacno Hox RotorCut GARDENA DnTyp60tpmmepa apt.5368
CHRTHe NtactMACCOBOrO HOXA:
1.ПepeBepHnTe TpMmMep.
2.CnERKa HAKMHTe BHN3 Ha KOHeu INaCTMACCOBOrO HOXA(A), CbHNbTe MACTMACBOBIOHOK@pe3 HOKeDEpXaTeIb BOHYTpB(B)N BtTAHNEI ETO.
YCTAHOBKa TIACTMACCOBOHO HOXA:
→3aBnraTe HObI pnaCTMaCCOBH HOK ⑧ Hepe3 MetaIIuYeckn IINU HOKeepKaTeN 18, NOKA He ycbluTE FHKCaUN CoeINHe HNA (ueNOK).
ECHNOBbI IACTMACCOBbHOK yCTAHOBJIeH npABINbHO, ERO MOXHO CnERKa NOKaYNBaTb.
PpO6JIeMa Bo3MOXHn pIpyHn YcTpaHeHne
| Тузмоген Косcent Косcent Плобо | Пл actmaccobm HOK ИSthoшени Ил Stlshkom KoprOKн. | → 3amehite Пл actmaccobm HOK. |
| Пл actmaccobm HOK CnOMaH. → 3amehite Пл actmaccobm HOK. | ||
| Тузмоген сильно Вибричут | Пл actmaccobm HOK Сильский Сиьно ИSthoшени И Мeet Дicбаланс. | → 3amehite Пл actmaccobm HOK. |
| Hoxkepekatael ИSthoшени. → 3amehite HOxkepekatael. | ||
| Тузмоген ЗаускадетсA | Аккумлготор BCTablen В вakumлготорhoe Гэдzo п поноctы. | → BCTabte Akkyumlrgotop В akkyumlrgotorphe Гэдzo п поноctыdo улчка Фикcatopa. |
| Аккумлгotрразраяжени. | → 3apadite Akkyumlrgotop. | |
| Мotop заблковов. | → Yctpaanite Рамуху. Ромбerte- дITE Повторнй Загуck. | |
| Тузмоген He octahablnbaeTсA | Пусковов рьчаг Клинит. | → Chinmte Akkyumlrgotop Отту CTITEpyckobor рьчаг. |
| Светдимod Несчparно- Стн STN ha Akkyumlrgatope Miraet [Pnc. 03] | Аккумлготор пereprugken. | → Дайte Akkyumlrgotopy Ocstbyt И zanycntdes TrpIMmep chOba. |
| Нedoctatochnoe Haprajekene | → 3apadite Akkyumlrgotop. | |
| Temperatypa akkyumlrgotop нхоцttca 3a DoiPyctimbIMn прededлamn. | → Пльштесы Akkyumlrgotopm пriп Tempepatypax Okpyka- юsergo Bozduxa ot 0 °C do 40 °C. | |
| Светдимod Несчparно- Стн STN ha Akkyumlrgatope CBETITcR [Pnc. 03] | Сбонakумлготор/ Дeфekt Akkyumlrgotop. | →Еспнппппдiklukhenin akkyumlrgotora K zaridhomy усточьу hyпроксдит ero CBpoca, obparitentecb V GARDENA cepbrchniy ceHTpr. |
| Конtrpoльный Иndikatop Зарддд STN ha Zaradдд Усточье He 3a rgopacTcR [Pnc. T3] | Зардддду ecryoctvo Ип Кабель zaradддду podkluchны небравл�но. | →Равлнho Podkluchte zaradдду ecryoctв И karбель zaradдд. |
PpO6JIeMa Bo3MOKHaH npMmHa YcTpAneHHe
KoHTpOJIbHbMnHdHKaTOp 3apJKnK HApZHMoYcTOPOIcTBMe MHRaet KpaCbHbEMCBOTOM [Pnc. T3]
Temnepatypa akkymyntopora HAXOITCR 3a DONTYCTMMM NpEJIEMM.
MetoIaMamepeHH cornaHc: EN 50636-2-91 RL 2000/14/EC

YKA3AHHE: PImBDEHHeHO 3HAUEHNE Bb6P03MmCCN b6JNo M3MepeHO B COOTBETCBNH CO TcAndapthBM MoTeOM HcBtAHIN M KOET HCNOb3OaTBc pRn CpaBEHNE 3JEKTOPNCHTPEMHOB AOTC Dpyr. 3TO HAUEHNE MOKT TAKKEBATCBsI JRAI PpEBApHTeHb OqEHKn POIIBepKHeHO BQADBJCTMBIO. 3HAVEO3MCCHN MOKET H3MEHHTCb BO BcPM RAeALBOHO HCNOb3ObaHHA 3JEKTOPHHa.
TapaHTHbIe 06aTeJIbCTBa:
B clyae rapaHnHO peKnaCn C BaC He BImaetc nata 3a npocctaneHHy ycnym.
GARDENA Manufacturing GmbH rapaHTnpuyET haJIeKauyio pa60Ty BCEX hOBx opIRnHaBbHx n3denni GARDENA B TeueHne 2 net c DaTb npBoN ToKynu YIaepna Ipr npCIOBn IMNoIbOBAHN H3dien NcIKIOUHTNEBO DnIIMHbX ceJeN. TapaHTN INOTOBIneH paacpoctpaHReTcRa HA n3dennr, npno6peTeHHhe Ha BTOpNHOM bINke. DaHnA rapaHTnAPcapPOCTPAHNTcRa HA CBe CyueCTBEHHbe HeNOCTATKn n3dennr, KOTOpBle DOkAsaTeBHO CBraHbC OwIbKaAMB MATEPINAANX NN pOn13BODCTBe. FapTaHn NOpa3yMeBaT npEOCTABHeHne NOHOCbIO fHyHKUONHpyUoEro n3dennr Ha zAmEHy nn PEMOH HncnPabHOrO n3dennr, OTnpaBHeHoro HAM BecnPaTHO;Mb OCTaBtAHem 3a Coobn ppAO BBvupatb OmIH INI dByx BApNAHTOB IN CBOEMy yCMOTpeHHIO. DaHnA yCyIra npDeocTabnreTcRpn CObKnOHeHN CnDEyOUsX yCNOBn:
- INaTeJIeNcNoIb3oBaNocb No HA3HaueHEnIO B COOTBeTCTBnCpeKoMeHdauINMn B pyKOBOdCTBe NO 3KcPiNyatauIN.
HnIOKynateIb,HN TpeTbe NIO He NItaNcBCKpbBaTbnn peMOHTnpoBaTaN3dEne. - Pn3KcNpyataunncnoJb30BaHnCtIbKO opuHaHbHbte 3aNaChbIe n3HaunBaemble Detanl GARDENA.
-ПпсдостаьениToВapHorOуka.
13 rapaHTmN NCKIOUeHb HOpMaIbHb N3HOC DeTaneN KOMNOHETOB (HaNPIMep, HOKei, DetaneN KpENJIeHr HOKei, Typ6VN, OCEtITEnb- hIX npIN6oPob, KInHObix N 3y6HaTbX pEmHei, paBOHx KOIEc, CBeHei 3aJTHAHn), N3MeHEN BHeuHrO Bua, a TaKke N3HaUNBaEMble n pacxoNDhie Detann.
JaHHa rapaHTnI N3ROTOBtEnr ORpaHnHbAeTc 3ameHo n peMOH TOM HeKoHdNIOHO HO TOBaPa HA yKa3aHHbIX Bblwe ycLOBIAx. rapaHTn I N3ROTOBtEnr He MoKeT bOCHOBaENm DnBbDINBeHn INbIX npTeH3n HApIMep, Ha Bo3MeUHeY uep6a. DaHHa rapaHTn I N3ROTOBtEnr, ECTeBHeHNo, He 3atPaHbAeTzAKOHbE n IOBOOpHbE rapaHTnIbIe Tpe6CBaHN BOTHOeHNuDInepa /npOdaBu.
Iapantna nroTOBnTea perynpyeTc npabom FeepaTHBOH Pecny6nKn EpmaHn.
B rapaHTnHOM cnyae, noxayyIcTa, onnaTITHeo6xOIMbIe NOTOBBy C60bpN BblWNIte DepeKTHOE NdEJIne BMCTe C KOHN ToBaPHorO Yeka N OINCAHEM HeNCpPaBHOCTe No aDpeCy cepBnC-Hou cyn6bGARDENA.
HaBaeBteTann:
TnactmaccoBbHOKNHOKeepKATEbABNIOCTcN3HaWNBaEMbIMn
DEtaAMMnHaHnHEpaCnPOCTpAHReTCrapaHTn.
HCTpykun npoun3Bounten Poccnckoepaun
HaroToBntenb:GARDENA Germany AB
PO Box 7454, S-103 92 Stockholm, Sweden
CtpaHa n3rTOBHeHn yKa3aHa Ha ToBape.
OΦnuaIbHbI HmnpTepe Tepptopno
Poccn:
OOO XyckBaHa>
141400, MockoBcKa o6NaCTb, r. XmKn,
yIJIeHHrpaDcKaB,BAaJeHne 39
CTPOEHNE6
nomeeene No OB02_04
CepinHbI Homep:A1945
A 19*45
1-icepnn(Hndekc Toid Bbnycka Kanennapn Hede npon3BODCTBA) BBnycka
PocneHnrau nppa roda binycka 2019 (yTeBepb3HaK).
SL
Sistemiakumulator BLI-18
| Napetost akumulatorja | V (DC) 18 | 18 | |
| Kapaciteta akumulatorja | Ah | 2,6 | 2,0 |
| Število celic (litij-ionskih) | 5 | 5 | |
| Čas poljenja akumulatorj80%/100% (prbl.) | h | 3,5 / 5 | 2 / 2,5 |
Primerni GARDENA systemski akumulatorji BLI-18:art.-st.9839/9865/9866/9867
Polnilnik akumulatorjev 18 V Enota Vrednost (art.-st. 9825-00.630.00)
| Omrežna napetost | V (AC) 100 - 240 | |
| Omrežna frekvenca | Hz | 50 - 60 |
Poinlnik akumulatorjev 18 V Enota Vrednost (art.-st. 9825-00.630.00)
He BnKOpNcTOByIe Bnpi6 IINI ndprraHn KHBONnOry, nopi6- HennMaTe piany nKOMnOCTyBaHH.
1. B3NEKA
BAJKINBO!
Pertbno npouhTaTe 10 HcTpyKIO 3 EKcnnyataaII Ta 36epexitb II, 106 npn Heo6xHoct MoKa 6yNo 3BepHytnCn Do Hei.
CHMBONHaBnpo6i:

He HnnaBaN BnNBy Douy.
HE6E3NEKA!
He6eaneKa TpaBmyBaHn HnHx oC6i He DonnyckaiTe HnHx oc6 y pObouy 3ohy.

Ia3raHIO npHcTPO:
HeraHO BmIMb Bnky 3 po3eKn y BnnaKy, RaKo Ka6eB
nowKoJKeHH a6o nepeP3aHN.
3araIbHI BkazIBK 3TexHik6e3neKn
Enektpo6e3neKa

HE6E3NEKA!YpaKeHHa cTpymOM!
He6e3neKa OTpMaHnH TpaBM qpe3 ypaKeHH CTpyMOM.
→JHbBHeHH BnPoBy Ma3 3IiChHOBaTHc Hpe3 Hepe3 npHCTpi 3axHoHoro BIDKIOUeHH (P3B), HomHaIIHn 3aIIHKoBn CTpym CnpaBoyBaHHr KORO HE NOBHeHnepeBnYBuHTn 30 mA.
YHnKaIeHeHnpaBnBnHXNIOJoxKeHbTinaIzABKnyTpmyTePiHOBaIy,0oB bNy6dy-bAKnC3MOrnCTiKOcTOrnHaCxInax.XoDITb,Hebirate.
He TopkaTEcR JKOJIHIX pyxOMHX He63eNEHIX qACTHJIO TOTO, JK MAJIIMHa He Byde IbKHOHeI BID eNKTpuHoi MepeKi, i He63eNeHi pyxOMi qACTHIN He 3YNIHRTBCN TOBHCIO.
P1D 13Ceknnyataui Maunnni 3aBKn HAdBaTe MlHe B3yTT Ta doBri 6pOkiK.
Be3neuHa eknnyataui
1 HabayHHa
a)IpoynataYeBaXhoHCTpyKJIO.OsHaONMTeC3eJeMeHTAMKepyBaHHnPnCTpOTo TaNoHO HAnEKMIMBkOpNCTaHHM.
6) YJXOHNY PA3I HE DO3BONNIte OOCAM, IIO HE O3HAIOMNIMCR 3 HCTPYKILIO, aOIOITRM BVKNOPICBOYBATn PnCtPI. IIIOCHI MICUEBI ZAKOHMOKYb OBMOBYATN BIK KOPCYBAHa.
B) 3BepHt b yary Ha Te, 10 KopnctyBaC am BiiNobiae 3a abapii a6o CTBOpeHHHe6e3neHHxCityaui DnI IHmX ocic a6o ix MaHa.
2 NiIroTOBka
a) PereBn BIKOPNCTAHHn Heo5xJHO npeBipn CNOyHnn KabeB IIOOBKYBaH Ha HABHCTb CnIbI yuKOJKeHb ABO CTAPHH. HkIoPi Nc BIKOPNCTAHn KabeB dybe yuKOJKeHn, HeraHb BiEeDHaHTe Ioro BID eNEKTPOMePexi. HE TOPKAIETCRA KABELIO DOKNI BIH HE BYDE BIJKIOUHEHIN BI ENEKTPOMEPEXI.
He BnKOpncTObyIte npicTpI, kkuo KaebIyukOxKeHn aO bO hocBcN.
5IpeepBnKpOCTAHHHPiNcTPIHHeo6XiHO B3aYbHO PepeSiPTHa npMeT yUkOKeHX, BiCyTHx aBO HnPaBnBHO BCTaHOBeHNX 3axnHIX npNCTOCByAB hAo KooxyIB.
B) HikonHe eKcPnyateI npCTpi, AkoNOpny 3hAxOaTbCnIO, Oo65mBO dITn, a50 Cmckbl TbpHn.
3 Ekniyyataaia
a) CnOlyHnn KAbelb IIOOBKYBaH Heo6XHH ToPMATNI OAnI BID pIKyHor oPnCTOCyBaHH.
6)Oo8aR3KOBO Hb06xJHO BnKOpNCTOByBAtn 3acobn 3axncty OeH MlHe BByTTI pOITROM yciE ekCnVyaTaui npntpoio.
He60xHIO yHnKATn BVKnOpCTAHn pIITcPOTHa 3a gonHan nOroDHyMOB, oocNbUo ByuNDkhyBeNe3enB uNHNHEHn BnSckAnk.
r) BHKOPNCTOByTe npnctpi TInbKn npn DeHHOMy cBtni a6o npn DoCTaHbOMy wTyHOMy oCBItneHHi.
HIKONHEKOPACTOByeMaUHy3YUKOJHEMUMXACHIMKOKyXOM a0a3axCHNMPnCTOCyBaHNAM,a0b6ea3axHCHOKOKyXaH3axHCHX npCTOCyBaHb.
)Mortcp3anyckatnTinbKnToi,konpyknHornpe6ybaioB no3a DocBHeHCTIO pinyoro npncpO.
e)3aBxDn BID'EnHyTe npntcpiB iB nEKeTpcMepeXi (TO6TO BnMaHte BnKy 3 pO3ETK, BnHyHt bIkyBaHBe nPNCOTcyBaHHn a60 3HmHy 6bataeio
1) 3aBxN, KOIN pncptpi 3aIIHaaetbca 6e3 dornny;
2) npeB BuDaneHHM 6KyBaHHa
3)PepedpeBipko,HHHnAM a0o obo6kO npntpo;
4)nicra KOHTAKTy 3I CTOPOHHIM PpeMeTOM;
5)3aBx, kx npicpiip noHnHe 3BnHnHO BpBn
K) OctepiraTecr TpaBm pyk i HIR, BIKNikKaHnx pkiyHM npNCToCyBaHHAM.
3)NoctHIO nepeBipNHTe,106yBEHTINLIMNXOTOBpAX He 5yNO CTOPOHIX TIN.
4 Texhihe 06cyrobyaHHra 36epiraHH
a) Pered BIKHOAHHHPOBIT 3 OTOA HADy a60 OHUeHnMaHHy NOTiPoH BIDKIOHTI BID MEPEKJ ENEKTPOXINHEHnO (TOBTOBTRHYuTEKeP 3 POETKJ, BNTRHTHnB GIOKyoHn PNKCTPIN a60 SHIMHy BaTapeHO).
6) NOBHHI BIKOPICOTByBaTcH 3aNaCHi YactHHI KOMPNEKtyOHi, peKOMeHIOBAHI BPO6HNIKOM.
B) Hoo6xIuHO peryrHPO nepeBpIrynMoClycBOyBpynt PnIcTPI. PnIcTPI Hoo6xIuHO pemOHTByuTIbnKb MAnTePHi rapaHTIHO pemOHTy.
r)KJIO npIcTIPIHnB NKOpNCTOByTebCh,36epirae IHO rno 0o3doC8HtIO DIJIe.
DdaTkoBbKb3iBKn 3TexHkN6e3neKn
6e3neueHNE NOBOXKeHHaKMyNtOpHMn 6aTapeMn

HE6E3NEKA! He6e3neka noKexi!
AkyMnyrtopha batape, uio sapaJxactbcr, y npoueci sapaJkn noBnHa 3hAxoNDtnc ha Heropuoyi, TepmoctiiKIN nobepxH, RaKe HnpOBOntb eEeKTPnHc CTpyM.
Iiuc3apRKnakymyTOpHa6atapEn He nobHHa 3annuaTnca 6e3 Harny.
KoHTAKTHI KJIEMn He MoXHa 3aMMKaTH HAcopoTko.
36epiraTe iKi, nERko3aMnCTI ta nERKOROPoU npEmdTn noDanIK BID 3apHnHO npCTpOTo akyMnTropHo6bapei.
RkUO akymyHToPA 6batape He 6yde BHKOPNCTOByBaTHCn IPOTRGM TpBbIaIIO rOc (3m), 3apdIIb IOBbHCTIO akymyHrTOHy bataeIO, 0o6 3aoBtI rNfBokOy pOz8y.
He 36epiraiTe akymyTAtOpHy databeO y bVpObi, 106 yHnKHytn camOpO3pn-ny, HecAHKIOHOBAHO BOKOPMCTaHrI TpaBM.
He 36epirateAkymntropHy GatapeB npimuiueHHx, De bdybaotboc ENKTKOCTaHnP008N.
EneKtpo6e3neKa

HE6E3NEKA! 3ynnka cepa!
UeBnPi6 niacekcnnyataui CTbOpoe enekTpomarHthe none. Ue none pnh nBmHX yMOBX MOKe CTbOpNT hErATBNH BnNB Ha poBoty AKTHNBMx ABOcNAHNBX MEuHNH IMNHAHTaIB. OoB bKJNUOHT HBe3neHi CHTyaui, kki MOKyTB PnH3BecTdo TAKKHX a60 cMePtehNHX TaBPAM, 0oc6n 3 MeuHHM IMNHAHTaOMpeD BVKNOPCTAHHM IbOTo BHpOby NOBHNI npkoHCynbTyBaTHC3i CBOIM NkApem I BnpoSHNKOM IMNAHTaY.
Bukopictobaye akymyntophni Bupi6 Tlnek npri Temnepatypi BID, 0do 40^
BttarHb akymnatoHy batapeo B paa abapinoi cntyaui.
3a0b6Hc8cBnKOpNcTobyBaTN BnIb 5bnBOnDnIgOrNDy3aCTABKMn.
Oc06ncTa 6e3neKa

HE6E3NEKA! He6e3neka 3aayx!
DpiHcTHNNMOyTByTNERKPOPKOBHTYi.Yepe3 nonieNHeBOBmIKOICHEbeaneKa3aynnMaNEbKnX DITEe HDoNYckaTe MaNEbKnX DIteo MiCi36IPkn.
Ypasi CnBnHbix BApOeNoEhDIO hAMINHTI pKHyI pNCTP Ta nepeBIPuT NYoR TPOImH HABAHBHCbTOJNOKQHOHS.
PepdIKBOKIPCTAHHNIpeKOHAIteChY TOMy,IOI WIBIKO3HOUBAHE pebo B NPOHJN.
TpaHcnpTyBaHHa3a nepdHi0 pyKy.
3aBxKnBnKOpncToByTe 3ac0bInHdbDyabNbHoro 3axncty.
BdraTe pykabu, 06 ouctnpi kyy npctpi.
3aBxHn HaidiBaHte 3ac06n 3axHcTy ouH.
Taki 3axiCHI 3ac06n, RK pykabuui, HekOBHe 3axiHHe BAYTA 3axiCHI HabyHHK, RIK BKNOPCTOByOTCBYBIDIOBIMX yMOBX, 3HMkyOTb pNHK TPABMYBAHHA.
BByIe OBepeKHI NID HAaHbYBaHH BnOo6y, YHikKaIte 3aTHCKAHN HANLIMXpOMMHN HepyxOMMHN aCTINAMM MaUNHn A50 Niac 3bUpaHH 3axiHOFO KOKxyxy.
He BnKOpOCTOByIte dJIHnUeHHN 3axHCNHx PnIcTOCByAHb aBO cHINX XACTHN TPMOPA BO ADO x6M1XHI PEBOHNH
Bci raiki, rBHTHn I BHTHn MAObT 6yTn DO6pe 3aTnRhyti, 106 Bnpi 6yBv y6e3nnno hpo6OHy o7aHi.
He po3bpaTte Bpi6 Ha 6iBsy KInbKic7y AcTHN, YIM pRn noCTaHaHHI.
3actepekeHHI PnBukopctaHHi HJNduyabHHX 3ac06B 3axnCTy cprAHI Bcny I BHACIOK LMy, RkN BpuObHe BpI6, KopcyBaH MOKHO NOMITNIHbNOKEHIOEi.
ПДСЕКТУАЛТРANOCHYВИНСООБПИЗСТКЕТМ,SOBHBNKHAHNEBSEZNAДЯнIHINXNOJDEI.
Bydtye ybaXhi, cnikkyte 3a Tm, 00 Bn p6bnte
iKepyieec3dopobmIpyzdom npipo60ti 3 enekTpponpnaaM.
He KoprctyIEcNEIeKPTPOHCTPYMEMTOYM ToYtac, RkUO BtOMNCHA60 nepeBaSyte nJd NBIbIMo HAPKOTIKB, AikKOrNo 1a60 IaRapckHHX3ac06IS.
OJHMAHTBHeYBAHIXCTPIMBHKOPINCTAHJI EJIKTPOIHTCPYMOTIBMOKIPN3AECTNO cepRoR3NHXTPAMB.
2. MOHTAK

HE6E3NEKA! He6e3neKa OTpMaHH TpaBMn!
e3neka OTPMAMHNA NOPi3y npn BnnaKOBOMy 3anycky Bnpo6y.
→3auekaTBe,doKnIaCTMaobn pixyni npnctpi He 3ynHntbCBy BNTAIGHTb AkyMnytOpHy 6aTapeIO, nepu HIX KMOHTyBAt BNPI6.
BctaHOBHeHH 3axnCHOrO KOxyXa N O6MeKyBaYa Dn8 3axnCTy pocmH [306p.A1/A2]:

3NEKA!
→Bupi6 MoKHa BnKOpNCToByBaTH TiIbKn ToDi, RkUO BCTaHOBNEHm 3anachn KoxyX.
- HanaHnItb nepaHIO qactHy 3axncHO Koxyxa Ha roIbky TpImepa ① ,DOKN BOHa He 3aueHHeTbcN.
- HanaHITb 3aHIO YactHy aaxIncHOro Koxyxa ② do ynpOHa roIbky TpImepa ①.
3.06epexho 3aTaHrHiB 06nDBA rHHTN ④ - HanaHnItb o6mExyBaU dIa3xNCTy poCINH 5Ha toniBky TpImepa ① ,DOKu BIn He 3aueENHeTbcra.
ΦIκγBaHHπaCTMaCObOro pikyOro npncTpoHa pyuCi [306p.A3]:
do kOMNNEK TY NOCTABKN BXOJITB 5 NACTMACOBHX pIKYHINPnCTPOIB 8.43MIHHI NACTMACOBIPIKKYHINpNCTPOI PO3aUBOHINb na3ax Hpa yhu
Iy yctahOBKn IaactmacoBOrO pikyHOrO npncTpoIO BTPmam pkiyHOrO npncTpoIO nIB.6.YCYHEHHHHECnPABHOCTEIN
3amHa nlaactmacoboro pikkyoro npnctpoio
3. OBCNYTOBYAHH

HE6E3NEKA! He6e3neKa OtpmaHnTpaBMn!
e3neKa OTRIMAHH NOPI3y npn BnnaKOBOMy 3anycky Bnpo6y.
→3aHeKaIe,IOKn INaTACMOBn pIKyHn npNCTpiH He 3ynHHtCBn BnTARHITb AkyMnyTOpHy 6aTapeo, nepu HIX HanaWTOBYatn a60 TpAHCnpOTByn BnPi6.
3apnntaKymnTOpHy6atapeo[306p.01/02]:

Hana Hanpyra pyHye akymyIaTOp i3apAHH
npncpiyakymyntopa.
→IpekeKaHTeCg,IO Bn BnKOpHcTObYeTe npaBnblHy Hanpyry B MepeKi.
До кOMNнeКу NOCTaHnH aKymyIaTOpHnx TpHmepiB GARDENA, Homepr apTNkynIb 9876-55/9878-55,aKymyIaTOp Ta 3apAHH n pIcTpiH He BxOaRtB.
IpeepnepuBnKOpCTaHnA kymyrtopHa 6atapen noHHa 6yt nOBHicTIO 3apJxkeha.
JIITIEBO-I0HNY akymyIaTOpHy 6aTapeHO MOKHa 3apRJaKaTN npN 6yNb- kOMY CTyNEHI 3apRKn, a npOec 3apRKn MOKe 6yTH nepePbaHn y 6yNb-ynKu cA, He noWkoJxkyOuN akymyIaTOpHy 6aTapeHO (BIDcyTHi eEeK TAM'NTI).
- Hatachihha fikcatop(4) A BHTHnHt bakymyntophy 6atapeio (B) i3 kpinneHHa akymyntapohoi 6atapei (D) ha pyui.
2.Плдклочьзарднйпсntриakymnyatopa ⑥do enektpomepexi.
3.Плдкючьзарднй кабелakумлготар(Бdoakmylrtopa(B)
Kkuo KOHTpoIbHa IaMaHa 3apRKn Ha 3apHOMy npCTpOi 6nMae 3eneHm KOnbOpom, 6atape 3apJxacTbcra.
KIO KOHTPOlbHa lamna 3apAKn Ha 3apHOMy npHcTpoI RopnB 3eNEHM KOBOPom NoCTiHo, AkyMnyaTOpHa batape NOBHtO 3apAKeHa (tpBaJIcTb 3apAkn, niv.7. TEXHI-HI XAPAKTEPICTIKU).
4.B npoueci 3apn kn nepebipn Te cepe3 pibHomipn npomknn hcy CTynh 3apnkn.
5. Konyakmyntopha 6atapen ( nobHicTHO 3apn JkeHa, Bi'cdHaiTe akmyntopHy 6atapeo (B biJ 3apnHO npictpoC
6. BntrHnItb 3apAaHm npctpi 3 po3eKn
Inikatop 3apnakymyntopa [306p.03]:
IHdkatop 3apAkn AkyMnyTopp B npoueci 3apAkn:
3apJxHeHcTa Ha 100% ①,②i③CBITbCBA (BnpOa6K 60c)
3apdxHeHicbHa 66-99% i②cBtTa,③5nMa
3apJxHeHb Ha 33-65 % Cbitntbcn, 6nMa
3apnkeHicbHa 0-32% 6nMa
IHHNKATOP 3aprakn akymyntopat B npoeci 3aprakn:
→HaTnCHiB KHOKNy(6) Ha akymyIaTOpHi 6aTaapei.
Inikatop 3apny akymnptopho-6atapei bio6paaetbcn npotrom 5 cekyHd.
3apJxHcHb Ha 66-99% ①,②i CBTbC
3apnkeHicbHa 33-65% i CBITaBcA
3apAnKeHicbHa 11-32% CBITITBCB
3apdxHeHCTb Ha 0-10% 6nmae
BCTAHOBJIeHHr TpHMeepa B po6oue noJIOKeHHr:
Poboe noJoxeHH1 [306p.04]:
CtahapTha 0bpi3ka.
Poboe noJoxeHHa 2 [306p.05/O6]:
O6pi3ka nI nepeWkoJIO.
Dnna ndpuraHHH ni nepeuikQammykoATky MOxHa onyCTHTN 3 noNOKeHHH 3a 3aMOBvBAHHAM 1 y DBA HxKHi NOKeHHH 2 a6o 3.
1.BctaHOBtB TpMmep Ha 3eMJIIO.
2. TpMaIeTpMep o6oma pykAmn 3a pyKoNTky 7aKIM uHOM, 06 Bn MoTn HATNCHTN NaJIbCem Ha fikcatop 10.
3. Hatncihb Ha qikcatop 0 n onycitb pykoarky 7 B baxahe noIOxehn.
4. Bldnyctitb pikcatop 10, nicn yoro pykontka 7 Mac 3HOby zafikcybatncn.
Po6ohe nonoXeHHa 3 (TINbKN HOMep apTNKny 9878) [306p.07/O8]:
IiDCTPnraHn no KpAnr a30Hy.
YBAIATpHmepMOxHaBnKOpNCToByaTHTilbKnBTOMyBnAnky, AkiO pIXyua roNObKa TpHmepa 3aΦikcObaHo Ha 0^ a6o 90^
IIOEpa 90pyKoRTy notpiHO 3HOBY BCTAHOBHTN y NONOKEHH 3a 3AMOBYBAHHM1.
- TpmaTe Tpmepe 06oma pykam3a pykoRTky ① TaKm YHOM, 06BnMOrn HATNCHTn NaIbCem Ha fikcatop ⑩
- HATCHITb Ha iKcATOp 1 nobepHtB rONiBky TpMepa 1 3 0°Ha 90°,doKo BOHa He 3auenHeTBcR.
- Bijnycitibikcatop 10, nicra yoro pykoartka 7Mae 3HOBy aafikcybatnca.
PeryIOBAHH BHCOTN pyKoRTKN [306p.09]:
![GARDENA ComfortCut Li1823 - PeryIOBAHH BHCOTN pyKoRTKN [306p.09]: - 1](/content/2026/03/480180/images/35e814a9d3bcb9f7c3dcefcf70546c943304c04f8e15892ed32cb8340c7b86d0.jpg)
HE6E3NEKA!
Bpi6 He moKHa BnKOpNCTOByaTH, KOJI pyKoRtKa NOBHCIOCKnaedeHa (noLoXeHHI TpaHcNoptyBaHH).
1.Ocna6Te 3aTmckHy BTyNkY ⑥
2. BuTARHITb pyKoRKy ⑦ ha nortpi6Hy doBxNHy.
3. 3HOBy 3aTARHITb 3aTnCKHy BTyNkY ⑥
PerynboaHHNoJoxeHHdQatKoBoIpyKn[306p.010]:
IIOJKeHHaDdAaKoBOIpycknMoKe 6bTN BipepybObaHe BIDNOBIdHO doBaaworo3pocTy.
- NotarHirb 3a BaKInb ②
- Haxinitb doaTkoBpyky 13 B Heo6xInHe noNooKeHHA.
3.3HOByBIDnycTITBaKnlb
Rkio TpMpeBippeyIbOaHO 3a pIcTOM npaBnIbHO,To nono-KeHHa 76e BepETKauHBM, a rONOBa TpMePA Bpo6OMy NONOEXHI TPOXHAXINHeBApeD.
→TpImaTe TpImep 3a OCHOBHy pyKy 14 Ta IOnaTKOBy pyKy 18 TaKIM YHOM, IO6 TOriBkA TpImepa 6yla 3IeKa HaxInHe Bnepe.
PeryIOBaHHo6MeKyBaHaaIa3axHcyPOcHH:
- Po6oey noIoxKeHHa [306p.011]
- PonoKeeHH 36epexeHH [306p. O12]
→BiTARHITb 06MEXKByaD n3axnCTy pocnH 5 Ta BCTaHOBtB noRo Bnotpi6He NOJOKeHHa TAKIM YHOM, 106 Bi HzaiKcyBaBCa.

3anyck TpHmepa [306p. 013]:
![GARDENA ComfortCut Li1823 - 3anyck TpHmepa [306p. 013]: - 1](/content/2026/03/480180/images/fa6167ad0b6002bcb6b1d0301053bbc59316408e9e004afd49ccc3db2f12d740.jpg)
HE6E3NEKA! He6e3neKa OTPmAHnTpaBMn!
3arp03a OTPMaHHraPbMn, RkUo Bnpi6 He 3ynm
HnTbcnToro, k6yB BiDnyuehen nyckOBn Baxkib.
→He 06xOdbTe 3axnChi npntocybaHHa6o BmHKa.
Hapnka, He 3akpinioTe nckobn Baxib 3a pyky.
BnipochaeHHnoDbHMMzXHCHM npncTpoem (nyckobn Baxjib 36kOyBaHHBM KJIOUeHH),Akm3axHuaeBnip6 BiBnApkaKOBORo BMKAHAA
3anyck:
- BctaTe akymyIaTOpHy 6atapeHO B 3aKIM akymyIaTOpHoi 6atapeiO, nOKn BOHa He KnaUHe, CTaBUn Ha Micue.
- TpmaTe doaTkOBy pyKy (oOnHieO pyKOIO.
- TpImaIte npyroIO pyKOIO 3a OCHOBHy pyKoRTky 4, nepeCyHBt6 bokyBAHn BkIIOueHHN 5BnepeT Ta NotRHTb 3a NyCKOBn BaxKin 16
Tpmepeaynctnbca
4.BiDnycttB 6JOKyBaHH BKNIOHHeHH 18
YBAI! YHKaIte KOhtakTy INaCTMacOBOro pIKyHOrO npNCTPOIO Ta TpIMMa pIKyHOrO npNCTPOIO 3 TBePdHMn npEeMTAMn (Kam'Ha CTHa, Kameni, oropoxi i Take i Hse), 106 3ano6iTn 3Hocy afo nolomui PnaCTMacOBOro pIKyHOrO npNCTPOIO afo TpIMMa pIKyHOrO npNCTPOIO.
3yHHKa:
- BiDnycitb cTapToBn Baxinb ⑥. TpMep 3ynHHTbcA.
- Hatachihha 06nDa fikcatopn A i BHTHtB akMyrTopHy 6atapeo 0 i3aHaAkyMnTropHO 6atapei D
4.Доглад

HE6E3NEKA! He6e3neKa OtpmAHnTpaBMn!
→3aueKaIte,DOKIIpACTMaconBipKyuynnpnctpiHey 3ynHHbCnBnBHTbAkyMnTOpHybatapeU,nepu HIX3dHiCHIOBAtNTEXo6cnyroByBaHRBPO6y.
HnueHHrTpmepa[3o6p.M1]:
![GARDENA ComfortCut Li1823 - HnueHHrTpmepa[3o6p.M1]: - 1](/content/2026/03/480180/images/d3879c0899b0a2f383272387555f7bdff8ea702c48f76fe6ff607e923267b7a7.jpg)
HE6E3NEKA! He6e3neKa OTpMaHnTpaBMn!
3arpo3a OTpMaHHra TpaBMn i pN3NK NOwKOxHeHH Bnp6y.
→He ouuuyte Bpi6 BOIOO a6o Ni CTpyMeHem BOIN (ocobnBO nBnBCOKM TnCKOM).
→He ouinyTe ximikatmN, BKIOUOauO 6eH3HH, a6o po3uHNHKAMn. DeKi 3 HxMOKyTb NooKOJTu BAKNJBI nactKOBI detani.
BentnrauiH OTBOpMaOTb 6ytn 3aBxynuCTHMN.
- OuHCTIb BEHTINIAUHI OTBOPN M'RAKOIO UITKOO (HE BUKOPNCOByTe BUKpyKy).
2.Писькхноги ВИКОРИСТАНHA OMHДАЕ ВСIpyXOMIЧASTHIN.ВДддпгoc6blnBOЗANHUNtpaBnIb6pyd3axmchoroKOKyxa②
UcTka akymnntopoi i 3apAnHoro npncptpo akymnntopa:
Ipeep TMM AK NIKHOHTN 3apADHNI pNCTPII ayKMyTApO,nepeKOHaTEcH,IO NOBExPH I KOHTAKTN aKMyTApO Ta HOro 3apAHorO npncToPO uNCTi C yci.
He BnKOpNCToBMyTe npoTOHy BDOy.
→OCHITb KOHTaKTH N PAACTNKOBI YACTHIN 3a JONOMORIO M'RAKOICYX01TKAHHN.
5.36EPIAHH
BnBeHH3eknnyatauii:
Bpi6 noBHeH 3eepiratmra B HeoctynHomy dIa Micu.
-
BuHrHltb akymyIaTophy 6aTaapeio.
2.3apRitb akymyTOpHy 6atapeio. -
OunctiB trpmepe, akymnytoptHy 6aataeio i 3apnHn npncptpi akymyntopora (mVB.4.DOJIJI).
- 36epiraIe trpImep, akymyIaTOpHy 6batapei i 3apdHn npInctpi akyMynTApHOI 6bataei B cyxOMy, 3akpHTomy i 3axHnEHomy BiD MOpOyMiCiU.
Ytnni3aui:
(12021/19/CC)

Birip6 He MOKHA yTNi3yBaTn 3i 3BvHauHIMN mNo6yTOBmN bIHXoDAMn. Bih NOBHeH 6Ty nTIIO3aOBn HbNIOBHO Do MCIeBxN YHHNX CTahAQPribT 3 OXOPOHN HABKOINHbOro CepedOBMua.
BAJKINBOI
→YtunizyeBnip6yabo3aDonomorOoMICeBoroCneuaianiBaHO ro 36ipHOrO npKty ayniiaui.
Ytni3aiaqn akymyntopho6atapei:
AkymyIaTOpHa 6bapaere GARDENA MiTtB NITiI-IOHHI akymyIaTOpHJI eIeMeHTn, Iki NiCII 3akiiHeHHA TepMHIn Ic SYkBuH Me MoJHa Ytnl3ByAtn IK 3BmAHHe NObTyOBe CMITN.

Li-ion
BAJKINBOI
→Ytni3yte akymnyatophi 6aatapei y afo 3a donomoroo micueboro cneianizobahoro 36ipnor nyHKty 3ytniiaui.
- NobHicTIO po3pIiB nii-iOHHI ayMMyIaTOphI eMeHHTN (3eepHITbCa do cepBichoro ceHTpy GARDENA).
2.3axnCTITb KOHTAKTN iINI-iOHHX akymyIaTOpHX enEMeHtIB BID KOPOTKORO 3AMKAHHA. - Ytunl3ynte nii-iOHHa kymyntopHieNemehn HaneHHM yHOM
6. YCYHEHHH HECNPABHOCTEIN

HE6E3NEKA! He6e3neKa OTPMaHHa TpaBMn!
e3neKa OTPMAMHn Nopi3y npn BnnaKOBomy 3anycky Bnpo6y.
→3aekaiTe,doKnIpaTACMOBpiKyynnpIncptiH neyHHbCBy, BNTARHtB ayMynrTOpy 6aTapeIO, nepw HIX yCyBAtu HeCNpRaBHOCT BiP06Y.
3aHa nactmacoboro pikyuro npctpo [36p. T1/T2]:

HEBE3NEKA! He6e3neka npi3y!
→He BnKOpHcTOByTe MeTaneBi pixyui eIeMeHTn a60 3mHi GARDENA.
Kuio WBIOKOHOyBaHOro pe6pa 6INbue He BnDHO,TO TpIMau pIkyO npictpo18 niIrae 3aMIHi.3BepHtbcdo cepBIOCHO tENTpy GARDENA.
PnactmacobipixyipnpctpoMoxyb6tyn3nooehiMAKcHmAbHO
Ha nonOBHN CyOeIOBxHH.03BOAeTBCa BHKOpNCTOBYbATn
nIne opriHAnbHI GARDENA 3minHi pixyipnpctpoIRotorCut.
3MnHI nIacTmacobipixyipnpctpoMOxHa npu6aTHB MaraHNI,
oo npedTabnE fipmy GARDENA,a6o6eNocepeHbO Cepsic
hnx ceHTpax GARDENA.
GARDENA 3minnpixynn npncptpi RotorCut IINr Typ60tpmepa apt.5368
BNTARTnIaTMacOBni pIXyUn npCTpi:
- NpeBepHITb TpMnep.
- PnndabTb KHeueb PnactMacoboro pkiyHOro npncTroO 3nerKa BHN3 (A), BnndabTb PnactMacoboro pkiyHOru npncTroP 8peep 3muay pkiyHOro npncTroO 8(B) Ta BnTARHTb HNOr.
Bctabtnn nactmacobni pkynn npncptpi:
→CTABATEIINTMACOBNIPIKCHINPNCPTPIB METANIHNNnpop3 TPMMAHpIKyHOrO pncTPOIO 10 do fikcaui 3 cHaHH 3 yTHoIO fikcalio (KnaaAHNA).
Hkuo HOBn nactmacOBn pKyH npCTpi npabunbHO BCTaBneHN, BIH Mac HeBENKNIIOFT.
PpO6JIeMa MoXJImBa pIpmHnCnOci6 ycHeHHa
To3n npOyKT MoKe Da ce 3noJ3Ba OTea Ha Bb3pact OT 8 rOuHn I NO-ROJeMN NIIua C HamaJIeHN fN3NUeCKN,
CETNBHINIINYMCTBENICNOCO6HOCTNIINIINCA HaONITIIO3HAHNA, KORAToTe Ca NOID HAID3Op IINIcBa 6IIINIHCTpyKTIpaHnOTHOCHO6e3OpanC HATA yNOtpeBaHa npOdykTa n pa3bupat npo13TNUaUHTe OT TOBA pncKObE. Deua He Tp8Ba da INrpaT C npOdykTa. NOnuCTBaHe n Notpe6ntenCKaTexHnueckaNoDpBxxKa He Tp8Ba Da ce IN3BbPwBa OTe Dae3Be3HaD3Op. PpenOpbYBaMe IN3No13BaHeTo Ha npOdykTa Da Ce IN3BbPwBa OT IINCa HAD 16 RoNiuHa Bb3pact.
Ynortpe6a no npedHa3HaueHHe:
TpmebHaGARDENAe npaHa3HaeH 3a KocHe Ha Mopabn TpeBn PLOIN B JUNHN XO6n rpaHH.
IpoodykTHe e noDxOaA 3a npoBnKHTeHa ekCnloataa.

ONACHOCT! KoHTy3Hn!
He n3non3baTe npodykTa 3a noDpR3BaHe Ha XNBn IeTObE, 3a pa3npo6raBe Ha OKOceHn MaTePnAn Nn 3a KOMNocTnpAe.
1. TEXHNIKA HA BE30NACHOCT
BAKHO!
IpocheTete BHMMATEHNO HNCTpyKUIMRA 3a ekCnnoatauaN I 3aana3eTe 3a 6bEne cnpBKn.
CmB0nBbpx npoaykTa:

CTpyKunrTa 3a ekCnloaatay.
Te BnHaNc septnHmnpaHO 3aunTHO yCTPOIcTBO 3a Hocetbe BnHaNc septnHmnpaHO 3aunTHO yCTPOIcTBO HHTo.

I3BaTe 6atepeHra Ta PpeN NouchBaHe HnTexHuecko 06cnyKbaHe.

IaraTe Ha IbXd.
ONACHOCT! Onachoct ot HapaHbAhe Ha pyr
LIIa! DpIbXTe DpyTH N Ilia daiuey OT 3OHTA B KORTOPa60THe.

3a 3apndto yctpoiCTBO: He3abHNO nKIOHOTe enccena O T KOHTAKTa, aKO Ka6bT e nobpehen nn npekchat.
06u yka3aHHn no TexHnKa Ha 6e3oNaCHOCT
Be30nacnoct Ha eNeKtpnuecknte ypeDn

ONACHOCT! TokoB yap!
OnachoCT OT HapaHbAhe OTE TOKOB yap.
→PpOyKbT TPrBa 6a 6be 3ae xapAneH c eNekTrpuNCCTBO ppe aBtOMaTuH e PpeKbCau, dceTba u np NOBpea HnNtTuHaHe h ToK (RCD) CHomNHAneH ToK hNkIIOuBaH o NTMAKCHYM 30 mA.
H3aBaaTe Hoo6bMaHa H03a Ha TAnTo H BmHa NaaTe PaBHOBCMe, 3a Da IMate HepeKbChato 3paba Onopa Ha cKnHOseTe. XoTe, He TuaIe.
He DoKocBaIte DnKHeUe C6 OaCNHactn Ha MaunHata, TpeuMaunHata Da 6Je HKnHOHeAOT eKeTpuecKaTa MPeka NDBKeuHTe Ce onacn ChaNt DcnPcat DnKHeUeHTo Cn HantbNo.
Hocete BInHaI NO BpeMe Ha paBoTa C MaIIINHATA 3nPaBv N OByKbN IdbTn NaHTaHOH.
No-6e3onacha pa6oTa
1O6yueHne
a)PnoTeTete BnHmATEHoNtCPyKUHTA.3NaOn3AHte ce Kc KOHTpONHTE eJEMENTHnPABINHOToNtON3BaHaeMaNNHATA.
6)He n038nBaahe HaHua, KOTo He ca 3aOnoHATc T a3n HcTpyKUHnn DeuHa da hnoIbTa TaHMaHua. DeIeTBaunite MeCTHnpAahHmUHn HapEnbMOrat Da orpHaHuaNab BbpaCTHa HnptBeNTeY.
B) Tp6Ba da CMa IpeBdIe,4o HtpoBeIaTeIe 0OTOBOpE3a INHuaDeHTIbN OINFaHOCTO AIDyTN IuJIa NIMIIMNUJECTSOIIMO.
2 NoDrToBka
aIpyeHnyoPBeA trp6Ba da 6Bdat npOpeBepnHa 3a npH3auu 3a npBepda nn HNHOBCaHe 3axpaanBaunu YdbJbKaabuaa Kaebn.AKO no BpeMe Ha npOyTeBa 6Bdo nOpeBepn 3axpaanBaunu Kaebn.CbSnn TnpBa 6Da 3nKIOKHe HEn 3a3abAoEOT en. mpeXea. HE JOKOCBAITE KABEJA, IPEJN DA CTE FO N3KIOHUN OT MPEKAtA.He HnONBaIte MaHnHaT, Ako 3xapraBauin Ka6eI e npOpeBepn Hm 3a#TETe.
6) Pnpn ynoTpe6a MaunHata Tp86aa da b6de BmuyAIno npoeBepena 3a. noPboEeHN, HnncBaunu nn HnnpaBnHIO nOCTABeHN npEtna3HH uYcpoi-CTBA nn Kanaa.
b) HIOKORA He BUKOHABTE MaUHINATA, Ako B 5N3OCT ce HAMIPAT XOPA, OCC6EOHe Da, INI KUBOHTNI.
3 Eknnoataa
a)ДрхTe 3axpaHbAunn n ydbJkaBaunn Ka6e danue OT pekeuata KOpda.
6) IIO Bpeme Ha CEINIePNOHa HNIOJI3BaHe HA MaUNHata Tp8Ba Da Ce HOCAT 3aUHTH OUYIna H3DpaBnO6yKu.
B)Ja cIe3b4BaIaIINo3BaIeHaTO HaMaiHHTa BIOJIaMIeTeOpOIoNHHYc0OBnA,cc06EHO pRn OAnCHOCT OT MJIHNH.
NtIJIaIIaHMaJIINHATAcMAOHaIaHEBbAcbETIIHnIINPiNIO6pI M3KCTBEHOOCBTNGHHe.
HHe nnon3BaiTe MaunHata C nobpehen Kanaknn 3aunTHo npncnco6bneHn n63 KaanKnn 3auuTHn npncoc6bneHn.
e) Bkniouhe enektpoDBnraTea, ako pbueTe n KpaKaTa ca H3BbH 0xbata Ha pekeuTo yctpoCTBO.
X)BHNHINKIOUHOBAE MAUNHATA OT ENEKTOPO3axpahBaHETO(T.P.NKIOHOBAHae HA NCSCEA CT CJ.MPOKA, CBAJHA HbIKOPCBATA Wn HA CBNAUHTa ce 6ateepn
1) BnHaH, KOraTo MaunHata ce octaB 6ea HaI3Op;
2) NOEOTCTpAHRAHHe Ha npo6IeM c 6nOKpana MaunHa;
3) npednpobepka, noocmbahe nn n05pa5oKa Ha MaunHaTa;
4) cnei KOHTaK T cyjKnTeNa,
5) BnHa, KOraTo MaunHata 3anOHe Da BnBpnpa HeoNauH.
3) BHIMABAte 3a hapaHbHaNo kpaKaTa n pBcTe O t pKekToO npCnO- co6IeHMe.
nBinaHcye6bckdaabeTte,oeOBpOte3aBeHTINaunCepeNDbpkat cnCTnTOyKmTeHa
4 PoiIbpxHaHe B n3npaBHOCT n CbXpaHHeHnE
a) MaunHata Tp8Ba Da 6bE INKIOHe OI eKtpO3axpaHbaHETO (T.p. INKIOUBAHae HA UENcEPAOT en MpeKa, CsAINHE Ha BOKIPOBkATA HnHa CBAAJtAeTa CeBATEPn, PpeDn INBbPWBaHeto Ha paBOTn NOIIOBkkata NIN NOUCTBAHETo.
6)AaCeHnON3BATcAmpe3epBHNyactnNakcecoapnpenopbHaHnOT npoHBOIDHTEJI.
B) MaunHATA Tpa6ba Da 6bJe IpoBepBaHa HIOIbIpbKaHa peoBHO. MaunHata Da 6bJe peMOHTn paHa cAmO BOTOpM3npaH cepBu3.
)AkoMaHHaTaHeCeI3non3Ba,TaTpaBbJa5bDecbxpaHbHaHa MRCTOHOIOCTbTHO3a
DIObHHTeHHykaaHnHaTeHHKaHa 6e3oNaCHoc 6e3oNaChpaaboTa c6atepn

ONACHOCT! OnachocT or noxap!
No IbpeMa HnpoaeCa HnapeXnDahe, 6atePHTA, KORTo 3apeKdTaTePbBa Da bDe Bbpyx He3anaHMA, yCTOuHbA Ha BnCOKA TemnepatypaHn HnepoBDoHMa NOBbPxHOCT.
AkymnaToPnata 6aTeepnHe Tp8BaJa 6bJe 3apeKdHa 6e3 Ha3Op. KOHTAKNTTE 3a CbP3BaHe He Tp8BaJa 6bDat DaBn Ha KbcO.
DpbkTe DaneuOT 3apnHToO yctpOCTBO n AkymynatopHata 6atepnpa3aKaIau, rOpMm N neCHOsanaMm MaTePmaHn.
3apnHOTO yctpoCTBO n akymyIaTOpHATA 6atePNHe Tp6Ba Da 6bdaT nOKPnBAHn No BpeMe Ha npoueca Ha 3apeKdaHe.
He3a6bH0 IaKIOHeTe aapIHO yctpoCTBO OT eJIeKTPyueckata Mpeka npn NOBAA Hn PyuKeN nn OfBn.
I3no3BaIe 3a akymnatoPn npDyKT GARDENA cmo akymnatoPnp H batepnn GARDENA. GARDENA He moKe Ja rapaHTnpa 3a akymnatoPnp Hte batepna Ha npOnBdoHtEn. B CnyaHa no-HNCKK aueCTBO, To MOrat da pinnHIT anOchost O nokap N ekcnNoNNi
He 3n013BaIte 3apHIOHO yCtpoCBO GARDENA 3a 3apeKdane He pa3nnHAnkyMylatopBbATEPn, Tkato GARDENA HE MOKe Ja rapaHTpa CBMECTMOCTTA H 3ATOBA B TO3N CNYHc b5O MoKeJa CbSCTByBa OINAC HOCT O TNOXAP INCKON3IA.
He 3apaekdaIte HeakymyIaTOpHb6aTePm.

ONACHOCT! ONACHOCT OR EKCN03N!
JaTaTe aKymyNaTOpHnTe 6aTePMn OToNnHa NOrb.He NoctabAnIte aKymyNatopHnTe bApMe BbPyx ToNtNNHn H3ToHmN He rN n3nArAte npOJnxNTeNo BpeMa HcNHa CnSHeBa CEBTNHa.
He n3non3BaIte B EKCIIO3NBn CpeHn, Hapn. B 6JIIO3OCT Do 3anaJIMM TeHOCHTn, F3a0Be NNN HATpyNBAHe Ha npax. PpH n3NO3BaHe Ha akymy- IaTOPHB6ATEPHN MoRat Da 6bDat ppeIN3BHKann Nckpn, KOITo da 3anaJANr pPAXAHN NaPHTe.
IpoBepBaIte akymatopHa 5aTePnnpDn BCKa ynoTpe5a. Iocnokete akymataOpHATA 6aTePn HA B3yAInna npOePka npDn BCKa ynoTpe6a. HeNpPaHBn AkymatopHa 6aTePn Tp6Ba Da 6bDe mXbPnHe bCrlNacho paanopeDBe. H a KniPnATE no Noata, 3a noebe nHfOpMaun Cc CBxPkeTe C MeCTHATA cHnma 3a nKxBpInHe Ha otndu.
He nnoaBaiTe AkyMnatoHata BatepN KATO eHeprH NtOHTNH 3a pyrnn npoKTN. CbueCTByBa OAnCHOt OT HapAHBaHe. MnnoBaeTKe AkyMnatoHATA BatepN CMO 3a npdeAeHHeNTE npOyDKTH Ha GAPDENA.
3aepaaie HnHnONBaIe AkyMnatOPHa 6bepra cmo npTmnepepaHa HoOkHnHaTa cpeMa MeKdy O Cn 40oC. 6ctabeAkyMnatOPHa 6bepra da Ce oxnad nclnnpOdbnKtHeNa yonptpe6a
IpoeepBaIe peo3oKa 3a 3aepeJa 3a TpepeN cTapeH e (yynno3) 1v0n3BaIe Ka6eIcama B6eznPneHO C5CTOHeH.
B HnkaBb CnyaH He cxbpaHbaIte H He TpaHcnpTnpaIte akymnaTopHpata 6atepma npri TempepaTypa Hnd 45^ Nn Ha npka CbHHeBa CBETnHa. B ndeJIHH CnyaH akymnaTopHa Batepma Tp6Ba Da bDe cbxpaHbaHa npri Temepatypa nod 25^ 3a da ce noDtpKa camopapaeKdaHo Ha MNHMMy.
He n3naraTe akymynatopHata 6aTePnHa HbX, B0Da (notanrHe) nnBnra.
Ia3eAkymnaTopnata BaTePnUcTa, OocEHO OTsOpNTe 3a BeHTnlaCnH. Korato Akymynatopnata BaTePn HMaJa Ce NtnoN3Ba 3a No-dnTf RepoD (npes3 nMata), sapeTeBeTepnAt HaBnHO, 3a Da ce npedotbPaTn D160k paoRd.
He CxpaHaeBte AkyMunOpatHa 8aTePn B npOyK, 3a da nIbeHertc cawopaepekdae, anyoTnepeu N uHINLEHTN.
He cxbpaHReBaTe akyMylatopHata 6aTePnB NmoeuHnKbTeC HMa eNkTPOcTaTuHepn pa3p.
B30nacnoct Ha eneKtpnuecknte ypein

ONACHOCT! Cbpeuen apecr!
To3n npOyKT obpa3ya bEnkTporMarHHTHO none no BpeMe ha pa6oTa.
Toba none MoKe jnp OnpedeneHb NOBc0TeNCTBa DA OKaKe BmnnHe
BbPxy HauHnHa No fHyKluOHnPaHe A kAeTbHN NIN Nn pacNBn MeMNHNCKn
HMnNAHTn. 3a Da ce NsKnIOu PNckbT o CnTuacn, KOtO 6Na xMORn da
DObeDat To EekKn INN cMbptOHcHn HapAHBaHnR, INIcata C MeMNHNckn HMnNAHT Tp8Ba pNeip yInOpEba Ha To3n npOyKT da Ce KocyntnPA tcsCBor NEkap n PnoNsbOITneHn HA MMnNAHTa.
Hnnon3BaiTe akymnyatopHH npdykT caMO 0do 40^
N3BaTe akyMnyatopHata 6aTepeB B Clyuay Ha abapn.
He n3noBaiTe npOdykTa B 6bn3ocT Do BOa H 3a NoDpByKa Ha rpaHnckn3epua.
JINHua6e0nacnoct

ONACHOCT! ONACHOC T O 3aDywaBaHe!
Dpe6hnte TaMn Morat necho da 6bDat norbnHAT. NoennenHOBA
Ta TOp6a npEcdTaNbRA onaChOc OT 3aNywaBaHe 3a MAnKnTe Deca. DpBxTe MAnKnTe Deca daney no BpeMe Ha MOtaxa.
B CnyaHn Hcnnn Bnbpauu, cmHeTe HOx n npOBepe Te DpkaHa HHOx 3a Noppeu.
Ppoepepe npedynyntpe6a,dannnH3HocBaIOTc pe6po e H3npabHOCT. PpehacHe 3a npedHaTApbKa.
HocTe NmHHn npednaHn cpeDCTBa.
Hocete pBkabn3a noHCTBaHe Ha yCTpoIcTBoTo 3a pr3aHe.
HocTe BInHar 3aunTHn Ounla.
3aunTHnTe nOcNObEHeH NATO pKaSHuN, HEnKbRaAuaCe nppeNaSHn ObykN INI 3auNTa 3aCyXa, KOITe cNtnoBbAT B onpeDeneH yCNoBn, HAMANATPNCRAOT KOHYIm.
BbTeBe HBNMATEHNO BpEMe HA NaCTPOKATA Ha npOyKTa,3a da I36BerHete npNKneBaHETo HA npCTHTe Meky DVBKeUte Ce nCTAUHOHAPNTEactn HA MaUNHATAI INP NPMOTAKA HaaUMTHNAKAN.
He nI0nIaBae Boa IIN XIMUeCKN npenapATn 3a noCHCTBaHe Ha 3auNTaT aII INpyTte YACTH HA TpMMepa.
DpBkTe BCNUKr RaKu, BONTOE N BHTOBE 3aBHTEHN, 3a CTE CnTyPHN, 4e npOdyKTbT E Be3oancho paoTHO cbCTORHHe.
He paarno6baBnTe npodykta cnei doctabkata.
PnpynpecknneH! Pnp Hoche Ha 3aunta 3a cnyx nopaan yma, KtoTn3bva npdykTA, onepatopbt Moke da He 3abeneek npnbokaba ci neIiua.
IpoBwEHa paBota N TpaHcnpTupaHe OooBHO BHIMABaIte 3a,dpyrrite xopa.
BbTeKoHcHTpPAnH, TnDaaTToTOBa, KOeTo npaBnTe n pa3cbkDaabAte Tpe380 npaPbOta cEneKTPOHNCTpyMeHT.
He HnnoBaIte ENEKTPoINHCTpyMeHT, DOKATO CTe NMOpeHN NIN CTe NOBHHMTO HA HApKOTUN, AUKOXOJ NIN MEINKAmeHTN.
MOMENT HEBHIMAHNE npa6oTa C eJIOKTPONHCTpyMeHT MOKE Da DOBEODo TEKKN KOHTy3N.
2. MOHTAK

HOCT! KoHTy3m!
Pnck OT npra3BaHe, aKo npOdykTbT ce BKnIOuH HeBOJHO.

H3aKaIte DOKaTIO NACTMacoBHT HOK Cnpe H3BaTeAkyMylatopHATA bATEPn, PneN da CrNo6nt npOdykTa.
MOnTak Ha 3auTHnKa napan Kn 3auTHata cKo6a 3a pacteHn [fnr.A1/A2]:

CHOCT!

PpOyKbT MoKe Da 6bDe H3NoJ3BaH CaMo aKO e MOHTnpaH 3aunTHnT Kanak.
1.ПльзHTeпрнHаТСТЯЗИTNHANKAN ③ВbpxYrIaBATAHa TpIMepa ①ДOKATOCEФКСИРСИЗцPakBaHe.
2.ПьзHTe 3aHATA qACT Ha 3auTHnA KANAK ②do orpaHHTenBbpxy rnaBata Ha TpMepa①.
3. 3aterHETe Dbata BHTA ① BHIMATEHO
4. NocabeTe 3aunTHata cKaoba 3a pacteHn ⑤ Bbpy rnaBata Ha TPmepa ①doKATO ce qncnnpa C n3paKaBaHe.
3aKpEnBaHe Ha nactmacOBn HOK KbM pBkoXBatkata [ 0ur. A3]:
BdoCTaBAkata Ca BkIOChEN5NAACTMACOBHHOXA@OTTAXIMA 4pe3epBHNnACTMACOBHOKA BrHEzDAtaHa pbkoXBaTKaTa.
3a MOHTaKa Ha IIaTMacOBIN HOK B IbpxKaHa HOKa BIX
6. OTCTPAHRABAHE HA IOBPEIN, CMHA HA IAACTMACOBNA HOX".
3. OBCJNYKBAHE

CHOCT! KoHTy3nn!
Pnck ot npra3BaHe, aKo npOdyKTbT CE BKnIOu HEBOLHO.

N3yakaiTe DOKAO NNACTMACOBH NOK CNpe N 3BaTeA kMyIaTOPHATA BATEHn Da HactPOBATE Hn TPAHCNPOTnPatePoykTA.
3apekdahe ha akymyna topnata 6atepn [fur.01/02]:

MAHNE!

PaxhanpexeHnTo NOBpeJda 6aTePnTa n 3apnHOyCTPOCTBO 3a 6aTePnTa.

YBepete ce, ye n3non3bate npabnHOTo HAnpeKeHne Ha enektpnueckataMpexa.
PnGARDENA AkymyataOpHn TpHmepn Apr.9876-55/9878-55 BIOCTaBkata He e BKNIOUeHa akymyataOpHa 6aTePN H3apAHO yCTpoiCTBO.
IpeiMbpa ynoTpe6a akymyNatopHata 6atepn Tp8Ba da 6bde 3apeHa HnblHo.
JIITnEBo-IOHHaAkyMylatopHa 6aTePnMoKeJa 6bDe 3apeKdaHa BbBBCAO CbCToAHHe IN pOuEcTb Ha 3apeKaDaHe MoKe Ja 6bDe pKeBcHAT No BCaKO BpMe, 6e3 Da ce NobpeDn 6aTePnTa (HMa MEMOpN-EeKt).
- Hatachete Ocb60kDaBaaun(HTe) 6yToH(UN) uN3BaTe akyMnaTOpHATA 6aTePnA (OT rHe3dOto 3a 6aTePnTA Ha pbkoXBATkATA.
- BkIIOUeTe 3apJHOTO yCTPOINCTBO B KOHTaKT Ha eJIeKTPnueckKaTa MPeka.
3.BkIOUeTe Ka6eNa 3a 3apeKdAnHe B6bATEpNra
Korato JAMMnKATA 3a KOHTpOJ HA 3apeXdaHTo O Ha 3apRnHO To yCTPOCTBO MTRA 3eNEHO, AkymyNatopHata 6aTePnCe 3apeXda.
Korato lamnukkata 3a KOHTpOJ Ha 3apeXdaHeTo Ha 3apAHO TcPOIcTBO CEBTe 3eNEo 6eIpeKcbAHe, AkyMynatOpHATA 6aTePna e HbIbNo 3apeDeHa (BpeMe 3a 3apeXdaHe, BIK7.TEXHUYECKN DAHHI).
4.Поверявiate nepnoDnH npn 3apeKdahe cctoHHeToHa 3apeJdaHETo.
5. Korato akymyataophata 6atepna (B) e HanbIHO 3apeHeHa, nKIOHETe 6atepnaTAt (B) OT 3apHnHO yCTpoIcTBO (C).
6.ИЗКИОЧЕЗAPАНΟТУСТПОCTВО 念 OT eLEKTPN YECKIN KOTAKT.
HdkaTop 3aapeKdane Ha 6atepnta [nur.03]:
| 100 % 3apeDeHa | ①, ② N ③ CBETT (3a 60 cek) |
| 66 - 99 % 3apeDeHa | ① N ② CBETT, ③ MIRa |
| 33 - 65 % 3apeDeHa | ① CBETN, ② MIRa |
| 0 - 32 % 3apeDeHa | ① MIRa |
HnkaTOp 3a 3apeXdahe Ha 6atepeYra Tno BpeMe Ha ekCnnoatau:
| →Hанштete 6утона® bьрха akмунаторна 6batори. Инданашита заразмене на 6batорида с поkaэba за 5секудп. | |
| 66-99% zapendeña | ®, Ⓞ n® CBETAT |
| 33-65% zapendeña | ®, n® CBETAT |
| 11-32% zapendeña | ®, CBETN |
| 0-10% zapendeña | ®, MURA |
Hacpoika ha pa6oTHa no3nur:
Pa6oTHa no3nua 1 [Φn.r.O4]:
3a cTahdapTHO KOceHe.
Pa6oTHa no3nua 2 [Φur. O5/O6]:
KoCeHne noi npenrTCTBne.
HaIbHKHATA DpbKKa MOKe Da 6bDe CnYCHaT O TcA HApTHoN03u1B DE CnYCHaTN O03u2 Nm 3a KocHe NOd PpenATCTBnA.
- NocTaBeTe TpImepa Bbpyx 3emrTa.
2.ДрБКТСсдпьбгпмета3aндынннataДрБЖКа ⑦ТAKA, YeC eENHHTPbCTDA MOKTe DA HATNCHETe OCBOOxDABAUY6yTOH ⑩
3.HaTNCHETeOCBO6OXdAbaunB6yTOH 10nCBaIeHeHaJIbXHaTa npbKka7BKeNaHATANo3uINr. - LycHETe OCB60KdAbaa 6yToH 10 nOCTaBeTe HaIbXHaTa DpBkKa ①OTHOBO Da ce fMKcnpa Cn3uPakBaHe.
Pa6OTHa IO3nIur 3 (cAmo 3a Apr.9878) [Φnr.O7/O8]:
KoceHe no kpaunata Ha MopabaTata
BHIMAHHE! TpHmepbT MoKeJa 6bJe H3NON3BaH, CaMO KOrato rnaBata Ha TpHmepa e PnKcnpaHa Ho 0^ nH 90^ .
3a da moxe rnaata ha Tpmepe ①da 6bde 3abptnha ha 90^ HADJIKNAHATA dpkKa Tp86Ba da ce hAmnpa B cTahapTha no3nua 1.
- DpBkTe C dBe pBcE TpMepa 3a HauNbKHTA dpBkKa ⑦ TaKa, 4e C eHnHrT npbCT Da MOKeTe Da HATNCHETe OCBO6OxDabuA u8yTOH (10).
- HatncheTc ocbooxkdaaun 6ytoh n3abbpTeTe rnaBata Ha Tpimepa ① OT 0^ Ha 90^ ,doKaTO cbuaTa ce fikcnpa c m3uapKBAHe.
- NcHete OCB60KdAbaun 6yToH ① nOCTaBeTe HaIbXHaTa DpBka ⑦ OTHO B Da ce Kncpa CnIpaKaBAHe.
HactpoKaHaIbJnxHnHaHaIaJIbXnHaTApbKka[phr.09]:
![GARDENA ComfortCut Li1823 - HactpoKaHaIbJnxHnHaHaIaJIbXnHaTApbKka[phr.09]: - 1](/content/2026/03/480180/images/d07f61bb8ca844017194dc41bcc7d42b3e8eb7d4519dcfbfeeaae1e50a54f964.jpg)
ONACHOCT!
IpoodykTbHe Tp6Ba Da 6bDe H3No13BaH, aKa HaIbXHaTa IpbXka e N3BaJeHa N3aHIO (No3nUra 3a npEhaHe).
1.Pa3BnIte cTraaata Btynka 6
2.Ⅲ3nbpnaIteHaIbIbKHaTaDpBka⑦HaJenaHaTaDbIbKHa.
3. 3aterheTe OTHOBO CTaraaata Btynka 6
HacpoKa Ha no3nqraHa DOIbHHTenHaTa pbKoXBaTKa [fur.010]:
POnuTHa Ha DOnbJIHHTeJIHATA pBkoXBaTKa MoKe da 6bde HAcTpoEHa 3a Baunr pCT.
1.Ⅲdbpnairepbkara ②
2. HakoHete DonbHHTenHaTa pBkoXBaTKa ⑬ Bbpxy JeaHaTa no3uia.
3. IycheTe OTHOBo pUkata ②
Korato TpmeBt E HACTPOEHN BAPINHO CNPRAO BNCCHHATA HA TRIOTO, CTNOKAHA TANTOE I N3PABEA H INABATA HA TPNMEPA B pabotHO N3MUNI E J NEKO HAKNOHEA HANPED.
→ДьжTe TpIMepa 3a OCHObHata pBkoXBaTKa ⑧иДоьЛнHTeHATA pBkoXBaTKa ⑬ТаKa, Ye rIaBata Ha TpIMepa da 6bJe Neko HAKNo-HeHa Hanpei.
HactpoKaHa 3aunTHata cKo6a 3a pacteHHr:
Pa6oTha no3nua [fur.011]
-ⅢxOHa n03nua [ΦnR.012]
→M3dbpnaTe 3aunTHata cko6a 3a pactehn ③ n noctabete BKeNaHATA NO3uNRA DOKATO CE NIKCpu C u3uPakBaHe.
BknHouBaHe Ha TpHmepa [Φn. O13]:
![GARDENA ComfortCut Li1823 - BknHouBaHe Ha TpHmepa [Φn. O13]: - 1](/content/2026/03/480180/images/1169ca0e7878cc4dfb91178521d48856af02c2f2b35ac08430fe3023d676f42e.jpg)
CHOCT! KoHTy3Mn!
CHOCT OHT HapaHbAHe, aKo npOdykTbT He cnpe npn TcKaHe Ha pBkKaTa 3a BkNIOUbaHe.
→He n36BaTne npEpa3nHTe npncoc6nHnHnnpeKcbcBauHt. He 3aKePbnBeTbe pBkKaTa 3a BkIIOuBaHe HapnMep KbM dpBkKaTa.
PpOdykTbE OOBpyDbaC bIKyKIOUOBO-aaHTMNOYcTpOINCTBO (pTuka 3a BKNIOUBAe C 6bOKIOPOBKA cpeuB KIOUBAHe), KOETO pNeOpDTBpTaRa HEOBNHOTo BKNIOUBAHe Na PpOdyKa.
BkIOUOVAHe:
- Noctabete akymyaIatopHata 6atepnaB rHe3 doTo3a 6atepnaT@DOKATO Tc ce dncnpaC n3paKbaHe.
2.ДьжTeДиБнHHTeHATApbkoXBaTKa 9c eHaTa pKa.
3.ДрькTe cpyrata pka ochOBHata pko8aTka 19, nIb3HeTe 6IOKIOPOBkATA cpeu BKNIOUbaHe HAnpei n IaDbprnTe pka 3a BKIOUBAHe 16. Kocaykata ce BKNIOUBA. - NcHETe OTHOBO 6NOKINPOBKA tCpeu BKNIOUHaHe 15
BHIMAHNE!N36BraTe KOtKaTa Ha NnactMacOBn HOX HnHa Tbp-kaaHa HOxca T8bPnnpEMeTn (3nObe, KAMbHn, ORpaHn nJp.) 3a Da N36BerHeTe N3HOBaHe INn CuynBaHe Ha NnactMacOBn HOX Hn DA BtpxaHa HoXa.
Cnnpahe:
1.PyCHTe pBkKaTa 3a BKNIOUOBAHe 16
TpMepbT Cnnpa.
2. Hatnche TaBata OCB60kDaBau 6yToHa A u 3BaTe akyMynaTOpHATA 6aTePn8 OT rHe3dOto 3a 6aTepePnra ①
4. TEXHnuecko OBCJyXBAHE

CHOCT! KoHTy3nn!
Pnck OT npraBaHe, ako npOyKbT ce BKnIOuH HeBONHO.
→ 3aKaTe DOKATO NpactMacoBnH HOX CNpe HnBaTepe AkyMaNatoHPaTa 6aTePn, Ppei Da HnPaBnTe TexHueCeKo 06CnyBaHe Na npOyKTA.
TouncBahe Ha Tpimepa [qHr.M1]:
![GARDENA ComfortCut Li1823 - TouncBahe Ha Tpimepa [qHr.M1]: - 1](/content/2026/03/480180/images/84ff0fd18c18311726673eed0ee70372a982639954ac8e8007b1cfe97f2548e7.jpg)
CHOCT OTHAPAHABaHe H PnCK OT NOBpeHa Ha npOdykTa.
→He nouHCTBaHTe npOdyKTa C BOda HnBODHa cTpyr (oco6eHO BOdHa cTpyr nOJ HnIrahe).
→He nouHCTBaIe C xHMnKaII, BkIIOHTeIHO 6eH3HH Hnnpa3TbOpN. HAKON OT TxA MOrAT da NOBpeIAT BaXHN INaCTMACOBdTeAHI.
BentnaonHnTe OTbOpn Tpa6Ba BnHaar da 6bDat uctn.
- NocHTeTe OTBOpHTe 3a BEHTnlaUra (m C MeKa YetKa (He nOJI3BaIte OTBePTka).
2.CnBBCaYa ynpb6a noHCTBaHTe BcHKnNoDnBnHN YacTN. Han-BeHe OTcTaHbAaTE OCTaTbUaNTOTpeBaN aMbpcBaHe OT 3auHTHn Kanak②
NoctBaHe Ha 6atepHra Ta Hn Ha 3apHHO tpoctBO:
YBepTe CE NOBpXHOCTT N KOHTaTHe HA 6atePnAta N Ha 3apADHOTO YCTPOCTBO Ca HINu CYNTu Cyxu, PpeDn DA BKIOHOHTe 3apADHOTO YCTPOCTBO KbM ENoKTpMeCKTa MPeKa.
He n3noJ3BaIte Teuasa Boga.
→Почнстete KOHTaKTITE n ПлacrMacoBHTe DeTaJIIM C MEka n cyxa Kbpna.
5.CbXPAHEHNE
Cbaahe or ekcnnoataun:
PpOdykTbT Tpa6Ba Da 6bDe CbXpaHBAH Ha HeOpCTbNHO 3a Deua MACTO.
1.Ⅰ3BaDteakymnataOpHata6atepna
2.3apeTe akyMynaTOPHaTa 6aTePnA.
3. NocHTeTepMepe,akymyIaTOPHATA 6aTePnN 3apAHHOTO yCtpoIcTB0 (Bk4.TEXHNUECKO O5CJYKBAHE).
4.CbxaHbaaTe TpMepa,akymyIaTOpHata 6aTepeuN 3apnHOTo yctpoCTBO HA cyxo,3aTBOpEHO N 3aunTEHOOT 3ampb3BaHE MACTO.
MxBbPnHe:
(cBnACHO DnpeKmBa 2012/19/EC)
IpoynbT He Tpa6Ba Da 5bJe n3xBpnn H 3aeHNO C o 6nKHO BENHTe 6ntoB OtnaBtu. To Tpa6Ba Da 6bJe n3xBpneH cBnaCHO DeCTBaWNTe MeCTHN pa3npope6n 3a Ona3BaHe Ha OKnHaTaCpeA.
BAKHO!
→N3xBbPpIe npOyKta Ha nnupe3 Baunr MeCTe Cb6npaTeH nyHK 3a peUKNIPAHe.
HxBpnaHe Ha Batepuata:
GARDENA akymylatophata 6atepna cbbpka Jntnebo- noHn KnetKN, KOIO TPOBa CNEI, KPAH a EKCPNOATAOHHNIMN JINBOT DA CE N3XBpPNT OTDeHNOOT ObuaHnTE BTOBOT ONaBtU.

BAKHO!
→IV3xBbPpIeAkyMylatopHnTe 6aTeepnnHa nnupe3 BaunmecTeH cb6npateH nyHKT 3a peuKnnpahe.
- Octabete NHTNEBO-NOHNTE KNTKN HANbNHO da CE n3TOUaT (O6bpHETe Ce KbM cepBn3en ceHTbp Ha GARDENA).
2.063onacete KOHTAKTITE Ha NITnEBO-IOHHNTE KNEKIN cpeiy Cbbp3BaHe HA Kbco. - NaxBpIeTe JInTneBO-IOHHnTE KNeTKn CnpoeJ npaBnIaTa.
6. OTCTPAHRABAHE HA IOBPEI
OACHOT!KoHTy3nn!
PnCK OT npR3BaHe, aKo npOdyKTbTc BkNIOuH HeBOJHO.
→ N3quakaiTe DOKATO NACTMACOBHRT HOK CNpe N3BaDEte akymylatopnHATA 6aTePNI INe Da OCTpAHTE NOBPeDa no npOykTa.
CmHa Ha nactmacobn HOK [Hr. T1/T2]:
![GARDENA ComfortCut Li1823 - CmHa Ha nactmacobn HOK [Hr. T1/T2]: - 1](/content/2026/03/480180/images/23dc76c5232c65926fd5b323f872f97f2e65b979daa48989470054f824e4d1fb.jpg)
ONACHOCT! HapaHbahe Otn nop3Bahe!
→He n3noi3BaIte MeTalHn peXeUeIeMeHTn nnpe3epBn uactn akcecoapn, KOnTo He ca nppeDbndn ot GARDENA.
Korato n3hocBaIooTo ce pe6po 8Beue He ce BnJka, TpR6Ba Da 6bJe CMeHeH bPkaHa Ha HOKa 8. O6bpHeTe ce KbM cepBn3 Ha GARDENA.
IIaactMacOBHe HOXOBe MoRat Da Ce H3NOJ3BaT MaKcMym Do NOIOBHnATA O TbJINHnAT Nm. Tpr6Ba Da 6bDat H3NOJ3BAHN cAmo OpunHHAnHpe3epBn HOxOBe RotorCut Ha GARDENA. Pe3epBnTe INaTHcMoRbHn HOXOBe MoRat Da 6bDat 3akyneHn OT BAAHrT bProBEu Ha npOdyKTHe Ha GARDENA nn DnpeKTHO ot CepBnHaTc nYk6Ba Ha GARDENA.
GARDENA Pe3epBEN HOK RotorCut 3a Typ60tpmep ApT.5368
CBAJIHE Ha nlaCTMaCOBn HOX:
- SaBpTe TpMepa.
- Hatachete nactMacoBn KpaH HoXa neKo Hndony (A), npNDbXkeTe nactMacoBn HOK ⑧ HaBbTpne ppe ZbPkaHa HOXA ⑧ (B) HTo I3BaDeTe.
NoCTABHHe Ha IInactMACOBH HOK:
→BkapaIte HOBNIIpACTMACOB HOK ⑧ Inp3 METAIHINOTBOP Ha IbpaKaHa HA HOKa⑩,DOKATOyTe N3uPAKBAHeOT CBpb3BaHETo (n3uPAkBAHe).
AKO HOBNI NACTMACOB HOK E NOCTABEN IpaBNIHO,TOI NO3BOINBA NEKO DA CE KAHNAH.
Ipo6JIeM Bb3MOXHa IIpUHnA OToTpaHRABaHe
| Триметъ He КОСи ЛИ КОСи ЛЮо | Пл actMOCOBHIT HOX e I3HOCEN ИИ TБьрдe Kbc. | → 3amHeTe Пл actMOCOBHIT HOK. |
| Пл actMOCOBHIT HOX e ChyпeN. | → 3amHeTe Пл actMOCOBHIT HOK. | |
| Триметъ ВИбрпра сblно | Пл actMOCOBHIT HOX e TБьрдe сblно ИЗOCEN e РсДИЗВИКВа ДебалHC. | → 3amHeTe Пл actMOCOBHIT HOK. |
| Дыржачьт ha HOX e I3HOCen. | → 3amHeTe Дыржача ha HOXa. | |
| Триметъ He ce Bкlnoува Спрг | РьчКATA 3a Bкlnoуве e Зэл. | → NocTabeTe akymylatopHATA 6aTePrya I3ZIaNo B rIe3dOTO Ha 6aTePrya, dOKaTO Tc ce ФИКСИРа c I3UpAksBaHne. |
| Акymу latopHATA 6aTePrya e paskedena. | → 3aPeDeTe akymу latopHATA 6aTePrya. | |
| ЕнektpoDIBrataTeRAT e bIOKpIaI. | → OTrCTpaHETe npEnrTCTBnEO. BklnOHTe OTHOBO. | |
| Триметъ He може д a bde спрг | РьчКATA 3a Bкlnoувe e Zэл. | → CbANeTe akymу latopHATA 6aTePrya IocBoBodetce PbKATA 3a BklnOuBaHne. |
| СberToHOBt 3a nobpeDA ha akymunatopHATA 6aTePrya MIRa [ФИR.03] | Акymу latopHATA 6aTePrya e npetobapcaHa. | → Octabete akymу latopHATA 6aTePrya da cc oxlaia H BklnOHTe TrpIMePa OTHOBO. |
| ПО-нИСКО HANPEKCEHNE → | 3aPeDeTe akymu latopHATA 6aTePrya. | |
| TemInePatyPATA Ha akymuna- TopHATA 6aTePrya c I3BbH ДОуСТМИДИЗАЗ. | → IVIIOJIbIe akymu latop- HATA 6aTePrya pri Tc mTePepa- Typa Ha OKONHATA cpeDa mEXJy O °C n 40 °C. | |
| СberToHOBt 3a nobpeDA ha akymunatopHATA 6aTePrya CBETn [ФИR.03] | Поврда BбtePrya/ deФeКТуралa 6aTePrya. | → AkO akymu latopHATA 6aTePrya He може DA bde „peceTaHa- Ta" upE3 CBpb3aHae KbM ЗарДНOTO уctPoIcTBQ CC KOKcYIbIpaite cIb cspBn3 Ha GARDENA. |
| Лamnivkata 3a кontрл назаразжданeto HAZAPINOTU HAZAPINOTU yCTPOIcTBQ He npoCBeTBA [ФИR. T3] | ЗарДНOTO уctPoIcTBQ ИИ Кавелт BA zapeKdAne He ca СБрЗАнmpaBIMHO. | → CBvKETe npaBIMHO zapd- HOTO уctPoIcTBQ И KaELA 3a ЗapcKdAne. |
| Лamnivkata 3a кontрл назаразжданeto HAZAPINOTU HAZAPINOTU yCTPOIcTBQ MIRa YerbeHo [ФИR. T3] | TemInePatyPATA Ha akymuna- TopHATA 6aTePrya e I3BbH ДОуСТМИДИЗАЗ. | → IVIIOJIbIe akymu latop- HATA 6aTePrya pri Tc mTePepa- Typa Ha OKONHATA cpeDa mEXJy O °C n 40 °C. |

YKA3AHME: npn npny nOBpeyn ce o6bpuaIte KbMa BaaHna cepBn3en ueHTbp ha GARDENA. PemOnHTVE Tp8Ba da 6bDat H3MnHnABHa cAmO ot cepBn3Hnat ueHTbp Ha GARDENA, KaKToN O t CneHnAIN3nPaHIne TbPROU, KOTo ca O toPm3paHn ot GARDENA.
7. TEXHnueCKN DAHHN
| Akku-TpMHep | Марka | СтойhoeT (Арт. 9876) | СтойhoeT (Арт. 9878) |
| Номинален тok | A | 2,3 | 2,3 |
| Номинално наразожения V (DC) | 18 | 18 | |

Akku-TpMep
Mapka CToHocT (ApT. 9876) CToHocT (ApT. 9878)
UmpnHa Ha KocHe cm 23 23
06obotnHa bIpbkana Ha HOKA
06/MH9500 9500
Tero (6es 6atepu) kg2,02,1
HnBOHaHaIraHaTeO
74 70 dB(A) 2,5 2,5
HaWyma Lp1) NorpeHNOCT kM
HbHOHa3ByKOBata
MOUHOCT Lw2:
Mmepeho/RapahtnpoAo Rporpoohoc K
dB(A) 83/85 86/88 1,6 1,8
BbpaumnHa dbyea.1
<2.5 <2.5
Norpseuhoct k.
m/s 1,5 1,5
MetoHa Hmepbae Cbnacho: EN50636-2-91 RL 2000/14/EC

YKA3AHHE: Nocoheta ctoHOT ha BnboaHnHMe emnCne 3mepBa cbnacho CTanapdTHaMHTOe 3a MHTBAn H MoKE da 6bde MnO3BaHa 3a CDABBHBeA h ENKTDHOCTDyMEHN NOMEKAY IM. TAHcT OHTHOCT MOKE
da 6bIe K3N03BaHn 3a npEpaRHTenHa oEHNKa Ha EekO3NIHra. CToHIOCTHa Hm6pauMOHHTe EMcMn MOKe Da BapMa PO BpeMe Ha JeICTBtEnHa yNtPO6a Ha eENKTOHPCTPmHNTA.
ACKYMATOPHATA BATOPA BLI-18 HA CTMOCTA
Mrpka CToHooCT (Apt. 9839) CToHooCT (Apt. 9865)
HansekehenHa 6aTeepnV(DC)1818
KanaaHTHa 6ateMaA Ah 2,62,0
YecToHaMpeKaTa Hz50-60
HOMHaHaMoHcOe W16
MxOJHO HApEKeHHe V(DC)21
MaKc. m3xOpaT ToK mA600
Ipoxdoa akymnaTopn3aepnn ycnpo1Ba 18VGARDENA:Ap1.8832/8833
8. AKCECOAPN
GARDENA Pe3epben Hox
3a3aMAHA HA M3HOCEH TINACTMACOB HOK.
APT. 5368
RotorCut 3a Typ60rPmmep
GARDENA Peερβεν Hocay HA HOK
MOKA da bJa IopnHau npe3 cepBnHa cnyBa Ha GARDENA.
GARDENA Ппставka
3a necho koche no kpanuata Ha MopabaT.
ApT. 9880
c Kanaha 3a TmuPMD (camo 3a Apr.9878)
GARDENA CmHnEHa kMyy- AkymNATOPHa 6aTePRA 3a DoJIbHIeTIO hBcpe M aIopHa 6aTePRA BLI-18 3a paOta HIN 3a NoIMHa.
ApT. 9839
GARDENA Cmehema Akmy-Akymynatopha 6atepna 3a noIbHnTeHn BpeMe Iatopha 6atepna BLI-18/36 3a paobota Hn 3a nOIMHa.
ApT. 9865
GARDENA 3apdno yctpoiCTBO 18 V
3a3apekdaheha6atepnGARDENA BLI-18.
Apt. 8833
GARDENA AkymynatopH0 6b30 3apnHO yctpoiCTB 18V
3a 6bp3o 3apekdahe Ha akymnatopn batepnn
ApT. 8832
9. CEPBn3/ΓAPAHU
CepBn3:
Mona, Cbpxte Ce ypea apeca Ha o6paTHata cTpHa.
RapaHOnHa KaPaT:
B cnnyaHa rapaHIOHe HcK Bne He nbJNKe 3aIaahe 3a OKa3aHnTe yCnyr.
GARDENA Manufacturing GmbH npedocab 3a BCnKOpnHnHn HOBN npdykTN GARDENA 2rOHNn rapaHnO t DaTATA Ha 3aknyBaHe np TpBOpea, ako npdykTNe ca 6nnn n3noJ3BaHn CaMo 3a NnHn HyKn. FapahnNTA Ha npo3BOnTe He Baxn 3a npdykTN, npdo6nHn HbTOpUeHn naap. Ta3n rapaHnCe oTHacn 3a BCnKn
cePno3Hn DeEeKtn Ha npOyKta, KOInTo Ca CneIcTBeN O TdeEeKb B MaTePnAa Hnn PpOnBIOoDCTBEH DeEeKt. Taan rapAnuCe nHbIINRABa Ype3 NpeOCTABHe HA NaBbHO FyHKUHOHaEN PnpOyKT 3a NOmDAHn Upe3 peMOHT NoOBpeEHn PnpOyKT, INpPaTeH Do Hac Be3nNaTHo; Hne Cn 3ana3BaMpePBOto Da IN6bpaMe Mekdy TeN Bb3MOXHOCTn. Ta3n ycLyra NoJNeKn Ha CneHNte Pa3nopeD6n:
- PpOdyKbTe n3nON3BaH no npEHa3HaueHne CbflaCHO npenOpbKNTe B INCHpyKuNTe 3a pa60ta.
He ca npabeneHOnnTn 3a OTbapHe nn pemOH Ha npodykTa O KyuBaHa nn ot TpeTo nue.
3aekntloataaunrta ca n3no13baHn cmo opnHaHn pe3epBn 6bprn3HocBaun ce daTaN Ha GARDENA. - PpeIcTaBHe Ha KacOBn60H.
HopmaHOTo n3HocBaHe Ha qactn N KOMNoHEHTn (HaPmep no HOKOBe, TaTNIITE 3a 3akpeBnAE Ha HOKOBe, Ty6HN, OCETInTeHN TeNa, KINHOBNHn N 3b6yATn peMbL, pa60TH KOLeNA, B3- DUYHn FNTPN, 3anaIeTIEN CBEU), BN3ayIeNTE PpomeHn, KaKTO n 3HOCBaUNCe qACTn KOMNOHETN, CA INKIOCHEN OT rapaHnIaTA. Ta3r rapaHun HA npOn3BODInteN Ce ORpaHNUAba Do DCtABKaTa 3a 3AMHA n pEMOHTa cByIacHO TropHnE YCLOBnR. Dpyr npTeHnIcpeuH HAC KATO npOn3BODInteN, KATO HAPmEP o6e3eTHeN 3a uETn HE CE OCHOBAnat HA rapaHUNr HA npOn3BODInteN. Ta3r rapaHUNA hnpOBOITeN pa36bnpa CE NOKPbNA deiCTBAUHTne 3aKOHOBn I DOROBCPHn RapaHNOHH pNETEHn CIPPMo DIIbpa/TbproBeua.
IapaHHTa Ha npOIN3BOIDTEJI NOJIXn HA 3aKoHOdaTeIcTBOTHa FedepaHa peny6nka FepMaHn.
B cnyaHa rapaHnMOnnN3npaTeTe DepeKTHnI npOyKT 3aeHO C konne Ha KACOBIA BOH 3a 3akynBaHe n OncuHne Ha nopeData, C pnte Hn NooHcKn TAKCn Do NocOeyHn aDpec Ha cepBn3 Ha GARDENA.
БьрзнЗHOCBaUNceЧТ:
IJaCTMaCobNt HOKn DpKnaHT Ha HOXA Ca 6bp3oAn3HocBaun Ce
Teaunn 3aTOba Ca n3KnIOHeHn O rapaHuaTa.
SQ
Perkthimi i menyres se perdorimit nga originali.
Nxjerrja jashtefunksinimit:
Produkt duhert te ruhet ne vende je te akssueshme nga femijet.
9.SERVISAS/GARANTIJA
Servias:
Susidevincios dalys:
(C1428ARP) Buenos Aires
Phone: (+54) 11 5194 5000
info.gardena@
ar.husqvarna.com
Armenla
Garden Land Ltd.
61 Tigran Mets
0005 Yerevan
Australia
Husqvarma Australia Pty. Ltd.
Locked Bag 5
Central Coast BC
NSW 2252
Phone: (+61) (0) 243527400
customer.service@
husqvarna.com.au
Austria /Osterreich
Husqyama Austria GmbH
Industriezeile 36
4010 Linz
Tel.: (+43) 732 77 0101-485
service.gardena@
husqarnagroup.com
Azerbaijan
Firm Progress
a. Aliyev Str. 26A
1052 Baku
Belgium
Husqvama Belgie nv/sa
Gardena Division
Rue Egide Van Ophem 111
1180 Ucce / Ukkel
Tel.: (+32) 2720 92 12
info@gardena.be
Bosnia / Herzegovina
SILK TRADE d.o.o.
Industrijska zona Bukva bb 74260 Teşanj
Brazil
Brampton, Ontario L6T 4X3
Phone: (+1) 905 792 93 30
info@gardenacadana.com
Chile
Maginarias Agroforestales
Ltda. (Maga Ltda.)
Santiago, Chile
Avda.Chesterton
8355 comuna Las Condes
Phone: (+56) 2 202 4417
Dalton@maga.cl
Zipcode:7560330
China
Husqvarna (Shanghai)
Management Co., Ltd.
富世华(上海)管理有限公司
3F, Benq Square B,
No207, Song Hong Rd.,
Chang Ning District
Shanghai, PRC. 200335
上海市长宁区淞虹路207号明
某广场B座3楼,邮编:200335
Colombia
Husqvarna Colombia S.A.
Calle 18 No.68 D-31, zona
Industrial de Montevideo
Bogota, Cundinamarca
Tel. 571 2922700 ext. 105
jairosalazar@
husqvarna.com.co
Costa Rica
Compania Exim
Euroiberoamericana S.A.
8/57 Beliashvili street
0159 Tbilisi, Georgia
Phone: (+995) 322 14 71 71
Great Britain
Husqvarma UK Ltd
Preston Road
Aycliffe Industrial Park
Newton Aycliffe
County Durham
DL56UP
info.gardena@
husqvama.co.uk
Greece
IIIINAOIOYAOZAEBE
AεωΦ.Aθηνωv92
A0nva
T.K.104 42
Eλδa
Tnλ. (+30) 210 5193100
info@papadopoulos.com.gr
Hungary
Aycliffe Industrial Park
Newton Aycliffe
County Durham
DL56UP
info.gardena@
husqvarna.co.uk
Italy
23868 VALMADRERA (LC)
Phone: (+39) 0341.203.111
assistenza.italia@
it.husqvarna.com
Japan
KAKUICHI Co. Ltd.
Sumitomo Realty &
Development Kojimachi
BLDG.,8F
5-1 Nibanncyo
Chiyoda-ku
Tokyo 102-0084
Phone: (+81) 33 264 4721
m_ishihara@kaku-ichi.co.jp
Kazakhstan
LAMED Ltd.
155/1, Tazhibayevoi Str.
050060 Almaty
IP Schmidt
Abayavenue 3B
110 005 Kostanay
Korea
Kyung Jin Trading CO.,LTD.
107-4, SunDuk Bld.,
YangJae-dong,
Seocho-gu,
Seoul, (zipcode: 137-891)
Phone: (+82) (0)2 574-6300
Kyrgyzstan
Alye Maki
av. Moladayaguardir J 3
720014
Bishkek
Latvia
Husqvarna Latvija SIA
Ulbrokas 19A
LV-1021 Riga
info@gardena.lv
Lithuania
UAB Husqvarna Lietuva
Ateities pl. 77C
LT-52104 Kaunas
info@gardena.it
Luxembourg
Magasins Jules Neuberg
Husqvarna New Zealand Ltd.
PO Box 76-437
Manukau City 2241
Phone: (+64) (0) 9 9202410
support.nz@husqvarna.co.nz
Norway
Husqvarna Norge AS
Gardena Division
Troskenveien 36
1708 Sarpsborg
info@gardena.no
Peru
Husqvarna Peru S.A.
Jr. Ramón Cárcamo 710
Lima
Tel: (+51) 13320400 ext. 416
juan.remuzgo@
husqvarna.com
Poland
Husqvarma
Poland Spolka z o.o.
ul. Wysockiego 15
03-371 Warszawa
Phone: (+48) 22 330 96 00
gardena@husqvarna.com.pl
Portugal
Husqvarna Portugal, SA
Lagoa -Albarraque
02-08 Tat Ann Building
Singapore 577185
Phone: (+65) 6253 2277
shiying@hyray.com.sg
Slovak Republic
Husqvarna Cesko s.r.o.
Türkova 2319/5b
149 00 Praha 4 - Chodov
Bezplatná infolinka:
800154044
servis@sk.husqvama.com
Slovenia
Husqvarna Austria GmbH
Industriezeile 36
4010 Linz
Tel.: (+43) 732 77 0101-485
service.gardena@
husqvarnagroup.com
South Africa
Husqvama
South Africa (Pty) Ltd
Postnet Suite 250
Private Bag X6,
Cascades, 3202
South Africa
Phone: (+27) 33 846 9700
info@gardena.co.za
Spain
Husqvarna Espana S.A.
Calle de Rivas n°10
28052 Madrid
Phone: (+34) 91708 0500
TOB "XyckBaPHa YKpaIHa"
Byn.BacunbkiBcbka,34
odic 204-r
03022, M. Knib
TeN. (+38) 044 498 39 02
info@gardena.ua
Uruguay
FELI SA
Entre Rios 1083 CP 11800
Montevideo-Uruguay
Tel: (+598) 22 03 18 44
info@felisa.com.uy