
GIC 120 C Professional - Surveillance Camera BOSCH - Free user manual and instructions
Find the device manual for free GIC 120 C Professional BOSCH in PDF.

| Product type | Digital inspection camera |
| Brand | Bosch |
| Model | GIC 120 C Professional |
| Dimensions (handheld unit) | 217 x 90 x 49 mm |
| Weight (according to EPTA 01:2014) | 0.64 kg |
| Power supply | Li-Ion battery 10.8/12 V or 4 LR6 (AA) batteries via adapter |
| Battery life with battery pack | Approx. 6 h (light at 100%) |
| Battery life with batteries | Approx. 2 h |
| Display | Color, resolution 320 x 240 pixels |
| Camera head | Diameter 8.5 mm |
| Cable | Length not specified, min. bending radius 25 mm |
| Main functions | Photo capture, video recording, digital zoom (1.5x/2x), image rotation (Up is Up™), adjustable LED light (0/25/50/100%), gallery, settings |
| Included accessories | Micro-USB cable, micro-SD card, mirror, magnet, hook |
| Storage | Micro-SD card (not included in basic version) |
| Data transfer | Via micro-USB cable to computer (external drive) |
| Operating temperature | -10 °C to +50 °C |
| Storage temperature | -20 °C to +50 °C (without battery or adapter) |
| Maintenance and cleaning | Clean with a soft, damp cloth; do not use detergents; lens to be cleaned regularly |
| Safety | Do not point the light at eyes; do not use in explosive atmospheres; observe magnet warnings (pacemakers) |
| Repairability | Repair by qualified personnel only; spare parts available via Bosch (after-sales service) |
Frequently Asked Questions - GIC 120 C Professional BOSCH
User questions about GIC 120 C Professional BOSCH
0 question about this device. Answer the ones you know or ask your own.
Ask a new question about this device
Download the instructions for your Surveillance Camera in PDF format for free! Find your manual GIC 120 C Professional - BOSCH and take your electronic device back in hand. On this page are published all the documents necessary for the use of your device. GIC 120 C Professional by BOSCH.
USER MANUAL GIC 120 C Professional BOSCH
OHRIICIL2355-004bank Page 1 Tuesday, November 7, 2017 8:40 AM
Robert Bosch Power Tools GmbH
70538 Stuttgart
GERMANY
www.bosch-pt.com
160992A3Z0{2017.11}1/170

160992A3Z0
GIC 120 C Professional

BOSCH
Digital Inspection Camera

Read all safety warnings and all instructions. Failure to follow the warnings and instructions may result in electric shock, fire and/or serious injury.
Have the inspection camera repaired only through a qualified repair person and only using identical replacement parts. This will ensure that the safety of the inspection camera is maintained.
Do not operate the inspection camera in explosive atmospheres, such as in the presence of flammable liquids, gases or dusts. Sparks can be created in the inspection camera which may ignite the dust or fumes.
Before any work on the inspection camera itself (e.g. assembling, maintenance, etc.) as well as when transporting and storing, remove the battery from the inspection camera.
Do not open the battery pack. Danger of short-circuiting.

Protect the battery pack against heat, e.g., against continuous intense sunlight, fire, water, and moisture. Danger of explosion.
When battery pack is not in use, keep it away from other metal objects like paper clips, coins, keys, nails, screws, or other small metal objects that can make a connection from one terminal to another. Shorting the battery terminals together may cause burns or a fire.
Under abusive conditions, liquid may be ejected from the battery pack; avoid contact. If contact accidentally occurs, flush with water. If liquid contacts eyes, additionally seek medical help. Liquid ejected from the battery pack may cause irritations or burns.
In case of damage and improper use of the battery pack, vapours may be emitted. Provide for fresh air and seek medical help in case of complaints. The vapours can irritate the respiratory system.
Recharge only with the charger specified by the manufacturer. A charger that is suitable for one type of battery pack may create a risk of fire when used with another battery pack.
Use the battery only together with your Bosch inspection camera. This is the only way to protect the battery against dangerous overload.
The battery pack can be damaged by pointed objects such as nails or screwdrivers or by force applied externally. An internal short circuit can occur and the battery pack can burn, smoke, explode or overheat.
After the automatic shut-off of the inspection camera, do not continue to press the On/Off button. The battery could become damaged.

12 | English
Do not direct the light beam at persons or animals and do not stare into the light beam yourself (not even from a distance).
Check the working range before using the inspection camera. No part of the inspection camera may come into contact with electrical lines, moving parts or chemical substances. Interrupt the power circuit of electrical lines in the working range. These measures reduce the risk of explosion, electric shock and property damage.
Wear appropriate protective equipment such as safety glasses/goggles, protective gloves or respirator when materials that are hazardous to one's health are in the working range. Sewer lines or similar areas can contain solid, liquid or gaseous substances, which may be toxic, infectious, caustic or otherwise hazard to one's health.
Pay particular attention to cleanness when working in areas with substances that are hazardous to one's health. Do not eat during work. Avoid contact with substances that are hazardous to one's health. After finishing your work, wash hands and other affected body parts that may have come into contact, with warm soapy water.
Do not stand in water when using the inspection camera. When standing in water while working, there is a risk of electric shock.
Magnet

Keep the magnet 23 away from cardiac pacemakers. The magnet generates a field that can impair the function of cardiac pacemakers.
- Keep the magnet 23 away from magnetic data medium and magnetically-sensitive equipment. The effect of the magnetic can lead to irreversible data loss.
Product Description and Specifications
While reading the operating instructions, unfold the fold-out page with the illustration of the inspection camera and leave it open.
Intended Use
The digital inspection camera is suitable for inspecting hard to reach locations or dark areas. After mounting the provided accessories to the camera head, it is also suitable for moving and removing small and light objects (e.g., small screws). The digital inspection camera may not be used for medicinal purposes. It is also not suitable for repairing pipe clogs or pulling in cables.
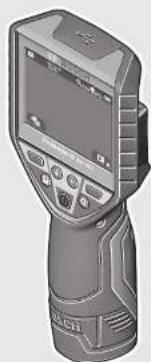
Product Features
The numbering of the product features refers to the illustration of the inspection camera on the graphics page.
1 Hand unit
2 Magnification button
3 On/Off button
4 Gallery/ settings button (1st level) OK/delete button (2nd level)
5 Up is UpTM button (1st level) Scroll forward button (2nd level)
6 Trigger for photo or video capture or for video playback (gallery mode)
7 Lighting/brightness button (1st level) Scroll back button (2nd level)
8 Button for switching between photo or video mode (1st level) Back button (2nd level)
9 Display
10 Upper cover
11 Slot for micro SD card
12 Connection for micro USB cable
13 Camera cable
14 Camera head
15 Illumination light in camera head
16 Camera lens
17 Battery pack
18 Unlocking button
19 Micro USB cable
20 Micro SD card
21 Camera connection
22 Camera cable lock
23 Magnet
24 Hook
25 Mirror
26 Battery adapter cover
27 Battery adapter sealing cap
28 Port
29 Battery lid
Display Elements (selection)
a Selected photo or video mode
b Status bar
c Selected magnification
d Selected lighting/brightness
e Charging condition of battery pack/batteries
f Symbol for switching between photo or video mode
g Symbol for gallery mode/settings mode
h Switching between colour rendering/black-and-white rendering
i Setting for brightness of display
j Setting for date/time
k Setting for duration of automatic shutdown (Auto-Off function)
Setting for lighting duration of display
m Current storage occupancy of micro SD card
*Accessories shown or described are not part of the standard delivery scope of the product. A complete overview of accessories can be found in our accessories program.

English | 13
Technical Data
| Digital Inspection Camera GIC 120 C GIC 120 C | |||
| Article number | 3601 B41 2.. 3601 B41 270 | ||
| Rated voltage | |||
| - with battery pack | V= | 10.8/12 | - |
| - with batteries | V= | 6.0 | 6.0 |
| With battery pack | ● - | ||
| With battery adapter (removable) | ● - | ||
| With battery adapter (not removable) | - ● | ||
| Batteries (alkali-manganese) | 4 x 1.5 V LR6 (AA) | 4 x 1.5 V LR6 (AA) | |
| Relative humidity | % | 5 1) | - 5-95 1) |
| Smallest bending radius of camera cable mm 25 25 | |||
| Diameter of camera head | mm | 8.5 | 8.5 |
| Display resolution | 320 x 240 | 320 x 240 | |
| Operating time, approx. | h | 2 2)/6 1) | 2 2) |
| Weight according to EPTA-Procedure 01:2014 | kg | 0.64 | 0.64 |
| Dimensions (length x width x height) | mm | 217 x 90 x 49 | 217 x 90 x 49 |
| Permitted ambient temperature | |||
| - during charging | °C | 0...+45 | - |
| - during operation 4) | °C | -10...+50 | -10...+50 |
| - during storage | °C | -20...+50 | -20...+60 |
| Storage temperature (hand unit without battery pack or battery adapter) | °C | -20...+60 | -20...+60 |
| Recommended batteries | GBA 12V... | - | |
| GBA 10,8V... | |||
| Recommended chargers | GAL 12...CV | - | |
| AL 11...CV | |||
| 1) Free of moisture condensation | |||
| 2) with batteries | |||
| 3) with battery pack at 100 % brightness of the illumination light in the camera head | |||
| 4) limited performance at temperatures < 0 °C | |||
Assembly
Power Supply
The inspection camera can be operated either with commercially available non-rechargeable batteries or with a Bosch lithium-ion battery.
Operation with Battery Adapter (Removable) (3601 B41 2.) (see figure A)
The batteries are inserted into the battery adapter.
The battery adapter is intended only for use in designated Bosch inspection cameras and must not be used with power tools.
To insert the batteries, slide the cover 26 of the battery adapter into the port 28. Place the batteries in the cover as per the illustration on the sealing cap 27. Slide the sealing cap over the cover until you feel it engage and it is flush with the handle of the inspection camera.
To remove the batteries, press the unlocking buttons 18 of the sealing cap 27 and pull off the sealing cap. Pull the inside cover 26 out of the port 28.
Always replace all batteries at the same time. Only use batteries from one brand and with the identical capacity.
- Remove the batteries from the inspection camera when not using it for a prolonged period of time. The batteries can corrode and self-discharge during prolonged storage.
Operation with Battery Pack (3601 B41 2..) (see figure B)
- Use only the chargers listed in the technical data. Only these battery chargers are matched to the lithium-ion battery of your inspection camera.
Note: Using batteries not suitable for your inspection camera can lead to malfunctions or damage the inspection camera. Note: The battery pack is supplied partially charged. To ensure full capacity of the battery pack, completely charge the battery pack in the battery charger before using for the first time.
The lithium-ion battery pack can be charged at any time without reducing its service life. Interrupting the charging procedure does not damage the battery pack.
14|English
To insert the charged battery pack 17, slide it into the port 28 until you feel it engage and it is flush with the handle of the inspection camera.
To remove the battery pack 17, press the unlocking buttons 18 and pull the battery pack out of the port 28. Do not exert any force.
Operation with Battery Adapter (Not Removable) (3601 B41 270) (see figure C)
To open the battery lid 29, press the unlocking buttons 18 and remove the battery lid.
When inserting batteries, pay attention to the correct polarity. Mount the battery lid 29 again until you feel it engage.
Always replace all batteries at the same time. Only use batteries from one brand and with the identical capacity.
- Remove the batteries from the inspection camera when not using it for a prolonged period of time. The batteries can corrode and self-discharge during prolonged storage.
Charging Condition of Battery Pack/Batteries
The symbol will initially appear on the display if the charging condition of the battery pack/batteries is low. When the symbol is empty, you have to replace the battery pack/batteries or recharge the battery pack because inspections are no longer possible.
Mounting the Camera Cable (see figure D)
For operation of the inspection camera, the camera cable 13 must be mounted to the hand unit 1.
Attach the plug of the camera cable 13 to the camera connection 21 in the correct position until it engages.
Dismounting the Camera Cable (see figure E)
To remove the camera cable 13, press the lock 22 together and pull the plug out of the hand unit 1.
Mounting the Mirror, Magnet or Hook (see figure F)
The mirror 25, the magnet 23 and the hook 24 can be mounted to the camera head 14 as auxiliary aids.
Slide one of the three auxiliary aids to the stop onto the recess on the camera head 14 as shown in the figure.
Note: The magnet 23 and the hook 24 are only suitable for moving and removing loose, small and light objects. Applying too much tension can damage the inspection camera or the auxiliary aid.
Operation
- Keep the hand unit 1 and the battery pack 17 dry and protect them from direct sunlight. The camera cable and camera head are waterproof when mounted correctly. However, the hand unit and the battery pack are not protected against water. If they come into contact with water, there is a risk of electric shock or damage.
Do not subject the inspection camera to extreme temperatures or variations in temperature. As an example, do not leave it in vehicles for longer periods. In case of large variations in temperature, allow the inspection camera to adjust to the ambient temperature before putting it into operation.
Do not use the inspection camera when the lens on the camera head 14 is misty or fogged-up. Do not switch the inspection camera on until after the moisture has evaporated. Otherwise, the inspection camera can become damaged.
The switched-on illumination light 15 can become hot during operation. In order to prevent burns, do not touch the illumination light.
Initial Operation
Inserting the Micro SD Card
Open the upper cover 10 and slide the micro SD card 20 all the way into the slot 11. Close the upper cover again.
Switching On and Off
To switch on the inspection camera, press the On/Off button 3. The start screen will be shown on the display 9 for a short time.
To switch off the inspection camera, press the On/Off button 3 again.
If no button on the inspection camera is pressed, it will automatically switch itself off when the set duration (k) has expired.
Regulating the Illumination Light in the Camera Head
To brighten the camera image, you can switch on the illumination light 15 in the camera head and adjust the brightness.
The brightness can be adjusted in 4 stages (0%, 25%, 50%, 100%).
To switch on the camera illumination light 15 and to increase the brightness, press button 7 repeatedly until the required brightness is reached.
Do not stare into the illumination light 15 and do not direct it at other persons. The brightness of the light can blind the eyes.
To reduce the brightness and to switch off the camera illumination light 15, press button 7 repeatedly until the required brightness is reached or the illumination light is switched off.
Magnifying the Image on the Display (Zoom)
Briefly pressing button 2 magnifies the image on the display by a factor of 1.5 or 2.
Rotating the Image on the Display (Up is UpTM) (see figure G)
Use button 5 to turn the image so that "up" is also shown as up on the display.
Note: Restricted function when mirror 25 is mounted and/or when camera cable 13 is aligned vertically.

Taking Photos/Videos
Use button 8 to switch between photo or video mode. The currently selected capture mode a is shown in the status bar b.
Use button 6 to take a photo or to start/stop video capture in the corresponding mode.
Gallery Mode/Settings Mode
Pressing button 4 assigns a different function to buttons 8, 7, 5 and 4 (according to the representation above them on the display) (2nd level). Use these buttons according to the representation on the display.
Briefly pressing button 4 opens the Gallery Mode. Press button 4 to view the image in full-screen mode and press button 6 to play a video.
Holding down button 4 opens the Settings Mode. The following settings are possible:
-Colour rendering (red dot)/black-and-white rendering (green dot) (h)
- Brightness of the display (i)
- Date / time (j)
- Auto-Off function: duration of inactivity of the inspection camera after which it switches itself off (k)
- Lighting duration of the display (I)
- Storage occupancy/formatting of the micro SD card (m).
Status Bar
The status bar b is shown on the display for approx. 2 seconds after every button press. It shows:
- the selected capture mode (a)
the date and time
the selected magnification (c) - the selected brightness (d)
the charging condition of the battery pack/batteries (e).
Transferring Images and Videos
Transferring images and videos is only possible when a micro SD card 20 has been inserted.
The inspection camera can be connected to a computer using a micro USB cable 19 in order to transfer images and videos.
A symbol on the display indicates that the inspection camera is connected to a computer.
The inspection camera will be shown as an external drive on the computer.
The battery pack of the inspection camera cannot be charged via the connection 12.
Connecting a Micro USB Cable for Data Transfer
Open the upper cover 10 and insert the micro USB cable 19 into the connection 12 in the correct position.
After data transfer, remove the micro USB cable and close the upper cover again.
Working Advice
Check the area that you want to inspect and pay particular attention to obstructions or hazard areas.
Bend the camera cable 13 in such a manner that the camera head can be easily inserted into the area subject to the inspection. Carefully guide the camera cable in.
Adjust the brightness of the illumination light 15 so that the image can be seen well. For heavily reflecting objects, as an example, less light will provide a better image.
When objects to be inspected are represented unsharp, reduce or increase the distance between camera head 14 and object.
Recommendations for Optimal Handling of the Battery Pack
Protect the battery pack against moisture and water.
Store the battery only within a temperature range between -20^ and 50^ . As an example, do not leave the battery in the car in summer.
A significantly reduced working period after charging indicates that the battery pack is used and must be replaced.
Observe the notes for disposal.
Troubleshooting - Causes and Corrective Measures
| Cause Corrective Measure | ||
| Error indication on display | ||
| Camera cable not mounted. | Mount the camera cable. | |
| Micro SD card not inserted or not correctly inserted. | Insert the micro SD card and slide it all the way in. | |
Maintenance and Service
Maintenance and Cleaning
Do not immerse the hand unit 1 into water or other fluids.
Keep the inspection camera clean at all times. Clean the inspection camera and all auxiliary aids particularly thorough after having worked in areas with substances that are hazardous to one's health.
Wipe off debris using a moist and soft cloth. Do not use any cleaning agents or solvents.
Especially clean the lens 16 of the camera regularly and pay attention for any lint.
After-sales Service and Application Service
Our after-sales service responds to your questions concerning maintenance and repair of your product as well as spare parts. Exploded views and information on spare parts can also be found under:
www.bosch-pt.com
Bosch's application service team will gladly answer questions concerning our products and their accessories.
In all correspondence and spare parts orders, please always include the 10-digit article number given on the nameplate of the product.


16|English
Great Britain
Robert Bosch Ltd. (B.S.C.)
P.O.Box 98
Broadwater Park
North Orbital Road
Denham
Uxbridge
UB95HJ
At www.bosch-pt.co.uk you can order spare parts or arrange
the collection of a product in need of servicing or repair.
Tel. Service: (0344) 7360109
E-Mail: boschservicecentre@bosch.com
Ireland
Origo Ltd.
Unit 23 Magna Drive
Magna Business Park
City West
Dublin 24
Tel. Service: (01) 4666700
Fax: (01) 4666888
Australia, New Zealand and Pacific Islands
Robert Bosch Australia Pty. Ltd.
Power Tools
Locked Bag 66
Clayton South VIC 3169
Customer Contact Center
Inside Australia:
Phone: (01300) 307044
Fax: (01300) 307045
Inside New Zealand:
Phone: (0800) 543353
Fax: (0800) 428570
Outside AU and NZ:
Phone: +61 3 95415555
www.bosch-pt.com.au
www.bosch-pt.co.nz
Republic of South Africa
Customer service
Hotline: (011) 6519600
Gauteng - BSC Service Centre
35 Roper Street, New Centre
Johannesburg
Tel.: (011) 4939375
Fax: (011) 4930126
E-Mail: bsctools@icon.co.za
KZN - BSC Service Centre
Unit E, Almar Centre
143 Crompton Street
Pinetown
Tel.: (031) 7012120
Fax: (031) 7012446
E-Mail: bsc.dur@za.bosch.com
Western Cape - BSC Service Centre
Democracy Way, Prosperity Park
Milnerton
Tel.: (021) 5512577
Fax: (021) 5513223
E-Mail: bsc@zsd.co.za
Bosch Headquarters
Midrand, Gauteng
Tel.: (011) 6519600
Fax: (011) 6519880
E-Mail: rbsa-hq.pts@za.bosch.com
Transport
The usable lithium-ion battery packs are subject to the Dangerous Goods Legislation requirements. The user can transport the battery packs by road without further requirements.
When being transported by third parties (e.g. via air transport or forwarding agency), special requirements on packaging and labelling must be observed. For preparation of the item being shipped, consulting an expert for hazardous material is required.
Dispatch battery packs only when the housing is undamaged.
Tape or mask off open contacts and pack up the battery pack in such a manner that it cannot move around in the packaging.
Please also observe possibly more detailed national regulations.
Disposal

Inspection camera, battery packs, accessories and packaging should be sorted for environmental-friendly recycling.

Do not dispose of inspection cameras and battery packs/batteries into household waste!
Only for EC countries:
According to the European Guideline 2012/19/EU, electrical devices/tools that are no longer usable, and according to the European Guideline 2006/66/EC, defective or used battery packs/batteries, must be collected separately and disposed of in an environmentally correct manner.
Batteries no longer suitable for use can be directly returned at:
Great Britain
Robert Bosch Ltd. (B.S.C.)
P.O.Box 98
Broadwater Park
North Orbital Road
Denham
Uxbridge
UB 95HJ
At www.bosch-pt.co.uk you can order spare parts or arrange the collection of a product in need of servicing or repair.
Tel. Service: (0344) 7360109
E-Mail: boschservicecentre@bosch.com
Battery packs/batteries:
Li-ion:
Please observe the instructions in section "Transport", page 16.
Subject to change without notice.


Francais | 17
Français
Robert Bosch (France) S.A.S.
Lamp in camerakop regelen
Bosch Service Center
Telegrafvej 3
2750 Ballerup
Pá www.bosch-pt.dkkander online bestilles reservedeleller oprettes en reparations ordre.
TIf. Service Center: 44898855
Fax:44898755
E-Mail: vaerktoej@dk.bosch.com
Transport
Bosch Service Center
Telegrafvej 3
2750 Ballerup
Danmark
Tel.: (08) 7501820 (inom Sverige)
Fax: (011) 187691
Transport
Xpnon ouuovva Tov npooipopo
H ynphiakk kapea eewponc elva katalan yia tnv enthewpon duonpoitw n akoteiw npioxw. Me ouvapoloyon ontny kepaan tnc kapeac tw bonentikov meowou nepiexovta on oukeuaia elwa enion katalan kai ia tn metarion kail anopakpuvan ikpwavntikepvw (π.x. iipkwβidw).
Hynpiakk kapepa emeewponnc dev eniptpenetai va xnpoonoungei orny iatpki. Dev eivai entanc katalAn ouTe yia Tny anoppaEn oawinyuv outy ta nepaaKaawdiw.
AnouuapmoIoynon Tou Kaawdiou Tc Kapepa (BaeEikova E)
Tia tv apaipeoan tou kalwbiou tnc kapeac 13 mote tv aopalao 22 ka tpaBnTe to eEw an o uokuei xeipoc 1.
UvapmoIoynon kaOpeptn,paVntn yavrcou (Baeicova F)
O KaOpemtnc 25, O ayVntnc 23 kaoyavToc 24 anoteauv Bonnka poea kai npoov va ouvapmoaynoov otny kepa- nTNC KEPAHc 14.
Othote eva ano ta tpa Bonntka meaa tepua enavw otny eykonn TNC Kepalnc TNC kaepac 14. onwc paivetai otny eikova.
Ynodex:Oayntc23koyavzoc24npoipovraiaT metatomn kailnv anapkpuon xalapw kelaappov avntkeevv.OTav n eEivai nouioxupn monei va unotei nia n ypiakkape eneopnonc n to bontnko eo.
Aetroupyia
PiooataeTe Tn ouakeun xeipoc 1 kai nyn enavaopoptojevnnatapia 17 any uypacia kai nyn aepon nAakn akntvoBoia.To kaiwdoTnC kajeopac kai nKepaanTc kapeac oe nepiinwn oowntc ouvapoloynonc elwai ubaoteyava.Houakeun xiepc kai n enavaopontoevmnapaia dev npootateuovtaoi owc and to vepo,oe pinnwn enaphc me to vepo unapxki klvuvoc nAektponlanlacn Znuaic.
Mny ekOeote TnV npiaik kape enoewpnoac oe akpaie cepokpaoic n diakumavoe cepokpaoiac. Mny tnv aipnoete n.x.yia noanwpa oto autokivno.Apt-ote Tnv npiaik kape eneewpnoac v anoktnoei tn epe pokaia tou nepiBaaovoc otav nponyouevucrav EKTEeivn oeyale diakumavoe cepokpaoiac.
Mnyxnooioaoteynpkiakkaepaemewnp anotav o pakoTNCKEpa14 TNC kapeac eiva 0alwEvoc. OeTe nTv npkiakk aepa emeewponnc nai aeitoupyia mvo otav th Eaatmuei nyupaia. Diaopoptikmaopeva unootei qnla n npkiakk kaepa emeewponnc
H evpyonouieyn auvia 15 mnoepi kata tn diapkeia mc letoupiaac va Bepaovte npao. Mnyakounn- octe tn auvia, yia va anopuyete ra eykaumata.
Oeog aeLetroupyia
Tonoetnon tnc kaptac Micro-SD
AvolTeTo enaww kaLmu 10 Ka onpEe Tnv KApTa Micro-SD 20 mexptepua paa otnv unooxN 11. Kelaote To enaww kaLmu xava.
Oeon aeIeoupyia kI ekTOc aeIeoupyiac
TnEv evpyooin Tnc kapeac enieewponnc natiote to nAnkto On-Off 3. TnV oovn 9 epaivicetai ia ouvtopo xpovo npxipkn oovn.
Tia va 8eae EKTOAeIoupyiac Tny ynpiakk kapea eIe- wponan natnoe nto ATo nAnktoo ON/OFF 3.
Eav natn9e1 kaveva nhtpo 0ny kape em0eupnonc, Tote anevpyoioelal autouata meta to npac tncpuoiuevncxoviknc diapkeia(c).

6EAAynvka
Poumuon mcsauxviasnVKeepaJkapepac
Hpoeivotna pnpoei va puthetai oe 4a0i6c (0%, 25%, 50%, 100%).
TIA TIV EEpyoioiOn TNC AuxVlaC TNC KApepac nathote 15 kai
YIA TIV EVIOXUON TNC PwTeivOTnAC nathote TO NAnKtpo 7 Toec
Popec, Wotou me emteuxgei enemOunTH PwTeivOTnTA.
Na mny koiatazete kateuthetaiav otn luyvia 15 kal va mny kateuovete tn luyvia enawoe aaaa atoma.To qwctnc luyviac npoei va ta tupawaoei.
Tia nIeIomega nIc qWTeivOTnAC kai yia tny aneepyoioiOn TnC luxvia cTNC kapeac 15 natote to nahtpo 7 tooc opec, meXpi va eniteuxei n eithuunth wteivotn ta v aneepyoioi-0e i luxvia.
Meyeovon mC eKovac oNv oOvN (ZouP)
Tatovtac ouvtota to nktpo 2 mopeite va meyeovete tny eikova otnv oovn kata 1,5 n 2 opoc.
Teipotpoqtnc eikovac oTnv 0ovn (Up is UpTM) (BLeNt cikova G)
Me To nAikto 5 yupiote tny ekova etoi, wote To «enavu» va epaavietai enion otyn oboyn enaw.
YnodEeN:Piopioevn aeoupyia e ouvapuooynevo Kaepptn 25 kai/n ae nepintwn kaetnc euyypauioc tou Kaawbiou nTc kapeac 13.
Anioupyia wtoypaipv/bivteo
Me To nAiktpo 8 aaaaZete meaEe Aeioupyia cpoTovpapiaic n Aeioupyiac bivto. H tpexoua puqmupeyn Aeioupyia Anpsi n aepavicietai ot npumn kataotaonc b.
Me To nAHTPO 6 KAVETe Aun OTOV AVIATOIO TPONo LEITOUpyiac Maac PtoOypaiaac N EKIVATE KAIEPATIZETe TNV CyypaipnBivTeo.
Aetroupyia ykaalepi/Aetroupyia puθμioewv
TATovTACTo nHktpo 4KxWpeiTa oTnAiktpa 8,7,5KaI4
mu aALn leIoUpyia (avriotoxa otnv npadotaon otny oOvyn
mio naV) (20 emine6o).Xpauonoiote auta ta nHktpa ouP
phiva me nTv npadotaon otnv oOvyn.
TATovtac ouvtoaTOI ANKTPO 4avolyeTn aeitoupyia yka-
Aepi. TATovtac TOI ANKTPO 4 mOpTe va deite Tnv eKova o
nAnp meyeoc Oovnc kai TatovTac to IANKTPo 6 mOpTe va avanapEte eva Bivteo.
TATovvTacnapaTeaJevToNAnKtpo4avoJeI NAcetoupyia puOpioeov. OkokouOecpuOpiocEivai duvatc:
-Eypwun avanapaywyn (kokivo oneio)/aonpounp avanapaywyn (npaoivo oneio) (h)
ΦwEvOtnTaTcOboVnc(i)
-Hmuopounia/omega (j)
Aetoupyia Auto-Off: Aipkeia nC abpaeic nKapeac emeewpnong, pT ano Tnv onoi arevepyonoielra (k)
-△apkeia tnc o0ovnC (I)
-Karalnqtncmuynnc/npoppoinongtnkaprtac Micro-SD (m).
Tpaunkarataoanc
Hypaun karaataoc b epaivctai peta an kahe natma tou nAnktpou nepinou yia 2 deutepoemta otny oovn. Aun delxve!
Tnpuomuoev naeioupyia nns (a)
-Tny npeounvia kal wpa
-Tnpu0muiev nyeoovon (c)
-Tnpuuuguevwnovotnta (d)
-Tny kataaon poptnnc enavaopnpocve nmuataipac/tw npataipw (e).
Metaopopá cíkovov kai bivteo
H metapopapawv eikovw kai wv bivteo elvat duvat n ovo me tonoetnveyn tvkapta Micro-SD 20.
H kapepa emeepannc moneip va ouv6e9e ta Kaawio Micro-USB 19 eev unoloyiot, ia tn pataopd cikovw Kai bivto.
Hkapea eimepnncdelye ievaoupolo otyn oovn,nt evaiuuvdeevneivavunoloyoan.
Tov unooyi n kapea emeewponc eepavicetai w cEotepikoc ohyoc.
H enavaopnOjoeyn nnatapia tnc kapeac einteewponc dev npopei va oppiotei peow tn ouvdeocn 12.
Tnpoue to dikaiwaaayov.
Türkce
Güvenlik Talimatu
Dijital gozlem kamerasi

Robert Bosch Sp. z o.o.
Bosch Service Center PT
K Vapence 1621/16
692 01 Mikulov
Na www.bosch-pt.cz si si muzete objednat opravu Vašeho
Regulovanie lampicky v have kamery
Na zvy Senie jasu obrazu kamery mozete zapnuf svetlo 15 v havo kamery a regulovat jas.
Jas je mozné nastavovat v 4 stipnoch (0%, 25%, 50%, 100%).
Na zapnutie svetla kamery 15 a na zvyjsenie jasu stlacaje tla-cidlo 7 dovtedy,Pokial sa nedosiahne zeelanu uroven jasu.
Nepozerajte sa priamo do lampicky 15 a nesmerujte svetlo lampicky ani na ine osoby. Svetlo lampicky by mohlo poskodit'udsky zrak.
Hymepaunna H3o6paekhenbIX deTaeIe BblOnHeHa no PcynKaMaHa cTpaHnucx C H3o6paekhenm BnDeockona.
1PyKoTka
2KhoNka yBeneHnna
3 BbiknioateB
4KhONka ranepe/naCTpoiKN (1-nypOBeHb) KhONka OK/ydaJIHTb (2-nypOBeHb)
5 Khonka Up is UpTM (1-уpoBeHb) Khonka nepeJIncTbIbAHnB BpepeD (2-уpoBeHb)
6 NycOBa KHOIIKa IINI FOTo- INN BInDEOCbEMKn INN INPOINrPBiBaHHBnDEO (peXHM ranepeH)
7 KhoNkaNoCBeTKn/RAKoCTn(1-ynypoBeHb) KhoNka nepennctbBaHnaHa3a(2-ynypoBeHb)
8 KhoNka nepeKIOueHm MExNy fOTo-N BnDEopeKHMOM (1-ynypoBeHb) KhoNka《Ha3aI》(2-ynypoBeHb)
9Диспnett
10BepxHRA KpbIuKa
11CnotdIaKapTbIpaMaTbMiro-SD
12 Theo da Ka6eMa Micro-USB
13 Ka6enb KaMepebl
14ФолOBkaKaMepebl
15 NaMnocha B rONoBKe KaMepeI
16ObekTNKaMepebl
17 AKKMyNtTOP
18 Khonka pa36nokpoBkn
19 Ka6enb Micro USB
20 MmKpo-SD-kapTa
21 He3do nla NpokKluOeHnKaMepebl
22Фнкаторкавелкамерbl
23 MarHHT
24Kpouok
25 3epkafo
26KoKyx npexopdHnka nla 6aataeek
27 KpbIuKa nepexoHnKa nla 6aTaapeek
28OTceK
29 Kpbiika baatapeHHoro OTecka
HdNkAtOpby(Bb6op)
a HactpoeHHbpeXHM pOTo- nHn BnDeocBemKn
b CstatcnaCTpoka
cHaCTpoeHHoe yBEnHueHne
HAcTpoeHHaNoCDBeTKa/rapKocTb
e CoToHnHe 3apJa aKKyMnyIaTopa/baTapeek
f CmBbON nepeKIOUeHn MEXy peXHMAMN FOTo-N BInE-OCbEMKN
g Cmmbon pexkma ranepeH/HactpoHn peckma
H IpeeknIOueHHe MExdy UBeTHbIM/YeepHO-6enbIM OTo6paXeHHEM
I Hactpoika npKocTHnCnne
jHactpoJa daTb/BypeMeHH
K HactpoKaIaIITeJIbHOCTNaBtOMaTHueCKrOOTKIOUeHn(fHKuABTOMaTHueCKrOOTKIOUeHn)
HacpoKa dInTeIbHOCTnIOcBETKINHCnPien
m Tekyüee paacnpedeienenne naamTn ha Kapte Micro-SD
M3o6paxehhIbe HnONHCAHIIpeINHADJIeXHOCTHE BXOATB CTaHApTbHIb OEBm NOCTABK. NOnHbN ACCPHTMEt PnHAdJIeXHOCTe BHaHdete B Hauei nporpamme npHnADJIeXHOCTe.
Texnueckne daHHble
UHPOB0B VUNEOCKON GIC 120C GIC 120C
H3BnKeaTe 6aTaepKn H3 BHeckoNa,ecn Bb npOdoJXHTeNbHoe Bpemr He 6yTepepaotb cHm. PnI dInTeJIbHOM XpaHEHN BO3MOxHa KoppoNn I camopa3paKa 6aTaapeek.
3KcnnyaataaOnO aKKMynTOpHoi 6atapen (3601B412..)(cm.pnc.B)
Ponb3yIeTcBToJbKo 3apnHbIMN yctpoiCTBaMn, yka-3aHHbIe BTEXHnueCkNx npametpax. TOnbKO 3TH 3apnHbIe yctpoiCTBa pnproDhbl IINHTeBO-HOHOr aKKymyIaTopa Baew HcneKIOHOH KamepbI.
Yka3aHHe:3KcNpyataunBnDeoCKOcaN C He npEHa3HaueH HBIMnIg Hrero akkMyTApOM MoKET npBeCTN K c6oRMB pa6ote nn K nobpeXeHHIO BnDeoCKOca.
Yka3aHHe: AkkMyIaTOpHa 6batape nocTaBnIeTc qactuHO 3apKaeHHo. IJIIOCTNKeEHn IIOHOr EMKOCTN AkkMyIaTOpHo 6batape nIOHOCTbIO 3apJITe akkMyIaTOpHyO 6batapeo B 3apAHHom yctpoHCTBe nepei nepBbIM HcNoIb30BaHem N3MepHTenbHO HO HcTpymeta.
HHTHEBO-HOHHyOaKKymyIToPHyO6TaapeIOMOKHO3apKaTbKOrdaYrOJHO,30HeCOKpaAeTe eeEKCnIyatauONHHbpecypc.PIpepbBaHne Ipocecca 3apKn He NOBpexJaet AKKymyIToPHyO6TaapeIO.
IyctaHOBK3apJxEHORoAKKyMnTOpa17BCTaBbTe eroBOTcEK28tak,TO6blOHOTyETNBOBoWBeN B3aCenHe H npneran 3anoDnIO KpykOKeTkeBHeOckona.
H3BneuHnAkkymyIaTopa17HaXMMTe HaKHONpa3-6NOKPOBKN 18 H3BnEKeHTe AKKMyIaTOp 3OTcKa 28.He npHMehnTe pnp 30m Chbl.
3Kcnnyataaunc nepexoDnHkOM dna6aTapeek (He cBemHbIM) (3601B41270) (cm.pnc.C)
TTO,OT6bOtOKpbItbKpbHky 6aTapeHoro OTcKa 29, HAKMITE Ha KHONKn pa36nOKnPOBKN 18 n CHMMTe KpbHky 6aTapeHoro OTcKa.
PnBknaDbBaHnn 6bataeek cneJeTe 3a npaBnBHOI NOJAPHOCTbIO.
CHOBa HadehBe KpbIky 6batapeHoro OTecka 29 TaKIM
obpa3om, yTO6bl OHa OTyeTINBO BOUla B3aueJIneHHe.
BcerTa 3aMeHHe BCE 6batapeKN OJHOBPemHo. PnimeHnIte TOnbKO 6batapeKN OJHORO hroTOBHTen I C OJNHAKOBOE MKOCTbIO.
H3BnKaTe 6aTapeKn H3 BHeeckona,ecn Bbl npO DonKHTbHOe Bpem He 6ydeTe paOtaTc Hm. PnDINTEbHom XpaHEHH BO3MOxHa Koppo3Ha n Camopa3PraKa 6aTapeek.


Pycckn|97
CoctoHne 3apyaakymyntopa/6aataeek
PnH3KOM 3aJaDE aKKMyJNtOpa/6aTapeek Chauana Ha dnCnnee NOBnEeTcra CMBON EcnN CMBON 6aTapeek Kn yctO, HyKHO NOMEHa bAKKyMnTOp/6aTapeekKn Hn3apAaNTb aKKMyJNtOp, DaJIbHeIJne N3MepeHHa HeBO3MOXHbI.
MOHTAKKa6eJnKaMepeBc( cm.pnc.D)
ДяЗкплуаци Видаоckona KpykorTke 1doJxeh 6bIbNoDcoeINHeH Ka6eB kAmepb13.
BctabBeIeKepKaebnKaempe13BnpaBnHbOMnoJKeHHN BHe3DIOJIPOKnIOUeHNKaMepe21,TO6bOHBOWeB 3aueenneHne.
DemontkKa6eJnKamepeblc.
YTo6bIOTcoeHNHTbKa6eHbKaMepeB13,CaBAHTeФHKCaTOp 22N BbTAaHTe WTeKep H3 pyKoRTKn 1.
MONTAX 3epkana, marHHTa Hnn KpOuKa (cm. pnc. F)
3epkano 25, MaHHT 23 IN KPOUOK 24 MOKHO MOHTNPOBaTb Ha TONOBKE KAMEpb1 14 B KauCTBE BCNOMORAteBbHbIX CpeCTB. HAnHeIbTe OJHO H3 BCNOMORAteBbHbIX CpeCTB, KAK H3o6paKeHo Ha PnCyHKe, Do ynpa Ha yrny6neHne B TOnOBke KAMEpb1 14.
YkaaHHe: MaHHT 23 N KpOuOK 24 npEHa3NaueHbI ToJIbKO DnI nepeBnKHeHn UydaENHn He3aKpeNnEHbIX, He6oNbX Hn IeKnx npEMeTOB. Pn CnIKOM CnIbHOM TgROBOM yCNIH MOKHO NOBpEHTb BnDEOCKON Hn BCNOmOrTaTeNbHOe CpeDCTBO.
Pa60Ta c HcHCTpyMeHTOM
3aunaaTe pykoTky 1n aKKyMnyTop 17 ot Bnarn npmbix conHeuHbIx nyey. Pnp npabHbOM MOHTaKe KaebIb kamepbI nToBOKa kamepbI BOHOePOnHuaembl. Ondako pyKoRTka n AKKyMnyTOp He 3auHueHbI OT BoDbl, npN KOHTaKTc CBOO CyueCTByET ONaCHOCTb NopaxHnA 3NEKTPnueCKM TOKOM INIOBpeXdEHH.
He noDBepraiTe BnEockon BO3eHcTBHO 3KCTpeMaIbHbIX TEMNepatyp H TemnepatypbIX nepenadOB. B qactnoctH, He octabnIte erO Ha IInTeNbHoe BPemR MaunHe. Ppi BoIbXn X nepenadax TemnpaTpyb Chauana DaIte BnEoCKony CstBnHnHsIOpaBoTa TEMNepaTpy, npexJe cHmHaHbTa pa60taTb c HIM.
He hcnb3yte BnDeoCKon npn 3anoteBaHHn 06bekTHBaHa rOIOBKe Kamepb14.BKnOuaTe BnDeoCKOn TOnbKO NOe HcnapenH BAar. HNaue Bo3MOxHO No-BpeXdHeH NBeDcoKoNA.
BknIOeHHa NaMnOuKa 15 MoKet Bo BpEmpa6oTbI HarpeBaTcB.Bo n36eKaHne OxKorOB He npKacaiTecb K NaMnOuKe.
3Kcnnyataa
YctahOBka KapTbI naMTH Micro-SD
OTkpOte BepxHIOKpblkky 10 N BCTaBbTe KapTy NaMaTH Micro-SD 20 do ynpa B cnot 11. Choba 3akpoite BepxHIOKpblkky.
BklioueHne/BbIKIOUeHne
Uro6bI BKNIOHTB BVNEOCON, HAKMITE Ha BbIKHOATeJIb 3. Ha KOPOTKoe BPem HA DCNCEE 9 OTo6paKaETcCTapTObBI 3kpaH.
Ttobb BIKIOHTB BIDeOCKOI, CHOBa HAXMITE BIKIOA-TeIb 3.
Ecn Hn Ba NduoecKone He HaKmMaOTc HnKaKe KhoNKn,TO nI npOoeCTBn YcTaHOBNeHHOro BpeMeHn (k) OH abTomaHTeCKN BbIKIOHaTeCt.
PerynpoBaHne npocTH naMnoouKn B roNoBKe KaMepbI
Tc6bI Cenatb nonyeHHoe Kamepo H3o6paXeHne npue, MoxHO BKNIOHTb NaMnOuyk 15B rONOBKe KaMepbH OTPeryNipOBaTb RpKoCTb.
Imeetc4 cteeneHH perynipOBKn npKoctn (0%, 25%, 50%, 100%).
IINBAKIOUeHnNAMNOOKKaMepb15NyBENueHnRApKOCTNHAXMNTE KHOKNY7HECKONbKOpa3,NOKAHe NOnyHTeKeJaEMyIO RPOKCTb.
He cmToPte npmaHa nAmnoKy 15 He hapabnTe naMnoky Ha dpyrnx IIOe. CBeTnaMnoKMOKeT3aClenNTbIa3a.
IyMHeBHeHnRpKoCTN H BbIKIOueHnJaMIOuKNKaMepb15HaKHMaTe KHOJky 7 HeCKOJIbKO pa3, NOKa HE NoNYUHTeKeNaeMyIO RpKoCTb H NOKa HE BbIKIOUHTcraMaMIOUka.
YBENHNE H3O6paXeHHHaDmcNlee (MacUta6bpoBaHne)
KopoTKM HaxaTHEm Ha KhoNky 2 MoXHO yBENHt b3o6pa-KeHHe Ha dncnnee B 1,5 nnn 2 paa.
TobopauBaHne H3o6paXeHHa DaHcnnnee (Up is UpTM) (cm.pnc.G)
PnH NMOOuN KHOKNK 5 H3o6paXeHne NOBOPaYBaETcTAK, TTO BEPxN Ha DmCnIee HaxoDITcB Bepxy.
Yka3aHHe:ФyHKUaORpAHuEHa pIN MOHTnPOBaHHom 3epKa- ne 25 n/nnBepTKaJIbHOM IIOJKeHHKabEe KaMepb1 13.
HactpoKa pexkma fto-/BHeocbemKn
KhoNka 8 No3BnAeTnepeKNoaTbCmEkypeKMMoΦOToH BnDoeocEMKn. TeKyuynpeKHM CbeMKn a OTobpaKaetcB CTatycHOH CTPOKe b.
PnH NMOUKN KONK6 OcyuieCTBnIeTcH FOIOrpaHPOBaHHe HnHaayano H KOHeu BnDEOCbEmKn.
Pekm ranepeu/naetpoka pekma
HakatneM KHONK 4 KHNKAM8,7,5 n 43aetaTc npyra
fynkun (cooTBeCTBeHHNO npedctabNeHHIO Ha ndcnnee)
(2- npobeh).NcnoB3yIte 3TN KONKN B COOTBETCTBNn npedctabNeHHem Ha ndcnnee.
KpaTKM HaxaTHeM HA KHOIIky 4 OTKpbIbAeTcpeXm ranepen.HaxaTHeM Ha KHOIIky 4 MOxHPO pa3BepHyTB H3OpXeHHe Ha BeCb 3KpaH, a HaxaTHeM Ha KHOIIky 6 -BOCnpON3BeCTN BIDeo.
HnntelbHbIM HaKaTHEm HA KHOIIky 4 OTKpbIbAeTc HAcTpOkapeKMa.Bo3MOXHbCneIyUOuHe HAcTpOKn:
LBeTHoe OTo6paXeHHe (KpaCHaTouKa)/YeepHO-bEnoe 0To6paXeHHe (3eJIeHAr TouKa) (h)
-RpKocTbHcInnner (i)
-Дага/BрмЯ (j)


98 | Pycckn
-ФункиаВАТOMATИЧЕСКОТОТКПЮЧЕНЯ:ДИNTENHOCTB OTCYCTBNAAKTINBHOCHTBNIDEOCKONA,NOCNEKOTOPOH OH BbIKIOUaETCA(k)
-ⅡHNTeNbHOCTb NOCBETKN HcNnner (I)
-PacnpedeeneHne namTn/foPMaTPOBaHne KapTbI nAMrN Micro-SD (m).
Statycha cnpoka
Ctatachaa ctpoka b oTo6paKaaetcHa dHcnpee np6n.2ceKynbl np Kao KaqDom Haxatm Knonkn.Ha He oTo6paKaaetc:
-HacTpoeHHbpeKmcbEMKn(a)
-ДаТиВрema
HAcTpoeHHoe yBeneHne (c)
- HactpoehHaaRpKocTb (d)
coCToHHe 3apraaakmyTota/6aTapeek (e).
Ipeepa a fo H Bndeo
IpeepaФOTOBHbEOB03MOxHaTOnbKO pN BCTaBHeHNO Kapte naHTM Micro-SD 20.
Bndeocn moKHO noKnIOHTb KOMNbIOTepy npn NMOUKNa6ena Micro-USB 19 nna nepeaun foTo h Bndeo.
CIMBOHnHaDnCnIeBnDEoCKoNA NOKa3bIaEaT,TO OH NIOKIIOH KOMNbIOpTy.
HaKOMNbTepe BnDeocKn OTo6paXaETCBA BnDE BHeHero HAKONITIa.
AkkymyIaTOP BnDEoCKOHa He MoXeT 3apXaTbCra Hepe3 rHe-3do12.
IopknouhenkeKa6enMicro-USBdnapnepaHdaHHbIX
OTkpoTe BepXHIOKpbluKy 10 N BCaTbBte Ka6eNb MicroUSB 19 npabnblho CTopoHOB B rHe3o 12.
IIO OKOHauHH nepeaun daHbIx n3BneKeNte Ka6eIb MicroUSBnCHOBa 3akpoTe BepxHIOKpbIky.
Yka3aHaNo pnpMeHeHHo
IpoBepaTe cpey, KOTOpyo Bby XOTHTe OCMOTpeb, N o6pa- 7aTe Oco6eHHoe BHMaHHe Ha IpePnTCTBn H ONaChbIe Me- CTA.
CoHInTe Ka6eBb Kamepb1 13 TaKIM O6pa3OM, YTO6bI MoXHO 6bIIO yO6HO BBeCTn TOnOBky Kamepb1 B NCCNeDyEMyO Cpe- dy. OctopoxHo BBeNTe Ka6eBb Kamepb1 B Cpey.
Otperynpyte npkocb lamnouky kamepb15 Takm 6pa30m, yTObMoKHO bIIOxopoio pacno3HaTb n3o6paKeHne. Hap., nyuuee kaueCTBO n3o6paKeHHn PpeMToB, CnIbHO OtpaxaOux CBET, DOCTHraetc pIn MeHbWeOMCBeUeHNH.
EcHn H3o6paXeHHe NccneJeYEmbX npEIMTeOB HeetKoe, yMeHbWHTe HNN YBeNtBte pacCTOaHHe MekDy rONOBKO kAmepb14 nCCNeJeYEmbIM npEIMToM.
Yka3aHHN OTHoCHTeNbHO ONTHMaHbHOrO 6paueHHN C aKKyMnyTropHoB 6atapee
3aunuaiae akkymytoptHyio 6ataeio ot Bo3dienTBnBnaHn BODbl.
XpaHHeAkkMyIaTOp TOnbKO BHaHnAzoHe TempeAtypOT -20 ^ C Do 50 ^ C . He octabJIe AkkMyIaTOp IeTOM BA ToMo6Hne.
3HaunTeIbHoe cokpaueHne npoJOnKInTeBHoCTn pa6Otbl aKKyMnyTApHOB 6aTapeN nocle 3apRKn yKa3bYBaet Ha To, uTo aKKyMnyTOpHAB 6aTape NcepPnA CBoi pecypn e Heo6xOmo 3aMeHntb.
yUHTbIaBteYka3aHnIIO yTmH3aunn.
HencnpabHOctb -PpunHHuN yctpaHeHne
050050 AnMaTbI, Ka3axCTaH
Cnyke6hna 3n.nouTa: service.pt.ka@bosch.com
OΦηαλβHbI Be6-caɪT: www.bosch.com,
www.bosch-pt.com
TpaHcnpToPobKa
Ha nCIOB3yEmbIe IINTHeBO-HoHHbIe AKKymIaTOpHbIe 6aTape paCnpOcTpaHnOCTpEaDnHcAHN B OTHoWeHN TpaHcNoptnPoBKN OnaChbIX rpy3OB. AKKymIaTOpHbIe 6aTapeMOrY TnepeBO3NtCB CaHM NIOb3ObaTeNm ABTOMoBnHBm TpaHCnOPTom 6e3 Heo6xoHmOCHT Co6NIODeHn DoONHITeJIbHbIX HOpM.
PnnepeBO3e CnpBneueHem TpebHex Nll (HaNP::CaMOIeTOM HIN CNAMN TPAHCNOPTHO 3KcneDInTopa) Heo6xOIMo CoBIOaTb OOCbIE Tpe6oBAHN NO yNaKOBKe I MapKPOBKe. B 3OM cIyae npn noJrTOBKe rpy3a K OTnpABKe Heo6xOIMo yUacthe 3KcIepTa No onachbIM rpy3am.
IpebcnaiTe aKymyTApHy 6atapeiTOIbKO B TOM Cnyaee,ecn KOpync He NobpekJeH.3akneIe OTkpblte KOHTaKtBn yNakyTe aKymyTApHy 6atapeiTOk,OTbO hAHe NepemueaJacb BHytpn ynakobKn.
Poxayncta,co6nnaTae TaKke Bo3MOXHbIe DOnONHTenb HbIe HaunohnbHbIe npednncAHN.
ytnn3aun
Bndeocon, aKKyMnTOpHbIe 6aTapeN, npHaJnEHXoCTH N yNaKOBky HxKHO CdaBaTb Ha 3KOIoTmueCKN UcTiyO yTNlN3aUIO.

He BbIbpaCbIaTe BnDcOckOnbI n AkkymyTApOp HbIe 6bIaPepn/6bAtppeKnB 6bIbTOBm MycOp!
TolboKoIaI cTpaH-ueHOB EC:
B COOTBECTBHN C EBponeeCKO INpeKTBOH 2012/19/EU OTCNYKMBUNE3NEKTPONHCTPYMEHTb N B COOTBECTBHN C EBponeeCKO INpeKTBOH 2006/66/EC NOBpeJdEHbIe N6o HcNoJIb3OBaHHbIe AKKYMnTOpbl/6aTapeKN HxHNO CoNpaTb OTdJIbHO nCdaBaTb Ha EKOJIOnHeeCKn UcTcyIO peKypepaHIO.
AkkymyIaTOpbl,6aTapeH:
Li-Ion:
PonkaIyIcTa, yuHTbIbaIte yka3aHne B pa3dene «TpaHcnpTNPOBka», cTp.99.
B03MOXHbI H3MeHeHHR.
100|YkpaHcbKa
YkpaIHcbka
Bka3iBKn 3 Texhikn 6e3nekn
Lcnpobn Bideockon

IpounTaBc3actepexheni Bka3ibKn. HeOpTnMaHn3actepexhenb iBkazIBOKMOKe npn3BecTuOypaxenHEnekTpHuHM CTpyMOM, noxekjTa/a6o cepno3HNx TpaBM.
PemontyBatn BiOeocON Do3BOnrTbCn NHe KBaniFIOKOBHm FaxiBuMa TaNHe 3 BNKOpHCTaHHM opriHaBnHex 3anactn. NHe taK 3abe3neuyetbcr TpBana HaidinHictb po6oNt BiOeocKa.
He npaioTe 3 BideoKoNOM y cepeOBoHusi, de icHyc He6e3neKa B6yxy BhaCNIOK npCyTHoCTI rOpoux piHn, ra3iB a60 nHy. Y BideoCKOnI MOxTy bYbOPHOBaTHCA Ickn, Bid AKNX MoKe 3aMAtncn a60 napn.
BnMaTe aKymyTOpHy 6aTapeI0 nepei BHKoHaHHM 6yDb-RAHX MaHInyHnui3 BideOckOnOM (HaNP.,MOHTaXHHx po6it,po6IT 3TexHnOrO 6cNpyRObYBaHHToO),a TAKOX nepei TpaHCnOpTyBaHHAM Ta 36epirAHHH BideOckona.
He BixkPbBaIte akymyIaTOpHy 6aTapeIO. IChye He6e3neKa KopoTko 3aMnKaHHa

3axuatae akymytaTophy 6atapeo BID BHCOKHX Temnepatyp, HAp., BiD TpHBANX COHARHIN IPOMEHIB, BOHIO, BOHN Ta BOIORN. IChye He6e3neka Bb6yxy.
36epirate akymntophy 6atapeio, o ca me he 3ac-tocobyetcbiaDianik Bid KaHcnpaCkx Ckpinok MOHET, RBNTB Ta iHnx HeBENKHX MetaneBHX npedMetib, 0o MoKyTb CNpHHNt NpeMKHHeHHa KONTAKTIB. Kopotke 3AMHKAHMI KKTaTMn akymnTophoi 6atapei moe np3BOHTN do oniKy a6o noxexi.
PnHnepaBnBbHomy BkOpncTahHi 3akymnyTopHO 6bapei MoKe BnteKTH pIDHa. YNkaTe KOHTAKTy 3 Heo. PnBnAkoBOMy KOnTaKTi npomnIte BiIOB1E Mice BoIOJ. Ako pIdHa noTpanNaB Ooi,doAtKOBO 3BepHtbc Do NkApA. PiHa, zo BNTeKaI3 akymyTTOHPO 6bapei,MOKe BnKlnKaTIn NoDpa3HeHH WkIPn abo ximuiHti onIK.
PnnookoeHHi 60 He npabHbHOMy BHKOpctAHNI akymnTopho6aatapeMoXe BHXoHTnap.Bnycttcbixe nobitpr i-y pa3i ckapr-3BepHtbcdo nikapra. Nap moKe BnJIkKATn NOpa3HeHHdNxaIbHnx WJxIB.
3apJxteakymnTophi6atapeiIINueB3apdHnx npctpox,po pekomehdoabiHbpo6hknom. 3apHnn pncptm Moke 3aImaTcA, kIO B HbOMy 6yDytb 3apJkatnc Henepe6baehi akymnTophi6ataei.
BnKOpHcTObyIte aKymNtOpHy 6atapeo IInse 3 Baunm BideockONOM Bosch. IInse 3a TaKnx yMOB aKymNtOpHa 6atapee 6yde 3axnueHa BiN Hebe3neuHoro nepeBaHTaKeHHra.
FocpHmnpedMetamn, Hanp., rbi3kamn a60 BHKpytKAMn, a6o npHKlaaHHM 3OBHIuHbOi CnMoKHa noWKODTH akymyIaTOpHy 6atapeio. MoXJIInBe BHYpiHHe KOPOTke 3aMnKaHHa, 3aropHHa, yTBopeHHa Dmy, Bb6yx a6o neperpiabakymyIaTropHO6atapei.
PnicraabTomatHOroBHHKaHHBideocKa6inbHe HaTHckyTeHa BmHKaA. AKe ue MoKe noKoHTn akymyIToTpHy 6atapeio.
He HanpaBnAte CBITNOBn PpOMiHb Ha IIOeI a6o TBAPH, i cami He dNBIbCnHa NpOMiHb Na3epa, HABiTb 3 BENIKO BiCTani.
Peped BnKOpNCaHnM BiDeoCKona nepeBipnTe po6oy 30hy. KOnHa 3 Detanei BiDeoCKona He NobHHa TOpKaTHcEneKTponpOBoKn, pyxOMnx DeTanei abo ximHnx peoBHn. NpeepBaIte enekTPnue KOne eneKtponpOBOKn, kXIO BOHa npOxoHTb uee3 po6oy 30hy. U3axoDi 3MeHswyOt bPNIK BvOxy, ypaKeHN eNeKTPnHm CTpyMOM Ta IOwKOJKeHN MaTepiAlbHnx ciHHocTei.
BdraTe npdaTne ooche 3axnche cnopdxkeHH, Hap., 3axnchi Okyanp, 3axnchi pykabuqi a6o pecipatophy Macky, kuo B poobui 30hi 3haoDttcbx KkiHniI IaI 3doOp8'peOboHH. Y BOOCTUHIX KaHaJnax abo NODiHnx 3ohx MOKyTB MICTHTCH TBPdi, piki abo raOtroDiHi peOboHHN, kKi E OTPyHMM, IHpeKsiHMM, iKMM abo MOxyTB IHIHM UHOM 3aBDAH INKOdy 3doOp8IO.
3BepTaTe Ooc6nBy yBary Ha YHCTORY, KOHN Bn npaioCTe B 3ohax i3 wKidINbHMn dna 3doOpOB' peOBNAM. He ixTe nIac po6oTH. YHKaTe KOtAKrty i3 wKidINbHMn dna 3doOpOB'peOBNAM; nicra po6oTH MInTe pyKn aO bHUI cAChTHn Tina, oO MorTN DOTOPKaTHCn DO uX PeOBNH, rapAHM MnNBHM p03uHOM. Lm BN 3MeHUnITE He6e3neky dna 3doOpOB'.
He ctiye y BOi, konn Bu kopctyec BideockONOM. PnBHKoHaHHi po60Tu y BOi BHHKae p3NK ypaKeHH enEeKTPuHMM CTpyMOM.
Marhit

He BCTAHOBIOIte MarHIT 23 no6n3y KapIOCTHMNATOpIB. MarHIT CTBOPIOne none, Ake MOKe HeRaTHBHO BnINBaTH Ha cyHKIOHaIbHy 3daTHiCt bKApIOCTHMNATOpA.
TpMaTe MarHIT 23 Ha BiCTaHI Bi MarHITnHex HociiB daHnx iuyTNbNx Do marHITnHex noni npnaig. MarHIT CBOeIO DcIO MoKe Ipn3BeCTn Do Heo6OpToHOI BtpaTH DaHnx.
BnMaTe 6aTapeKn 3 BideoCKona, kNo TPnBaHn Hac He 6yDte KOpNCTyBaTHcHm. PnTPnBaIOMy 36epiraHHi 6aTapeKNMOyTB KOpOyBaTHi I camOp03pAxDkATHCn.
EkcnnyataaiaBidakymyTOpHo'6aTapei(3601B412..)(nB.man.B)
BHKOPHCTOByTe NHe 3apnHi npctpoi, 3a3haeHI BTexHINx DAnHX. NHe Ha ci 3apnHi npctpoi p03paxoBaHNI tiri-nIOHH akyMnyTOp, 10BHKOPHCTOByEtcbyBaWii IHcneKuHni KaMepi.
Bka3iBa: EKcnnyatauia BideoCKona 3 HnepnuaTHMN dHb0rAkyMnyaTOpHMN 6aTapeaMIM MOKe np3BOJNTn DO 360IB y pOboTi a6o Do nOwKOJKeHH BideoCKona.
Bka3iBa: AkymyIaTOPha 6aTaper NoCTaayctbca YactKOBO 3apJKeHOIO. Lio6 akymyIaTOPha 6aTaper 3MOrJa peani3yBaTH CBOIO NOBHy cMnHcTB, nepei nepiHIM BHKOPNCTAHm ENEKTOIHCTPymEtY II Tpe6a NOBHcTIO 3apJNTB 3apJHOMy PnCtPoI.
JIITIEBO-IONHny akyMnyTOpHy 6batapeIO MOKHa 3apdXaTH KOHN 3aBROJHO, CE He cKopOyE II EKcnNyatauIHn pecypc. IpepeNBAHH npoecy 3apdXaHHn He noKoDxye akymnyTOpHy 6batapeIO.
Uo6BCTPOMHT3apJxHnAkyMnyTOp17,npocyBaIte Horo y cekuio 28, nOKn BIn He 3aJeBbUyTHO y 3aueNHeHH Ta He 6ye 3haxoNTnCA BpIBeH b pykoTko.
Uo6 BnHrTH akymyTOp 17,HaNTCHITb Ha KHONKn po36NoKyBaHHa 18 IBMIMb akymyTOp i3 cekii 28. He 3actocobyTe npn ubomy cnny.
EkCnIyatau3 nepexiHnKOM n76aTapeHok (He BnMaTeBc) (3601B41270) (JNB.MaN.C)
Uo6 biDkpnt KpnuKc eKuiI nla 6atapeNok 29, HATNCHITb Ha KhoPiKn po36nOkyBaHHa 18 i3HIMtB KpnuKc ceKuiI nla 6atapeNok.
PnBCTabEnHi 6atapeHOK cnikkyTe 3a npaBnIbHOIO nonpHcTIO.
3HOH HAIHbTe KpnuKcKui dna 6aTapeKoK 29 i daTe iBIDyTHO yBIHTN y3aenenneHH.
3aBxMnMiHrTeOdHocHoBCi6batapeKKn.BkOpNCTobyTe 1nIe6batapeKKnOdHOroBNpObHKiaOdHaKOBoiEMHOCTi.
BHMaTe 6atapeKn 3 BideoCKOJa, kIIO TpHbAnu qac He 6ydeTe KOPNCTyBaTHC HMM. Ipi TpHbANomy 36epirAHHi 6atapeKm MOKyTB KOpOyBaTHi i camop03paJkATNC.


UkpaiHcbka 103
Ctah 3apany akymytnaTopa/6atapeHok
PnMaNoy3apRdi6atapeHokHaDcNpei3'ABINCTbCnMHBOI .AkuO CHMBON NcyTNI,NOTPi6HO 3aMHNtNkMyJLITOP/6atapeKn a6o 3apAnTHAkymyIATOP,NOaJIbShnOrnHEMOXJIHBN.
MOHTAX Ka6eIIO Kameph (DHB. Man. D)
Дя ekспунаць Biodeockona do pykoTkn 1 NOBHeH 6ytn nID'EDHaHn KaBebb KaMepn 13.
BCTPOMITbItekepKaBeIIOKamep13npaBnBnM6OKOM B rH3doPiicDHaHHKaMepe21,io6 Bin yBiWOBy 3aueenneHH.
DemontkKa6eIIOKamephn(Hb.Man.E)
Uo6BnHrTnKaebIbKaMepn13CTNCHTbΦikCaTOp22 IBNTHITbWTEKeP3pyKoRTKn1.
MOnTaX dzepkana,MarHiry a6o raYka (mB.MaI.F)
3epkano 25,Marhit 23 Ta rauok 24 MOXHa MOHTyBaTH Ha TOnOBuJi Kamep14 B kOCTI DonomixHXsacobib.
HainbteOINH is TpboxoONOMIXHX3ac06ib, k306paKeHo HA manIOHKy, do ynpny Ha 3aIIn5eHHB rOnOBuKi Kamepn14.
BkaibKa:MarHIT 23IraQK 24 npduHI nHne dna nepecyBaHH Ta BuaJeHH He3aKpInJIeHNx,HeBeNkX Ta IerKHX pEmETi. Pn3aHaTTO CINbHOM TYAROBMYcNnIO MoXHa NooKOJTH BideoCkON a60 DoonomjHnn 3ac6.
Eknnnyatauaia
3axnauTe pykoTky 1 iakymnyTop 17 BiD BonorTa npamnx coaHnX npomeHB.3a yMOBN npaBnIbHO MOHTaxy kaebkamepni I rOBoKa kamepnc repeMeTHNMM.CiNd 3ayBaKNTn,IO pyKOyTKi aikymyIaTOpe He 3axnuehi BID NotpanHnHBoND,OTke npKoHTAKTI 3 BOHO BVHNKae He6e3neKa ypaKeHH eNEKtpnHm CTpyMOM abo NowKOJKeHH.
3axnauTe BineoON BiEektpemabHx TemnepaTyt Ta TEmnepaTyPhNX nepenad. 3okpeMa, He 3aHHaTe HOro Ha TpBaanu cac B aTOMobini. Raio BineoKOn 3a3HAB BeNkoR BnNBy nepenady TemnepaTp, To npw HIX BMkATn HorO, daTe My CTabin3yBatn CBOIO TemnepaTyP.
He BnKOpHcTObyIte BiDeocckOn y pa3i 3anotIBaHH 06'ekTHBaHa rOIOBui KAmepn 14.BMkaTe BiDeocckOn NHwe nICr BnnapoByBaHH BOJOrn. IHaKSe BiDeocckON MOKe IOUkoDHTICR.
YbIMKHeHnAmnoQKn 15 niq lacp o60TH MoKytb HarpiBAtnc. He TopKaIteCnAmNoOOK, Uo6 He OtpMaTH onIKIB.
Pouatokpo60tn
BctahOBHeHHa Kaptn na'rti Micro-SD
BjdkpnTe BepxHIO KPNKU 10 I nocyHbte KapTy naM'Ati MicroSD 20 doynopy B cnot 11.3HOby 3aKpnTe BepxHIO KPNKU.
BMnKaHHBmKnKaHH
Uo6 yBIMKHyTN BiJeocKn,HaTNCiHtBa BHMnKa4. Ha HcNPiE9 HA KOpOTKN Yac 3'ABnEeTbCn NOATKOBn EkpA.
106 BMKNHYB BideoCKON,3HOBY HATNCHTb BMNKaU 3. RaHbHa BideoCKONI He HATNCKAeTBCaXoDA KOnKa, BIN ABTomTHUHO BMNKAeTBCa Ypee3 BCTAHOBNEH uac (k).
PerynoBaHHrackpaBoCTIaAMnOouKn BrOnoBu KaMepn
Ioo63po6nTHOTPMAHeKaMepoIO 306paKeHHRAckpabiHMM, MoXHaYBIMKHYTNamNOOky15B rONOBUJI KaMepi BIDperyIOBaTHAACKpABICbOCBITneHHA.
€ 4ctyneHnHaanWtyBaHHraCKpaBOCTI (0%, 25%, 50%, 100%).
U6yBIMKHTN lamnoky Kamep15i nibnHTN RcKpaictb, HATNCKaTe KHONKy 7KeiNbka pa3IB, NOKn He oTPhMcyTe Heo6xIDHy RcKpaictb.
He nBItbcn pIamHa nAmnoky 15 i He hAnpaBnTe
Ha iHnX oci6.CBtNo nAMNOyKn MoKe 3acNInTH OYi. 15,HaNTCKaTe KcKpAbictb i BmKNHyTn NAMNOky Kamepn 10 HeOp6xIDHY RcKpaICTb aOHe BmKHTBCa NAMNOyKa.
36inbweHHH306paXeHHHaDcNnei(MacuTa6yBaHH)
KopoTKM HaTnCKaHHMa H KaONKy 2 MoKHa 36iNbBHTN 3o6paKeHHHa nCnPeI B1,5 a60 2 paH.
NobepTaHHa 306paXeHHHa dHcnnnei (Up is UpTM) (nB.man.G)
3a donomorio KhoiK 5 06paKeHH NOBepTaebc TaK, 1o6 «Bepx» Ha nCnneTakox 3HaXOuBCa 3Bepxy.
BkaibKa:ФyHKsIgOBMeKeHa np3MOHToBAHOmy d3epkani 25i/a6o BepTKaJIbHOmy nOxKeHHI Ka6EIO Kamep13.
HanautybaHHpeKmMy foto-/Bideo3Himahnn
3a donomoroo KHONK 8 MoXHa nepeMkaTncmAix pexHMAMn foto-i Bideo3HImAHn. NToouHH peXM 3HImAHn a BiO6paKaetbC B PAnky cTahy b.
3a donomoroho KHONK 6HimaTbca foto, a60 pO3noHaHaTcTa 3aBepuyeTcb BiJe03HimaHHA.
Pexhm ranepei/HanaaHTyBaHHr pexhmy
HaTHCKAHHM KNONK 4 KNONKAM8,7,5I4HadaCTbcHINla cyHKUa(BiIDNOBiDIO npEcdTaNBEHHaDHCnnei)(2-ipieBb).BkOpNCTOByTe i KNONBIDNOBINO npEcdTabHeHHaDHCnnei.
KopoTKM HATNCKaHHM KONKN 4 BIDKPnBaCTbCpexHM ranepei. HATNCKaHHM KONKN 4 MOXHa PO3rOpyTH 3o6paKeHH Ha Becb ekpaH, a HATNCKaHHM KONKN 6 - nporpatn BiJeO.
IOBRE HaTnCKaHHa KKnOky 4 BiJdkPnBaC HanaTuYBaHHpeXMy. MoxJIbI Taki HanaTuYBaHH:
KolbopobBeBIDo6paKeHHa(yepBoHaKpKa)/OpH0-6iJe BIDo6paKeHHa(3eneHaKpKa)(h)
-JaKpAbictb DnCnnner (i)
- Data/ucac (j)
-Функія ABOMaTHUHOrO BHMnKaHHr: TpBaNICTb BiCyTHOCTi AKTHNBOCTi BiEoCKOna, nicra JKOI BIH BmHKaETbCRA (k)
TpBanictb nicBiyBaHnIcnIe (I)
- Po3noJineHHaam'ri/foopMaTyBaHHaKapTu Micro-SD (m).


104|YkpaIhcbKa
PdOKstany
PAnok CTany bBIOobpaJAcTbcHa dncnneipnoTARm npH6n.
2cekyndnicnaKoKHOrHaTHNCKAHNAHONKn.Ha Hbomy BIDOppaKaTbcra:
HanaTobAHn peJIM 3HImaHHa (a)
-dataiucac
- HanaTobane 36inbweHHa (c)
- HanaTObaHa RCKpaBicTb (d)
- cTah 3apnny akymyntopa/6aTapeHok (e).
Ipepa3o6paXeHb i Bideo
Ipeepa3o6paKeHb i Bideo MoKnBa IInue npBCTaHOBneHikapti nam'rti Micro-SD 20.
Bideockon MoKHa NiE'EnHAn Do KOMI'IOTepa 3a DonomorO Ka6eNo Micro-USB 19, u6 nepeatn 3obpaxenH i Bideo.
CmB0n Ha BideocKoI Bka3yC, BideocKoN iD'cHaHn Do KOMnIOTepa.
HaKomn'topei Bideockon BiDobpaKaetbcaK 30BhiHni HAKONuYBaU.
AkymyIop BiJeocKoNa He MoKe 3apJkaTncypee3 rHiaD 12.
Пд'сданькабелю Micro-USB дпа nepedaydiаннх
Bjdkpnte BepxHIO KPNsKy 10 iBCTpOMiTB Ka6eNb Micro-USB 19 npabnblHM 6okom B rHiao 12.
Iicna nepeaayi daHnx BnMItb Ka6enb Micro-USB i 3HOby 3akpnTe BepxHIO KPNKU.
Bka3iBKn 0oO p060tn
IpebeipnrecepeoBnue,ae Bx ouote ornhytn, 3BeptaTe oc6bny yBary na nepeuokn Ta He6e3neHi Micua.
3irHbKa6eNbKaMepn13TaKMMuHHOM,Uo6MoKHa6yI0 Do6pe BBecTH rOIOBky KaMepn B CpeEIOBNIe,Ke Bn OrnaAte.ObepexHO BBeiTb Ka6eNb KaMepn B cepeOBOHne.
BidperyIOIe Rckpabictb lamnoKn Kamepn 15 TAKHM HNOM, 06 MoKHa 6yNo O6pe po3ni3Ht 36paXeHHa. Dnnpedmeti, kki dyke BIDIaepKaIIOJb Cbitno, moKHa, Hap.,doCaryHTn KpaOoi KaOci 36paXeHH npm MeHOMy OCBITNeHHI.
KIOO 306paKeHHo 6ObTeXyBaHn X npEmTIB HeITke, 3MeHHTb a6o 36InbItb BiCTaHb MIX RONBOKO Kamep14 i npEmTOM.
Bka3iBKN 0do onTmMaHbHO NOBdoXeHHa 3 aKymnTropHO6atapeo
3axnauTe akymnyTOpHy 6aTapeIO BID BOONI BOIN.
36epiraTe akymyTOp InHne npn Tempepatyi BiD-20°C 1050°C.3okpema,He zannuTe akymyTOp BnITky B MaunHi.
3haHOnckopoheHaTpBAnictbEcknnyataiicnna 3apJxKHHCBdUHTbIpoTe,IooakymyTOpHa6atapen Bueepnana cebe iITpebaomihn.
3BaKaIteHaBka3IBKNIIOO BnDaleHn.
Henonadkn -npnHHi ycyhenHH
Kayinci3ik HycKaynapbi
CaHdbikTekcepy kamepacbl

BapnbK kayinciaik hcykaybIKapbH Xehe eckptnepei okbHbI. TexnKanbl KAYinciaik HcykaybIKapbH XaHe eckptnepei cakTaMay ToKbIH COyBuHa, oT XaHe/ HeMece aybip JxapaKaTTaHynapra anapby MyMKIH.
TeKcepyKaMepacbIH TeK 6iNkTI MAmHaFxAeHe apHaybI 6eWKeTepMeH XeHdeti3. Con apKbInbl TEKcepy KaMepacbIHbIH Kayinci3diH cakTaCbI3.
XaHaTaBH cybIKtBtAP,ra3ap HeMeCe WaH XnblrHan XapBbIbC kayni 6ap optada TeKcepy Kamepacbi naiDanaH6aHbI. TeKcepy Kamepacbi yuKhBiH WbIFapbln, WauDbI xKaHdbPbI, ept Tydbipy MyMKIH.
TeKcepyKaMepacbImeKe3KeIReHxMybIcTapdbi (MbICanbl,OpHAty,KbI3MeTKepeCyXHeT.6.)6actaMaI TypbIn,COHdA-Nk,TekcepyKaMepacbIHTacbIMAnDay KHeCaTay Ke3HDeaKKyMnIITopDbIaNbHbI3.
AkkymyTopbI awaHbI3. KbICKa TBybIKany Kayini 6ap.

Mbicanb,akkymnyTopblxblydaH,cohdan- aK, y3dikci KYNXapbIFbIHAn,OTAH, cydah XHe bInfandah KopFaHbI. Xapbiny kayini 6ap.
PnainanahmabTbHAKyMnyTopbTyicnepPe TynbTKaybMYMKINKcTbIPfBHTapHaTHbHdapHa KInTEpHe,WeRenepeH,BHHTepEnKahe6aCaYcakTemip3aTTapHaCkTaHb.ANKymyTOp TYicnepPiH apacbHdaFb KbcKa TybIKaTy KyikTepre Hemece eptke Aekny MyMKIN
Dypbc naaana6afaanbiktah,akymyntopda ncbiktkiaybiMmKih. Oraf Tmehi3.Ke3eicok THReHde,con Kepdi cymeHwaibHbI3.CybkTbIK Ke3re Tuce,MeHHnHaBik KMeK anbHbI3.AKKMynTopdaFbl cybkTBkTephi TitipkeHdipy Hemece Kydpiyi MymKH.
AkkymyTOpDah3akbIMDaHFaH HEmecIpybc naindaanH6aFAnXaFda 6y bHyfbyMmKIn. By karaia iwe Ta3a aya Kipri3iH3 Xe He WArBIMap 6oNa, MeuHaHbIK KeMe AblbH3. Bynap TbHbIC any kondapbH TitipKeHHipy MmKIn.
AkkymyIaTbIK 6aTapeHbI TeK eHdpYwi KepcTeKeH 3apTay KpyBnIFbcIMeH 3apTaHbI3. 3apTay KpyBnIFbcIb 6enrini 6ip akyyMnyaTOpnap Typihe apHaIFaH, OHb 6acka akyyMnyaTOpnapbl 3apTay yuH naiDanaHy ept Kayin TylbpabI.
AkkymyIaTOPbI TeK Bosch TeKcepy KamepacBIme naDanaHbIHbI3. CoApkbIbIa AkkymyIaTOPdbI Kayinti apTbIK JxKTeydeH caKaTcB13.
Ie Hemece 6ypaybi cHKTbI ytBt3aTAP Hemece cbiptkbeceapakblnabKKMyynrnap3kbIMdahyb1 Mymkin. Bykn Bcikca TyblkTaYf aIbn Kenin, aKKMyJITOPKaHbI, TYINbIFapby, XapblNybl Hemece Kbl3bn Ketyi Mykin.
Tekcepy kamepacbI ABTomaTTb EwkeHHEN COH Kockbl/ewipriwi T eHdi Bacyu b6onMaHb3. 0HTnece aKKyMnTOp 3aKbIMdaHyb MykH.
Kapbik cayncin aadamapfA Hemece XaHyapnapfa 6afblTamaHb3 XaHe tiTi anbictah 6oNcbIH KApbIK cayncine e3iH3 kapaMaHbI3.
TeKcepyKaMepacbHicKe KocyaanAnbHJyMbic aHaMaBbH TeKcepiH3.Tekcepy KaMepacbHbH eW6ip 6niri 3eNktp cbIMapra,apeKet XaCAn JXaTKaH 6bnikTepre Hemece XmHbHK 3aTTeKtpeTre Tmeyi Tnic. XMybcA MaFbHda XaKaH 3eNktp cbIMapDbH 3eNktp 13erH y3in. Byuapanap Xapblny, TOK COY XaHe 3HHAp KayIn TMehDetEi.
Kymbic aHMaFbHa Da HcaynbikKa 3nHnBbl 3aTeKtep 60nfaHa KopFaBbW Ke3iNdiPik, KopFay Konfa6bl HEmecpeCnHpOp CnHbTke KOPFaTbH X6dBkTapBb KIni3. CyuBaTaBn KaHaNapd Hemece YKcacKaHnApda yNbl, KxKnAbl, AuB He Mece bacKa JONMeH DeHcaynbikKa 3nHb BOnatbl KaTb, cyuHK HEmecr43 niHinHderi 3aTeKtep 6ap60ny MyMkiH.
- DeHcaybIKKa 3nHbIb 3aTKeTep XaTKaH aHaMaKTapDbIH Ta3a 60nybHa Ha3ap aydapbHbI3. Kymblc Ke3iHe TamaK iwnEi3. DeHcaybIKKa 3nHbIb 3aTKeTepre Tmehi3 KaHe XyMbcI cTeyHe COH KOl MeH 3aTAPfA THRe H DeH MyuIepePi bIcTBk cinti epitHicMeH Ta3aJaHbI. OcbIaN DeHcaybIKKa 3nH KayTI TeMeHdeIi
TeKcepyKaMepacbHnaiDanaHydaCydTaypMaHbI3. CydaTpydaTOKcoFyKayni6ap60anbl.
MarHrT

MarHHTI 23 KapnOCTmMyTOp XaHbHa KOIMAhbl. MarHIT apKbIbI KapnOCTmMyTOp XyMbICbHa acep etetih epic XacaIaNbl.
MarHHTI 23 MarHHTI depek TacbImaayubinap MeM MarHHTKe ceaimanacnTAPdAn anbc ycTaHbI3.
MaHHTecepIkanbHaKeTIpin60MaHbHdepeKTeP KofaTByHaAnblKenyIMKIn.
ΘHIM KəHe KbI3MeT CnNaTTaMaCbI
Tekcepy kamepaibihcypeti6ap8ti aibin naDanahy HcyaynbfbH OKy Ke3IHe OHb aibk YCTaHb3.
TaafbHdany6oBbHwaKoIdany
TeKcepy Kamepacbl KonkeTimci Hemece KapaHfbi
aMaKaTapBb TEKcepyra apHaIHaN. Obbl KeHe XnHaKaTafbl
KeMeK KypaIaPbH Kamepa 6acblHa opHaTbIFaHHaH coH
KiWi KeHe XeHIn 3aTAPBb (MbicAnb, KiWi bypaHaIaPbI)
XbIbKy MeH anblKO YwH de naJaIaNyF a 6oIaBl.
CaHbIK TeKcepy Kamepacbl MeuHnHaBk MaKaTaTapda
naIaHaHy MyMkiH eec. On KeHe Ky6bp 6tEnyIH Ta3anay
Hemece Ka6enbepdi TApTyra apHaIMaFaH.


Kaakaika107
BeHHeneHReH KypamdbI 6eNeKeTep
Kepcetinren Kypamactap Hempi cypertep 6ap 6teri Tekcepy kamepaibhlh cnntaMaCbHa KaTbICTbl.
1 Konacnbbl
2 YIkeTny nepheci
3 Kocy-ewiypy Tymeci
4 Tanepe/napaMetnpnep nepheci (1-HeHre) OK/kno npheci (2-HeHre)
5 Up nepheci UpTM (1-DeHre) AnFa npapaKaTay nepHeci (2-DeHre)
6 Cypetke Hemece 6eHere Tycipy Hemece 6eHhe OHaTy (ranepen pexnmi)
7 Kapbik/KapbIKTBk NepHeci (1-HeHre) Kepi npakTay nepHeci (2-HeHre)
8 Cypet nen 6eHpe jepi apacbHa aEtkiy nepheci (1-TeHre) Aptka kblkby npheci (2-He)
9 Dnncnn
10 Kofapfbl KaTtama
11 Minkpo SD kapra yawbfb
12 Mnkpo USB ka6eni kockbblb
13 Kamepa ka6 eni
14 Kamepa bacbi
15 KaMepa6acbHnDaftbIbipak
16 Kamepa HnH3acbI
17 AkkyMnyTop
18 Bocaty nepheci
19 Minkpo USB kabeni
20 Minkpo-SD KapTacbl
21 KaMepa Kocblbcl
22 Kamepa Ka6enHHbcbIpmacbl
23MaTHT
24 InreK
25AinHa
26 Batapea aanTepiH opambl
27 BaTApE aadantepiHn KynbInrTaY KaKnaFbl
28 NoToK
29 BaTApEn 6eNimi KaKNaFbI
Kepcetkiw 3neMeHTeP (TaHaMaIbI)
a PeTEnrE h CypET nEH 6eHHe peXHHi
b Kyu naheni
C PeTtenReH yNKeIy
d PeTtenreHkapbIK/JkapbIKTBik
e Akkymnyatopnap/batapera Nap zapd Kyi
f CypetHeMece6eHHepeXmepi apacbHa aTeK3y 6Enrici
gIanepepekmmipnapametnpepekmibenrici
h Tyc 6bpinici/ak-kaapa TycTepepinici
i DnCnne KApbKtbfbHbH 6epinici npametpi
j KyH/YaKbITnapameTpI
k ABtOMaTTbEiipy y3akTbIFbH pettey (ABtOMaTTb Eiipy fHKnncb)
1 DnncnneJxahy y3aktbHbI npaMeTpip
m Mnkpo SD KaptaBHBn afbIMdkTONybl
*BeHHeHReH HEmece cHaTAnFaH Ka6DbIkTap cTaHApPTbI
KETi3y KENEMIMEN KAMTBINMAHbI.ToBbKxa6dbkTapbI 6i3iH Ka6dbkTAP6aFapnAmMaB13an Ta6acbI3.
TexHukanbIK mAnimetTep
| СацькTekсеру Камерасы | GIC 120 C | GIC 120 C | |
| Фим Немпí | 3601 B41 2.. 3601 B41 270 | ||
| Жуmbic керneyi | |||
| - akкулармен | B= | 10,8/12 | - |
| - батерларmen | B= | 6,0 | 6,0 |
| Акумлармен | ● | - | |
| Батеря_ADDТЕРIMEN (шыгарыды) | ● | - | |
| Батеря_ADDТЕРIMEN (шыгарылмайы) | - | ● | |
| Батерлар (Alkali-Mangan) | 4x1,5BLR6(AA)4x1,5BLR6(AA | ||
| Аya салысторmaь bijingлдыfы | % | 5 1) | - 5-95 1) |
| Камера kaбелінінEnkiішіБуктey радиусы | MM | 25 | 25 |
| Камера bасьнінДиamETрì | MM | 8,5 | 8,5 |
| Ди检пей ожь行政处罚(bingdilbyfbl) | 320x240 | 320x240 | |
| Пайдану узakтыfblшам. | c | 22/63) | 22) |
| EPTA-Procedure 01:2014 kvyka'tbna сас calmafbl | КГ | 0,64 | 0,64 |
| Θлшем徴и (узвдыгы x ehi x shiktiri) | MM | 217x90x49 | 217x90x49 |
| 1) кондэнcaшидан δoc | |||
| 2) Батерларmen | |||
| 3) akкулармен Мен Камера bасьндаflшамны 100% kar铂ктунда | |||
| 4) <0°C Temпературалардашектениng кут | |||
Bosch Power Tools 1609 92A 320|7.11.17)
108|Ka3aKaIIa
| СандыкTekсеру Камерасы | GIC 120 C | GIC 120 C |
| Руksat eriniren коршay Temnepatypacсы | ||
| - заряданда | °C | 0...+45 |
| -^(4)ЖуMbICbIHДa | °C | -10...+50 |
| - сактыдд | °C | -20...+50 |
| Сакту Temnéраурасы (kon КурбIFы AkКуМУЯтор Немес | ||
| Батарегларсьз) | °C -20...+60 | -20...+60 |
| ЧьиньлfaH akКуМУЯторпeр | GBA 12V... | |
| GBA 10.8V... | ||
| ЧьиньлantaиЗapядай Куралды | GAL 12..CV | |
| AL 11..CV |
1)KoHdEHCaunDaanBoc
2)6atapennapmeh
3)akyymyTOp MeH KaMepa 6acbHaFb WAMHbH 100%KapbIKbIFbHJa
4) < 0^ C Temnepatypanapda wKeTtenreH KyaT
Knay
3HeprHMeH Xa6dbkTay
TekcepyKaMepacbCTaHdapTb6batapeRnapMeHHeBosch JNTHIHOHBIAKKMYIATOPMeH XyMbICICTeJI.
Batape aanTepimen naDanahy (bIrapbnadbl) (3601 B41 2...) (A cypetin kapaNb3)
Батаразлар Батараз anantepine салпады.
Batape aanTepi TeK Tnicti Bosch teKcepy KamepacbH naDanahyra aphanfah 6onbln 3neKtp KypanapbI MeH naDanahyra 6onmaibI.
BatapehnapbIcany yuHIN Batapea aanTepinH 26 Ka6bHn AKKyMnyTOp nToBHa 28 KblNkbltBu3. BatapeapnabJ Ka6y KaKaNfaHbAcbCyptTe KcpctinReHnei 27 Kanka canbHb3. Ka6y KaKnaFbHkan YcTiHeH on CeImdi Tipein TeKcepy KamepaacbHbTHyTkAcbHa TIn TyPfHaWJ KaJIbKbTIbHb3.
BaTapeHapbanywih any nepheciH 18 k6abyKaKnaFbHda 27 6acbln, k6by KaNaFbH Tapbln KoBbHb3. IuHde KaTkaH KaTbI 26 NOTOKaH 28 WbIFapbHb3.
Bapnik 6aTape npab 6ipne anmactbipbHb3. Tek 6ip eHdpuyHHKHe KyaTb 6ipne 6aTape npab naDanaHbHb3.
3aKaYaKbTnAaHaH6aCaHb3,6aTapeNaapBbTeKcepyKaMepacbHaH anBbN KoBbHb3.3aKaYakBt KaKaH 6aTapeNaapBbTOT bacyjXaHe 3apRbH KofaNTybl MykIH.
AkkymyTopmen naJdanaHy (3601B412..) (B cypetih kapaHbI3)
TekTexHkAnbIKMmIImETTepDeKAs3bINFAH3aprTay KypanDabPiNnDaNAhBHy3.TekKaHaOcbIzaprTay KypaIdApblciDInTEKcepyKaMepaHbIaKOJaHaTbH INTNHOHBkAKKyMyIANTOpMeHcAkeC.
Eckeptne: Tekcepy KaMepaHbI3Fa apHaMaHa akKyMyIATOpDbI naDaanahy Kate xMybc icTeyiHe Hemece Tekcepy KaMepacbIHb3aKbIMdaHybHa anBn Keny MyMKH.
Eckptne: Akkymnyatop xaptb3a4ytaIraH KyeKeT-ki3inei. AkkymnyatopdbH TOnbK KyaTbH naIaIaH yuHIn OHbl anfaw pet naiDanaHydAn aNbH TOnb 3aparTaHbi3.
HINTH-HOHBkAKKMyIaTOPbI NaIaIaNHy MEp3IMIH KbIC-KapTycIaKe3KeIeRy aKbITa 3aprTaYf60la.3aprTaY npocci H3y aKKMyIaTOPdbI 3akbIMdanybHa AekImMeiDi.
3apraTanFaH aKMyIyTopb1 17 cany yuH OHbl Notokka 28 on ceiImdi Tipenin Tekcepy KaMepacbHa TnIN TypfauHa JxblJXblTbHbI3.
17 aKKyMnTOpbH any yIiH aIy nepHeCin 18 bacIn, 28 noToBHaH TaTpBn IbIfapbHbI3. OcJI Ke3e KUw caMaHbI3.
BaTapeaanTrepeimennaDnany(buknab)(3601B41270)(CcypetinKapaHbla)
Batape 6enimih KKaNafbH 29 auy yui H 18 auy nepheci 6acbl, 6atape 6enimih KaNaFBH anbl KoiHbI3.
BaTapeaIapblcanyda nonIOCTapbIHINypbIC TpybHa H3apaydpbHb3.
BaTape60nIMHHKaKNaFbH 29 KaHTa cAnBn ce3iMdi TipteHH3.
Bapnblk 6batapeenapblb 6ipde anmactbipbHb3. Tek 6ip eHdpuysiHHKHe KyaTb 6ipde 6batapeenapbl naDaanHbHb3.
3aKaYakBITnaiDanaH6acAbI3,6aTapeNapBbTeKcepy KamepaBHAnAblIN KOHbI3.3aKaYakBIT KaTkaH 6aTapeNapBbTOT 6acybXaHe 3apRbIH XoFANTyblMYkH.
Akkymyntop/6atapennapzapdTay Kyni
AkkymyIaTOp/6atapera3apraIa 360lanca,anbIMenHnCnnneJe 一 6enriciXaHaIa. BEnriXaHbaca,akymyIaTOpnapa/b/6ataperaNapabI aMaCTbpy Hemece akymyIaTOpIb3apdTayKaKeT,TeKcepyeepDiopbHdayMmkiHemec.
Kamepa ka6enin ophaty (D cypetih kapahti3)
Tekcepy KamepacbiH icke Kocy ywiH kamepa KaBenIH 13 kon acnabha 1 opHaty KepeK.
KaMepa Ka6enHin Wtekepi 13 dypbic peTte KaMepa yBbHa 21 TipeReHue caBbH3.
Kamepa ka6enin wewy (Ecypetin KapaHb13)
KaMepa Ka6enH 6acBn,1322bCbIpbMaCbIH KbIcbIn, WTeKepei KON KpybIyFbJaH 1WbIfapbHb3.


Kaakwai109
AHa, MarHHT Hemece inReKti opHaTy (FCypetin KapaHb13)
AHHb25,MarHr23neHInReKTI 24KeMeK KpaJIbI peIHde kamepa6acbHa14OpHAtyMmKIN.
YiKEMek KypalbHbH6ipih CyePeTKeKpcetinreHei TipenReHHe KaMepa 6acbHaFb14 OyibKa caBbI3.
Eckeptne:MarHnT23neinreK24TeK60ctypraH,kiiXkHe HeHH 3aTTapbI XbINbIy HEmec aIbIn KOfApHaIraH. KaTbI TaTpya TeKcpey KAmepacH HeMeK KpypaJI bI 3aKbIMDaHybl MyMKH.
PaindanaHy
KoN KpyBnFbCbl 1 MeH aKKymnyTopbl 17 bInfan MeH TIKENEe KYN cayenepeHIN KopraHb3. KaMepa kaBeni MeH KaMepa 6acbl dpybc opHaTbIcna, onapFa cy eTneITIH 60ana. Bipak Kon acna6bl MeH aKKymnyTop cydaH KopraMaFAH, cy TureH 60anca ToK COfy Hemece 3aKbIMdAny Kayini naDa 60ana.
TeKcepyKaMepacbHaAaBikUaTeMnepaTpaHMeec temnepatypa Tep6ynepi acep etneyi Tnic. Ohbl MbIcIb aTOKEkJIkeY3ak YaBlt KaIbIpMaHbI. YIKeH TempepaTpa Tep6ynepi XafDaIbHdaAnbIMeH TeKcepy KaMepacbIH TempepaTpaCbH DpybCTan COH naIdIaHbHbI3.
Kamepa6acbHdAfb14INH3a6ynaHfAn6oNaTeKcepy KamepaBn naDanaH6aHbI3.bInrAnbIK 6yra aHaHbIN KeTKeHHeH coHFaHa TeKcepy KamepacBH KOcblHbI3. 3NtneCteKcepy KaMepacbI 3aKbIMdaHybIMyMKIH.
Kocynbi 15 xmbic icterene Kb3bn ketyi Mymkin. Kyiktpdi andbi any yuih waMFA TmneH3.
Paindanahya ehdpy
MnKpO SD KapTacbH cany
Korapfki KaTamaHb10 aWbIn, MKNpo SD KapTacbi 20 TipenreHwe yuBbFbHa 11 cAblb3. Kofapfki KaTamaHb KaTaKa6bHb3.
Kocy/ewipy
PaHnohbl Kocy yuHIN Kocy-ewipy nepHecin 3 bcbHbI.
DncnneIe 9 bactay kpaHbl KbICKa yaKbITKa KepcetineI.
Tekcepy KaMepacBHL eWipy yuHIN Kocy-ewipy Tymecin 3 kaTb6acBhl3.
Tekcepy kamepacbHna eWbip nephe 6acbIMaca, on petTEnREH y3aKbIK (k) etKeHHHe COH aBOMATbI Type de WseJI.
Kamepa 6acbHdafbl ibpaKaTb peTey
KaMepa6eHecinKapbIKAthDbyyuiH KaMepa6acbiHafti 15 KocBn, KapbIFbH petteyre 60ana.
KapbIKbI 46ackbiuH peTey MymkIH (0%, 25%, 50%, 100%).
Kamepa wambh 15 kocbin, japbiktb aptpby wih7+ nephecin kepekti japbkketinrehe6acbhlb3.
1bipakka 15 tikeen KapamaHb3 Xhe bipaktb6acka aamapra kapatnaHb3. IbipakXapbIFkE3IaFbIbCTbpy MmKIn.
Kamepa 15XapbIKTbfH TEmeHdTe XHe Owipy yuH7 TYmecin KepeKTi XapbIKTbK, XeTIInrHe Heme C bpaKewKeHWe 6acbHb3.
Ducnnei deri 6eHeni yKeey (Zoom)
2 nepheicine kka6acbin,ncnneperi 6eHHe11,5 ece Hemece 2 ece ykeTyre 6oana.
DcnnneiDi 6eHHeni bypay (Up nepheci UpTM) (G cypertin kapaht3
5 nepheimeh6eHnehiKofapb6enrriciHcnnneHJXOFapb 6bniride Kepcerinetihin 6paHB3.
Eckptne:AHa 25 opHbIiFaHda JxHe/Hemece KaMepe Ka6eni 13 BeptnKaIdbI TypraHda XyMbIC ICTey iweKTeIeRcBonaIbl.
CypTeK/6eHere Tycipy
8 nephecimehcypethemec6eHnepekminheaybctbipacbl. AfbmdkpetenreHtcipy pekmi a Kyi nlaHkacbHa b Kpcetinei.
6 nepheimeh nicti pexmne CypTe Kycipeci3 Hemece 6eHrere Tycipydi 6actaTcb3 Hemece aKtacb3.
Tanepey pexkmi/napMeTpnp epxkmi
4 nephecih 8,7,5KHe 4 nephepihe 6aca
fHKnra (HcNne Jxofapbcihdafb Kepctinimre cai)
taaBHana(b2JeHre).By nphepepi dncnneneri
kepcetinimre ca naDanaHbHb3.
4 nephecbk bicaKa 6acbnaCa Ianepepe pexmi aubnabdi. 4 nephecin 6acbin, cyeTI TObnK eIWeMHe Kepy KHe 6 nephecin 6bacn 6eHHe OHaTy Mymkn.
4 nephecbk bckca6acbncapametnpeppekmiaaunab. Temeheri npametnpepdi opbiHay MmkiH:
Tyc6epinici (Kb3bn HkyTe)/kapa-ak TycTepepinici (Kacbl HkyTe) (h)
-Диспнейларыltblfbi(i)
- KyH/carfat (j)
- ABTomattbIeWy dyHKUINcBt: TeKcepy KamepaCbI eWY yiwH KepeKTi apeKetciDik y3aKTBfBi (k)
-ⅡnncnneHiiH kanyH y3aKtBtfbl (I)
-MKpo SD KapTacbi KaabHToTbIpy/niWiIMdey (m).
Kyu naheni
Kyu nane bi aep nephe 6acbinybHaH coH siAM.2 cekyHke dncnneJe kanaBb.On TEmeHderiHi bindipej:
peTEnReH Tcyipy pexKmI (a)
- KyHJHe yaKbIT
peTneReynKeiTy (c)
- peTEnReH KApblkTbIfbl (d)
- aKKMyIaTOpnap/6aTapeAp3apAdbHbN Kyi (e).
110|Ka3aKaJua
CypTep MeH GHeHenepei 8Kti3y
Cypertep MeH 6eHHepepi EK3y TK MKNpo SD KapTacbl 20 canbHaHaFaHa MyMknB 6oana.
Tekcepy kamepacbi MHKpo USB ka6eni 19 apkblb KOMnbHTepre 6aHnaHbictbipin cypETep men 6eHenepei OTki3y MymKiH.
Tekcepy kamepacbI dncnneJe 6enri apkblb KOMnbHotep KocbnFaHbH 6inipei.
KOMIbIOpTePeTeKcepyKaMepacbIcblpTKblnck petiHekpcetinei.
Tekcepy KamepacbHbHaKKyMnyrTopbH 12 yHbIfbApKbIb3aprTay MYMKIH EMc.
MnKpo USB ka6enIH depeKtepdi TacbImday yuH KocbHb3
Korapfki KaTamaHb1 10aWbIn, MKNpo USBKa6eIN19 Dpybc Kynde 12 YwBbFbHa CanbHb3.
IepeKepiTacbImaHaHaHcOHMkPoUSBKa6enin aBn, KaTAmHaB KaTaXa6bHb3.
Падалану hyckaynapbi
TekcepiTeH KopuaybI kapan uBkIn Keepinepre Hemece Kayinti Kepnepre Haap ayapbHb3.
KaMepa Ka6en13 KaMepa 6acb TeKcepiTeiH aMaKa caBHaTbI etin 6yKeH3. KaMepa Ka6en16aaiNa n CaBbHb3.
KaMepa 15XapbIKTBfBih6eHdpybc aKbHaataBH etin petTeH3.MbcAbl, KaTbKaTapaBH 3aTAPbI TeKceprHeTeMeHipeKxapbIKnEHdpybcpaK 6eHne 6oana.
EreptekepinJXaTkaH3aTAPaIKbIHbIFblDypbic60nMaca KaMepa6acbl14MeH3aTTbIHapalbIFblY3apTbHb3HEMece KbICApTbHb3.
AkkymyIaTOpDbIOHTaTbI naHdAnHy tpyanbI HycKaynap
AkkymyIaTOpdbCybIKbIKTapdAn XaHe bINFaIaH KOPFaHb3.
AkkymyIaTOpbI TeK-20C...50C TempeIpya aykbmbHda CaKaTaHb3. AkkymyIaTOpdbI Ka3Da KeIiTe KaIbIpaMbI3.
IaIanany MeepimHaiTapbikTaIKbICApby aKcymyTopbIH eckipreHH xHe aybictbipy KepeKTiriH 6inipei.
KokbictapdaKaHtAeHndeyTpyaIbHyckaynpabiOpbHaBla3.
Akaynap - Ce6entepi xhe wewimdepi
Ce6e6i Ieewimi
Dncnnejeri kateniktek kepcetkiwi

Kamepa KaBeni OPhaTbImaFaH.
KaMepa KaBeniH oHaTbIHbI3.

MnKpO SD KapTacbl caJIbHbIbFaH HemeCe KATE caJIbIHFaH.
MnKpO SD KapTaBn CaBn TipEnReHHe XblXbItbHb3.
TexHKnblk KyTIM XaHe KbI3MeT
Kb3Met KepcTey XaHe Ta3anay
Konacna6bH1CyFa Hemece 6acka cybIKtbkTapra 6atbpMaHb3.
TeKcepyKaMepacbHApaBIMHaTa3aYcTaHbI.DeHcayblKKa 3nHbI3aTAPbI KaMTHTbIH aMaKTapda Kymbic icTeReHHe COH TeKcepyKaMepacbMeBapbIKKeMeK KypaanapbH H6dH Ta3anaHbI.
NactaHnynapbI cynaHaFan, XyMcak y6bepeKeHneCyptiHa. Xyfbu 3aTAPbI HeMece epitkiuTeepi naDalaHa6BaIbI.
Ccipece, Kamepa HnH3acbH 16 kyyenI tyPe Ta3anan KbluBkTapFa Ha3ap ayDapbHb3.
Tytbinybifa KbI3MeT KepcTeY XaHe naJaIaNy Kehectepi
Kb3met Kepcety we6epxahacb eHimdi Kehdey XeHKeTy, coHda-ak Kocalkb 6eIwekTeptypaIb cypaTapFaXayan bepei. KaKetTI cb3abap MeH Kocalkb 6eIwekTeptypaIb aKtnapbMbHa MEkeHkaDaH Tabacbi:
www.bosch-pt.com
Kehe6epyushi Bosch kbi3MeTkePJIeHIMdi naIaIaNayXaHe onapdbH Kocanbl 6enweKTePI Typalb CypaKTapblBlaFa TnHaKaTbXayan 6pepi.
CypakTap KOIO XHHe Kocalkb6eIWeKTePre Tancbipbc 6epy Ke3iHe MInDeTTI Typde EHMdi3aybltbk TaKaTuaCbHdaBf10-caHdbE HmHemipin Ka3bHb3.
EHnpyT TaanTapb MeH HOpMaIapbHbCakTaanyBmeH 3JnKp KypalbHxHdEy XHe KeiPiK bI3MeT KepcTe bapbM MeNKeTep apmaFbHaTeK "PObep Bow" cnPMaIbH HeMece ABToPn3aunnaHFaH Kb3MeT KepcTe opTaIbKaPbHdaOpbHdaNa.
ECKEPTY!3aHcb3xKoJMeHxKeJIHHeHbIMdepnI naDanaHy Kayinti, dHcaynbfbHb3ra 3HN KENTIPyIMMKIH. HImdeppi 3aHcb3Xacay XaHe TaPaTy xkIMwiNik XaHe KbIMbICTbIK TepTIN 60bHwla 3aHMeN KyDanaHaDbI.
Kazakctah
TytbHybIbnapraKeHec6epyXaneWarbIMapdbKa6bIyday optaIbIbI:
"Po6ept Bow" (Robert Bosch) KUIC
AMMaTbIK
KasaKaTah Pecny6nKacb050012
Mypa76aeB K., 180 yu
"TepeMec" BO, 7 ka6aT
Ten.: +7 (727) 331 3100
_aKc: + 7 (727) 2330787
E-Mail: ptka@bosch.com
CepBntK Kb3MET KepCeTy optaBkTapbl MeH KaBbIyad
NYHKTePiH, MEKeH-XaMb TypaBb TOnbK XaHe E3eKti
aknapaTb Ci3: www.bosch-professional.kz pecmN caTTAH
ana anaacb3


Romàna | 111
Tacbimday
PnndanaHbINHTNHOHBKAKKymyTOpnapKayinti TayapnapFa KOBbInaBTHanlantapFa caB6onybKepek. PnndanaHyblAkkymyTOpnapDbKeweDeKocbImwa KxKaTApcb3 TaCbImaJd anJaIbI.
Yiuihui Tynfnap (MbicabI, aye Keiniri Hemece Xibepy) opamara KHe MapkanaPFA KObNbTbH apHaBt TaanTapdb CaTay Kepe. Xibepyre DaBHydA KeiHne KayinTi KkyKTeppi TaBImaDlay MaMaHbEmxabapnacy KepeK.
AkkymyIaTOpDbKopnycb3aKbIMdaHaHbOncFaHa Hj6epiH3.AuBk tyicnepepiKeimdeH3KaHe aKKMyIaTOpDbOpamadaKo3FaImMaHbHdApHaH3. KaKet 60ncA,KocbIMuaYTTbKepexeepdiKaTaHb3.
Kadere kapaty

TekcepyKaemepacbH,akkymyIaTOpnapbl,KepeK KapaTapblXaHe opay MaTePnaIaPbH 3KoIOnnBtKTypbHaanDybpICKaJere XapataTbH OpbHApFa TancbIpy KepeK.

TekcepyKaMepaIapbH KHe AKKymyIaTOp- npbl/6aTapeaIapbI yKoKbIcHa TaCtAmh3I
Tek kana EO endepi yuin:
Eypona 2012/19/EU epexeci 6oBbHua Japamcb3neKtp KpaIaIapbl kHe Eypona 2006/66/EC epexeci 6oBbHua 3aKbIMdaIHaH HeMece eckkMynTOp/baTaepennap 6eKk HHHaII, KaDeE jkapatblNyblKaKeT.
Akkymyntopnap/6atapennap:
JIHTHNOHDbIK:
"TacbmaJay"rapaybHdaFbl,1116etIHderiHyckaynapblOpbHdaHb3.
Texnknabik e3epictepehriy kkykbfb caKaTanaDb.
Româna
Service sculelectric
Strada Horia Macelariu Nr. 30-34, sector 1
013937 Bucuresti
KaMepaTa 3a HnCneKtnpaHe MoKeJa 6bJe 3axPaHbHa HnIc 6oBnKHOBeHb6aTePnH, nHn CnHTHeBO-IOHHa AkymyNaTOpHa 6aTePna Ha BoII.
Pa6ota c aadantop 3a 6atepnn (demontpyem) (3601 B412...) (BxTe phr. A)
BaTePnIte ce noCTaBRT B aadantop 3a BaTePnI.
AanTopb3a6atepHn e npedha3hauen caMo 3a non3BaHe BnpeBnDEHTE 3a TOBa KaMepn 3a HHCNEKTHpaHe Nnon3BaHTo My C eNeKTPOHCTpyMeHTN He ce DoNycka.
3a noctabane Ha 6atepnte Bkapaiyeepynkata 26Ha anaantopa 3a 6atepnn B rhe3doTo 28. BkapaiTe 6atepnte B kyTnra Taka, KaKTo e nKa3aHo ha fHyypata Ha KaNaka 27. Ib3HETe 3aTbapuNn Kanak Hn cepynkata, DOKaTO yCteHr OUTeHnBO PnePpAKBaHe N KanauKaTa ce 3axKaTa ce 3paBO b pbKOxBatkata Ha Kamepata 3a HcneKtpaHe.
3aH3BaXdAHe Ha 6atePmTE HaTCHeTe De6IOKpaUHTe 6yToH 18 Ha KaNaka 27 n To H3IbPnAte. N3BaTepepynKaTa 26 ot THe3Dto 28.
BunHn3aMeHnTe BCnKn 6atepn nEHNOBpeMeHHo. HnON3BaIte cmo 6atepn nOT eHN n CbI pOn3BOOHTeN C eHaKaB KNaIuTet.
Korato Hama Da NoJI3BaTe KaMepaTa 3a HHCNEKTnpaH npOdbnKHTeNo BpeMe, N3BaXdaIte 6atePnte. Pn npOdbnKHTeNo cbXpaHaBaHe B KaMepaTa 6atePnte Mo- rat Da KopoDnPaT Ha da Ce camOpa3peJrT.
Pa6oTa cakymyNaTopHa 6aTepeHr (3601 B41 2..) (BHXTeΦnR.B)
H3non3BaIte camo nocouhnte Bpa3dena Texnueckn daHHN 3apAHHyctpoiCTBA.CamO Tea3 ZapAHH yCtpoi-CTBa ca cnapaMeTpH, npDxOJaU 3a H3non3BaHaTa BBB BaWata HcneKIOHOHa KaMepa NITHeBO-IHOHa 6aTepeH.
YnTBaHe: H3noB3BaHTo Ha HenoDxOJaun 3a BaWata HHcneKIOHHa KaMepa akymyIaTOpHb 6aTePHN MoKe Ja npeIN3BnKa He npabInHO yHKUOnHpaHe Hn NOBpeXdaHe Ha KaMepaTa.
YnbTaBe: AkymyNatopHata 6atepna ce doctabra qacTuHO 3apeHeHa.3a da noCTnHete pblHata npOn3BODntelnoct Ha akymyNatopHata 6atepna, npEn da 3anOpHete da non3BaTe, 3apeTe DOKpaI.
IITNEBO-NOHHATAaKymyNatopHa 6aTepeHn MoKeJa 6bJe 3apeXdaHa No BcKaKO BpeMe, 6eT OBa Da ce Otpa3raBa Ha DblroTaipauHocTt Na. IpeKbcBaHe Ha 3apeXdaHeTo He yBpeXdaAkyMnyatopHata 6aTepeHn.
3a noctabaneHa 3apeHe akyMynatopha 6atepna 17 a BkapaTte do ynpoB rthesDto28,doKATO yceTnte OHTeINBO npuepaKaBaHe H 6atepeHra 6bde 3axBaHata 3dpaboB pkoBxAkATA Ha Kamepata 3a HnCNEKTHpaHe.
3a nBaxdaHe Ha akymnatopHata 6aTepeHn 17 HATNCHEte De6nKpaunTe 6yToHn 18 n3dbpnaTe akymnatopHata 6aTepeHn OT rHe3DoTo 28. Pn TOBa He npnaraTe cHa.
Pa6ota c aanTop 3a batepnn (Bprpaen) (3601 B41270) (BNKTe qnr. C)
3a OTbapnHe Ha Kanaka Ha rHe3dOTo 3a 6aTePNn 29 HATNCHeTe De6nKpaunTe 6yToHn 18 n3BaTe KaNAKa Ha rHe3DoTo 3a 6aTePNn.
Pn noctabHe Ha 6aTePNTE BHNMaBaIte 3a npaBnHaTa HNOJPHOCT.
NoCTaBete OTHOBKanaka 29Iro3axBaHete COTyETNBO npuepaKaBaHe.
BHHaHn 3ameHnTe BCnKu 6atepHn eHNOBpeMeHNo. HnON3BaTcCaMo 6atepHn OT eHN n CbU pOnHBOJNTn c EdHaKbKanauTet.
Korato Hma da non3BaTe KaMepaTa 3a HnCneKTHpaHe npOdbNkHTeHbBpeMe, h3BaXdaTte 6aTePHTe. PnpoDbNkHTeHIO cbXpaHaBaHe B KaMepaTa 6aTePHTe Mo- rat Da KopoDnpat N da ce camOpa3peIaT.
CtenenHa3apeeHocHT haakymyIaTOPHaTa 6atepH/6atepHnTe
PnHcKa CTeEN Ha 3apeHeOCT Ha akymyNatOpHnTe 6aTe- nHa DCnner Ce NOBBA CmBOBbT KOrato CmBOBbT nOKaKe Ipa3Ha 6aTePNr, Tp6Ba Da 3aMeHnTe akymyNatOpHata 6aTePNr/6aTePNrte, pecn. Ja 3aTepeHnTe akymyNatOpHa-ta 6aTePNr; No-HaTaTbSha pa6oTa He e Bb3MoXHa.
MoHTnpaHe Ha Ka6ena Ha KaMepaTa (BHXTe 0Hr.D)
3a da pa60TH HHCNEKUHOHHaTa KAMEpa e Heo6xOJMO Ka6eBbT 13 da 6bDE BKNOHcMb PbHHype1.
BkapaIte 1ekepaHa Ka6ena 3a KaMepeata 13 B KynnyHra 21 B npaBnHATA No3nua,doKaTO yceTne npeepaKBAhe.
DemOHTHpaHe Ha Ka6ena Ha KaMepaTa (BnXTe cHr.E)
3a nBaxJaHe Ha Ka6ena Ha KaMepaTa 13 npHTncHe MeXaHn3Ma 22 n H3BaTe UeKepea O pBuHna anapat 1.
MOnTHpAnHe Ha orIeDano,MarHnT nn KyKa (BHXTeΦnR.F)
Ornnaoto 25, MaHTbT 23 N KyKaTa 24 MoT a Da 6bDat MOH TpaHn Ha IaBata Ha KaMepaTa KATO NOMOuH CpeCTBa 14. BkapaTe eNo OTo TpIte NOMoUH CpeCTBa Bbpx KaHaHa IaBata Ha KaMepaTa 14, KaKTo e NOKa3aHO Ha fHypata.
YnbTbahe:MaHnItb23N Kykata 24Ca npEHa3HaueHcAMo 3a npemeCTbaHe nOTcpanBaHe h Cbo6oJHO cTounn MaKNnIeKn npedmetn. Pn TbpeCnIHOTerneH eMOrat da 6bDat nobpeHn HnCneKuOHHa kamepa N/nn NmOuHTo cpeCTBO.
Pa6ota c ypeda
PpeNa3BaIte pbHnna anapat 1 n akymyNaToptHa 6aTePNH 17 OT Bnara HmpeKTHn CbHueBn CBETNNH.
Pn npabHNO MOHTnpaHe KaebbT Ha KaMepa T rnaBaTa HA KAMepa Tc aynbTHeHH Cpeu npOHKBaHe H BODa. PbHnT anapat N akymyNatopHata batepna, obaue, He ca ybnTheHH Cpeu npOHKBaHe Ha BODa; npn KOHTAKTC BODa. cbIectByBa OAnCHOCT OT TOKOB ydpn HIN NOBpeKaHa.


120|Блгарский
He H3naraHte HHcneKcHOnHHata KaMepa Ha ekCTpeMHN TemnepaTyPh Hn rOeMH TemnepaTyPh pa3nKn. HAp. He Hn octabHrTe PpOdbIbIKHeTNO BpeMe B aBTOMo6Hn. PnP rOeMH TemnepaTyPh pa3nKn N3uakBaHTe HcneKcHOnHHa KaMepa Da ce TmnpHpa, ppeH da RaBJIHOHTe H3nON3BaTe.
He h3non3baTne HnCNEKUHOHHata KaMepa, ako 6eK TBBbT ha rnaBATA ha KaMepa 14 e OBnaxHEn. BkIouBaTe HHcNEKUHOHHata KaMepa cAmO cNeI Kato BnaraTa ce e 3napHa. B npotmben cnuyau nHcNEKUHOHHata KaMepa moKe da ce noBpeiN.
BknoueHata naHn 15 MoKe da ce Haropeu no Bpe Me ha pa6ota.3a da n36erHete n3rapaHna,He doKocBaTe naMaTa.
3aBbPtaHe Ha H3o6paXeHHeTo Ha ekpaHa (Up is UpTM) (BHXTe chrypa G)
CbytoHa53aBbptateH3o6paKeHHeToTaKa,ue „rope"dae TopaHa H3o6paKeHHeTo.
YnbTbAe:OrpaHnueHaФyHKuIaPn MoHTnpaHO orneJao 25N/nnKoratoKaBeJIbTaHa KaMepaTa eBepTKaJHo 13.
3aChemaHa CHHMK/HBDeoH3o6paXeHHN
C6byToHa 8 npeBknOuBaTe MeKdy peXHM CHNkMa HnH BnDeo. TeKyUHO3bpaHnHpeXmHa zachemaHe a Ce N3nncBa Ha cTaTCHaTaNehTa b.
C6byToHa 6Bc0tBeTHnpeKHMnpaBnTe CHMKA HnCTaptnPate nCNpTa3aHnCBaHeo HA BnDeo.
PexHM ranepn/peXHM hactpoiK
C HATNCKAHE 6yToHa 4 Ha 6yToHnTe 8,7,5 H 4 Ce npMCBOBApyra FyHKUHA (cbfnaCHO h3oPaxeHnTo DnCnIe HaTAX) (2. paBHHa).H3no13BaIte TeH 6yToHn B CbOTBeTCTBHe C n3-0paxeHnTo HaDnCnIe.
Upe3 kpaTOKpAHO HATNCKaHe Ha 6yToHa 4 ce OTBAPeKHMraneHpye3 HAtNCKaHe Ha 6yToHa 4 MOKeTe Da BUNI-Te CHMkata Ha cENH eKpaH, a Upe3 HATNCKaHe Ha 6yToHa 6MOKeTe Da BB3PON3BeDEte BnDeo.
Upe3 npObIJXHTENHO HATNCKaHe Ha 6yToHa 4 ce OTBapr peKHM HAcTPOKH. Bb3MOXHN Ca CnEHNTEHcHAcTPOKH:
LBeTHO Bb3npOn3BExJaHe (uepeBaToka)/epHo-6raNo Bb3npOn3BExJaHe (3eJeHa Toka) (h)
-Ярковский (i)
- Iata/uaac (j)
- ABTomatoHNO H3K1IOUbaHe (Auto-Off): npOdbNkHTeHnOCT Ha 6e3dEChTBne HA HHCNEKUHOHHata KaMepa, cNeI KOITo Tc Ce H3KJIIOUyBa ABtomatoHNO (k)
IpoobnKHTenHOCTHaOCBETneHHeHaDcNner(I)
-CTeENHa3aMbIbAHe/ΦopMaTHpaHHe MaMKpo SD-KapTata (m).
Ctatycha Jentha
CneBBCaKOHaNTCKAHe Ha6yToHa3aPn6bN.2ceKHyHnHa
HcnnpeCeNoRBBACTaYChTaJeHTa.b.TnNOKa3Ba:
-Ⅲ6paHnpeXHMHa3acHEMaH)
-Data n yac
HactpoeHOTo yBemnueHne (c)
- HAcTpoEHaTa RPKoCT (d)
-CTeENTHa 3apeDeHocT Ha akymyNaTopHata 6atepna/ 6atepntte (e).
PpexBpnaHe Ha CHHMn BnDeo
PepxBpIHeTo Ha CHIMK IN BIDeo e Bb3MOXHO CaMo C NoctabeHa MInko SD-KapTa 20.
3a npexBbPnHe Ha CHIMKn H BVDeO KaMepaTa 3a HNCKeTnPaHcMoJe Da6bJe CbBp3aHa C KOMNIOTp c NOMOHTHa MmKpO SD-Ka6en 19.
HNCNEKUHOHHATA KAMepa NOKA3Ba CbC HMBON Ha DnCnIe, ye e CBbp3aHa C KOMNIOBp.
Ha KOMNIObpa HnCneKUHOHHata KaMepa ce BHXka KATO BBHNO DnCKOBO YCTPOICTBO.
AkymyaToPnHaTa6BaTePnHa HnCnEKeuHOHATA KaMepa He MoKeJa 6bJe 3apeKdHa npe3 HnTepFeCa 12.
BknouBaHe Ha MKNpo USB ka6en 3a npeHoc Ha daHH
OTbOpTe TropnKaIaK 10 H BkapaTe Mknpo USB Ka6eI 19 B KynnyHra 12 B npabHnHaTnNo3nua.
Cnep npKJIIOUbaHe Na npExBpIHaTe N3KIOUeTe MKNpo USB Ka6ena H OTHOBO 3aTbOpete rOpHna Kanak.


BbIrapckn|121
Yka3aHn 3a pa60Ta
PpOBepeTe CpeDAta, KOITo 1ue HnCneKTHpate, H BnHMaBaTe CNEuaJHO 3a IpnEaTCTBn INn OaChn MeCTa.
OrbHete Ka6ena Ha KaMepata 13 taka, ye rnaBata Ha KaMepaTa da MoKe Ja 6bJe BkapaHa o6pe B n3cneBaHata 30Ha. BkapaiTe BHMaTeJIHO Ka6ena Ha KaMepata.
HactpoTe npKocTa Ha lamnata 15 Taka, ye KaptnHaT a e RaCha. Hap. pIn HAINuHc Ha CNHIO OTPa3BaAs npeMTe MoXeTe Da NoCTHHeTe No-Dobpa KapTHa, Ako HAmnTe npKocTtHa lamnata.
Ako n3cneBbAHnTe npEmdTe Hc ca pokycpaHn,HaMaJIeTe nn yBeIuHETe pa3ctOaHHeTo MExdy TnaBata Ha KaMePaTa 14 n npEmdTa.
Yka3aHa 3a onTmHa p6oTa c akymnatoPHaTa 6aTePn
Pepnna3BaIteakymyNatopHata6atepnaOTBnaJXHOCTNBOda. CxbpaHbAteakymyNatopHata6atepnaCamaBtempeaTpyHnDnana3oHOT-20CDo50°C.Hanp.HeocTabaIte akymyNatopHata6atepnaIpe3nIATOTOBABTOMOHNHaCnBHe.
CbueCTBeHO cbkpateno Bpeme 3a pa6ota cneI nbHNO 3apeKDahe noka3Ba, ye akymyataopnata 6atepe HxabaHa Tpa6Ba Da 6bde 3aMeHeHa.
CnazBaTeyka3aHnTa3a6paKyBaHe.
TpeuKN - npnUHH 3a Bb3HKnBaHe HauHH 3a OCTpaHBAHETO HM
PnMHHa OTCpaHbAhe
Cb6eHHa rpeWka Ha dHcTneA


KabeBbHa KaMepaTa He e BKNIOUeH.
Mknpo SD-kaprata He e noCTaBeHa, peCn. He e noCTaBeHa npabNHO.
Bknoute KaebaHa KaMepara.
NocTaBete MmKpo SD-KapTa n BkapaTe Do ynop.
PpKHe cepBn3
Iopdbpxhae nIOuHCTBaHe
He NotanIte pUHnrype1 BBB BOa HIN DpyrTeuHOCTN. POnDbPkaIte HNCNEKUNOHATA KAMEPA BHNHARNTA.No- YNCCTBAITE OCHOBHO HNCNEKUNOHATA KAMEPA N NOMOUIHTe npncoc6bENH, CneI KAto CTe paBOTHN CTRX B CpeA, B KOToE HmAlo ONACn 3a 3npabETo cy6ctAHNI.
N36bpcBaIte 3aMbpcBaHnIa Tc Meka, IeKo HABnaXHeHa KbpNa. He n3noI3BaIte NouICTBaun npenapau nn pa3TBOpntenn.
NoCTBaIte OcO6eHO BHHMaTeJIHO 06eKTHBa HA KaMepaTa 16 N BHHMaBaIte No HeFo Da He OCTaBt BlacnHKn.
CepBn3 nTexHnueckn CbBETH
OTROBOPHa BbnpoCte Cn OTHOPOpeMOHTa NIOpIpbKkata Ha BaWnI npOdyKT MoXeTe Da nOlyuNtE OHaWNr cepBn3EN OTdEn. MoTAtxHH Yeptexn HnHΦopMaun 3a pe3epBHN vacTH MoXeTe Da HAmePHTe CbIo Ha aDpec:
www.bosch-pt.com
Ekmbt Ha Boi 3a Texnueckn CbBteH npinnoeHnue OTOROBOPC yDIOBOCTBne HA Bbnpocnte Bn OTHOCHO HauNTI npOdykTN NOnbIHHTENHTE pncnocobneHn3aTAX.
MOnI, npBbnpocn npnpopbUbaHe Ha pe3epBn qactn BN Harn nncOcbaiTe 10-umpeHn KaTANOKeH HOpE, n3ncaH Na tabenkata Ha ypea.
Былгаян
Robert Bosch SRL
Service sculelectric
Strada Horia Macelariu Nr. 30-34, sector 1
013937 Bucuresti, Romania
TeN.: +359(0)700 13667 (Bbrrapckn)
a c : + 40212331313
Email:BoschServiceCenterBG@ro.bosch.com www.bosch-pt.com/bg/bg/
TpaHcnpTpupahe
H3noJ3BaHHTeIINTHeBO-IOHHN AkyMylatOPHN 6aTePHN Ca B 0xbata HA N3NCBAHHTA HApOmaTHBHTe DOKyMeHTN, Kacaeeu npOyKTn C NOBnueHa OnaCHOCT. AkymylatOPHTe 6aTePHN MoTg Da 6bDat TpaHCnoptnpAHn OT Notpe6nten Ha ny6hUNH MeCTa Be3 DoNbHInTeHN pa3peWHTENH.
Pn TpaHcNOpTnpAne OT pTeH CTpAHn (HaNP, npB Bb3dyweh TpAChNOPrH NnON3BaHE Na KpyHepcKy cNyTu) HMa CneuAnH NsCKBAHH KMB ONaKOBaHTo N o603NaHaaBaHTo NM. 3a ceNTa Pn NPn NOfroTObKaTAt Ha NaKeTHaPeTo Ce KOHCyttnPaIe C cKcnept B cBoTBtHata oBnact.
H3npaaiTe akymnatopn6batepncMoA KOpnyt Hm He e NOBpeH. O5lenete OTKPNKoHTN KOHTN ONAKOBaTe akymnatopnata 6atepna Ta, ye da He MoKe Da ce npeMeCTBa B ONAKOBkata.
MOnI, cna3BaIte n eBeHTyAaHn DoBbHNTeHn HaHOHaHHn npedncaHn.
Бракуванe

C orne ona3BaHe Ha OKoHnata Cpena HcneKeuHnHata KaMepa, akymnatopHnte 6atePmN, DOnbHInTeHNITE pncnocoblenHa n OAnKOBKIne Tpa6Ba da ce npedaBat 3a OnoI3OTBopraBe Ha cbDbpxKaunite CE B TAX CypOBHH.

He n3XbprnIte HnCneKUHOHATA Kamepa N O6NKHOBENnnn akymyNaTopHN 6aTePNn PnN 6nTOBnTeOTnabu!
Cama 3a ctpaHH ot EC:
CbINaCHO EbponeNcKa DnpeKTHBa 2012/19/EC eneKTPnuCeCKnypeDN, a cbINaCHO EbponeNcKa DnpeKTHBa 2006/66/EO akymyataopHH Nm OH oBknHOBeHN batePHN, KOHT He mOrat da ce H3no3BAT NOBEe, Tp6Ba Da CE cb6paT OTeHNO Ha da 6b DaT NOJaHa Hn HnOxOJaI ppeaOTka 3a OOn3OTBOPBAHe Hc BpbXaUITE Ce B TxA CypOBHH.
AkymnaTOPH HnO6NKHOBeHH 6aTePH:
Li-Ion:
Molna, cna3BaIte yka3aHnraTb pa3dEn „TpaHcnpTnpaHe", cTpaHnca 121.
PpabaTa 3a H3MeHeHn 3ana3eHN.


122 | MaKeJoHcKn
MaKeDoHcKn
Be36eHocn HaNoMeHN
HnrtanhaKaMepa3a npoBepka

Ipochntajte rH cHTe HANOMEHn yNATCTBa 3a6e36eHnoct. TpeKHTe HactaHaTH KaKo peayntat OJ HENpDpxyBaHe Do 6e36eHocHNTe HANOMEHn yNATCTBa MoKe Ja npedIN3BnKaat EneKTPnuEh Ydap, NOxap N/NI IN TEKN NOBpei.
Kamepata 3a npoBepka cmee da ce nonpaba cmo od ctpaHa KaBnHfkyBaH CTpyuH nepcoHan co opHHaHnpe3epBHN DeOBn. CaMo Ha ToJ HauH Ke 6Hte CNrpyn BO 6e6bEndocTa Ha Kamepata 3a npoBepka.
He pa6oTe co KamepTa 3a npOBepKa BO OKOJIHn Kaede NOCTOn OAnCHOCT OeKcIIIO3NJa, Kaede HMa 3aIaJIINB TeuHOCT, rac HnnpaHHa. KamepTa 3a npOBepKa CO3daBa HCKPn, KOI MoKeJa Ja 3aIaIaNt PpaTb Hn napeata.
Pep6nno KaKbHa HHTepBENuJa Ha KaMepaTa 3a npOBepka (Ha np.MoHTaxa, OpXyBaHe nTH.) KaKO npH TpaHCnpTnCKnaHpaBe, H3BaTe ja 6atepujata od KaMepaTa 3a npOBepka.
He ja otBopajte 6atepnjata. IocToOn onaCHOCToK patoK cnoj.
3aunrte ja 6atepna oJ tonnna,Ha np.0d OAnroptajno nNoxyBahe Ha coHueBn 3paun, oran, BOn a Nbara. Hnky, noCTOn onaCHOCT od EKcNIO3nJa.
Heynotpe6eHata 6atepnaJa dpXete ja noDaneky od KaHcenapnckn CnojYBaNK, KnyeBn, Xene3HN napn, KlnHnC, WpaOBN HnI DpyrN MaH MetaHn PneMeTH, ITO MOKe Da npEtn3BnKaAaT NpemocTyBaBe Ha KOtAKTHe. KpAOK mery KOHTaKTIte Ha 6atepnaJATA MOKe Da npEtn3BnKa H3ropeHn nH NoXap.
PnnporeHNOKOpHe,MOKeJaHCTeYTeHocta od6atepnjata.36berHybaJte KOtAKT co Hea.DOKONky cnyajho DojTe BO KOtAKT CO TeuHOCTA,NCNnakHeTe ja co BODa.10KoKny TeuHOCTaDoJe BO KOtAKT Co ouHTe, no6apajte nekapca nomou. HcTeueHaTa TeuHOCT Od 6atepnjata MOKeJa PpeH3BkA KOxHN mPHTaunnn HnN HsropeHn.
Dokonkyce owtetn batepnjata Hn He ce Kopnctn npaBnH, od Hea moKe da n3ne3e naPea. Bhece Te CBex BO3dyx N DOkONky HMa NOBpeHn OndecTe rHa Naekap. NaPeata MoKe Da Tn Haupa3Hn DnUHHTe NaTHuTa.
BatepHTe nonheTe rCo nonHauN uTo ce npenopaAHn HcKnuyuBO oD npOn3BoUdTeNoT. DOKONky nonHaOT KoJ e npInarOeH Ha eEHeoCooBeteH Bn6 bateHH, ro KopHCTte Co dpyr 6ateHH, noCTOn onachOCT oNokap.
Kophtete 6atepnn KOH ce cooDBeTHN Ha BaWata KaMepa 3a npOBepKa oBosch. CaMo HA ToJ hauHH 6atepjuata Ke ce 3aunTN oonacno poneontobapyBaHe.
Batepnjata MoKeJa ca ce oWTeTH OJ octPHTe NpeDMETn KaKo Ha np. KInHcN HIN OJBPtyBaH Nn HADBoPeHo BnJahne. MoKe Da JoJe Do BHaTpeWeH KpAToK cNoj H 6atepnjata MoKeJa ca ce 3aann, nyTuqd, ekCnNoIPA nn da ce nperpee.
PnabTomatckoto HCKnyyBaBe Ha KaMepaTa 3a npOBepKa, He npHTNcKajTe Ha npeKNHyBaOT 3a BkNyUyBaBe/HCKnyyBaBe. BaTepnjata MoKe da ce OWTETH.
He ro hacovyBajTe 3paKOT CBETNHa Ha Nnua Hn Hn XHBOTnH He NorneHyBajTe DnpeKTHo BO Hero,dypn Hn od ronema oDanaueheOCT.
Pepda ja ynoptpekeKaempata 3a npobepka, npobepete ro pa6tohoto none. Hnehen den oKamepata 3a npobepka He Cmee da doJe BO KOHTaKT CO eNEKTPnHn Ka5nn, NOBnXHH DenOBn HnXemNcKn cynctanu. ENEKTPnHHe Ka5nn, ITO NOMHyBaAT Bo pa6tohoto none, Ncknyute He oCTpyJHOTo KONO OBHE MEPKN To HAmAlyBaat Pn3HkOT OJ ECKnIO3HN, eNEKTPnHv yapn Hn MaTepnJaHn IITetN.
Hocete cooBbTHa NnHa 3awTHTha onpeMa KaKo 3aWTHTHO OyHna,3aWTHTHPAkABuNn Hn3aWTHTH MaKa 3aDmUHebe,doKOnky NoctoJat cyntaHn ONaCHNo 3dpabJeTO BO pa60tHO tone. KaHaNTe 3a OBDHyBaHe HnCnHNe To bactn MoKe Da cOpXaT UBCPTN,TeuHN IraCoBUnH CyntaHn, KOH CE OTPOBHH, HnFekTNBnH, HMaAT HarpN3yBaKo JeCTBO HnCe ONaCHNo 3dPaBJeTo Ha npY HaNH.
Oc06eHO BHHMabajte Ha NCTOTATA, DOKONky paobnte BO nonHb co cynctahn Onachn no 3dpabjeto. He jaTe 3a Bpeme Ha pa6otata. H6erhybaje KOHTAKT CO cynctahn Onachn No 3dpabjeTo n no pa6oTaHa CCHCTete TIN dIaNKITE IN dpyIne DeNoBn OJ TENoTO IOOWne BO KOHTAKT CO cynctahnTE Co tonon pactBop oD canHy. Co TOA CE HAmanyBa OnachOCTa NO 3dpabjeto.
He ctojte BO BODa,doKoNky ja KOpHCTHTe KaMepata 3a npOBepka. Pn paOteHe BO BODa nocToH pN3NK oJ eNEKTPuueH ydap.
Market

He ro npnhecybajte MarHetot 23 BO 6nnnHa ha nejcmejkepn. MaHETOT co3daBa none, Koe MOKeJa ja HApUHn FyHKunjata Ha nejcmejkepHTe.
MarheTOT 23dpxete ro npdaeneky od marheTcNn HocauHn pnoaTOUH ypeHn ocettnbHa mharET. Iopadn BInjahneto Ha MarHeTOT,MOKe da doJne Do HeNoBpatoHO ryebeHa ndoToUte.
Onnc Ha npOn3BoDoT mokHocTa
Be monnme otBopete ja npeknonehata ctpaanca co npnka3 Ha KaMepaTa 3a npOBepKa, HdpKete ja OTBopeHa DoNeKa rO yntate ynaTCTBOTo 3a ynoTpeBa.


MaKeNoHcKn 123
Ynotpe6a co cooDBeTHa HameHa
IINHTaJIHATA KaMepa 3a npOBepKa e nOToHa 3a npOBepKa Ha TEUKOIOCTaIIH NII TEmH MeCTa. IIO MOHTaKaTa HA HcnpaauHO NOOMUHO CpeDCTBO Ha rIbATo OD KaMepaTa, Taa e ITOgHa 3a IOMeCTyBaBe b OITCPaHyBaBe Ha MaJIn ILeCHN PpeMeTH (Ha NP.CTHN UpaPobu).
IINHTaHATA KAMepa 3a IIPOBepKa He CMEe Da CE KOPnCTNa MeNtHckn cJI. Taa HcTo TaKa He e HameHeTa 3a NoppaKb Ka 3aanyeHHueBKN HnN Bneuehe Ha KaBn.
Nlyctpaunja Ha KOMNOHEHTN
HymepupaheTo Ha cnKHe Co KOMHOENTn Ce OJHecyBa H npka3OT Ha KaMepaTa 3npoBepKa Ha rpaNkKaTa CTpaHnua.
1 PaueHype
2 Konue 3a 3rOneMyBahe
3 Konue 3a BknyuBaHe-NCknyuBaHe
4 Konue Faneepnja/NoctabKn (1. HNBO) Konue OK/Bpnuehe (2. HNBO)
5 Konue Up is Up(1. HNBO)
KoIe 3a npEniCtYBaHbe HaNApEe (2. HnBO)
6 Ukpana 3a nytahe Ha fto Hn BHeo CHMka Hn BHeo (pekmHa ranepna)
7 Konue 3a ocBetnyBaHBe/CBETNoCT (1. HNBO) Konue 3a npEnctyBaHBe HaHa3aD (2. HNBO)
8 Konue 3a npeepnyBahe MeIy peXIM Ha foTOrpaHnja HIN BInDeo (1. HNO) Konue Ha3ad (2. HBO)
9 EkpaH
10TopenpoKnone
11 Cnot 3a MmKpO-SD-kapTnka
12 PnKnyok 3a Mknpo-USB-Kaben
13 KaBen 3a KaMepaTa
14InaBaHaKaMaPePaTa
15 CBeTnHa IraBaTa Ha KaMePaTa
16 ΠeKa Ha KaMepaTa
17 BaTepeHja
18 Konue 3a otKnyBaHbe
19 Minkpo-USB-Ka6en
20 Micro-SD-kapTnka
21 PnKnyok 3a kamepata
22ФИКСИРаБЕHAΚΑБENOTODΚΑМЕРATA
23 MarHET
24 Kynn
25Ornegaano
26 06BnBk3a 6aTepeNckHOT aanTep
27 Kanaye 3a 3atbopahe Ha 6atepncnT aanTep
28OTBOP
29 Pokloneu ha nperepaata 3a 6atepnjata
EneMeHTnHa npKa30t (H36Op)
aNoctabEn FOTo HnH BnDeo peXHM
B CStatycha neHTA
CNoctabeHo 3rOJeMyBaHBe
DNoctabeHoOCBETnyBaBe/CBETNOCT
e Coctojba Ha HanoHHeTcHa akymyataopoT/baTepuHTe
O3naka 3a nppepnyBahe Mey peKHM Ha foTOrpaPnja HIN BIneO
g O3naka 3a pexim Ha ranepna/pexim 3a noctaBkn
H PpePpnyBaBe Ha penpoDyKuJa Ha 6oJa/ucHo-6ena penpoDyKuJa
iNoecyBaIbeHaCBETINHataHaekpaHOT
jNoecyBaheHaDaTymOT/BpeMeToHaacOBHNKT
KIOdecyBaHe Ha BpeMeTpaeHbTo Ha ABtOMaTCKOTncknyuBaHe (Auto-Off-fyHKunja)
INoecyBaHe Na BpeMeTpaeH eTo Ha CBeTnO To Ha ekpaHOT MmOeHTaJIHa 3aΦaTeHoCT Ha MeMOpNJata HA MInKpO-SD-KapTHkKaTa
*OnHnHaTAt oponema pNkXKaHnHa cNtHKHe e den OCTaHdapHnO t6eHa Hcnpaka. KomnNethata onpema moKe da ja hajede BO hawata Iporpama 3a onpema.
Texnukn noaToun
| Дагитална камера за поверка GIC 120 C GIC 120 C | |||
| Бpoj на дe/артikл | 3601 B41 2..3 | 601 B41 270 | |
| Hominahen Hanon - co akymylatop | V= | 10,8/12 | - |
| - co batepin | V= | 6,0 | 6,0 |
| Co akymylatop | ● | - | |
| Co batepinskii adanterp (можеда сизвади) | ● | - | |
| Co batepinskii adanterp (неш можеда сизвади) | - | ● | |
| Бatepin (алкални мангански) | 4x1,5VLR6(AA) | 4x1,5VLR6(AA) | |
| Релатина влажноct на boадухот | % | 51) | -5-951) |
| Hajmal радиус на витkaлье на кабелot на камера ta | MM | 25 | 25 |
| 1)bebзамагnellyаве | |||
| 2)co batepin | |||
| 3)co akymylatop по 100% осевлиесп на с Bretлata на галава на камера ta | MM | ||
| 4)ограниема щача по пtemературс<0°C | |||
Bosch Power Tools 1609 92A 3ZO(7.11.17)


124 | MaKeDoHcKn
| Диогитална камера за поверка GIC 120 C GIC 120 C | ||
| Диеметар на галава на камера на MM 8,5 8,5 | ||
| Рezолушина на ekранот | 320 x 240 320 x 240 | |
| В Rimетраеве на работа okoly | 2/63) 2 | |
| Текина сordласно EPTA-Procedure 01:2014 | КГ | 0,64 0,64 |
| Диемени (Должинах Ширпах Висиа) | MM | 217 x 90 x 49 217 x 90 x 49 |
| Дозвoleна Temпература на okолинatable | ||
| - при паленье | °C | 0...+45 - |
| - при пюочesc на работа 4) | °C | -10...+50 -10...+50 |
| - при с各项工作 | °C | -20...+50 -20...+60 |
| Temпература на складралье (paumen урeding бezakумалator на пьпбатерскп поалтер) | °C -20...+60 -20...+60 | |
| П repорачанни ватерни | GBA 12V... - | |
| GBA 10,8V... | ||
| П repорачанни палачи | GAL 12..CV - | |
| AL 11..CV | ||
1)6e3aamnybarbe
2) co batepnn
3)coakymyntopipn 100% ocBtneHocHa CBtIaHa IaBaHa KaMepata
4) orpahnueHa jaHnHa npn Tempepatypn < 0^
MOHTaxa
MOnTHpaHBe Ha Ka6enot 3a Kamepata (BnDn CnKa D)
3a KopnctHe Ha KaMepaTa 3a npOBepKa, Mopa Da ce MOHTnpa KaBEnOT Ha KaMepaTa 13 Ha paHnOt ypeI 1. CTabete Ro npKnyOkOT OJ KaBEnOT Ha KaMepaTa 13 BO npaBnHa NonoXb Bo npKnyOkOT Ha KaMepaTa 21doNeKa He CE BkONH.
dmohtkaHa Ka6enot Ha Kamepata (BnDn CnKa E)
3a da ro n3BaInTe Ka6eIOT Ha KaMepata 13 npHTNCHe Ta 6nOKaDATA 22 H3BLeueTe Ro pRKnlyOoKOT od paHnOt ypeI 1.
MOnThpaHBe Ha orneIaNo, MarHeT HnN KyKn (Bnu n Cnka F)
Ornepaat KaKIO NOMOHO CpeCTBO Ha IaBATo OD KAMepaT 14. EINO O TPITE NOMOHN CpeCTBa CTABETe IO KOpaJ BO OTBOPOT HA IaBATo OD KAMepaT 14.KAKO ITO e ONHAno HcNkata.
HanomeHa:MarHeTOT23N KyKHTe 24ce norOHNcAMo 3a nomeCTyBaBe HnOTpaHyBaBe HaIababo NOCTaBeHn,MAHI IeCNH pEMeTN. PnJako BneueHb MoKe Da ce OHTeH Kamepata 3a npOBepKa Hn NmOOMOHTO CpeCTBO.
Ynotpe6a
3aHTTe ro paHHOT ype1 n akymynatopot 17 od Bnara HdupeKTHO h3noxyBahe Ha COHcEBN 3paun. Ka6eIOT n rnaBata HA kamepata ce OTNOPHN HbOda DOKONky npabHnHO ce MOHTnpaAT. PaHHOT ype1 n 6atepnjata He ce 3aHTHeH ON BOda, pni KOHTaKT CO BODa NOCTOn OHnIK OJ ENEKTPNueH yap Hn OWTeYBaBe.
He ja n3noxyBajte kamepata 3a npOBepka Ha ekTpeMH TMnepaTyHnO cunnaH BO TEMnepaTpata. Hnp. He ja octabajte dOnro BpeMe BO abTomobHOT. Pn rOemn OcunnaHn BO TmnpaTpata, OCTabeTe ja kamepata 3a npOBepka HajnpBO da ce akImmatnHa, nped Ja jcaTabite BO ynotpe6a.
He ja Kopnctete Kaemepata 3a npOBepka,doKoNky nekata ha rnaBata od kamepata 14 e 3amarneha. Ncknyte ja Kaemepata 3a npOBepka,dyh OTkako Bnarata Ke hcnapn.HaKy, Kaemepata 3a npOBepka Moke da ce oWtETH.
BknyeHnTe CBtna 15 MoKe Da ce BxKeUaT 3a BpeMe Ha pa6oTa. He rI dOnnpajte CBtNaT, 3a da n36erHete H3ropeHn.
CtabaBe BO ynotpe6a
CTabahe Ha MMKpo-SD-KapTMKaTa
OTbopete ro ropHnOt nokloneU 10 nCTaBeTe ja MHkpo-SD-KapTnKATA 20do kpaJ BO CNOT 11. NOBTOHO 3aTbOpTe ro rOpHnO t noklonu.
BknyBaBe/ncknyBaBe
3a BknyBaBe Ha KaMepaTa 3a npOBepKa npHTncHete Ha KOnUeTo 3a BknyBaBe-HckNpyBaBe 3. Ha ekpaHot 9 HApTaKo Ke ce pNkaKe cTapTHOT ekpaH.
3aHcknyyBaBe Ha KaMepaTa 3a npOBepKa, OJHOBO npHTNCHeTe rO KOneTo 3a BKnyyBaHe-CKNyUyBaBe 3. DOKOLky He CE pTnCTHe KOJIe Ha KaMepaTa 3a npOBepKa, Taa ABTomATcKn Ce HcknyyBa IIOCTeKOT Ha IIOCTaBeHOTo BpemETpaBe (k).
Perynnpahe Ha CBetnata Ha rnaBata Ha kamepata
3a da ja oCBETNITe cNkata Ha KaMepaTa Ha ekpaHot, MoKe Da rH BKNyUHTe CBETnata 15 Ha rnaBata OJ KaMepaTa N da ja peRynpate CBETNIHATA.
CBeTnHaTa MoKe Da ce NoDecu Bo 4 CTeNeH N 0% 25% 50% 100%
3a da nBknyuHcCBtNaHa KaMepaTa 15 Ha ja 3rolemte CBETnHa npTnCKajTe HA KOHTO7,doeka He ce NoCTrHe cakHaTa CBETnHa.
He norneHybajTe dupeKTHo BO CBetnata 15 H He HacouybajTe hCTHTe KOH DPyrn Nua. CBeTnHaTa Ha CBETnA ToMe Da Tn 3aCJEN Ouyte.
3aJa haHamaHTe CBETnHaTa 3a Da HNCKnyHTe CBTnata Ha KaMepata 15 npTnCKajTe FO KOnyTe 7,doNeKa He CE NOCTnHE cakahTa CBETnHa ODH.He CE Ncknyat CBTnata.
3rnoemyBahe Ha cHkata Ha ekpaHOT (3ymnpahe)
Co kpaTko npHTNcKaHe Ha konyeto 2 moKTeJa ja 3roJeMITE cnkata Ha ekpaHot 3a 1,5 nnn 2 natn.
BpTeHe Ha cnKata Ha ekpaHOT (Up is UpTM) (BmHn CnKa G)
Co konuyeto 5cbptete ja cnkaTata, Taka HTo Ha rOpHata cTpaHa Ha ekpaHOTKe ce npKaXe, rope
Hanomeha:OrpaHueha cyHKunja npn MOHTnpaHO orneepao 25 n/nn npn BepTKKaIHO H3paMHyBaHe Ha Ka6enot oKamepata 13.
KpenpaheHaΦoTOrpaHm/Bndea
Co konjeto8 npedpnybajte nomety foto nHH Bndeo pekm. MoemTaIHO NoCTaBeHNOt pekm Ha CHMHaBe a Ke ce npKakxe Ha CTatychata JeHTa b.
CoKoJIeTe6CHIMTeΦOTOrpaΦnJA BO COODBETHOTpeXHM OJH.CaTpYBaJte Hn3aBpWeTe BnDEO CHMKA.
Ka6eIOT Ha KaMepaTa MoHTnpajTe ro He e MOHTnpaH. Ka6eIOT Ha KaMepaTa.

Mnkpo-SD- CTabe ja Mknpo-SD-Kaptnkata He e Kaptnkata H CTaBeHa OJH. He e BMETHe J aIO KpaJ. npabNHO CTaBeHa.
OdpKyBaBe H cepBnC
OdpKyBaBe HnCtTeBe
He ro notonybajte paunnoT ype1 BO BOa nn npyrn TEUHOCTN.
IocjoJHO OdjxjBajte ja HcTOTATA Ha Kamepata 3a npOBepka. NcHCTe Tn Kamepata 3a npOBepka nCITEpyrN NOMOHN CpeCTBa TEMENHO,OC6EHO DOKOLKY cTe paBoTeNE BO ObNaTH CO cyNTAHU ONACNH NO 3dpabJeTO.
H36pHwTe Fn HeuHCTOTnHTe CO BnAaHa MeKa KpNa. He KopHCTe CpeCTBa 3a UcHteHe Hn paTbOpn.
Ocobeno peoOBHO uCTeTe ja nKaTa Ha KaMePaTa 16 HBMAbaTe HA BnAKeHEnaTAt.
CepBncha cny6a n COBETn npn KopncTeHe
CepBnchata cny6a Ke odroBOpn Ha BaWnte npaaBa BO Bpcka co nonpaBkata n OdpKyBaBeTo Ha BaWnOT npOn3BOkako n pe3epBNHe DeIOBn. EKnIO3NBeH uTeck n INHOPMaun 3a pe3epBNn DeIOBn Ke Hajnde Ta:
www.bosch-pt.com
TMMOT3a coBeyBaHe npn KopHCTe He Ha Bosch Ke BN NOMORHe DOKONKy HMaTe npaaHa 3a HauNte npOn3BODn N oppeMa. 3a CnTe npaaaHa n HapaKn Ha peepBHN DeNoBn, Be MoNMe HabeTe ro 10-uePpeHnO6poj od CneuNfKaunOHata pnoUka Ha npOn3BOoT.
MaKeDoHnja
Д.Д.Енктис
CabaKobaueBk 47Hb,6poj3
1000 Ckonje
E-nouta: dimce.dimcev@servis-bosch.mk
UNTEPHE:www.servis-bosch.mk
Ten./paKc:02/2467610
Mo6.:070595888
TpaHcnpot
JHym-jOHCKHe 6atepnnoNekKaHa 6apaBaTaHa 3aKOHOT 3a Onacn MATEpniJan. BatepnTe MoKe da Ce TpaHCNOPTnPaat cmo Oc TpaHa Ha KOpCNKOT,6e3 Notpe6aOd DononHHTenHN KBAnnFkauuH.
Pn npenoc Ha nCTte OJ cTpaHa Ha TpeTn Nua (Ha np. Bo3yweh TpaHcnpot Hnn WneNnja) HeonxOJHO e da ce


Srpski | 127
BHHMaaBa HcneuJaanHte HaonMeHN Ha aMbaXaKaTa H O3HaKNTe.BoTakOB cnyuj, npn noDroTObKaTa Ha npatkata Mopa da ce Nobka ekCnept 3a onaChcynctAHU.
TpaHcnpopajte rH 6atepHnTe cAmOdoKoJIky KyKuHTeToe e HeoWTeTeHO.3aIenete rH OTBopeHnTe KOtAKTHN CnAkyBaJte ja 6atepNJata Ha ToJ NaHH ITO Hema Da ce DnKHN BO am6anaxkata.
Be monnme BHHmabajte Ha eBentyahHHTe DOnonHTeHNHaunOHAn HpOINCH.
OtctpaHyBaIbe

KaMepata 3a npOBepka,6atepHnte, onpeMaTa n am6anaxnTe Tpe6a da ce otctpaHaT Ha ekOnoUKN npHafnnB Haun.

He ja pnpajte kaemepata 3a npoBepka H6aTepeHnTe BO domaunHa ta KaHTa 3a fY6pe!
Cama 3a 3emjn BO paMKn Ha EY
CnopeeBpOncKa peryNaTHBa 2012/19/EU eNeKtpnHHTe ypeNtco BoH yNoTpe6a NdeFeKTHHe IIN NcKOpHeHTe 6aTeepn CnopeI peryNaTHBaTa 2006/66/EC Mopa OdEInHO da ce co6epa Tda ce peuKnnpaat 3a NOBTOPAyNoTpe6a.
Batepni:
JTHym-joHcKu:
Be monnme BHHmabajte Ha HANOMEHTE BO den ,TpaHcnpT, ctpaHa 126.
Ce 3aDpXyBa npaboto Ha npomeHa.
Srpski
Uputstva o sigurnosti
Digitalna kamera za kontrolu

Central Motors & Equipment LLC
1984:
iullgl-oggglw
aJU
+97165932777:
+97165332269:U
powertools@centralmotors.ae:gjgJ
aaii aolbogw ocljo ygu (1io gga Jai
sic 6jubll slgall Jai jua 6juiuuiu Iyai .uulilg
aIJIIO 1JUJIJI J
gall. pwl qus uis u! kao slll pss
g uai 8 aui ay jall oleg aggul all wolall
.
Uaag u aolol alilgll oLl oL
aJySJI oSJI Joo
gugugpajgagjolal jolalll
ylaillgjbpjcaiyaaiaiaaayb,laillg
.
jUJbUJ/0sIJgAiaUJI UOJX
!ajjiaiUgai

:ba9 gjgJl JzJ1 jgJ
2012/19/EU
aagulwogJlsswUdJluyjSsI
UJUJI/2006/66/EC
aaijbuqioyalilai jaijlc aLiqiunllg aaii
gill gib c auiu aoio
:UJUJI/1pSJIJI
:oguU Ugj
.157 aaiill "jaiil" o jag o uuauuall oeljo
.
Tehini Hana & Co. S.A.R.L.
499-90:
gjJg
+9611255211:
service-pt@tehini-hana.com:
U
jdygdaaI gJgJd
jogssao jolal aaij,53
JUJI J1J120300
sav.outillage@ma.bosch.com: 山 _ 山 ^ 山 jj<1
lac
Malatan Trading & Contracting LLC
131:
jueaibuw
+968 99886794:
malatanpowertools@malatan.net:JgJ<JU
jbo
International Construction Solutions W L L
agJ151:
b9
+97440065458:
+974 4453 8585:U
csd@icsdoha.com:
a.sgawll aayal al
aiaiul aasaa dilgag g llaa
5
14gLs.ajgaiJaiJaiEJlu
a ysgawJ ayjaj aSLoJ121431
+9662667222:
+96626676308:UuS
roland@eajb.com.sa:gjSJx
UJgW
auiUgJUJUa
1030:
+963212116083:
rita.dallal@hotmail.com:
wugg 0gdoall wggg jds
UgJUw.5j abgbuEJU7
yuljun
w9jc u2014
+21671427496/879:
+21671428621:UuSg
sav.outillage@tn.bosch.com: 日 _ 1 ^ 一 jgJSL
olssw2I ojgog juljjdo
aiog gai jy siliol ic jiljdo jso y
ogwll ic jie jellg bgsay lo laig qall
:egay jll gag uc logglal lg odss
www.bosch-pt.com
asu oaiw 0jgoo aeg jg w g no jgsw
.ugig wuao u c aluw ogaa y sclw u wgyaoagll aag mlllgl g aaiall g j s pjl
Jc gabulb g tJluwawl aUw! sic
jJ
Jlww
julal auiial aaiial
06000 a_U
+213(0)982400991/2:
+213(0)34201569:U
sav@siestal-dz.com:JgJJJJ
#
aaii iiaai
1
+966126971777-311:
+97317704257:UuS
h.berjas@eajb.com.sa:JgRjLJy
#
Jai
Joo 20
00-0000000000000000000000000000000
+20222476091-95/+20222478072-73:
+20222478075:μsLg
adelzaki@unimaregypt.com: 品 _ 1 日 _ 2 日 _ 3 日 _ 4 日 _ 5 日 _ 6
#
ggiSll gajl 1s jagao
jaiJlbaeJluw
1
+9647901906953:
+97143973851:()
bosch@sahbatechnology.com:gjgJx
J81
Roots Arabia-Jordan
u u u
aJ1137 aJ aL
jLac11194
+96265545778:
bosch@rootsjordan.com: __ ≤
UgSJI
JyJwJgJz
gw acllal abiaol
13002 164:
+96624810844:
+96624810879:Uu≤Lg
josephkr@aaalmutawa.com:gJ<JS
UJ Micro-USB
19 Micro-USB 15 1g 10 15
1.12 alogll
11211 g Micro-USB 1254
J
Jsw aig gaiuuee jllgaa
jblalglgglgll
13 1
IJOLJI JSL JASJ. JNJJSUd aasg jgejll UJSSJ
.
-2g0g 1510k1e e gai
10 10
gall caaa u| aog | ojgo u| oogiu
aJ 1 J 1 J 1 J 1 J 1 J 1
dUwUgUgUgU
.3aill jao yalil 5yoo lalol yclj
U|=JgUw-1
aWwUgU
山山
.1J0LJI
100LSU
.

aUbUcSjpu
Lol Micro-SD
aui
Micro-SD aUb
alao 1o gai do
.

aJg aJ
aillg ailll
joo 1g111 15g111
.1j1gwJl
Jolcabi.aylaalIjols agbui jlc la kla
Jssu 1sui oxlal Og g aai
a aall y aal al gall lgl glll
- abjg ajb wu dwbabwlg 1wgl
alallglgalllglgo
16 |jol 16
aJUuJJUJJUcUJ
c | 159
4 jll bc bbl jbc J (gagwull gogjall) 4g5.7.8jj
glg a4 jll lc aggbjol bsall jno :alio aull kawll glog .aajbll bwo
ydu 1jw(jaoaabai)Ugul
(h) (aai aai) sgw2g
UgBw aJ -(j)@gl/luI-(
1111111111111111111111111111111111111111111111111111111111
aJJI Jw
abwUs 201100g b aIbJb
jui jg g. uui ooi
a) 1000011111111111
gjgjw
12 alogll jbc jcc aallll 0s o w
山JgUuBliJJI,0JIJI Sj (F gJgJJI j)
wJ 23 wjblaiJI,25 oJIJI CJS J 14 0eLoIgJ aJUa 24 JolSJI
17 pJg 1 ggl jgl aJL Jc JpJg lJL J, Jauall Jauill aaiag ll Jus Jal Jai Jai Jai Jai Jai Jai Jai Jai Jai Jai Jai Jai Jai Jai Jai Jai Jai Jai Jai Jai Jai Jai Jai Jai Jai Jai Jai Jai Jai Jai Jai Jai Jai Jai Jai Jai Jai Jai Jai Jai Jai
JusillglioIcbsaayaiylaalIyolSlab]jno .s03ablyg
Lqie,paalj jj sI lc baoaip aJ L (k) o jgjo ySglogig
Jusluljglc
15
Ugwo4c0.501 000 (0%,25%,50%,100%)
bsa 15 bc baaal jks lolkll elao jssu 11 Ugogp uui i oosu7 jll aegpall oolz
agjg jolpu 15 paaal l jbjdjagj
aalaaagoo!uJ.ouaiolaoaiIgac aalaaal
15 10aolj 1oao 1abg ofo 0oow aasil 0oai 0o w 1oggl pui jll bcdoal .gaaai gabi u gagai
Bosch Power Tools 1609 92A 320|7.11.17
160|gJc
| GIC 120 C | GIC 120 C | ### |
| - | 0...+45 | °C |
| -10...+50 | -10...+50 | °C |
| -20...+60 | -20...+50 | °C |
| -20...+60 | -20...+60 | °C |
| - | GBA 12V... | all |
| GBA 10,8V... | ||
| - | GAL 12..CV | Jahore |
| AL 11..CV | ||
| (1) | ||
| go (2) | ||
| go (3) | ||
| go (4) |
28 17 10000000000000000000000000000000000000000000000000000000000
w1g 18 jj111111111111111111111111111111
(g)(3601B41270)
j 2006/66/EC 2006/66/EC 2006/66/EC 2006/66/EC 2006/66/EC 2006/66/EC 2006/66/EC 2006/66/EC 2006/66/EC 2006/66/EC 2006/66/
:15j
(Li-1on)
163 000000000000000000000000000000000000
,cuiIgaoo yiaai aig5μg
olius Jaa
Jus jaa oolaiu1 1g jyogjglqjU g uI qiyu g JyL .suiy U ybs y slkss .Jas uul s uagj j0slaiu Ia g Jaa: uio) uuuw bguil uujl Ugo g Sdu aau aeguo cuaai (uoy uug Ouyuiau J. Jg dga ygo siaicla Jaa wuiu Jx uuw l dae (slw oolaiu
Lai d s ds JwJg j 1sJlu sJyU JI JI (Slaus) OJau .swO dy si wI Jsi d aas d s k s daa g 1sJy g
1 1
Bosch Power Tools 1609 92A 3Z0|7.11.17)
164|LwJ
Jolgulc-1b
山
#
gai daia jui bai jui lai
Jusio jwgs JUs
.
JUIO JUGS JUS
.

SsU|UJLSiO
guijL CwJ L
Lulu
SsU|UJLg
.0sliuJgCwJg

wugw g 1o
oJg jaoj
.1sijgabgiclaolawgifj1cws
Jdsjli. JJJgjjjogam jwjju
1035 15 15 15 15
Jus jui Cg s u J Sos Uab g w g wjju
gjog jj Jaiw SjI gJ jSj Sj
JLg g siiS S1g0 jI Jl. iS o laawl
S_ ACD = 12 · AQ · CD = 12 × 2t × 5
a g g jaij jao 16 jg s wsc
.3u j 15gj jds uS
julooIggloggjlo
jJ Lw XgW a w j J W Ls
Ulaio g L sy Ubea g uagw
LsU 10000000000000000000000000000000000000000000000
:Jg j0j0u JcUw Jdjlgl o g
www.bosch-pt.com
Jlss Jwg Csw wgd jU Ws d gua
aai g o laiaw jj yj oy jlaow ci gwi
a yu g uy Ualeio g 2gao
g g jjwaw g jgaw g
J1jI (59) Jwyy 4000128L 00000000
.
#
jI-0gOg
olduuLsi
3a,b,uloloo 3sU,ulolol
1994834571
+982186092057:
g
12 2 s do s j y n jn jg j u b c
jI CwI JUc UJUJUJUJU
a) a
jUojguiJ -
c)oawaaii laijj-(
d)aawpabii(iWiog)sds-(
e)Gol (Lgjy/1qjyjjw Cusog -.
gglaij
jgS uJL gUo Su LgUu g Uu
CuiJSSAO20oSoo
wglgclsdlwglglgjLwjjj
Jai aui S ay qalg g yglw Jaii 19 L
o juiuuiai a 5gj coLc SuJJU JyJg
wuiuaiuuiuui
jg jlgic yjwjjgdilj59
.0000
12JUaiI sduwgi jgai JwjuuD
J
wosu
19UwIgUoUJgUdJUJ10UuW
12 Jlai jao aogj
gss1g w g uu uusuuljw
yjg jy
JLAC 100 Jlaaij
g jj1 1 g
.
jg jg jg ju 13 jg j
g 17 g 1 w s o Ws
山 L uo u uu u u u u u u u u u u u u u u u u u u u u u u u u u u u u u u u u u u u u u u u u u u u u u u u u u u u u u u u uu
uauuauuuuuuuuuuuuuuuuuuuuuuuuuuuuuuuuuuuuuuuuuuuuuuuuuuuuuuuuuuuuuuuuuuuuuuuuuuuuuuuuuuuuuuuuuuuuuuuuuuuuuuuuuuuuuuuuuuuuuuuuuuuuuuuuuuuuuuuuuuuuuuuuuuuuuUU
sIjI 0JooJooJooJooJooJoo
Lg g 0oBosch jj
1j j 1j 1j 1j
26 wg jj 1s


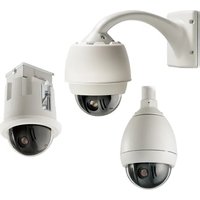
- GIC 120 C Professional
- BOSCH
- Digital Inspection Camera
- | English
- Magnet
- Product Description and Specifications
- Intended Use
- Product Features
- Display Elements (selection)
- Assembly
- Power Supply
- Operation with Battery Adapter (Removable) (3601 B41 2.) (see figure A)
- Operation with Battery Pack (3601 B41 2..) (see figure B)
- 14|English
- Operation with Battery Adapter (Not Removable) (3601 B41 270) (see figure C)
- Charging Condition of Battery Pack/Batteries
- Mounting the Camera Cable (see figure D)
- Dismounting the Camera Cable (see figure E)
- Mounting the Mirror, Magnet or Hook (see figure F)
- Operation
- Initial Operation
- Inserting the Micro SD Card
- Switching On and Off
- Regulating the Illumination Light in the Camera Head
- Magnifying the Image on the Display (Zoom)
- Rotating the Image on the Display (Up is UpTM) (see figure G)
- Taking Photos/Videos
- Gallery Mode/Settings Mode
- Status Bar
- Transferring Images and Videos
- Connecting a Micro USB Cable for Data Transfer
- Working Advice
- Recommendations for Optimal Handling of the Battery Pack
- Troubleshooting - Causes and Corrective Measures
- Maintenance and Service
- Maintenance and Cleaning
- After-sales Service and Application Service
- www.bosch-pt.com
- 16|English
- Great Britain
- Ireland
- Australia, New Zealand and Pacific Islands
- Republic of South Africa
- Customer service
- Gauteng - BSC Service Centre
- KZN - BSC Service Centre
- Western Cape - BSC Service Centre
- Bosch Headquarters
- Transport
- Disposal
- Only for EC countries:
- Battery packs/batteries:
- Li-ion:
- Francais | 17
- Français
- Lamp in camerakop regelen
- Xpnon ouuovva Tov npooipopo
- AnouuapmoIoynon Tou Kaawdiou Tc Kapepa (BaeEikova E)
- UvapmoIoynon kaOpeptn,paVntn yavrcou (Baeicova F)
- Aetroupyia
- Oeog aeLetroupyia
- Tonoetnon tnc kaptac Micro-SD
- Oeon aeIeoupyia kI ekTOc aeIeoupyiac
- 6EAAynvka
- Poumuon mcsauxviasnVKeepaJkapepac
- Meyeovon mC eKovac oNv oOvN (ZouP)
- Teipotpoqtnc eikovac oTnv 0ovn (Up is UpTM) (BLeNt cikova G)
- Anioupyia wtoypaipv/bivteo
- Aetroupyia ykaalepi/Aetroupyia puθμioewv
- Tpaunkarataoanc
- Metaopopá cíkovov kai bivteo
- Türkce
- Güvenlik Talimatu
- Dijital gozlem kamerasi
- Regulovanie lampicky v have kamery
- HdNkAtOpby(Bb6op)
- Texnueckne daHHble
- 3KcnnyaataaOnO aKKMynTOpHoi 6atapen (3601B412..)(cm.pnc.B)
- 3Kcnnyataaunc nepexoDnHkOM dna6aTapeek (He cBemHbIM) (3601B41270) (cm.pnc.C)
- CoctoHne 3apyaakymyntopa/6aataeek
- MOHTAKKa6eJnKaMepeBc( cm.pnc.D)
- DemontkKa6eJnKamepeblc.
- MONTAX 3epkana, marHHTa Hnn KpOuKa (cm. pnc. F)
- Pa60Ta c HcHCTpyMeHTOM
- 3Kcnnyataa
- YctahOBka KapTbI naMTH Micro-SD
- BklioueHne/BbIKIOUeHne
- PerynpoBaHne npocTH naMnoouKn B roNoBKe KaMepbI
- YBENHNE H3O6paXeHHHaDmcNlee (MacUta6bpoBaHne)
- TobopauBaHne H3o6paXeHHa DaHcnnnee (Up is UpTM) (cm.pnc.G)
- HactpoKa pexkma fto-/BHeocbemKn
- Pekm ranepeu/naetpoka pekma
- | Pycckn
- Statycha cnpoka
- Ipeepa a fo H Bndeo
- IopknouhenkeKa6enMicro-USBdnapnepaHdaHHbIX
- Yka3aHaNo pnpMeHeHHo
- Yka3aHHN OTHoCHTeNbHO ONTHMaHbHOrO 6paueHHN C aKKyMnyTropHoB 6atapee
- HencnpabHOctb -PpunHHuN yctpaHeHne
- TpaHcnpToPobKa
- ytnn3aun
- TolboKoIaI cTpaH-ueHOB EC:
- AkkymyIaTOpbl,6aTapeH:
- 100|YkpaHcbKa
- YkpaIHcbka
- Bka3iBKn 3 Texhikn 6e3nekn
- Lcnpobn Bideockon
- Marhit
- EkcnnyataaiaBidakymyTOpHo'6aTapei(3601B412..)(nB.man.B)
- EkCnIyatau3 nepexiHnKOM n76aTapeHok (He BnMaTeBc) (3601B41270) (JNB.MaN.C)
- UkpaiHcbka 103
- Ctah 3apany akymytnaTopa/6atapeHok
- MOHTAX Ka6eIIO Kameph (DHB. Man. D)
- DemontkKa6eIIOKamephn(Hb.Man.E)
- MOnTaX dzepkana,MarHiry a6o raYka (mB.MaI.F)
- Eknnnyatauaia
- Pouatokpo60tn
- BctahOBHeHHa Kaptn na'rti Micro-SD
- BMnKaHHBmKnKaHH
- PerynoBaHHrackpaBoCTIaAMnOouKn BrOnoBu KaMepn
- He nBItbcn pIamHa nAmnoky 15 i He hAnpaBnTe
- 36inbweHHH306paXeHHHaDcNnei(MacuTa6yBaHH)
- NobepTaHHa 306paXeHHHa dHcnnnei (Up is UpTM) (nB.man.G)
- HanautybaHHpeKmMy foto-/Bideo3Himahnn
- Pexhm ranepei/HanaaHTyBaHHr pexhmy
- IOBRE HaTnCKaHHa KKnOky 4 BiJdkPnBaC HanaTuYBaHHpeXMy. MoxJIbI Taki HanaTuYBaHH:
- 104|YkpaIhcbKa
- PdOKstany
- Ipepa3o6paXeHb i Bideo
- Пд'сданькабелю Micro-USB дпа nepedaydiаннх
- Bka3iBKn 0oO p060tn
- Bka3iBKN 0do onTmMaHbHO NOBdoXeHHa 3 aKymnTropHO6atapeo
- Henonadkn -npnHHi ycyhenHH
- Kayinci3ik HycKaynapbi
- CaHdbikTekcepy kamepacbl
- MarHrT
- ΘHIM KəHe KbI3MeT CnNaTTaMaCbI
- TaafbHdany6oBbHwaKoIdany
- Kaakaika107
- BeHHeneHReH KypamdbI 6eNeKeTep
- Kepcetkiw 3neMeHTeP (TaHaMaIbI)
- TexHukanbIK mAnimetTep
- Knay
- 3HeprHMeH Xa6dbkTay
- Batape aanTepimen naDanahy (bIrapbnadbl) (3601 B41 2...) (A cypetin kapaNb3)
- Batape aanTepi TeK Tnicti Bosch teKcepy KamepacbH naDanahyra aphanfah 6onbln 3neKtp KypanapbI MeH naDanahyra 6onmaibI.
- AkkymyTopmen naJdanaHy (3601B412..) (B cypetih kapaHbI3)
- BaTapeaanTrepeimennaDnany(buknab)(3601B41270)(CcypetinKapaHbla)
- Akkymyntop/6atapennapzapdTay Kyni
- Kamepa ka6enin ophaty (D cypetih kapahti3)
- Kamepa ka6enin wewy (Ecypetin KapaHb13)
- AHa, MarHHT Hemece inReKti opHaTy (FCypetin KapaHb13)
- PaindanaHy
- Paindanahya ehdpy
- MnKpO SD KapTacbH cany
- Kocy/ewipy
- Kamepa 6acbHdafbl ibpaKaTb peTey
- Ducnnei deri 6eHeni yKeey (Zoom)
- DcnnneiDi 6eHHeni bypay (Up nepheci UpTM) (G cypertin kapaht3
- CypTeK/6eHere Tycipy
- Tanepey pexkmi/napMeTpnp epxkmi
- Kyu naheni
- 110|Ka3aKaJua
- CypTep MeH GHeHenepei 8Kti3y
- MnKpo USB ka6enIH depeKtepdi TacbImday yuH KocbHb3
- Падалану hyckaynapbi
- AkkymyIaTOpDbIOHTaTbI naHdAnHy tpyanbI HycKaynap
- Akaynap - Ce6entepi xhe wewimdepi
- Ce6e6i Ieewimi
- Dncnnejeri kateniktek kepcetkiwi
- TexHKnblk KyTIM XaHe KbI3MeT
- Kb3Met KepcTey XaHe Ta3anay
- Tytbinybifa KbI3MeT KepcTeY XaHe naJaIaNy Kehectepi
- Kazakctah
- Tacbimday
- Kadere kapaty
- Tek kana EO endepi yuin:
- Akkymyntopnap/6atapennap:
- JIHTHNOHDbIK:
- Româna
- Pa6ota c aadantop 3a 6atepnn (demontpyem) (3601 B412...) (BxTe phr. A)
- Pa6oTa cakymyNaTopHa 6aTepeHr (3601 B41 2..) (BHXTeΦnR.B)
- Pa6ota c aanTop 3a batepnn (Bprpaen) (3601 B41270) (BNKTe qnr. C)
- CtenenHa3apeeHocHT haakymyIaTOPHaTa 6atepH/6atepHnTe
- MoHTnpaHe Ha Ka6ena Ha KaMepaTa (BHXTe 0Hr.D)
- DemOHTHpaHe Ha Ka6ena Ha KaMepaTa (BnXTe cHr.E)
- MOnTHpAnHe Ha orIeDano,MarHnT nn KyKa (BHXTeΦnR.F)
- Pa6ota c ypeda
- 120|Блгарский
- 3aBbPtaHe Ha H3o6paXeHHeTo Ha ekpaHa (Up is UpTM) (BHXTe chrypa G)
- 3aChemaHa CHHMK/HBDeoH3o6paXeHHN
- PexHM ranepn/peXHM hactpoiK
- Ctatycha Jentha
- PpexBpnaHe Ha CHHMn BnDeo
- BknouBaHe Ha MKNpo USB ka6en 3a npeHoc Ha daHH
- BbIrapckn|121
- Yka3aHn 3a pa60Ta
- Yka3aHa 3a onTmHa p6oTa c akymnatoPHaTa 6aTePn
- TpeuKN - npnUHH 3a Bb3HKnBaHe HauHH 3a OCTpaHBAHETO HM
- PnMHHa OTCpaHbAhe
- Cb6eHHa rpeWka Ha dHcTneA
- PpKHe cepBn3
- Iopdbpxhae nIOuHCTBaHe
- CepBn3 nTexHnueckn CbBETH
- Былгаян
- TpaHcnpTpupahe
- Бракуванe
- Cama 3a ctpaHH ot EC:
- AkymnaTOPH HnO6NKHOBeHH 6aTePH:
- | MaKeJoHcKn
- MaKeDoHcKn
- Be36eHocn HaNoMeHN
- HnrtanhaKaMepa3a npoBepka
- Market
- Onnc Ha npOn3BoDoT mokHocTa
- MaKeNoHcKn 123
- Ynotpe6a co cooDBeTHa HameHa
- Nlyctpaunja Ha KOMNOHEHTN
- EneMeHTnHa npKa30t (H36Op)
- Texnukn noaToun
- MOHTaxa
- MOnTHpaHBe Ha Ka6enot 3a Kamepata (BnDn CnKa D)
- dmohtkaHa Ka6enot Ha Kamepata (BnDn CnKa E)
- MOnThpaHBe Ha orneIaNo, MarHeT HnN KyKn (Bnu n Cnka F)
- Ynotpe6a
- CtabaBe BO ynotpe6a
- CTabahe Ha MMKpo-SD-KapTMKaTa
- BknyBaBe/ncknyBaBe
- Perynnpahe Ha CBetnata Ha rnaBata Ha kamepata
- 3rnoemyBahe Ha cHkata Ha ekpaHOT (3ymnpahe)
- BpTeHe Ha cnKata Ha ekpaHOT (Up is UpTM) (BmHn CnKa G)
- KpenpaheHaΦoTOrpaHm/Bndea
- OdpKyBaBe H cepBnC
- OdpKyBaBe HnCtTeBe
- CepBncha cny6a n COBETn npn KopncTeHe
- MaKeDoHnja
- TpaHcnpot
- Srpski | 127
- OtctpaHyBaIbe
- Cama 3a 3emjn BO paMKn Ha EY
- Batepni:
- JTHym-joHcKu:
- Srpski
- Uputstva o sigurnosti
- Digitalna kamera za kontrolu
- olssw2I ojgog juljjdo
- jJ
- #
- J81
- UgSJI
- UJ Micro-USB
- J
- U|=JgUw-1
- aWwUgU
- aJg aJ
- aillg ailll
- 山JgUuBliJJI,0JIJI Sj (F gJgJJI j)
- (Li-1on)
- olius Jaa
- Jolgulc-1b
- 山
- gai daia jui bai jui lai
- wugw g 1o
- oJg jaoj
- julooIggloggjlo
- g
- gglaij
- JLAC 100 Jlaaij
Brand : BOSCH
Model : GIC 120 C Professional
Category : Surveillance Camera