USER MANUAL OTM1005 Ferm
Thank you for buying this Ferm product.
By doing so you now have an excellent product, delivered by one of Europe's leading suppliers.
All products delivered to you by Ferm are manufactured according to the highest standards of performance and safety. As part of our philosophy we also provide an excellent customer service, backed by our comprehensive warranty. We hope you will enjoy using this product for many years to come.
SAFETYWARNINGS

WARNING
Read the enclosed safety warnings, the additional safety warnings and the instructions.
Failure to follow the safety warnings and the instructions may result in electric shock, fire and/or serious injury.
Keep the safety warnings and the instructions for future reference.
The following symbols are used in the user manual or on the product:

Read the user manual.

Risk of personal injury.

Risk of electric shock.

Immediately remove the mains plug from the mains if the mains cable becomes damaged and during cleaning and maintenance.
Risk of flying objects. Keep bystanders away from the work area.

Wear safety goggles. Wear hearing protection.

Wear a dust mask.

Do not dispose of the product in unsuitable containers.

The product is in accordance with the applicable safety standards in the European directives.

Contact with or inhalation of dust coming free during use (e.g. lead-painted surfaces, wood and metal) can endanger your health and the health of bystanders. Always wear appropriate protective equipment, such as a dust mask. Always use proper dust extraction during use.
- Do not work materials containing asbestos. Asbestos is considered carcinogenic.
- Do not work metal with a magnesium content of more than 80% .
- Be very careful when working painted surfaces.
- Do not use accessories which are not specifically designed and recommended by the manufacturer. Risk of personal injury.
- Inspect the machine and the accessories before each use. Do not use accessories which are bent, cracked, or otherwise damaged. If the machine or one of the accessories is dropped, inspect the machine or the accessory for damage. If necessary, replace the accessory.
Only use accessories that are recommended by the manufacturer.
- Only use accessories that are suitable for the application.
Only use accessories with the correct dimensions.
- Do not use accessories that require liquid coolants. Risk of electric shock.
Make sure that the accessories are properly mounted. Do not use adapters or other aids to mount accessories with another spindle diameter.
Make sure that the maximum speed for the accessory is larger than or the same as the maximum speed of the machine. Refer to the rating plate on the machine.
- Let the machine run at no load in a safe area
after mounting the accessories. If the machine vibrates strongly, immediately switch off the machine, remove the mains plug from the mains, and try to solve the problem.
- Make sure that the workpiece is properly supported or fixed.
- Wear safety goggles. Wear hearing protection. Wear a dust mask. If necessary, use other protective means, such as safety gloves, safety shoes, etc. Risk of personal injury.
- Keep bystanders away from the work area. Make sure that all persons in the work area wear protective equipment. Risk of personal injury.
- Keep the mains cable away from the rotating accessory. If the mains cable touches the rotating accessory, your hands or arms may come in contact with the accessory. Risk of personal injury.
- Hold the machine by the insulated gripping surfaces where the accessory may contact hidden wiring or the mains cable. If the accessory contacts a 'live' wire, the exposed metal parts of the machine can also become 'live'. Risk of electric shock.
- Do not use the machine while carrying it at your side. Risk of personal injury.
- Do not use the machine near flammable materials. Risk of fire.
- Beware that the accessory continues to rotate for a short period after switching off the machine. Do not attempt to bring the accessory to a standstill yourself.
- Never put the machine down on a table or a workbench before it has been switched off.
- Regularly clean the ventilation slots. Risk of electric shock.
Electrical safety

Always check that the voltage of the power supply corresponds to the voltage on the rating plate.
- Do not use the machine if the mains cable or the mains plug is damaged.
- Only use extension cables that are suitable for the power rating of the machine with a minimum thickness of 1.5mm^2 . If you use an extension cable reel, always fully unroll the cable.
Mains plug replacement (UK only)
If the moulded 3-pin plug attached to the unit is
damaged and needs replacing, it is important that it is correctly destroyed and replaced by an approved BS 1363/3A fused plug and that the following wiring instructions are followed.
The wires in the mains cable are coloured in accordance with the following code: blueneutral brownlive
As the colours of the wires in the mains cable of the unit may not correspond to the coloured markings identifying the terminals in the plug, proceed as follows:
The wire which is coloured blue must be connected to the terminal which is marked with the letter N or coloured black.
- The wire which is coloured brown must be connected to the terminal which is marked with the letter L or coloured red.
Technical data OTM1005
MainsvoltageV~230
MainsfrequencyHz50
PowerinputW280
No-load speed min-1 11,000 - 20,000
Weight kg1.5
Noise and vibration OTM1005
Soundpressure(Lpa) dB(A)85
Acousticepower(Lwa) dB(A)96
Uncertainty(K) dB(A)3
Vibration (sanding on wood) m/84.2
Vibration (sawing in wood) m/87.3
Vibration (scraping in wood) m/81.1
Vibration (sawing in steel) m/5,6
Uncertainty(K) m/s² 1.5

Wear hearing protection.
Vibration level
The vibration emission level stated in this instruction manual has been measured in accordance with a standardised test given in EN 60745; it may be used to compare one tool with another and as a preliminary assessment of exposure to vibration when using the tool for the applications mentioned
using the tool for different applications, or with different or poorly maintained accessories,
may significantly increase the exposure level
- the times when the tool is switched off or when it is running but not actually doing the job, may significantly reduce the exposure level
Protect yourself against the effects of vibration by maintaining the tool and its accessories, keeping your hands warm, and organizing your work patterns
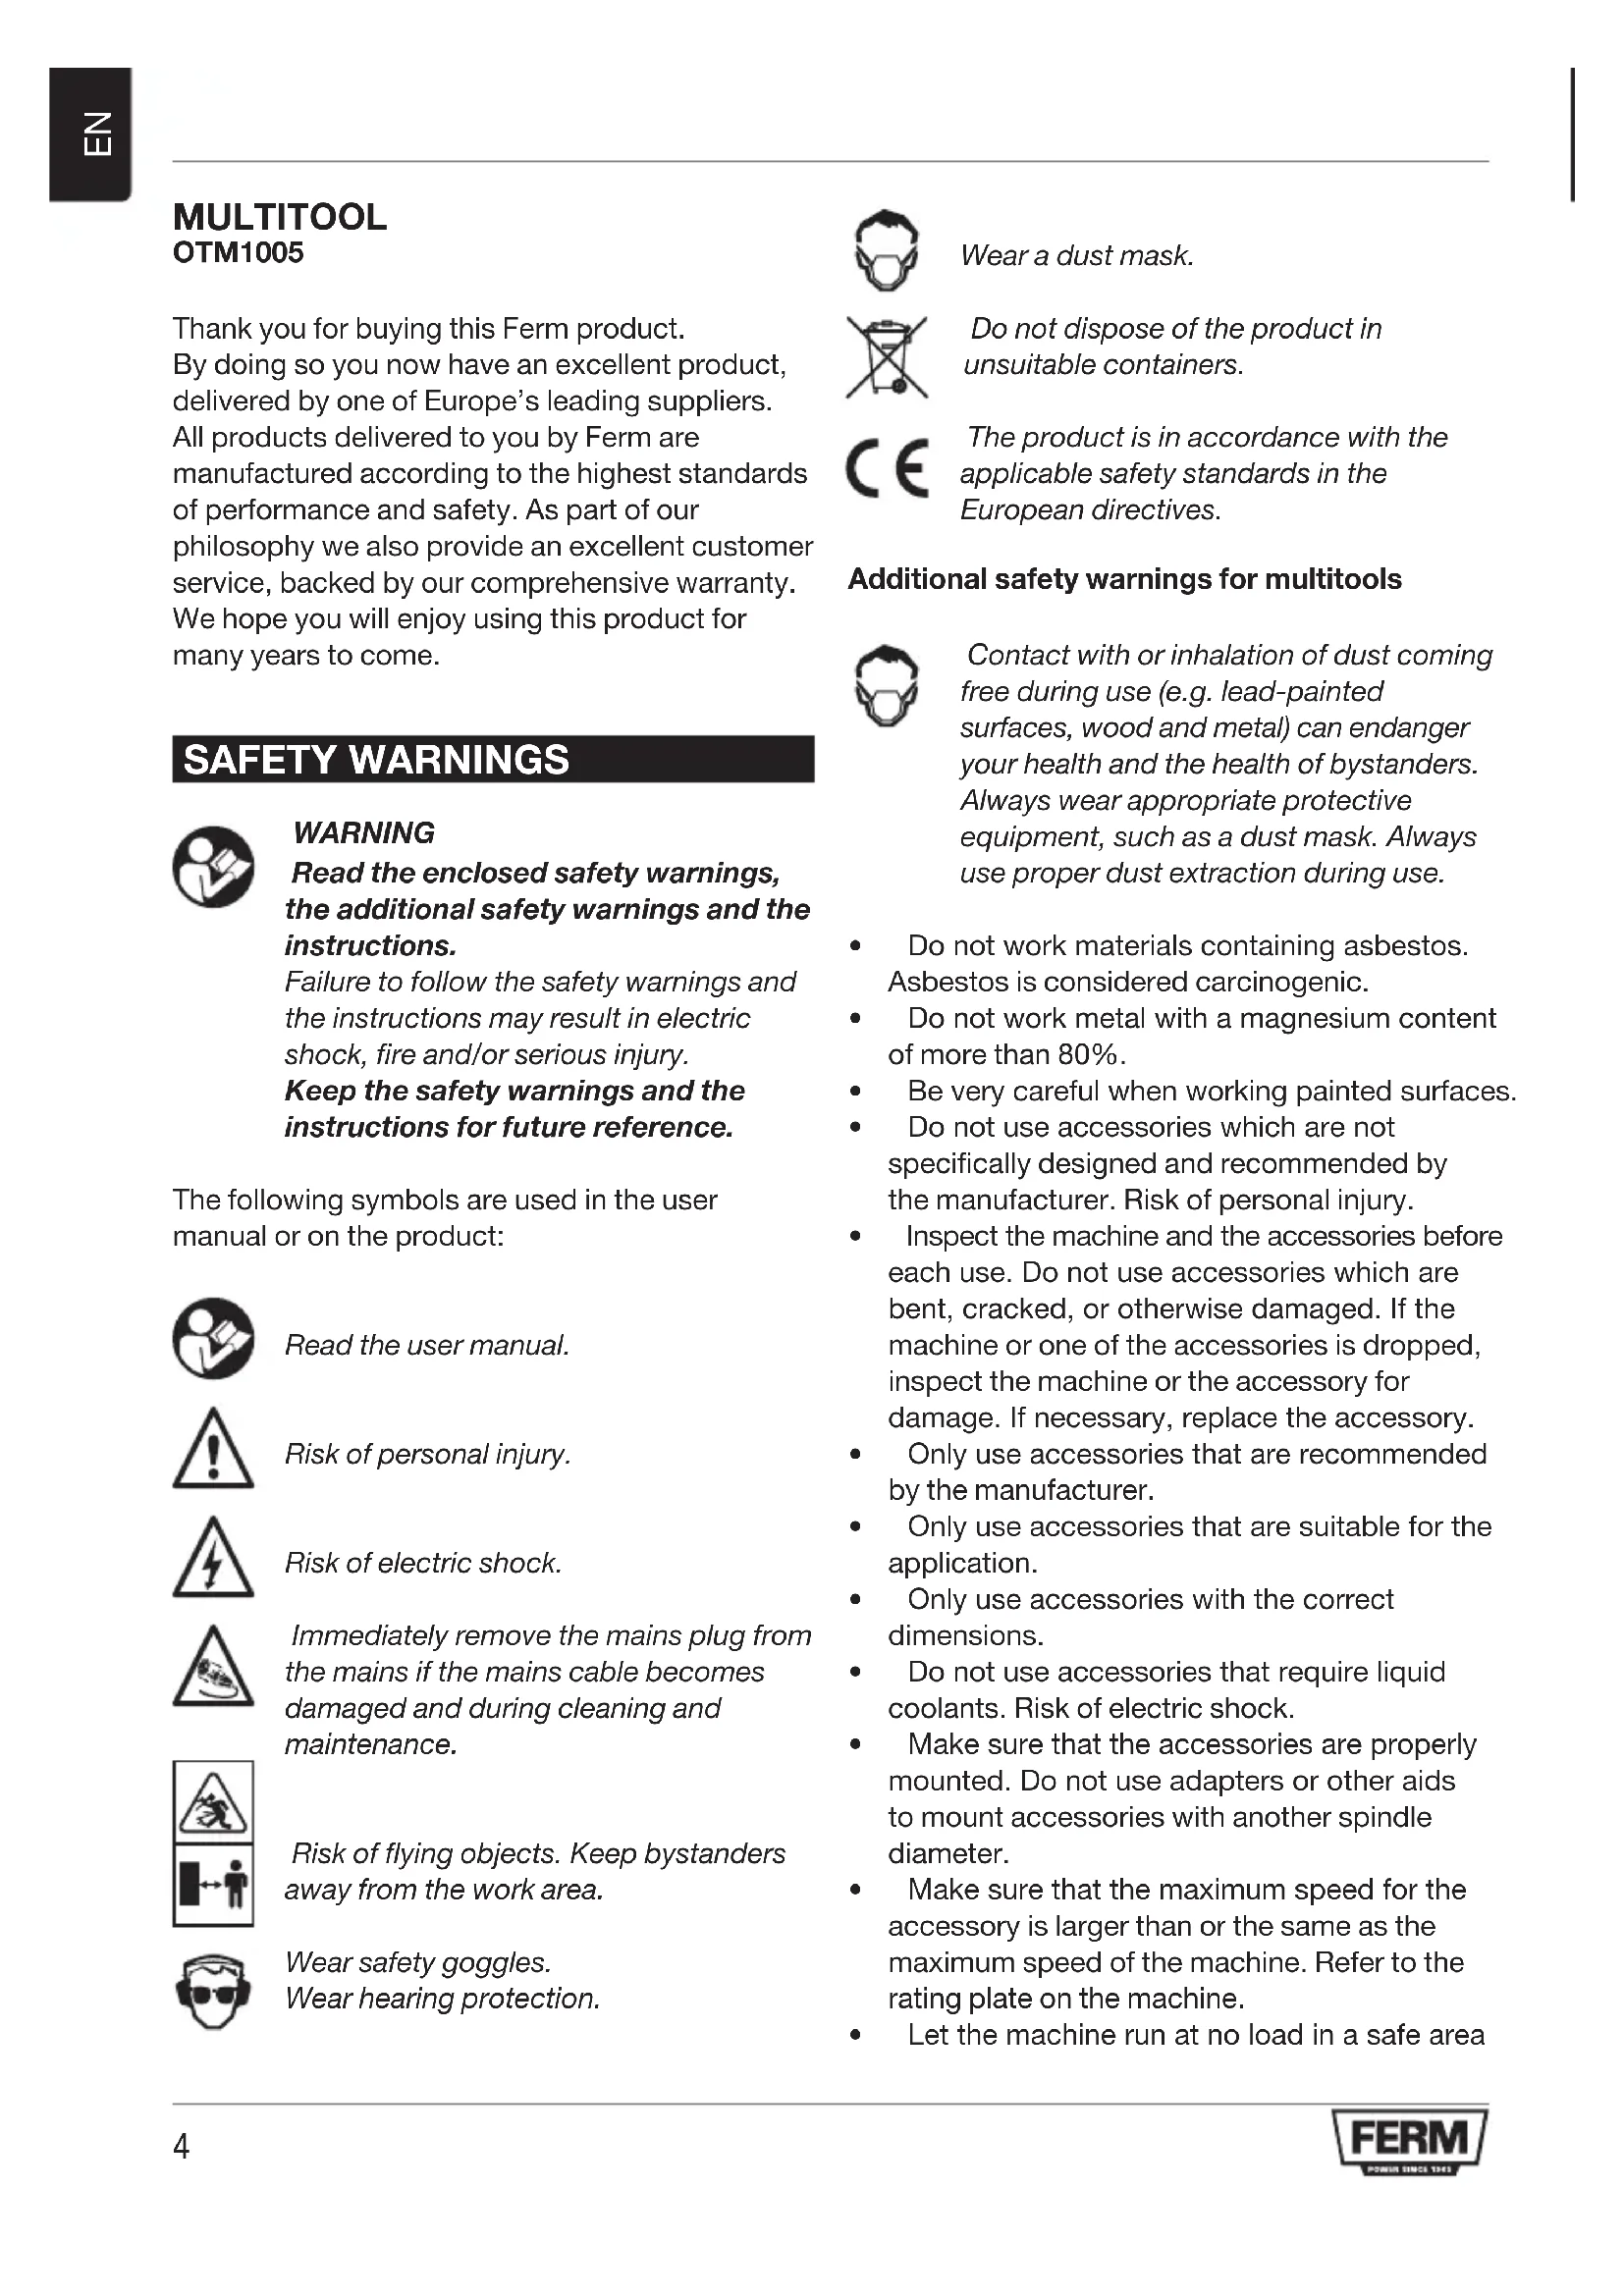
DESCRIPTION (FIG. A)
Your multitool has been designed for light sanding, sawing and scraping applications.
- On/off switch
- Speed adjustment wheel
- Mounting point for accessories
- Grip
- Allenkey
- Allen key holder
- Carbon brush cover
ASSEMBLY

Before assembly, always switch off the machine and remove the mains plug from the mains.
Mounting and removing the sanding pad and the sanding paper (fig. B)
The sanding pad and the sanding paper must be used for sanding applications.
Mounting
- Place the machine on a table with the mounting point (3) facing upwards.
- Loosen the Allen screw (7) using the Allen key (5).
- Mount the sanding pad (9) to the mounting point (3).
- Tighten the Allen screw (7) using the Allen key (5).
- Mount sanding paper (10) with the required grain size onto the sanding pad (9). Make sure that the perforation in the sanding paper (10) corresponds with the perforation on the sanding pad (9).
Use coarse sanding paper (grain 50) for sanding rough, uneven surfaces.
Use medium sanding paper (grain 80) for removing the remaining scratches from the
coarse sanding paper.
- Use fine sanding paper (grain 120) for finishing surfaces.
Removing
- Place the machine on a table with the mounting point (3) facing upwards.
- Remove the sanding paper (10) from the sanding pad (9).
Loosen the Allen screw (7) using the Allen key (5).
- Remove the sanding pad (9) from the mounting point (3).
- Tighten the Allen screw (7) using the Allen key (5).
The dust extraction piece can be used to connect the machine to a vacuum cleaner when sanding. Dust will be extracted and your work area stays cleaner.

the dust extraction adapter can only be used in combination with the sanding pad (9).
To install the dust extraction adapter:
If not done yet, remove the accessories from the machine spindle (3).
- Assemble the dust extraction parts (15A to 15D) together like shown in (Fig. C1 and C2)
- Click the adapter to the machine spindle until it fixes well, make sure the rear fingers (15C) click into the gaps on the machine housing.
- Add the felt ring (15E) between the pad and the adapter for a tight sealing and assemble the sanding pad like instructed in previous chapter.
- Connect a vacuum cleaner to the adapter end (15D).
Mounting and removing the saw blade (fig. B)
The saw blade must be used for sawing applications.
Mounting
- Place the machine on a table with the mounting point (3) facing upwards.
Loosen the Allen screw (7) using the Allen key (5).
- Remove the spacer (8).
- Mount the saw blade (11) to the mounting point (3).
Mount the spacer (8).
- Tighten the Allen screw (7) using the Allen key (5).
Removing
- Place the machine on a table with the mounting point (3) facing upwards.
Loosen the Allen screw (7) using the Allen key (5).
- Remove the spacer (8).
- Remove the saw blade (11) from the mounting point (3).
Mount the spacer (8).
- Tighten the Allen screw (7) using the Allen key (5).
Mounting and removing the scraping knife (fig. B)
The scraping knife must be used for scraping applications.
Mounting
- Place the machine on a table with the mounting point (3) facing upwards.
Loosen the Allen screw (7) using the Allen key (5).
- Remove the spacer (8).
- Mount the scraping knife (12) to the mounting point (3).
Mount the spacer (8).
- Tighten the Allen screw (7) using the Allen key (5).
Removing
- Place the machine on a table with the mounting point (3) facing upwards.
Loosen the Allen screw (7) using the Allen key (5).
- Remove the spacer (8).
- Remove the scraping knife (12) from the mounting point (3).
Mount the spacer (8).
- Tighten the Allen screw (7) using the Allen key (5).
USE
Switching on and off (fig. A)
- To switch on the machine, slide the on/off switch (1) to the front.
- To switch off the machine, slide the on/off switch (1) to the rear.
Setting the speed (fig. A)
The speed adjustment wheel is used for setting the speed. The speed adjustment wheel can be set to 6 positions.
The ideal speed depends on the application and on the material to be worked.

Do not set the speed during use.
- Turn the speed adjustment wheel (2) to the required position.
Hints for optimum use
- Clamp the workpiece. Use a clamping device for small workpieces.
- Draw a line to define the direction in which to guide the accessory.
- Firmly hold the machine by the grip.
- Switch on the machine.
Wait until the machine has reached full speed.
- Place the accessory on the workpiece.
Slowly move the machine along the pre-drawn line, firmly pressing the accessory against the workpiece.
- Do not apply too much pressure on the machine. Let the machine do the work.
- Switch off the machine and wait for the machine to come to a complete standstill before putting the machine down.
CLEANING AND MAINTENANCE

Before cleaning and maintenance, always switch off the machine and remove the mains plug from the mains.
Regularly clean the housing with a soft cloth.
- Keep the ventilation slots free from dust and dirt. If necessary, use a soft, moist cloth to remove dust and dirt from the ventilation slots.
Replacing the accessories (fig. B)
Worn or damaged accessories must be replaced immediately.

Only use sharp and undamaged accessories.
To remove the accessory, proceed as described in the corresponding section.
- To mount the accessory, proceed as described in the corresponding section.
Checking and replacing the carbon brushes
Fig. A + D
The carbon brushes must be checked regularly. If the carbon brushes are worn, the machine will start to run unevenly.

Only use the correct type of carbon brushes.
- Remove the carbon brush holders (13) using a screwdriver.
Clean the carbon brushes.
In case of wear, replace both carbon brushes at the same time.
- Mount the carbon brush holders (13) using a screwdriver.
After mounting the new carbon brushes, let the machine run at no load for 15 minutes.
WARRANTY
Consult the enclosed warranty terms.
ENVIRONMENT
Disposal

The product, the accessories, and the packaging must be sorted for environmentally friendly recycling.
Only for EC countries
Do not dispose of power tools into domestic waste. According to the European Guideline 2012/19/EU for Waste Electrical and Electronic Equipment and its implementation into national right, power tools that are no longer usable must be collected separately and disposed of in an environmentally friendly way.
The product and the user manual are subject to change. Specifications can be changed without further notice.
BESCHRIJVING (FIG. A)
RENGJØRING OG VEDLIKEHOLD

För du rengjørller vedlikeholder maskinen, ma du alltid slä den av og trekke ut stapslet.
IJIa\PJIeHnIaHEo6XoDnMo IcNoJIb3OBAtB NOJIoTHO.
YcTaHOBKa
ChTne
- YctaHOBnte MaunHy Ha CTOn TaK, YTO6bI ToUka KpeJIeHnA (3) 6bla HappaBHeHa BBepx.
Ocna6bTe BnHT C BHyTpEHHIM WeCTnIgpaHHNKOM (7) C NOMOuTO TopeBOKJIoua (5).
- ChHMMTe yCTaHOBOHyO wai6y (8).
- CHIMMTE NOIOTHO (11) c ToUKK KpePJIeHna (3).
- YctaHOBnte yCTaHOBOUHyU Sha6y (8).
3aTnHTe BnHT C BHyTpEHNM 70ctnrgpaHHNKOM (7) TopueBbIM KJIIOyOM (5).
YcTaHOBka n ChrTne cKpe6KOBOrO HOXa (pnc.B)
ДяЗачистКн Heo6xOДIMо NcNoJb3OBaTb CKpe6KOBbl HOK.
YCTaHOBKa
- YctaHOBNTe MaunHy Ha CToJ TaK, YTO6bI ToUka KpeJIeHnA (3) 6bla HappaBHeHa BBepx.
Ocna6bTe BnHT C BHyTpEHHIM WeCTnIgpaHHNKOM (7) C NOMOuTO TopeBOK KIOUa (5).
- CHIMMTE yctaHOBOHyO wai6y (8).
- YctaHOBNTe cKpe6KObI Hox (12) Ha ToUky KpeJIeHna (3).
- YcTaHOBInTe yCTaHOBOUHyU ⅢaIb6y (8).
3aTHe BnHT C BHyTpEHNM 7TOPeBbIM KJIIOyOM (5).
CHRTHe
- YctaHOBNTe MaunHy Ha CTOn TaK, YTO6bI ToUka KpeJIeHnA (3) 6bla HappaBHeHa BBepx.
Ocna6bTe BnHT C BHyTpEHNM WeCTnrgpaHHNKOM (7) C NOMOuTO TopeBOK KIOUa (5).
- CHIMMTE yCTaHOBOHyO wai6y (8).
- ChnMnte ckpe6KOBbI HOx (12) c ToQKn KpeNJIeHnA (3).
- YctaHOBInTe yCTaHOBOUHyU 1ua6y (8).
3aTnHTe BnHT C BHyTpEHNM 7TOPTcHpaHHNKOM (7) TOpueBbIM KJIIOyOM (5).
ИСПОЛьЗOBAHNE
BkJIIOUeHne n OTKJIIOUeHne (pnc. A)
- YTO6bl BKNIOHTb MaUNHy, CDBINHbTe BbIKIOUaTeJIb BKJ./BbIKJ. (1) Bnpei.
- YTo6bI BbIKJIOUHTb MaUNHy, CdBINHbTe BBIKJIHOuTaJIb BKl./BbIKn. (1) Ha3aD.
Hactpoika ckopoctn (pnc. A)
ДянacpoKn cKOpOCTn nCNoIb3yeTcRДNCKpeYIpOBKn cKOpOCTn.ДNCKpeYIpOBKn cKOpOCTn MOxHO yCTaHOBuTb B OJHO N3 6 NOJKeH.NdeaJIbHaJ cKOpOCTb 3aBUCNT OT poJa BbINOJIHReMoJ pa6oTbI n O6pa6aTbIBaEmoMaTePnaJana.

He HactpaunBaIte cKOpocTb BO BpeMpa6oTbl.
YNCTKA IN TEXHINUECKOE OBCJNYXINBAHNE

Ipeq uNCTKoN nTexHnueCKM O6cIyXnBaHnEM BceRda BbIKNoaHTe MaunHy n3BJIeKaIte BNKy CeTeBOrO Uhypa n3 p03ETKn.
- PeryjnapHO YnCTuTe KOpNyc cyXoI, MrgKoI TkaHbIO.
-ДерхиTe BeHTnlaцIOHHbIe OTBepCTnA CBO6OdHbIMNOTNbIINrpa3n.Iprn Heo6xOIMOCtNNCIOJIb3yIte MraKyo, BnaJxHyTO TkaHbДЯ ydaJIeHnI PbIINrpa3N C BeHTnlaZUHOHHbIX OTBepCTnI.
3aMeHa npHaJdxKHOCTe (pnc. B)
I3HOWeHHbIe IJIINIOBpeXdEHHbIE npHaJnxHocTn IOJexKaT HeMeJeHHoJ 3aMeHe.

UcnoJb3yIte TOnbKO OCTpbie HHeNoBpeKdEHHbIe npHAnJeXHoCTN.
- UTo6bI cHrTb npHaJdJIeXHocTb, DeiCTByIte KaK OINCAHO B COOTBeTcTByIOUeM pa3JeIe.
- UTo6bI yCTaHOBnTb npHaJneXHOCtB, DeiCTByIte KaK OINcAHO B COOTBeTCTByIOUeM pa3JeIe.
PpOBepka n 3aMeHa yroJIbHbIX uTeTOK
Puc. A + D
YroIbHbIe 1eTKn Heo6xOJIMo peRyJpHO npOBepaTb. EcIy rOJIbHbIe 1eTKn n3HOWeHbI, MaUNHa NaHT pa60TaTb HepaBHomepHo.

VcnoJb3yIte TOnbKO yroJIbHbIe 5eTKN DOJIKHORO TUNa.
- CHIMITE Āржателу γοльных ΜεΤΟΚ (13) с ПOMΟΥΙΙΟ OTΒΕΡΤΚΙ.
- BbIyIcTInTe yroIbHbIe IeTKn.
BcIyae n3HocBa BceIa 3aMeHnTe oBe yroJIbHbIe IeTKn OJHOBpeMeHHO.
- YctaHOBnTe DepeXaTeN yroJIbHbIX UeTOK (13) C NOMOuIbIO OTBePTKn.
- После установки HOьыx yroJBьх utetOK, 3anyctnte MaunHy Ha XOJIocToM XOdy npIMepHo Ha 15 MInHyT.
TAPAHTNA
06paTntecb K npnlaeraembim ycIOBnram rapaHTnn.
OXPAHA OKPYKAAIOUcEN CPEIbl
yTIN3aun

IaHHoe n3dJIeNe, npHaJLeKHOCTn UyaKOBka noJIeKaat copTupOBKe IypepebaOte, 6e3OpacHoi dny OKpyKaIOUeN cpebl.
Tolbko dny ctpan EC
He Bb6paCbIbAaTe 3JIeKTPoHnCTpyMeHT
BmecTe C 6bITOBbIM MycOpOM. B COOTBeTCTBn
c EbPoneiCKM pyKOBoODCTBOM 2012/19/
EU no "YtJIn3aun 3JIeKTPnueckoro
n 3JIeKTPoHnO o6OpyIDoBaHnI" n
HaUHOHaJIbHbIMN 3aKOHoDAteJIbHbIMN aKTaMn
3JIeKTPoHnHCTpyMeHT, KOToPbI 6OJIbWe He
HCNoJIb3YeTcR, Heo6XoIMMo Co6HpTaB OTdJIbHo
n YtJIn3uPoBaTb 6e3OnaChbIM dIra OKpyKaIOSei
cpebl O6pa3OM.
I3dJIeN e npKOBODCTBO nOJIb3OBATeJI MOryT 6bITb N3MeHeHbI. TexHnueckne xapaKTePnCTNI KMOrY T 6bITb N3MeHeHbI 6e3 daJIbHeJWeero yBeDOMJIeHnI.
БАГATOФУнкцIOHAJBHIN IHCTPYMEHT
OTM1005
Heo6xioHO,3amHtB KOMnEKeKtyOuy.
BnKOpncToByte JInIe KOMnIeKtYuOci, IOp peKoMeHDoBaHi BnPo6HnKoM.
BukopncToByTe Jnwe taki KOMnneKtyuOHi, 10 BiINOBiDaHTb 3aBdaHHIO.
BnKOpncToBnyTe JIiSe KOMnJIeKTyUOci HaneXHoro po3Mipy.
He BnKOpncToBnyTe KOMnIeKTyUoyi, IIO nOTpe6yOToB pIKnx OxIoJxkyBauiB. He6e3neKa ypaXeHHa eJeKTpnuHm Ctpymom.
KOMnIeKTyUoyi MaOTb 6yTN BCTaHOBJeH naJexHnM uHOM. He BnKOpNCToByte nepexiHi MyTn Ta iHsi 3acO6n dIra BCTaHOBJIeHHa KOMnIeKTyUoynx IHoTO BHyTpIiHbro diAmEtpy.
- IpekeHaiTecra, lo MaKcMaJIbHa WbNkCtB dIa KOMJIeKTyOoi - Bua a6o pIBha MaKcMaJIbHi IWBnKocTn IHCTpMeHTa. IHOpMaJia Bka3aHa Ha nacnpTHi TabnUcI Ha IHCTpMeHTi.
-ПисяВCTaHOBJIeHHЯKOMПLEKTKUOuHxДaITe npnlaIyNonpaIIOBaTuHaXoJocTnxO6ePtax y 6e3neuHomyMiCi.IpnCnJIbHiI Bi6pauii HeraInHO BIMKHIiTB iHcTpymeHT,BINMIiTB uTeNceJIb 3po3ETKnTa cnpo6yIte 3HaIITn npuHHy.
- IpepeKoHaTecra, 3aROTOBka npaBnIbHO 3aΦikCoBaHa.
HaiaraTe 3axnchi Okyjarpn. HndraTe 3ac06n 3axncTy opraHIB clyxy. KopncTyTecb nlo3axnchoIO mackoIO. KaIO Heo6XiHO, KopncTyTEcI INHMN 3axnCHMn 3ac06aMn, TaKIMN Iy pyKaBnUKN, 3axNCHe B3yTTI, i T.I. He6e3neKa tinechoro yskOdkxehnn.
Cnoctepira niOBHHi 3HaxoDITNCI no3a poobum maJdaHnKOM. IpekoHaITeC,IO Bci IIOi Bpo6OHi 30Hi BdIrHeH i 3axnci 3ac0bN.He6e3neKa TIIEcHOrO yuKOJKeHNH.
Ka6eIbJxNBeHnHe NOBuHEn 3HaXoDntnc nO6n3y KOMJIeKTyUOoi, IIO o6epTaetbcr. RaKIO Ka6eIb JxNBeHnRA DToPKeTbcr DO KOMJIeKTyUOoi, IIO o6epTaetbcr, BaWi pyKn MoKyTB yBiINB KOHTaKT 3 KOMJIeKTyUOHO. He6e3neKa tineChoro yuKOJxHnH.
TpmaTe npnla3a iOJbObaHi nobepxHi IJIa 3axBaTy, kIIO MOKJIInBe DOTOPKaHHa KOMNKeKTuOHOI DO npNXOBaHNx dpoTIB a6o Ka6eJIb JKNBHeHHa. KaIO KOMNKeKTuOHa NOTpAnJIe B KOHTaKT 3 dpOTOM nID HApPyroO, BiINObiDiH He3axuIeHi MeTaJIeBi YacTINH INpUaNy TaKOx MOKyTb ONHINTcB
πiδ HanpyroI. He6e3neka ypaXeHnE neKtpuHm cTpyMOM.
Bumkhitb IHctpymeHT, KOJI npeHocnte Ioro. He6e3neKa tinechoro yukoJxehnra.
He KopnctynteciHCTpymeHTOM npa3 Ierko3aMnCTmMaTepiJaAmn. He6e3neKa noxeki.
MaTe Ha yBa3i, 10KOMnJIeKToUOa npoIOBxye o6epTaTncb DeaKn Yac nicJy BmNKaHH iHCTpyMeHTy. He HamaarItec b camOTyXKN 3yINHrT N KOMnJIeKToIouy.
- Nepsh hix noklactn iHcTpymeHT ha cTin a6o BepCTaT, o6OB'3KOBO BUMKHITb NOrO.
- Peryjaryno unciTiB BeHTnlauiHi npop3n. He6e3neKa ypaXeHHra eJeKtpuHm cTpyMOM.
IpaBnla 6e3neKn npnpo60ti 3 eJeKtpnHmM npnlaadam

3aBxnn nepeBipraTe BiINOBiHicTb HnpyrN DKepeLa KINBneHHa HabeJeHomy y nacnopTHi T6nHyci 3NaueHHIO.
3a6opohreTbcra BnKOpncTOByBaTu iHCTpymEt 3 ykoJKeHm Ka6eJeM a6o uTeNceJeM.
BnKOpNCToByIe Ka6eJIb-nOIOBxUyBaU, 3aIOBOJbHRe nOTyXHiCTb IHCTpyMeHTy, PloSeIO nepepi3y He MeHwe 1,5 MM2. RaKIO BnKOpNCToByEcTBcRA NODOBxUyBaU 6apabHHoro TIny, 3aBXdN NOBHicTIO p03MOTuIte Ka6eJIb.
TEXHICHIXAPAKTEPNUCTNIKOTM1005
Hanpyra mepexi B~ 230
Yactota y mepekei 50
CnoXnBaHHnnotyKHOCTiBT 280
Yactota xoJocTnx o6epTib XB-1 11.000 - 20.000
Bara Kr 1,5
WYM TABIBPAU
OTM1005
3BykoBm TnCK (LPa) 85
IotyKnHcTB 3ByKy (LWa) dB(A) 96
Poxn6ka(K) nB(A) 3
Bi6paia (wnipyBaHHa DepeBnH) m/c2 4,2
Bi6paia (po3nnIOBAAHn DepeBnH) m/c2 7,3
Bi6pauij (3aunueHHn depeBnH) m/c2 8,1
Bi6paia (po3nnIOBaHHcTani) M/c2 5,6
Ioxu6ka (K) m/c2 1,5

HaiaaTe 3acobn 3axncty opraHIB cnxy.
Pibehb Bi6pauii
Pibeh Bi6paqii, 3a3haeHn B KINi daHoro
noci6nka 3 ekcnlyataqii, 6ylo BmipraHo
y BiIDNOBIOHOCTi 3i CTaNapTn3OBAHIM
Bnnpo6yBaHHam, 10MiCTNbC8B EN 60745; daHa
XapaKTEpNtKa MoKe BnKOpNCTOByBaTnC8
dI npIBHHn OJHOrO IHCTpyMeHTa 3 IHsM, a
TaKoK dIy nonepedhboi OcIHKn BnNBy Bi6paqii
iD yac 3actocyBaHH DaHOrO IHCTpyMeHTa IJI
BkA3AHx cInei
- npn BnKOpncTaHhi iNCTpyMeHaB iHux ciJax a6o 3 iHmMn/HeCnpaBHmN DoNOMIXHMn npNCTOcYBaHHmPiBeHb BpIiBy Bi6paqI MOKe 3NaHHO NiDnUyBaTnC
- y nepioi, KOJI INCTpyMeHT BUMKHeHn a6o cyHKIOHye 6e3 paKTNUHOro BVKOHaHHaPo60Tu, piBeHb BnIbBy Bi6paui MoKe 3HaUHO 3HNKyBaTnCra
3axuatae ce6e BiD BnInBy Bi6paui,
PiTpmyoyn IHcTpyment I Ioro DoonomixHi
PnCTOCyBaHHB CnpaBHOMy CTAHI,
PiTpmyoyn pykn B TeNli, a TakoK npabnlbHo
OrpaHn3OByoucn Cbi pOboOn npoec
ONIC (PNC.A)
Ley 6araTofoyHKIOHaIbHn iHCTpyMeHT npn3HaueHn Ira po3nnIOBaHHa DepeBa, metany Ta nlaCTnKy.
- Bumkaay
- KoliiataKo peRyIIOBaHnHaBnD KocTi
- MoHTaxHa ToUka Iy KOMnIeKTyOuHx
- Puyka
- TopceBn Klnou
- TpIMaT TopueBOro KInOua
13.Дерхавka ByrilbhoI UtiKn
3БИРАHHЯ

Ipeq 36npaHnM 3aBXnBmNkaTe iHCTpyMeHT Ta BnMaTe WTeNCenb 3 p03eTK.
MoHTaX Ta demoHTaX TpImaHa hXdauHoro nanepa i hXdaunho nanepa (pnc. B)
Tpmau haxdaunoropanepa i haxdaunn panep NOBHHI BUKOPNCOTOByBaTnCra IJRA3abnHb nO 7liiCyBaHHIO hXDaunm panepom.
MOHTAX
- Покладит b inhctpymehn Ha cTin TaK, 6o6 mONTaxHa ToUka (3) 6yna 3Bepxv.
-
Pocna6Te TBnHT 3 BHyTpiuHIM
WecTNrpaHHNKOM (7) TopueBm KJIIOyem (5).
BcTaHOBIb TpIMaHnKDaHOro nanepy (9) Ha MOHTaXHy ToUky (3).
3aTAYHITb TBnHT 3 BHyTpIiHHIM UeCTNIRpaHHIKOM (7) TopueBIM KJIIOyem (5).
BctaHOBiTb HaxdauHnI nanip (10) 3 notpi6HM po3mipom 3epHa Ha TpImaH HaxdauHOro panepa (9). NepeKoHaITeCra, lo OTBip B HaxdauHomy panepi (10) BiINOBiJaoc OTBOPy B TpIMaHi HaxdauHOrO panepa (9).
-
BnKOpncToByTe rpy6o3epHnCTn HaxdauHn panip (3epHo 50)ДЯ 7liΦyBaHHra py6ux, HepiBHX NOBepxOHB.
- BnKOpNCToBvIe cepeHbO3epHnCTn HaxdauHn nanip (3epHo 80) IaB VndaJIeHHN NOpRpyINH BiD rpy6o3epHnCToRo HaXDaunHO nanepa.
- BnKOpNCToBvIe dpi6H03epHnCTn nackdaunn panip (3epHo 120) dans CTOBOrO wliCyBaHHN NOBepxOHb.
ДемоHTax
- Покладиь InctpymeHT ha CTIN TAK, lo6 MOHTaXHa ToUka (3) 6yla 3Bepxv.
3HimiTb HaxdauHn nanip (10) 3 TpMaHa haxdauHoro nanepa (9).
- Iocna6Te rBnHT 3 BHyTpiiHIM
IeCTnIgpaHHIKOM (7) TopceBm KJIIOyem (5).
3HIMITb TpImaHnKaDaHOro nanepy (9) 3 MOHTaXHOI TOKNI (3).
3aTgHITb rBnHT 3 BHyTp iuHim uecturpaHHNKOM (7) TopueBIM KJIouem (5).
BCTaHOBJIeHHI INIOBIOBIOBIOBAa (MaI. C1 + C2)
IeTaJIb IJRA NIIIOBNOBIOBAHNA MoXHa BnKOpNCTOByBaTIN DnRA NiIckIIOUeHHN PrnlaNy Do NIIIOOCCy npu 7JIiOyBaHHi. PnI 6yDe BCMOKToYBaTncB, a pOboa 30Ha 3aJIINITbcr YNCTOIO.

AanTep nIOBIOBIOBaHa MoXHa BnKOpNCTOByBaTN IuWe pa30M 3 npncPoem dIyIiOyBaHHa (9).
YctaHObKa aanTepy NIOBNOBIOBaA:
3HimItb Hacaikn 3i IwnHeI npucTroO (3), kso ce ue He 3po6neHo (3).
3'eHaIte DeTani IINIOBIOBIOBaHHa (15A i 15D),ЯкпokazahnoHa(maI.C1iC2)
-Припсніть[aanTepdoшин'deя npinlaу,06obdo6pe3aФikcyaTuN noro, nepekoHaiTeCb,zo3aDihiΦikcaTopu(15C) do6peBCTabIeHiВna3nHaKopnyci npinlaу.
BctaHOItb npoklaky (15E) mix npncTroem dIy uHnTa aanTePOM nHaHIO yuINbHOBAHn, a notim 36epitb npicpti dIy uHIOBIDNO do IHCTpyKsi nonpeDHBoro po3iny.
-Пдклочь пилосocdo kiHca aanTepy (15D).
MOHTaKa Ta dEmoHTaK NOJIOHa NnIKn (pnc. B)
IonoTHo nnKn noTpi6Ho BnKOpncToByBaTu nIaBdaHb no po3nnIOBaHHIO.
MOHTAX
- ПокладiTь IncTpymeHT ha CTiI TaK, lo6 MOHTaXHa ToUka (3) 6yna 3Bepxv.
- Iocna6Te rBnHT 3 BHyTpiuHIM
IeCTnrgpaHHNKOM (7) TopueBm KJIHOyem (5).
3HimiTb waI6y (8).
- BcTaHObiTb noJIoTHo nIuKn (11) Ha MoHTaXHy ToUKy (3).
BcTaHOBIbIb IaIb6y (8).
3aTARHITb TBnHT 3 BHyTpiiHIM IecTNrpaHHNKOM (7) TopceBm KJIouem (5).
ДемоHTax
-Покладит bInchpymehT ha ctiTak,цo6 mHTaKHa TOnka (3) 6yna 3Bepxv.
- Pocla6Te rBnHT 3 BHyTpiHIM
WecTIrpahHHNKOM (7) TopceBm KJIHOyem (5).
3HimiTb waI6y (8).
3HIMITb NIOHTHO INIKN (11) 3 MOHTaXHOI TOUKN (3).
BcTaHObitb wai6y (8).
3aTARHITb TBnHT 3 BHyTpIuHIM IeCTurpaHHNKOM (7) TopueBm KJIoucM (5).
MOHTaK Ta demoHTaK cKpe6KOBOrO HOxa (pnc.B)
Ckpe6koBn HIX NOtpi6HO BVKOpNCToBvBaTN dIaBdaHb No 3aunueHHIO Ckpe6KOBM HOXem.
MOHTAXK
- ПокладiTb iHcTpymeHT ha cTil TaK, uO6 MOHTaXHa ToUka (3) 6yla 3Bepxv.
- Nocla6Te rBnHT 3 BHyTpIiHIM
WecTnrgpaHHNKOM (7) TopceBm KJIIOyem (5).
3HimiTb 7aay (8).
BctaHObiB cKpe6koBn HIX (12) Ha MOHTaXHy TOnKy (3).
BcTaHOBiTb 7aN6y (8).
3aTARHITb rBnHT 3 BHyTpipHim WeCTURpaHHNKOM (7)TOPueBIM KJIIOyem (5).
ДемоHTax
- ПокладiTb inhctpymehT ha cTiJ TaK, ьб монтaxkha Tocka (3) 6уla 3Bepxy.
- Nocna6Te rBnHT 3 BHyTpIiHIM
WecTnrgpaHHNKOM (7) TopceBm KJIHOyem (5).
3HIMITb 7aay (8).
3HimiTbCKpe6KOBn HIX (12) 3 MOHTaXHOI TOUKN (3).
BcTaHOBiTb 7aI6y (8).
3aTARHITb rBnHT 3 BHyTpipHim WeCTurpaHHNKOM (7) TopueBm KJIoucem (5).
BVKOPNUCTAHH
BMUKAHHa Ta BMUKAHHa (pnc. A)
Lio6 BBIMKHyTu iHcTpymeHT, nepecyHbTe BnMkau (1) Bnepeq.
Lio6BumKHytniHCTpymeHT,nepecyHbTe Bmukau (1)Ha3a.
BcTaHOBJIeHHaWbNdkoCTi (pnc.A)
KoIiuaTko peRyIIOBaHHra WbUdkOcTi
BVKOpNCTOBYeTBcRA IJIra HalaWtBuHnRA
WBuDKocTI. KoiuataKo peRyIIOBaHHra WbUdkOcTi
MOxHa BCTaHOBHTB 6 POnuiz. ldeaJbHa
WBuDKICTb 3aJIeXHTB BiD 3aBdaHnRA i BiD
MaTepiany, zo o6pO6IeTBcRA.

3a6opohrEcbBCTaHOBIOBaTu WbNkictbPiJyacpo6OTn.
- OsepniTb koliataKo peRyIIOBaHnHa WBNkOcTi (2) y Heo6XiHe noloxeHHa.
Iopadn3BVKOpncTaHHa
- 3aTnchItb 3aRToBky. BnKOpNCTOBynte 3aTnCKaU dIra MaJnx 3aRTOBOK.
- HakpeciItb liHIO, 106 Bu3HaHTn Hanpam cnprMyBaHHaKmJIeKToIyoOi.
3aBxIyTpMaITe npIaIz 3a pyky.
BbIMKHiTb iHCTpymeHT.
-Доукайтесь,пOKи iHCTpymehT habepe noBHnX o6epTiB.
- Nomicb KOMNKeKTyOuH Ha 3aRToBky.
- Nobilbno pyxaTe iHCTpyMeHT B3doBx HaKpeCJIeHOI LiHi, MiHO npITnCKaIOUH KOMNJIeKTKIouy Do 3aROTOBKn.
He TnchItb Ha iHCTpyMeHT 3aHaTTO CnIbHO. DaIte iHCTpyMeHTy BnKoHaTu po6Otu.
BumKHiTb iHcTpymeHT i, nepe TmJ K noklaTn Ioro, doyeKaITeCb nobHOI 3yINHKN.
IpeBipka i 3aHa ByrilbHnx uitok (pnc. A & D)
Heo6xio hpeyraepno nepeBiprtu Byrilbhi 1tKn. KaIO BOH3HOcunncb, IHCTpymeT noHepaOOBATn CTpi6kONoDi6Ho.

BukopncToByte ByrilbHi iitkn npabnIbHOro Tnny.
3HIMITb DepXaBKn ByrIbHOi 13) 3a DOHOMOIO BnKpyTKN.
OuictiBByrIbHiUitKn.
- YKIO BOHn 3HOCINNCb, ODHoacycho 3aMiHiTb 06nDi ByrIbHi UITKn.
BctaHObitb depKabKn ByrilbHoi iitkn (13) 3a DOnOMOrHO BnKpyTKn.
Iicna BCTaHOBHeHHa HObX ByrInbHx uitOK, daTe MoXJIbICt b IHcTpymEtY nonpaObaTu Ha xoJocTHx o6epTax npotarom 15 XbUlnH.
UH H N T E H H OBCNYOBYAHN

Ipeq uHcEHn mTexHiHm
OcnyroByBaHHa 3aBXKn BUMKauTe
iHCTpyMeHT Ta BuMaTe UTeNCeJb 3
p03eTK.
- PeryjnapHo YnctbTe Kopnyc M'koHO TkaHnHOJ.
BeHTnJIaIciHi OTBOpMaOTb 6yTb BiJIbHIMBiD 6pydy Ta nnly. JaKIO Heo6xIDHO, BnKOpNCToBMyTe M'ky BOIORY TkaHNHy dIByBaJaEHnHa 6pydy Ta nnly 3 BeHTnJIaIiHnx OTBopIB.
3aɪHa KOMnJIeKtIyOuHx (pnc. B)
3HoueHi a6o yuKoJxKeHi KOMnJIeKTyUOHy Heo6XiIHO HeaIHO 3amIHNT.

BukopncToByte TInbKn roctpi Ta HeyuokOKeHi KOMnIeKTyUOn.
- 3HrTNI KOMNKeKtUOHy, iIte 3rIiHO IHCTpyKciY BiINOBiINHomy po3nii.
- Uo6 BCTaHOBtN KOMJIeKToUy, DiIte 3riHIO HCTpyKciy BiINOBiDHomy po3diI.
TAPAHTI
Kohcylbtaicj BIDHOCHO TepmiHIB ydoaHir rapaHTii.
OTOUOUE CEPEIOBUNCE
YtNiI3aui

IpoyKT, KomnleKtuyoHi Ta NaKyBaJIbHi MaTepiAn Heo6xIaHOb BiDCopTyBaTu nIe EkoIorUHO HeuKiIINBOI nepepo6Kn.
Tinbkn dny kpaH EC
3a6bopnoTb8cBnKnDaTn eJeKtpoiHCTpyMeHTny no6yToBI biXoNi. BiNIOBIDNo Do NInpeKtNBNC 2012/19/EU npo BiXoNi eJeKtpuHoro i eJeKtpoHHOrO oblaHaHHraI 3aKOHIB, eJeKtpoiHCTpyMeHTN, IIO He NiJaRaOTb NOdaJIbWOMy BnKOpNCtAHNO, HEO6XiHO 3bnpaTI OKpEMo I yTNlI3yBaTNI Jxom ekolorH No HeWKiDnBOI nepepo6kn.
IpoDyKT Ta noci6HnK KopnctyBaay MoKyTb 3miHOBaTnCra. TexHiuHi xaapKeptnK moKyTb 3miHOBaTnCra 6e3 DoaTKOBOrO nonepdKeHHra.
NOAYMHXANHMA OTM1005
Zac euxapiotoupe nou eIaleEate va ayopaoTe auTo npoiov Tnc Ferm.
Twa neov diaheTeEva eapetiko npoiov, kataokuaogevo ano evav ano touc yeaalutepouc npountheutec tnc Eupwnnc. Ola ta npoiovta nou npountheueote ano tn Ferm kataokvocvat oumwva e Ta uynolotepa npotuna anodooanc kal aofaliac. Qc npoc tn ciooophiac mac, napexoupe enionc apiotn Eunnpetnon nElambdaow, ouvoboumevn ao tvn pnyonn maç. Eanizoupe otI tha meivete euyapiotnevoi ano tn xpnoautou Tou npoiovtoc yia noaa xpovia.
IPOEIAOIOIHSEIEAΦAΛEIA

NPOEIAOIOIHsH
MeTne Tc eokleotec npoEonoioeic oxetik aTv aofoaia, tic npo0eTc npoEonoioeic oxetik aTv aofoaia, kaowc kai tic odnyiec. H n npnTw npoEonoioewv aofoaia c kal twv obnyiwu npoei va npokaolei nKpOAnxi, npkayia /kai oBapec oWATIKEC
i k a v a o i a k a i c o n y i c y i a o v t i k j a v a o p a.
Ta akolouθa ouβoλxρηοιoioúvτai oTo Exyeipidio xphonc n επavw oTo npoiov:

BJe3Ha MoKHOCT W 280
Bp3nHa 6e onTepeTyBaHbe min -1 11,000-20,000
TexnHa kg 1.5
Byuaba n Bn6paun
OTM1005
HnBO Ha 3ByeH npTncok (Lpa) dB(A) 85
AkyctnHa MoKHOCT (Lwa) dB(A) 96
OtcanyBahe (K) dB(A) 3
Bn6paunn (bpycehe Ha npBo) m/s 4.2
Bn6paun (cehebe Ha npBO) m/s 27.3
Bn6paun (ctpykehe Ha npBO) m/s 8.1
Bn6paun (ceuehe Naeienk) m/s 5.6
OrcanyBahe (K) m/s² 1.5

Hoceme 3aumuma 3a cnyxom.
HnboHaBn6paun
HnBOTO Ha emncjata Ha Bn6paunite, HabeJeHO BO yNaTCTBOBO, e n3MepeHO BO cOrnaCHocT co CTAHapn3pan Tect daen HO EN 60745; Toj MOKe Da Ce KopnCTn 3a cnopeyBaHe Ha eEHa anat Co npYr KaKo N 3a npelIMnHapHa npOceHa Ha n3NoXeHOCT Ha Bn6paunn PnKopnTeHe Ha aNATOT BO CNOMeHaNTte apnkaun
- Kopucmehemo Ha anamom 3a pa3nuyu H annukaquu uu co pa3nuyu uu cna6o oopkyeah npubop, moke 3naumenho da 20 320JEMU HUEOM Ha u3noxehocm
- epememo koza anamom e ucknyueh unu koza paobomu Ho He ja epwu paobomama, MOKe 3HaUmeHNO da 20 HamaNu Husbomo Ha U3IOKeHocm.
3aWNTTeCe oJ efeKTnTe Ha Bn6paunTe co OndpKyBaHBe Ha anatOT n np6Opot, paueTe da BN 6nDat TOnnnn OpraHn3npaJTe rnpoTHnTe HABUKN.
OINC (CJI.A)
Baunot nobekehaemckn aanat e konctpyupaH 3a Iecno 6pycbe,ceye He n ctpykeHe.
- On/off npekenHyBauch
- Tpkano 3a doTepyBaHbe Ha 6p3nHa
- MoHTaXeH BpB 3a npu6op
4.Дршka
5.Имбус кnyu
6.Држачзимбусклuy
- Kanak ha jarneHa YeTknUka
MOHTAXA

Ipe MoHmaxa ucknye me ja MauuHama u u3eademe 20 npuknyokom od 2naBuom HanoH.
MoHTnpaHBe n OTCpaHyBaHBe Ha 6pycha noIora n 6pycha xapTnja (cJ. B)
Брусната полoraи Хартужда мораат да ce
Корисота 3a Брусенье.
MOHTaxa
- Iocmae me ja mawunama ep3 maca, co MOHmaxHuom epe (3) cEpmen Haope.
CmezHeme ja um6yc 3aepmkama (7) co nomou Ha um6yc kny4 (5).
- MoHmupajme ja 6pycHama noDnoza (9) ha MoHmaxHuom 8pe (3).
CmezHeme ja um6yc 3aepmkama (7) co nomou Ha um6yc kny4 (5).
-
Mohmupajme ja 6þychama xapmuja (10) co nompe6hama āpaHyaújla, ερ3 6þychama noðnoza (9). Прòepe me daIu nepΦopaujama ha 6þychama xapmuja (10) odöeapa co nepΦopaujama ha 6þychama noðnoza (9).
-
Kopucmeme 2py6a xapmuja (epaHyauja 50) 3a 2py6o 6pyceHe Ha HepamHu noepuuHu.
- Kopucmeme cpeha 6pycha xapmuja (epaHyauja 80) 3a omcmpaHybaHe Ha 2pe6hamu ocmaHamu od apybama 6pycha xapmuja.
Kopucmeme fuHa 6pycha xapmuja (epaHyauja 120) 3a 3aepwHo 6pyceHe.
OCTpaHyBaHbE
-
Nocmae me ja mauunama ep3 maca, co MoHmaxHuom epe (3) cEpmen HaZope.
-
OmcmpaHeme ja 6pychama xapmuja (10) od 6pychama noDnoza (9).
CmezHeme ja um6yc 3aepmkama (7) co nomou Ha um6yc kny (5).
- OmcmpaHeme ja 6pcyHama noDnoza (9) ha MoHmaxHuom epe (3).
CmezHeme ja um6yc 3aepmkama (7) co nomou Ha um6yc kny4 (5).
MOnTnpaBe Ha oDBeDyBaU Ha npaunHa (cI. C1 + C2)
EJIeMeHToT 3a OJBeyBaHe Ha npaunHa MoKe Da ce KopnCTn Kora 6pycnte, 3a npKnyuBaHe Ha npabocmykAnka . PpaunHata Ke ce OJBeyBa n pa6oTHnOT npocTop Ke 6nIe YnCT.

Adaanmepom 3a odebeyeaH na npauHa ce Kopucmu cmo co bpycha noJnoza (9).
3a noctabvbahe Ha aanTepot 3a oDBeyBaHnpaunHa:
Ako He e, omcmpaHeme 20 npubopom od epemeho Ha MauuHama (3).
- Mohmupajme zu 3aeHNO eIeMeHmume 3a o0eDyBaHe Ha npauHa (15A do 15D) cnopeD (cI. C1 u C2)
3a6paBeme zo adanmepom Ha epemeHomo Ha mawuHama, 3adHume ucnycmu (15C) mpe6a da 3a6paBam zo kne6om od kykuumemo Ha mawuHama.
- Iocmae me quen npcmn (15E) nomy nooasa u adanmepom 3a 3amuahe u mohmupajme ja bpychama nooza, cnped hedehomo 60 npemxodhomo nozaie.
- Пухлчeme пабocmykaлиka 3a краjom od adanmepom (15D).
MoHTnpaHBe N OTCpHaYBaHBe Ha JnCT 3a nnJa (cI. B)
IinCT 3a nIIa cMee da ce KopnCTn camo 3a ceueHe.
MOHTaxa
- Nocmaeme ja MauuHama ep3 Maca, co MoHmaxHuom ep8 (3) cepmen Hazepe.
CmezHeme ja umbyc 3aepmkama (7) co nomou Ha umbyc Knyu (5).
- OmcmpaHeme zo omcmojHukom (8).
- MoHmupajme zo nucmom (11) Ha
MOHmaxxHuom epe (3).
Mohmupajme zo omcmojhukom (8).
CmezHeme ja um6yc 3aepmkama (7) co nomou Ha um6yc knyu (5).
OtcTpaHyBaHbE
- Nocmae me ja Mauhama ep3 Maca, co MOhmaxHuom ep6 (3) cepmen Hazepe.
- Omcmezhe me ja umbyc 3aepmkama (7) co nomou Ha umbyc knyu (5).
- OmcmpaHeme zo omcmojHuKom (8).
- OmcmpaHeme zo nucmom (11) od MOHmaxKHuom epe (3).
- Mohmupajme zo omcmojhukom (8).
CmezHeme ja um6yc 3aepmkama (7) co nomou Ha um6yc Knyu (5).
MoHTnpaHBe n OTCpaHyBaHBe Ha HOX 3a CTpyKeHe (cI. B)
Hoxkot 3a ctpykeHe cMee da ce KopncTn camo 3a ctpykeHe.
MOHTaxa
- Nocmae me ja MauuHama ep3 Maca, co MoHmaxKhuom ep8 (3) cEpmen HaZope.
- Omcmzeheme ja umbyc 3aepkama (7) co nomou Ha umbyc kny (5).
- OmcmpaHeme zo omcmojHuKom (8).
- Mohmupajme 20 Hoxom 3a cmpykebe (12) Na MOhmaxHuom epe (3).
- Mohmupajme zo omcmojhukom (8).
CmeaHeme ja um6yc 3aepmkama (7) co nomou Ha um6yc knyu (5).
OToTpaHyBaHbE
- Nocmae me ja MauuHama ep3 Maca, co MOhmaxHuom epe (3) cepmen Hazepe.
- Omcmeheme ja umbyc 3aepkama (7) co nomou Ha umbyc kny (5).
- OmcmpaHeme zo omcmojHuKom (8).
- OmcmpaHeme 20 Hoxom 3a cmpykehe (12) od MOhmaxHuom 6pe (3).
- Mohmupajme 20 omcmojhukom (8).
CmeaHeme ja um6yc 3aepmkama (7) co nomou Ha um6yc knyu (5).
YNOTPEEA
BknyuBaHe n NcknyuBaBe (Cn. A)
3a eknyybahe, mypHeme zo haHanpeD On/
Off npekuhyaayom (1).
3a ucknyyeabe, myphe me 20 haHa3ad On/ Off npekuHyeaom (1).
H36op Ha 6p3nHa (cN. A)
3a n36op Ha 6p3nHa ce KopncTu TpkaITo 3a
n36op Ha 6p3nHa. TpkaiTo 3a n36op Ha 6p3nHa
MOKe Da ce
NoCTaBn BO 6 noLoXbN. IdeaJHaTa 6p3nHa
3aBnCn OD BnDoT Ha o6pa6oTkata N od
O6pa6oTyBaHnOT MaTePnJaI.

He u3bupajme 6p3uHa 3a epeMe Ha pa6oma.
Bpmeme 20 mpkanomo 3a u36op (2) 60 cakaHa nOox6a.
Cobetn 3a ONTUMaJIHNO KOpNCTeHbE
CmezHeme 20 pa6omHomo napye. Kopucmeme cmezu 3a manu npuha.
Haupmajme luHuja 3a Hacoka Ha eOede He Ha npu6opom.
-Држeme ja Maшунama uepcmo 3a deprukkama.
Bknye me ja MauuHama.
- Noyekajme MauuHama da docmu2he nonha 6p3uHa.
- Pocmaeeme 20 npubopom 8p3 pa6omHomo napue.
- Poneka deuxeme ja mawuHama no nuHujama, npumuckajku 20 npubopom ep3 pa6omHomo napye.
He npumuckajme npemhozy ep3 Maushama. Ocmaeeme Maushama da ja 3aepwu pa6omama.
- Ucknye me ja MauuHama u noyekajme ueNocho da ce conpe, nped da ja odnoxume.
YINCTEHEIOOPXyBAHbE

Ipe ducmbe u odpxybahe ucknyeme ja mawunama u u3eademe zo npuknyokom od 2na8nuom HanoH.
- Peodobu yucmeme 20 kykuumemo comekaHa Kpna.
- Чуваиме zu omeopume 3a венмунцuaju yucmu, be3 npauha. Ako e nompebno, kopucmeme MekaHa, bnaXHa Kpna 3a omcmpanhybaBe Ha npauHa u Heyucomomuu
od omeopume 3a bemmuauja.
(EN) We declare under our sole responsibility that this product is in conformity with directive 2011/65/EU of the European parliament and of the council of 9 June on the restriction of the use of certain hazardous substances in electrical and electronic equipment is in conformity and accordance with the following standards and regulations:
(DE) Der Hersteller erklärt eigenverantwortlich, dass these Produkt der Direktive 2011/65/EU des Europäischen Parliaments und des Rats vom 8. Juni 2011 über die Einschränkung der Anwendung von bestimmten gefährlichen Stoffen in elektrischen und elektronischen Geräten entspricht. den folgenden Standards und Vorschriften entspricht:
(NL) Wij verklaren onder once volledige verantwoordelijkheid dat dit product voldoet aan de conform Richtlijn 2011/65/EU van het Europees Parlement en de Raad van 8 Juni 2011 betreffende beperking van het gebruik van bepaalde gevaarlijke stoffen in elektrische en elektronische apparatuur en overeenstemming ismet de volgende standaarden en reguleringen:
(FR) Nous déclarons sous notre seule responsabilité que ce produit est conforme aux standards et directives suivants: est conforme à la Directive 2011/65/EU du Parlement Européen et du Conseil du 8 juin 2011 concernant la limitation d'usage de certaines substances dangereuses dans l'équipment électrique et électronique.
(ES) Declaramos bajo esta exclusiva responsabilidad que este producto cumple con las siguientes normas y estandares de configuracion: se encuesta conforme con la Directiva 2011/65/UE del Parlamento Europeo y del Consejo de 8 de junio de 2011 sobre la restriccion del uso de determinadas sustancias peligrosas en los equipos electricos y electronicos.
(PT) Declaramos por.nossa total responsabiliida-de que este produits este em conformidade e cumpre as normas e regulamentacoes que se seguem: esta em conformidade com a Direcva 2011/65/EU do Parlamento Europeu e com o Conselho de 8 de Junho de 2011 no que respeita a restricao de usoação de determinadas substancias perigosas existentes em equipamento eletrico e electronoico.
(IT) Dichiariamo, molto la nostra responsabilità, che questo prodotto è conforme alle normativè e ai regolamenti segunti: è conforme alla Direttiva 2011/65/UE del Parlamento Europeo e del Consiglio dell'8 giugno 2011 sulla limitazione dell'uso di determinate sostanz pericolose nelle appearecchiatura elettriche ed elettroniche.
(SV) Vi garanterar på eget ansvar attenna produit uppyller och foljer foljande standarder och bestammelser: uppyller direktiv 2011/65/EU fran Europejska parliamentet etch EG-radet fran den 8 Juni 2011 om begransningen av anvandning av farlga substanser i elektrisk och elektronisk urustning.
(FI) Vakuutamme yksinomaan omalla vastuullamme, etta tama tuote tayttaa seuraavat standardit ja saadokset: tayttaa Europon parlementin ja neuvoston 8. kesakunta 2011 pailvatyn direktlin 2011/65/EU vaatumukset koskien vaarallisten aineiden kayton rajoiftusta sahko- ja elektronisissa laitteissa.
(NO) Vi erkräner under värt eget ansvar at dette produitet er i samsvar med félgende standarder og regler: er i samsvar med EU-direktivet 2011/65/EU fra Europa-parliamentet og Europa-rädet, pr. 8 Juni 2011, om begrensning i Bruken av visse farlige stoffer i elektrisk og elektronisk utstyr.
(DA) Vi erkræter under eget ansvar, at dette produit er i overensstemmelse med følgende standarder og bestemmelser: er i overensstemmelse med direktiv 2011/65/EU fra Europa-Parliamentet og Rädet af 8. Juni 2011 om begraënsning af anvendelsen af visse farlige stoffer i elektrisk og elektronisk udstyr.
(HU) Feelösségünk teljes tudataban kijelentjuk, hogy ez a termek teljes mertékben megfelel az alábbi szabványoknak és elgirasoknak: je v souladu se sméniči 2011/65/EU Evropskeho parlementu a Rady EU ze dne 8. cervna 2011, ktera se týká omezi nouziti určitych nebezpečnych laktev elektrickych a elektronickych zaflizenich.
(CS) Na nasi vistni zodpovednost prohlasujeme, ze je tento vyrobek v souladu s naskledujciml standarda y normami: Je v svlade s normou 2011/65/EU Europskeho parlementu a Rady z 8. juna 2011 tskajucej sa obmedzenia pouzivania urcitych nebepezchnyt látok v elektrikcom a elektronikcom vybaveni.
(SK) Vyhelasujeme na nasu vyhradnu zodpovednost, ze tento vyrobok je v zhode a sulade s nasledujucim normami a predispimi: Je v sulade s normou 2011/65/EU rópskeho parlementa a Rady z 8. juna 2011 tykajucej sa obmedzenia použivania urcitych nebezpečnchy látok v elektrickom a elektronickom vyaveni.
(SL) S polno odgovmosto izjavljamo, da je ta izdelek v skladu in da odgovarja nasledn-jim standardom terpredispom: je v skladu z direktivo 2011/65/EU Evropskega parliamenta in Sveta z dne 8. juni 2011 o imejevanju uporabe dolocenih nevamih snovi v elektrichi in elektronski upremi.
(PL) Deklarujemyna wlasna odpowiedzialnošć, ze ten produkt spelnia wymogi zawarte w nastepujaçych normach i przyepsach; jest zgodny z Dyrektwy 2001/65/UE Parliamentu Europejskiego i Rady z dnia 8 czerwca 2011 r. w sprawieogranozenia stosewania niedtórch niebepezcnych substancji w spręcće elektrycznym i elektronicznym.
(LT) Prisimi dami visa atsakomybe deklaruojame, kad sis gaminys attitinka zemiau paminetus standartus arba nuostatus: atitinka 2011 tam tikru pavojingmu medziag u naudojmo elektros ir elektronineje jrangoe aprbojimo.
(LV) Ir atbilstosa Eiropas Parliamenta un Padornes 2011, gada 8, jūnija Direktīvai 2011/65/ES par dažu blstamu vielu izmantoşanas ierobežoşano elektriskās un elektroniskās iekartās.
(ET) Apgalvojam ar visu atbildtu, ka sis produits ir saskaŋa un atbilst sekojošiem staneliarni un nolikuniem: ir atbilstoša Eriopas Parliamenta un Padornes 2011. gada 8. jūnja Direktīvai 2011/65/ES par dzau bǐstamu vielu izmantošanas ierobežošanu elektriskāns un elektroniskās iekārās.
(RO) Declaram prin aceasta cu raspunderea deplina că produsul acesta este in conformitate cu urmatoarele standarde sau directive: este in conformitate cu Directa 2011/65/UE a Parliamentului European si a Consiliului din 8 iunie 2011 cu privire la interzicerea utilizarii anumitor substante periculoase la echipamentele electrici si electronice.
(HR) Izjavljemo pod vlastitom odgovorol, su da je strojem ukladan sa siljedesim standardima ili standardizarim Dokumentiia i u skladu sa odredbama: uskldeno s Direktivom 2011/65/EU europskog parlamenta i vijeca izdanom 8. lipna 2011. oogranojenu koristenja odredenih opasnih tvaru i elektrichnoj i elektronichkoj premi.
(SR) Pod punom odgovomoscu izjavljemu da je usaglasen sa sledecim standardima ili normama: usaglasen sa direktlovom 2011/65/EU Evropskog parlamenta i Saveta od 8.juna.2011. godina ze restrkciju upotrebe odredenih opasnih materija u elektricnoj i elektronskoj opremi.
(RU) PocBcOIO CTBECTBHeHCTb 3aBnBEm, YTO DaHHoe H3dE NmE COOTBeTCTByET CNEyDIOHM CTAndaptAM IN HOPMAM: COOTBTCTBYET Tpe6OBAHMR MInpeKTHBb 2011/65/EU EBponeKcro npAJaMeHTa COBETA OT 8 NOHr 2011 r. no OprpanHeHIO HcNtloBHaHOn OPpeIeHbXb OnaChbX BeueCTB B 3NeKTPnueckOM nIeKtpoHOM o6OpoyOBAHm
(UK) Ha cbo Bnachy BiDnoblaBnHcTb3aBnHMeO, 0o dahe oBnDaHHn BIDnoBiae HAcTyNHM CtaHdaptam I HOpMaTHBaM: 3aDObONbHNe BmGOr NpyekTNBn 2011/65/ EC CbponeCbKoro NapnAmEtY Ta PaDi Bic 8 cepBn 2011 pOKy Ha obMeKeHHN BIKOPNCtAHn DeAKNX He63neuHNx peOBnB E eNEkTPnHOMy Ta eNEkTPOHOMy 0bnadHnHi.
(EL) ue uTtOuvva dTo npioov auto oupwvei kai npel ToupapakTu Kavoviaouc kai npotura: ouoppowetrae tye ONYa 2011/65/EE tou Eupwtaikou KoVoiBouIou kai tau UqBouIou nC8auovliou 2011yov Tnepiopiaq nCxphnog opiaevv etikivdvov ouiwz e naekptko kai naektproviko efotlaiuo.
(BG) HnE KeKnapnpaMe HaHaHaOTROBOpHcT,Ye To3n IpOdyKT OTROBApHa CbOTBeTCTBnC dKeKTHBa 2011/65/EC Ha EBpOenckxNn napAmeHT n Ha CbBeta O T8 kHM 2011 r. oTHCHO OrpaHmHeMTo HA yNoTpe6TaHa O npTeIeHN OnaChn BeueCTBA B eektpweckoto H enkToPOnHO toObopydBaHe, B cToBTCTBnC CneHInte CTAnDaptn Hape6h
EN 55014-1, EN 55014-2, EN 60745-1, EN 60745-2-4, EN 61000-3-2, EN 61000-3-3
2006/42/EC, 2014/30/EU, 2012/19/EU, 2011/65/EU
Zwolle, 01-04-2016
H.G.F Rosberg
CEO FERM B.V.